-
Posts
2,213 -
Joined
-
Last visited
Content Type
Profiles
Forums
Gallery
Events
Everything posted by GuntherMT
-
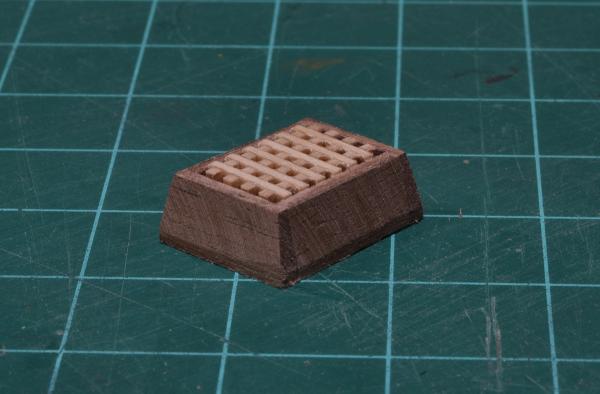
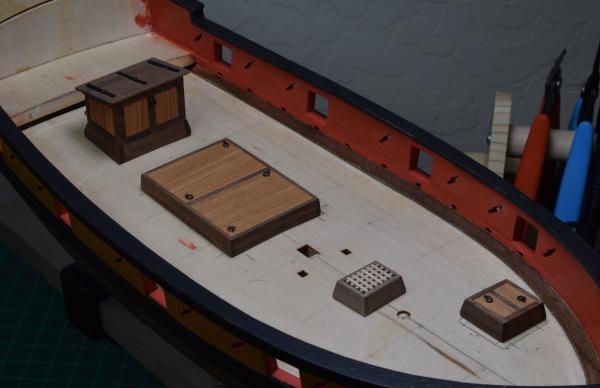
Thanks gents, for the comments and likes. I made the galley hatch, but it looks.. off. I'm not sure what it is, the measurements are all good, and it's square according to my square, but it's off to my eye. I may remake it. In the meantime, I put everything on the deck together just to see it, not glued obviously and not even in exactly the right spots, but just for the visual. Need to put a coat of poly on the hatch still, but waiting for the glue to dry since the grating is a bit touchy. In the meantime, I can start working on figuring out the deck planking. Woo!
- 831 replies
-
- Armed Virginia Sloop
- Model Shipways
-
(and 1 more)
Tagged with:
-
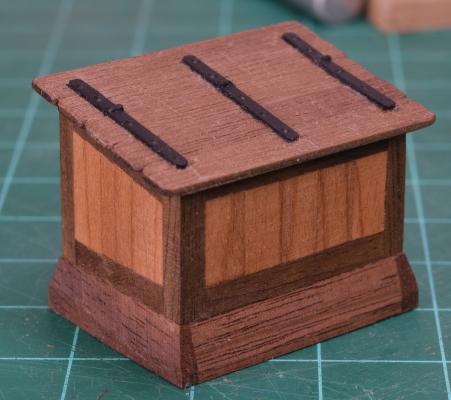
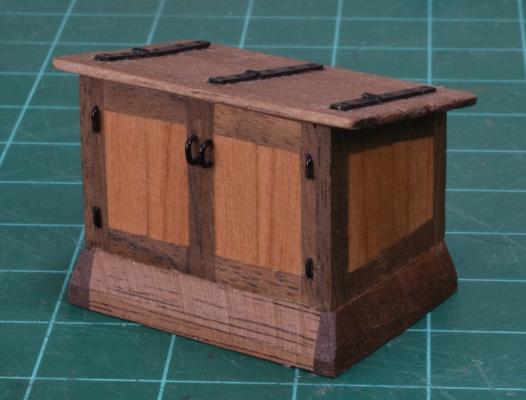
So I have no idea why I thought I'd be going faster once I got to the deck furniture, because this is all new to me, so I screw up and have to remake lots of parts, but I'm learning, and am reasonably happy with the final results. This morning, after working on this all day yesterday (and having started it by making the base some days ago), I completed the companionway. Looking at everyone elses build logs, this little structure seemed neat, but nothing all that complicated, but after completing it, I counted, and there are 73 individual parts in this dumb little thing! Today I hope to get the final hatch completed, and maybe start on the deck planking, which I've really been looking forward to!
- 831 replies
-
- Armed Virginia Sloop
- Model Shipways
-
(and 1 more)
Tagged with:
-
Ben Lankford's name is on the plans & instructions for the Armed Virginia Sloop & Pride of Baltimore II by Model Shipways, as well as the Niagara. He also is named for revisions to the instructions on the Fair American by MS, but not the plans.
- 17 replies
-
- best
- instructions
-
(and 1 more)
Tagged with:
-
Looking great! Sorry to hear about your CS issues with MS. I'm one of those guys who has had nothing but excellent support from them, so no idea what the problem is in your case. It's a bummer though.
- 2,250 replies
-
- model shipways
- Charles W Morgan
-
(and 1 more)
Tagged with:
-
I have Alexey's Serving machine as well. Just played with it so far, as it will still be a while before I get to the rigging on the AVS. I've just used dry graphite to lubricate the squeaky bits and it worked fine. Very happy with the craftsmanship and received it in about a week, and the shipping from overseas is included in the pricing.
-

Has anyone got or used headband magnifiers?
GuntherMT replied to vossy's topic in Modeling tools and Workshop Equipment
I use a visor with a built in LED light that I rarely use (the light, not the visor - I use the visor all the time), and 4 changeable lenses with different magnification powers. I use it for many 'up close' tasks. I originally got one of those combination lamp/magnifiers, but I have problems keeping things focused in it as it doesn't seem to play well with my prescription glasses, so I got the visor and it works great for me. Because of the prescription glasses, I can't really do the cheap drugstore reading glasses trick that a lot of guys seem to like. -
Ah, so it was the false keel (center piece that runs the length of the ship) that was sanded too far back. Shimming should still work fine, just build it up and sand it back to where it needs to be. Glad it seems to have worked for you. Is the warped deck you are talking about actually glued down to the frame? If it's not, then making sure you get the shape of the top of your frame right, and then securely attaching the deck to the frame (keel and bulkheads) should take care of it.
- 31 replies
-
- le hussard
- artesania latina
-
(and 1 more)
Tagged with:
-
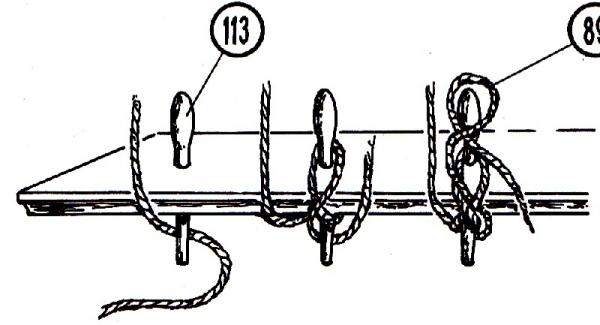
Rich - Constructo had a small drawing on the plans of the Carmen showing how to tie off the rigging to the belaying pins, and it is what I followed for the Carmen. Here is a scan of that drawing:
- 1,756 replies
-
- constitution
- constructo
-
(and 1 more)
Tagged with:
-
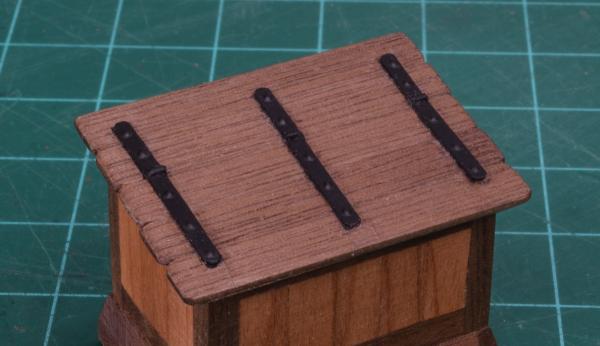
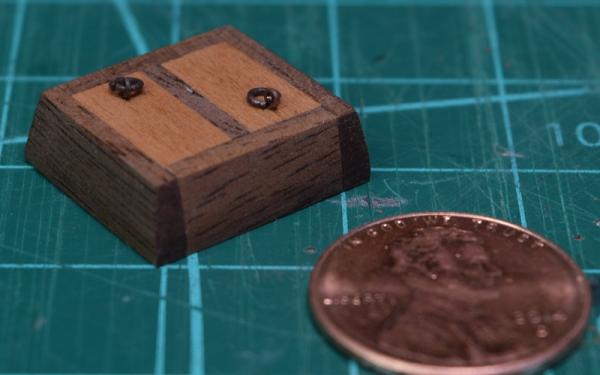
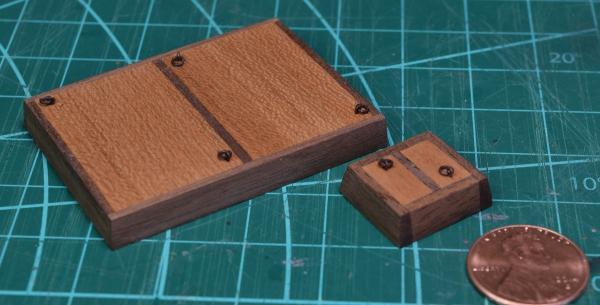
Very small update, as I haven't done much work on the ship the last couple of weeks, just had a busy schedule and other things going on. For anyone interested I added an 'index' to the first post in this thread, so if for some reason you want to find a specific point in the build, it should be much easier now. I've gotten the main hatch, and the scuttle port completed - I am using cherry for the planking and the kit walnut for the coaming, I think it makes a nice contrast. The hardware was chemically blackened.
- 831 replies
-
- Armed Virginia Sloop
- Model Shipways
-
(and 1 more)
Tagged with:
-
When you say you removed too much from the framing, are you referring to the forward bulkheads? If so, you can just shim them up with strips of basswood, and then sand them back as needed. Wood is cool, you can use glue and add to it, not just remove it! Here is a link to the post in my build log showing how I used basswood to shim my bulkheads so you can see what I mean: http://modelshipworld.com/index.php/topic/8085-armed-virginia-sloop-by-gunthermt-model-shipways-scale-148/?p=241424 Take care,
- 31 replies
-
- le hussard
- artesania latina
-
(and 1 more)
Tagged with:
-
My solution was considerably more drastic. I ripped out the carpet and put in a maple hardwood floor. Your solution is magnitudes cheaper!
- 708 replies
-
- victory
- constructo
-
(and 1 more)
Tagged with:
-
Looks like a great start Grant, quite nice to see a very different sort of boat being built. How do you like working with balsa pieces for the framing? I don't care for balsa as it's so soft, but I've not built a kit with any included, only used it for filler blocks (which I've switched to basswood for). Looking forward to watching the planking go on!
- 339 replies
-
- dumas
- Chris-Craft
-
(and 3 more)
Tagged with:
-
Welcome aboard Frank. You can put any text you like between photo's by simply typing the text you want, placing the cursor where you want the picture to be, and then clicking the "Add to Post" for the photo. Then with your cursor after the newly inserted image (it will be text saying 'attachment: name' enclosed in square brackets), keep typing whatever you want after the image. Repeat as needed. You can add as many photo's in a single post as you like (or at least I've never hit a limit), but you can only upload 10 of them with a single click. Have fun with the dinghy, I'd like to try some of these little Midwest kits in the future, they look like fun.
-
I use PVA only, and it doesn't slow me down at all. I build each plank section to fit, and PVA tacks up quickly when applied in very thin coats to both pieces and then set with moderate pressure. Except for a few oddly stressed pieces right at the stem or stern, I never stopped specifically to let a piece dry, I just worked on making the next piece, and when it was ready, removed the pins holding the previous piece and glued. I actually made a short time-lapse video of my final planking band in my AVS log (last page or two of it currently) showing the progress. It was done over two days, but only about 6 hours total in that time lapse. The glue technique was learned from someone else here on MSW - apply a very thin layer of PVA (I use Tite Bond original) to the plank, set aside. Apply a thin layer of glue to the hull where the plank will go (I use a syringe for this), and use a piece of scrap to spread it out and remove all excess. By this time the layer on the plank should be almost dry (only takes a few minutes). Put the plank in place, and then apply moderate pressure (as much as you think you can safely apply) with your fingers and the plank will stick in place almost as quickly as using CA. Use pins as needed to hold in place for more complete drying, and start shaping your next plank. Repeat.
-
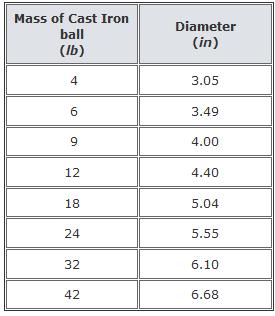
Let's see what math says! Start with the diameter of the cannon balls: Then do math! Confederacy had 6lb and 12lb guns, and the scale is 1:64 (3/16" = 1'). Convert 1:64 to a decimal gives .015625 (1/64). 6lb = 3.49" diameter x .015625 = .0545" in diameter at scale = 1.384mm 12lb = 4.40" diameter x .015625 = .06875" in diameter at scale = 1.74625mm
-
I agree about the MS kit line. I've got Syren line already for my AVS, and will probably stick with it rather than dealing with trying to make my own in the future.
- 31 replies
-
- armed virginia sloop
- model shipways
-
(and 1 more)
Tagged with:
-
Nicely done Dave. I need to get off my butt and back to work on mine. On your fuzzies - what rope was it that you were getting the fuzzies from (I can see it in your close-ups)? The terrible rope in the kit is some sort of nylon, so I can't see how that would fuzz up. Did you have some extra you used from another source?
- 31 replies
-
- armed virginia sloop
- model shipways
-
(and 1 more)
Tagged with:
-
I used nothing but PVA for my 2nd planking Medic. If you are patient and make sure everything fits right, you should be able to do just fine without using CA. As far as steaming goes - just use whatever works to make your planks fit. For many of my 2nd planking I used nothing. For some I just used heat, and for a few at the stern I used both water and heat (effectively steaming). I just played it by ear and used what worked for the specific plank I was working with. Good luck, looking forward to seeing how nice you make it!
-
She's beautiful Max, and I would say you more than accomplished your goal of making something that will look good on display in your living room. Anyone would be proud to have that on display!
- 153 replies
-
- royal caroline
- panart
-
(and 1 more)
Tagged with:
-
Awesome work on the wheel, it looks much better than the kit wheel. I've been pondering trying to scratch a wheel for my AVS, but I'm not sure yet whether I'll make the attempt on it. It is only my 2nd kit, and if I keep adding new 'things' I'll never finish it!
- 525 replies
-
- cutty sark
- mantua
-
(and 2 more)
Tagged with:
About us
Modelshipworld - Advancing Ship Modeling through Research
SSL Secured
Your security is important for us so this Website is SSL-Secured
NRG Mailing Address
Nautical Research Guild
237 South Lincoln Street
Westmont IL, 60559-1917
Model Ship World ® and the MSW logo are Registered Trademarks, and belong to the Nautical Research Guild (United States Patent and Trademark Office: No. 6,929,264 & No. 6,929,274, registered Dec. 20, 2022)
Helpful Links
About the NRG
If you enjoy building ship models that are historically accurate as well as beautiful, then The Nautical Research Guild (NRG) is just right for you.
The Guild is a non-profit educational organization whose mission is to “Advance Ship Modeling Through Research”. We provide support to our members in their efforts to raise the quality of their model ships.
The Nautical Research Guild has published our world-renowned quarterly magazine, The Nautical Research Journal, since 1955. The pages of the Journal are full of articles by accomplished ship modelers who show you how they create those exquisite details on their models, and by maritime historians who show you the correct details to build. The Journal is available in both print and digital editions. Go to the NRG web site (www.thenrg.org) to download a complimentary digital copy of the Journal. The NRG also publishes plan sets, books and compilations of back issues of the Journal and the former Ships in Scale and Model Ship Builder magazines.


