HOLIDAY DONATION DRIVE - SUPPORT MSW - DO YOUR PART TO KEEP THIS GREAT FORUM GOING! (Only 75 donations so far out of 49,000 members - C'mon guys!)
×


GuntherMT
-
Posts
2,213 -
Joined
-
Last visited
Content Type
Profiles
Forums
Gallery
Events
Everything posted by GuntherMT
-
Looking good. I'll be starting on this model when I finish the Carmen, looking forward to it, and good to see where you've hit snags (like the doors), so maybe I can avoid them!
-
Some good looking work there Rich. I really like that top piece that ends in the stop for the 2nd section, very nicely done. I'm not overly impressed with the Constructo plans now that I have another kit to compare them with (Armed Virginia Sloop by Model Shipways). How many sheets of plans does the Victory kit come with? The Constructo Carmen has a single plan sheet, while the AVS, which is a similar size model has 7 sheets! On the other hand, with how nicely you are doing with that kit, think how easy a kit with proper plans will be in the future!
- 1,756 replies
-
- 1
-

-
- constitution
- constructo
- (and 1 more)
-
Nice work Timmo. I'm going to seriously have to consider some tools like that lathe when I get the other room cleaned out and turned into a proper hobby/shop room. Not enough room on the single workbench where I'm working now for that, but small power tools of all kinds are much cheaper than I ever imagined that they could be, and would make a lot of things in this ship building hobby pretty nice.
-
Thank you Keith. I may try this blackening on a bit of scrap brass and see how it works, and just blacken all the brass if that's what it should actually be. I may have to just paint the chain-plates though, as they are already mounted to the ship, and I'm not going to pull them off for that, as they are attached with CA and nails. The AVS that I ordered expecting a mid-late October delivery showed up today. I opened it up and took inventory, and am sort of wishing I hadn't now. Every single thing about that kit makes the Carmen kit look cheap in comparison, and apparently, wildly out of scale. The AVS is 1:48, while the Carmen is 1:80, yet all the little fittings (eye bolts, deadeyes, blocks, etc.) on the AVS are actually smaller (and very much sharper and better quality) than the fittings on the Carmen. All of the wood is much nicer, and the laser cut pieces absolutely blow away the pre-cut pieces on the Carmen both in sharpness, and in the quality of wood. Oh well, I still think it's looking nice and will turn into a nice looking model, but it certainly points out that there is a huge variation of quality between the two kits. Does the quality within a specific manufacturer vary a lot as well? I.e. is the Constructo Constitution better quality, or similar to the Carmen. Makes me wonder for future kit purchases. Finished up the 2nd mast, and have the bowsprit all shaped and fit to the bitt that I modified. Edit: Eh, I'm wishy-washy. After I blackened the cast fittings, I played with the brass a bit, and decided since the chain-plates are brass, I'm just going to leave all the brass fittings as brass to match them. Time will tell if that's the right decision, but I've started putting in the eye-bolts, so it's decided now.
- 119 replies
-
- 1
-
-
- carmen
- constructo
- (and 2 more)
-
Superb work, it's looking beautiful.
-
Very nice detail. Why do you choose to use CA when gluing wood to wood (the spray-shield) instead of using a wood glue, just for the quick bonding?
-
Well.. now I'm hungry.
-
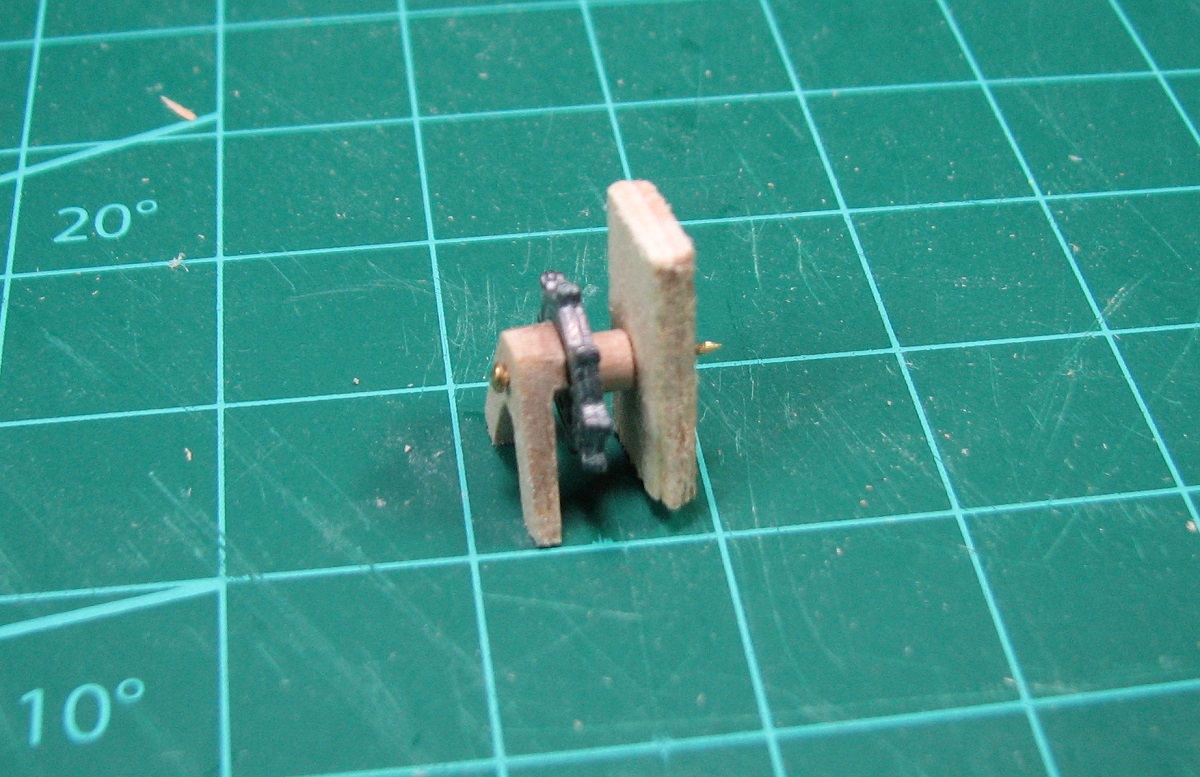
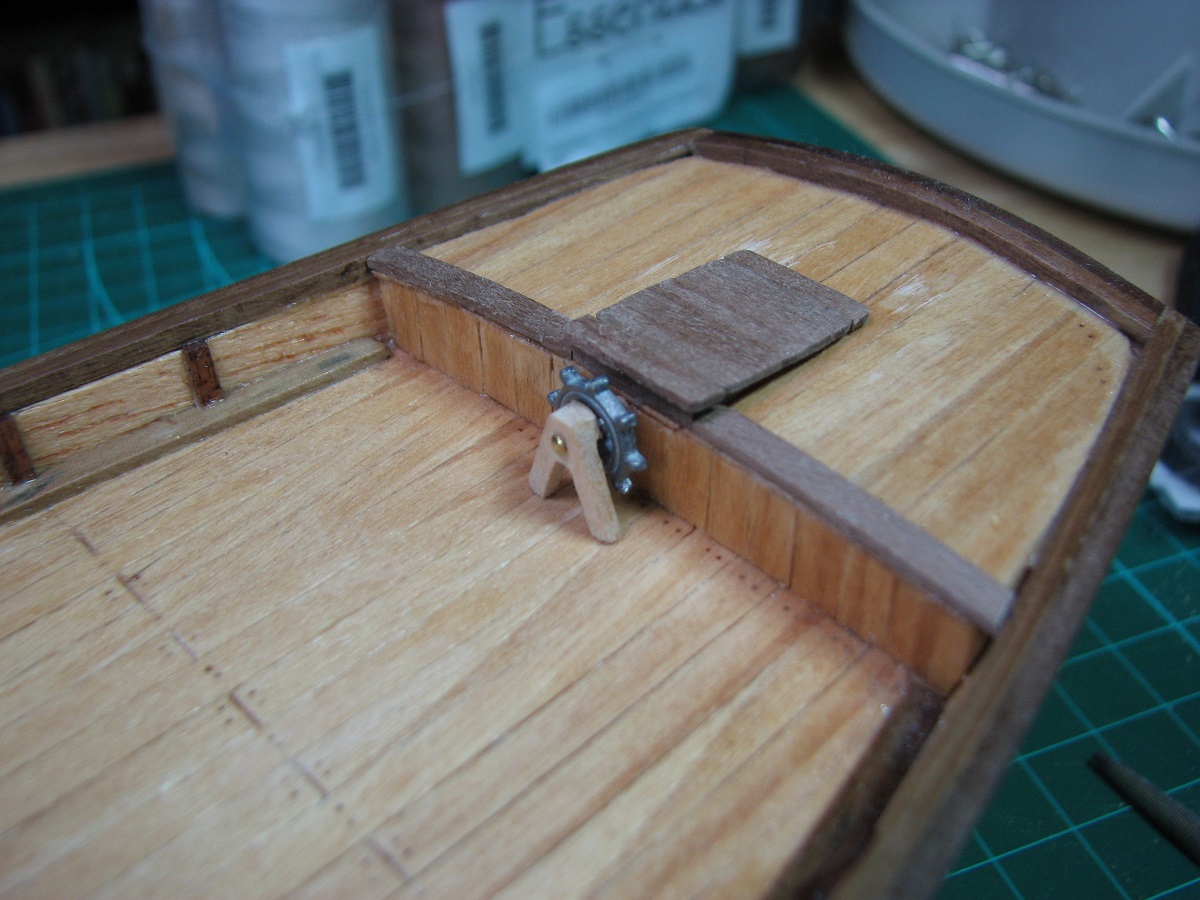
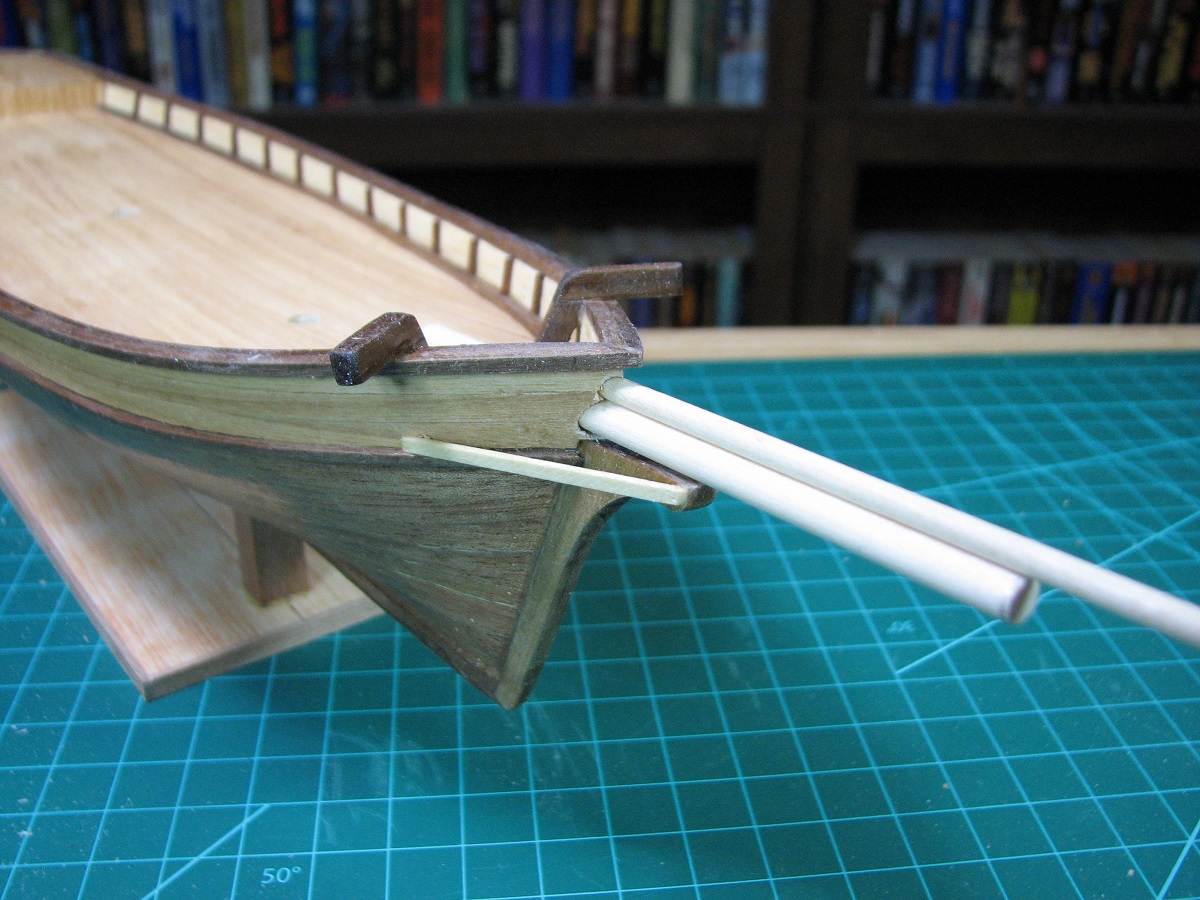
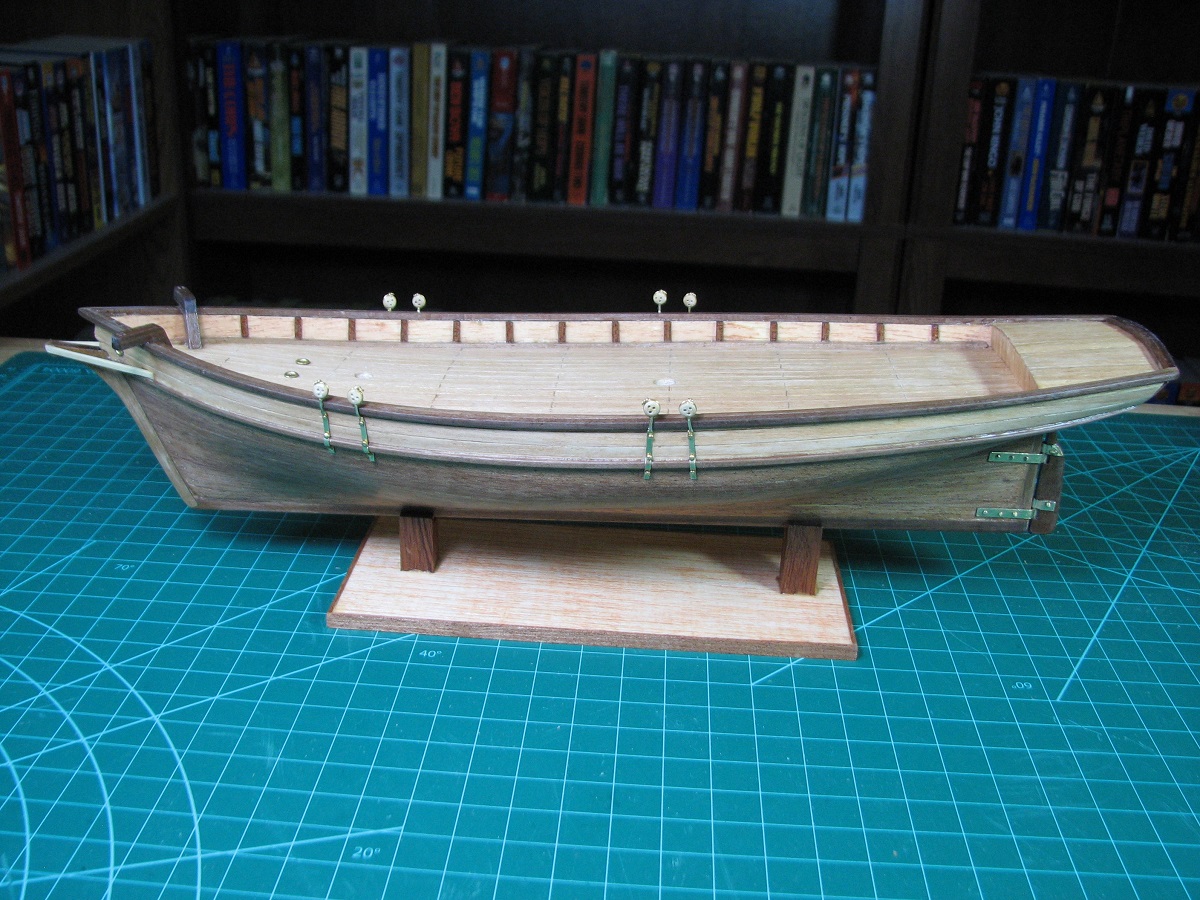
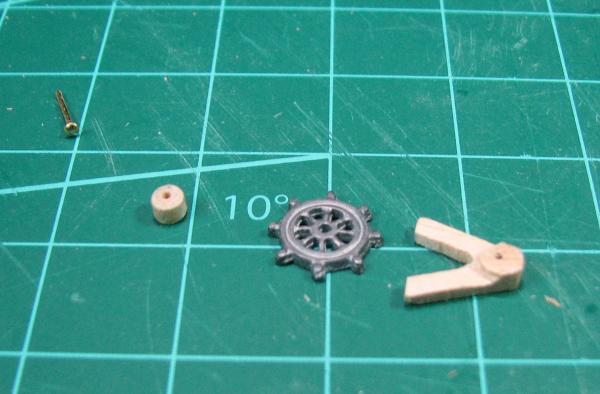
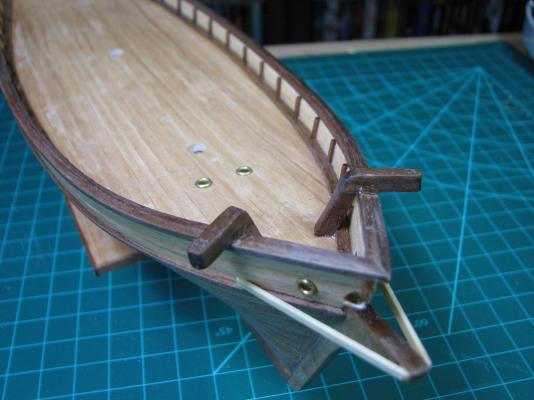
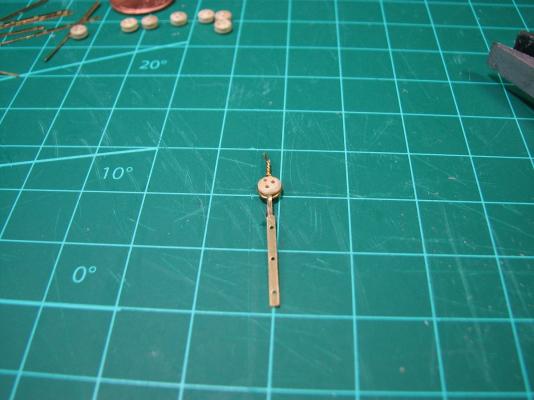
I'm going to sand my little wooden a-frame down a little more to expose more of the wheel, and also try to clean up the casting a bit, I haven't touched it yet. On to other modifications, I was reading through Dubz Syren build (still only a bit over half-way through that, it's magnificent), and saw how the bowsprit was mounted into the bitt, and a light-bulb went on in my head. My kit instructions just show the dowel, still rounded, glued to the hull and ending at the bitt, but after seeing how it's actually supposed to work, I've re-done my bitt (or is it bitts?) with more wood inside so that I can square off the butt end of the bowsprit and give it a nice tight home in the bitt. Also continue to shop for flat black paint and am having a horrible time getting any for some reason. I got a can of Humbrol from across town, and it's almost a solid chunk in the can when I opened it. I bought a couple different acrylic's from Hobby Lobby today, and they are both pretty bad on a sample piece as well. I'm at the point where I need to mount all the cast pieces on the hull, and they are all supposed to be black (I assume they used iron?). On the brass parts - eye-bolts and stropping the blocks and deadeyes, the kit has all of this as brass wire, should it all be blackened, or was it actually common to use brass fittings around 1850? I got a bottle of blackener so I can do it either way now. Maybe I can just use the blackener on the cast fittings?
-
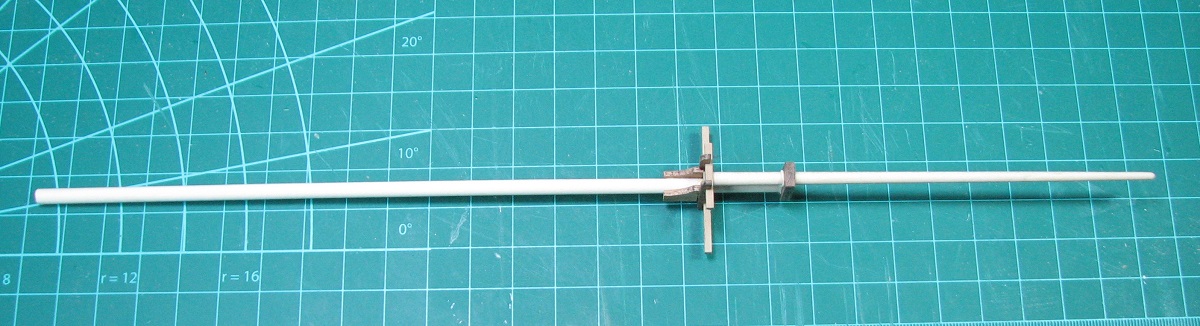
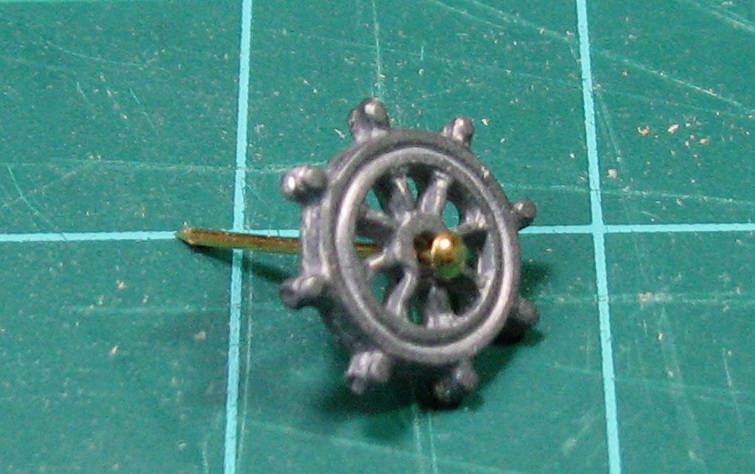
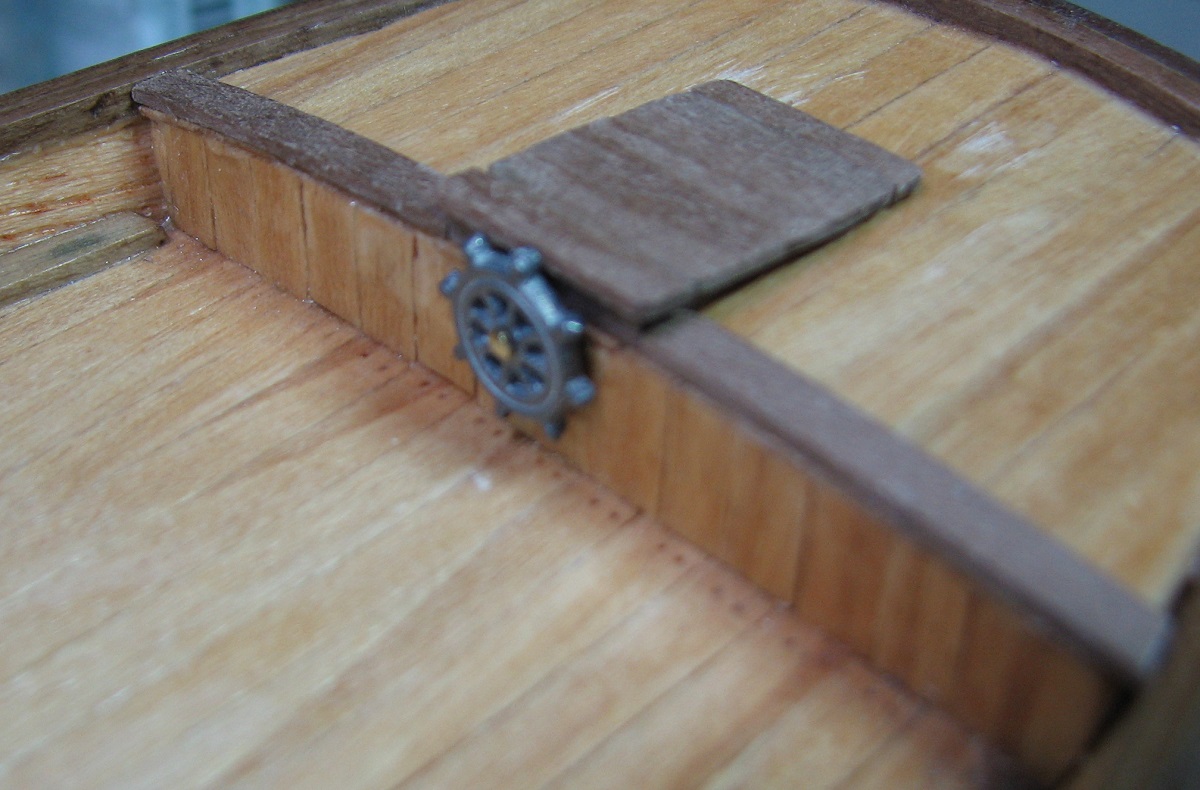
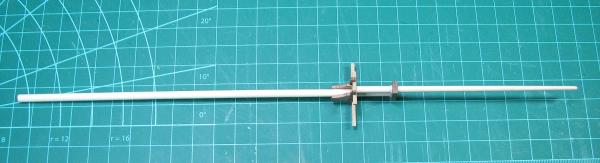
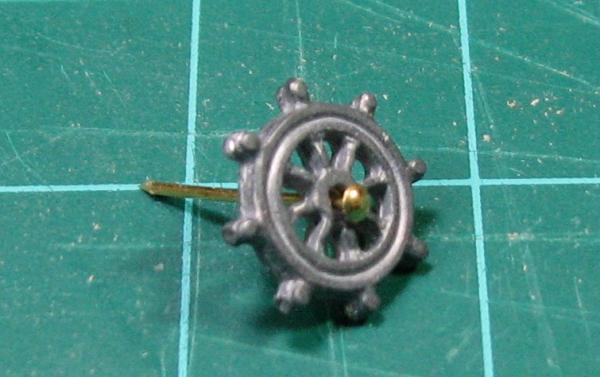
2 years without TV in November Keith. Don't really miss it, and I certainly don't miss sending that $75 per month to the cable company for something I rarely used. Not a huge amount accomplished in the last couple of days, but - First mast! This assembly has reminded me to check the measurements on the plans - for *everything*, as I built the crows nest thing (not sure what the platform is called on this small ship) with the measurements in the instructions, instead of the measurements from the plans. So the openings for the masts are too wide and I had to carefully put a 'step' in the sideboard things to fill that gap. A better man would have deconstructed to start over probably. One of the things that has been bugging me about this model for a while now, is that the ships wheel is not only a terrible looking cast part that appears to be completely out of scale: ..but it's also 'per the instructions' just mounted to the rear bulkhead directly with a nail. Like so... This just didn't seem right to me, so I spent a long time going through pictures of every sloop and schooner build I could find in the build logs here, in the tips and tricks, finished kits, and books and online. I finally found a fairly simple ships wheel that was mounted to the rear bulkhead like this, with no rope showing, but it was mounted with a large barrel/shaft coming from the bulkhead, and the wheel was supported to the forward with an a-frame arrangement. So, I sanded down a piece of dowel and drilled a hole in it, and then spent some time with a little piece of basswood, and came up with a first-time scratch build thingie on my ship I swore I would build 'out of the box' for this first time. It's nothing compared to the amazing scratch build stuff on many of these builds, but after everything is stained and painted, who knows, might look halfway decent, and can't really help but be better than the little wheel stuck to the bulkhead. I figure I can replace that cast part with something better someday if I decide I want to as well.


- 119 replies
-
- 1
-
-
- carmen
- constructo
- (and 2 more)
-
Beautiful work indeed. Looking forward to pictures as this goes on.
- 2,191 replies
-
- 1
-
-
- confederacy
- Model Shipways
- (and 1 more)
-
Very nice painting. Look forward to more updates as this progresses.
-
Very nice work. Are the ladders hinged so you can actually pull them up?
-
Just caught up on this build. I just wanted to say that this is simply spectacular work. Thanks for sharing it!
-
Fantastic detail and scratch work there. Hat's off to you.
-
Thanks for the mast advice. It seemed kind of obvious to me that it would be better to have a clear deck to do the mast mounting, but thought maybe I was missing some important reason to mount the deck stuff first. I'm using 95% wood glue (Titebond original). I only use the Jet superglue when bonding a metal piece to wood or other metal. I typically use the tip of a flat toothpick to apply the glue, and occasionally get about the right amount, but still have a tendency to feel like I'm not using enough glue when in fact I'm using too much. Doubt that the applicator will help with that, only time, as I am slowly improving. Edit: Also got a response to my email from Constructo already, and indeed I am not missing any plan sheets, they just give no details of these parts. Getting out of the plastic model mindset and shifting into the 'figure it out and make it yourself' system that seems to be the norm for wooden ships is something that isn't coming naturally for me.
-
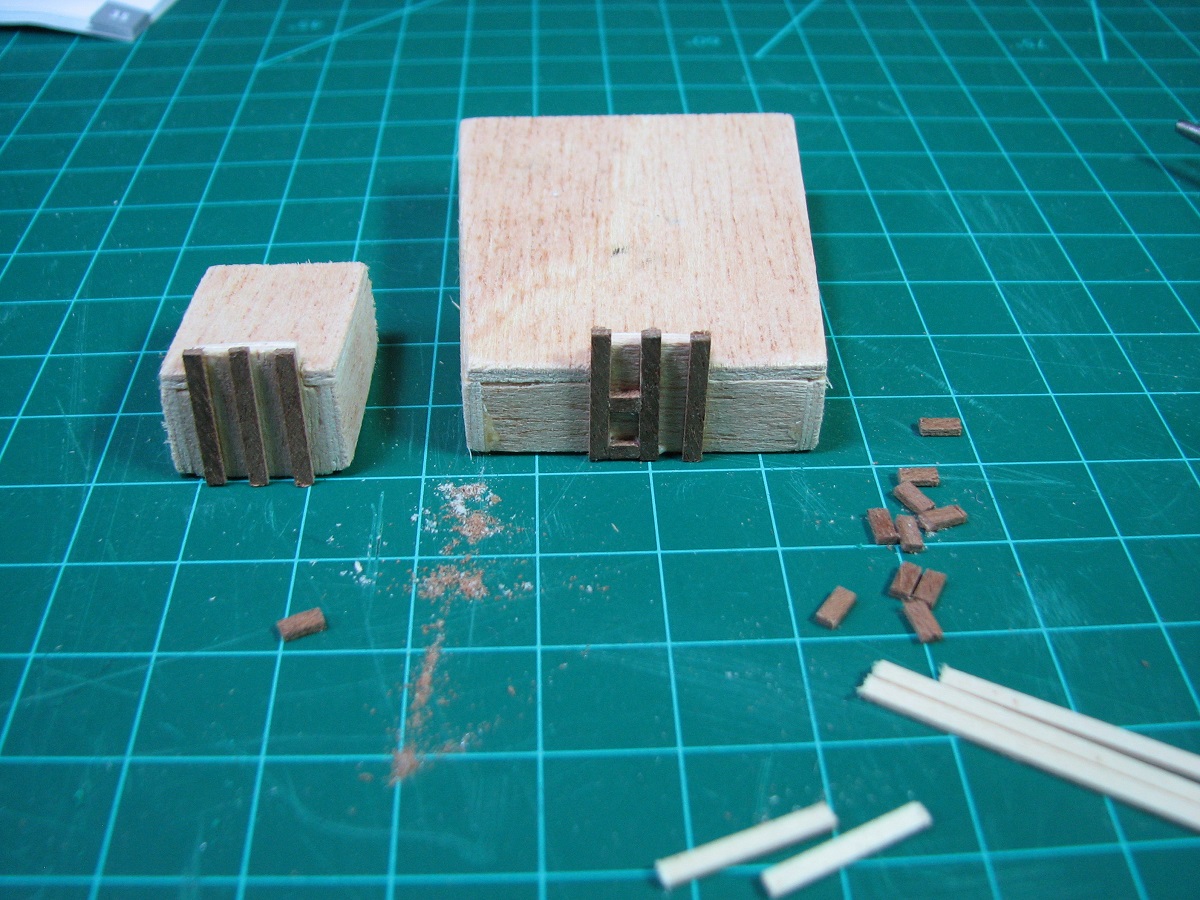
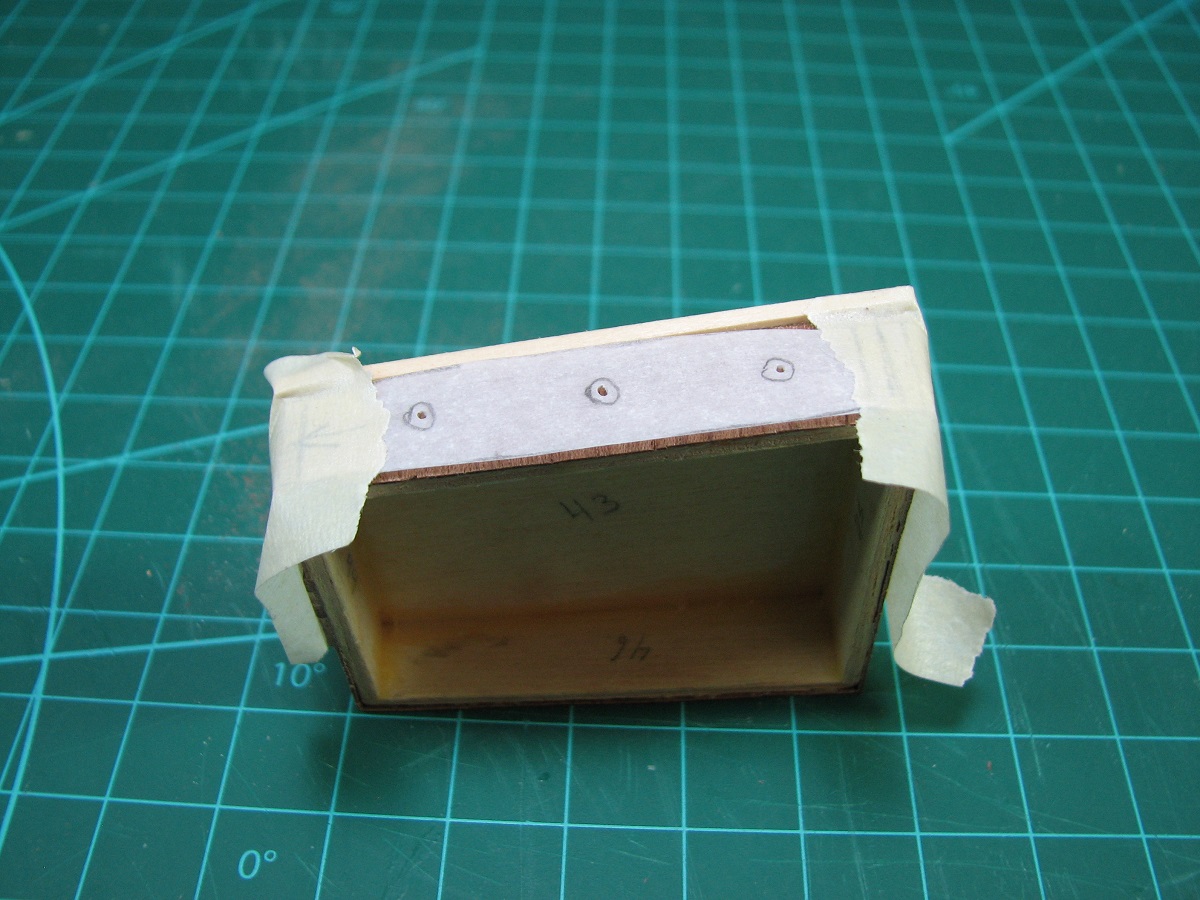
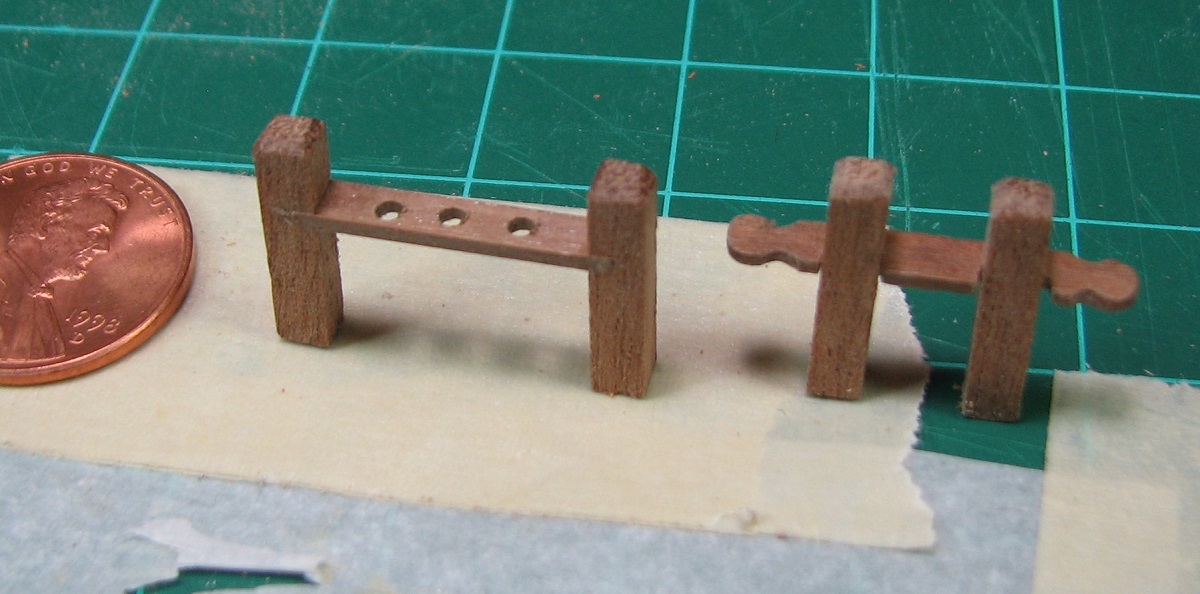
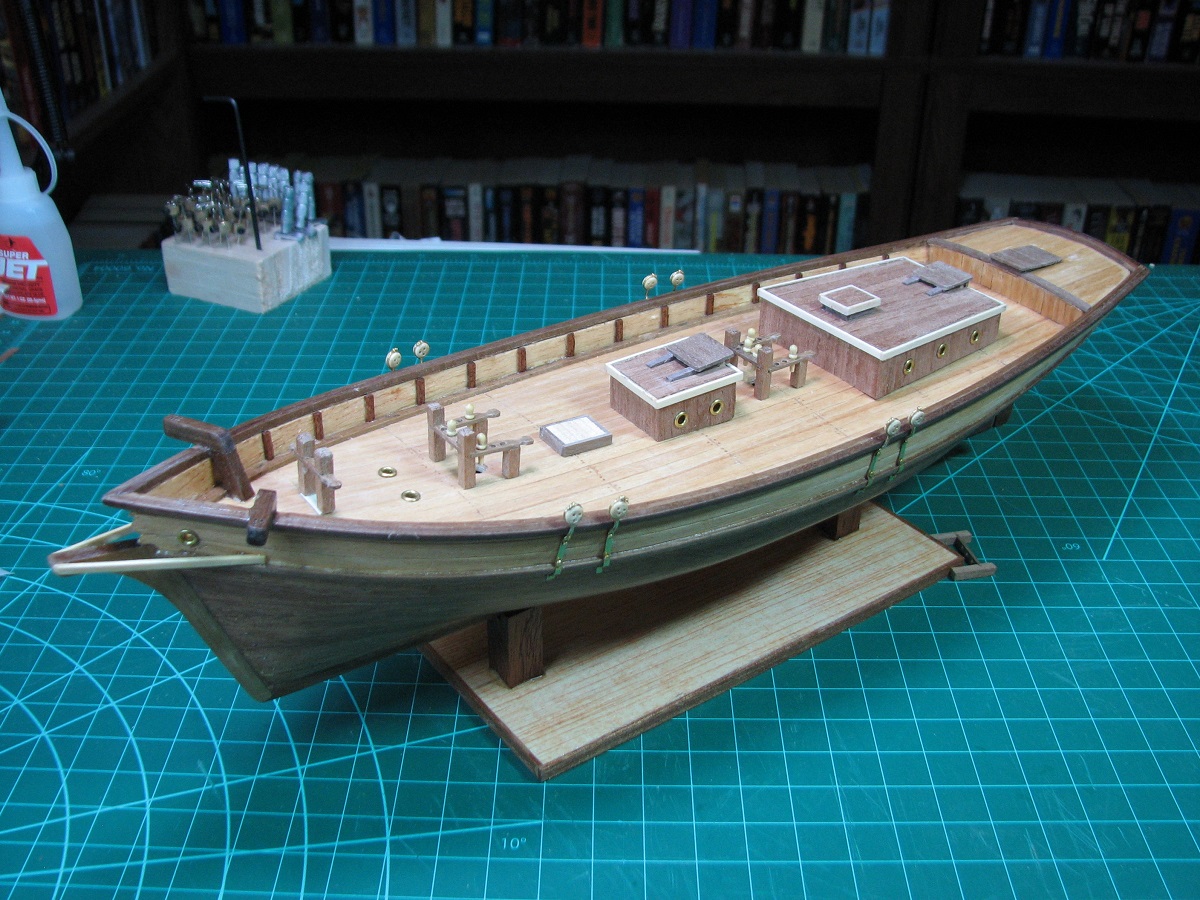
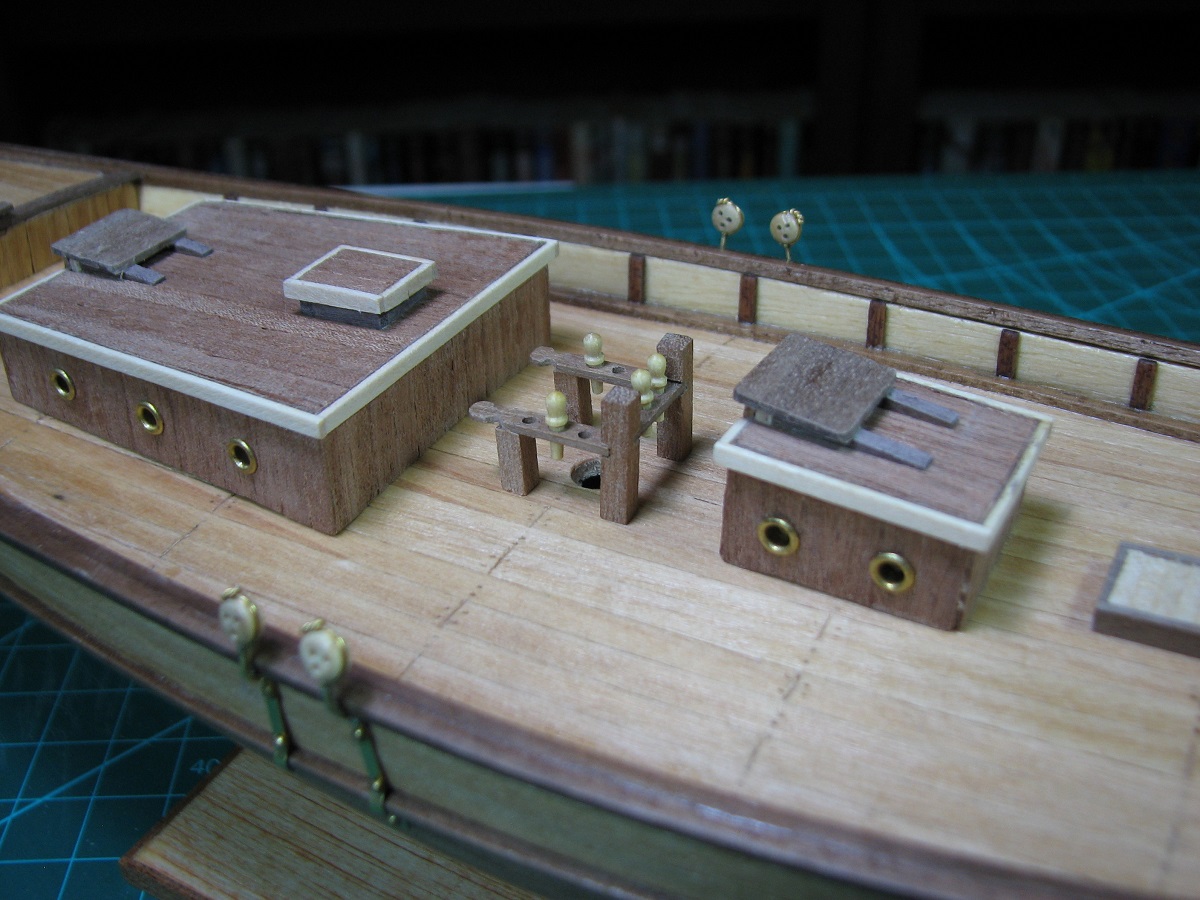
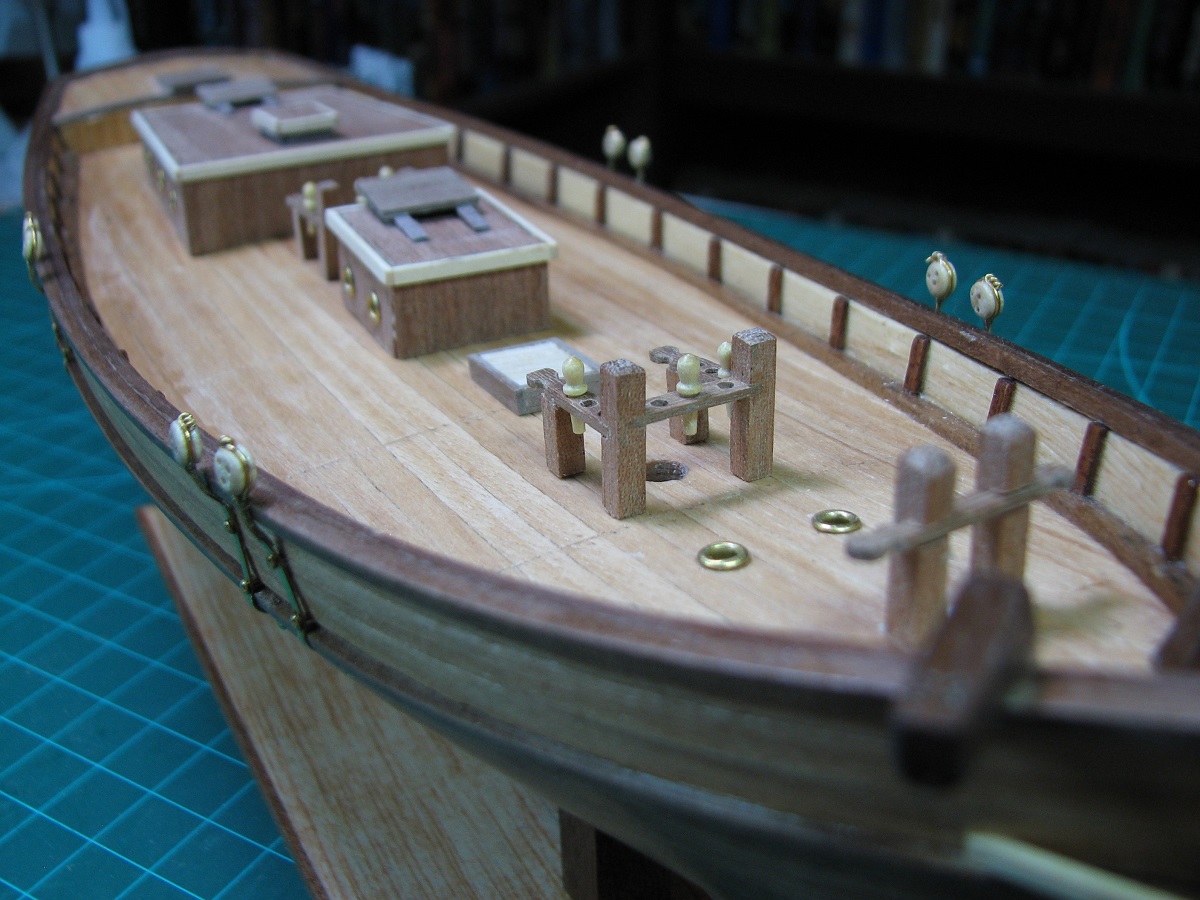
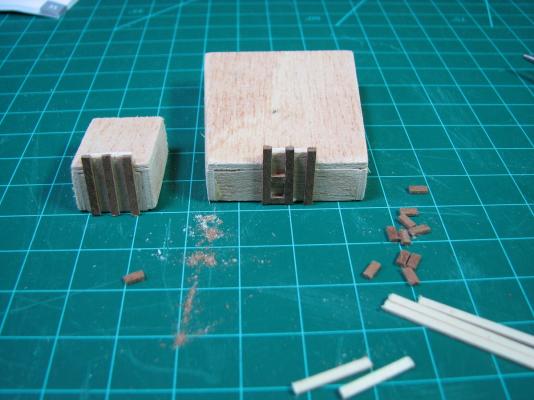
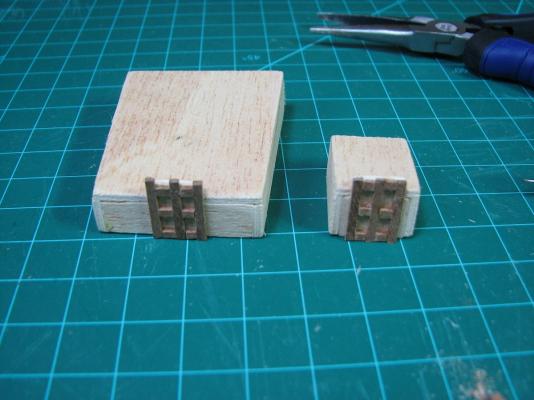
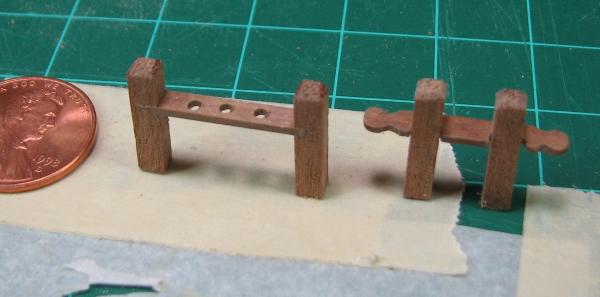
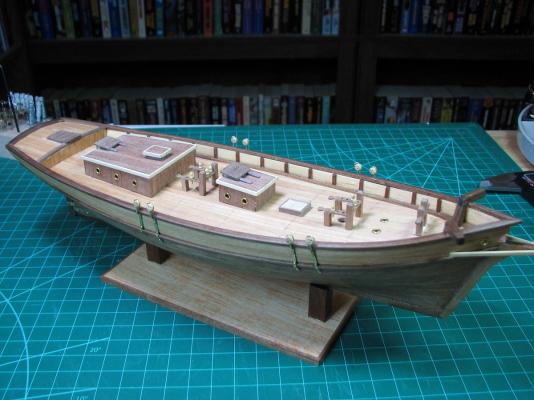
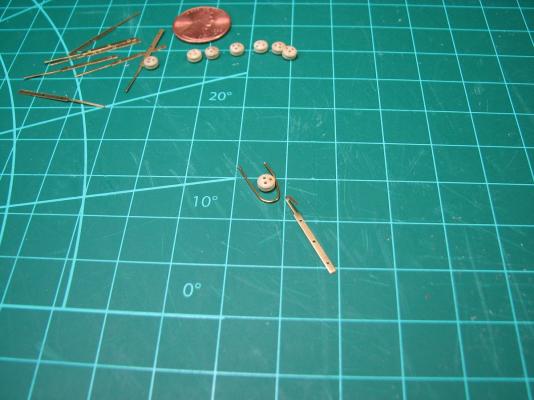
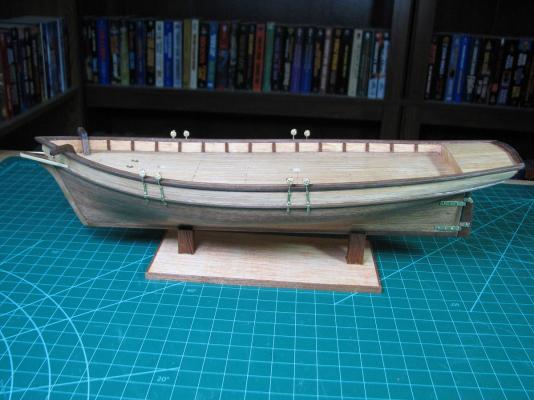
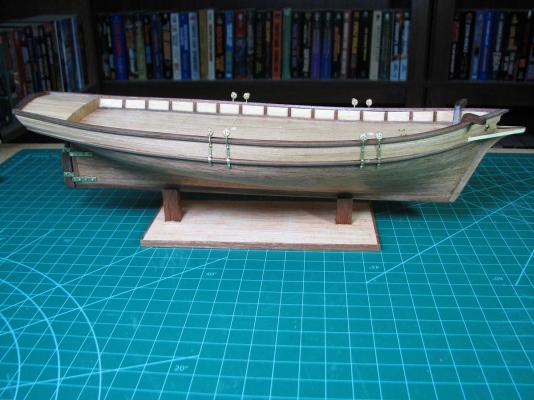
Yesterday I worked on the cabins, so here are a couple of pictures of that process. I was worried that they would look very bad based on what I started with, but I think they ended up turning out alright, and will look better after finishing. For the port holes in the cabins, I used some parchment paper and traced the plans, then held them to the side of the cabins and used a punch to set the center point of the holes for drilling. The more I looked at the plans problem mentioned in my prior post, the more I began to think that there are probably no plans missing, Constructo just expects you to 'figure it out' without proper detail diagrams. I also came to realize, that for these parts (bitts, pin racks), if the heights of the cross pieces weren't exactly right, nobody would ever know, so I traced them out as best I could from the plan views I had, and got to work. The plans/instructions give no indication of what size hole to use for the pin racks, so I measure the belaying pins at their thickest point with calipers, and then used a slightly larger sized drill (1.7mm). I was ridiculously pleased with myself when I finished my first piece of pin-rail. It was about as perfect as I could have hoped for (pictured here next to the bitts that wasn't quite so perfect, but is ok). My smugness ended abruptly after coming back from a dinner break, looking at the parts remaining to assemble the rest of the rack, and realizing that I'd used the wrong piece (too long) between the uprights. Doh. Set my pretty little pin rack section off to the side and started over. The completed pin racks didn't come out perfect, but I think they are good enough for this first run. Here everything up to this point is set onto the deck in the approximate final locations. Nothing is glued. Pretty happy with how things are looking. Once varnished, should fit right in. Things I've learned over the last couple days: - I should have purchased stock in Micro Mark (and Amazon) the day I bought this kit. - I ordered a Dremel drill-press/work station that will be here tomorrow or Friday. It would have been *really* helpful for the pin racks, I think I ruined about 5 pieces trying to get the holes drilled acceptably. - I need to find a source for some scrap wood to make jigs and crap (and a building board in the future), and to drill into instead of using a perfectly good basswood block. - The flexi-shaft attachment thingie for the Dremel is the best bleeping thing. How did I ever use a Dremel tool without one of these? - One skill that has remained intact after 25+ years of not touching a model; I'm still really good at using too much glue and getting it all over everything. - Buying drill bits from #80 to #60, and from 1mm to 2mm (in .05 and .1mm increments) was a very good thing. Should have ordered metric bits from 2mm up also, those are on order. Looking a number of steps ahead, the instructions have the pin racks and other pieces set onto the deck and glued in place permanently prior to setting the masts. It seems to me that it would be much easier to set the deck stuff in place with the masts set, than it would be to set the masts with all that stuff in the way. Thoughts on that? Advice welcomed. Oh yea, the bitts (that's what the instructions call it anyway) where the bowsprit will mount - should it be vertical in relation to the deck, or vertical in relation to the waterline when it is mounted? The deck has an upward sweep in that area, which would give it a slight backwards slant if mounted vertical to the deck. Thanks for visiting, and please feel free to throw advice, comments, or whatever else my way.


- 119 replies
-
- 5
-
-
- carmen
- constructo
- (and 2 more)
-
First off, Keith, that book is fantastic. Thanks again! It seems that I've run into a bit of a stumbling block. I'm at a point in the instructions where I'm building deck furniture (fittings?) and the instructions say - "Cut out the bitts no. 71 and make the recesses as shown in the centreline plan." The only problem is, that as far as I can tell, I don't have a centreline plan. I could try to put these together from the pictures in the book, but without decent measurements I am not sure how well that will work. I don't have much extra of the wood sizes used for these pieces for do-overs either. I've sent an email to the email address I found elsewhere on the forums to a guy at Constructo (diset), but I understand they take a while to respond. I'm not sure if I'm missing plans, or if they really expect me to figure the recesses out from a single overhead deck plan that doesn't actually show the recess depths or heights. I have finished up both cabins, and they came out ok, if nothing special. There are other little bits I can continue to work on, as these pieces can be placed later (but must go in before rigging starts, as it ties off to them). In other news, my "30 day back-order" on the AVS shipped later on the same day I placed it, and the website now shows that kit available instead of back-ordered. So I guess I have an AVS in the mail about a month sooner than I expected.
- 119 replies
-
- 1
-
-
- carmen
- constructo
- (and 2 more)
-
That's incredible. To be able to create that 3d item from simply looking at some pictures is amazing to me. Fantastic job. Now if I understand correctly, you are going to put all of this amazing work under a deck? The mind boggles.
-
Wow.. that is gorgeous. Also, I'm way jealous of that camera setup!
-
Thanks Keith, I'm downloading that book now. Luckily I don't need to read it right now, as they throttle free accounts to old-school modem speeds. Thanks for the kind words Alistair. Your build of the AVS was one of the ones I went through and will reference when I get to this a couple months from now, and I'm following your Fly build as well, it's looking great so far.
- 119 replies
-
- 1
-
-
- carmen
- constructo
- (and 2 more)
-
So as I've worked on this kit, I've done a lot of thinking about what I liked about it, but also about what I would look for in a first kit if I knew a few weeks ago all the things I've learned since starting. Things that I came up with: - Larger scale, but not necessarily more complicated. - Better instructions and plenty of reference works to use for assistance. - Single mast preferred, not square rigged. - Double planked. - Guns to learn that aspect, but not very many of them. - Something that appealed to me (the Carmen does fit this bill, it's a pretty ship). I kept coming back to the same model, over and over again when looking through models offered by many different companies, and that model is the Armed Virginia Sloop by Model Shipways. I finally decided this weekend that I was going to get that as my next kit, and when I visited the Model Expo website this morning, discovered that it is on a 30 day back-order, which seems like pretty good timing to me (I figured another week or two for shipping for 5-6 weeks total to be delivered), so I went ahead and ordered it. Next project confirmed!
-
So one thing that did not come with my Carmen kit was a parts list. Did yours come with a parts list, and if so, does the list say how many sheets of plans it should come with? Mine only has a single plan sheet (plus the instruction book), and it seems terribly inadequate at times, so I'm wondering if I might be missing something (like sail patterns might be kind of nice). Thanks,
-
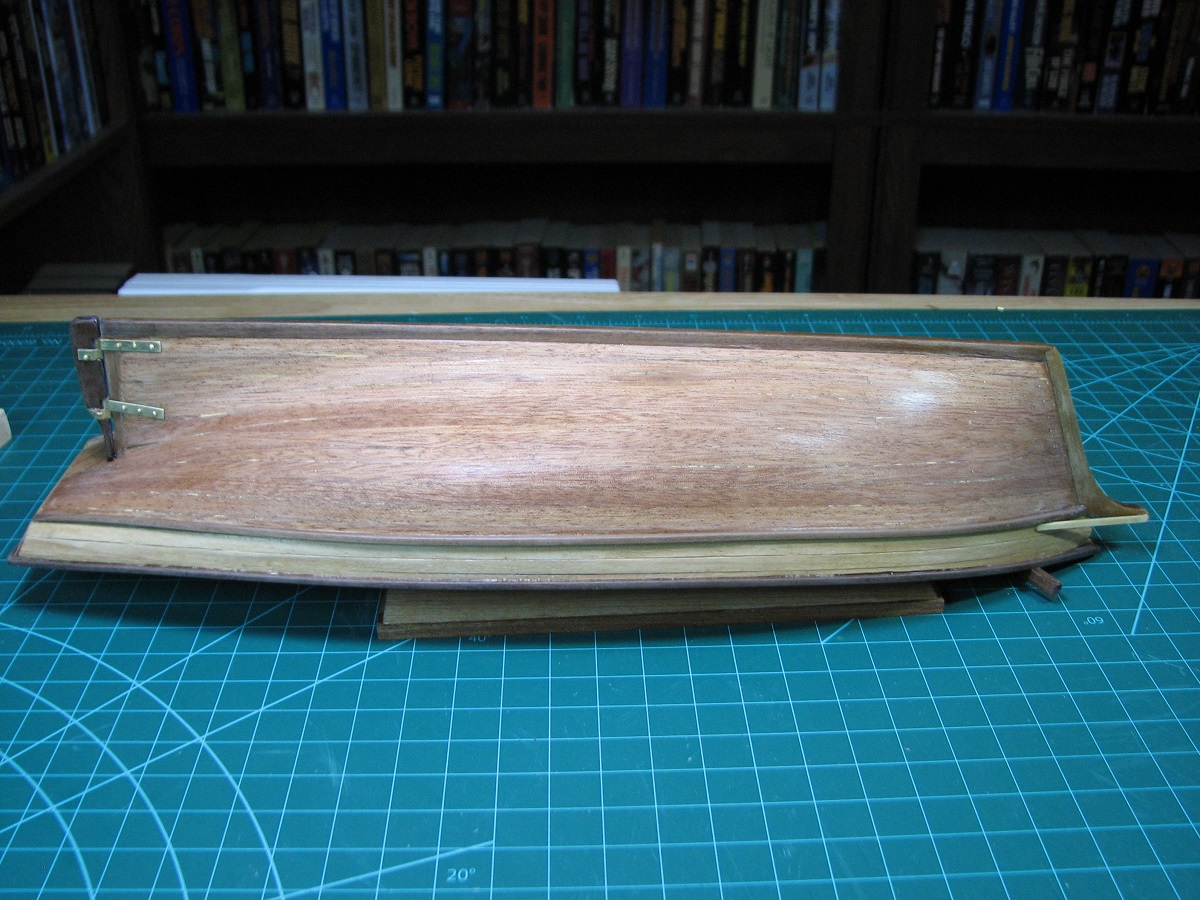
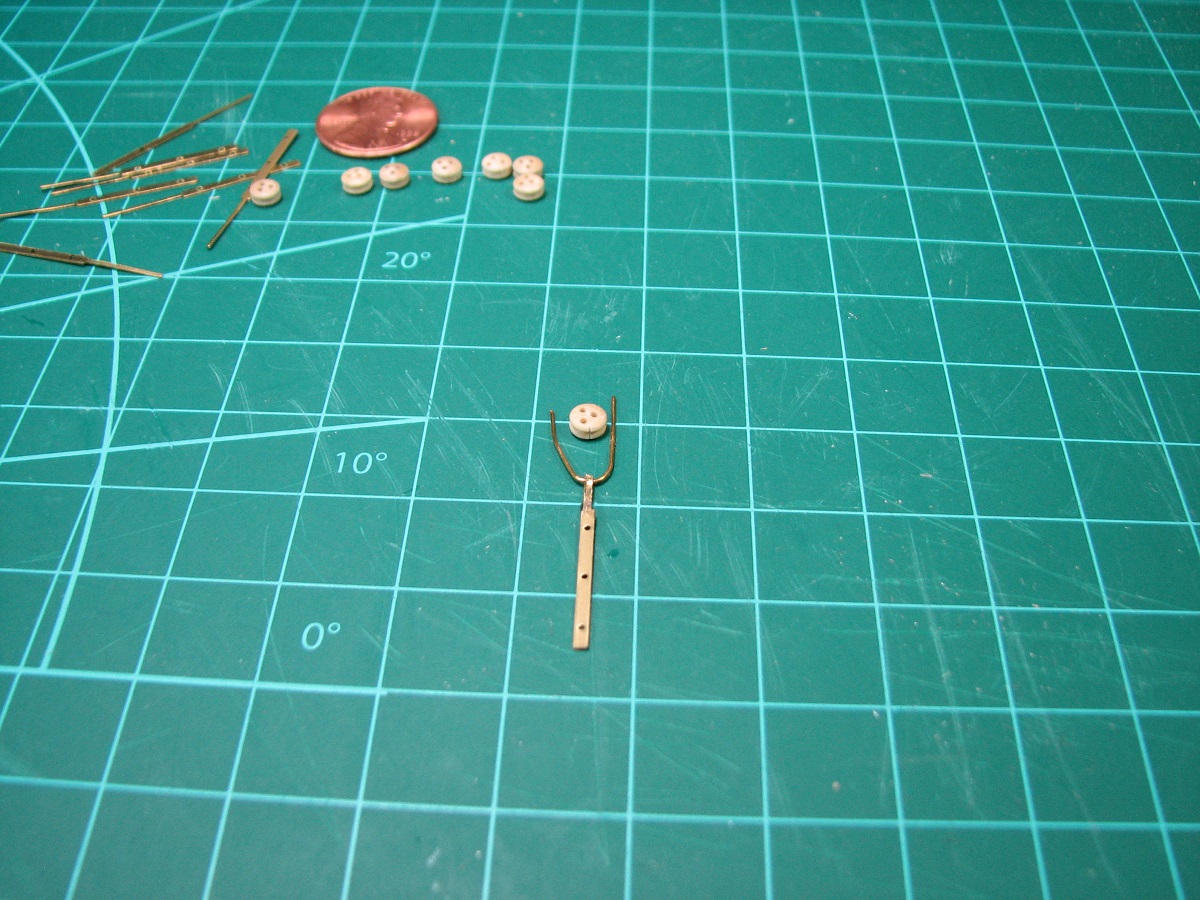
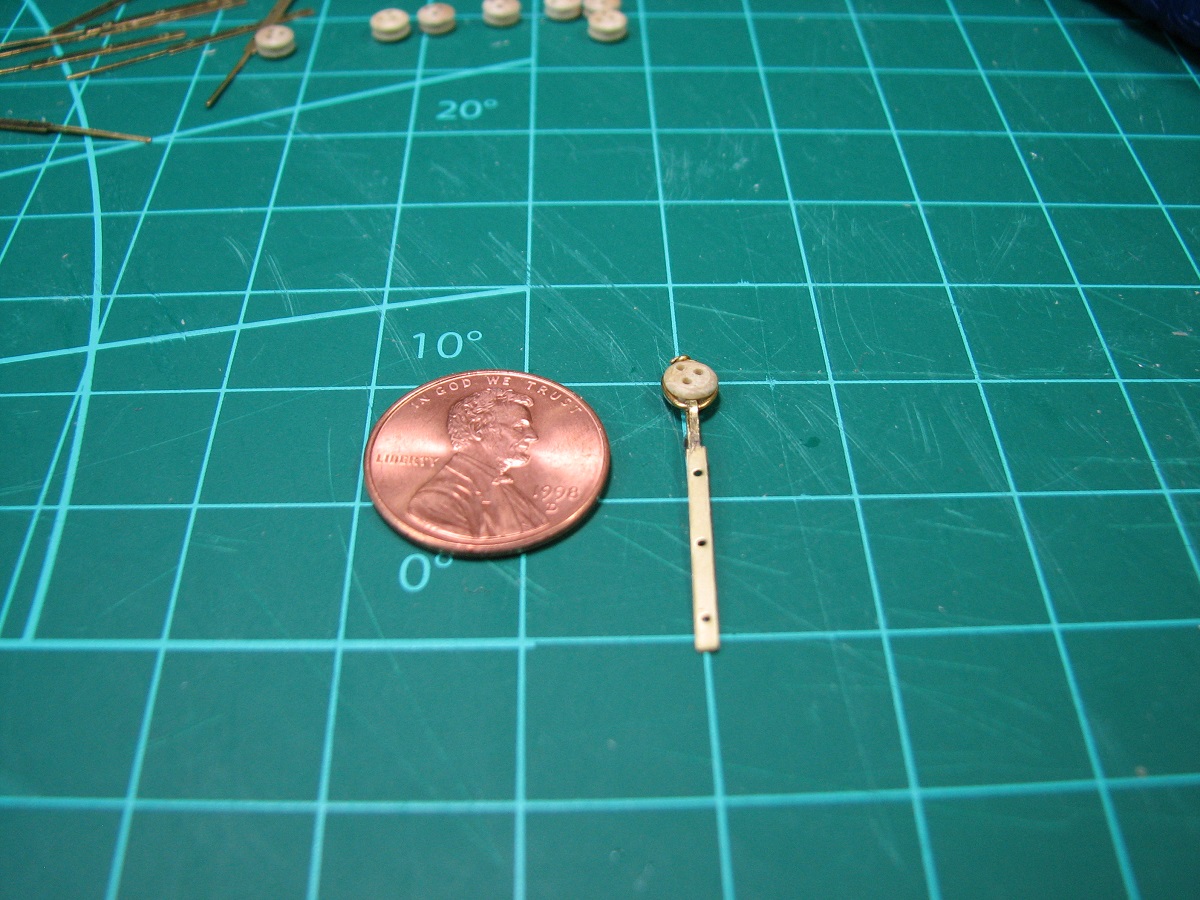
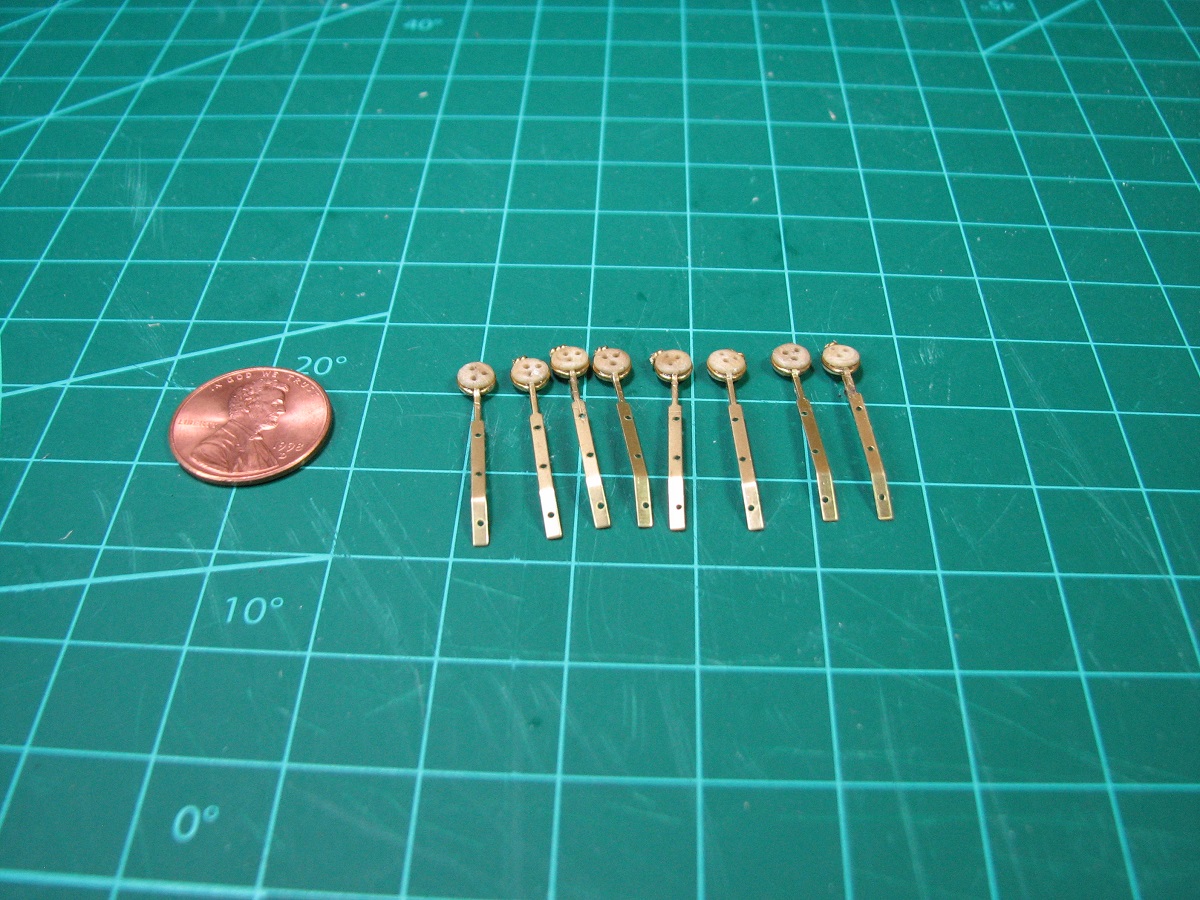
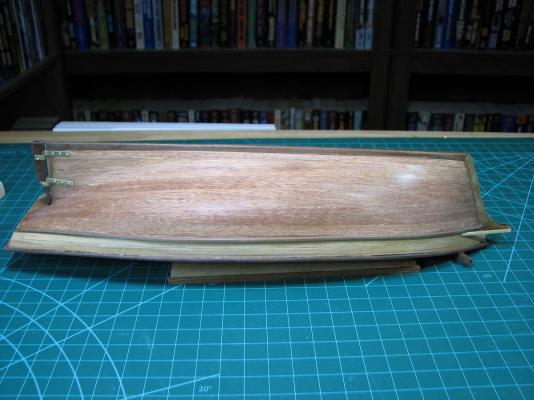
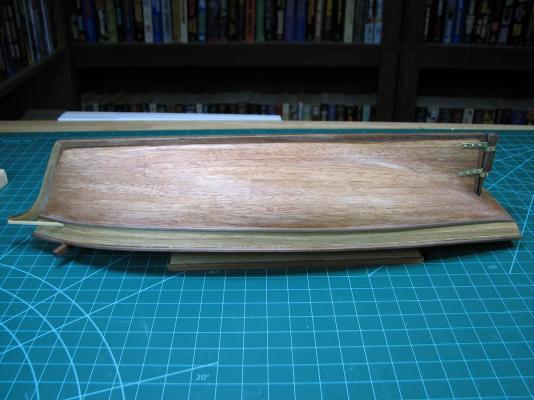
Next up in the instruction book, take that hull you've been painstakingly working on for who knows how many hours, and drill holes in it. Wait.. what? Nooo... Didn't get them quite perfectly aligned, but looks pretty decent in the dry test-fit. After the 2nd coat of urethane dried, I took the steel wool to it, and I'm pretty content with how it turned out, and will likely leave it this way. Now, on to.. drilling more holes in her. Spent a lot of time measuring and comparing to the plan sheet to locate these, think they are pretty close to what all the pictures and plans show. Time to assemble the dead eyes to the chain plates. Per the pictorial instructions in the book, this is how Constructo says to do it. I'm sure there is a much better way, but for this build I'll stick with the kit components and they turned out ok. Next I mounted them to the hull. Another time to spend lots of time in measurements, and I think it worked out, they seem to be even, raked properly, and match up with the plans well. I framed up the doors (windows?) in the two deck houses, and am about 75% through planking them. Tomorrow should get them planked and trimmed, and hopefully they'll look much better than they do now, as the base structure is fairly ugly!


- 119 replies
-
- 4
-
-
- carmen
- constructo
- (and 2 more)
-
Beautiful work on the deck furniture.
-
Rich, your Connie is looking great. Things like 100 hammock stanchions are why I started out much smaller.
- 1,756 replies
-
- 1
-
-
- constitution
- constructo
- (and 1 more)