Ryland Craze
-
Posts
1,573 -
Joined
-
Last visited
Content Type
Profiles
Forums
Gallery
Events
Everything posted by Ryland Craze
-
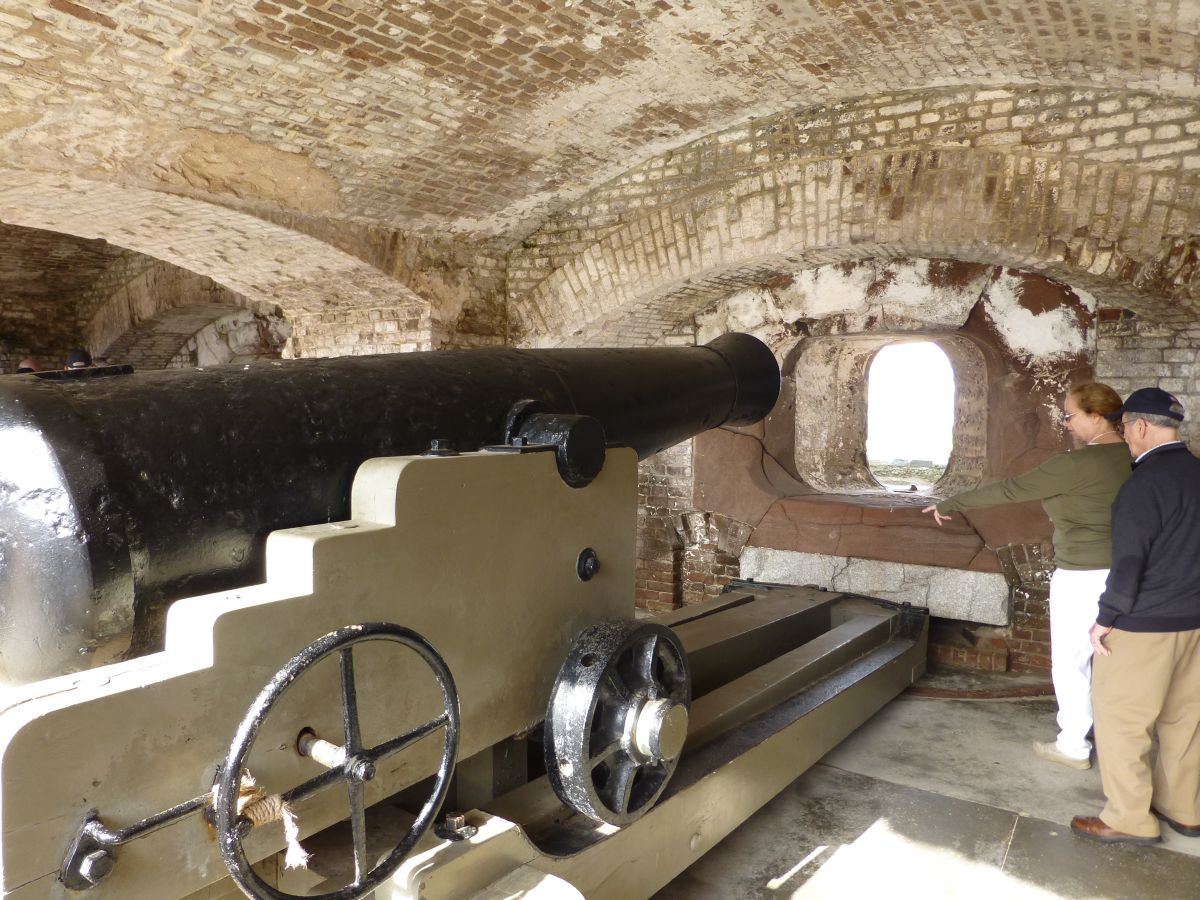
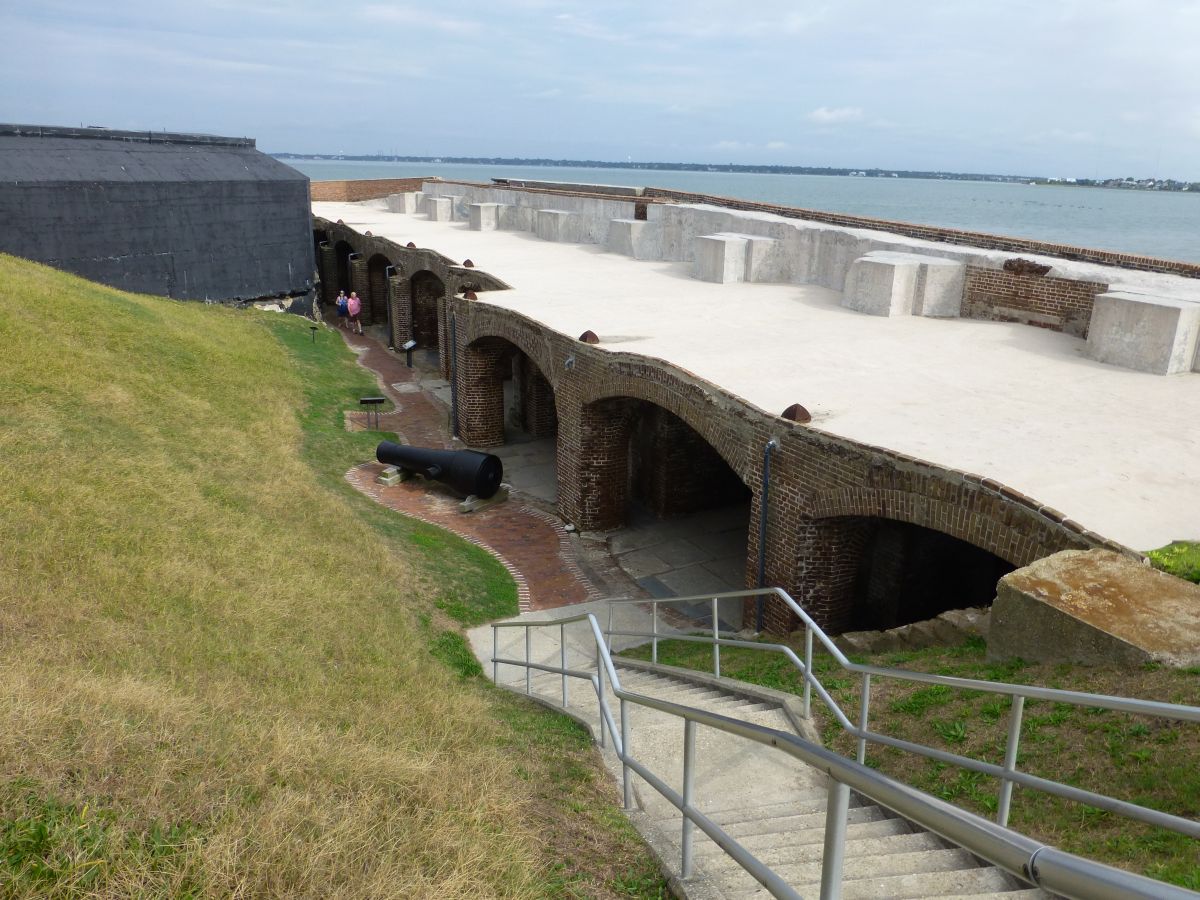
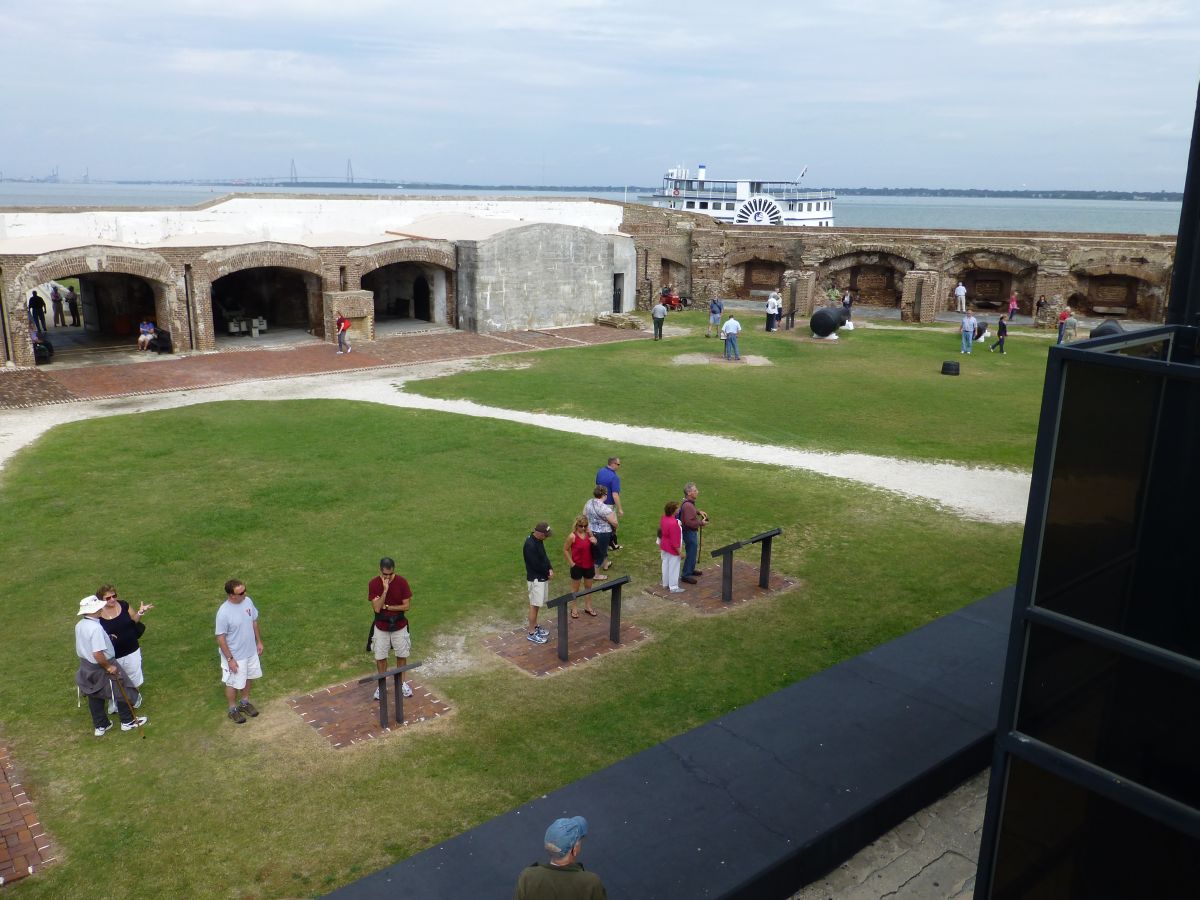
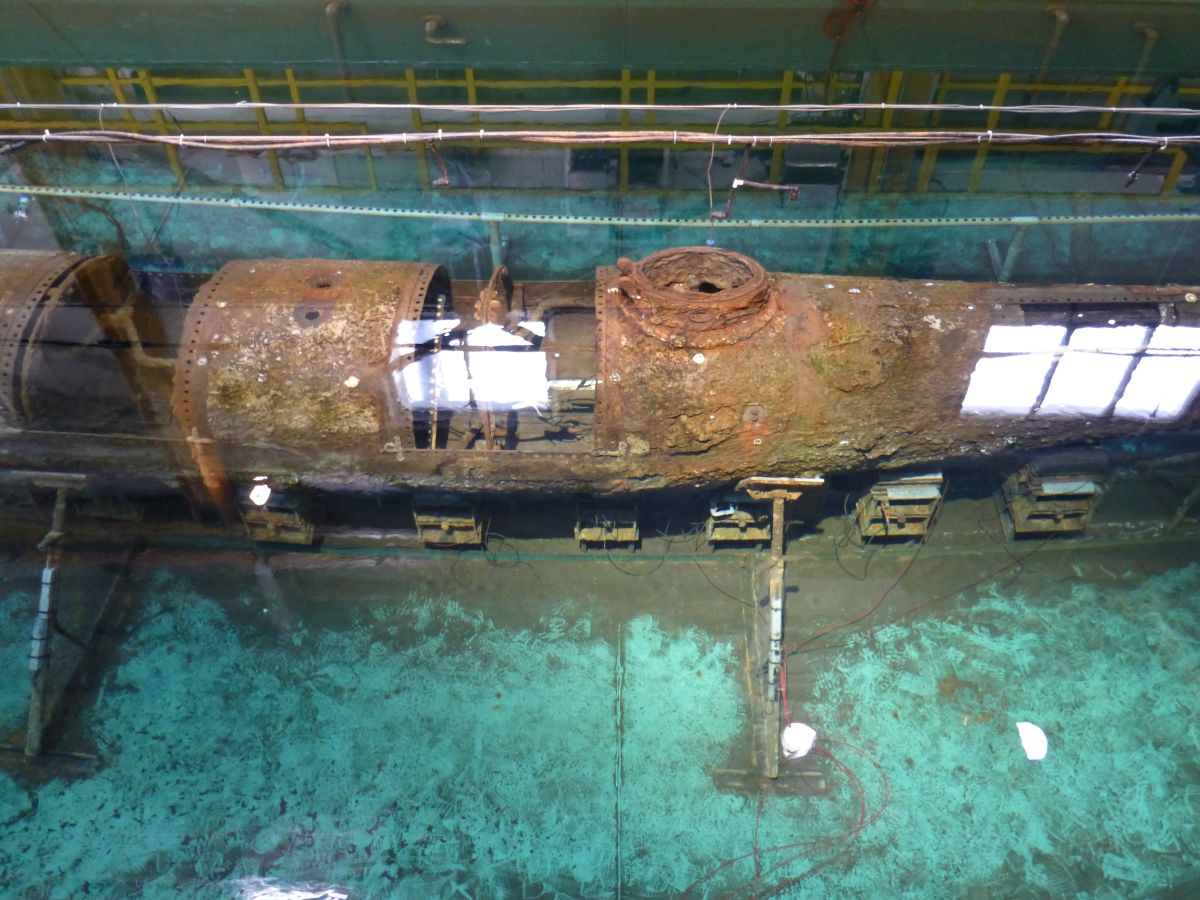
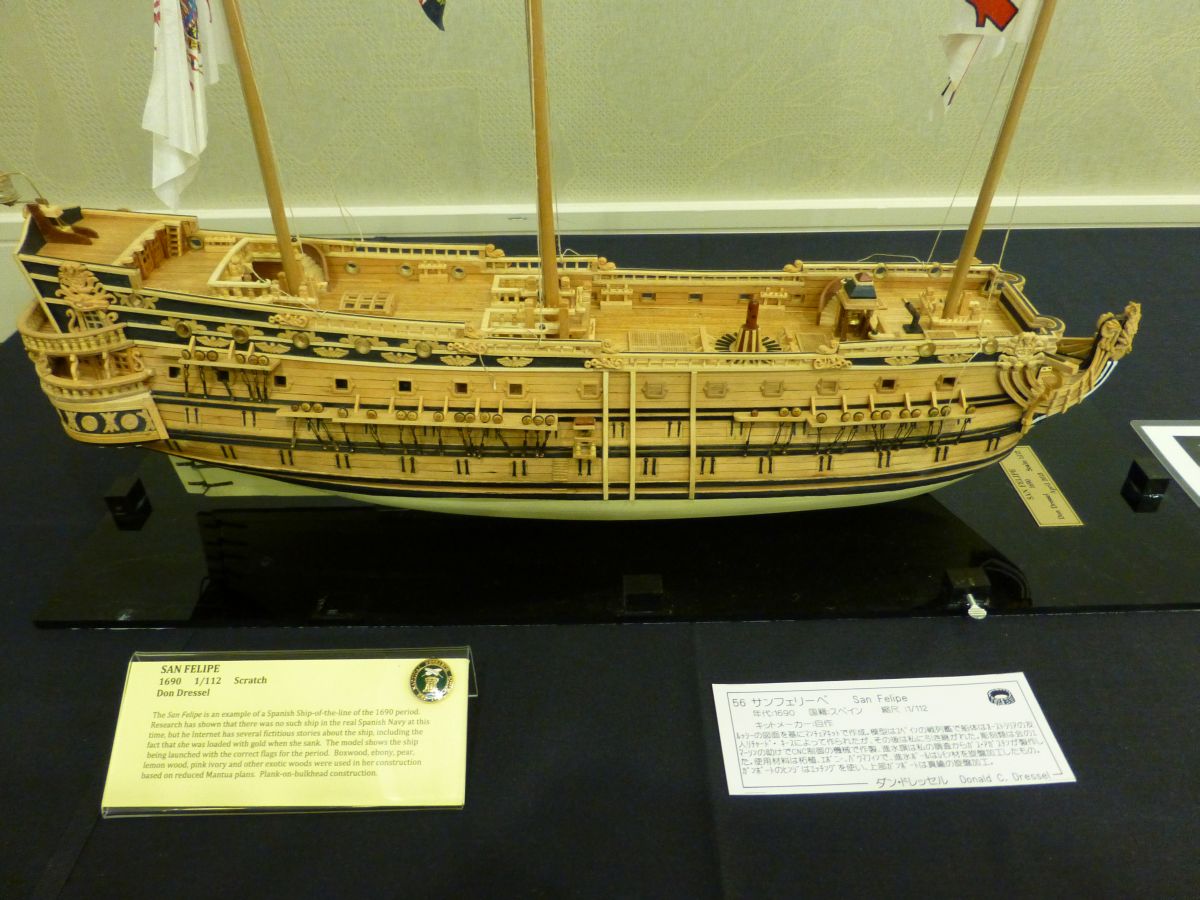
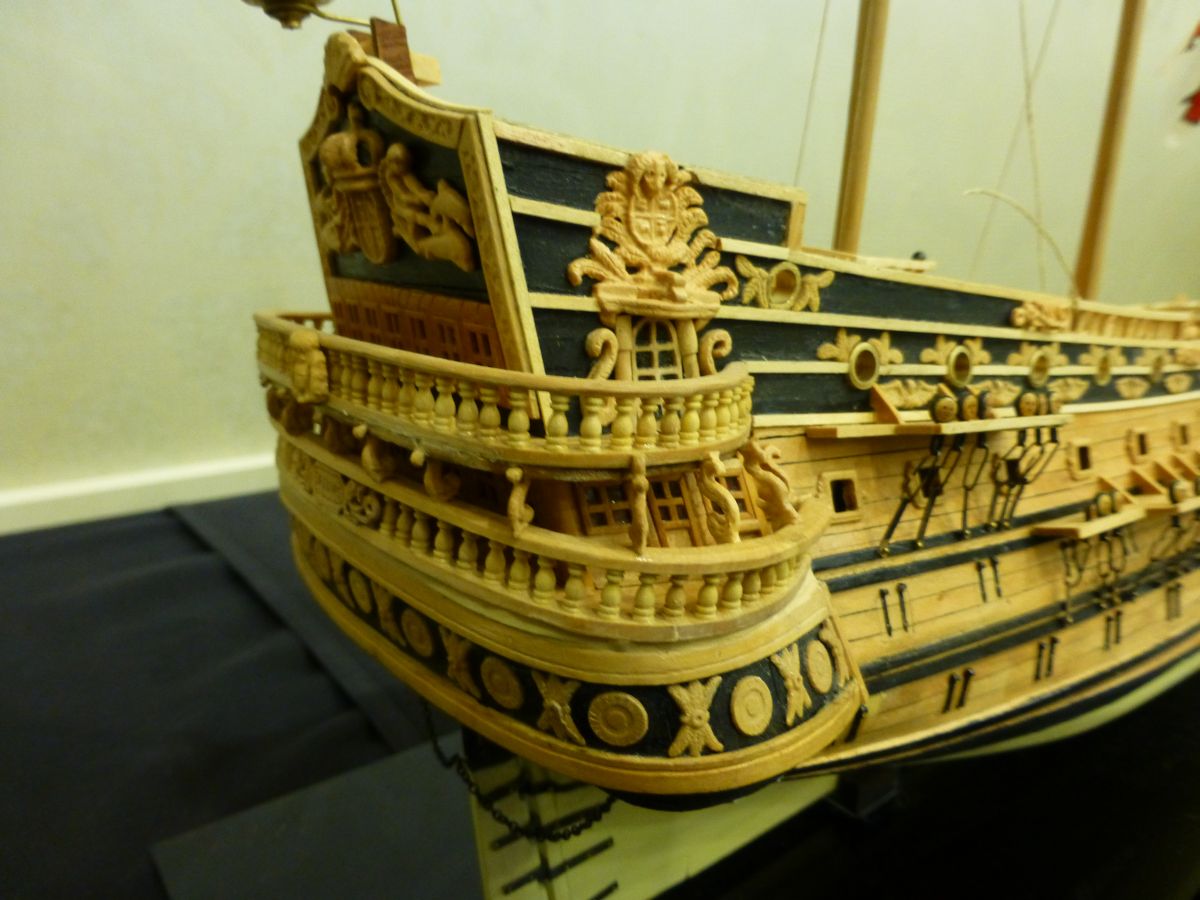
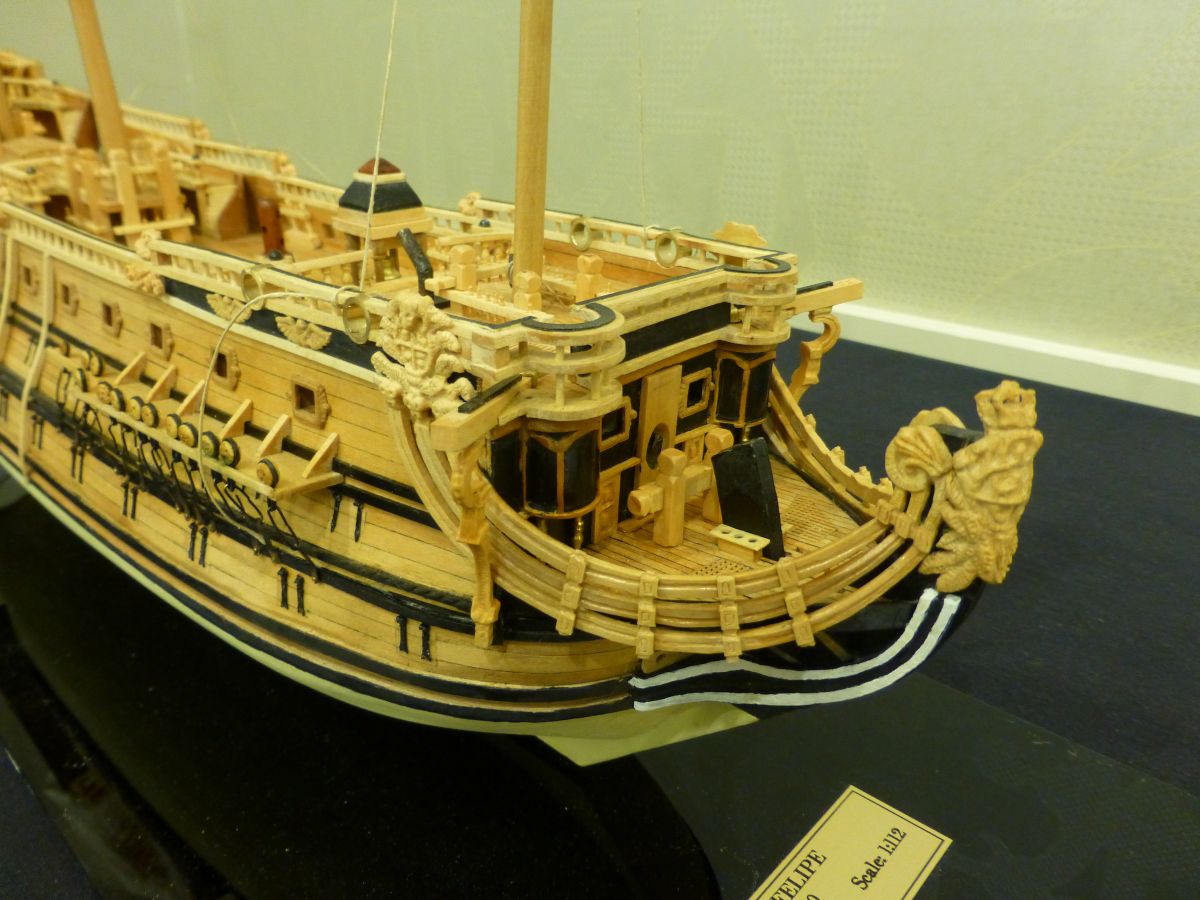
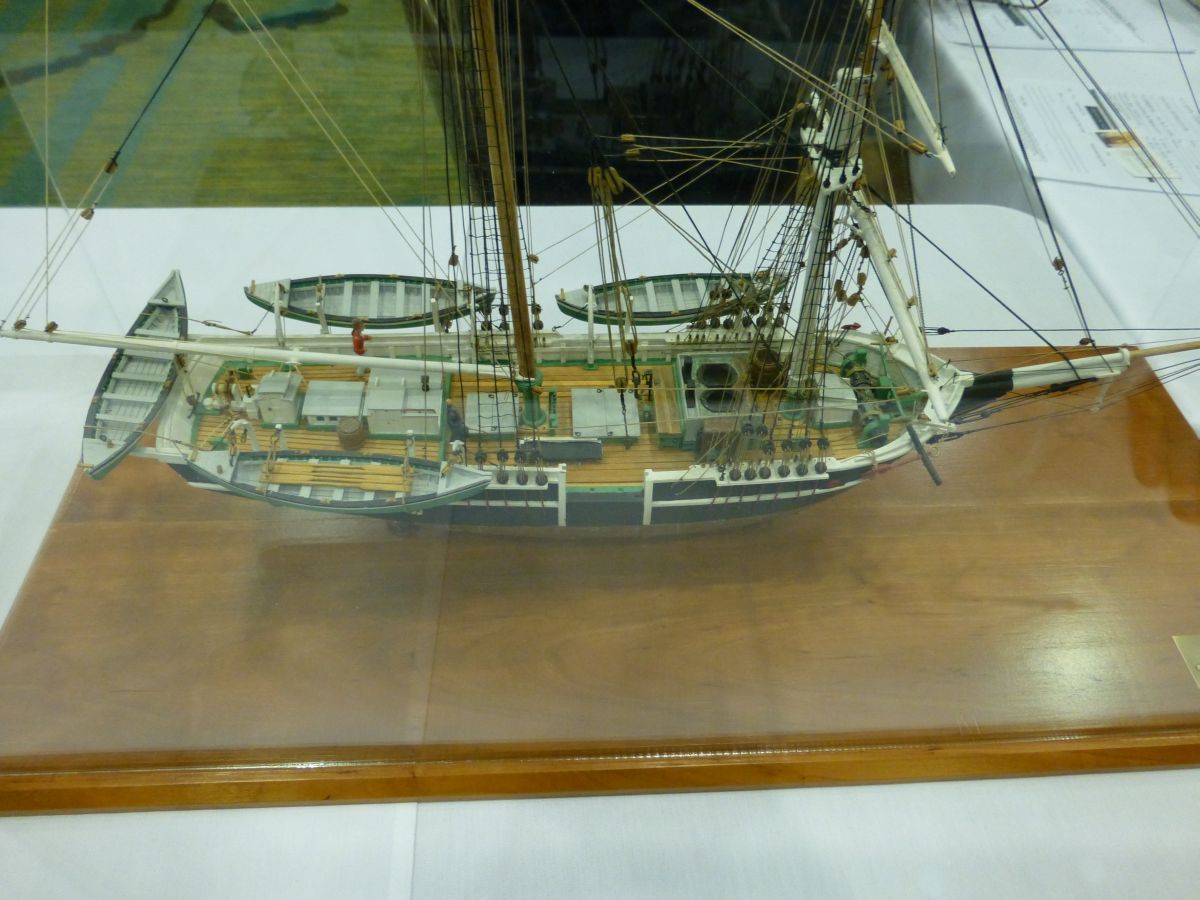
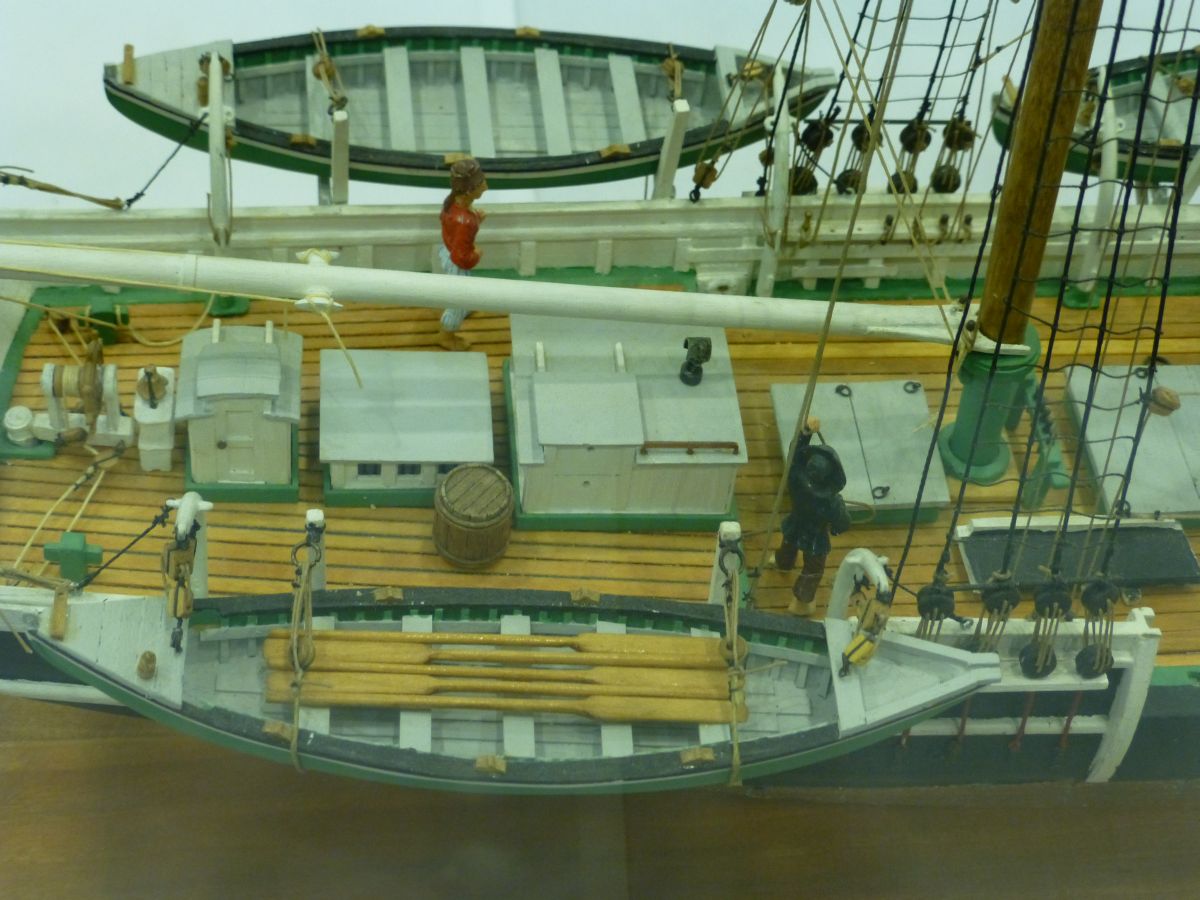
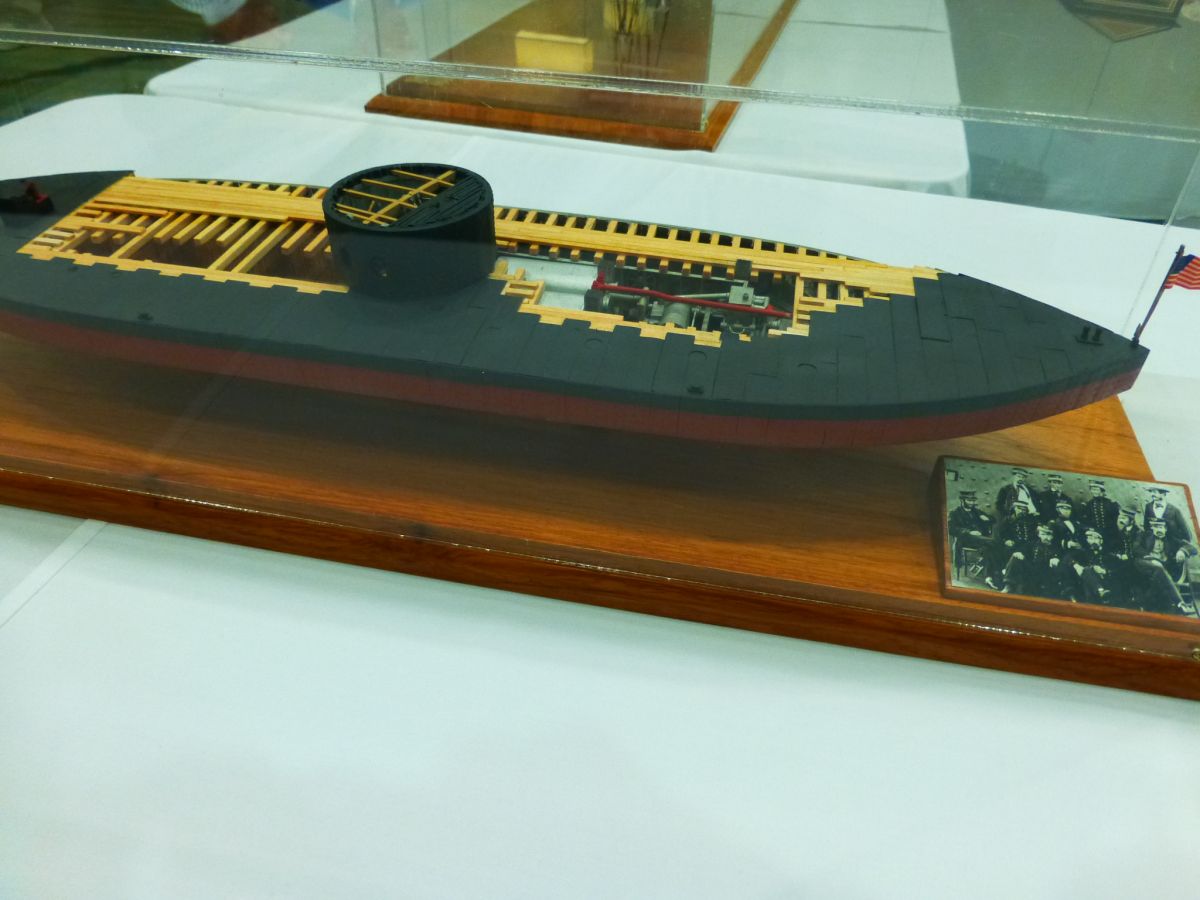
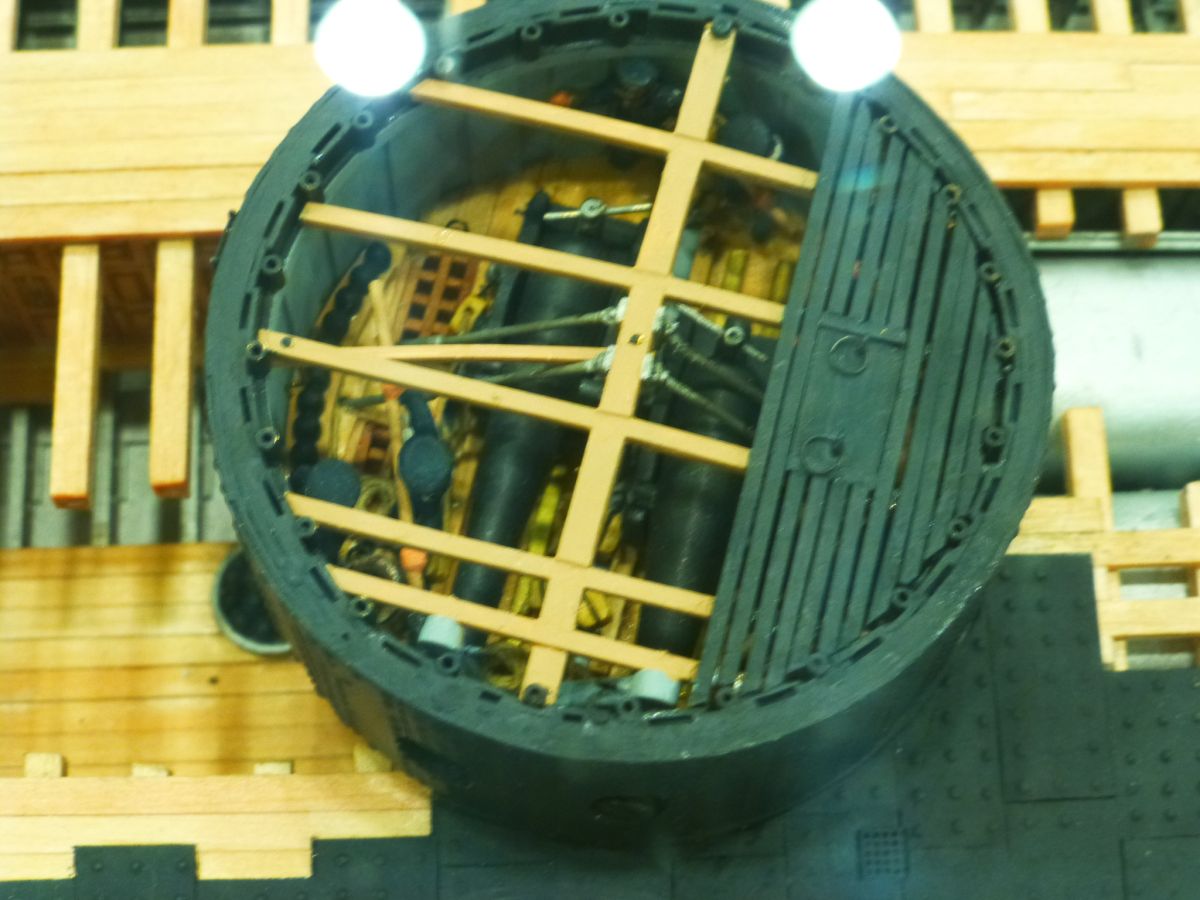
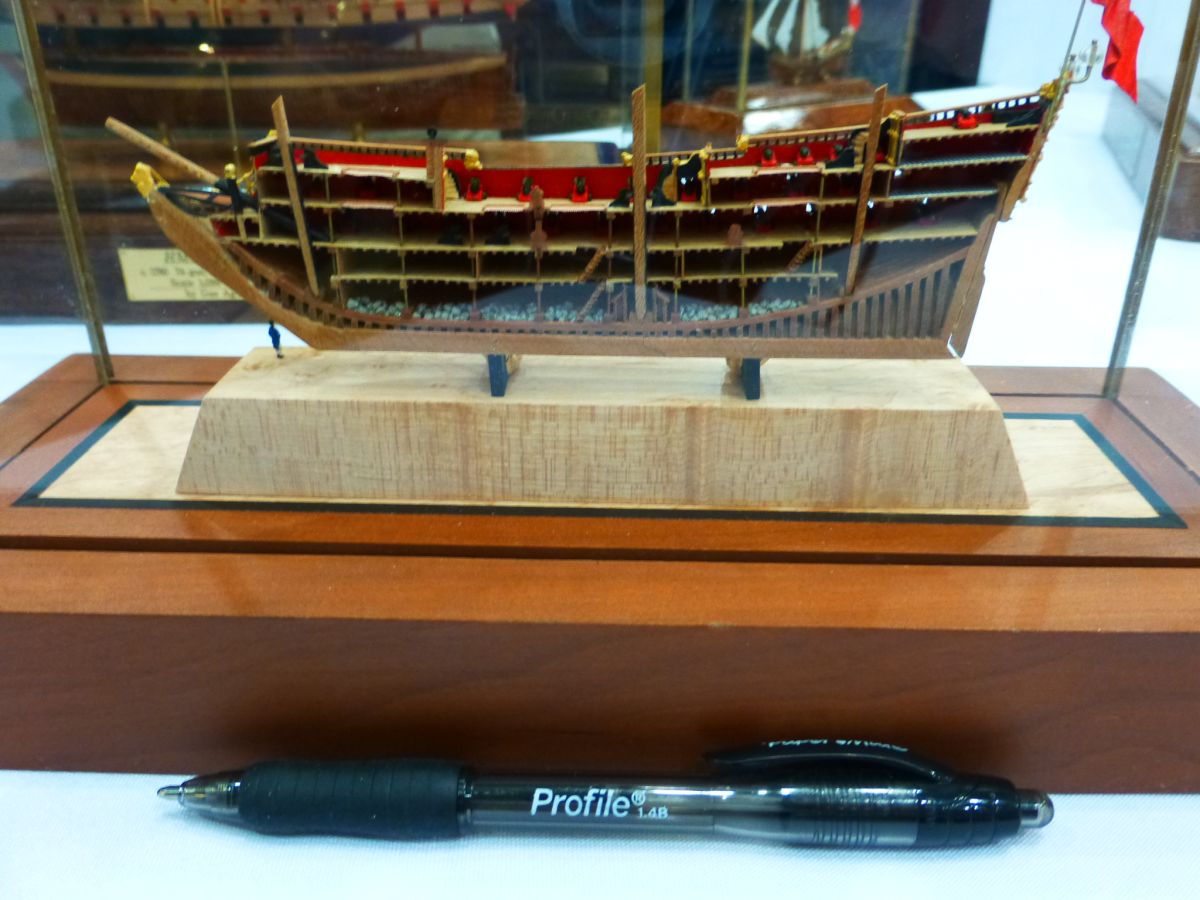
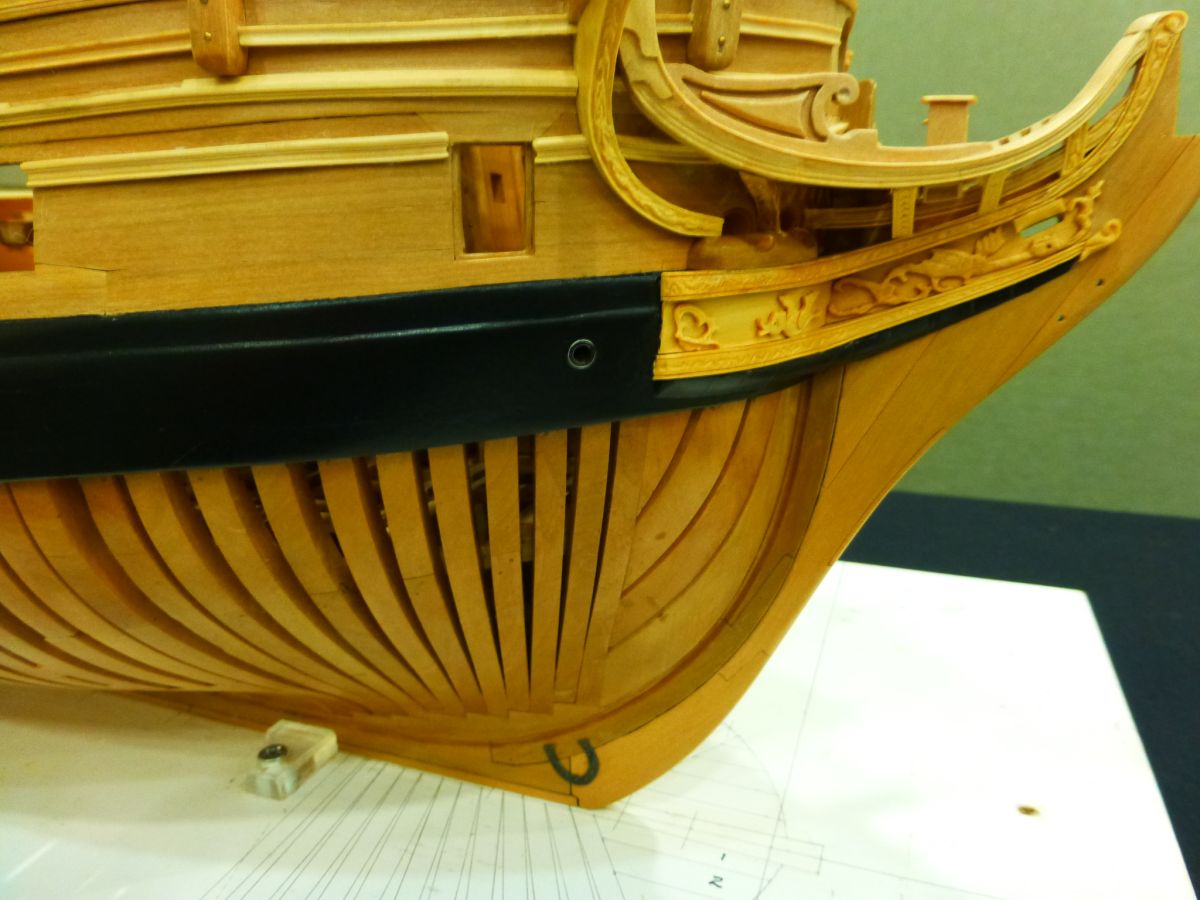
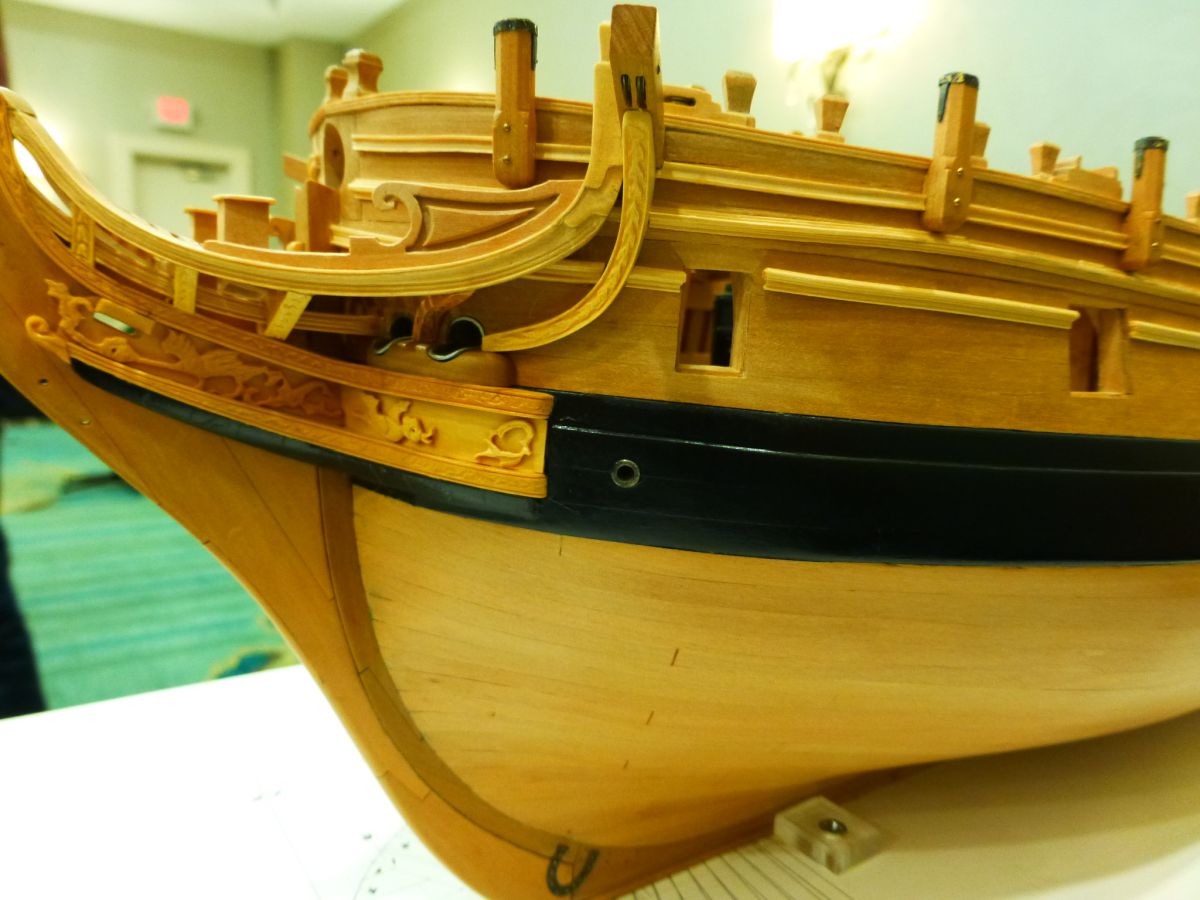
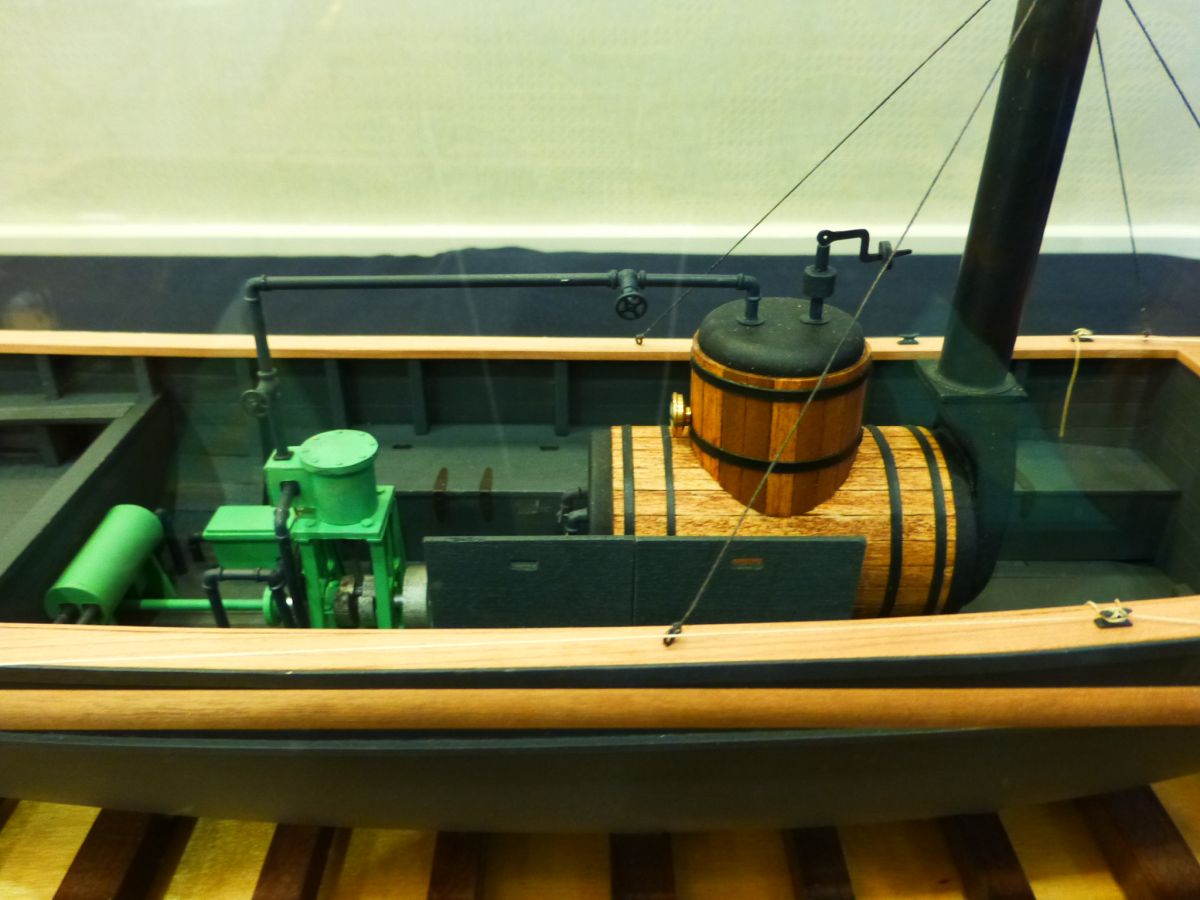
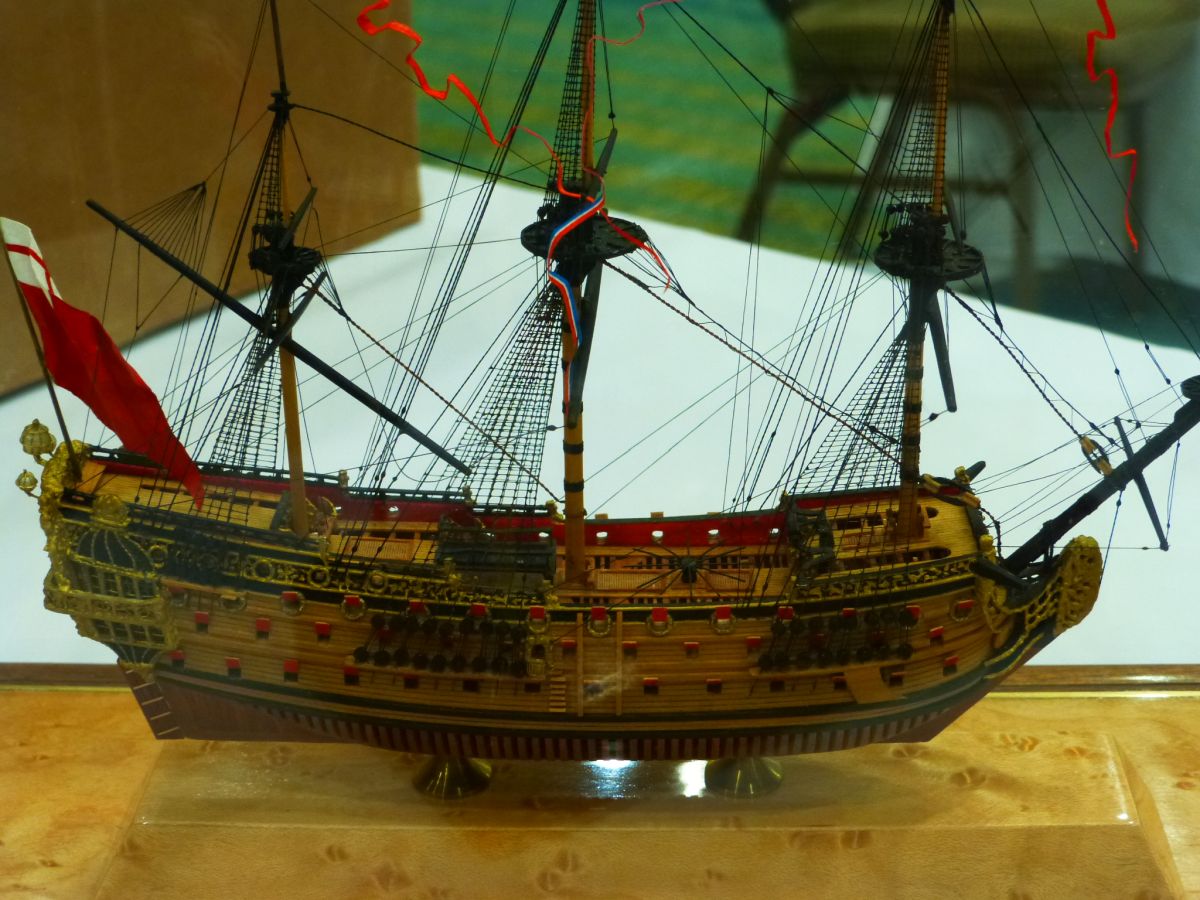
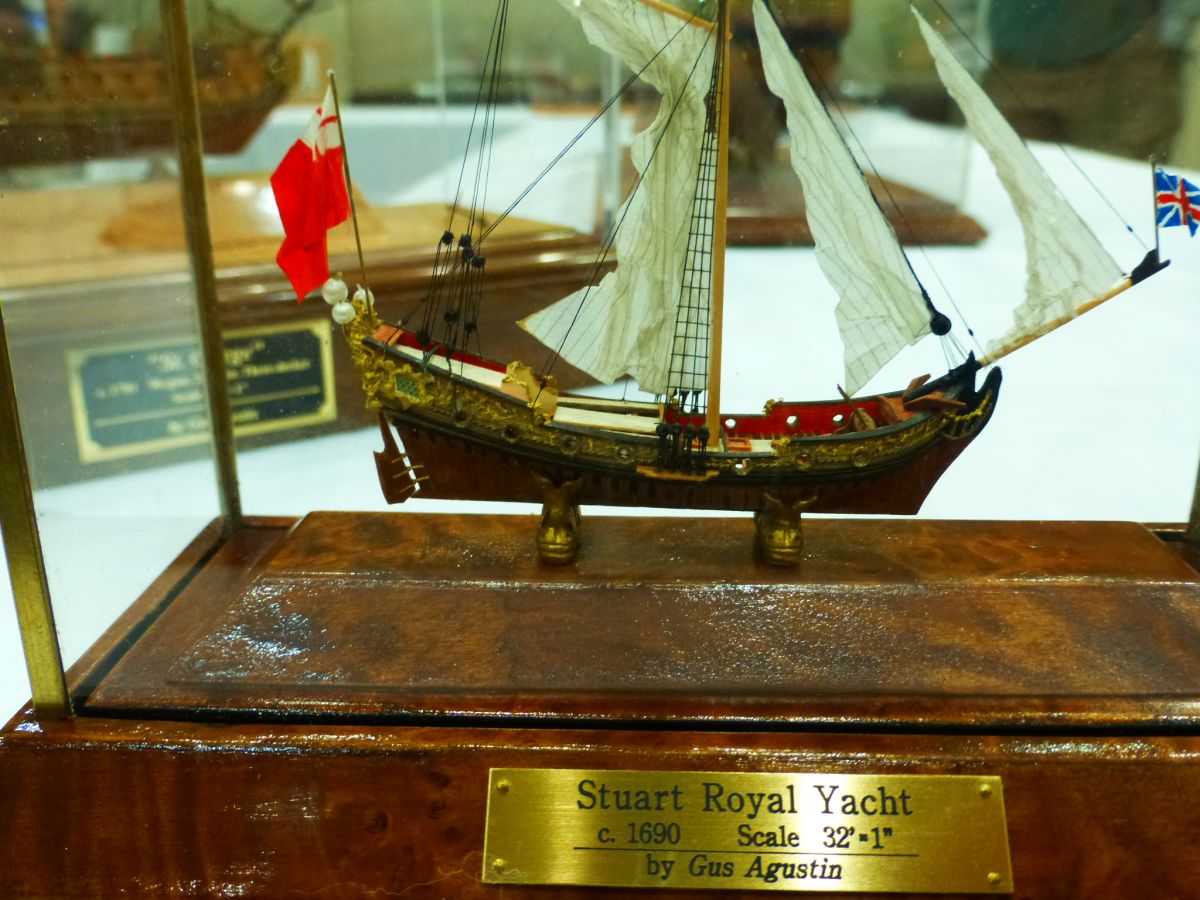
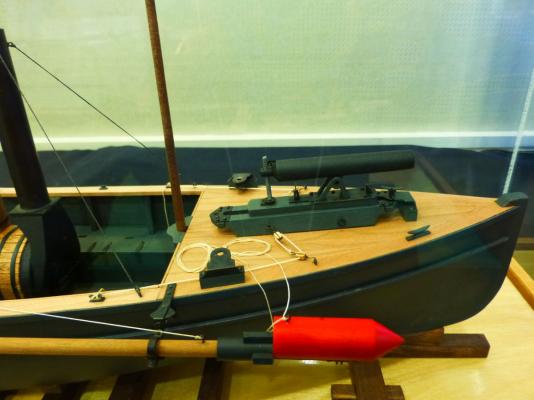
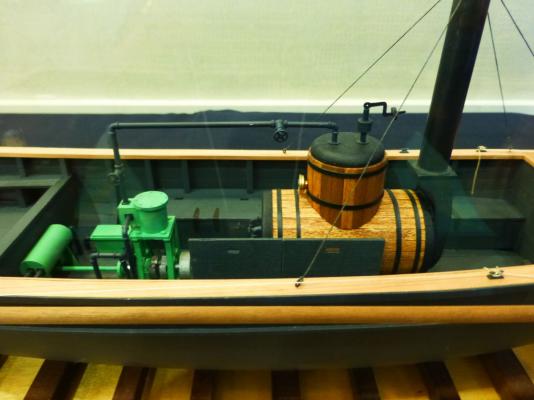
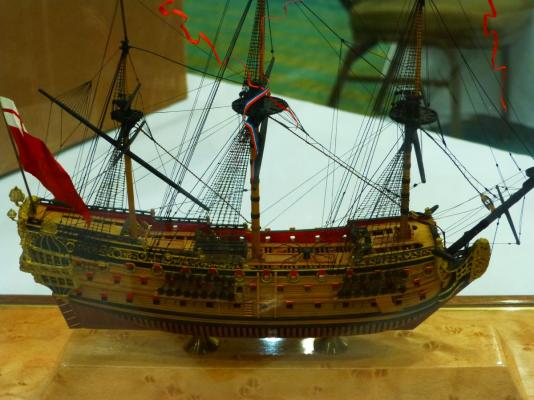
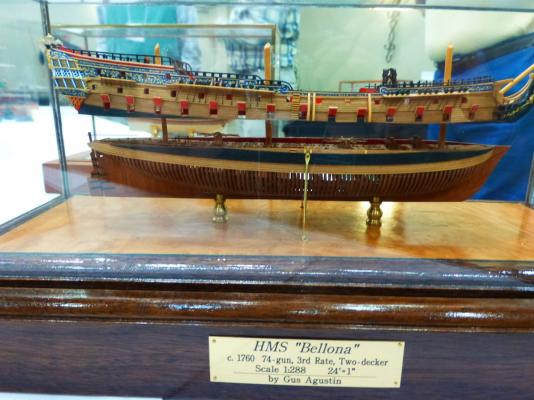
 Here are some photos of the NRG Conference in Charleston, South Carolina:

-
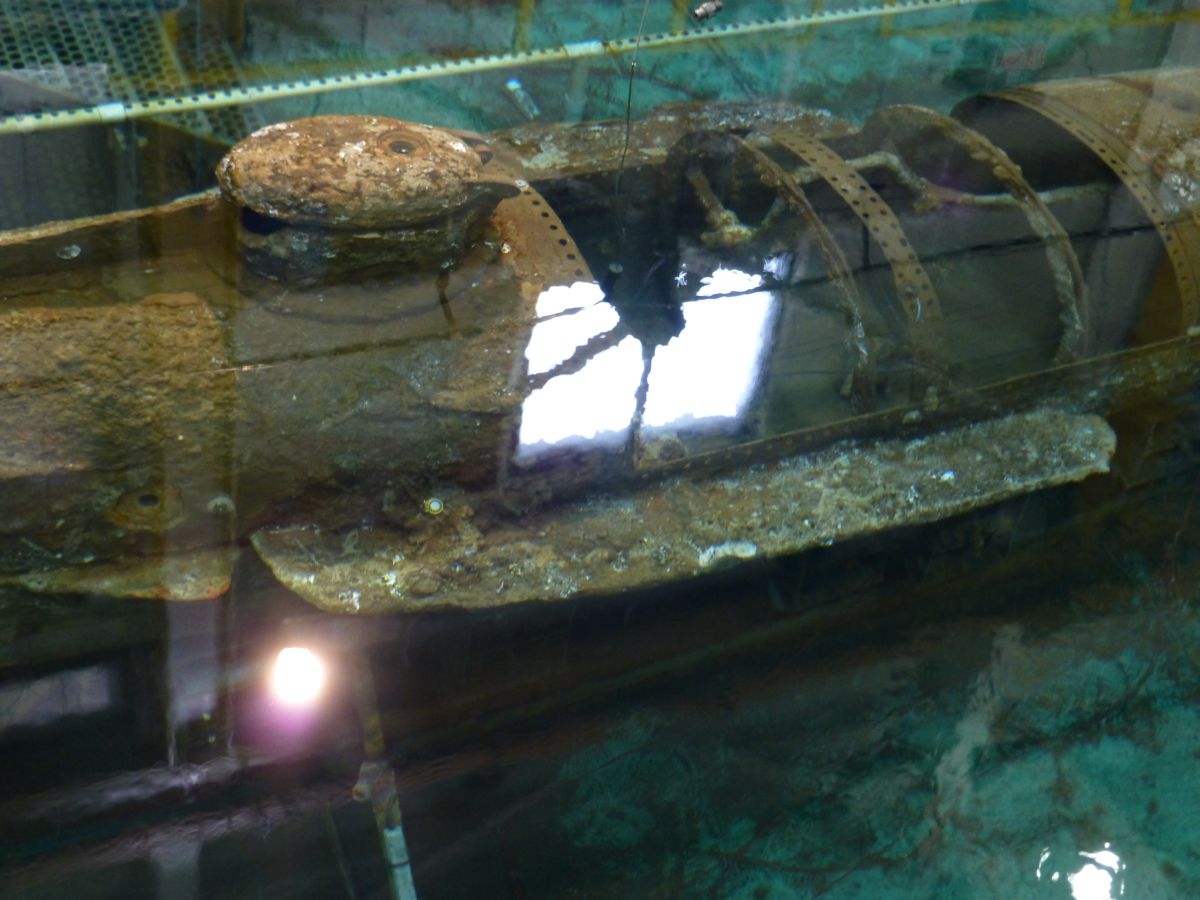
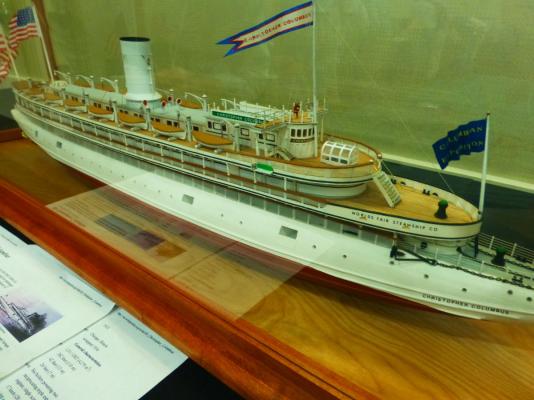
It was a great time for all that attended the Conference. I really enjoyed the trip to Patriots Point on Wednesday and the tour of Fort Sumter and the Hunley on Friday. The presentations were excellent and the presenters definitely had a lot of enthusiasm for their topics. There were also about twenty ship models on display. The best part was meeting up with old friends and making new ones. There were also a lot on Model Ship World members in attendance. Like Tim, I am looking forward to St. Louis in 2014.
-
Thanks Alistair and racouch444 for the nice comments. I got my Morope from curlee11@aol.com. It is nice scale rope but in the future I will be buying my rope from the Syren Ship Model Company. They produce excellent rope and it does not unravel like Morope does when you cut it. The cannons are the ones that came with the kit. After I cleaned them up, I painted them with Model Shipways Iron Cannon Black.
-
Thanks John. I hope you enjoyed your visit to Virginia Beach. My wife and I took a visit today to Surry, then crossed the James river by ferry to Jamestown and eventually made it to Williamsburg for lunch and some shopping. I need to get back in the workshop as my AVS is begging me to finish it.
-
Dan, You received some excellent advice from Bob and Toni. You will be much happier correcting the planks. I look forward to following your build.
-
Your Longboat looks great. You are not as slow as some other builders that I know. Thanks for the update.
-
This really looks nice. I have enjoyed your build log.
-
Good job Tim. It is coming along nicely. I like the idea of adding the rudder later.
-
That was quite an adventure. I am envious. It had to be a thrill to be a crew member on the re-enactment. I am glad you shared your experience with us.
-
Looks very nice. Glad to see that you have started back on your AVS. You are on your way to the finish line.
-
Looking good Bob. I am going to enjoy this build.
-
You "Slackin-off"? I think you have made a lot of progress in the last month. I hope you bring your Elco to Saturday's meeting.
-
Have there been changes to Model Expo Support?
Ryland Craze replied to rtropp's topic in Wood ship model kits
I faxed in a request in mid June to replace my carronades for my Syren kit and received the replacement parts about two and a half weeks later. They may be running a little behind but I am sure they will get to your request soon. Excellen customer service and I have enjoyed doing business with them over the past fifteen years. -
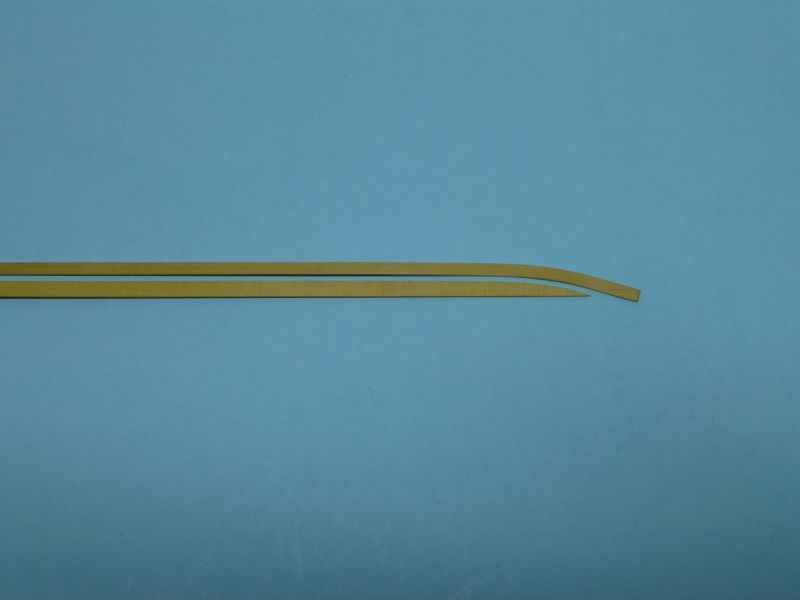
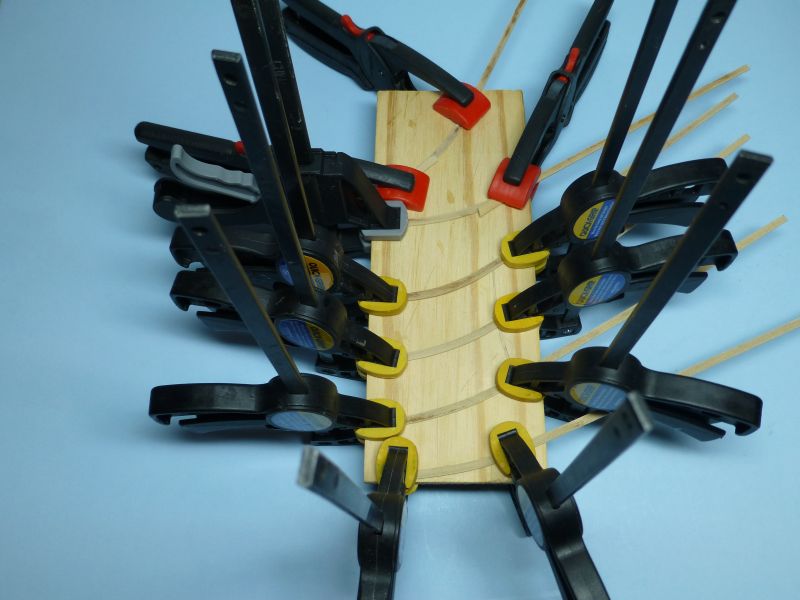
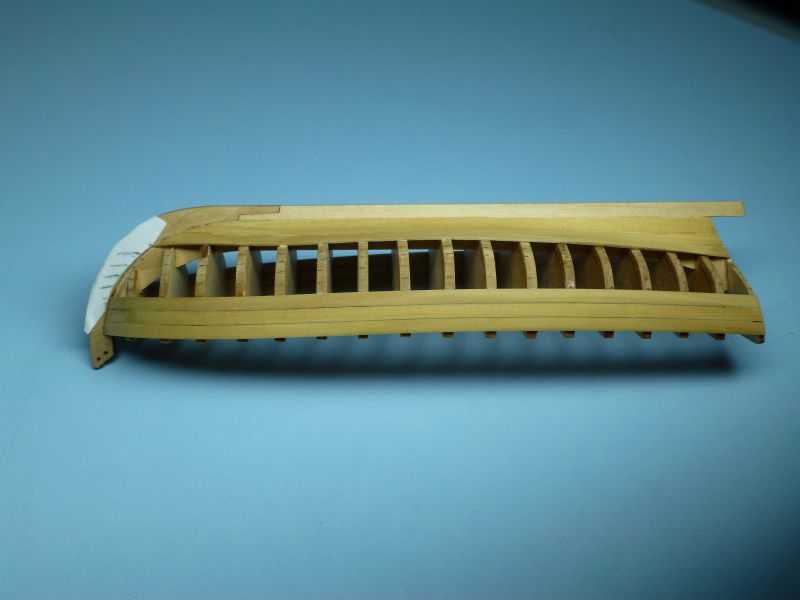
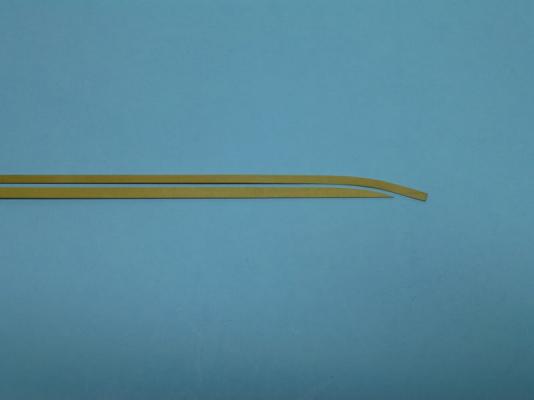
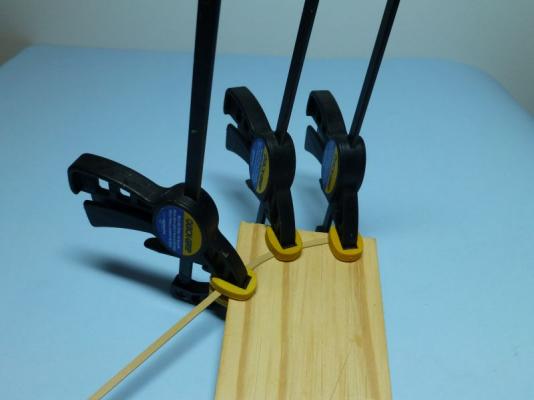
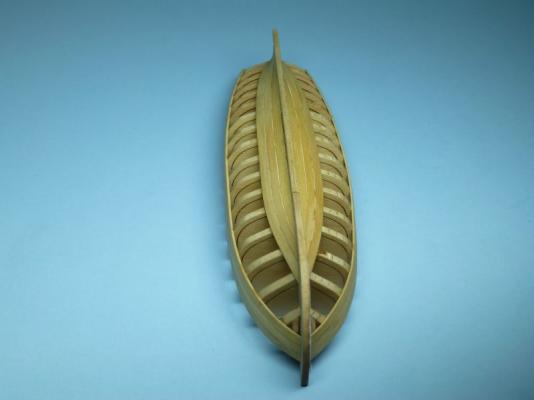
Thanks Grant and Tim for your comments. I have learned a lot while building my Longboat. It is really nice to see all of the Longboats being built. I have learned something from everyone's build that has helped me on mine. I mentioned on another Longboat build log that I removed my garboard planks as I felt I was planking this boat incorrectly. I removed one side and reinstalled a new garboard plank. I followed BobF’s build log on how to do this. I used a 5/32” wide strip of boxwood for my garboard plank. I have never installed a garboard plank in this manner, but it worked out just fine, especially after the next two planks were installed. After the one side was installed, I replaced the other side. Next, I added two 1/8” wide planks, which would be enough to plank to the bottom edge of the transom. I had a lot of trouble bending the last ¼” below the transom as it must twist at least 45 degrees to lie flat at the stern. I broke several of the boxwood strips as they were very brittle, even after soaking for at least 24 hours. The hardest part for me was installing the three bottom planks. After they were installed, I measured out the width of the remaining planks using tic strips on each bulkhead. My longboat will use eleven planks on each side. I was surprised to see that I will have very little trimming of the remaining planks to be installed. The two pictures below show where I am currently in the build process. I am a slow builder. I have ten planks to install to complete the hull. So I soaked an additional six planks over night and pre-bent them as shown below. This should speed up the process. I have really enjoyed the updates on the other Longboat builds and I look forward to seeing the progress of the other Longboat builders.


-
David, We have missed you on MSW. Glad to see you back and cannot wait to see your updates on your Niagara.
-
Thanks Marty for the comments. I may bring it to Saturday's meeting if I can get some planks installed. You have done a great job on your Hunter and I cannot wait to see your sails. You should be close to posting pictures of your model in the completed gallery. You do excellent work at a fast pace.
-
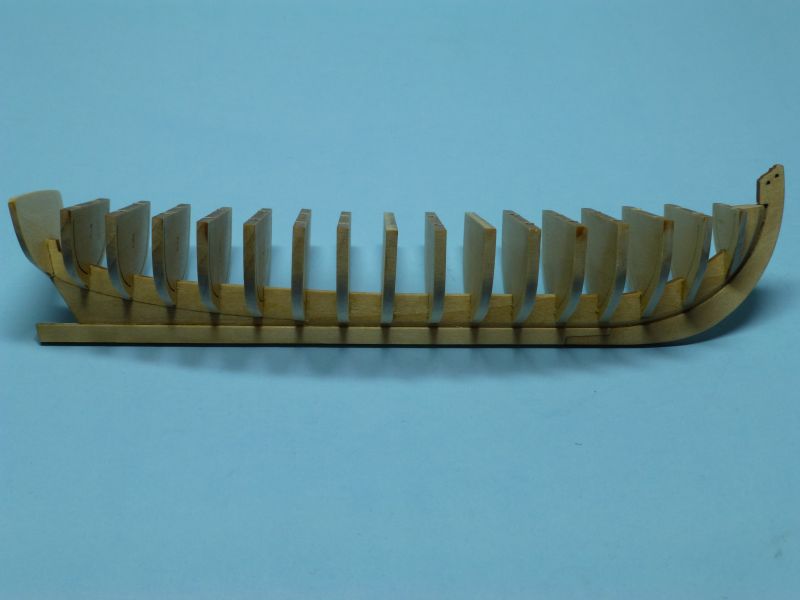
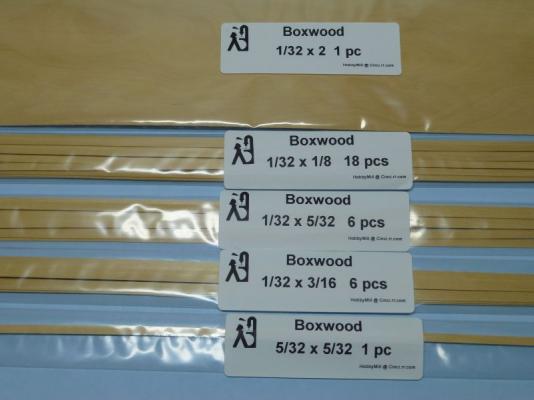
I thought I would give everybody an update as to where I stand on my Longboat. A lot of good things have been going on in my life over the last three months and I just have not done much modeling on my Longboat. I was originally going to build my Longboat in basswood but made a decision that if I was going to spend the time on this excellent kit, why not upgrade the wood in the kit. I got with Jeff Hayes at HobbyMill and placed an order for some boxwood. This is what I received. I probably could have ordered six less strips of the 1/8" wide boxwood as I cut the planks to an 8" length, so I was getting three planks per 24" strip of boxwood. Here is a picture of my Longboat before I started planking. I proceeded to install the two top strakes to define the sheer line and then I installed the garboard strake and one additional plank. Then I started seeing other Longboat build logs and I carefully studied their garboard strakes. I then realized that I had installed my garboard strake and the additional plank too far forward and was fearful that this would cause problems further on in the planking process. I had installed these planks on both the port and starboard sides. I carefully removed one side of the garboard strake and its companion plank and left the other side to do later after I replank the garboard strake. Cleaning up the rabbet joint took a lot of time, but the good thing is the lower hull will be painted further in the build. I must admit that I have learned a lot from sitting on the sidelines these last three months watching the other Longboat builders complete their planking. Their build logs have been an inspiration for me.

-
Dan, I got these angle plates off of ebay many years ago. I could not find any on ebay but I did come across some at this website. Just click here: Global Industrial. I ordered a pair of 1"x1"x1" and a pair of 2"x2"x2". Mine were imported from India. You can also make some angle plates out of legos.
-
Thanks Anja and Tim for the Birthday wishes. I spent all day with the grandkids. My two and a half year old granddaughter sang happy birthday to me about six times. We lit the candles each time and she got to blow them out. I made wishes each time and hopefully they will all come true. All in all, a great day.
-
Thanks Wayne. It is a fun little boat to work on. I am watching the other Longboat builders as they are turning out some beautiful models. I have learned a lot from their build logs. I have been following your Granado build log and I am amazed at your artistic talent regarding the painting of the quarterdeck bulkhead panels. You really did a nice job on them. They are going to add to an already excellent model.
-
Phil, I have to agree with Andy at looking at Chuck Passaro's Syren from Model Expo. There are many excellent build logs of the Syren on MSW plus you have the kit designer, Chuck, on this site if you should have any questions. Check out the instructions at this link: Brig Syren Instructions Just click on the documents tab under the pictures. Good luck on your next build.
-
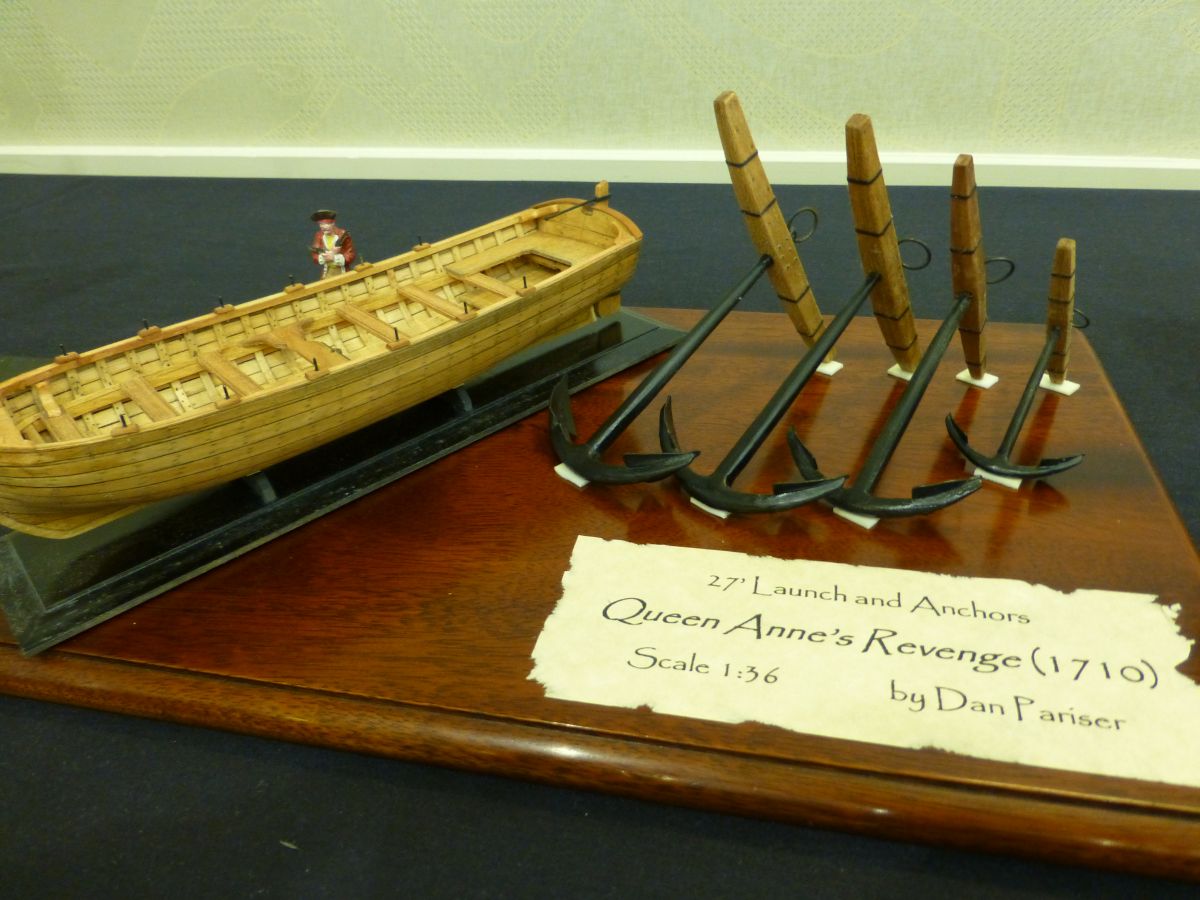
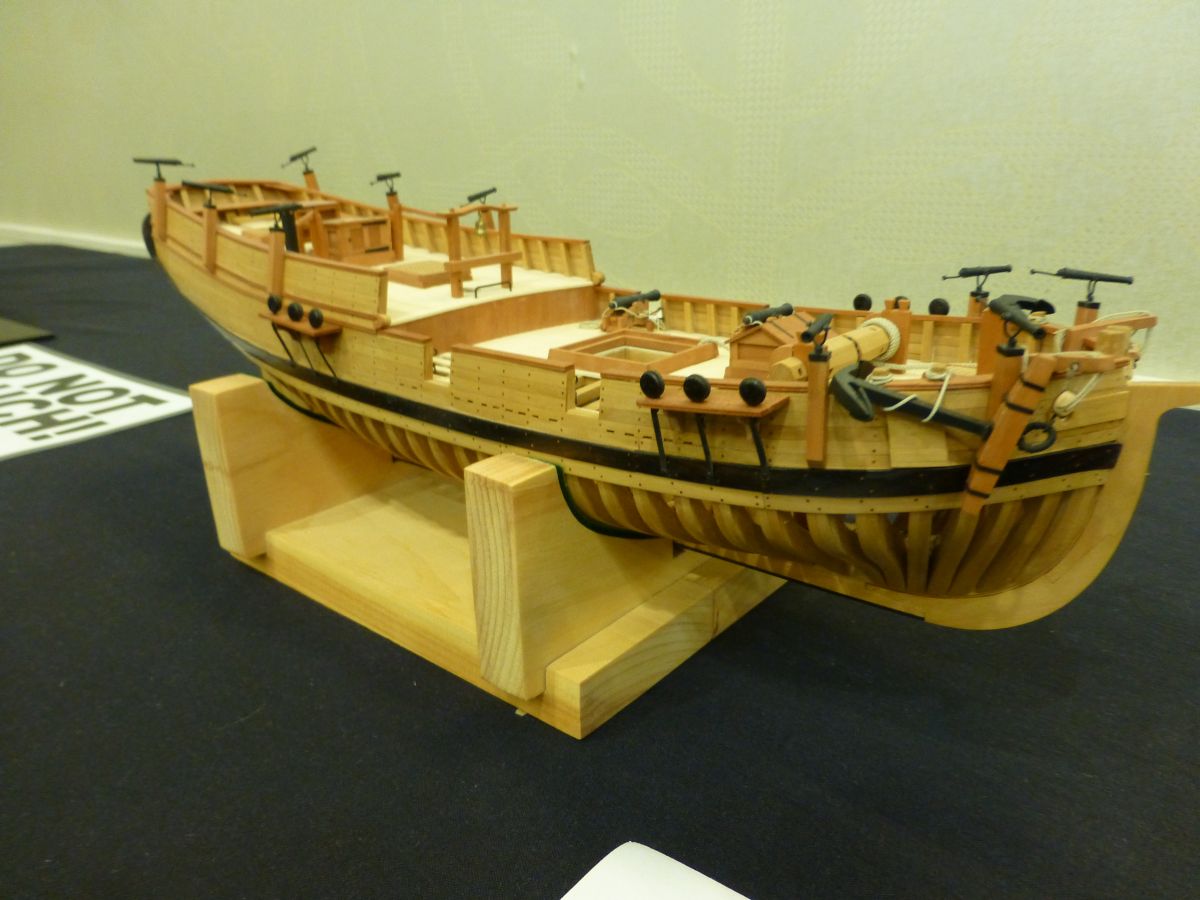
Dan, Glad to see you posting your work on MSW. It is going to be a pleasure viewing your ship models and I know we are all going to learn from you. I have enjoyed your presentations over the years at various Conferences.