


Ronald-V
-
Posts
1,442 -
Joined
-
Last visited
Content Type
Profiles
Forums
Gallery
Events
Posts posted by Ronald-V
-
-
11 hours ago, brunnels said:
That looks great welcome to the exclusive club 😁 , are you going to open up the Quarter Galleys as well?
Thanks! And yes probably....but when it's time to fit them I will look into it if it's doable for me
") 13 hours ago, AJohnson said:
13 hours ago, AJohnson said:That’s brave surgery you have undertaken there Ron, but looks neat, will make the cabin look good.
Thanks! Always a bit scary to do it when the construction is already so far, but it worked out fine
Everyone thank you for the likes! 🎉
- Oboship, AJohnson, Knocklouder and 3 others
-
 6
6
-
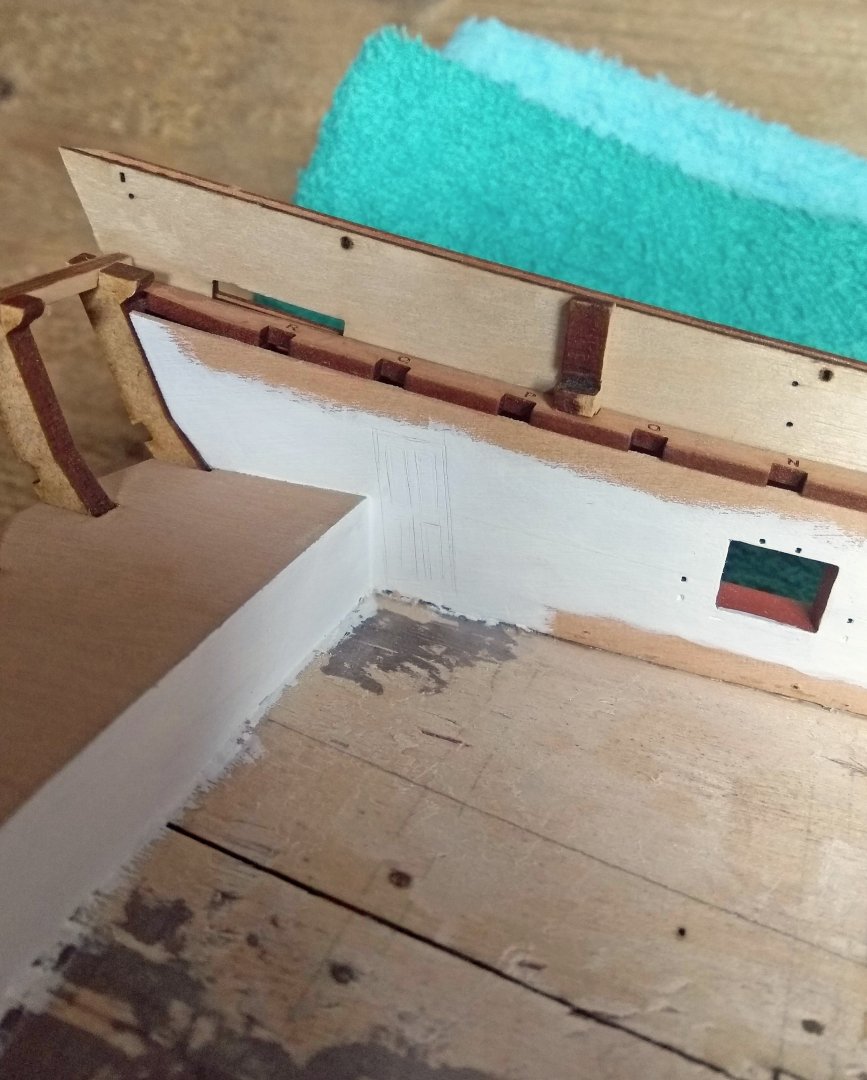
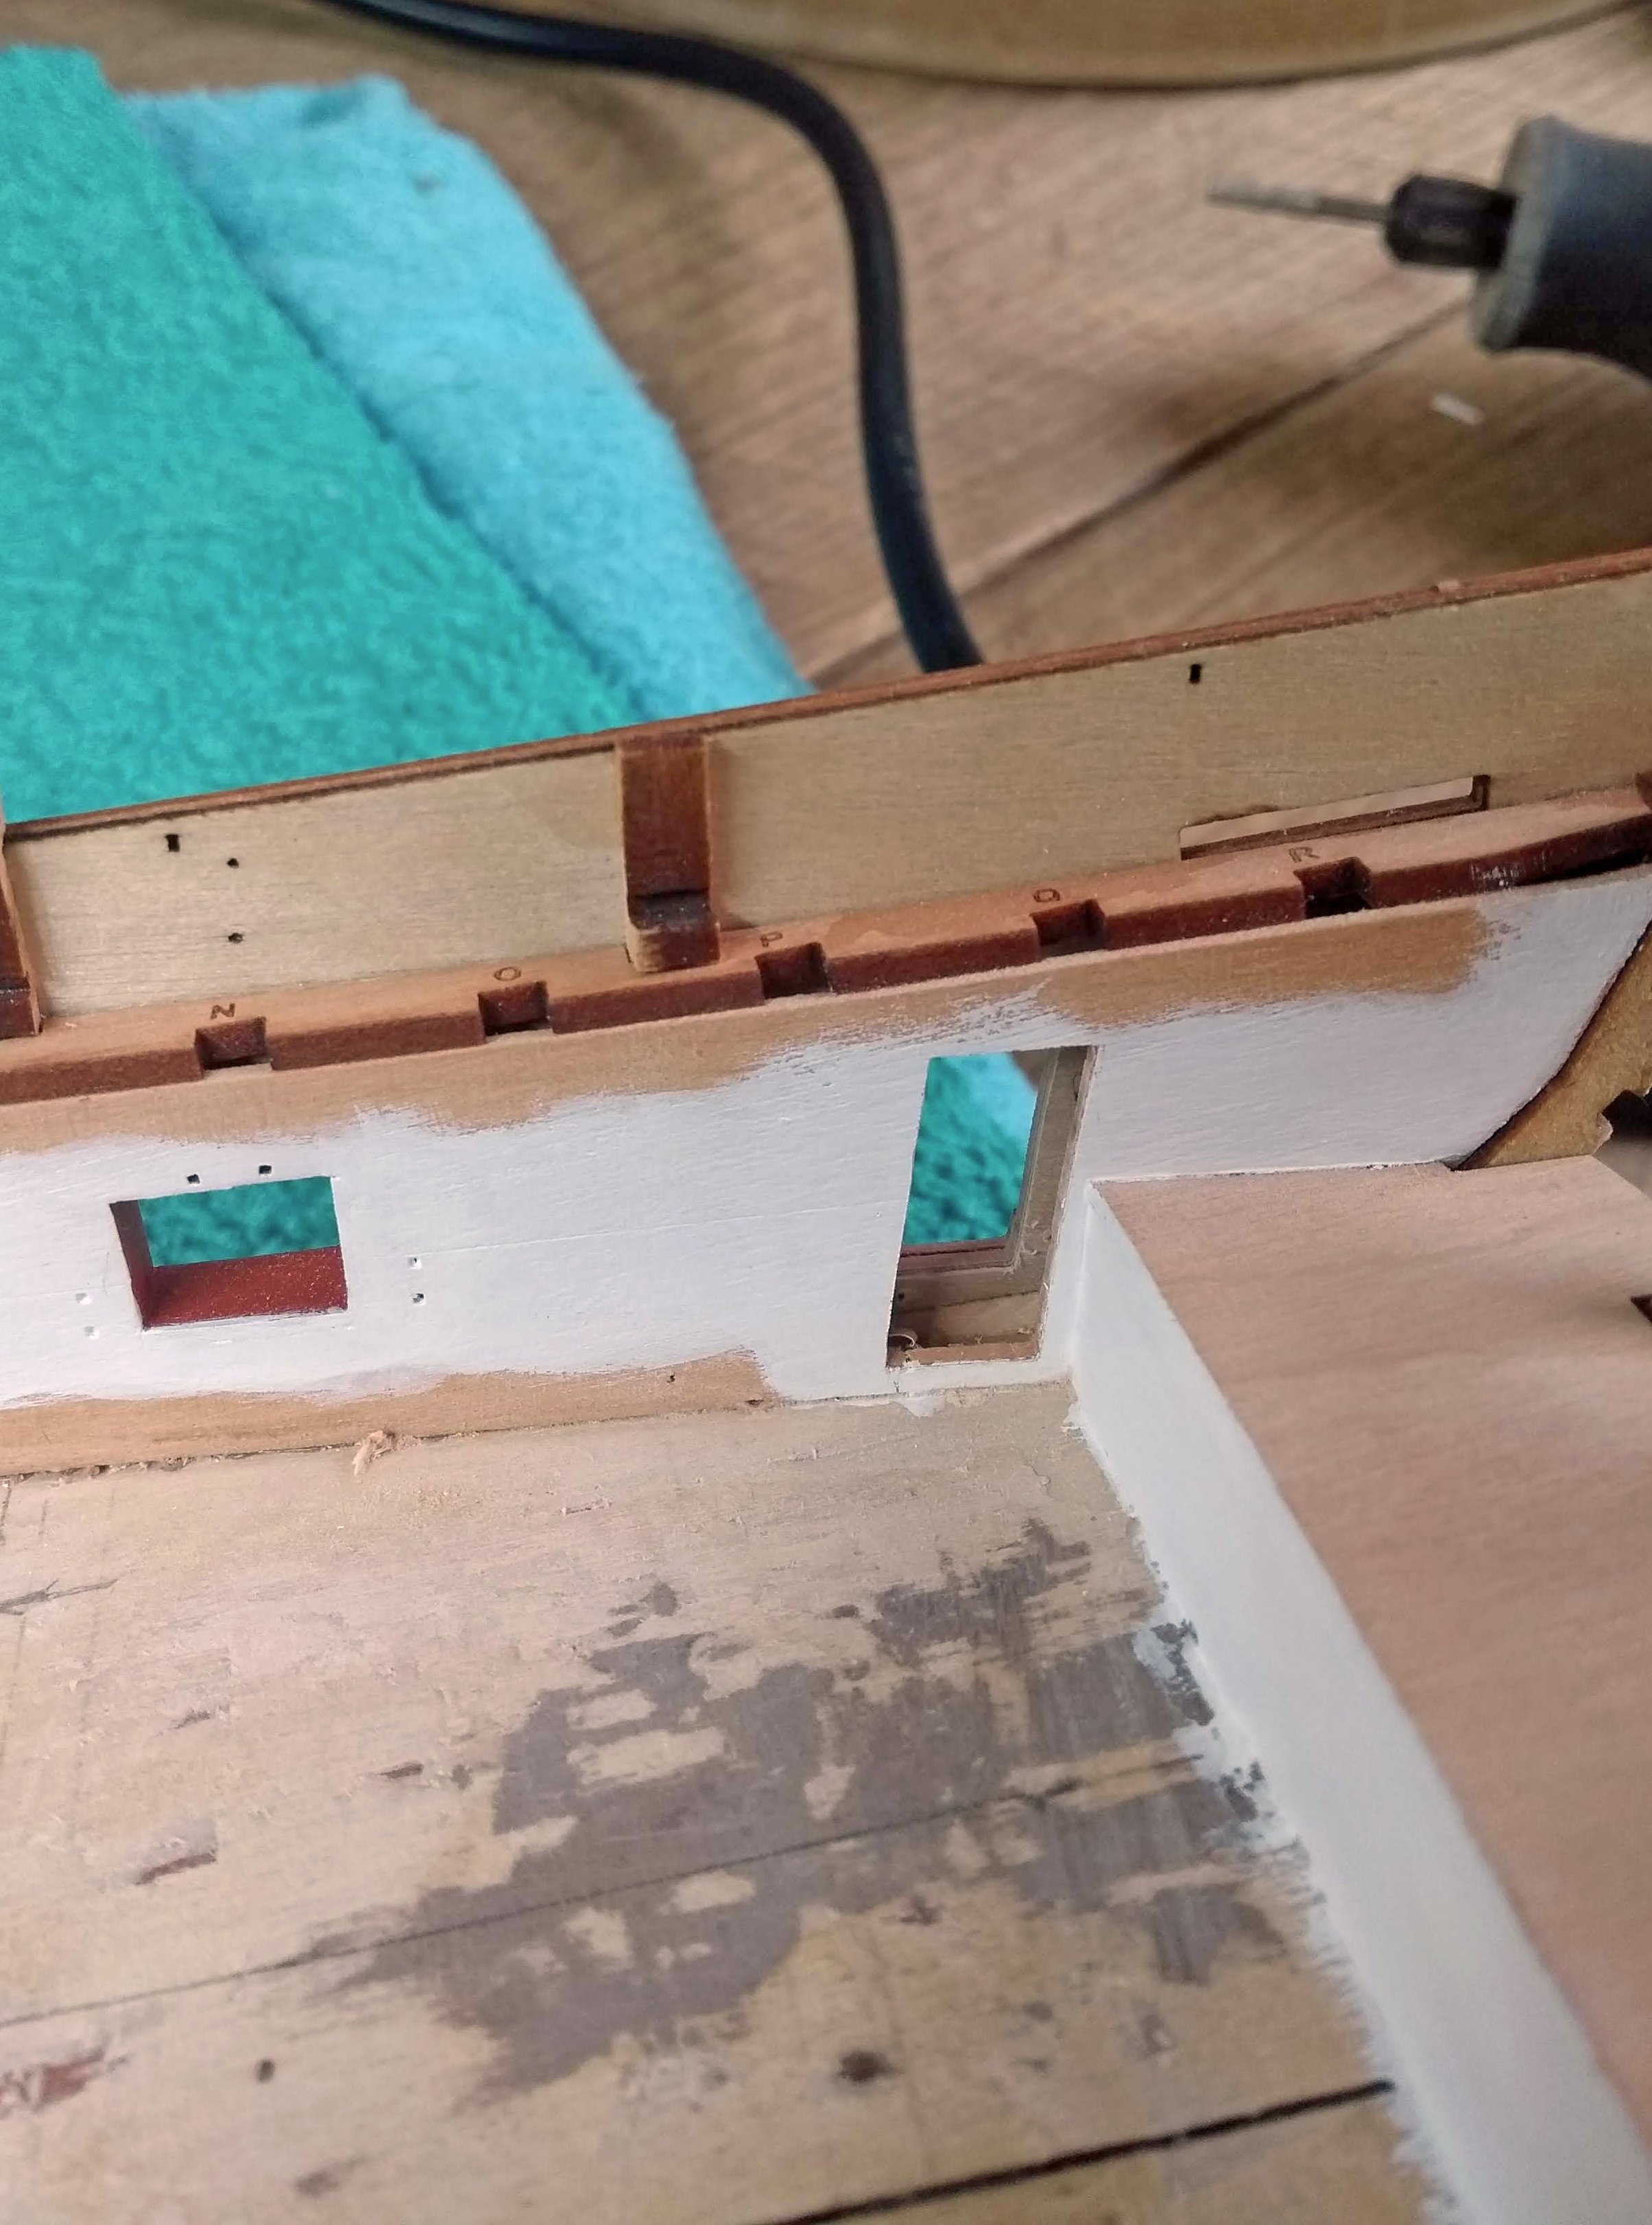
Update:
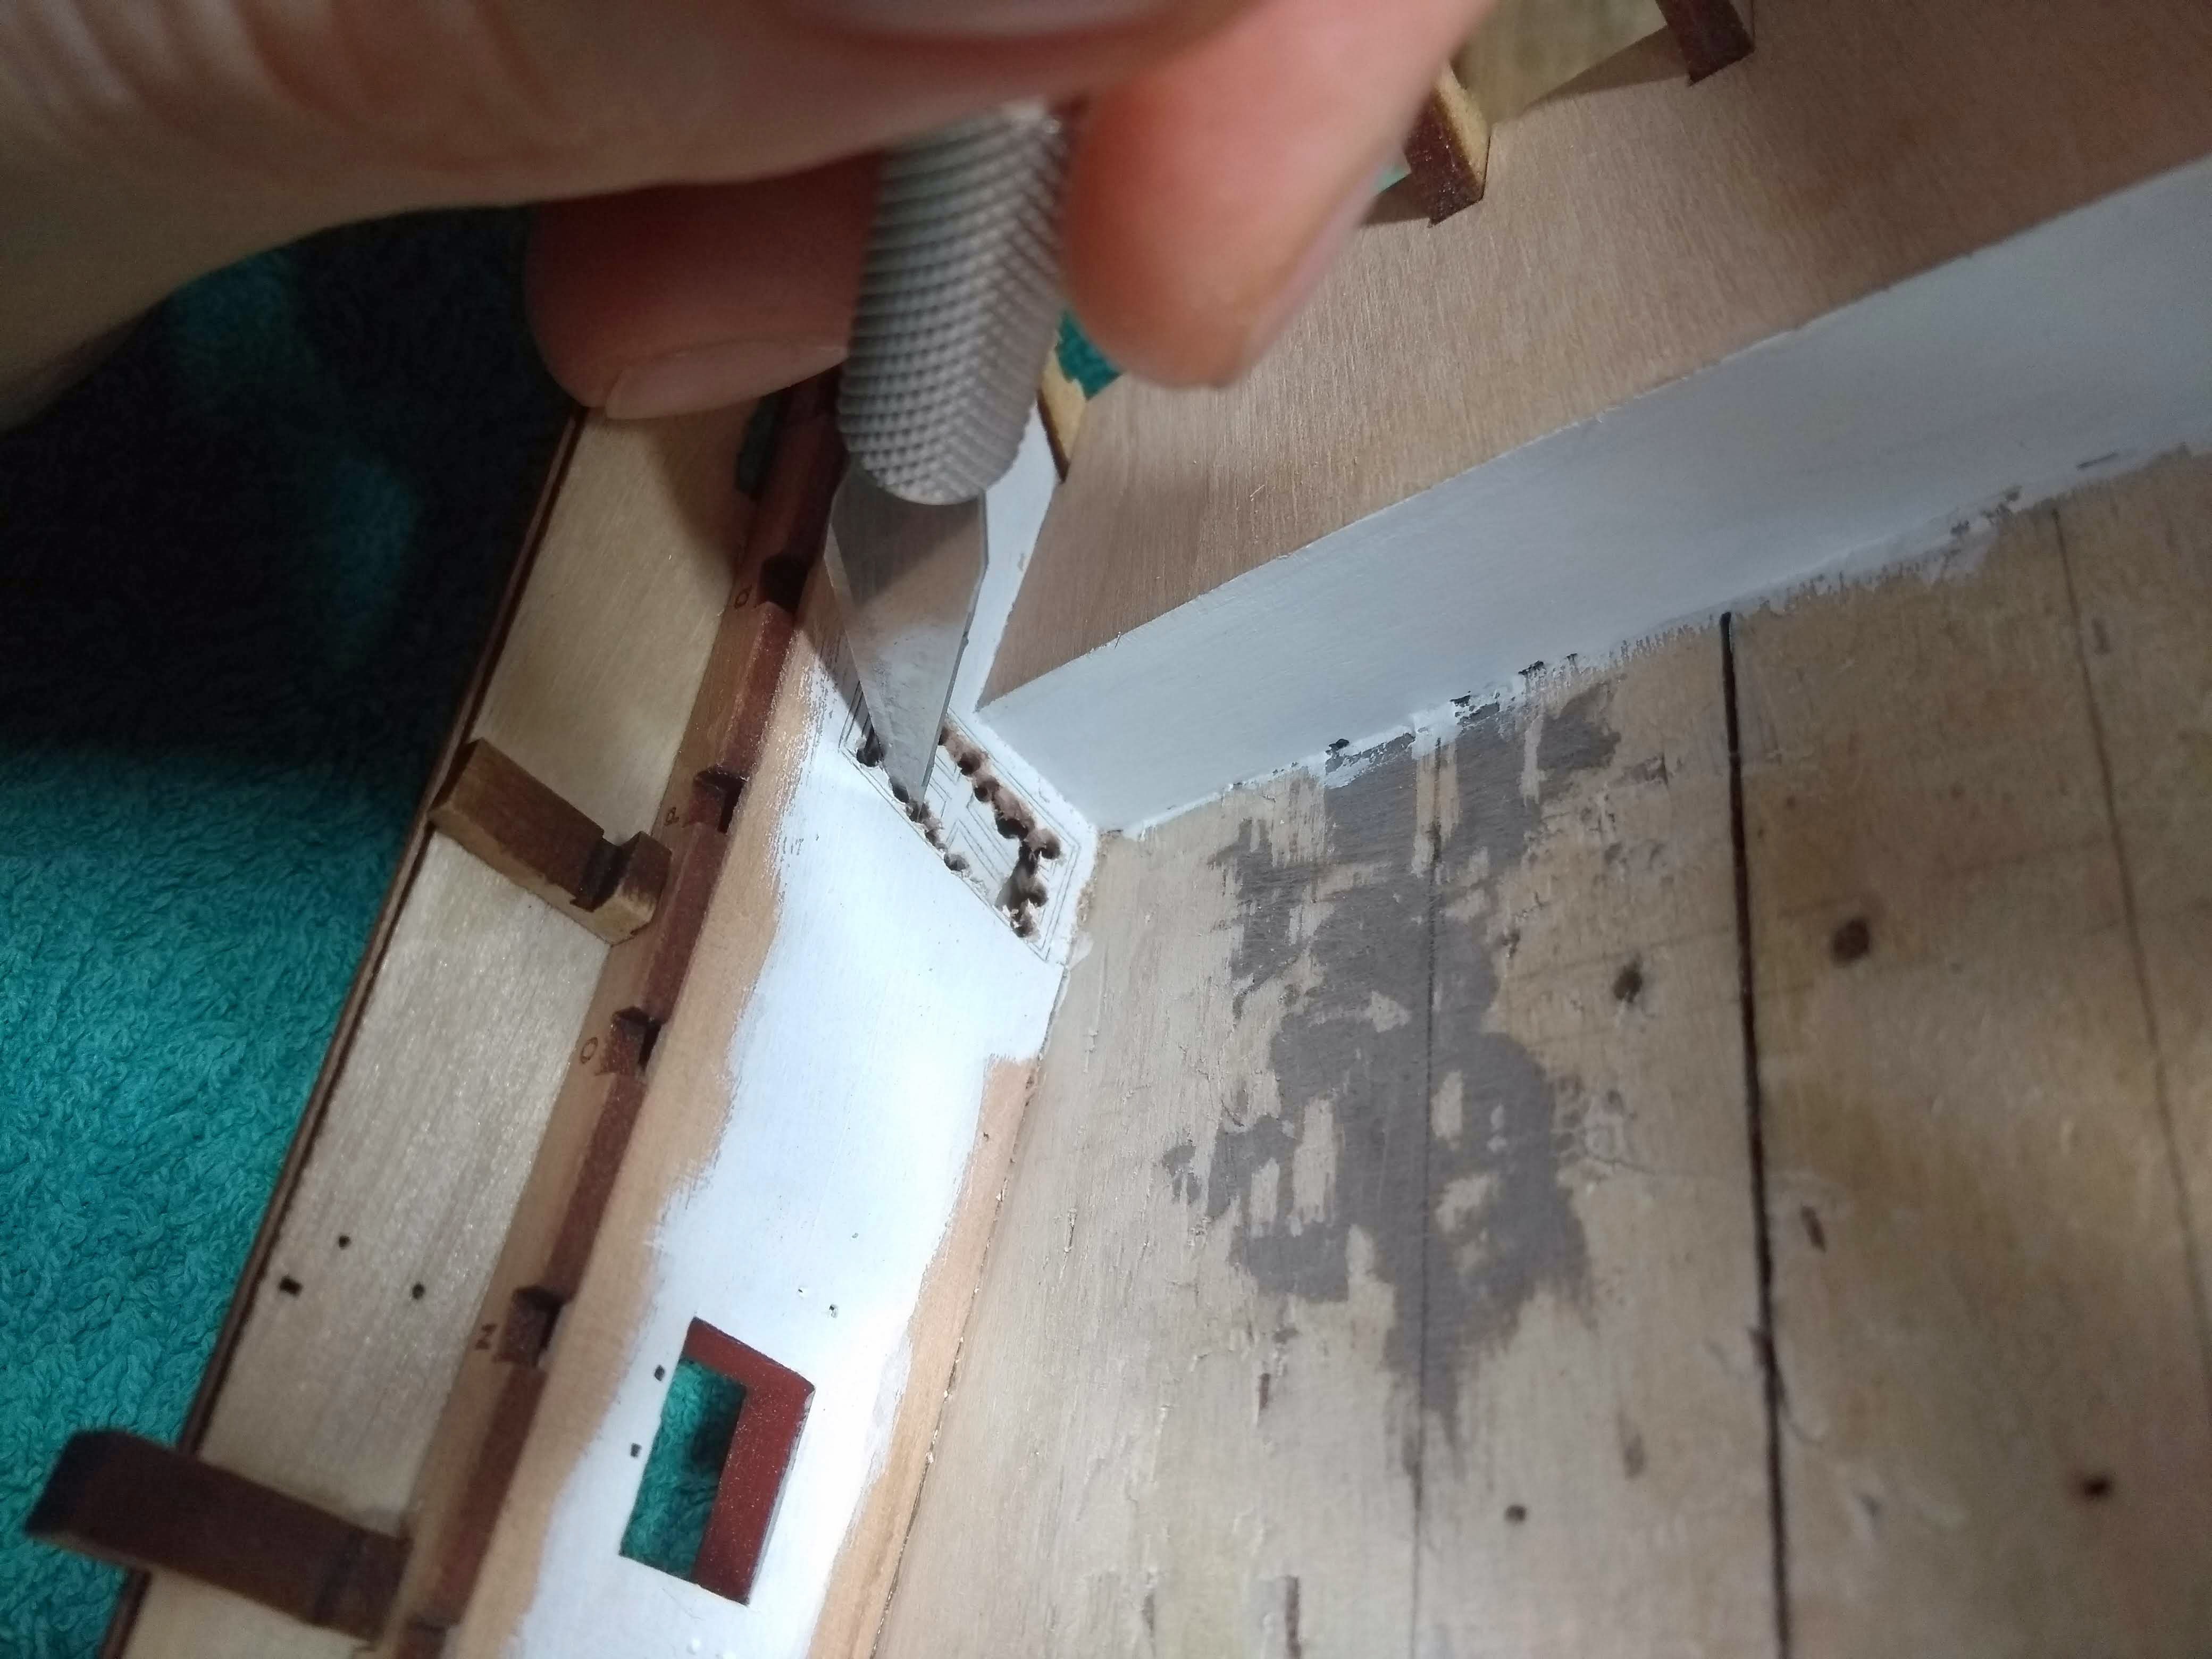
Before I started on the main gun deck, I thought I would paint a piece of the captains cabin white. When I had done that, the lasered doors
on the side to the quarter galleries were hard to see. (the white paint did not cover well so I needed 4 layers)
I tried to make the lasered doors visible again by going through the lines with a knife, but the knife followed the line too poorly, causing them to go crooked.This of course did not look so cool. So then I tried to make a door out of paper... this seemed okay, but also not to my liking. Then I remembered Blue Ensign
and Brunnels their Sphinx where they removed the doors, so that more light comes into the cabin. This seemed to me the nicest and most beautiful solution,
so here is a small side quest to realize this. You can see the result below... the photos are self-explanatory.
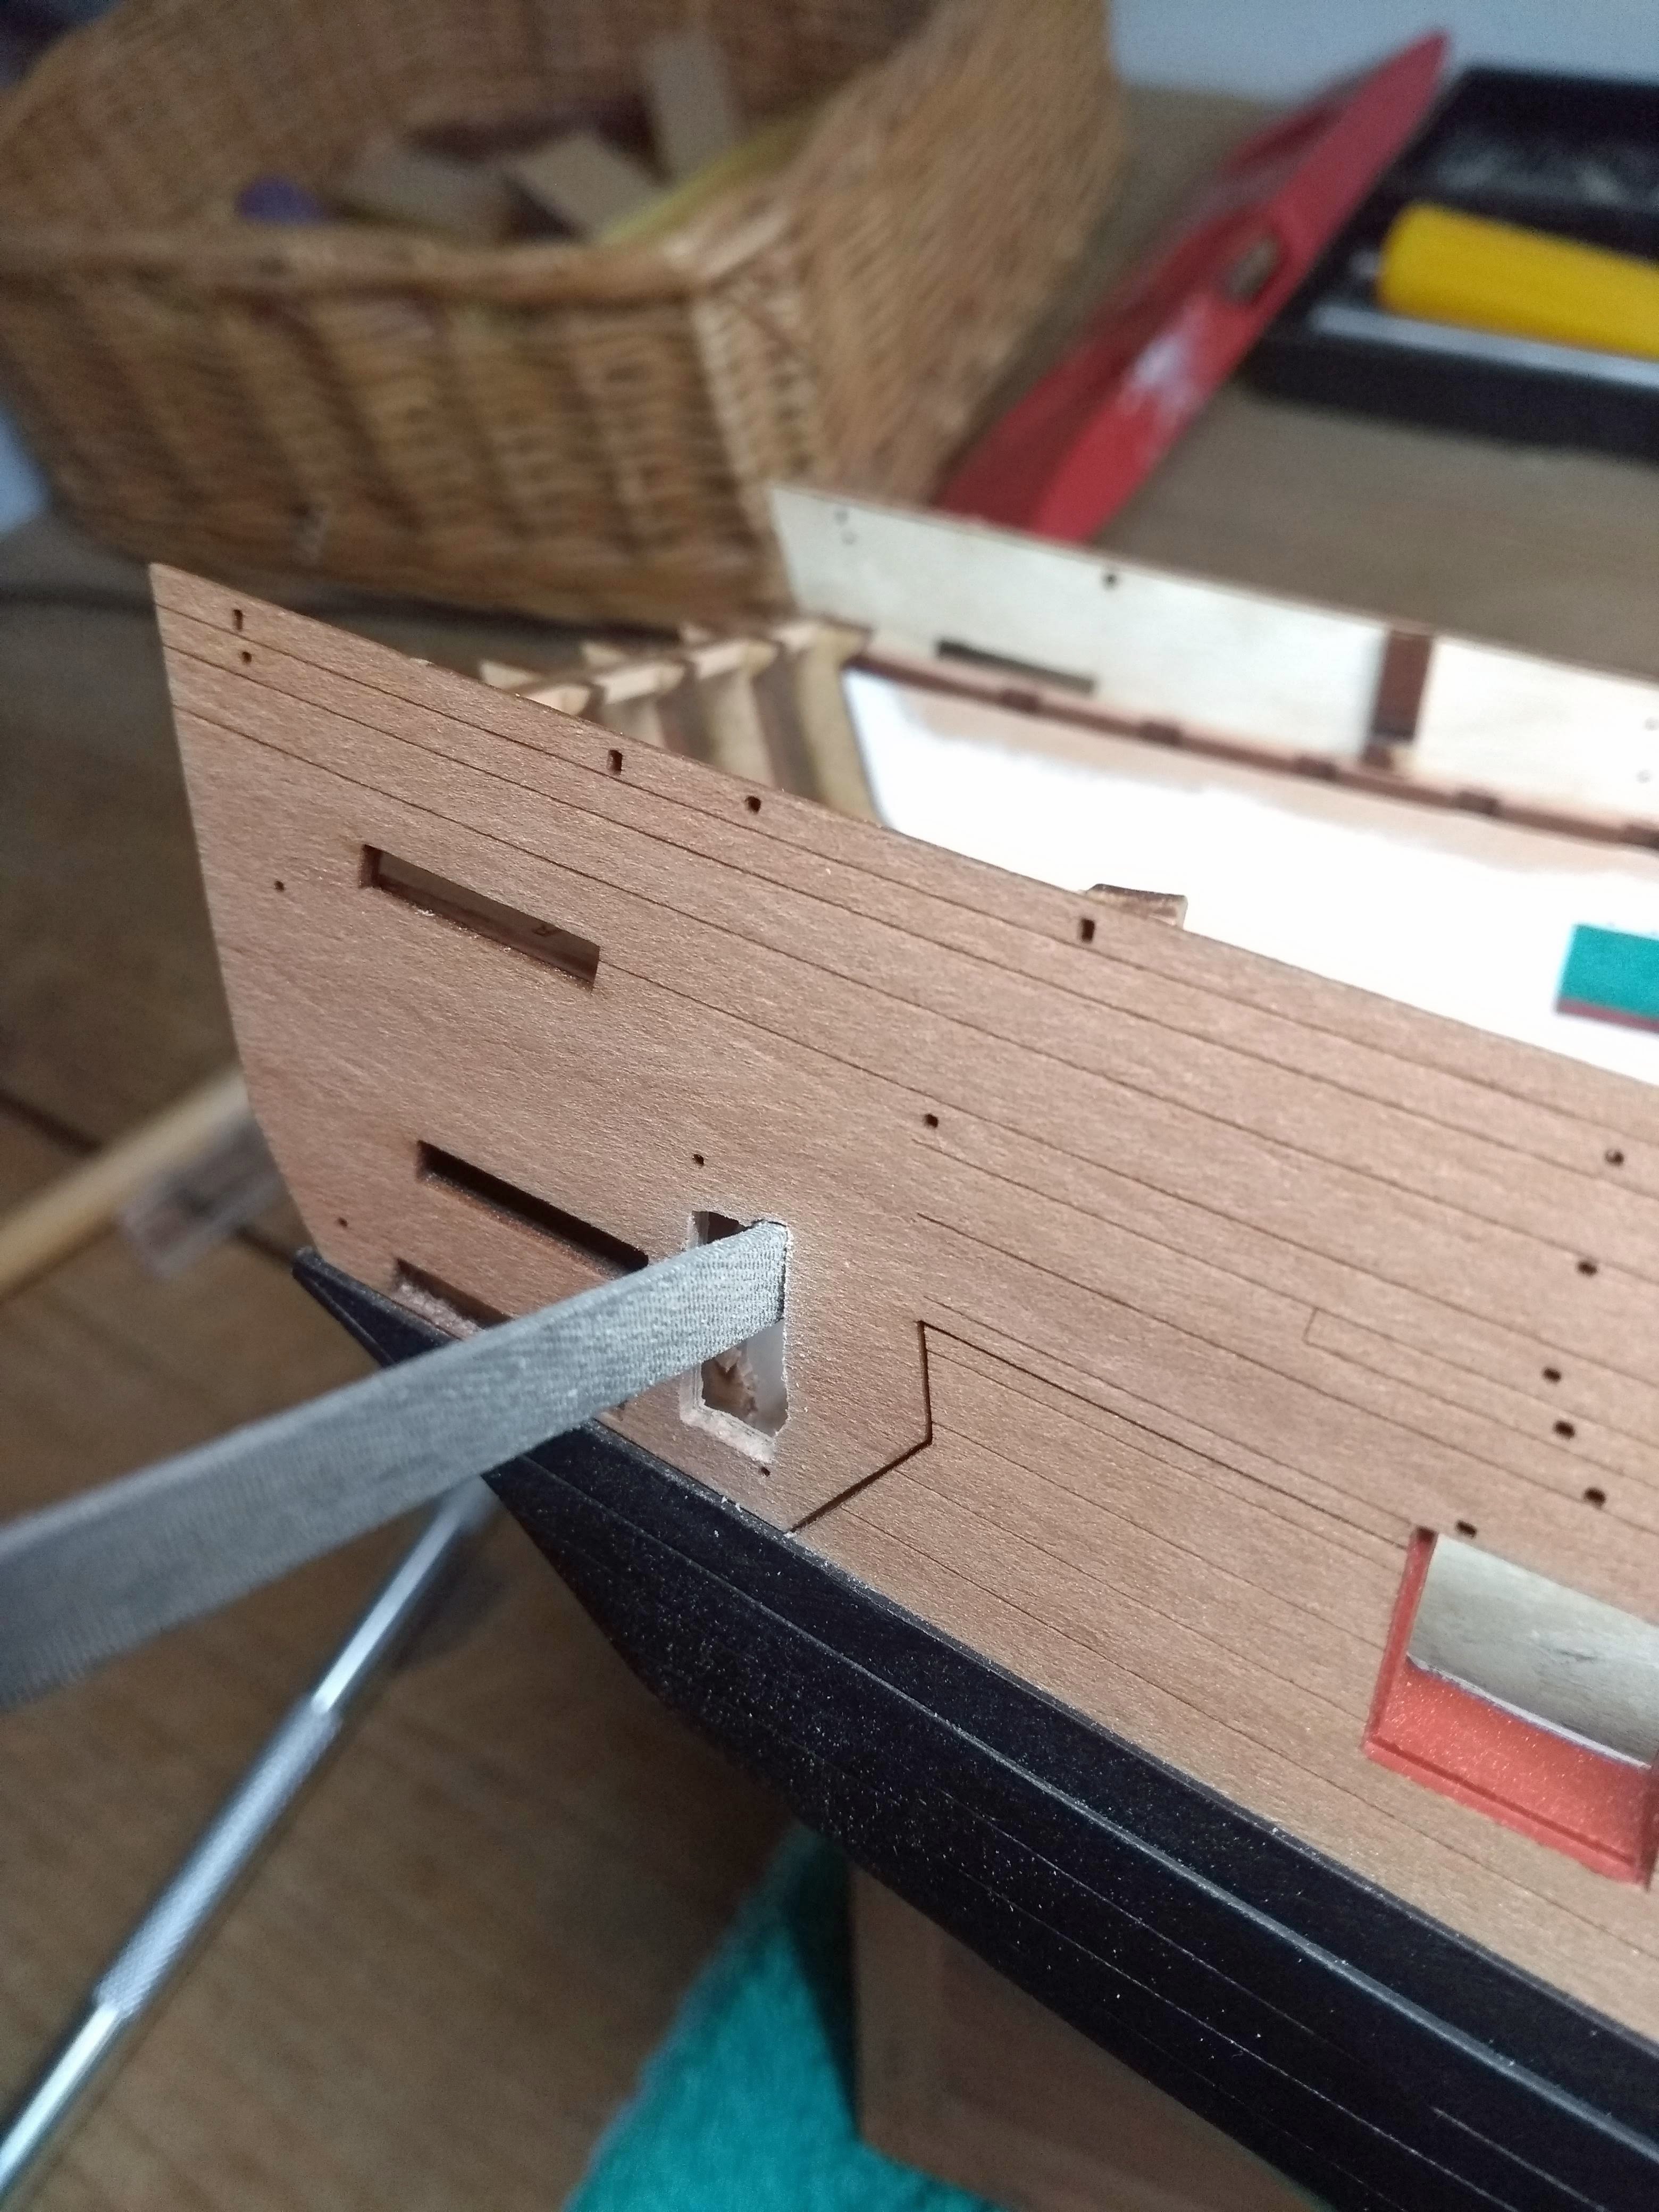
The first door has been removed, now the other one still has to be done and then finished with wood between the inner and outer wall and make everything a bit nice and straight. (and I need to re-paint the gunports as you see...there is spilling of the white paint, jobs keep stacking up
)
So now I also belong to the open door quarter galleries club
 🎉
🎉


-
-
-
My idea was to use the lasered decks as a kind of template, by placing them on the decks you laid yourself and then poking the holes with a needle or something. So that you can see where everything will be placed.
Your deck looks nice and clean by the way. The natural colors of the deck items give it a calm impression.
-
That is some beautiful woodwork! Lovely build so far 😮
-
-
-
-
-
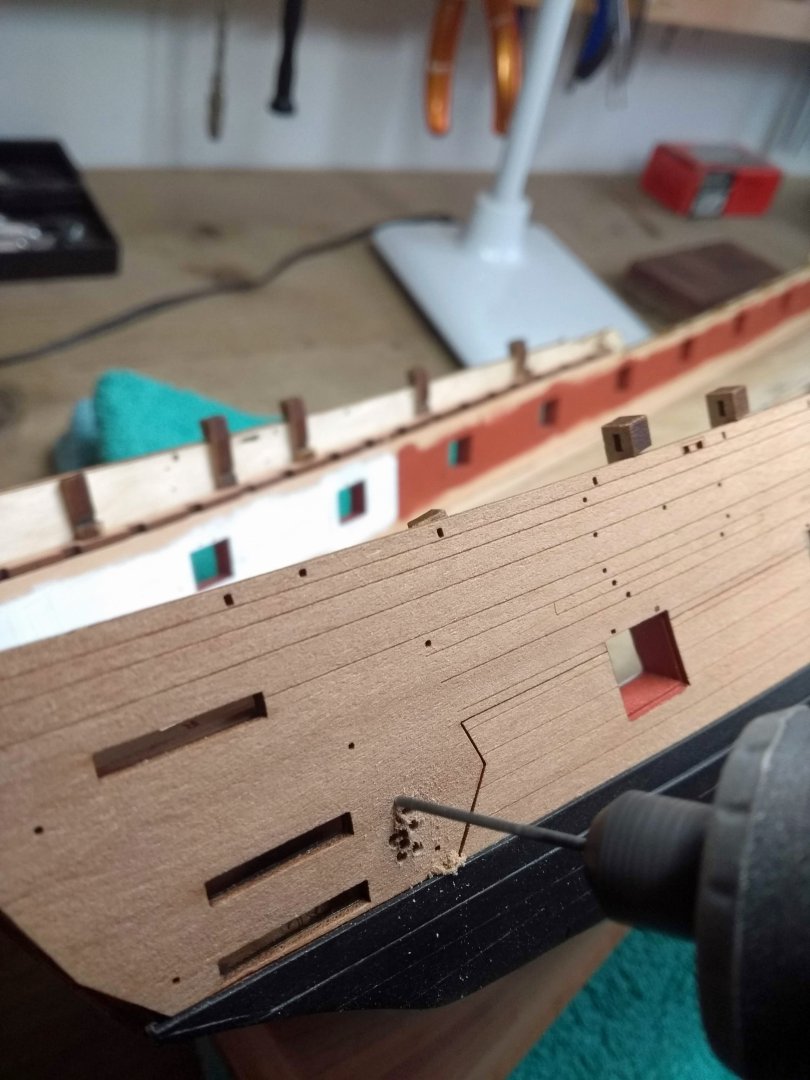
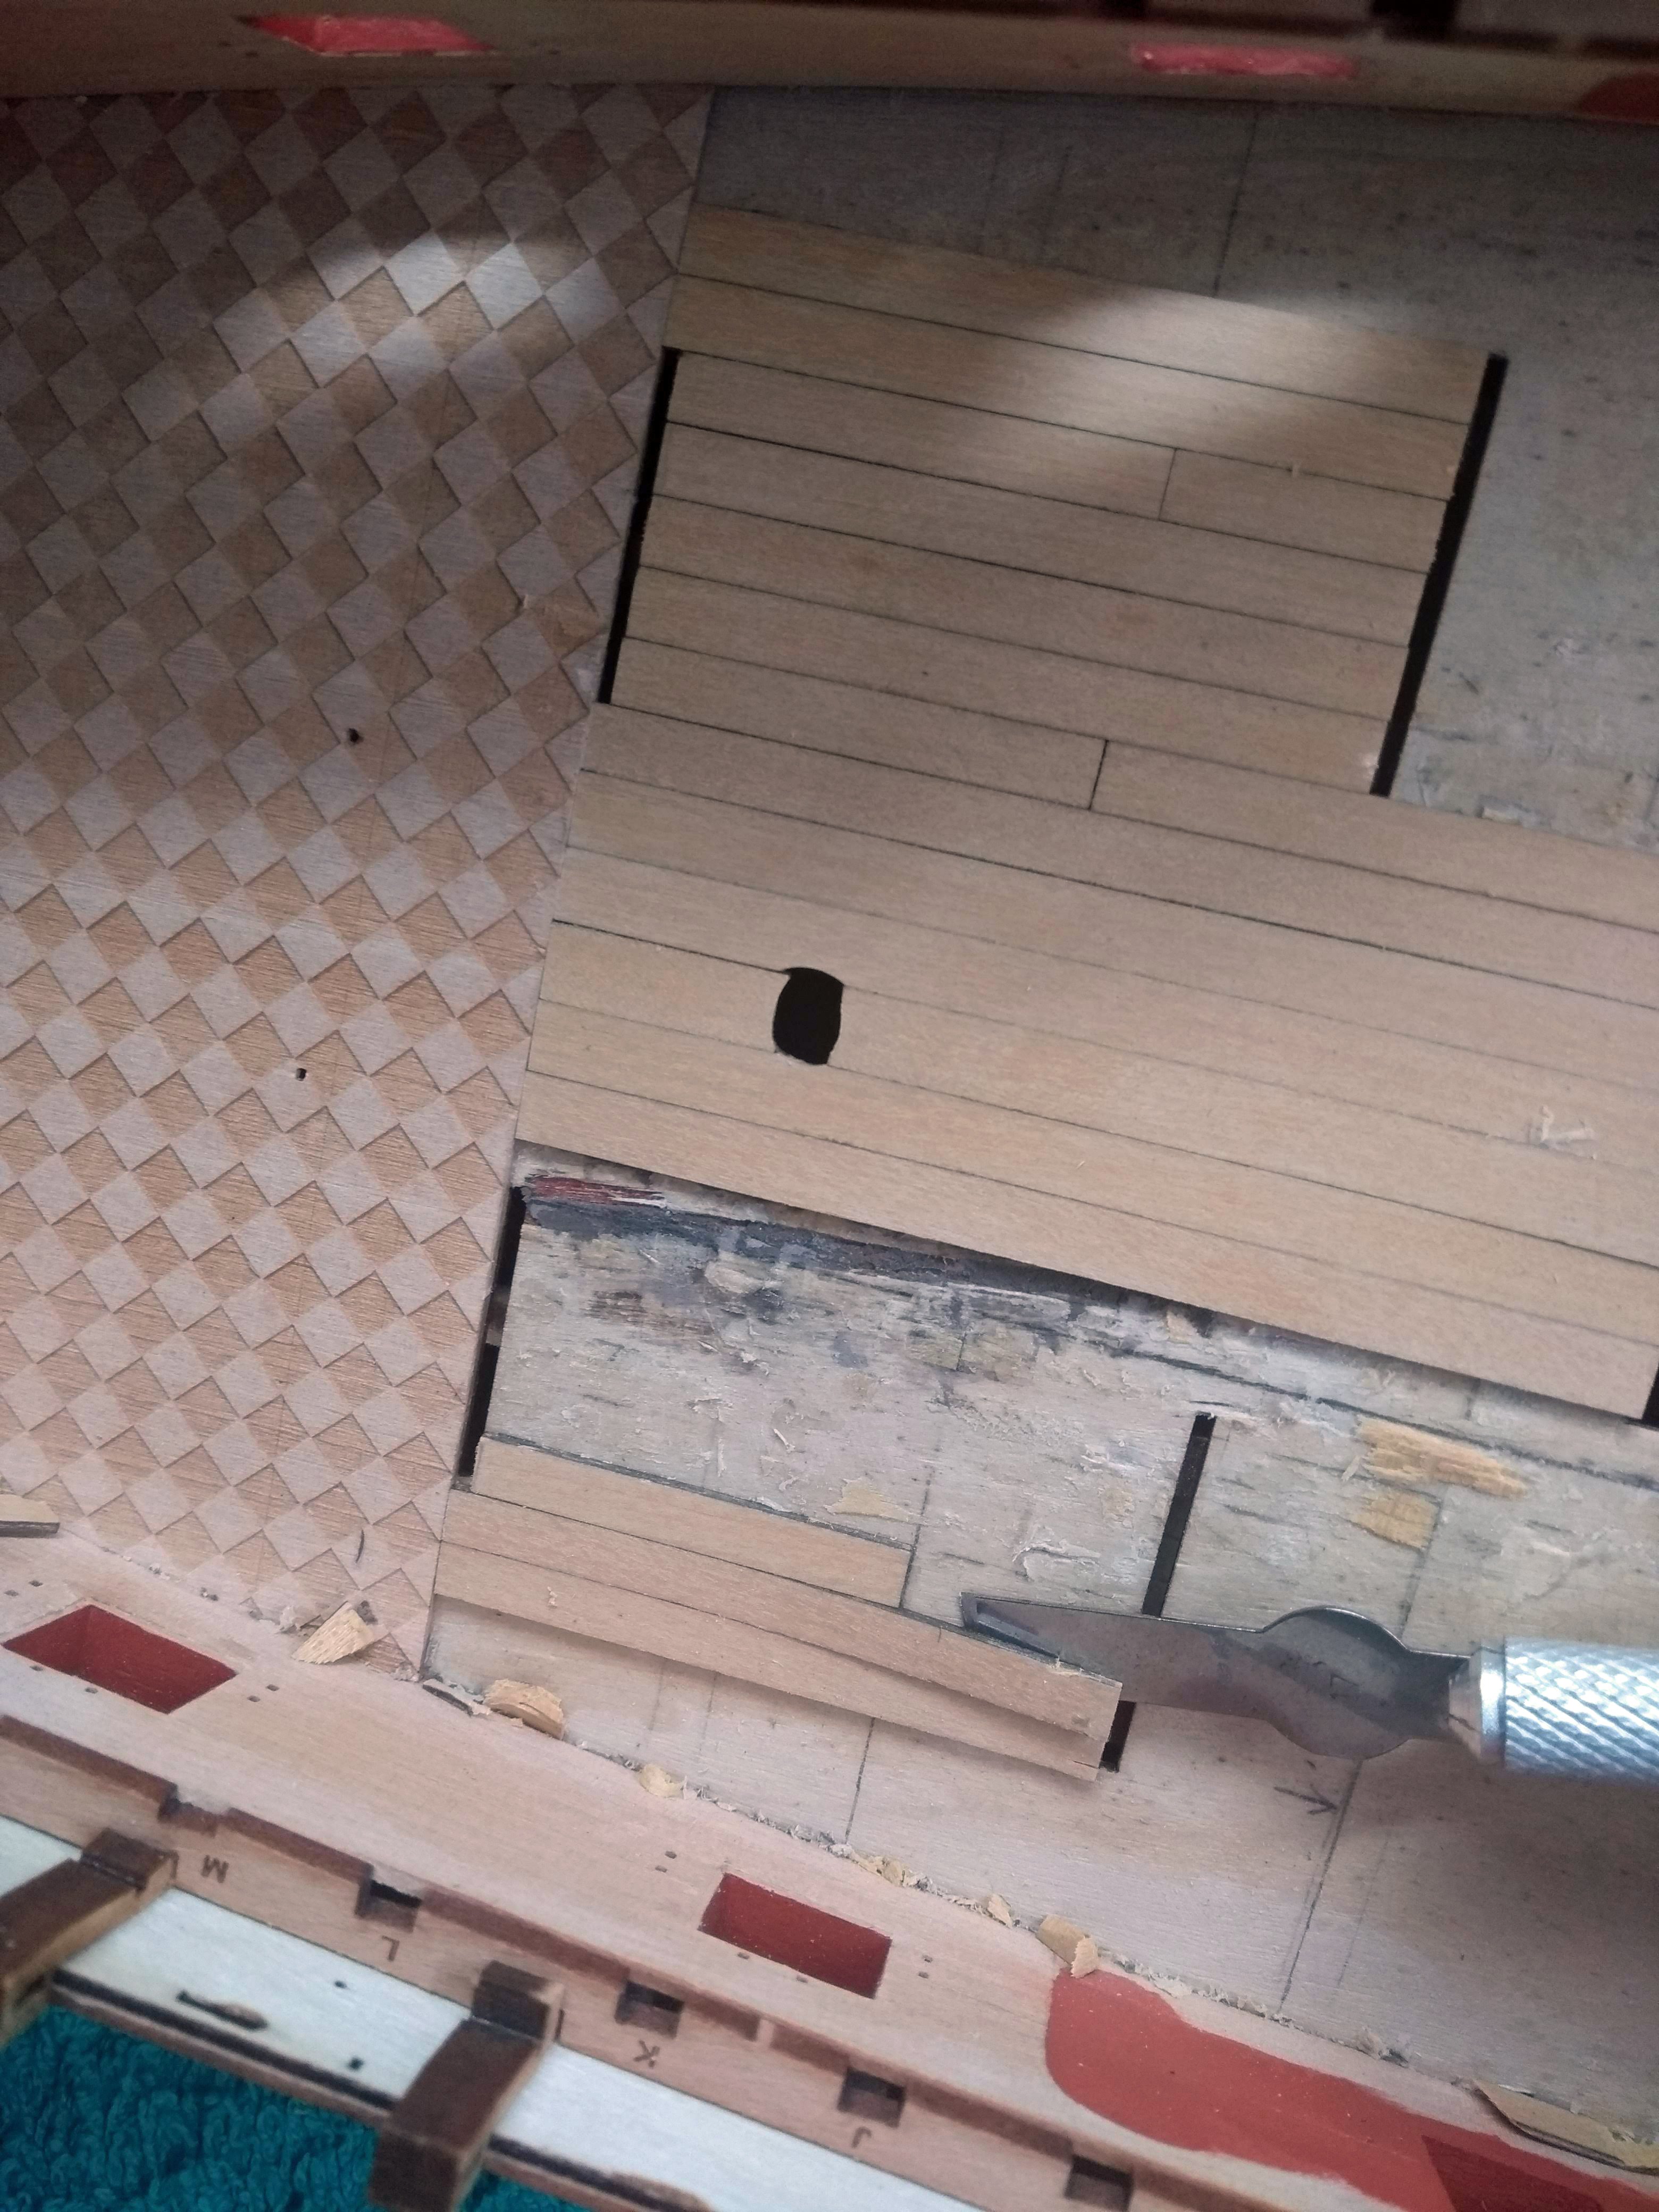
Removing the planks with some tools:

Ok...the removal process is quite delicate, you have to use just enough force, but not too much otherwise you will slip.
This happened twice. In the first place it had no consequences, because that is covered by the oven.
But in the second place it did because I damaged the checkered floor. But...I was already planning to do something with it
(probably stick a printed white/black floor on it). But now that it had to be removed completely there are of course more possibilities.
I can also extend the deck planks and put a nice carpet on it. Let's see what I think is the most beautiful/accurate. The captain's cabin will be painted white anyway (a nice example of this is in "Brunnels build log")
The battlefield now looks like this
:

I must remind myself....it will look beautiful again 😛😄🫠
- KurtH, chris watton, Knocklouder and 10 others
-
11
-
 2
2
-
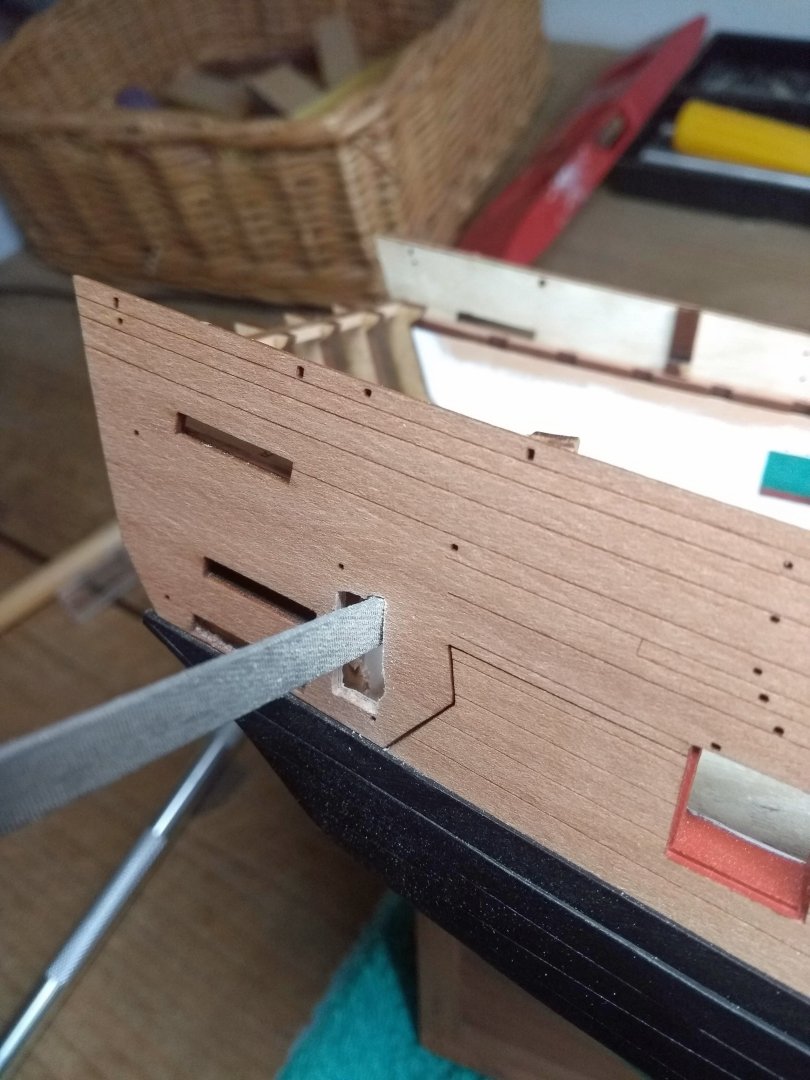
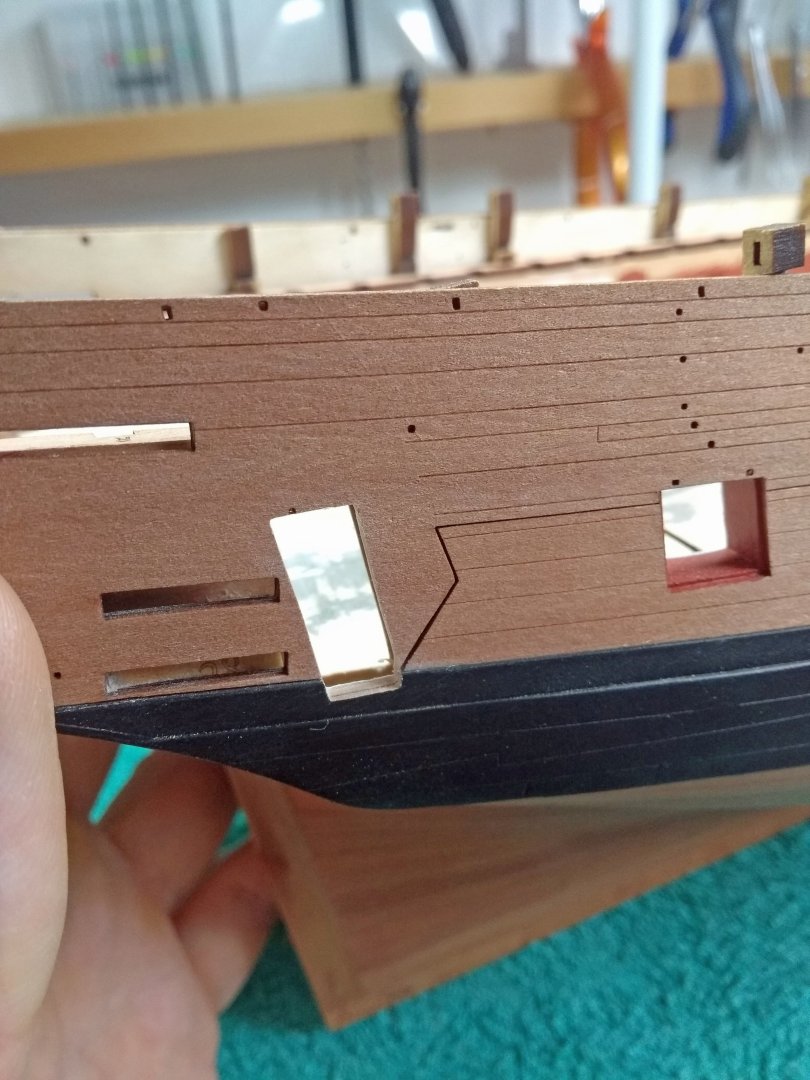
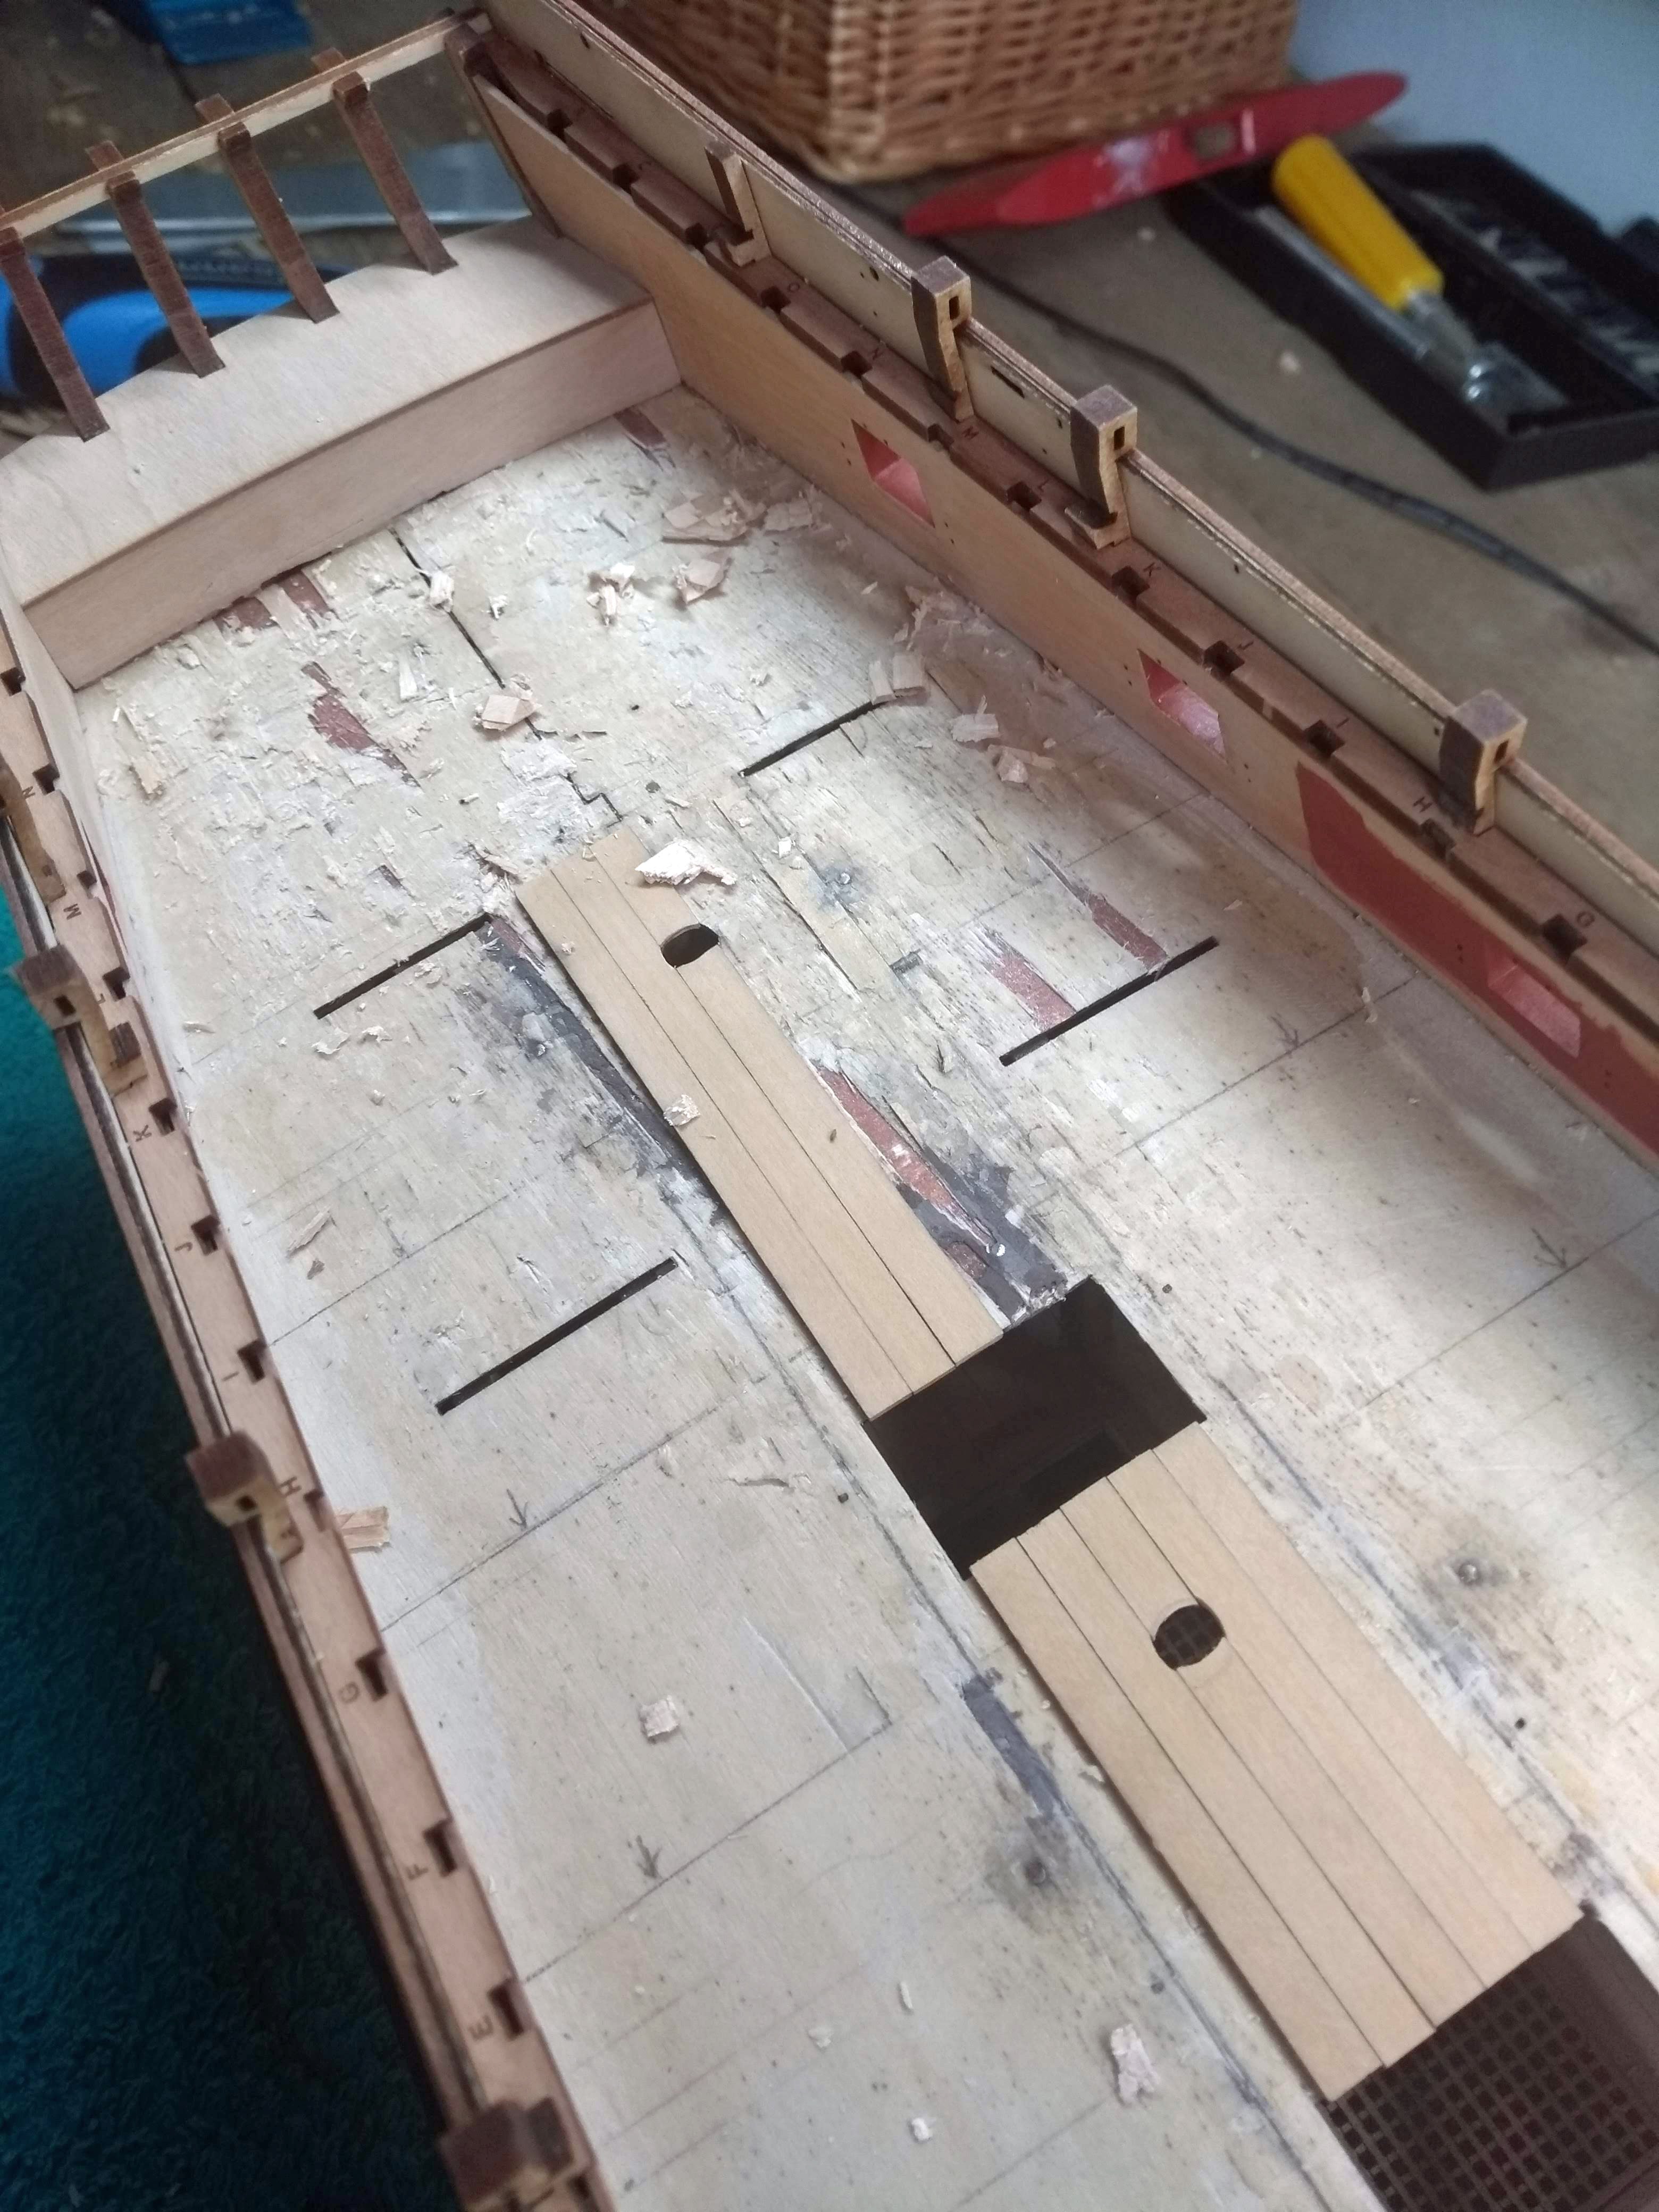
So here I am now regarding the deck laying, but in my search for how to lay the margin plank etc... I came across a passage
in Chuck's "Cheerful" about how to lay the deck in a curve. So that the deck slowly tapers towards the bow and towards the stern, as do the planks.
I thought this would be very complicated so beforehand I just had the idea to lay the deck planks straight. But as Chuck explains it in this chapter:
https://syrenshipmodelcompany.com/resources/ChapterchapEight.pdf
To be honest, it seemed doable to me. Worth a try anyway. That's why I wanted to try it with the main gun deck since most of it disappears under the
upper decks anyway (if it doesn't look okay.) That way I could practice nicely. And it turns out I have ordered more than enough boxwood so that's why
I'm now demolishing the planks that I have laid now (except between the hatches and gratings)
So that's the plan! Seems like a nice challenge

- Thukydides, Nearshore, AJohnson and 8 others
-
11
-
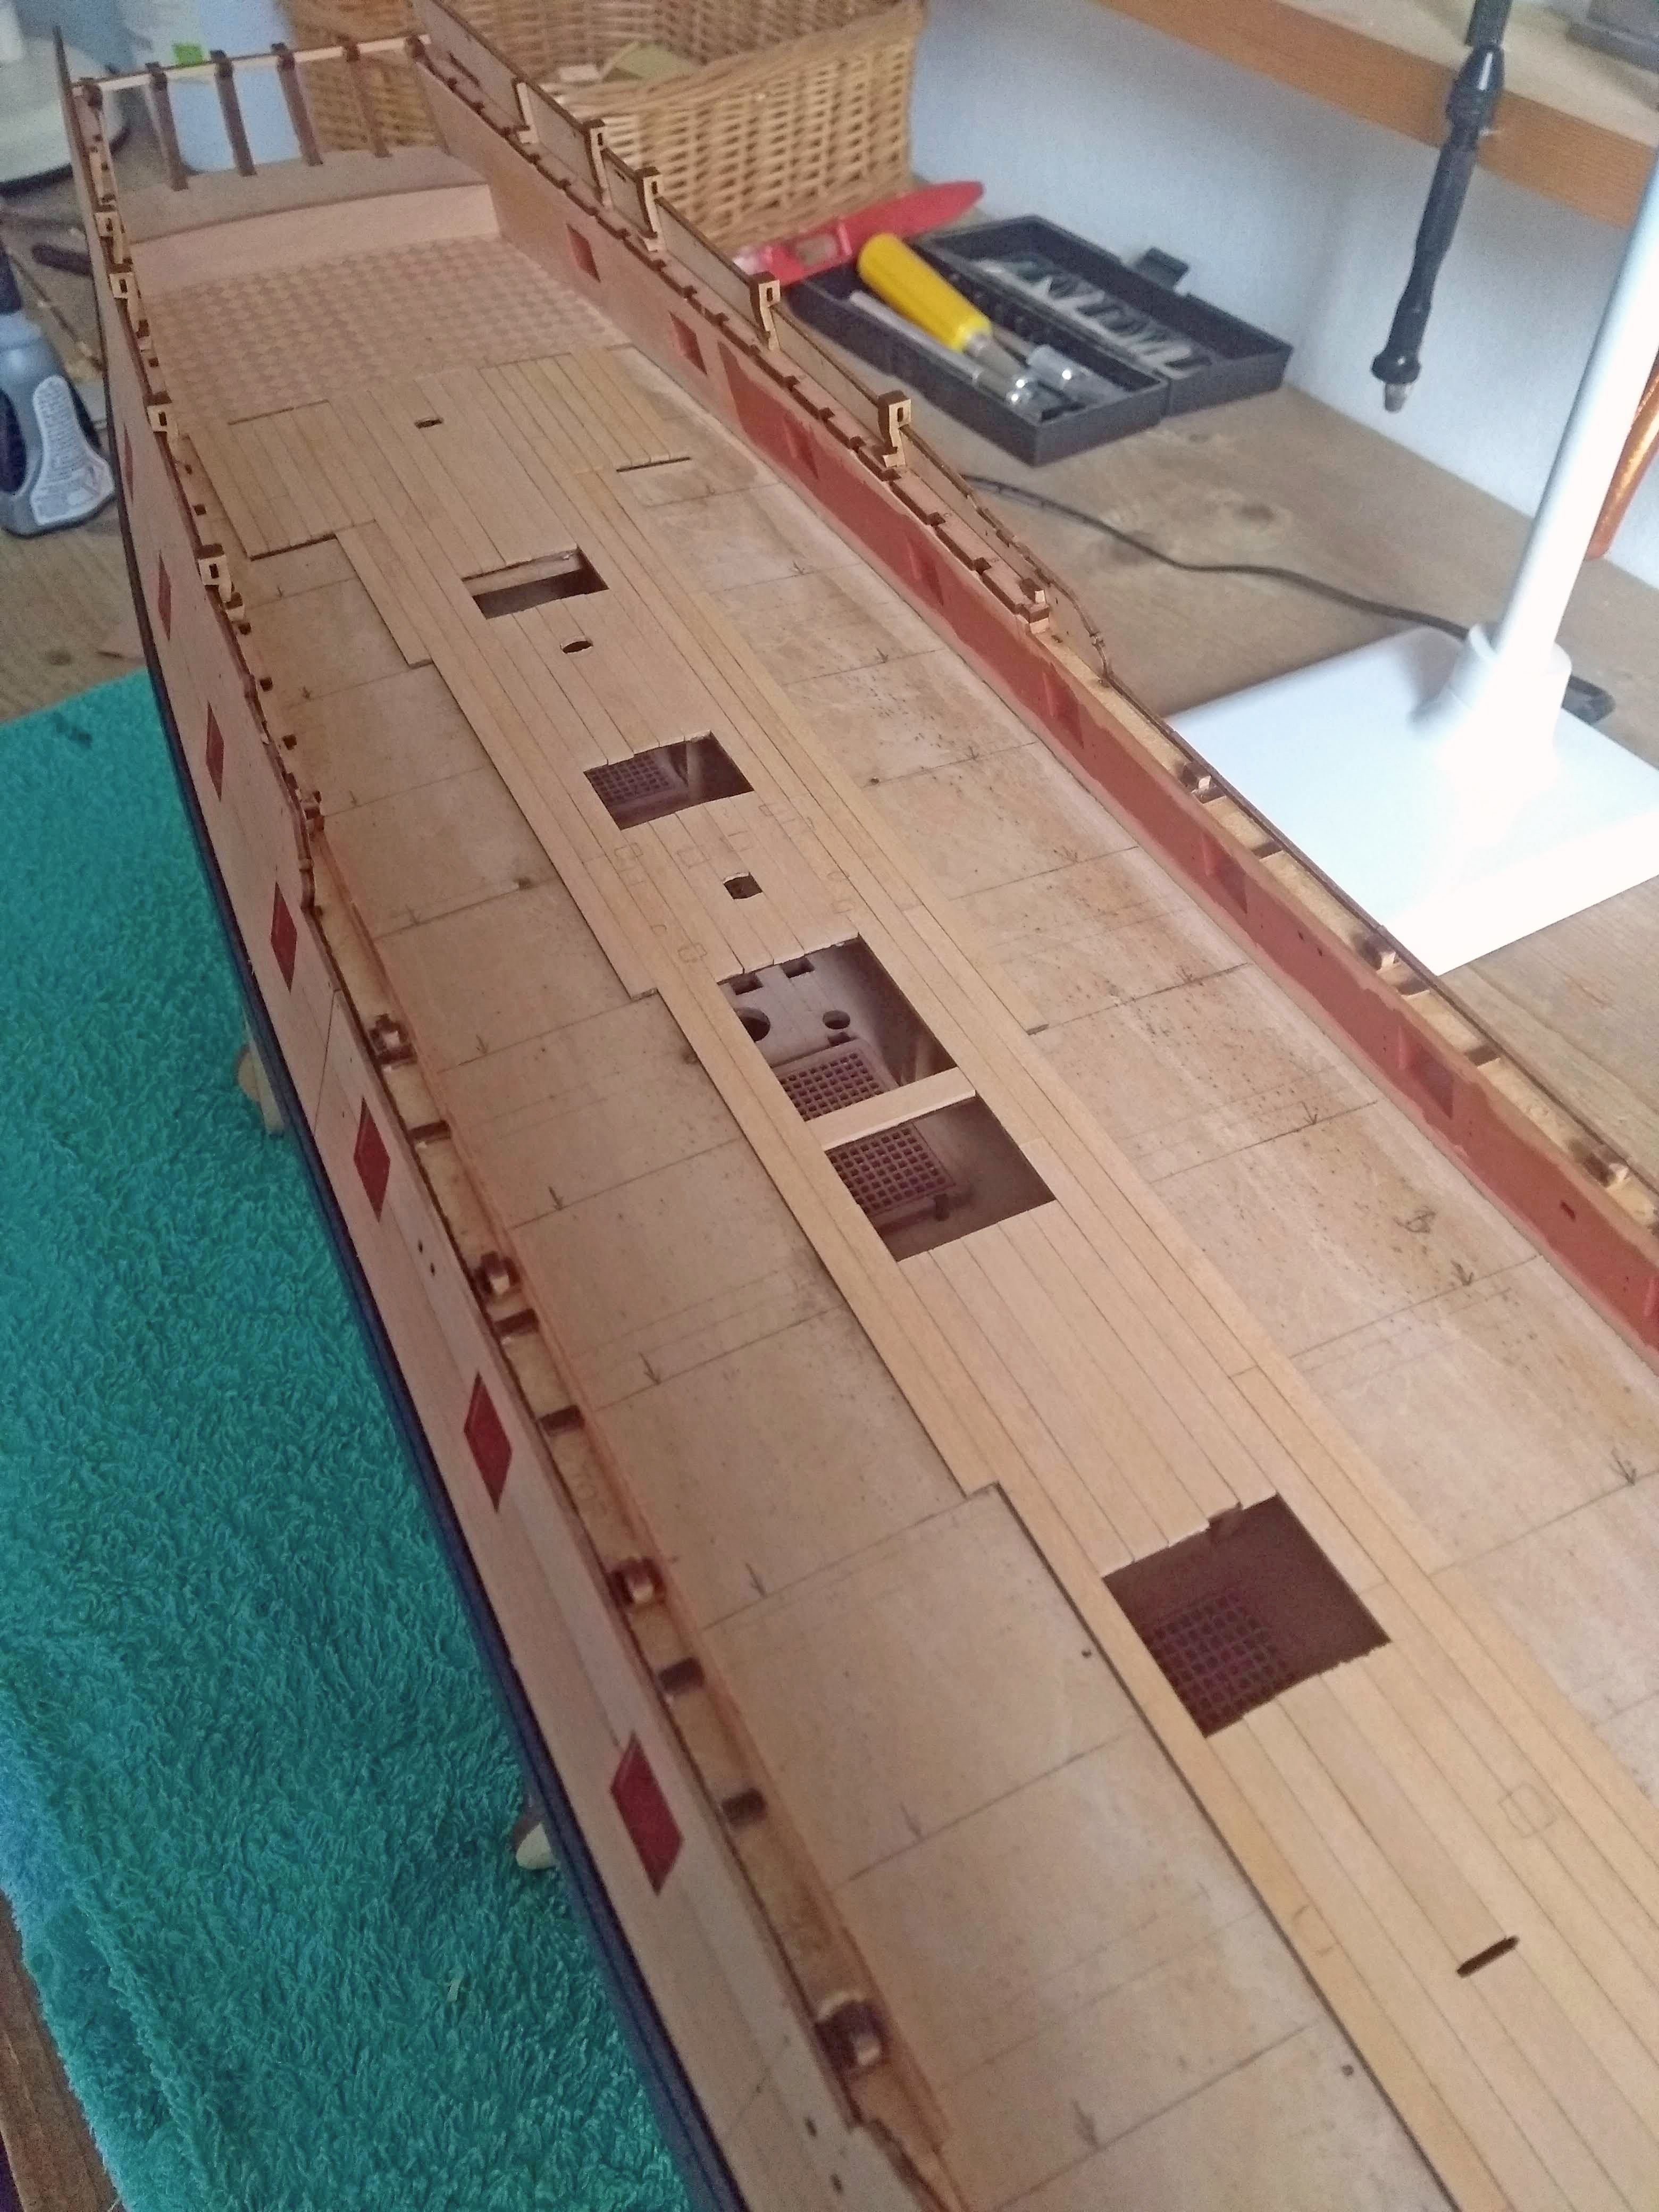
5 hours ago, Seventynet said:
Your planking is looking really nice and clean. Well done.
Ian
I agree! Very nice planking!
-
30 days is crazy! 😮 Well done so far
- Keith Black, AJohnson, Glen McGuire and 1 other
-
3
-
 1
1
-
-
-

Hope you have some fun here
- AJohnson, mtaylor and Keith Black
-
3
-
You could gain some height by putting a cover strip on your stern. And lower the bulwarks a little? Split the difference this way perhaps
-
That is a nice ship! You can be proud of that!
-
-
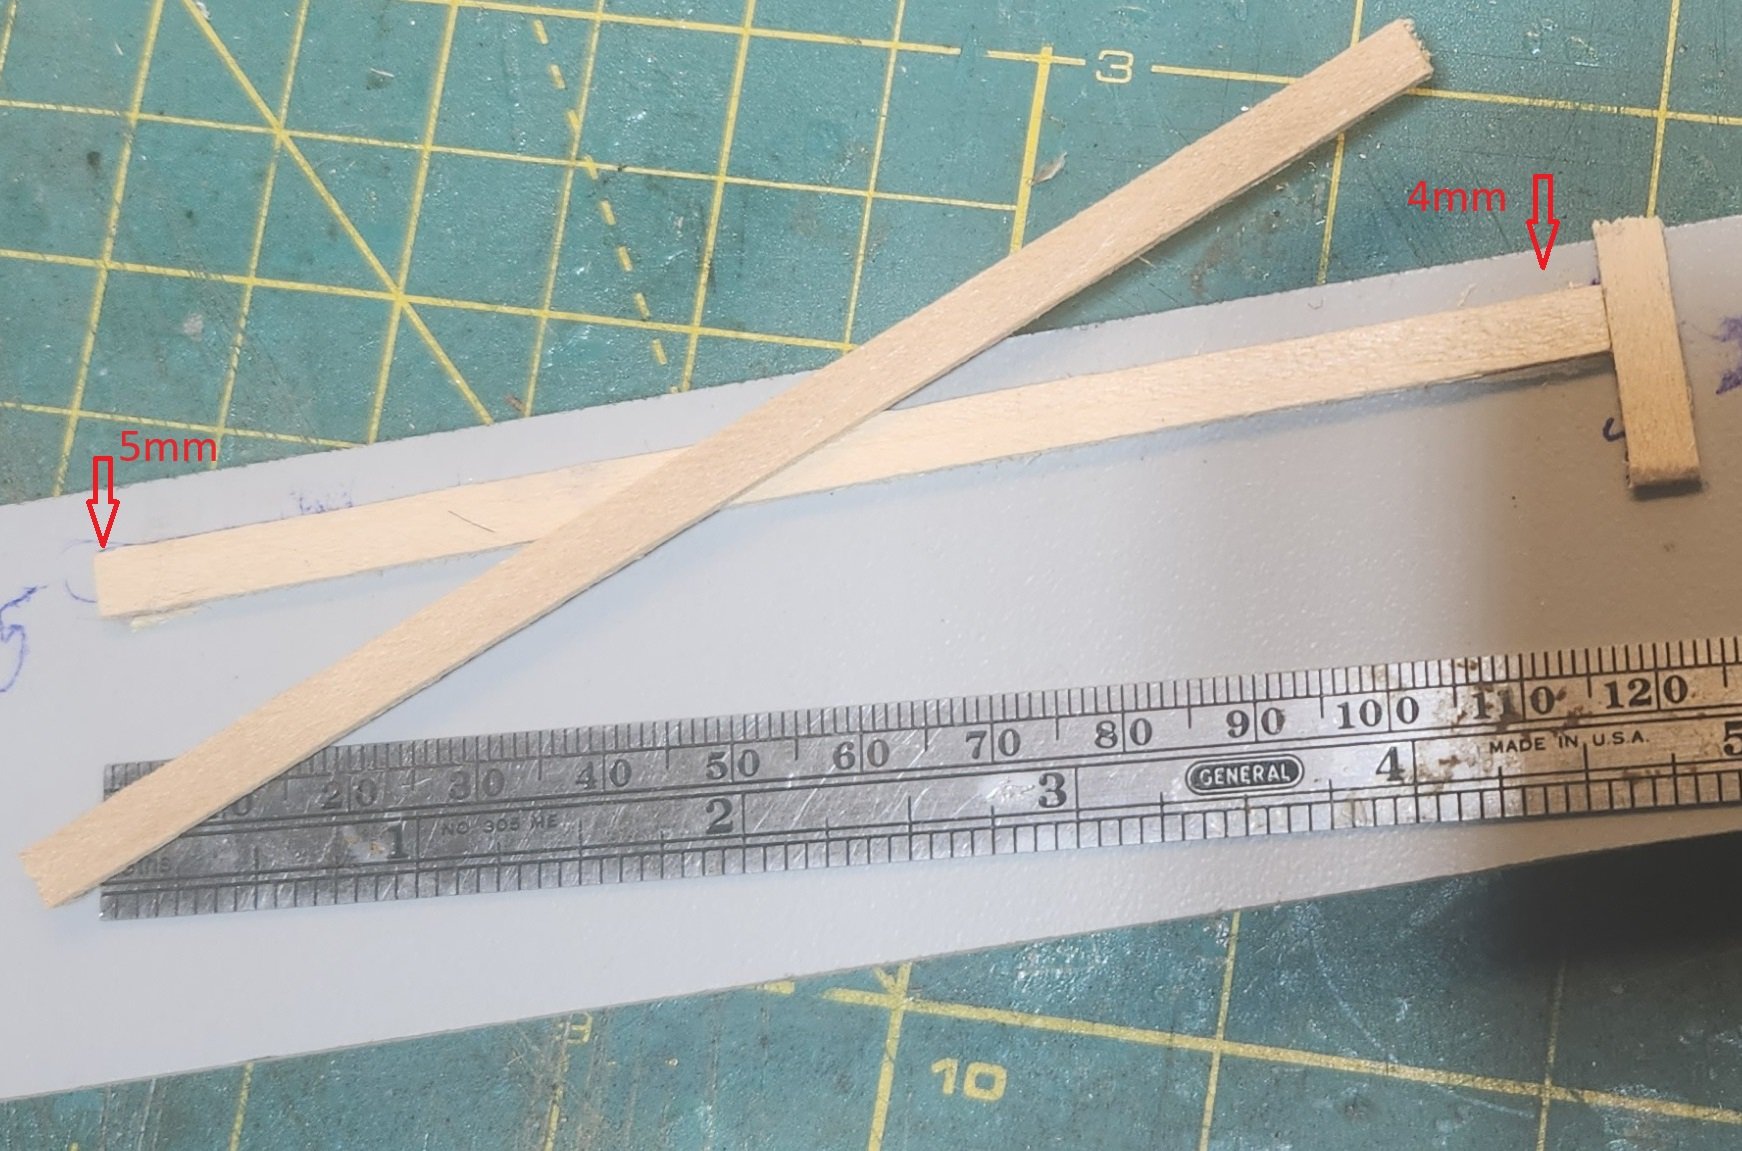
On 8/28/2024 at 2:41 AM, Gregory said:
This is something I put together quickly to demonstrate, so it could be refined somewhat.
I have this real hard melame/mdf stuff, but I'm thinking aluminum might be better.

I glued ( just tacked at each end with CA, so it could be easily removed later ) a strip the same thickness and length as my target, to the MDF. The little vertical piece acts as a stopper.
Note one end is 5mm from the edge of the MDF. The other end is 4mm. At this point you could probably just lay your strip to be tapered against the template above and trim with Xacto blade or scalpel and follow with a little sanding .
I took another option and clamped the smaller piece of MDF onto the template and trimmed from there. The target still has a tendency to move around, so you have to make sure it stays flat against the jig.
Make sure the business side of the two MDF pieces are flush.
I also thought I might screw the jig together for a tighter fit.
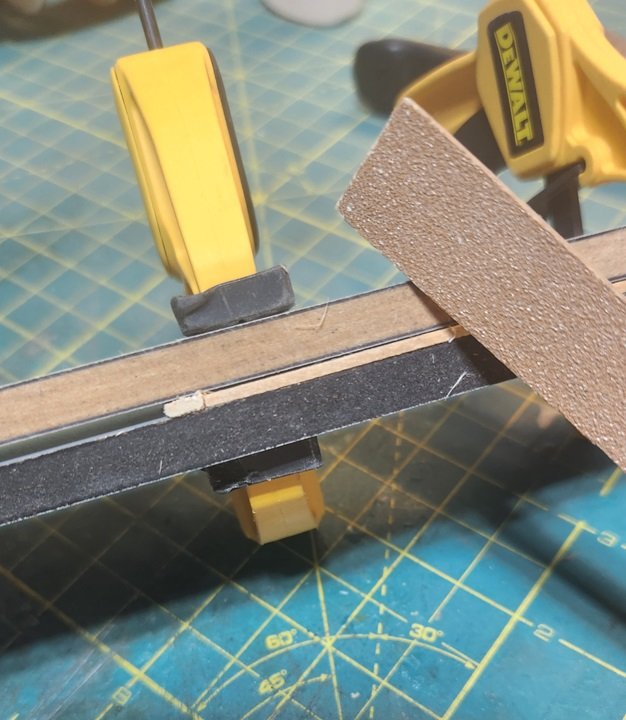
After the blade, I did a little sanding.
4mm On one end.
5 On the other.
Let me know if I can explain any better.
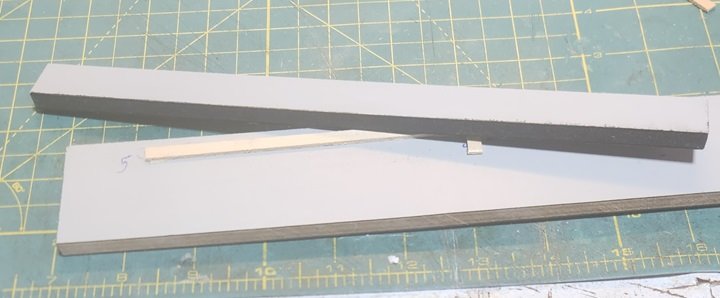
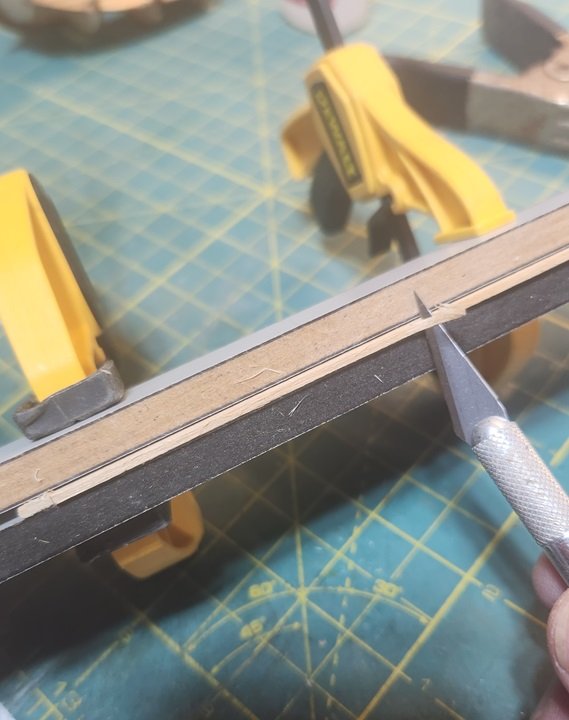
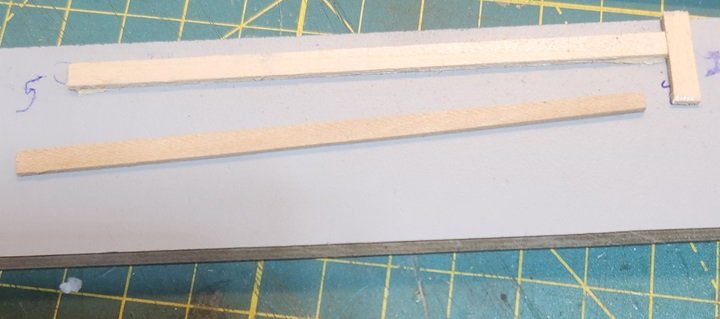
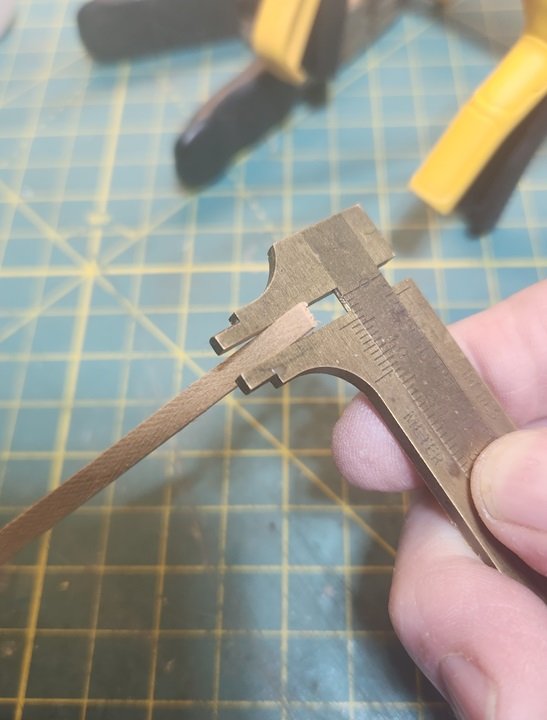
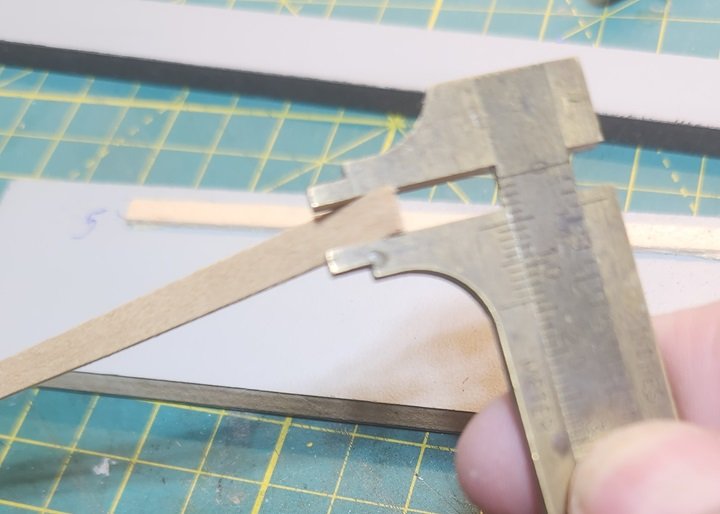
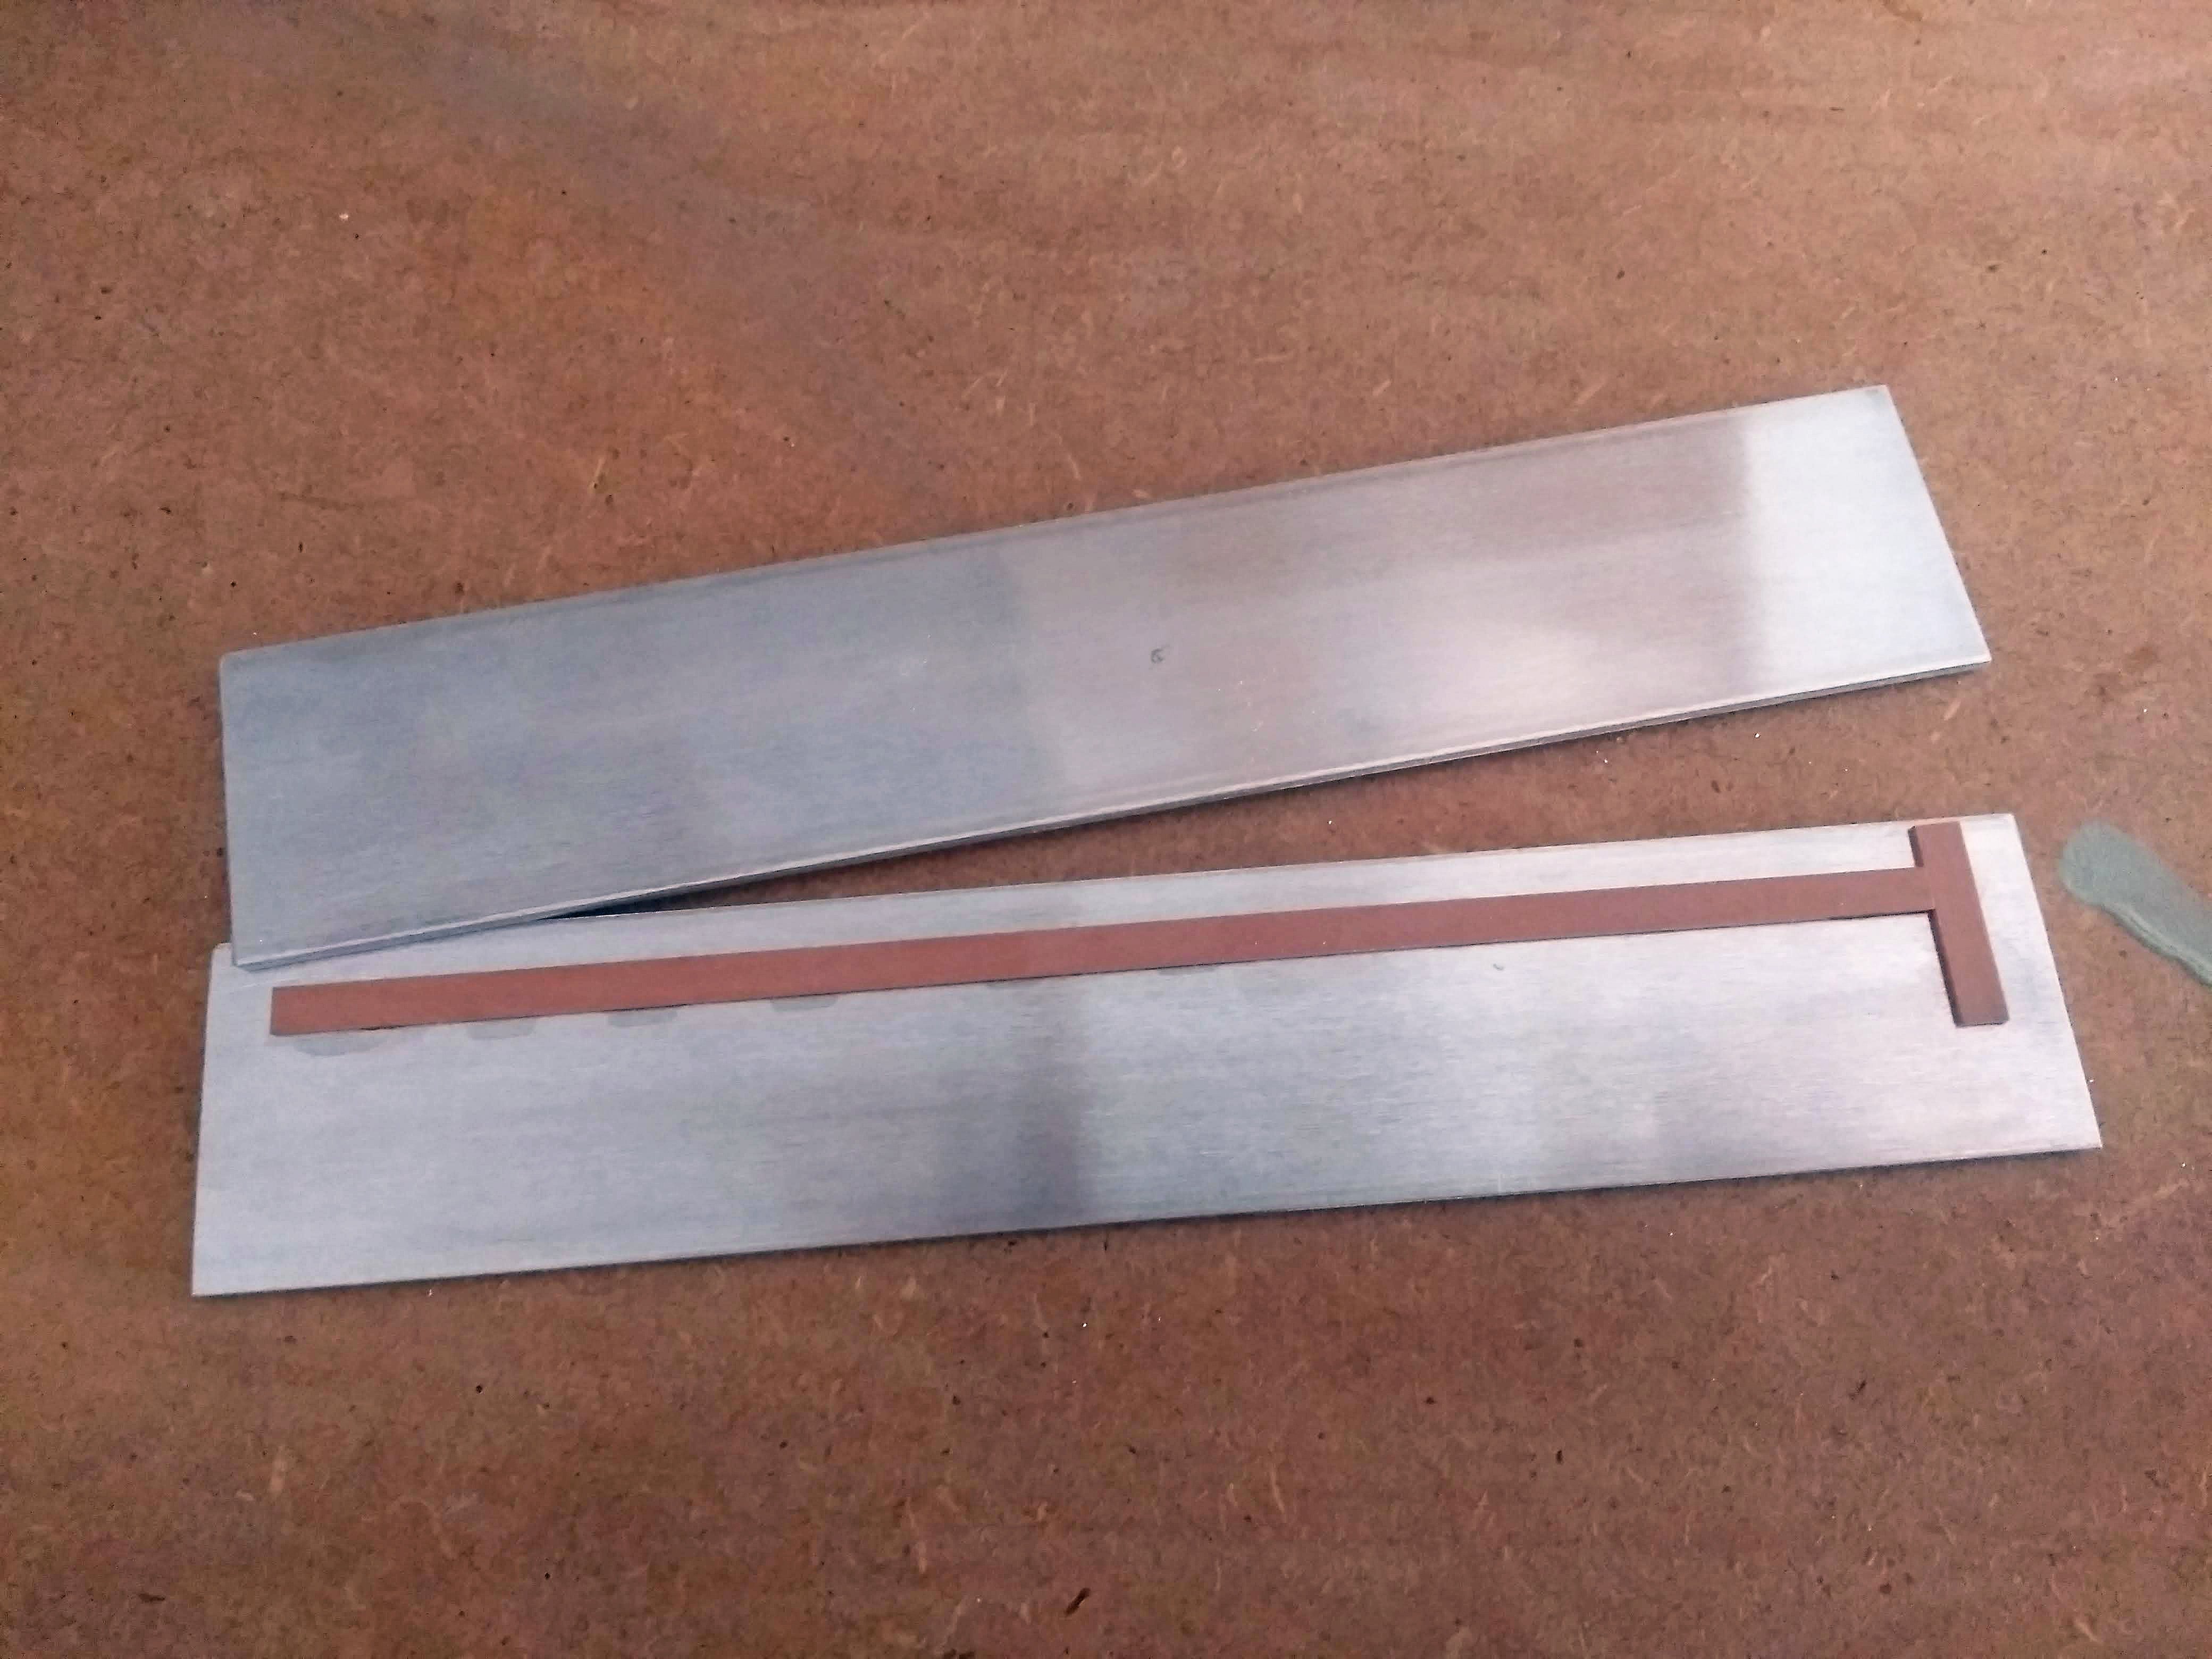
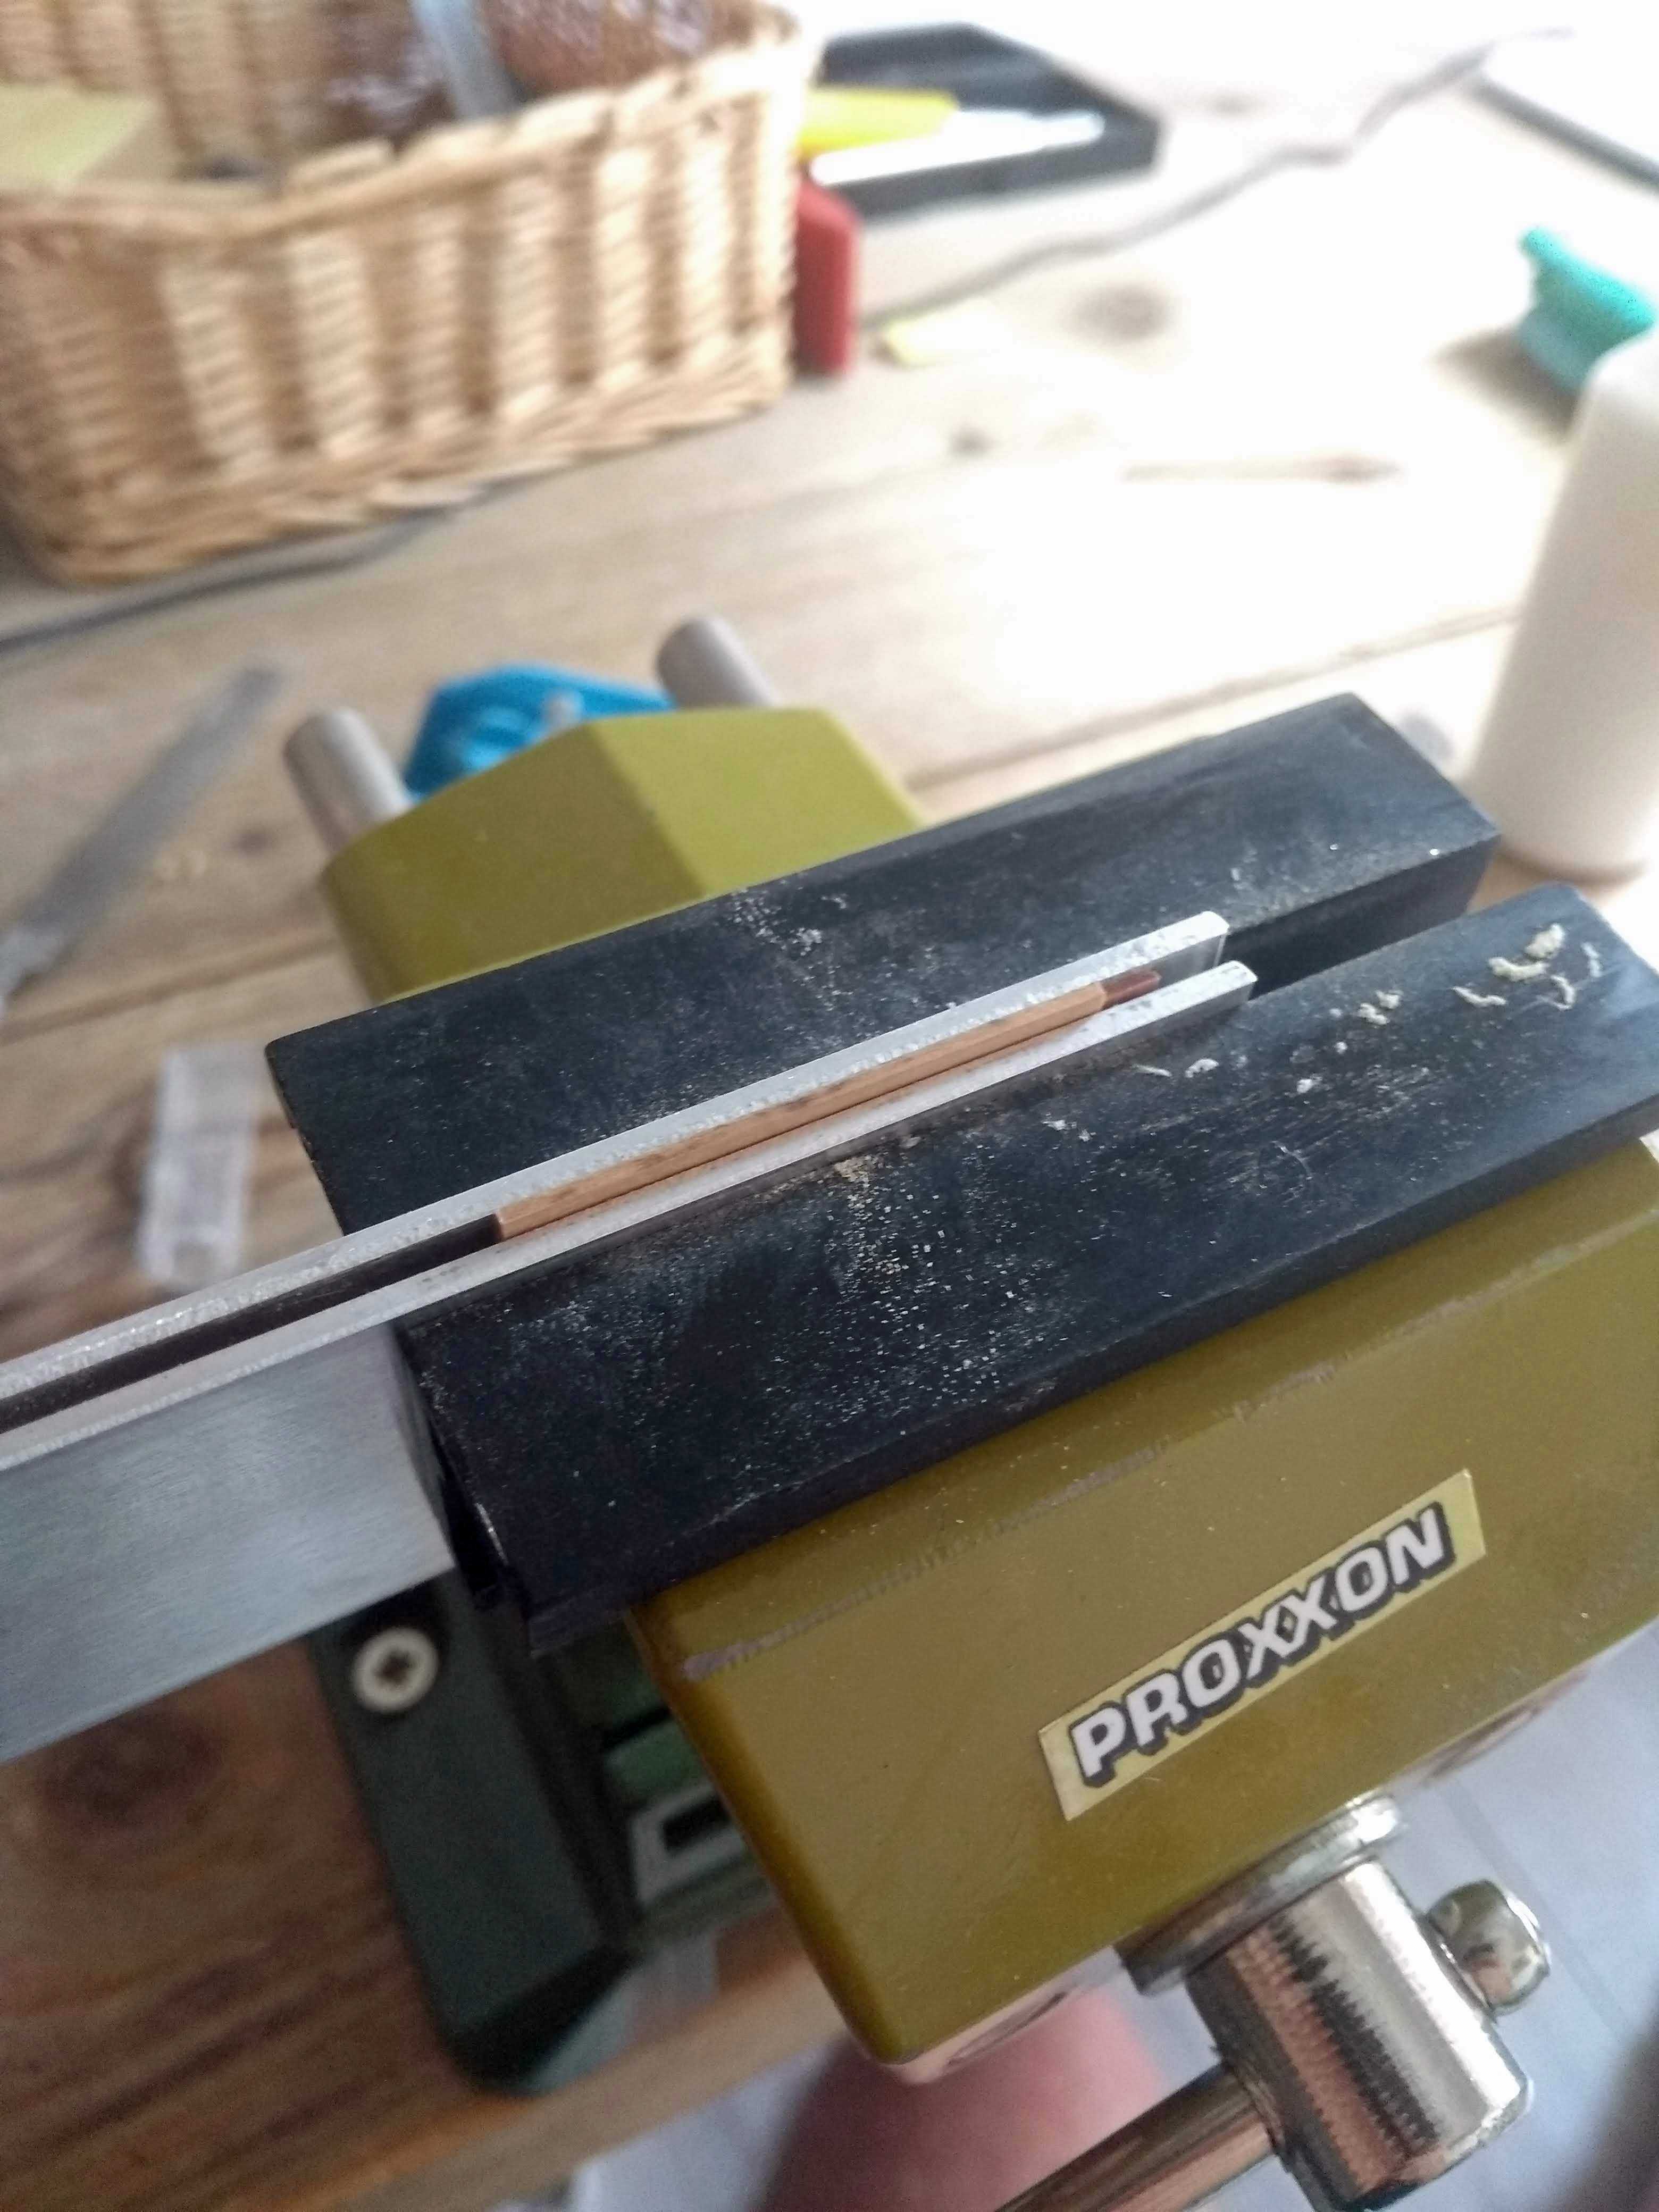
It works quite well...experimented now with some planks and they stay the same dimensions.
I used aluminum as a template with stops that are 0.2mm thinner than the deck planks. And I clamp the plates between the vice.
That works accurately. I just have to be careful not to go too far, because the aluminum is no match for my woodplane and sanding stick
I do think Johnny's solution was also a good one, but Gregory's was a bit cheaper to realize. (I had the aluminium profile lying around.) So thank you both!


- PaddyO, jloppermann, mtaylor and 1 other
-
4
-
Lovely model! Well executed! Always loved that green color on the bulwarks
-
-


USF Confederacy by Zarkon - Model Shipways - 1:64 Scale
in - Kit build logs for subjects built from 1751 - 1800
Posted
Looking good! How do you like working with the basswood in this kit?