Ronald-V
-
Posts
1,934 -
Joined
-
Last visited
Content Type
Profiles
Forums
Gallery
Events
Everything posted by Ronald-V
-
This must be really fun for you to design these little gadgets I asume
-
Very nice website! Wish you all the best with this new endeavour 🙂👍
-
Lovely paintjob, nice matt black!
-
It's a homemade wipe-on poly. So I thinned a polyurethane varnish with thinner that you can use like you would use wop. But for these small areas I use a brush and wipe off the excess after a few seconds. Never used a airbrush for this, because after a few coates it looks really equal in coverage. And because I have it quite thin...it doesn't look thick or something. So I don't see the need for an airbrush here 🙂
-
Just a little update in the form of a video of what I'm doing. I've been waiting for this for a long time... finally some varnish on the "stern counter." That bare wood was staring at me all this time😩, while the rest was already covered in varnish or paint. But now that I'd attached the wooden trim, I could finally brush on the first coat. I think I'll add another coat or two later, and then it should all fit together nicely. 😁
-
Both models looking great!
-
Welcome to MSW 🙂
-
That looks really neat! And indeed complicated
-
Lovely work so far! Your little boats look exquisite!
-
Pure joy to watch your work
-
Nice hookplanks!
-
Very well done indeed! Congratulations...the model is quite high 😦
-
Yes and just look at other builds on the forum, which finishes do you like the most?
-
Beautiful work Nearshore! Those outside pictures with the natural light and wooden stand look amazing! (and tropical ) I like the wooden tool organizer your wife has made, it's nice that you can share your creativeness with each other
-
Looking great! I agree with the colour variation...it's "alive" a bit more in that sence. How is working with the Cherry wood? I never used it myself, so I am curious
-
What's the plan now? Working further on your beautiful Mary Rose? Or do you have new projects in the pipeline?
- 97 replies
-
- 1
-

-
- Corel
- Große Jacht
- (and 2 more)
-
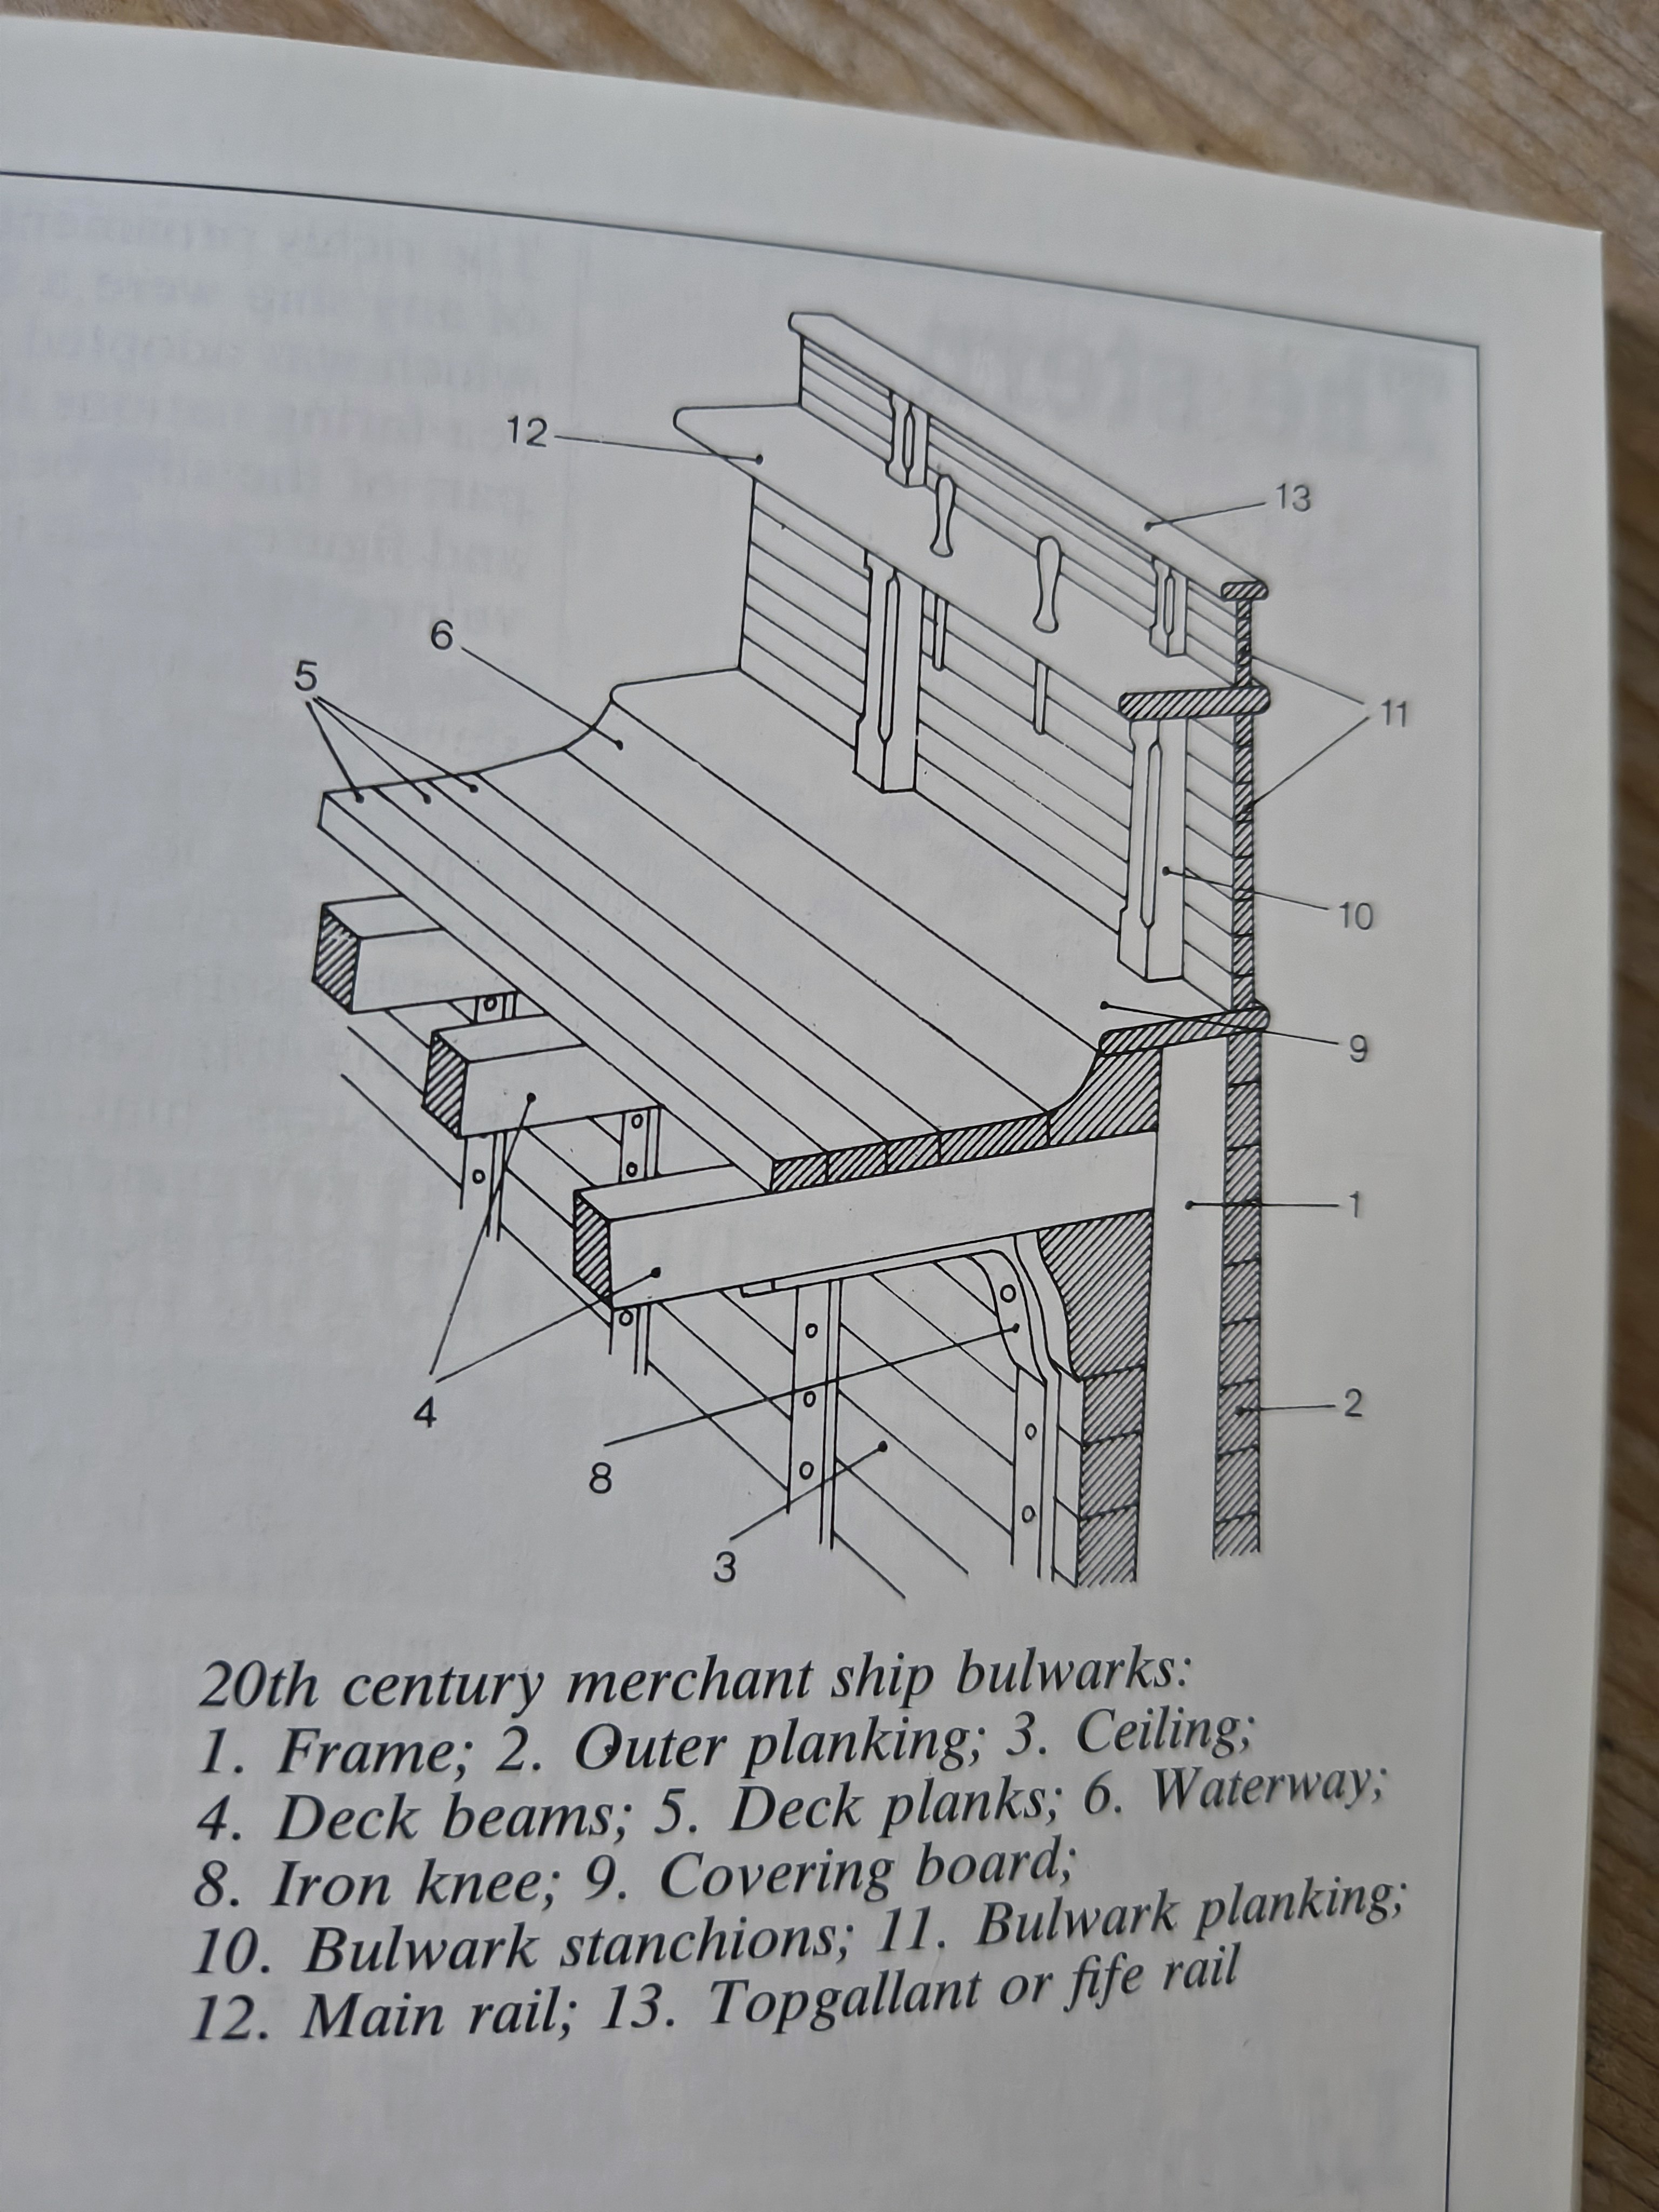
Finish of the Waterway
Ronald-V replied to RossR's topic in Building, Framing, Planking and plating a ships hull and deck
If you look at the pictures from the HMS Victory, they seem to be unpainted. If I understand correctly, they're part of the deck, a sort of L-shaped plank that starts on the deck and ends in the bulwarks. That's why I consider them a deck component and leave them bare (varnished, of course). This isn't based on facts, but on my own observations, haha. 😄 I hope someone with real knowledge will come along Edit: I have included an illustration from Mondfeld's "historic ship models" where you can see how the waterway as I see it is part of the deck. Obviously this isn't a picture of the ship you're working on (not even of the time period), but personally I don't think there would be much difference?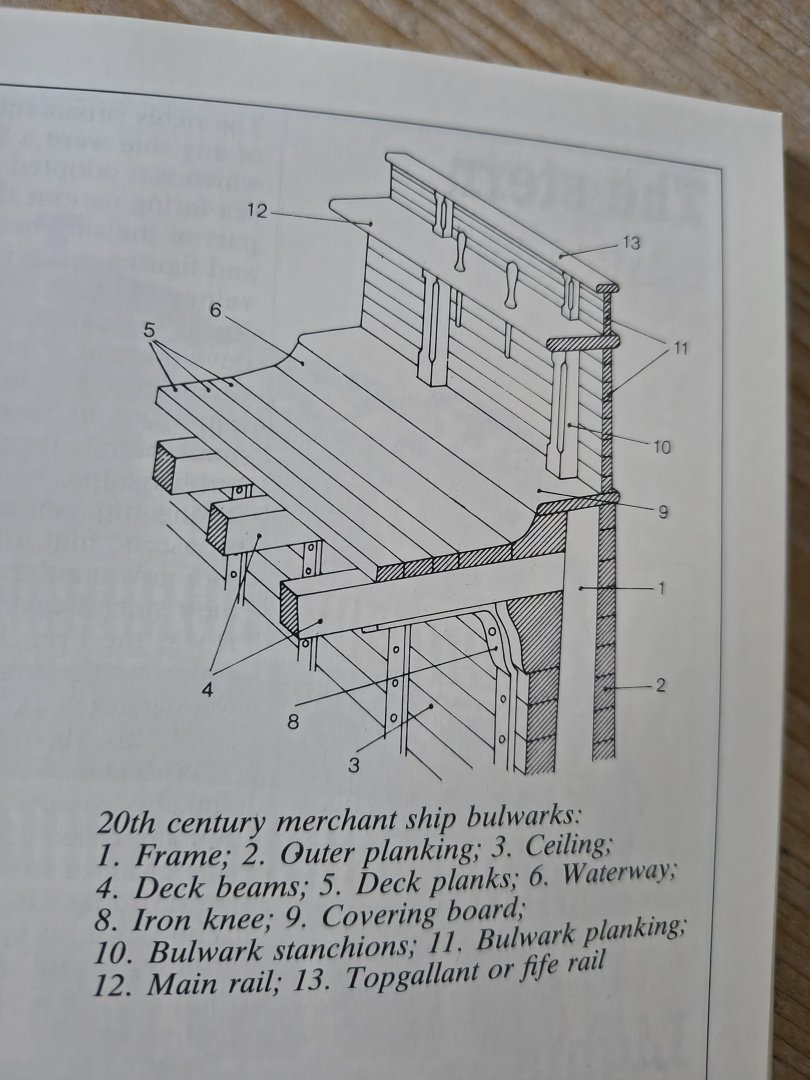
-
Welcome back
-
Congratulations Baker! A very nice vessel, and I like the upgrades...well done 👏
- 97 replies
-
- 1
-

-
- Corel
- Große Jacht
- (and 2 more)
-
Thanks Frecap! I understand your thoughts on photoetch. In general...not sure i'm the biggest fan of it, mostly through it's flat appearance...but it can add a lot of details for the less skilled amongst us and sometimes you can get things more in scale with PE. But I also prefer to see as much wood as possible where possible.
-
Welcome to MSW and lovely work so far!