

CPS_skybolt
-
Posts
217 -
Joined
-
Last visited
Content Type
Profiles
Forums
Gallery
Events
Posts posted by CPS_skybolt
-
-
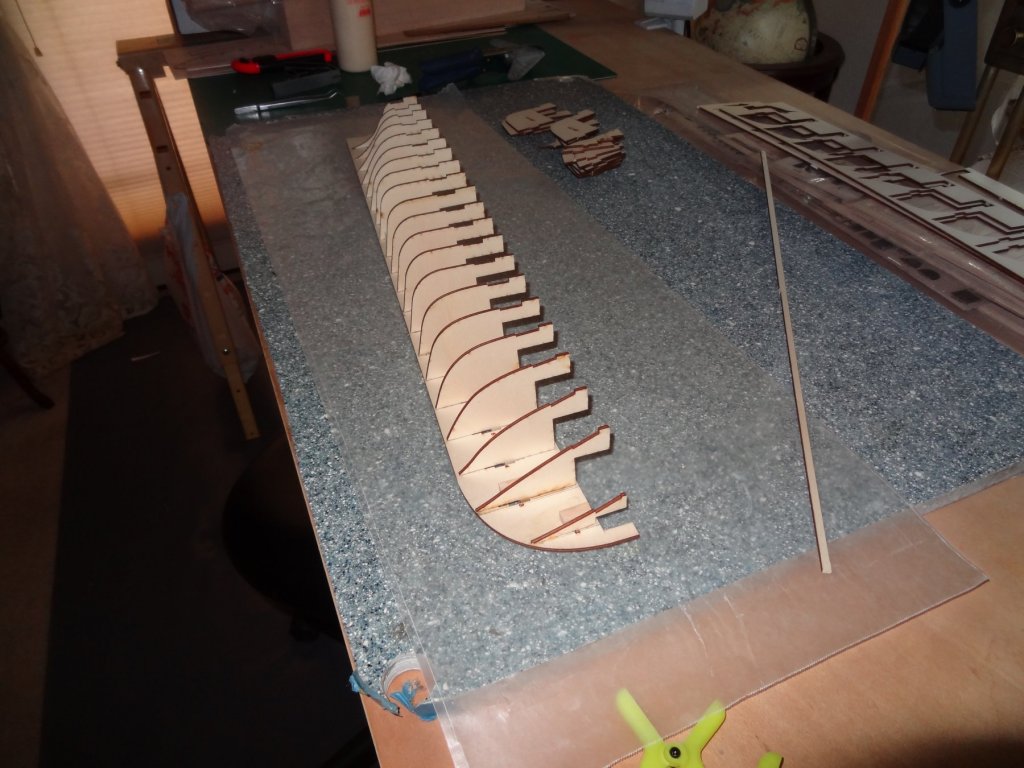
Used Aliphatic resin glue and supports, a very strong glue.
- CDW, coxswain, Ryland Craze and 1 other
-
 4
4
-
Beautiful work. Another family heirloom.
-
I started the USS Kearsarge in 1/96 scale a couple days ago. After I built the BlueJacket USS Constitution in 1/96 scale I said to myself no more 1/96 scale wood ships but the Kearsarge is such an interesting ship I had to break that pledge. The Connie kit was a solid hull and the Kearsarge is a POB, a big difference to me . Love POB ship models. Planking and wood working is interesting, rigging is boring but easy to me. Love building hulls, not so much for hanging thread and the shrouds.
Notes: Do a thorough inventory of parts before starting the build. When you get to the Main weather deck you have a choice of using the side with the deck structures rastered on them or using the sides without these marks. I used the sides with the deck locations marks. My experience has been that the structures and brass fittings do not overlap all of these marks but actually expose some of these marks. It does not look good. Should I do this again I would use the unmarked sides. With the great drawings in this kit you can accurately locate everything with a set of dividers. Be careful as there is a slight difference between the actual model and the drawings size. Also, The decks are marked with planks that are as long as the ship. I would mark each plank to scale lengths as it looks better. Be careful building the stern, read all instructions before assembly.
-
Jfinan, Just found the best reference for the stern quarter galleries stools .
- J11, Geoff Matson, coxswain and 1 other
-
4
-
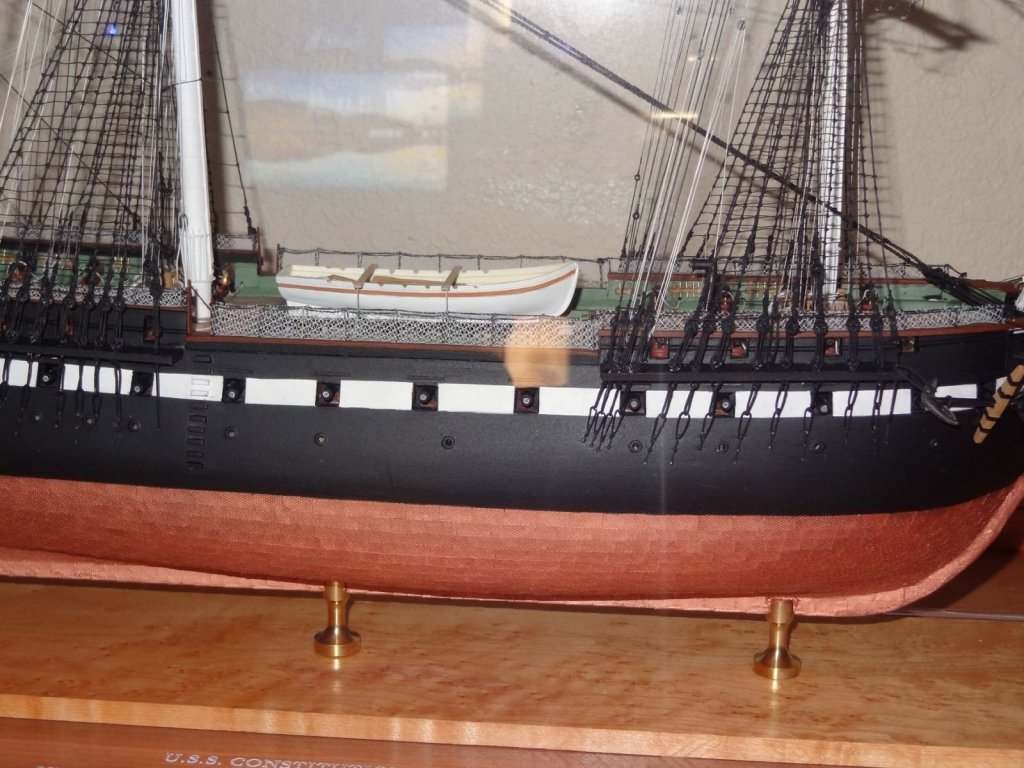
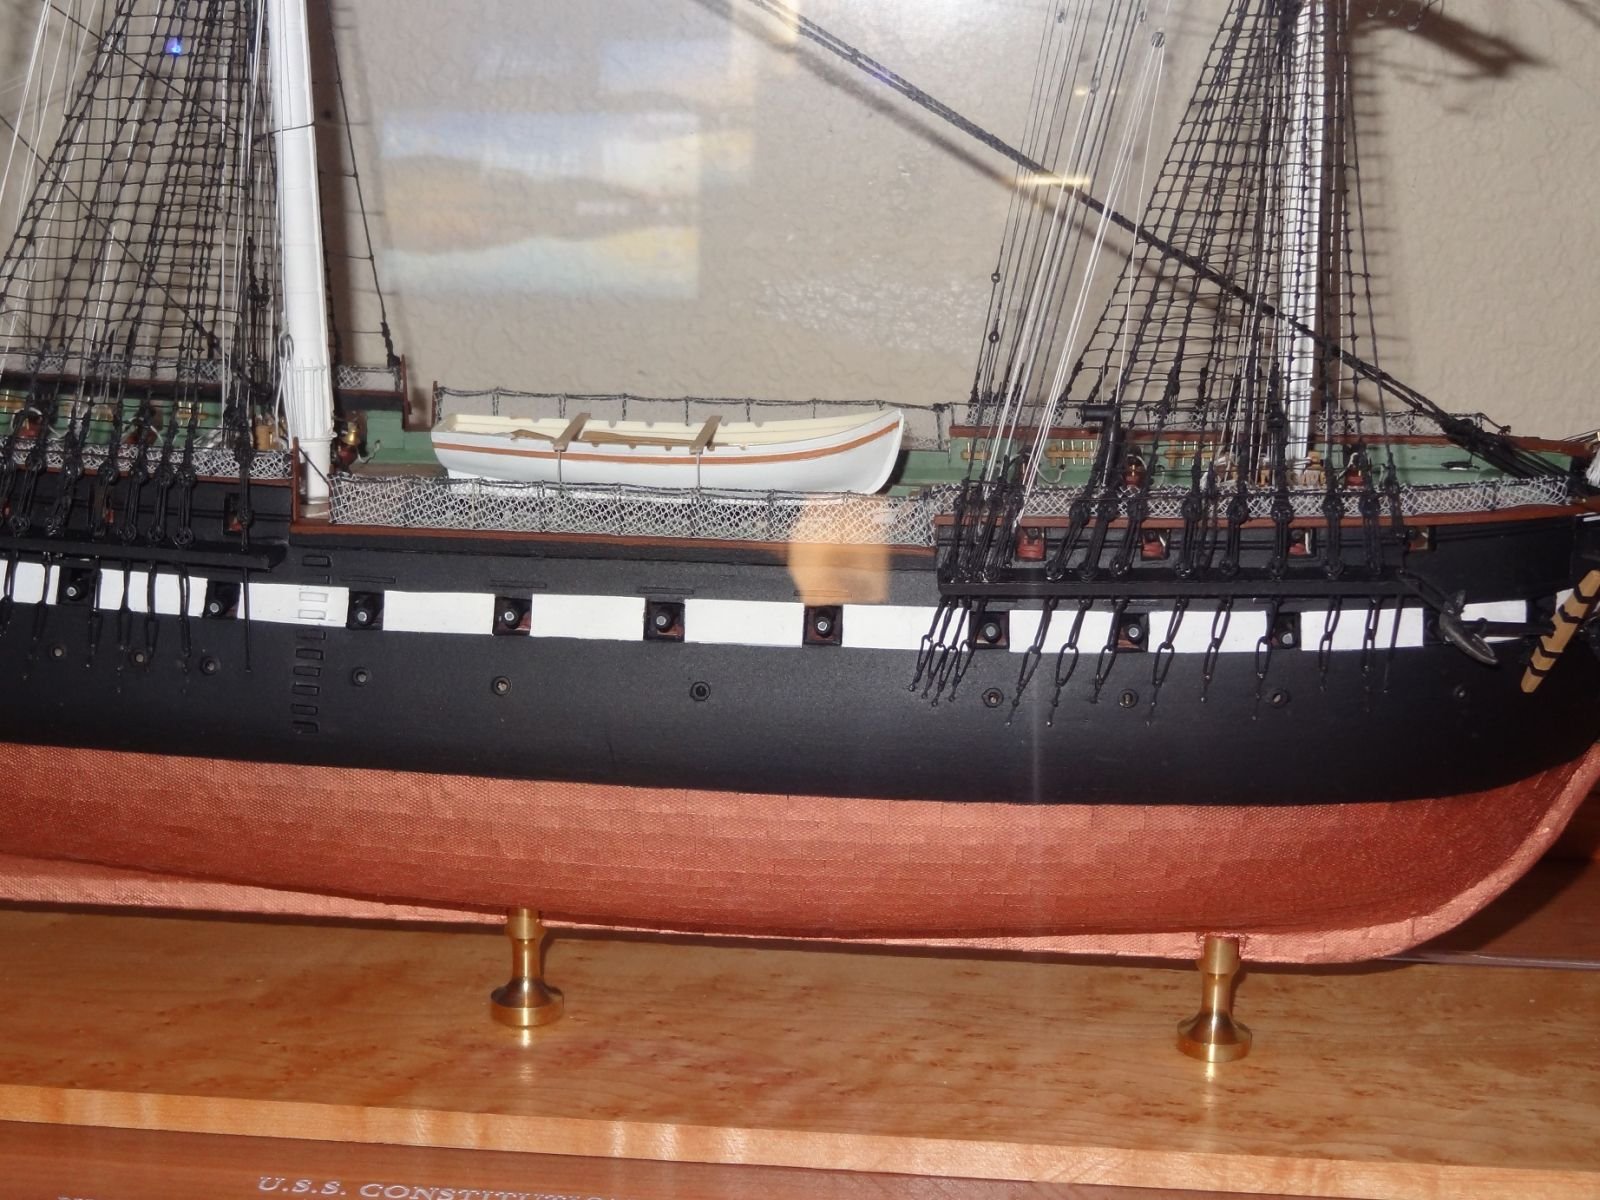
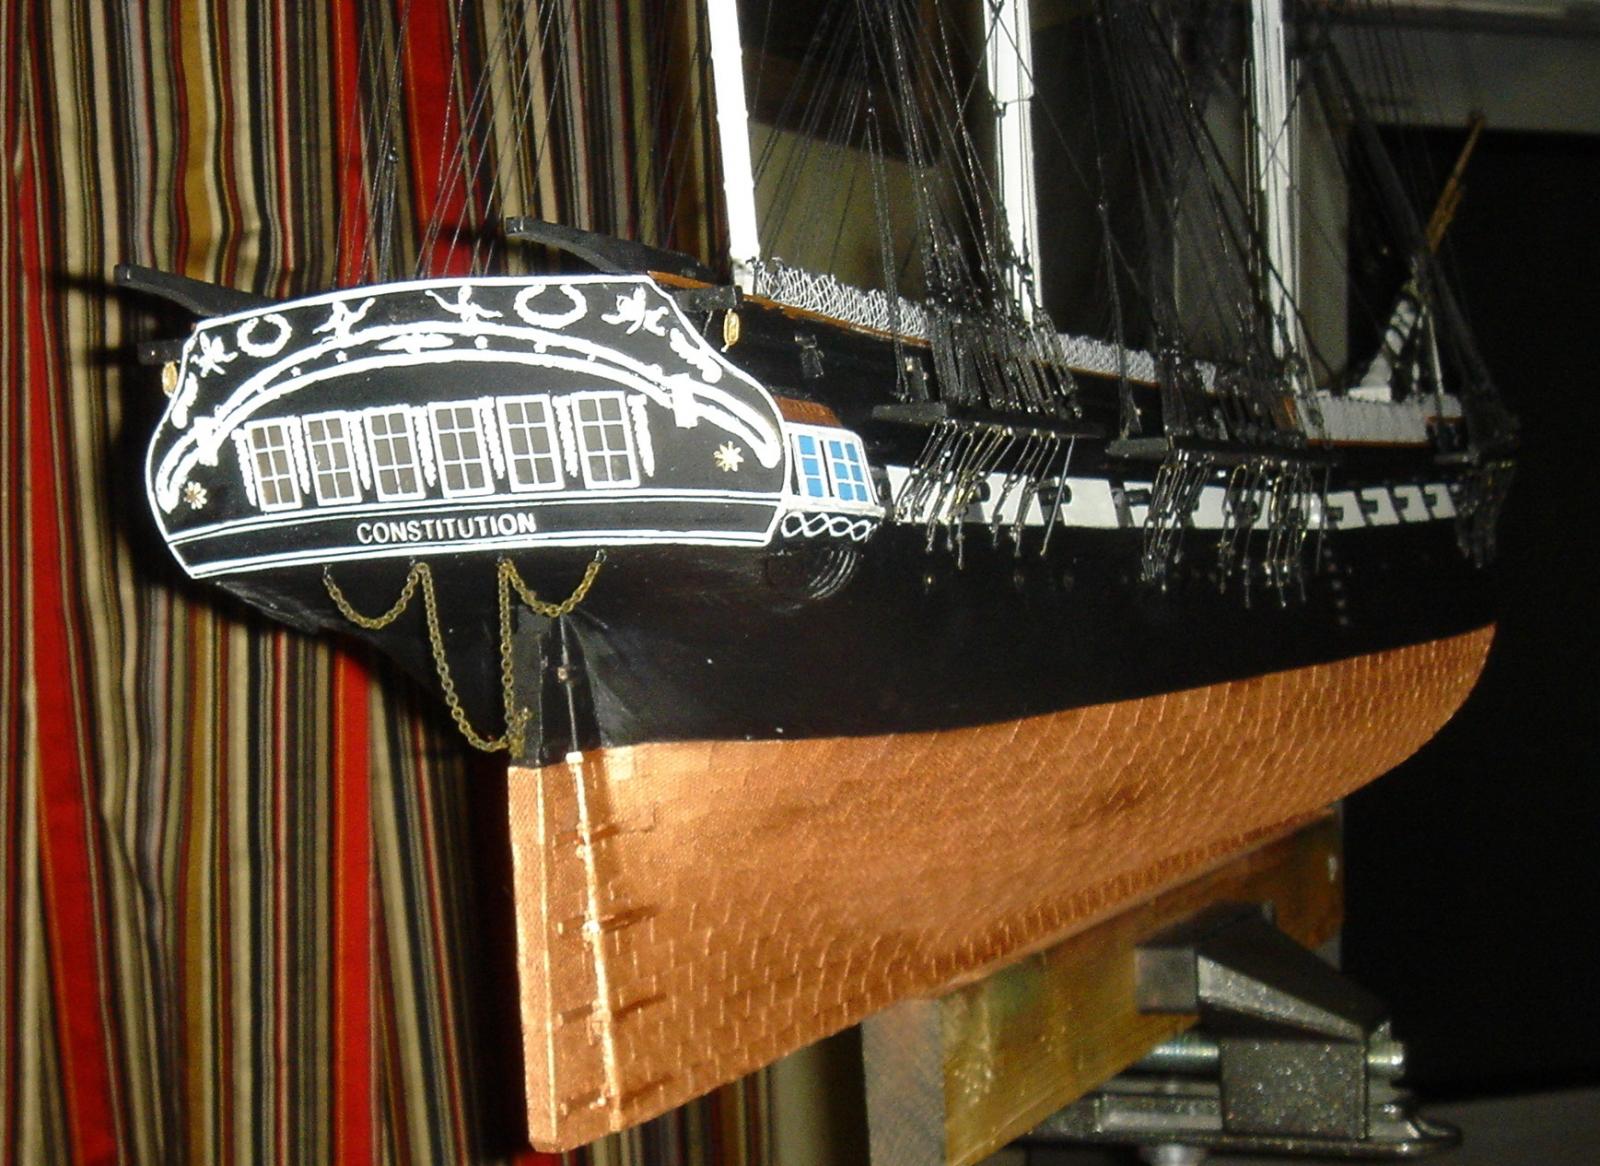
Ref. " Did you opt for the hull planking? I love the "authentic"look. See below: " Yes, I put the planking on. However, I sanded them smooth and lost the definition of the individual planks. Another mistake I made was to put the copper on the hull with CA glue. This caused some discoloring so I had to paint the copper to cover the discolor. Not a good effect.
- Blue Pilot and Bill Morrison
-
2
-
Excellent work. Best cardstock I have ever seen. As time goes on you will admire your ship model like a stranger, never seeing any mistakes. You have made a family heirloom.
-
I like your work jfinan. Your work on the bulwarks was excellent. I didn't do near as well with them on my BlueJacket model. With all the mistakes I made it still turned into a beautiful model. I never was happy with the bow vertical supports. I could never figure them out so I winged it. I used decals I made for the fine striping. I made decals for the cannon barrels ends since there are no holes. I still do not know if I got the stern quarter galleries stools right. My BlueJacket reference pictures were terrible.
-
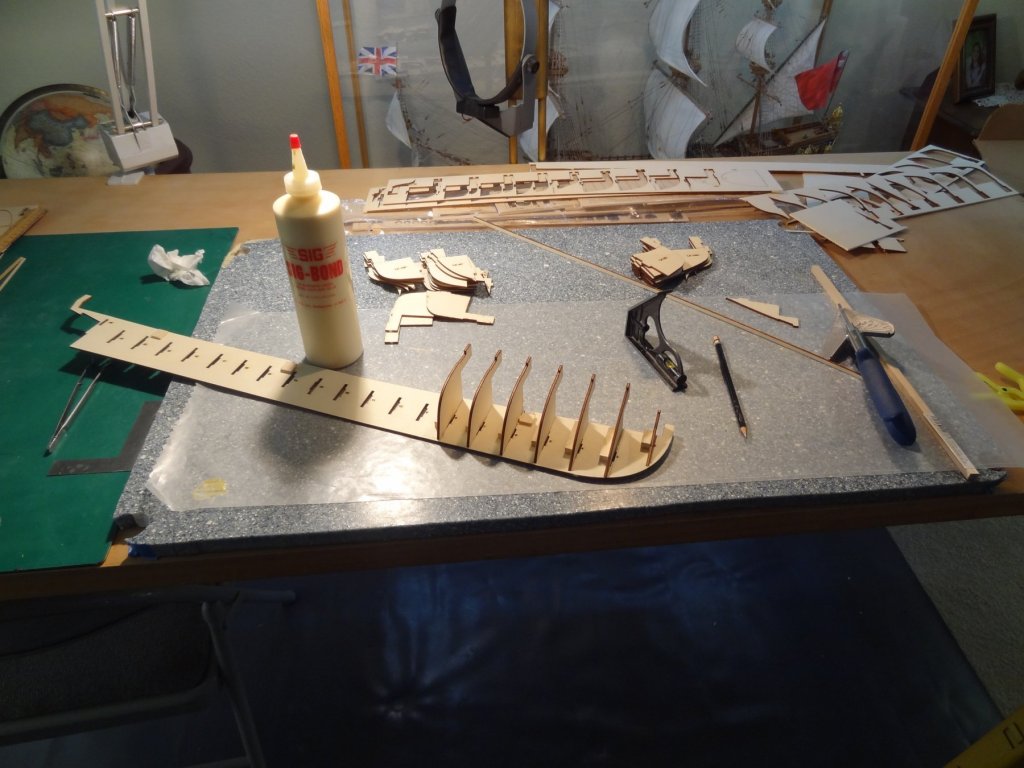
The balsa support triangles ideal must have come from model aircraft construction. I always put them everywhere in aircraft models. Never thought of using them in ship construction. Great ideal. To support the finished model I glue pieces of hardwood inside on either side of the keel where the Pedestals screws go through. You have given me ideals on purchasing some new tools prior to my next build. I'll be watching.
-
Hi rtibbs2018 , You have inspired me to build another ship. So I ordered kit #50. My last build was the USS Constitution by BlueJacket. I swore I would never build another 1/96 scale ship but here I am again a couple years older but none wiser. Seems like ship building is in my blood. I will be following your build. Just as soon as I figure out how to follow a build log. This looks like a beauty.
- Canute and popeye the sailor
-
2
-
When finished you will have made a family heirloom. It was two years of intense building to make this model and I enjoyed every minute. I will follow your build as it will be like making it all over again. This is such a beautiful ship with such a great history. Best regards, CPS_skybolt.
- Old Collingwood and rtwpsom2
-
2
-
-
-
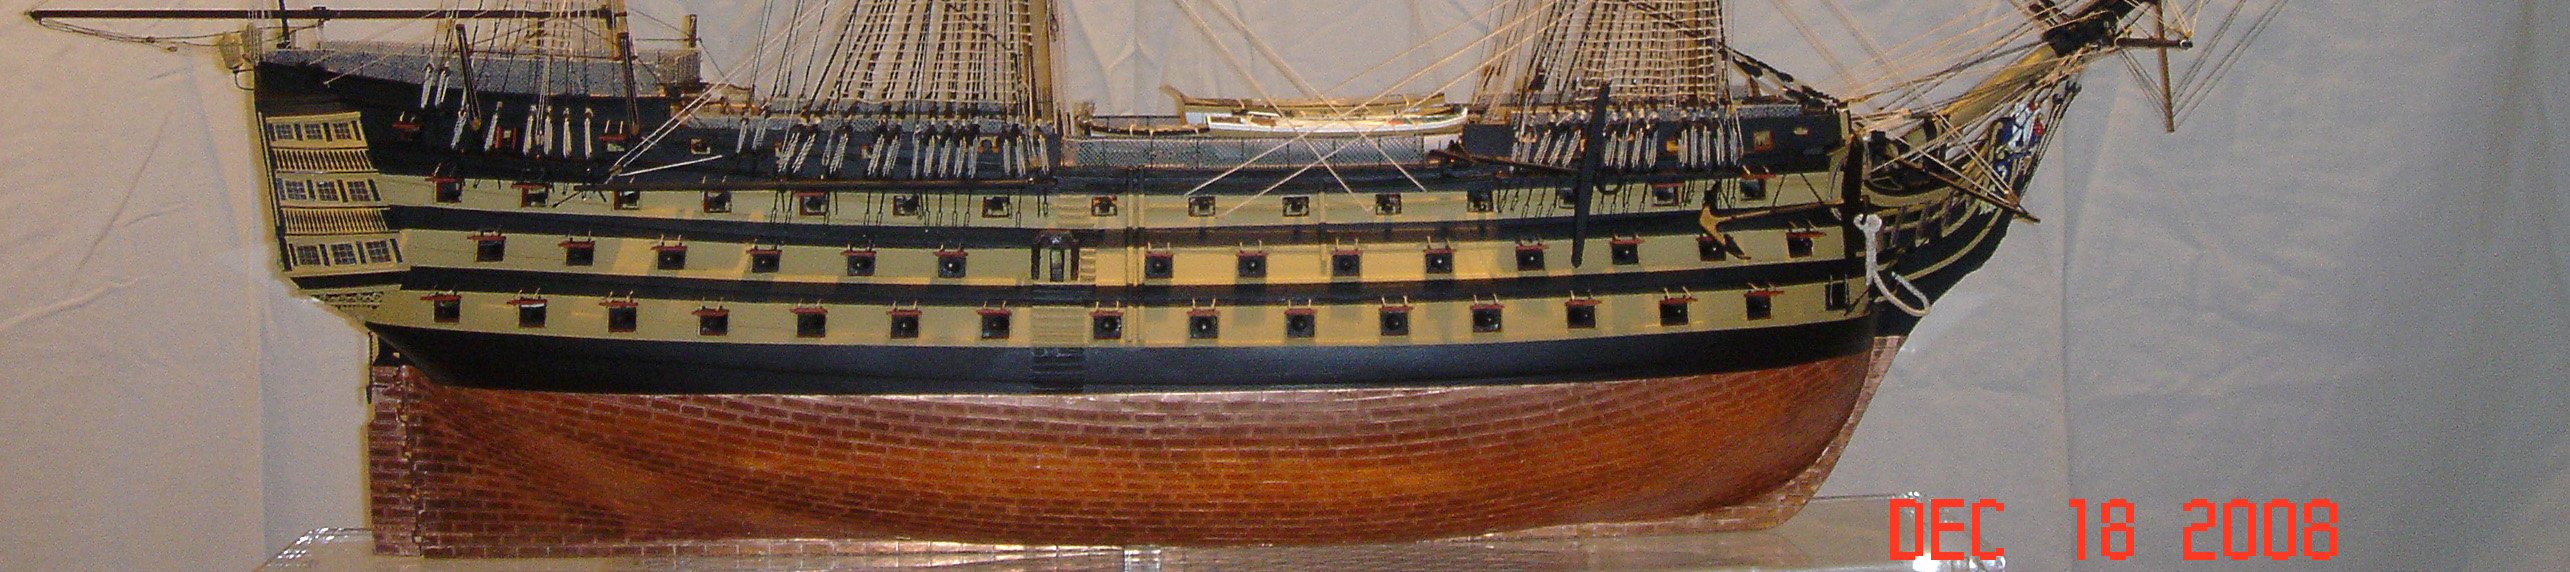
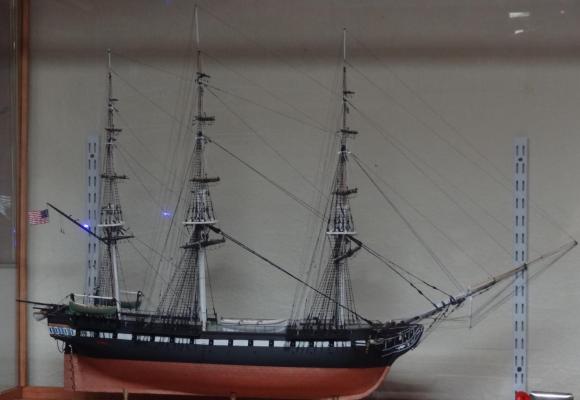
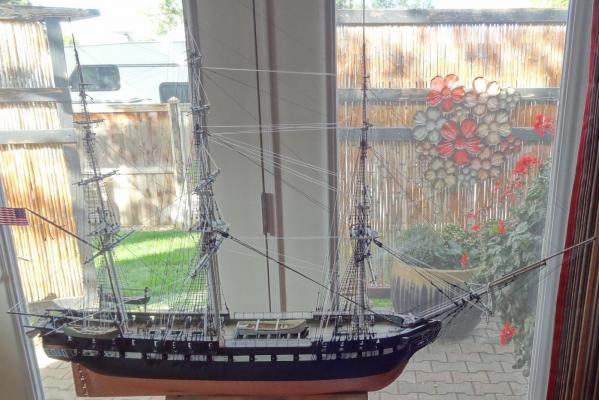
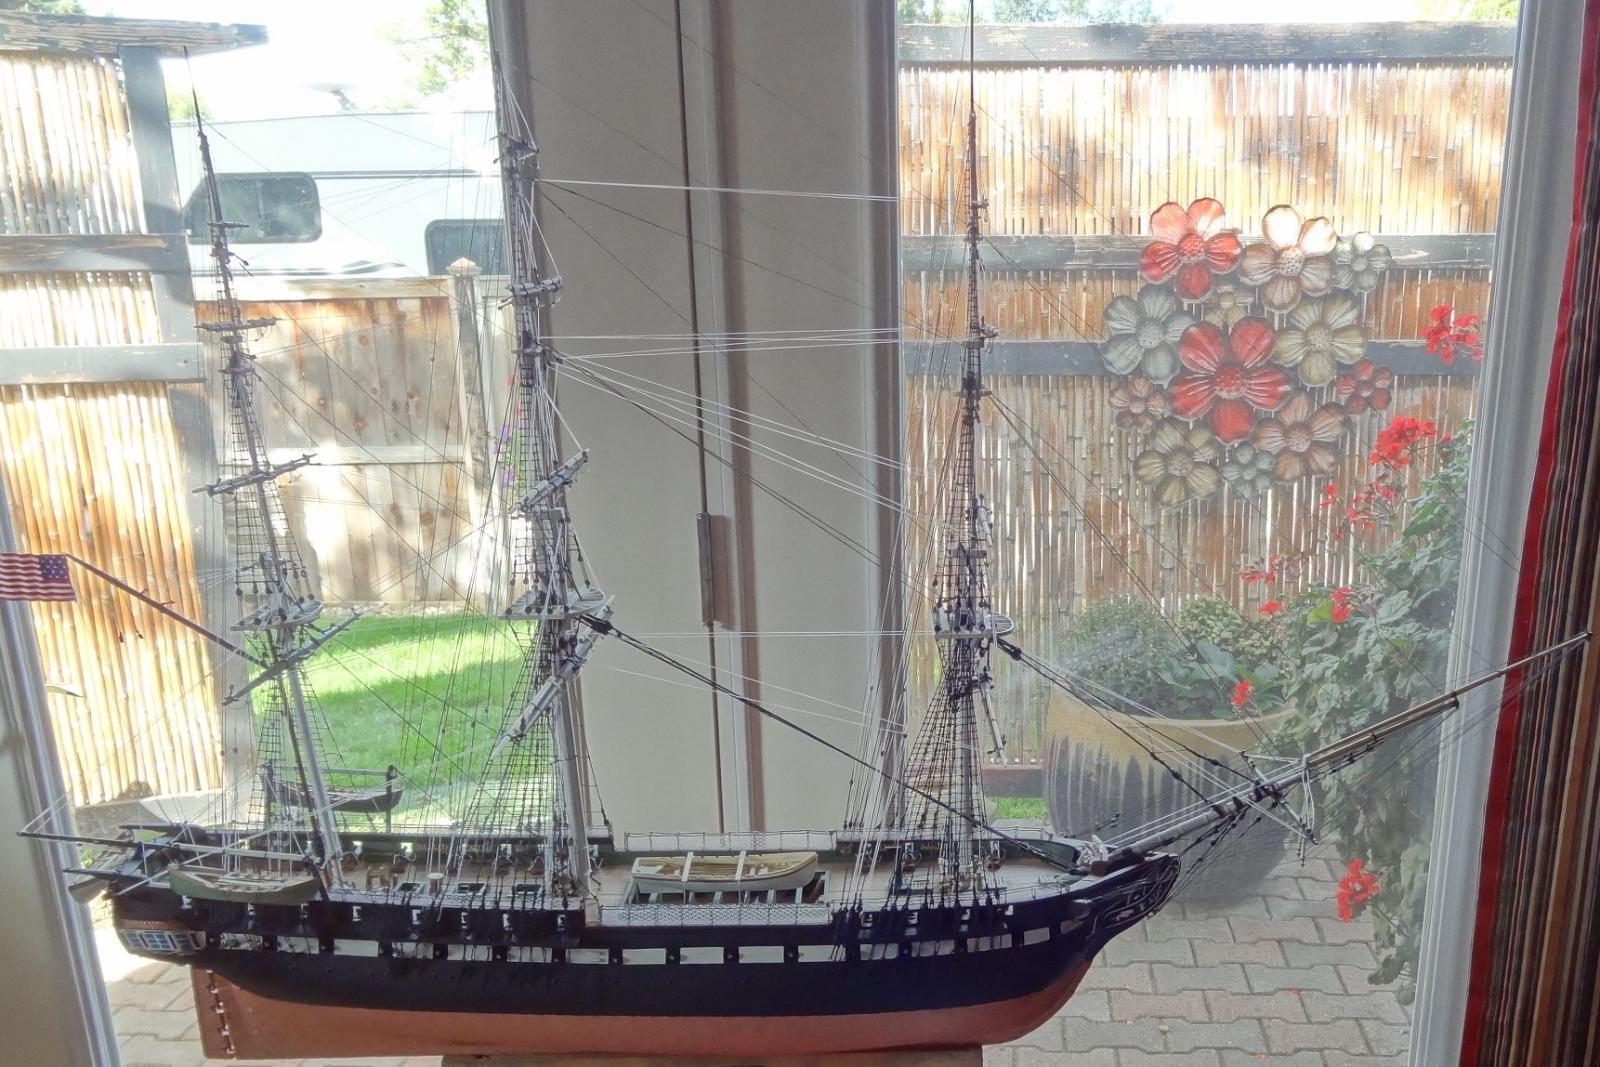
Finished. The ship looks better to me as time passes. I no longer see my mistakes. If I were to build it again I would have done a better job. That is not going to happen. It makes a beautiful model . I used a BlueJacket display case .I glassed it with acrylic sheets. It looks good, not intrusive and it was not that expensive.
- ccoyle, CaptainSteve, mtaylor and 7 others
-
10
-
-
I'm working the kit now and am about 98% done. The kit quality is very good. The metal parts are excellent. The gig boats require repair. They are very good but the rosin hulls are full if air bubble holes and require filling in with putty. They turn out very good. The pictures in the instruction book are almost to dark to be much help. The assembly instruction book is very detailed. I recommend you read all the instruction book prior to building. I did not do that and found out latter that it was a mistake. I skimmed over the instruction book and dove right in. MISTAKE. I prefer " plank on bulkhead " to the solid hull. To get the solid hull perfectly true is beyond my skill or patience. I am almost done and it has been a one year build. I am retired and work on the model almost every day. Hours worked vary. My guess is it is a 1000 hour build. I think it has turned out to be a very excellent build. I ordered the planks for the upper hull and the copper plates for the lower hull. I very glad I did. I ordered the paint kit but found out that I only use about one third of the paints. The quarter galleys are a bit of a mystery. The bow is a beast. Have fun, It tried my skills and patience. I used the internet a lot in finding answers to my questions. Pictures were my primary references.

-
-
Keith you make me think I should go back to building model airplanes, LOL . Your model is fabulous. You have a follower.
-
-
I was perplexed with the wood quarter galleries and finally cut them off. I assembled the five parts of the galleries ( with CA glue )and shaped them with much care. The glue broke loose a couple times but was helpful in allowing shaping as an assembly. This metal bends really nice without breaking.

- CaptainSteve, Elia, Scallywag and 3 others
-
6
-
I agree, Plank on bulkhead has been much nicer to work with. I am building a solid hull now and this will be my last. Back to plank on bulkhead. I really like the way you carved out the bulwarks.
-
Almost finished. Have to do the anchors, fighting tops guns, Ships bell and ropes on pins.
- uss frolick and GLakie
-
2
-
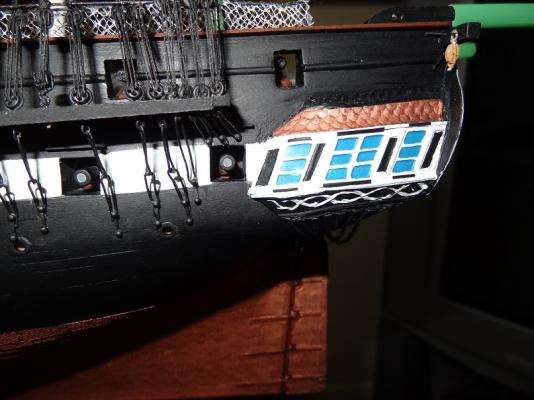
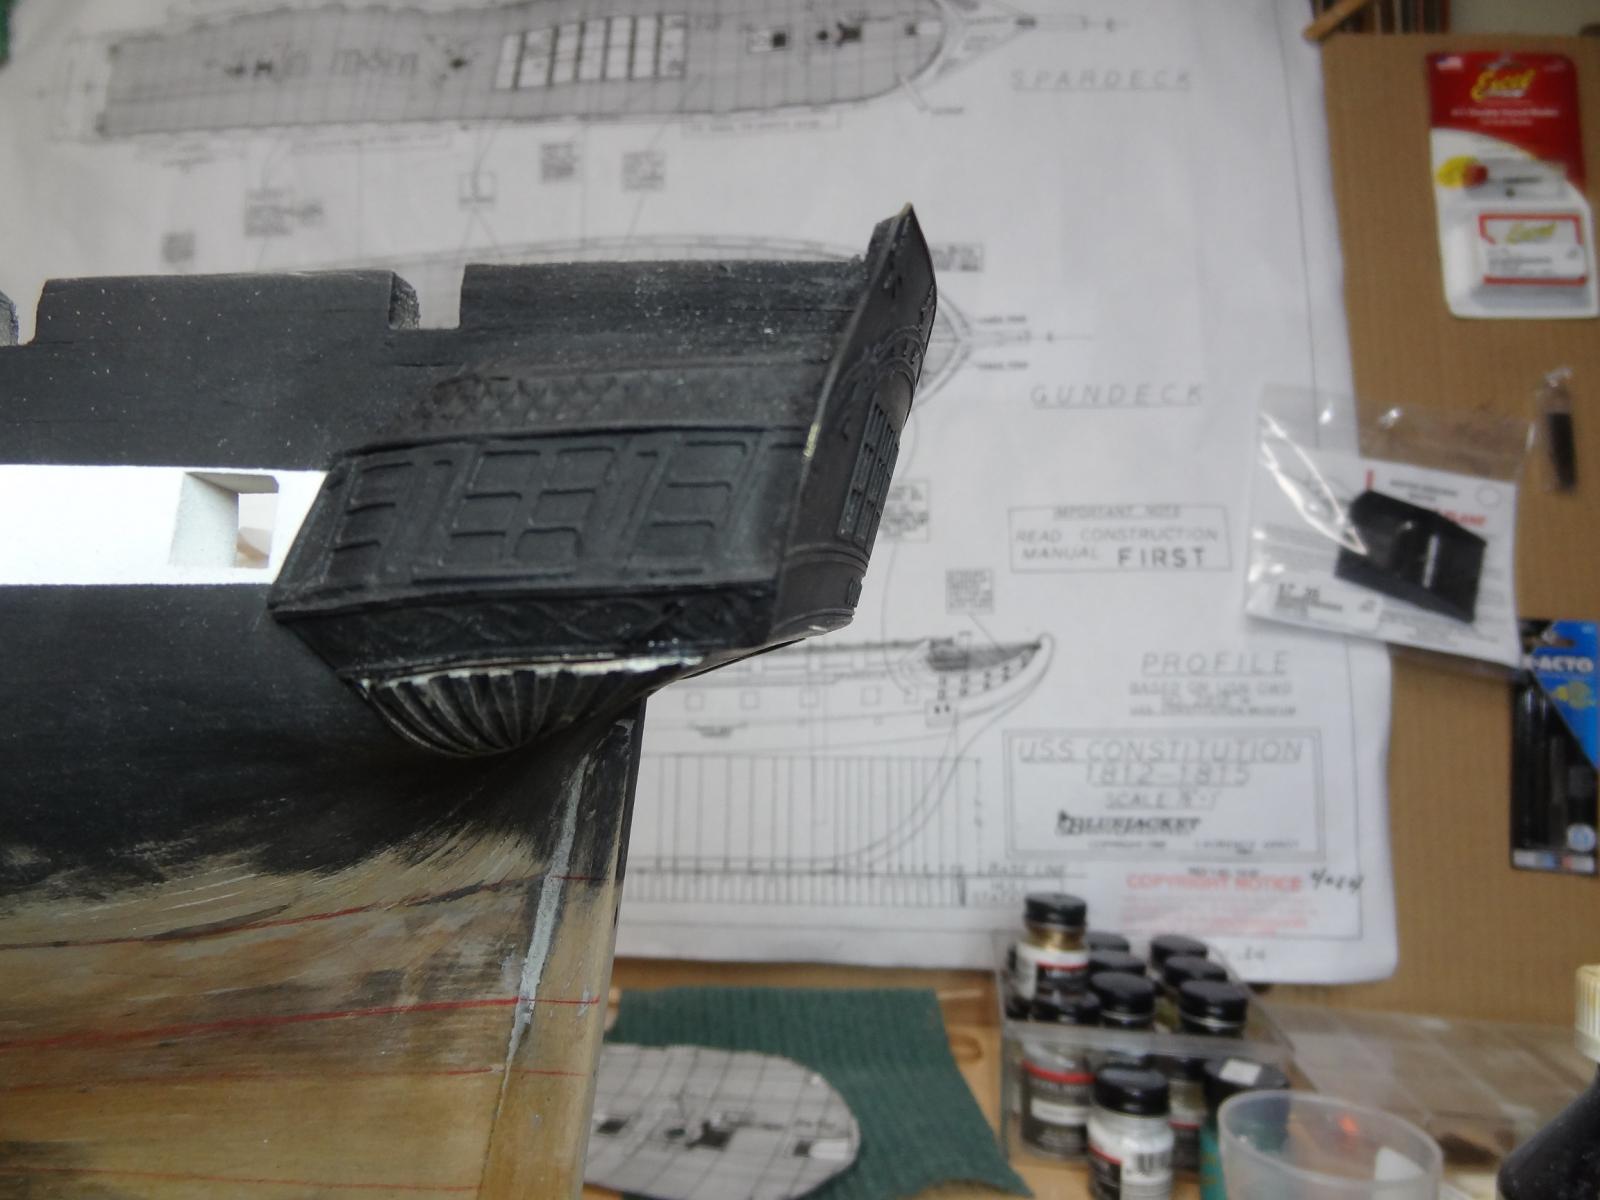
I shaved the wood quarter galleries from the wood hull. It was no help to me. The cast quarter gallery lower stool threw me for quite awhile. After much study I decided the counter was concave and not convex to fit the stool. I then glued the quarter gallery assembly to the hull and bent the stool under to fit as flush as I could to the counter.
BlueJacket says a guy who has built this model for them many times takes calls about this kit .His name is Charlie Cook at 800 336 2795 9-4 Mon thru Friday. I tried to reach him a couple times but never got a phone answer. I am going to try again as I have a part that looks like a grease gun ( a lot of them ) and have no Idea where they go. Think they are hand pumps.
I figured out what the grease guns are, the swivel guns for the fighting tops, LOL.
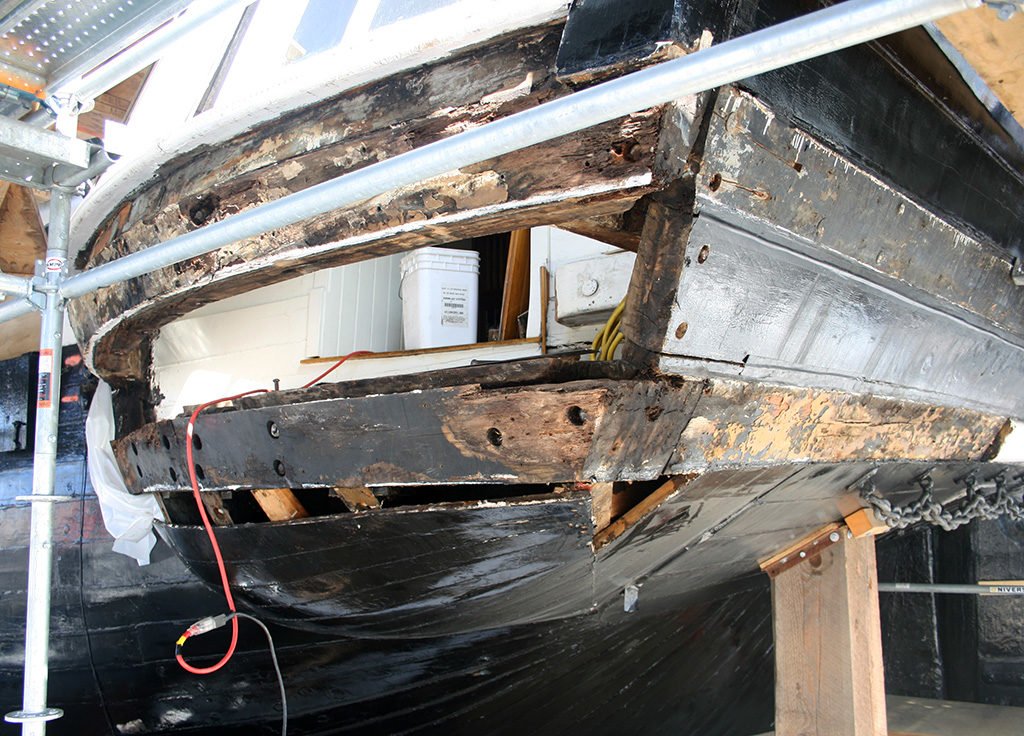
NOTE July 2018 : I just found this reference photo of the stool, see below. I do not know if this for the time period of this model. I believe the stern was rebuilt differently several times.
Bob


- CaptainSteve, uss frolick and GLakie
-
3
-
Not really. The photos in the instruction book are dark, poor quality. I could not figure out what to do with the lower stool of the quarter gallery as they just didn't fit so I curved them under until they were flush with the counter. Not real happy with them that way. I studied many pictures but could not come up with an answer I was satisfied with. Also, the 1812 stern view shows two windows below the transom on the counter. I will need to form them yet. I tired of the stern problems so I moved on. I wanted to work on other parts of the model. I'll go back to the stern later on .
-
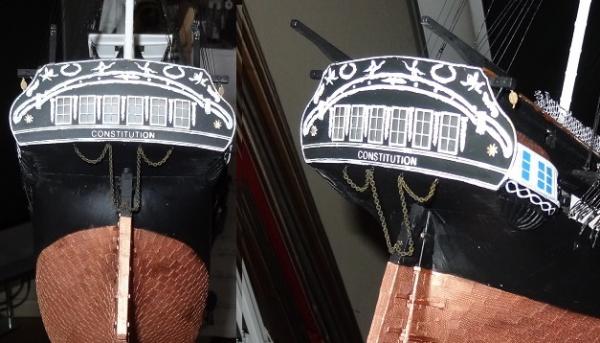
Thanks billt. I have researched the stern during this period and never came up with an answer I was happy with. So this is what I did with the stern.
I sprayed decal paper black and covered it with a clear. Then I cut strips of this and applied them to the quarter gallery. I can't paint small stripes so I use decal paper. The canons do not have holes in the barrel and to try to drill holes in the barrels is beyond my skill and equipment . For the canons I painted decal paper grey and punched out the small disks using a bit and a drill index. Does not look like I would like it to but this is the best I could do.
- mtaylor, GrandpaPhil, mort stoll and 4 others
-
7


USS Kearsarge by CPS_skybolt - FINISHED - BlueJacket Shipcrafters - Scale 1/96
in - Kit build logs for subjects built from 1851 - 1900
Posted
Installed the sub deck