BobG
-
Posts
3,109 -
Joined
-
Last visited
Content Type
Profiles
Forums
Gallery
Events
Everything posted by BobG
-
Glenn, I'm not sure I'm understanding this step completely looking at your photo. Are you essentially tapering the deadwood area that is formed from the bearding line as it curves up from the bottom edge of bulkhead 12 to the the bottom edge of bulkhead 16 so that the final thickness of the keel former is 2 mm thick at the stern all the way to the bottom of the keel?
-
Amazing detail work and your carving is incredible, Katsumoto! WOW! 😲
- 208 replies
-
- 1
-

-
- kitbashing
- Woodcarving
- (and 4 more)
-
There's wisdom in this statement for those of us who aren't professional ship modelers. Don't ask me how I know this!
-
Very nice work, Tom. It's coming along nicely!
- 163 replies
-
- 1
-

-
- Model Shipways
- Constitution
- (and 2 more)
-
I just found your build log, Tim, and your work on this beautiful model is impressive. She's going to be a showpiece!
- 164 replies
-
- 2
-
-
-
- fly
- Victory Models
- (and 4 more)
-
We all like parts that fit well and Chris has certainly done that well with the precise laser cutting in his kits. I'm wondering, however, if the tolerances on the deck could be just slightly more relaxed and still fit very nicely given that it will be covered up when the final scribed deck is laid on top of it anyway? I'm not talking about a big change in the size of the notches in the deck but just ever so slightly larger so this task might be less challenging while still keeping the integrity of the framing intact.
-
Really amazing work at that scale, Bug. I'm beginning to think that everyone who ever builds the Pegasus from this point on will be swimming in your wake! You're setting the bar very high!
- 419 replies
-
- 5
-
-
- Victory Models
- Pegasus
- (and 2 more)
-
I read all the way to the rigging last night. No more surprises for me...I hope! 😅
-
Thanks Bug and Glenn for your comments and others for the likes. Glenn, I had read in the manual about slotting the deck into the bulkheads notches by bending it and I tried doing it that way but I couldn't get it entirely into the notches on the side I started placing it on. Then I thought I should try and get the other side started before the glue got too sticky and, when I tried to get it in, I ended up with neither side fully into the notches and the glue was sticky enough now to make it even tougher. My error, as you noted, was not getting the first side all the way into the notches in the first place. I'm not sure how I finally got the deck all the way in while fighting the sticky glue but it finally happened much to my relief! I'm sure I made it a lot harder than it actually is though...
-
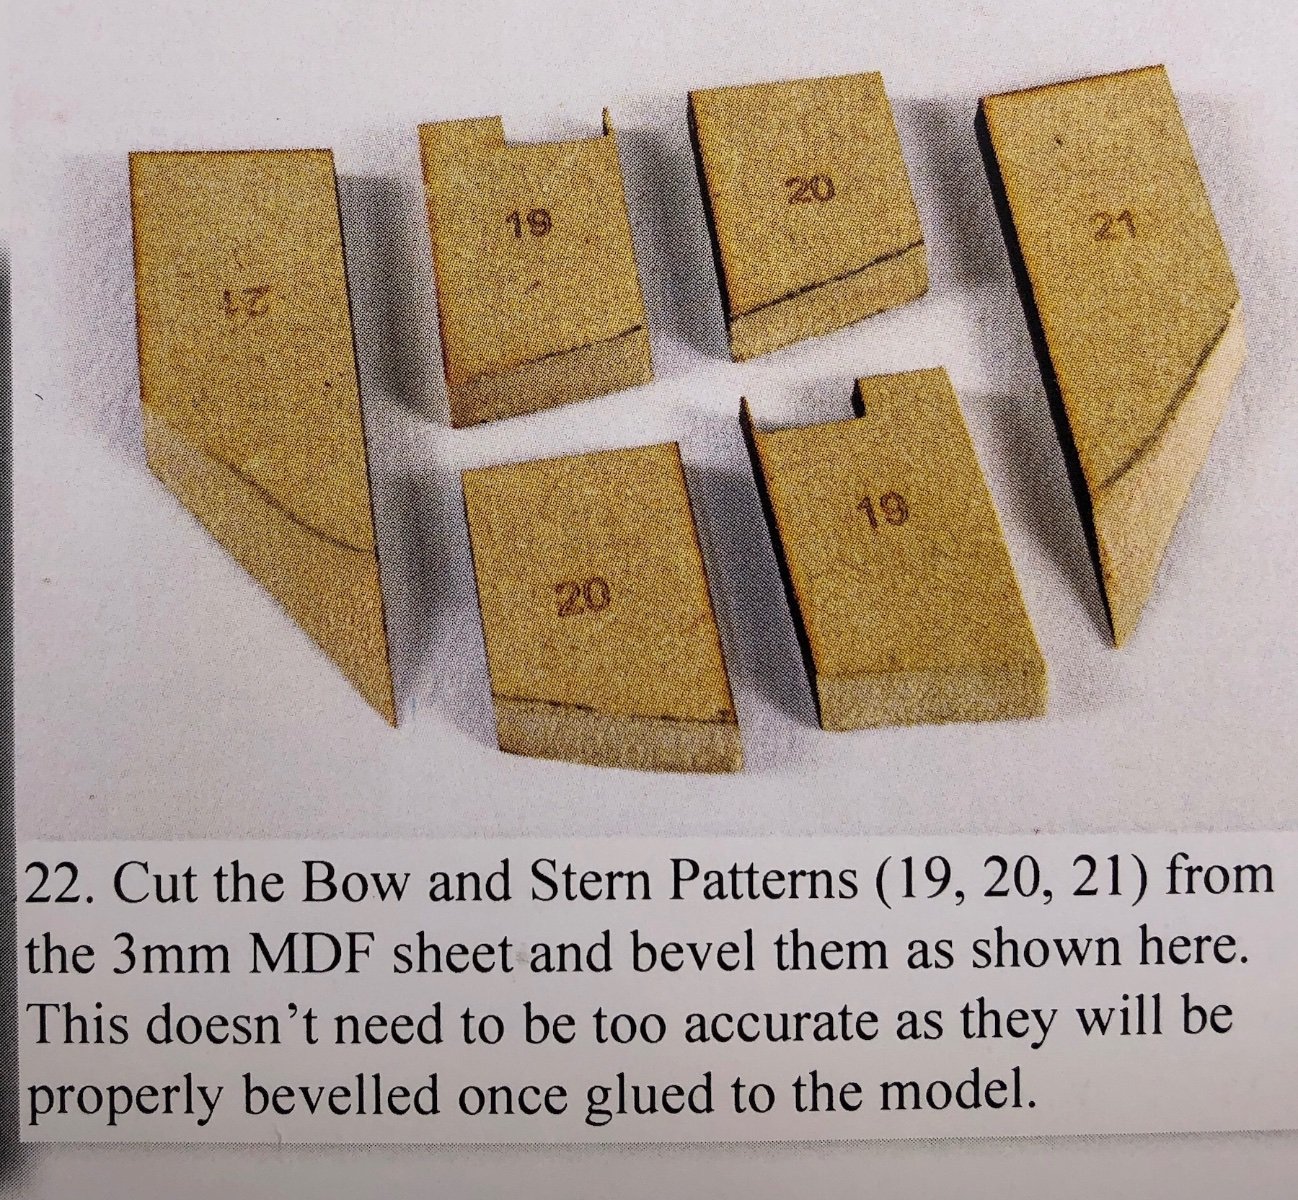
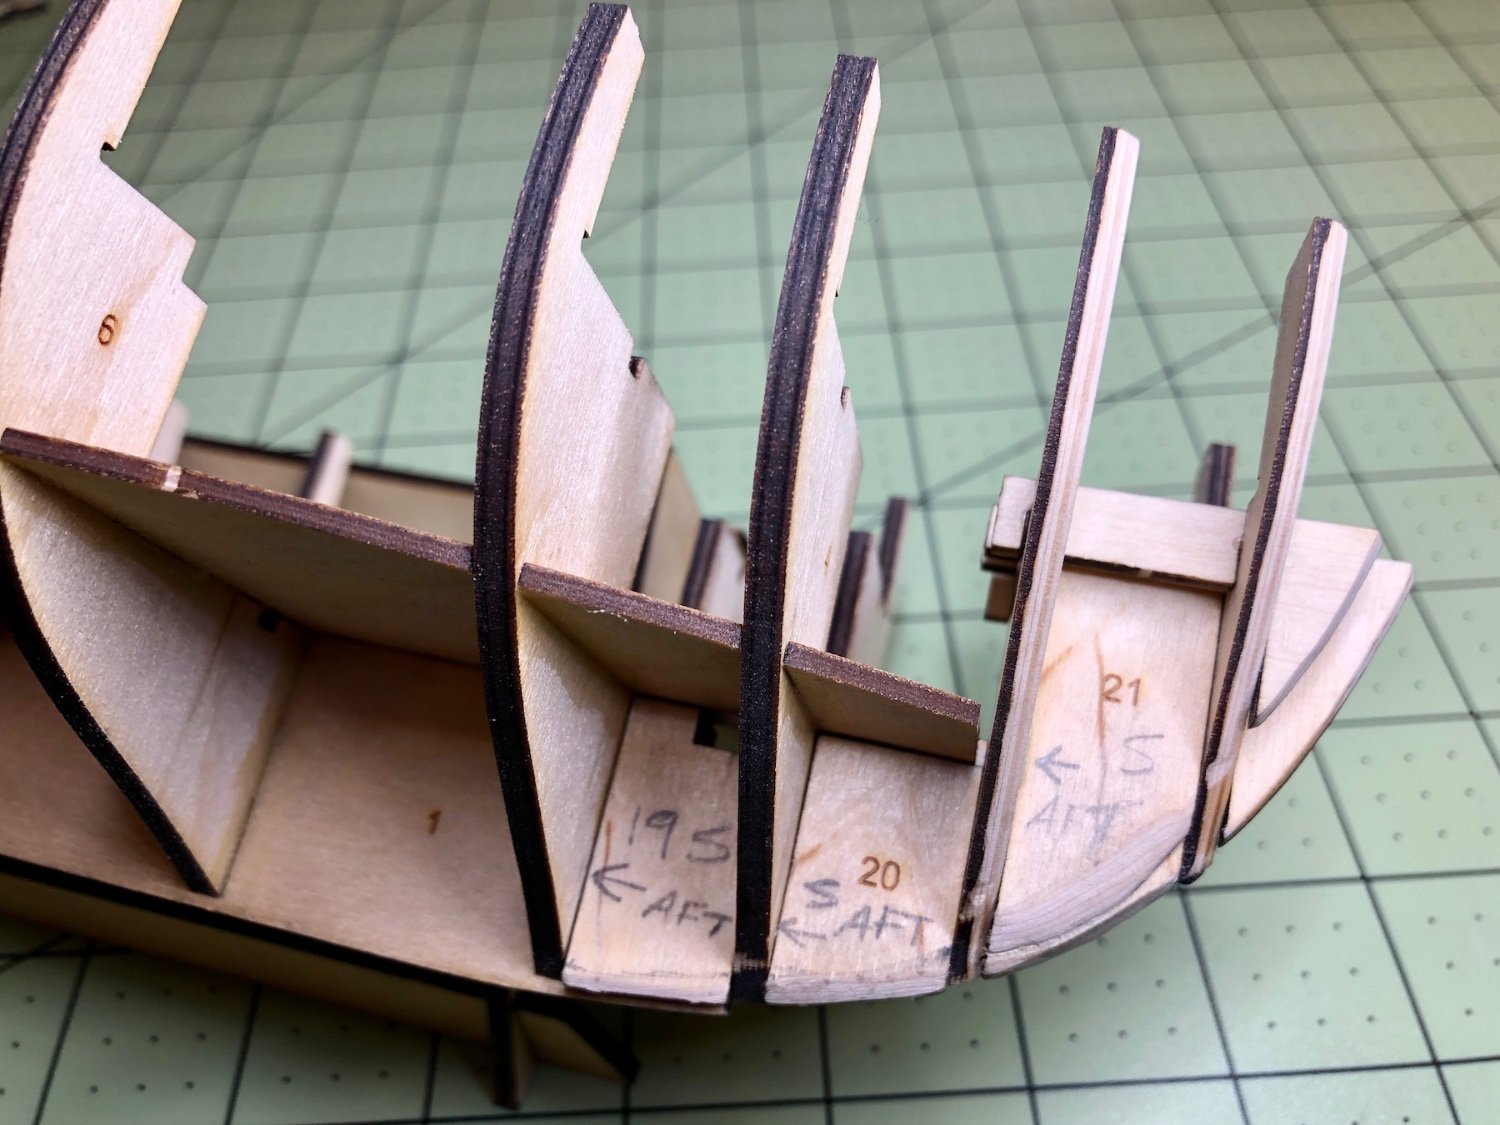
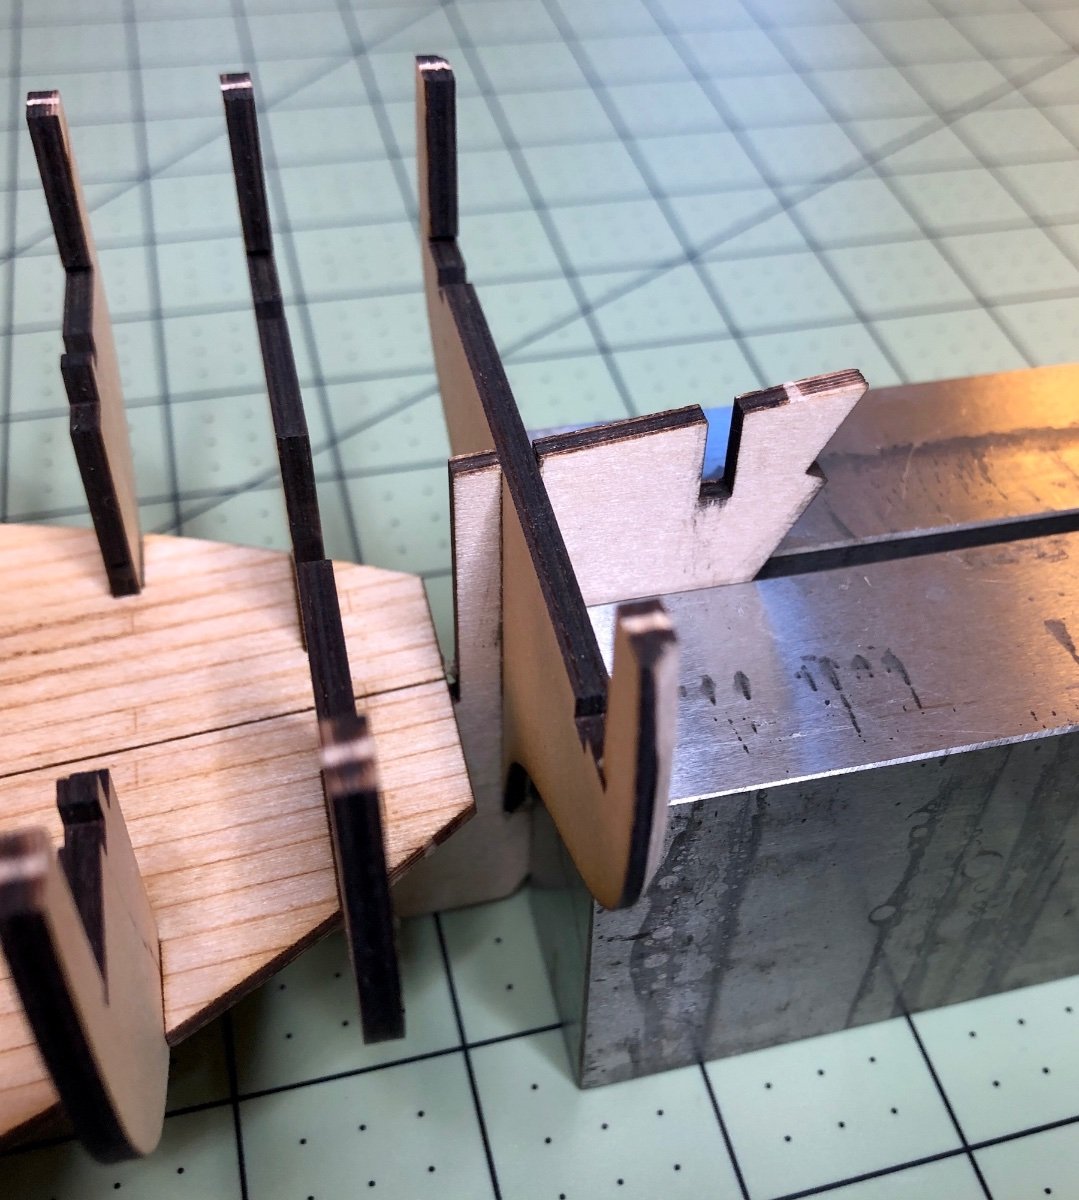
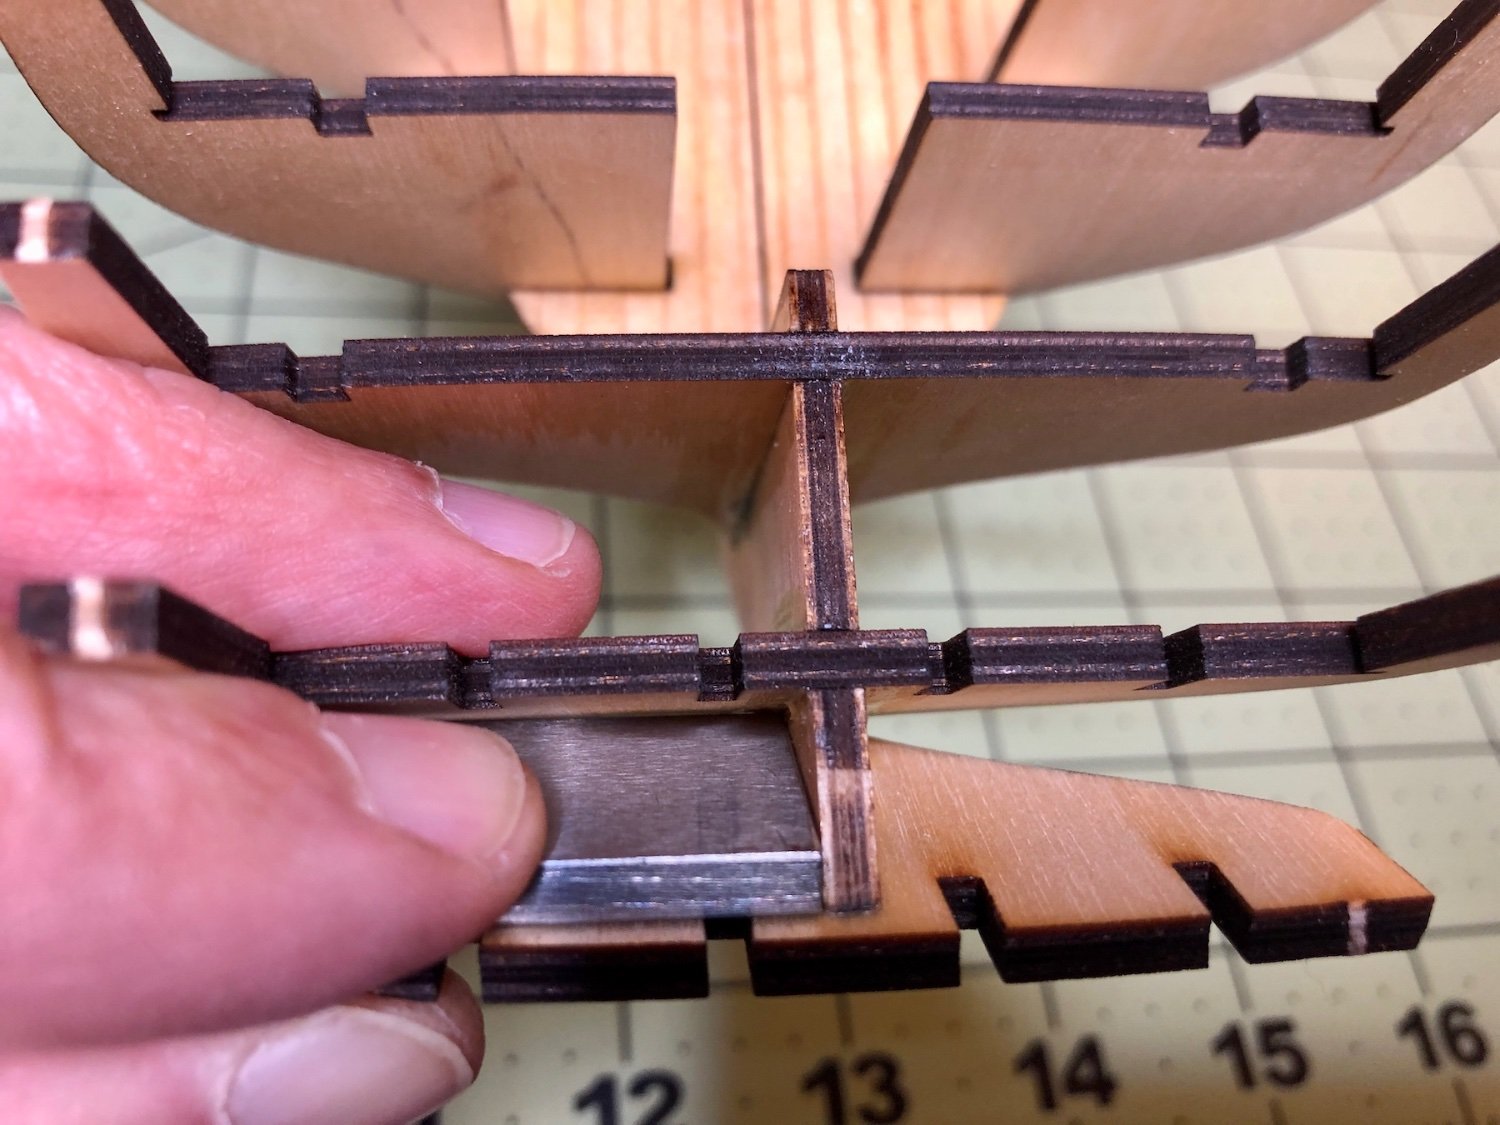
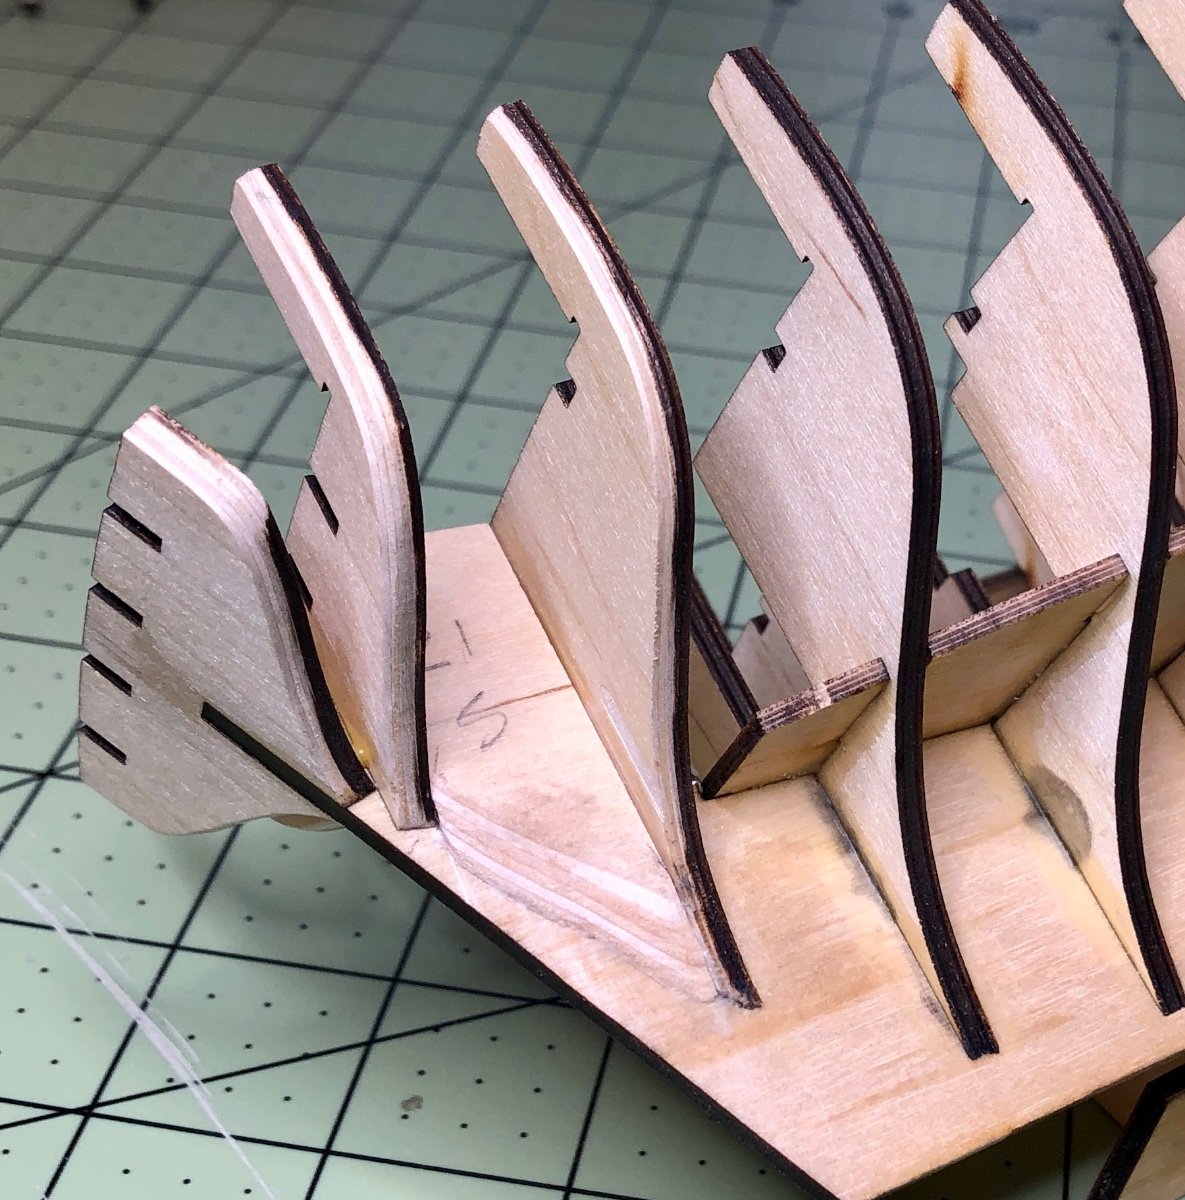
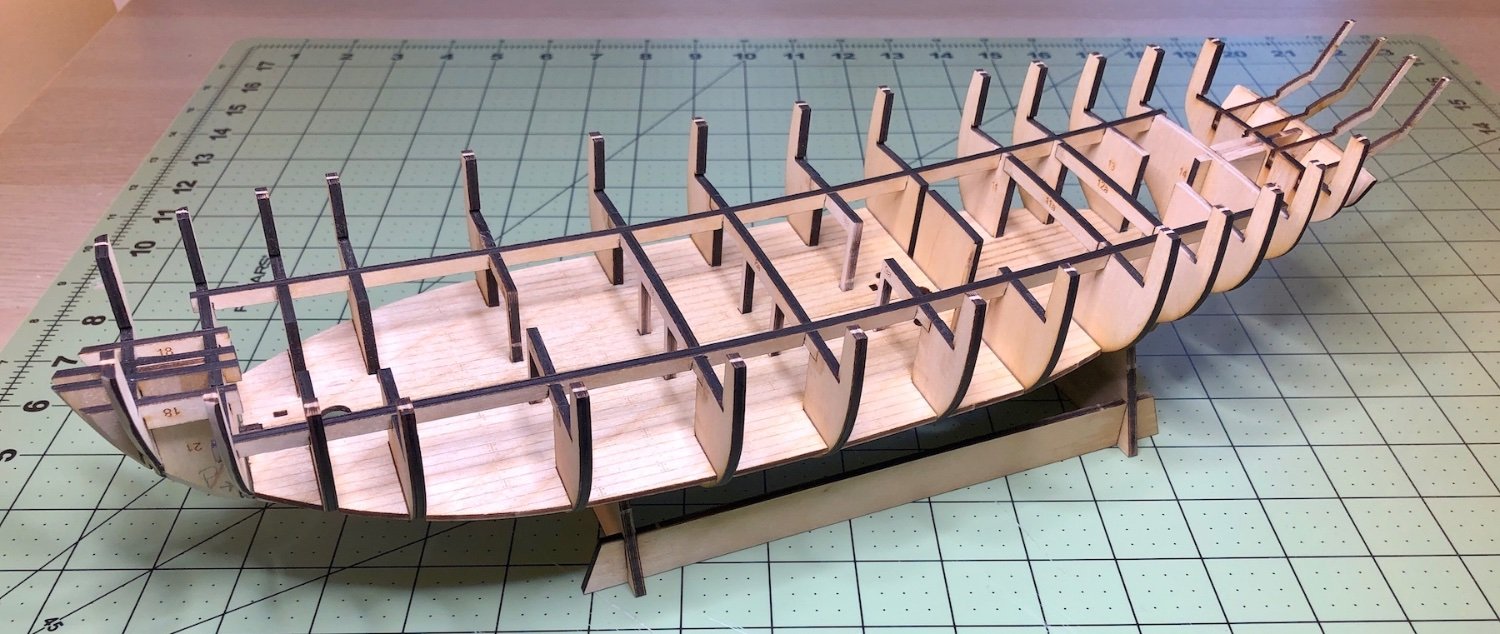
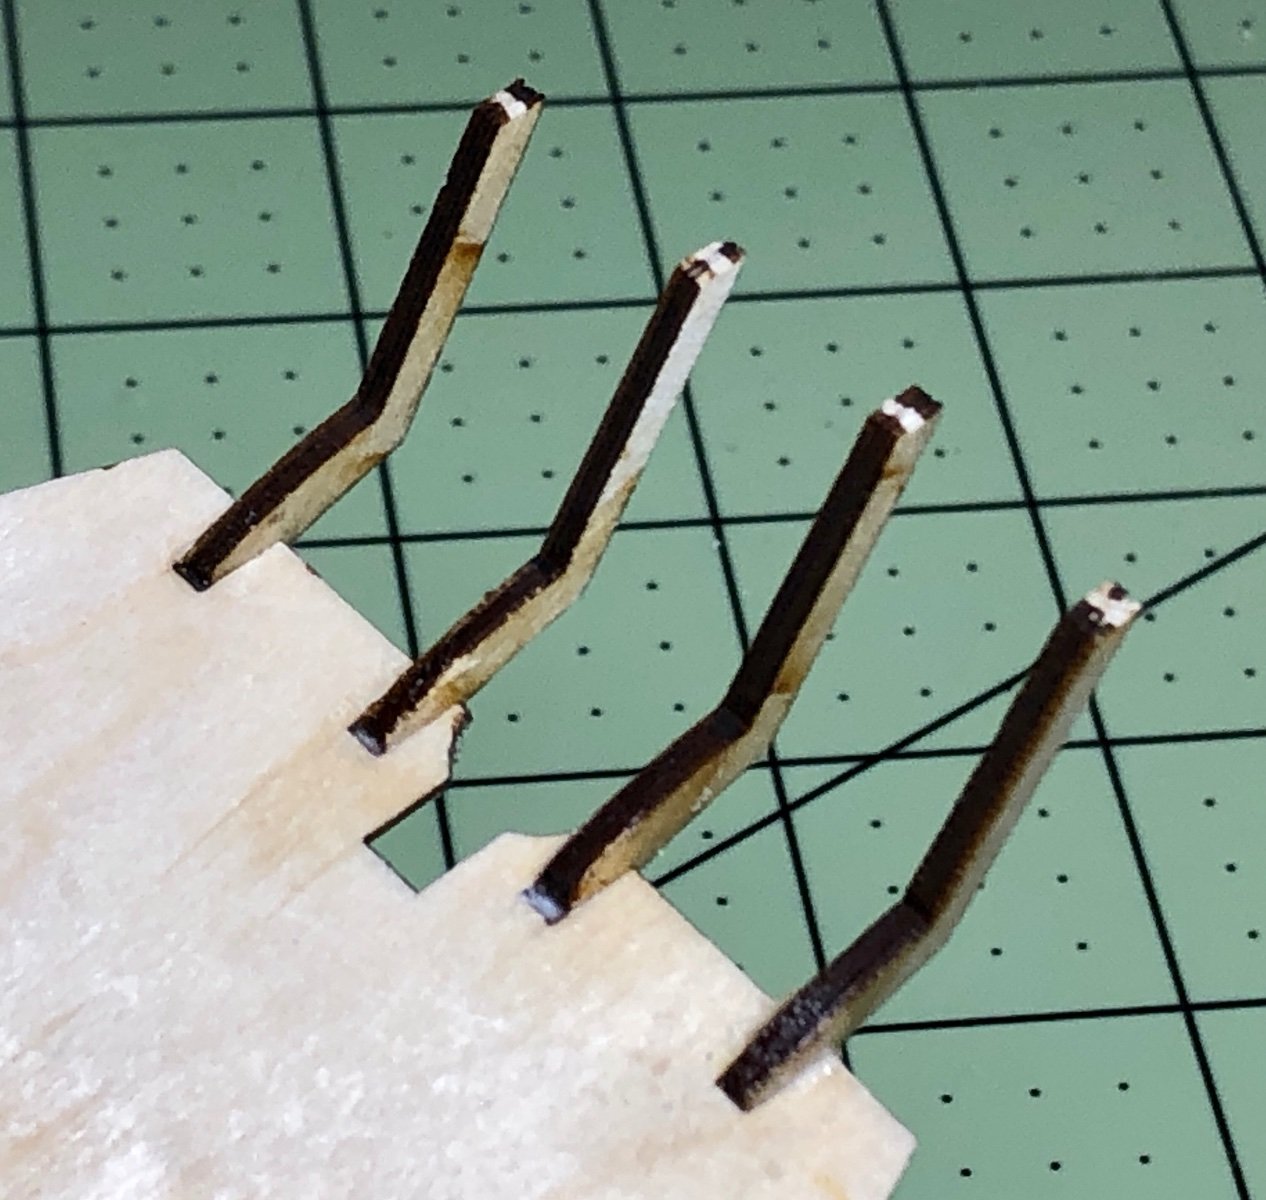
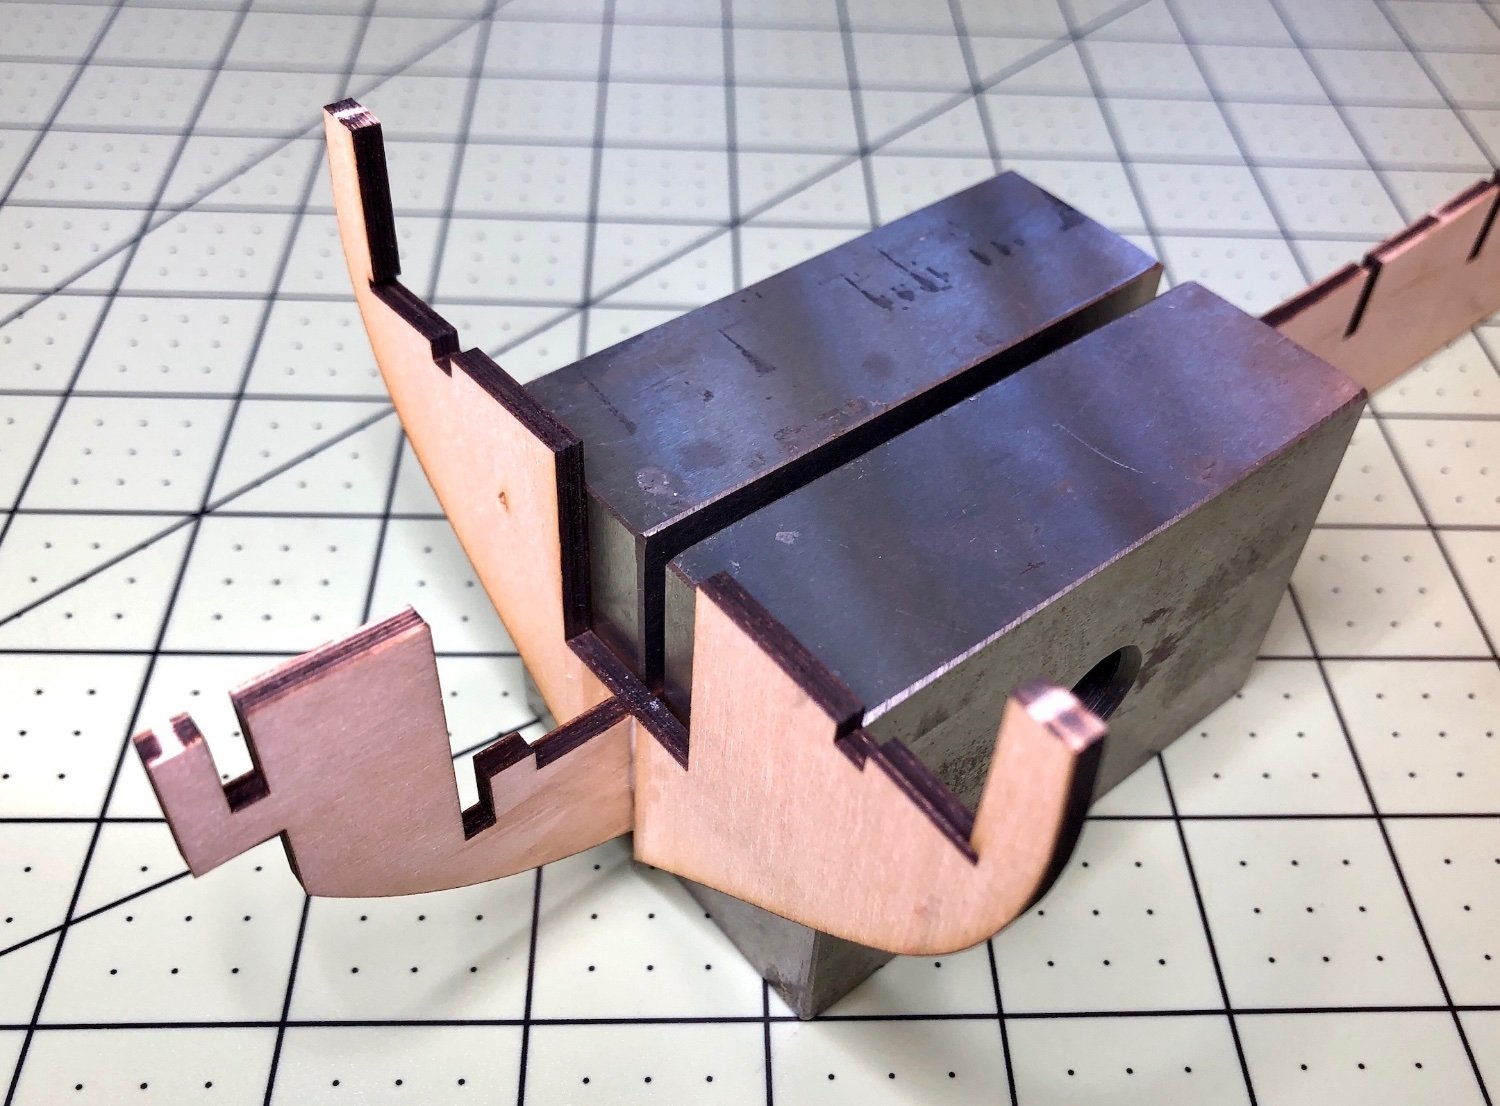
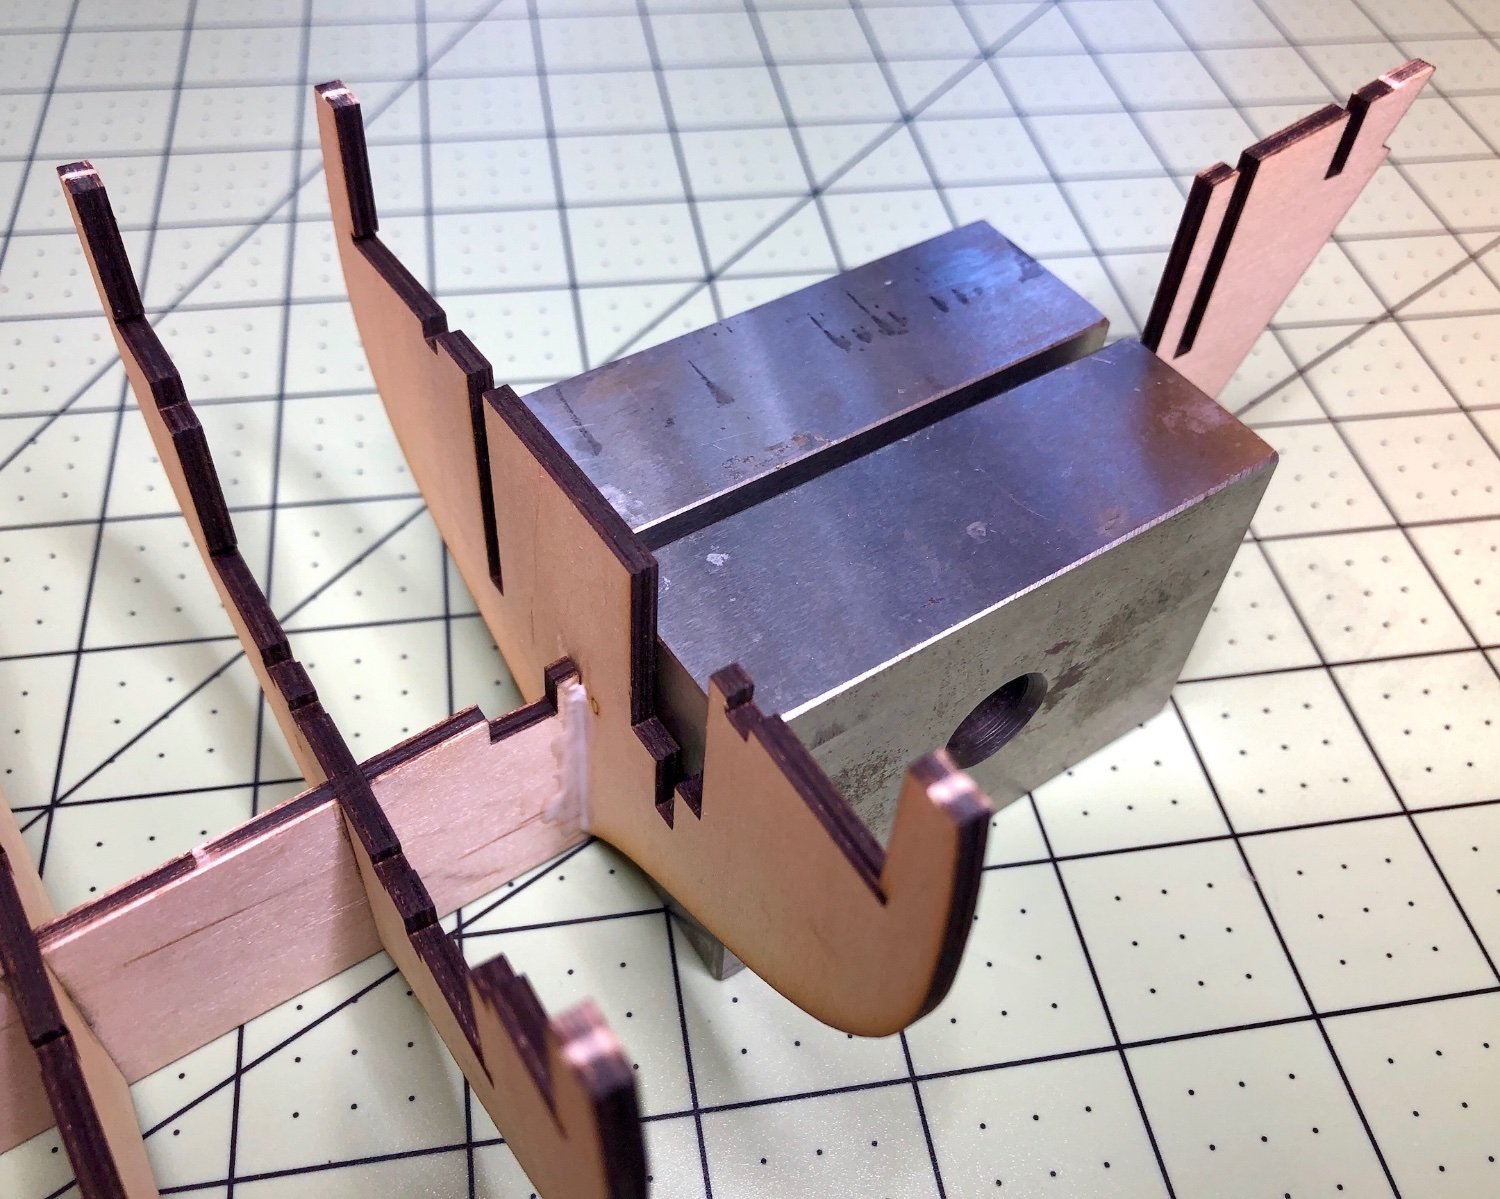
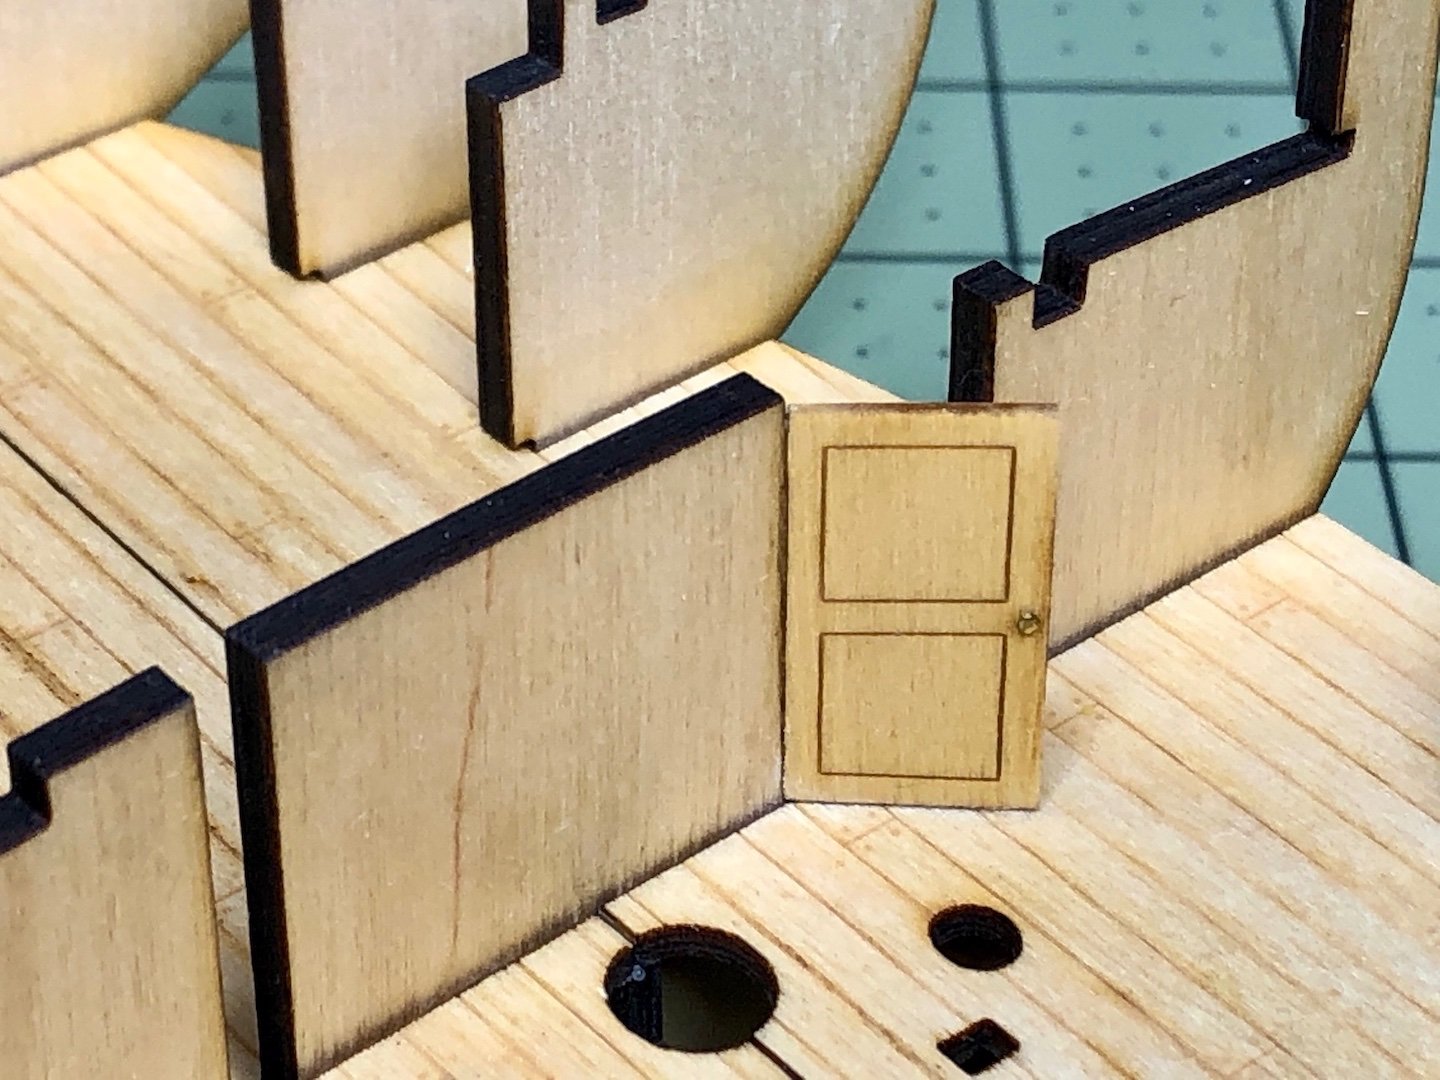
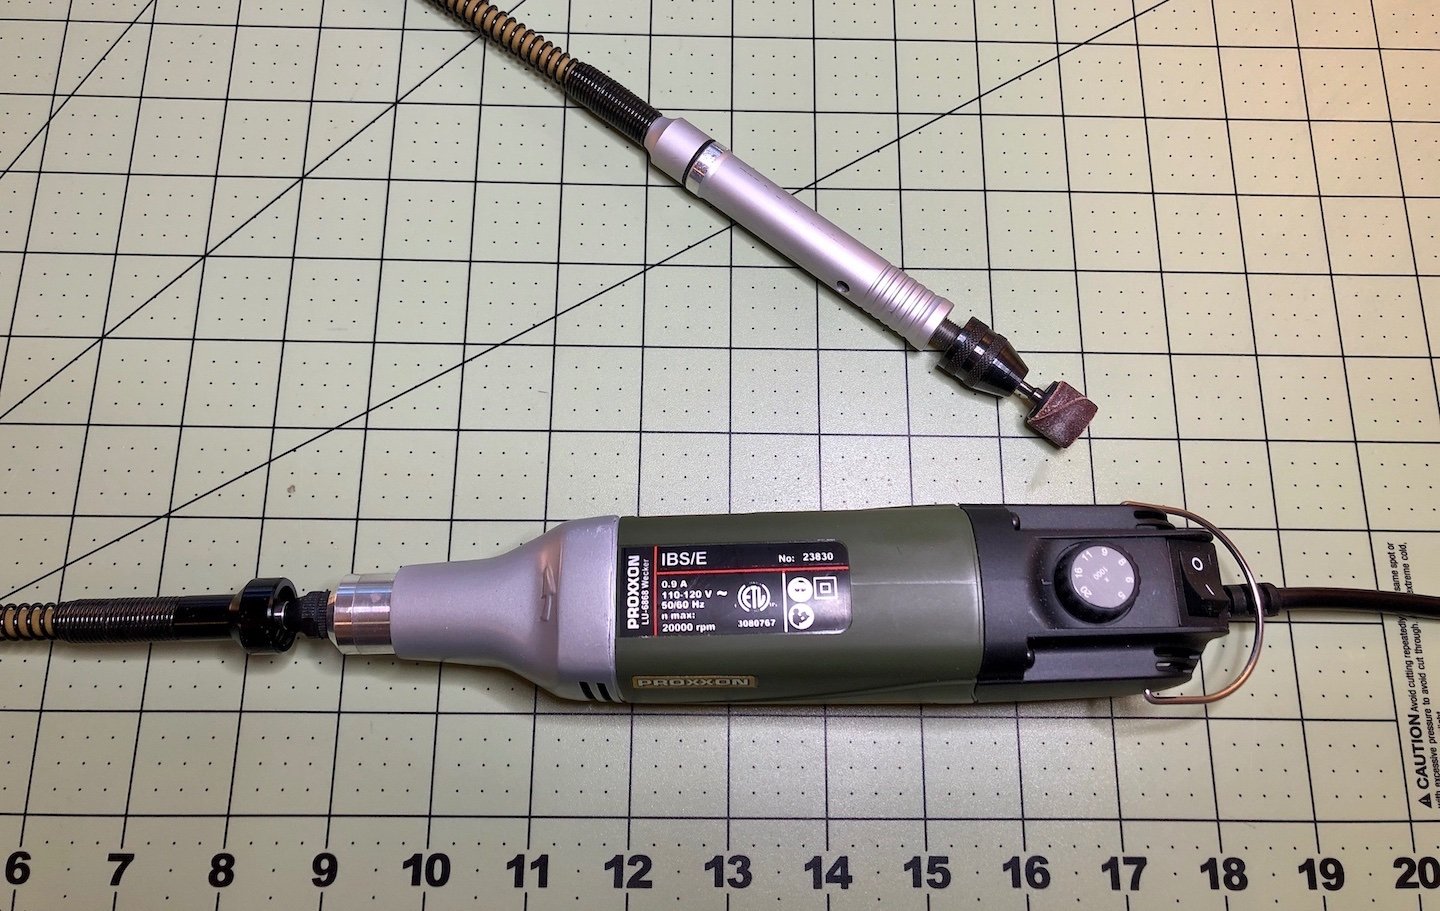
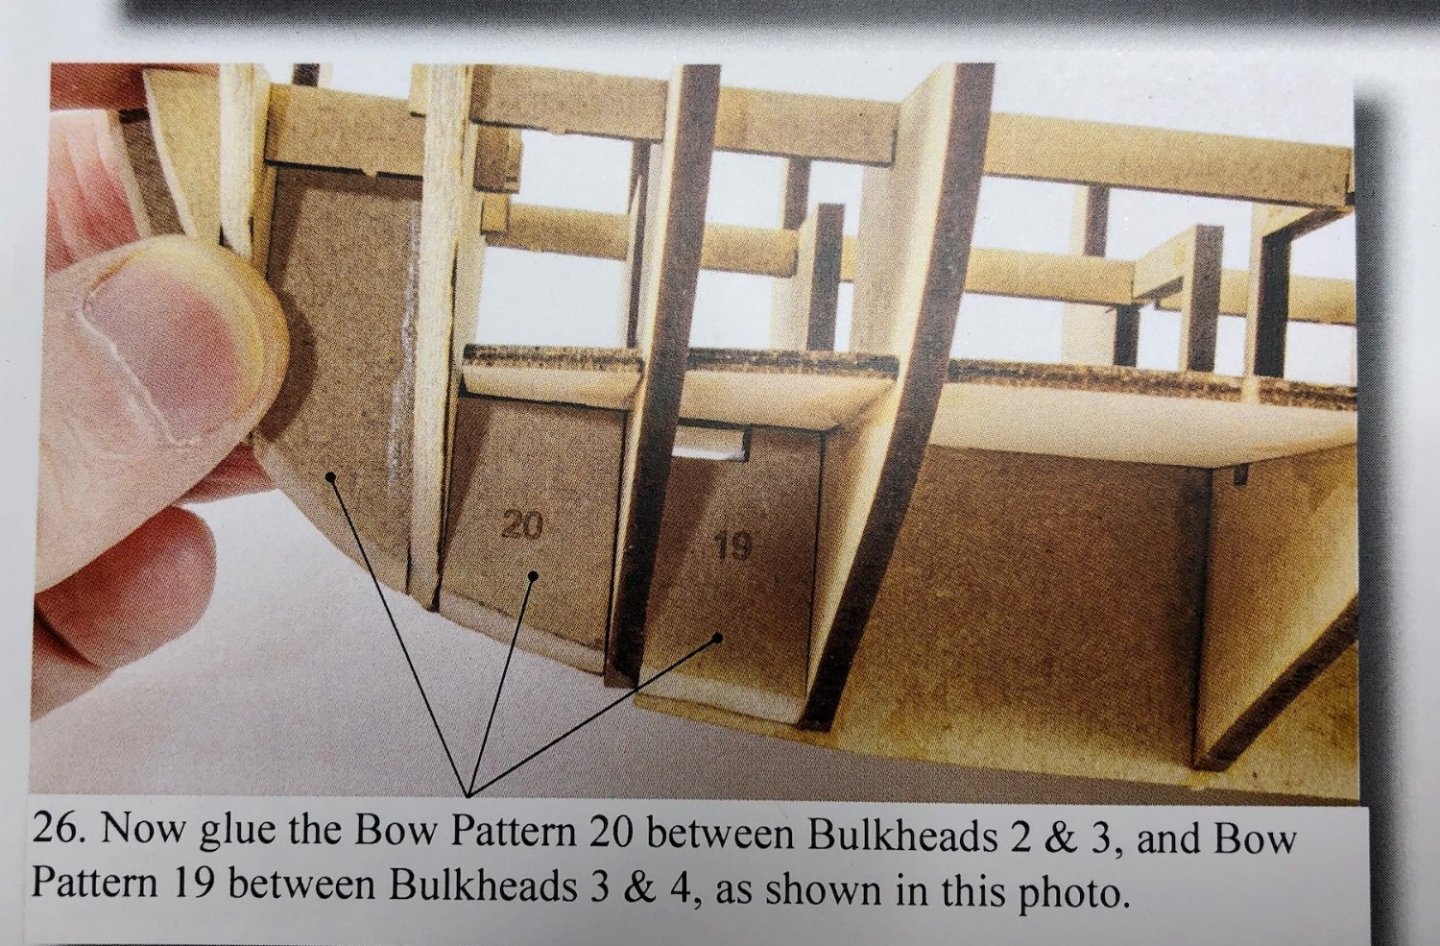
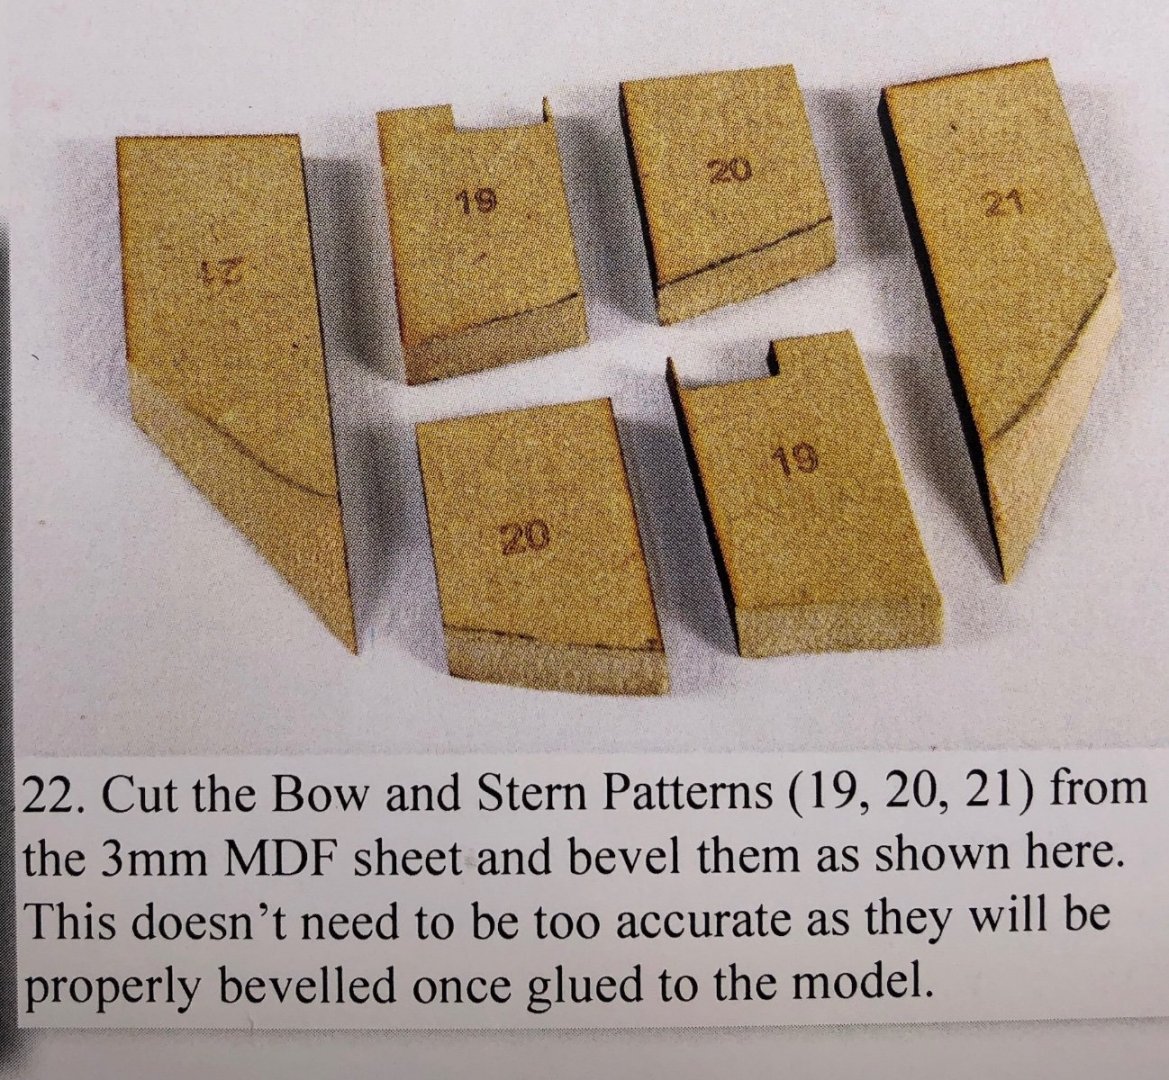
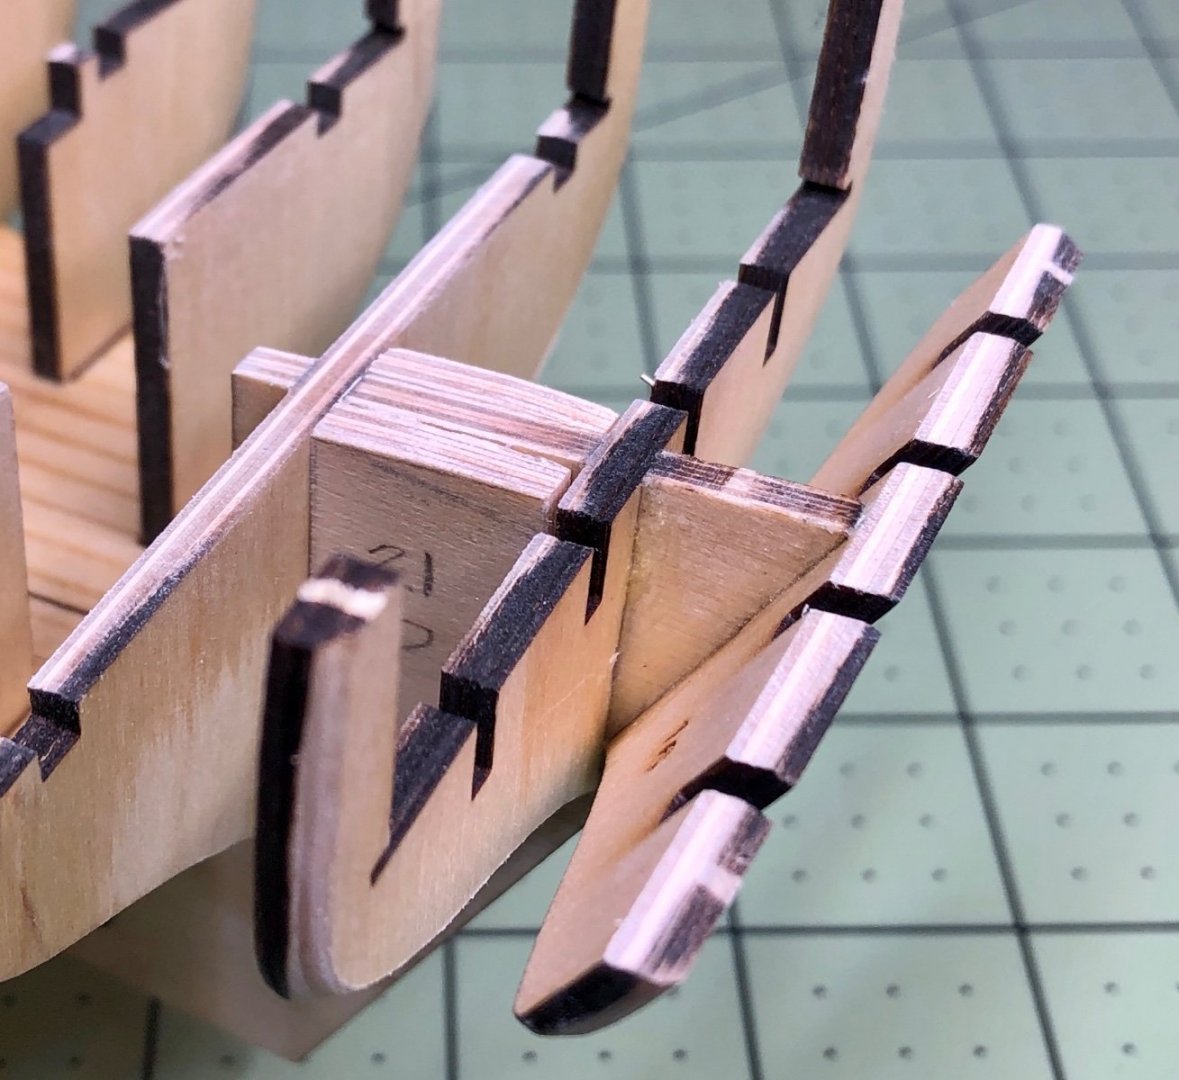
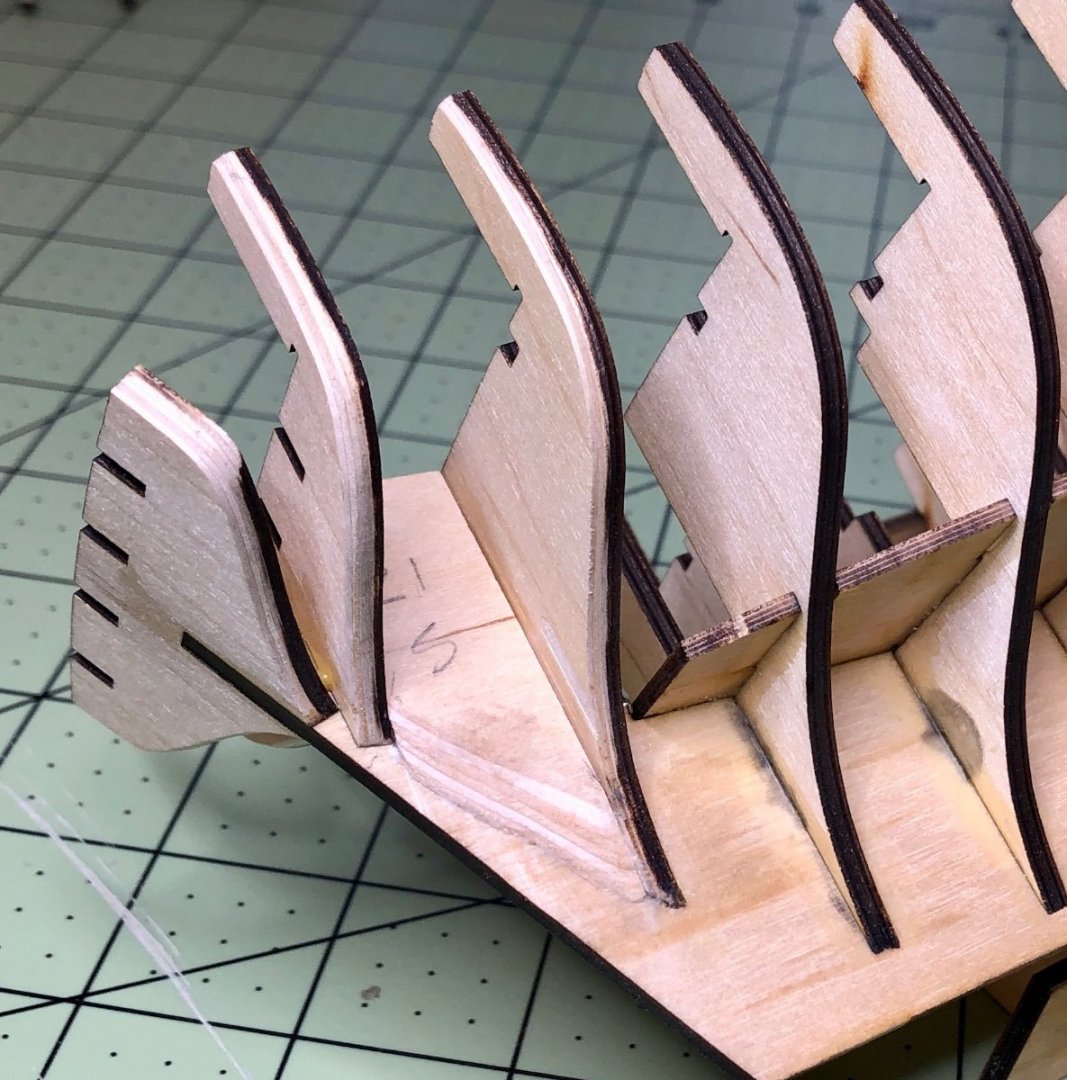
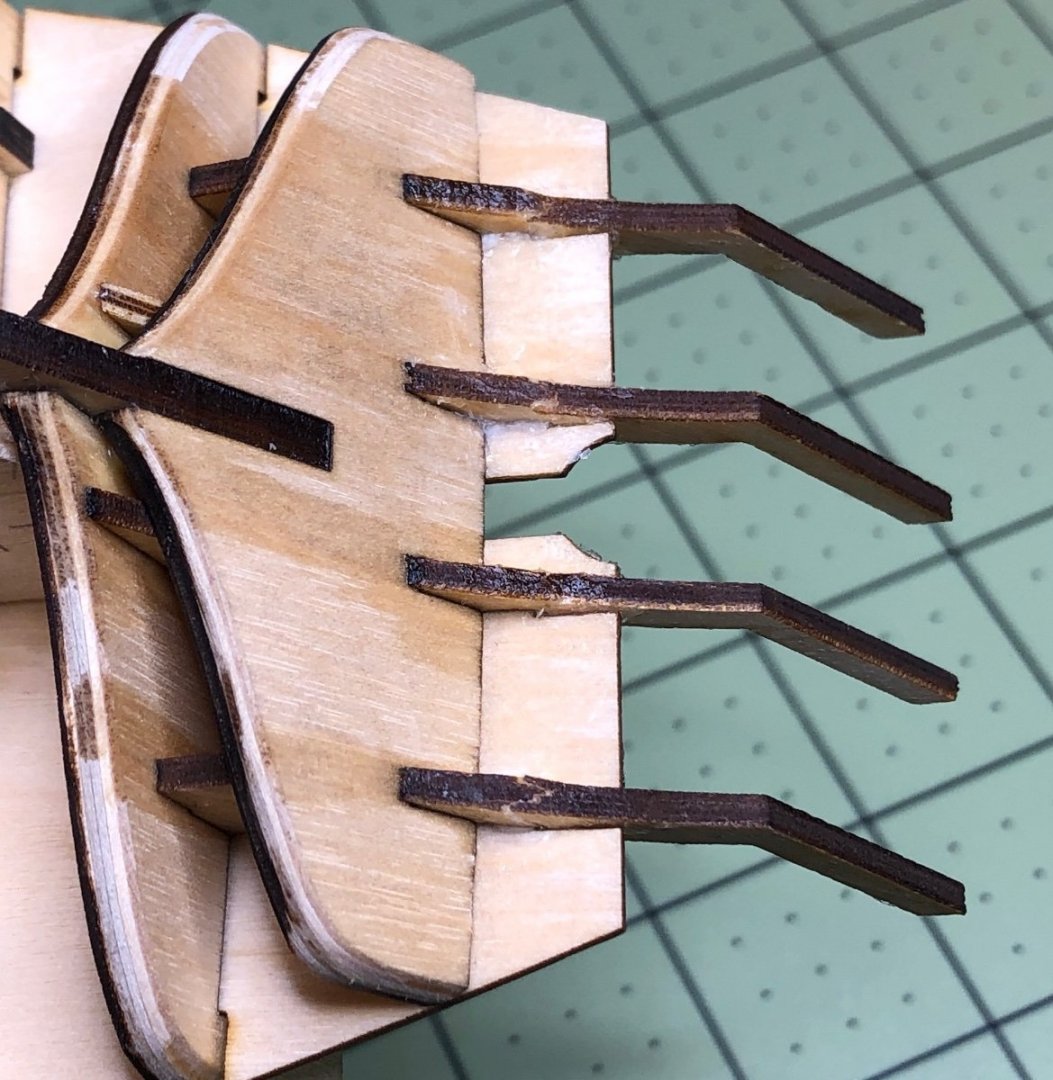
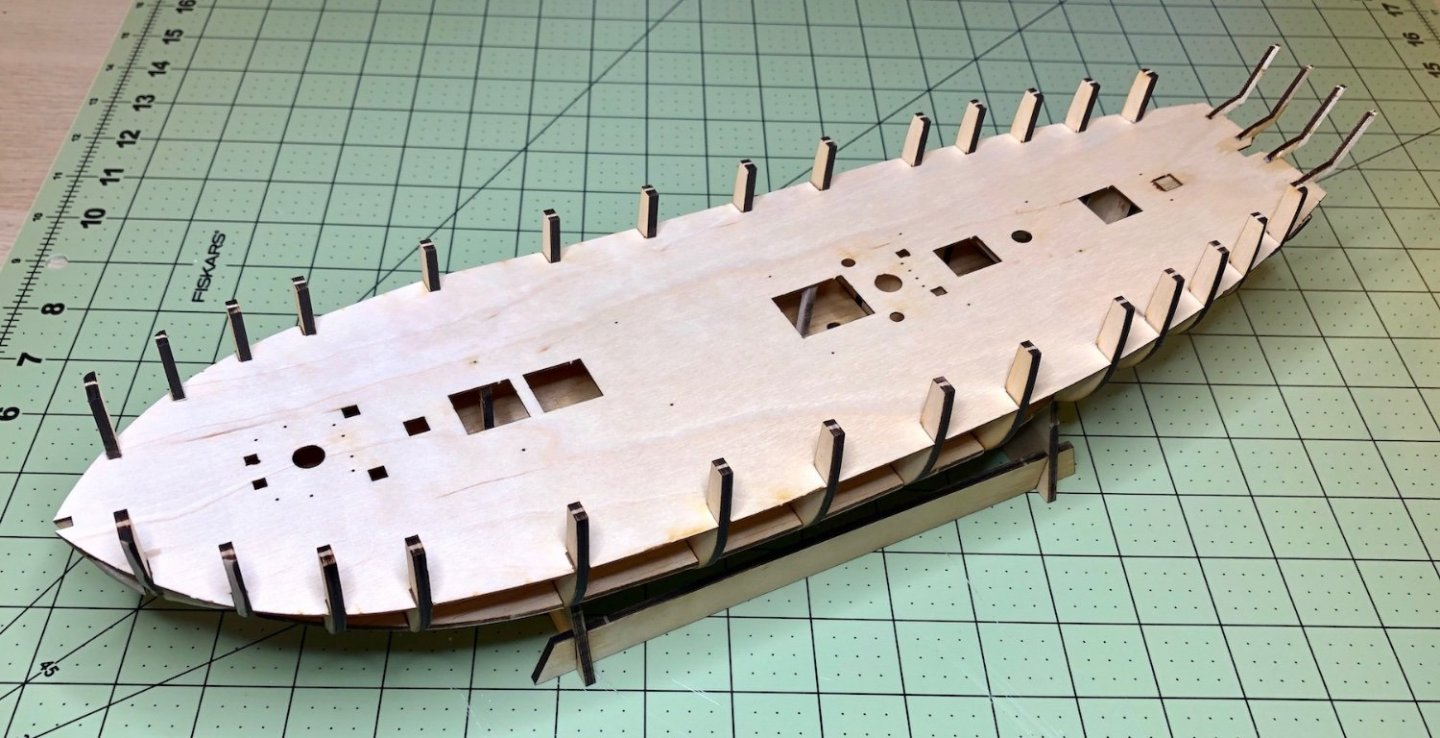
Well, it's been an interesting 2 days. I've made some progress but it hasn't been without some hiccups and one major disaster. Read on to see how things went a little haywire and how I think I managed to bail myself out and, yes, it's ok to roll your eyes! After today, I may need to rename my build log "A Comedy of Errors and Repairs." 🤣 First off, I added the little door to the sub deck and used a cut off pin for the door knob. Then I gave the deck and door a single coat of satin WOP. Next up was to add bulkheads 2 and 3 and the 4 bow pattern pieces. The manual suggest beveling these pieces before installing them. I've always just shaped the bulkheads when I fair the hull so I was hesitant to do this but I decided to try it. I used my new Proxxon rotary tool with the Proxxon Flex-Shaft attached to it. I really like this tool. It has a nice variable speed dial and the Flex-Shaft is so much more comfortable to hold rather than the bulky rotary tool itself. Now here's where I began to get ahead of myself by not thoroughly reading ahead in the instructions. I was relying too much on the great photos in the manual. The first photo below is from the manual and it shows the beveled Bow and Stern Patterns 19, 20, and 21. The second photo is also from the manual and it shows that pattern 19 is placed between bulkhead 2 and 3 and pattern 20 goes between bulkhead 3 and 4. However, there are 3 arrows in the photo and one of them is pointing to the space forward of bulkhead 2 and 3. I simply assumed that the arrow meant that pattern piece 21 would go there (i.e. 19, 20 and then 21 where the arrow was pointing). Wrong! Pattern 21 goes between bulkheads 14 and 15 near the stern which is actually shown in the next photo in the manual but I didn't read ahead. The arrow that points to the space ahead of bulkhead 2 should not be in the photo but I could have avoided the error by reading more carefully. After I realized what I had done, a little bell went off in my head where I thought I had read about this same error somewhere before. So I checked out the other Flirt build logs and, sure enough, Glenn (gbarlow) did exactly the same thing when he was building his Flirt. I had read about it some time ago but had forgotten about it. Hilarious! Glenn and I must think alike! 😂 Here's a photo of pattern 21 wrongly glued ahead of bulkhead 2. It won't cause a problem being there. Bulkheads 14 and 15 were very loose so I used my machinist blocks to square them up to the false keel. The very last bulkhead #16 was very loose so I took my time eyeballing it and using a narrow, 90 degree angle square to line it up perpendicular to the false keel. This was a bit tricky but I think I got it squared up pretty well. The tops of bulkheads 14, 15 and 16 also need to be sanded quite a bit so they are level with the top of the false keel. I think I may have needed to sand it even a bit more but it looked and felt level so I stopped. I'm always afraid of sanding too much. Having glued pattern 21 in the wrong place simply meant that I needed to make a new set from the same parts sheet. I cut the new patterns with my razor saw and glued them in the right place between the stern bulkheads 14 and 15. I went out of sequence from the manual a little and waited until I had all the bulkheads and patterns installed before I added the deck beams, the upper deck longitudinal support and the stern frame patterns which are very fragile. I took my time with these parts as nearly all of them required some sanding to get them to fit properly and I still managed to snap one of the stern patterns when my elbow hit it while I was adjusting one of the deck beams. The tolerances between the these pieces and the slots are very tight. I was able to carefully glue the stern pattern back together also. Adding the main deck is when things really began to get crazy! The 2 mm birch plywood main deck is an extremely tight fit. I tried to test fit it but I was afraid I would never be able to get it off in order to glue it down. I tried to check the spacing of the bulkheads and the slots in the in it also as best I could and then proceeded to put glue on all the supports. Even though I used regular PVA for this, I knew I needed to work fairly quickly since there's a lot of notches in the bulkheads to get lined up right and to get the deck to sit down properly. Try as I might by flexing the deck until I thought it was going to break, I couldn't get it to seat properly and I had a bulge in the middle. So I kept wresting with it by pushing down between the bulkheads. I even tried to get it off but it wasn't cooperating so I just keep at it. Little by little and with a bunch of frightening snaps and pops, it began to seat better but it was still not seated down flush to all of the deck beams and was not all the way into the notches in the bulkheads. Then disaster struck. I was holding the model in my lap and still working on getting it to seat when it slipped. The stern bumped into my forearm and all of the fragile stern frame patterns broke off! After a few choice words, I realized that if I didn't get the deck to seat properly, the model would pretty much be ruined so I focused my attention on manipulating the deck and finally I got it to seat. All I can say is that the deck is an astonishingly tight fit and that it was really difficult to finally get it to seat properly. I'm not sure how I could have done it any different given how tight it was. I wonder if anyone else has had this problem? Now I needed to see if I could repair the stern frame patterns. Fortunately, I was able to correctly match the broken off pieces with their mates when I looked at them closely under magnification. So, little by little with PVA, thin CA and a lot of patience, I was able to get them glued back together and properly aligned...I think! Fingers crossed!🤞 So there you have it folks. Another adventurous day of errors and repairs in Bob's shipyard. You'll certainly be able to learn a lot about "what not to do" here! So stay tuned, there's probably more bloopers to come! 😂 Thanks for stopping by. Cheers!


-
Congratulations on your photo, Eric! I swear, I'm just about to give up on 35mm photography and just shoot with my iPhone. It's just so convenient, compact and darn good! Now, tell us about your photo...what is it?
-
Beautiful, Paul! So you quenched the brass in the blackener while it was still hot?
-
Really nice work, Darren!
-
Great work on the mackerel seine, juju! It's very realistic!
-
First of all, wonderful work, Michael, on this immensely ornate and historic model. I would guess that the changes that Sergal has made to the current kit were done to save on production costs. However, I think that most modelers who pay over $1000 USD for a kit, expect to get a superior quality kit and wouldn't mind spending a couple hundred more to get outstanding quality in the materials of the kits. These higher end, expensive kits have a limited market and I believe that the people who buy them want the best and are willing to pay for it.
-
Fantastic detail work, Bug, and those sheaves...😲!
- 419 replies
-
- 2
-
-
- Victory Models
- Pegasus
- (and 2 more)
-
I just saw your Cutty Sark in the gallery also. Wow, what a masterpiece! Both the model and the display case are magnificent! Great job, Harry. You should add a link for it under your signature so others can find it too. What a treasure!
-
It's in the the Build Logs for Kits from 1751-1800 or just click on the HMS Flirt under my signature - current builds. It could well be a comedy of errors!
-
OMG, I just did the very same thing! So I'll be a scratch making a part "21b" tomorrow too. This is too funny! 🤣
-
Many thanks to everyone for the comments and likes. Much appreciated! Good Lord, ain't that the truth! 😱
-
It sounds like this was very challenging work, Bob, but from the looks of it, you've done a beautiful job!
-
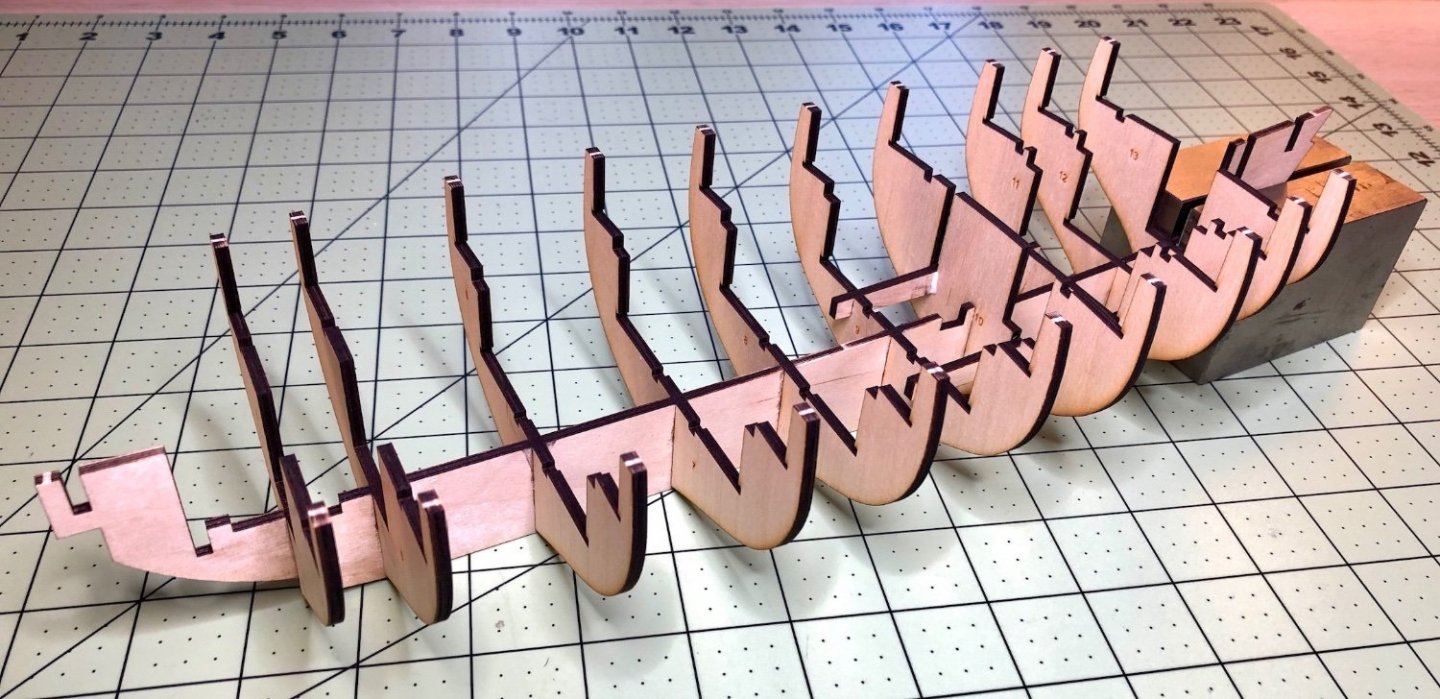
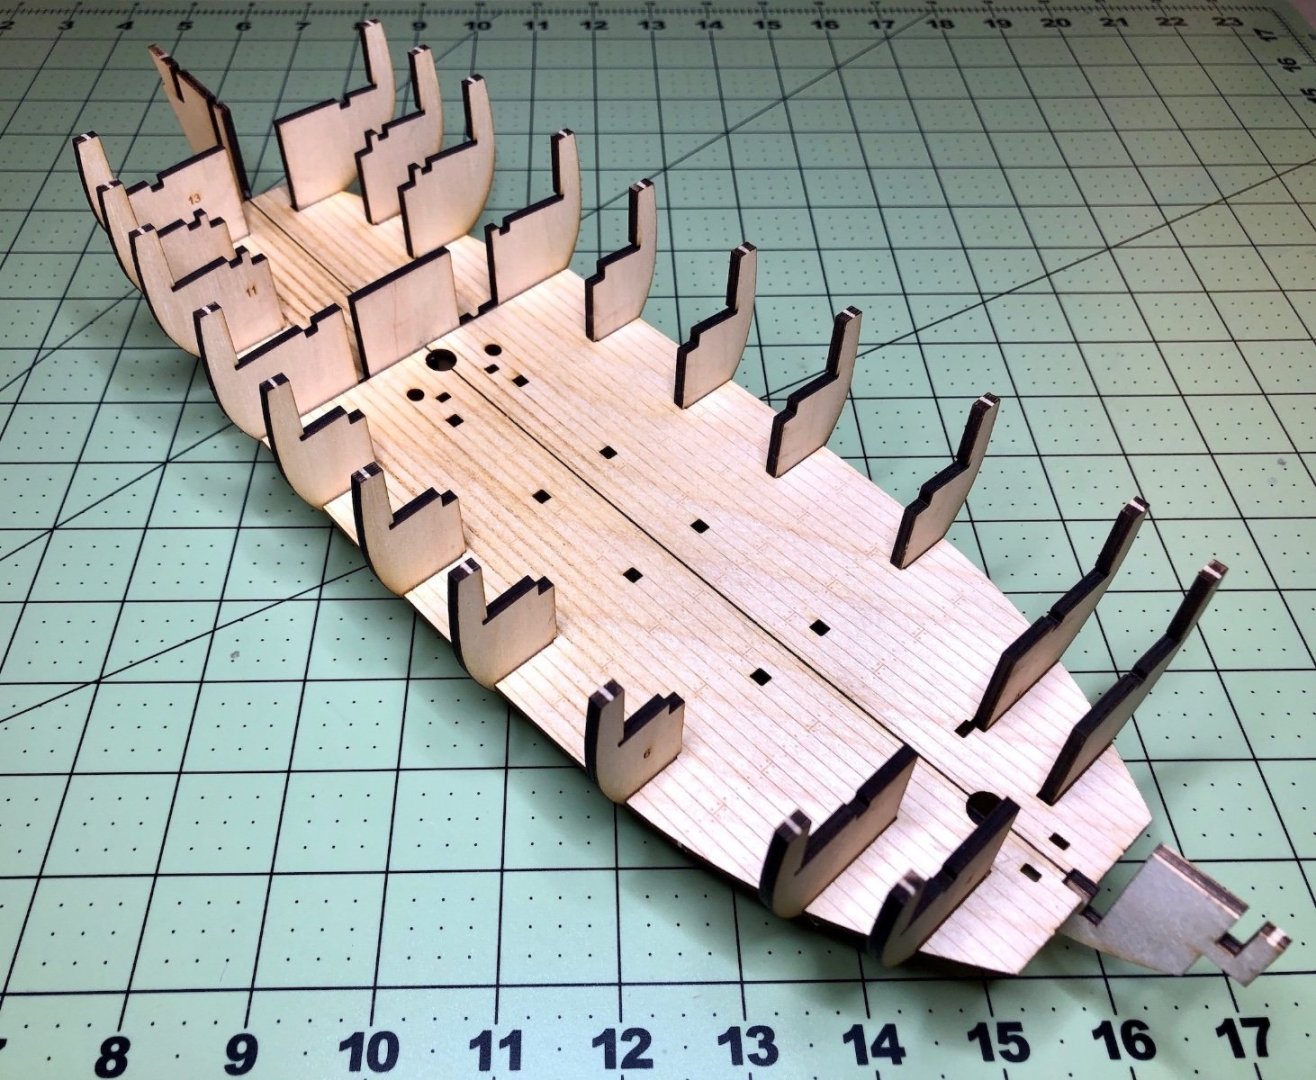
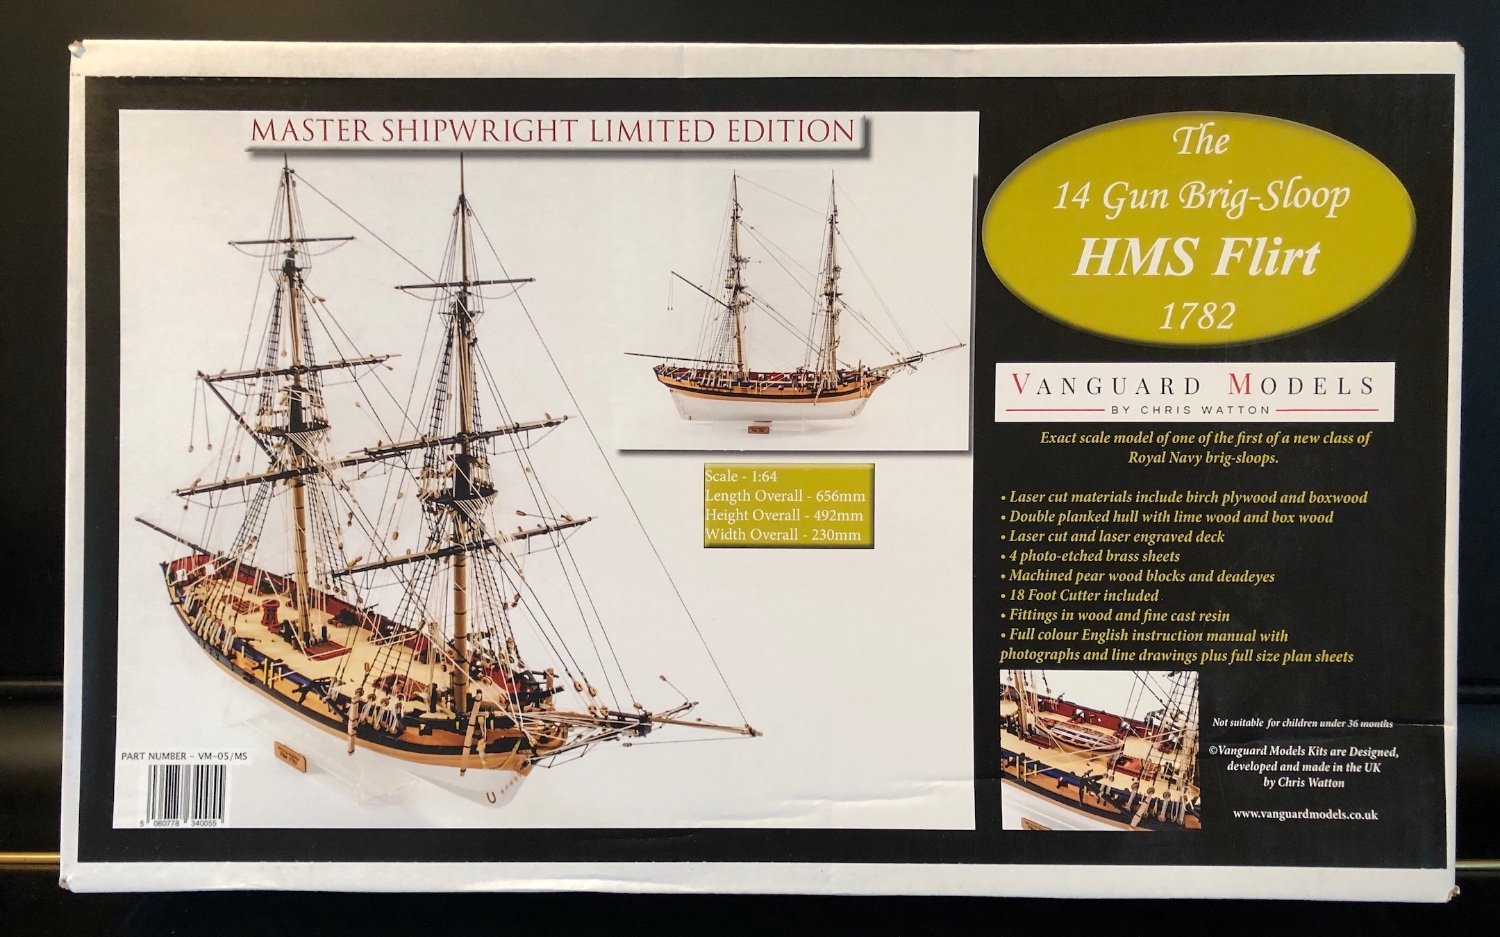
Hello and welcome to my build log of the HMS Flirt by Vanguard Models. I've decided to start building the Flirt in addition to my current build of the Pen Duick after a significant hiatus from doing any ship modeling as I grappled with the vague and confusing, instructions by Artesania Latina. At this point, I just need to build something that has excellent instructions, great materials and is historically authentic and the Flirt fits that bill for me. My goal to improve my overall modeling skills while taking my time to slow down and carefully execute each step without rushing the process. I want to thoroughly understand what I'm doing before I do it especially when it comes to fairing and planking the hull. I will be using Chuck's method of planking for lining the hull, shaping and bending the planks. Those who use this method well end up with beautifully planked hulls and it's time for me to learn it too. Finally, I plan to simply have fun and enjoy the journey without getting overly perfectionistic. I can get obsessive about the smallest details at times and I have found that there's a point at which I need to say "enough" at continue forward. Of course, I will be relying heavily upon the expertise of other modelers whose work I admire here on the forum such as gbarlow, DelF, Blue Ensign, Hollowneck, desalgu, WalrusGuy, Moonbug, gjdale, James H and many others. So here we go. I will be building the Master Shipwright Edition of the Flirt. I chose this edition particularly because of the extensive use of boxwood rather than pear wood which is used in the standard version . I've heard ship modelers sing the praises of boxwood over the years but I've never used it before and have wanted to see what it like compared to woods like yellow cedar and pear which I like very much. The false keel and the bulkheads are birch plywood which is very smooth and quite hard and the laser cutting is excellent. The cuts are extremely accurate with minimal laser burn. The first step was to add bulkheads 4 -13 to the false keel. Bulkhead 4 had a little wobble in it and bulkheads 10 - 12 were quite loose so I used my machinist blocks to insure they were all accurately perpendicular to the false keel. I primarily use Titebond Thick & Quick glue which sets up faster than regular Titebond but still gives me plenty of time to make adjustments as needed. It also doesn't run down vertical surfaces. I added the scribed lower deck next. These fit very snuggly and I'm glad that I practiced test fitting them first before gluing so I could see how they click into place with a careful amount of pressure. Lastly, I used regular Titebond to brush glue on all the joints which makes for a very solid frame at this point. Many thanks to everyone for stopping by and taking a look. Your comments and advice will always most welcome. Cheers!