HOLIDAY DONATION DRIVE - SUPPORT MSW - DO YOUR PART TO KEEP THIS GREAT FORUM GOING! (Only 36 donations so far out of 49,000 members - C'mon guys!)
×


BobG
-
Posts
3,109 -
Joined
-
Last visited
Content Type
Profiles
Forums
Gallery
Events
Everything posted by BobG
-
Bob, I goofed up on making the keel with the lap joints on my first try. I made a mistake of inattention where I drilled the holes and placed the monofilament into the holes in different places on either side of the keel. Everything was perfect except for 4 little black dots were not in the same place on both sides of the keel. My wife said, "Nobody but you would ever notice it." Well, it just bothered me and, although I could have used the simplified version of the keel, I really liked the keel with the lap joints. So I ordered another one from Chuck and made another keel with lap joints. There's always a fix and sometimes that means starting a task over.
- 217 replies
-
- 2
-

-
- medway longboat
- Syren Ship Model Company
- (and 1 more)
-
Do you ever find that you only need to bevel a portion of the plank instead of the whole length of the plank from end to end? For example, when a plank has a gap that extends only for a small portion of the whole plank. I love this boat, James. It's going to be a beauty!
- 100 replies
-
- 6
-
-
- zulu
- vanguard models
- (and 2 more)
-
Grass Valley is a beautiful place. We have some good friends who live there and were just up visiting them right before all hell broke loose in the world. We have taken some long road trips to Canada visiting Vancouver Island, the Canadian Rockies, Newfoundland and Nova Scotia. So much land and so few people! I am always taken aback when I think about California with a population that is larger than all of Canada. Stay safe and well and enjoy your time in the model shipyard.
- 170 replies
-
- 2
-
-
- medway longboat
- Syren Ship Model Company
- (and 1 more)
-
Thanks everyone for the likes and thank you Chuck and Diver for your kind compliments. I feel like this model is taking me to a new level of modeling.
-
This is so true. I remember being disappointed at first when a problem would crop up even though I felt like I was following the directions on a build very carefully. Then when I searched the forum for help I would find that people had many different ways of fixing a similar problem. You'll find lots of good advice on the forum but you will need to sift through it and choose to try what feels the best for you. You'll also find yourself figuring out ways of doing some procedures in your own unique way also. I'm beginning to do that more and more and, honestly, figuring out how to complete a step my own way has become one of the most satisfying aspects of this hobby. Hang in there and let us know how it goes. Good luck!
- 217 replies
-
- 4
-
-
- medway longboat
- Syren Ship Model Company
- (and 1 more)
-
You should do it Justin. These little canoes are really beautiful when they are done well. I still love to look at my Indian Girl Canoe.
-
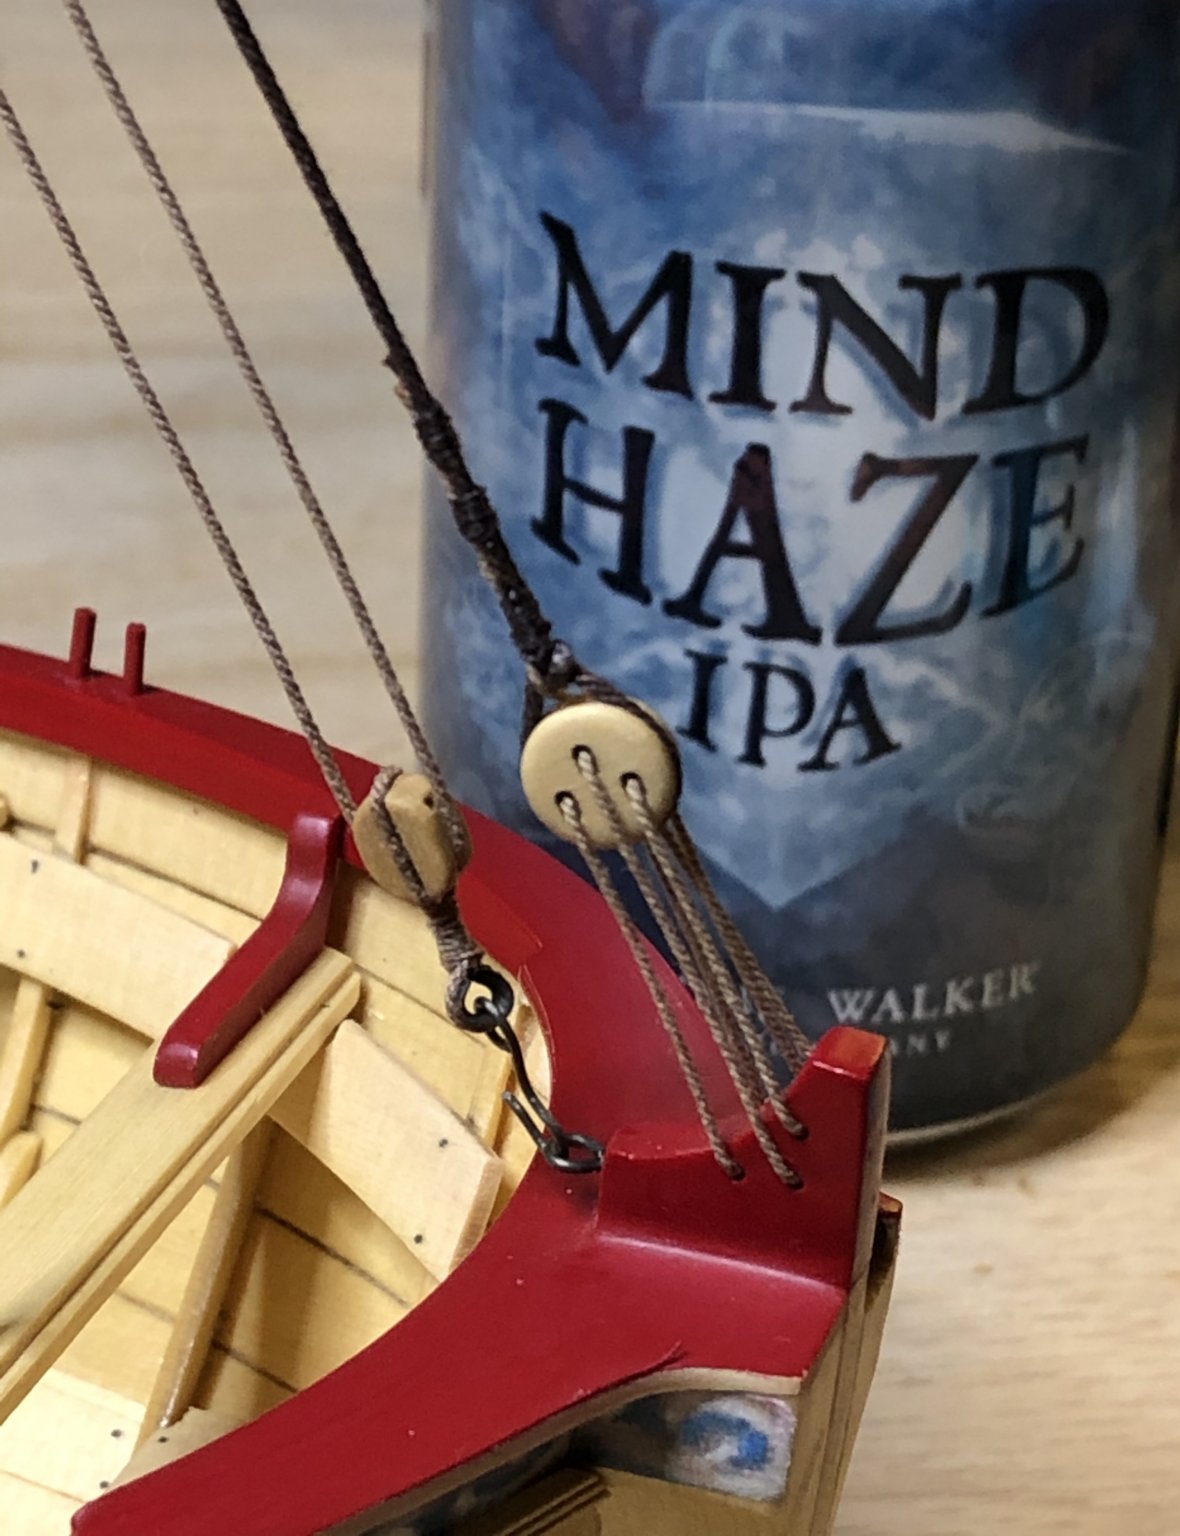
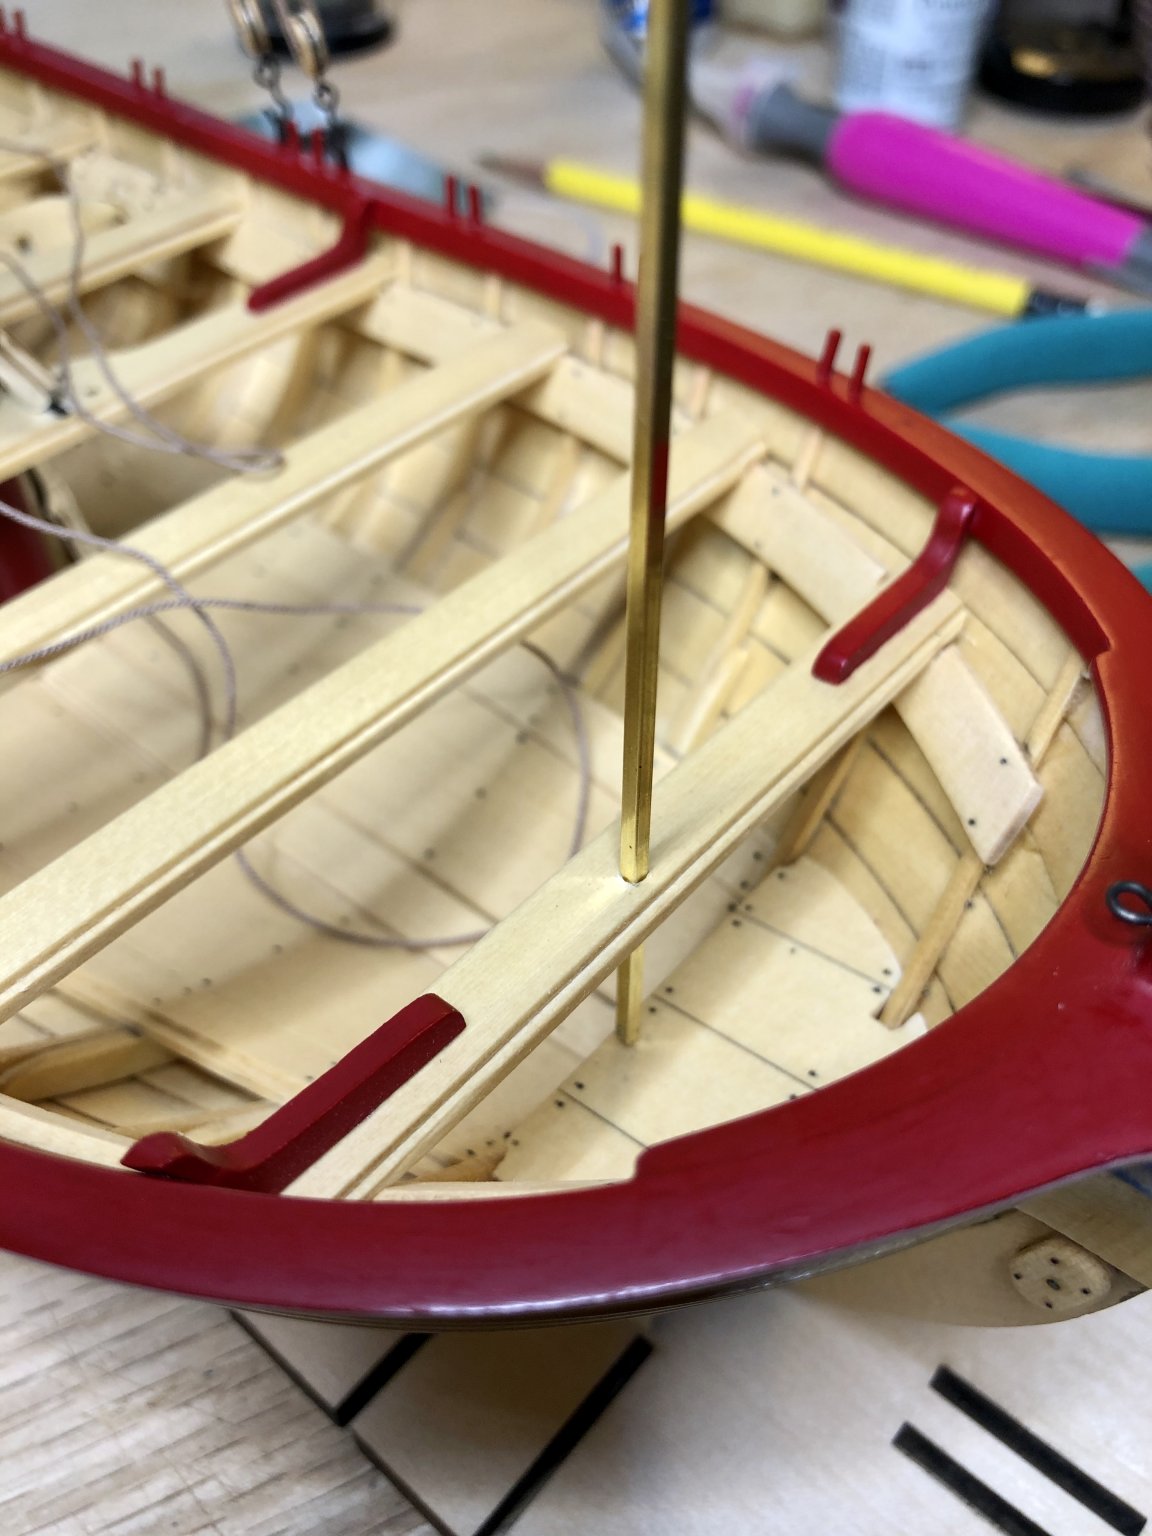
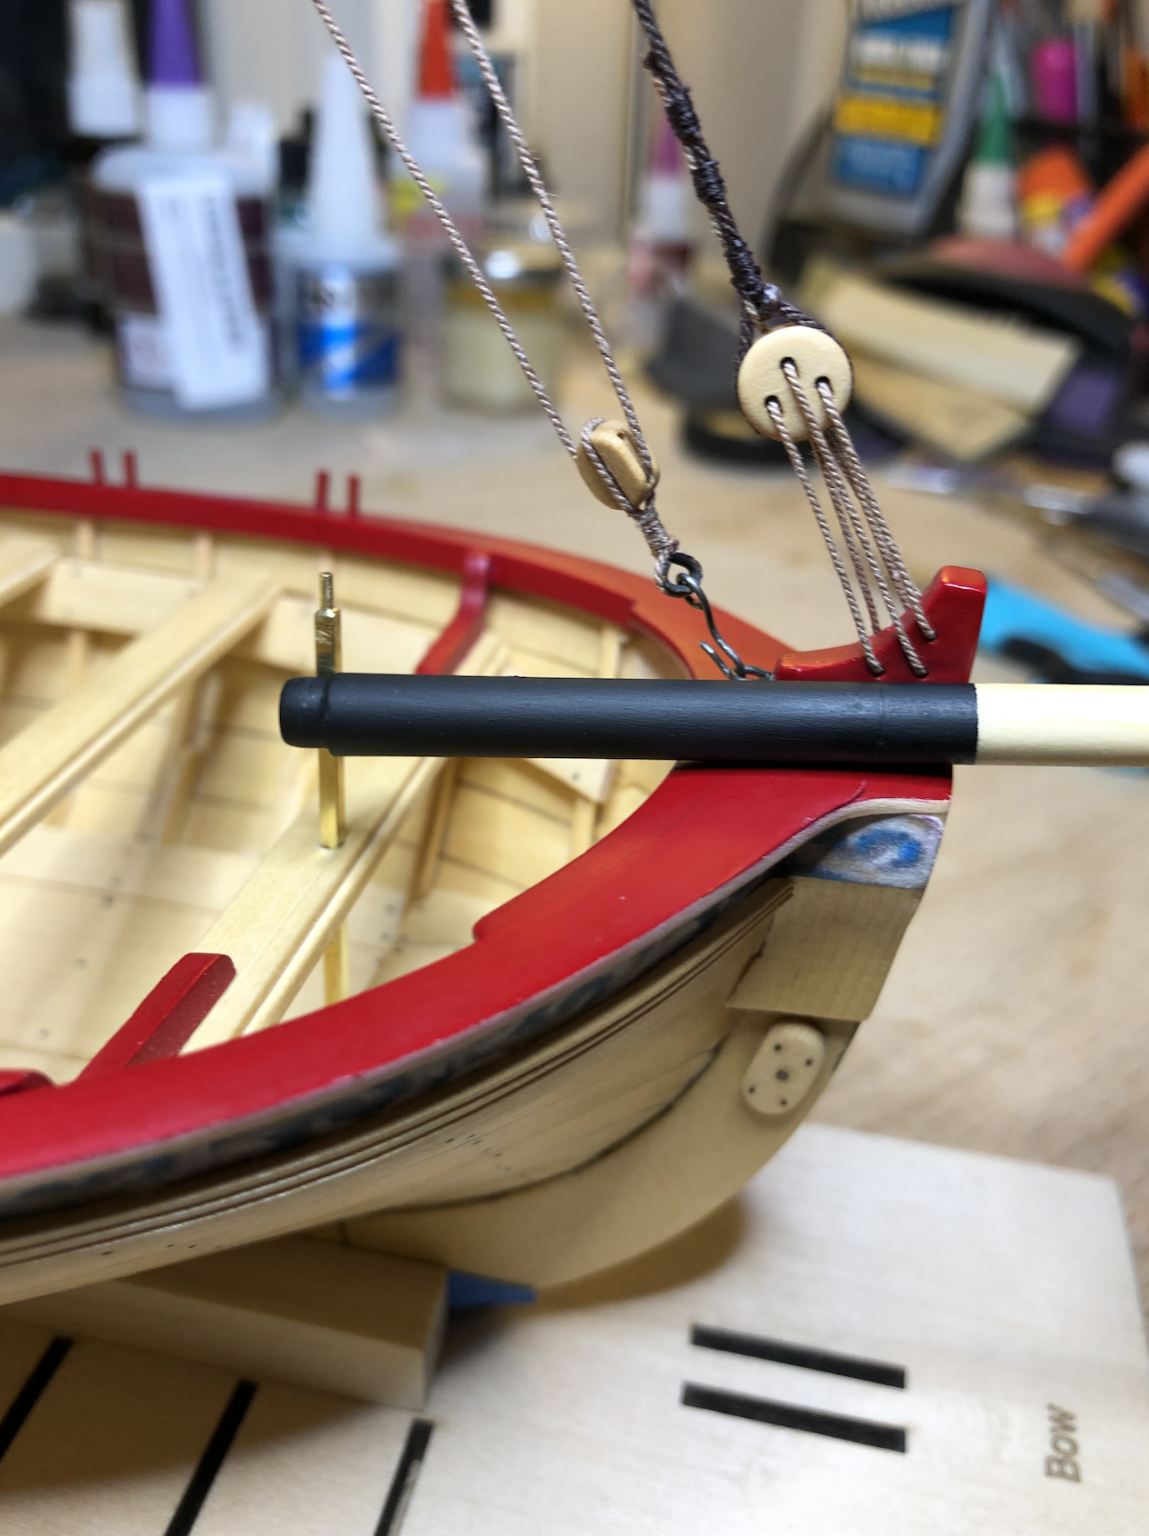
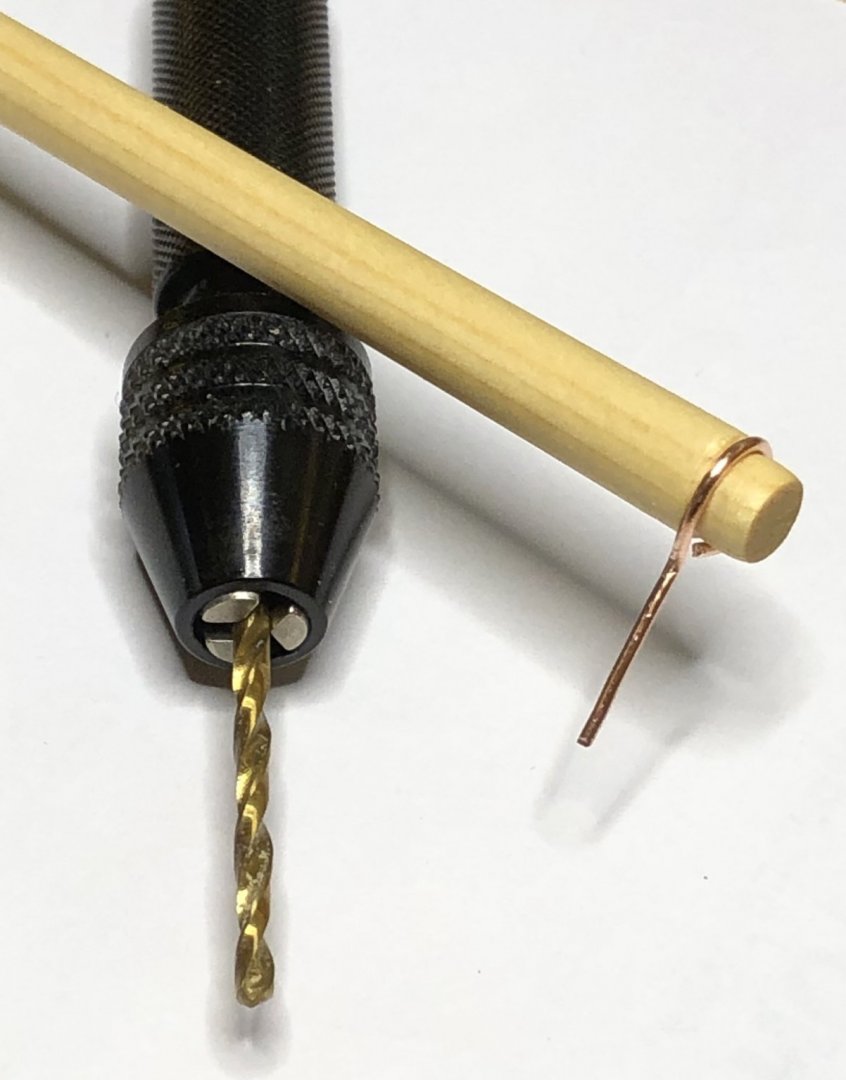
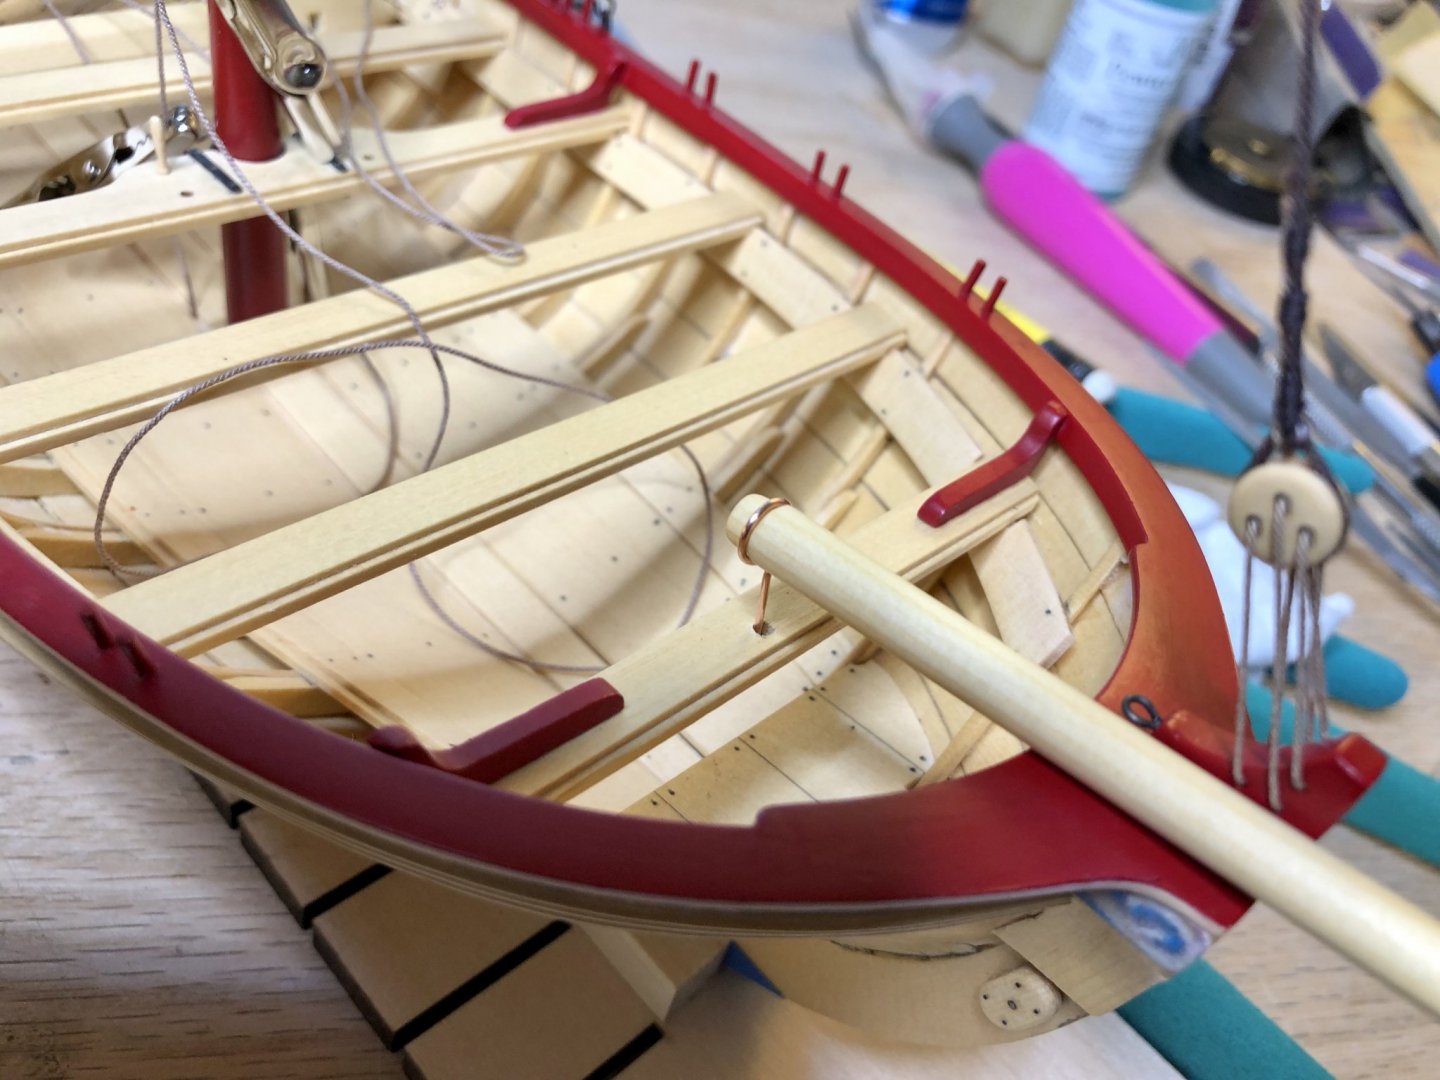
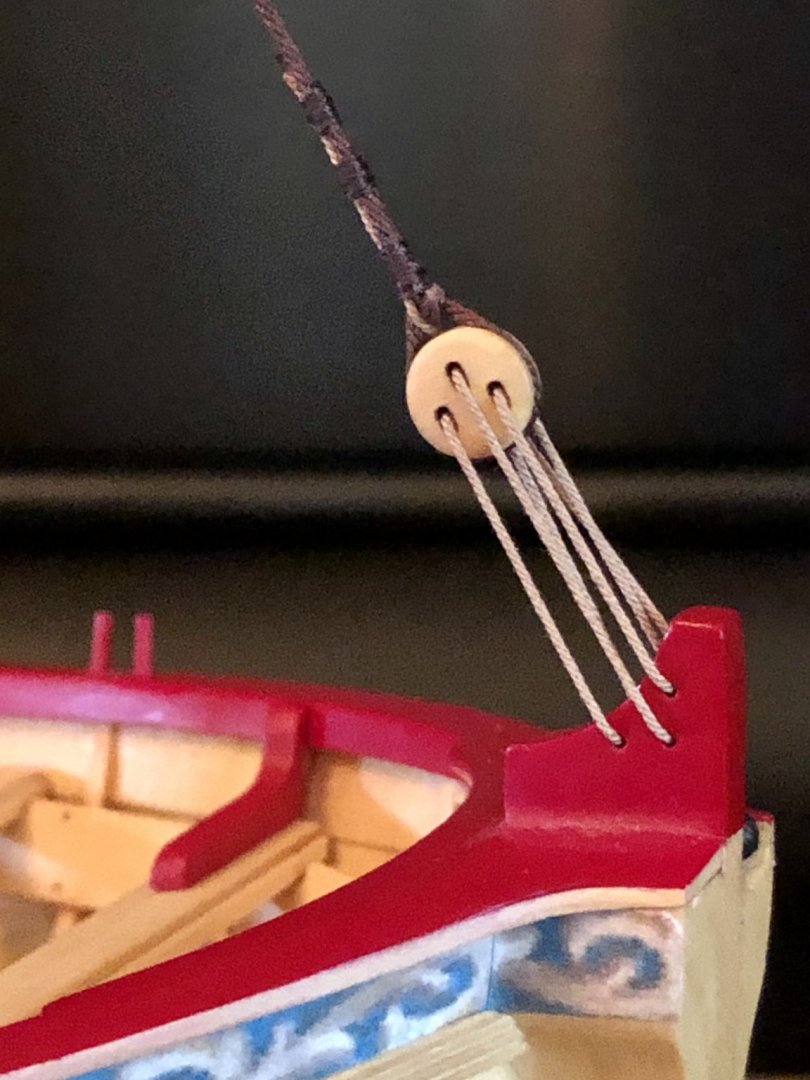
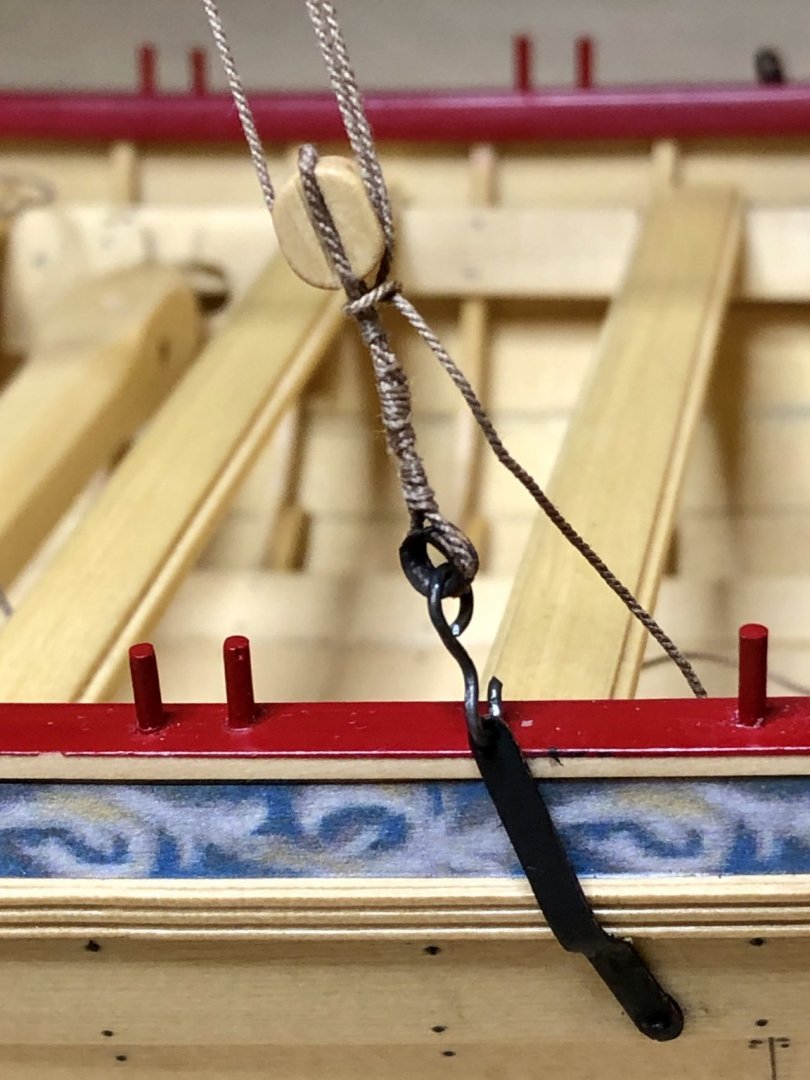
I made a small bit of progress today. First, I stropped the block for the jib halliard with a thimble and made a hook to attach it to an eyebolt in the stem. Then I seized it to the halliard and seized the halliard around the mast. The Mind Haze IPA helps to keep the hands steady! Then I began to work on the bowsprit. Getting the bowsprit positioned correctly and then drilling the hole through the thwart at the bow for the square brass support looked tricky. I read the instructions a couple of times and heeded the warning from Chuck that you need to make sure you've got the measurements right before you drill the hole since you only have one shot get it right. I fiddled around with the bowsprit trying to hold it in place and estimate where the hole for the support should be but that seemed like that would be a hit or miss way to do it. So here's how I went about it so far: I filed a pin on the end of the brass support: Then I took the bowsprit and wrapped a piece of 20 gauge copper wire around the end of the bowsprit where the pin will go and formed the copper wire so was it close to perpendicular to the bowsprit. I then positioned the bowsprit by eye at the correct distance and angle and marked where the copper wire was touching the top of the thwart. I drilled the marked spot with a tiny drill bit just barely into the thwart and positioned the bowsprit with the copper rod touching the hole to see how everything looked. It looked good so I drilled the final hole. Chuck used a #49 drill bit which is .073" but I didn't have one of those so I used a 5/64" bit which is .078. It worked just fine. I forgot to take a photo of the bowsprit with the copper wire jig marking the spot so I took a photo that shows it in place after I drilled the final hole to give you an idea of how it worked for finding where to drill the hole through the thwart. I used some small files and a scalpel to square up the hole and press fit the square rod into it. I left it long at this point. Tomorrow I'll simulate the iron bands around the bowsprit with black masking tape and finish them with Doc O'Brien's Rusty Brown Weathering Powder before cutting the support rod to size. Then I'll drill the hole in the bowsprit for the support pin and make the other short rod with a pin on the end that goes into the bowsprit at an angle from the front of the stem. I'll test fit of everything first to double check the alignment and then glue everything in place after blackening the brass. Hopefully, it will all line up nicely.


- 170 replies
-
- 4
-
-
- medway longboat
- Syren Ship Model Company
- (and 1 more)
-
Whatever it is, it sure is beautiful with the poly on it.
- 77 replies
-
- 4
-
-
- morel
- master korabel
- (and 1 more)
-
I use CA more than a lot of people it seems especially for planking and places where clamping can be a big problem. I will place a tiny dot of medium viscosity CA and hold the piece firmly for a few seconds and then move along just a little and place another dot of CA and hold it and then move along etc, etc. If you are careful and use only tiny amounts of CA it can be very useful. At least it has been for me. I used it almost exclusively on my Indian Girl Canoe. I'd probably try that with those coamings if I was build the Peterboro Canoe. Just a thought...I'm no expert!
-
Wonderfully creative, Bob!
-
Well done, Jean-Paul.
-
Thank you so much Jean-Paul and Grant for your kind words and thank you to everyone else for your likes and taking the time to check in on my build log. I look forward to watching the progress that each of you make on your Medway Longboats. I also hope that each and everyone of you and your family and friends are safe and well in this most difficult time for the entire world. Best regards,
- 170 replies
-
- 2
-
-
- medway longboat
- Syren Ship Model Company
- (and 1 more)
-
I keep thinking that if I just pay closer attention I won't make any more mistakes but it's fanciful thinking. I've come to accept that mistakes are just a part of model ship building and it's how you recover and move on that's the important part. I just say a few choice words and redo my goofs... 🙄
-
Thanks, Michael, I appreciate it.
-
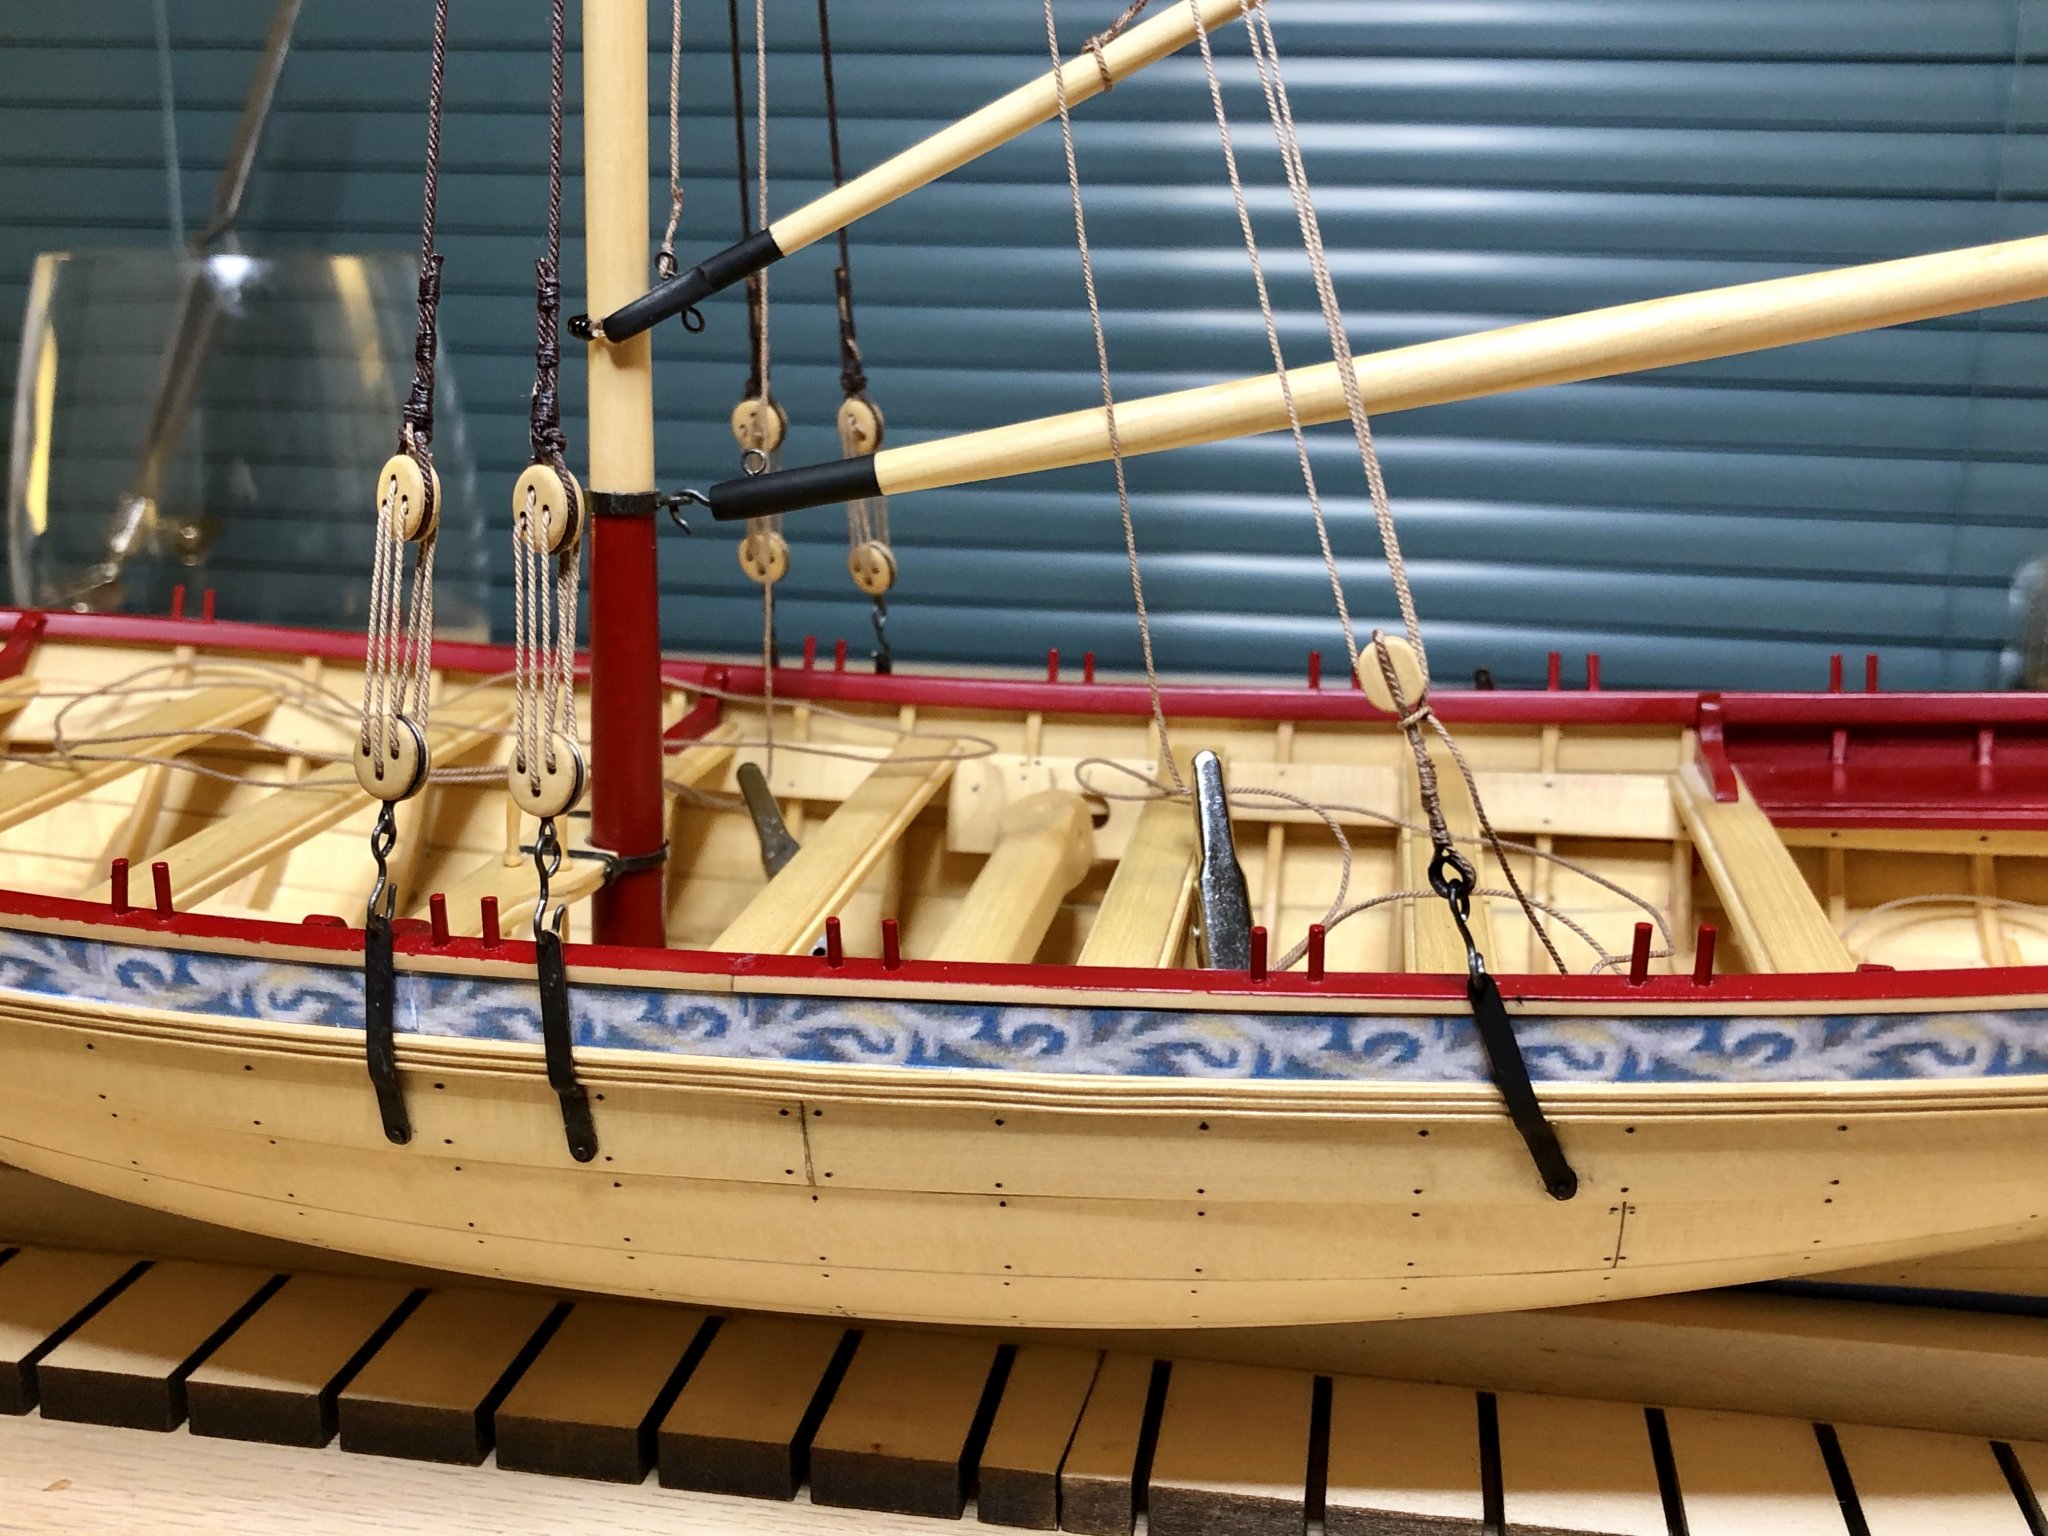
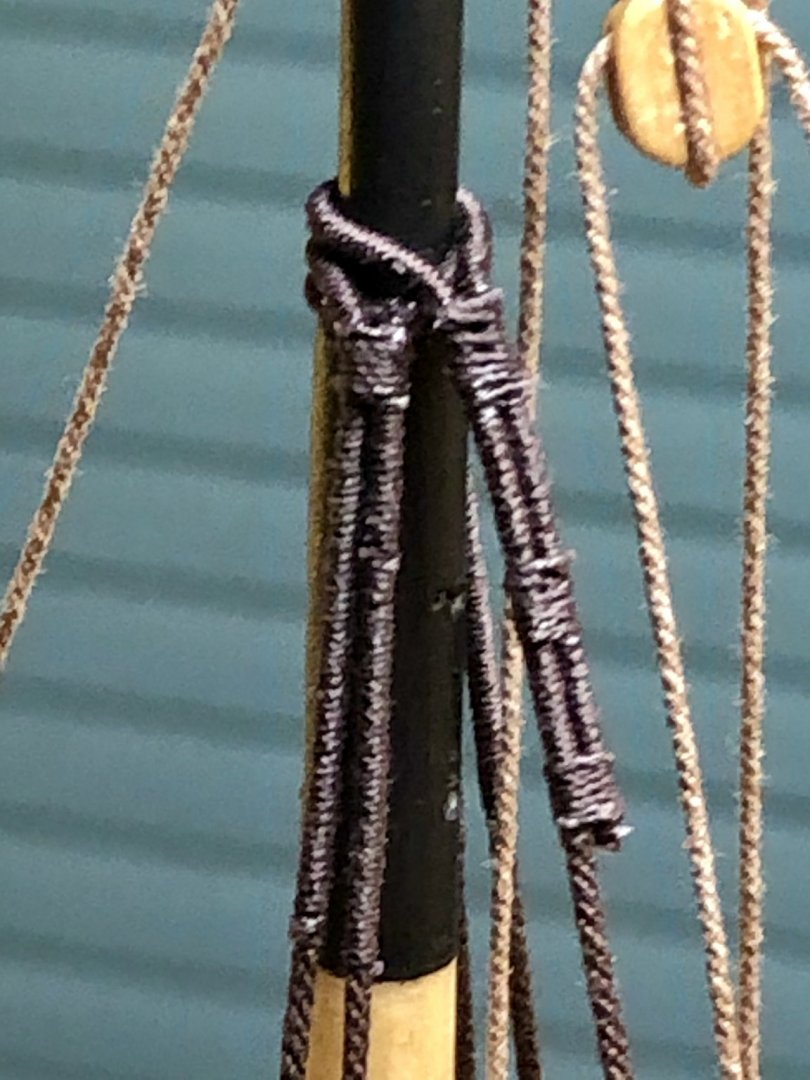
I'm plugging away on the rigging little by little. I completed rigging the starboard backstay and tackle. Then I seized the forestay shroud to the mast, seized a deadeye to the end of it and rove the lanyard to the bow. I'll begin the bowsprit tomorrow. The rigging really makes the boat come alive!
- 170 replies
-
- 10
-
-
- medway longboat
- Syren Ship Model Company
- (and 1 more)
-
Thanks Don. I couldn't make the thimbles the way Chuck does. My punch wasn't the right size so I went with Plan B that I talked about in a previous post. It worked out pretty well. The close up photos show every little detail though so things look kind of rough even though you can't really see that level of detail on the boat with the naked eye...thank goodness! I hope all is well for you and your family and friends during this difficult time.
- 170 replies
-
- 2
-
-
- medway longboat
- Syren Ship Model Company
- (and 1 more)
-
Thanks Michael. The rigging can be tedious but I find it very satisfying when I complete a line!
-
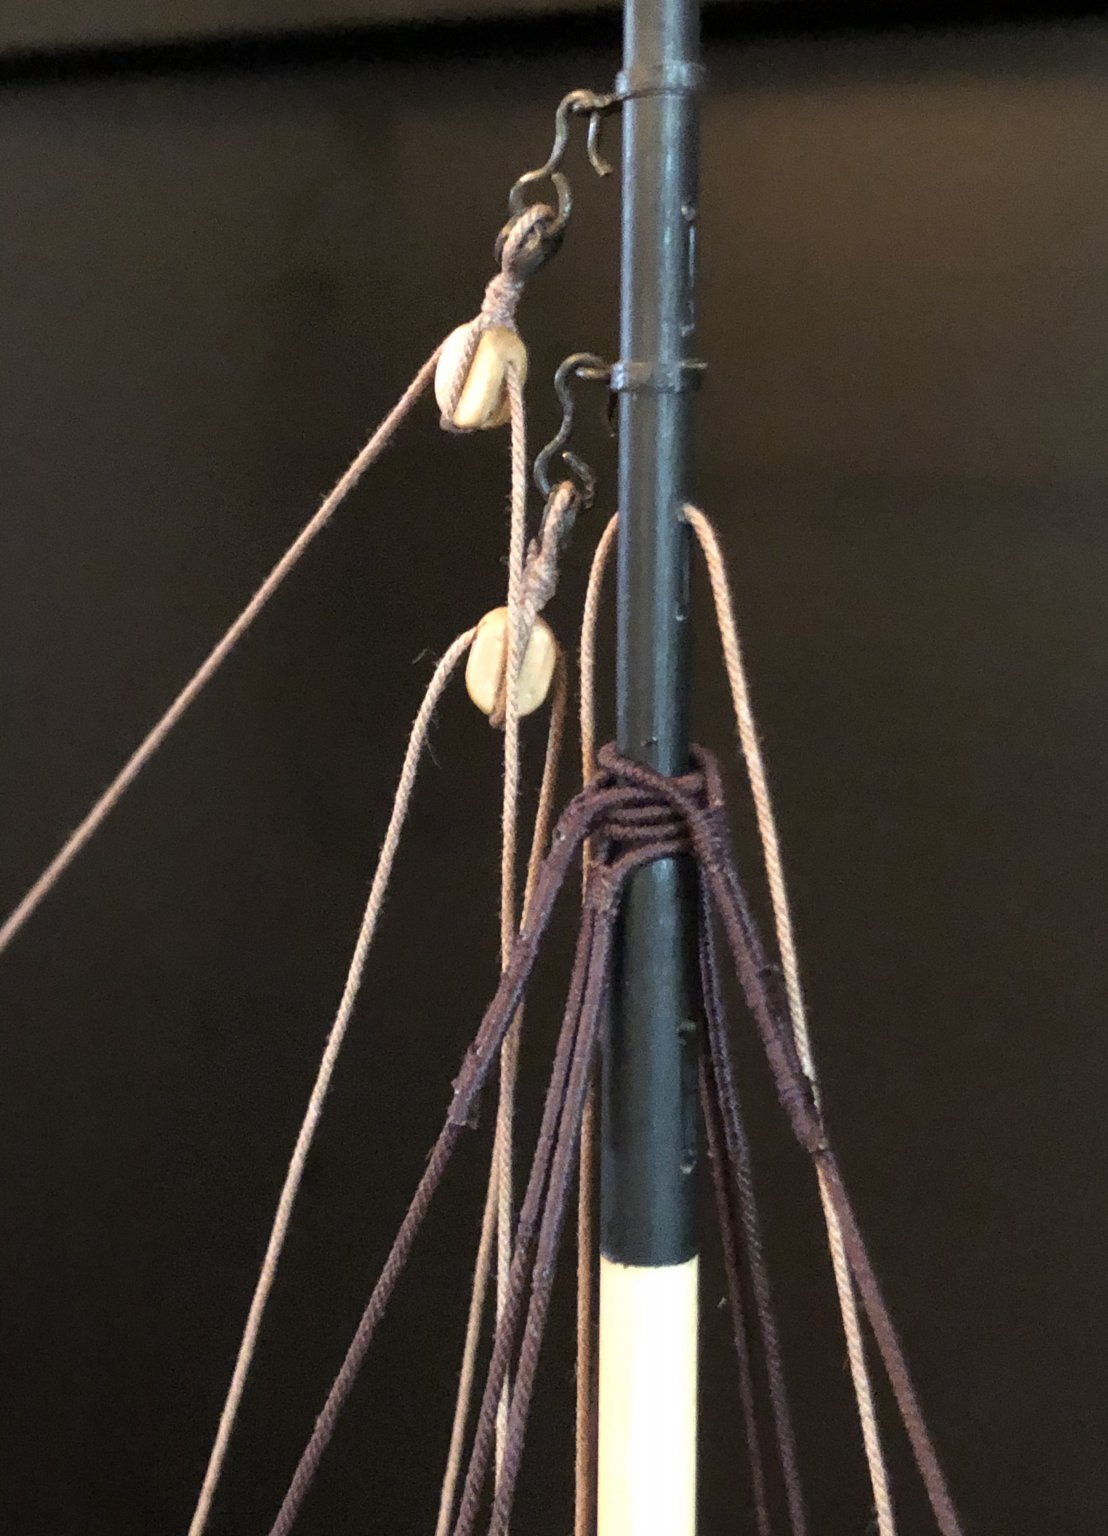
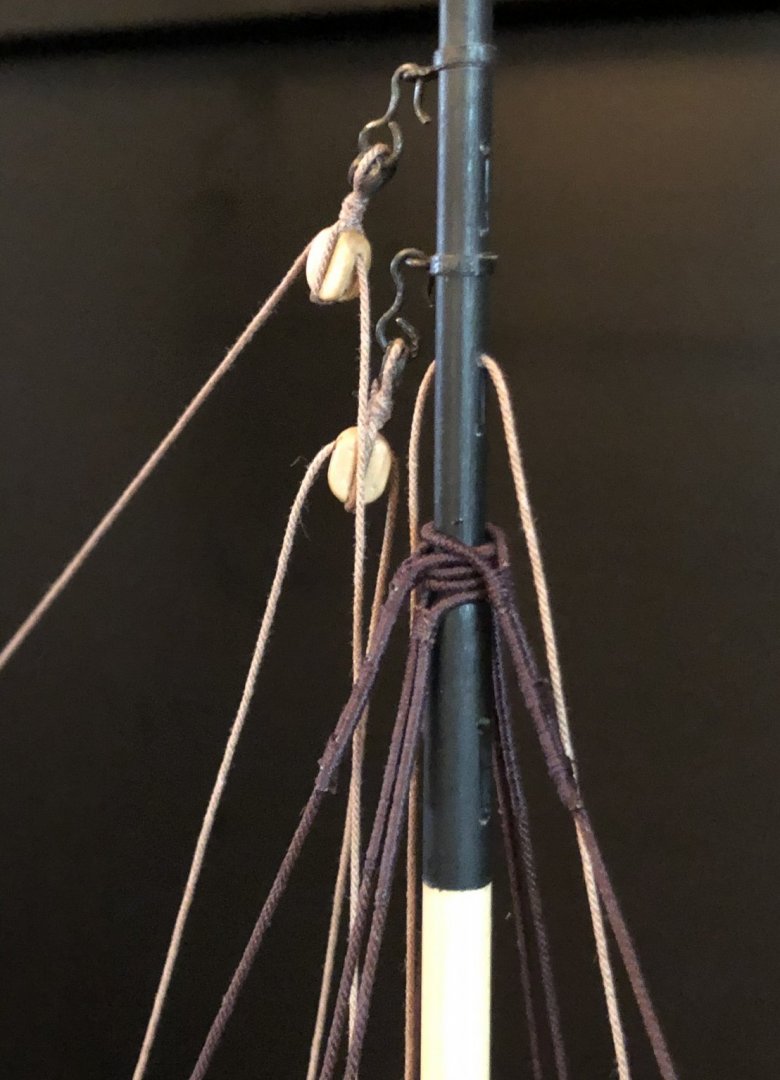
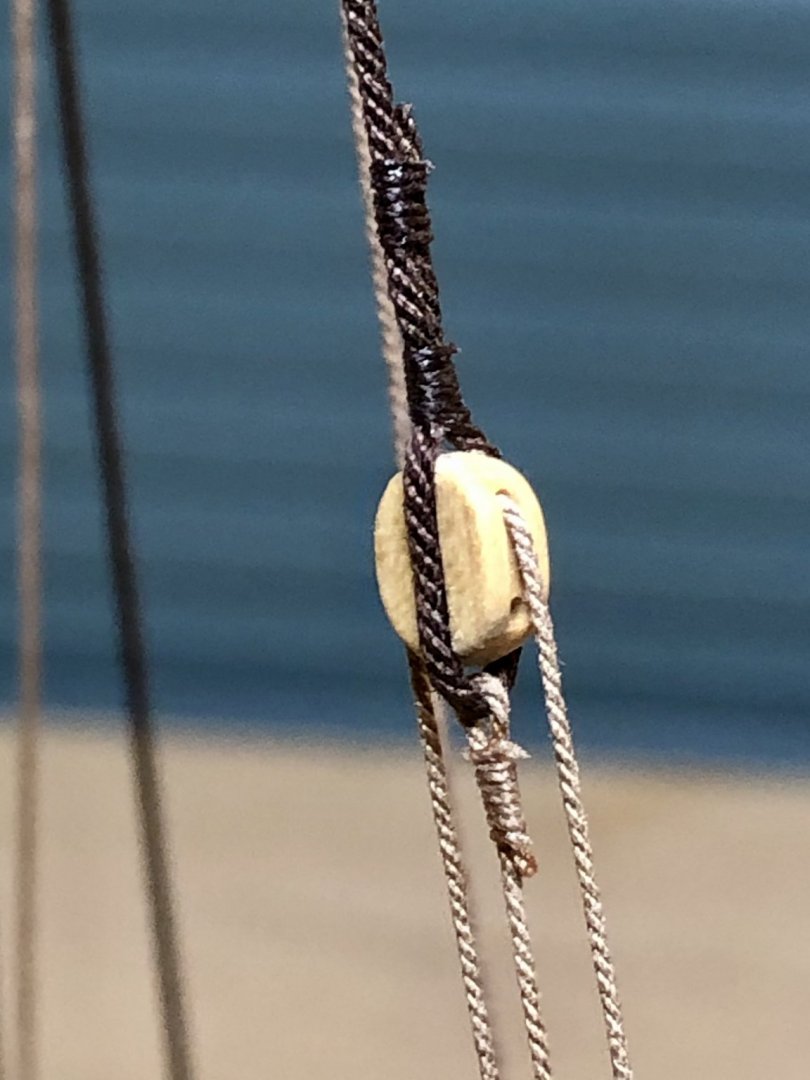
I made the chainstays for the backstays, blackened them with Jax Pewter Black and glued them to the hull. Then I served the backstays and the forestay and stropped the blocks with thimbles for them. I was able to seize the port backstay to the mast and rig the port backstay tackle. I'll rig the starboard backstay and the forestay tomorrow and then begin working on the bowsprit. I'm not always happy with the Jax Pewter Black. I clean the brass well with white vinegar and rinse it with water and the pieces blacken nicely but when handling them the black flakes off at times exposing the brass. I've tried redoing those pieces again but the black still flakes off so I painted those spots with a dilute solution of Vallejo Black Acrylic. They look pretty good but I might try a different blackening agent in the future. I also am beginning to have a bit of a tangle of lines even though I have them weighted with alligator clips. I thought it would probably be best to wait until all the lines were rigged before making a final tensioning and then gluing them into their belaying places. I'm not sure if this is the best strategy and I'm glad I don't have a couple dozen lines hanging around! Port backstay:

- 170 replies
-
- 6
-
-
- medway longboat
- Syren Ship Model Company
- (and 1 more)
-
You're off to a great start using your creativity to figure how to do things. That's a big piece of model ship building. This is a wonderful model you chose to start with. By the way, I grew up in Elwood about 40 miles northeast of Indianapolis many years ago before leaving for the Coast Guard after high school and later making California my home after college. My sister lives in Indy. It's a really nice town. Good luck with your build.
-
I am happy to see you building this battle station and look forward to following along. It is an interesting model. I recently purchased a Corel Wasa Battle Station on eBay and it looks fairly similar. It will be a while before I start building it since I want to finish my Medway Longboat first. I hope that you and your family and friends stay safe and well until the world returns to normal. Best regards,
- 20 replies
-
- 1
-
-
- panart
- battle station
- (and 2 more)
-
I've had problems with the rattle cans spitting tiny globs at times. Have you experienced this and do you know a way to prevent that from happening when using rattle cans?
-
The Mikhail Kirsanov chisels that you have are the best of the best from what I have read and, of course, very expensive also. I noticed that you have a diamond mini file in a photo with the chisels also. I've been considered trying some of those. How do you like the diamond files compared to regular steel files and what brand do you use? Thanks.
-
Beautiful work...no doubt that this is going to be a fantastic build of this model. Your photos and build log are excellent also. I'm sure this log will be one that future builders of this model will use as a reference.
-
Was the Krylon matte clear the regular rattle-can spray?