HOLIDAY DONATION DRIVE - SUPPORT MSW - DO YOUR PART TO KEEP THIS GREAT FORUM GOING! (Only 20 donations so far - C'mon guys!)
×


Thistle17
-
Posts
1,054 -
Joined
-
Last visited
Content Type
Profiles
Forums
Gallery
Events
Everything posted by Thistle17
-
 Nice to tune in and see your great work and progress. How you and the others manage to stay the course is a mystery to me. Life for me has many interruptions. Winne sits on the shelf while I add den cabinetry for my wife's art works. For now I will have to content myself with yours and the others works. Happy New Year! Joe
- 642 replies
-
- 1
-

-
- winchelsea
- Syren Ship Model Company
- (and 1 more)
-
Inspirational! Obtainable, now that might be another story! Joe
- 1,784 replies
-
- 2
-
-
- winchelsea
- Syren Ship Model Company
- (and 1 more)
-
Remarkable drive Jon! I have been in this house 11 years now and I am still trying to finish my wood working shop and model building "shop". The former is in the basement and the latter is on the first floor. I just finished the second installment of cabinetry for my wife's art work area. This all meant that I get about an hour a day to model. And yes finding the tool or glue bottle is a universal problem. I have Channing's Friendship plans and hope some day to build a scratch version. Love those Maine work boats. So much to do and so little time! Joe
-
I too have this saw Jaagar. Mine is referenced as a veneer cutting saw and also does a good job of cutting for modeling but does not quite have the "clean cut" of the former one I suggested. You do point out the one thing I like about veneer saws and that is it is easier to start the cut with the one you suggest. I have found that with the Japanese version if I scribe the cut line first the pull sawing is much easier. Joe
-
Bob your work inspires us all. Nice clean execution and progress. My work has stalled as i have wood shop projects "on the ways" that desperately need to be launched. I need to adopt your focus/mentality about this project. Joe
-
Lee Valley has several versions as I look back. The one I favor is 60T2222. It is a bit more in cost than I remember. It is $34. Joe
-
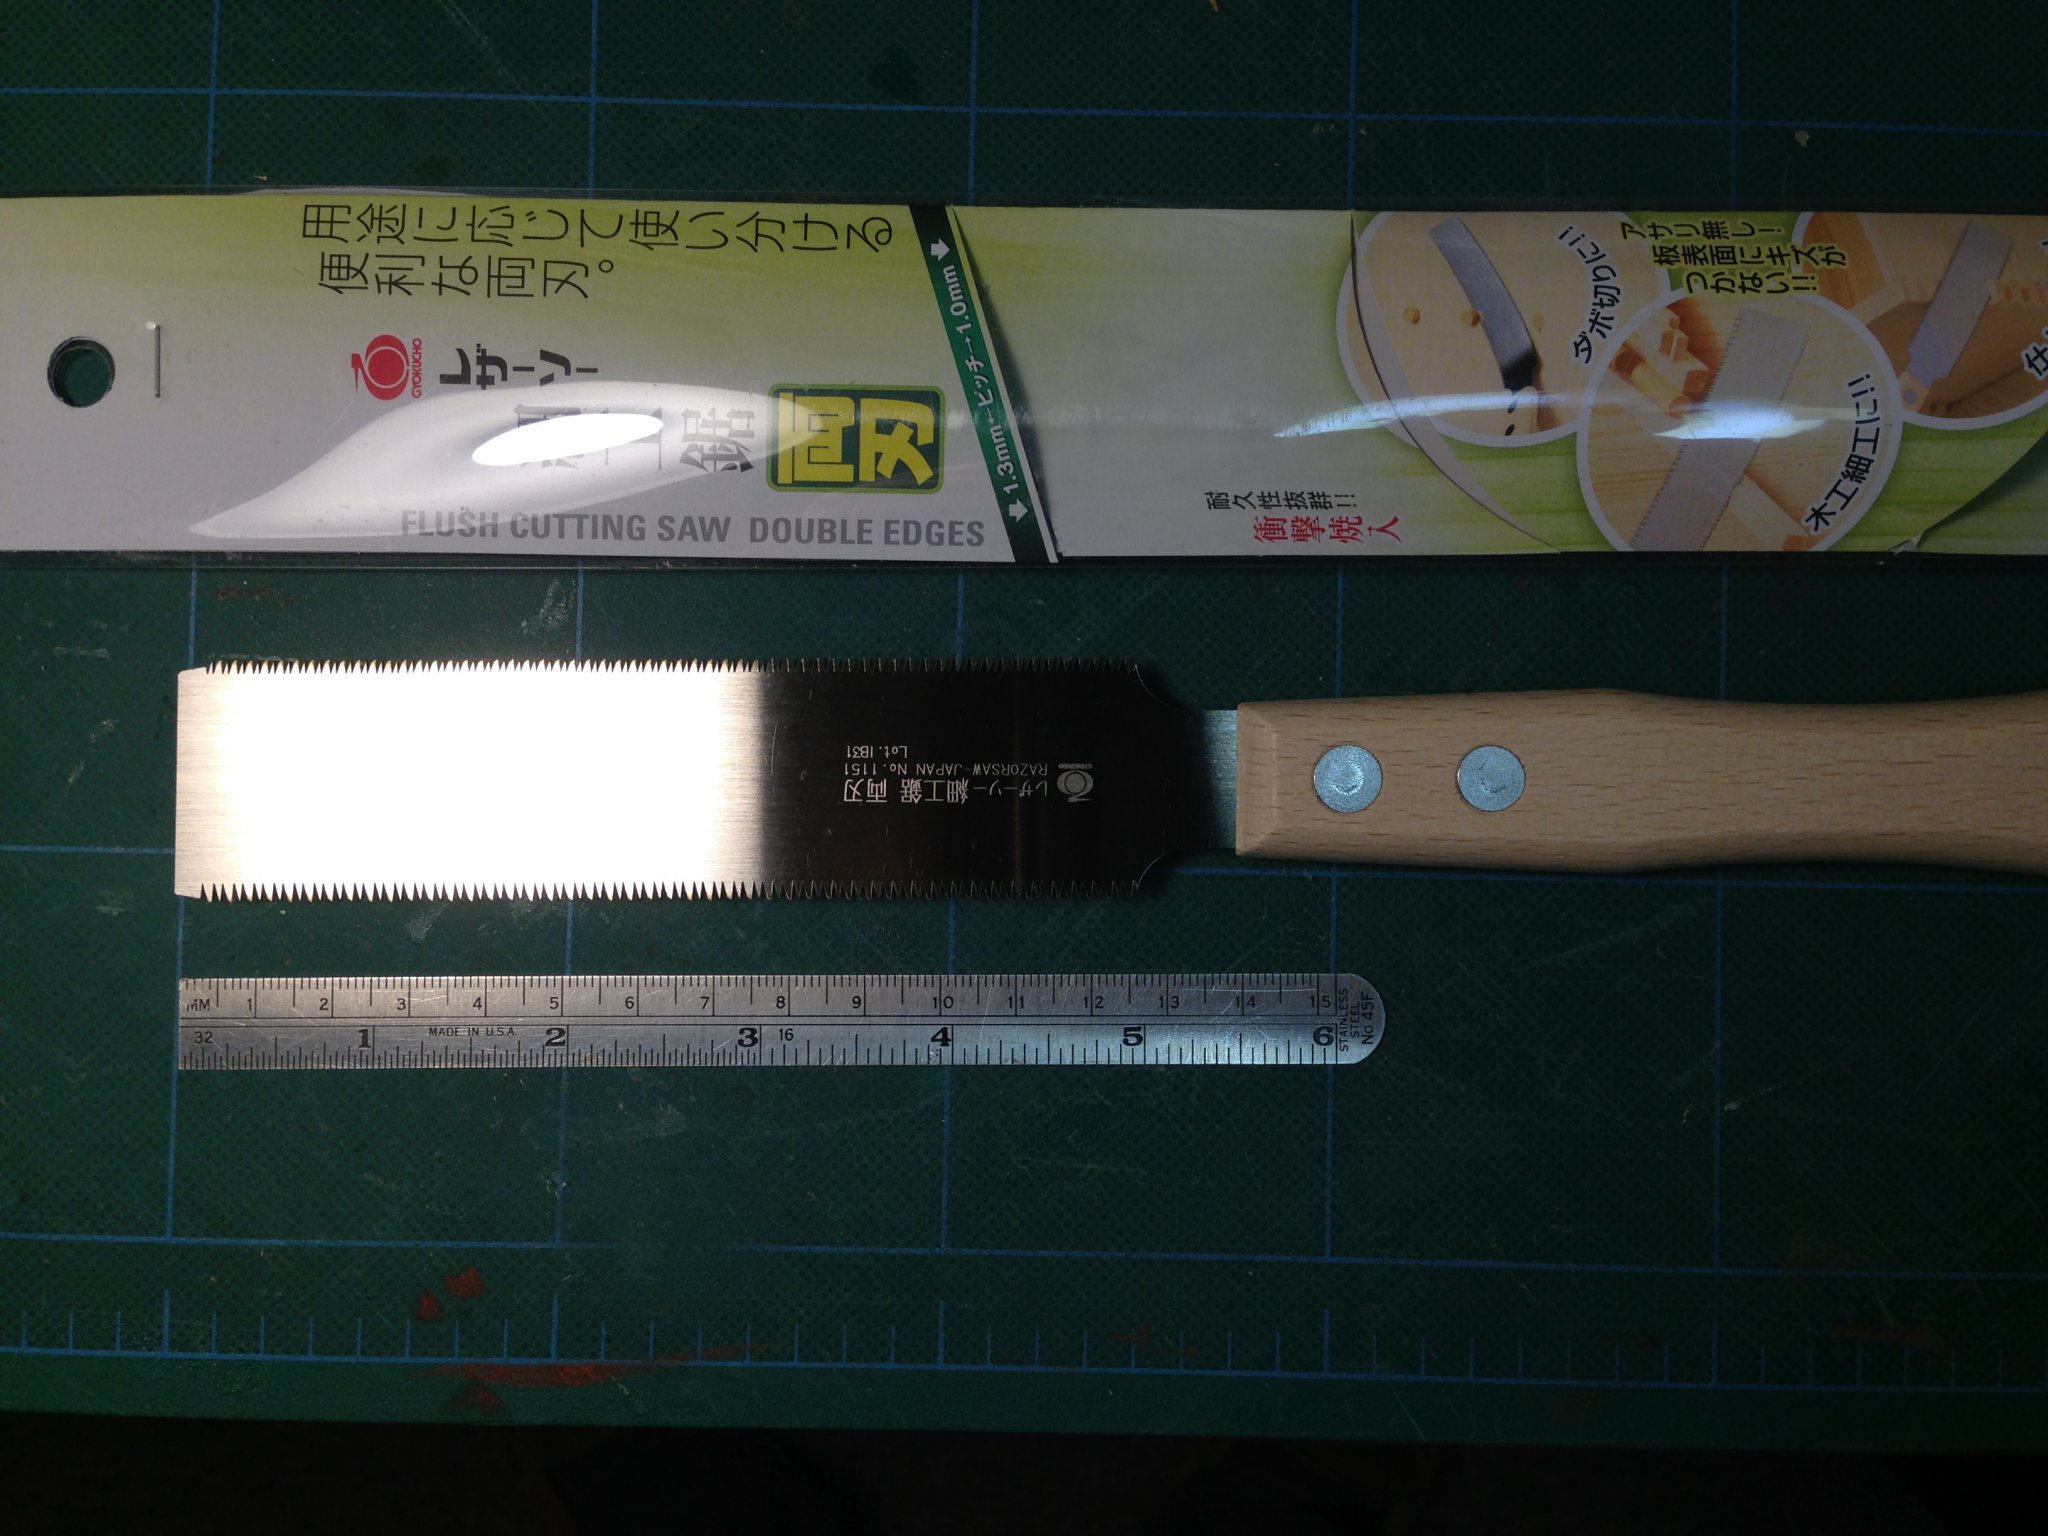
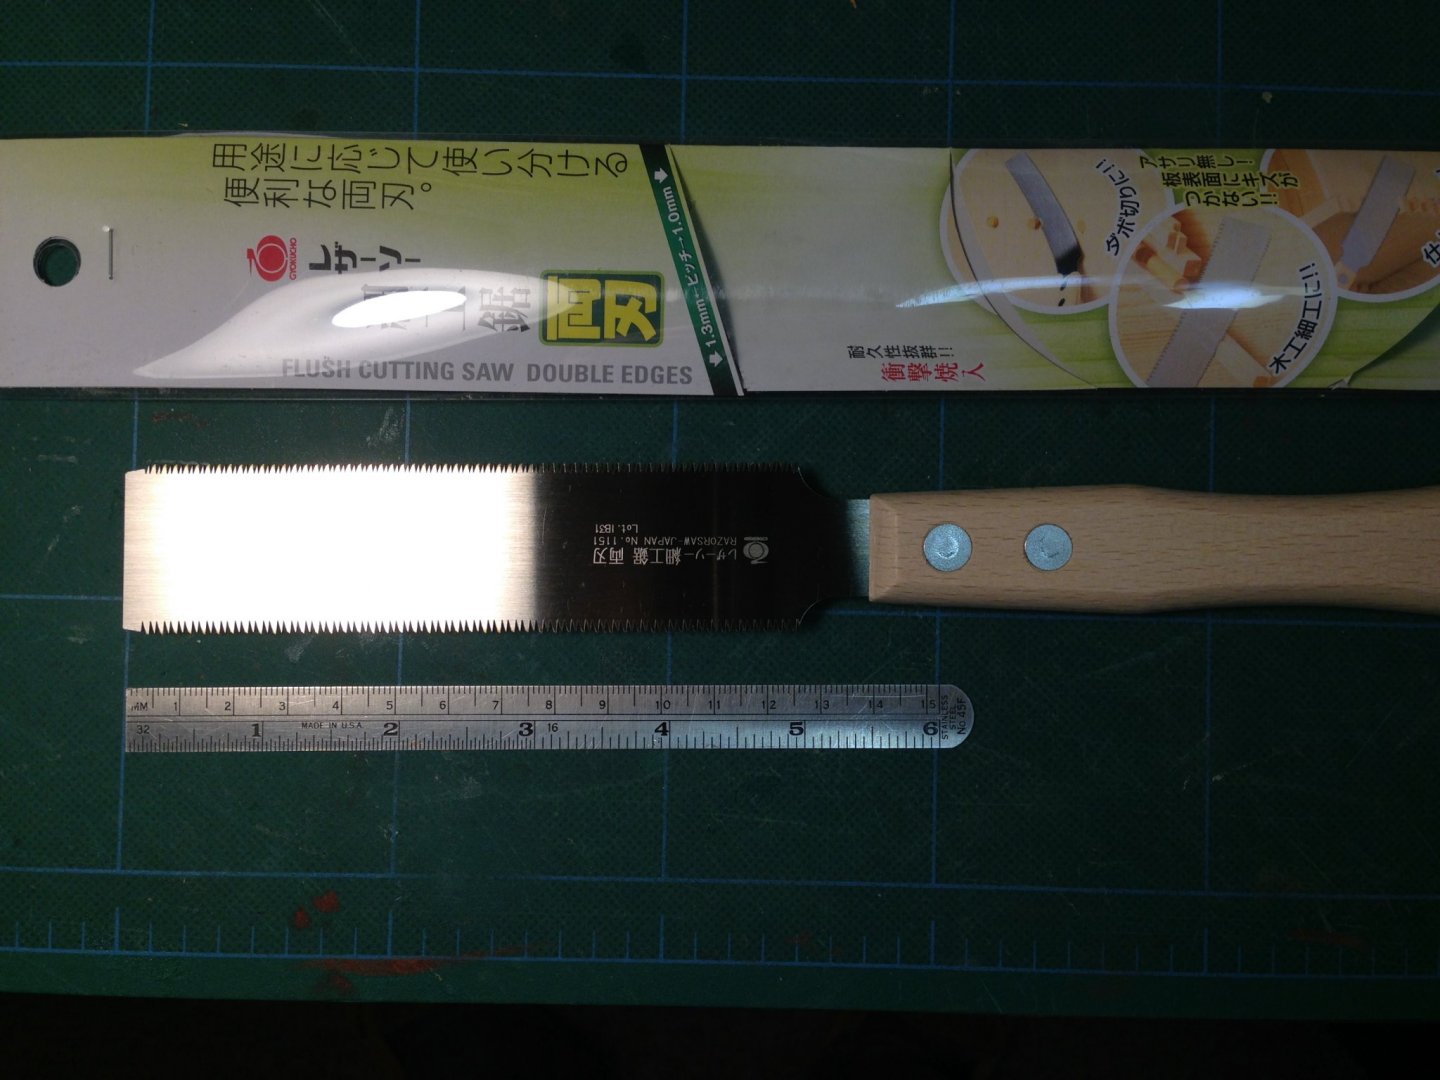
I have found several tools that have migrated from my wood working chest to my modeling chest. The latest is this Japanese flush cutting hand saw that has been a real surprise to me in modeling. I have had other style flush cutting saws but none have proved to be as good as this one. It has a blade thickness of 0.0120 inches or 0.30 mm. It has 2 blade pitches, the finest is about 0.725 inches. There is zero tooth offset and it is incredibly sharp. As with most Japanese saws it is a pull cut. I purchased it from Lee Valley for a few dollars . Joe
-
Try this site out. https://www.archtoolbox.com/representation/scale/changescale.html Joe
- 1,784 replies
-
- 2
-
-
- winchelsea
- Syren Ship Model Company
- (and 1 more)
-
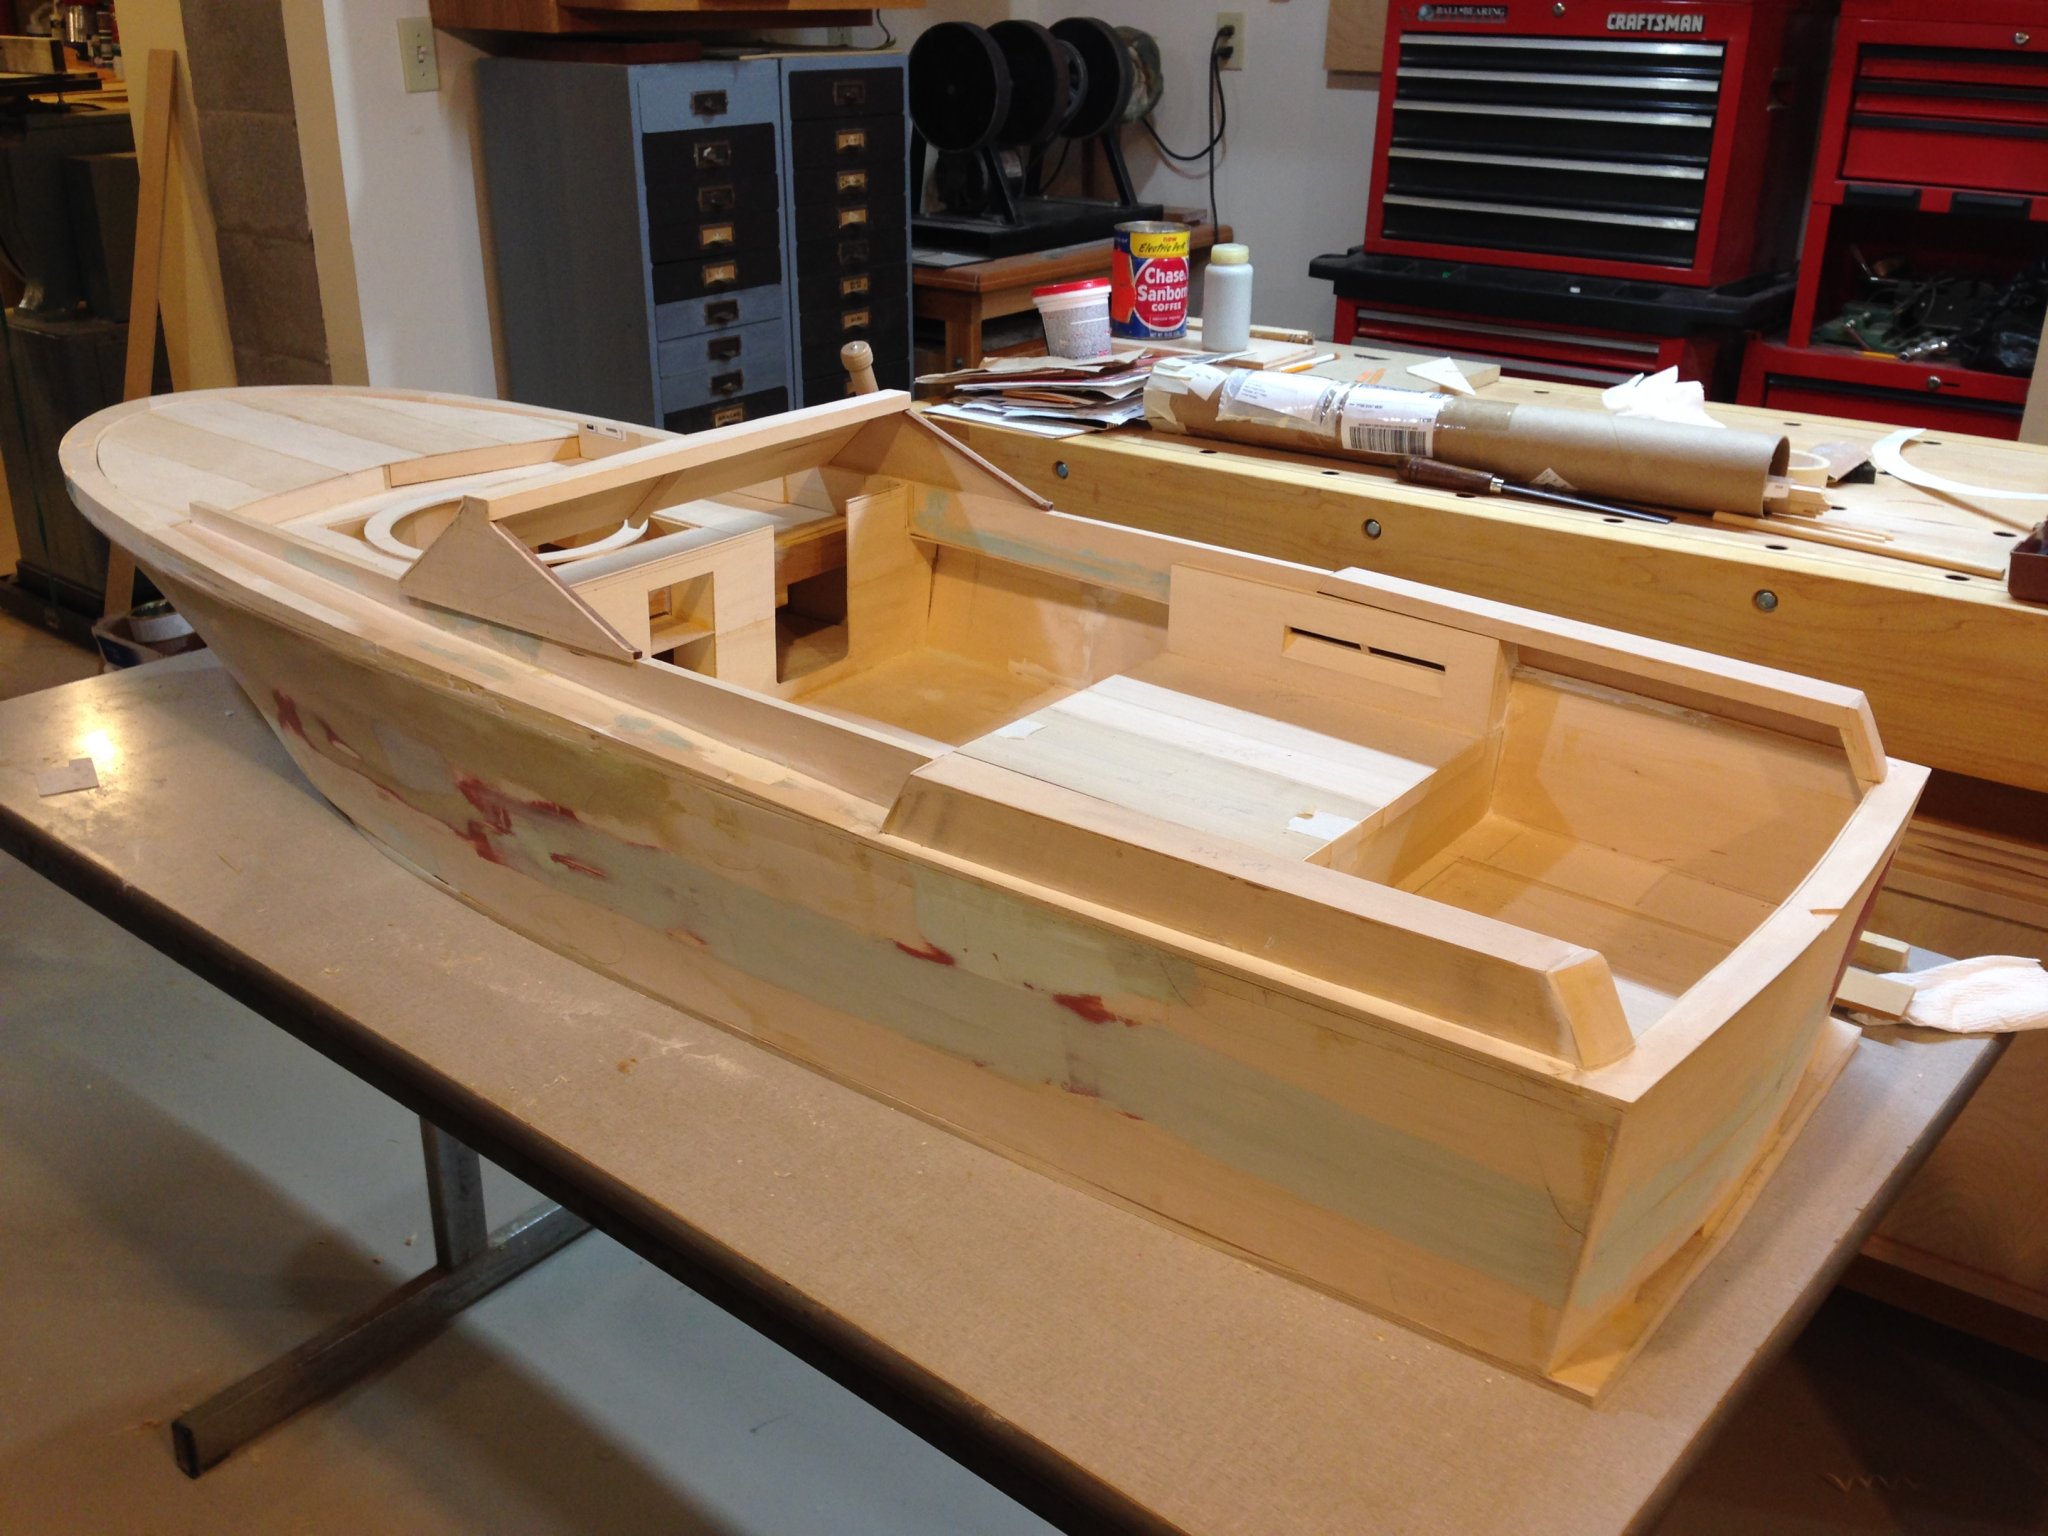
Today we dry fitted the helmsman cowling and the forward decking. Forward of the cowling is the beginnings of the gun tub. The ring is the base support for the gun tub. Structure for the deck above that will soon be added and that entire area will be decked over. While fitting the cowling for the helm we also determined the inner support/finish members that will be needed to complete the operational area of the helm. The control station (not shown) and the cowling were built off line by another member, Matt, following drawings supplied by our "building supervisor". Given the variability that could creep in base and off line development, assemblies have fit quite well. Joe

-
Converting a Backyard Shed into a Model Workshop
Thistle17 replied to Hank's topic in Modeling tools and Workshop Equipment
Hank you could build a full sized craft in there! I toyed with that idea in a shed I recently built. I was talked out of it by wiser people than myself and went back to building models. I would assume you have thought of this but if you have not heed the following. One of our group members is/was using his shed for model building but found the humidity gave him all sorts of problems. So much so that he had to restart one project that ended up with a warped keel. He lives in upstate New York on one of the finger lakes. Hope you are putting this space under AC. Joe -
I salute you for not only your incredible workmanship but also your endurance and never losing site of the end point as can easily happen. What a gift you have! Joe
-
Now Christian were/are you an altar boy or entomologist to pick such a name? Joe
-
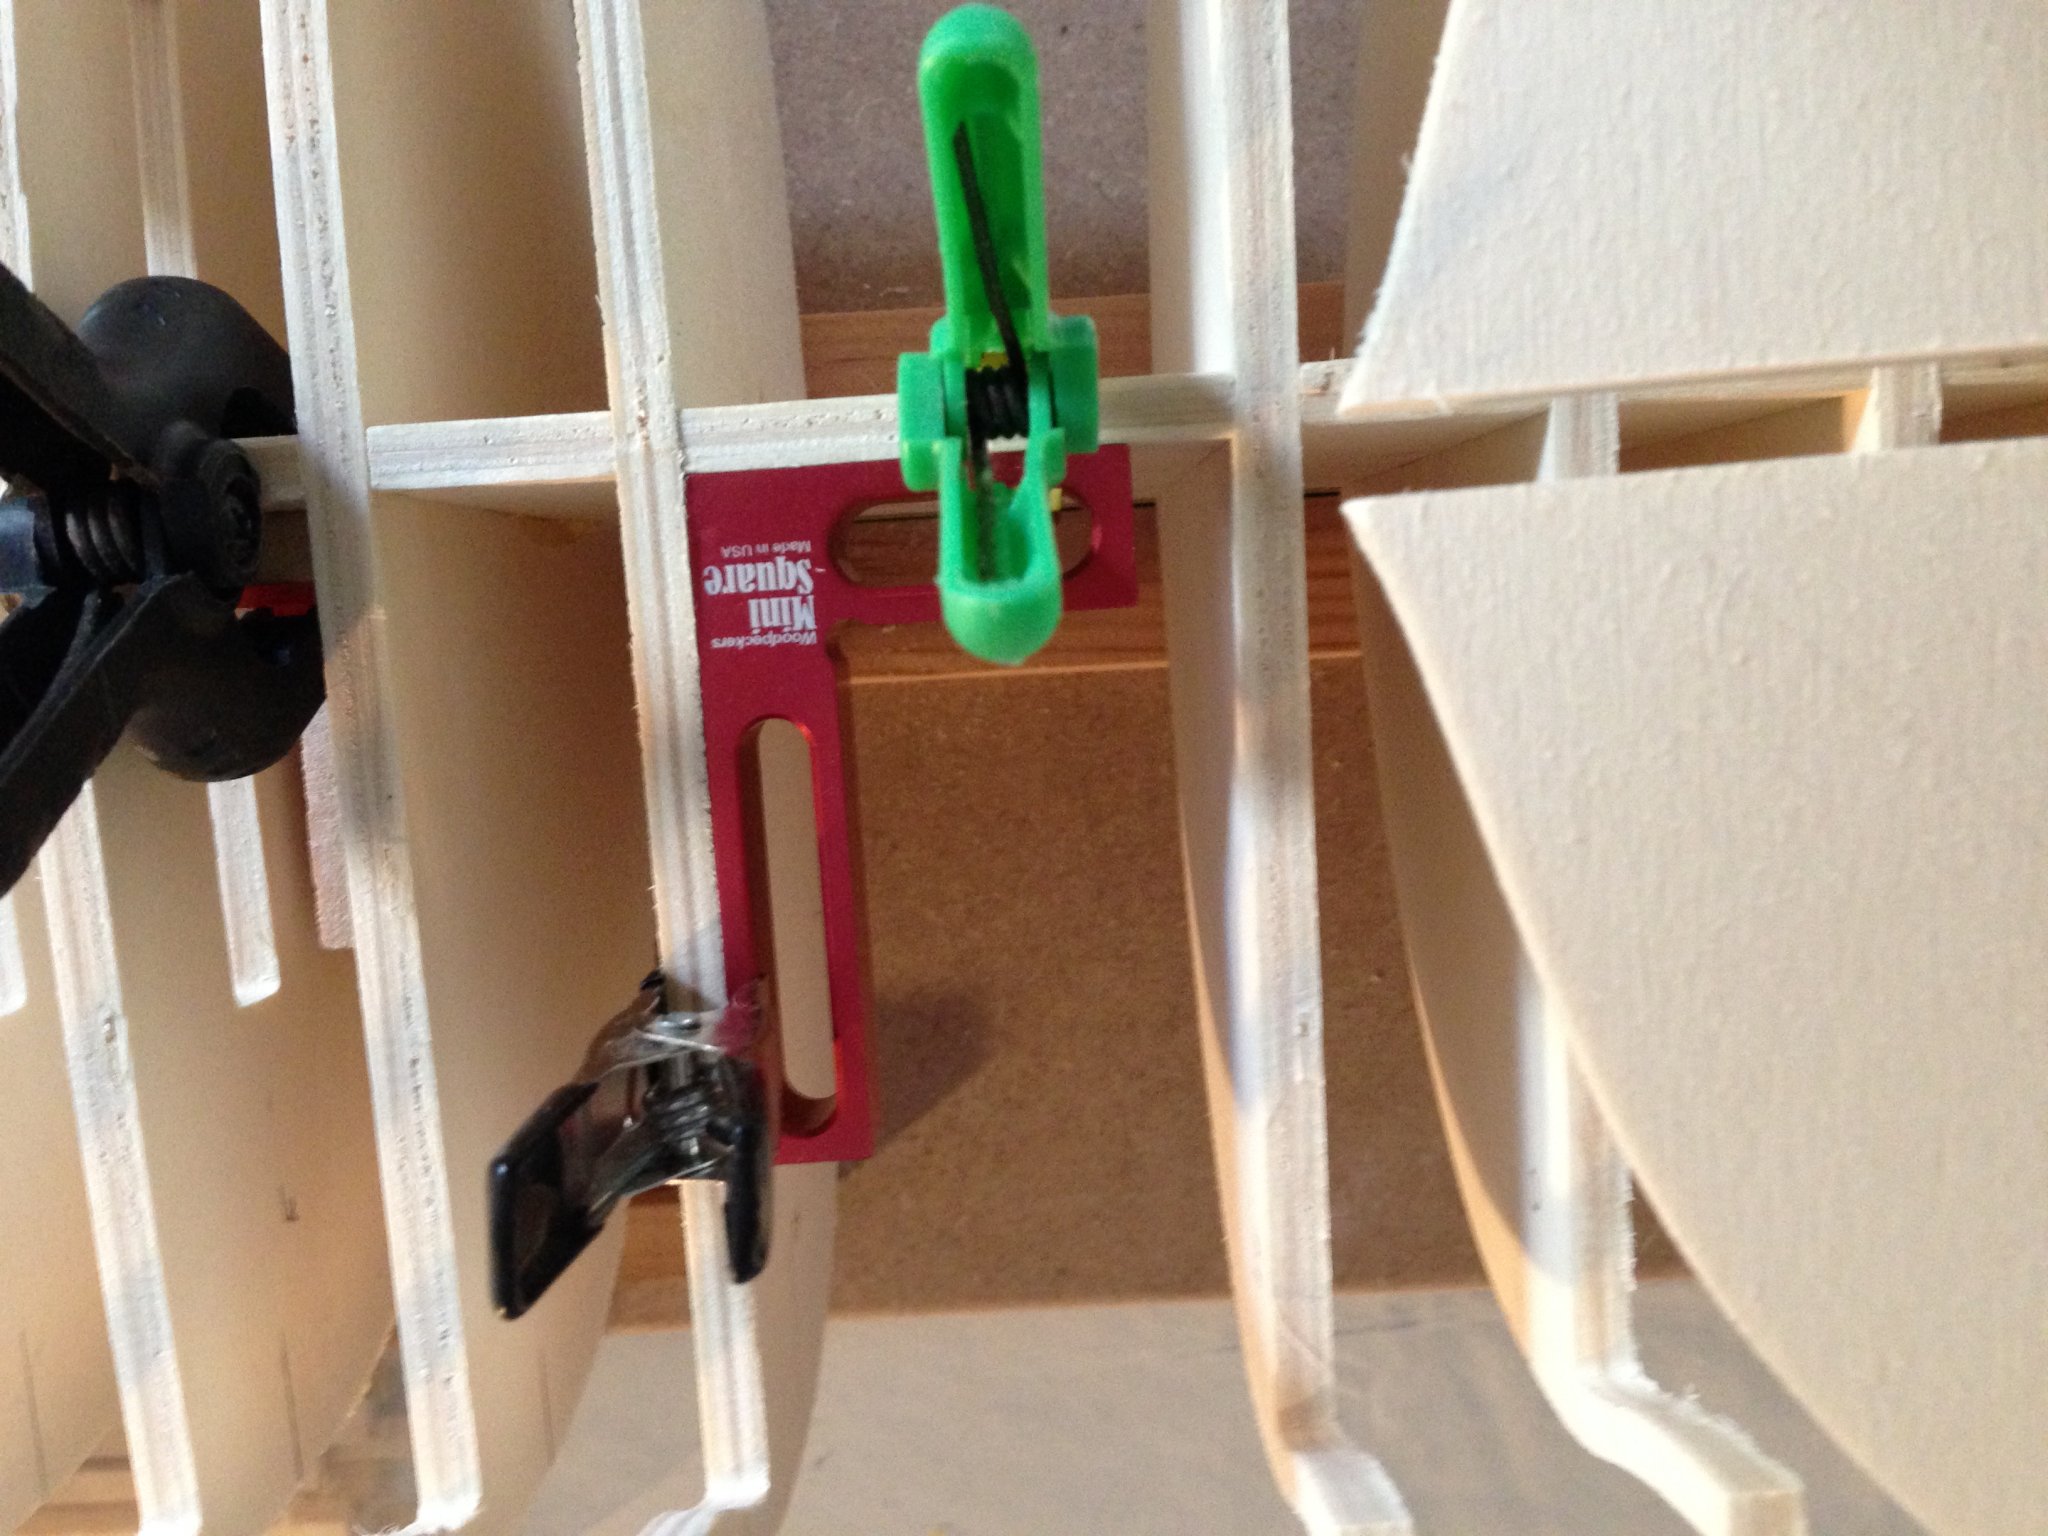
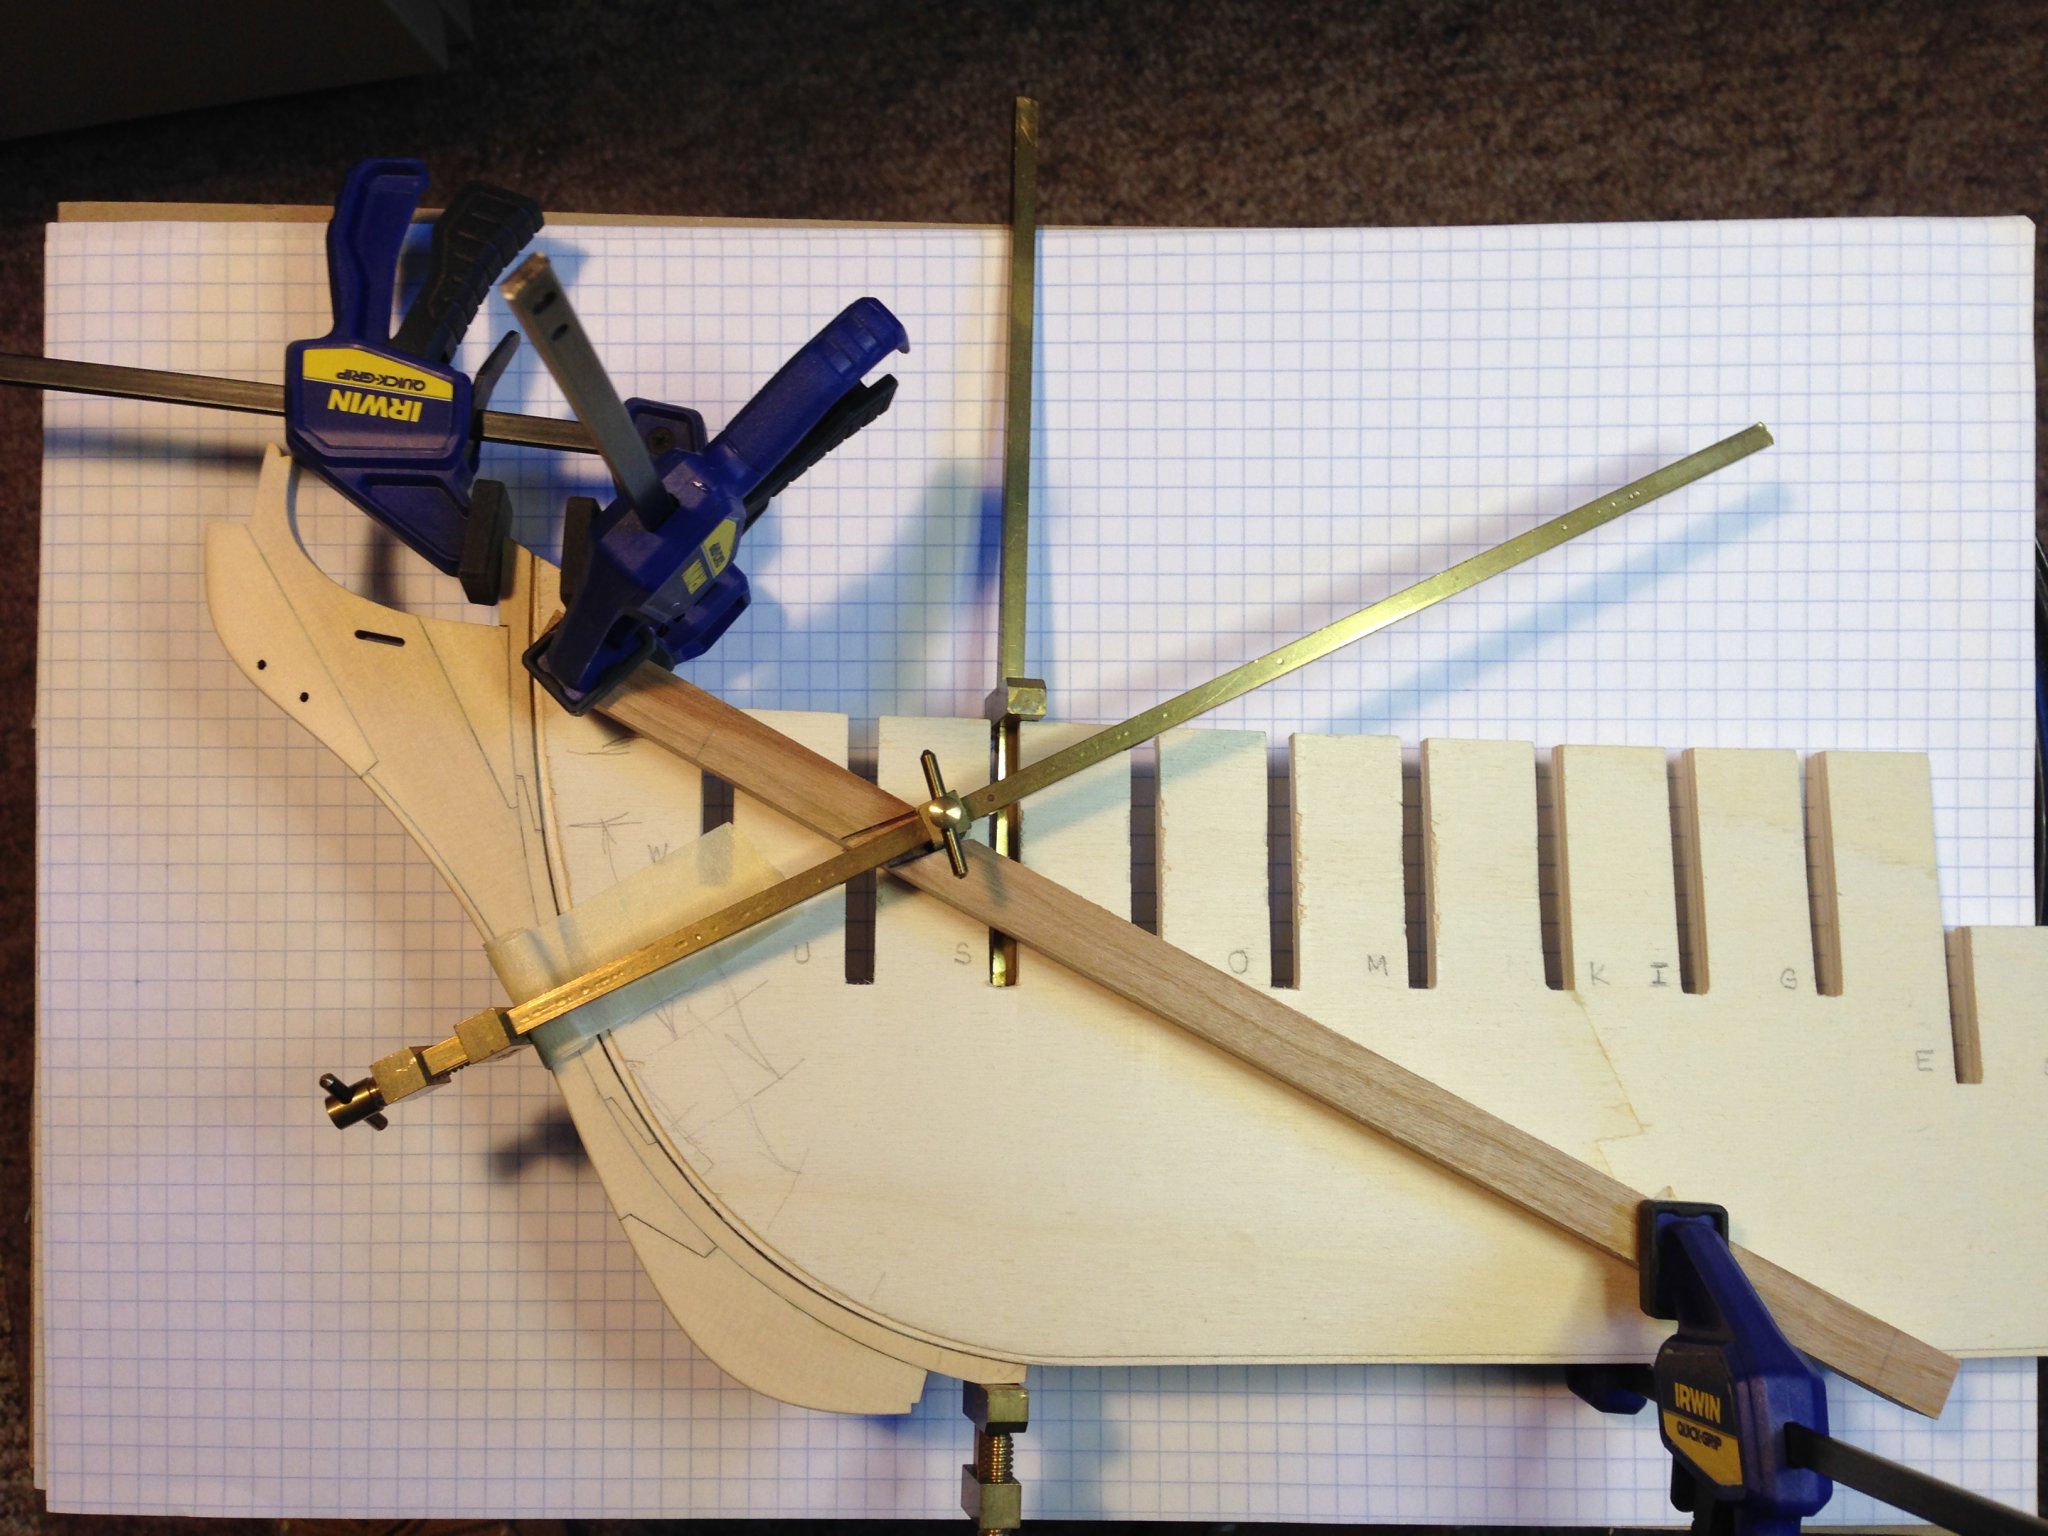
A vice I will admit to is tools. I find myself asking "do I really need another tool" and often the answer is yes "I guess". Anyway for what it is worth I bought this Woodpeckers pocket square which is primarily intended to gauge the trueness of the business end of woodworking chisels. Obviously it is one of those tools one uses in the workshop less than often so it has wandered into my modeling tool chest. I have found it to be just the right size for a number of build applications. Here is another I found. I am installing the bulkheads from the middle out to stem and stern so it just requires the removal of the nearest neighbor to fit. The reliefs in each arm of the square allow me to use some of the clamps with lesser throat and it does wonders to square up the bulkhead while glue dries. Albeit a bit pricey it seems to do the job. Joe

-
Thanks Chuck it feels good to be moving along albeit at a snail's pace. Again this is not a race but a journey. I am determined to get this right! Everyone on this forum whom has shared makes the journey so much more pleasurable. Joe
-
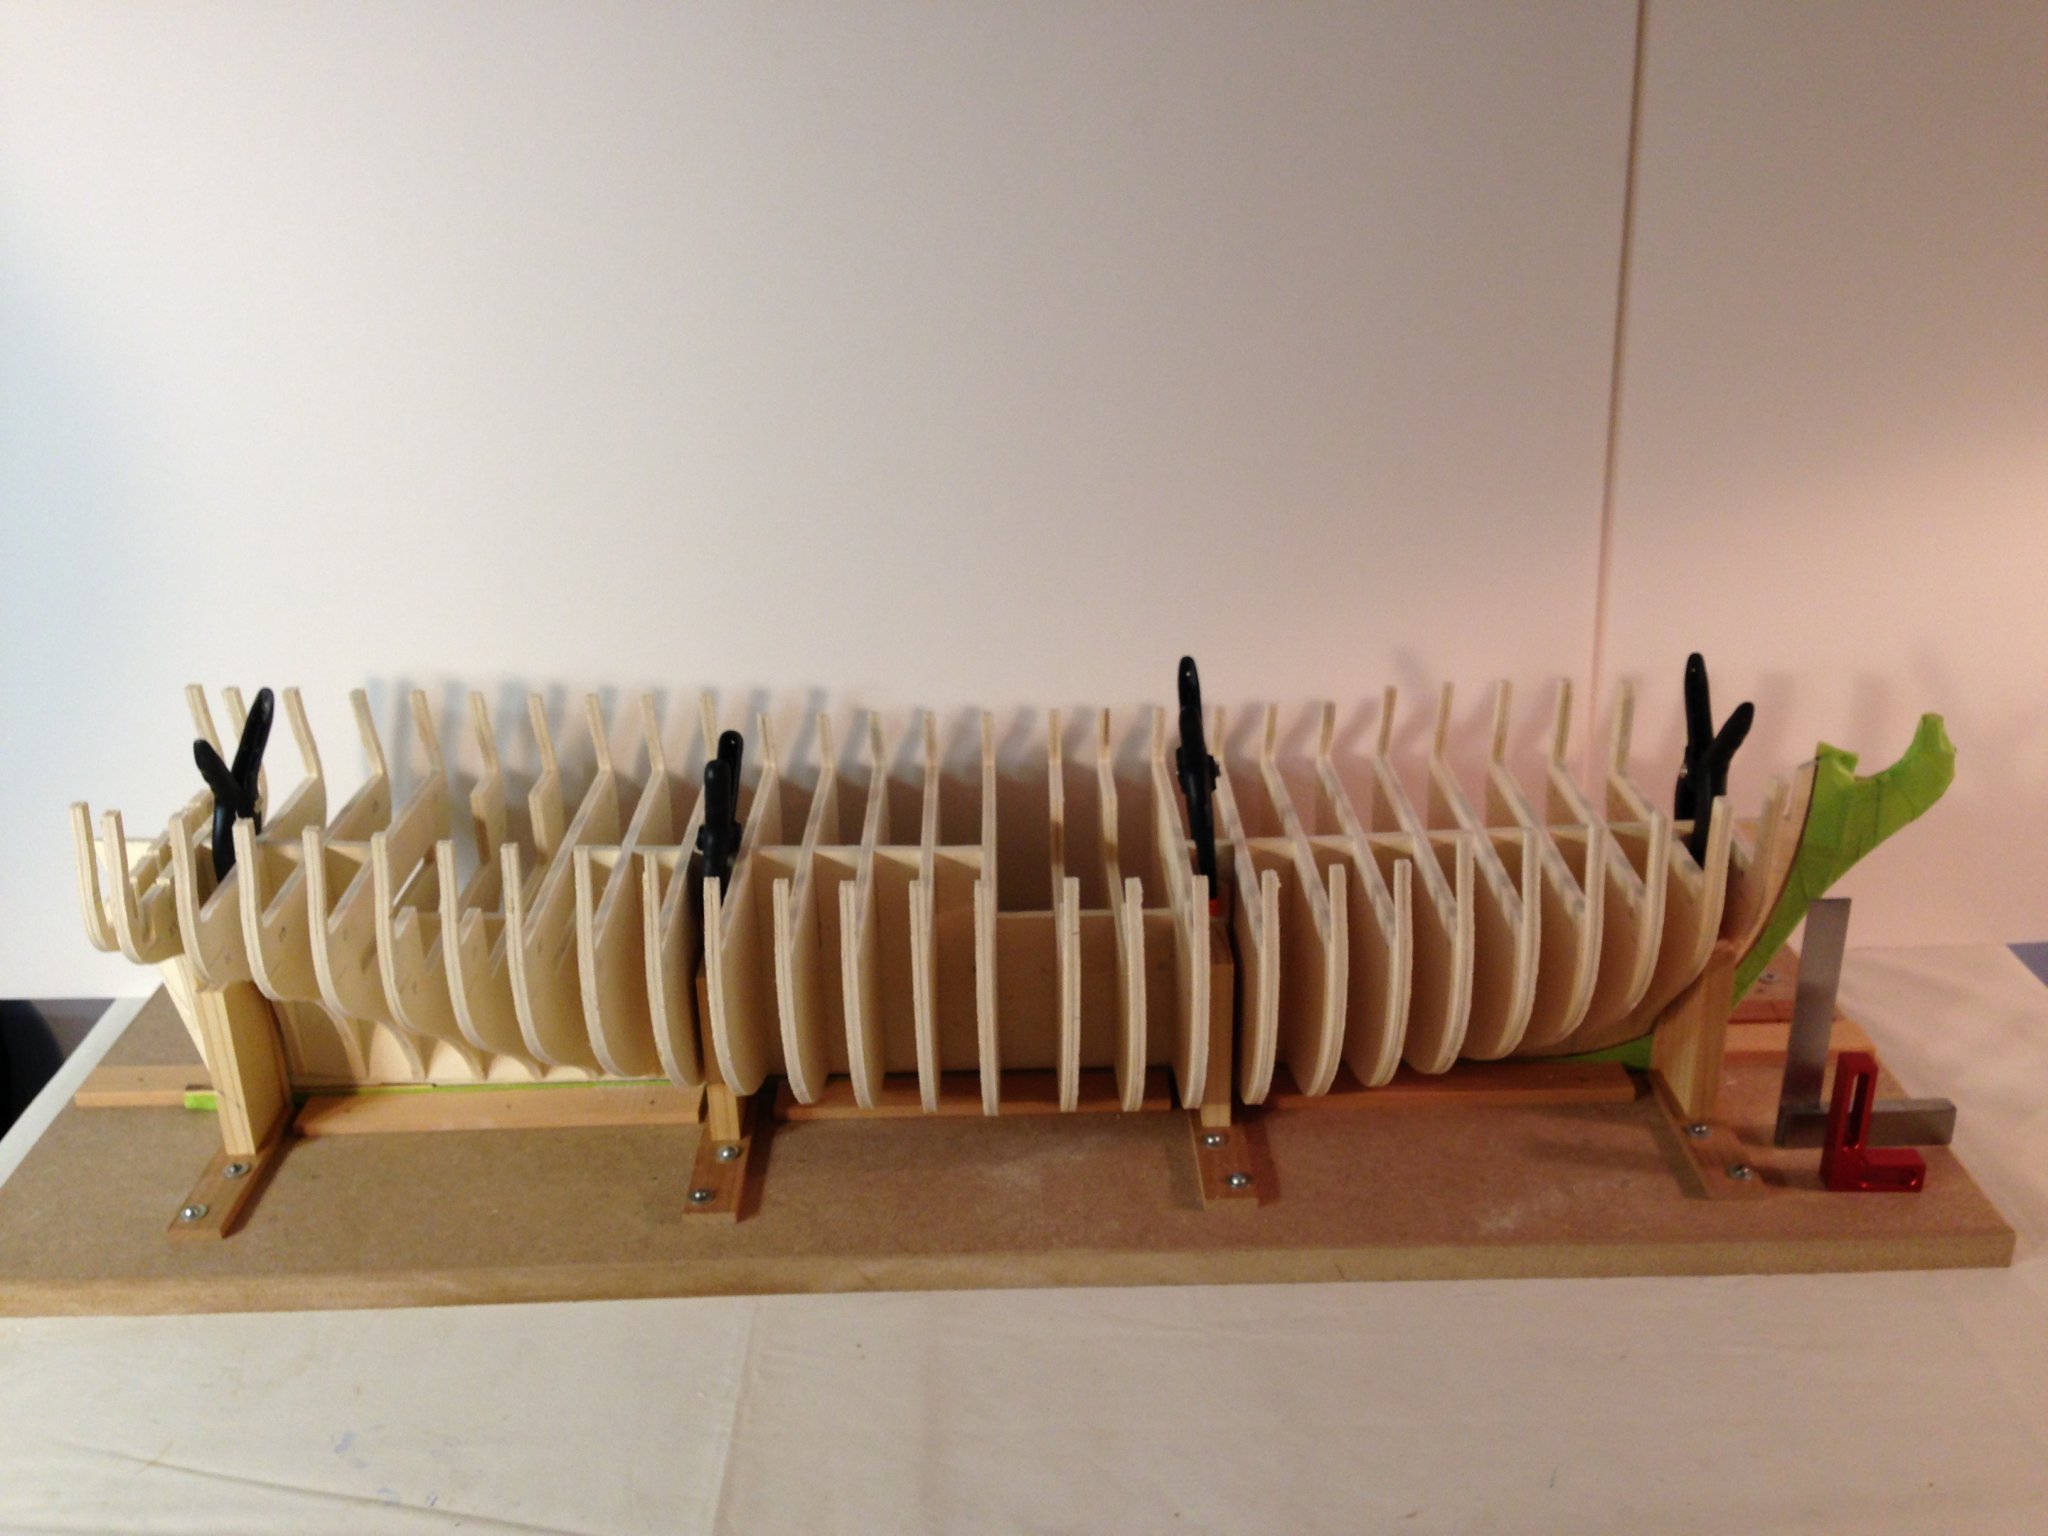
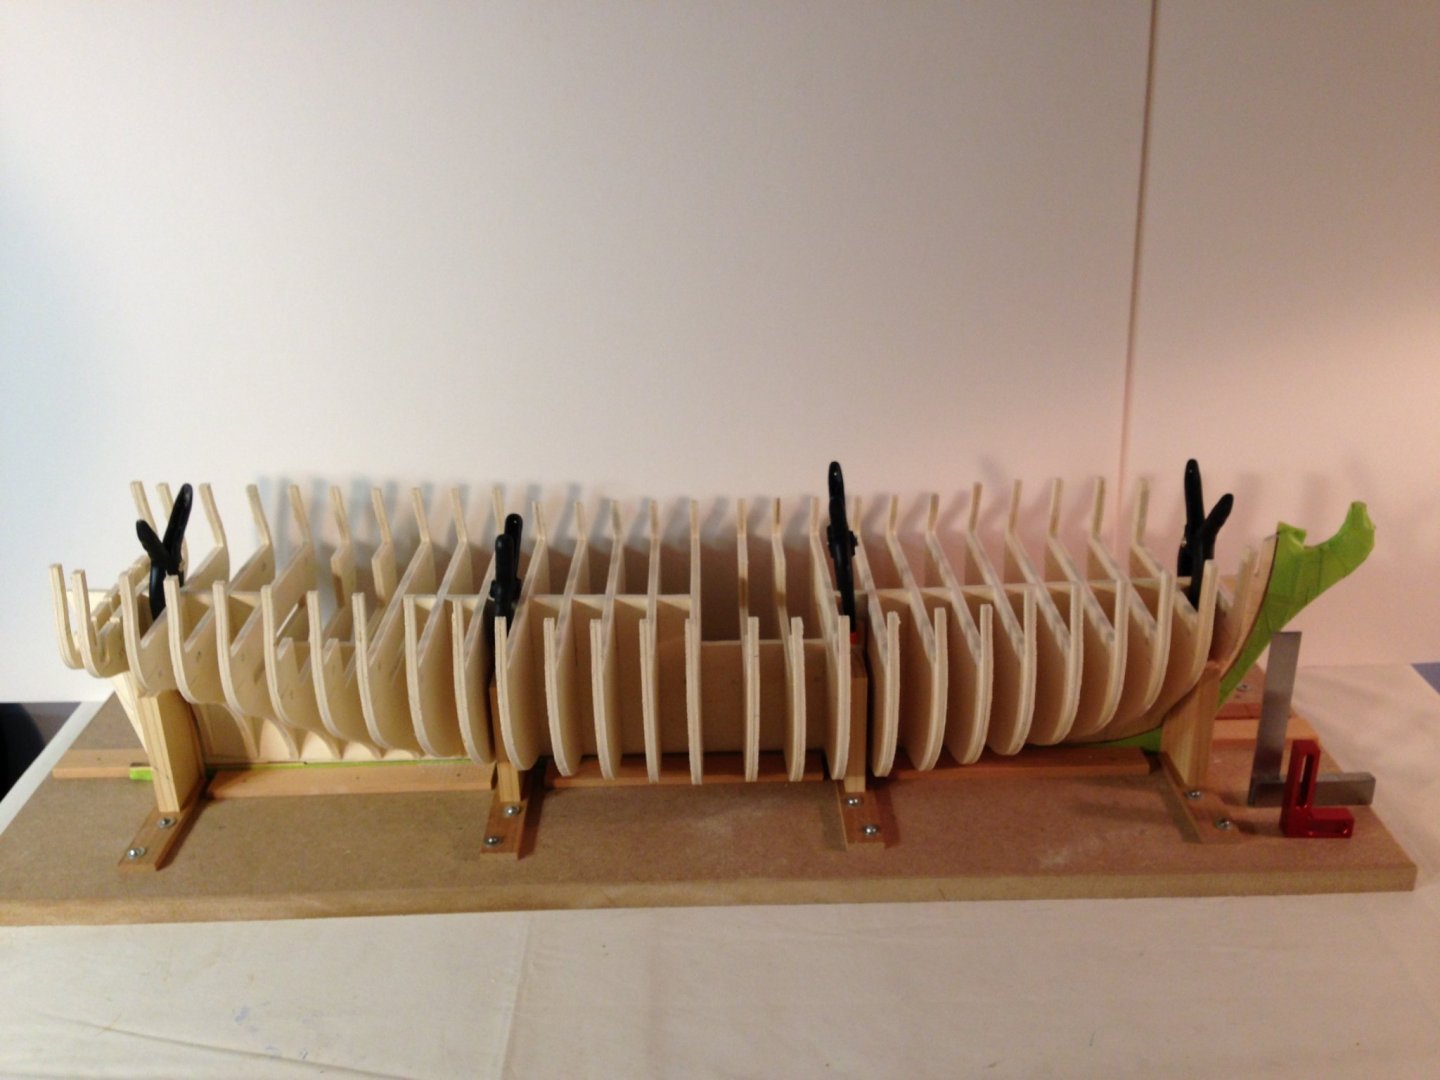
Another milestone of sorts (at least for me given all the other things swirling around in my life). All of the bulkheads have been dry fitted on the former. It did take more fine tuning of the bulkhead slots as they were a bit undersized and I was looking for a slip fit. As I have learned in the past if this fit is not deliberate the bulkheads tend to twist about the keel center line which in turn leads to further difficulties when installing the gun port timbers. In addition I would comment on the building board. I was intrigued by a group members approach to the build platform. I adopted Rusty J's method of the build board as I felt it served my needs better. I rebuilt the right angle supports a bit longer so that they could be clamped with my clamp stock. These supports are only used on the starboard side and the clamps ensure the assembly verticality (they needed some shim build out to achieve this). Thanks for the tip Rusty! As I glue these in, starting amid ships, I will turn my attention back to Cheerful inboard/deck detail while the glue dries. This model has had little attention since the Spring and is begging for forward movement. I will now proceed to where many of you have already gone. You all are an inspiration to me. Joe
-
Atlantis by Thistle17 - FINISHED - Robbe
Thistle17 replied to Thistle17's topic in RC Kits & Scratch building
John I returned the instructions to the client. They were of some help but mostly for the parts identity. I may be able to get you some copy of the English instructions if she has not placed them at their retreat home. PM me with an address (email or otherwise) and I will try and get them. Joe -
Thank you Mike I am going to give Cheerful (and Winchelsea when the time comes) another try using your approach. Joe
- 607 replies
-
- 1
-
-
- winchelsea
- Syren Ship Model Company
- (and 1 more)
-
Mike your work is inspirational and I have to say you set a high bar. When you get to form the moldings can you give some "how to information" to those of us who could use some coaching. I tried it for my Cheerful by filing some 1/16 brass sheet with a bevel on one side so as to form a knife edge. I wasn't too happy about the result: (1) the boxwood profile shape was not crisp no matter at what angle I held the scrapper at at and (2) when applied to the 1/16 wide stock it had a tendency to wander off the center line. As a result the hull has yet to be dressed out. I anticipate the same result on the Winne without some guidance. Joe
- 607 replies
-
- 2
-
-
- winchelsea
- Syren Ship Model Company
- (and 1 more)
-
Finally I am have been able to start this project with the focus and attention it is going to need. If you follow the scratch build forums I am also involved in building the Viet Nam era River Patrol Boat for the museum where we hold meetings. That project even with good drawings and photos has no guidance other than our combined sense of how to build it. I liken it to building "in the air" as one might build a tree house. In contrast this project is exacting and so well documented that one has to respect each and every step of the build. I did not purchase the bulkhead sub kit but started from the raw Lite ply. I assembled the former sections on a 1/2 plate glass that is longer than the former full length to ensure I got the truest assembly. Because of the quality of the ply it still had a slight cup. The bow section even had a bit of cup at its upper reach hence the "strong-back" temporarily clamped across the body. This turned out to be a convenient location to add a clamp across the midsection of the stem which was sanded to conform as best as I could get it. Still I could perceive a very slight separation once fitted to the former. And as most of you know PVA glue is strongest when the wood surfaces are in good contact. Joe

-
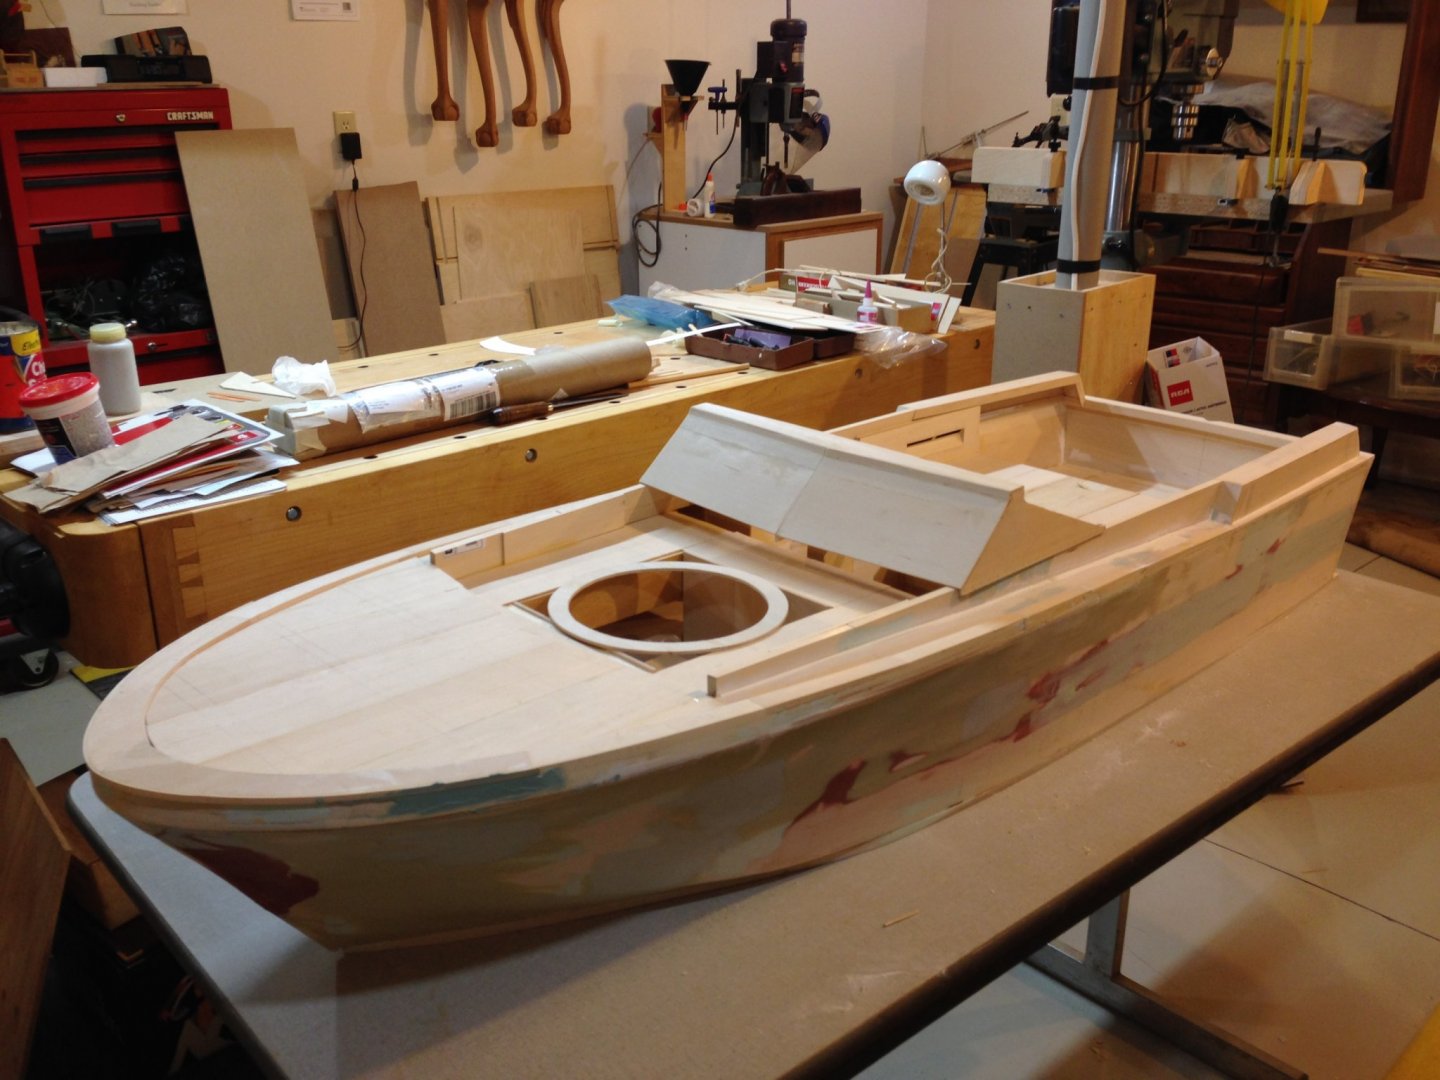
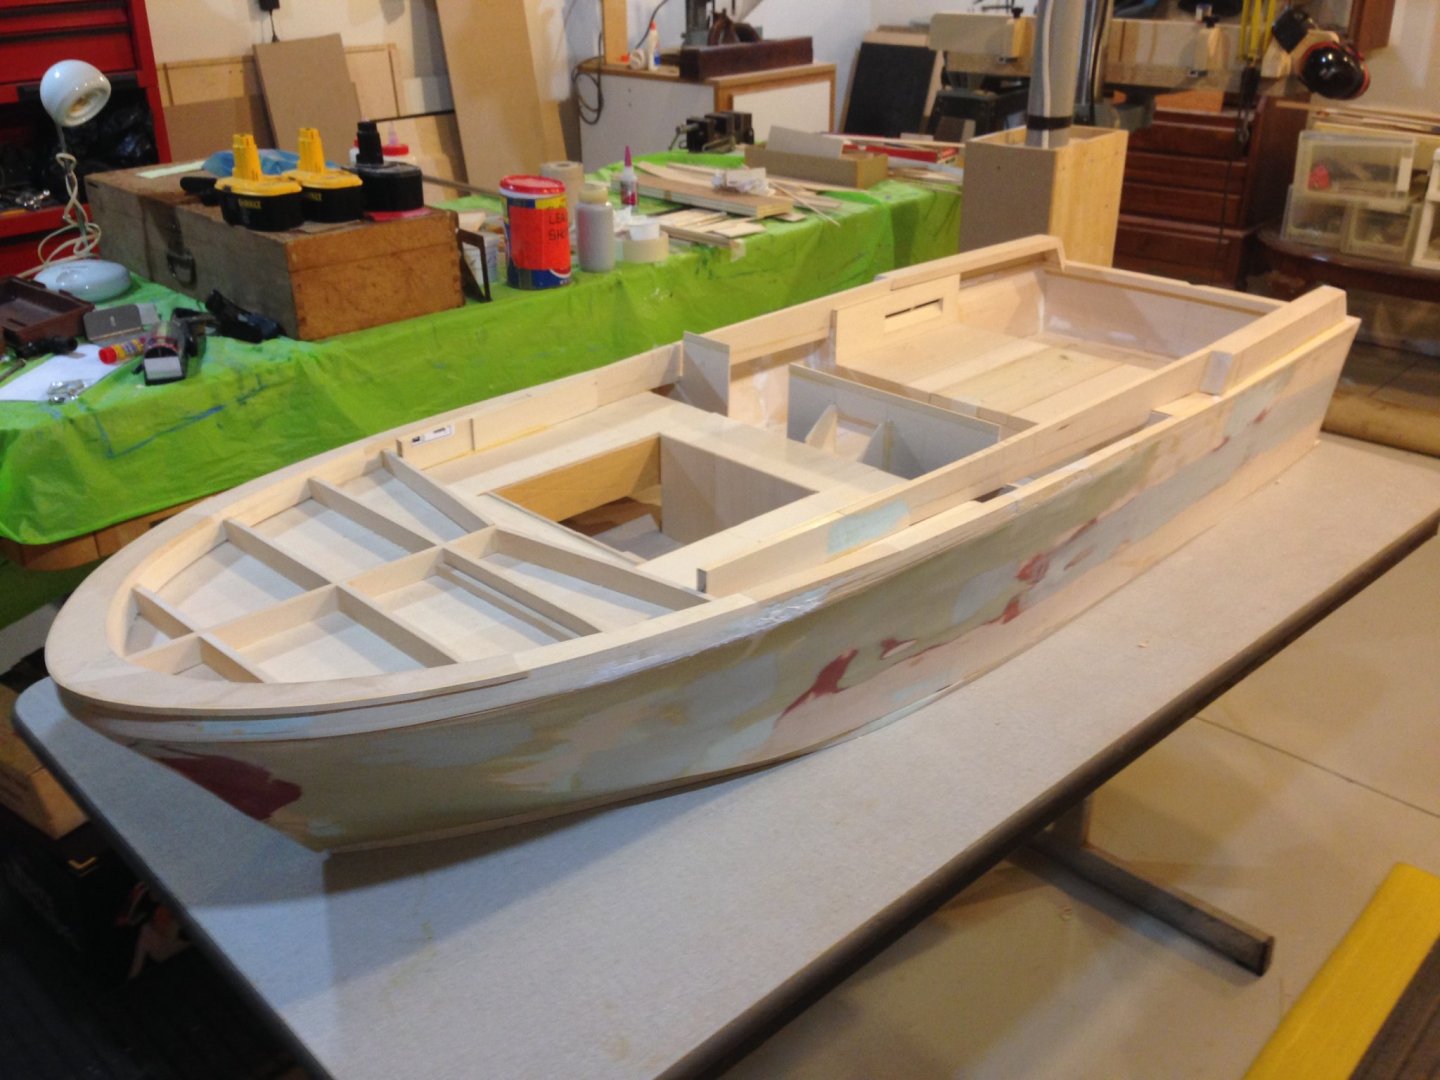
Exceptional weather here in upstate New York. I mowed the lawn Sunday and snow-blowed the driveway on Tuesday after an 11 inch snowfall! The only good thing I can say about the weather is it drove us inside for the remainder of the week and Jim, a fellow group member and I were able to install the remainder of the internal rail works and the bulkhead for the helm today. We will trial fit the helm this week hopefully as that has been prepared off site by another group member. I must say without Jim's engineering support in terms of drawings and cataloging of all archival pictures we would not have had a relatively smooth go at this project. Jim comes naturally to this role as he is an ex Navy officer that had oversight responsibility for nuclear power plants on some naval vessels. Beyond the helm work to be addressed we will now begin the process of infill for the true decking that runs from the bow towards the air intakes. This will include the forward deck skin and the forward gun turret deck frame out and top sides. The turret is to be farmed out to yet another group member. For those that might be visiting for the first time the model is just about 55 inches long. Don't be too critical of the overloaded work bench behind the model as this should be cleaned up before Thanksgiving. The table that the model sits on will hopefully have wheels before too long and this will enable parking it out of the way when other house projects take hold. I have a question to ask. We are using Rage Easy Sand at the moment for infill. You will also note we are using spackle compound (sparingly as it were) as well. I for one am not fond of the latter becuase of its long term durability. The Rage is much stronger but it tends to set up a bit too fast (it is a 2 part compound) to achieve really satisfying results such as fillet radii without a lot of careful and long sanding. Anyone got some other ideas for a glazing compound? Joe
-
Rusty have you determined where bulkheads #29 fit into the stern construction? Joe
- 642 replies
-
- 1
-
-
- winchelsea
- Syren Ship Model Company
- (and 1 more)
-
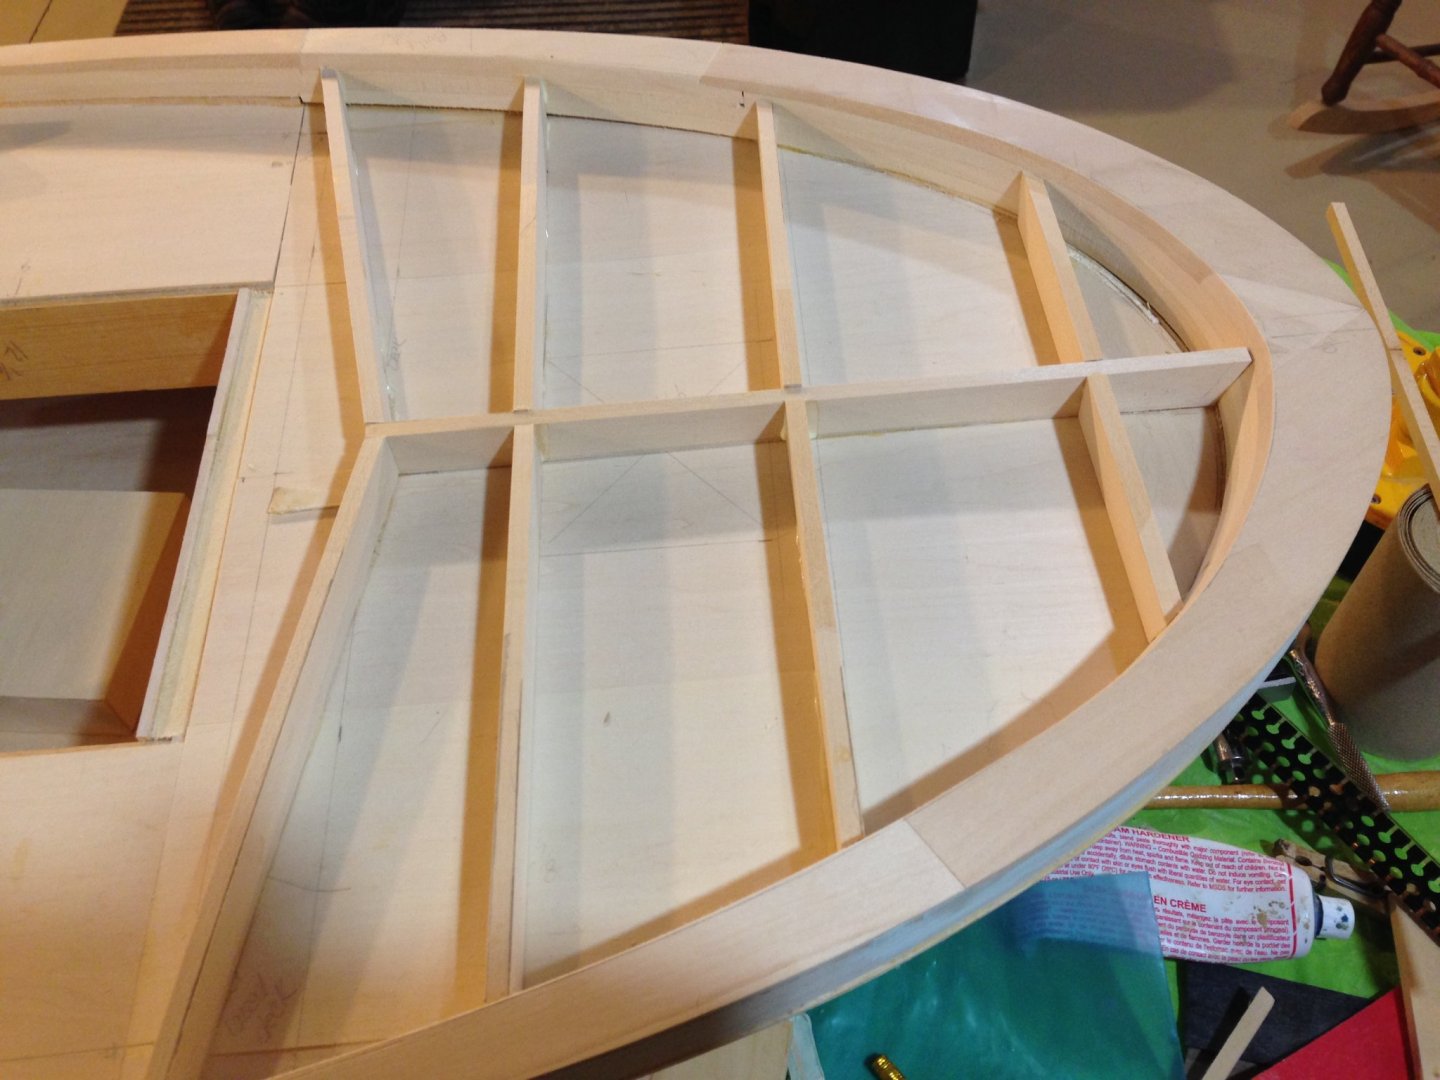
If truth be told there was likely a smarter way to incorporate the upper rail as described previously. Note the grid work added to the sub deck to raise the actual deck to its proper height forward of the helm. The rail that will not be evident inboard need only have been beveled where it is visible and a good deal of the inboard shaping would have been unnecessary. One lives and learns. In any event the grid work will be skinned over and faired into the visible rail assembly. Another observation we made today is that the bow section of the rail has a slight rake outboard when we inspect the supplied photos given to us by the Patriots Point folk. That too is on the schedule to be modified prior to attachment of the bumper strip. Also the air intake covers have been attached and the "rail" that advances forward from the covers is being integrated. It will terminate upon the rear members of the "grid work". That will be depicted in the next post. Joe
-
I will not clutter the forum with another rendition of bulkhead machining and keel build. Rather I will post the assembled skeletal structure and take it from there. Sufficient it to say that all bulkheads are machined as well as the false keel/former. As I assemble the Alaskan Yellow Cedar for the former supports I am forewarned that the laser char is going to be a problem in terms of keeping components clean. A good clean eraser doesn't really do it. I have had to sand them with 600 grit paper. I think I read or heard somewhere that a measure of control of the char is to give the AYC a surface coat of shellac or wiping varnish diluted. Any thoughts out there would be appreciated. Joe
-
Jim there just isn't a substitute for the Byrnes saw. I sold my Preac on Craigs and that helped defray the expense.
Joe