


ccoyle
-
Posts
10,038 -
Joined
-
Last visited
Content Type
Profiles
Forums
Gallery
Events
Posts posted by ccoyle
-
-
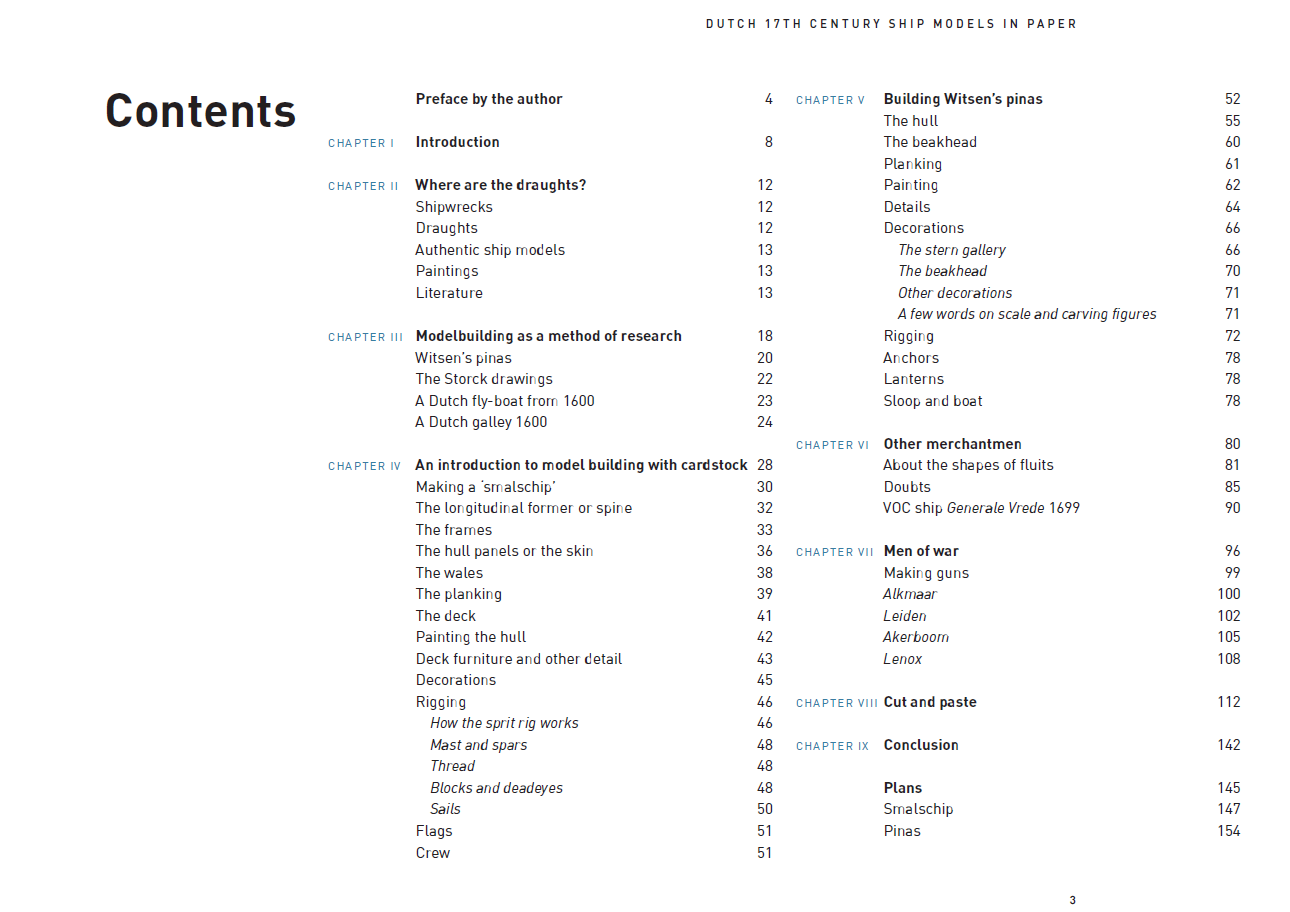
Dutch 17th Century Ship Models in Paper
An Introduction to Scratch Building Paper Ship Models
by Ab Hoving and Emiel Hoving
2024 Seawatch Books
USD $75.00
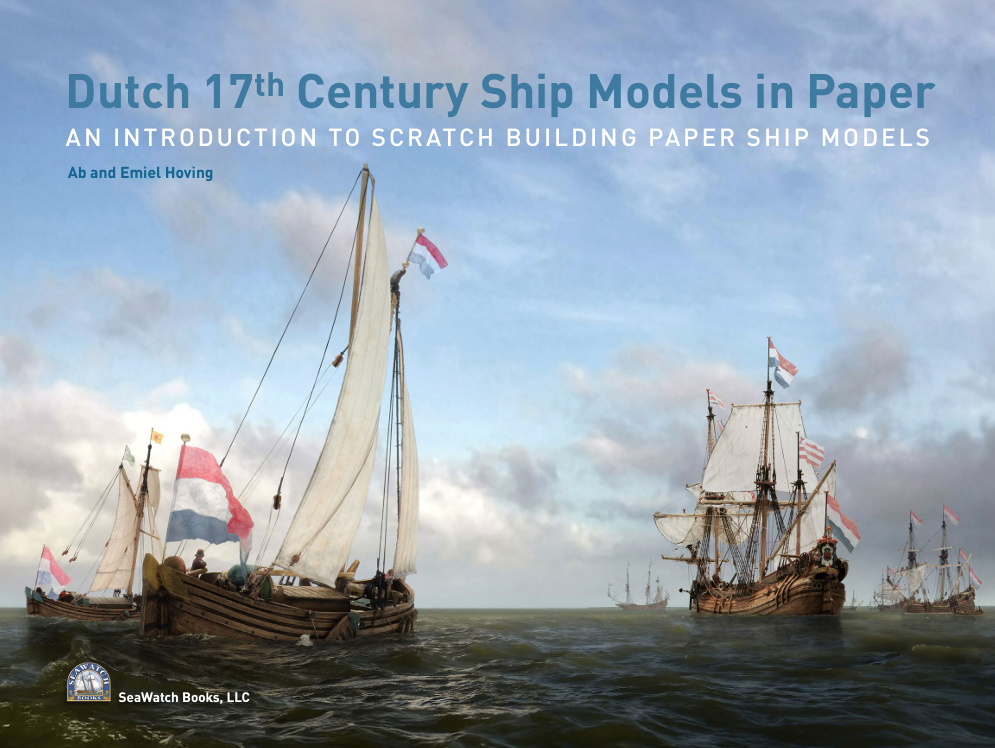
All photos courtesy of Seawatch Books
Long-time members of MSW will need little introduction to Ab Hoving, a man well known as a curator, modeler, and expert on 17th century Dutch shipbuilding. His exceptional knowledge in these areas is on display in his latest book, Dutch 17th Century Ship Models in Paper: An Introduction to Scratch Building Paper Ship Models. I really don't need to say much regarding the topic and intended purpose of the book, since both are plainly stated in the title and subtitle. Rather, I will focus on the Big Question that any potential buyer of the book will undoubtedly have in mind when thinking about putting the book in his or her shopping cart at Seawatch:
Can I actually build a card model of a 17th century Dutch ship using the methods outlined by Mr. Hoving in this book?
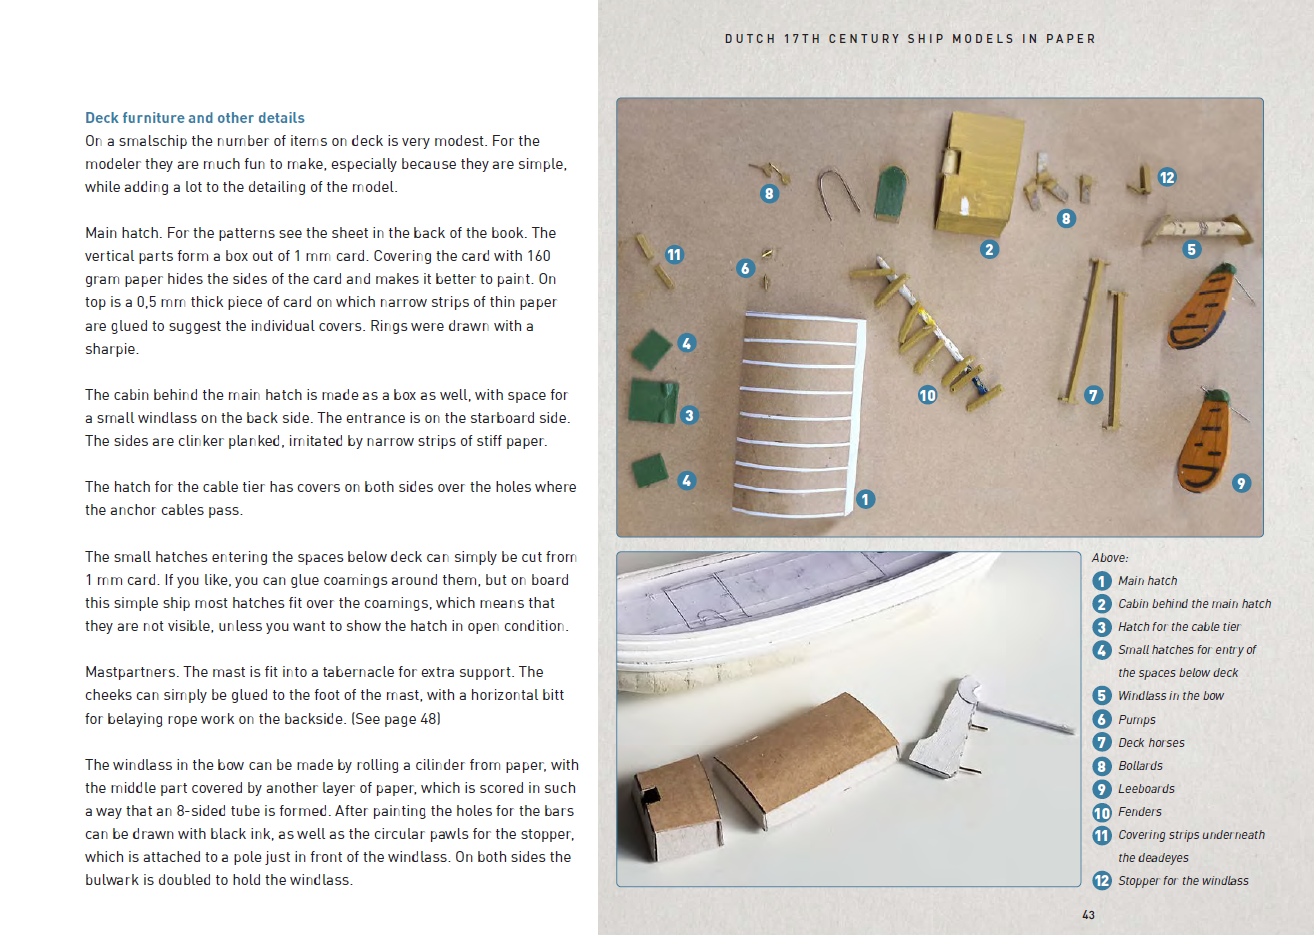
I believe the answer to that question is a solid yes. First of all, Ab's method will not be completely foreign to anyone who has built a wooden ship model from a kit -- it's a take on the classic plank-on-bulkhead technique, starting with a longitudinal hull profile and a set of bulkheads. Instead of wood, the hull is built up from card stock. After a first planking in card, the hull is then 'planked' with self-adhesive plastic film (this is the method that we have seen so expertly done by MSW members Doris and Firdajan).
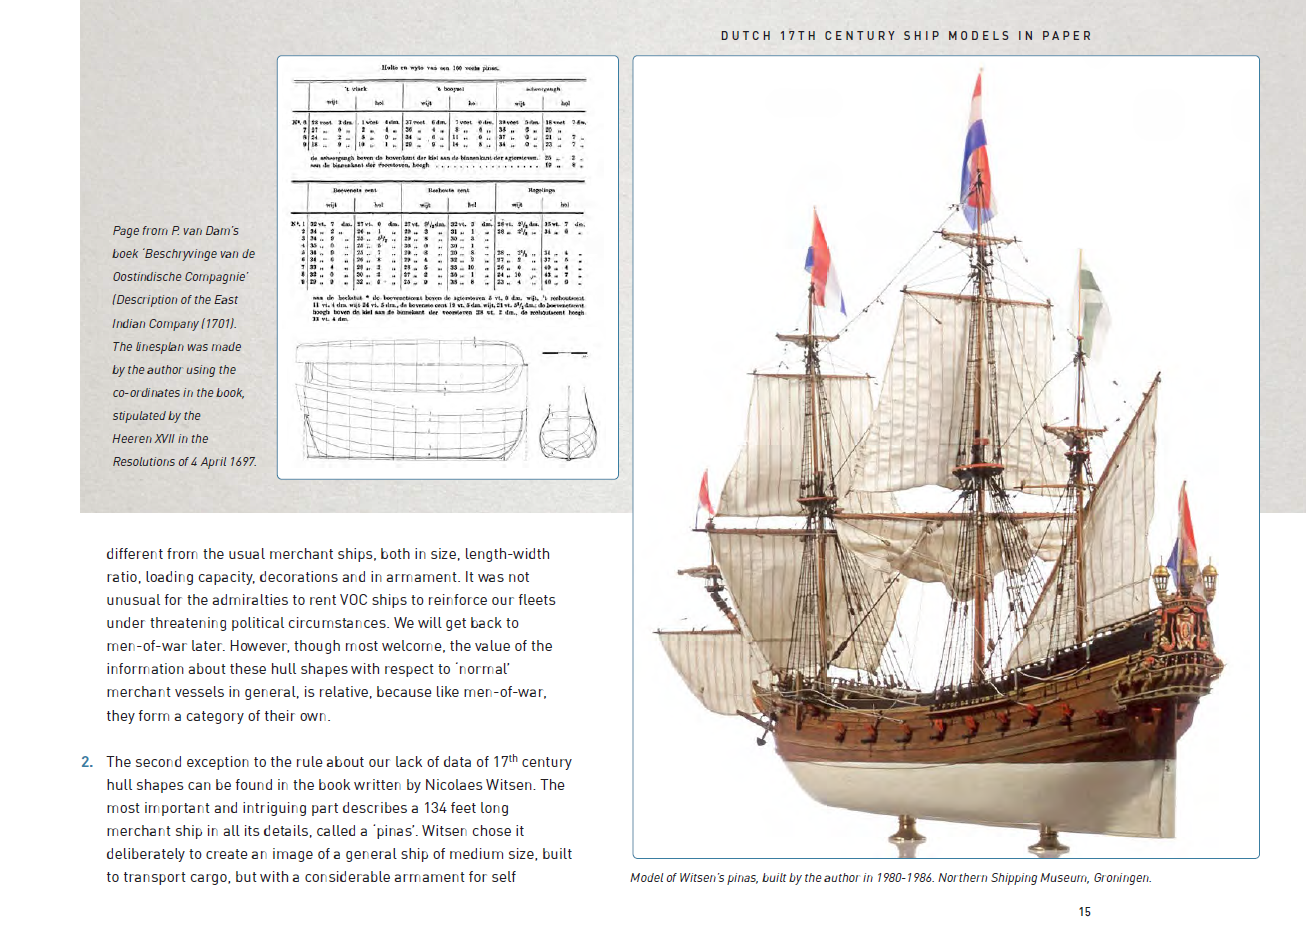
Ab walks the builder through two models, a relatively simple smalschip ("narrow ship") and a more complex pinas. Templates for the framing and planking of both models are provided in the book, and digital copies are available at Seawatch's website for those who have purchased a copy. Of course, after the basic hull is constructed, it needs to be appropriately painted. One of the things I have always appreciated about Ab's models is the high degree of realism they project as a result of his particular painting and weathering techniques. These are outlined in the book as well.
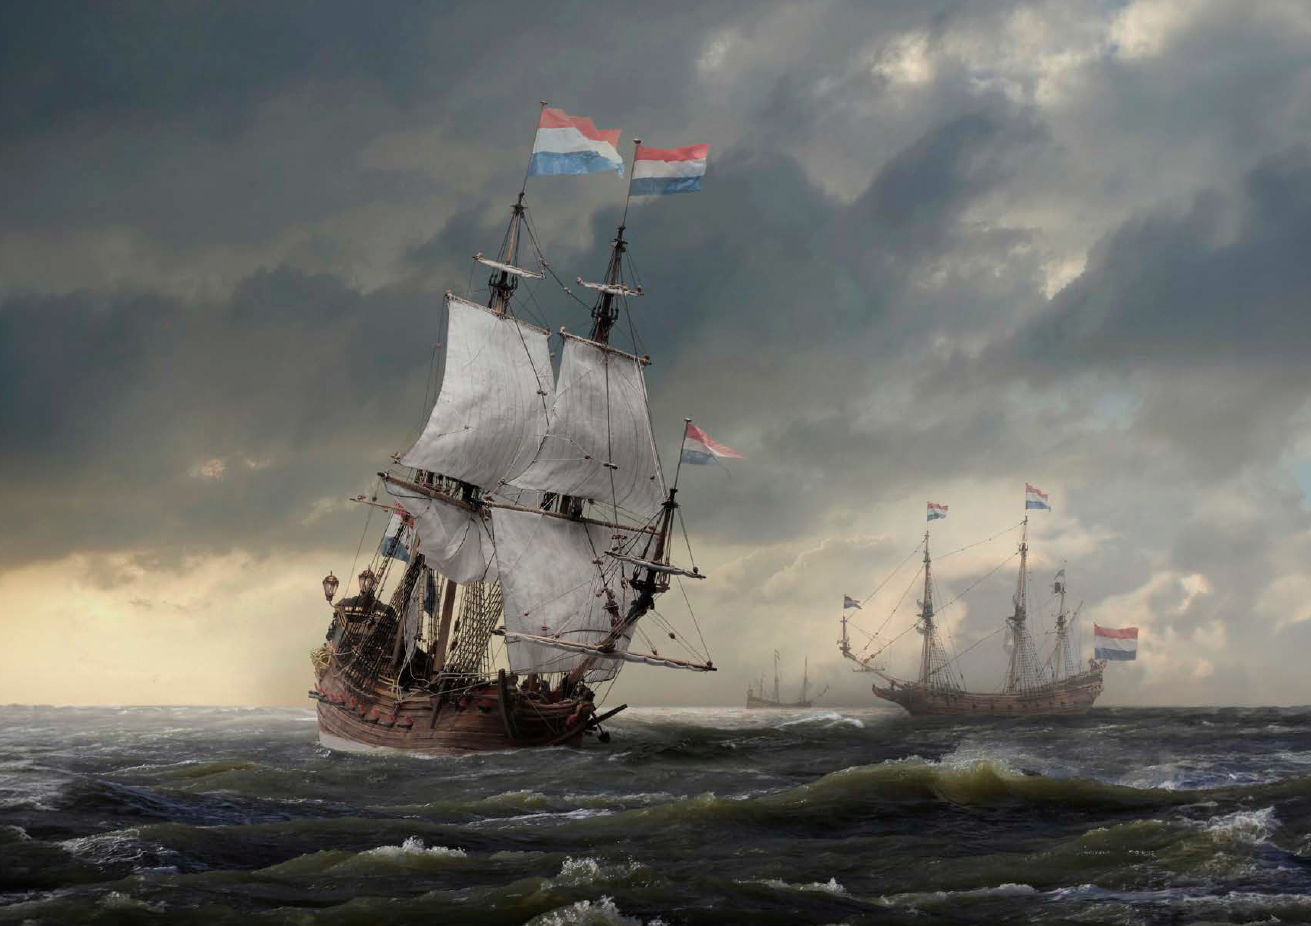
The book has some interesting selling points in addition to being a how-to on card modeling. The first few chapters are devoted to the vagaries of modeling Dutch ships due to the paucity of original source material (and the reasons for why such is the case), how the author has coped with those limitations, and how his research and his model building are inextricably linked (we who enjoy Ab's models should therefore be thankful for his intense desire to understand a subject as admittedly esoteric as 17th century Dutch shipbuilding practice). The book is also richly illustrated, both with diagrams and with beautiful photographs of the author's models. I was quite surprised, in fact, to learn that the book's photos depicted Mr. Hoving's models and not original works by the Dutch masters! His photo compositions are that convincing. Readers will be pleased to learn that the book describes exactly how to create such compositions using Photoshop.
To summarize, purchasers of this book will receive some interesting insight into the author's research and background, detailed descriptions of how to build two different Dutch ships using a technique that can readily be used for other ship model subjects, a plethora of beautiful photographs suitable for any coffee table, and a treatise on how to create life-like photographic compositions incorporating one's own models. That makes it a worthwhile addition to most anyone's library.
- James H, GrandpaPhil, Paul Le Wol and 15 others
-
 16
16
-
 2
2
-
See, wouldn't all of that have been so much easier to depict in, gee, I don't know -- a diagram, maybe? 😉
-
Welcome aboard!
- mtaylor, serpe and Keith Black
-
2
-
1
-
1 hour ago, HardeeHarHar said:
new book on "Dutch 17th Century Ship Models in Paper"
A review of this title is in the works.
-
4 hours ago, amateur said:
But there are pics showing this part (only head on….)
That confirms my guess for the front half, but the rear half remains a mystery. I suspect it is a scoop, but can't know for certain.
-
The gift that keeps on giving . . . 😑
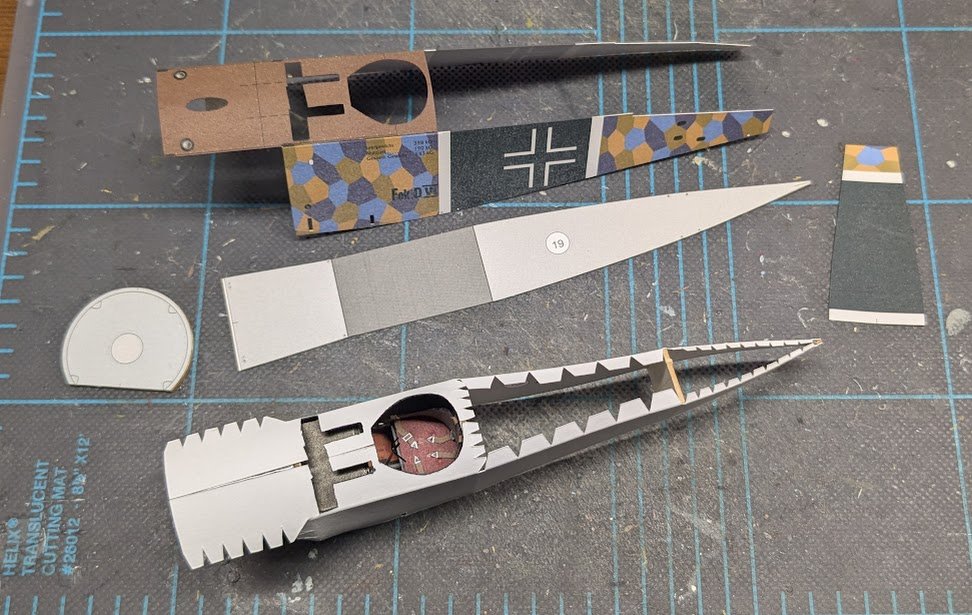
Moving on to the horizontal stabilizers -- we start by gluing up the framing, except for two problems:
- As we have previously noted, the laser-cut fret is the wrong thickness, which means two of the four interior framing parts are too thick. Or I should say "would be too thick" (see #2).
- One of the four parts, 26c, the part that forms that aft edge where the elevators will attach, is missing completely. I don't just mean it is missing from the fret -- it's missing on the printed parts sheets, too
These two issues are not insurmountable, but taken along with everything else that has been a problem so far, they are extremely annoying. No kit builder should have to put up with this. I no longer wonder about why there are no finished examples of this kit on the internet -- perhaps mine will be the very first.
Oh, Mr. P -- Fool me once -- shame on you.
Fool me twice -- shame on me.
Fool me five times in a row -- good grief, what is wrong with me?!?
(And now, for the cherry on top, the post editor is not allowing me to paste an image into my post like I have done at least fifty bazillion times before.)
- Dave_E, Landlubber Mike, thibaultron and 4 others
-
2
-
 5
5
-
Welcome aboard!
A three-masted man-of-war is one of the most difficult types of wooden ships to model. As a beginner, you should aim toward the opposite end of the spectrum: smaller ship, fewer guns (if any), and less masting and rigging.
To get an idea of what other beginning modelers are building, take a look through the following 523 build logs, all of which have been tagged as first builds:
https://modelshipworld.com/tags/First Build/
Pay particular attention to the builds that have been tagged as "finished." Those are models that beginners actually finished -- a good attribute for any beginner kit!
-
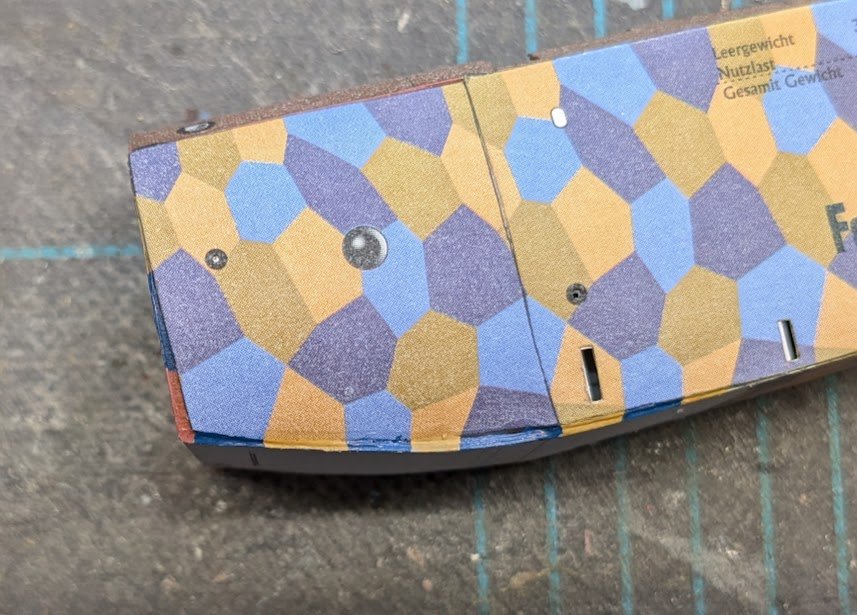
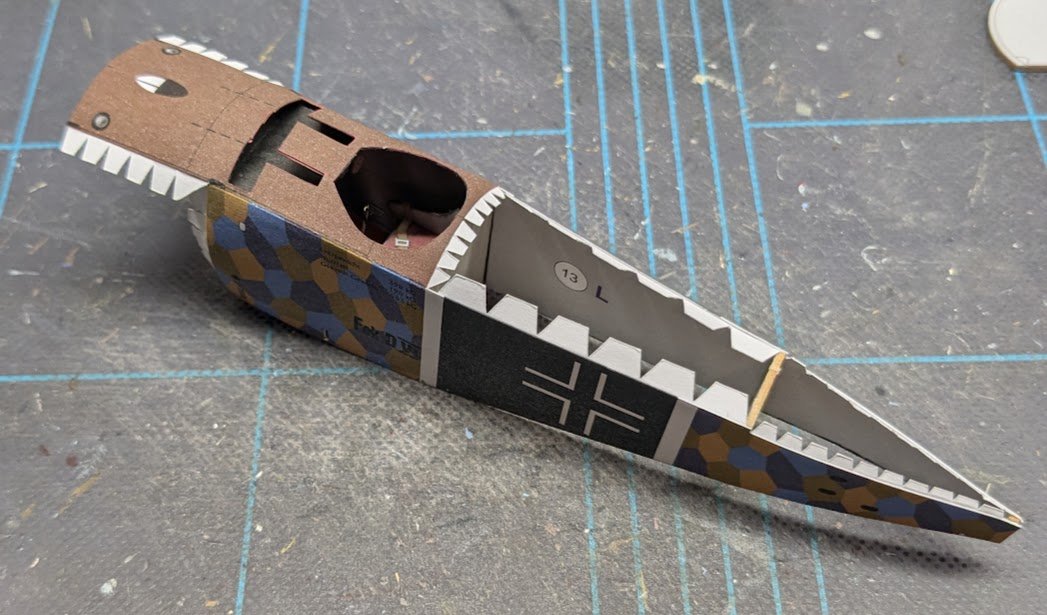
Thought I'd start this post by showing a fix for a particularly ugly seam. I first filled in the seam with some glue. After that dried, I used my AK markers for some cosmetic work. I did not try to match the lozenge colors exactly -- there's five of them, after all. The nice thing about lozenge camo is that the whole idea behind it is to break up outlines, so I simply used the markers to break up the continuous seam line.
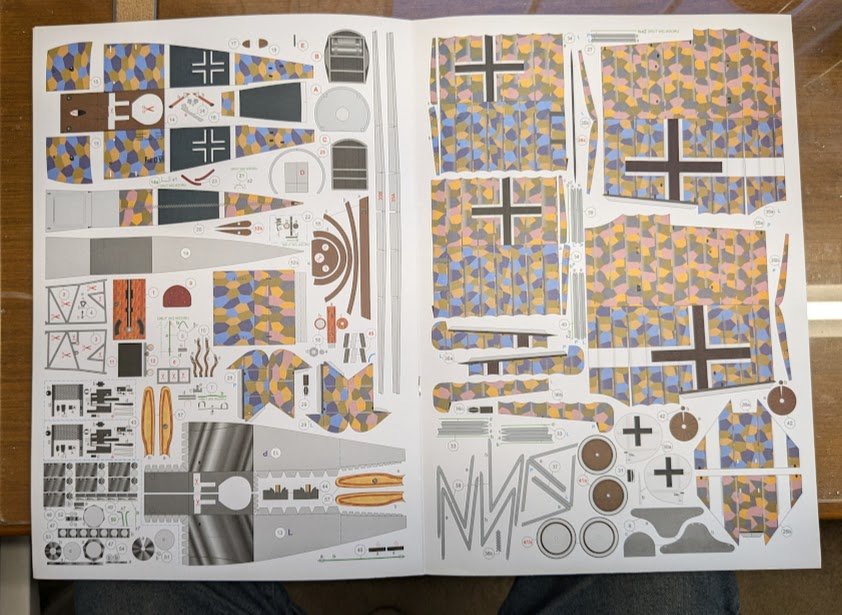
And now for another lesson in sloppy kit design. Take note of parts 17 and 18 in the image below (lower right). They're supposed to be placed on the forward fuselage between the guns.
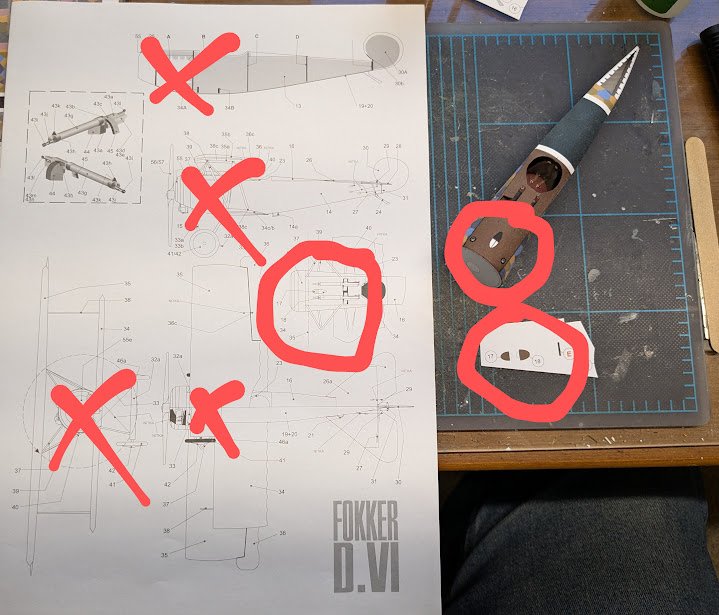
Now notice that there are five different views of the fuselage shown in the diagrams. Five! Of those five diagrams, only one shows parts 17-18 -- but only from above, not from the side. There is no way to tell exactly how the two parts should be placed. To make matters worse, since only 59 D.VIs were built, none survived to the present day. All of the color photos you can find online depict replicas, and none of them have the parts 17-18 structure. Contemporary B&W photos aren't much help either, because whatever that little structure is, it obviously wasn't interesting enough to tempt any photographers of that era to take a close-up photo or two. To top it off, I haven't found any finished examples of this model, either. Models built from other kits, whether plastic or RC, have been no help either -- most of them don't have any structure between the guns.
Whatever -- onwards!
- Canute, Old Collingwood, thibaultron and 6 others
-
4
-
5
-
-
-
5 hours ago, SaltyScot said:
I would really appreciate any input
I also moved your topic to the correct area.
-
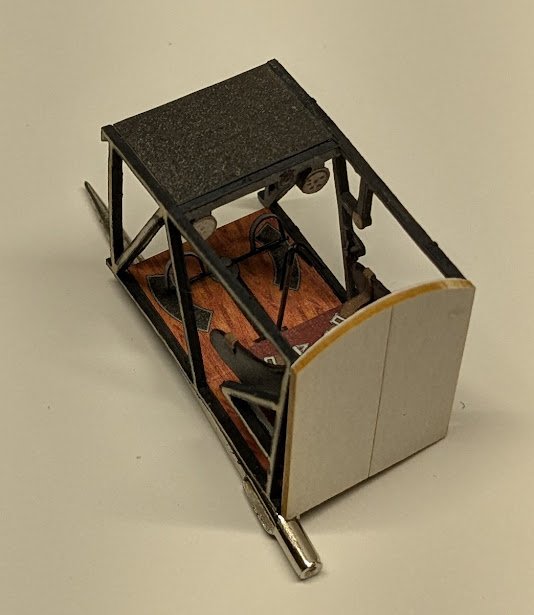
So, here's the basic fuselage parts. The bulkheads and salvaged cockpit bits have already been added to the interior skins.
The fuselage is kinda flimsy at this point.
The main exterior skin is now added.
That's it for now.
-
58 minutes ago, Jsk said:
Maybe the manufacturer simply used the wrong thickness of card for the laser cut parts?
That is a possibility, but one that should never have made it out of the barn. There are also other niggling design issues that are definitely the fault of the designer and not production issues. For example, cut-outs for the lower wing spars are marked on the exterior cockpit skins, but not the interior skins through which the spars will need to pass. And since the spars must be able to pass through the fuselage structure, that means that at least half of the lower wing, as designed, can only be skinned after the wing substructure has been added to the model.
1 hour ago, Jsk said:Looks like a Dr.I fuselage mated to D.VII wings.
That's kinda what it is, although I believe I read somewhere that the wing area is reduced compared to the D.VII. Also, the D.VI was supposed to be mated to a more powerful engine, which as I recall never made it into large scale production. The plane thus never achieved its maximum potential, and the war ended before much could be done about that.
- Ryland Craze, Egilman, Canute and 7 others
-
10
-
I don't know exactly what you've read, but I suspect the bashing is only necessary to make the model more historically accurate, since OcCre kits tend to incorporate a lot of simplified and/or off-the-shelf fittings. It should also make an attractive model out-of-the-box, if that's the route you choose.
-
9 minutes ago, Jsk said:
I know the Card Purists would run me out of town on a rail
I don't think we have any of them here.
- GrandpaPhil, druxey and Canute
-
3
-
Upon further examination, the fix I mentioned in my previous post will not work. The assembled cockpit structure is simply too large in every dimension, making a quick fix impossible. So, I have cut the framing apart and will work on fitting most of the parts within the allowable space on the interior skins. Of course, post-assembly surgery isn't always neat, and this time that means that the side pieces cannot be reused. As I always point out, finished cockpits are a lot of work that can't be truly appreciated once the model gets zipped up, so I'm not overly upset about the parts that must be omitted. What I am annoyed about is the possibility that most or perhaps even all of my laser-cut frames set may be unusable as well -- which kind of defeats the purpose of buying the laser-cut frames in the first place. This is not exactly a ringing endorsement of MPModels.
-
Marek vs. Pawel: A Hard Lesson in Competing Card Model Design Philosophies
Well, it's only Day 2 of construction on this kit and I've already found the answer to the question of how Mr. Pacynski's WW1 kits stack up against his WW2 kits.
Answer: They are just as fraught with unforeseen perils for the unwary and unsuspecting as any of Mr. Pacynski's designs. 😑
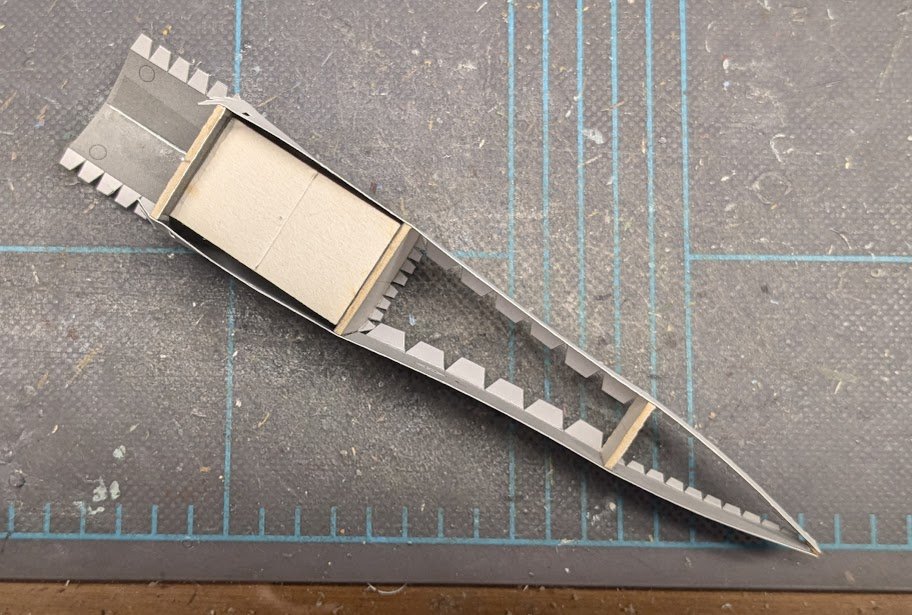
How did I discover this? Let's examine the attached photo:
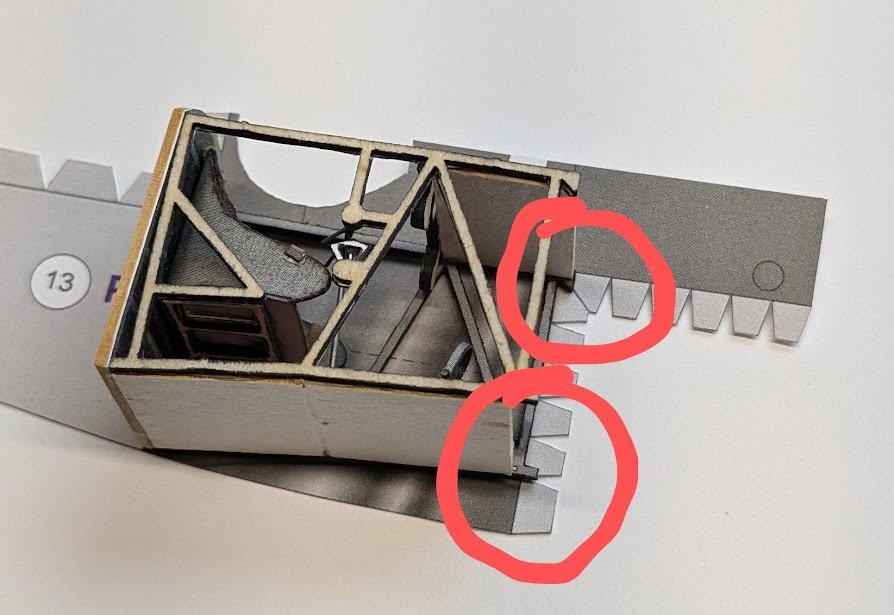
I began to suspect I was going to run into trouble when I discovered that the laminated cockpit floor (printed part + laser-cut frame) is thicker than the width of the attached side framing, with the result being that the floor protrudes below the side framing. I then checked the instructions using Google Lens to translate them. The instructions (as minimal as they are) mention that all parts with red numbers need to be laminated onto 0.5 mm card stock. That's odd, because the laser-cut frames set I purchased along with the kit is cut from 1.0 mm card, not 0.5 mm. You can see why this is a problem in the red-circled portions of the photo. The rear bulkhead of the cockpit is aligned on the aft end of the printed cockpit interior, so the glued-up cockpit framing should just reach the forward end of the printed cockpit interior. But the forward projections of the side framing, which attach to the forward bulkhead, clearly already extend beyond the printed sidewall before the forward bulkhead has even been added. If the forward bulkhead is glued to the framing without any adjustments being made, then the forward bulkhead will not be properly positioned relative to the interior skin.
This is a super annoying situation to have to rectify, and there is at least one designer out there whose kits never have this problem. Here's a shot from my construction of Pawel Mistewicz's Nieuport 11c published by Kartonowa Kolekcja:
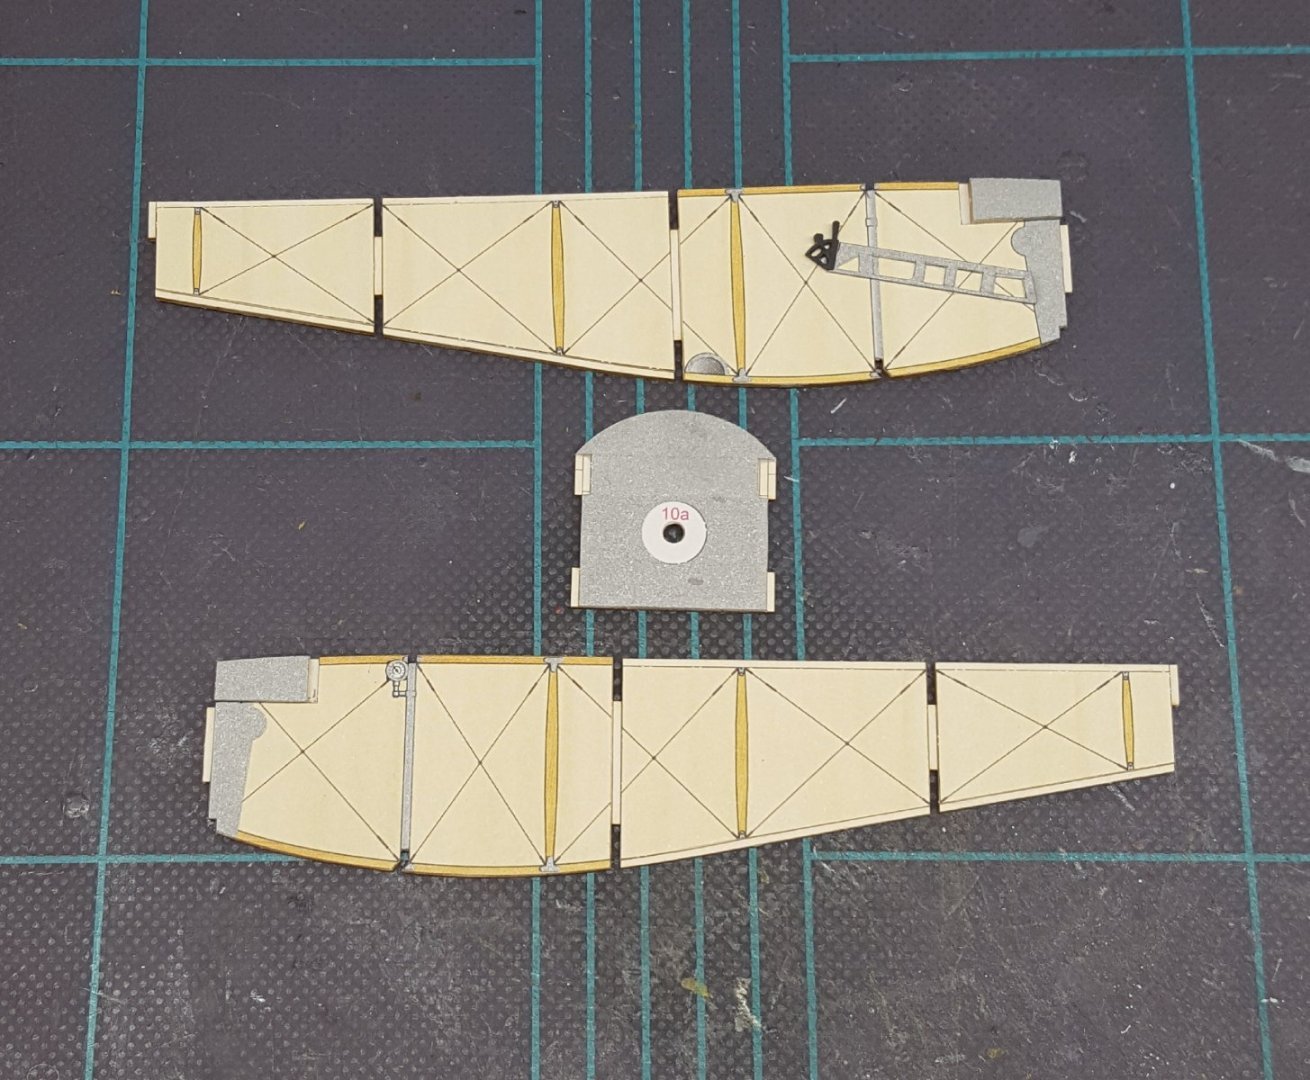
The white areas of the printed parts in Mr. Mistewicz's design clearly indicate both where structural parts are to be glued together and how thick the laminated parts should be. There is no guesswork involved. Also, the entire side panel of Pawel's design is a single rigid piece of heavy card, which produces a very strong model. The D.VI is essentially designed as a tube with a number of transverse bulkheads. This is why I have always raved about Pawel's models and have completed six of them without any ending up in the trash. It's also worth mentioning that Pawel's kits are superior to Marek's on almost every metric: ease of build, logical instructions, and number and quality of diagrams.
Oh, well. Back to the fun(?). I have a fix in mind for the D.VI, so we'll see how it goes.
-
-
Good luck on your project! These early Caldercraft kits were a bit short on instructions by today's standards, but they are nevertheless fine kits.
-
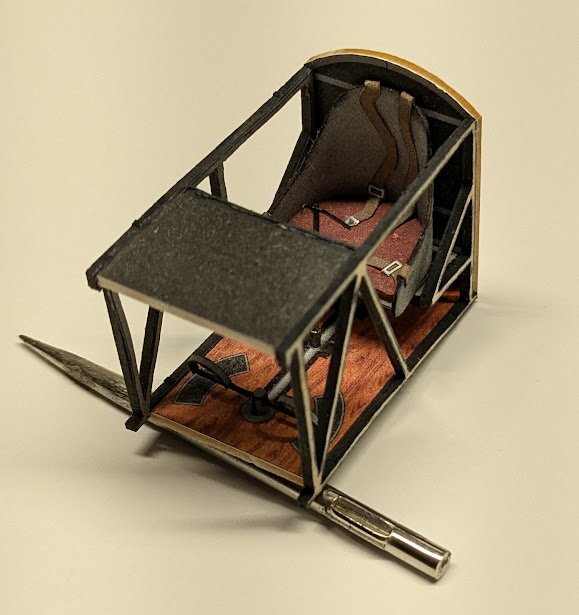
Assembling the cockpit required one evening's work.
-
That is truly a work of art!
- Trussben, FrankWouts and Ryland Craze
-
3
-
Hello!
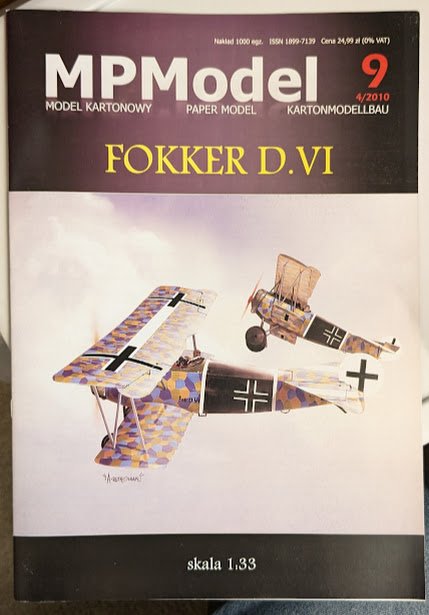
While I was away on Christmas vacation for a week, my Next Project (which I ordered on my birthday back in August) still did not arrive at my house, though the Polish Post swears it is on its way. So in lieu of the Next Project I have decided to go ahead with an interim next project. I have chosen to build the Fokker D.VI from MPModel for a couple of reasons:
- The D.VI is mercifully short of rigging.
- The model is designed by Marek Pacynski.
That second point needs some additional explanation. Mr. Pacynski's designs have been a mixed bag for me (see here for a prior example). I have completed two of them, but two others wound up in the trash can. The two finished models were both WW2 monoplanes; this one is a WW1 biplane. I have many of the other MPModel biplane kits designed by Mr. Pacynski in my stash, so this one is a guinea pig of sorts -- a build to see how the Pacynski WW1 kits stack up against the WW2 kits. Call me a masochist, but I'm always willing to give a designer another chance at redemption.
The D.VI, of which only 59 examples were built, is a relatively small and simple aircraft, so this kit shouldn't take too long to build if everything goes together with a minimum of fuss. That's what we're here to find out if it will do.
Stay tuned!
P.S. Mr. Pacynski is nothing if not extremely prolific -- you'll note that this kit is #9 in the MPModels series. That line now includes a whopping 124 titles.
- Haliburton, mtaylor, Canute and 14 others
-
17
-
13 hours ago, Charlie pal said:
Has anyone built this vessel?
Charlie,
I have merged your two Black Prince topics, since they are essentially duplicates, and moved them to the kit discussions area since neither of them is an actual build log. In the future, should you wish to start a build log, please refer to the "starting and naming your build log" topic pinned at the top of each build log category.
Thanks!
-
5 hours ago, SaltyScot said:
I had never seen a model that was made of cars before! How very interesting.
Try clicking the 'card' tag at the top of this page. 😉


Hello from a South London
in New member Introductions
Posted
Welcome aboard! What sorts of ship subjects are you interested in modeling.