ccoyle
-
Posts
10,354 -
Joined
-
Last visited
Content Type
Profiles
Forums
Gallery
Events
Everything posted by ccoyle
-
 Your before-and-after nails pictures remind me of removing the wires from my stitch-and-glue canoe project.
- 25 replies
-
- 1
-

-
- Ranger
- Vanguard Models
- (and 1 more)
-
For the Beginner Modeler
ccoyle replied to kgstakes's topic in Modeling tools and Workshop Equipment
Back when I was a member of the Ship Modelers Association, a local club based in Southern California, I knew a member there (Randy Biddle) who built wonderful models without using any power tools. A lack of power tools doesn't make any modeling task impossible -- the tools just reduce the amount of time needed to do them. -
Fred, I finally hit on a technique that works reasonably well for me. All of the anchor points have a small hole in them made with an awl. I glue one end of the line into its hole using canopy glue, then let it set until the glue cures from white to clear. I then trim the other end of the line so that it is about 1 mm short of the second anchor point. After daubing a tiny amount of glue into the hole, I stretch the line to insert it into its hole and then hold it for 40-60 seconds. By that time, the glue has normally set enough so that I can release the line slowly. Because I have to stretch the line slightly to reach the second anchoring point, the finished line will be taut, but because it is only just shy of being the exact length between anchor points, it doesn't exert enough tension on the glued joint to pull itself loose. This works on the first try about 80% of the time -- enough to keep me from going completely insane.
- 54 replies
-
- 13
-

-
Congratulations! That is a beautiful model in every respect.
- 366 replies
-
- 2
-
-
- bellerophon
- victory models
- (and 2 more)
-
I've noticed the rounded coaming corners in Chris' kits before and wondered whether they mirror actual practice? Knowing Chris, I'd be slightly surprised if it didn't.
- 96 replies
-
- 5
-
-
- Sphinx
- Vanguard Models
- (and 2 more)
-
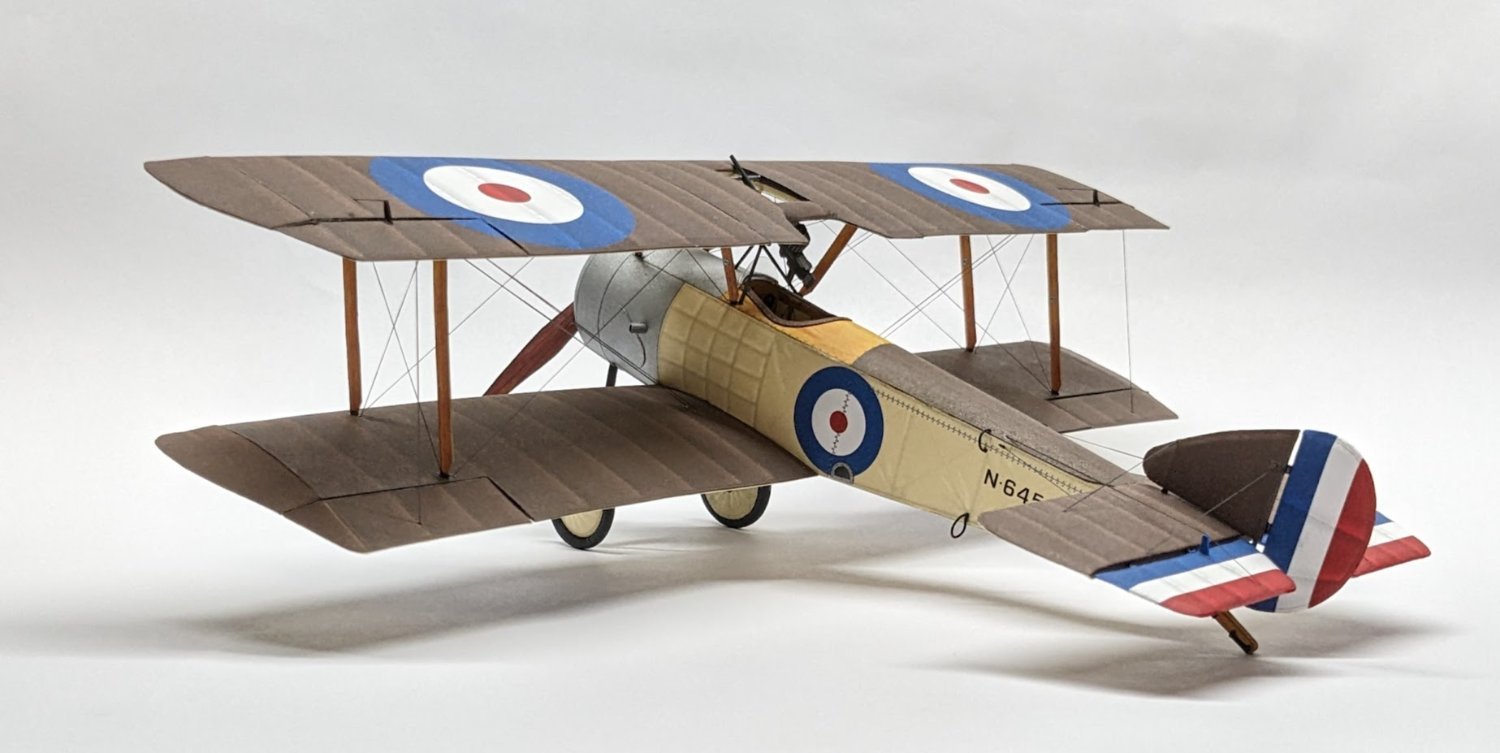
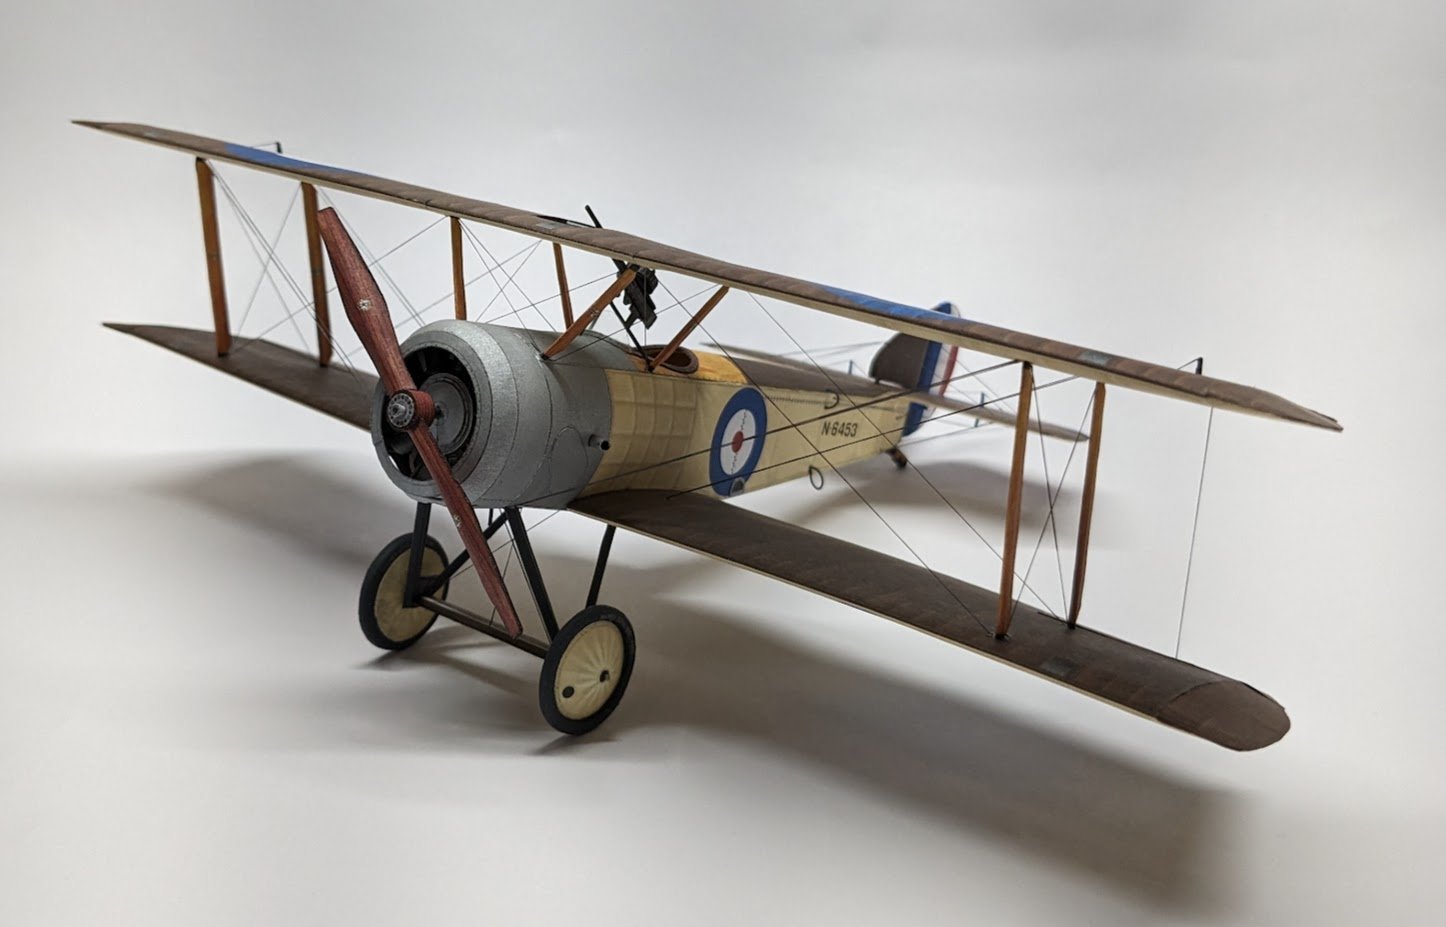
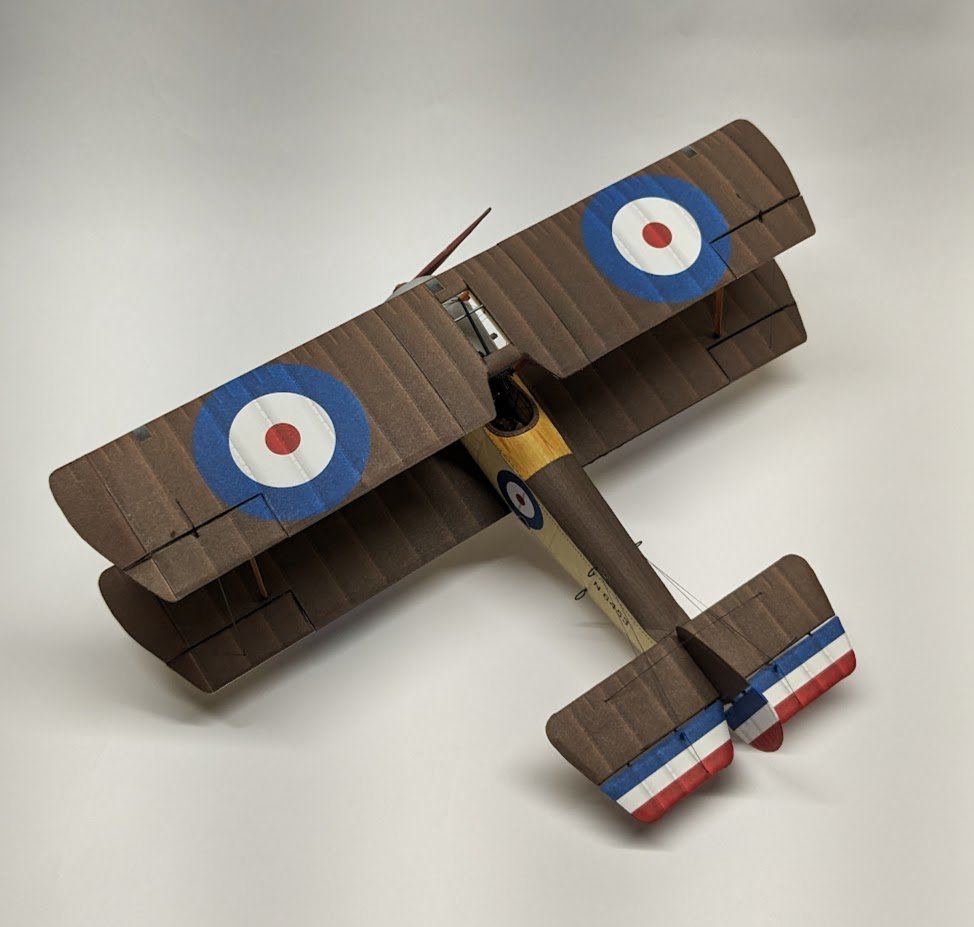
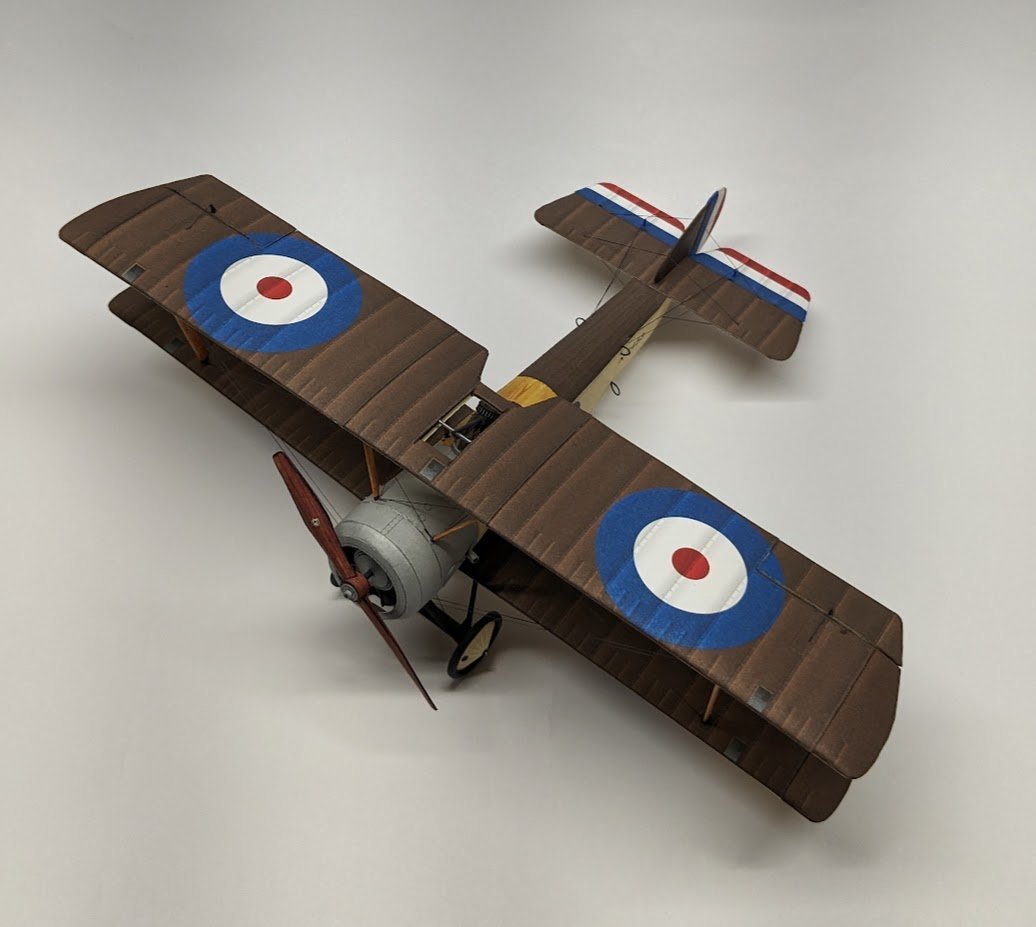
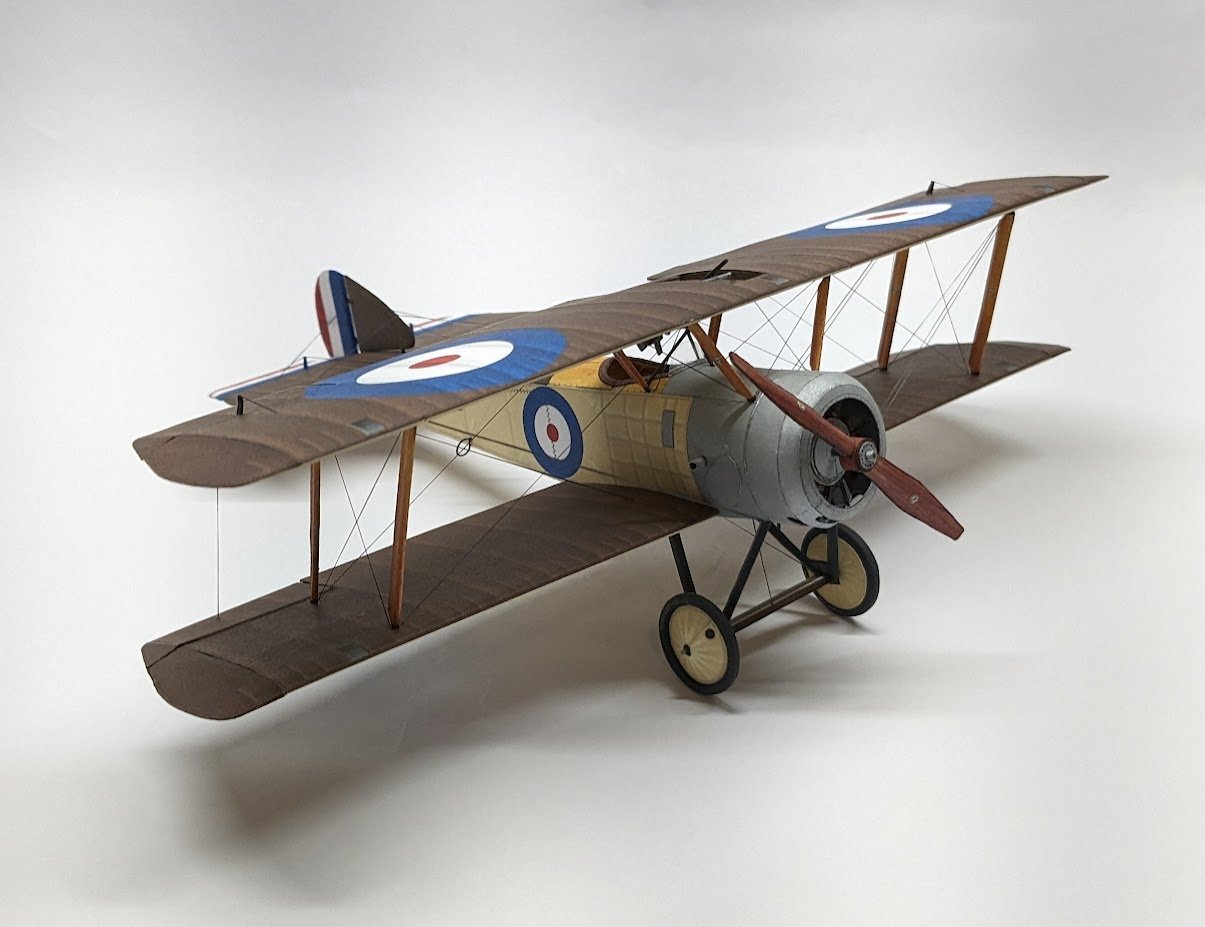
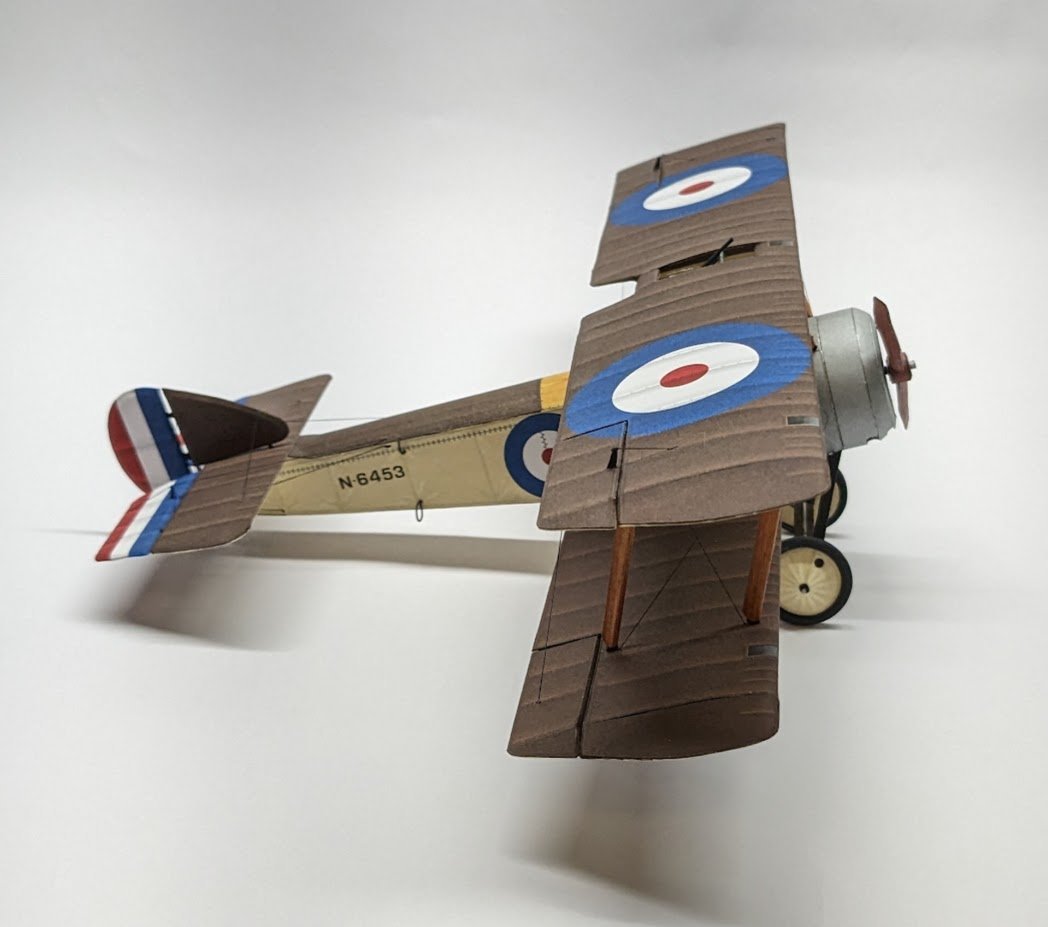
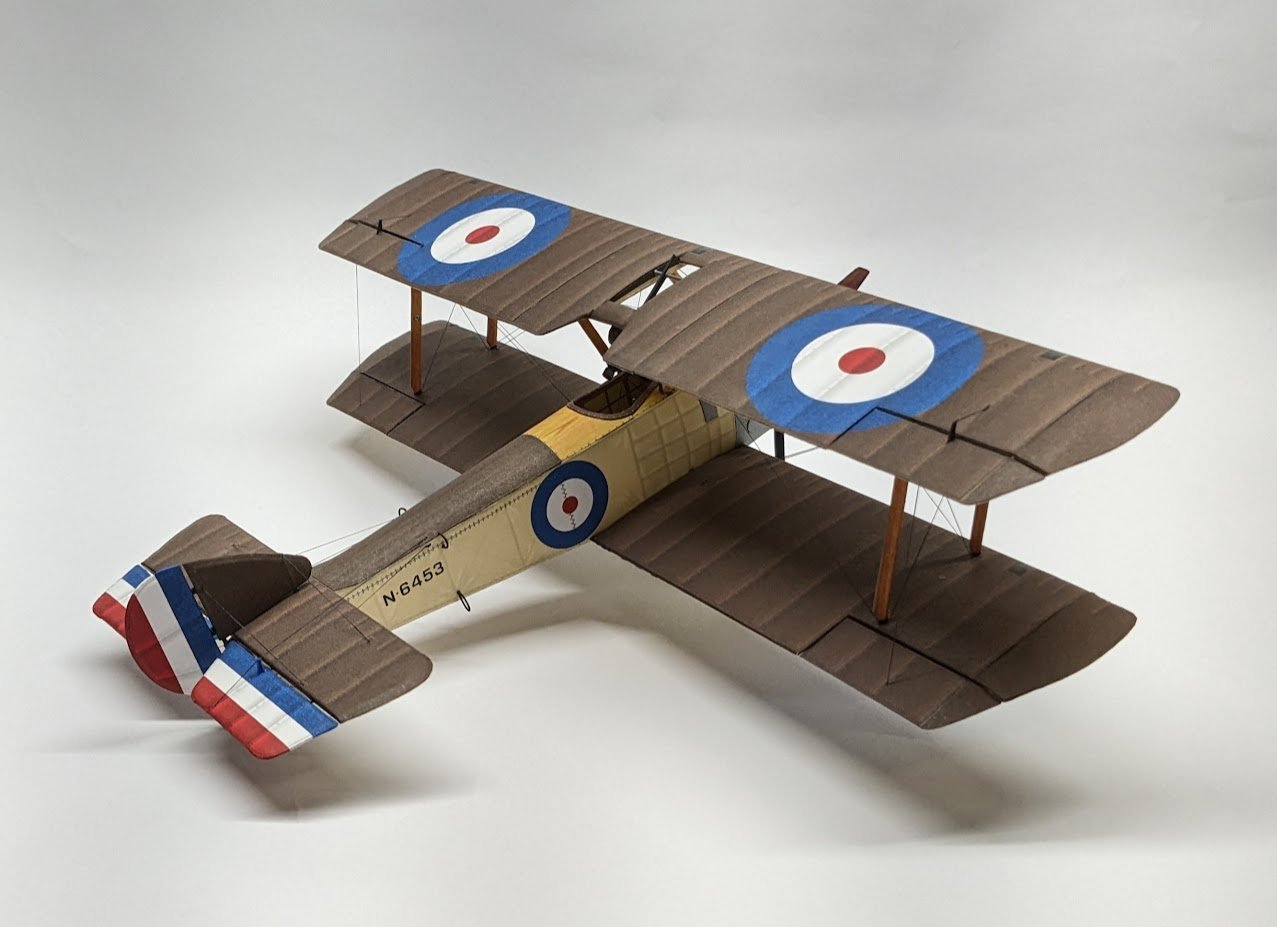
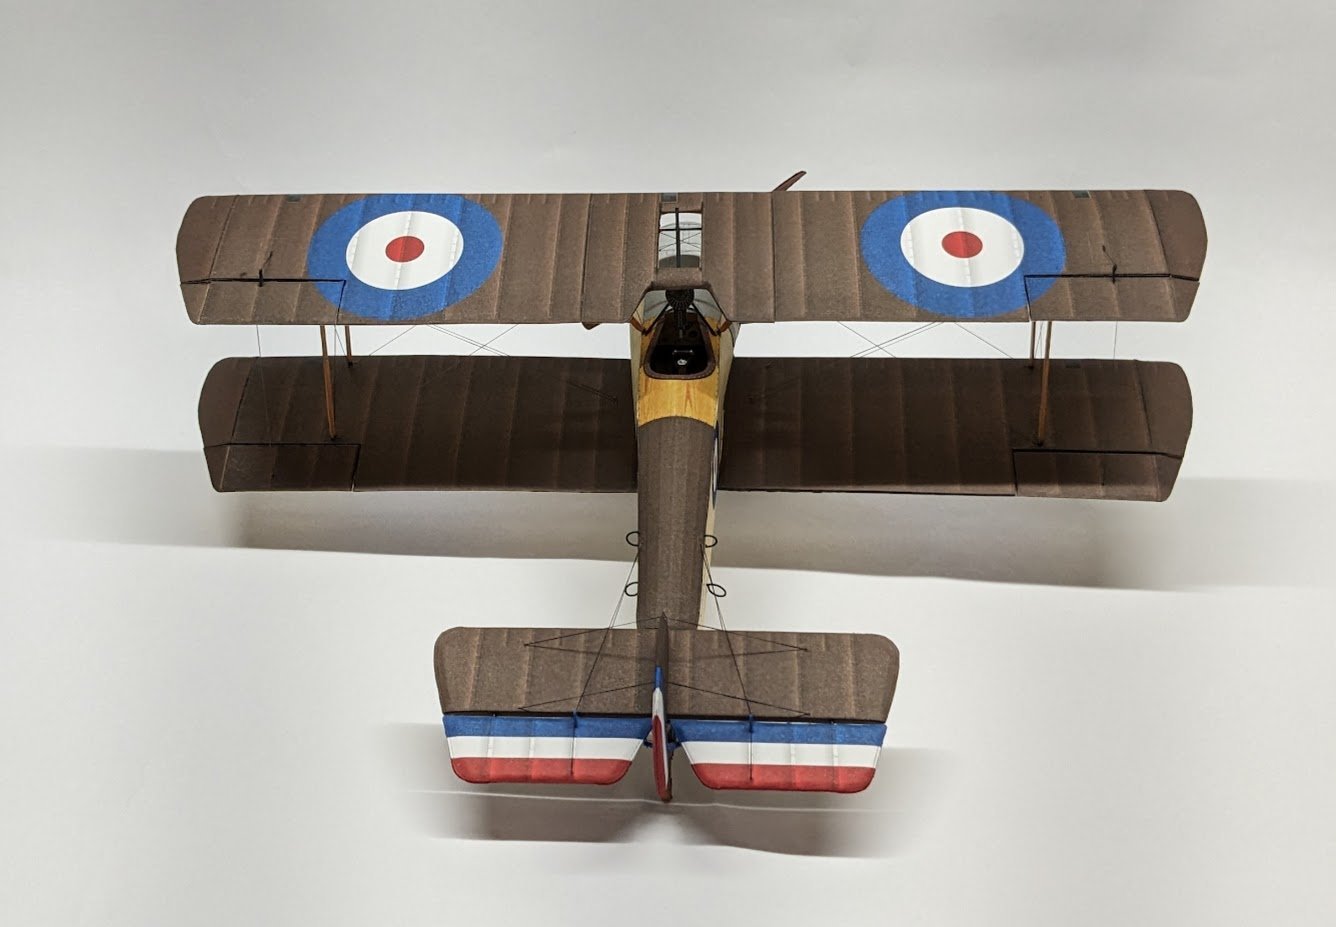
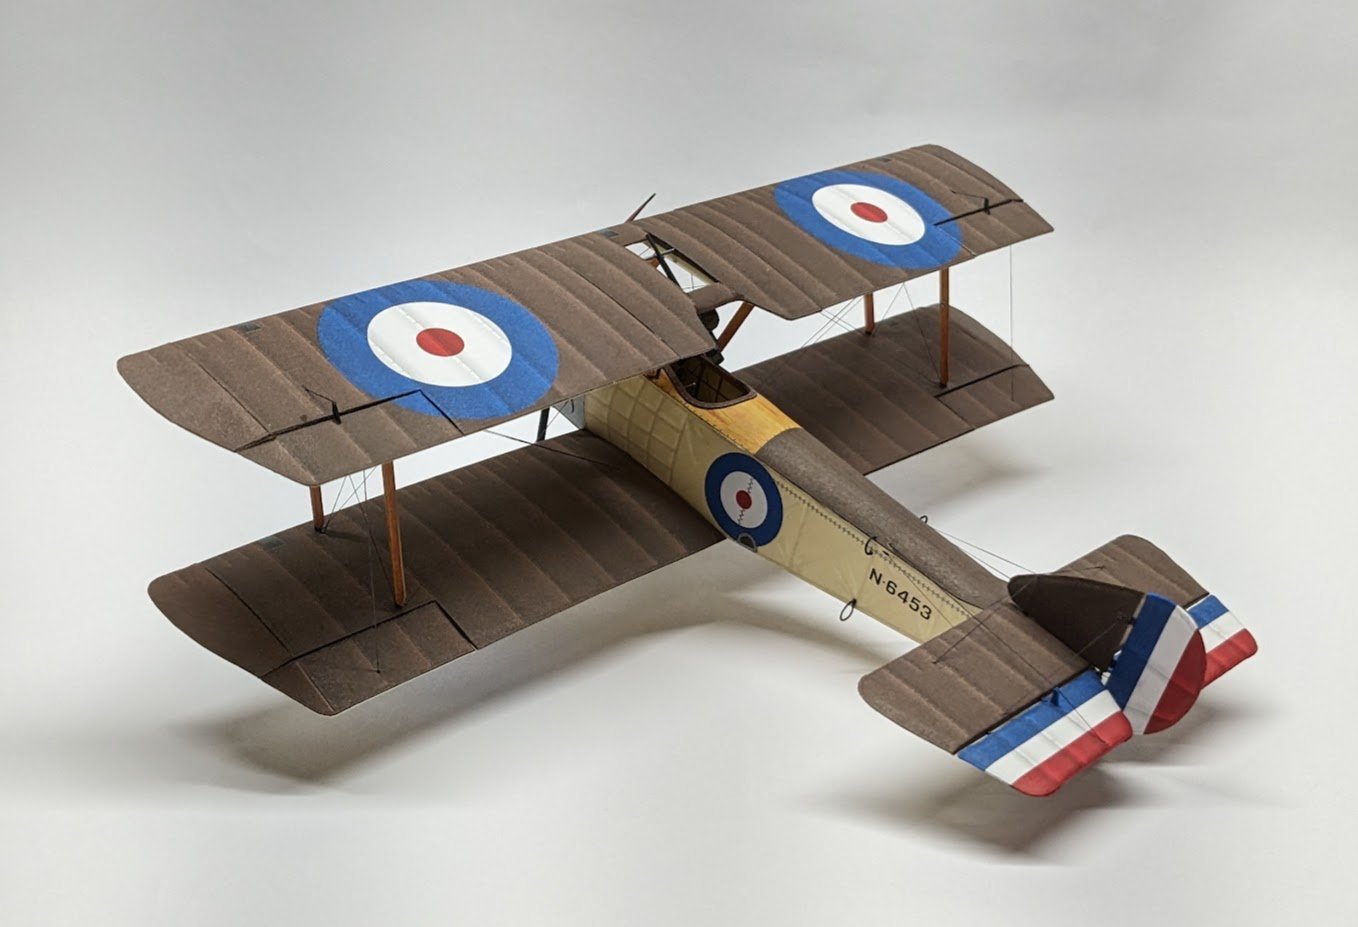
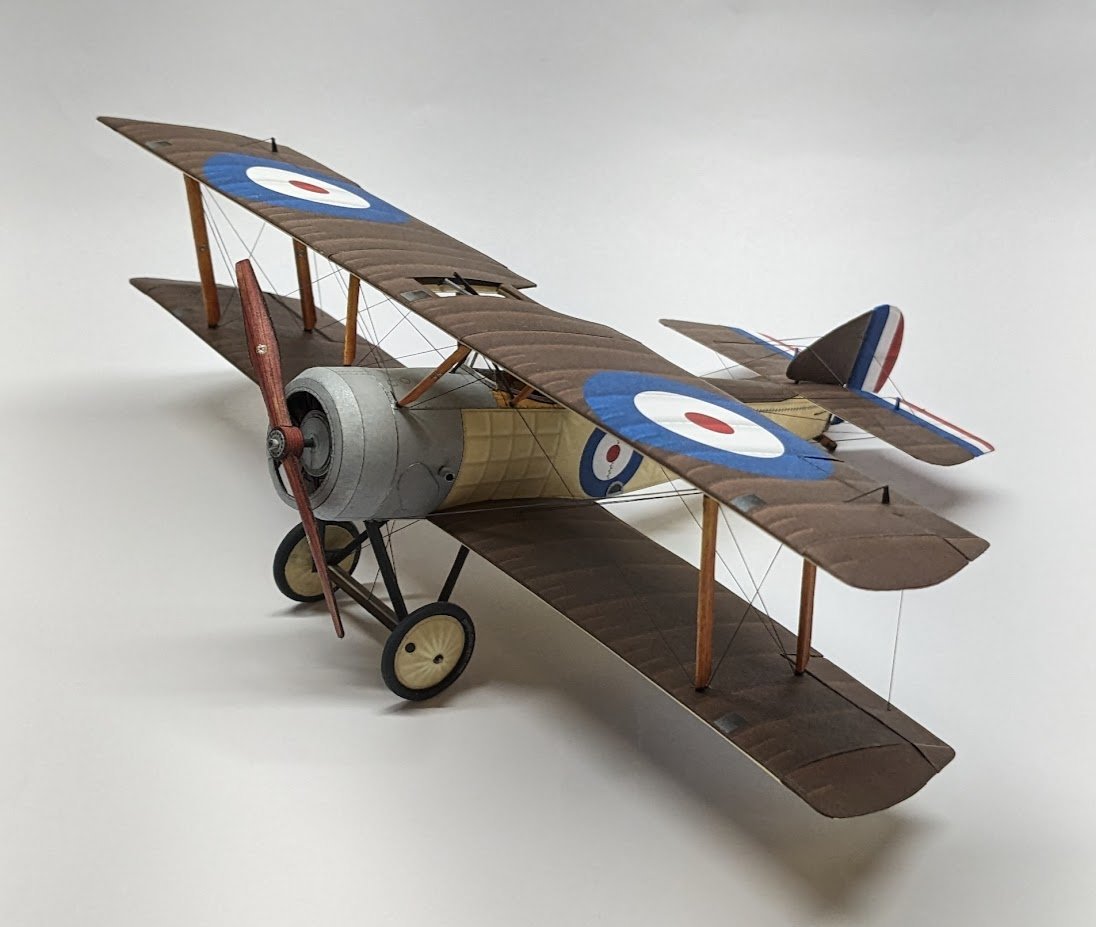
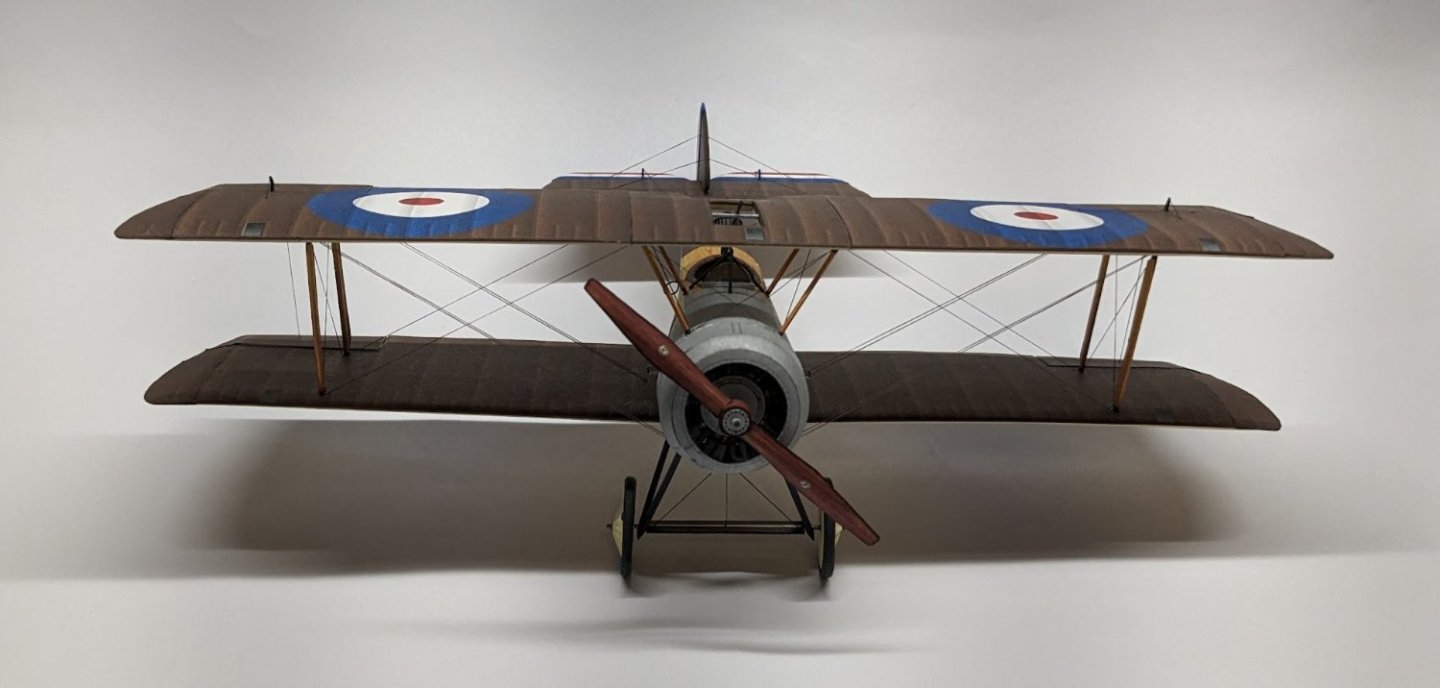
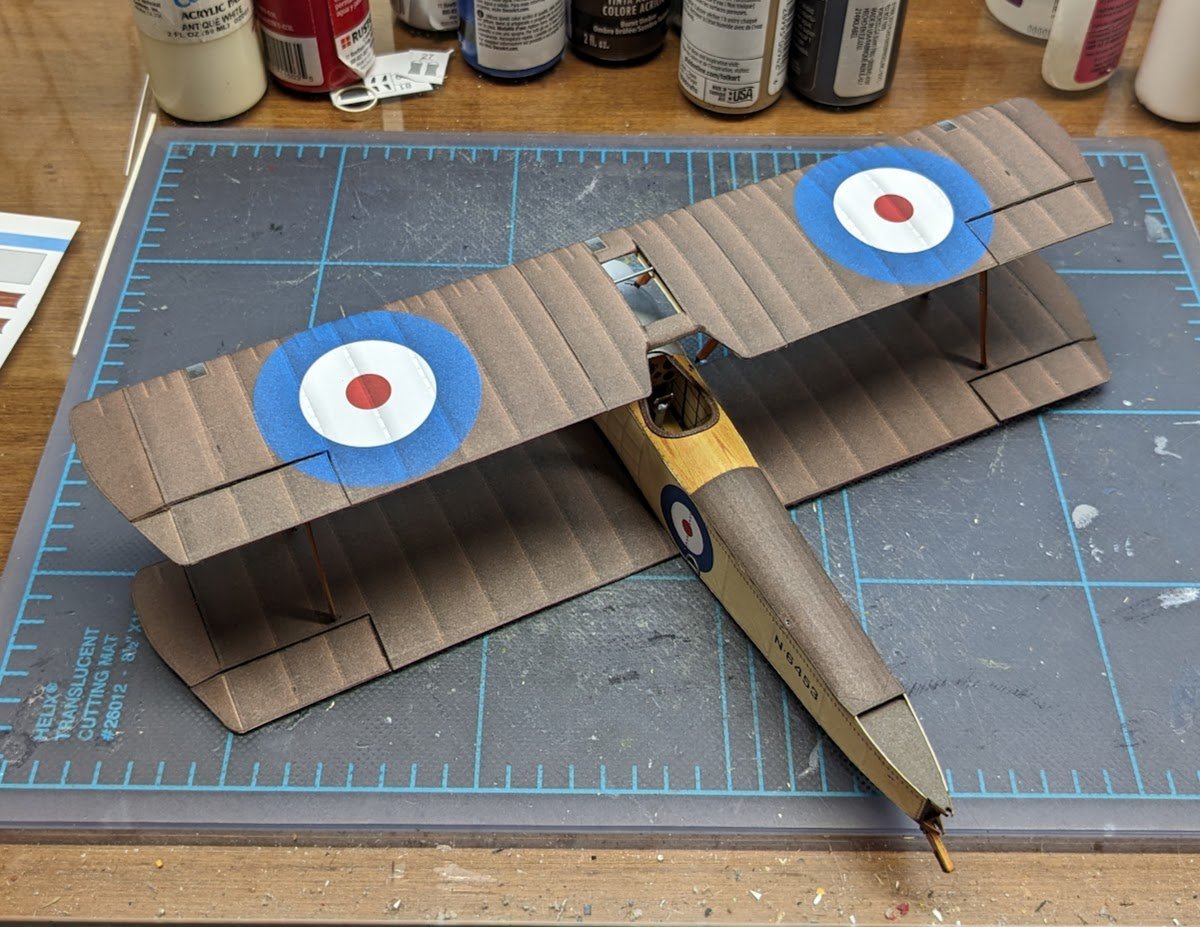
The Big Reveal! After pretty much an entire day spent modeling, the Pup is complete! The most labor-intensive task was adding the rigging -- if I counted correctly, the rigging amounted to 38 separate lines. Whew!! Sqn Cdr Dunning's Pup had some 'handles' of some sort attached to the rear fuselage -- I suspect that these were used by the crew of HMS Furious to maneuver the Pup about the flight deck; in photos, the handles appear to be made of rope and look like they may have been wrapped in leather or perhaps tarred. Mine are made of wire and painted black. Also in the photos, I just now noticed that similar rope handles were attached to the underside of the lower wing -- these were not shown on the kit plans, so I will not add them. Getting the Lewis gun onto its mount was a little tricky, and of course the mount had to break during the photo session (🤬🤬🤬), but it's fixed now. As was pointed out to me earlier, the starboard lower wing is canted aft a degree or two -- fortunately, the finished Pup now sits on the Shelf of Fame with her more photogenic port side facing the viewer. Enjoy the pics!


- 54 replies
-
- 29
-

-
-
I completed it that way because I wasn't completely happy with how the hull had turned out, but hey, I'll take 'brilliant'! 😁
- 96 replies
-
- 6
-
-
-
- Sphinx
- Vanguard Models
- (and 2 more)
-
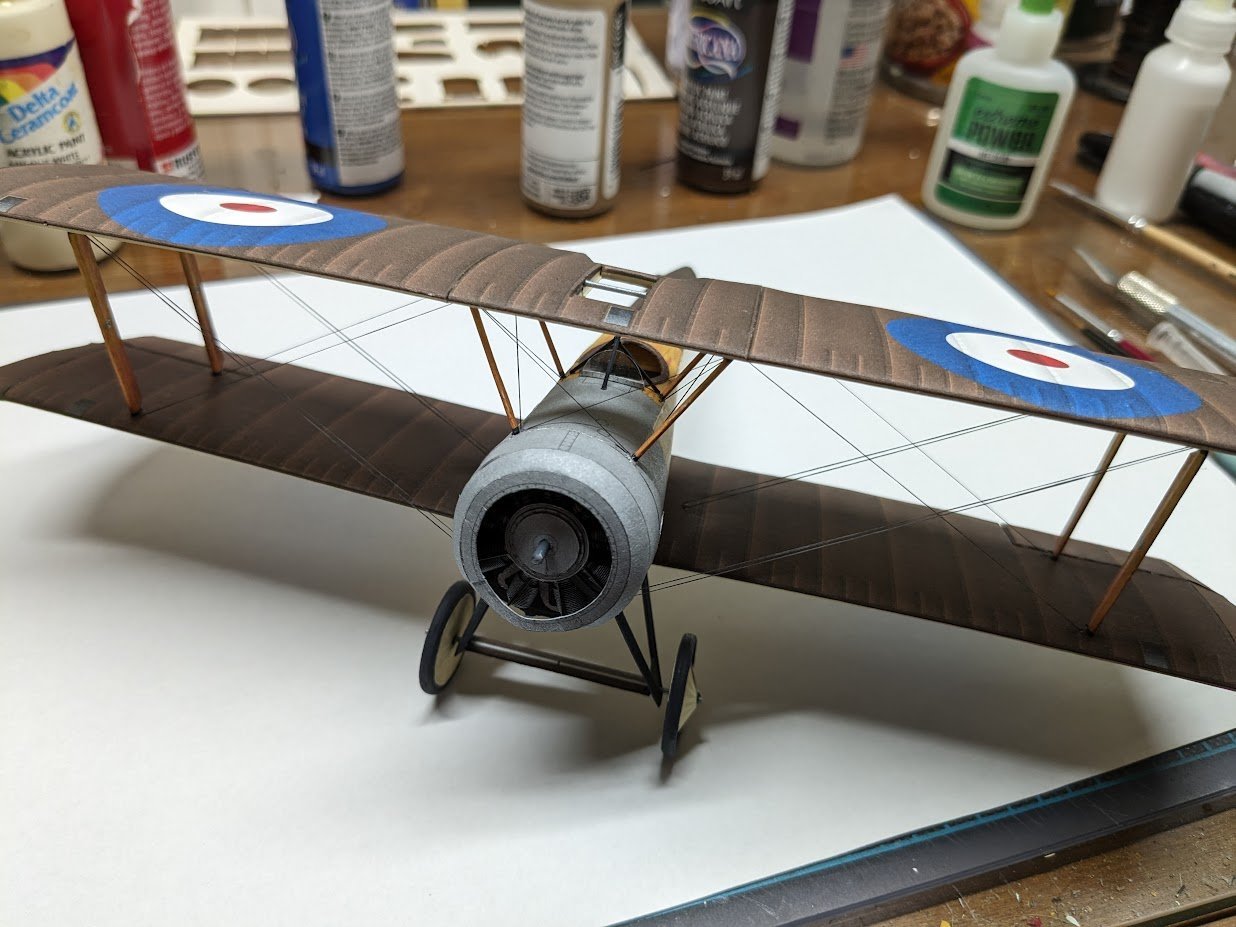
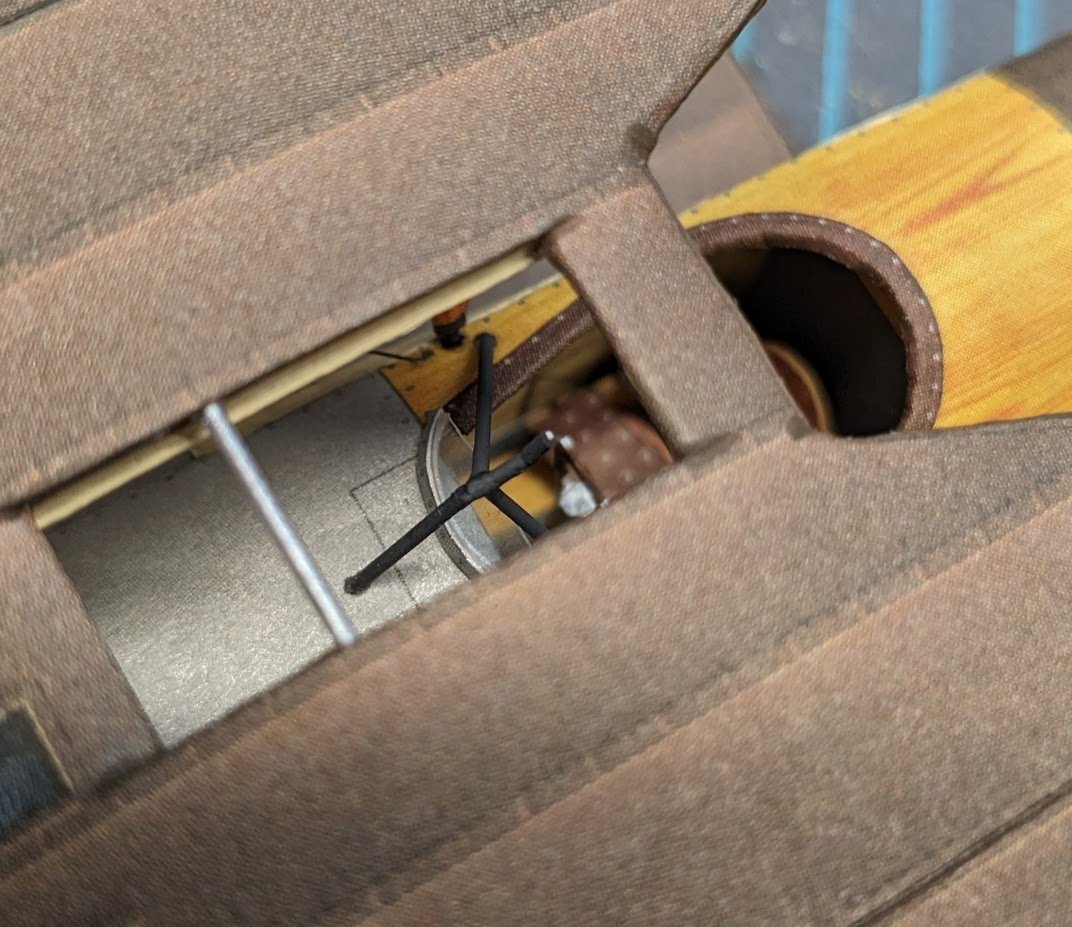
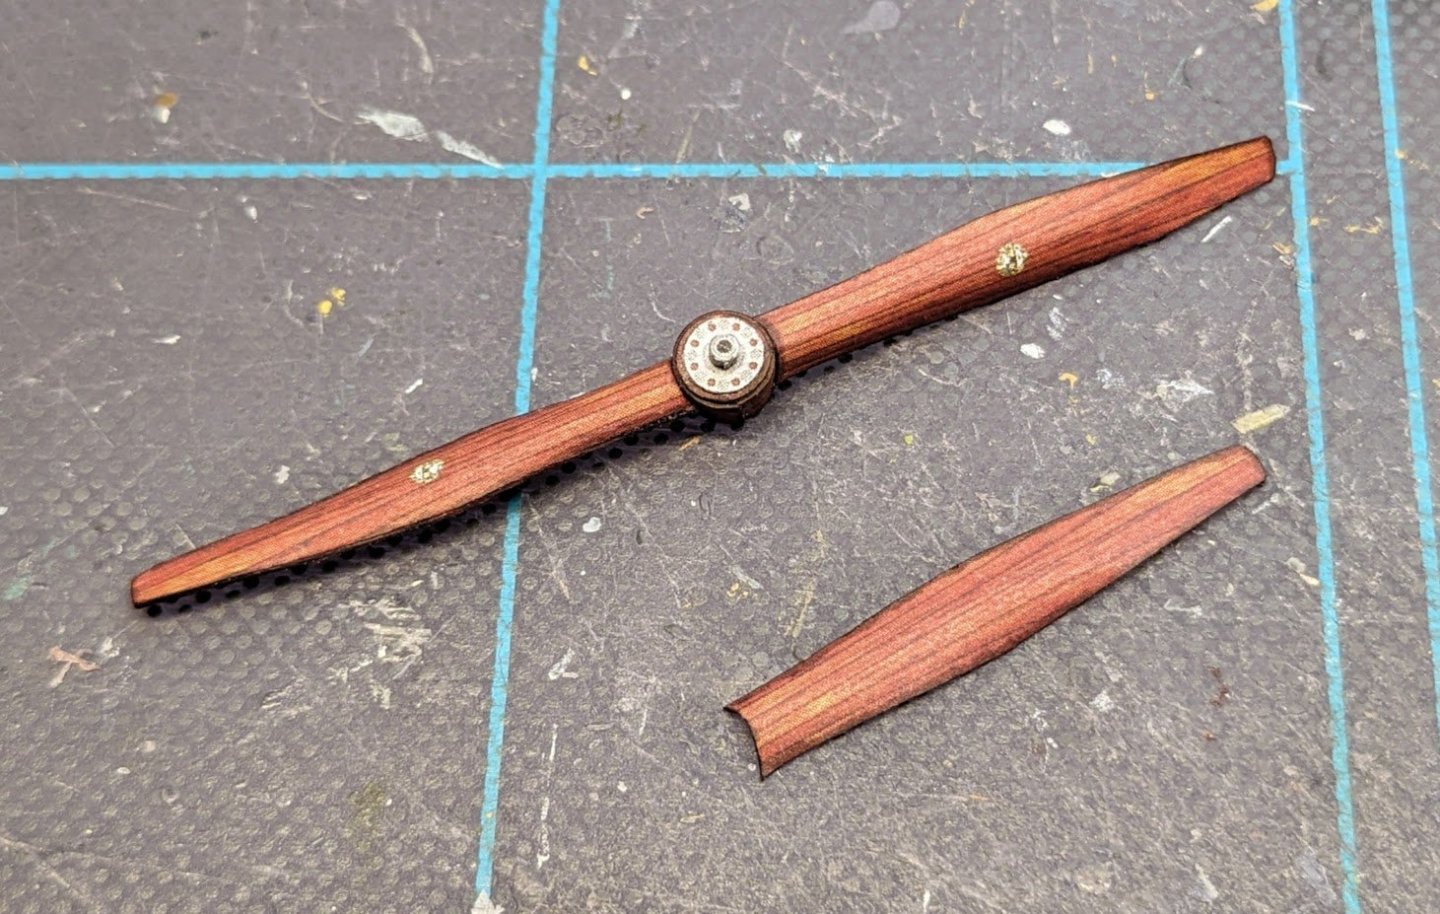
Work continues. Before finishing the bracing for the cabane struts, I needed to make the Lewis gun mount. The mount is made from bits of styrene rod. You can see it's located in a bit of a tight spot. While I waited for bits of glue and paint on the gun mount to dry, I built up the propeller, using the optional parts intended to add depth. With the gun mount in place, I could then finish off the cabane strut bracing. I'm now working on the inter-wing bracing, which is six lines per side -- pics to come later.
- 54 replies
-
- 18
-
-
-
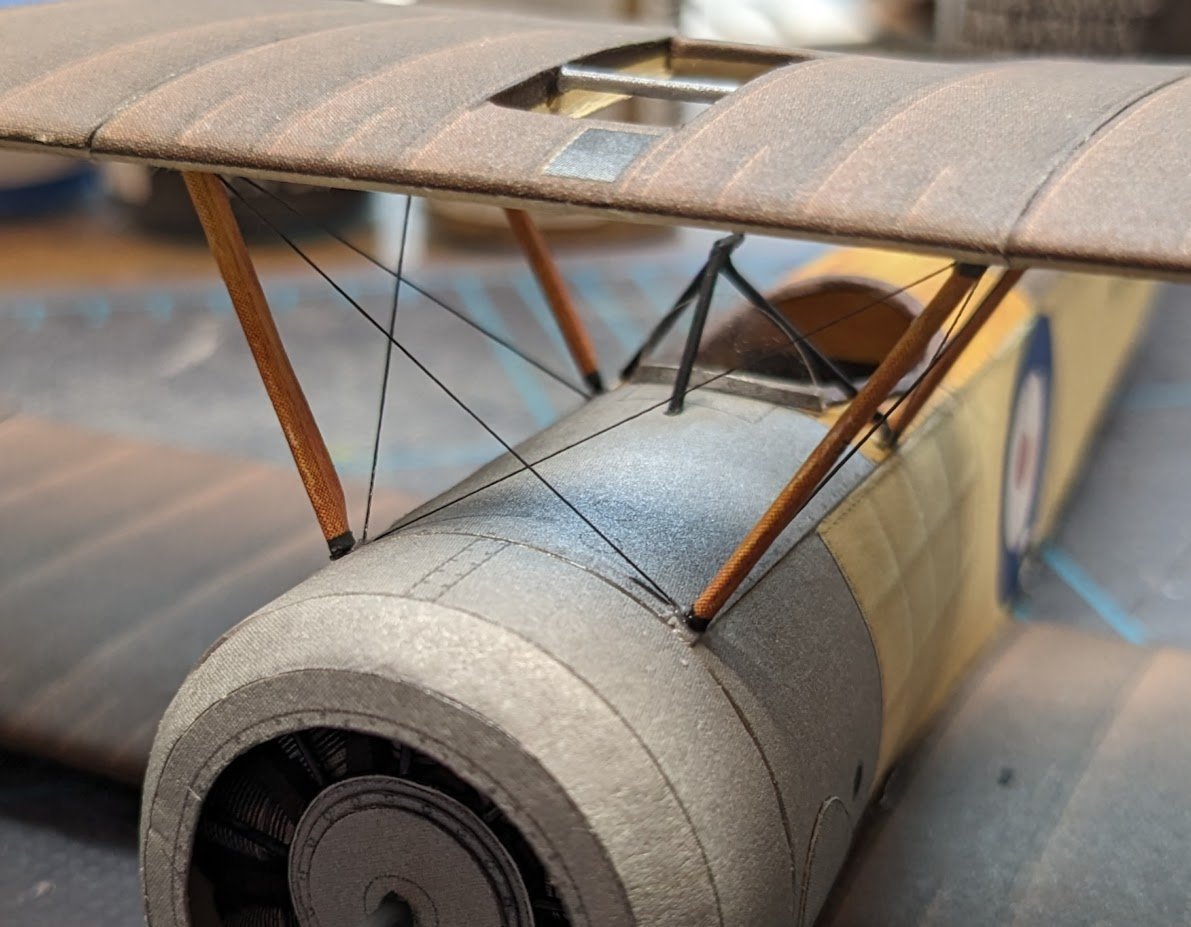
First off, Keeva says "Merry Christmas" to all my MSW friends! Now for the modeling update. I got all the struts put on. Then it was time to add the top wing. I was thinking that this would be a straightforward task, but I forgot that the Pup, despite being a single-bay aircraft, did not have any V- or N-struts, meaning that all eight struts were individual parts. This made putting the top wing on kind of like lassoing an octopus, but I got it done. Next up will be the wing rigging. The Pup had a lot of rigging! 😑
- 54 replies
-
- 19
-
-
https://www.mr-beam.org/en/blogs/news/was-ist-finnpappe
-
That is really not too shabby a planking job, especially for a first model -- and a difficult one as well. A lot of first-timers don't even get this far, so you're doing great!
- 33 replies
-
- 4
-
-
- Victory
- DeAgostini
- (and 1 more)
-
Merry Christmas to you as well, Lyle! Sorry to hear about your wife -- I hope that things will turn for the better soon.
-
I have avoided this issue by gravitating almost entirely to kits that include the option to order laser-cut frames. In the past, when I have need to create my own frames, I have used one of two methods: 1. Laminating sheets of ordinary card to create stock of the desired thickness (somewhat laborious, but works well). 2. Using chipboard (the stuff used for backing on scratch pads) -- not my preferred method, since chipboard cuts like stone. Either of those methods will also produce some curling issues, which are likely due to the type glue you use rather than an issue with the stock itself. For laminating parts sheets to thicker stock, avoid water-based glues. I use 3M spray adhesive for that purpose -- and avoid the cheaper stuff, which often produces clumpy spray patterns. Cheers!
-
Welcome aboard, Andrew, and good luck on both of your projects! BTW, the answer to your question that you posted elsewhere is that this should go in the kit build logs section in the 1750-1800 category.
-
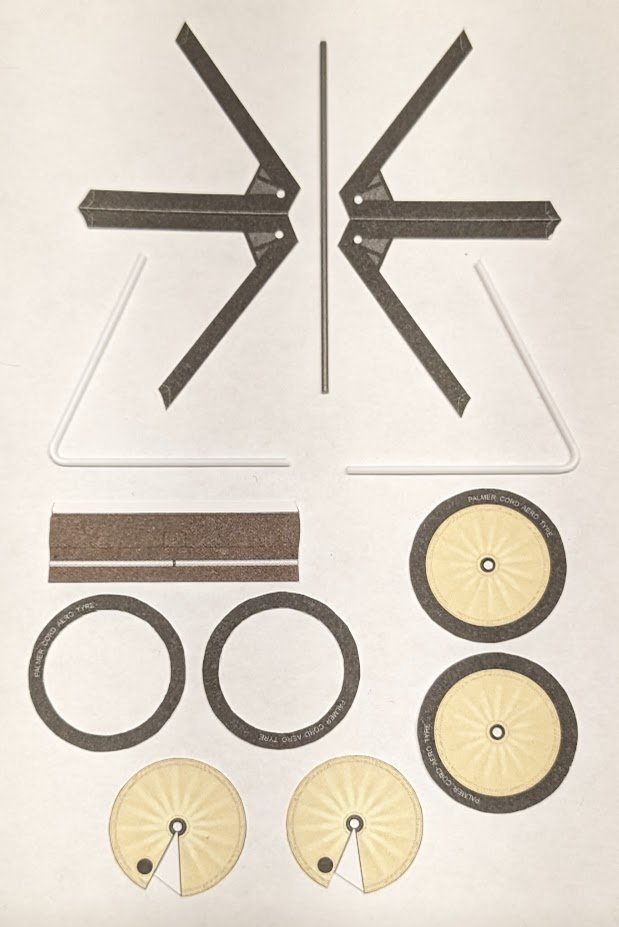
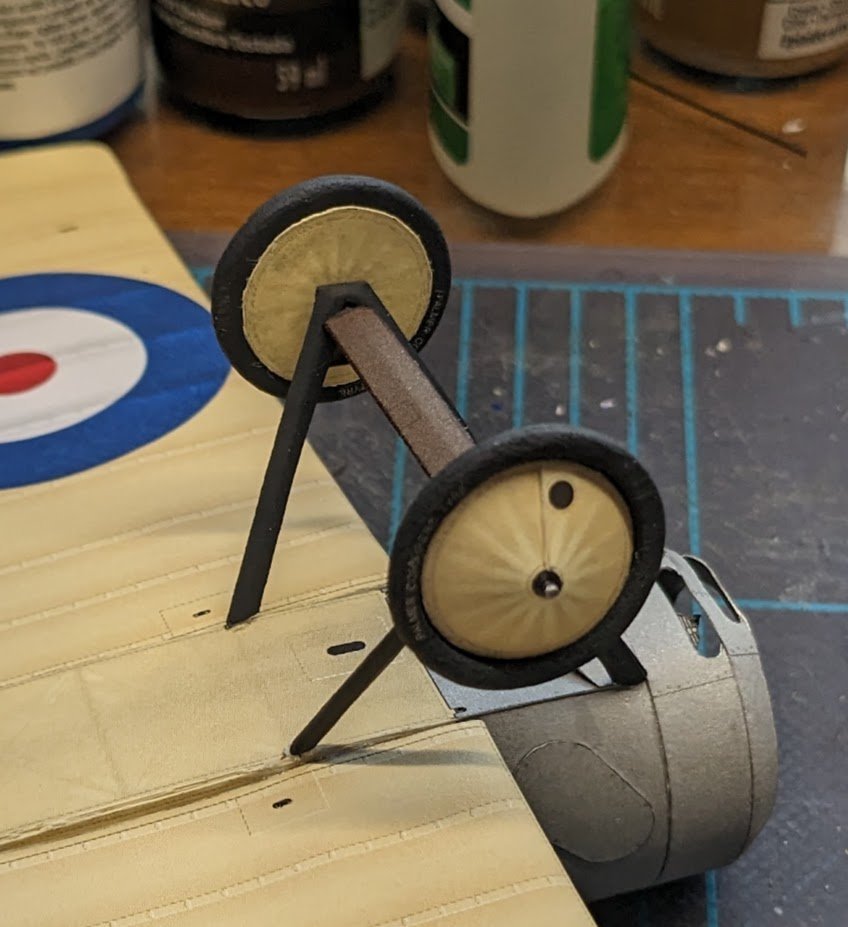
On to the landing gear. First we have the prepped parts. And here's the gear glued up and dry-fitted to the fuselage. If you squint really, really hard, you can read the words "Palmer Cord Aero Tyre" on the sidewall. Struts are next!
- 54 replies
-
- 18
-
-
-
Welcome aboard! I think that's almost a requirement for membership here!
-
I'm happy you got to have that moment with your Dad.
-
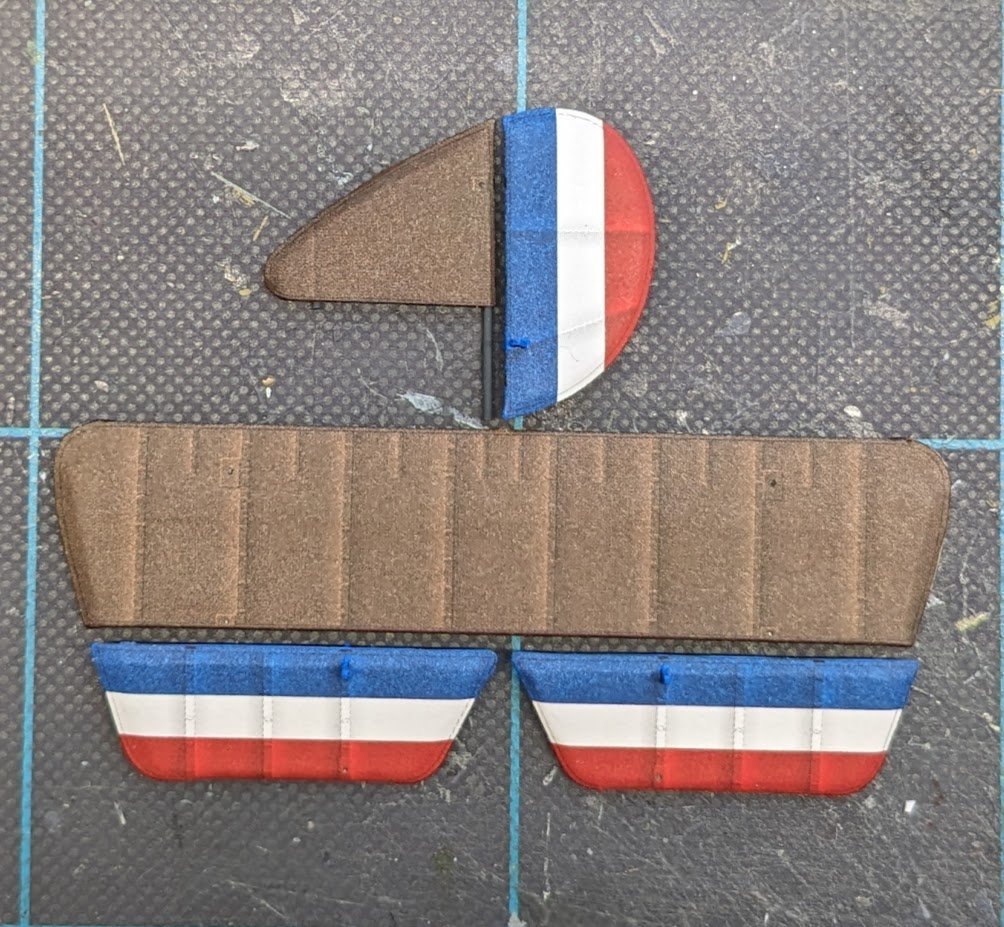
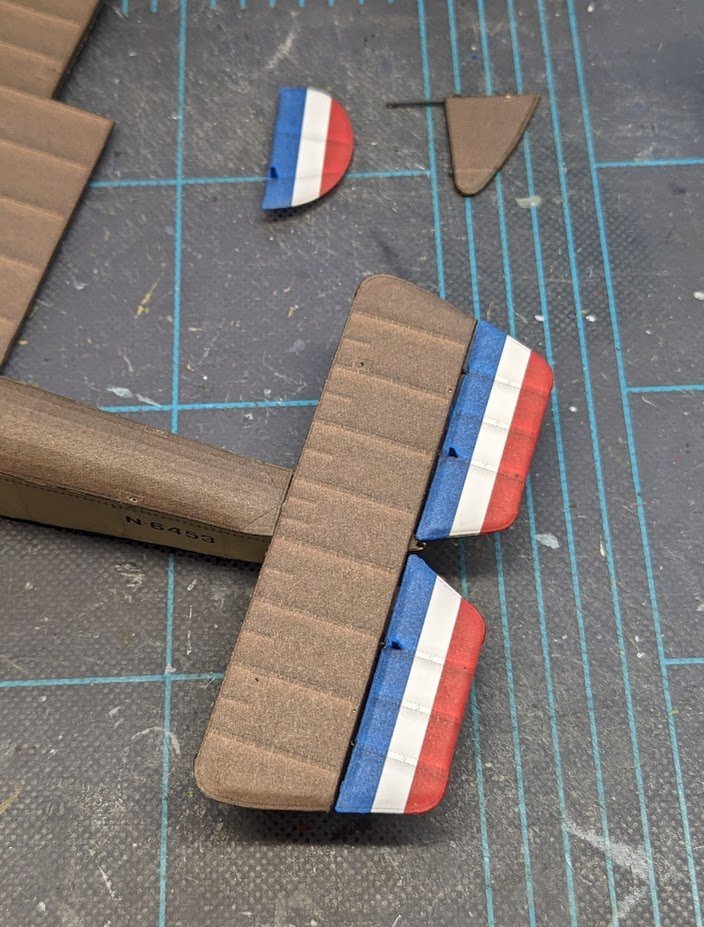
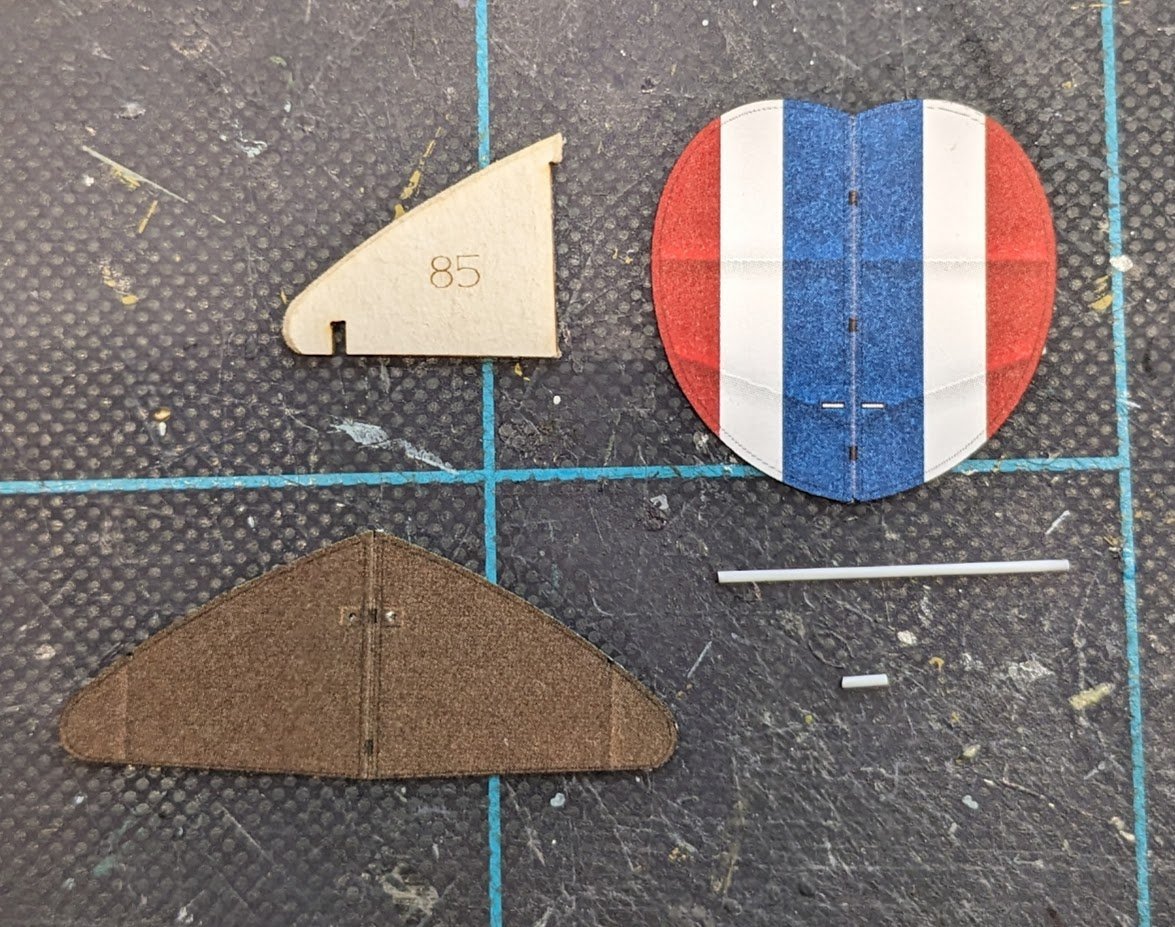
All empennage pieces completed. I went ahead and added the elevators to the horizontal stabilizer. The diagrams call for plastic/wire 'hinges' to be used between the pieces. I could immediately see that this would create weak joints. So instead, I drilled pilot holes in the hinge locations and used CA glue to pin the elevators to the stabilizer -- less hinge-like but much sturdier. Here's a dry fit of the finished structure on the fuselage:
- 54 replies
-
- 18
-
-
I can't speak for Seawatch regarding their email response, but once the shipper picks up the package, any delay(s) are their responsibility, not Seawatch's.
-
But MarisStella are not responsible for the design. It's from the same designer behind MarisStella's Ontario and Speedy kits -- we have reviews of both kits in the reviews section. Neither kit has yet been the subject of a build log, probably because both are pretty expensive compared to comparable kits from other manufacturers. Speedy is available from ModelExpo for $700, which is roughly twice the cost of the same subject from Vanguard Models. Ontario is also available from ME for the eye-watering price of $825.
-
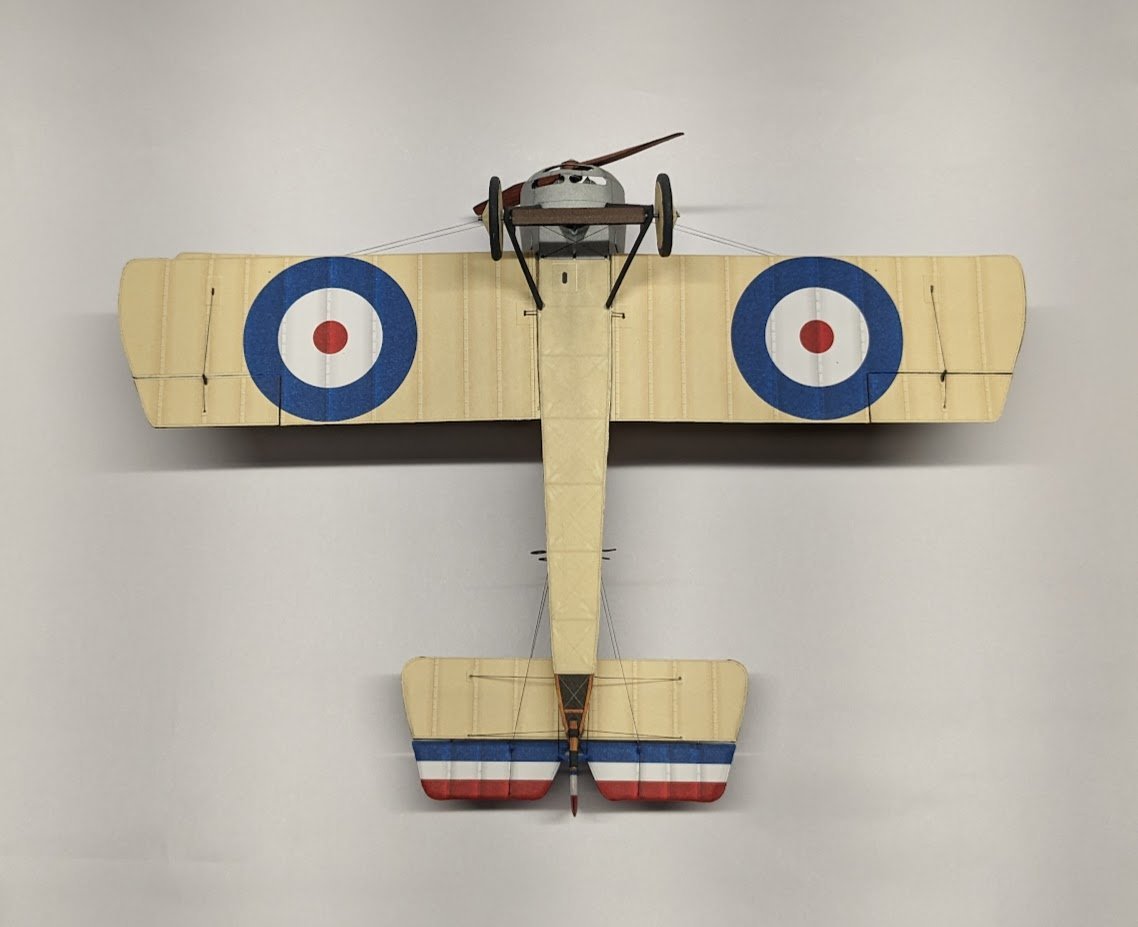
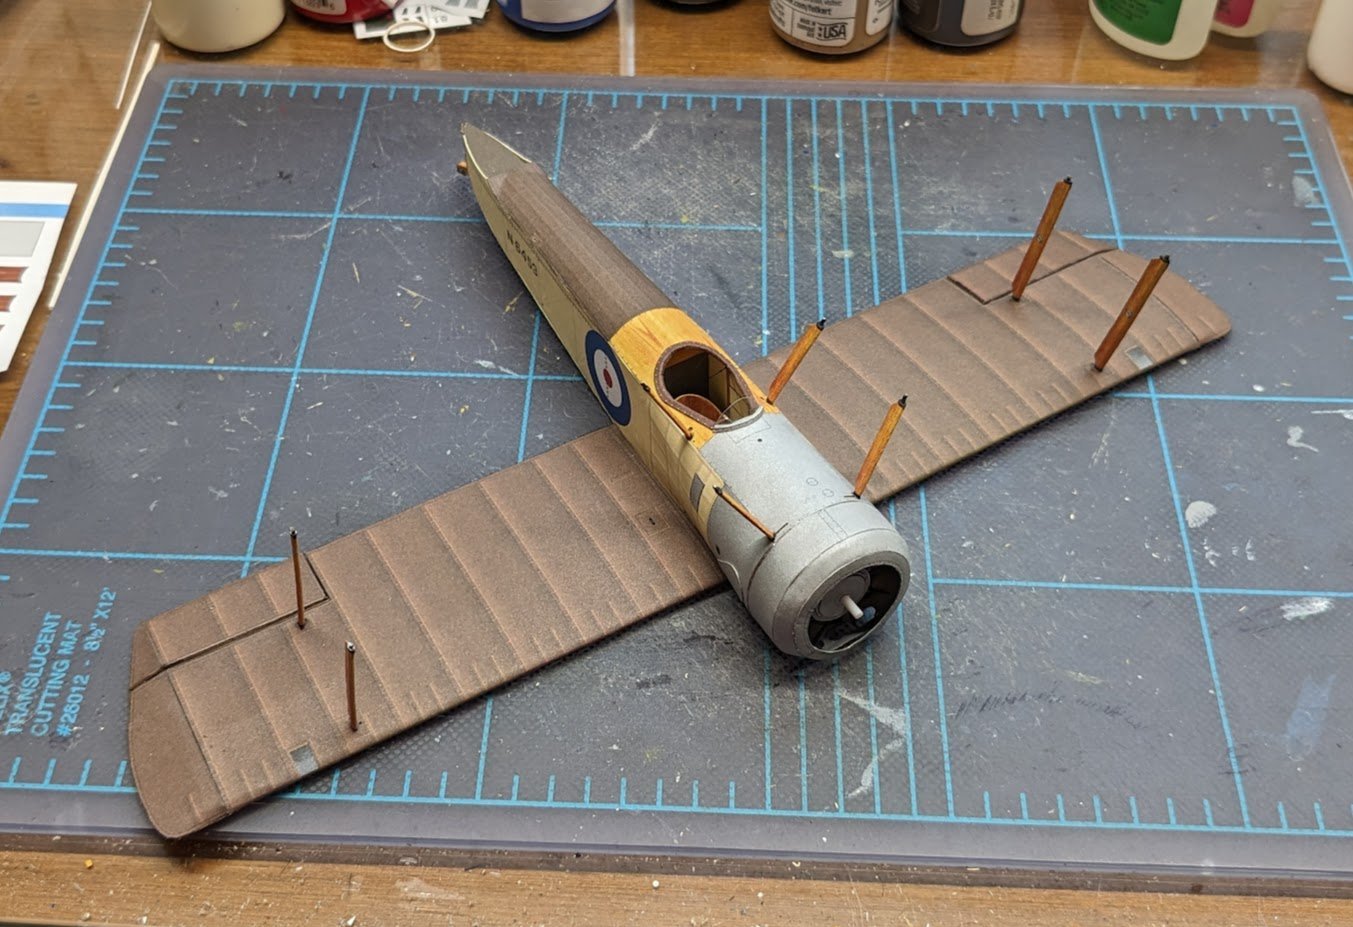
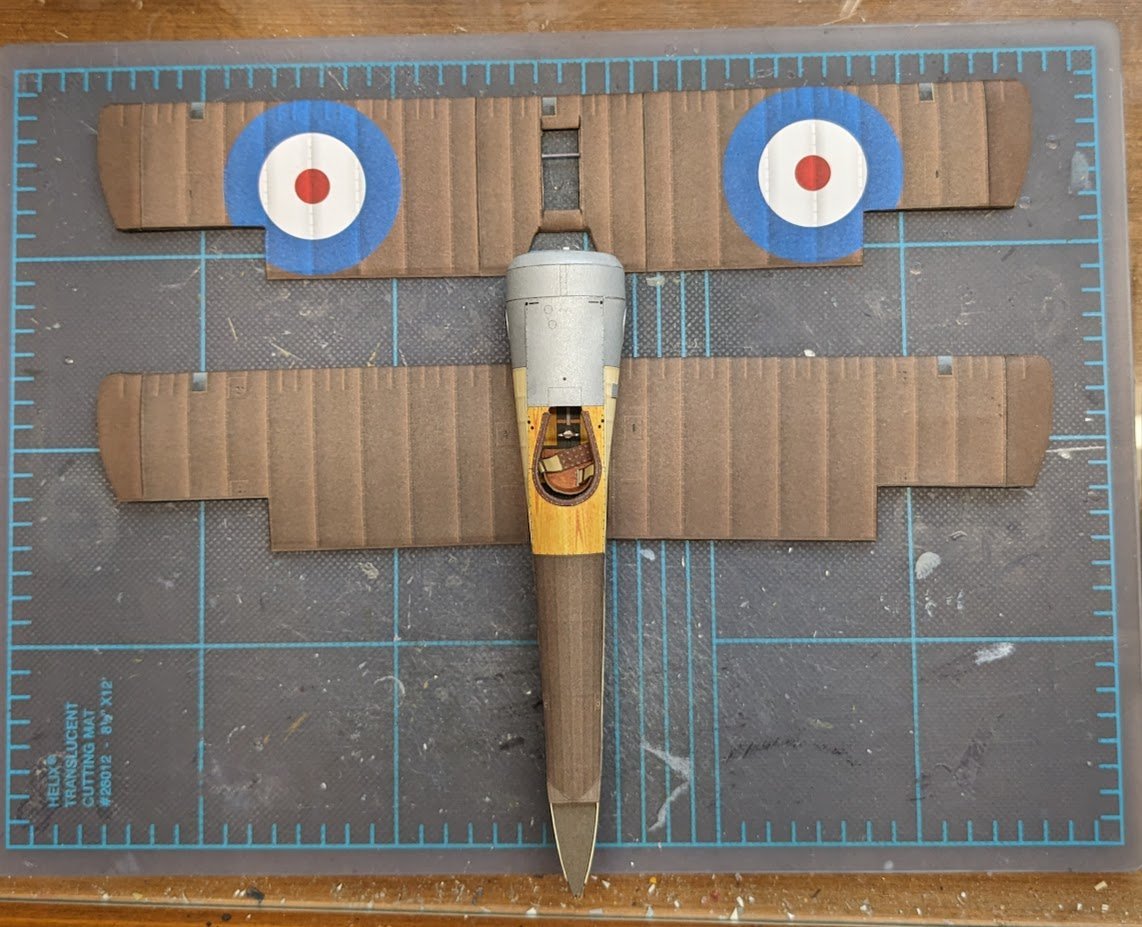
No. I hope that's just a trick of the camera angle. 😬 The construction of the wing/fuselage joint is a bit odd in this kit. It allows for a slight amount of flex at the wing root, so if there is an issue, I should be able to fix it. EDIT: I forgot that I had added some CA to the joint in question to stiffen it -- it is what it is now, and yes, the right wing is canted back slightly. One of these days I will make it through a model without making one of these pathetic oopsies. 😂
-
Upper wing is now completed. I plan to build all of the major sub-assemblies -- wing, empennage, landing gear -- off the model and then add them later. Next up is the empennage. Parts have been cut out -- still need a little prep work.
- 54 replies
-
- 18
-
-
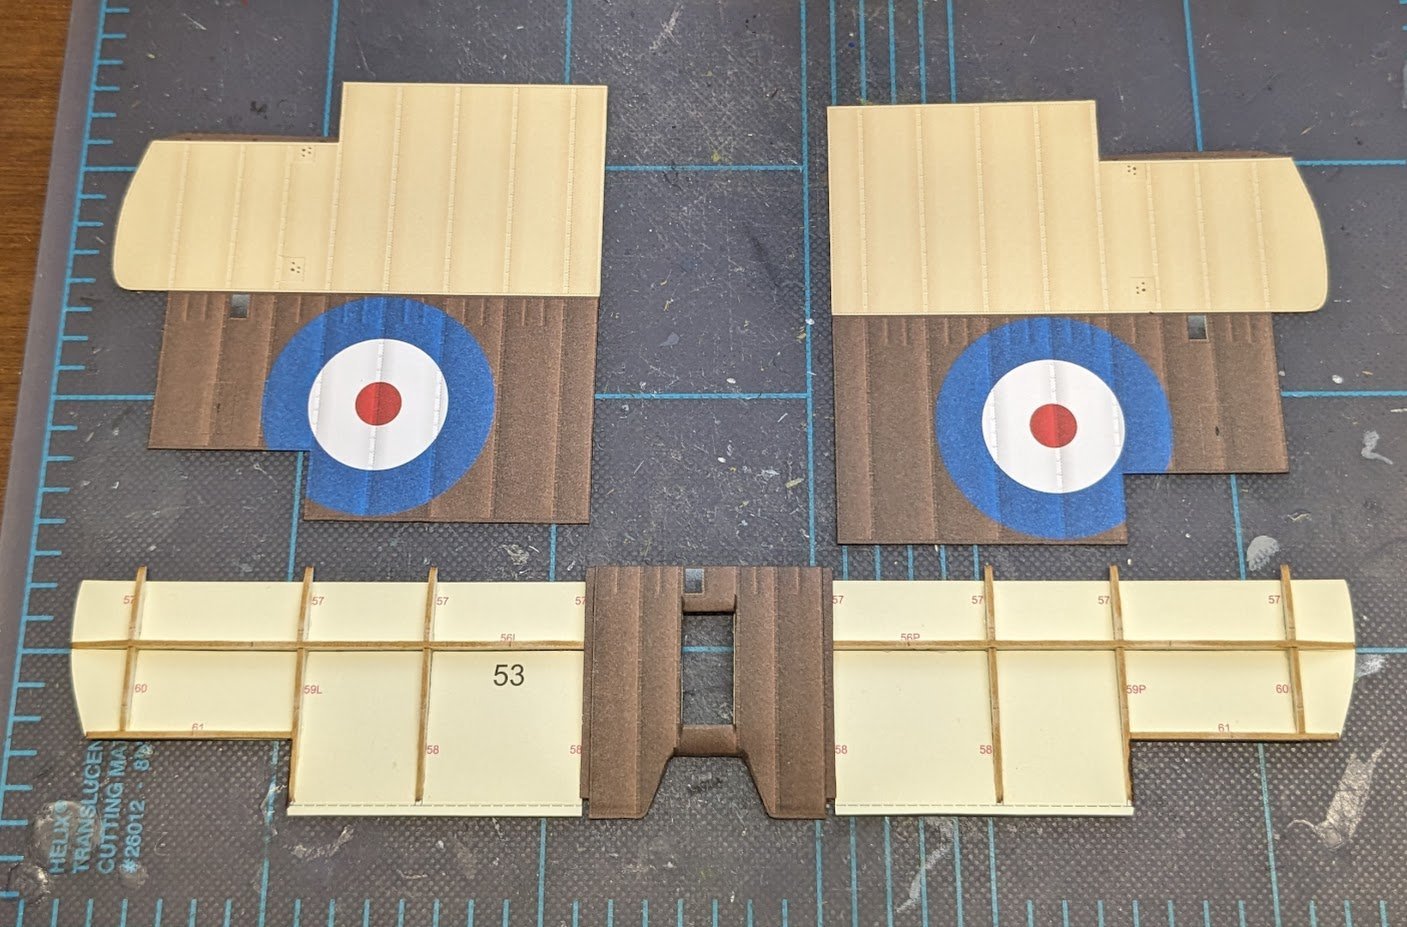
Working on the upper wing. Center section is done, outer frames have been added, and skins are prepped and ready.
- 54 replies
-
- 16
-