HOLIDAY DONATION DRIVE - SUPPORT MSW - DO YOUR PART TO KEEP THIS GREAT FORUM GOING! (Only 75 donations so far out of 49,000 members - C'mon guys!)
×


ccoyle
-
Posts
10,459 -
Joined
-
Last visited
Content Type
Profiles
Forums
Gallery
Events
Everything posted by ccoyle
-
 Ryland took care of that for you, but please note that I have also deleted the tags other than "done," since no tagging is allowed in this area. Cheers!
 -
I admire your willingness to tackle the same demanding model twice -- personally, I doubt I would have the necessary determination to see the job through to completion. You have a knack for quick work, so I imagine this one will move right along!
-
Most kit manufacturers have some sort of standardized method of numbering the rigging lines and indicating where they should be belayed. I'm not familiar with Mamoli's method, but a picture or two of the rigging diagrams should help. Also, some of our members may be able to recommend some basic rigging books -- the rigging of English gun brigs should also be fairly standard.
-
Well done, Adrian!
-
Welcome aboard!
-
question about waxing thread
ccoyle replied to ford34tom@comcast.net's topic in Masting, rigging and sails
Hi, Tom. It is really not a good idea to include your email address as part of your user name, as this will attract the unwanted attention of bots. Contact @James Habout changing it. Cheers! -
Welcome aboard!
-
Hello from the Finger Lakes Region of NY state!
ccoyle replied to Rinekar's topic in New member Introductions
Welcome aboard! -
Need small repair done on jibboom of Le Superbe model
ccoyle replied to Mr. Matt's topic in Masting, rigging and sails
I have taken the liberty of modifying your post title to more accurately reflect what you are looking for. I know we have some capable members who live up that way. One detail you did not disclose is whether you are willing or able to pay for the work -- that might attract more takers. Cheers! -
Welcome aboard!
-
I'm back from bleeding money, er -- I mean, "vacationing" -- in Gatlinburg. The arresting hook and tail wheel are now done.

- 92 replies
-
- 17
-

-

-
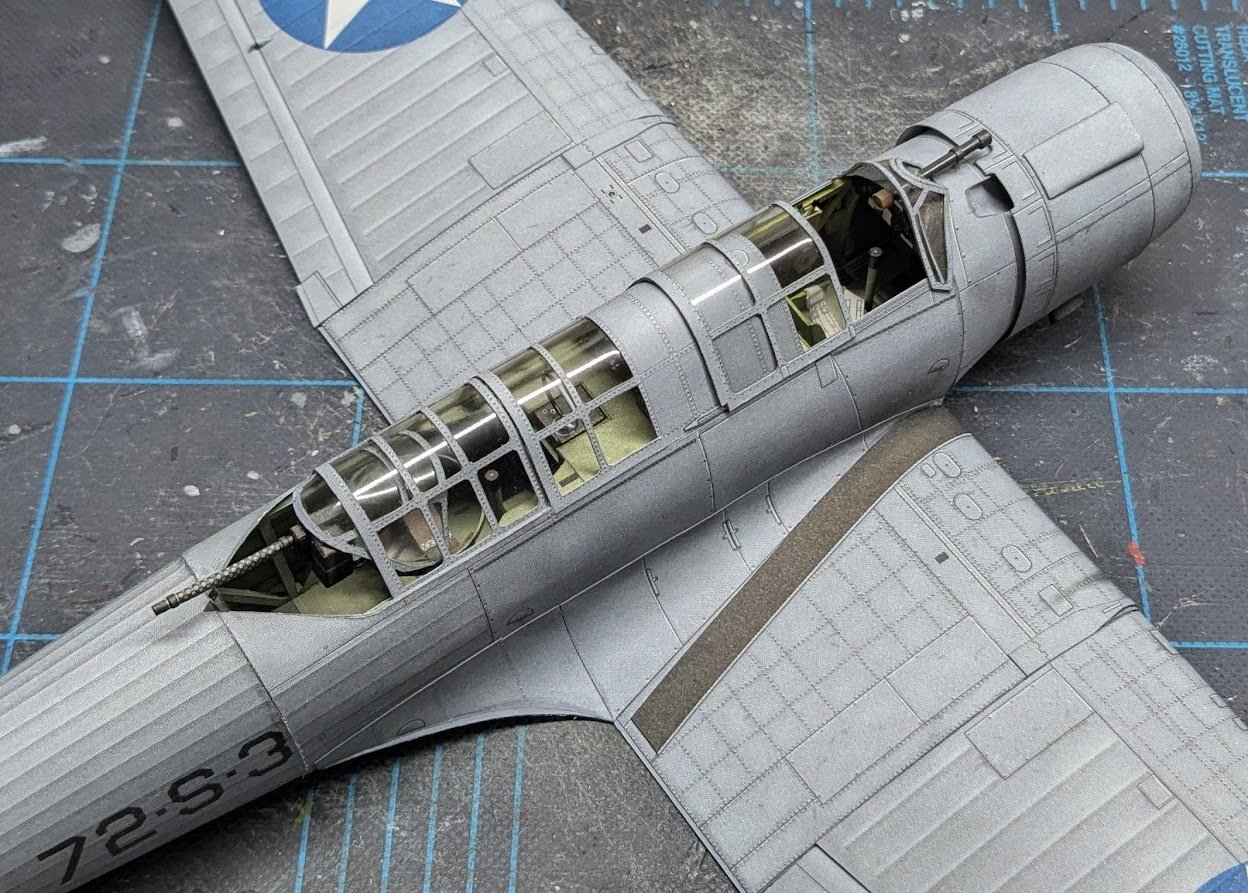
Main gear covers added. That odd little kink between the upper and lower covers on each strut is not a construction error -- the real covers were 'bent' in that fashion.
- 92 replies
-
- 16
-
-
Sad news. https://www.bbc.com/news/articles/cn7em5p087vo
-
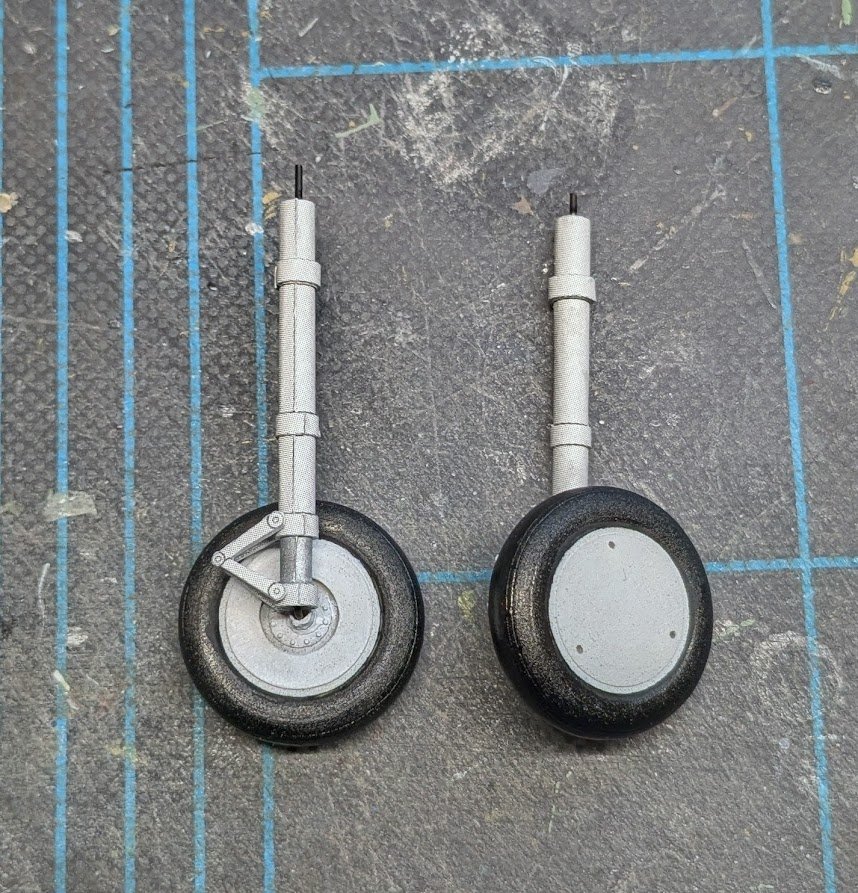
Have been making slow progress on the main landing gear. The struts are the usual paper wrapped on wire; the wheels are resin.
- 92 replies
-
- 16
-
-

-
Ya know, with a pair of long guns right there in the cabin, those two could have done a bang-up job, literally, of the 1812 Overture -- if only they hadn't preceded its writing by 75 years!
-
Welcome aboard, Glenn!
-
Welcome aboard, Nico! There is a discussion area for plastic kits here: https://modelshipworld.com/forum/26-plastic-model-kits/
-
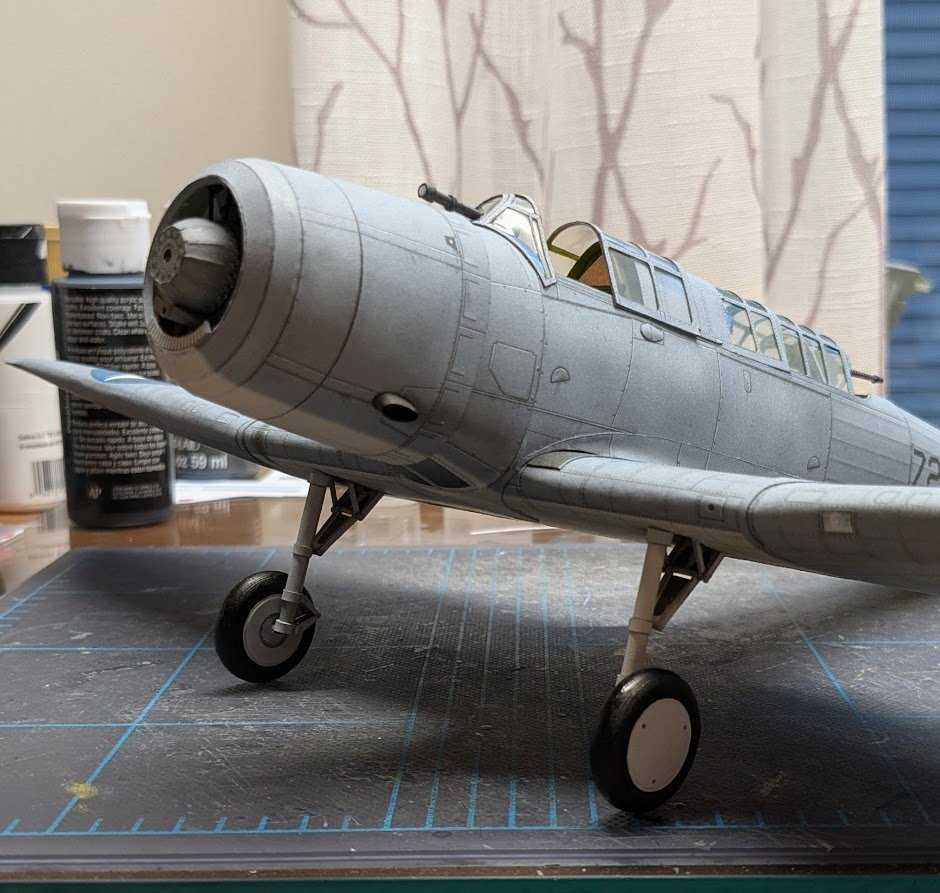
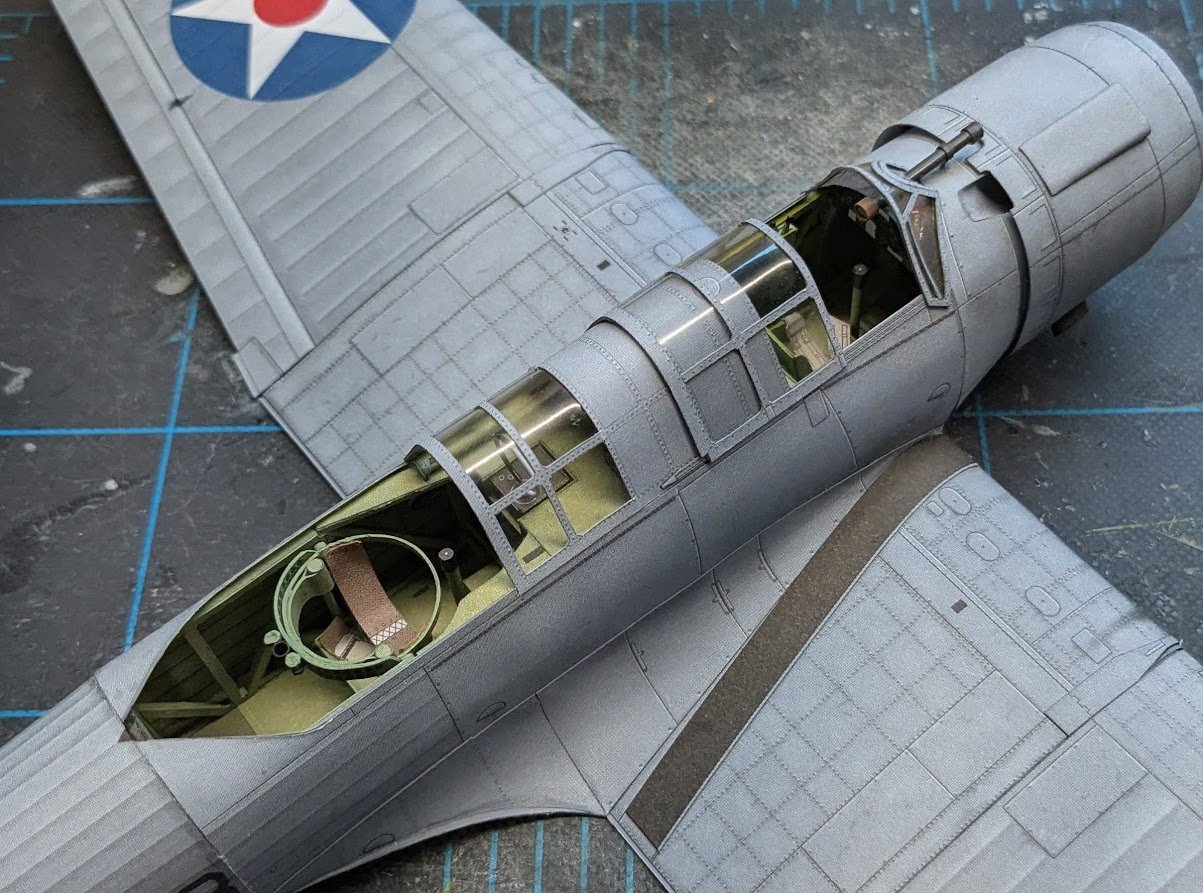
The only thing I got done today was the last two canopy pieces. The first one was not too much trouble -- until I realized it was riding too high because it is supposed to sit inside the fuselage rails, not on them. So, I had to cut it free from the fuselage, clean up the glued edges, and glue it down again. Then came the last piece. It was an absolute nightmare. I had to take a best guess at how far back the framing went on the molded canopy, because the forward part wouldn't sit right if the frame was too far back, and the aft part wouldn't sit right if the frame was too far forward. Ultimately, I must have guessed wrong, because the resulting piece absolutely would not fit where it was supposed to go, and no amount of cajoling had any positive effect. I also discovered that the machine gun was going to have to go in before installing the last piece, because it would not fit in after the piece was installed. I finally had to resort to cutting off some of the aft portion of the last canopy piece. The resulting shape is now wrong, but at least I was able to finally install it after many, many attempts. This process literally took hours to complete. 😑 Next up: landing gear.
- 92 replies
-
- 16
-
-
-
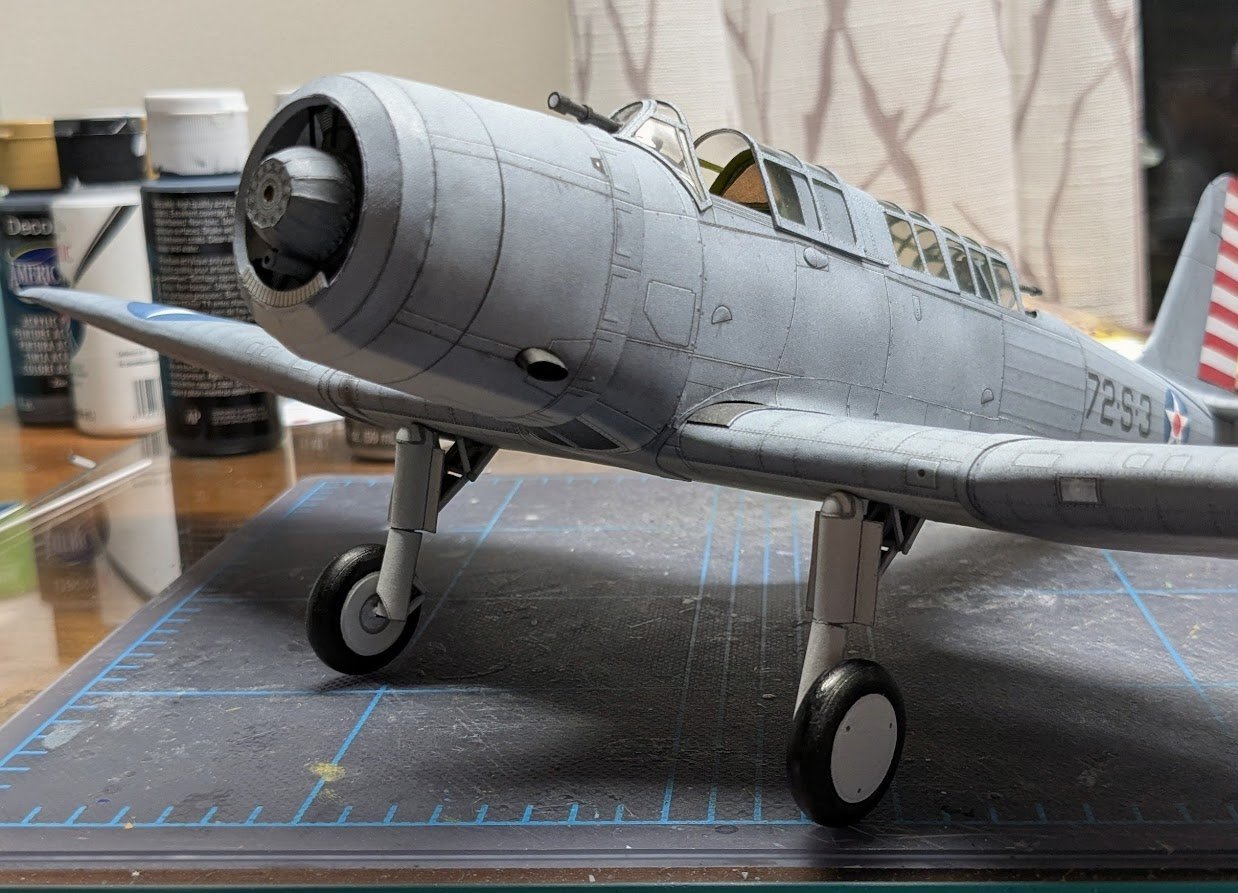
Windscreen and cockpit canopy done. Building and installing the bomb sight was a booger -- the paper part wound up being too large, so I had to replace it with a piece of styrene rod wrapped with several paper bands.
- 92 replies
-
- 17
-
-
-
Yep. There's a picture of it in the first post.
-
I laughed when I read that, but only because I know the magnitude of the understatement!
- 106 replies
-
- 2
-
-
- digital navy
- v108
- (and 3 more)