NMBROOK
-
Posts
2,305 -
Joined
-
Last visited
Content Type
Profiles
Forums
Gallery
Events
Everything posted by NMBROOK
-
 Glad to hear everything is going more or less to plan.I hope your timber isn't coming from the same place as my lime sheet I have just ordered How many of Keith's books have you acquired so far? Kind Regards Nigel
 -
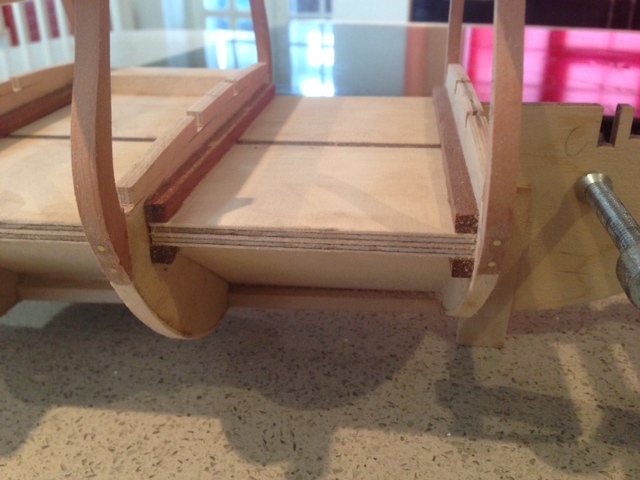
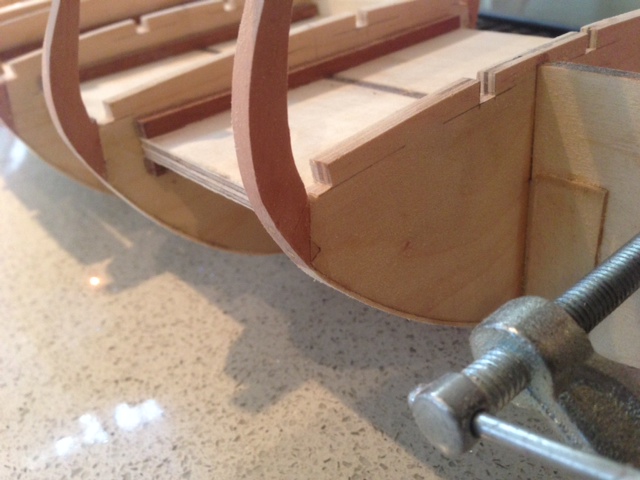
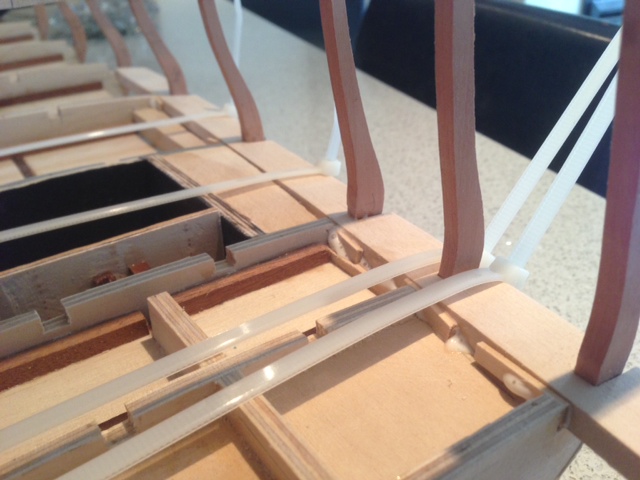
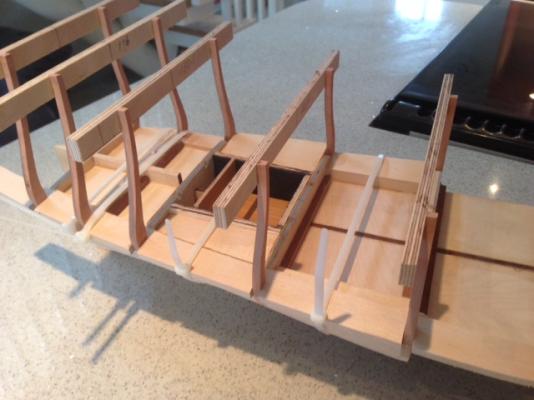
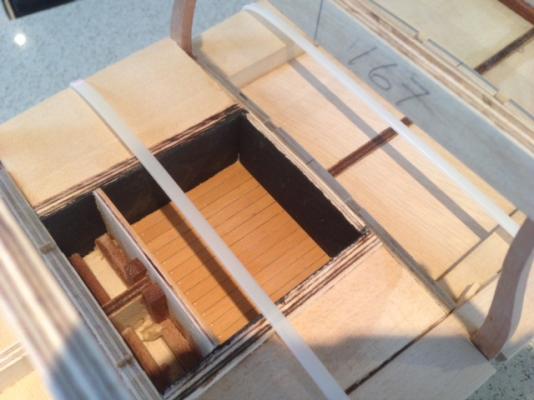
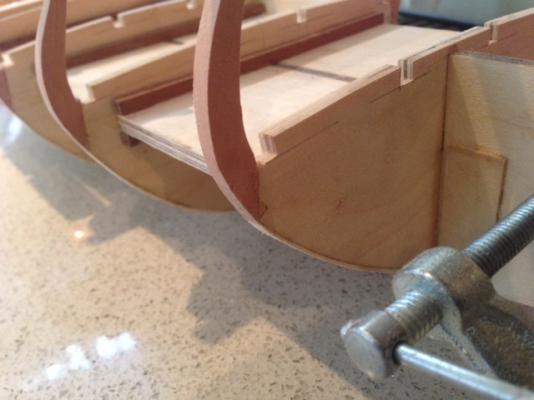
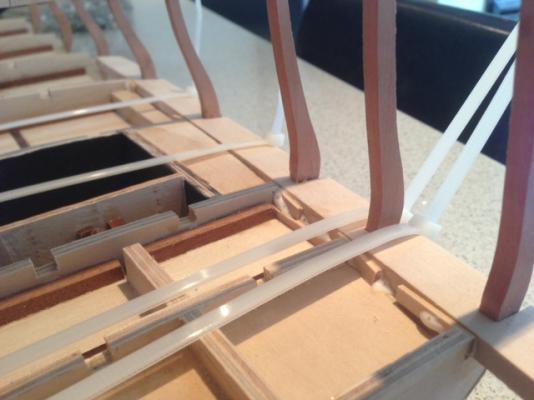
Ok then,I thought I would take the opportunity of waiting for glue to dry and upload some more pics. I was not happy with my original strategy for the topsides as I thought in the long run it would be more work.The tops of the bulkheads have been replaced with solid Pear to a more authentic profile.These can be integrated in the topside framing detail,whereas the ply would have needed replacing later.The ply deck beams were inconsequential,I only left them in place as temporary braces.An authentic deck construction will be used gun deck upwards when I get to that stage.These pear extensions have been fitted with brass dowels epoxied in.The extensions have also been tweeked to allow for single planking.The remaining section of the bulkheads have been 'banded' with 1.5mm lime strip to compensate for single planking.I have incorporated a small section of orlop deck in front of the mizzen step as a ladder runs down here.There is also one right at the bow which will result in a significant amount of work in this area.I am leaving this until the 'donkey' work is complete on the rest of the hull as it will involve removing considerable amounts of material from the false keel.As you may have noticed the lower hull is filled with limewood.This is to provide substantial support to the single planking and is a good aid as this is one of the most complex shaped hulls I have worked on.The area where the pear frames meet the deck is a crucial point.The sheer on the outer edge has to be perfect as everything will be measured from here.This is the reason for setting 6mm lime sections in around the perimeter.It ensures the ply subdeck will conform to exactly the right profile.One section is clamped in place while the glue dries.I have clamps ranging from 20p up to £95 but sometimes the easiest solutions are the best Kind Regards Nigel
-
Hi Wayne I thought I would drop by as I have been following Bob's Essex build.I don't want to come across as 'steaming in'The deformity in the keel is caused by the dowel holes in the offending bulkheads being out of position.The only way to get it straight is to 'chase' out around the dowels with the dremel on the offending bulkheads.I have a feeling the false keel will then 'pop' straight,if it doesn't it will only need the lightest of clamping to true up. To put the strength back is just a case of cutting some ply washers cut in half and gluing either side of the dowel.I hope this sorts the problem,I felt I should speak up as I have come across this before. Kind Regards Nigel
-
Not a daft question Eamonn,I file mine smooth with the keel.Simply because I rather it was visible to demonstrate that it has been done properly,but I appreciate that is a matter of personal taste.If you want to fill over,I would snip the pin after the glue is distributed,with the pin not fully home.You should be able to push it fully in with the length of brass.Carefully clean the uncured epoxy off with some paper towel with a little nail varnish remover on it.You should then have a little recess you can fill later,or if you want to go the whole hog,you could whittle a little walnut peg and fit that without removing the epoxy,this could then be sanded flush when set. Kind Regards Nigel
- 1,039 replies
-
- 1
-

-
- ballahoo
- caldercraft
- (and 2 more)
-
I almost forgot One last tip and I only thought of this last week as I have been doing a lot of pinning on Mordaunt.Put some 2inch masking tape over your pin hole and cut a tiny window out with the scalpel,stops epoxy everywhere,the tiny bit that is left when you remove the tape(before the glue sets hard)trims off easily when you trim the pin flush Kind Regards Nigel
- 1,039 replies
-
- 1
-
-
- ballahoo
- caldercraft
- (and 2 more)
-
I generally use the Zap 30min because it comes in two large bottles,I go through a fair bit,but to be perfectly honest all are ok,I just avoid the 5min ones because they go off too fast,the slow one I use,I could mix enough and do all the pinning in one go,rather than mixing some for each pin.It is also a little thinner than the likes of Araldite so penetrates into the joint better Kind Regards Nigel
- 1,039 replies
-
- 1
-
-
- ballahoo
- caldercraft
- (and 2 more)
-
I always use Epoxy on anything that could be broken or any joint that isn't snug.Wood glue is not very strong at bridging gaps Kind Regards Nigel P.S.drill the hole for the pins a little larger,the small gap is immaterial if you use epoxy,say 1.2mm,just helps ensure you get good coverage with the glue.
- 1,039 replies
-
- 1
-
-
- ballahoo
- caldercraft
- (and 2 more)
-
Hi Eamonn,I have seen some professionals use Gorilla glue assembling bulkheads to the keel.They tack everything together with spots of Cyano with everything assembled dry,then apply beads of the glue to the outside of the joint and then wipe over the joint with a wet cotton bud.The theory is that the foaming nature causes the glue to expand into the joint,not tried it myself though.It is an idea to 'dowel' keel to the model if you have not yet thought of it.Brass or copper wire,anything 1mm or above will do the trick Eamonn.If you are at a loss,you can use the solid copper cable(2.5mmsq) and clamp one end in a vice,then stretch it till it snaps.This work hardens it and removes the bendy nature.I normally fit the keel,rudder post etc and leave to dry,then drill through the lot into the false keel.A dab of epoxy and a pumping action ensures the glue is distributed in the hole.Back to the gorilla glue,what ever you use it on must be clamped solid,the foaming tries to force the joint apart.Sorry for the lecture buddy,hope I don't come across as being dictatorial. Kind Regards Nigel
-
I thought you may have Bob Read and reread my copy several hundred times Kind Regards Nigel
-
Hi Shipmodeler1,first of all,welcome to the forum As regards hammocks,I suggest you check out Canoe21's (Lawrence)build log on Victory in the kit section.He has spent last week producing stowed hammocks so he is the man you need to speak to. Kind Regards Nigel
-
Truly exemplary work on your capstans Karl! Kind Regards Nigel
- 662 replies
-
- 1
-
-
- bonhomme richard
- frigate
- (and 1 more)
-
Fabulous work Jan,This is truely a labour of love for you and it shows in your work. Kind Regards Nigel
-
Hi Keith I am following along in the background.I know you log title says 'another'but to my knowledge(someone may correct me here)this is the only Billings version being built on this forum.I very,very nearly purchased this kit when Modelzone was closing down,but in the end decided they hadn't knocked enough off the price when comparing what I could get it for from other suppliers.I wish you all the best with your build and look forward to seeing how Billings have tackled the details on their kit. Kind Regards Nigel
-
Fabulous work Bob!I like it a lot.I think leaving select areas of the deck unplanked will be a great idea.My bible on the subject is 'Navy Board Ship Models 1650-1750'by John Franklin ISBN 0-85177-454-7.I bought my copy around 15 years ago,but I find it one of my best reference books.He discusses at great length(with some good drawings) the construction used in these models.There are many examples of how planking is omitted and there are a few ways to do it so it looks right.If you do not have the book already,I thoroughly recommend it to you,or any one else reading this who is thinking of going down route. Kind Regards Nigel
- 1,477 replies
-
- 1
-
-
- essex
- model shipways
- (and 1 more)
-
Smashing work Eamonn!!You have got some nice symmetry going on there You will be on to the 'pretty' planking soon.I am glad the book meets expectations Kind Regards Nigel P.S.Forget Alien,Predator and Terminator,none are as intimidating as Lister's vindaloo curry monster
- 1,039 replies
-
- 1
-
-
- ballahoo
- caldercraft
- (and 2 more)
-
When you developed your cannons,do you have a barrel centre to deck level height?I am trying to establish gunport sizes and the deck levels in relation to these.So far my calculations going by the Spanish drawings gives the following clear opening size for the gunports; Top deck working down 8mm wide by 6mm high 9mm wide by 7mm high 10mm wide by 8mm high 11mm wide by 9mm high I worked the deck level to lower cill height out from the same drawings but I am getting small discrepancies when I cross reference with the artillery drawings on the same website. Any values you have calculated will be interesting as I could do with a second opinion on this one. Thanks in advance Kind Regards Nigel
-
Coming on well Eamonn you missed the line"smoke me a kipper I'll be back for breakfast,Johnny"remember that one?Yes I concur some Chinese takeaways do have a forte for overcooking squid,so Kester's theory may indeed be true Kind Regards Nigel
- 1,039 replies
-
- 2
-
-
- ballahoo
- caldercraft
- (and 2 more)
-
Looking good Eamonn,I found the alaphatic glue benefits from being left a good 24 hours before sanding,after this time it has gone fully hard and lost any of it's rubberyness (is that a word? ) Kind Regards Nigel
- 1,039 replies
-
- 1
-
-
- ballahoo
- caldercraft
- (and 2 more)
-
List price in the UK £1000 Kind Regards Nigel
-
SHIP'S BOATS
NMBROOK replied to piratepete007's topic in Painting, finishing and weathering products and techniques
An interesting and valid question Pete,I have to admit a feeling of dismay when seeing one of these when i opened the Mordaunt box.There is a very good chance I won't use mine and go without.If I were to utilise it,I would sand the keel and planking lines off and use it as a former and plank around it,fit the keel then remove it and then fit the interior out.I know this doesn't fit with your ethos of using everything supplied,but taking the hull thickness down to anything like scale is masses of work.On this particular ship,there isn't much paint,so to have a coloured boat would look odd.There are many experts here in making plastic and resin look like wood,but unfortunately I am not one of them. Kind Regards Nigel -
Wonderful to see the stages involved Alexander.Very clever recovery with the shield,no one would know if you hadn't said anything. Kind Regards Nigel
-
VERY nice work on the cabin Bob Kind Regards Nigel
-
Yes you are correct Eamonn ,I would elaborate further.If you fit the garboard and then work towards where you left off,it will prevent the planks from clinkering between bulkheads.To continue as you are would mean lots of 'edge bending' to follow the crescent shape of the previous planking.I know this would mean the plank ends butting up to the other planks,but I think either way you would have that situation.I hope this makes sense Kind Regards Nigel
- 1,039 replies
-
- 1
-
-
- ballahoo
- caldercraft
- (and 2 more)
-
Your Lion is wonderful Alexander I am sure I speak for many when I say yes,pictures of the work in progress please.Thank you for sharing your marvelous talent with us. Kind Regards Nigel
-
I am sorry Pete,I have the greatest respect for what your are accomplishing regarding the instruction issue I do not mean to cause offence,your notes ( I have read them myself) would be of great help to anyone building this kit.I did want to stress that the supplied instructions are minimal and to compare them in any way to Caldercrafts three books included with the Victory would give Hans the wrong impression. Kind Regards Nigel