KeithAug
-
Posts
3,986 -
Joined
-
Last visited
Content Type
Profiles
Forums
Gallery
Events
Everything posted by KeithAug
-

Keel klamper alternative
KeithAug replied to zamboknee's topic in Modeling tools and Workshop Equipment
I must be missing something because I have never used a keel clamp. I just tend to knock up a support cradle from scrap wood and have never felt the need for anything better. As far as the Stanley vice is concerned I have one and wouldn’t recommend it for anything but the very smallest boats - nothing more than a few inches long. -
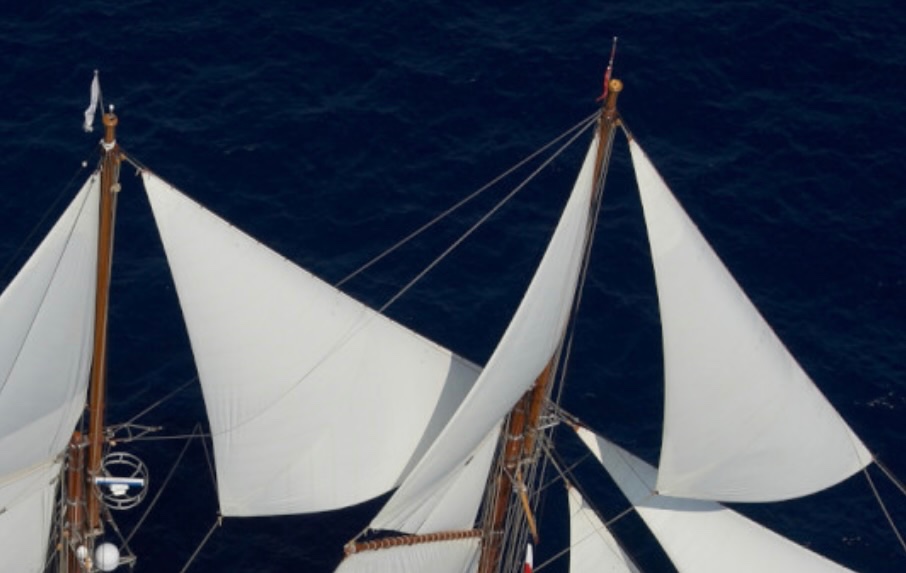
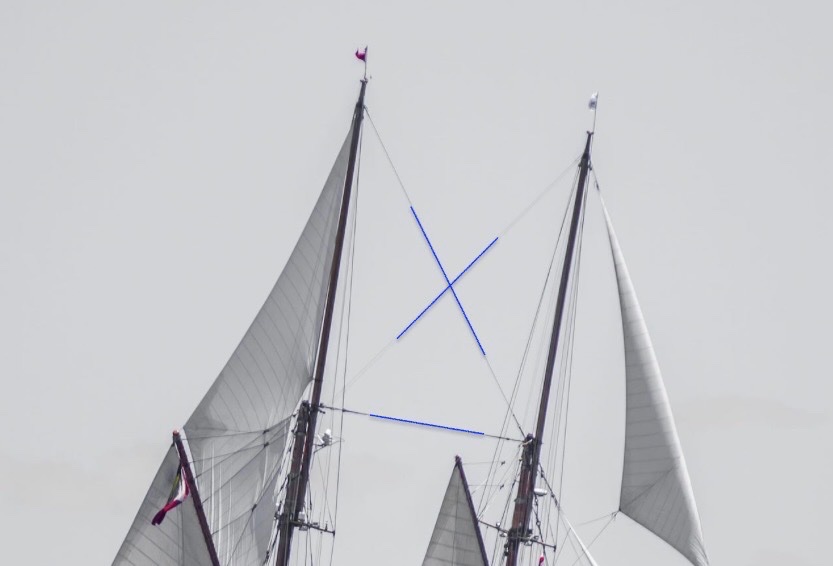
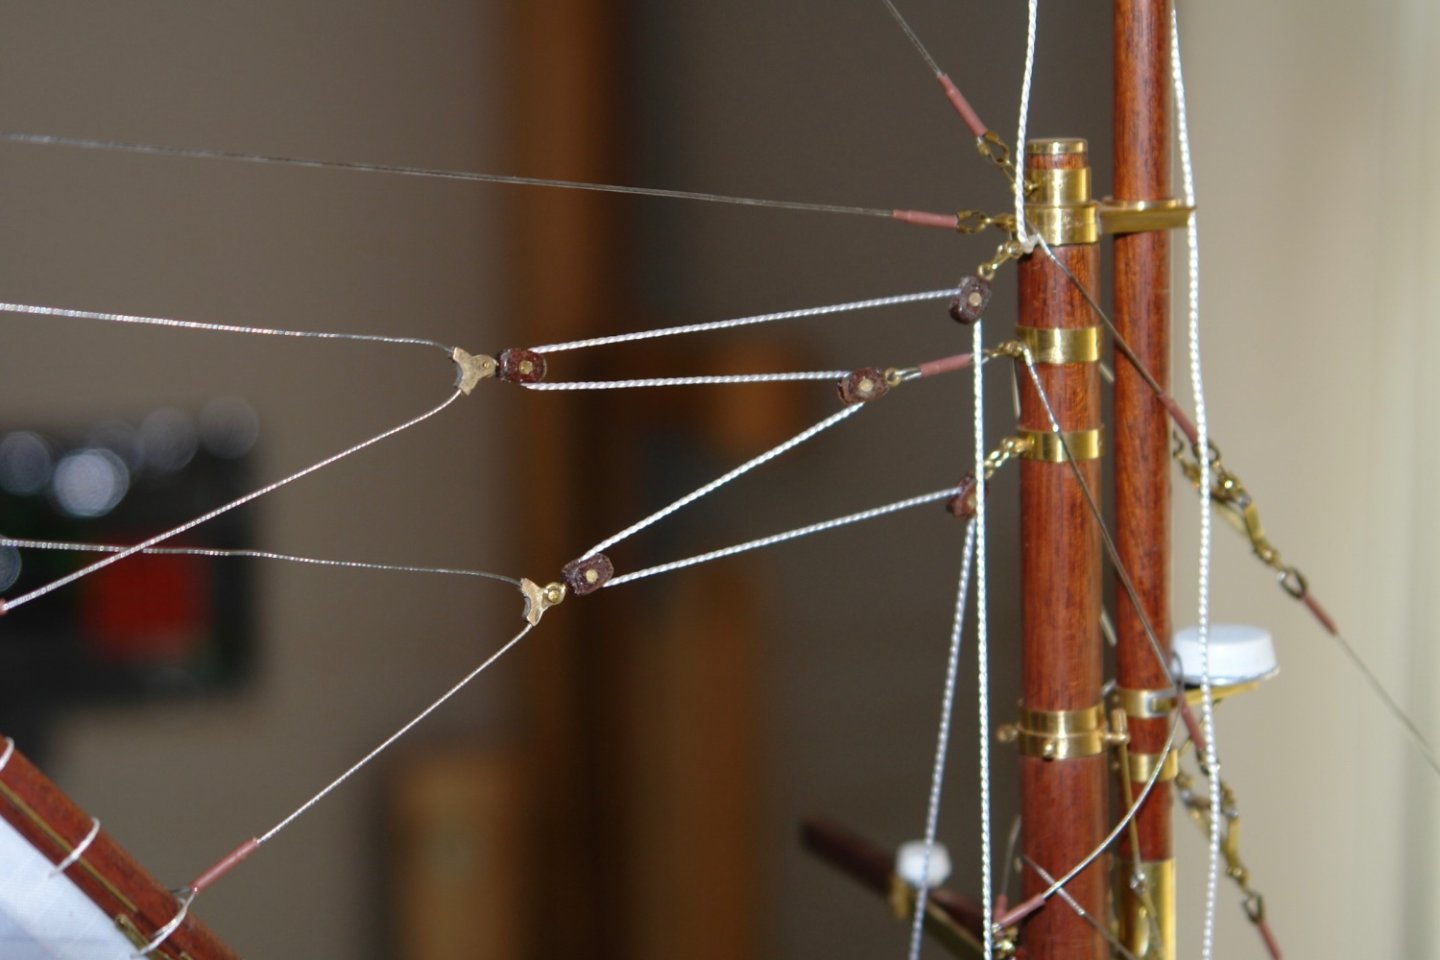
However if I look long enough i will find the answer! There are a pair of stays and they are obviously "running" stays that can be slackened on either side depending on which tack the boat is on. i hope the crew remember to tighten the stays or they may loose the fore top mast. it seems a bit of a worrying arrangement to me.
-
They have even managed to make tacking the fishermans complicated on Germania. I don't think you have spotted the unusual way the between mast stays are rigged. It is like the final video you posted in 2073. Now why would they do that? I have added insta360 to my Farther Christmas wish list. It is brilliant.
-
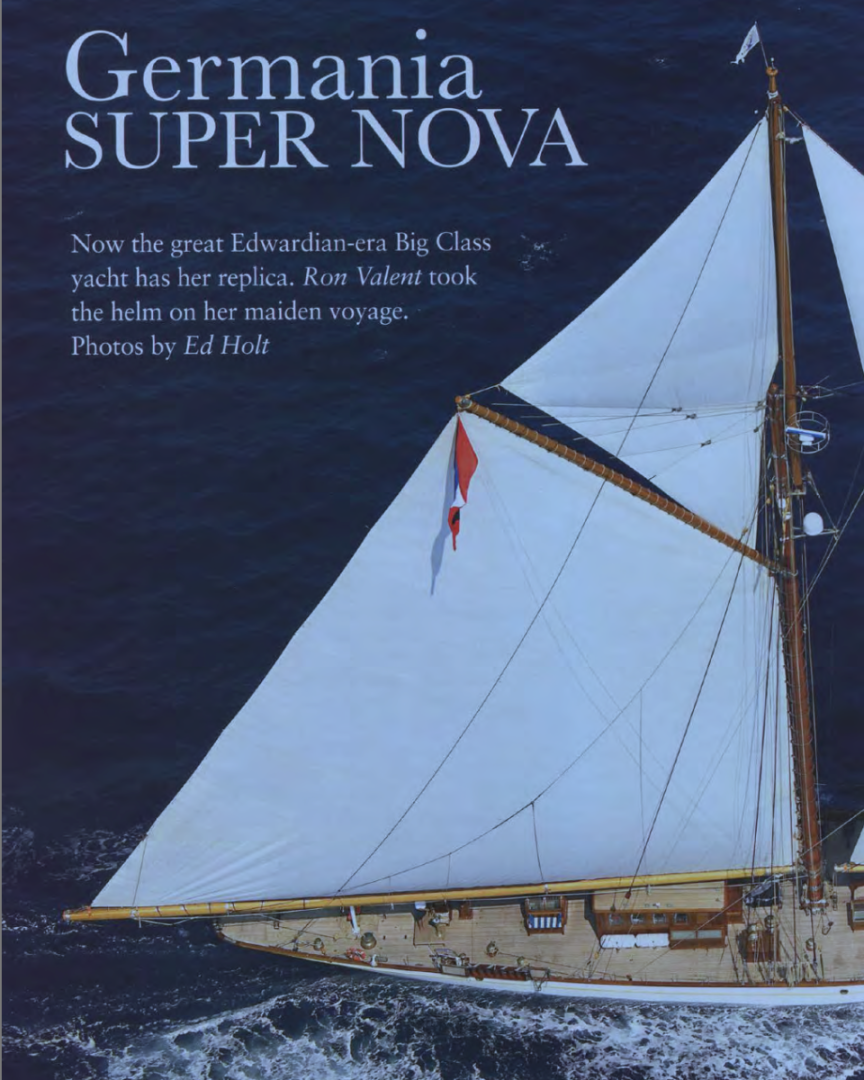
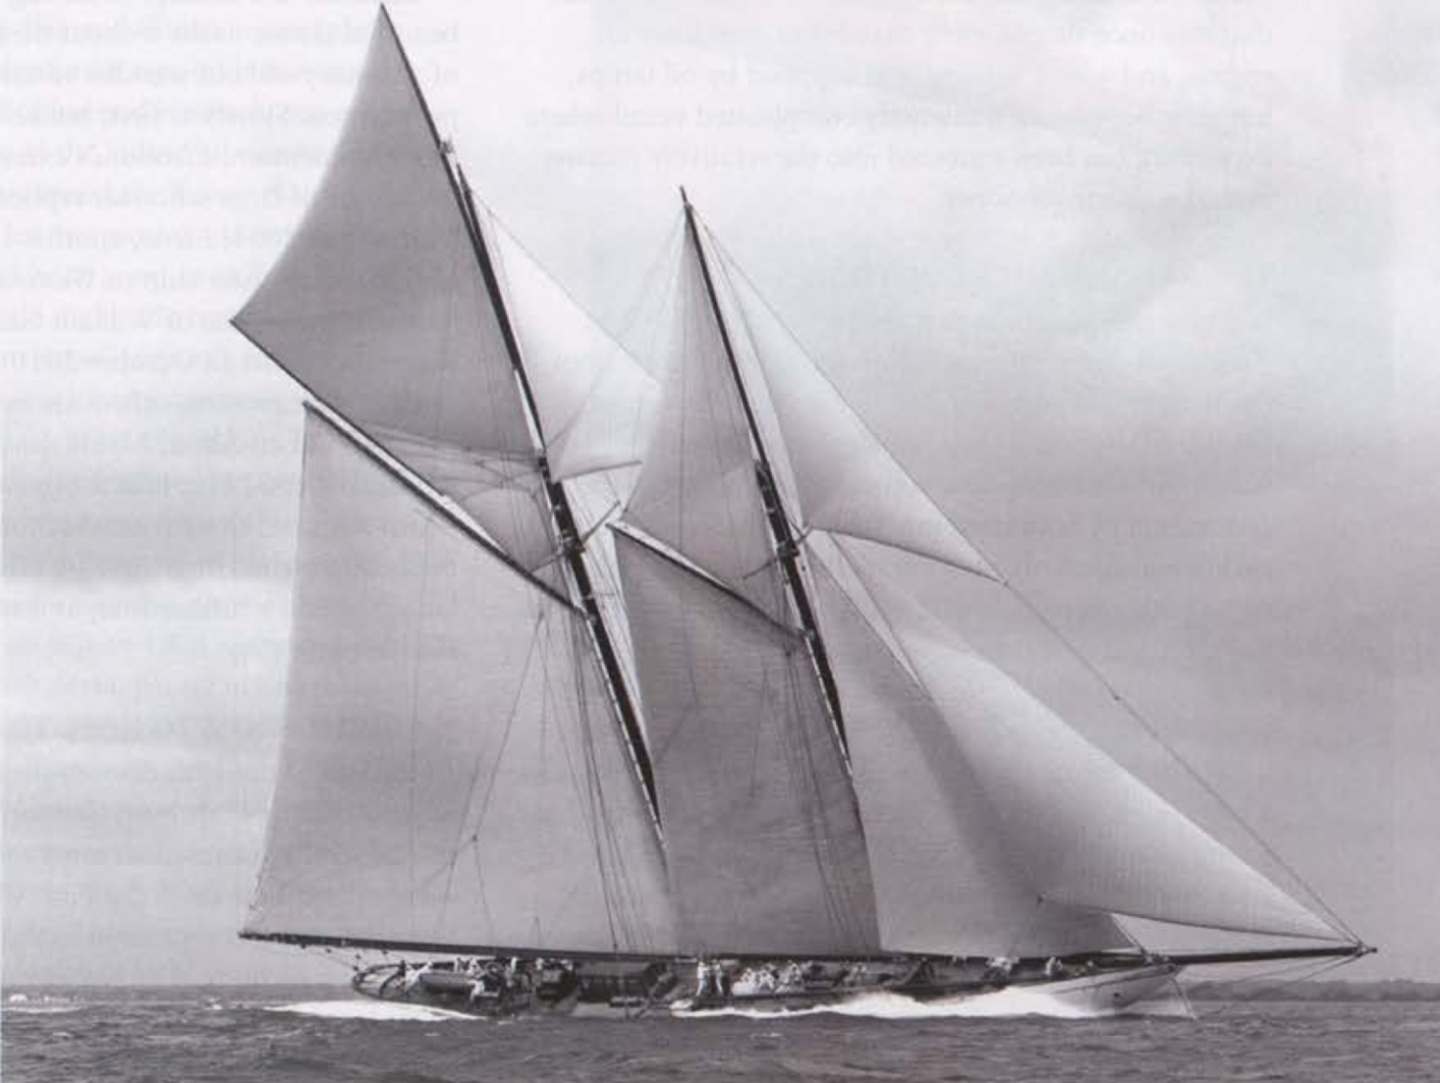
Thank you for your two interesting and informative contributions, i learned a lot and i am sure they will be of interest to quite a few visitors to my build. The camera work in the second video is fascinating. I assume a drone was employed with some sort of fancy lens. Were you the operator? The video also reminded me that I haven't hd chilli for a while and I love chilli. Steve - I have a lot of photos of Germania that supports your point. The coloured photos are of Germainia Nova while the black and white is the original.
-
I am sure I have seen someone post a picture of a Byrnes saw set into a work bench with the top flush with the bench surface. If I had the space I would do this to overcome the limitations of the relatively small table. p.s. Does everyone keep the blade guard on? I found it was constantly in the way and removed it a long time ago ( I take a lot of care - famous last words!).
-
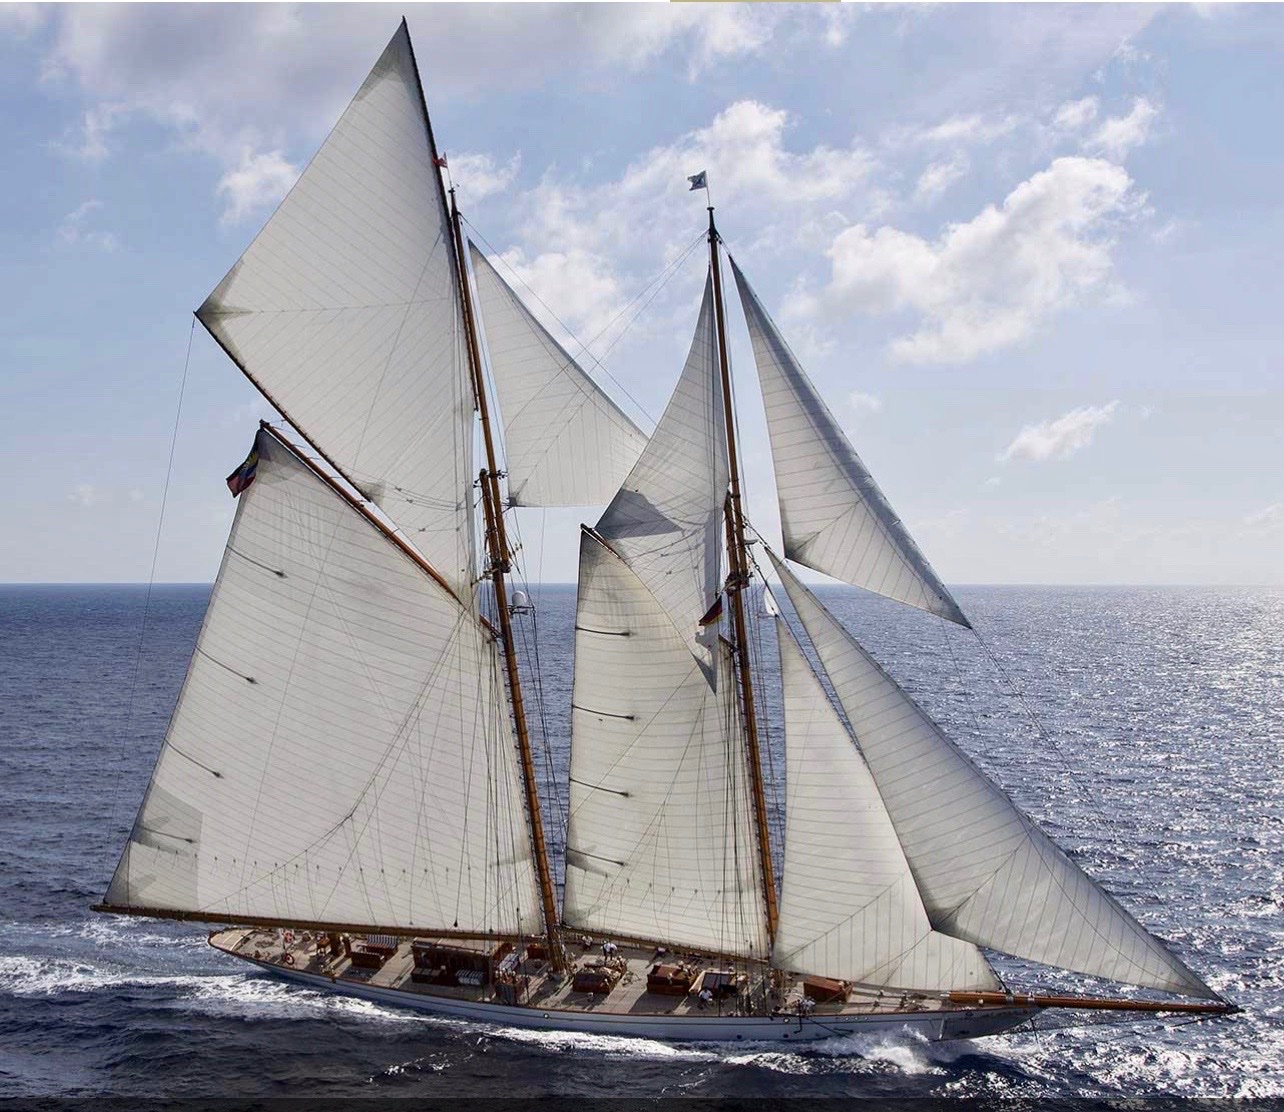
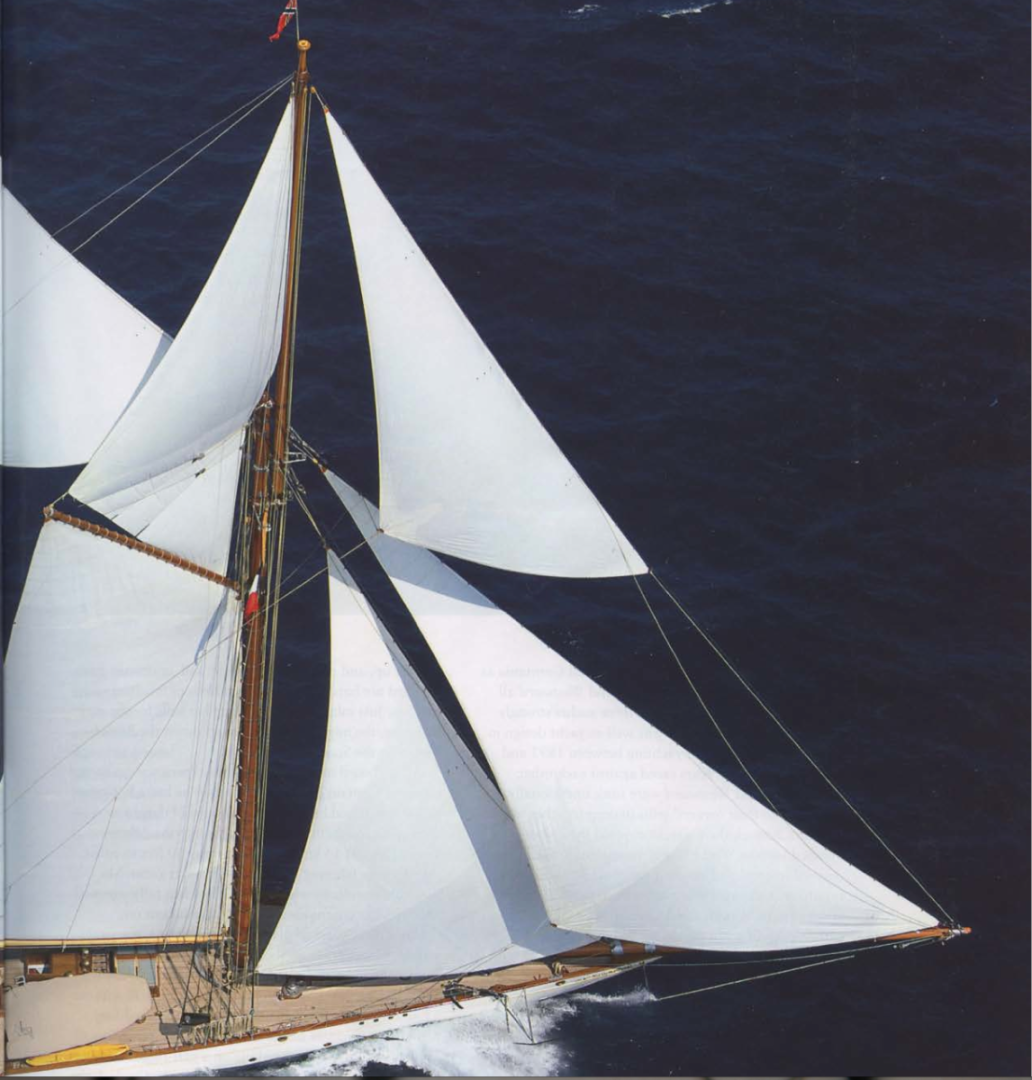
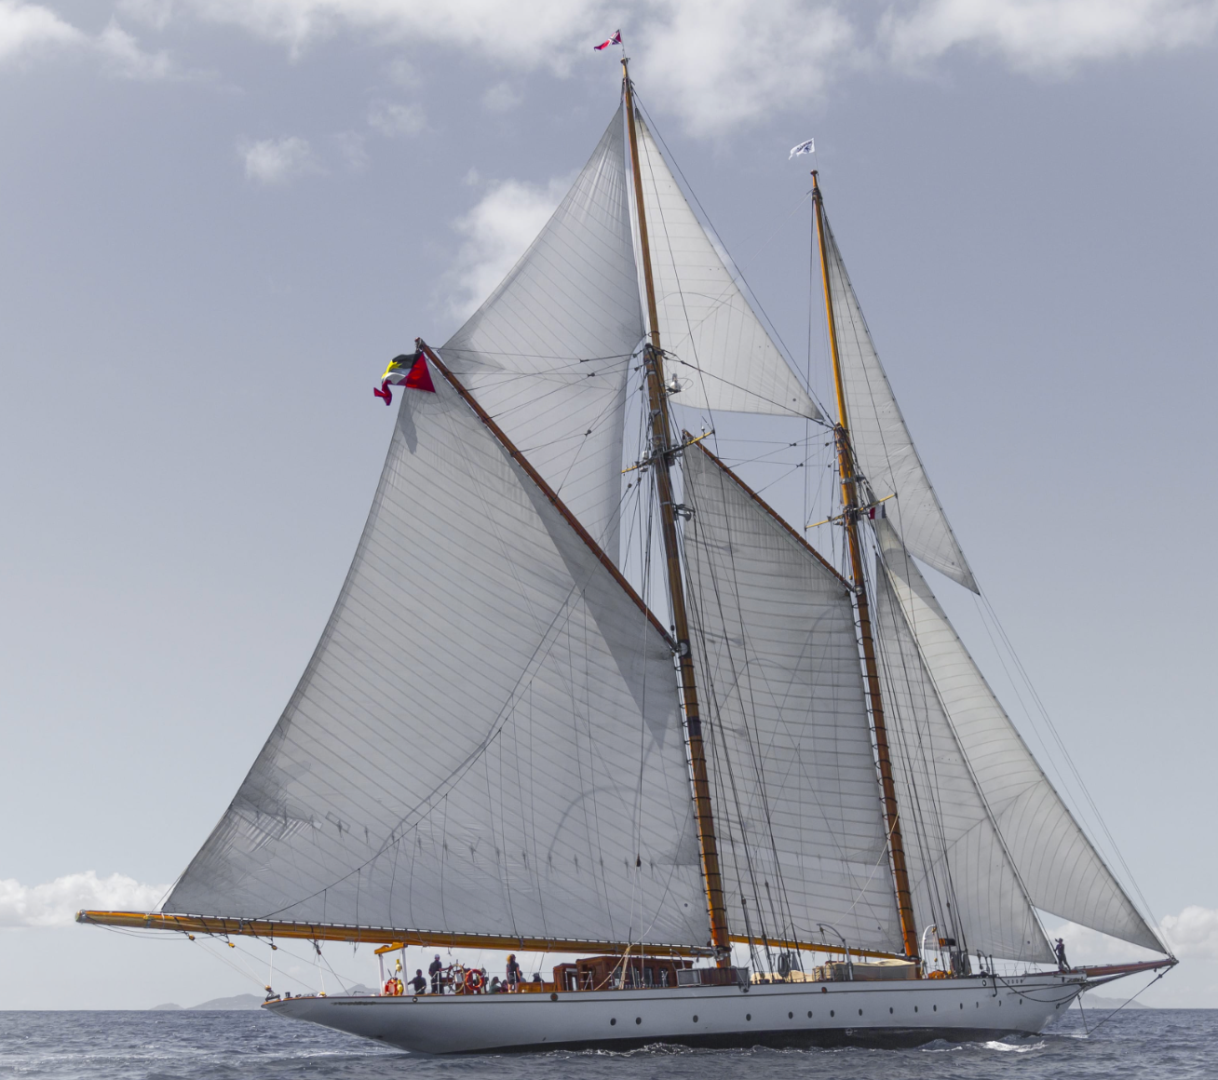
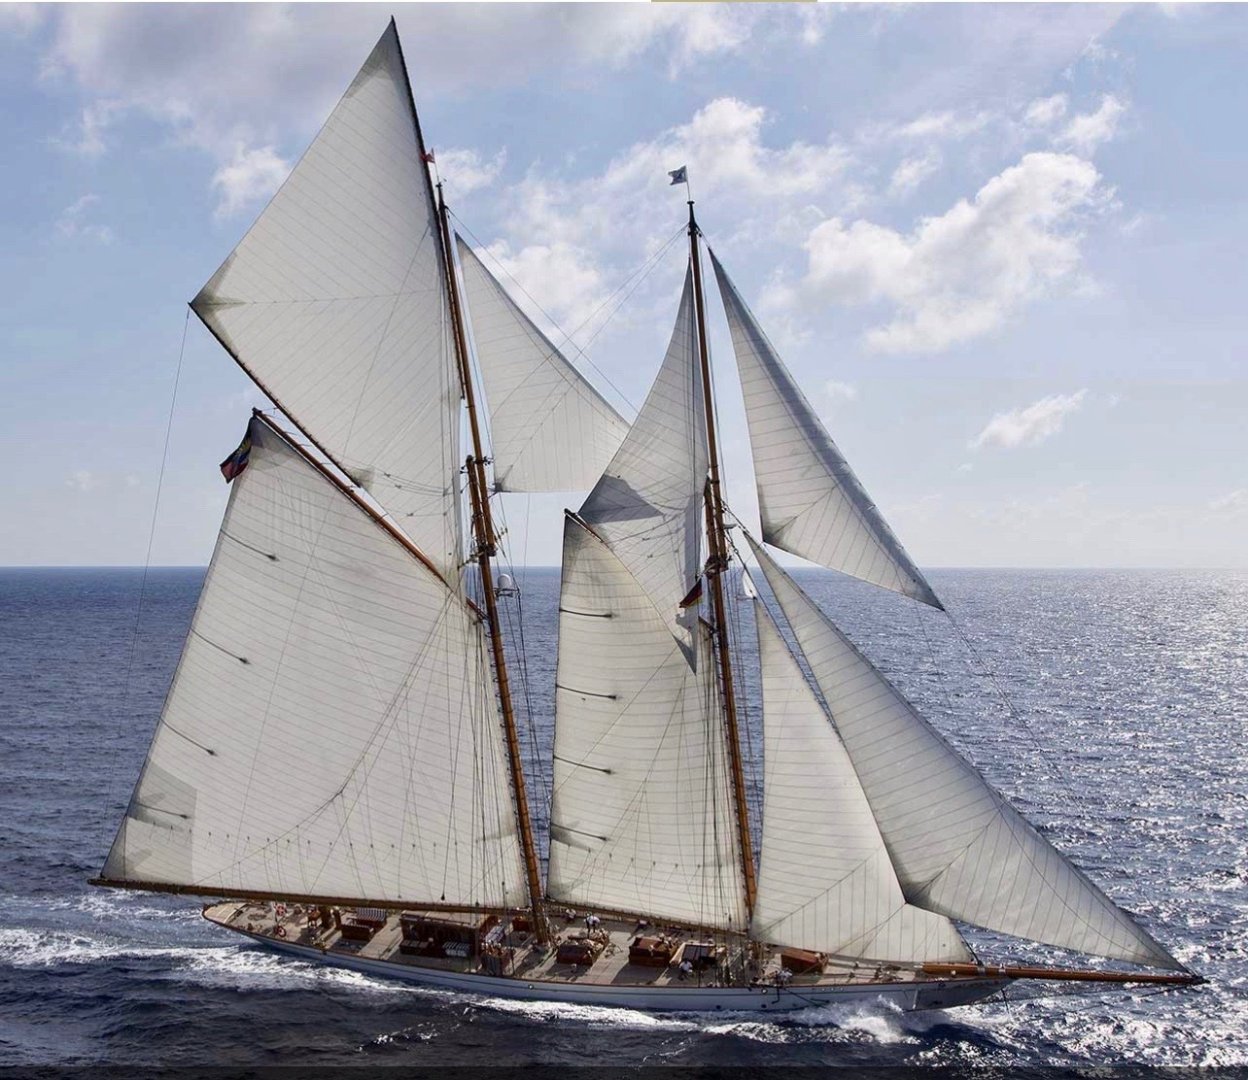
Andrew, I haven't seen the film but I will look out for it on Netflix or similar. I agree there is something special about a schooner under full sail. Phil, I agree that a squall would be worrying. They seem to sail Germania most of the time with a much smaller sail (Photo) so I guess they are worried too. I don't like Germania as much with this rig. She seems a little "squat" to me. Sadly not Tom - we don't get a lot of visitors beyond family and close friends. The most important and valued audience is of course my friends at MSW. Thank you Keith, Brian, Steve, Pat, Andrew, Phil, Eberhard, Valeriy and Tom, your interest and kind remarks are as ever much appreciated. Also thanks to everyone who have visited and or liked my work.
-
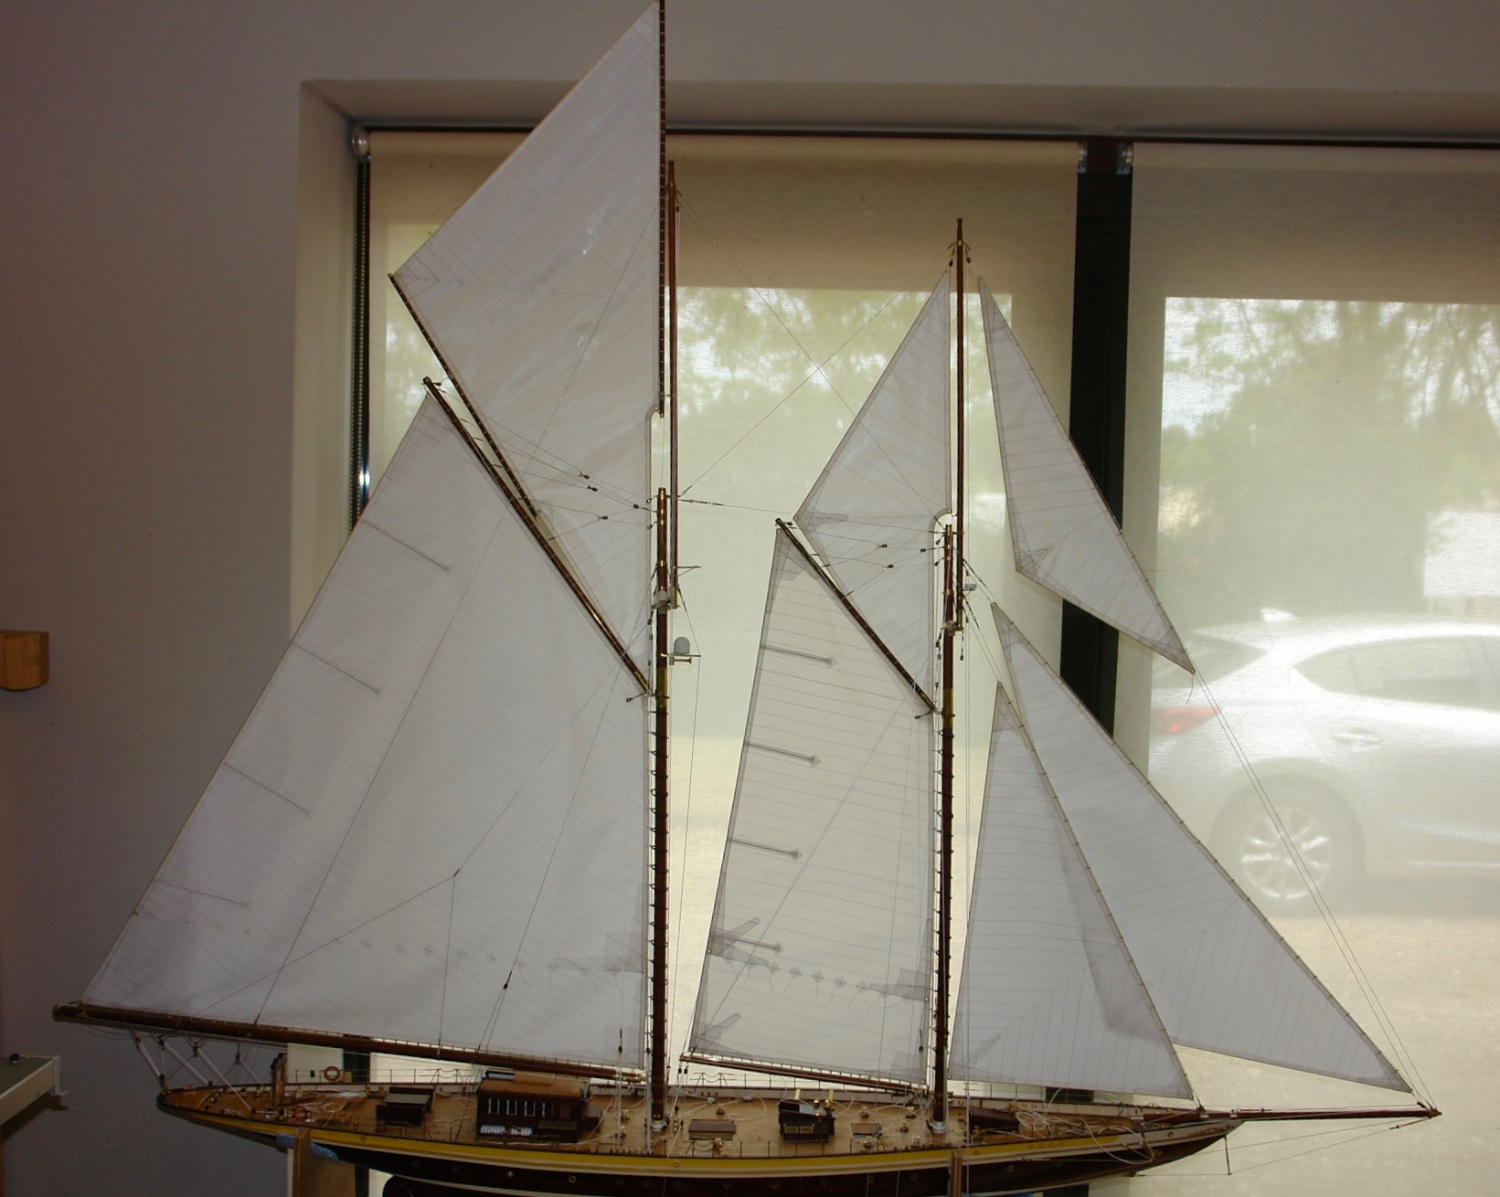
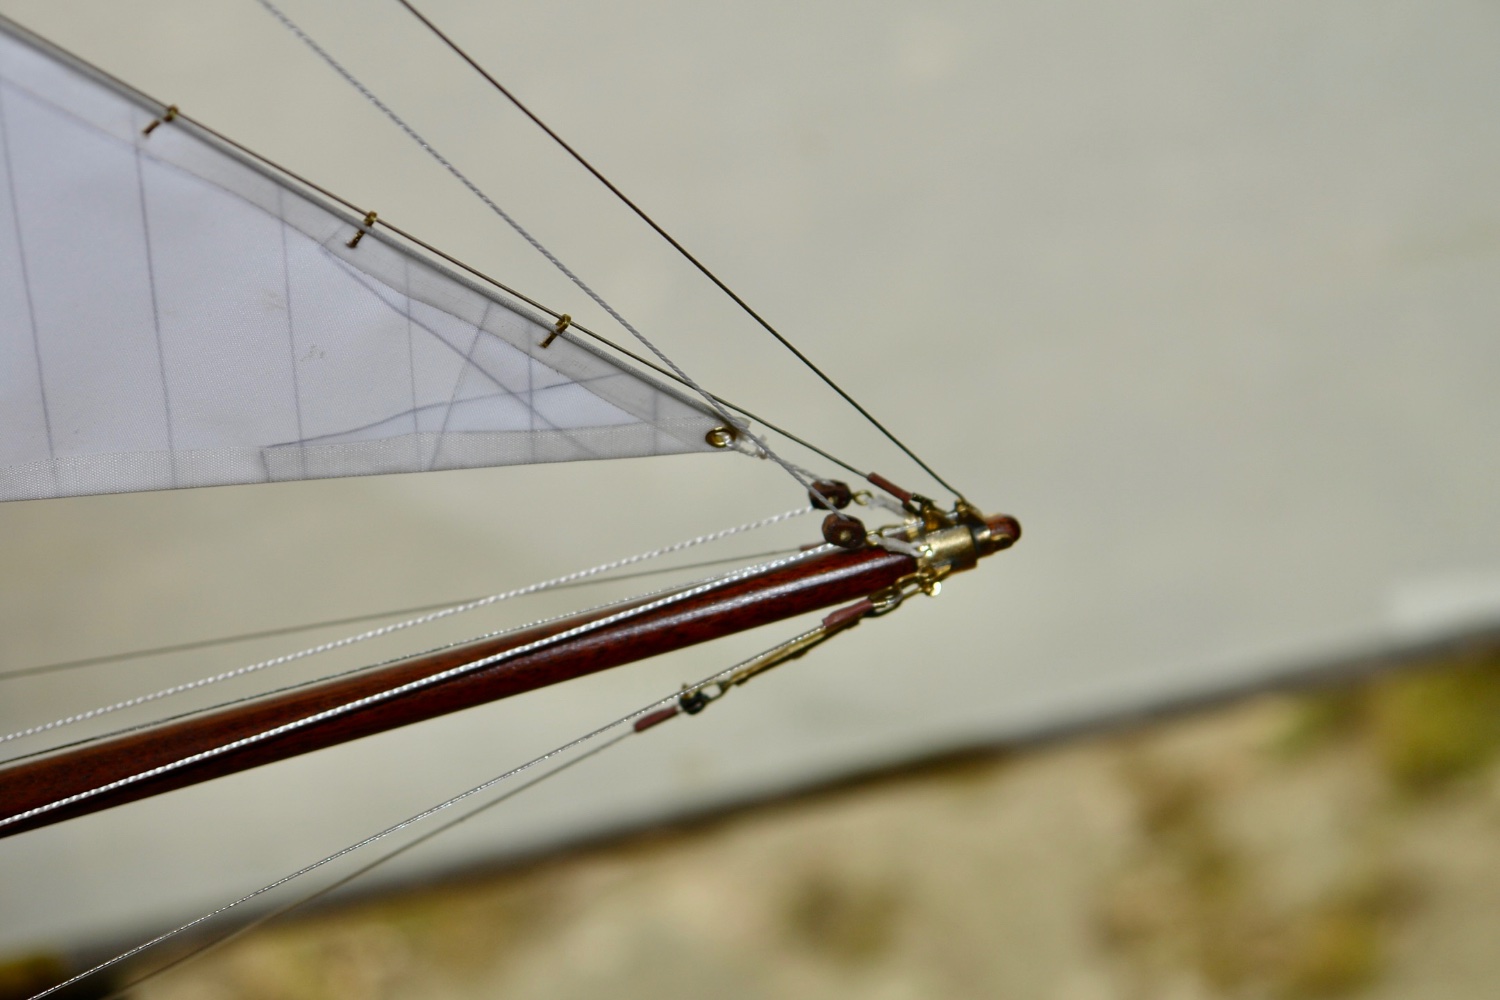
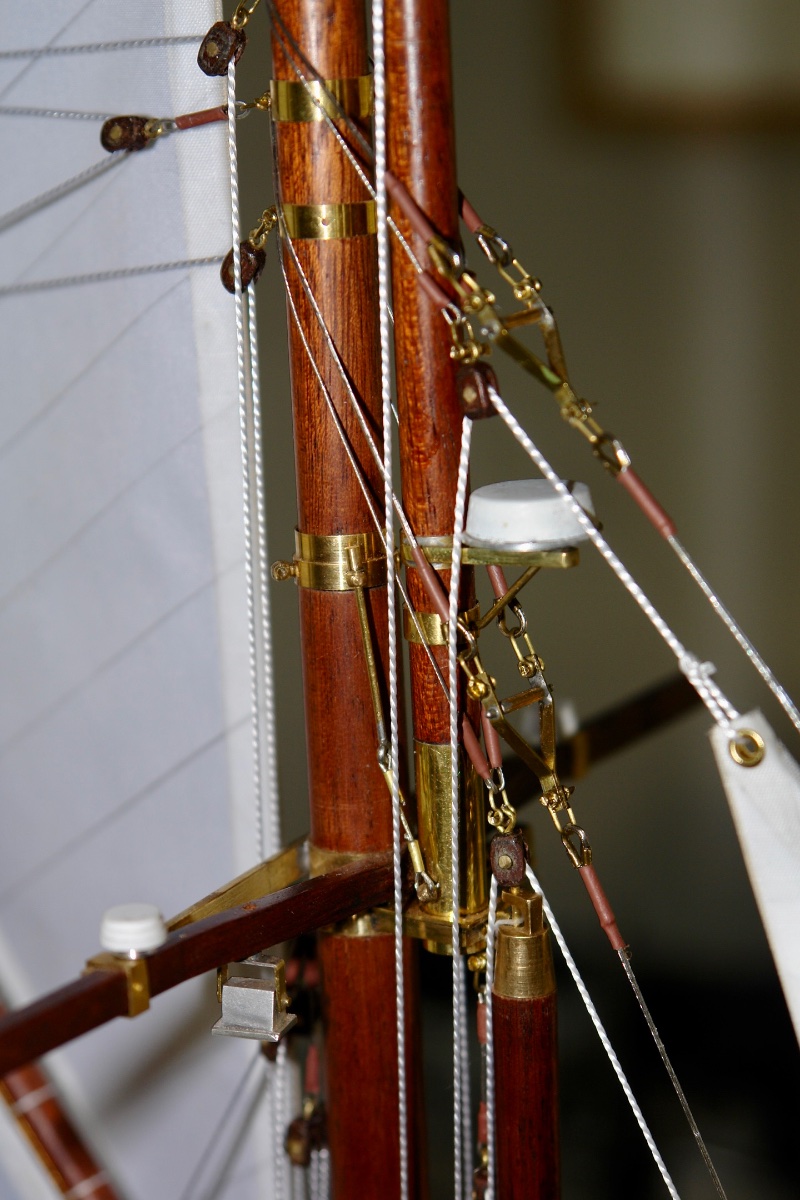
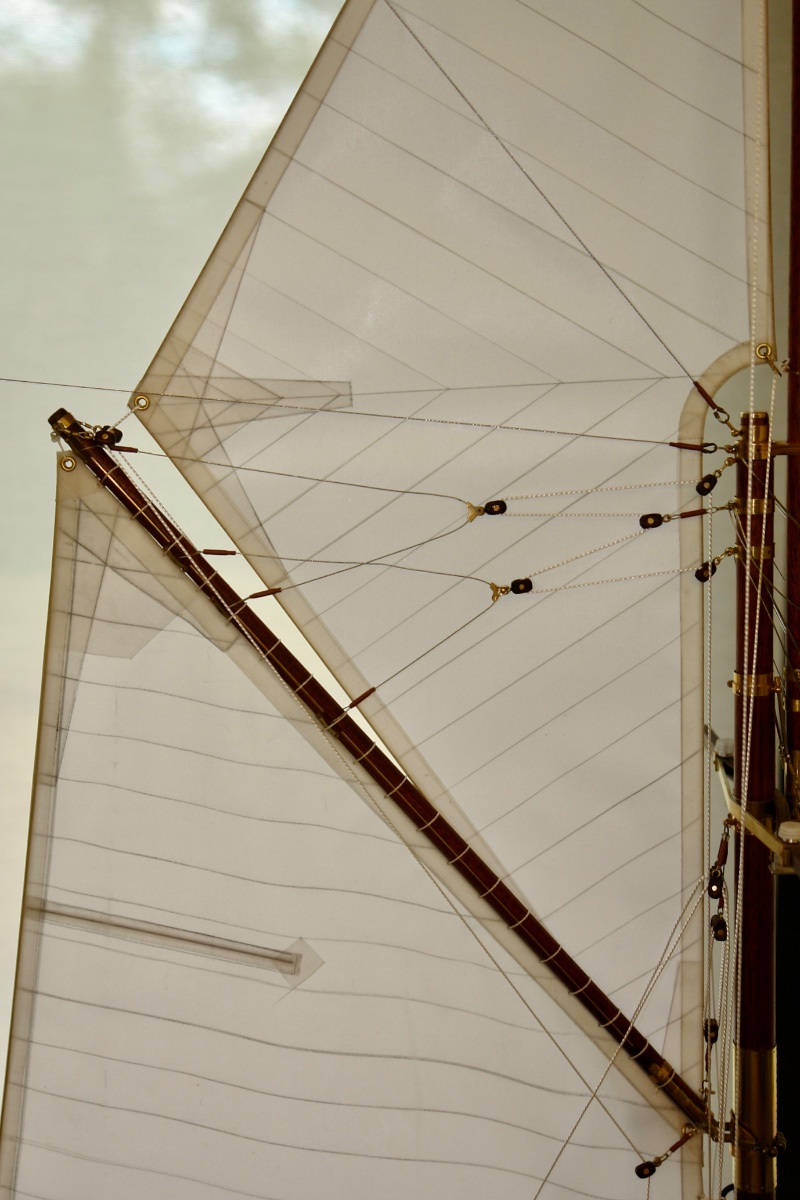
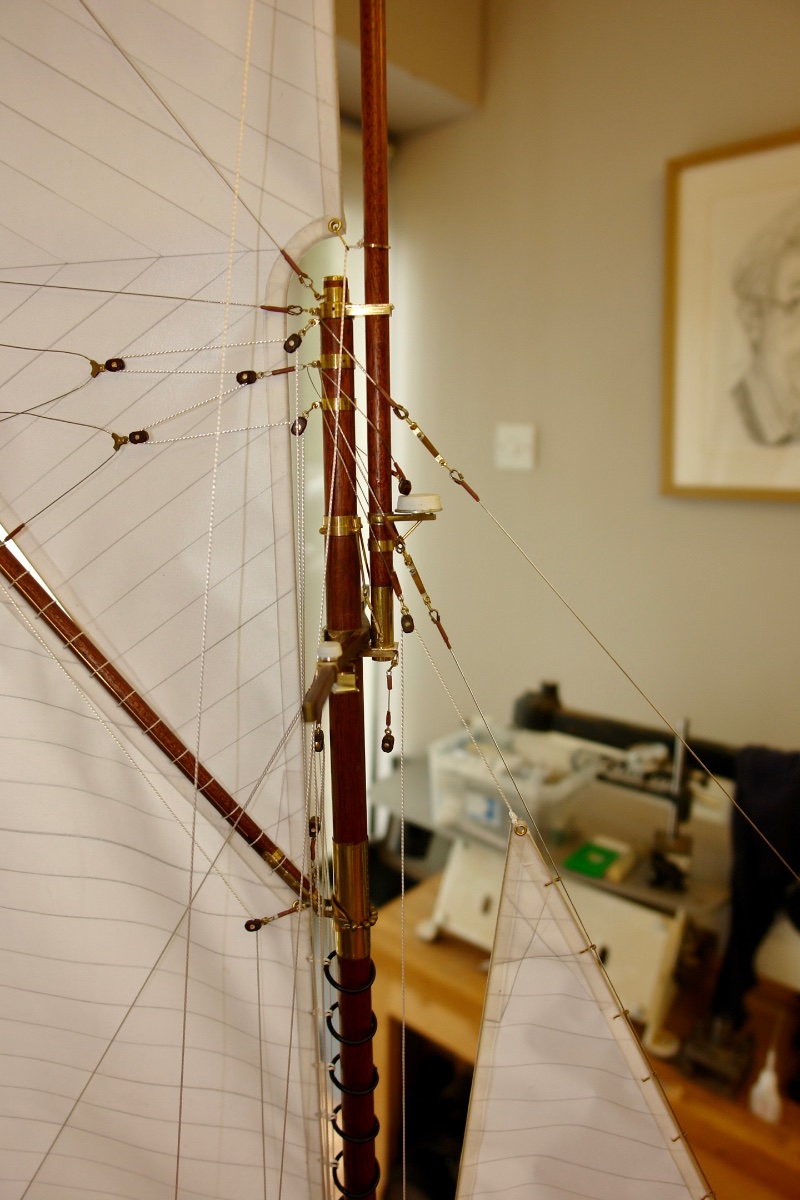
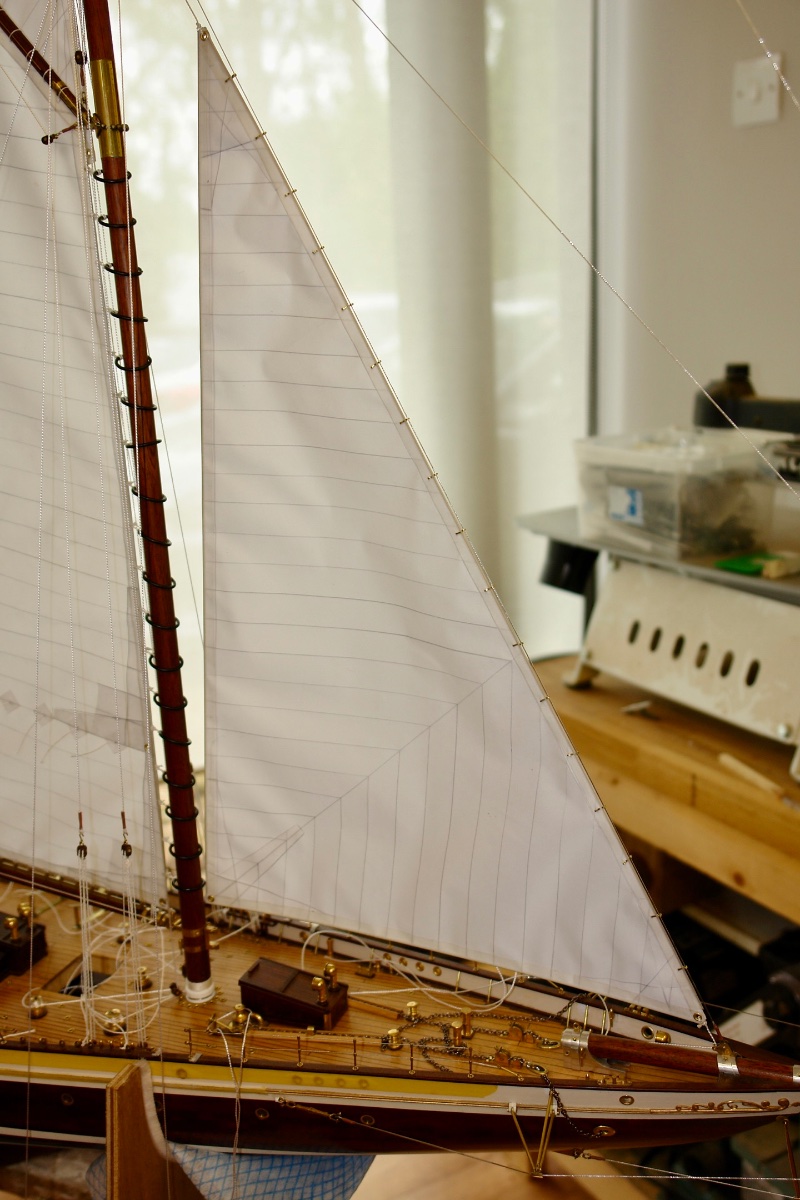
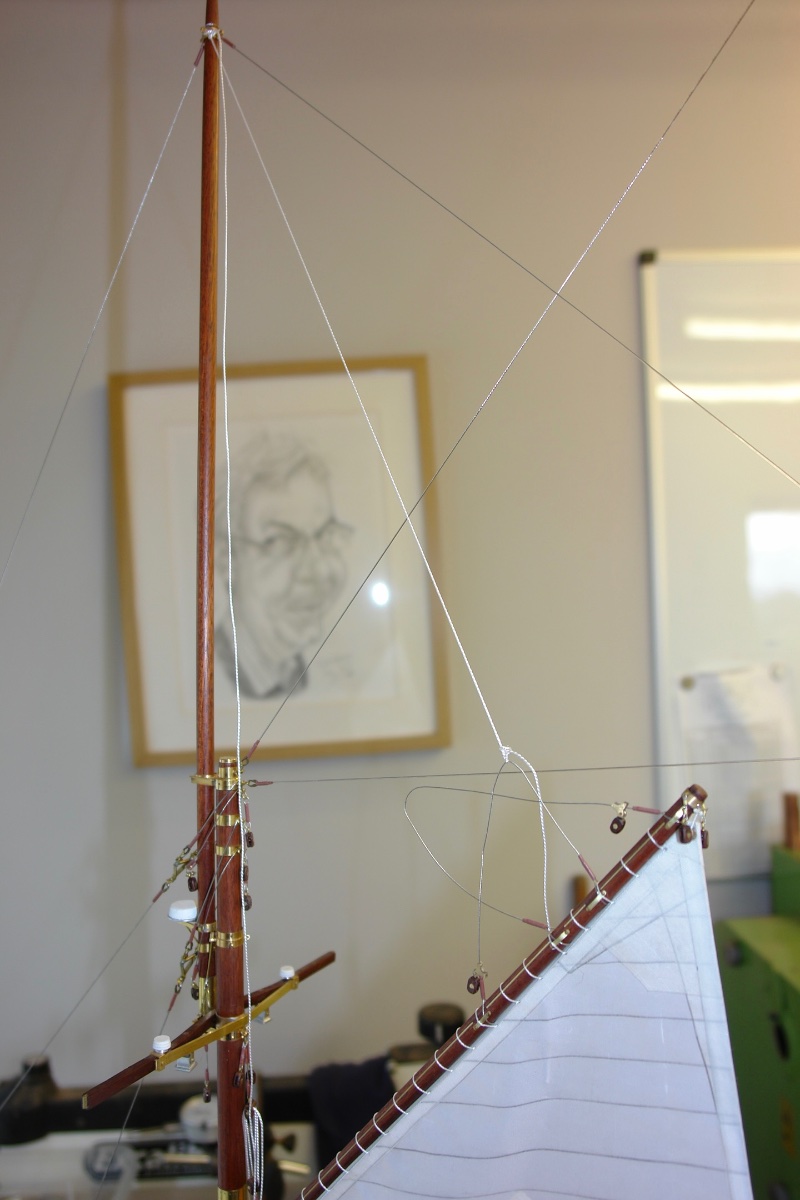
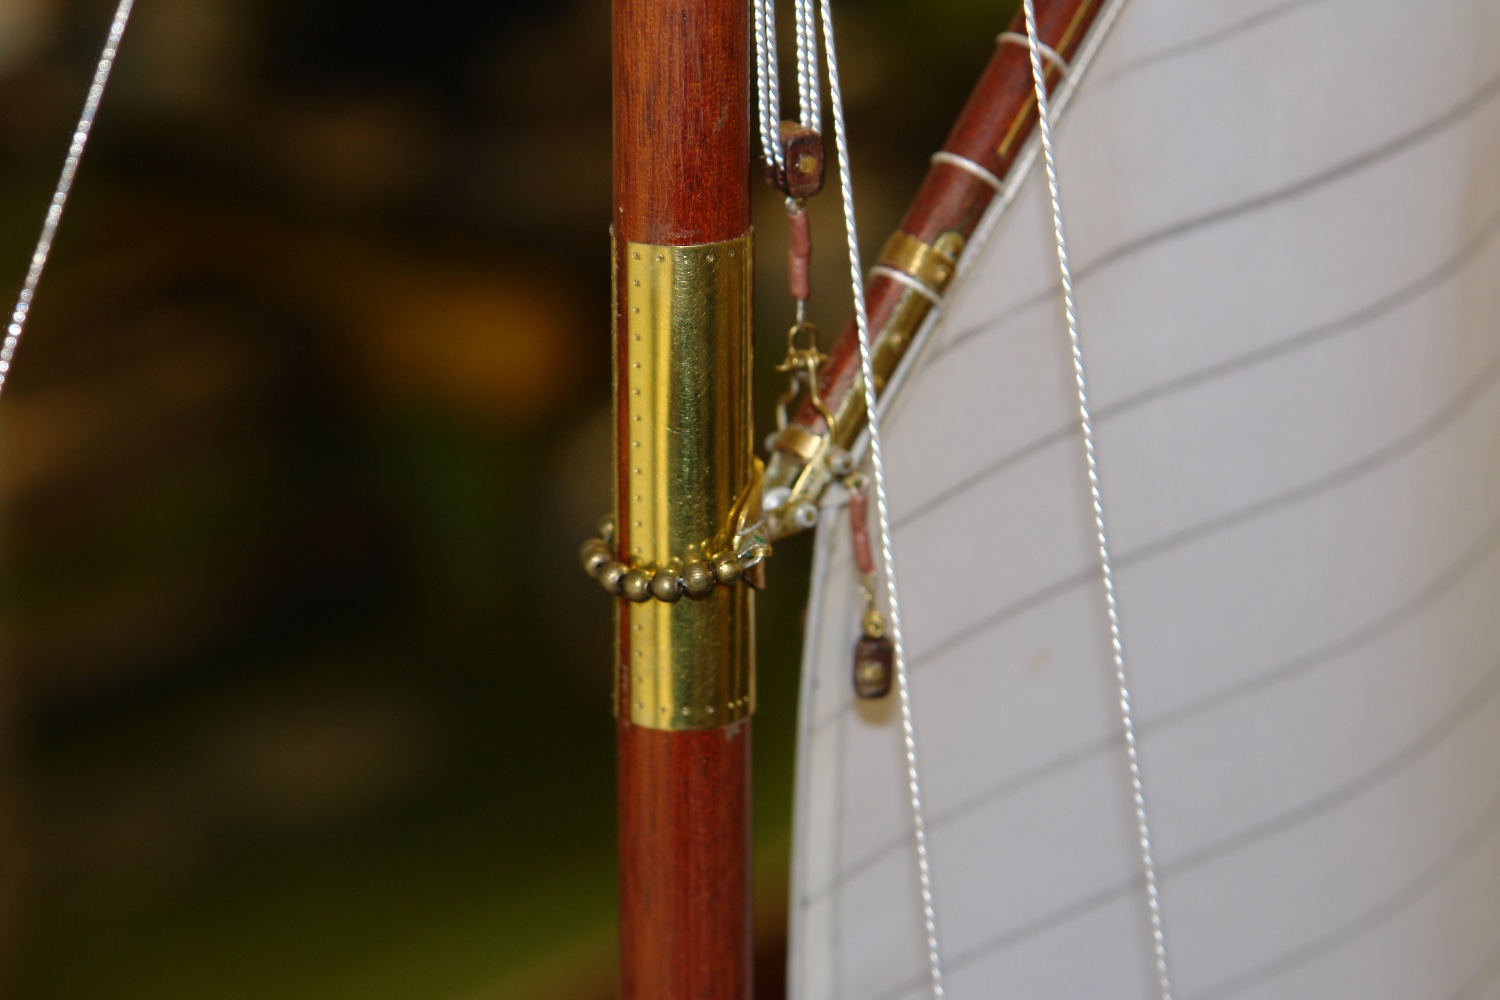
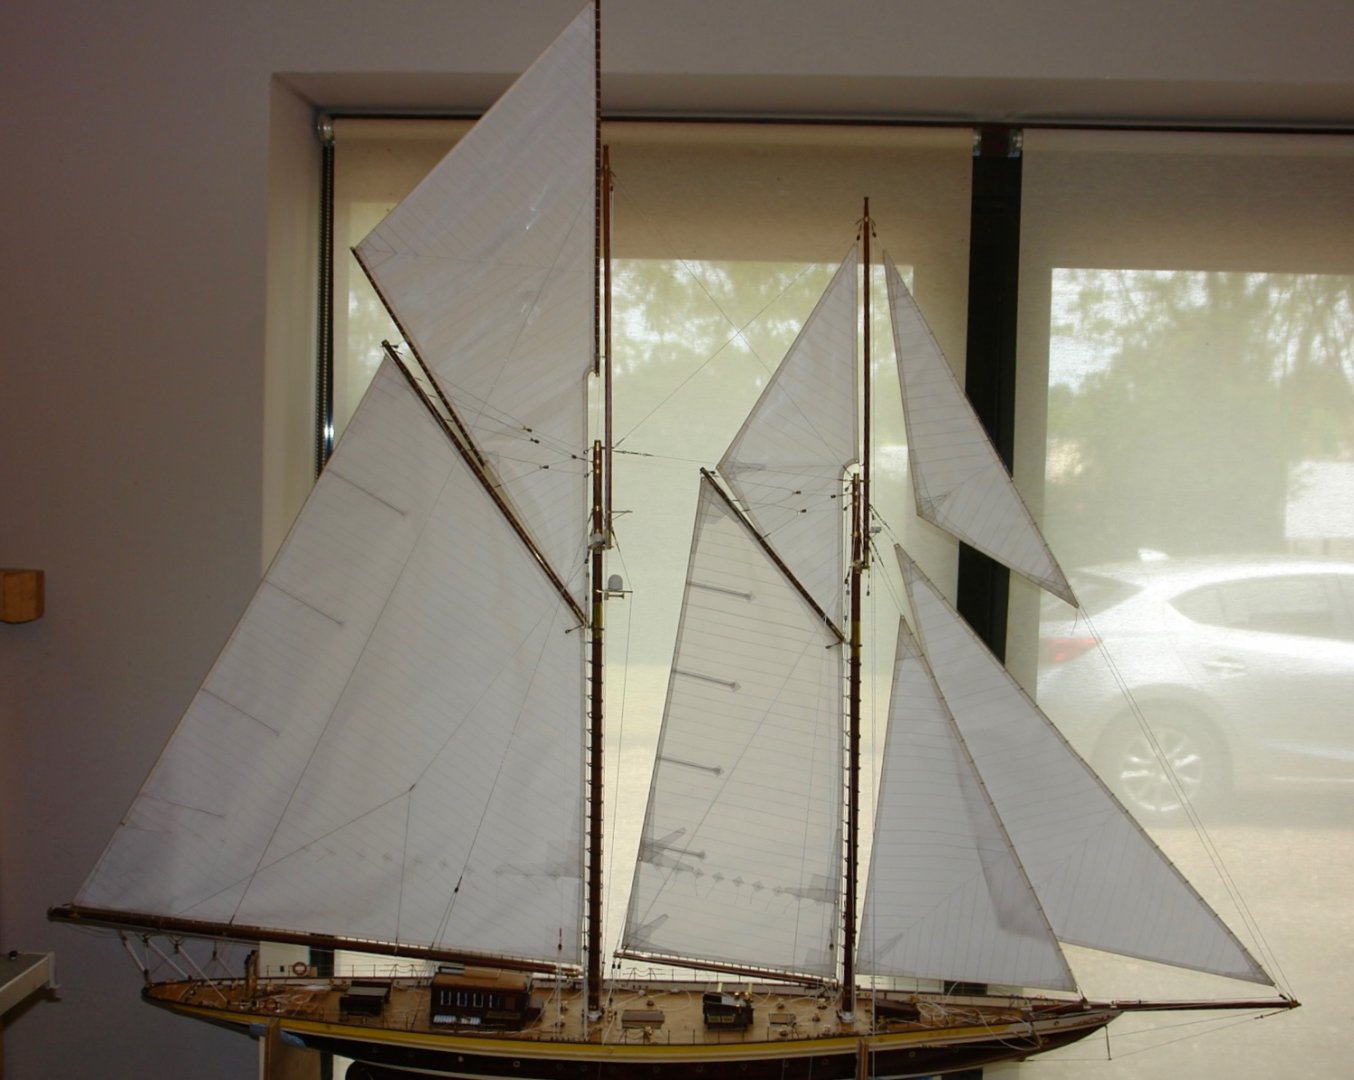
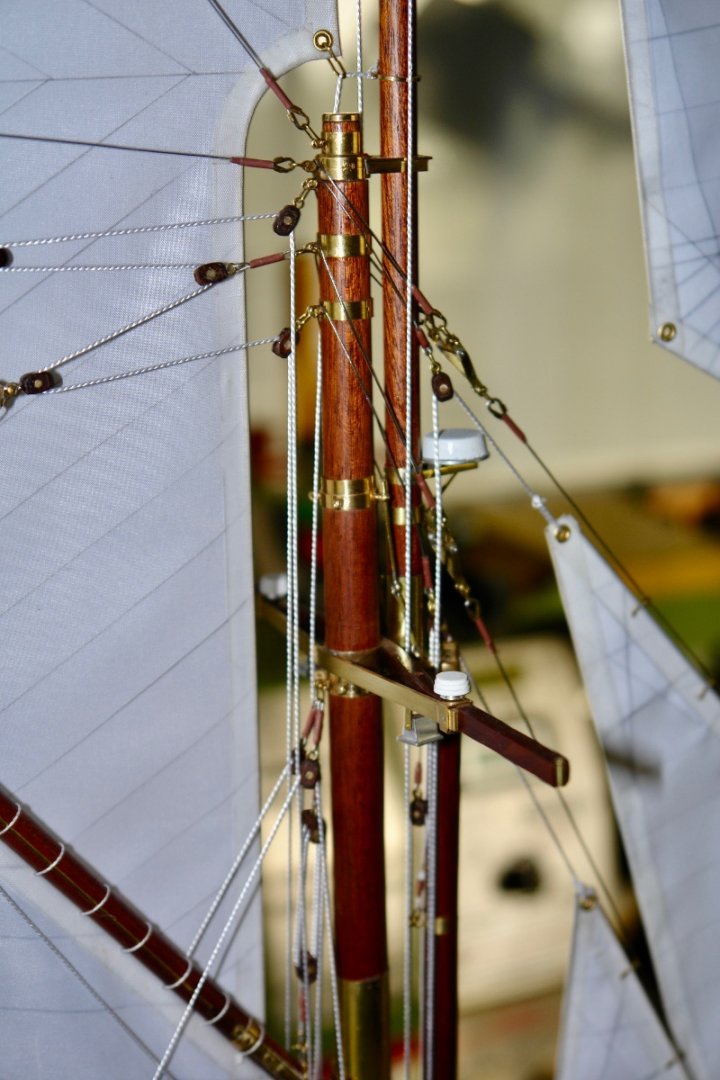
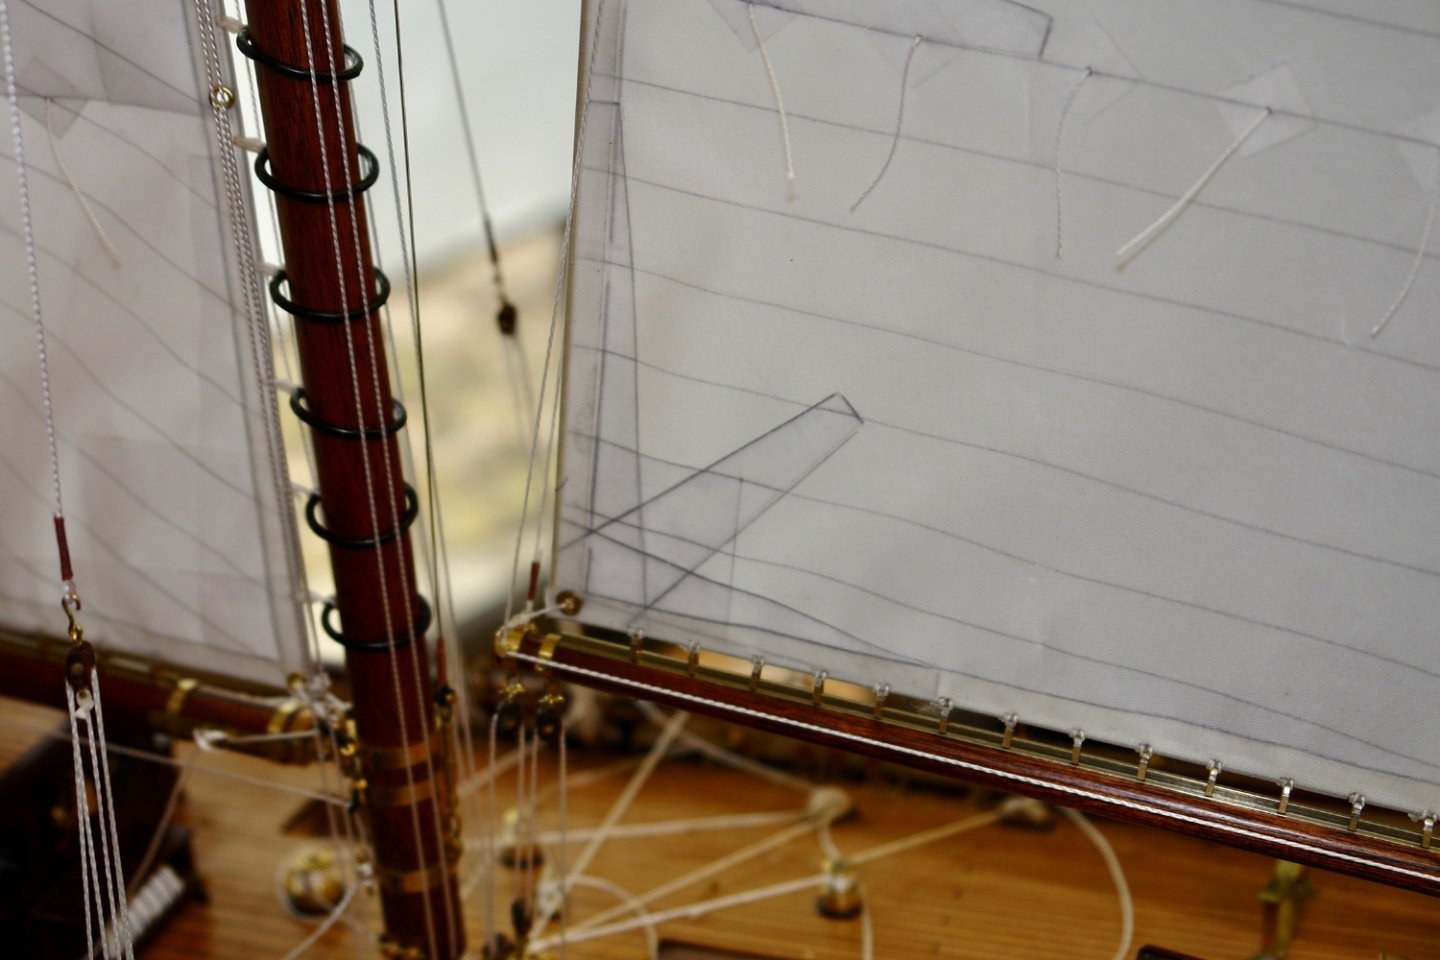
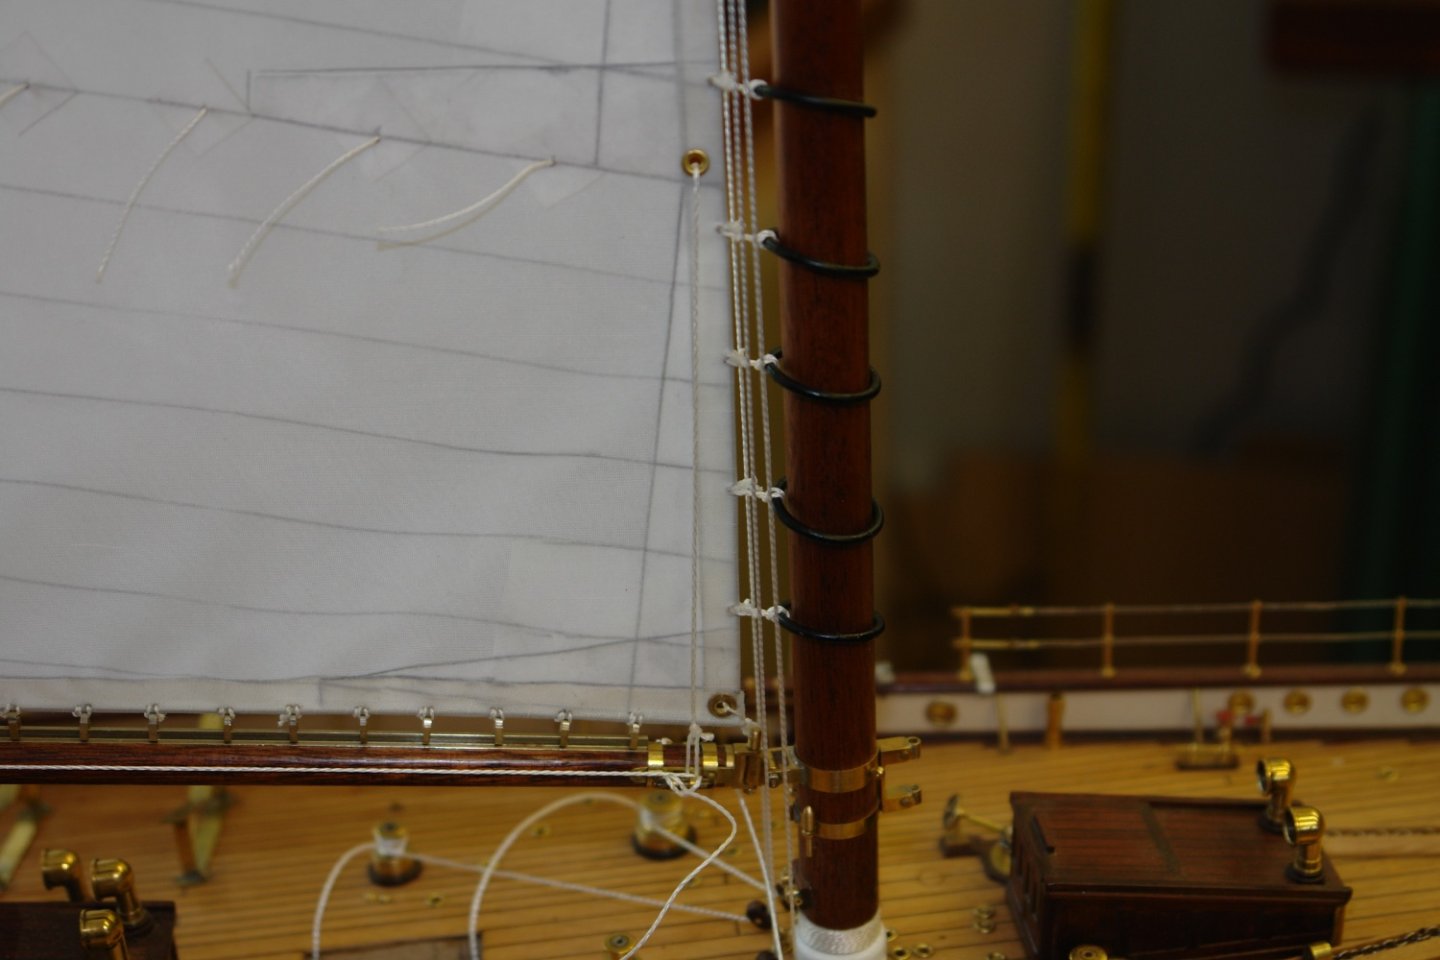
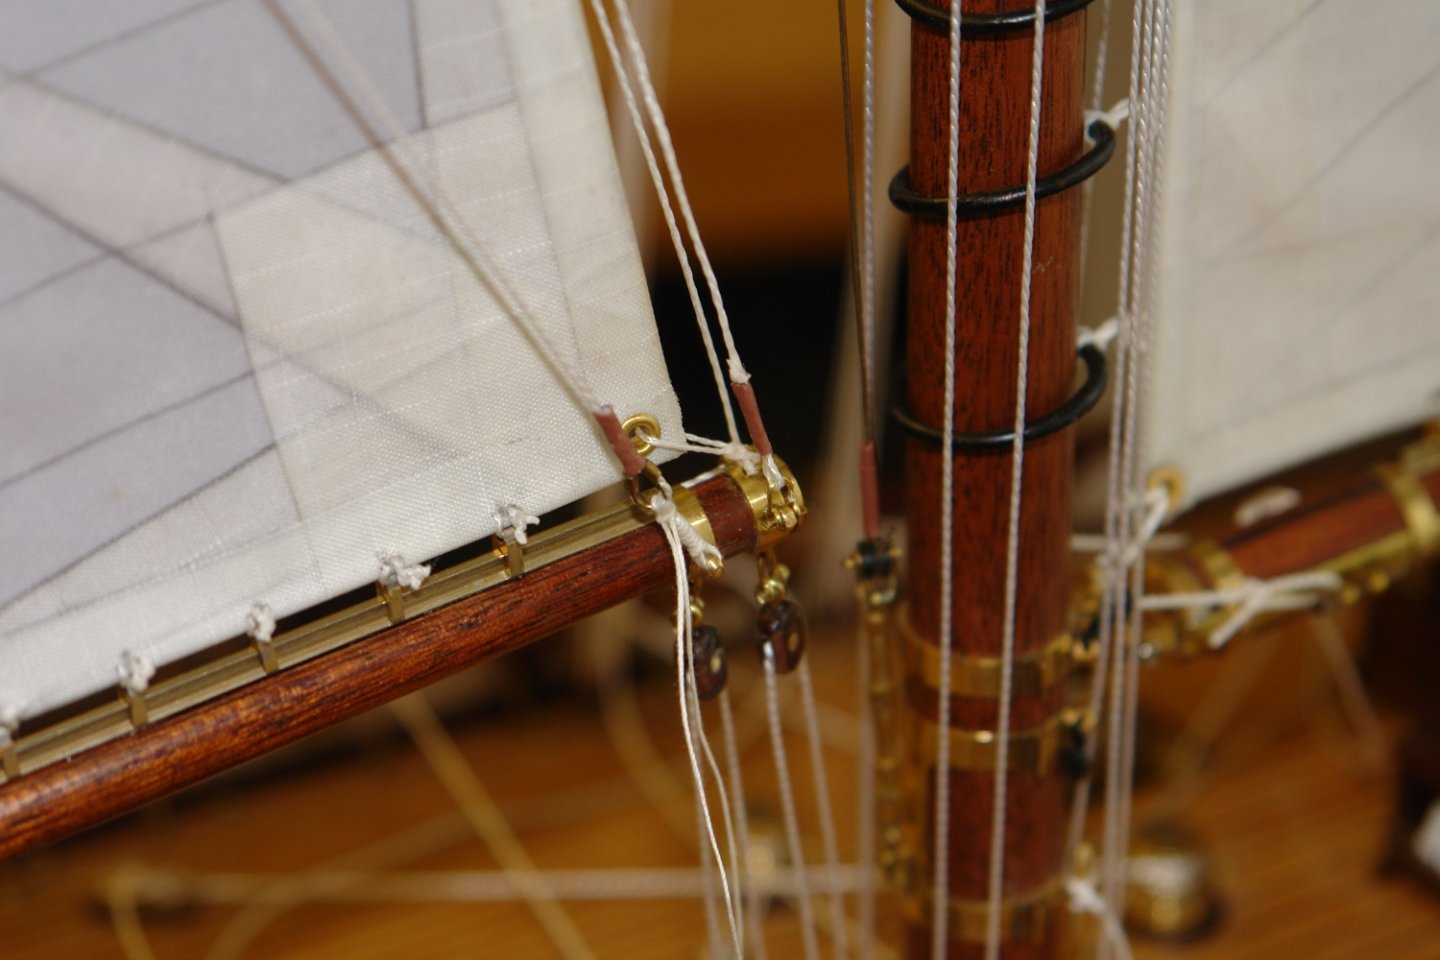
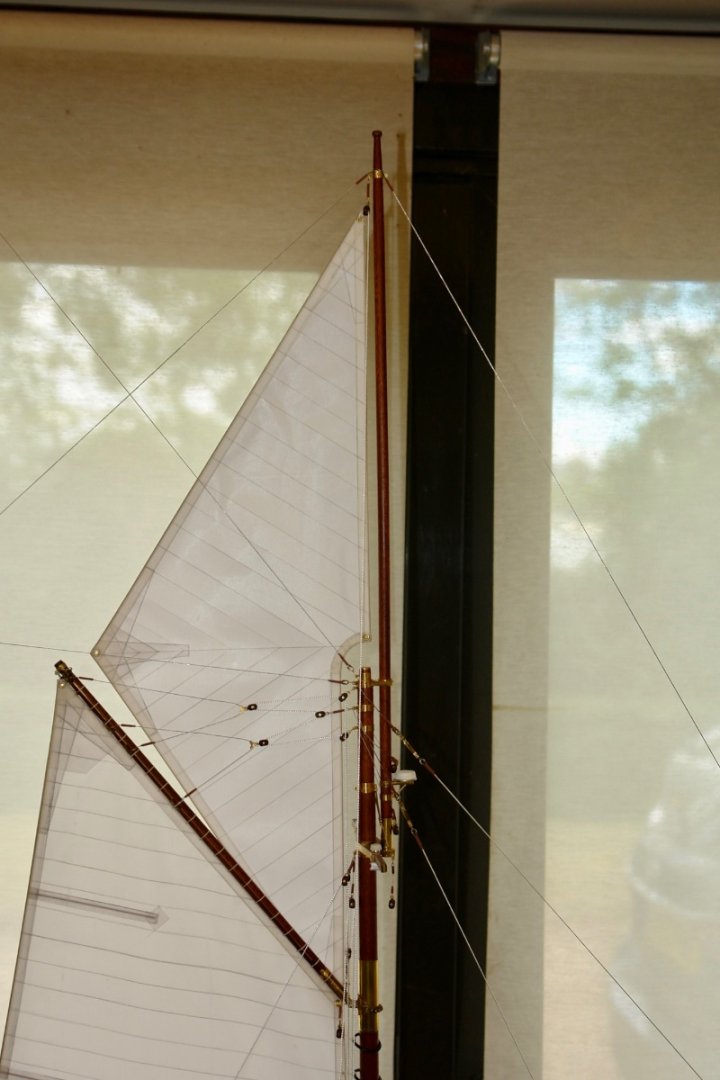
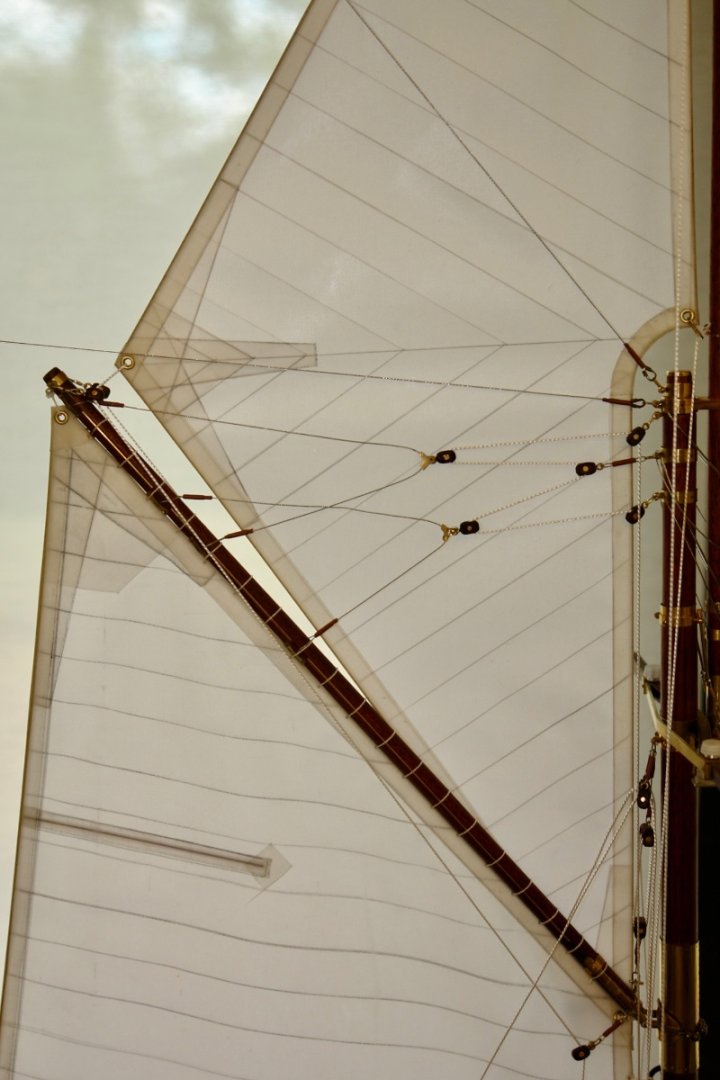
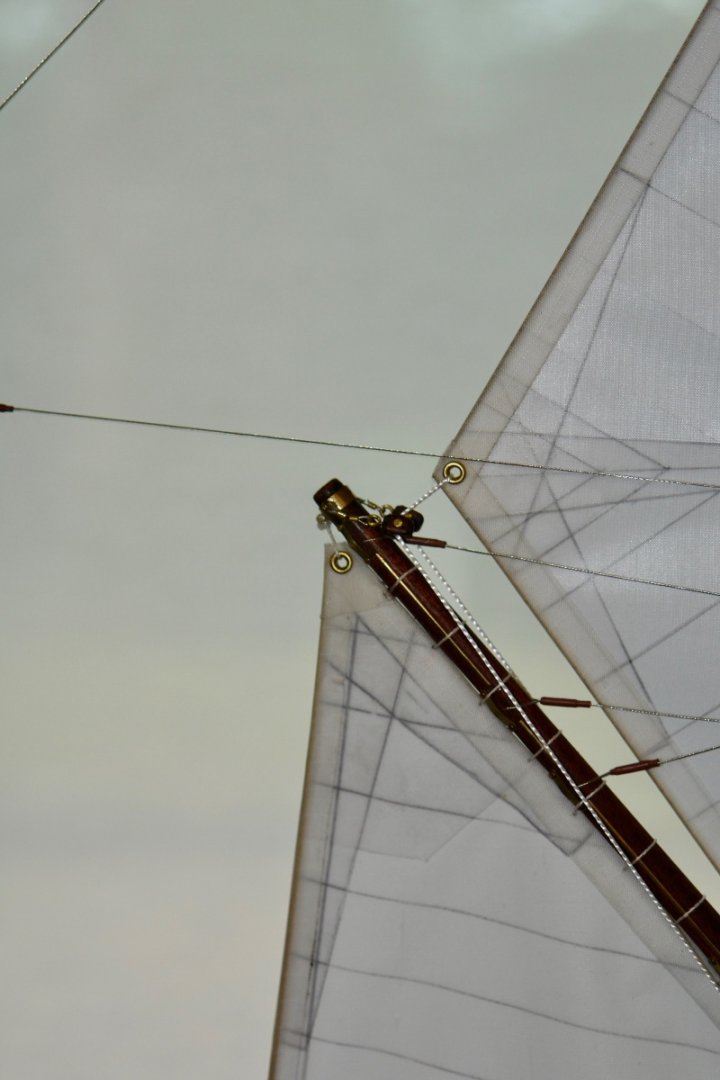
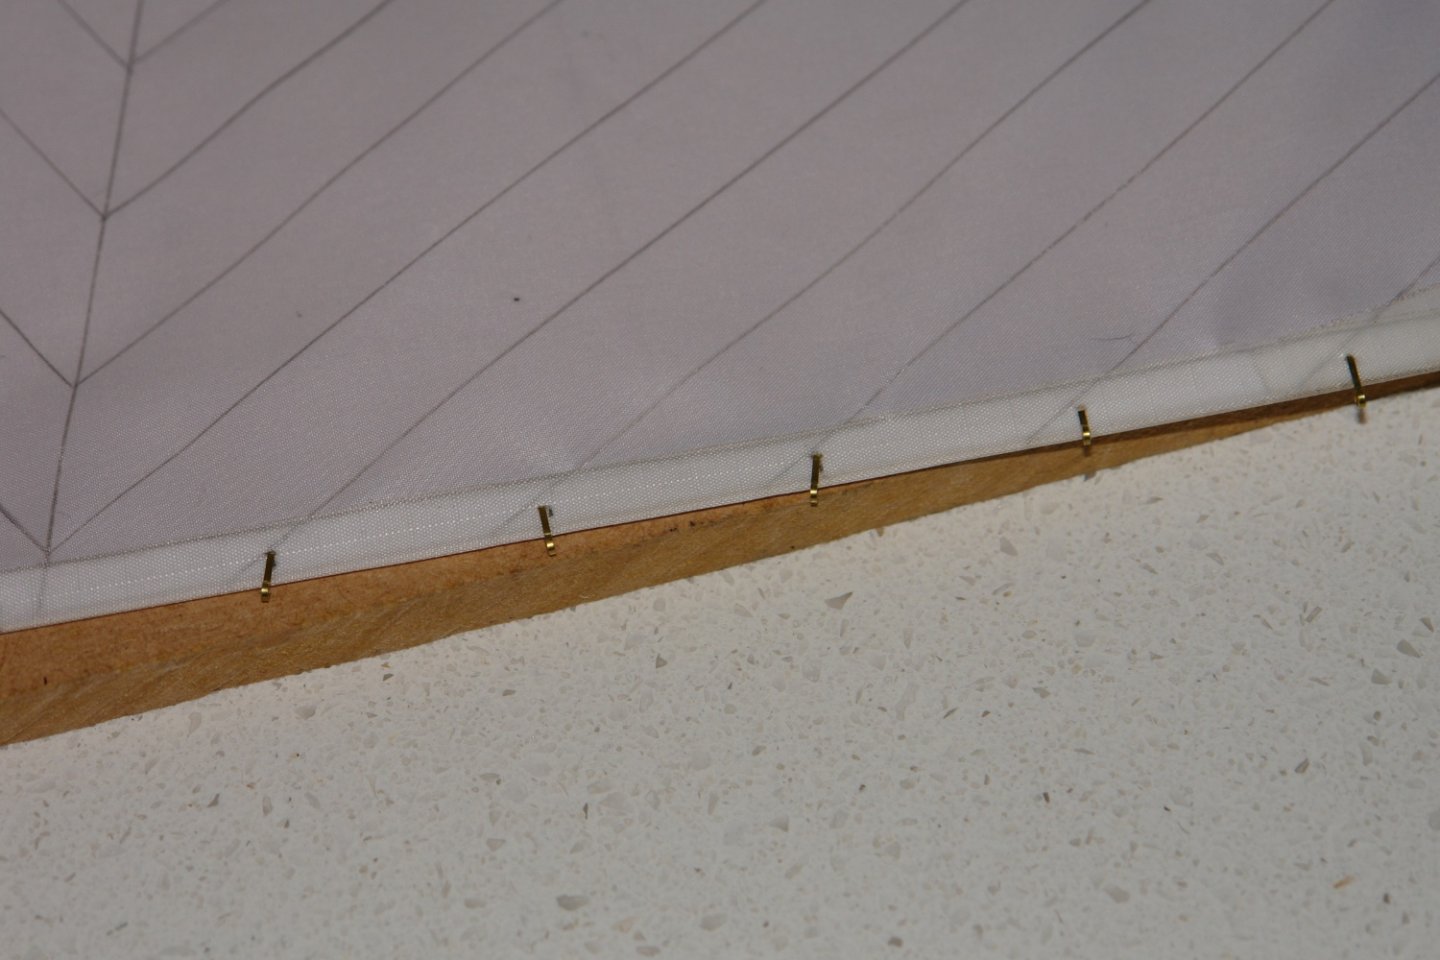
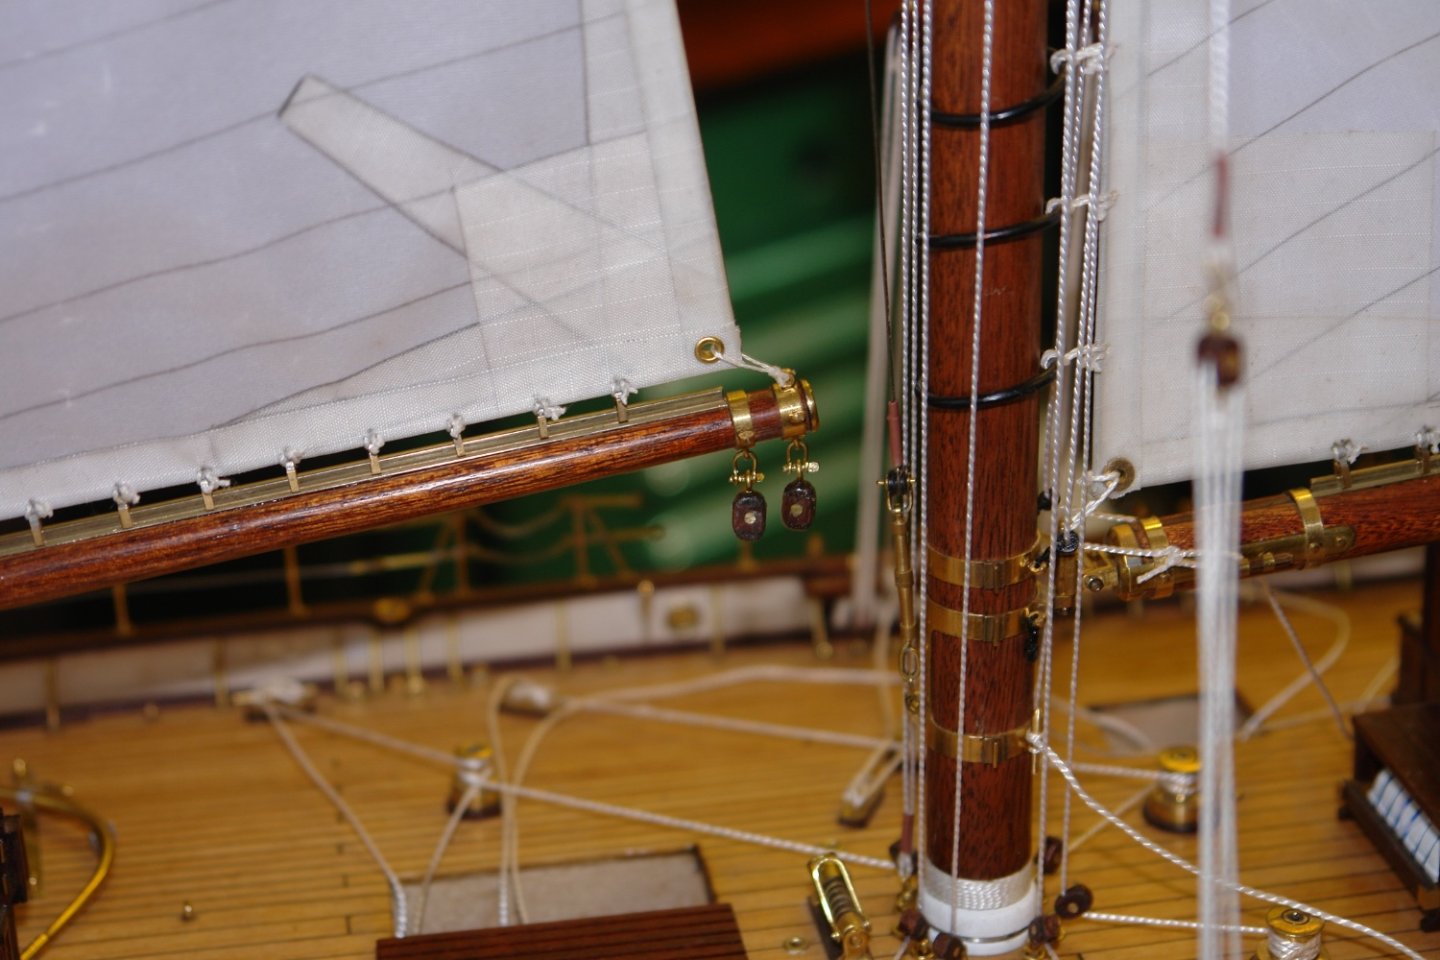
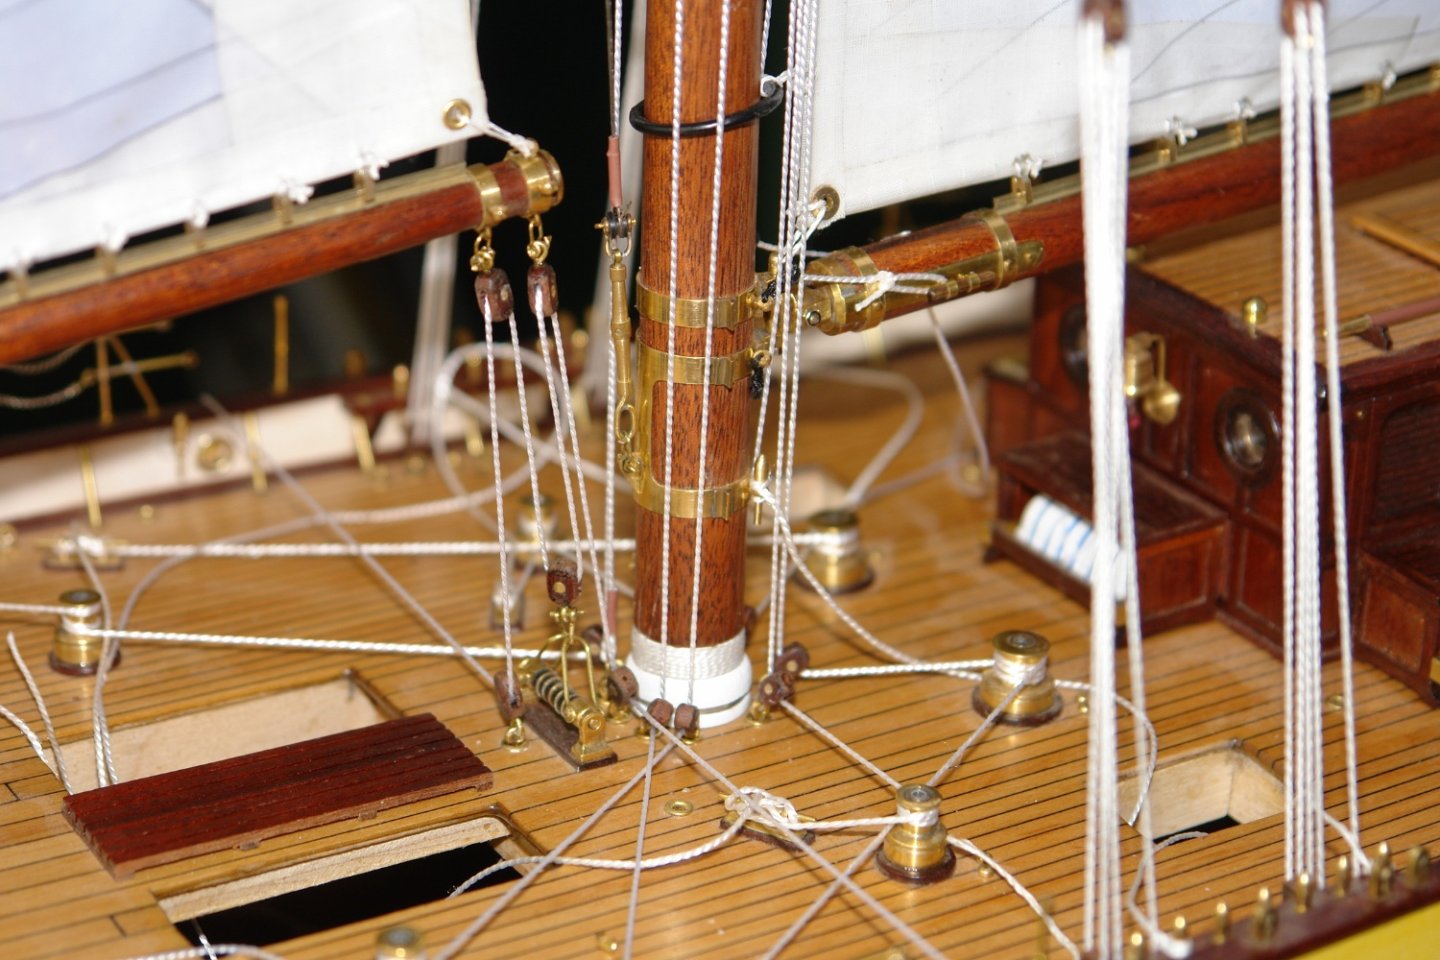
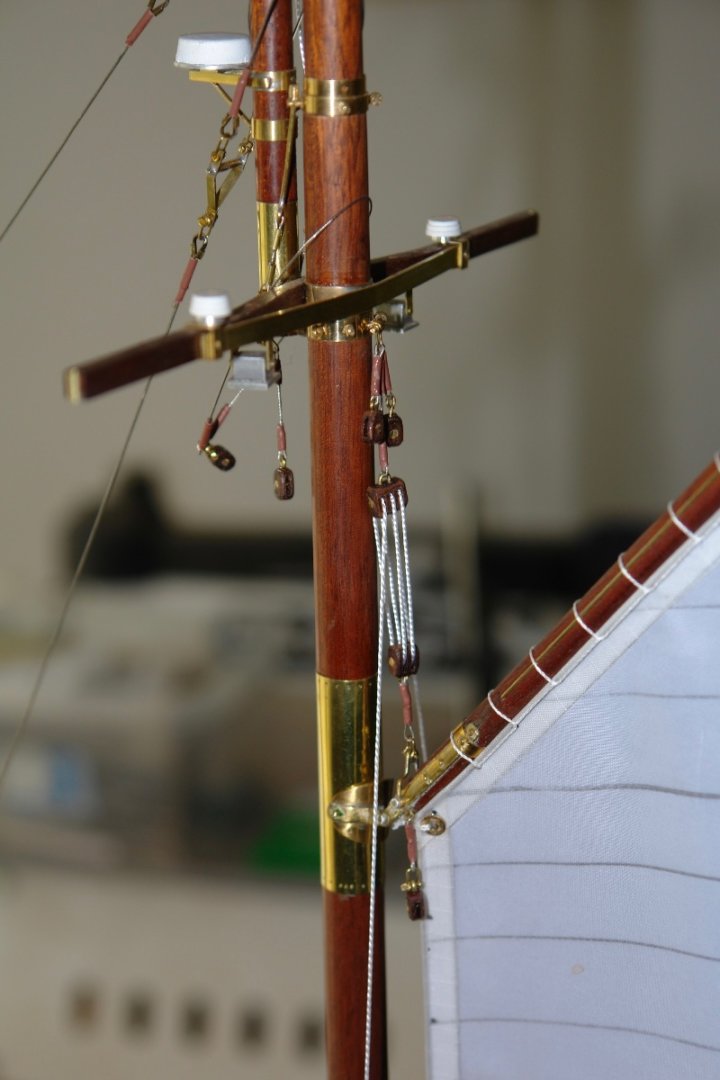
The final part of my log catch up:- I completed and hoisted the staysail and jibs. Germania is now showing her final profile. She is also quite large. I think I am going to have some tough negotiations about the display location! A number of deck houses are missing, awaiting the tidying of the various lines. The real thing for comparison:- The following shot shows the cranse iron. The two single blocks go to the jib and flying jib tacks (flying jib out of shot). The flying jib and jib halyards:- A more general view of the rigging at the top of the fore mast. The additional blocks at the base of the fore mast have been added. I now need to rig the jib sheets and sort out the tails of the various lines.


-
Very interesting description of mapping the hull lines, and a very commendable task in creating a historical record.
-
Hello Pete I have bought a number of these cheap sets but have never found them to be too accurately made. Where did you get yours from?
-
All looking very good Dan. The containers are looking particularly uniform.
-
Yes its all a bit weird isn't it. The main looks set for a close reach but the jib seems all over the place. I can't work it out.
-
Eberhard - yes that is correct. Your suggestion that ease of handling outweighs efficiency is I think pertinent.
-
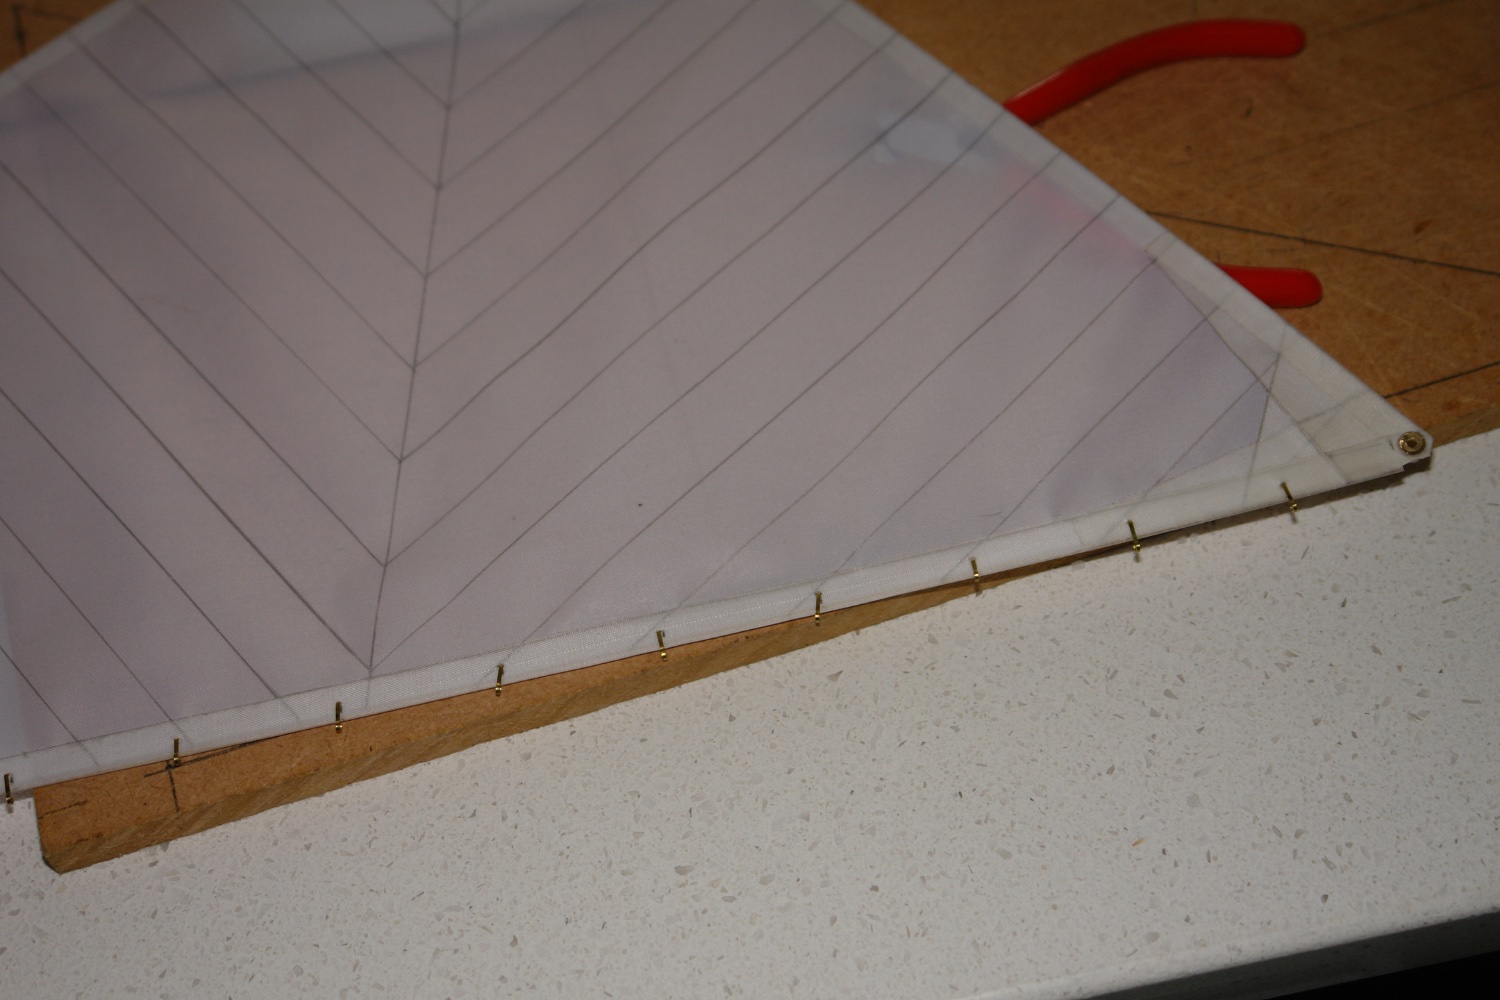
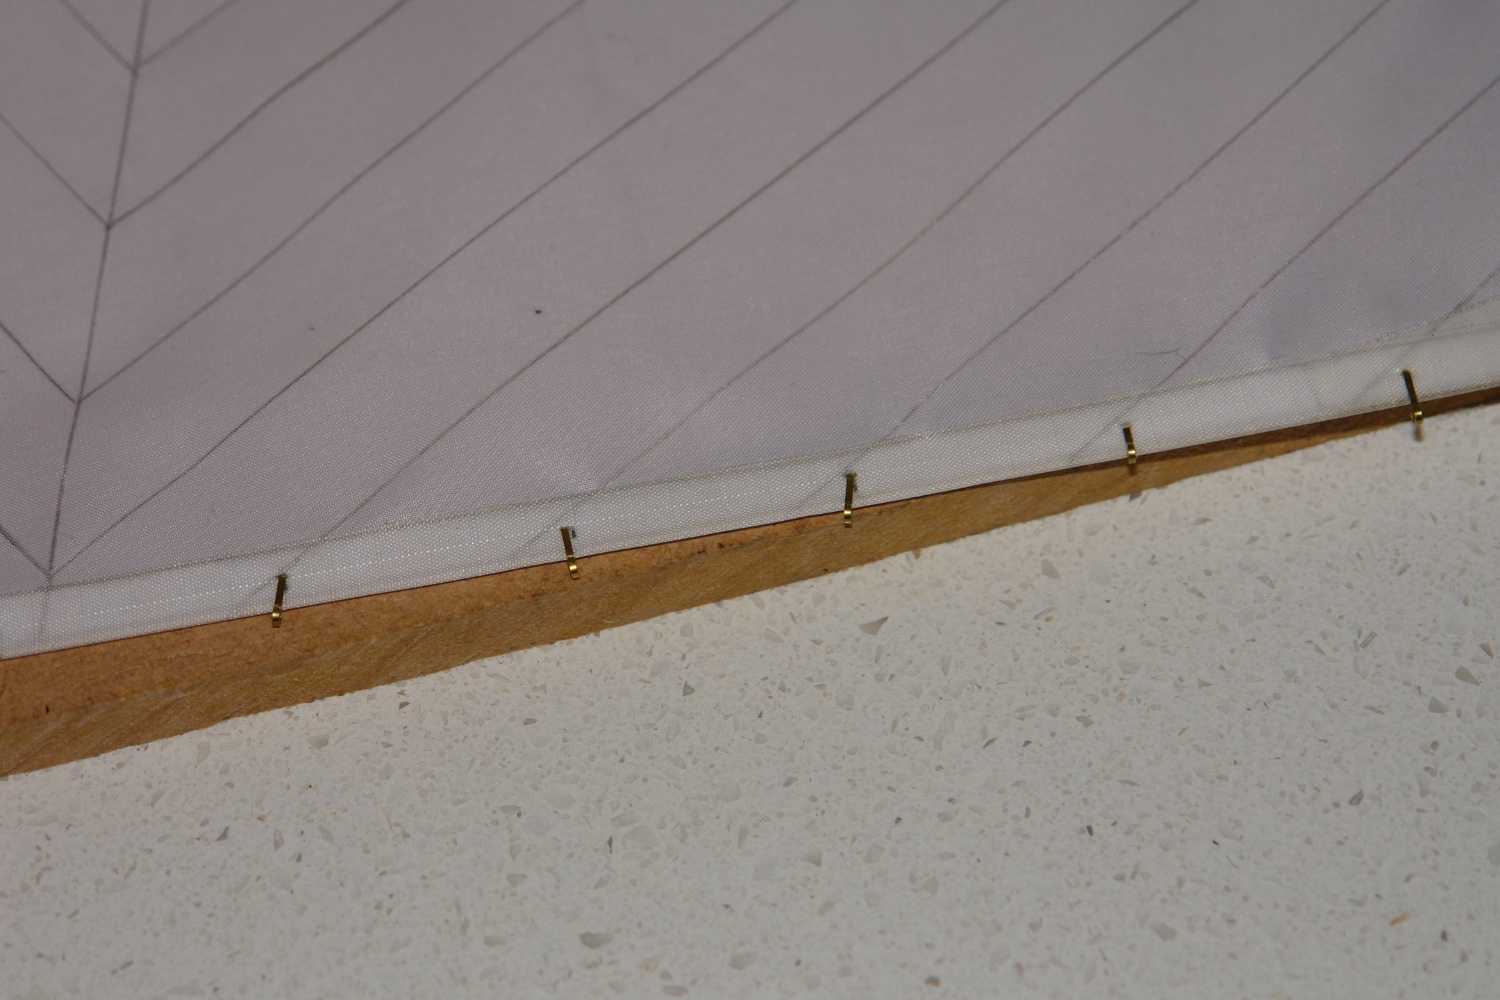
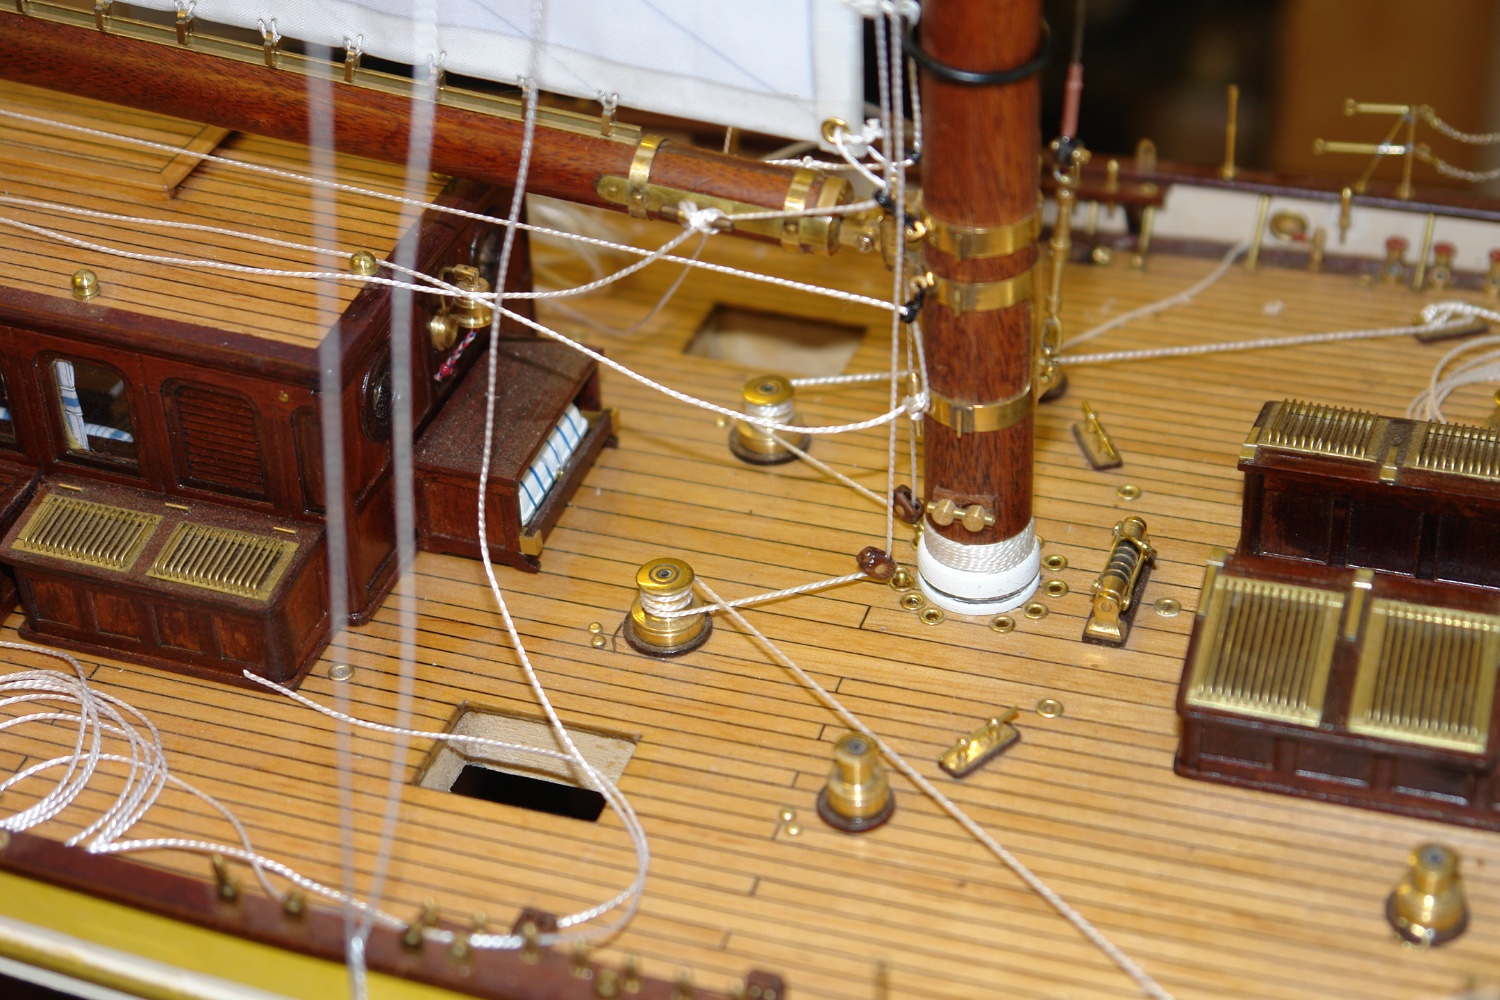
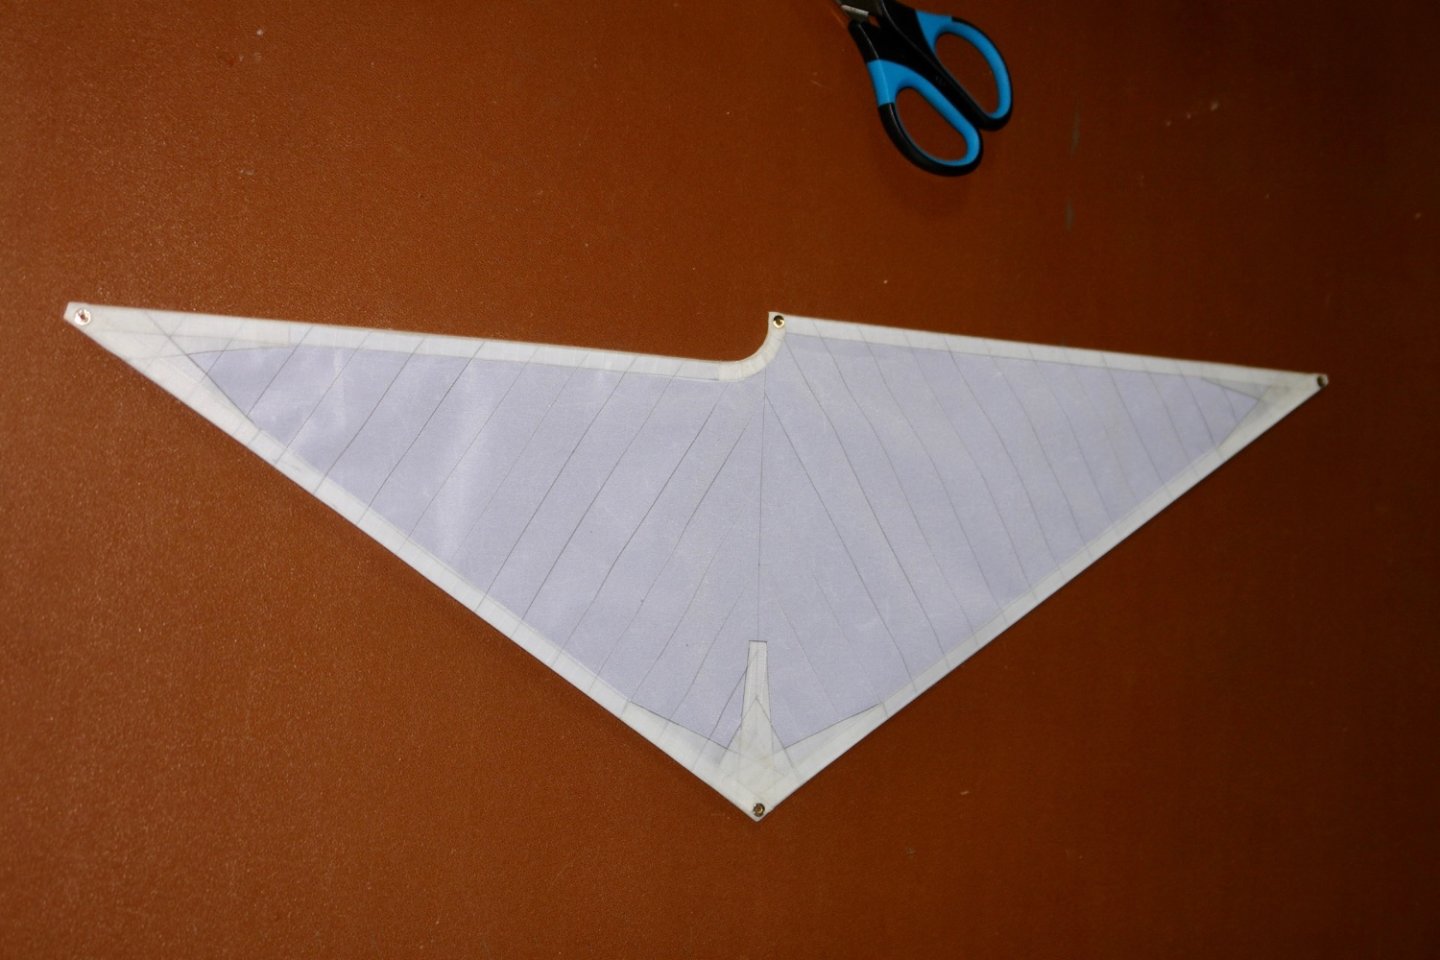
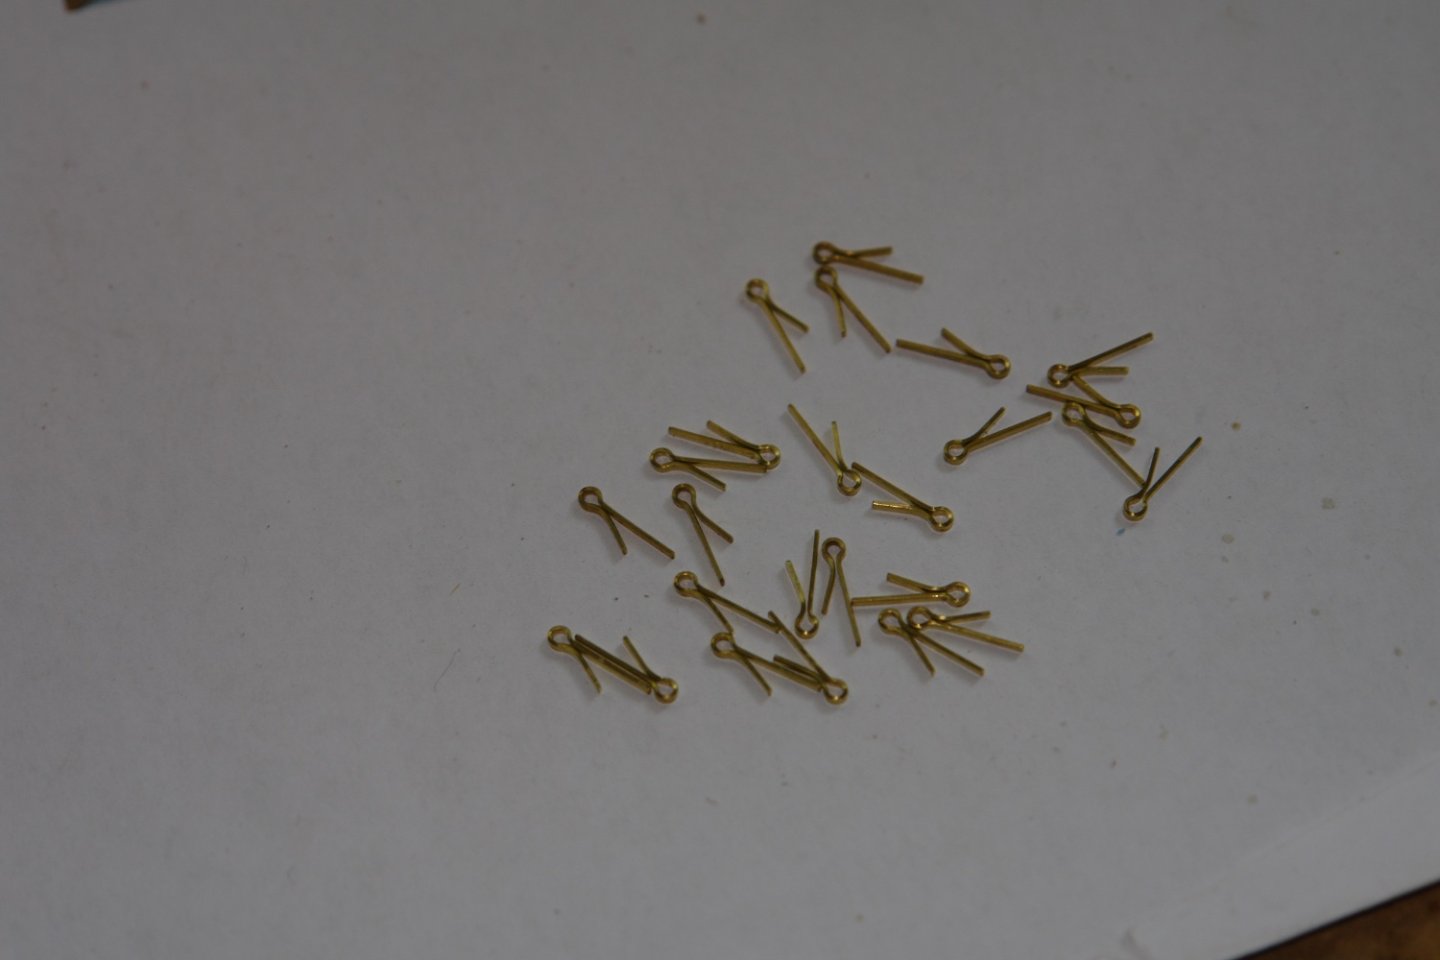
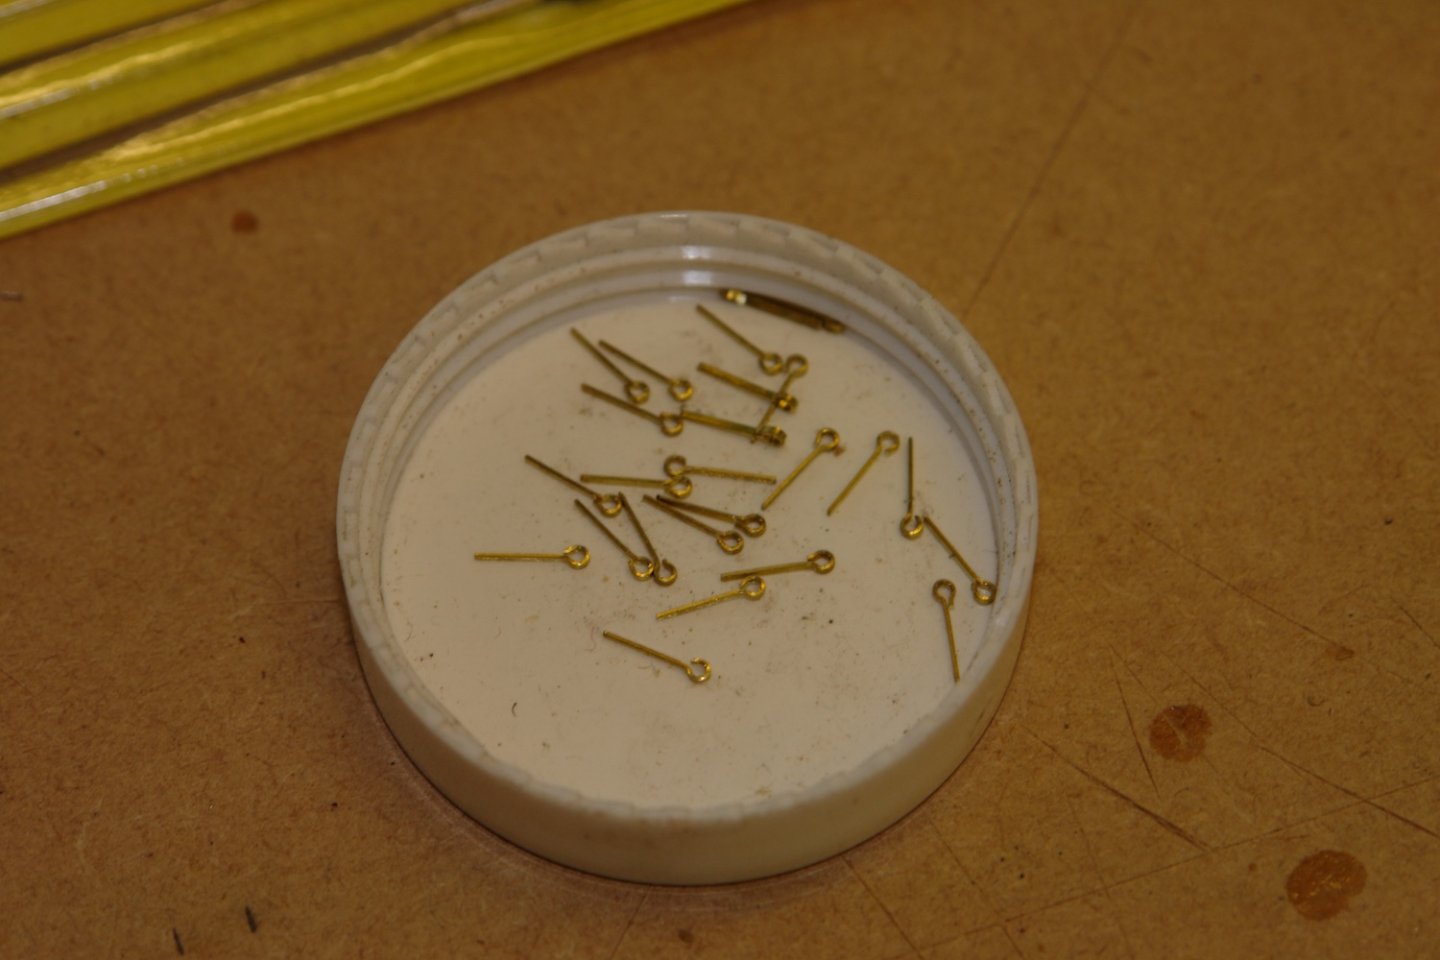
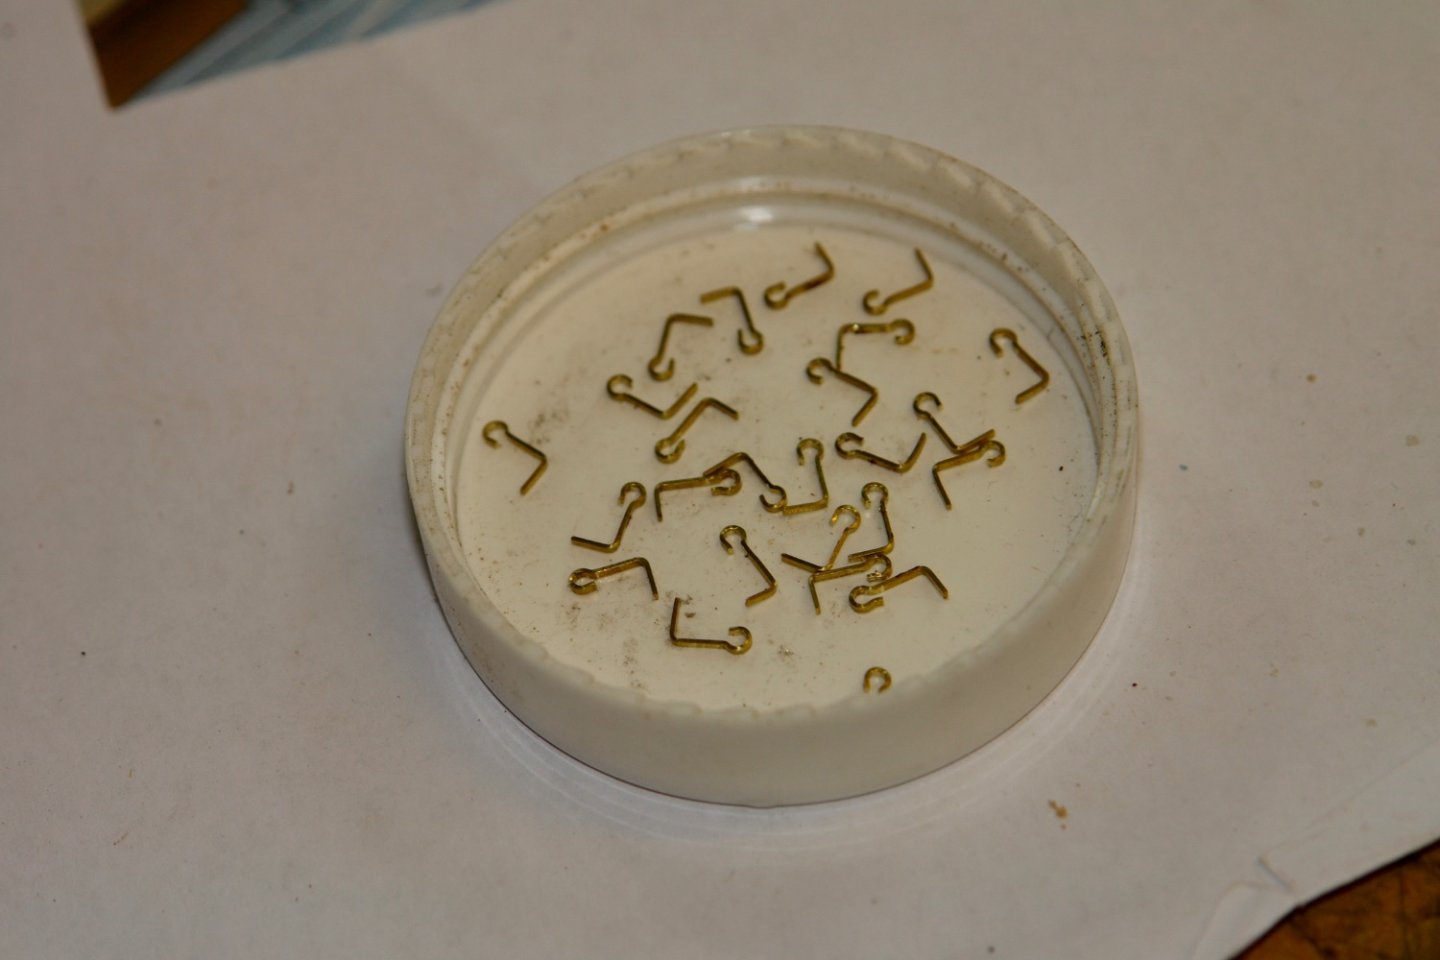
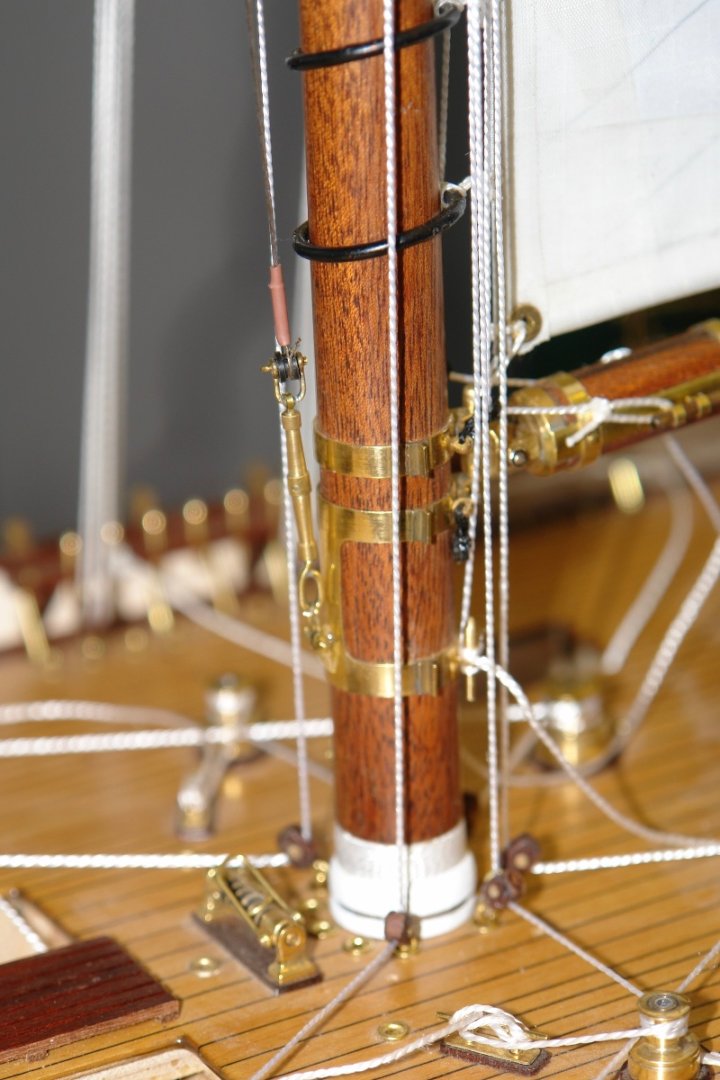
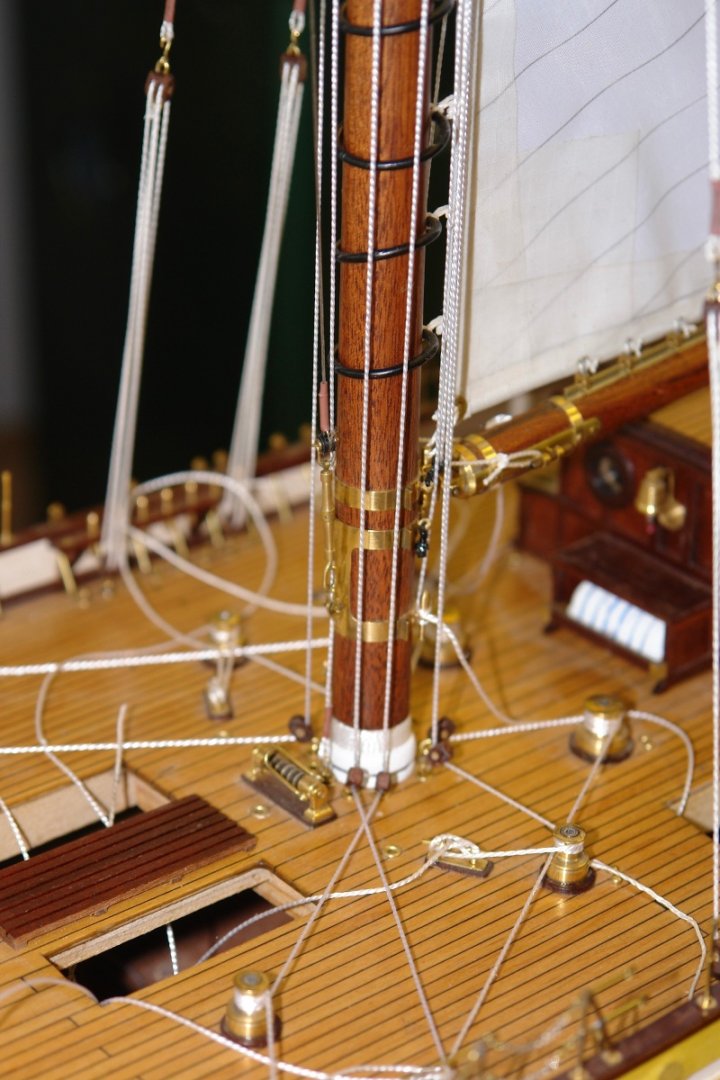
Thank you Eberhard, Pat, Brian and Michael. This is the continuation of my log catch up. The next job on the foresail was attaching the mast hoops to the sail - repeating the process used for the main mast. With the foresail mounted I could measure up and adjust the dimensions for the topsail. This done I made the topsail with wired edges and reinforcing as previously described. The process of mounting the foremast deck blocks also commenced. The reefing lines were then installed. The topping lift was then lashed to the fore boom. The fore topsail was then hoisted. The sheets for the fore topsail were then rigged. The staysail, jib and flying jib were then made. I had a think about the most practical way to make the hanks and decided my best bet was to start with small split pins. The short leg of the pins was first removed with a jewellers saw. The ring was then opened out and the long leg was bent to insert through the sail. The bent legs were then inserted and clamped shut around the luff wire. The staysail was then hoisted.


-
Hi Tony A pity she is now gone but I think I will take great pleasure in seeng you bring her back to life.
-
That sounds like a lot of work. Have you worked out how many hours it is going to take to make the lot? They are remarkably consistent for such small shackles.
-
You have my sympathy - always a time consuming and somewhat repetitive exercise. How small are they and what diameter wire did you use? I always think the key requirement is a pair of very fine round nosed pliers with beautifully aligned jaws which do not flex under pressure. I just find it is impossible to find any.
-
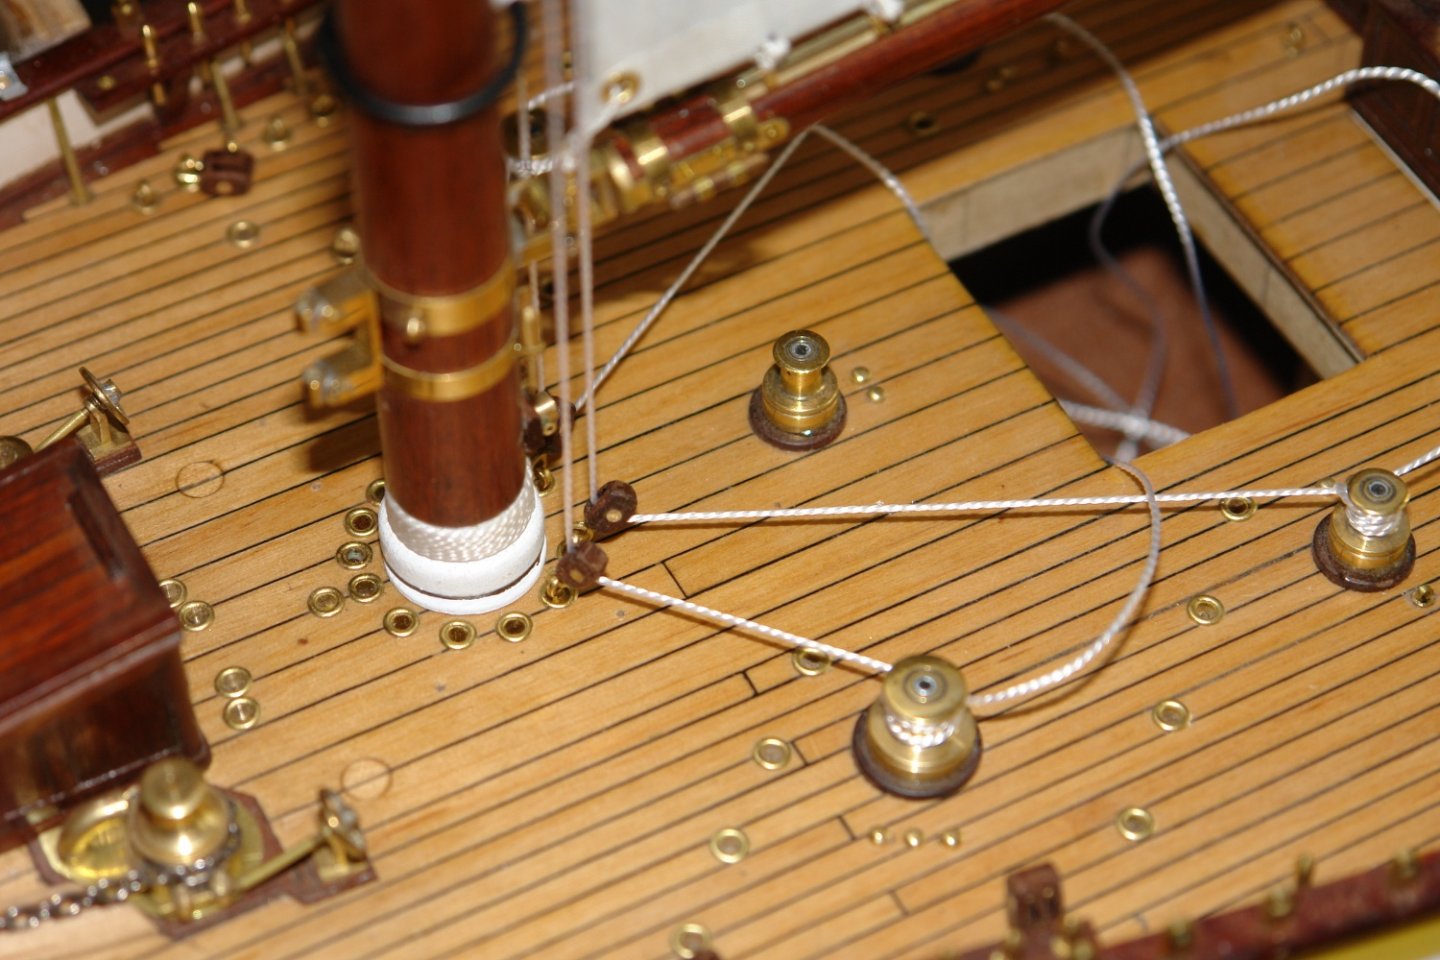
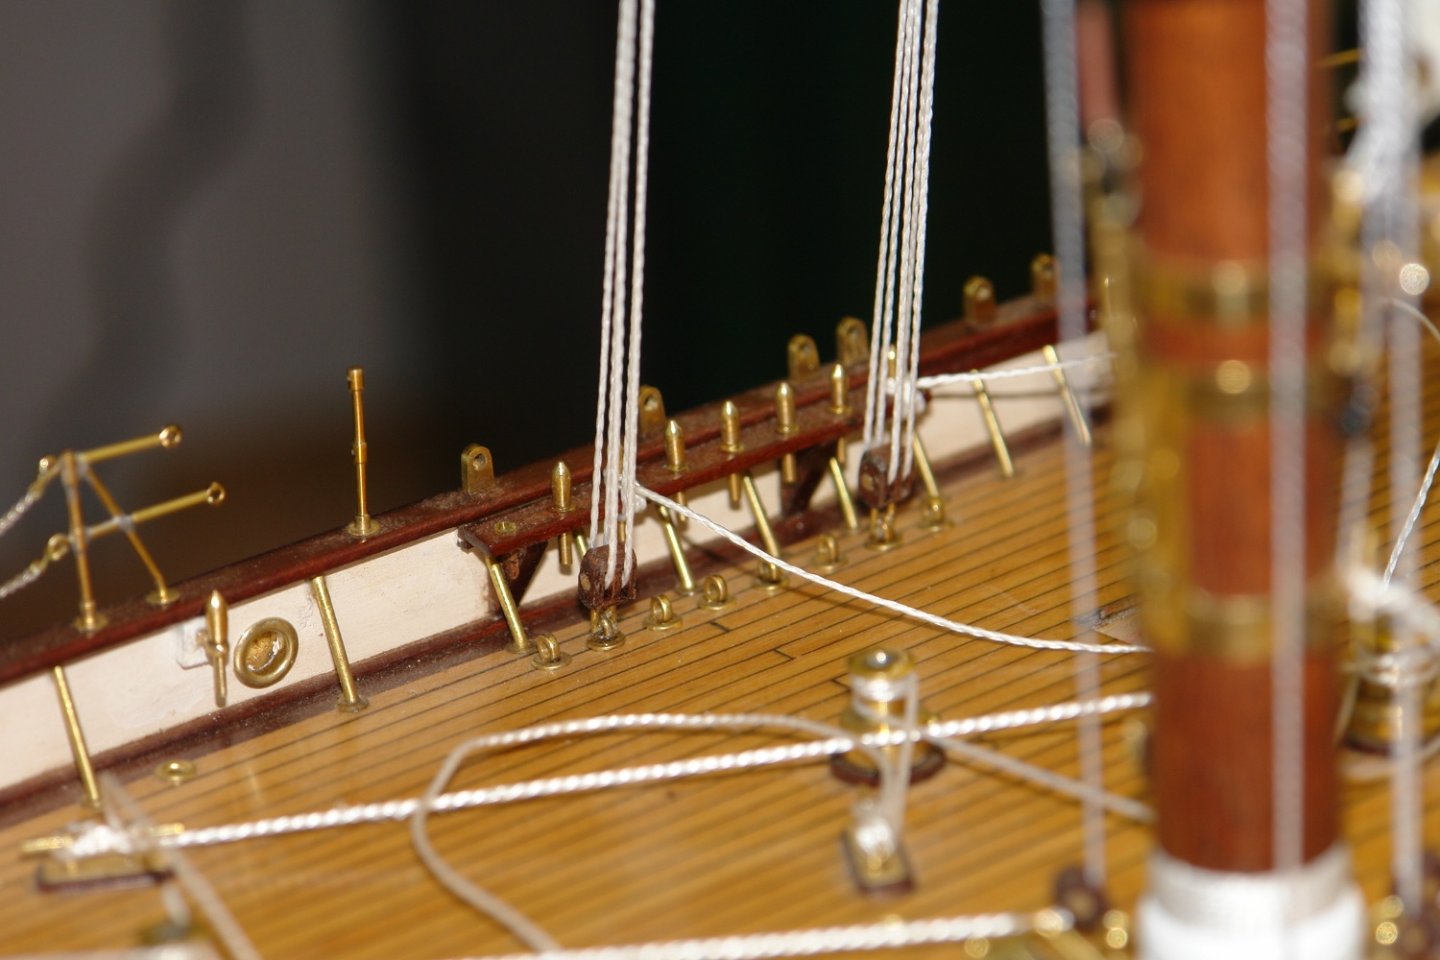
Thank you everyone for your encouraging comments. I haven't posted an update since the end of September although I have been making progress. I am away with relatives at the moment so this is an opportunity to catch up my build log. I hope to post a few updates over the next week. Here is the first. Although I had hoisted the main and main top sail I wasn't worrying too much about sorting out the halyard tails. Over the following shots you will see the deck starting to feature a rats nest of lines. Thankfully I hadn't glued the various deck structures in place so these were gradually removed to throw the tails down as an expedient. The next bit of rigging was the halyards for the main topping lifts and sheets for the top sail. These were rigged to the two pairs of twin sheaved blocks that terminate near the bulwark on either side of the main mast. As I rigged the main mast halyards I progressively installed the single blocks at the base of the mast. Which halyard went to which block was not discernable from the available information / photos so I rigged the lines in what made most sense to me and also minimised crossing and binding of the lines at higher levels. And so I progressed adding blocks. I then moved to the foremast, temporarily supporting the fore mast gaff bridles as i had done with the main gaff. I loosely rigged the throat halyard. The pair of single blocks were then attached to fore boom to take the sheets. The fore mast sheets were then rigged. I then tightened the throat halyard. The fore gaff bridles are much less complex than those of the main gaff and consequently the block and rigging arrangements are also simpler. Finally for this update the parrel beads were installed on both the main and fore masts.


-
That's a bit of a bummer Hakan, lets hope the medics have got it wrong, it seems to me they are far less accurate than the average model boat builder. Best of luck with the MRi's mate. Model building and family are the best therapy.
-
She is exceptionally beautiful Rob, a true work of art.
- 3,560 replies
-
- 1
-

-
- clipper
- hull model
- (and 2 more)
-
Beautiful little boat Eberhard. I was surprised how well your late fixes worked, it looks perfect.
-
Eberhard, I think you are being a little bit hard on yourself, The overall effect is looking very good. It will be interesting to see how easily it comes off the frames.
-
Excellent work Dan. I still don’t know how you manage to interpret those photos.
-
The anchor looks great Brian. Over here we would call the rope attached to the crown a "tripping line".