HOLIDAY DONATION DRIVE - SUPPORT MSW - DO YOUR PART TO KEEP THIS GREAT FORUM GOING! (Only 13 donations so far - C'mon guys!)
×


UpstateNY
-
Posts
466 -
Joined
-
Last visited
Content Type
Profiles
Forums
Gallery
Events
Everything posted by UpstateNY
-
 Thanks for posting all details on how to do the sea and get the model into the bottle. She looks wonderful in there with the bottle shape complementing the sails. Sorry about the crack of course, but certainly look forward to seeing your stand. Cheers, Nigel.
 -
Hi Dimitris, Looking good...great to see some sawdust being made! Cheers, Nigel.
-
I agree w Max and Greg...lovely work as usual Denis. Very much enjoying following your build. Cheers, Nigel.
-
Thanks Augie...and will do! Should have said the masts and deck furniture are actually still just pinned in place. I figured I would need some extra space to rig the cannon's, anchor and other items that are self contained. Once I start on the standing and running rigging, everything will then have to the be glued in place. I will certainly have to watch I don't break things loose. Cheers, Nigel.
- 270 replies
-
- 5
-

-
- red dragon
- artesania latina
- (and 1 more)
-
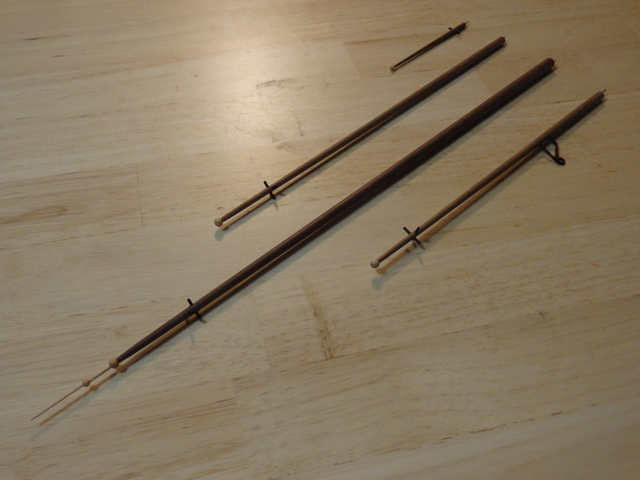
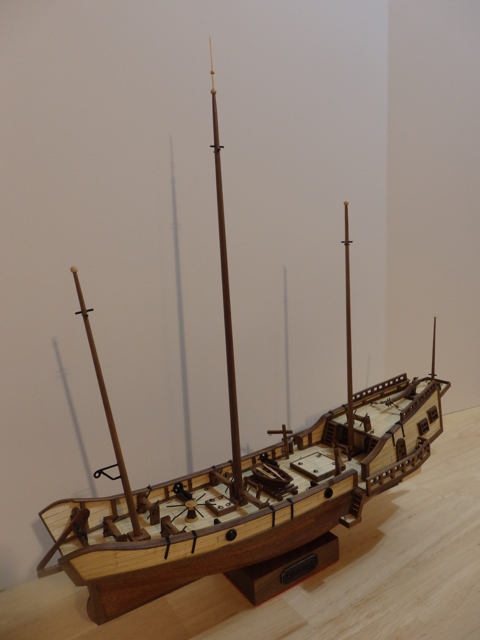
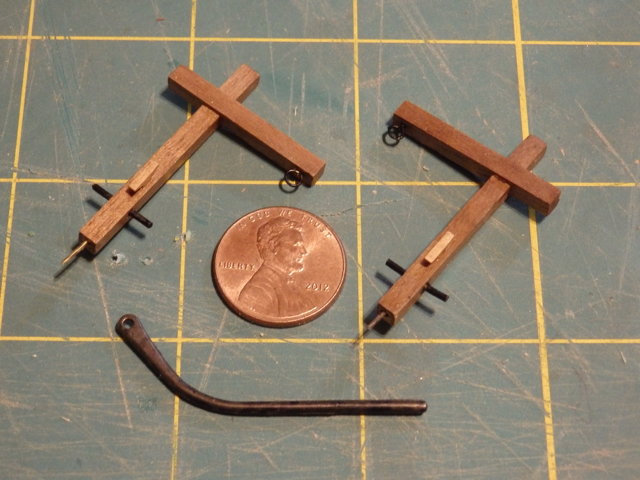
Hi All, Another small milestone as the masts are now assembled. Tapering of the walnut dowels was done using my small lathe and I found, while rather dusty, simply using coarse 180 sandpaper worked well to quickly taper them to shape followed by smoothing using 220/320 grit paper. The flagpole on the mainmast was made by tapering a toothpick and the small round balls were kit provided items. Wood finish is a just a couple of coats of wipe on poly and the metal work is simply blackened brass. I also bought a white project board so the masts and rigging to come can be seen better. Pictures below and it is now time to face the rigging! Thanks for the likes and of course for visiting! Cheers, Nigel.


- 270 replies
-
- 12
-
-
- red dragon
- artesania latina
- (and 1 more)
-
Just to add my congrats to the above list! Just a wonderful model! Really enjoyed following along and looking forward to your next build. Cheers, Nigel.
-
Hit like for support...sorry about the news...will keep you all in my thoughts and prayers. Dollhouse looks awesome. Cheers, Nigel.
-
Hi Brian, Very impressive...been very much enjoying watching your rigging work. The full hull shots really show how your AVS is now coming to life. It must be nice to be at least starting to see the finish line! Cheers, Nigel.
- 831 replies
-
- 3
-
-
- Armed Virginia Sloop
- Model Shipways
- (and 1 more)
-
HI Nils, Wonderful to see those shots of the full hull...like Patrick says, they really emphasize just how sleek the hull lines are. Very much enjoying your build...lovely work. Cheers, Nigel.
- 2,625 replies
-
- 5
-
-
- kaiser wilhelm der grosse
- passenger steamer
- (and 1 more)
-
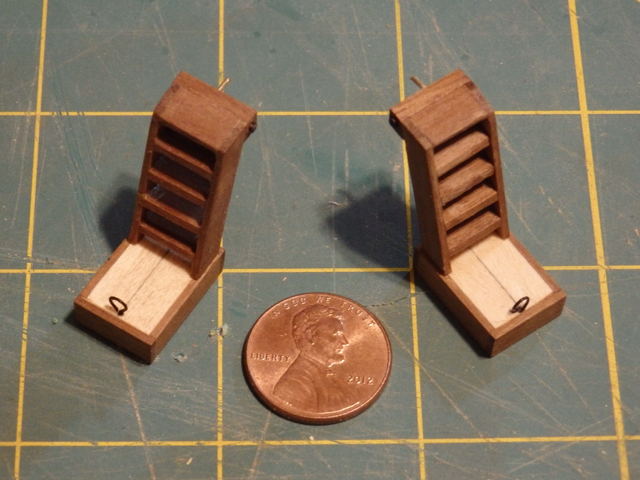
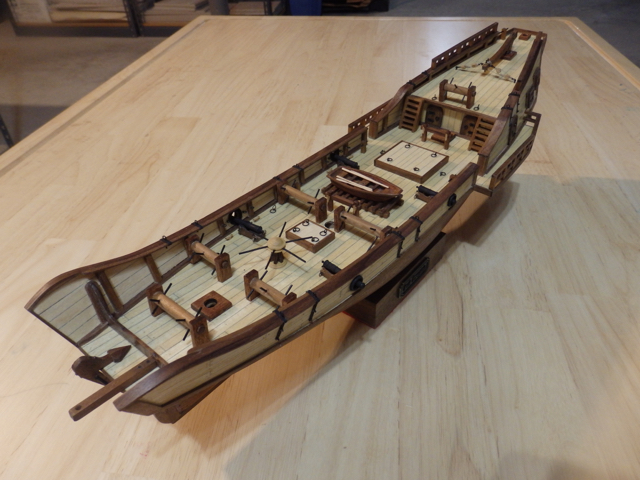
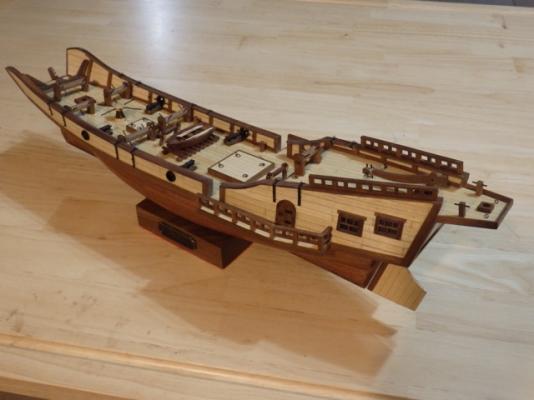
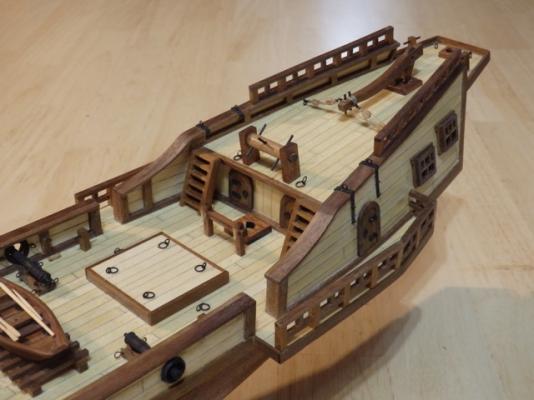
Welcome back Dimitris! Looking forward to seeing your updates on your lovely Amerigo Vespucci again! Augie...right now the maples here are only starting to turn...their deep red is a couple of weeks away if we are lucky with the fall colors! Your leaves up in the Rockies are now doubt a bit ahead of us! As for the Dragon...a little more progress as the gallery ladders and their support posts have been completed. Making the ladders went more smoothly than when I made the ladders to the poop deck which I am rather happy about. Platforms are just some basswood planks with the edges lined using walnut. Kit ladder support posts were simple curved metal posts and so I made some replacements using 3mm walnut square stock. I cut out a lap joint to join the sections but decided to only make it 1mm deep to leave an offset as I liked the extra relief between the two sections. I then added some brass rod and the base so the post also formed a bitt and also some of Chuck's cleats. I'll use the cleats when I rig the lines to the ladders. That completes all the decking work so now time to start on the masts! Cheers, Nigel.


- 270 replies
-
- 12
-
-
- red dragon
- artesania latina
- (and 1 more)
-
Congrats Patrick...the gold detailing just gives it that finishing touch. Beautiful work! Hope you have a great place picked out to display her. Cheers, Nigel.
-
Yes...will say a prayer all goes well today and for a fast recovery for the days after.... Cheers, Nigel.
-
Thanks for the kind words Carl and very glad you are enjoying the build! It has taken longer to get to this point than I expected, but has been a lot of fun! Will keep the updates coming and as the leaves are starting to turn here, the winter build season is on it's way! Who knows, I may actually finish this little guy before the end of the year! Cheers, Nigel.
- 270 replies
-
- 2
-
-
- red dragon
- artesania latina
- (and 1 more)
-
Everything everyone else said above Jeff! Looks awesome..she'll love it and her Dad made it for her! Can't buy that! Cheers, Nigel.
-
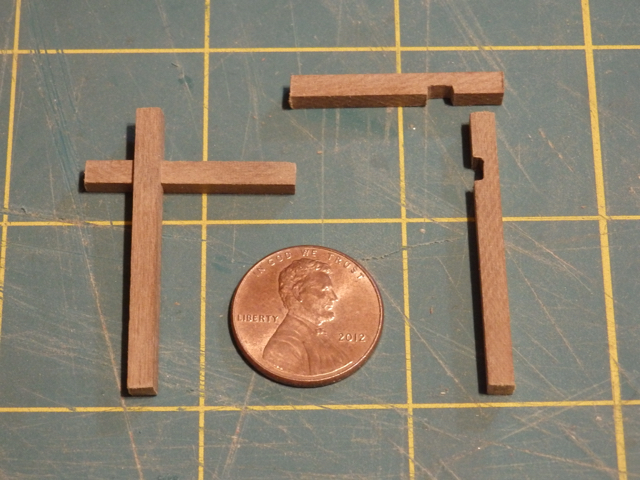
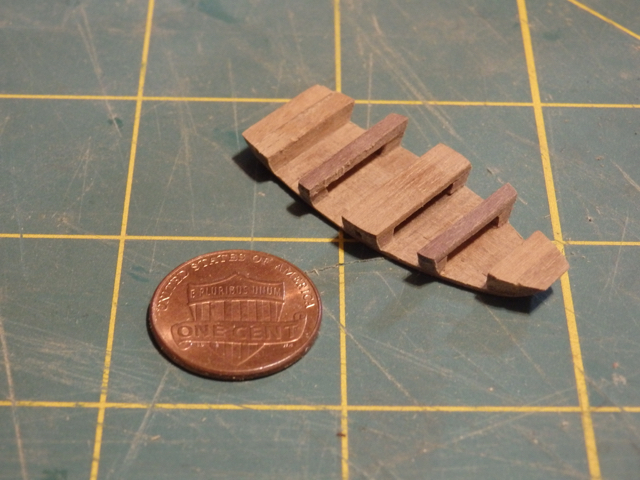
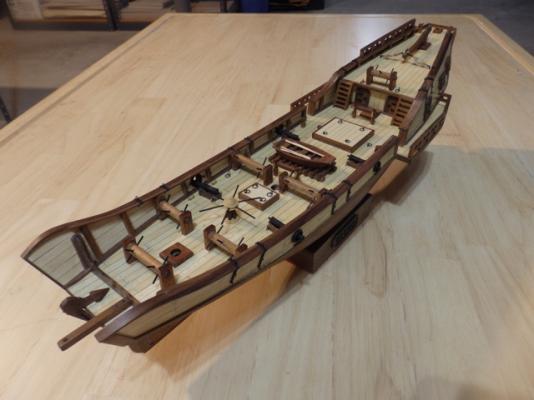
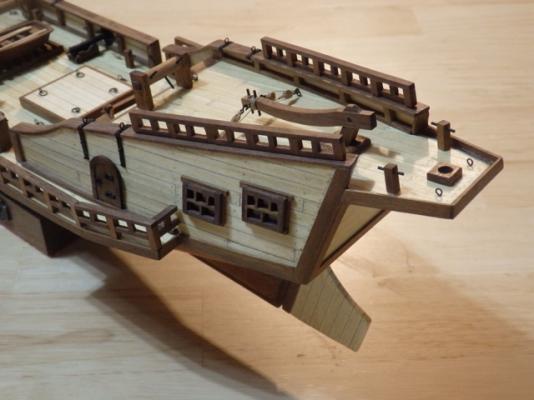
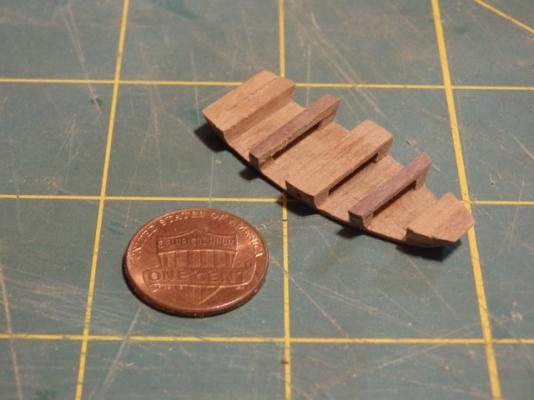
Hi All, Only a small update this week, but I did finally complete the railings. The turned railings I'd made earlier didn't really look right anymore against the square design of the windows. So I redid the design using 3mm square stock for the major posts. The rails and smaller posts were made from 1mm walnut. The last deck furniture items to finish are the gallery stairs and the support posts used to help raise and lower them. Pictures below and thanks for the comments, likes and for reading. Cheers, Nigel.
- 270 replies
-
- 9
-
-
- red dragon
- artesania latina
- (and 1 more)
-
Hi Augie, Just my 2c to say she is looking just wonderful. I love the way these wider angle shots pull the whole model together somehow. I also really like the alternation of the open decking fore and aft....a very neat detail! Cheers, Nigel.
- 2,191 replies
-
- 4
-
-
- confederacy
- Model Shipways
- (and 1 more)
-
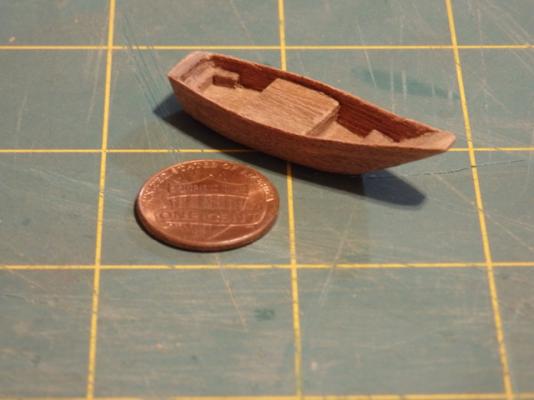
Hi Robb, I am finding old, worn 320 sandpaper is sometimes very useful! The oars also have a thin coat of wipe on poly on them as well. Cheers, Nigel.
-
Sorry to hear about your illness Dave...hang in there and keep fighting! Wonderful thought to build this for your surgeon...I will follow along if you don't mind. Cheers, Nigel.
- 209 replies
-
- 6
-
-
- cheerful
- Syren Ship Model Company
- (and 1 more)
-
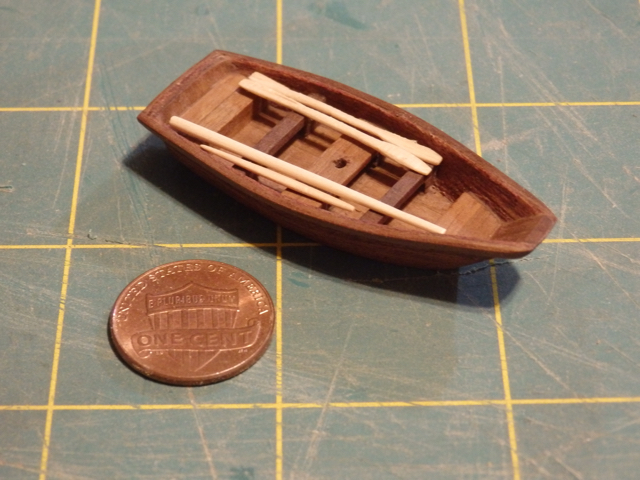
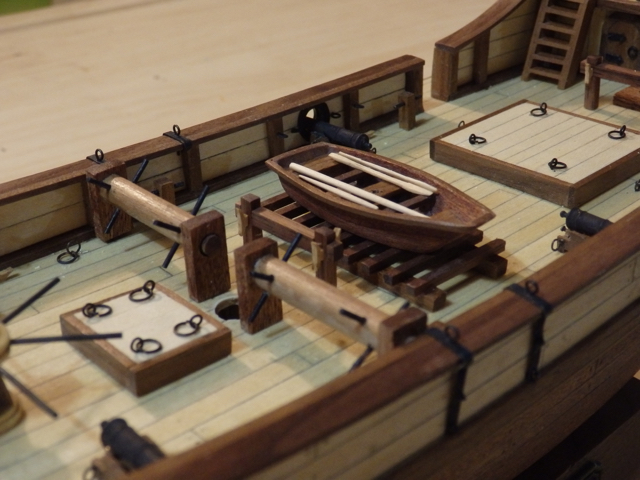
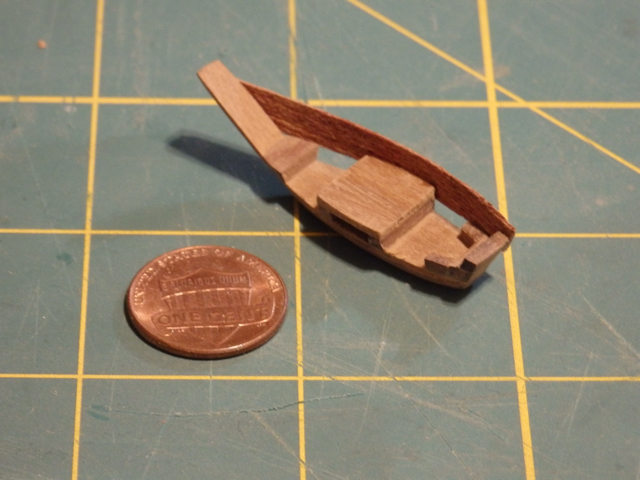
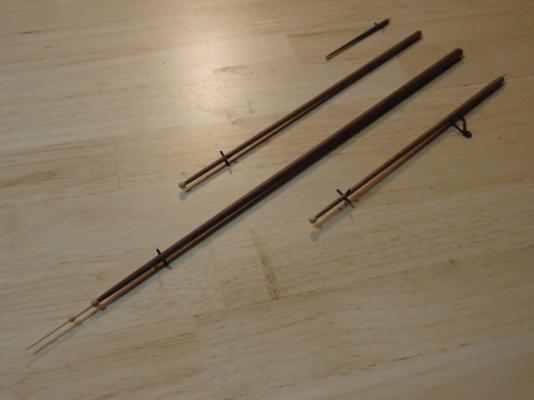
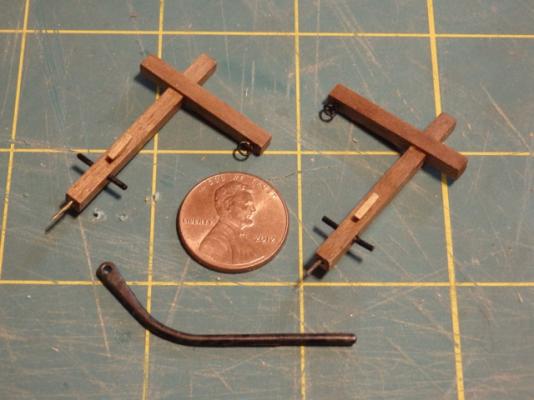
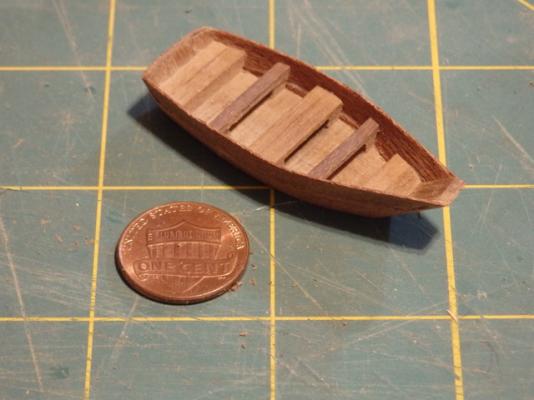
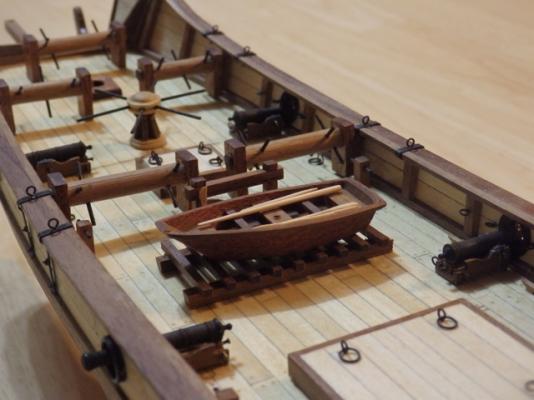
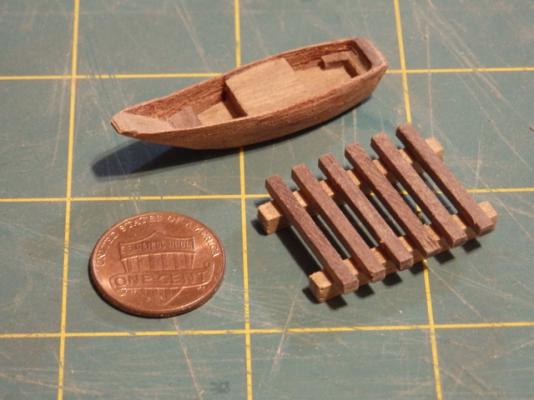
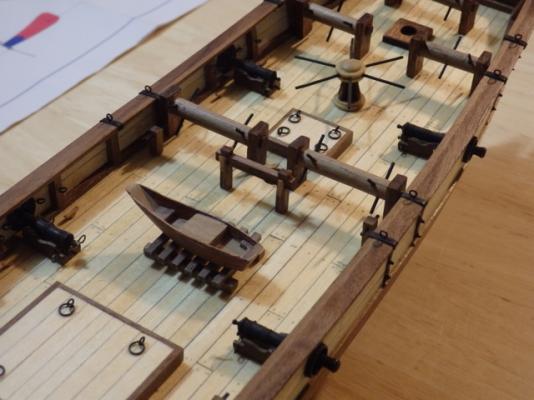
Hi All, Spent the last few days redoing the ships boat to make it about 50% larger. I used the same method to build it as the first version except I changed up the design a bit to accommodate a larger crew and add some side rails. I also made a larger platform and then took a try at making the mast, yard and oars from some toothpicks. Just have to remove some dust I just noticed in the pictures! Overall I am pretty happy with how this version turned out and thanks to all for helping me ! Cheers, Nigel.

- 270 replies
-
- 11
-
-
- red dragon
- artesania latina
- (and 1 more)
-
Hi Max, I like the first anchor, but agree that the second looks even better! Lovely work on your Endeavour...she is a real beauty! Cheers, Nigel.
-
Hi Captain Steve, Thanks for the inputs and good thought about using a scale figure. I don't have one unfortunately, but right now at scale the boat would be about 10 feet long with perhaps a 4 ft beam. So it would probably take about 4 or 5 people. A junk would probably have something larger as well, so I think I am going to upsize the design so it can take about 12 men and then hang this little guy off the stern. Cheers, Nigel.
- 270 replies
-
- 1
-
-
- red dragon
- artesania latina
- (and 1 more)
-
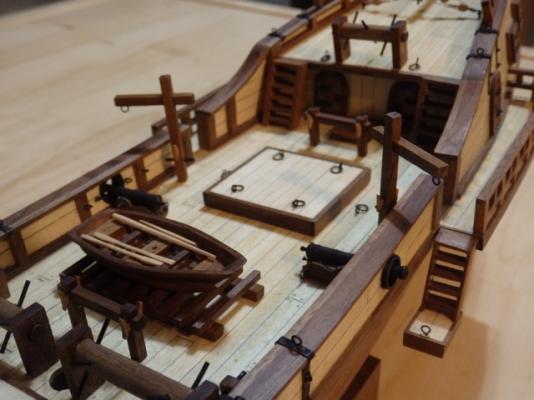
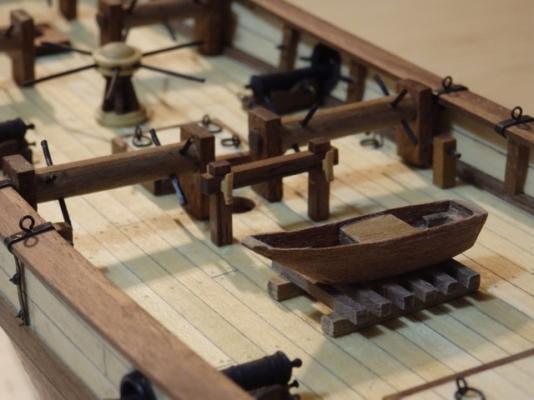
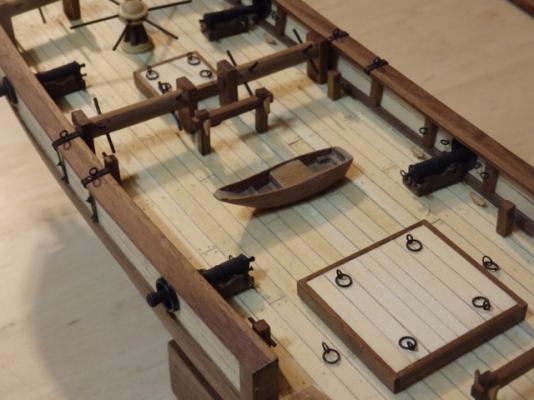
Hi All, Thanks for the more than kind words guys....making this little boat was a lot of fun. So to follow up on Augie's point, I made up a simple base today. I think it adds a nice detail and help the boat fit into the rest of the deck furniture. Still mulling over if it needs to be a bit larger but I think it looks better. Inputs welcome, as even if consensus is it should be larger...no worries. I've figured out I can make some davits and hang this boat off the stern to add another neat detail. Cheers, Nigel.
- 270 replies
-
- 7
-
-
- red dragon
- artesania latina
- (and 1 more)
-
Hi Augie, Ah..good point! In the kit they only say to tie the boat down to some eyebolts. I will make a support for the boat and see if that helps. Cheers, Nigel.
- 270 replies
-
- 1
-
-
- red dragon
- artesania latina
- (and 1 more)
-
She's really starting to come together! Always fun to see the deck start to get filled up with neat details! Great work! Cheers, Nigel.
-
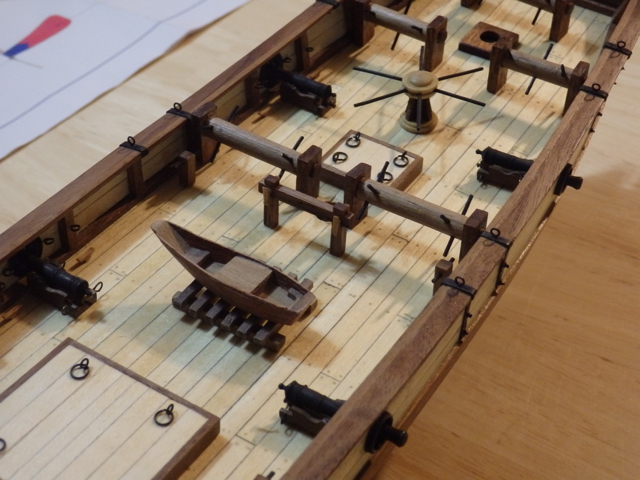
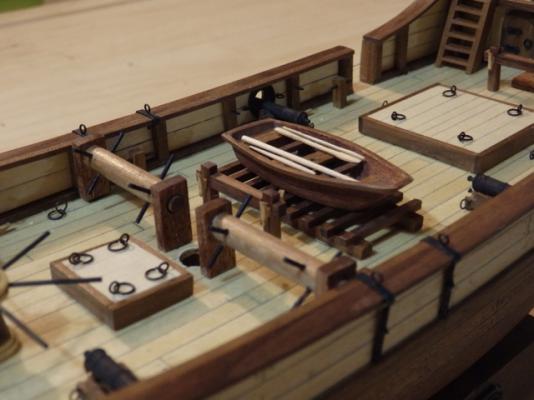
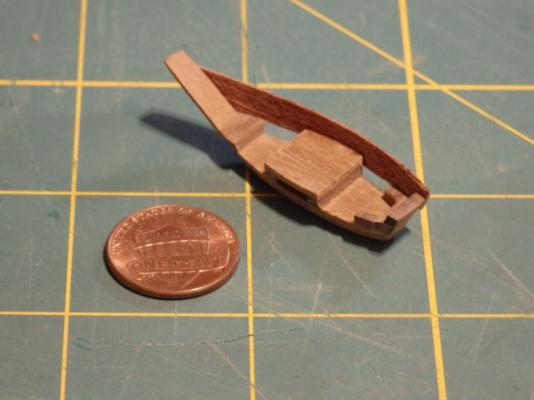
Hi All, Made my first attempt to scratch make the ships boat. Thanks to Igor for sharing his methods in his SIB scratch build Lena log. Floor of the boat was made from some walnut strip and shaped. Square walnut strip was used to make the stern, forward and center storage lockers and 1x5mm walnut strip to form the bow. These were faired to the shape of the hull and also acted as the planking supports. I used some left over sapelle strips to plank the hull, spilling them slightly to get a decent fit. End result is not exactly the same as the reference I posted above, but overall pretty happy at my first attempt. I am wondering from the pictures on the deck if it is actually a bit small. May take another crack at this and make it a bit bigger by perhaps by 1cm in length and 0.5mm or so in beam. Thanks again for the comments, likes and for reading! Cheers, Nigel.

- 270 replies
-
- 9
-
-
- red dragon
- artesania latina
- (and 1 more)