kurtvd19
-
Posts
3,019 -
Joined
-
Last visited
Content Type
Profiles
Forums
Gallery
Events
Everything posted by kurtvd19
-
I think you will be disappointed as these are meant to compress wire rather than removing material. The wire get longer as it is reduced in diameter. Search for this topic as draw plates have been discussed. Byrnes Model Machines makes a very good draw plate that works great for wood.
-
Welcome to MSW Bud.
-
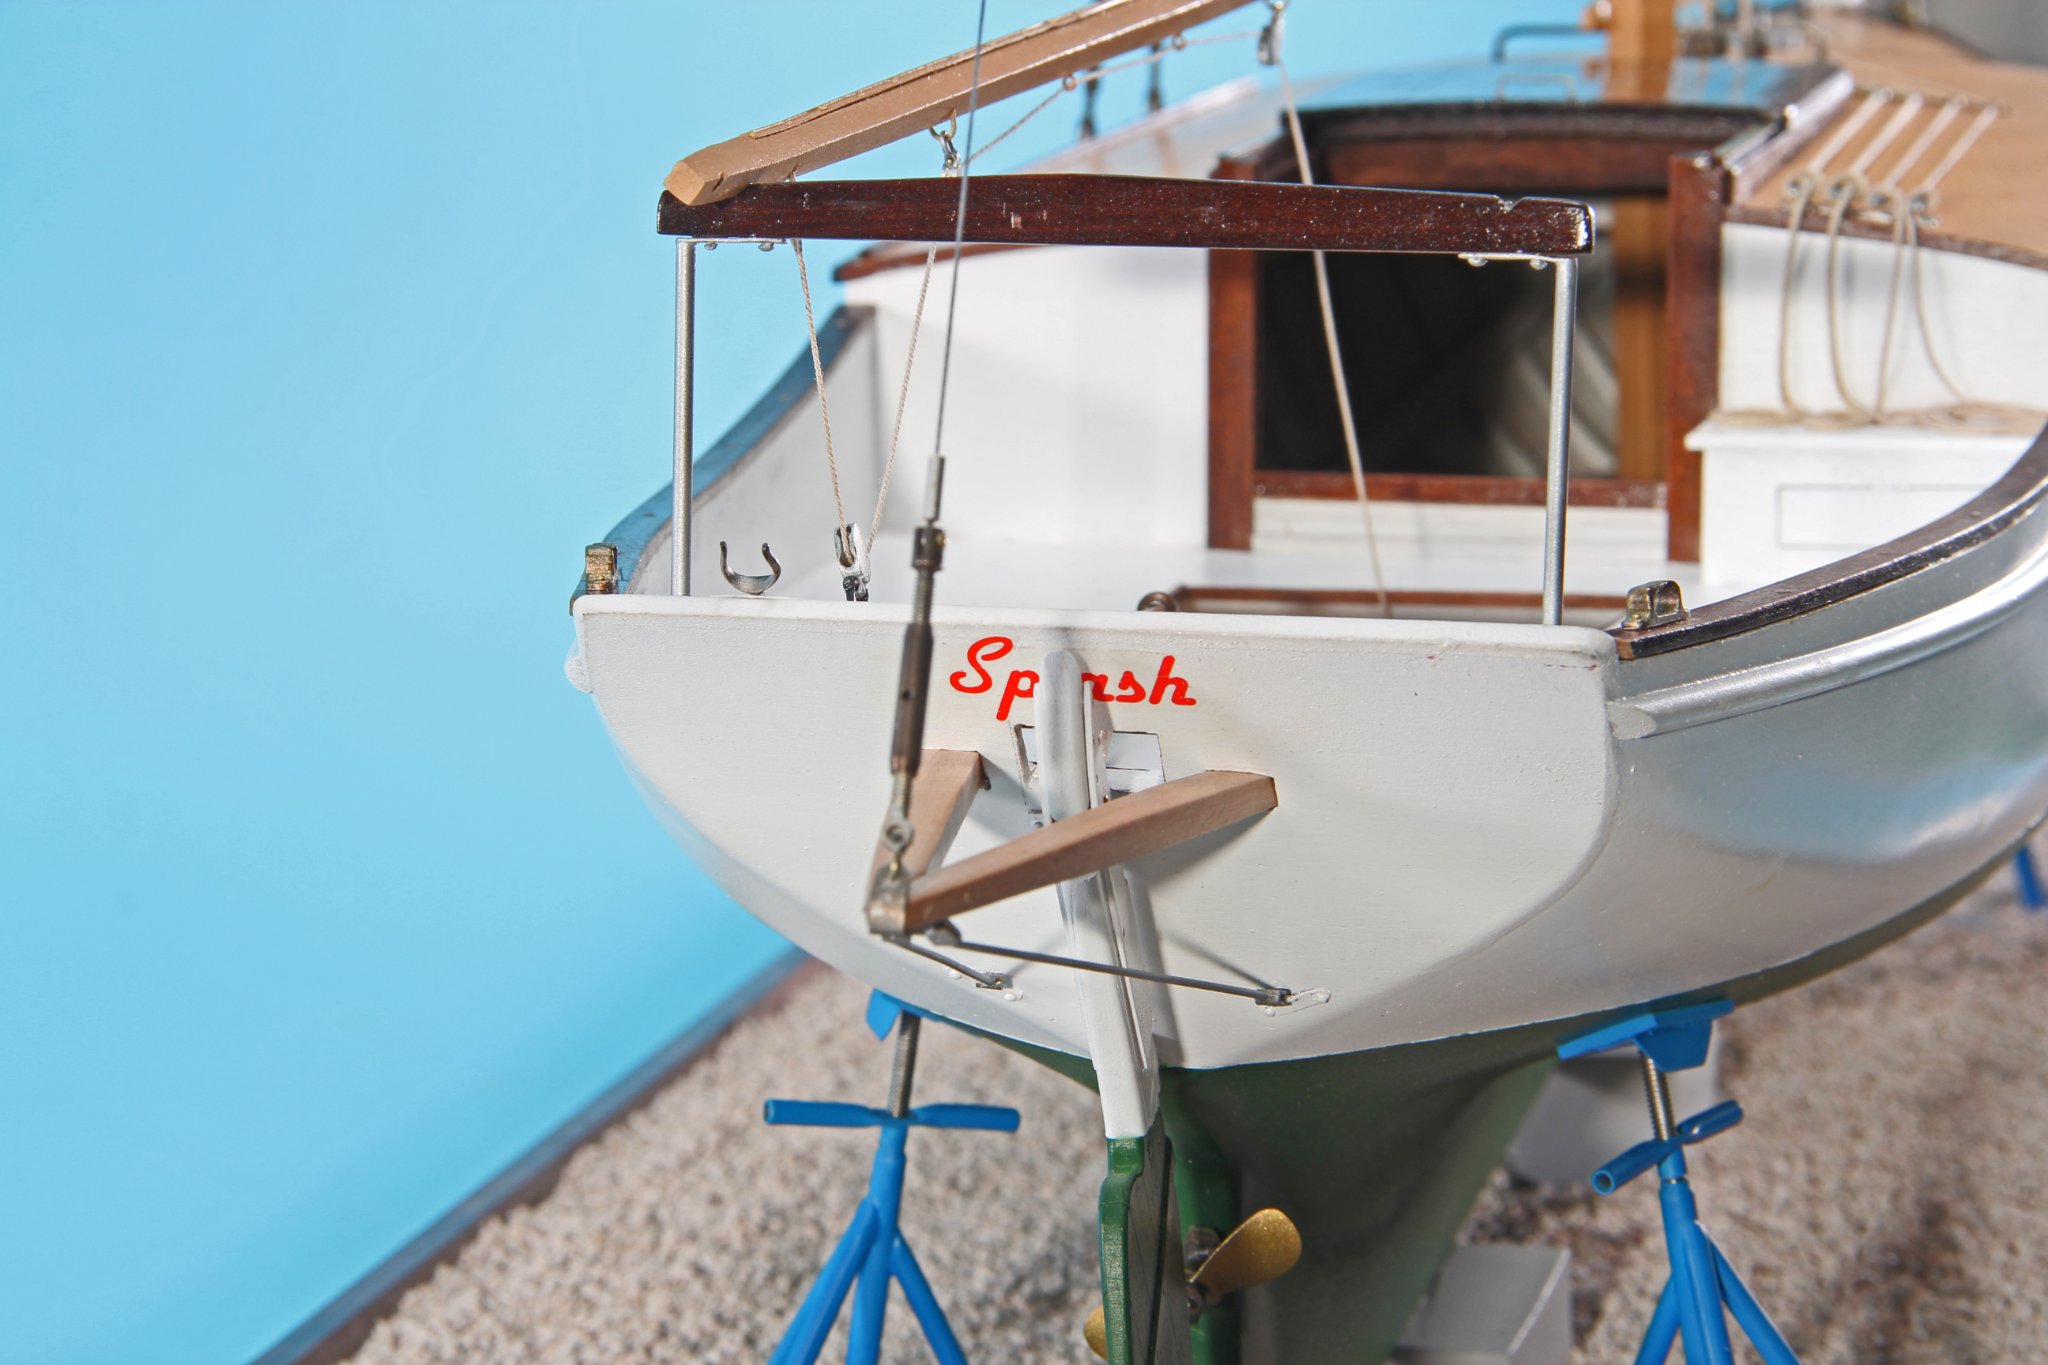
 Beaders/Jewelers use a piece called a "crimp" with special pliers to attach the crimp and lock the wires in place. Small diameter tube - various finishes - put the end of the wire through the crimp, thread on the eyebolt, hook or turnbuckle and put the end of the wire back through the crimp and crimp the tube with the pliers and cut the excess wire off. The photo shows a crimp at the top of the turnbuckle on the wire rigging line. This is a 1:12 scale model with 7 strand SS wire about 0.015 diameter.
-
Check out the great weathering on the model by FriedClams - should help you
-
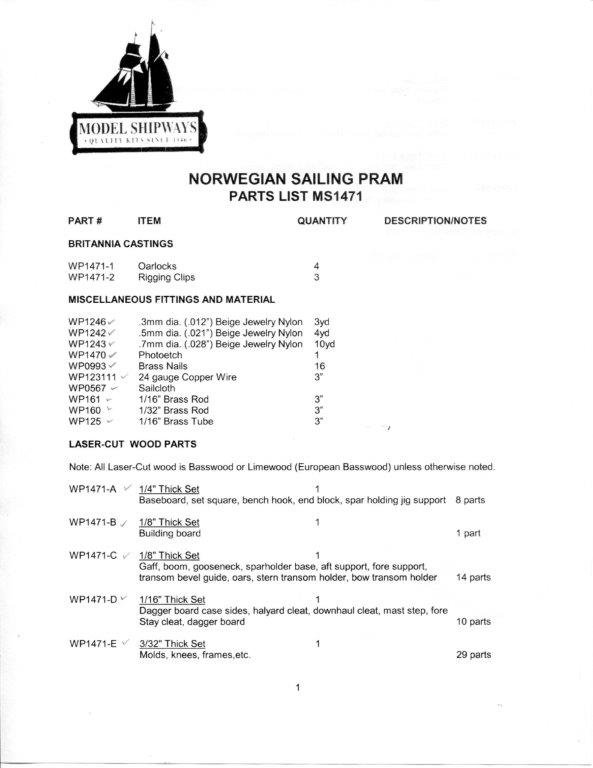
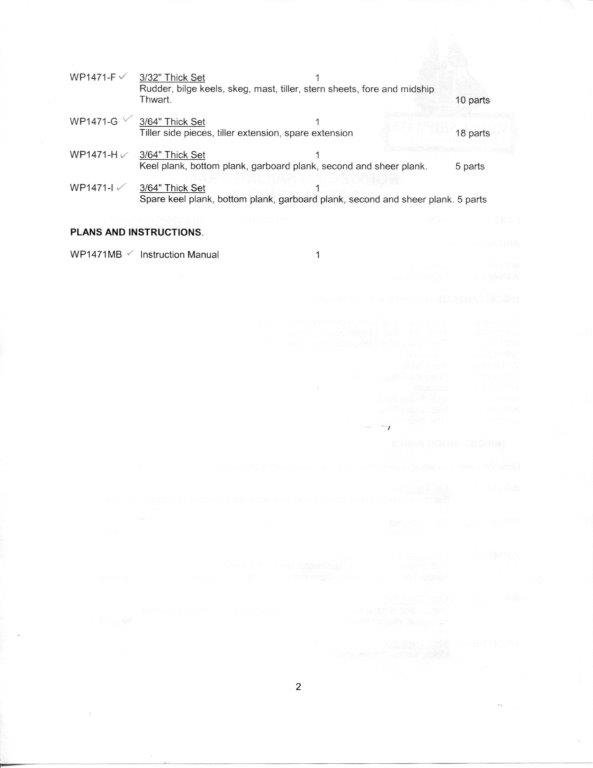
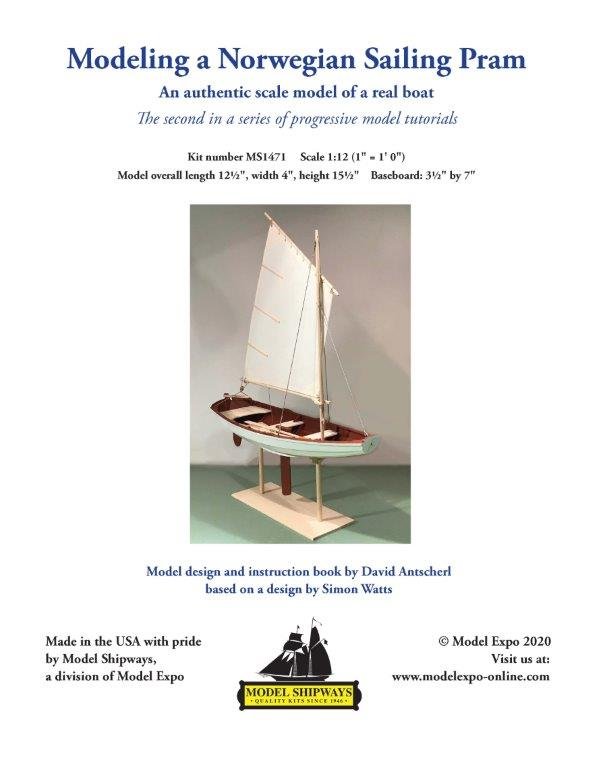
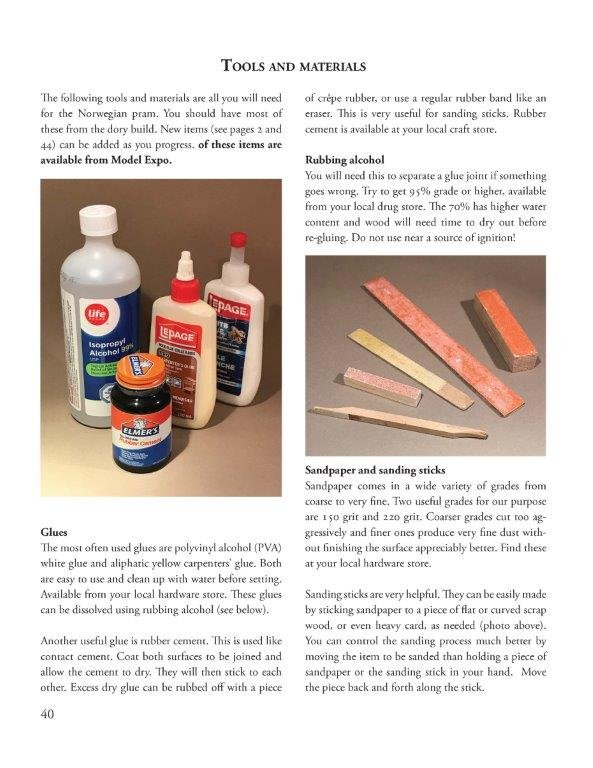
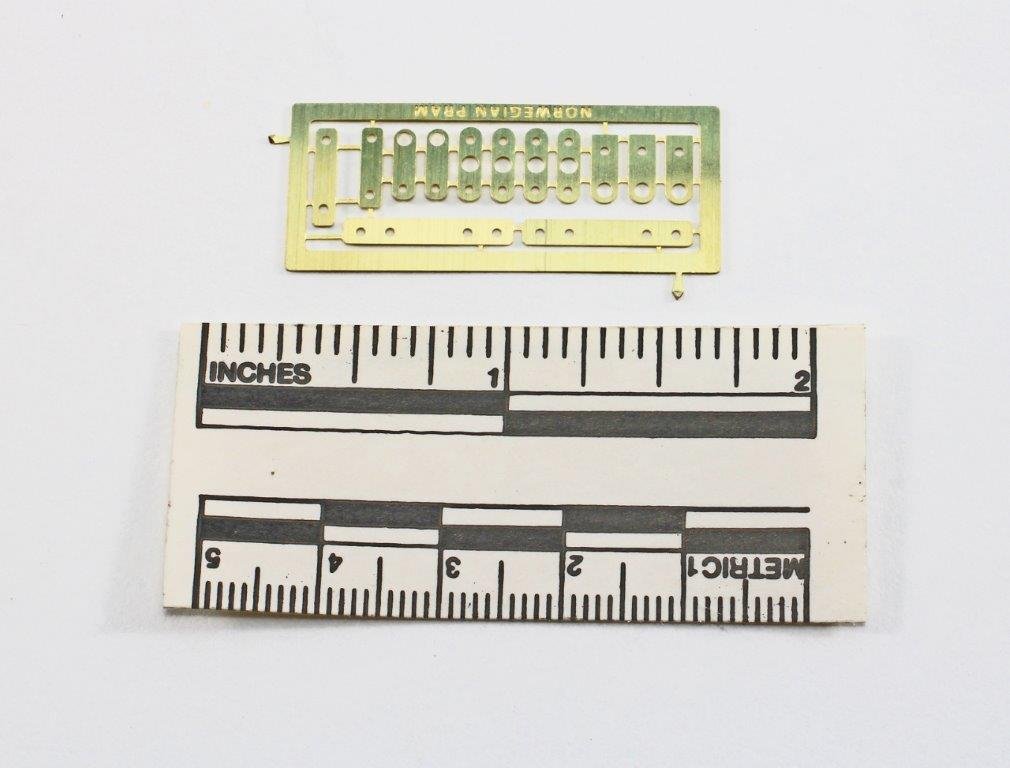
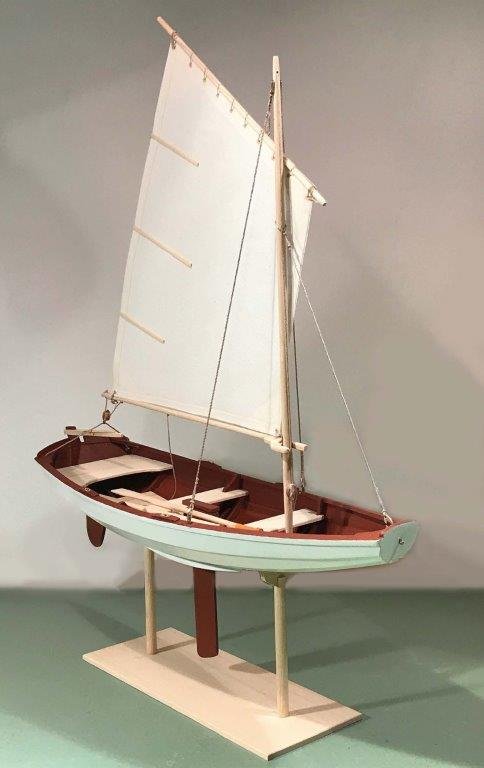
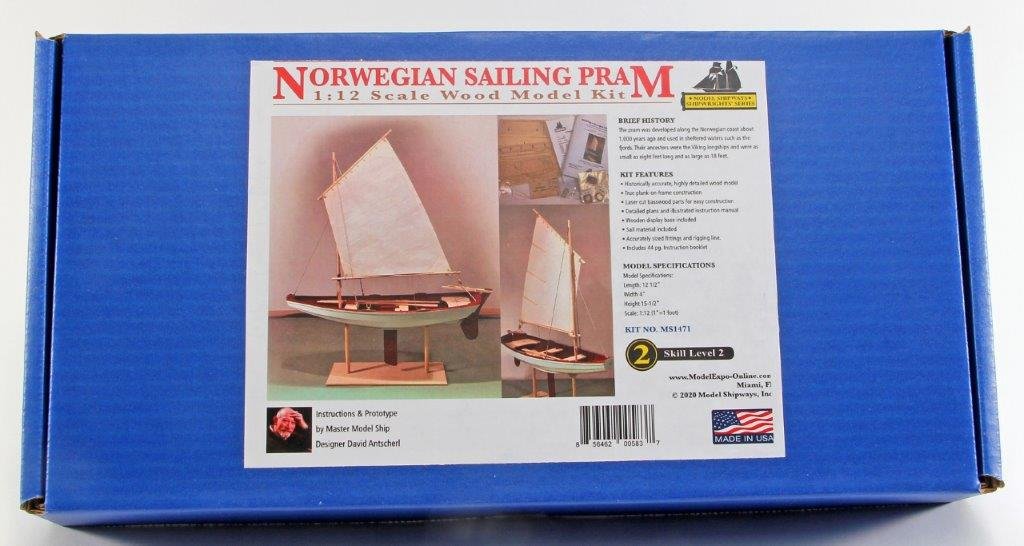
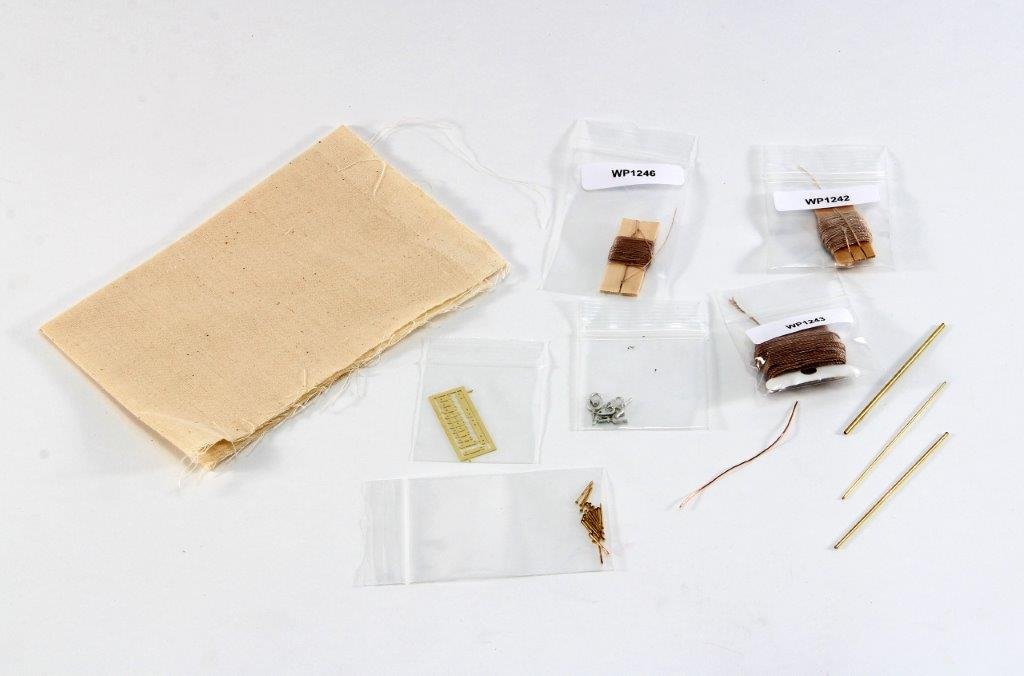
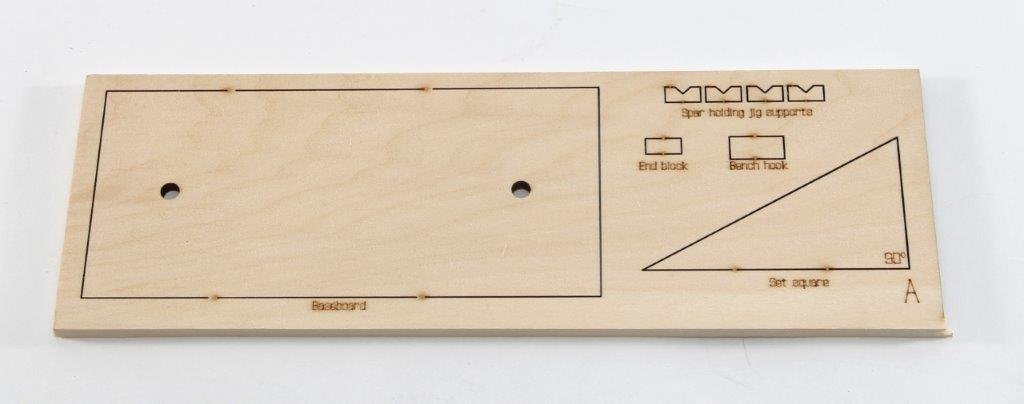
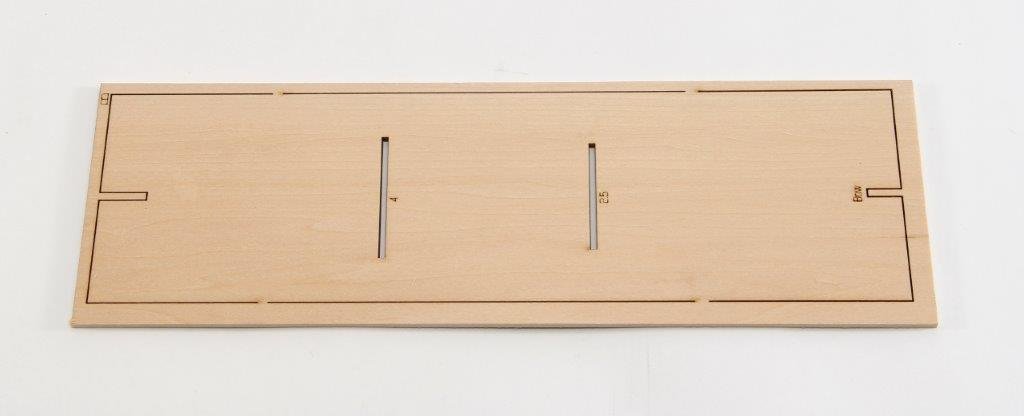
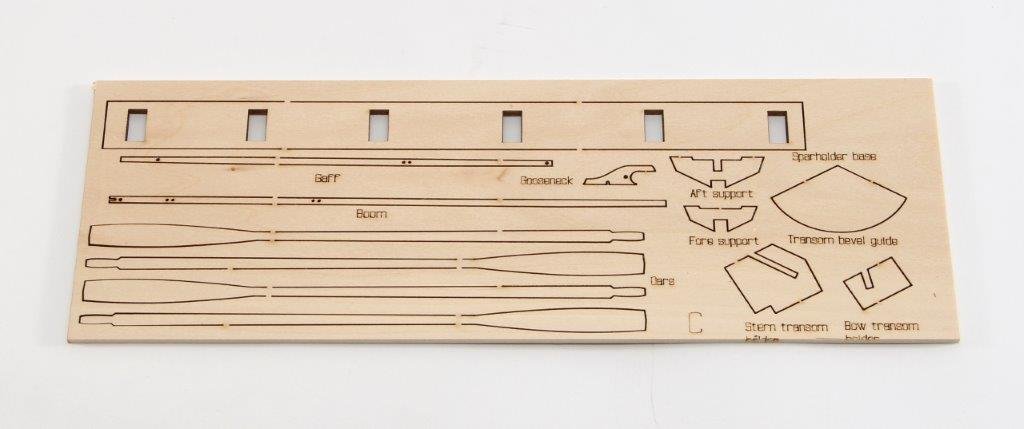
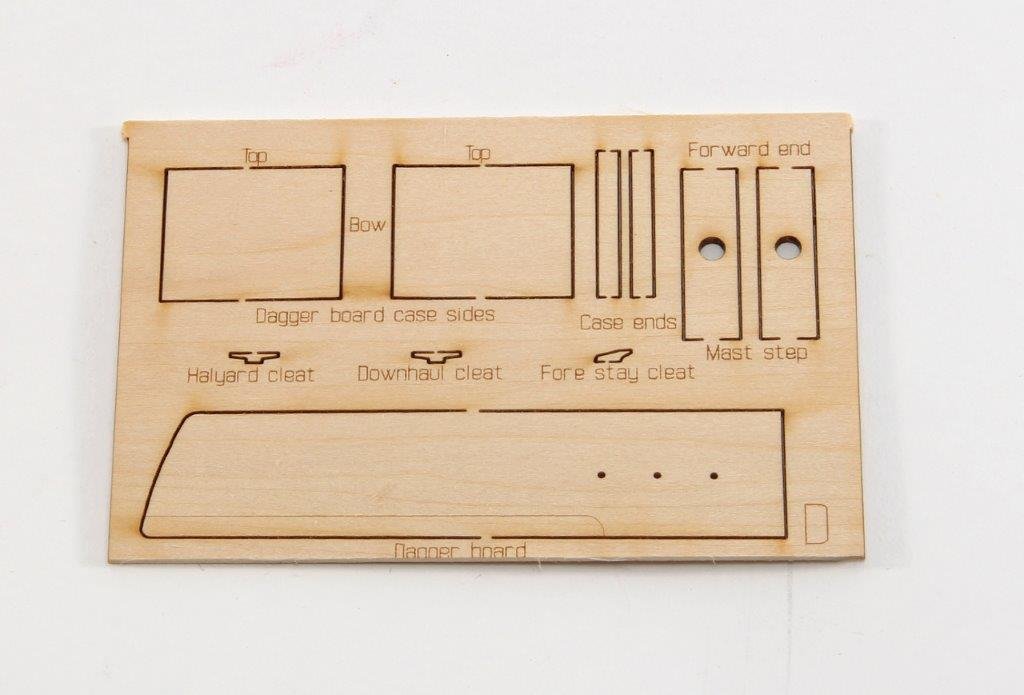
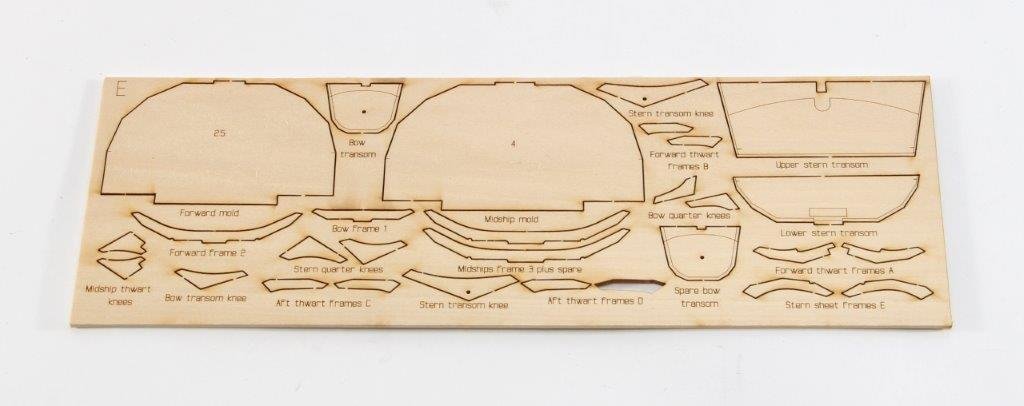
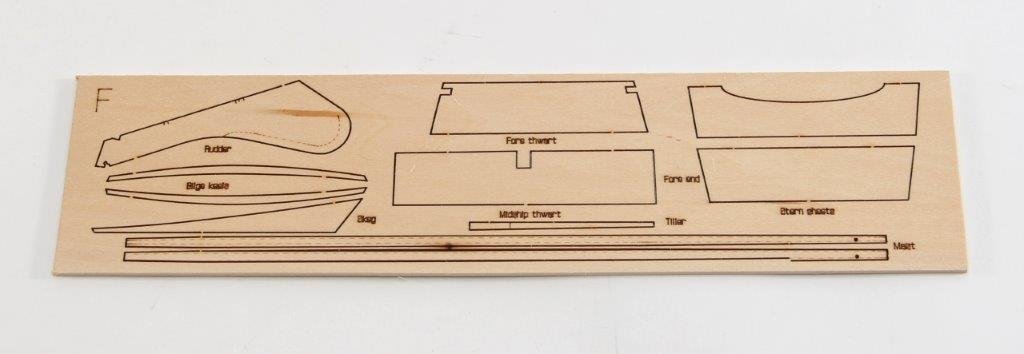
New Shipwright’s Series from Model Shipways NORWEGIAN SAILING PRAM - Kit #MS1471 Skill Level 2 Scale 1:12 Overall length 12 1/2 inches - Overall Height 15 1/2 inches - Baseboard 3 1/2 inches x 7 inches This kit is the second in the new Shipwright’s Series of progressive model tutorials designed by David Antscherl for Model Shipways a division of Model Expo. These kits fill a void in our hobby for simple but good kits that teach the new model builders the necessary skills to enable them to move on to build bigger more complex kits. Photo of finished model by Model Shipways For many years, Midwest Model Products manufactured a great series of kits that were designated as Level 1 through Level 4 designed to teach the beginner wood boat modeler the basic skills a wooden boat modeler needs to learn. New ownership cancelled the line several years ago and the hobby has needed replacements which Model Shipways is now providing with the new Shipwright’s Series. The Norwegian Sailing Pram kit is labeled as a Skill Level 2 kit and the instructions say, “For this second, intermediate kit, some previous knowledge is necessary in order to be successful”. The first kit in the series, labeled as a Skill Level 1 kit is a 1:24 scale Lowell Grand Banks Dory and the instructions say, “For this introductory kit, no previous knowledge is assumed or necessary”. (The Lowell Grand Banks Dory is reviewed separately here on MSW). A nice feature of the kit series is the listing of all tools needed to build each kit. This kit lists the same tools as the Dory kit with several additional tools needed and a couple optional tools that while nice are not truly needed for this kit. Unpacking the box finds a full color 43 page instruction manual, a list of all the parts contained in the box, nine sheets of laser cut Basswood, cloth for the sail, a plastic bag containing three diameters of nylon rigging line, a small sheet of photo etch, a bag of 16 Brass nails, a 3” piece of 24 gauge Copper wire, a 3” piece of 1/16” Bras rod, a 3” piece of 1/23” Brass rod and a 3” piece of Brass tube. Also included is a bag with four oarlocks and 3 rigging clips. These parts are of cast Britannia with the rigging clips being free of flash or mold lines and the oarlocks showing some very even and easily removed mold lines on the outer edges. Overall, the materials are very good. The instructions for this kit like all the instructions for Model Shipways kits are downloadable as a pdf from the Model Expo website. https://modelexpo-online.com/ I highly recommend the new Shipwright series of kits from Model Shipways. I recommend this kit for the second kit to build from the series. If you are asked by a fledging modeler to recommend a good kit to start with I have no hesitation in recommending that they be told to look at the new Shipwright’s Series and that this kit be number two right after the Lowell Grand Banks Dory kit. A separate paint kit is available from Model Shipways (#MS1471MS - Model Shipways Norwegian Sailing Pram Paint Set). The paint set Includes 4 1oz bottle of each color. Colors included are Warm White, Hull Bottom Copper Red, Primer and Clear Satin Protective finish.

-
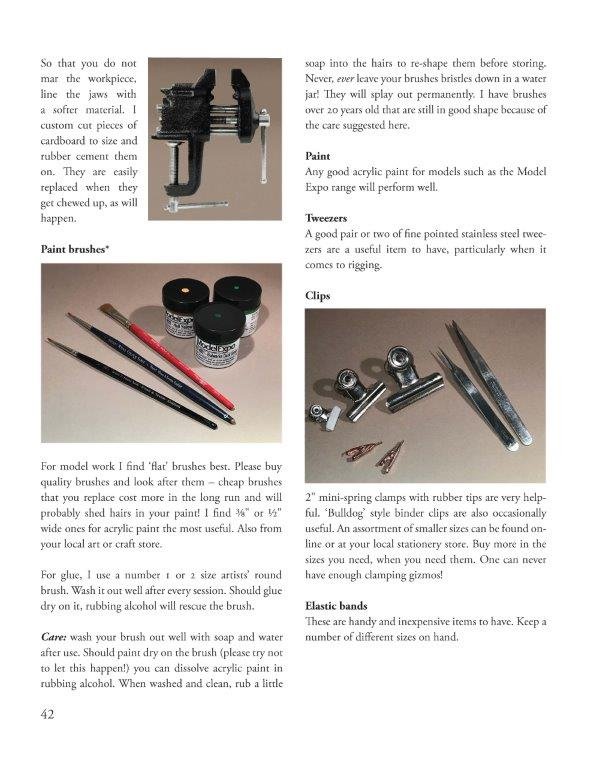
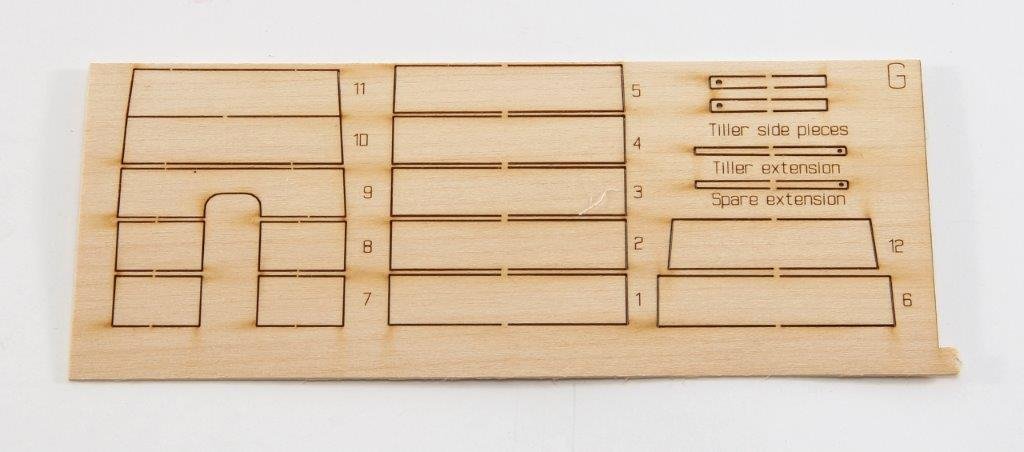
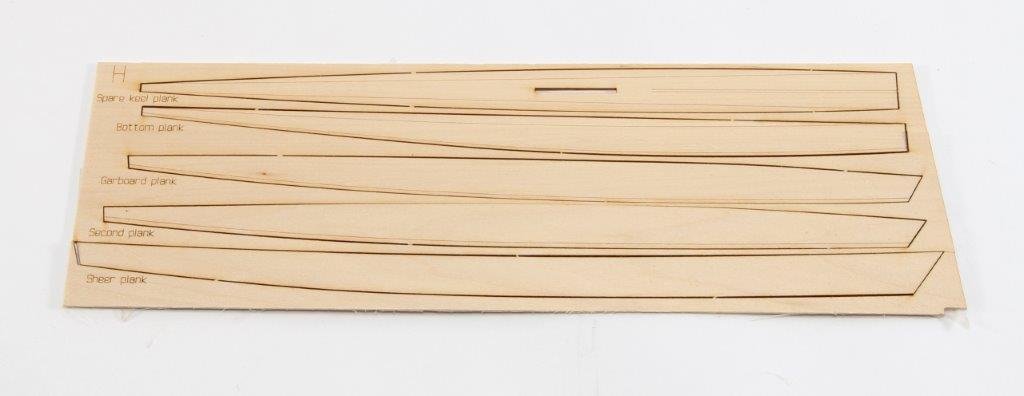
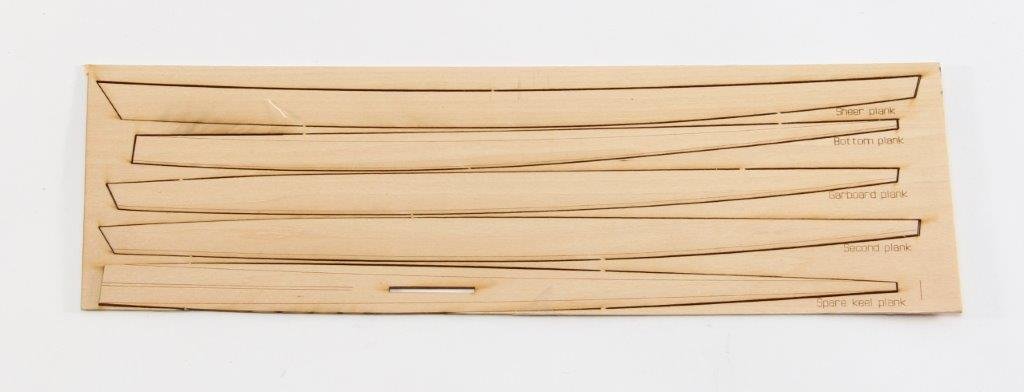
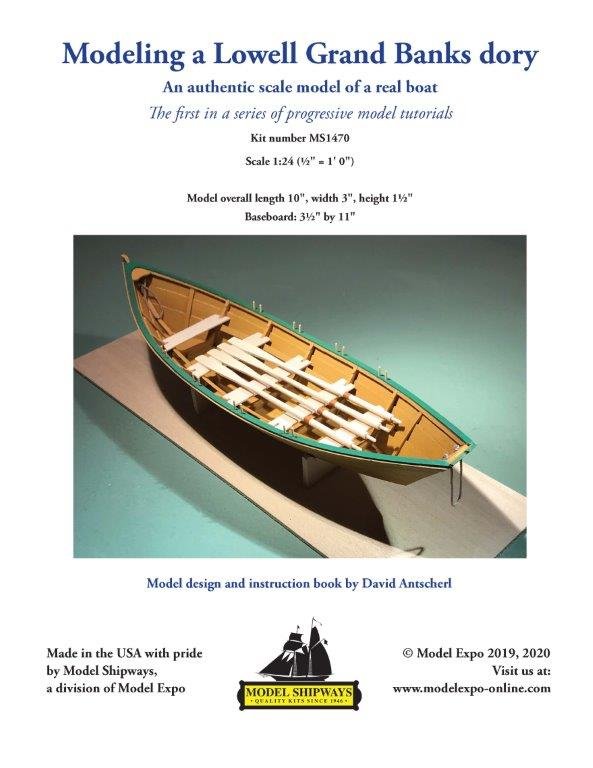
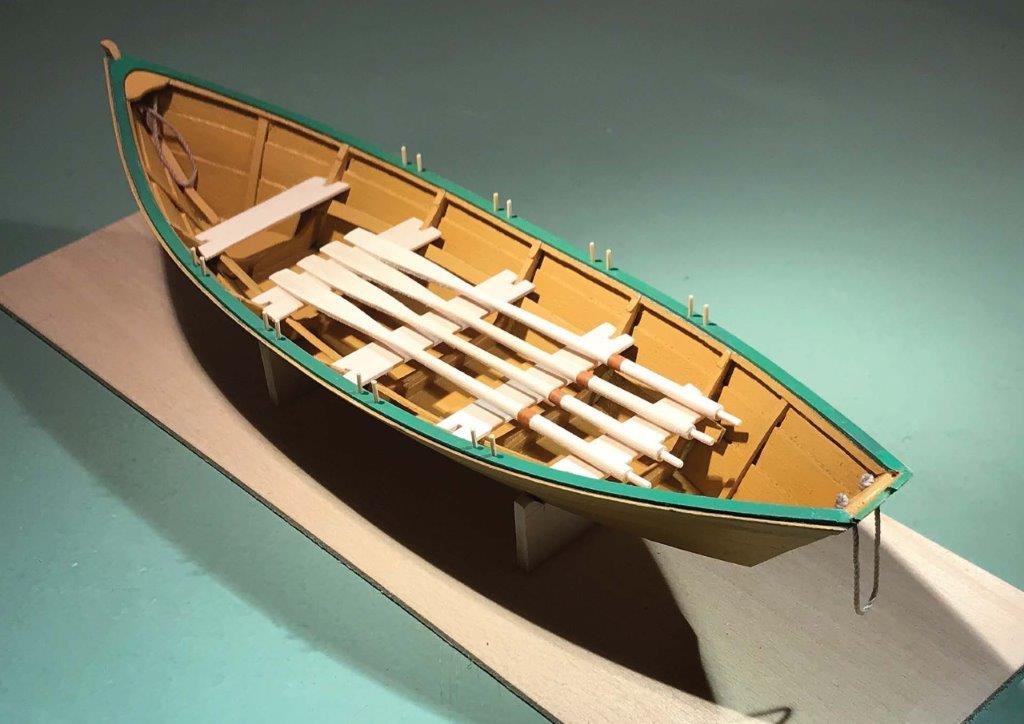
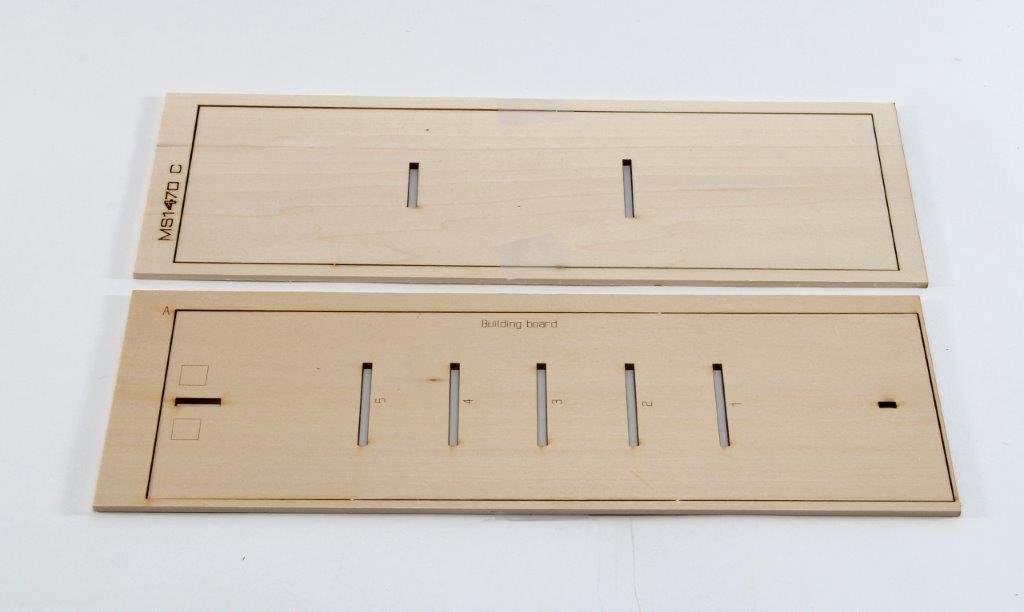
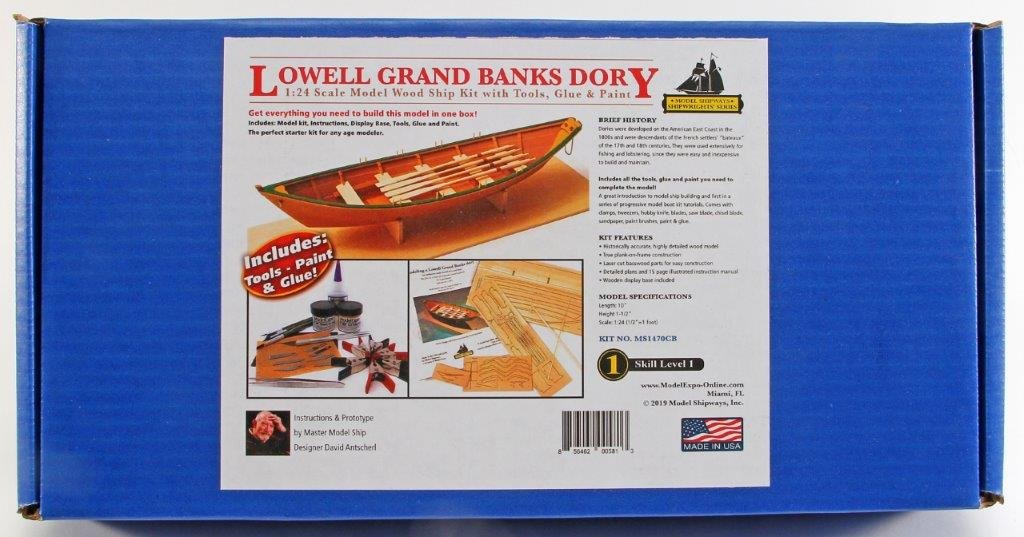
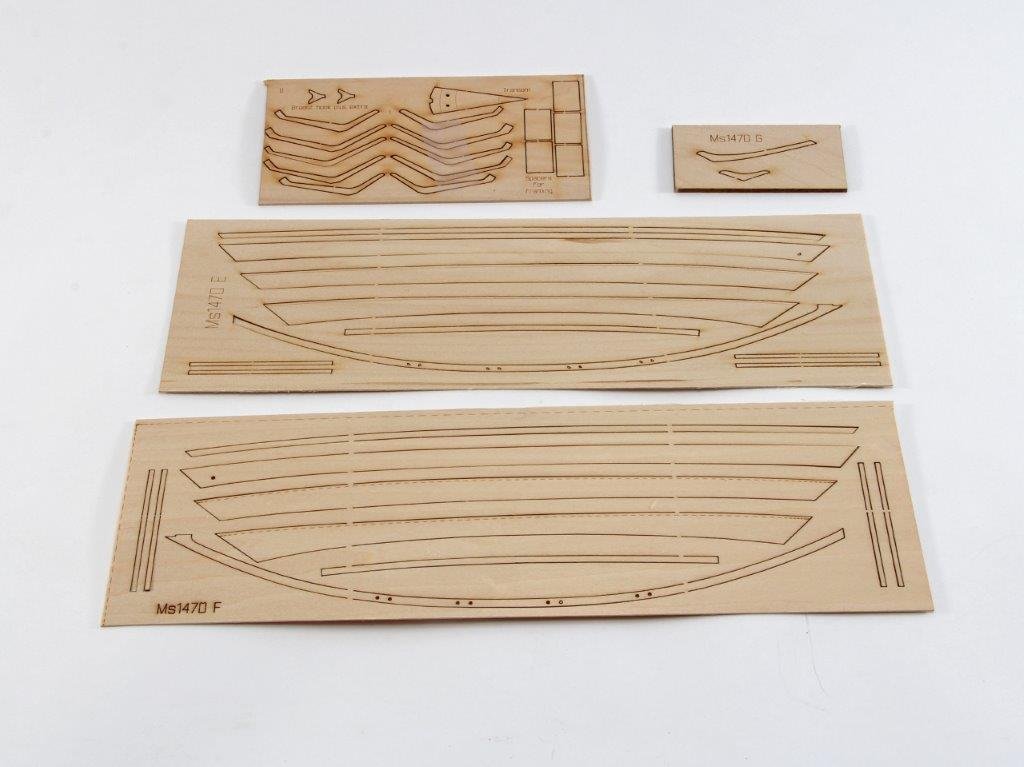
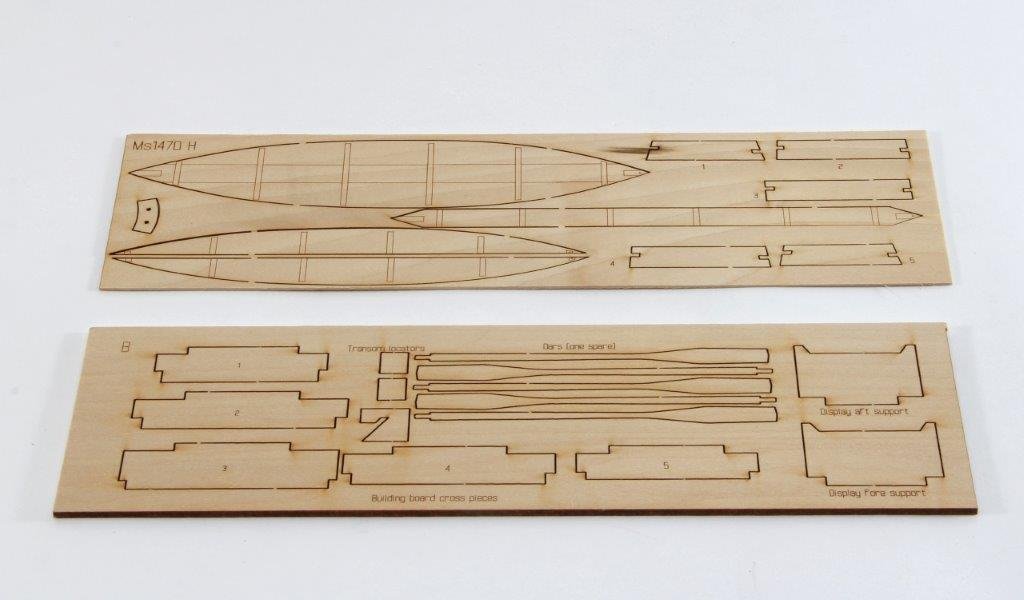
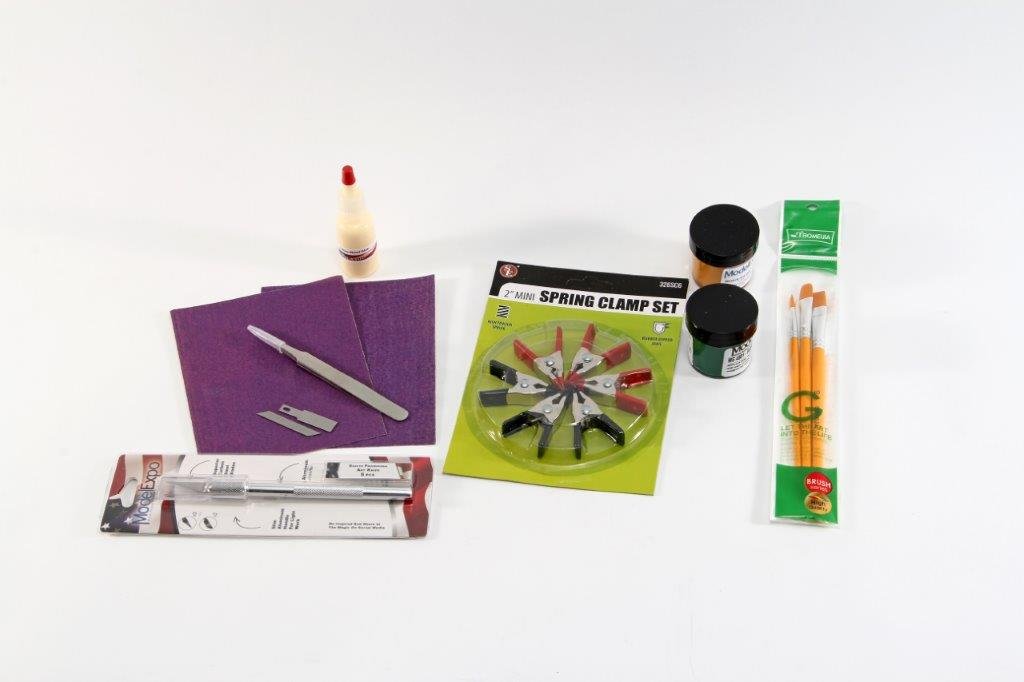
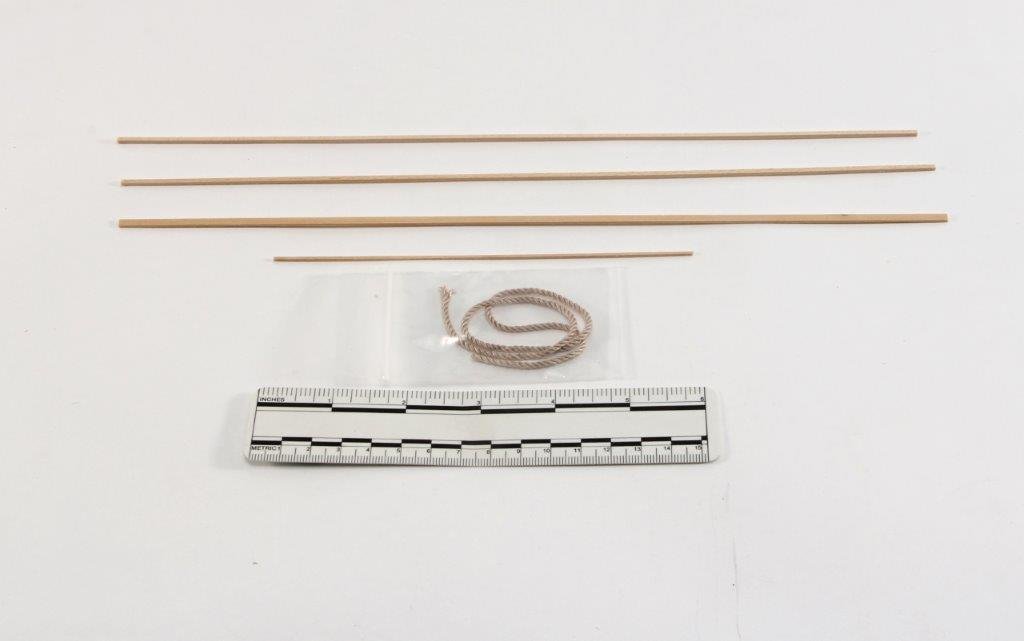
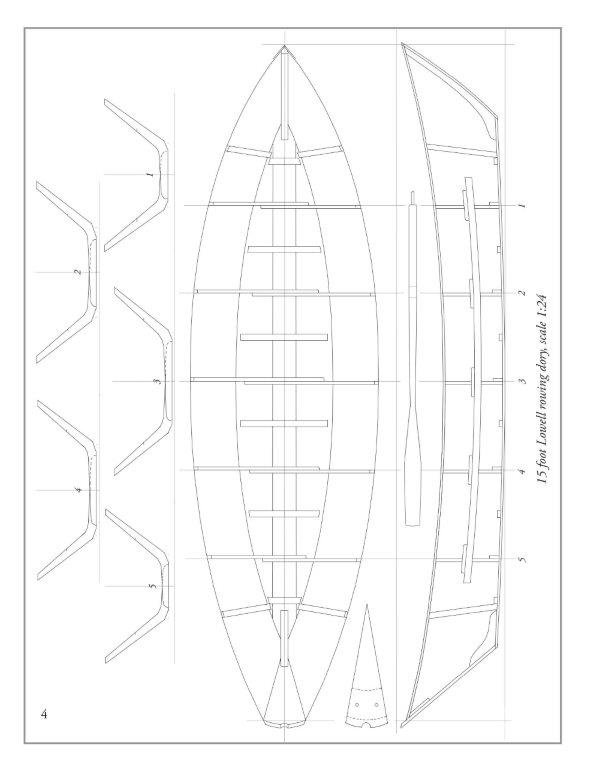
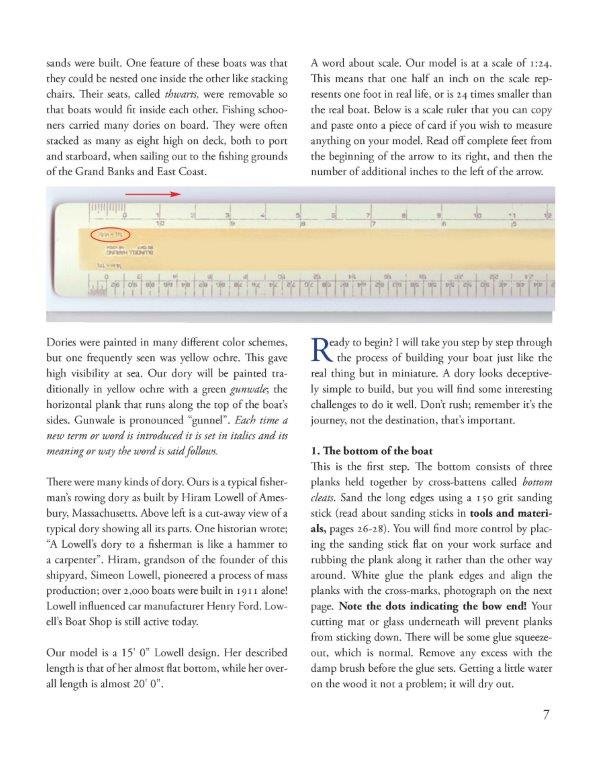
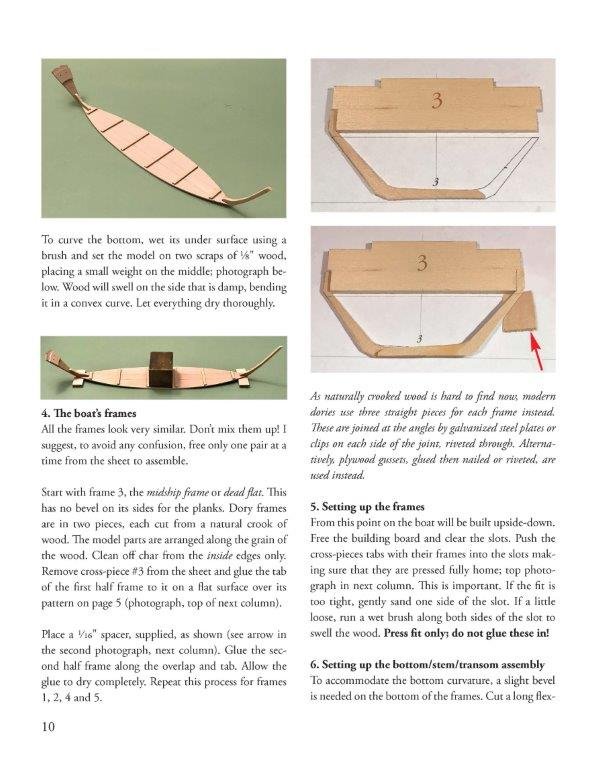
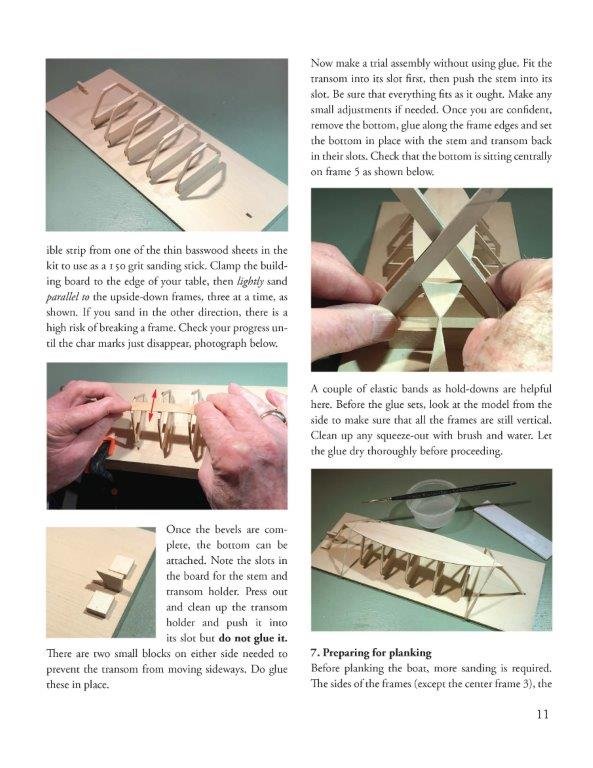
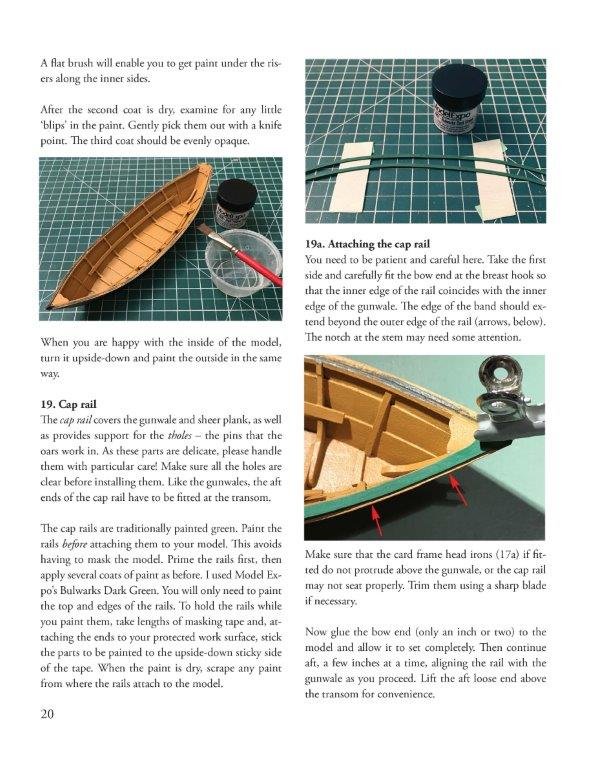
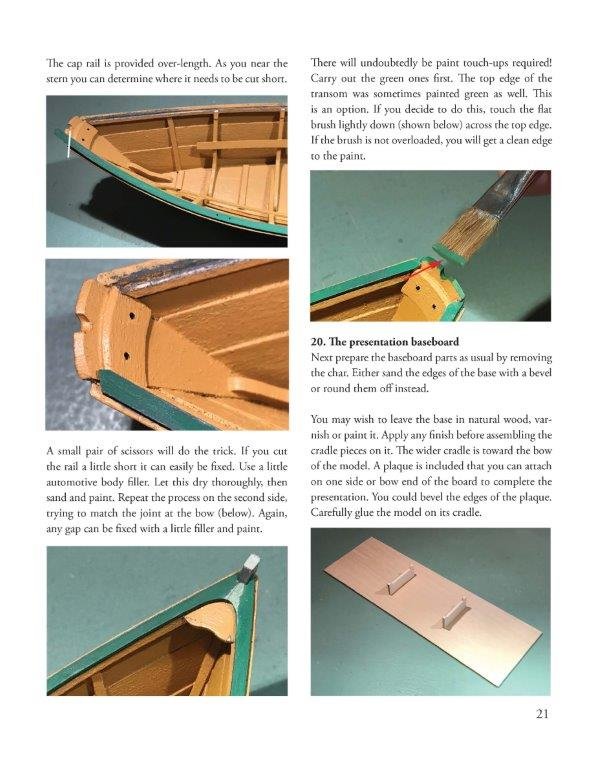
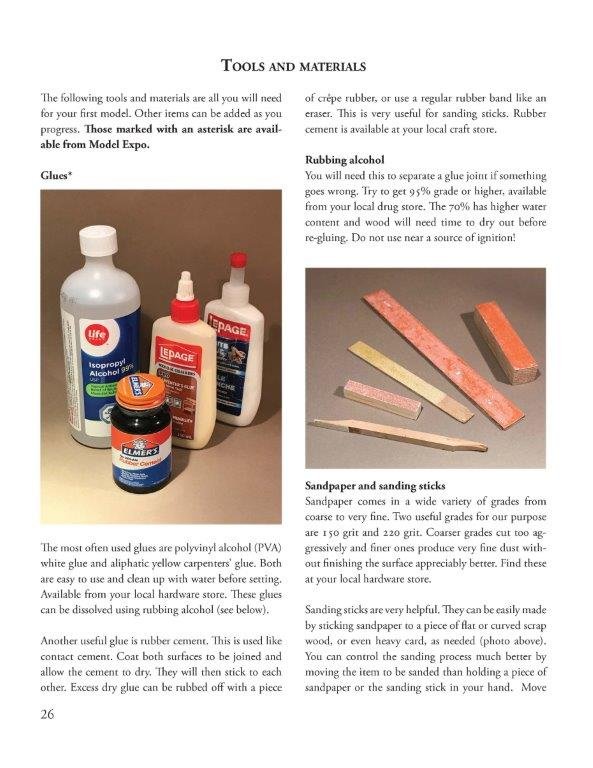
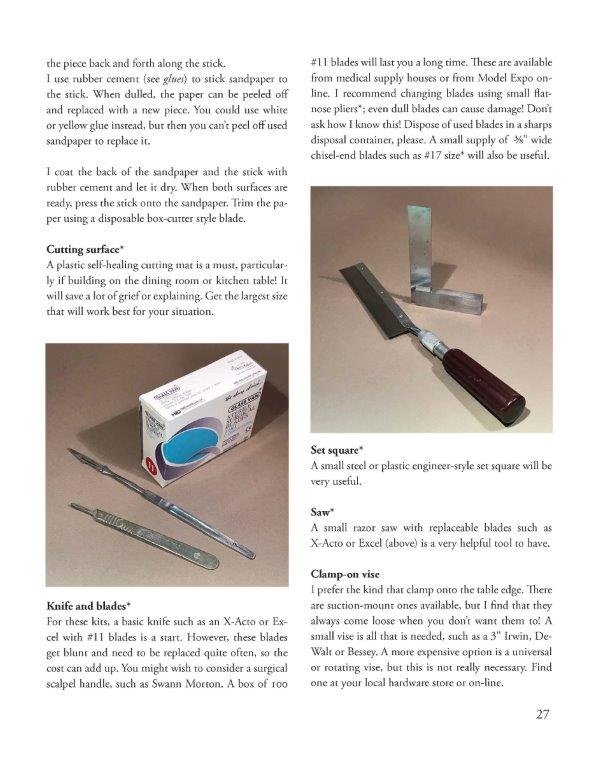
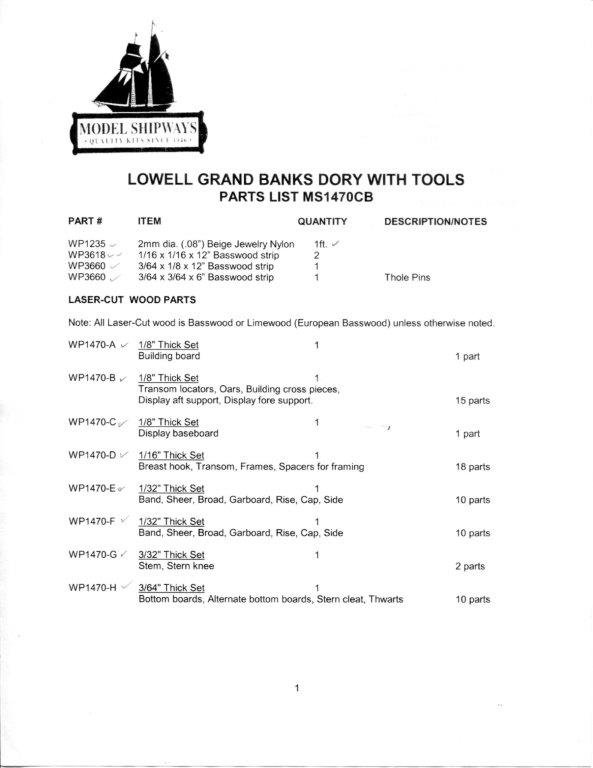
New Shipwright’s Series from Model Shipways LOWELL GRAND BANKS DORY - Kit #MS1470 Skill Level 1 Scale 1:24 Overall Length 10 inches Overall Height 1 1/2 inches Overall Width 3 inches Baseboard 3 1/2 inches x 11 inches This is the first kit in the new Shipwright’s Series of progressive model tutorials designed by David Antscherl for Model Shipways a division of Model Expo. These kits fill a void in our hobby for simple but good kits that teach the new model builders the necessary skills to enable them to move on to build bigger more complex kits. PHOTO OF FINISHED MODEL BELOW BY MODEL SHIPWAYS 27 PAGE INSTRUCTION MANUAL For many years, Midwest Model Products manufactured a great series of kits that were designated as Level 1 through Level 4 designed to teach the beginner wood boat modeler the basic skills a wooden boat modeler needs to learn. New ownership cancelled the line several years ago and the hobby has needed replacements which Model Shipways is now providing with the new Shipwright’s Series. The Lowell Grand Banks Dory kit is labeled as a Skill Level 1 kit and the instructions say, “For this introductory kit, no previous knowledge is assumed or necessary”. The second kit in the series, labeled as a Skill Level 2 kit is a 1:12 scale Norwegian Sailing Pram and the instructions say, “For this second, intermediate kit, some previous knowledge is necessary in order to be successful”. (The Norwegian Sailing Pram is reviewed separately here on MSW). A nice feature of the kit series is the listing of all tools needed to build each kit. Unpacking the box finds a 27 page full color instruction manual, a list of all the parts contained in the box, eight sheets of laser cut Basswood, two strips of 1/16” x 1/16” x 12” Basswood, one strip of 3/64” x 1/8” x 12 Basswood, one strip of 3/64” x 3/64” x 6” Basswood and a 12” piece of 2mm (0.08”) nylon line. Overall, the materials are very good. There are two versions of this kit available. The basic kit (#1470) and the basic kit with the addition of all tools, paint and glue needed to complete the kit (#1470CB). The tools and paint included are tweezers, 6 mini spring clamps, 3 paintbrushes, 2 pieces of sandpaper (150 & 220 grit), a Model Expo brand (Xacto type) knife and 3 blades (#11, saw and chisel), wood glue, Model Expo brand 1 oz. bottles of acrylic Ochre paint and Bulwark Dark Green paint. I highly recommend the new Shipwright series of kits from Model Shipways. I recommend this kit for the first kit to build from the series. If you are asked by a fledging modeler to recommend a good kit to start with I have no hesitation in recommending that they be told to look at the new Shipwright’s Series and that this kit be number one.


- 2 replies
-
- 11
-

-
- kit review
- Lowell Grand Banks Dory
- (and 1 more)
-
I just got the new club newsletter this AM and Bob's info is still printed - same info including the expired domain.
-
Gary: Great work. A tip for the tires. There are usually some holes drilled in the bottom of the tire to let water drain out. About 1-inch diameter. Kurt
-
Yes that was established by others. I emailed him but I am not going to give out his email. That's why I said to call or write him.
-
Pat: Badger has a fairly new primer paint for 3D printed parts. It is called 3D Prime. It's made to stick well to the 3D printed parts - some paints have difficulty sticking - and they smooth out the surface pretty good. As part of the 3D Prime line they have a translucent primer called 3D Surface Smoother that handles the rougher striations but your parts look smoother than one that need this option. 3D Prime is designed for airbrushing like all of their paints but can be brushed. With guns I wouldn't try brushing with any paint but if I remember correctly you do have an airbrush.
-
This is Bob's information from a club newsletter. I have communicated with him recently and he is selling the motor upgrade kits. Call or write him if you want a kit. Kurt Ship Ahoy Models 39 Pearl Road Saugus, MA 01906 Equipment For Sale • Model Maker’s Thickness Sander, 1/4 HP motor • 6" Tilt Table Disc Sander, 1/4 HP motor • Seizing and Serving Tool. • Upgrade your Preac table saw with 1/3 HP motor; Complete Kit - motor, cord, 1/4" V belt, motor mount and base - $100 <http://www.shipahoymodels.com/> Bob Prezioso 781 231-0212
-
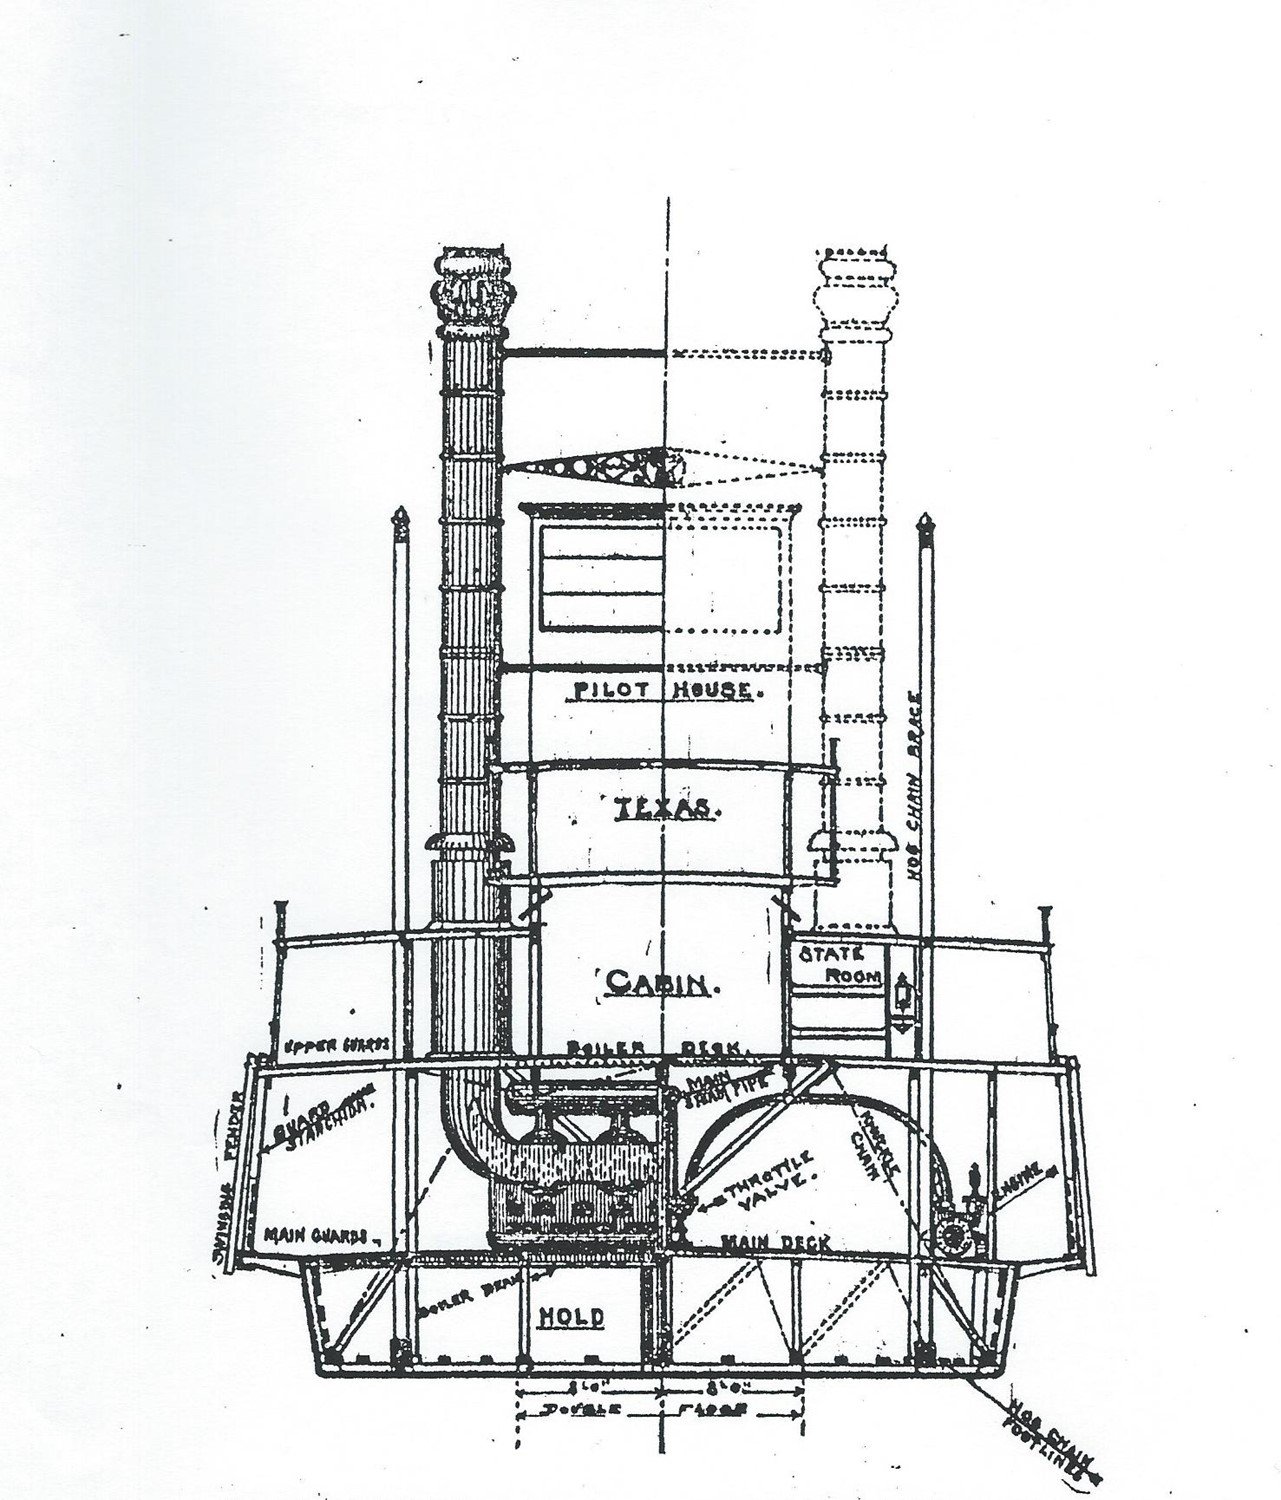
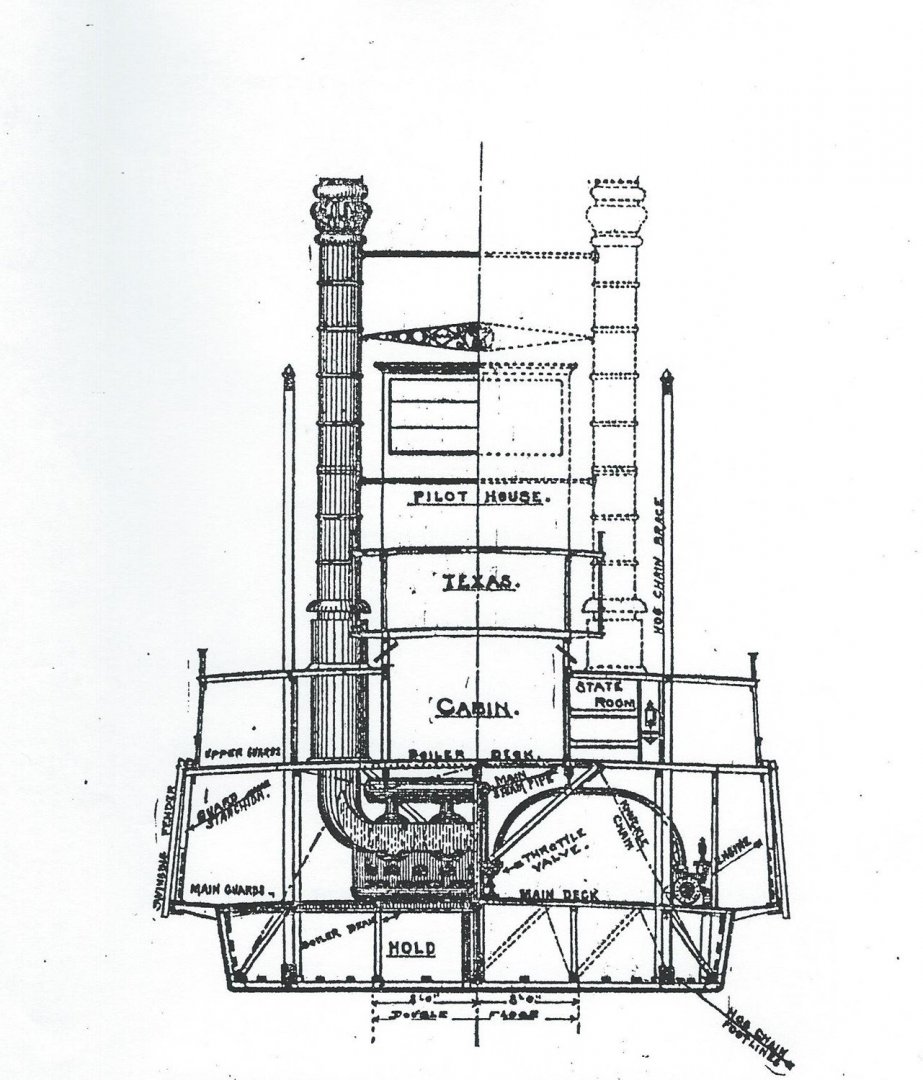
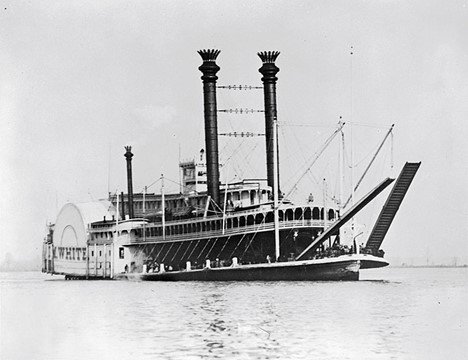
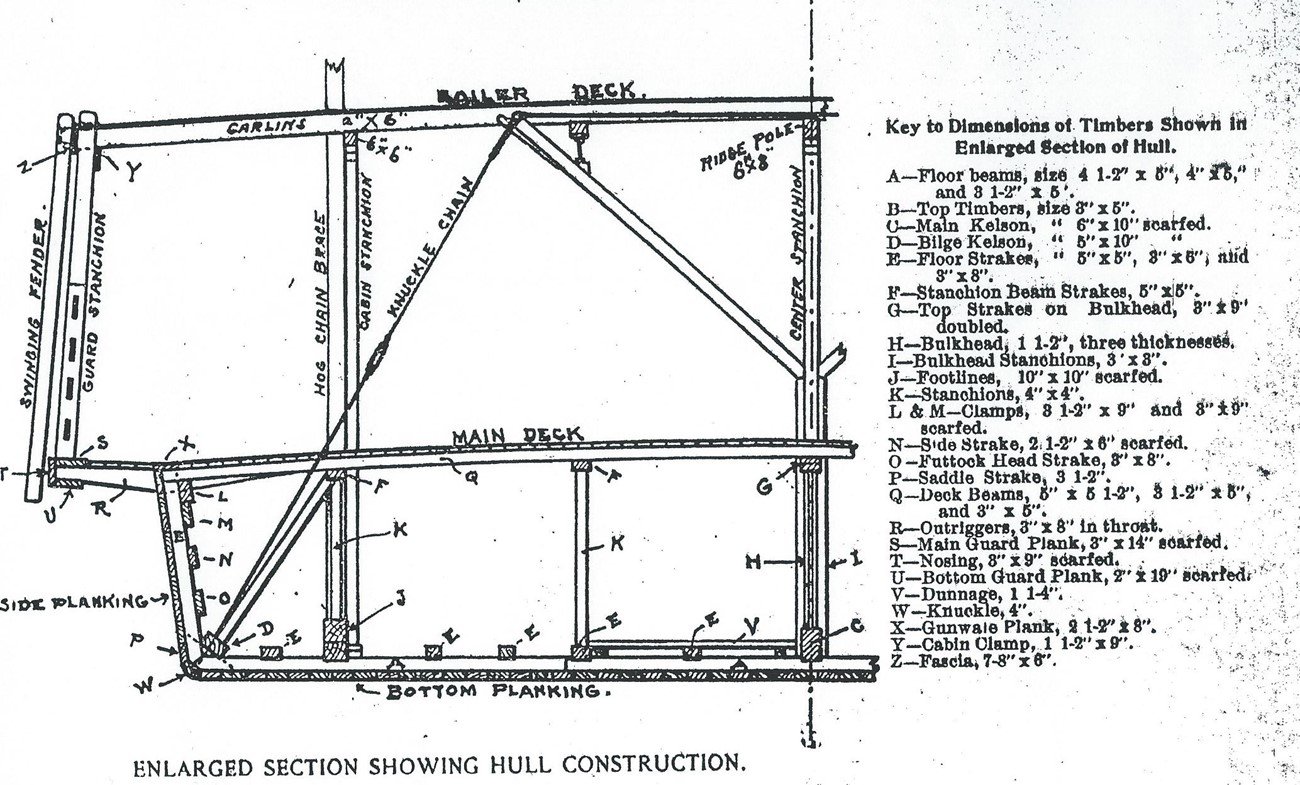
Here is some info on transverse chains from a talk at a NRG Conference in St. Louis, MO in 2013 presented by Jack Custer a noted expert on steamboats. Jack was the Editor and Publisher of the Egregious Steamboat Journal. The talk was on Steamboat Architecture. A photo of the J.M. White is also included. I think the drawings and photos were printed in the Egregious Steamboat Journal at some time.
- 599 replies
-
- 5
-
-

-
- sidewheeler
- arabia
- (and 4 more)
-
I thought the photo I have was of the J.M. White but I must be mistaken. The photo I was thinking of was provided by Ralph DuPae who found/provided most of the photos in the museum's collection.
- 599 replies
-
- 2
-
-
- sidewheeler
- arabia
- (and 4 more)
-
I agree when it's small scales. I build most models at 1/24 or 1/12 and some at 1/48 and it shows at these scales.
-
Stay-Brite blackens very well.
-
The scriber from UMM is very good - have used one many times UMM03 UMM™ Third Generation Scriber SCR-03 "Universal" I have used it mostly on plastic to delineate door and window seams/openings in scratch built tugs where there is a line visible where panels and components join. However, I agree with Roger that scribing the deck will give you an unrealistic appearance.
-
Stay-Brite has plenty of strength to with sand any amount of tension that can be put on rigging a model ship. I have used it with wire rigging on 1/12 scale models. I would say that the yards or even the mast will break before a Stay-Brite joint. Used to use silver solder all the time - started with radio control boats and needed it for certain joints - rudder, control arms, etc. Tried Stay-Brite on those joints and tried to break them and gave up and it's very rare that I use silver solder today.
-
I was told there will be no new books but I am sure Bob will continue to sell the remaining books on hand. If you want any buy them ASAP.
-
Glad you resisted the urge to get a photo floating on the river
- 599 replies
-
- 4
-
-
- sidewheeler
- arabia
- (and 4 more)
-
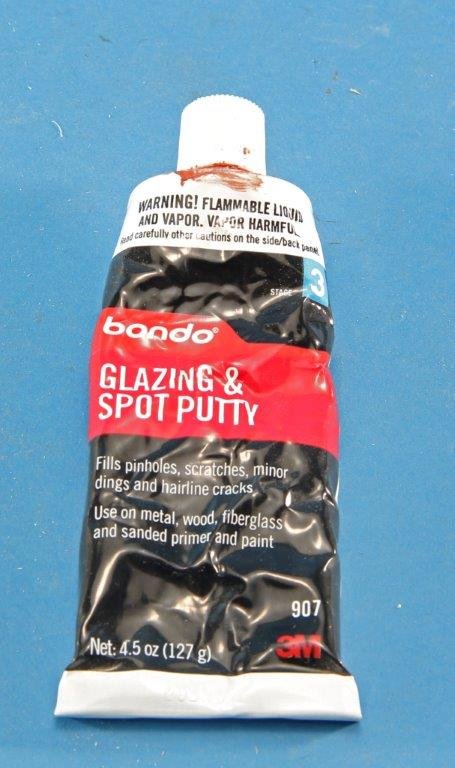
When I want wood to be smooth I use an automotive body filler meant to fill scratches in final or close to final sanding. It adheres to wood w/o any problem. Bondo Glazing and Spot Putty. This isn't meant to fill massive dents, dips are voids - that's regular body filler Bondo. I use an old credit card as a squeegee to force the filler into the wood grain - don't let it build up. When cured I sand it and see how smooth it is. If you want the part to look like metal or fiberglass multiple coats might be needed. Some use Spackle wall hole filler the same way.
-
Unless the motor is classed for use in a spray booth with combustible vapors (NEC Class 1 Division 1) you are just asking for trouble. Using a house fan in place of a properly classed exhaust fan is an accident waiting to happen. It's not IF a fire will occur but WHEN. Water based acrylics are the only safe paint to use in a spray booth not using the proper type of fan. No amount of filtration in front of the motor makes this safe - filters only trap particulate matter not the dangerous fumes. The rate you mention is the lower and upper combustible limits of a combustible or flammable liquid - the % of combustible vapors to air mix. Good luck.
-
BUYING A "PAINT SET"
kurtvd19 replied to MadDogMcQ's topic in Painting, finishing and weathering products and techniques
I agree with Grant - buy what you know you will use and then add colors as the need arises. -
Eric: Feel even better about it because I had absolutely no input on the selected images so the model made it without my positive bias toward riverboats. Kurt
- 599 replies
-
- 7
-
-
- sidewheeler
- arabia
- (and 4 more)
-
Yes it was there and still is. It can be read off the NRG website or downloaded as a PDF. The link is below: https://thenrg.org/resource/articles/materials-in-ship-models
-
Try Krylon Premium Metallic - Original Chrome. Works great.