kurtvd19
-
Posts
3,019 -
Joined
-
Last visited
Content Type
Profiles
Forums
Gallery
Events
Everything posted by kurtvd19
-
 Yes. At least in front of the table - spill some paint = BIG trouble. If you are using acrylics your only issue is spilled paint. Acrylic over spray will be dry before it hits the floor - you may need to sweep up some dust. If using solvent paints they are not always dry before hitting the floor and make sure the fan at the rear is explosion proof.
 -
Better use some sort of drop cloth if not using acrylics.
-
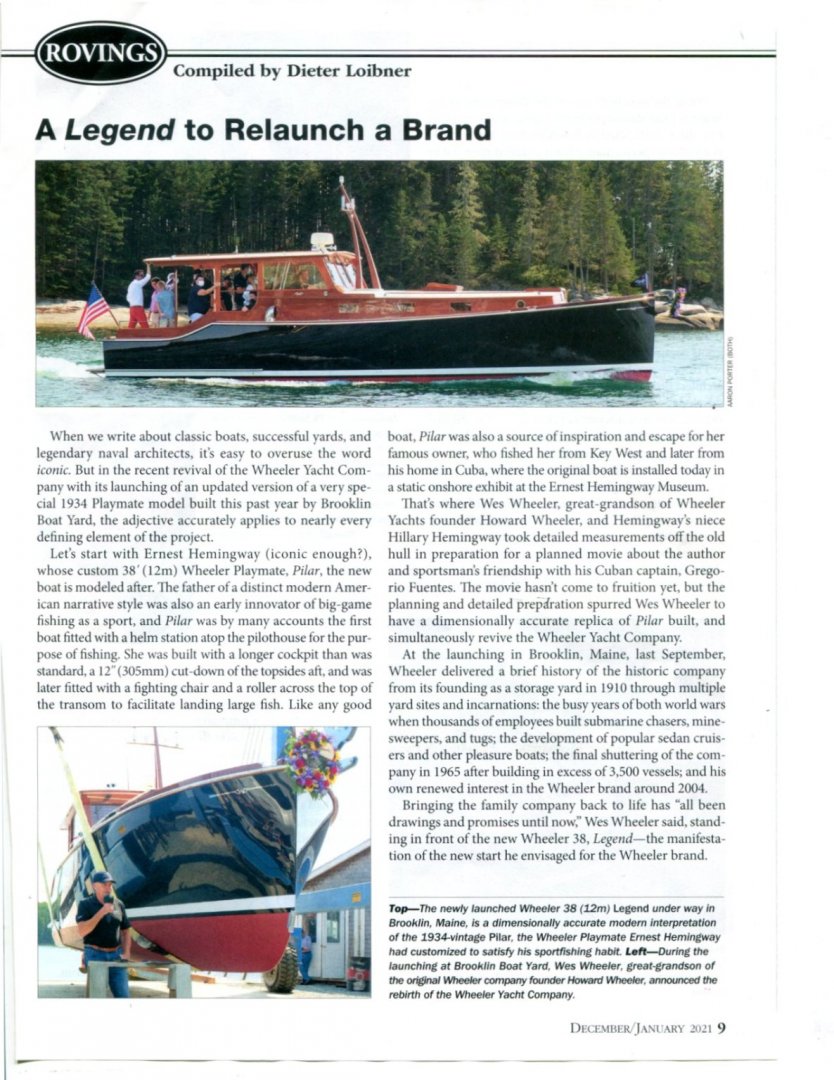
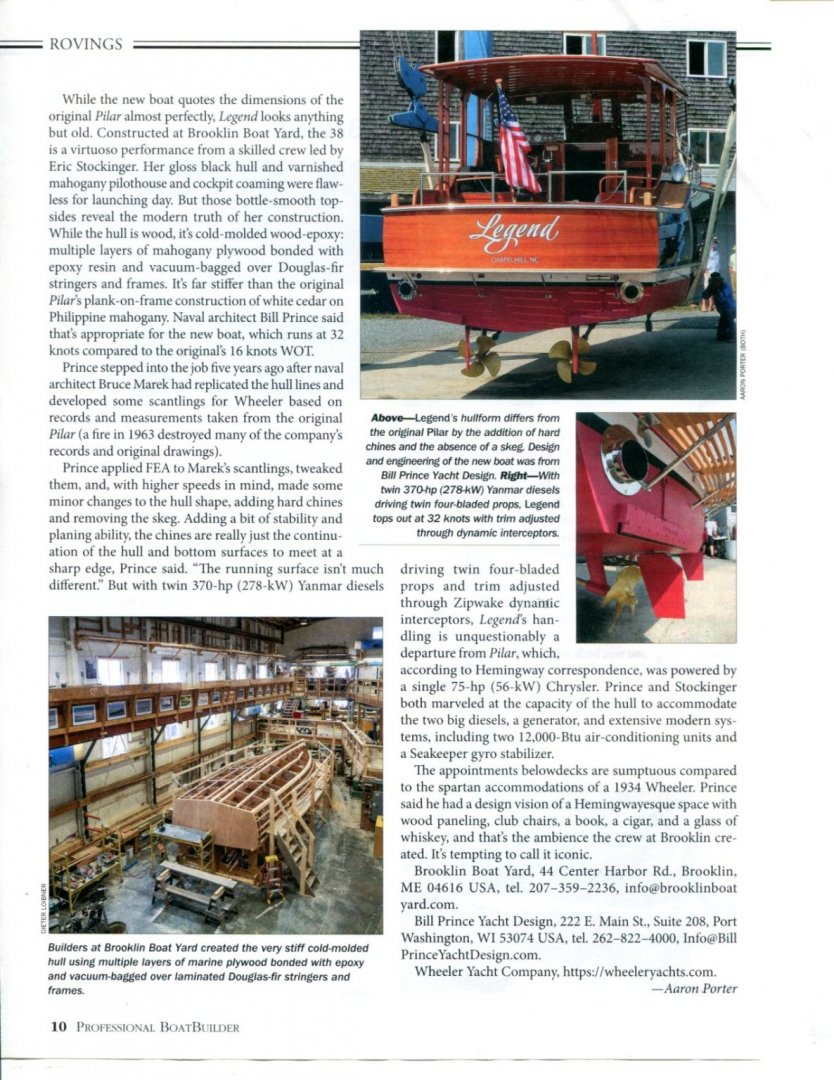
Pat: Thought you and others who followed this great build would like to see that Hemingway's boat is being revived in a new design. This is from the Dec./Jan. issue of Professional BoatBuilder magazine (a Wooden Boat publication). Kurt
-
Can you please let us know what issue it was?
- 100 replies
-
- 1
-

-
- pauline
- BlueJacket Shipcrafters
- (and 1 more)
-
Model Photography/Scheimpflug Principle
kurtvd19 replied to Charles Green's topic in Modeling tools and Workshop Equipment
I haven't used a view camera in a long time. Got rid of my darkroom when I concluded that spending time in it took time I could be shooting so farmed the darkroom work out to the pro lab and concentrated on the photography. Sold the 4x5 and the RB67 just in time before you couldn't give away film cameras (and a 4x5 digital back is just too much cash. Anybody want to buy a few Canon F1's and a bunch of Canon lenses (that don't work on my digital Canons)? Enter the digital age and knowing the limitations of a TS lens decided that focus stacking was the way for me to go. A bit of hassle but it does work. Kurt -
Check the TAMU site too. They have done stuff in the Great Lakes and Lake Champlain (the 6th Great Lake)
- 16 replies
-
- 2
-
-
- figurehead
- Thesis
- (and 2 more)
-
The Nautical Archaeology Program at Texas A&M Univ (TAMU) also has students thesis available for download. https://nautarch.tamu.edu/academic/alum.htm
- 16 replies
-
- 5
-
-
- figurehead
- Thesis
- (and 2 more)
-
I am working on a kit review as I write this - actually I can't do both at the same time...😎 It will be just a bit before it is posted but it's a great Level 3 kit.
- 43 replies
-
- 4
-
-
- Norwegian Sailing Pram
- Model Shipways
- (and 1 more)
-
Newer to Model Building, requesting assistance.
kurtvd19 replied to histprof1066's topic in Wood ship model kits
Do a search for build logs of the Billings Vasa kit here. There are more than one. Should help you just by looking at the logs but feel free to ask questions. -
Masking tapes are designed for use with solvent based paints or water based - but few work for both. Check the tape manufacturer's data sheets for their compatibility.
-
Repaint with the correct paint that is flat. Just consider it a second coat.
-
Do a search for "furled sails" it has been discussed here. One thing that all say about doing this is to not try to use a full size sail to furl. Use a smaller length or the results will be way too cumbersome.
-
2021 NRG CONFERENCE
kurtvd19 replied to kurtvd19's topic in NAUTICAL RESEARCH GUILD - News & Information
We have had the Conference in San Diego 3 times. -
The instructions plus the photos should give you a good guide but below are a couple of on-line dictionaries that should help. If you want a good print book The Oxford Companion to Ships and the Sea edited by Peter Kemp is what sits on my shelf. I am not usually a fan of Wikipedia but this reference is pretty good. https://en.wikipedia.org/wiki/Glossary_of_nautical_terms http://phrontistery.info/nautical.html https://officerofthewatch.com/tools/maritime-dictionary/
- 44 replies
-
- 3
-
-
- half hull planking project
- half hull
- (and 2 more)
-
Congratulations Chuck!
-
The NRG store has been doing increased business during the pandemic. People are building and reading.
-
Compound Plank Bending
kurtvd19 replied to Neil10's topic in Building, Framing, Planking and plating a ships hull and deck
Bob is right - the Bible when it comes to bending wood. This govt agency more than earns their keep. We had a speaker from the Madison, WI lab speak at the 2007 NRG Conference. After he explained what happens to wood when Ammonia is used to help to bend wood I am very sure nobody in attendance that day has ever used Ammonia again and hopefully has cautioned others not to use it. An interesting ship related item - I visited the Wood Services Product lab in Madison when I participated in a building code class at the U of W - and watched some deflection testing of wood beams. They had a full size hull section of several frame pieces and planking off to the side built by the shipwrights involved with the USS Constitution's 200th Anniversary rebuild. It was built so the lab could design and test a method of gauging the wood condition of the hull while the before it was moved to the drydock. Similar to the electronic way a metal hull's thickness is gauged. Doing so allowed the shipwrights to have a very good idea of what had to be replaced before the ship was drydocked so plans could be made for the restoration. The lab director said they were going to have to do something with it soon to free us space and that the shipyard didn't want it back. I volunteered to take it off their hands but the govt is real fussy in how stuff is disposed of - it's probably still sitting there. If you ever get a chance to see a wood column load tested until it shatters I guarantee you will be impressed. -
Black Friday Deals for Modelers
kurtvd19 replied to jackieofalltrades's topic in Modeling tools and Workshop Equipment
MSW Sponsor USA Airbrush Supply has a special LETTERTOSANTA discount offer from now until Wednesday December 3, 2020. 25% off their usual prices. USA Airbrush Supply always has the lowest Badger Airbrush products prices so 25% off can't be beat. -
Black Friday Deals for Modelers
kurtvd19 replied to jackieofalltrades's topic in Modeling tools and Workshop Equipment
Model Expo's been sending daily emails about their sales. Sign up for their news - they are sponsors here. Check out the other sponsor's links - right side of the MSW main page. Kurt -
Some of the books had some pages not printed at 100%. I am sure this has been corrected for future prints.
-
Toni: Contact Cole Seskind as he purchased Roger Cole's Alert model. If they show on the outside I would follow Roger's work - if they are not on the outside I would put my money on Roger having the right answer. He didn't do things halfway. Roger gave me one of the 6 copies he did up documenting his work on that model - unfortunately it grew legs some time ago... Kurt
-
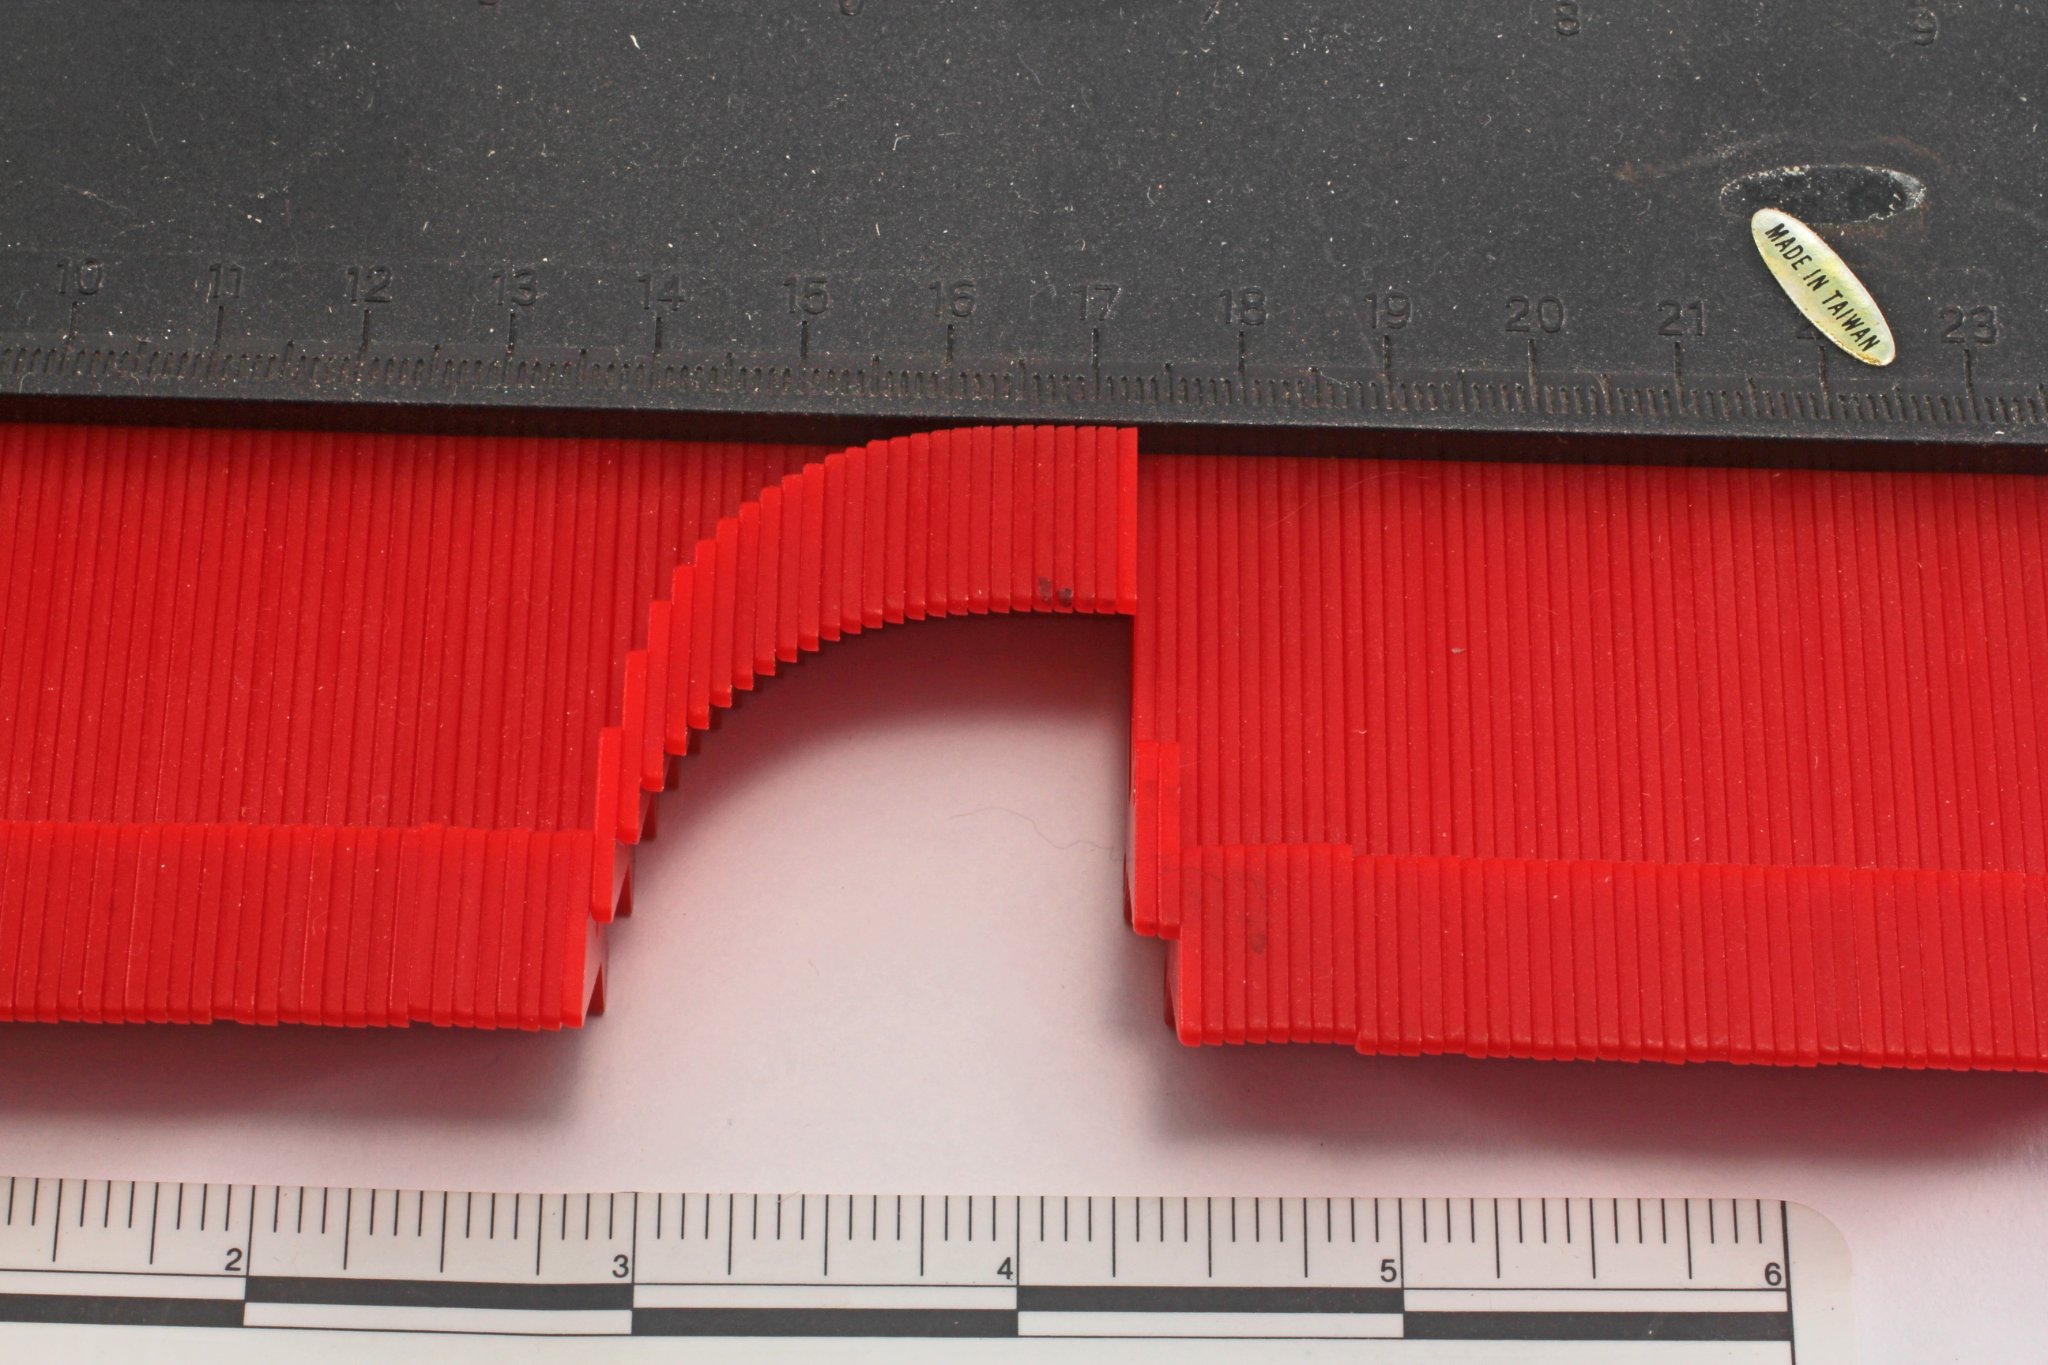
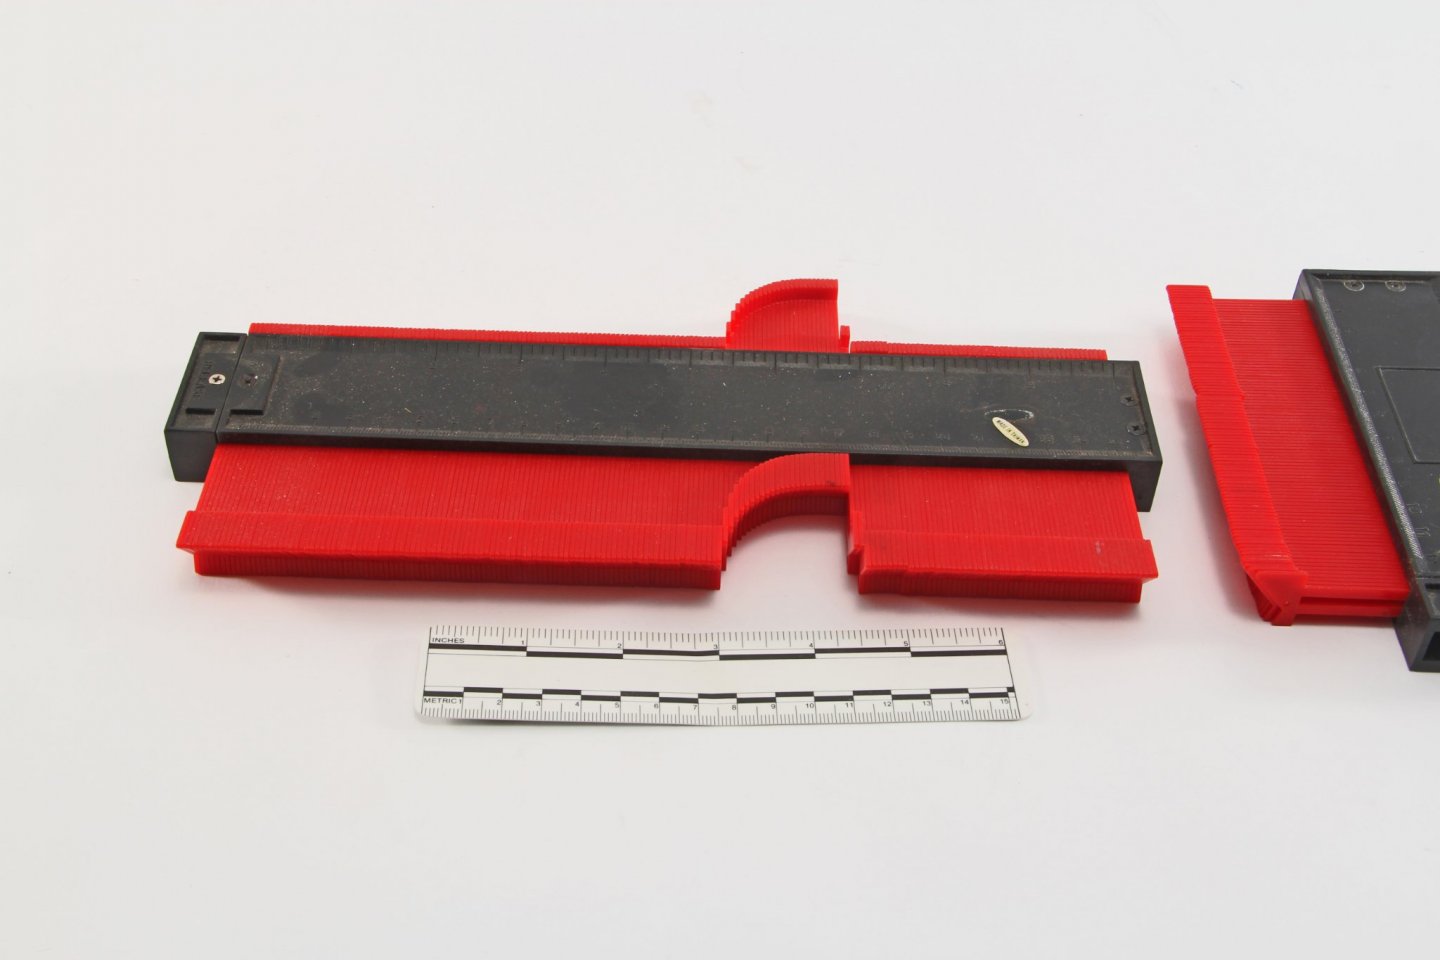
I found that the wire tools similar to what is shown here are finer but also a bit deeper/longer even this type makes a pretty smooth copy of the contour. A simple "fairing" of the points marked onto the piecec being made to fit will make a very close fit. The one drawback to this type of tool is the limited depth. They can also be laid into the hull at an angle making the relative depth workable. I have used these mostly to check symmetry. Have also used Klean Klay modeling clay to precisely match the contour but have found that some sort of support for the clay is needed - an undersized bulkhead like piece of heavy card or polystyrene with the clay on the outer edge so that it's not distorted when removing it to transfer the contour. Klean Klay is a non-drying clay that doesn't leave oil behind when removed and is often used to dam up areas when filling with expoxy or resin for reinforcements or making molds.

-
Use the rubber bands over the molds and transoms - no need for in between - no distortion.
- 43 replies
-
- 2
-
-
- Norwegian Sailing Pram
- Model Shipways
- (and 1 more)
-
Airbrush painting
kurtvd19 replied to Keithbrad80's topic in Painting, finishing and weathering products and techniques
Look at the Badger Airbrush paints. The Modelflex Marine Color line has 52 colors. Their RR Colors have a lot more. They are the exact same formula regardless of Marine or RR. These are all ready to use in the airbrush. USS Airbrush Supply is a sponsor here on MSW and note there is a discount for NRG/MSW (hoover the pointer over the banner to see discount code). Discount applies to all products. You will not beat the regular price from USS ABS - before discounts. Kurt -
OK. I could never get a jewelers draw plate to work on wood.