HOLIDAY DONATION DRIVE - SUPPORT MSW - DO YOUR PART TO KEEP THIS GREAT FORUM GOING! (Only 20 donations so far - C'mon guys!)
×


rafine
-
Posts
2,932 -
Joined
-
Last visited
Content Type
Profiles
Forums
Gallery
Events
Everything posted by rafine
-
 As always Nils, I'm impressed by your metalwork. Bob
- 2,625 replies
-
- 6
-

-
- kaiser wilhelm der grosse
- passenger steamer
- (and 1 more)
-
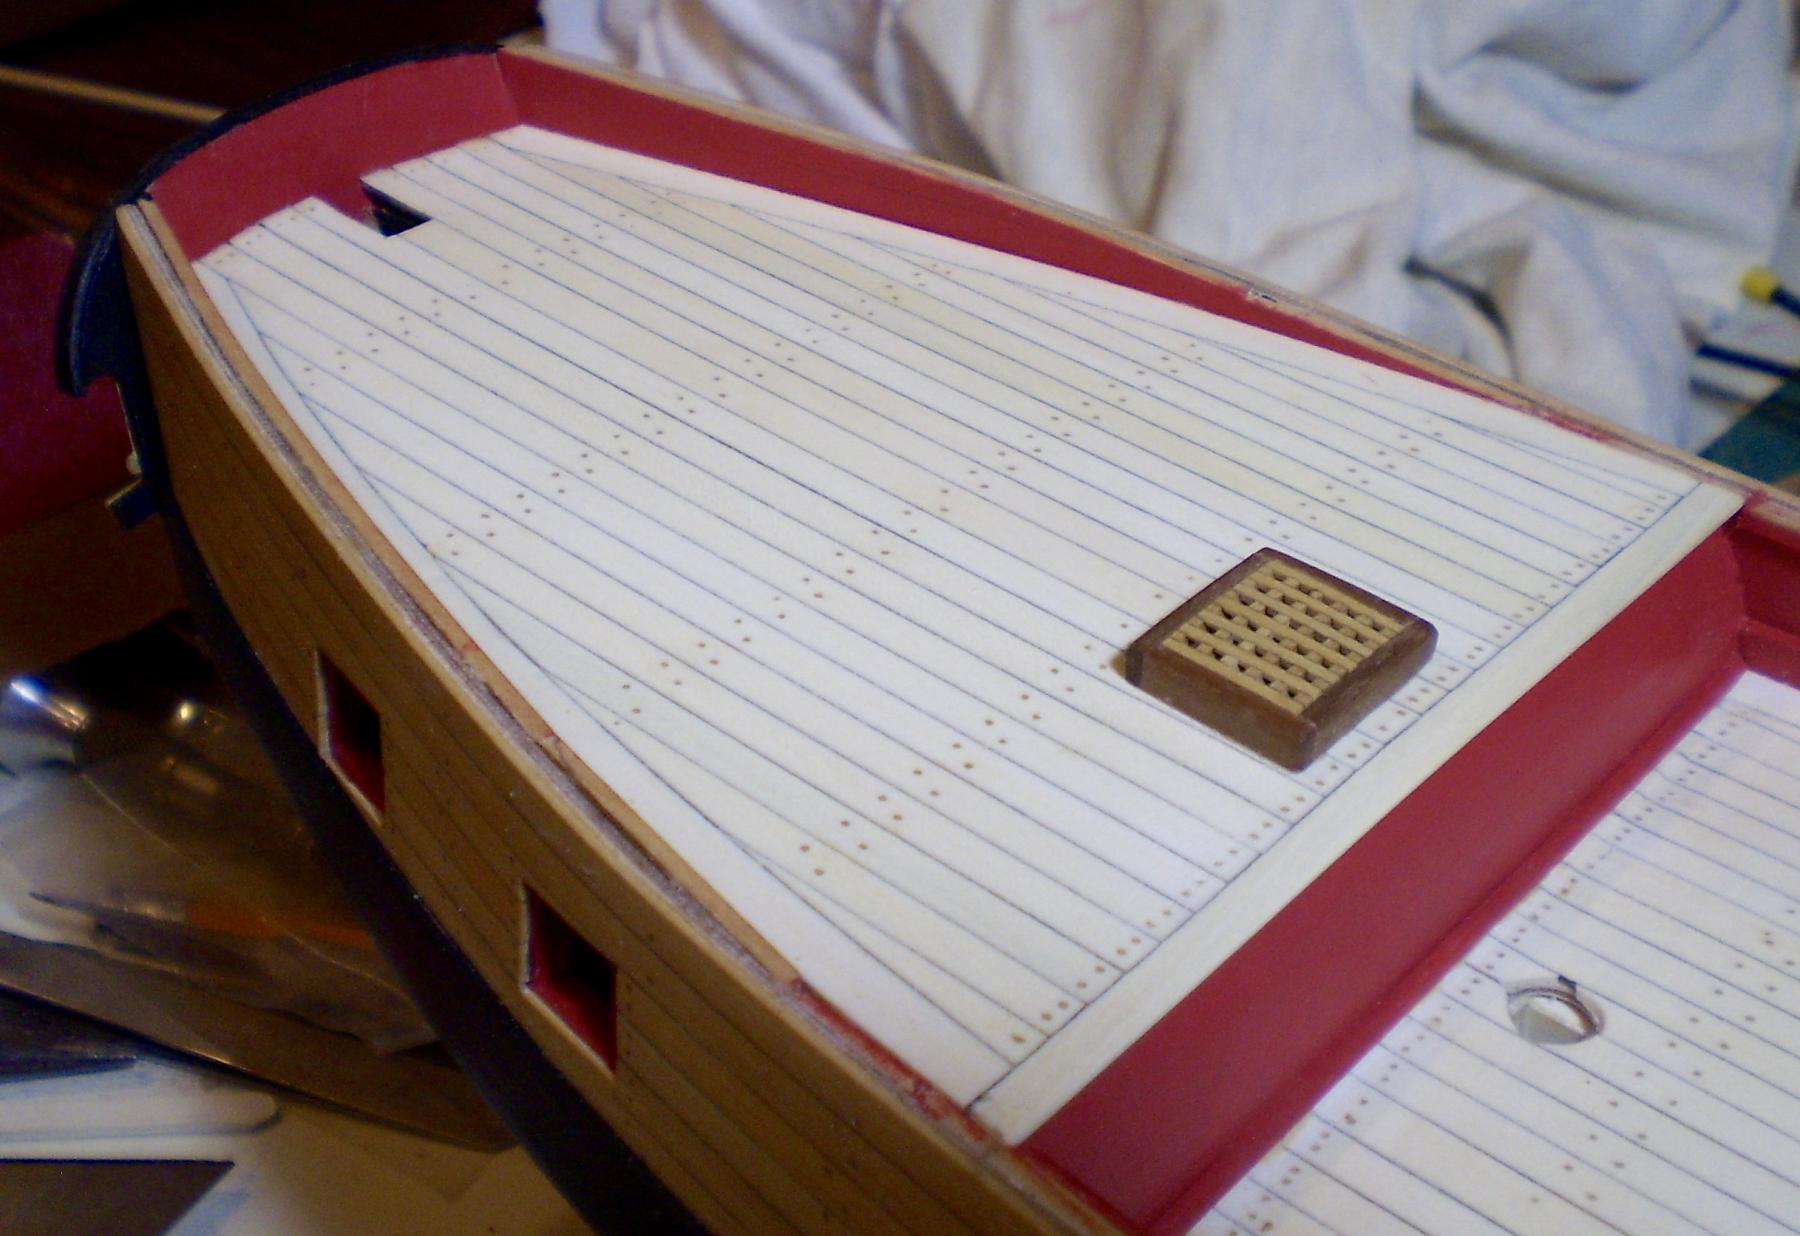
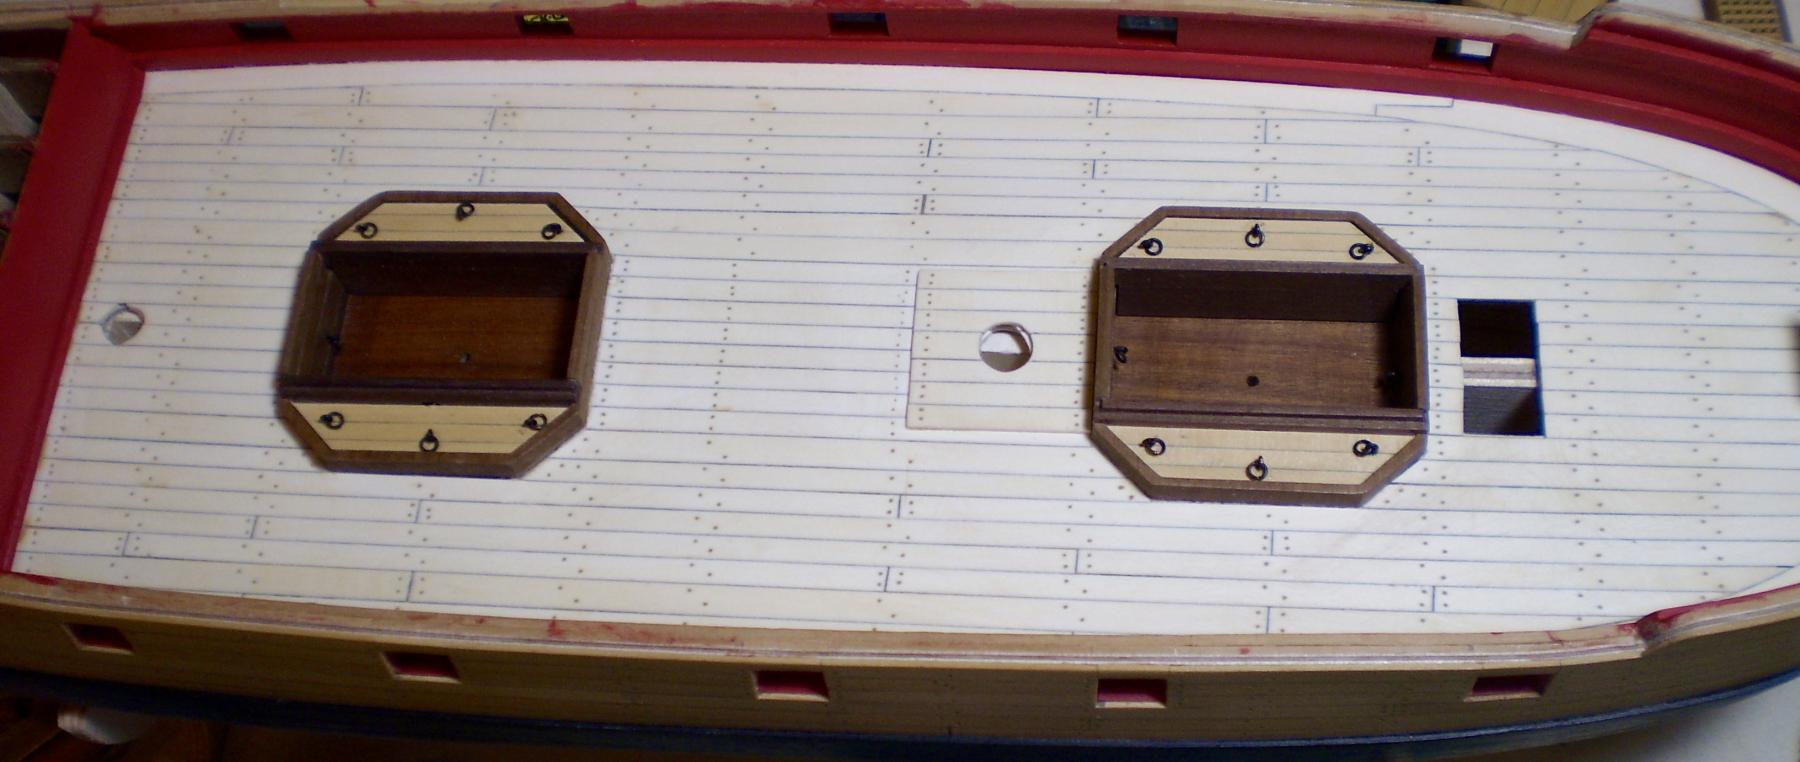
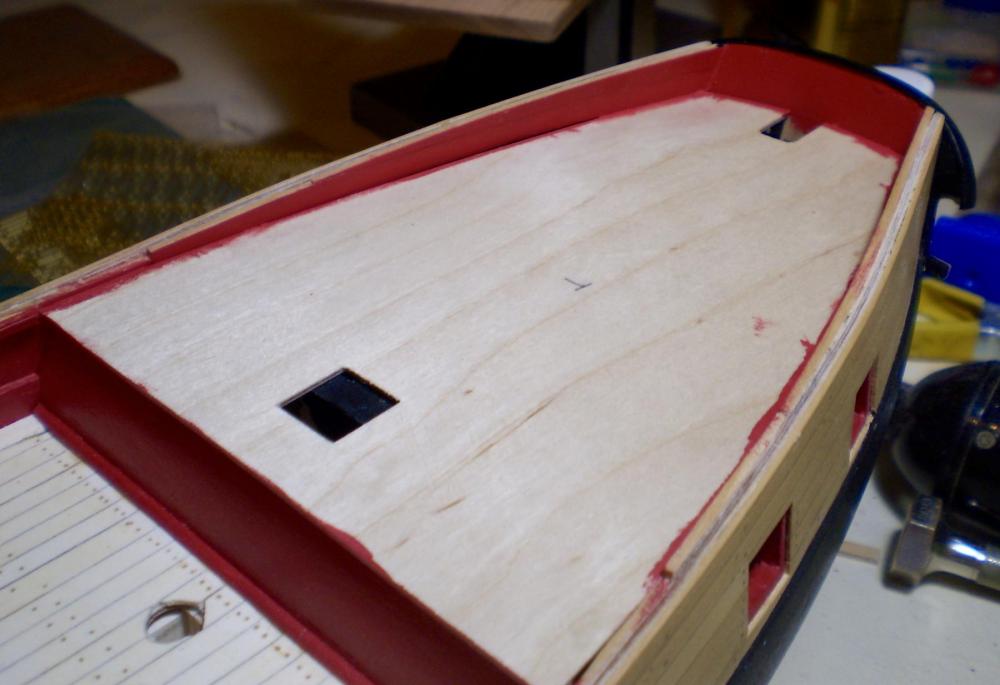
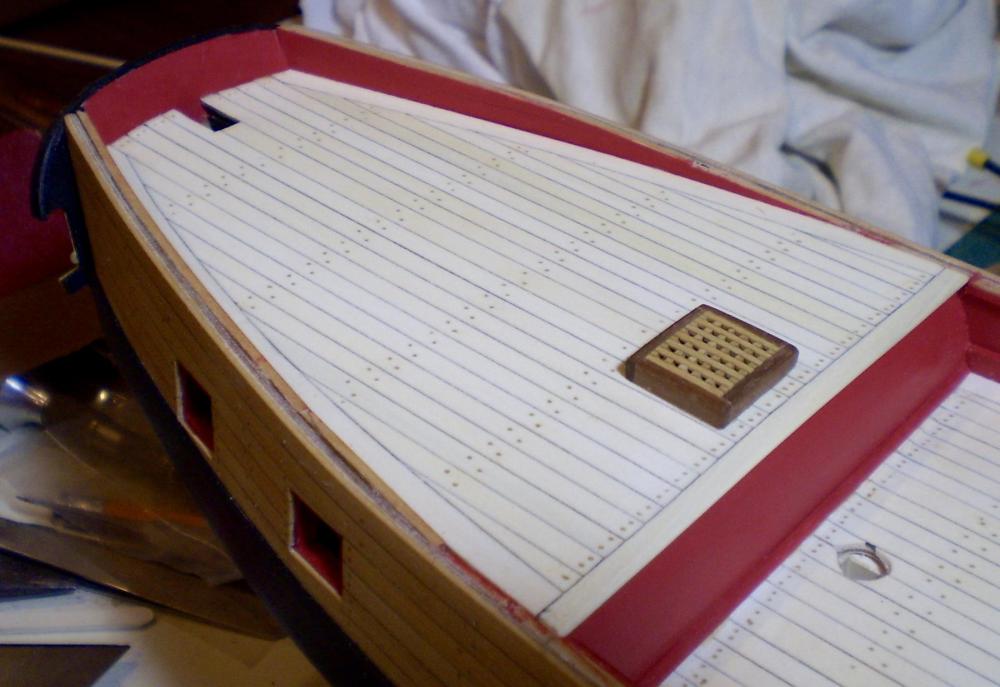
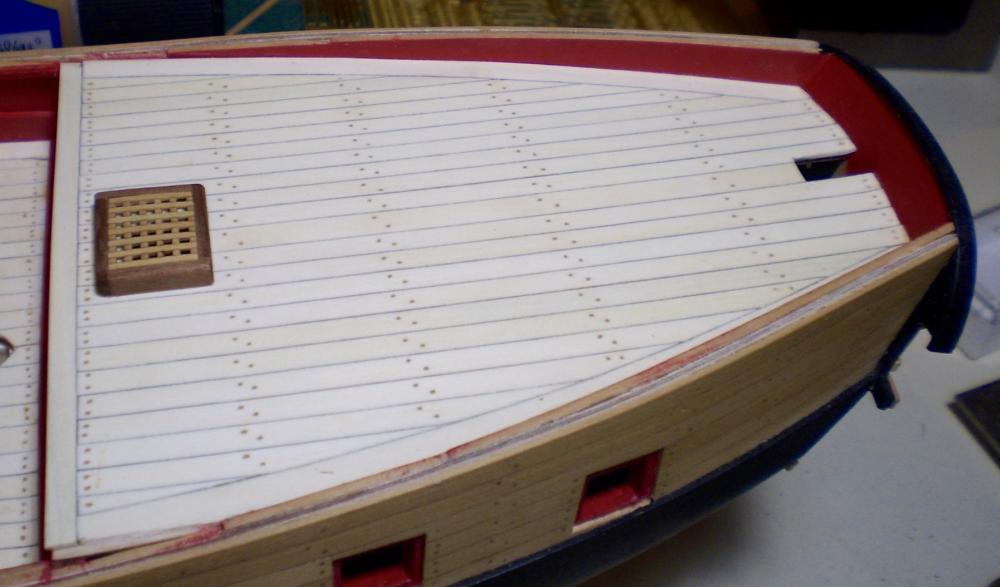
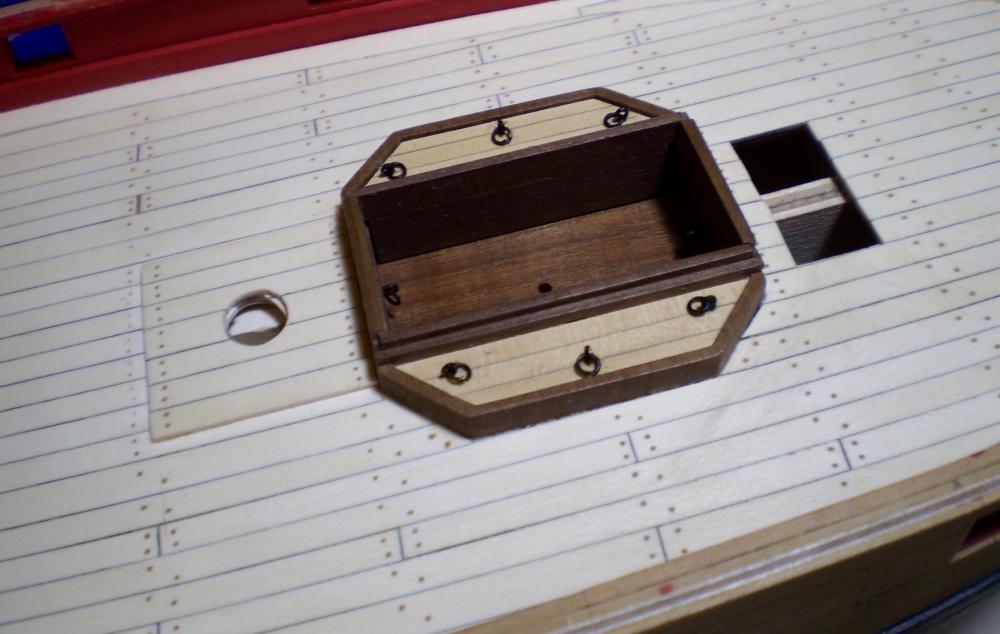
The quarterdeck is now planked. To begin with, I added the subdeck. Then, I lined the inner bulwarks with strip wood that was trimmed and then painted red. Next, I did the planking, using holly, beginning with margin planks that were bent to shape before installation. Once again, a pencil was used to simulate caulking on one side and one end of each plank. The last step was to do the the drill and fill treenailing, using golden oak filler. When the planking was done, I made up the quarterdeck hatch. As with the forward hatch, I used kit walnut strip for the coaming, and Syren boxwood grating material. All-in-all, a very straight forward segment that went pretty smoothly. Bob
- 563 replies
-
- 22
-
-
Thanks so much Nils, Scott, Don, Red and the "likes". Don, I think I may have had something other than coffee in my cup when I took those pictures. Not very good. I'm attaching a couple that, hopefully, are better. Bob


- 563 replies
-
- 22
-
-
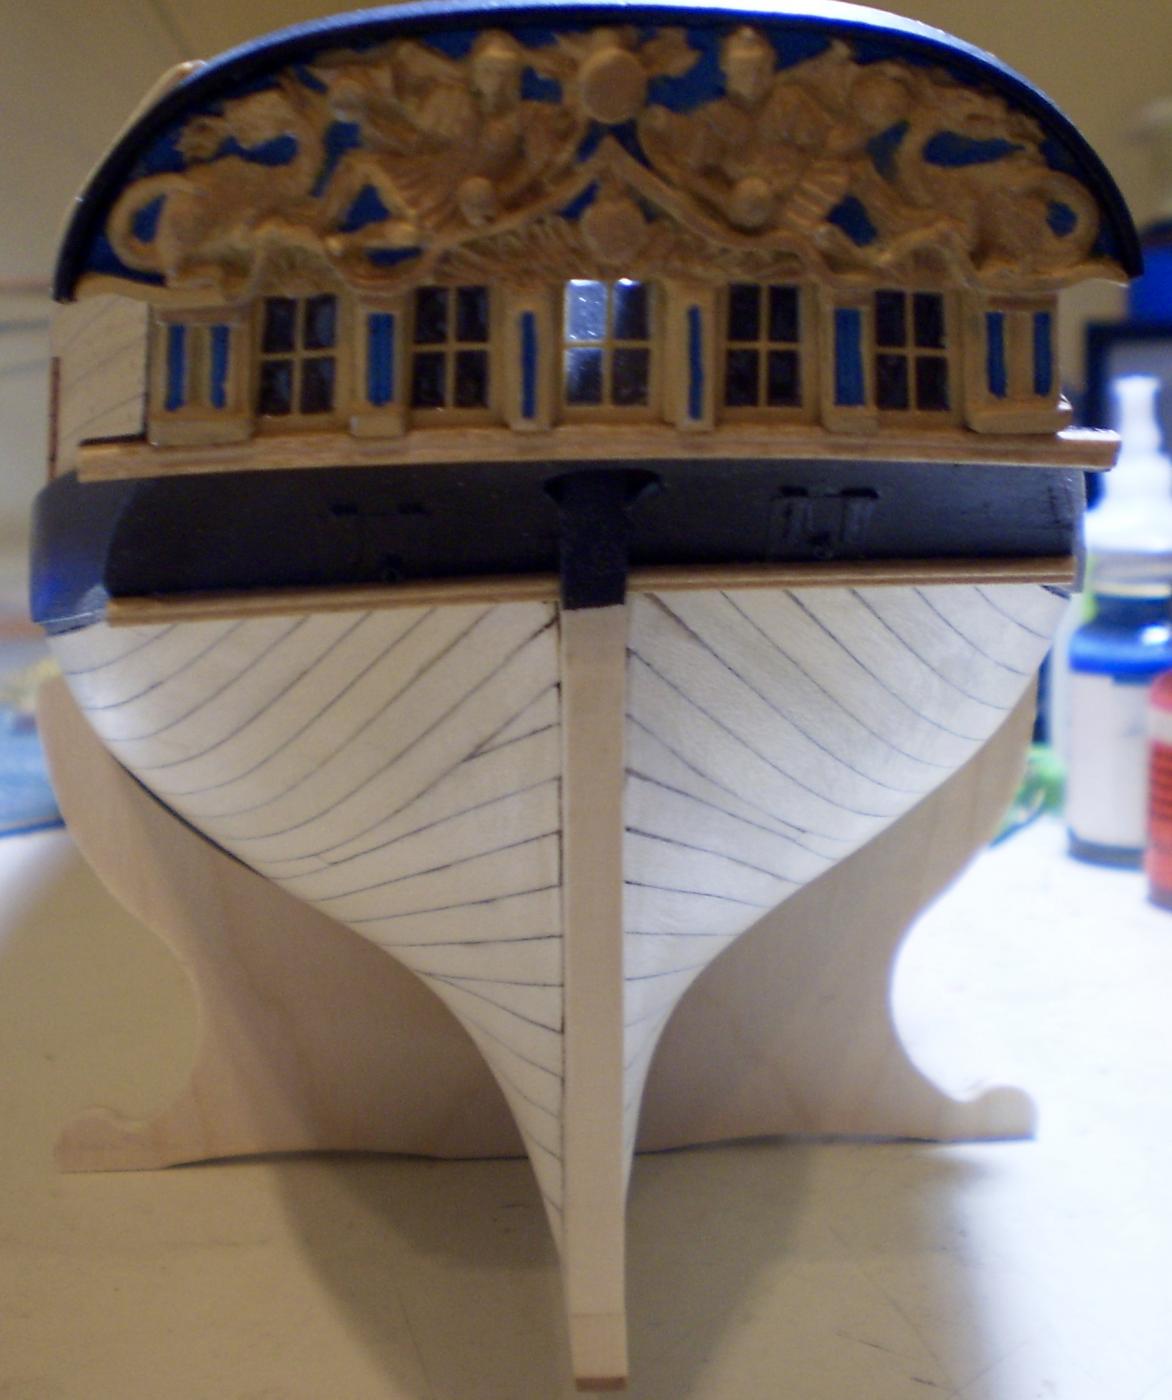
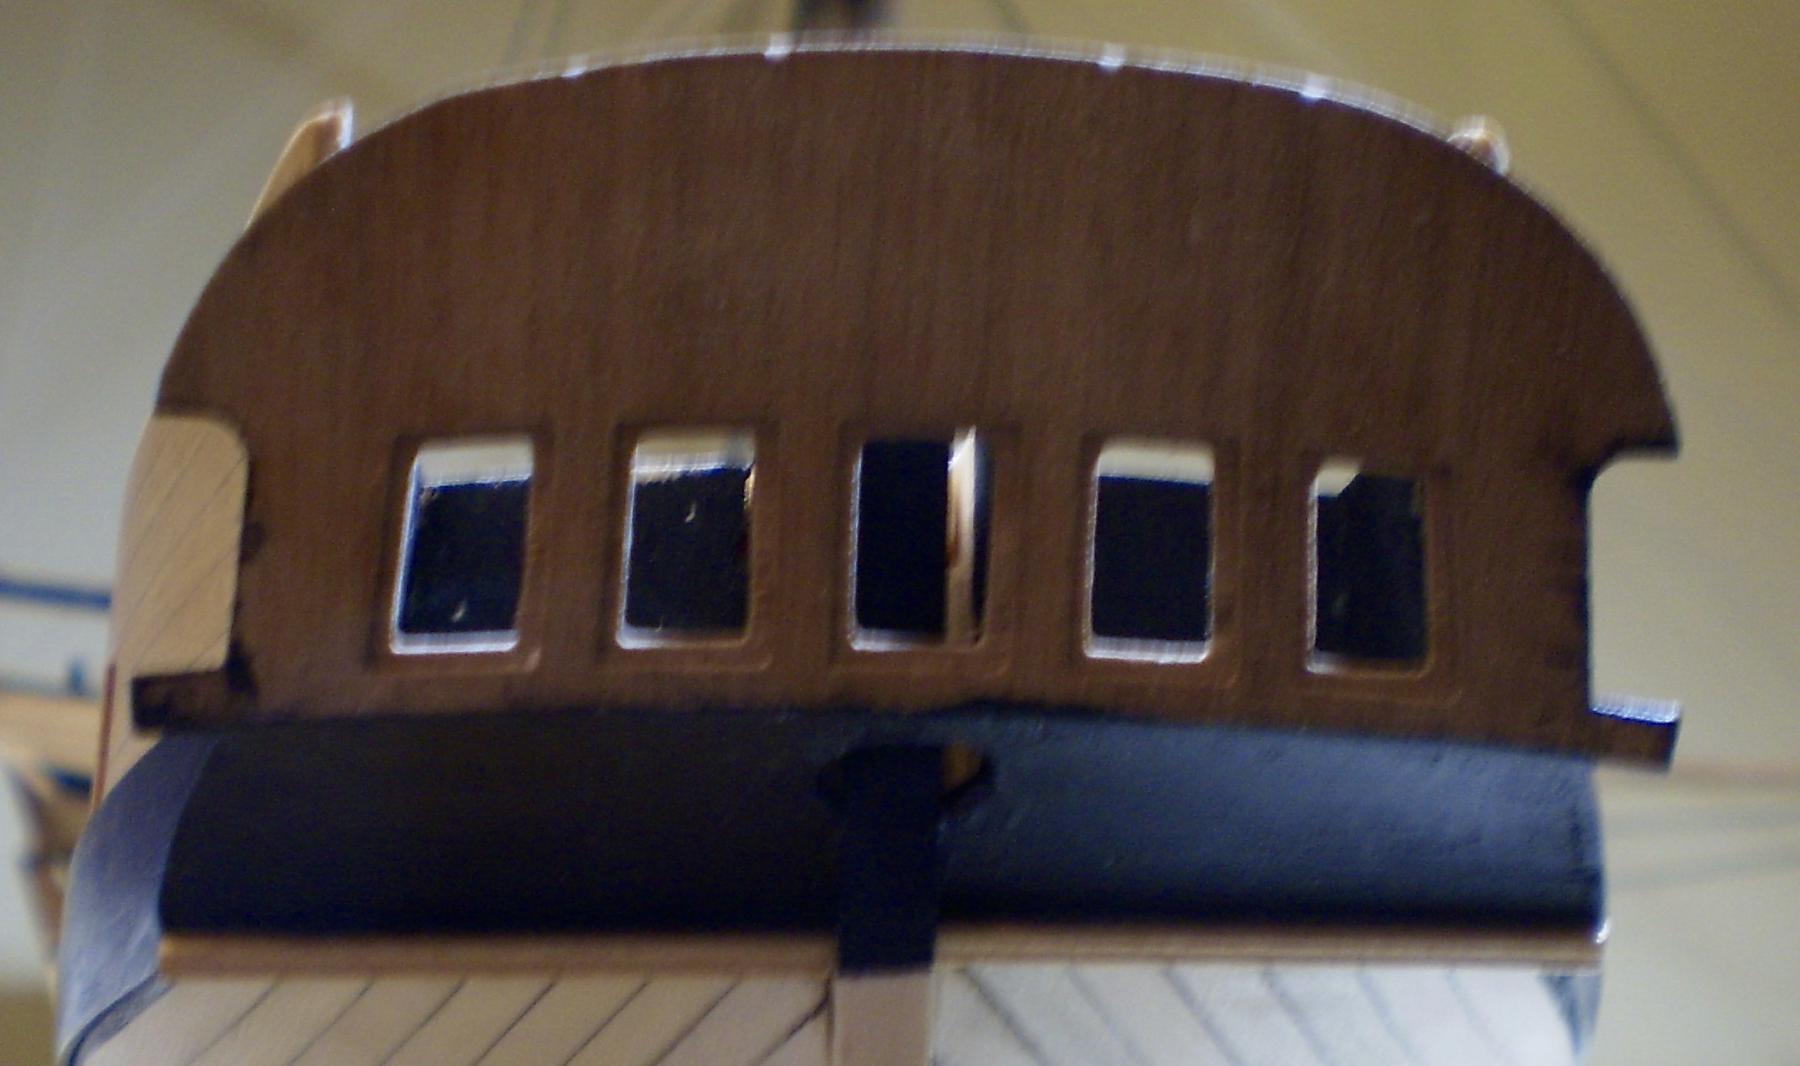
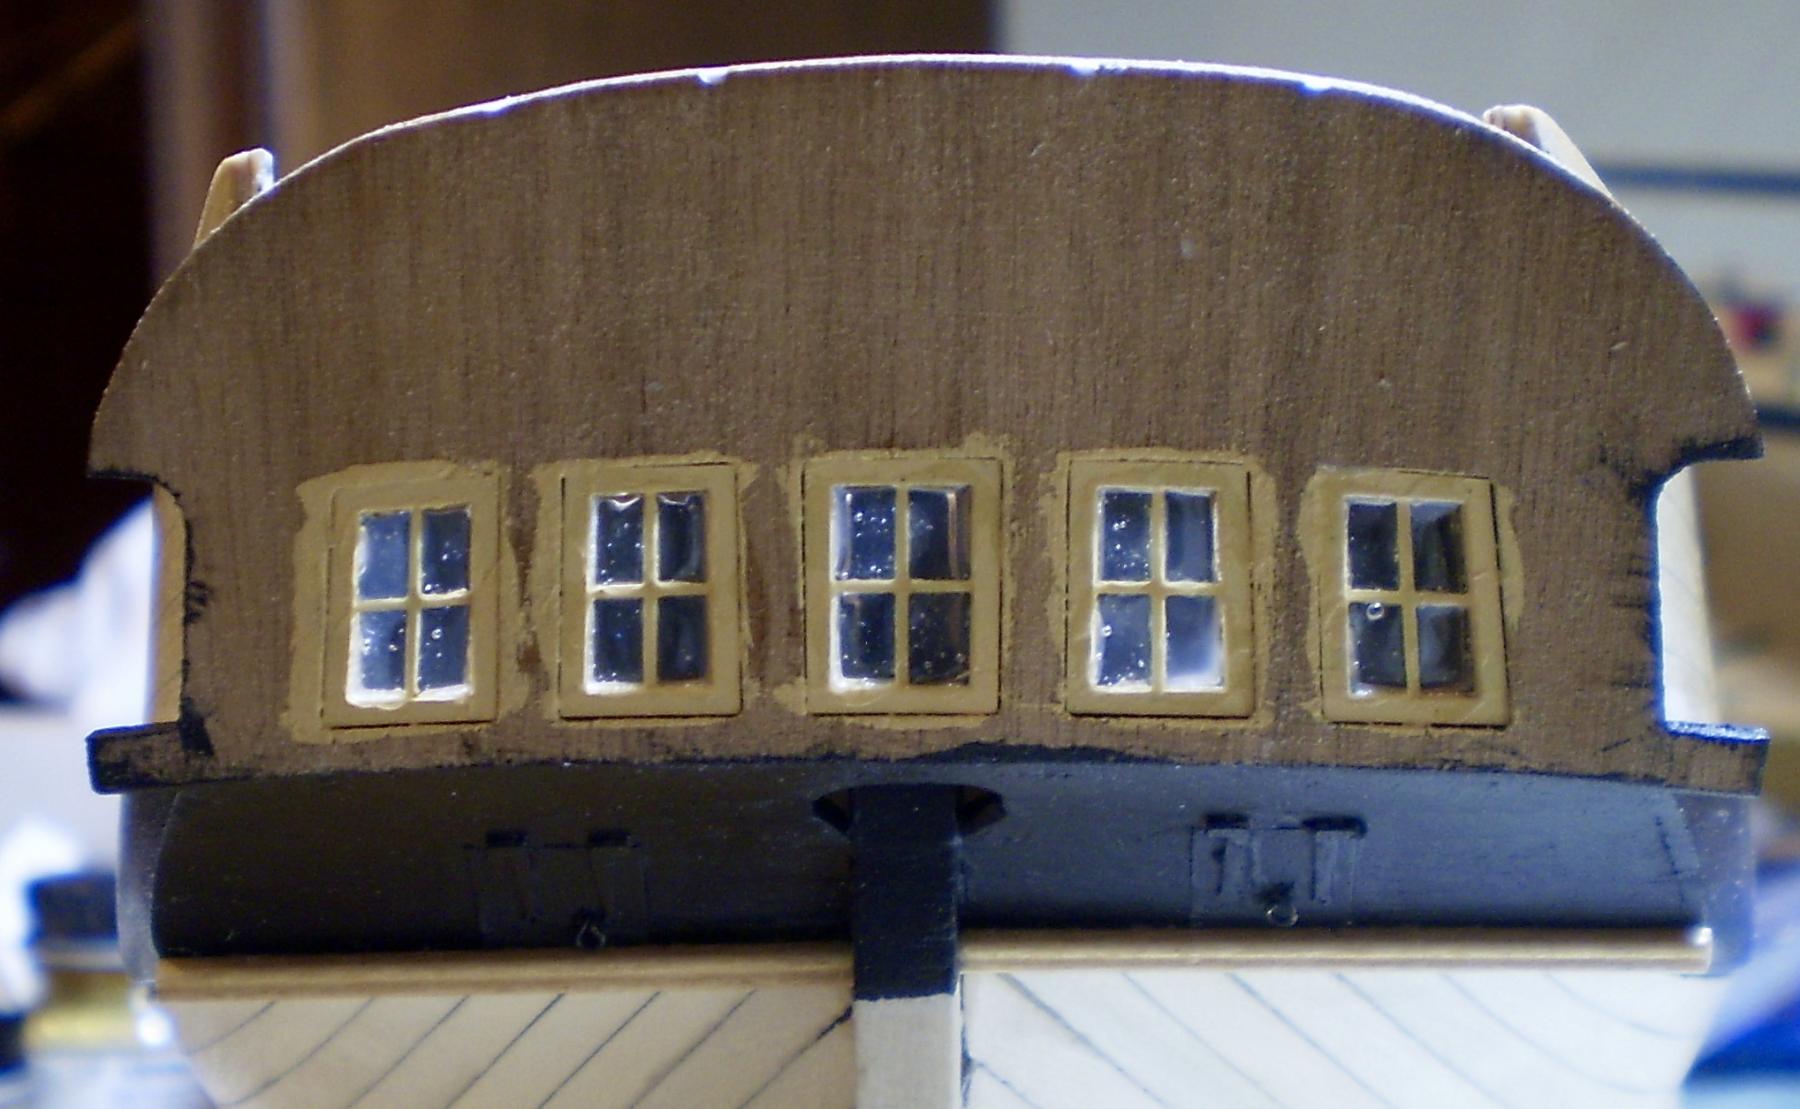
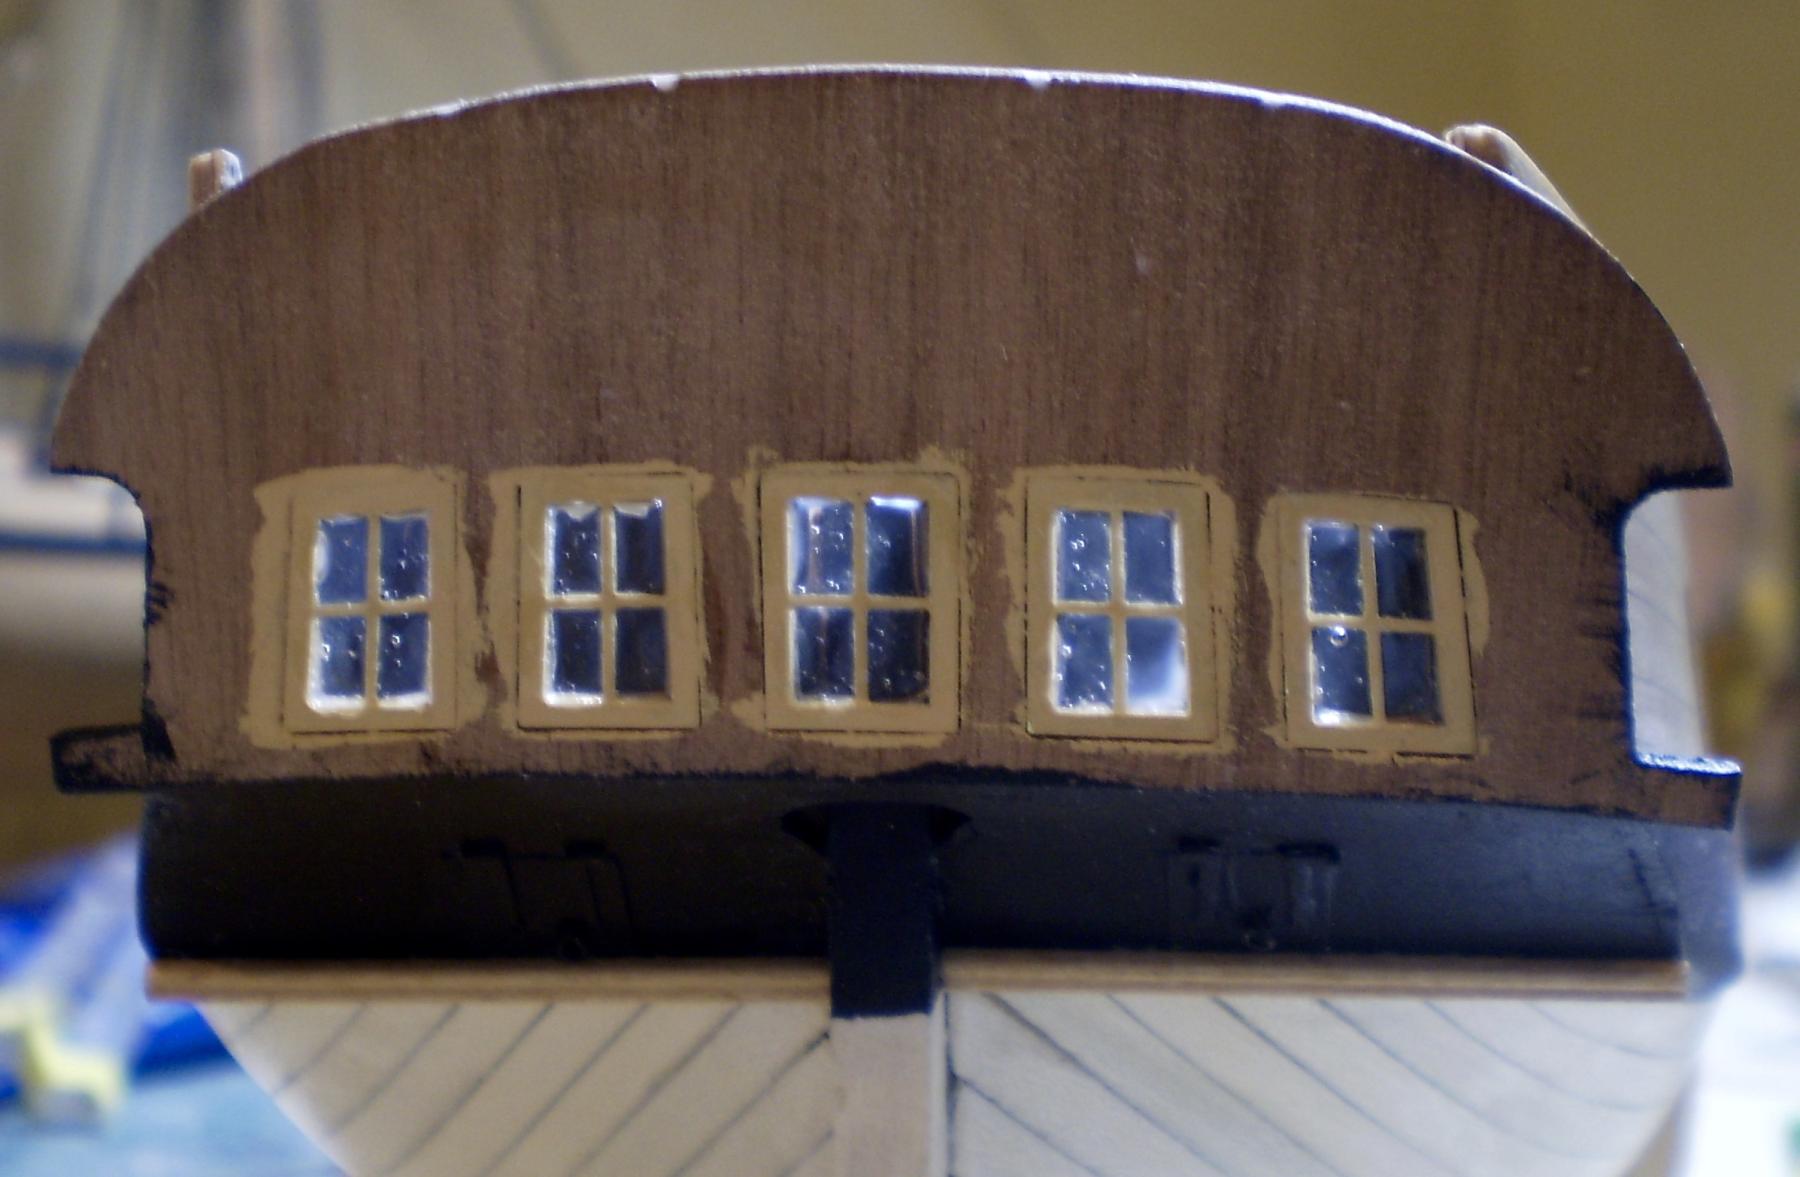
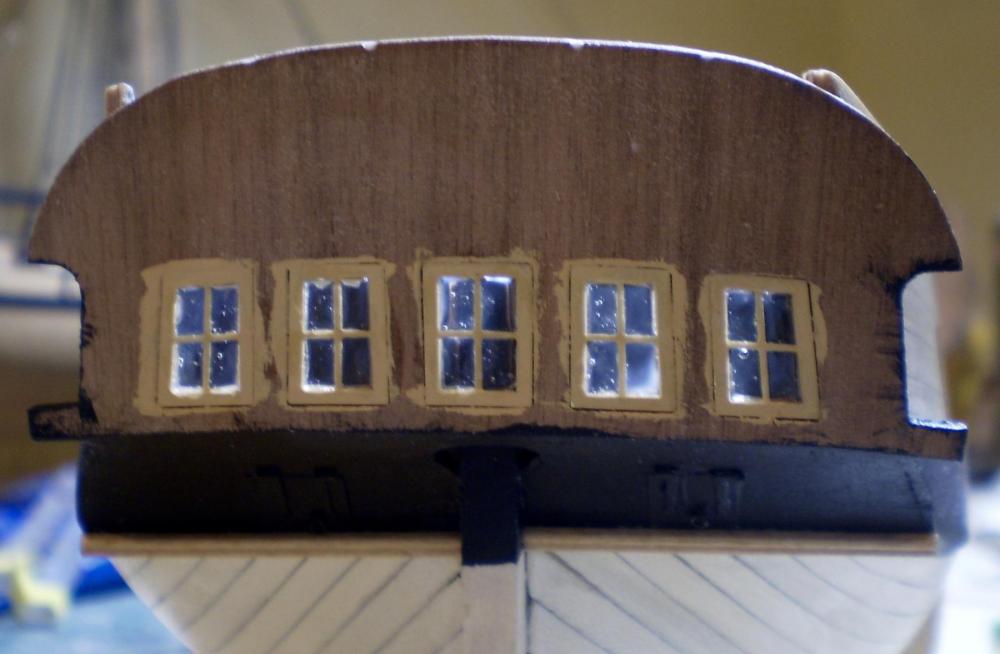
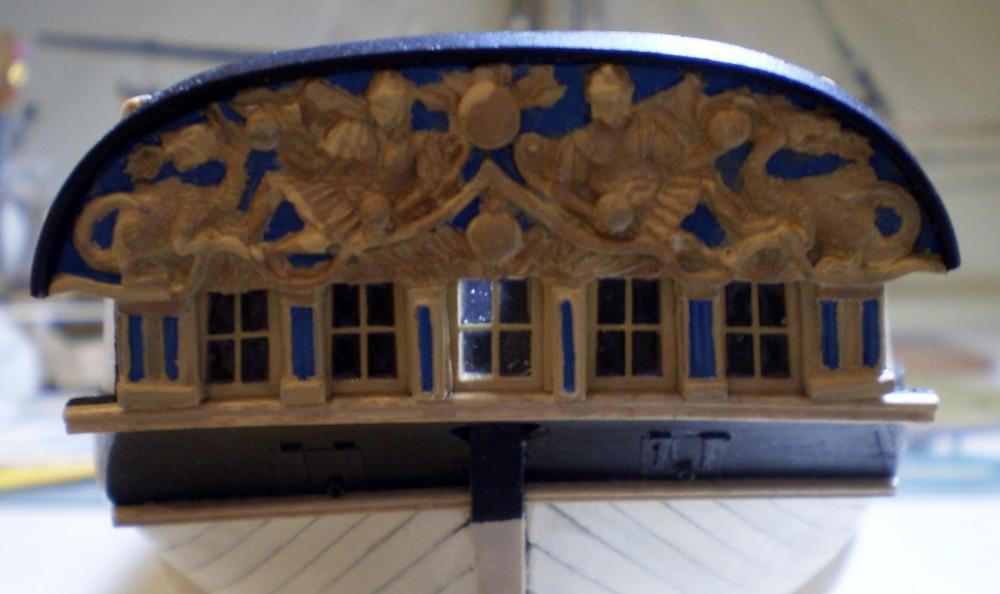
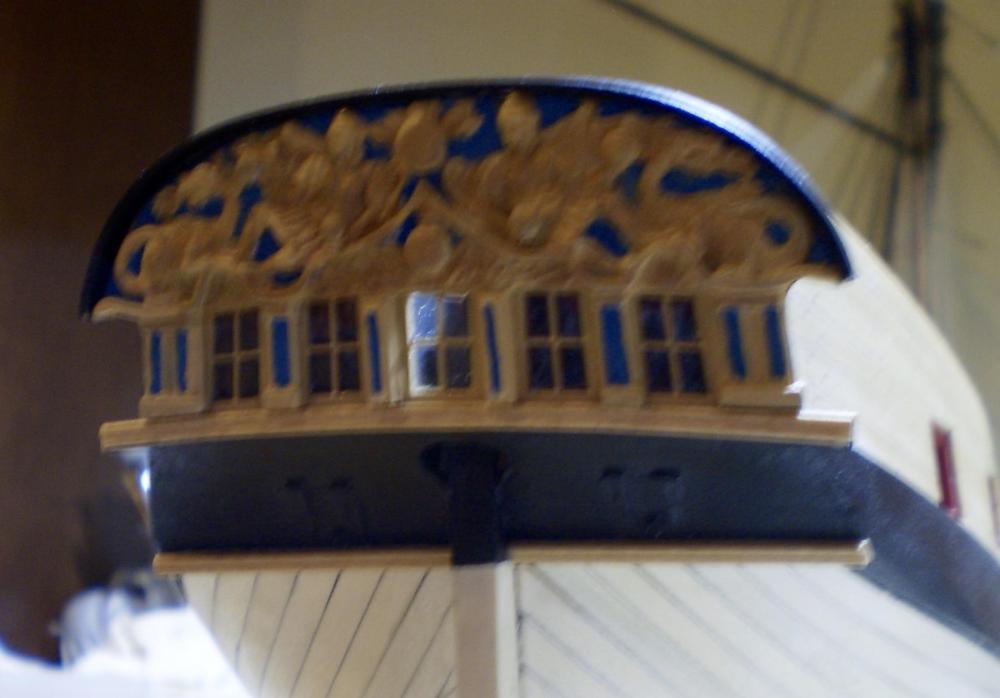
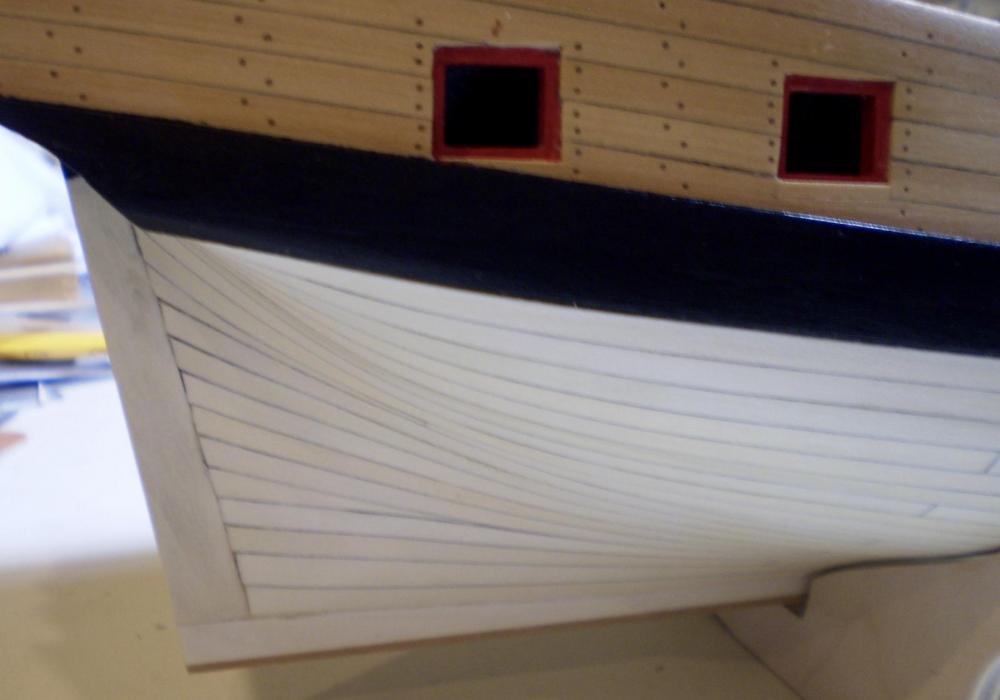
After doing all of that hull planking, I felt like doing something very different. My choice was to do the stern. This work began with the wooden transom piece which was wet bent to shape and then glued in place. I then did the stern lights (windows), using the very nice kit PE pieces, which fit almost perfectly. I painted them using some old Floquil buff and glazed them with Micro Kristal Klear. After that, I cut in the counter vent ports and added their hinges, using the kit PE pieces, and their ringbolts. Then, I did the final painting of the counter and added the moldings at the bottom of the transom and the bottom of the counter. These were done with boxwood strip, scraped to a simple double bead shape. Next was the metal transom piece, which contains the stern decorations. Following the lead of Joe V, I decided to paint the background blue, with the decorations to look like natural wood. After bending the metal piece to shape, I did the painting. For the blue, I used Pollyscale B&M blue. For the wood color, I used the Floquil buff, followed by highlighting and shading done with Modelmaster wood color. The metal piece was then glued to the wooden transom piece, using medium CA. The stern work was completed by making and installing the taffrail. This was done by wet bending a piece of holly strip to shape and painting it black before gluing it in place. The next work will be the quarter deck area. Bob


- 563 replies
-
- 23
-
-
HMS Naiad 1797 by albert - FINISHED - 1/48
rafine replied to albert's topic in - Build logs for subjects built 1751 - 1800
Beautiful work, Albert. Bob -
That dashboard is fantastic ( the rest of the build isn't bad either ). Bob
- 339 replies
-
- 4
-
-
- dumas
- Chris-Craft
- (and 3 more)
-
Thanks so much Abert and Martin. Martin, I do have to admit that despite the flaws (and they are plainly visible to me), I'm pleased with the overall result of the planking. Looking at your Fly, I think that you should feel the same way. Bob
-
Thanks so much Mobbsie, Don, Red, Bruce,Popeye and the "likes". Much appreciated. Mobbsie, I can only repeat what I said to Grant. Bruce, all good choices. Looking at your Morgan, you should be up for whatever you choose. If you go with Granado, you should take a look at Joe V's log. It's been my inspiration. Bob
-
Wonderful Nils -- as always. Bob
- 2,625 replies
-
- 7
-
-
- kaiser wilhelm der grosse
- passenger steamer
- (and 1 more)
-
Thanks so much Dirk, Joe, Red and and Grant for the very kind comments. Thanks also to the "likes'. Trust me Grant, it's there. Red, the holly i'm using, as well as the boxwood, is from Crown Timberyard. Excellent quality. Bob
-
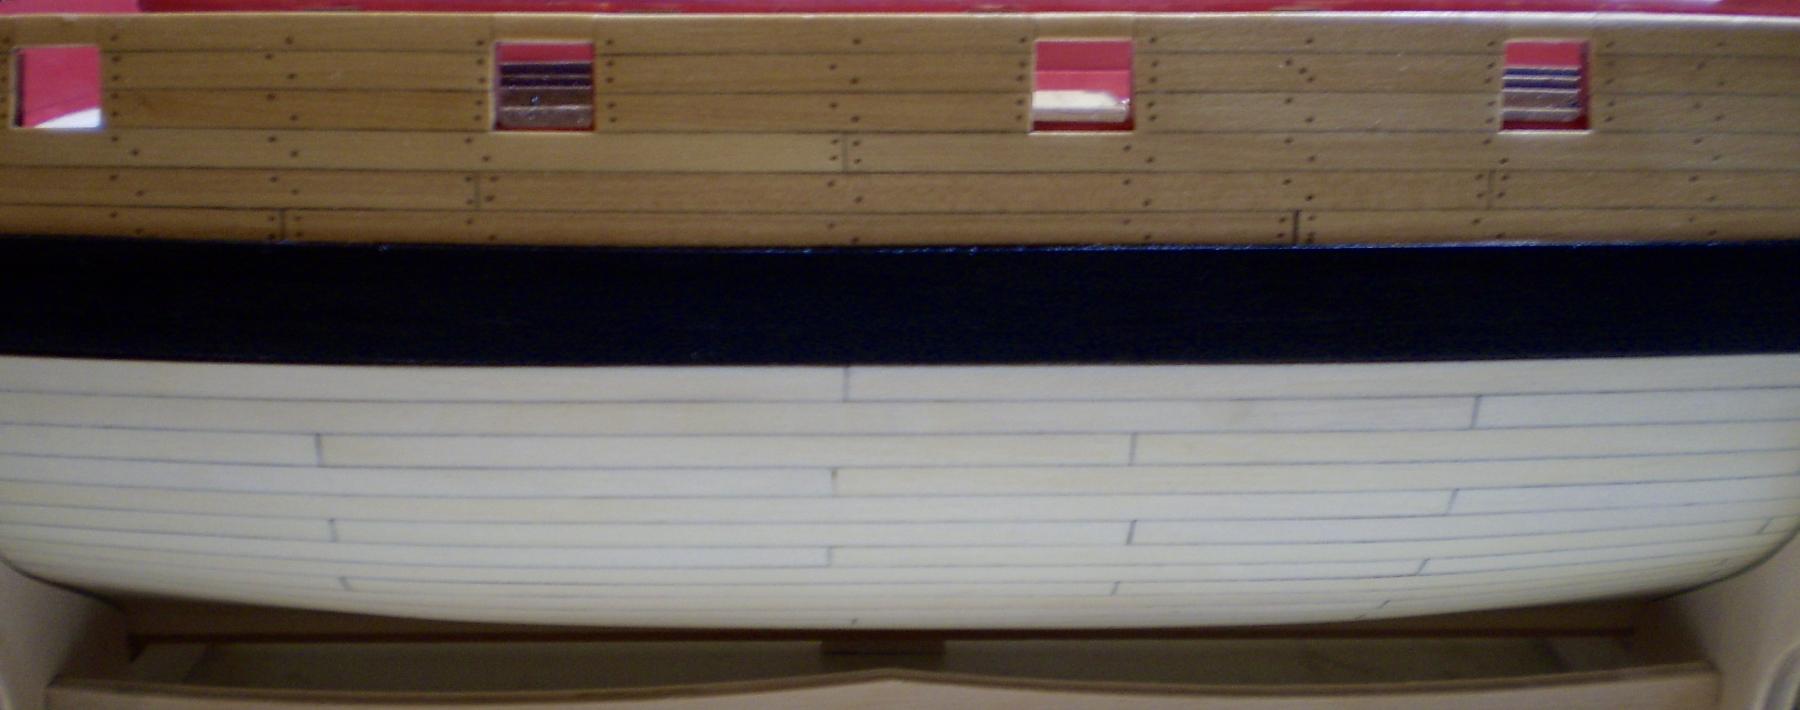
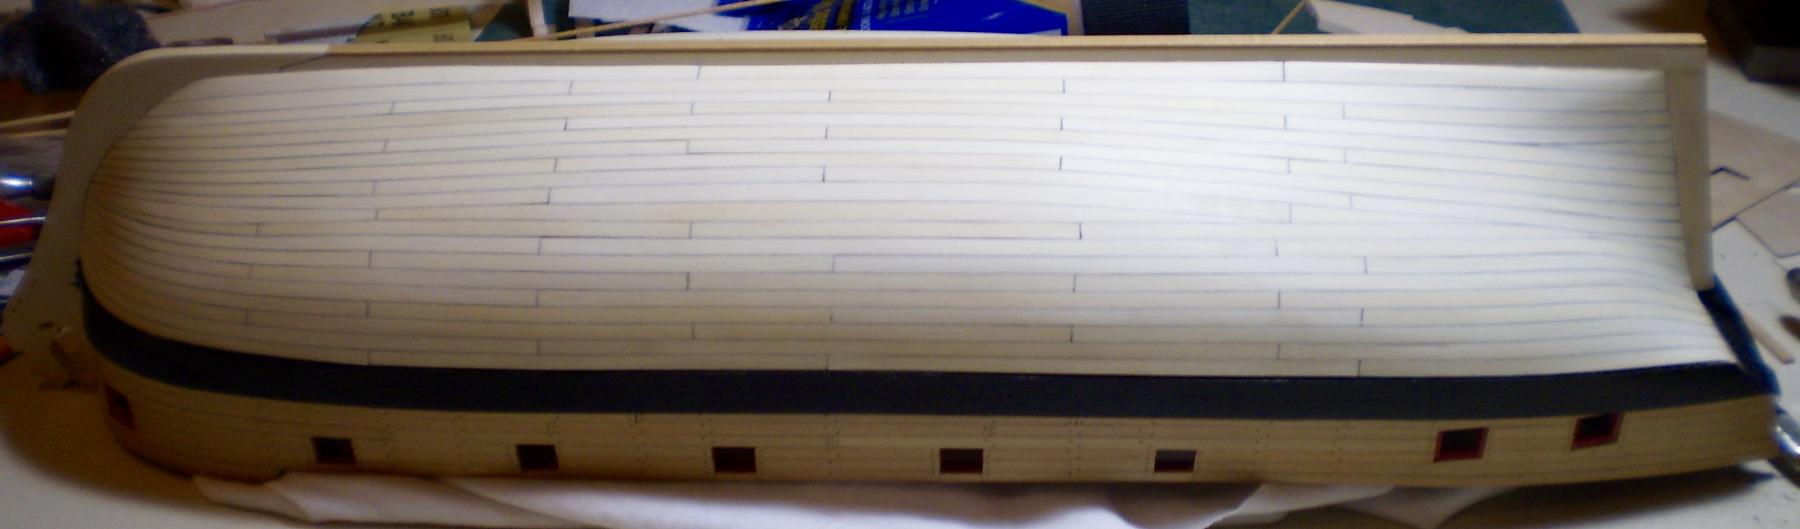
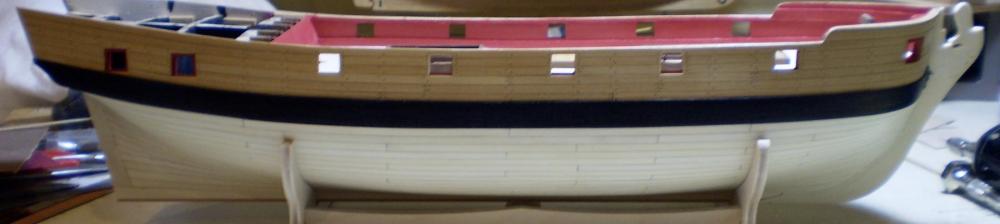
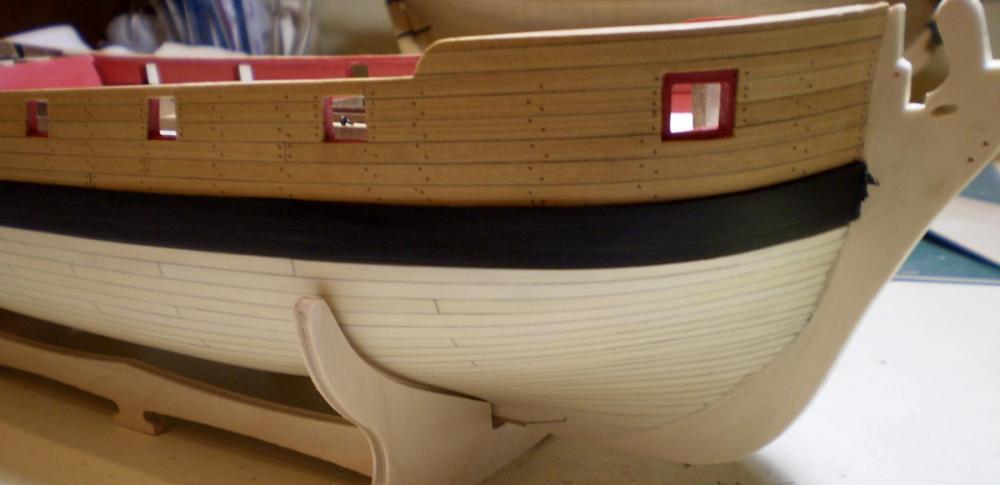
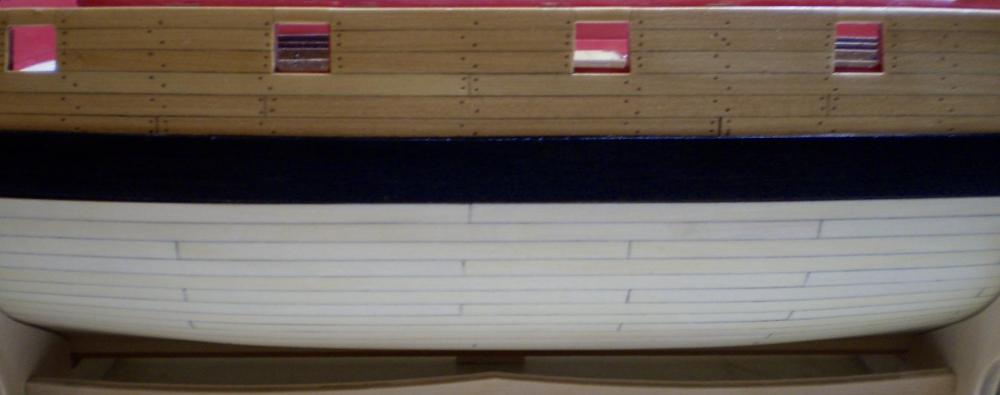
I've spent the past couple of weeks doing the second planking of the lower hull. Since I didn't want to paint the planking, I had chosen to do the lower hull in holly to represent the tallowed planking. The lack of painting also meant that the planking would have to be done in a prototypical manner. Since neither the kit plans nor AOTS showed a lower hull planking layout, i had to create one , based on typical practice. The procedure followed was to use tick strips to measure out plank width at various points and to maintain the same number of planks throughout. This was accomplished by tapering each plank to achieve the correct plank width at each measured point. The holly bends easily, so I decided to edge bend the tapered planks rather than spiling. The bending was done by soaking in boiling water. The planks were beveled on one edge, as necessary, to achieve a close fit, and then a pencil was used on one edge and one end to simulate the caulking. The planking was sanded smooth and then finished with Wipe-on Poly. I'd like to say that it came out perfectly, but it didn't. Small errors in measurement, and the almost inevitable effects of creep. led to some funkiness in the last strake or two on each side. I am happier with the starboard, done second, and that is the side shown in the photos. Bob


- 563 replies
-
- 32
-
-
US Brig Syren by Gahm - Model Shipways
rafine replied to Gahm's topic in - Kit build logs for subjects built from 1801 - 1850
Amazing looking work Thomas. You shouldn't let life get in the way for so long. Bob -
Really nice work on the deck planking Mike. Bob
-
Thanks so much Nils, Dirk and Rusty. Much appreciated praise from three of the modelers I admire most. Bob
-
Thanks so much Martin, Red and the "likes". Your interest and encouragement are greatly appreciated. Bob
-
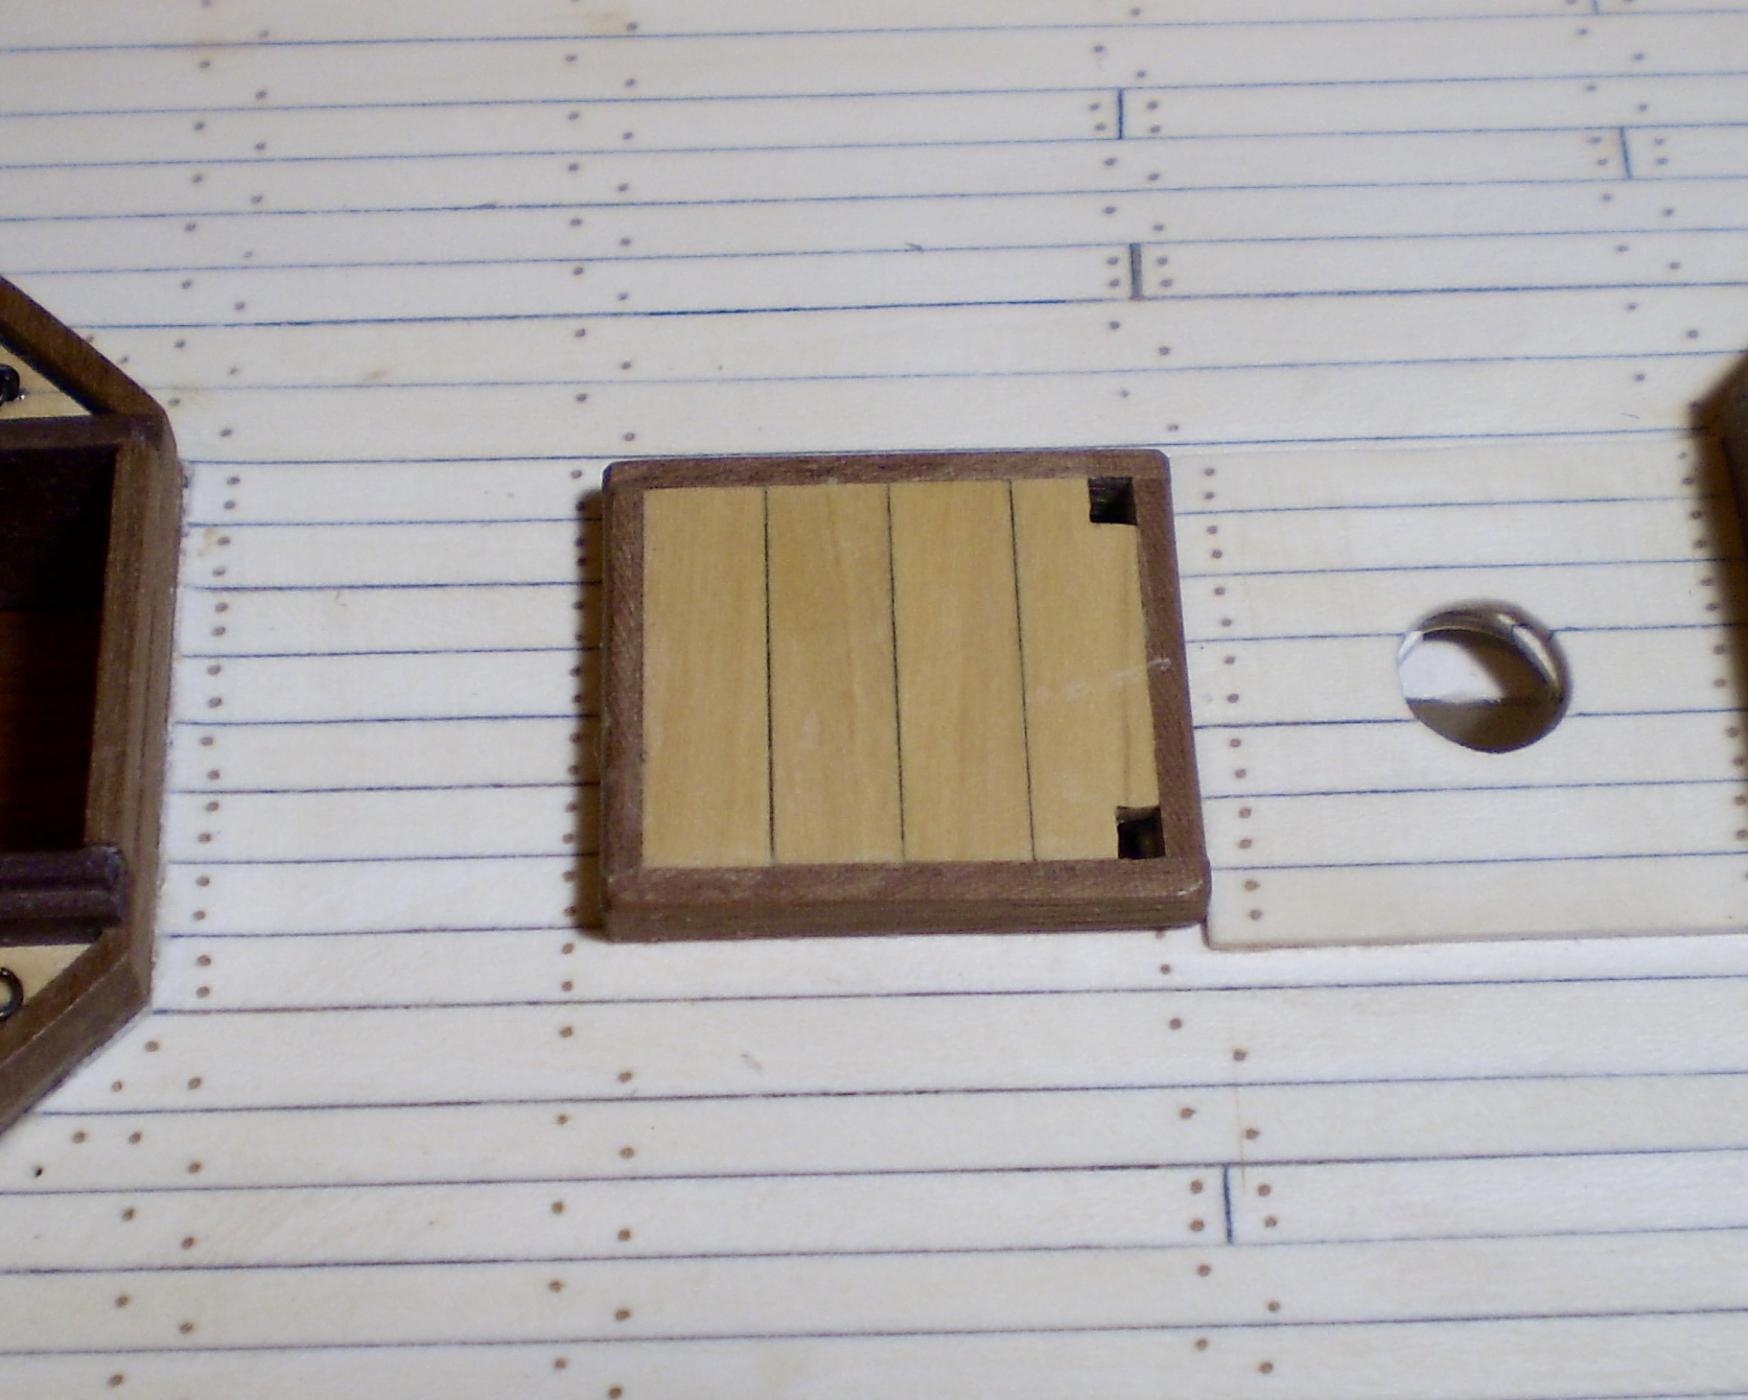
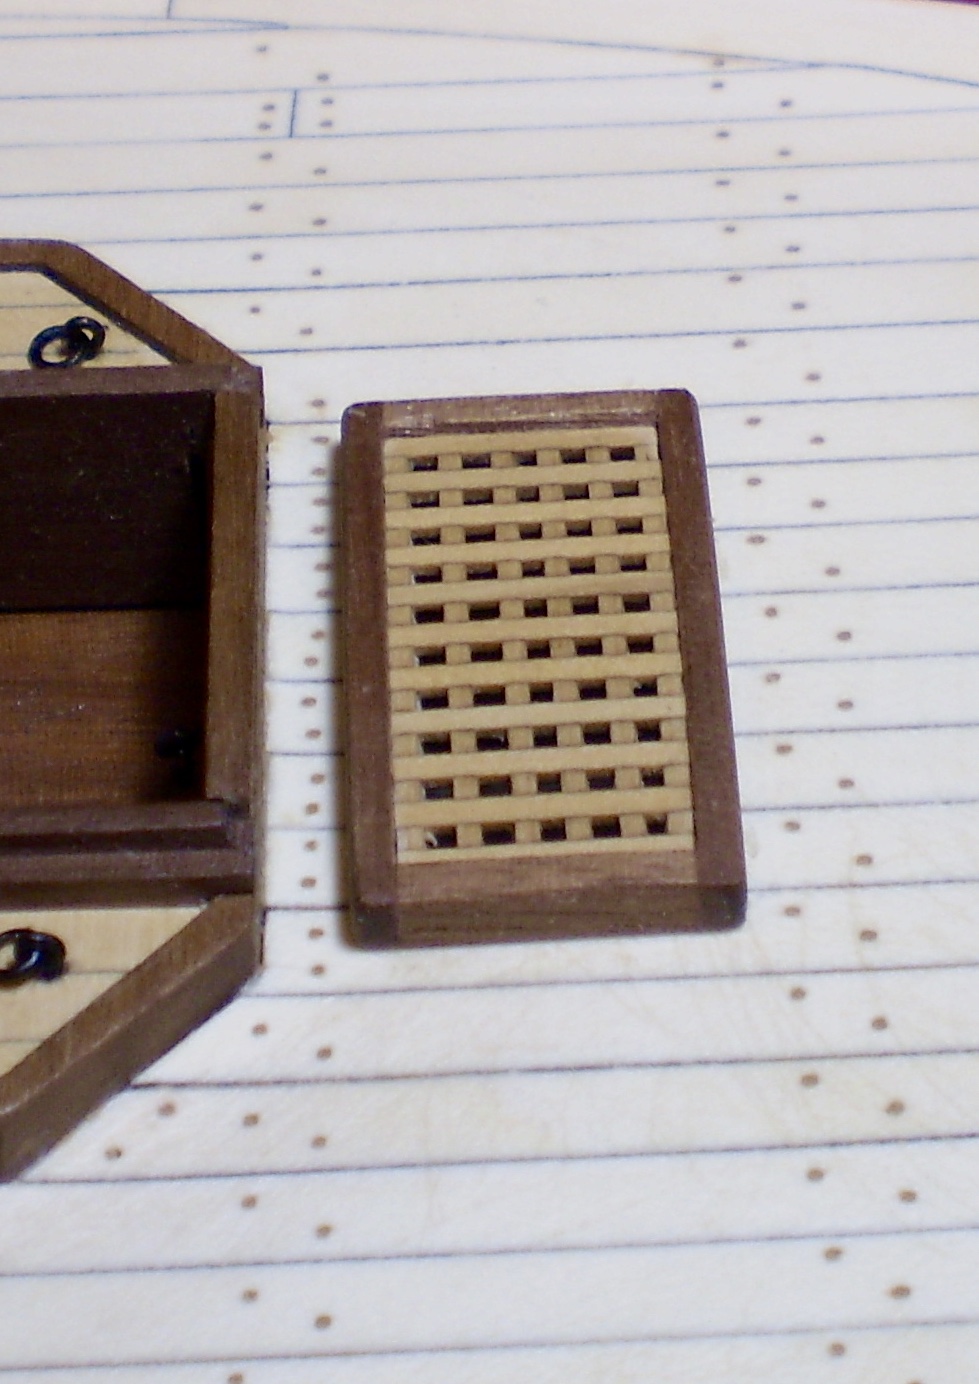
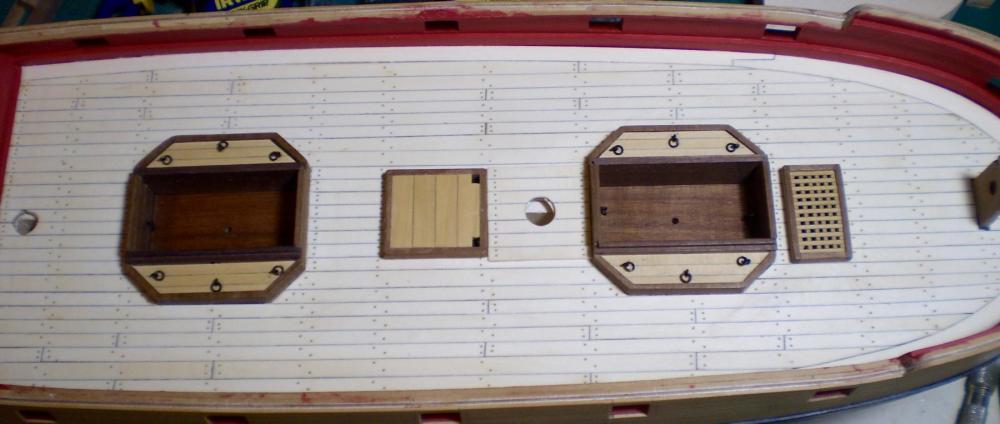
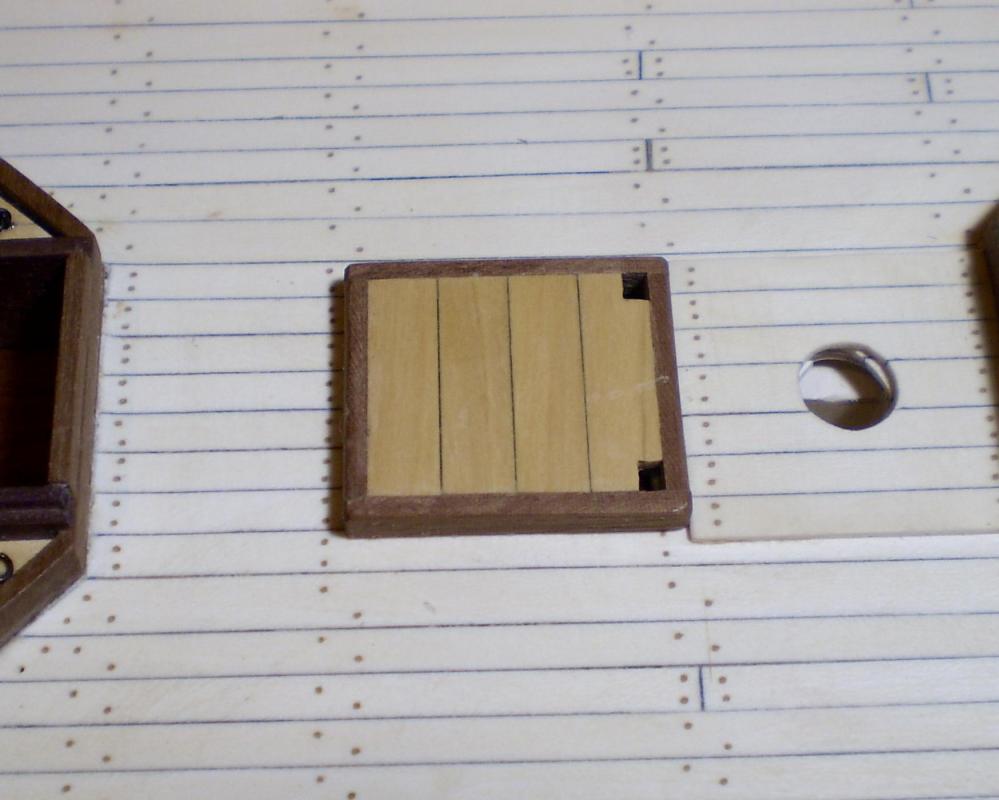
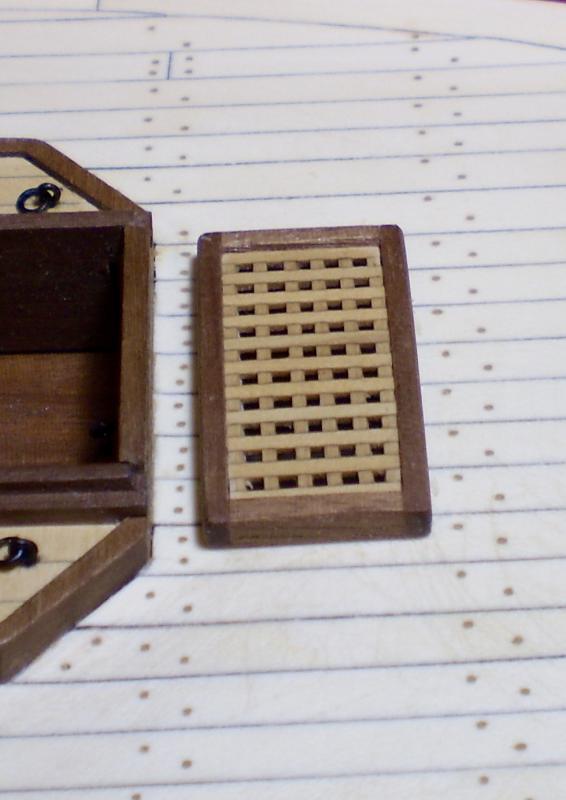
Treenailing of the main deck planking is now done. As with the hull, this was done by drill and fill, using golden oak filler. After final sanding, a coat of Wipe-on Poly was applied as a sealer. The treenailing followed the beam lines previously laid out, and the pattern shown in AOTS. To break up what what seemed like an endless drilling of holes, I decided to make the fore and main hatches during that process. The coamings were made from walnut strip from the kit. The main hatch planking was done with boxwood strip.Ringbolts still need to be added to the hatch planks. The fore hatch grating was done using cambered boxwood grating material from Syren that I had left over from Cheerful. After putting it off for as long as I could, I'm now starting on the second planking of the lower hull. Bob

- 563 replies
-
- 26
-