rafine
-
Posts
2,932 -
Joined
-
Last visited
Content Type
Profiles
Forums
Gallery
Events
Everything posted by rafine
-
 Sjors, I know that everyone has a way that they think best, but for whatever it's worth, my way is this: I do the mizzen shrouds first, then the mizzen stays, then the main shrouds, the main stays, the fore shrouds and lastly, the fore stays. I have found that moving from the mizzen forward gives better and easier access to the stays than working the other way. On the lower masts, the stays lay over the shrouds at the masthead and should be done after the shrouds. I'm sure that you will get other opinions. Bob
- 1,616 replies
-
- 6
-

-
- caldercraft
- agamemnon
- (and 1 more)
-
US Brig Syren by Gahm - Model Shipways
rafine replied to Gahm's topic in - Kit build logs for subjects built from 1801 - 1850
Beautifully done, Thomas. Bob -
Cutter Cheerful 1806 by rafine - FINISHED
rafine replied to rafine's topic in - Build logs for subjects built 1801 - 1850
Thanks so much Erik and Nils and also the "likes". Bob- 525 replies
-
- 5
-
-
- cheerful
- Syren Ship Model Company
- (and 1 more)
-
Nils, your imagination and ingenuity are amazing. Bob
- 2,625 replies
-
- 6
-
-
- kaiser wilhelm der grosse
- passenger steamer
- (and 1 more)
-
Cutter Cheerful 1806 by rafine - FINISHED
rafine replied to rafine's topic in - Build logs for subjects built 1801 - 1850
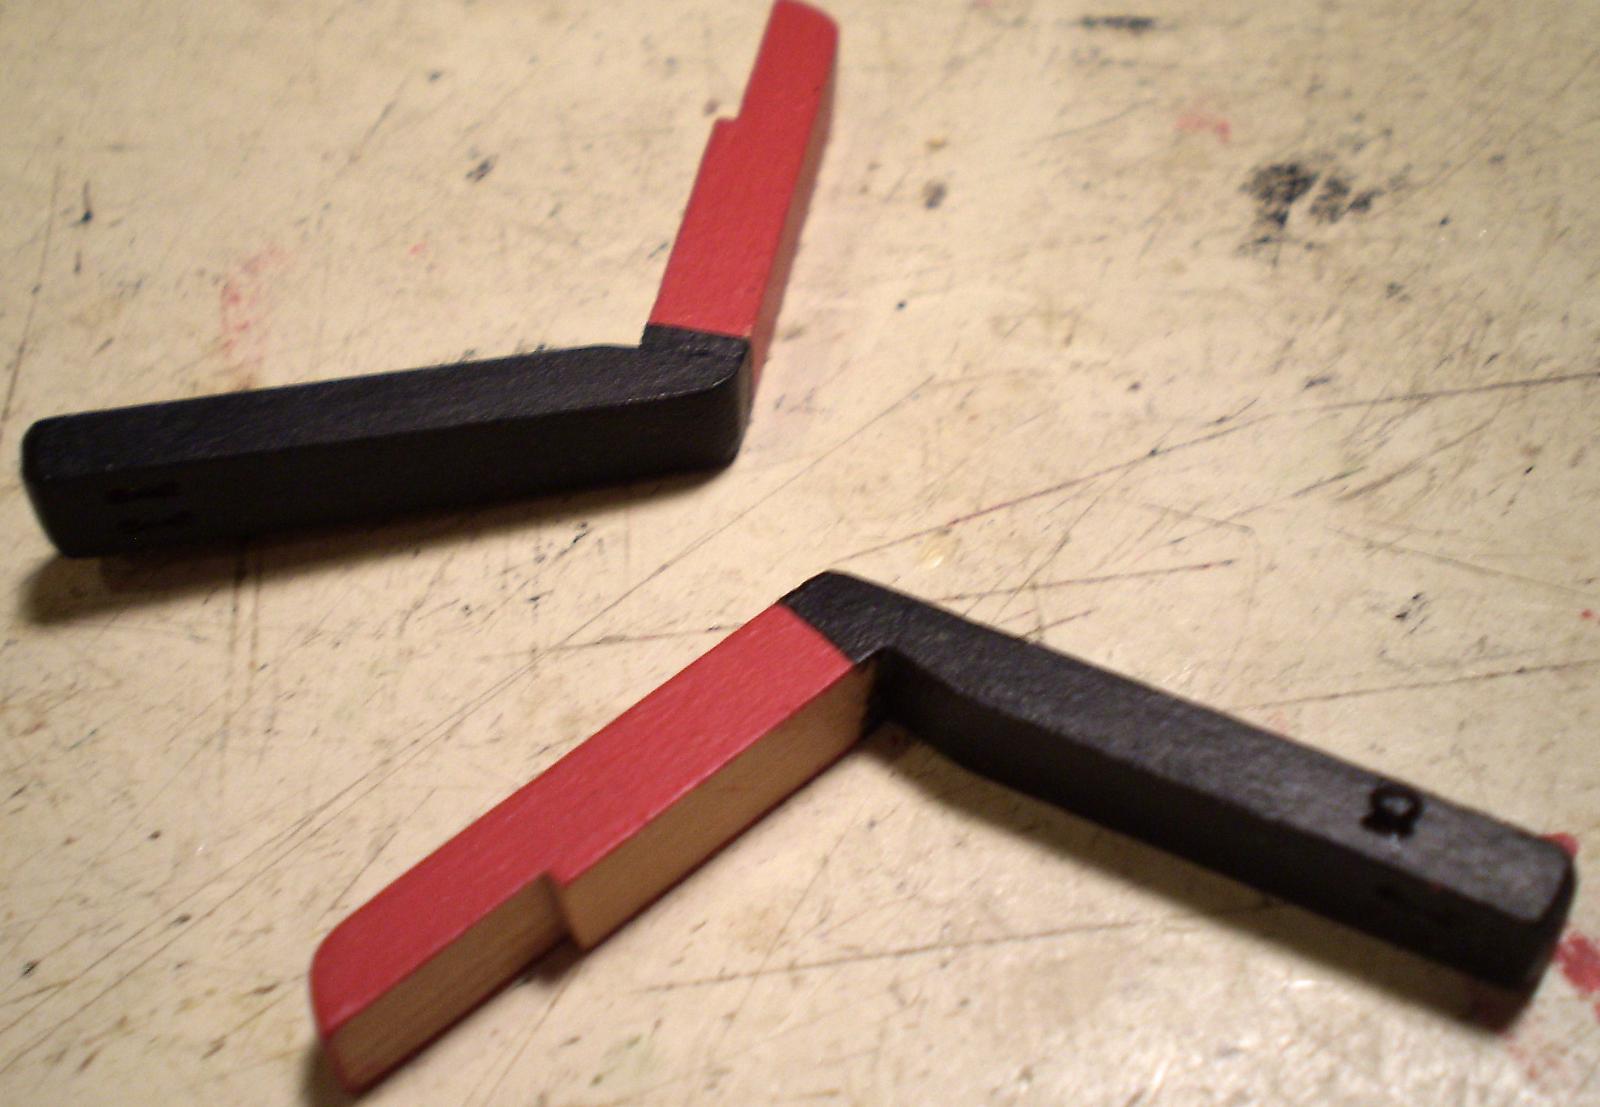
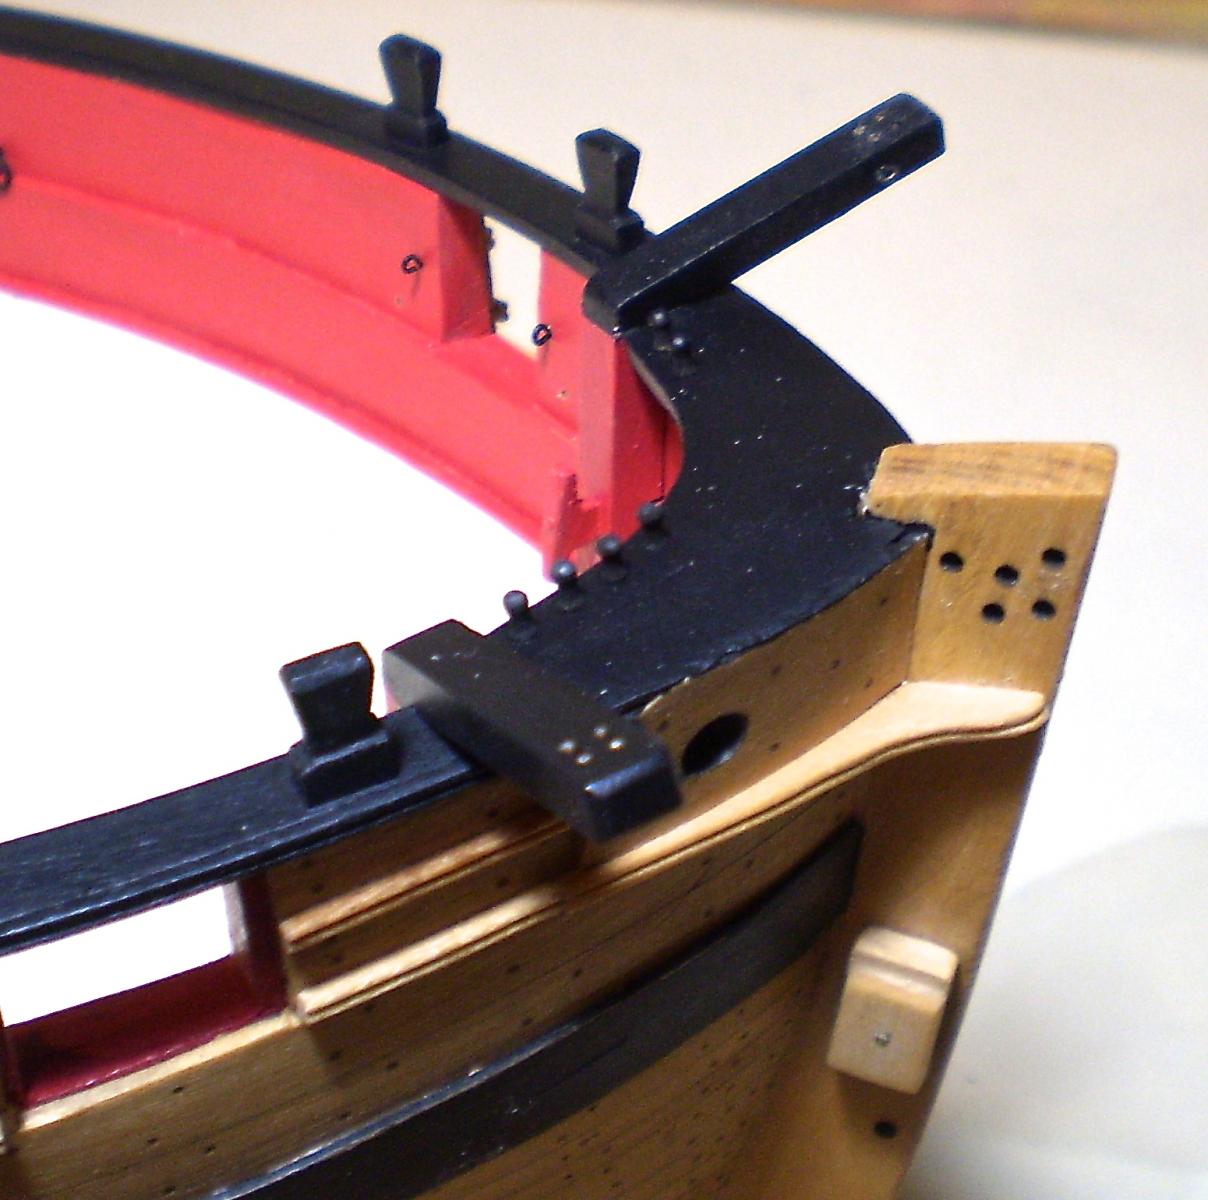
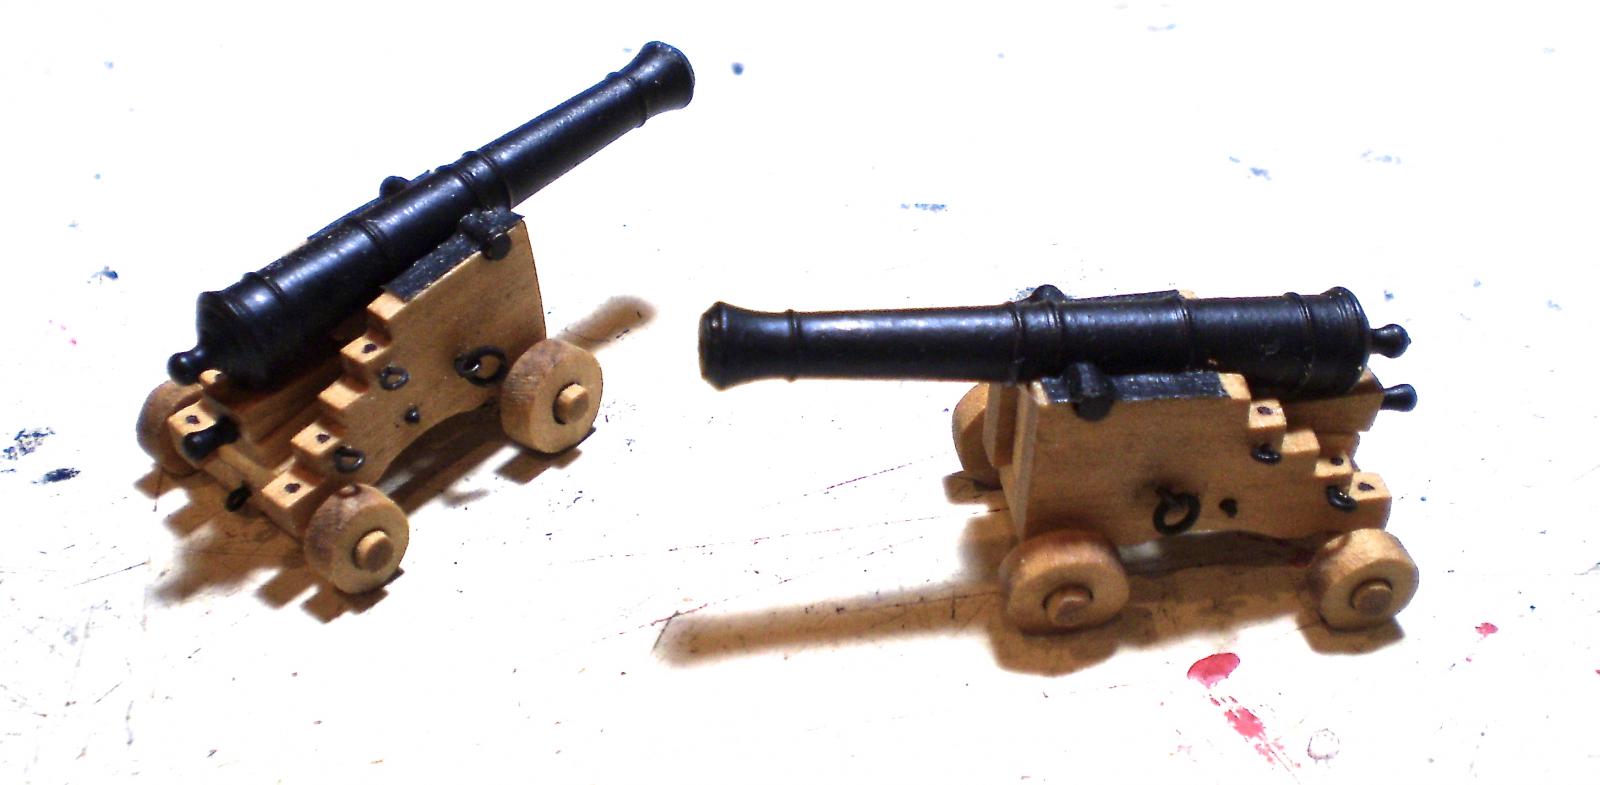
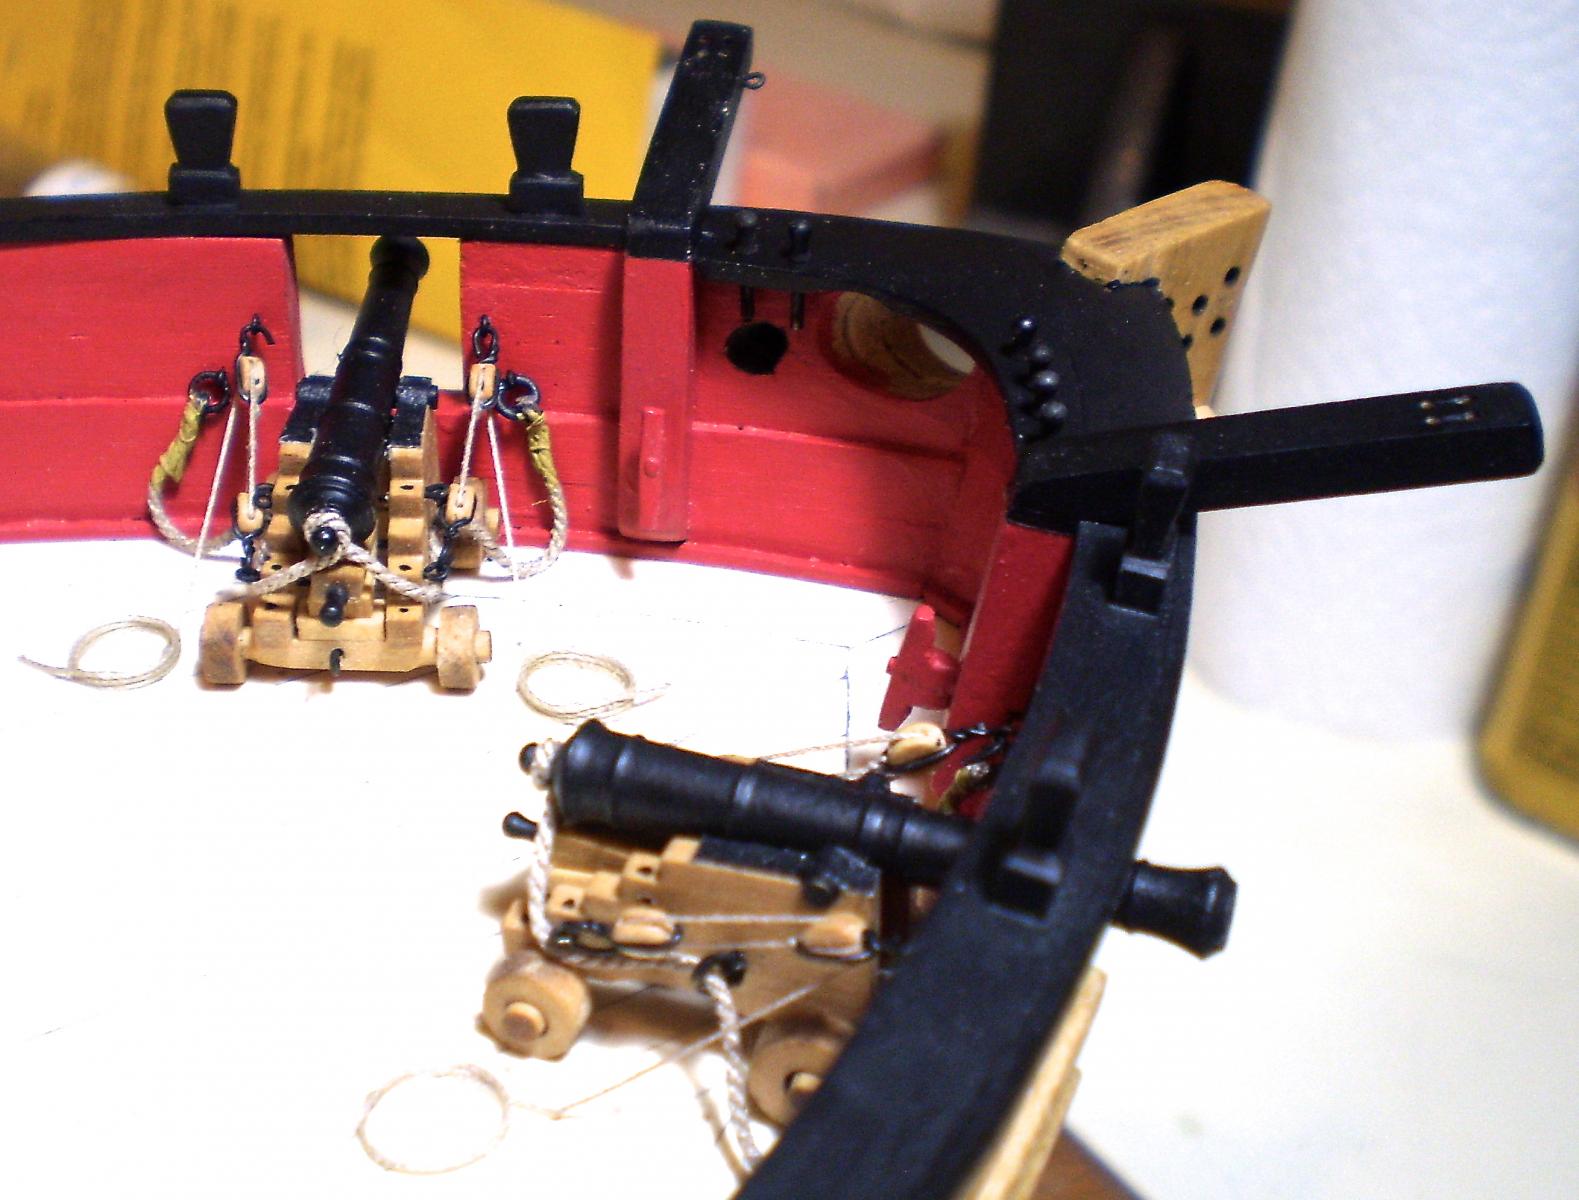
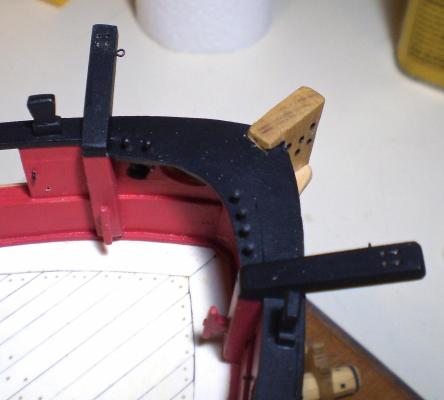
My plan to finish off the interior hull detailing with a final forward segment has been changed a bit. I realized while thinking it through, that I needed to break it into two parts. The first, which I have now completed, was to do the catheads, bow pin rail and the two long guns. The bowsprit bitts could not be made and set until the bowsprit itself was made, and I hadn't planned on that. The windlass could be made, but was better left unmounted until after the bowsprit bitts were set. I began with the catheads. I chose to make them from boxwood strip, rather than cutting them in one piece from sheet. Fitting just seemed easier. The outboard sheaves are simulated, using drilled holes and scribing, rather than slots and actual sheaves. The completed assemblies were painted red and black and mounted on the hull. Cleats, made from boxwood strip were added inboard and eyebolts outboard. The bow pinrail was next. It is shown on the drawings as being between the catheads, but the vertical positioning is unclear. Because the bowsprit has to pass below it, I concluded that I had to make it level with the cap rail. Hopefully, this is correct. Using a card template, I cut the piece from boxwood sheet, drilled holes for the pins, and painted it black to match the cap rail. It was mounted using pins and glue. Blackened brass belaying pins were added. Lastly, I made and added the two 6 pdr long guns. These were made and rigged just like the previous carronades. I followed the positioning shown on the drawings and the photos of the contemporary model, although it seems awkward and hardly workable in light of the position of the bowsprit and bitts. I'll now move on to complete the remaining items. They will probably get done sooner than I would expect, because south Florida is going through an unusual period of rain that will decrease golf time and increase modeling time. Bob


- 525 replies
-
- 32
-
-
- cheerful
- Syren Ship Model Company
- (and 1 more)
-
That looks just great Sjors. I'm really looking forward to your rigging. BTW, much as I enjoy retirement, there is still a lot to be said for making money. Bob
- 1,616 replies
-
- 6
-
-
- caldercraft
- agamemnon
- (and 1 more)
-
I let soaked planks dry for hours before trying to use them. This seems to help with the kind of problems you describe. Bob
-
You should be more than "satisfied" with your work on the head rails Ken. They look really good. Bob
- 481 replies
-
- 1
-
-
- rattlesnake
- model shipways
- (and 1 more)
-
Cutter Cheerful 1806 by rafine - FINISHED
rafine replied to rafine's topic in - Build logs for subjects built 1801 - 1850
Thanks so much Greg, Grant, John and the "likes". John, looks can be very deceiving. Bob- 525 replies
-
- 3
-
-
- cheerful
- Syren Ship Model Company
- (and 1 more)
-
Cutter Cheerful 1806 by rafine - FINISHED
rafine replied to rafine's topic in - Build logs for subjects built 1801 - 1850
Thanks so much Sjors, Albert and the "likes". Bob- 525 replies
-
- 2
-
-
- cheerful
- Syren Ship Model Company
- (and 1 more)
-
Very nicely done on the planking Mike. Are you going for the curved planking? It really wasn't much more difficult than straight. Bob
- 452 replies
-
- 5
-
-
- cheerful
- Syren Ship Model Company
- (and 1 more)
-
Cutter Cheerful 1806 by rafine - FINISHED
rafine replied to rafine's topic in - Build logs for subjects built 1801 - 1850
Thanks so much Nils, druxey, George and Rusty for the very generous comments and also to the "likes". I probably don't say enough just how much all of your thoughts and interest are appreciated. Bob- 525 replies
-
- 4
-
-
- cheerful
- Syren Ship Model Company
- (and 1 more)
-
Cutter Cheerful 1806 by rafine - FINISHED
rafine replied to rafine's topic in - Build logs for subjects built 1801 - 1850
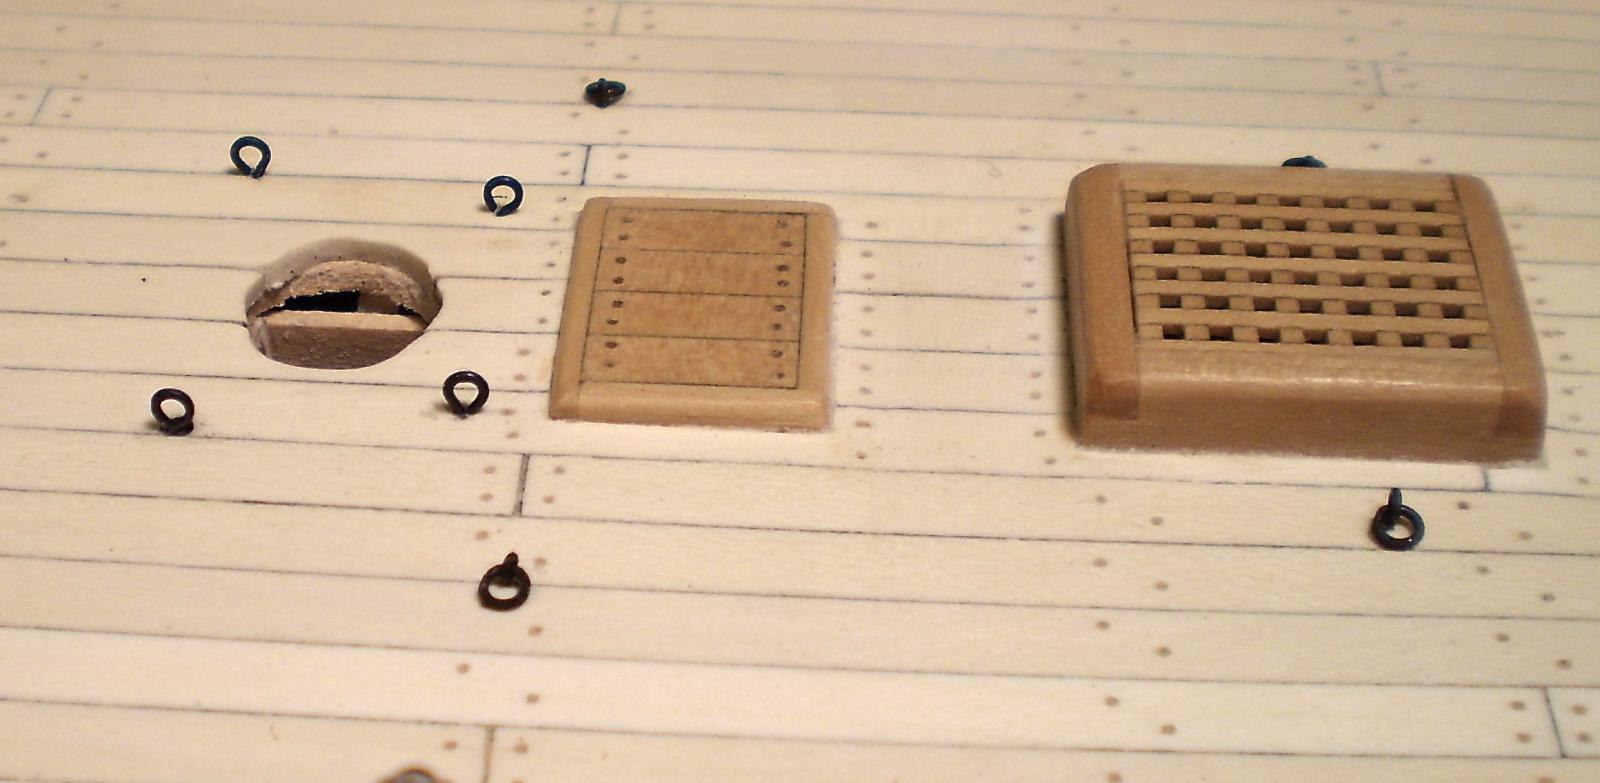
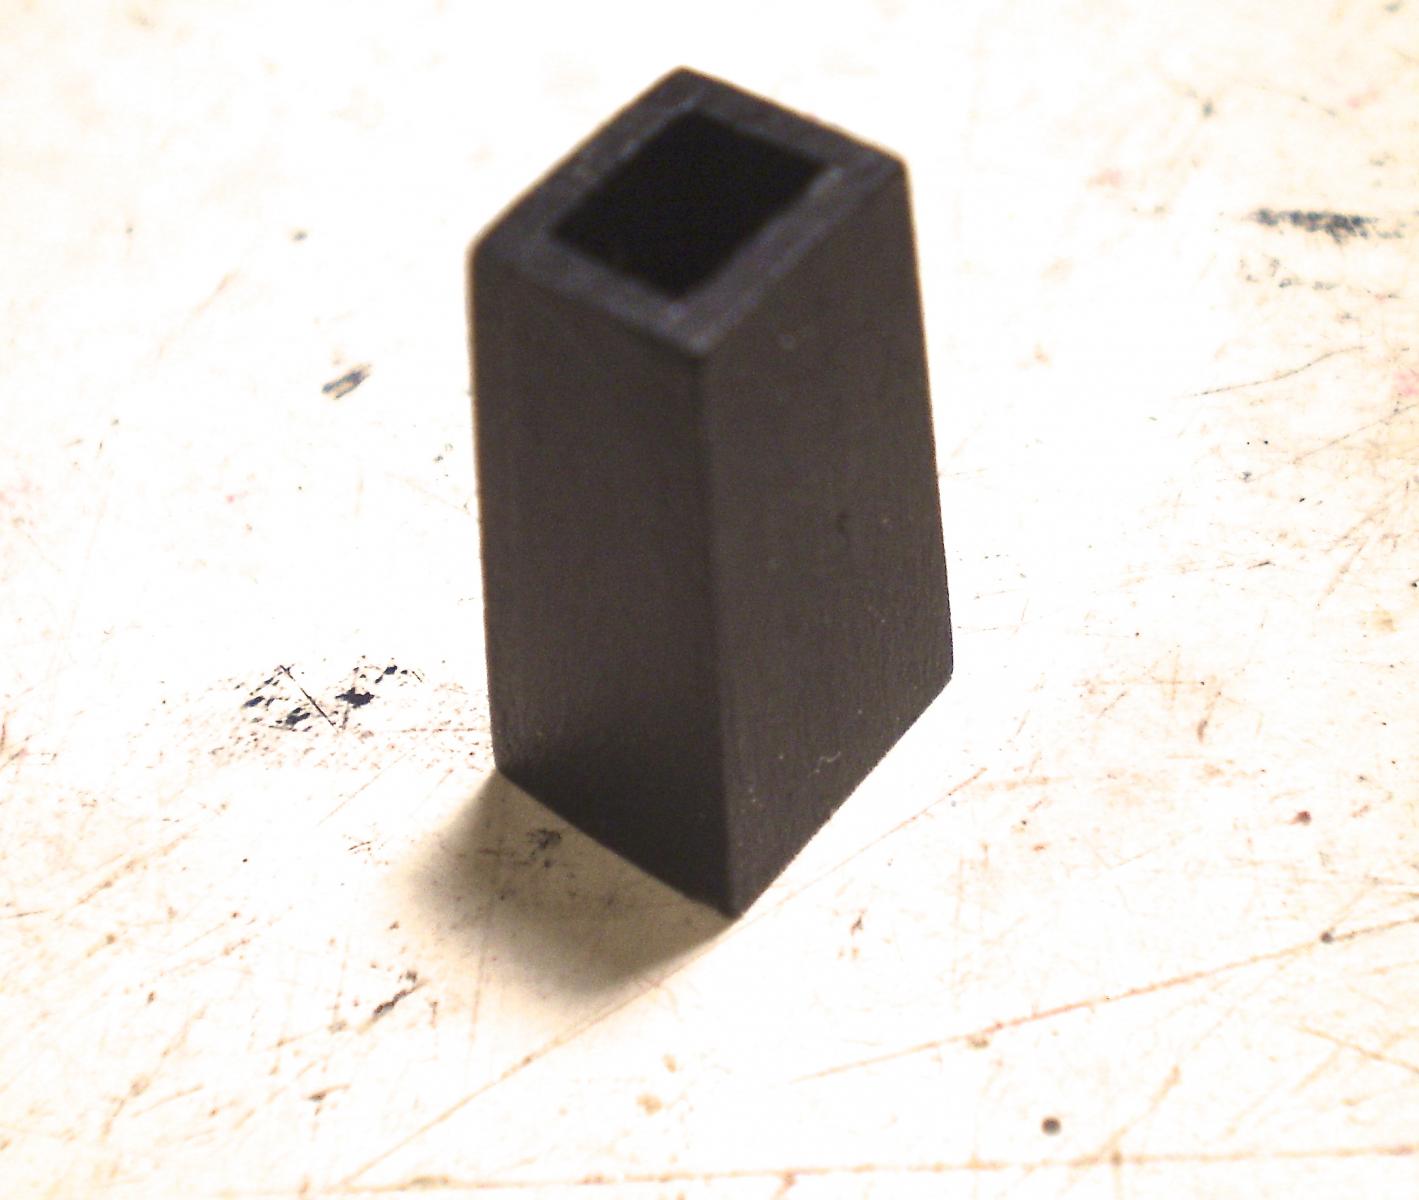
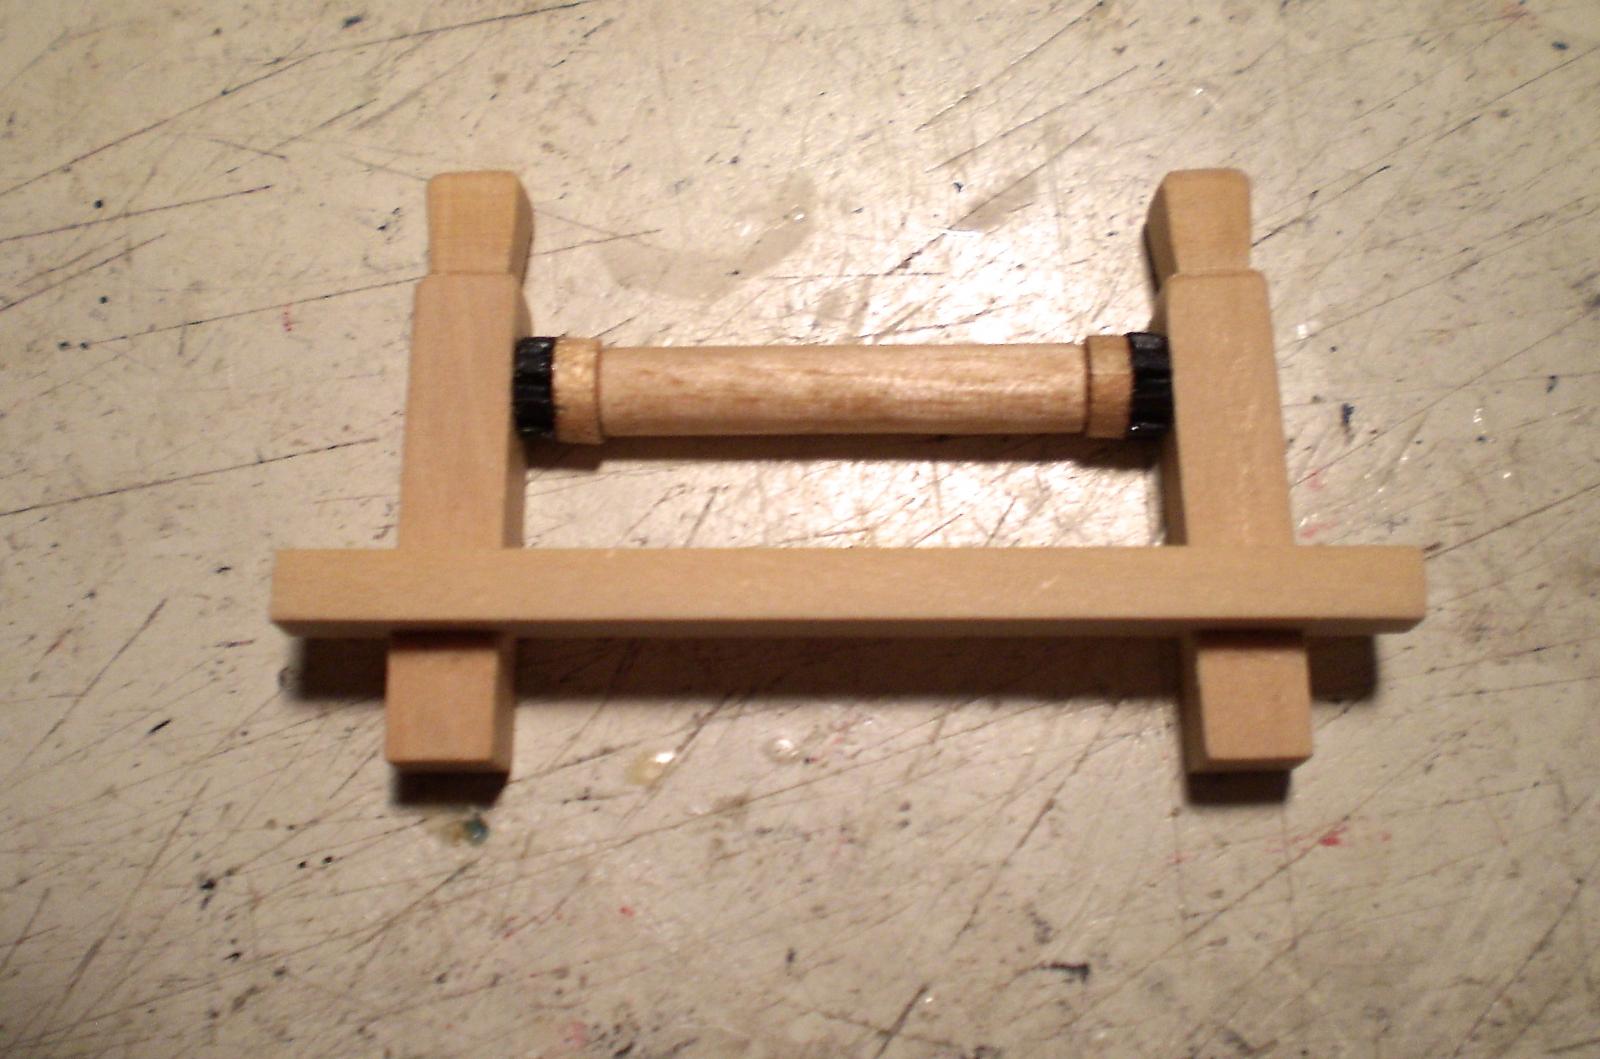
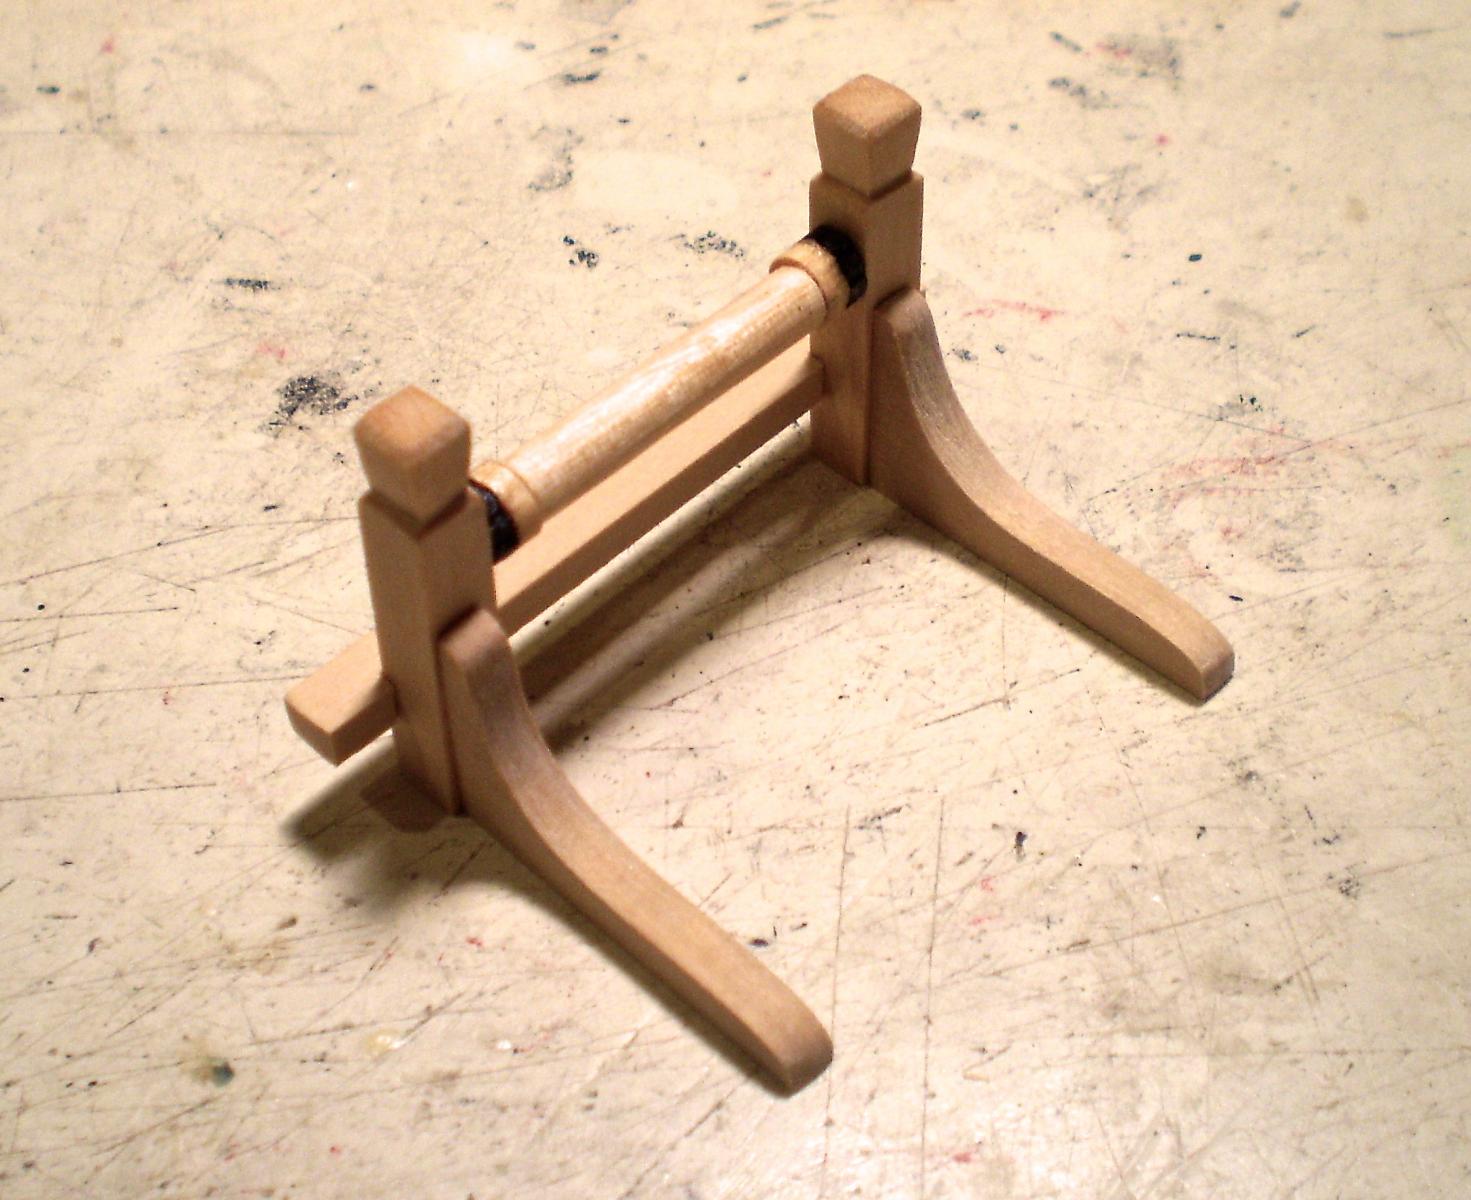
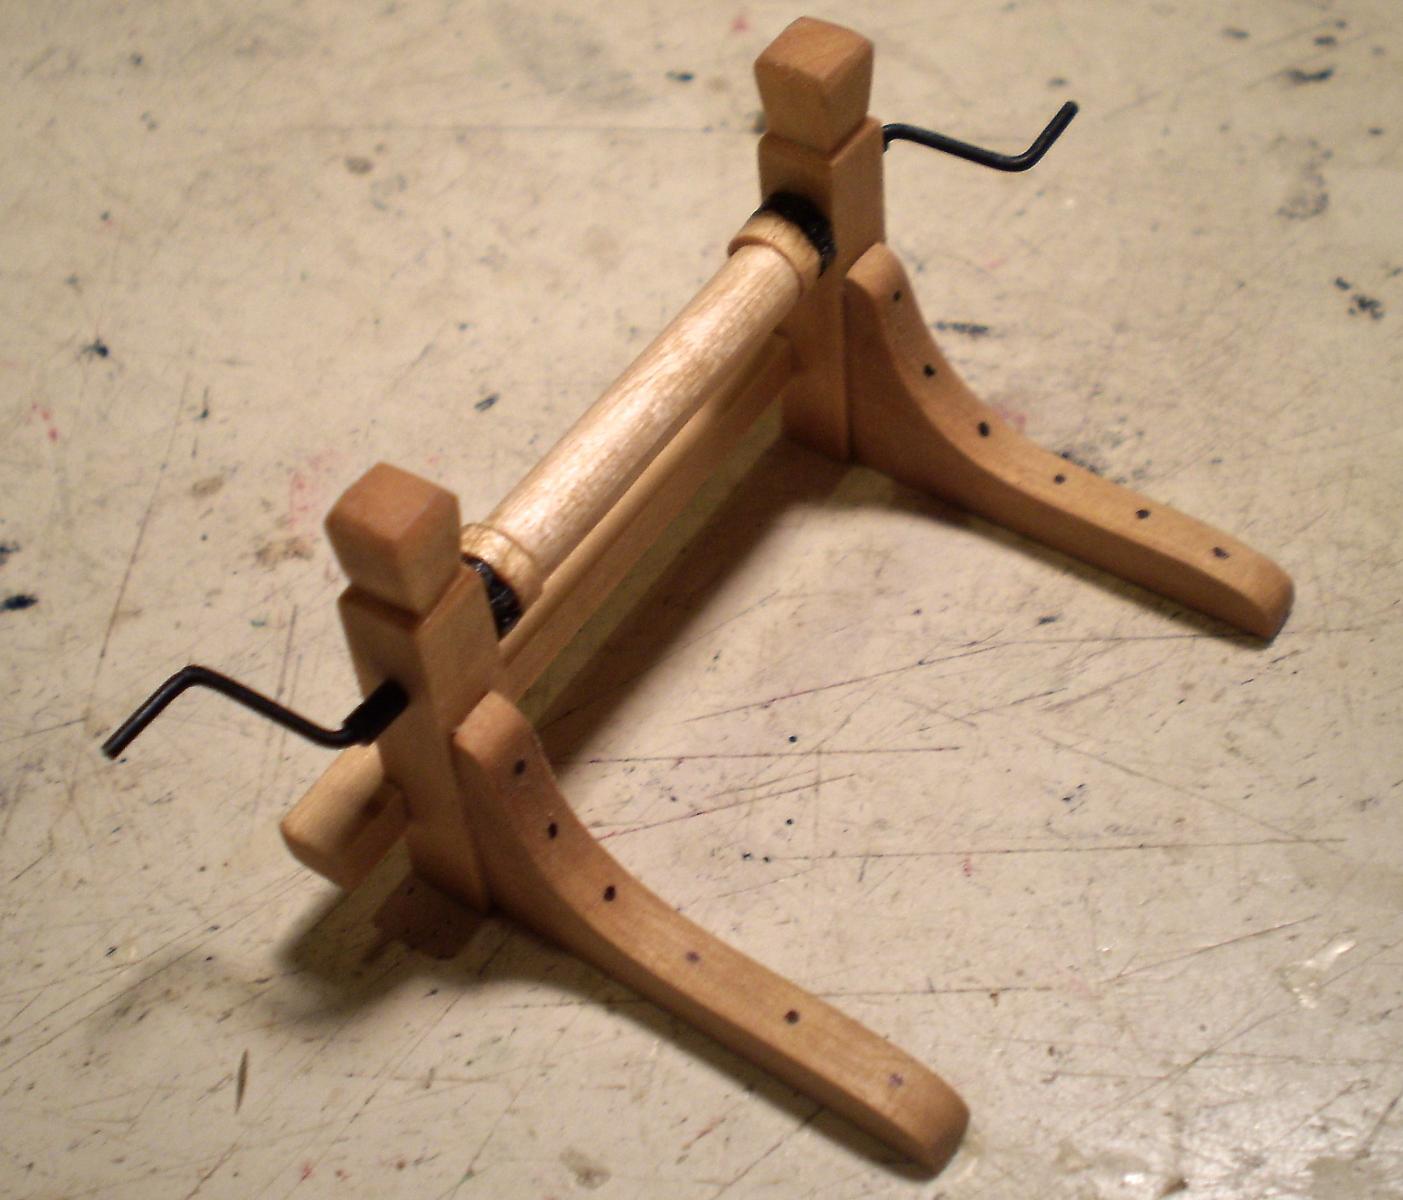
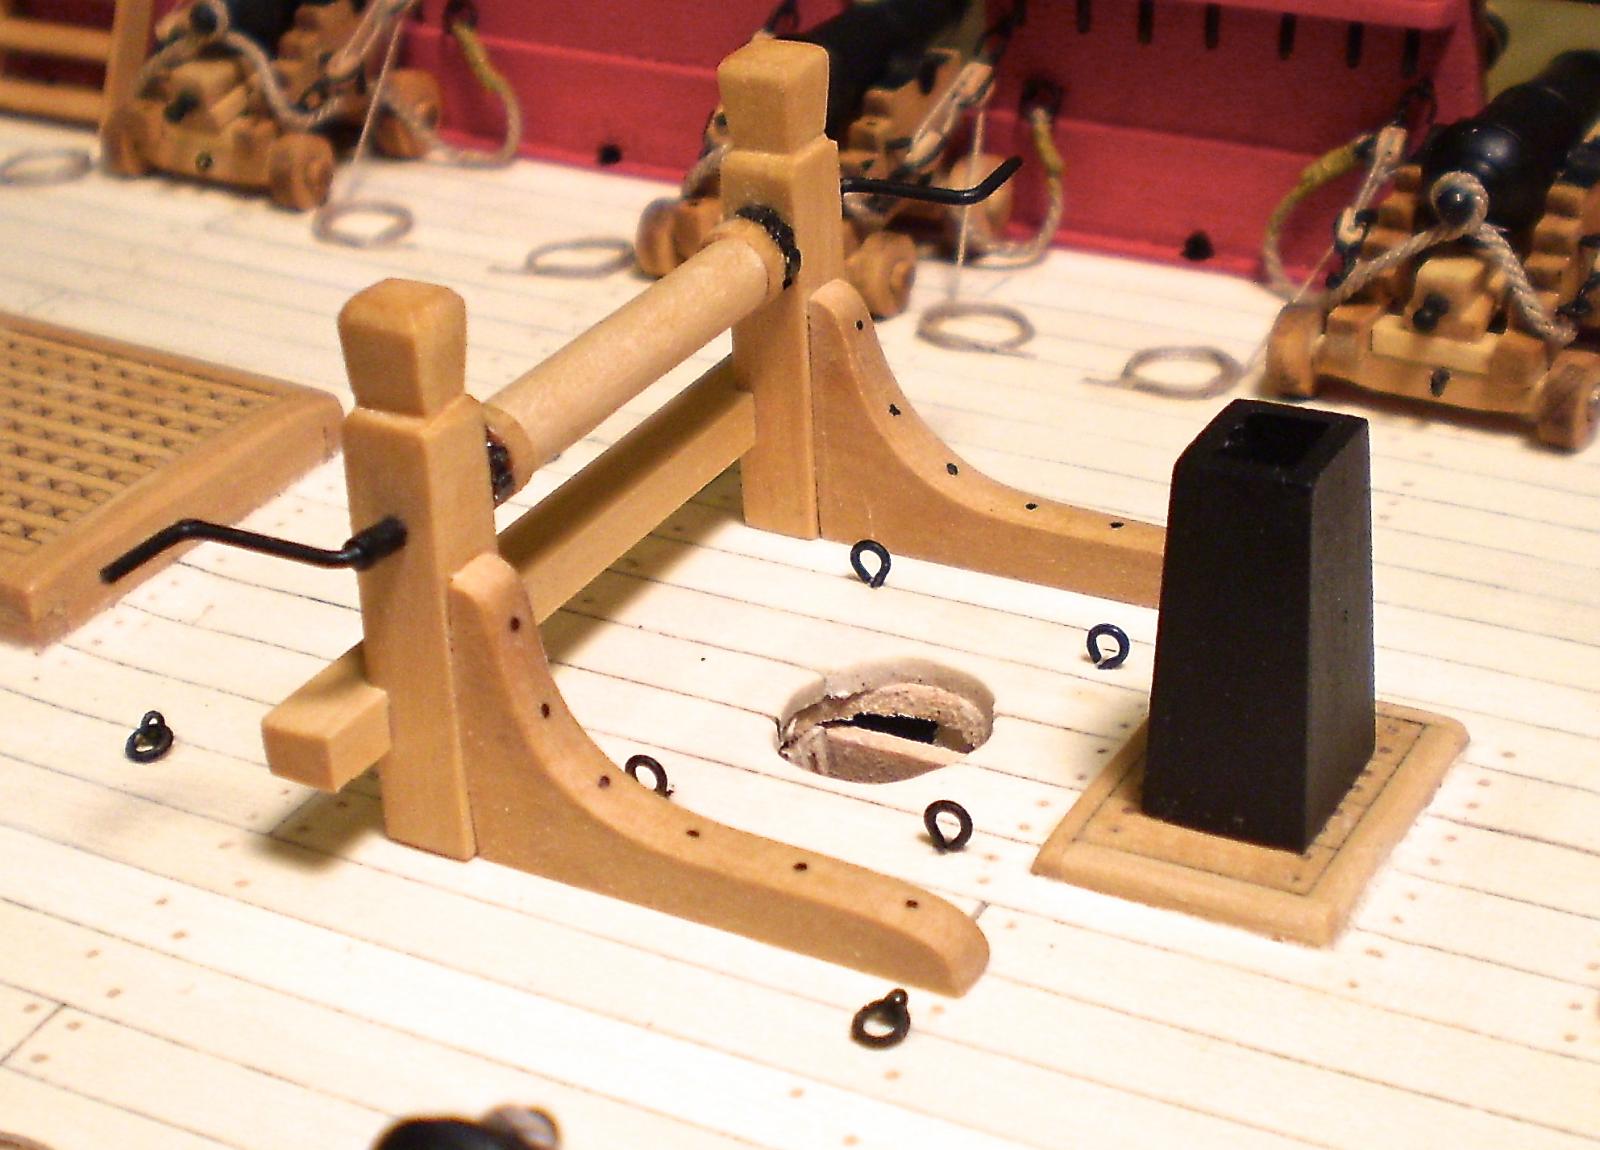
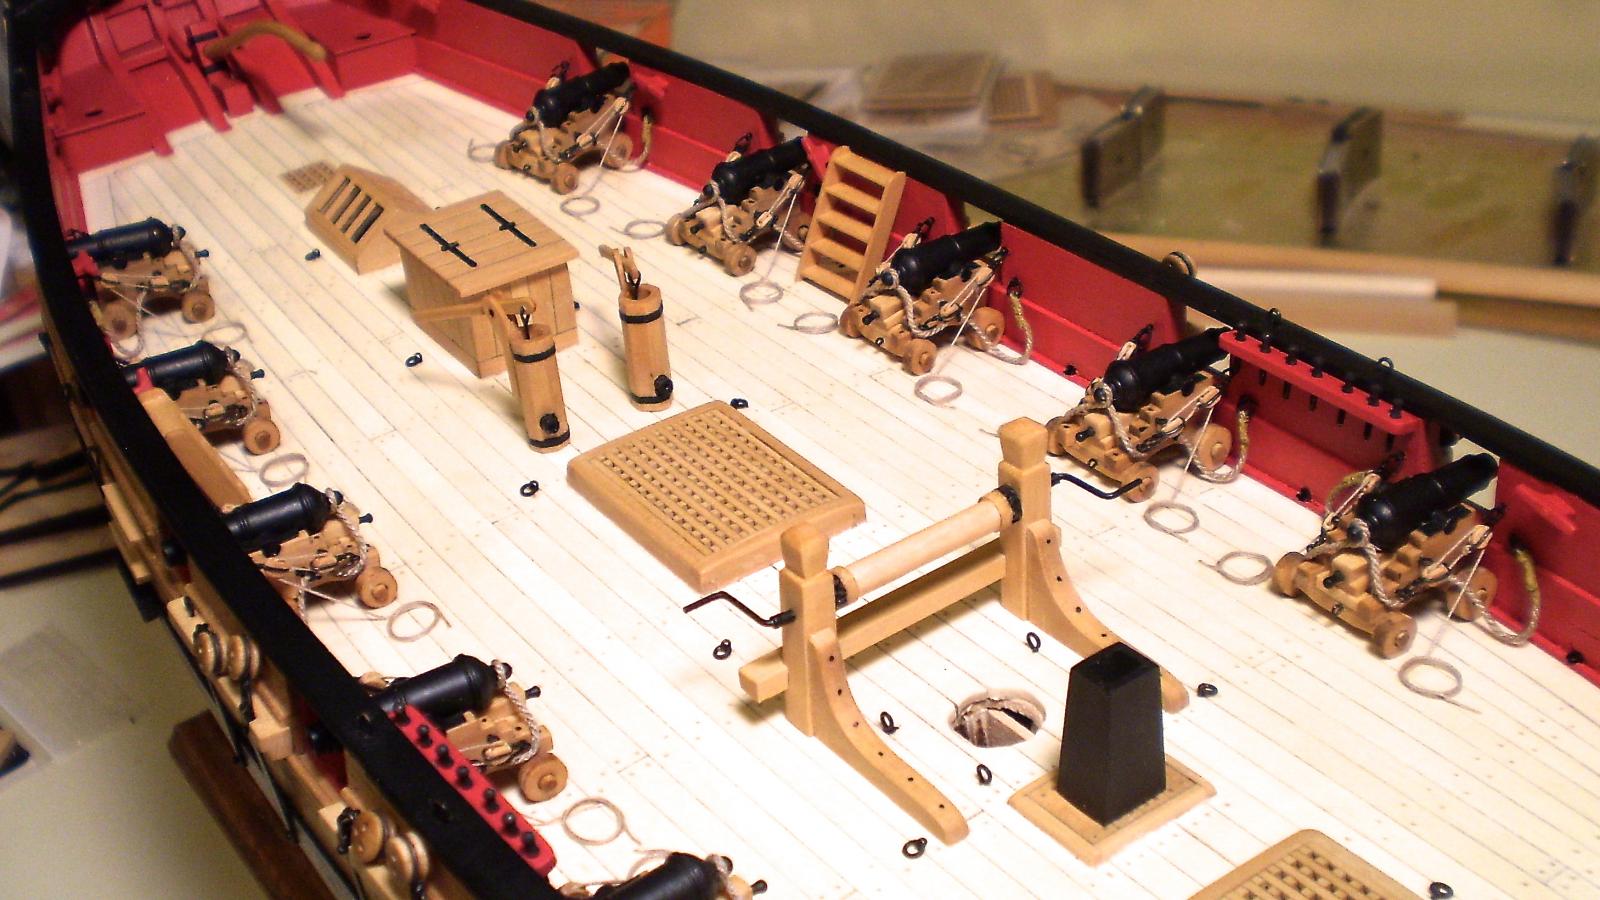
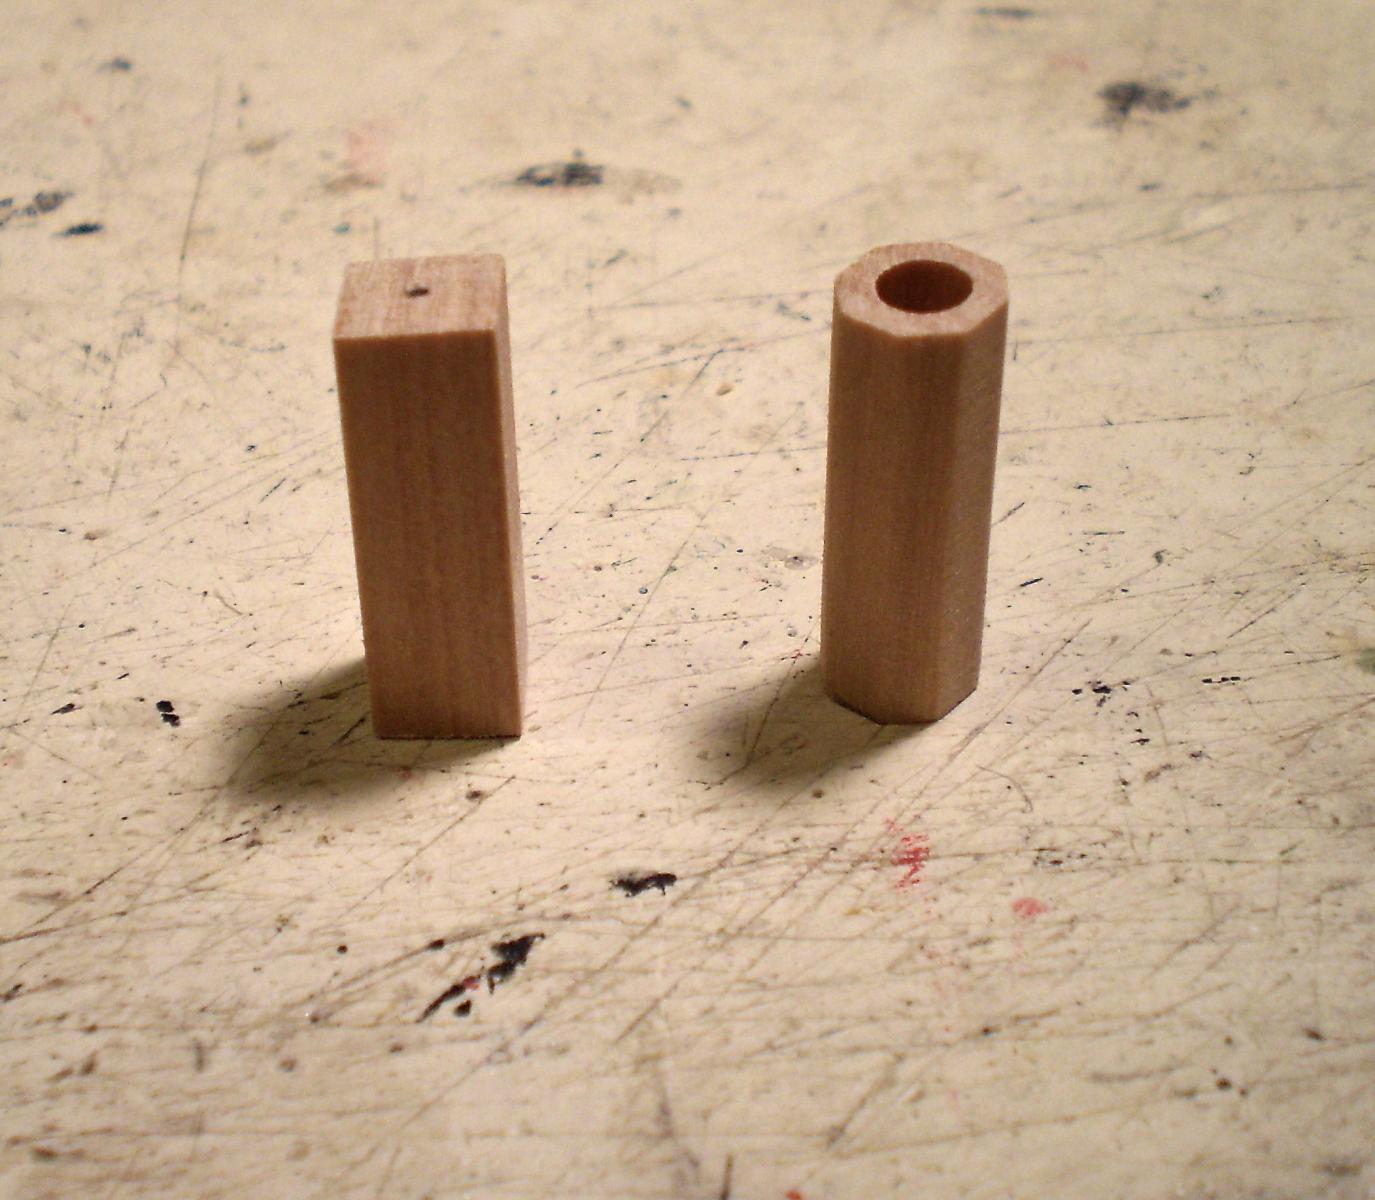
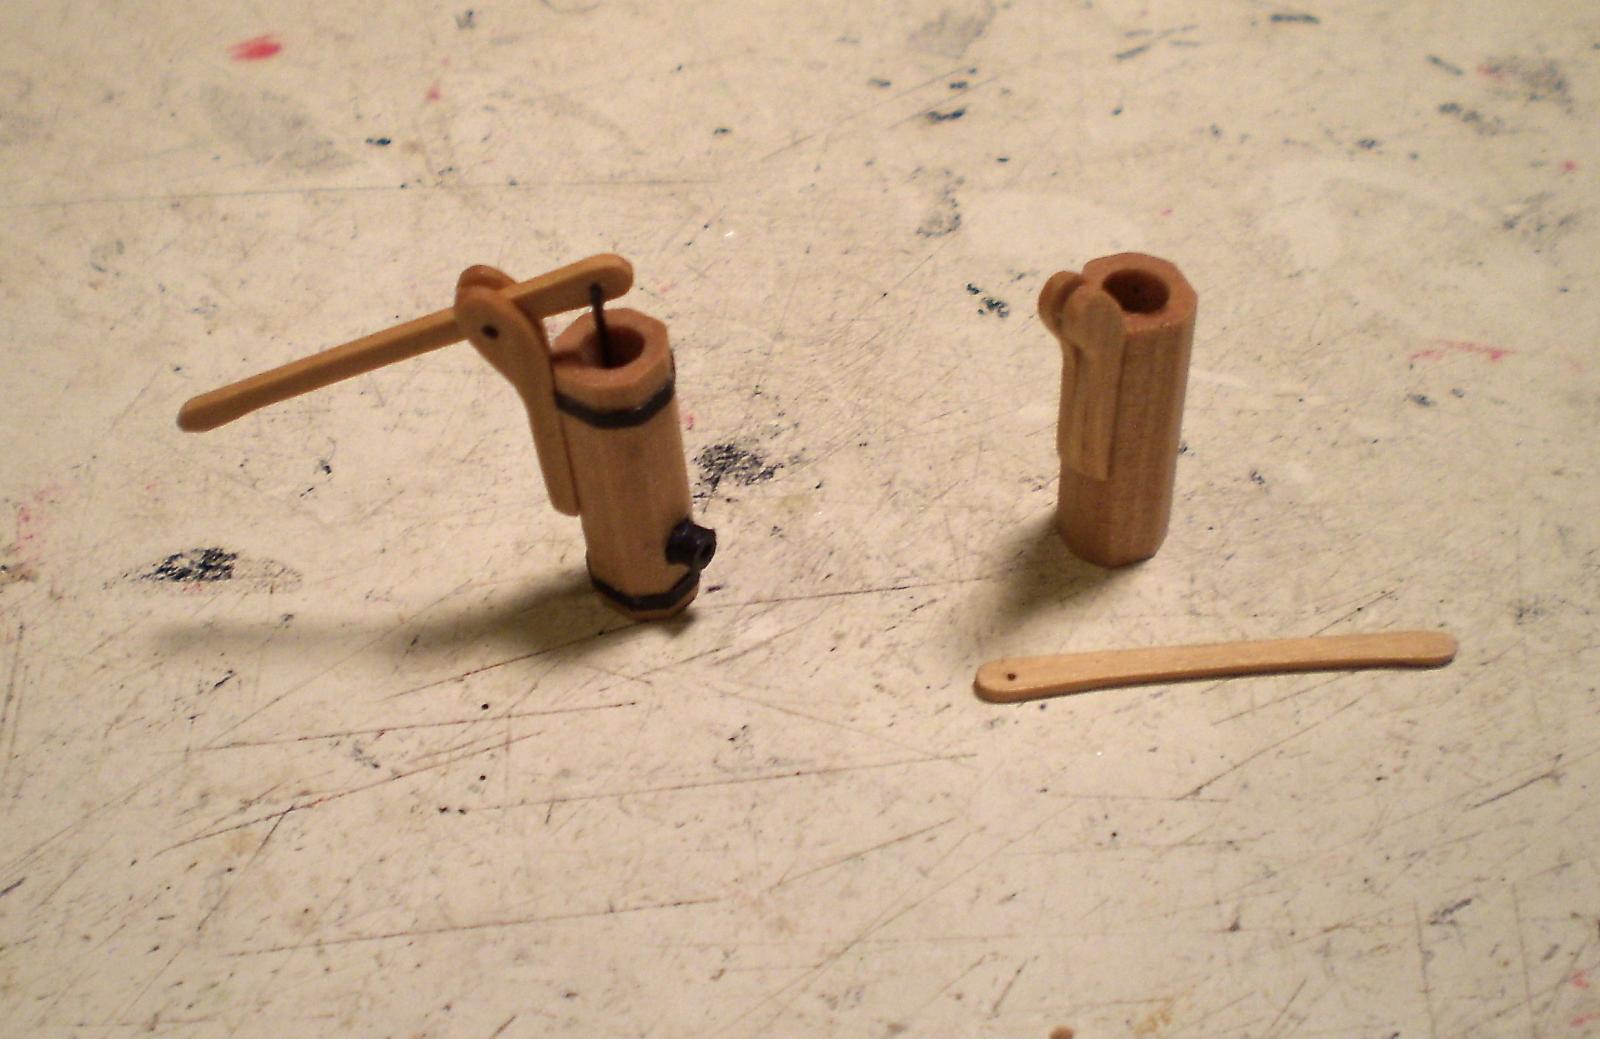
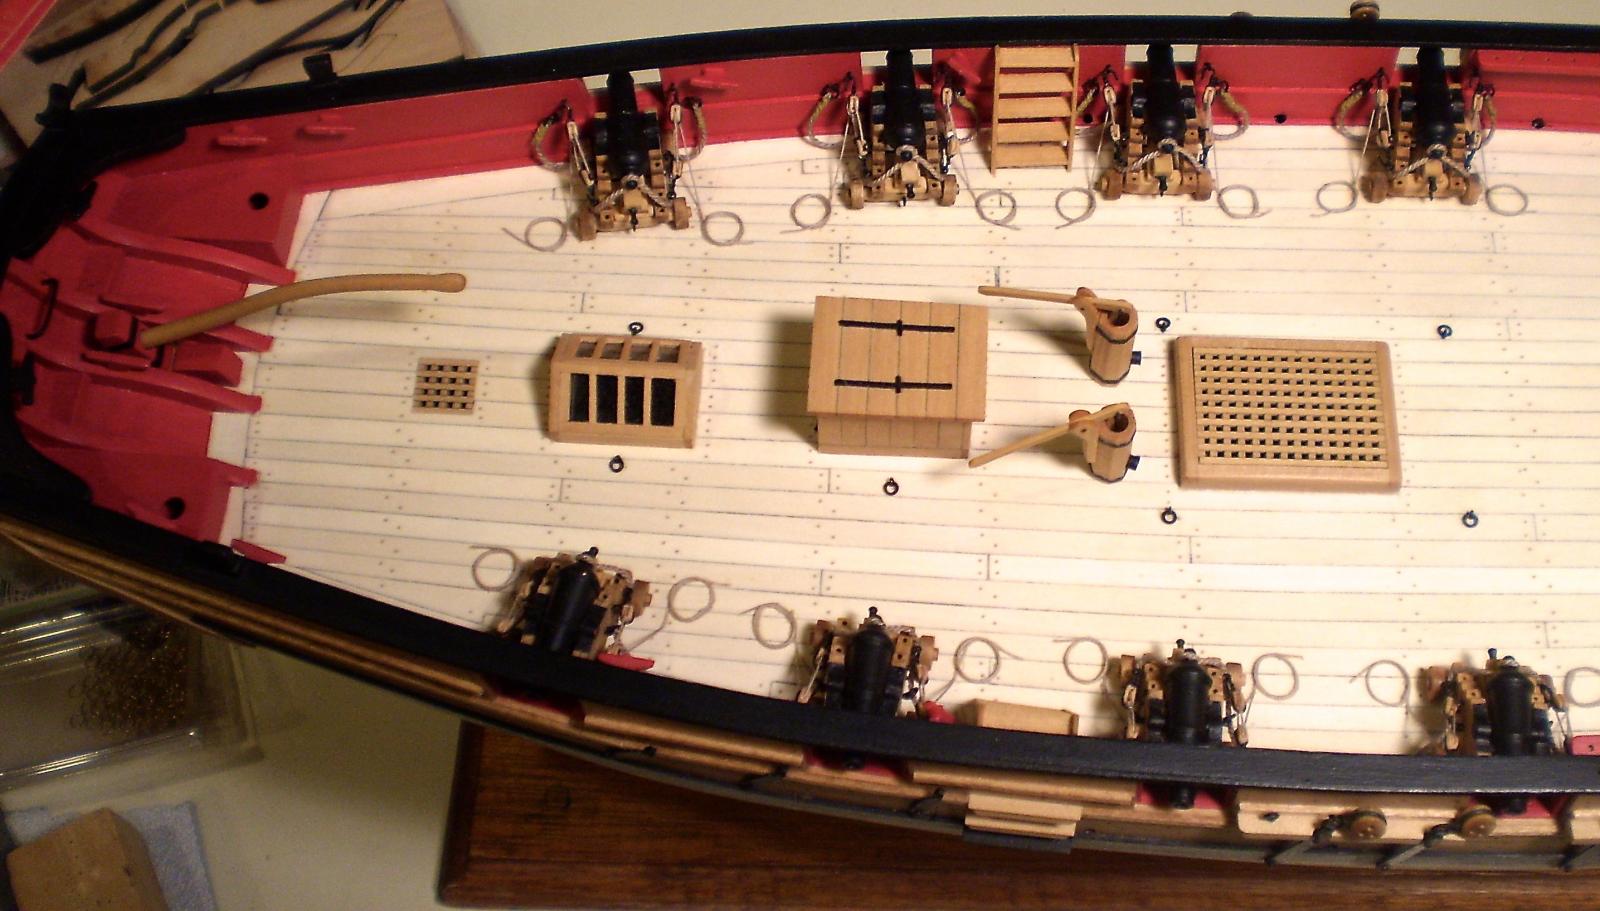
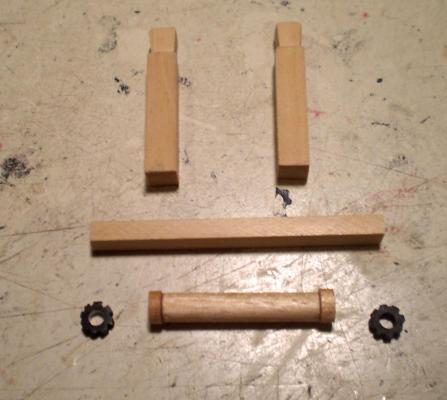
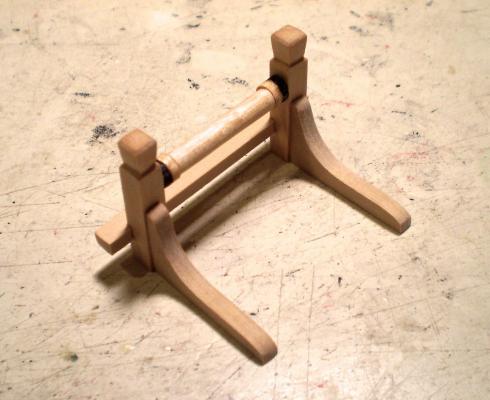
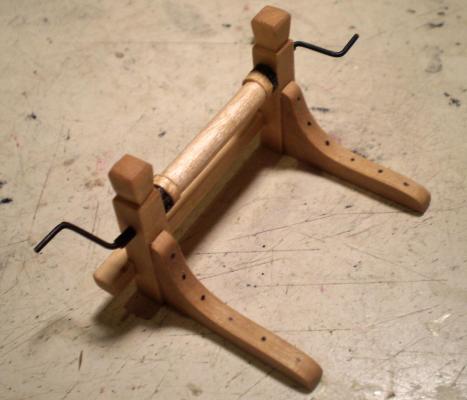
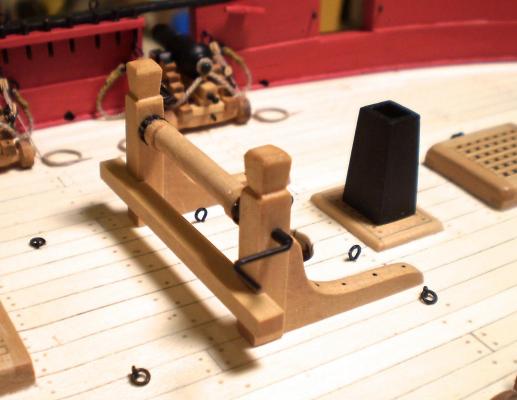
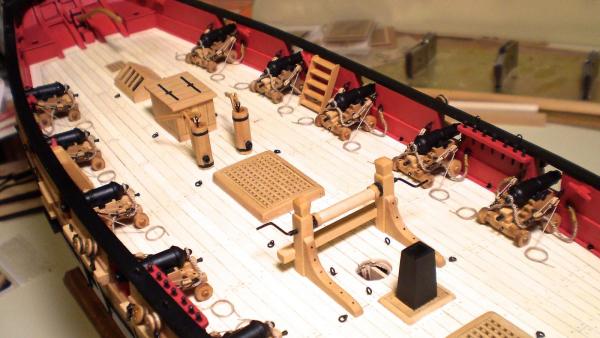
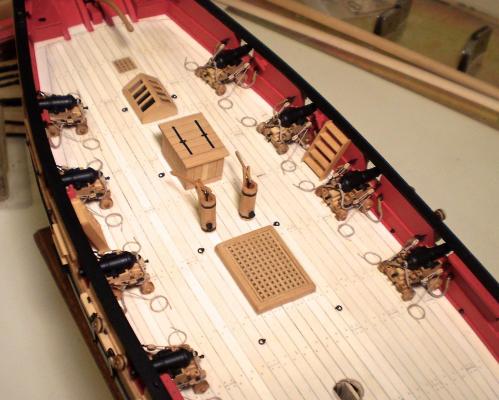
I've now completed the next segment of interior detailing. This included eyebolts at the foot of the mast, deck ringbolts, a couple of bulwark cleats, bulwark pin rails and belaying pins, the last two carronades, the galley stack and the mast bitts and winch. The guns, cleats, ringbolts and eyebolts all followed the procedures previously described for them. The pin rails were cut from boxwood strip, shaped and drilled for the pins, painted red and then pinned and glued to the bulwarks. The belaying pins are commercial brass items, which I blackened. The galley stack was cut in four pieces from 1/32" boxwood sheet, assembled, painted black and installed on it's previously installed base. The mast bitts and winch were a fun piece to do. The bitts were cut from boxwood strip and shaped with files. The cross piece was cut from strip, notched with saw and chisel cuts and mounted on the bitts. The knees were were cut from boxwood sheet and added to the bitts. The winch barrel was made from two sizes of dowel. The gears were an interesting exercise. I first tried, unsuccessfully, to do them from wood with a file. I finally ended up using styrene tube, which I filed lengthwise, and then cut slices to size and painted black. They are hardly perfect, but they are very small and their appearance is satisfactory to me. The handles or cranks are bent brass rod, blackened and passed through pieces of blackened brass tube to represent bearings.I tried to follow the drawings and the photos of the contemporary model, but I have no idea whether this mechanical arrangement is correct. I'm now moving on to the last, forward segment. Bob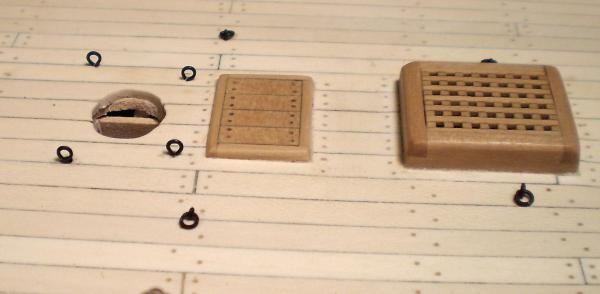


- 525 replies
-
- 37
-
-
- cheerful
- Syren Ship Model Company
- (and 1 more)
-
Welcome aboard Rusty. It's great to have you back as a builder. You will enjoy Cheerful, and we will enjoy watching you do her. Bob
- 310 replies
-
- 6
-
-
- cheerful
- Syren Ship Model Company
- (and 1 more)
-
Erik, your workspace looks very much like mine -- except for the neatness. I wish I had more space, and i'll bet that you do too. Bob
-
Cutter Cheerful 1806 by rafine - FINISHED
rafine replied to rafine's topic in - Build logs for subjects built 1801 - 1850
Thanks so much Sjors. Bob- 525 replies
-
- 4
-
-
- cheerful
- Syren Ship Model Company
- (and 1 more)
-
Cutter Cheerful 1806 by rafine - FINISHED
rafine replied to rafine's topic in - Build logs for subjects built 1801 - 1850
Thanks so much Sal and the "likes". Bob- 525 replies
-
- 3
-
-
- cheerful
- Syren Ship Model Company
- (and 1 more)
-
Cutter Cheerful 1806 by rafine - FINISHED
rafine replied to rafine's topic in - Build logs for subjects built 1801 - 1850
Thanks so much Erik, Dirk, George, Grant and Albert for the nice comments and thanks also to the "likes".- 525 replies
-
- 4
-
-
- cheerful
- Syren Ship Model Company
- (and 1 more)
-
Cutter Cheerful 1806 by rafine - FINISHED
rafine replied to rafine's topic in - Build logs for subjects built 1801 - 1850
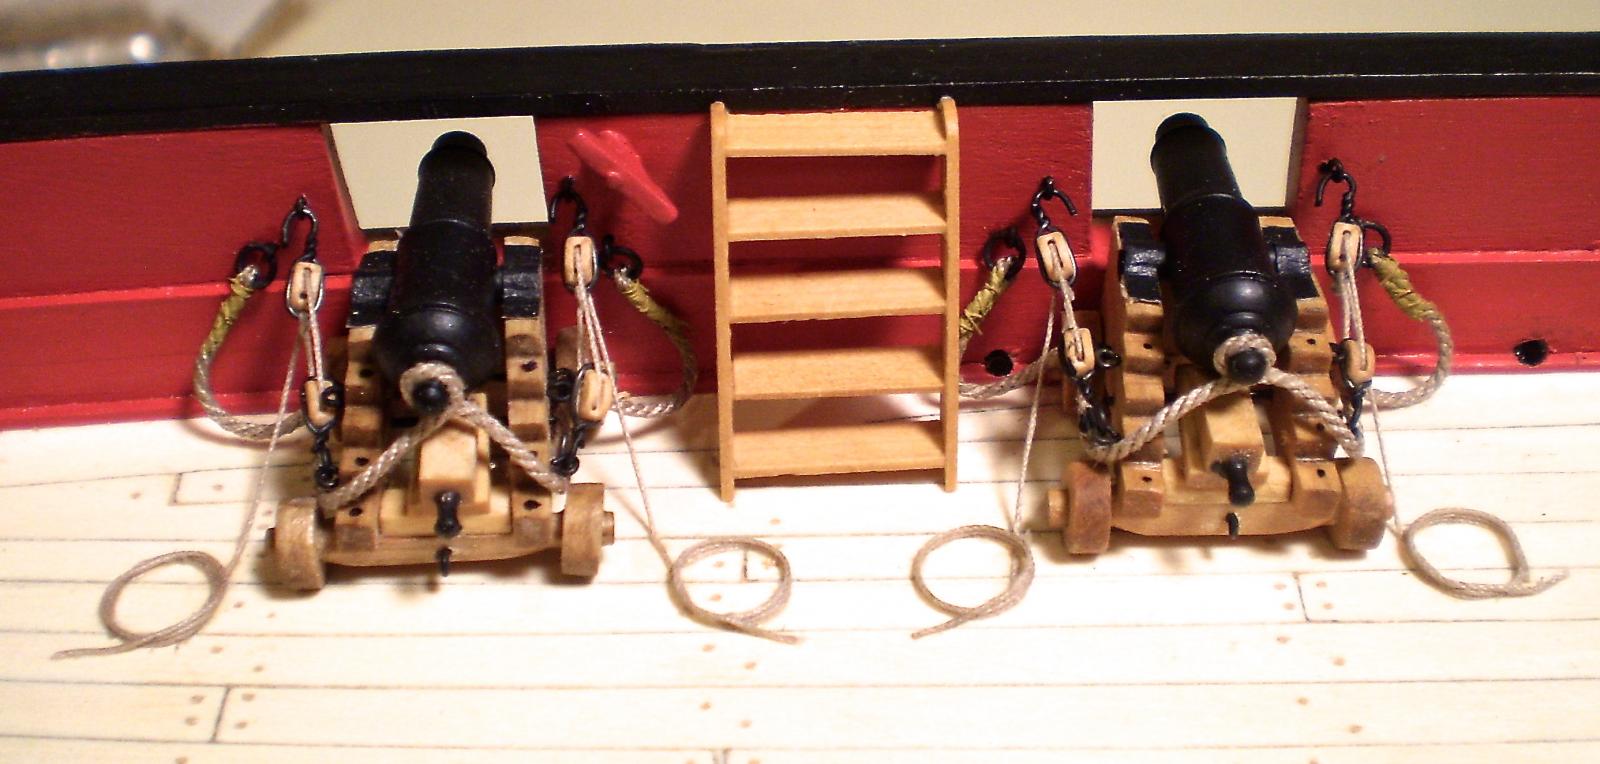
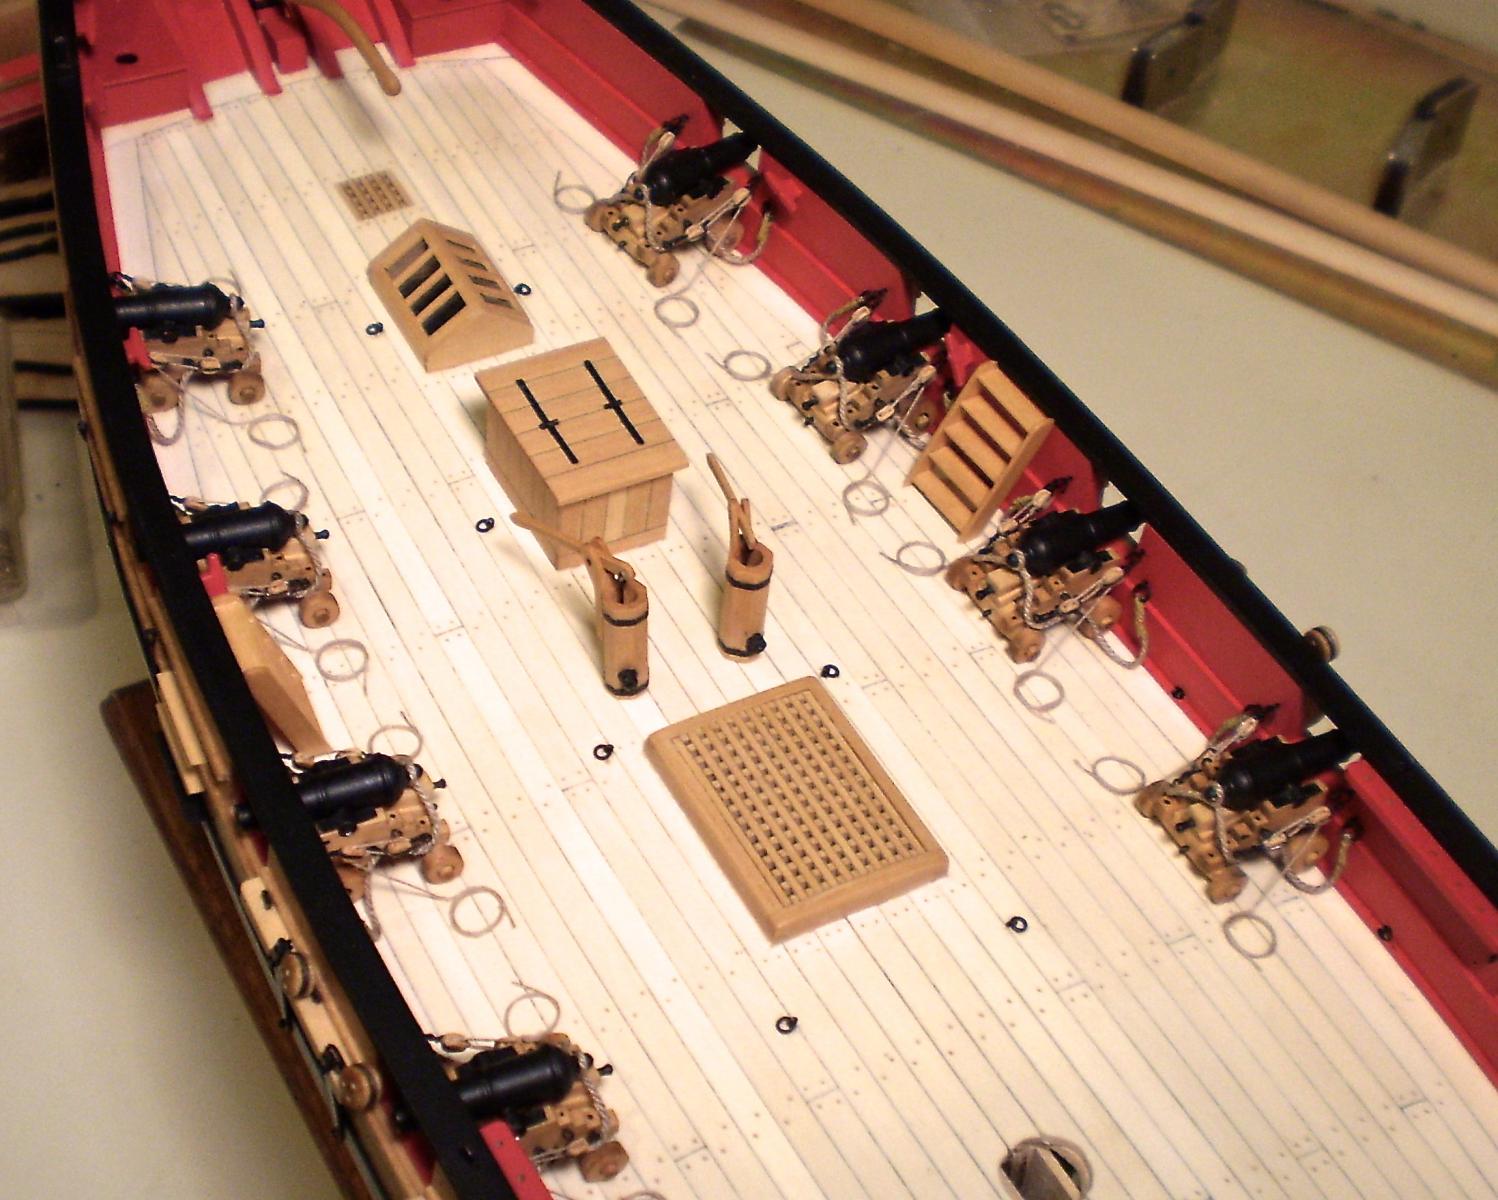
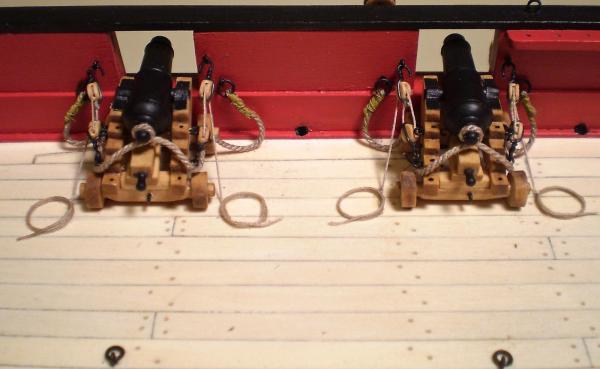
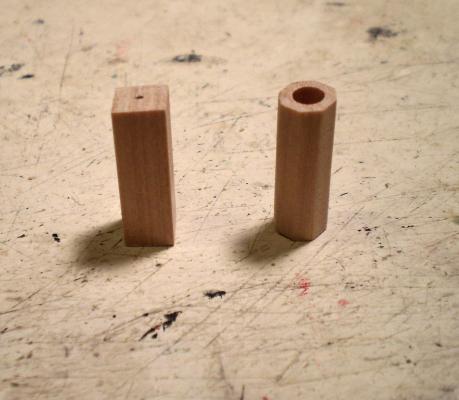
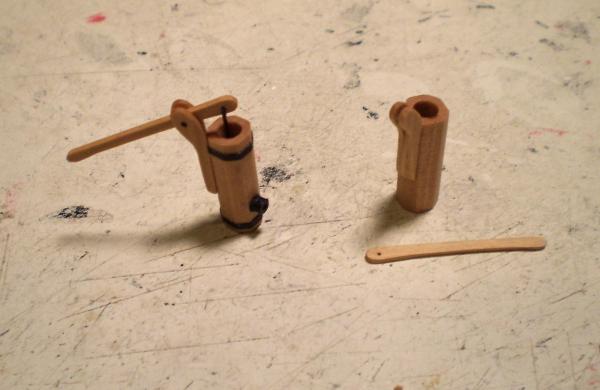
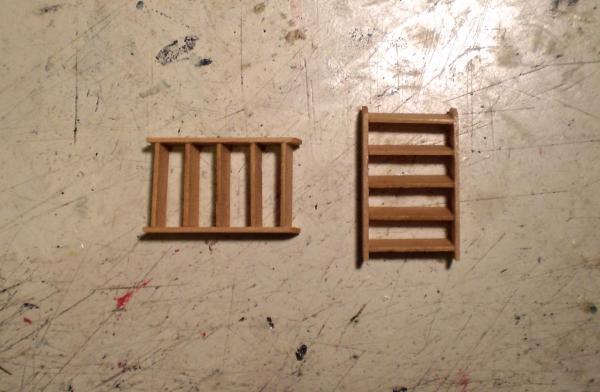
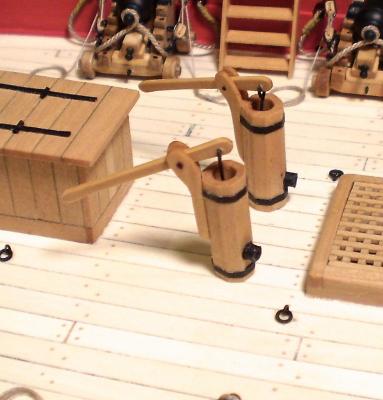
I've now completed the next segment of the interior detailing. This included four more guns, the pumps, the entry ladders, four deck ringbolts and the interior scupper openings. The guns were made and rigged as on the previous guns. The pumps were made from boxwood strip. Square pieces were drilled out and then shaped to octagon with sanding sticks. The handles and their mounting brackets were shaped from strip and pieces of wire added. The bands are black painted paper. The drains are bits of black painted tube, inserted in drilled holes. The ladders are boxwood strip. They were very simply made, without use of slotting tools or fancy jigs. As a result, they are certainly not perfect, but after a couple of tries, I was satisfied. The scupper openings are drilled holes, which do not go through to the exterior openings, but match up closely with them. They were painted graphite with a toothpick. The ringbolts again are blackened brass. Bob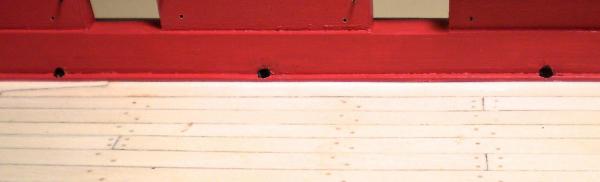


- 525 replies
-
- 31
-
-
- cheerful
- Syren Ship Model Company
- (and 1 more)
-
Cutter Cheerful 1806 by rafine - FINISHED
rafine replied to rafine's topic in - Build logs for subjects built 1801 - 1850
Thanks so much Thomas. The gun carriages are boxwood, from Chuck's carriage kits. Bob- 525 replies
-
- 3
-
-
- cheerful
- Syren Ship Model Company
- (and 1 more)
-
Buying an Expensive Kit and throwing most of it away
rafine replied to pirozzi's topic in Wood ship model kits
I'm with B.E., Erik, Don and Joel. While I know that I can scratch build (I've done the Triton cross section), I have no power tools, and the thought of hand cutting all of the framing for a full ship just doesn't appeal to me. I'd rather spend my time on other aspects. For me, buying a kit simply provides a convenient way to get plans, framing and whatever else may be of use, and then go from there with enhanced wood and scratch building. Bob- 72 replies
-
- 19
-
-
Echo by Maury S - FINISHED - Cross-Section
rafine replied to Maury S's topic in - Build logs for subjects built 1751 - 1800
Beautiful work Maury. A really nice accomplishment. Bob