G.L.
-
Posts
1,553 -
Joined
-
Last visited
Content Type
Profiles
Forums
Gallery
Events
Everything posted by G.L.
-
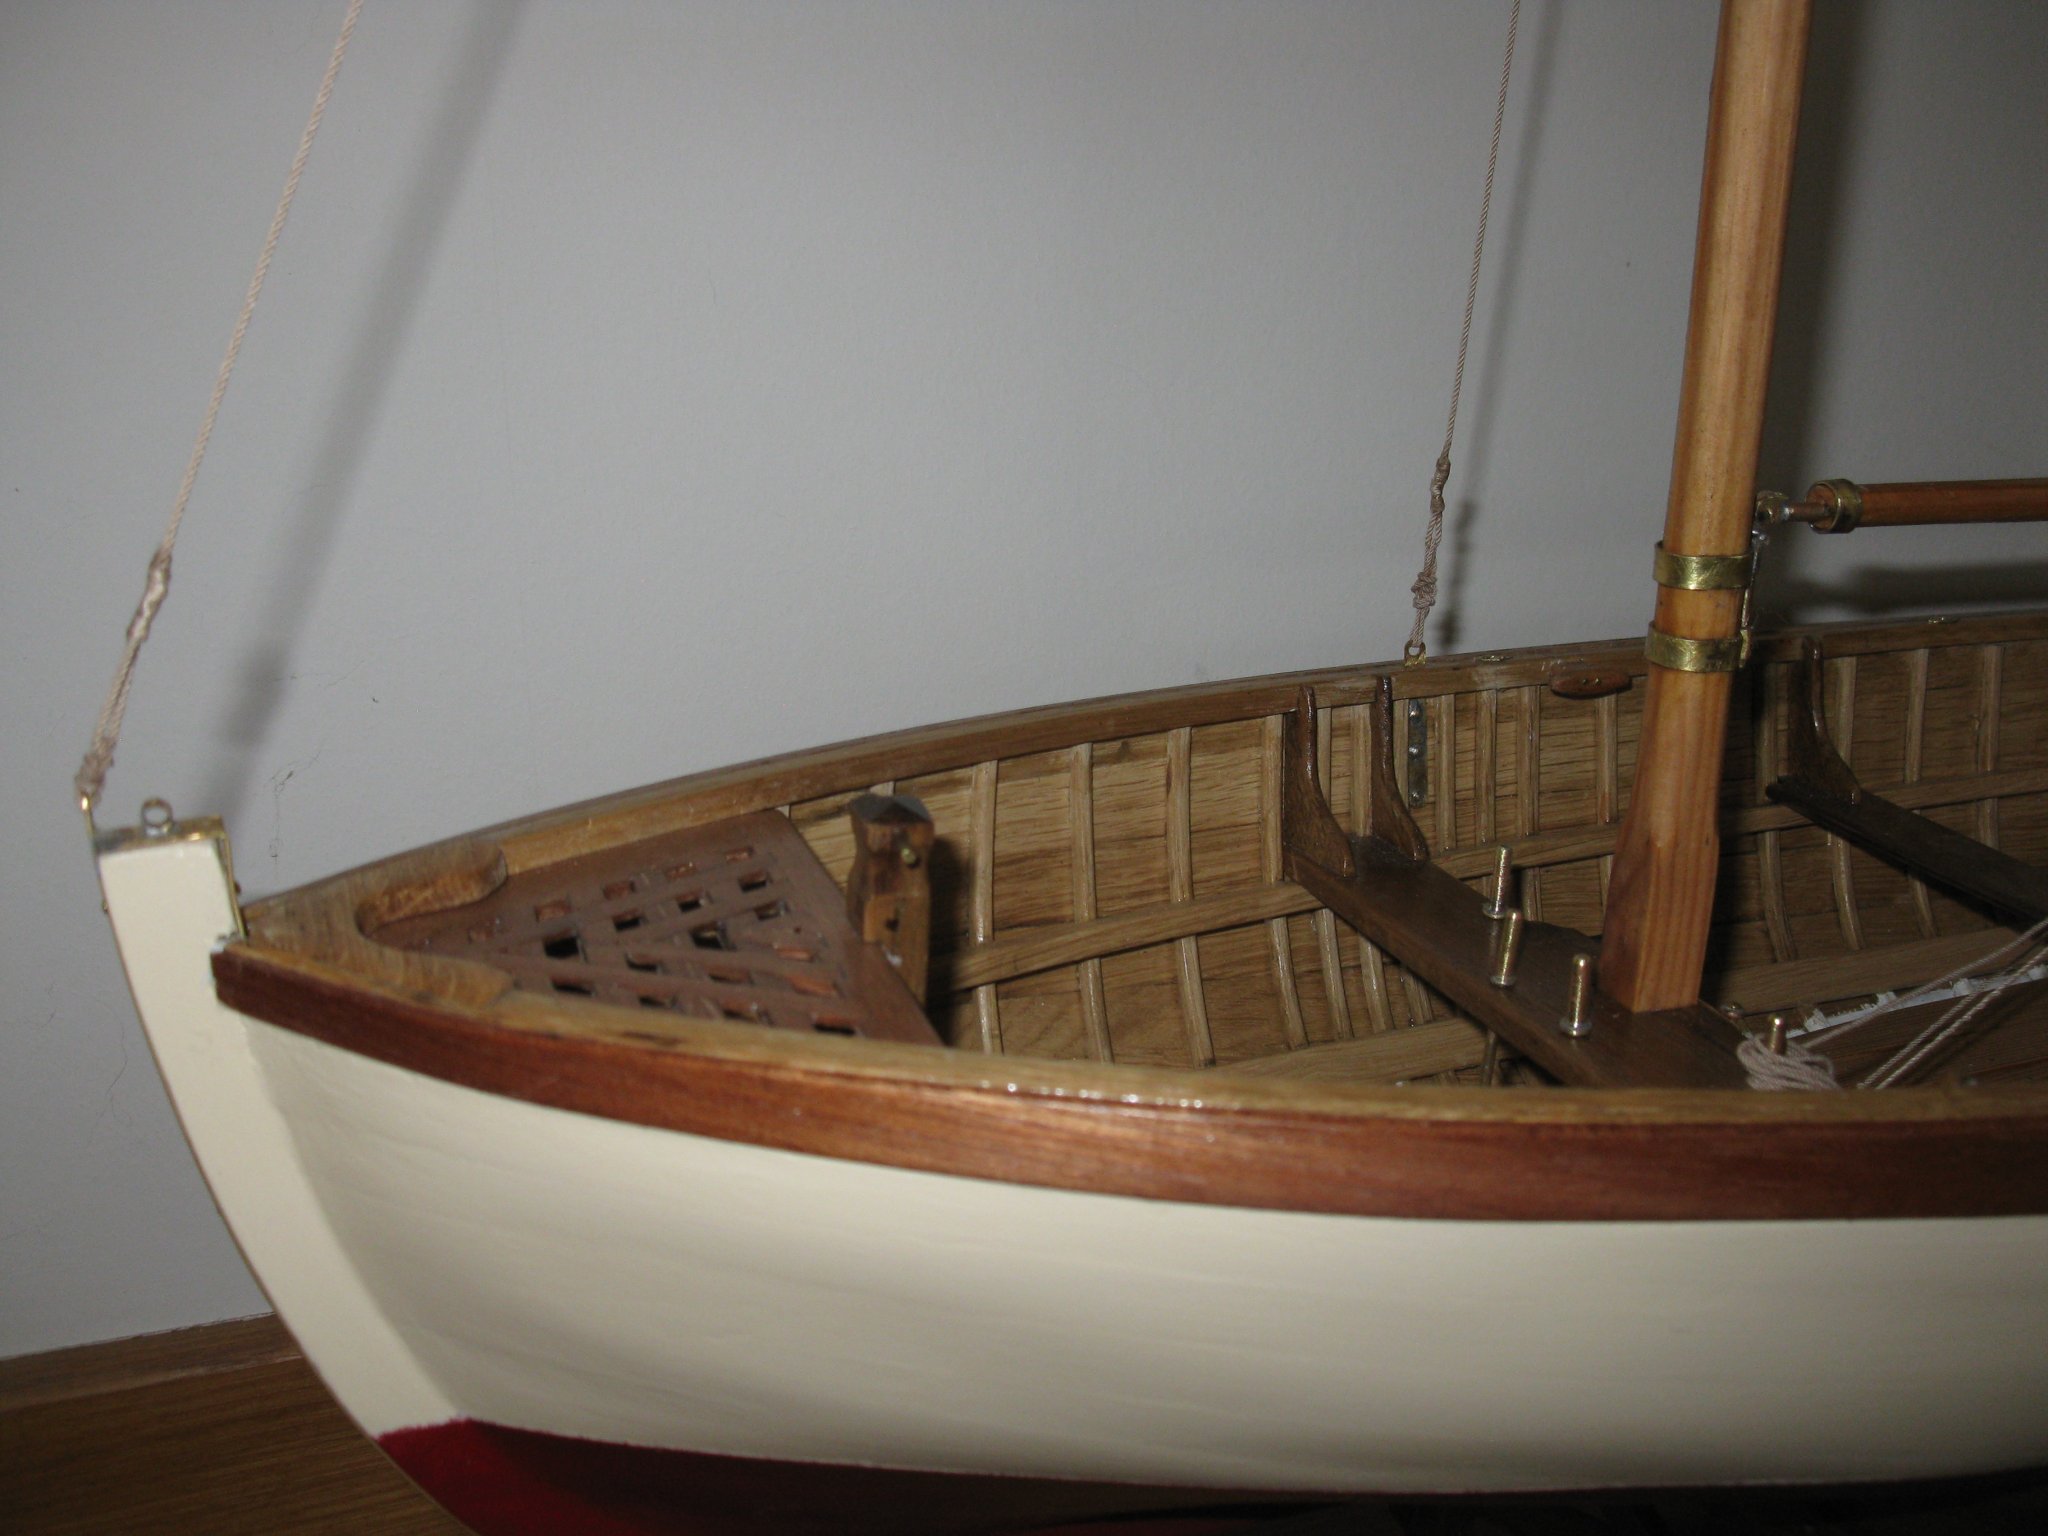
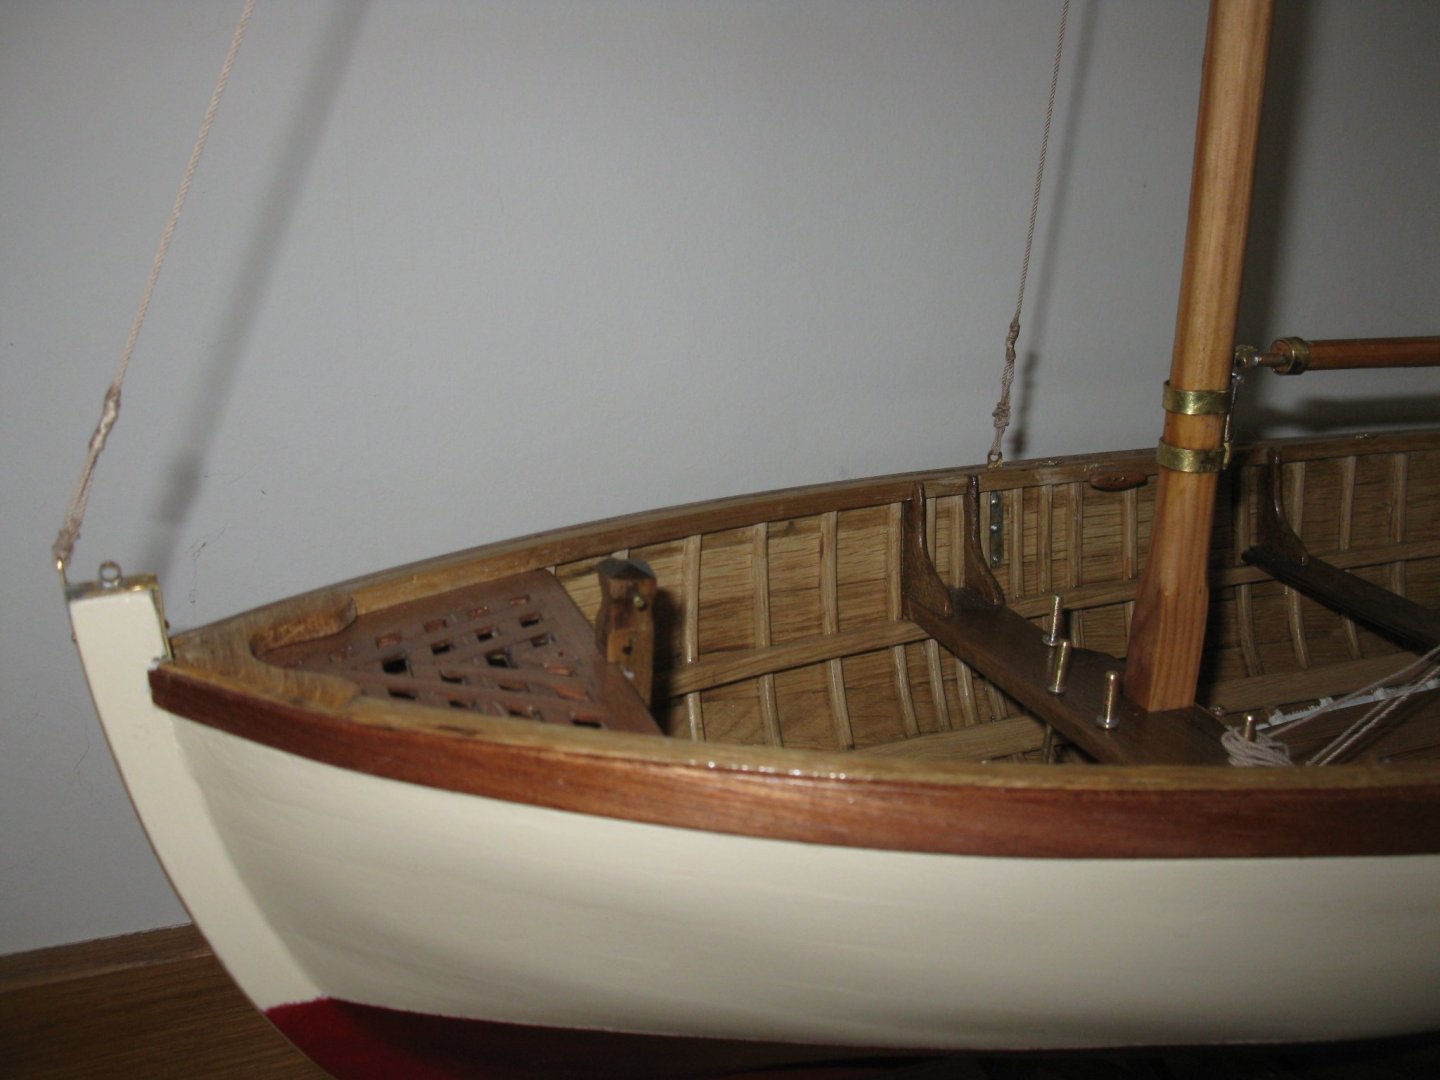
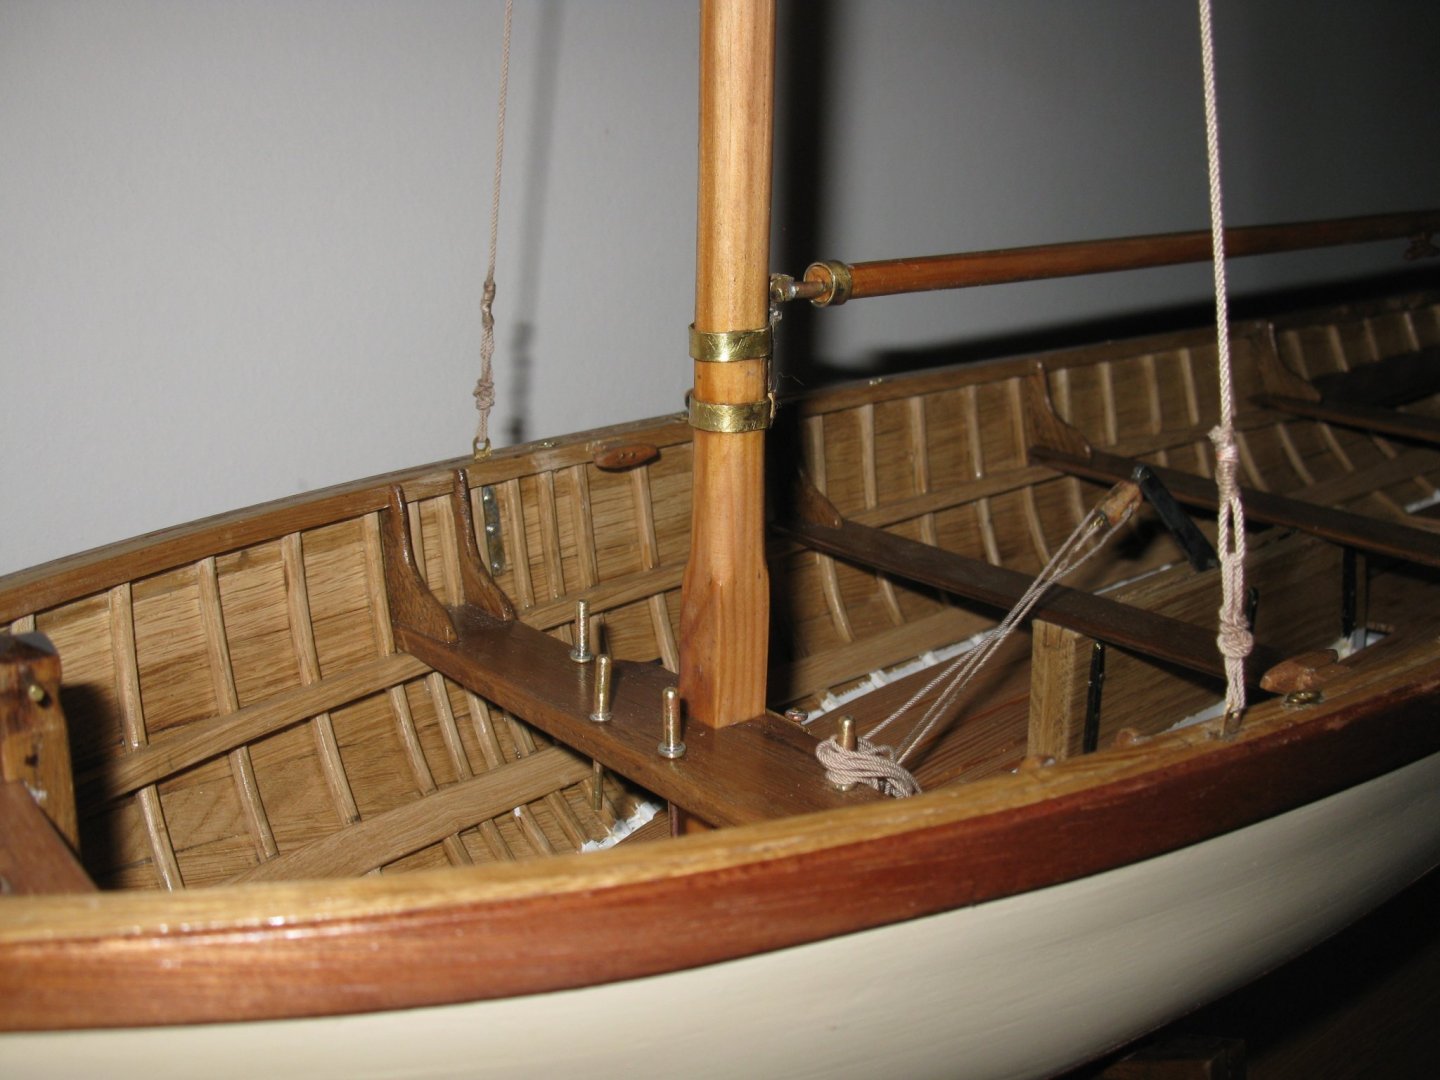
 12.3 Rigging of the mast 12.3.1 Standing rig The mast is supported by three stays: One to the stem and two to the chain plates at the sides. 12.3.1 Running rig Top of the mast and gaff: 12.3.2 Running rig main sheet.

-
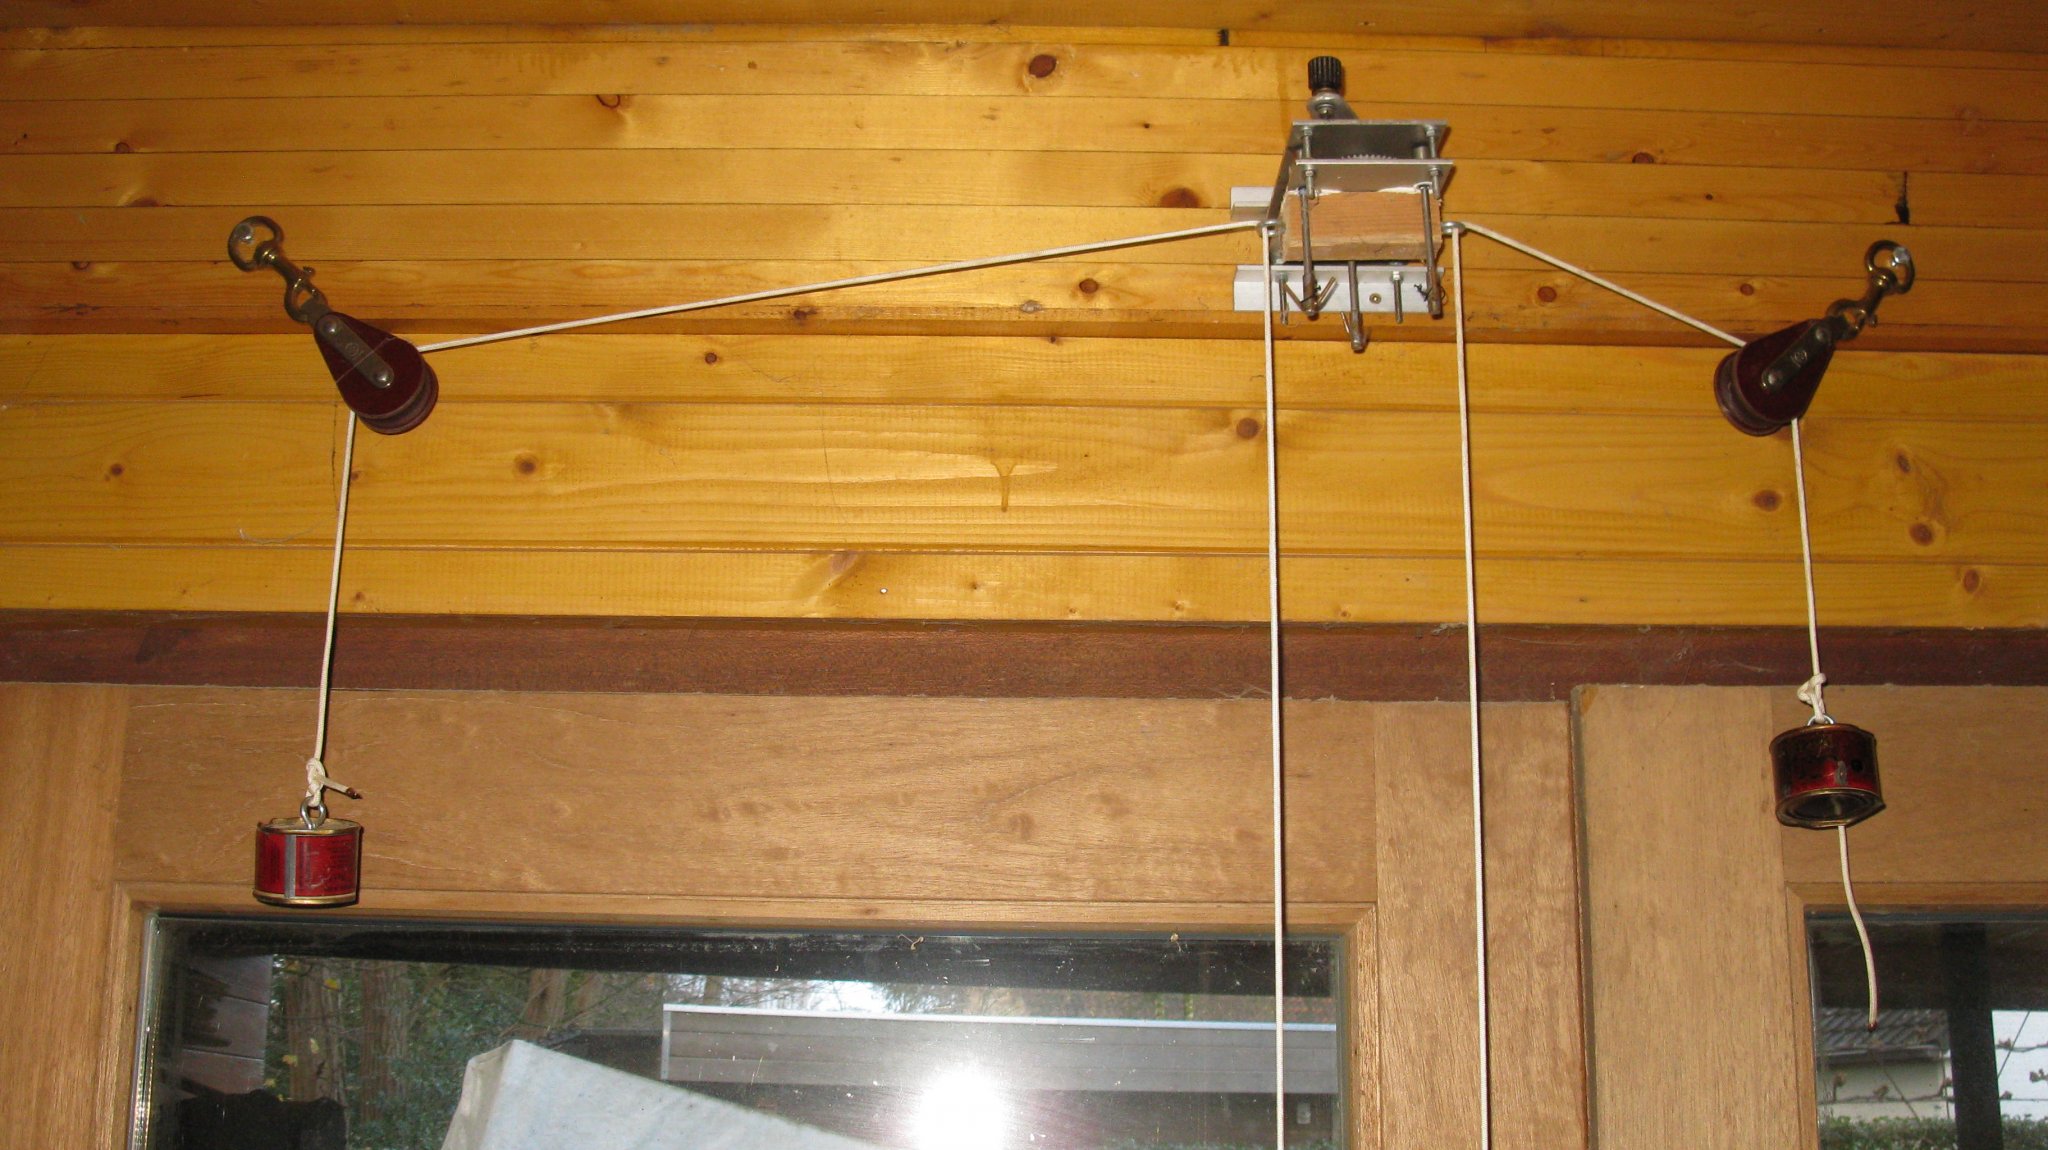
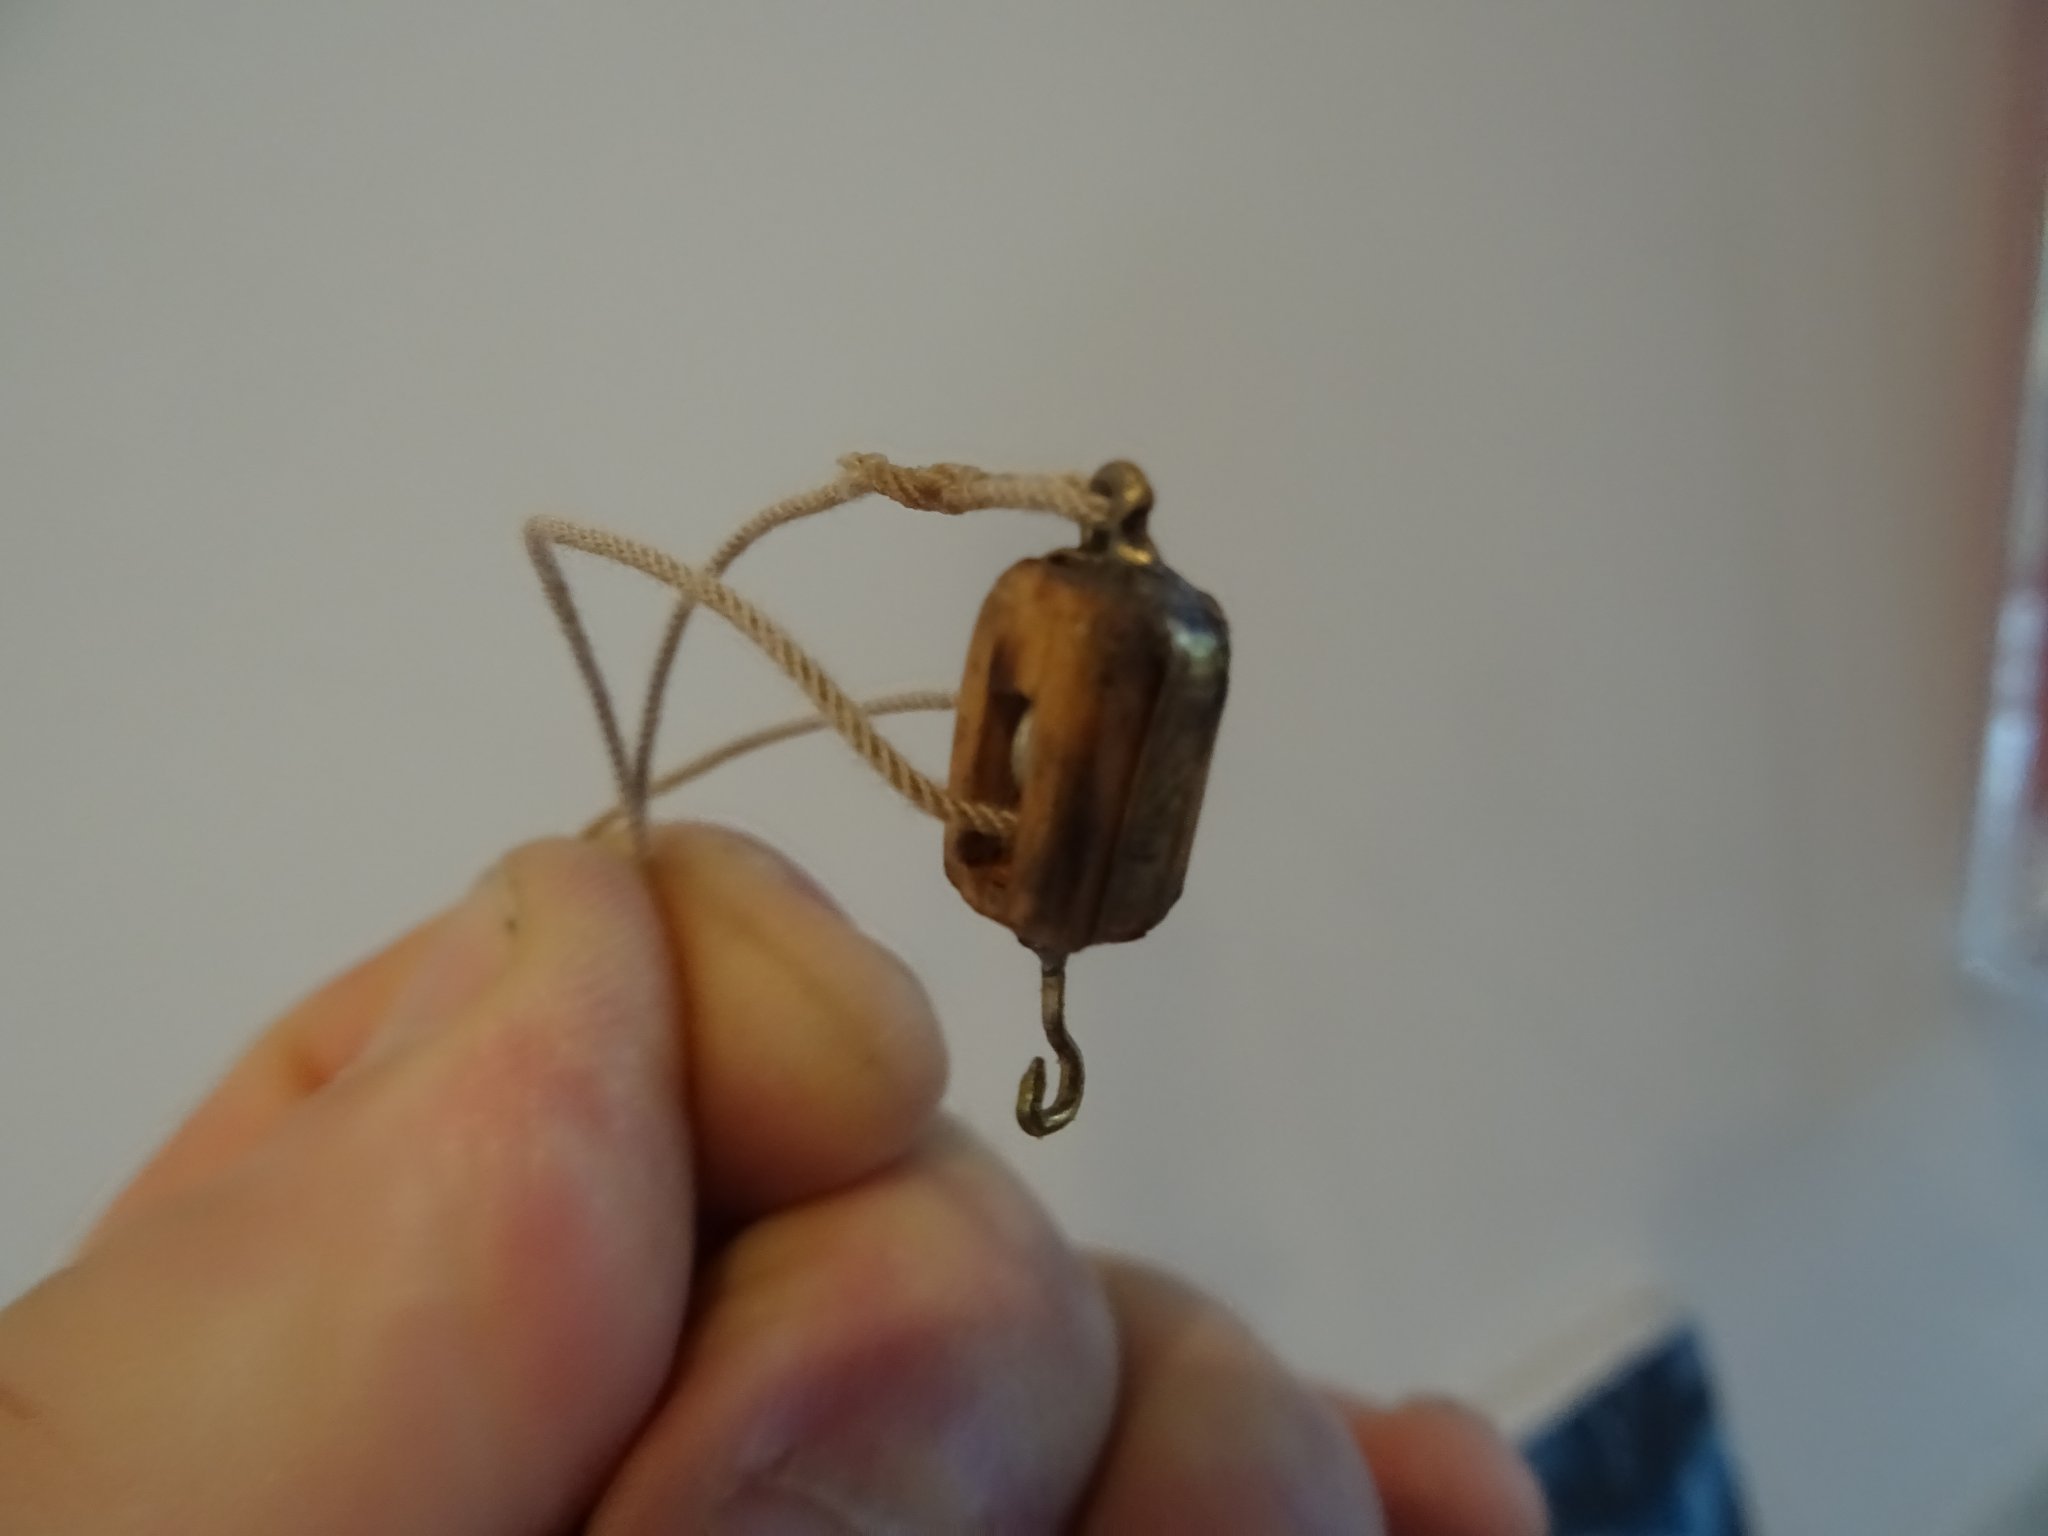
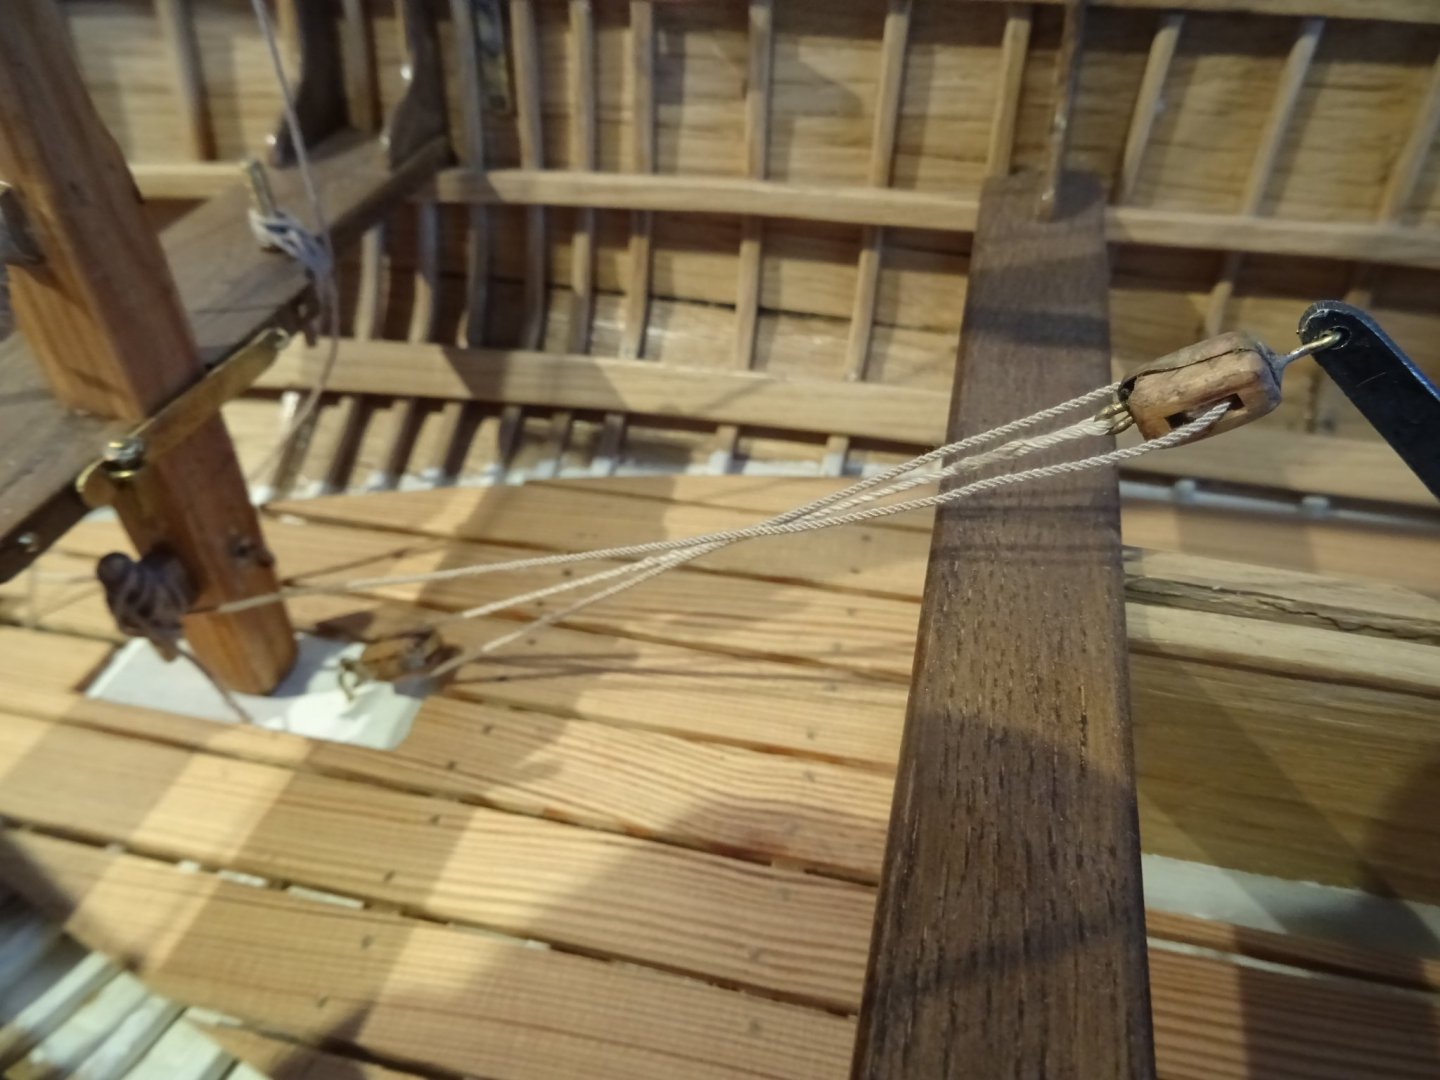
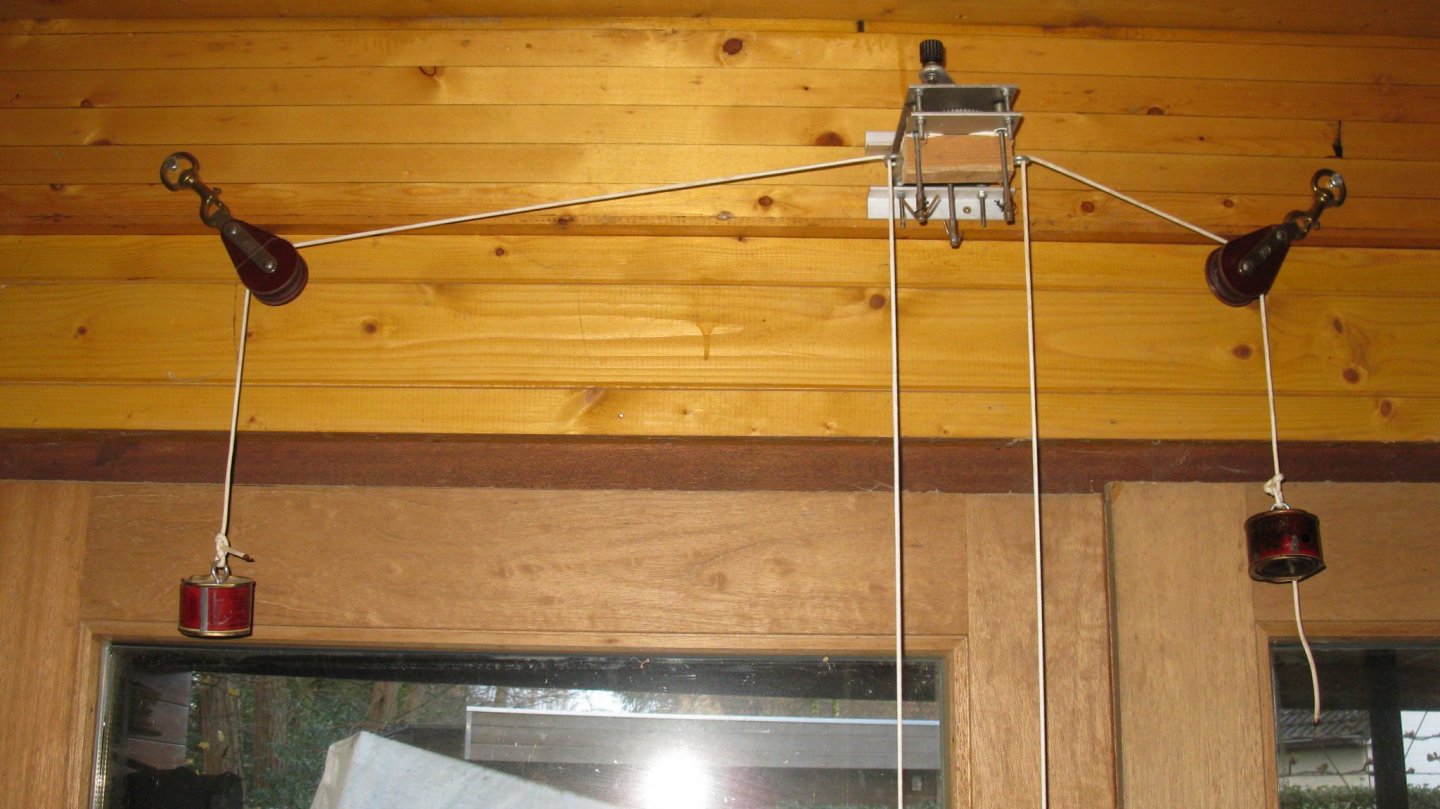
12.2 Rigging of the center board. The center board can be lowered and hauled with a tackle of two single blocks.
-
That is a very nice small boat squadron.
-
Thank you Vaddoc, The rope is homemade with DMC thread. My ropewalk is manual operated and vertical. It is very unpractical. I have to stand on a ladder to operate the handle. I am not really satisfied by it. I would like to make such one like you showed us in your Deben 5-tonner log in September. I was very pleased by the video that you posted then.

- 209 replies
-
- 10
-

-
I am glad that I inspire you to continue your Buzzards Bay sailboat, Michael. It is one of your projects that I follow with much interest.
-
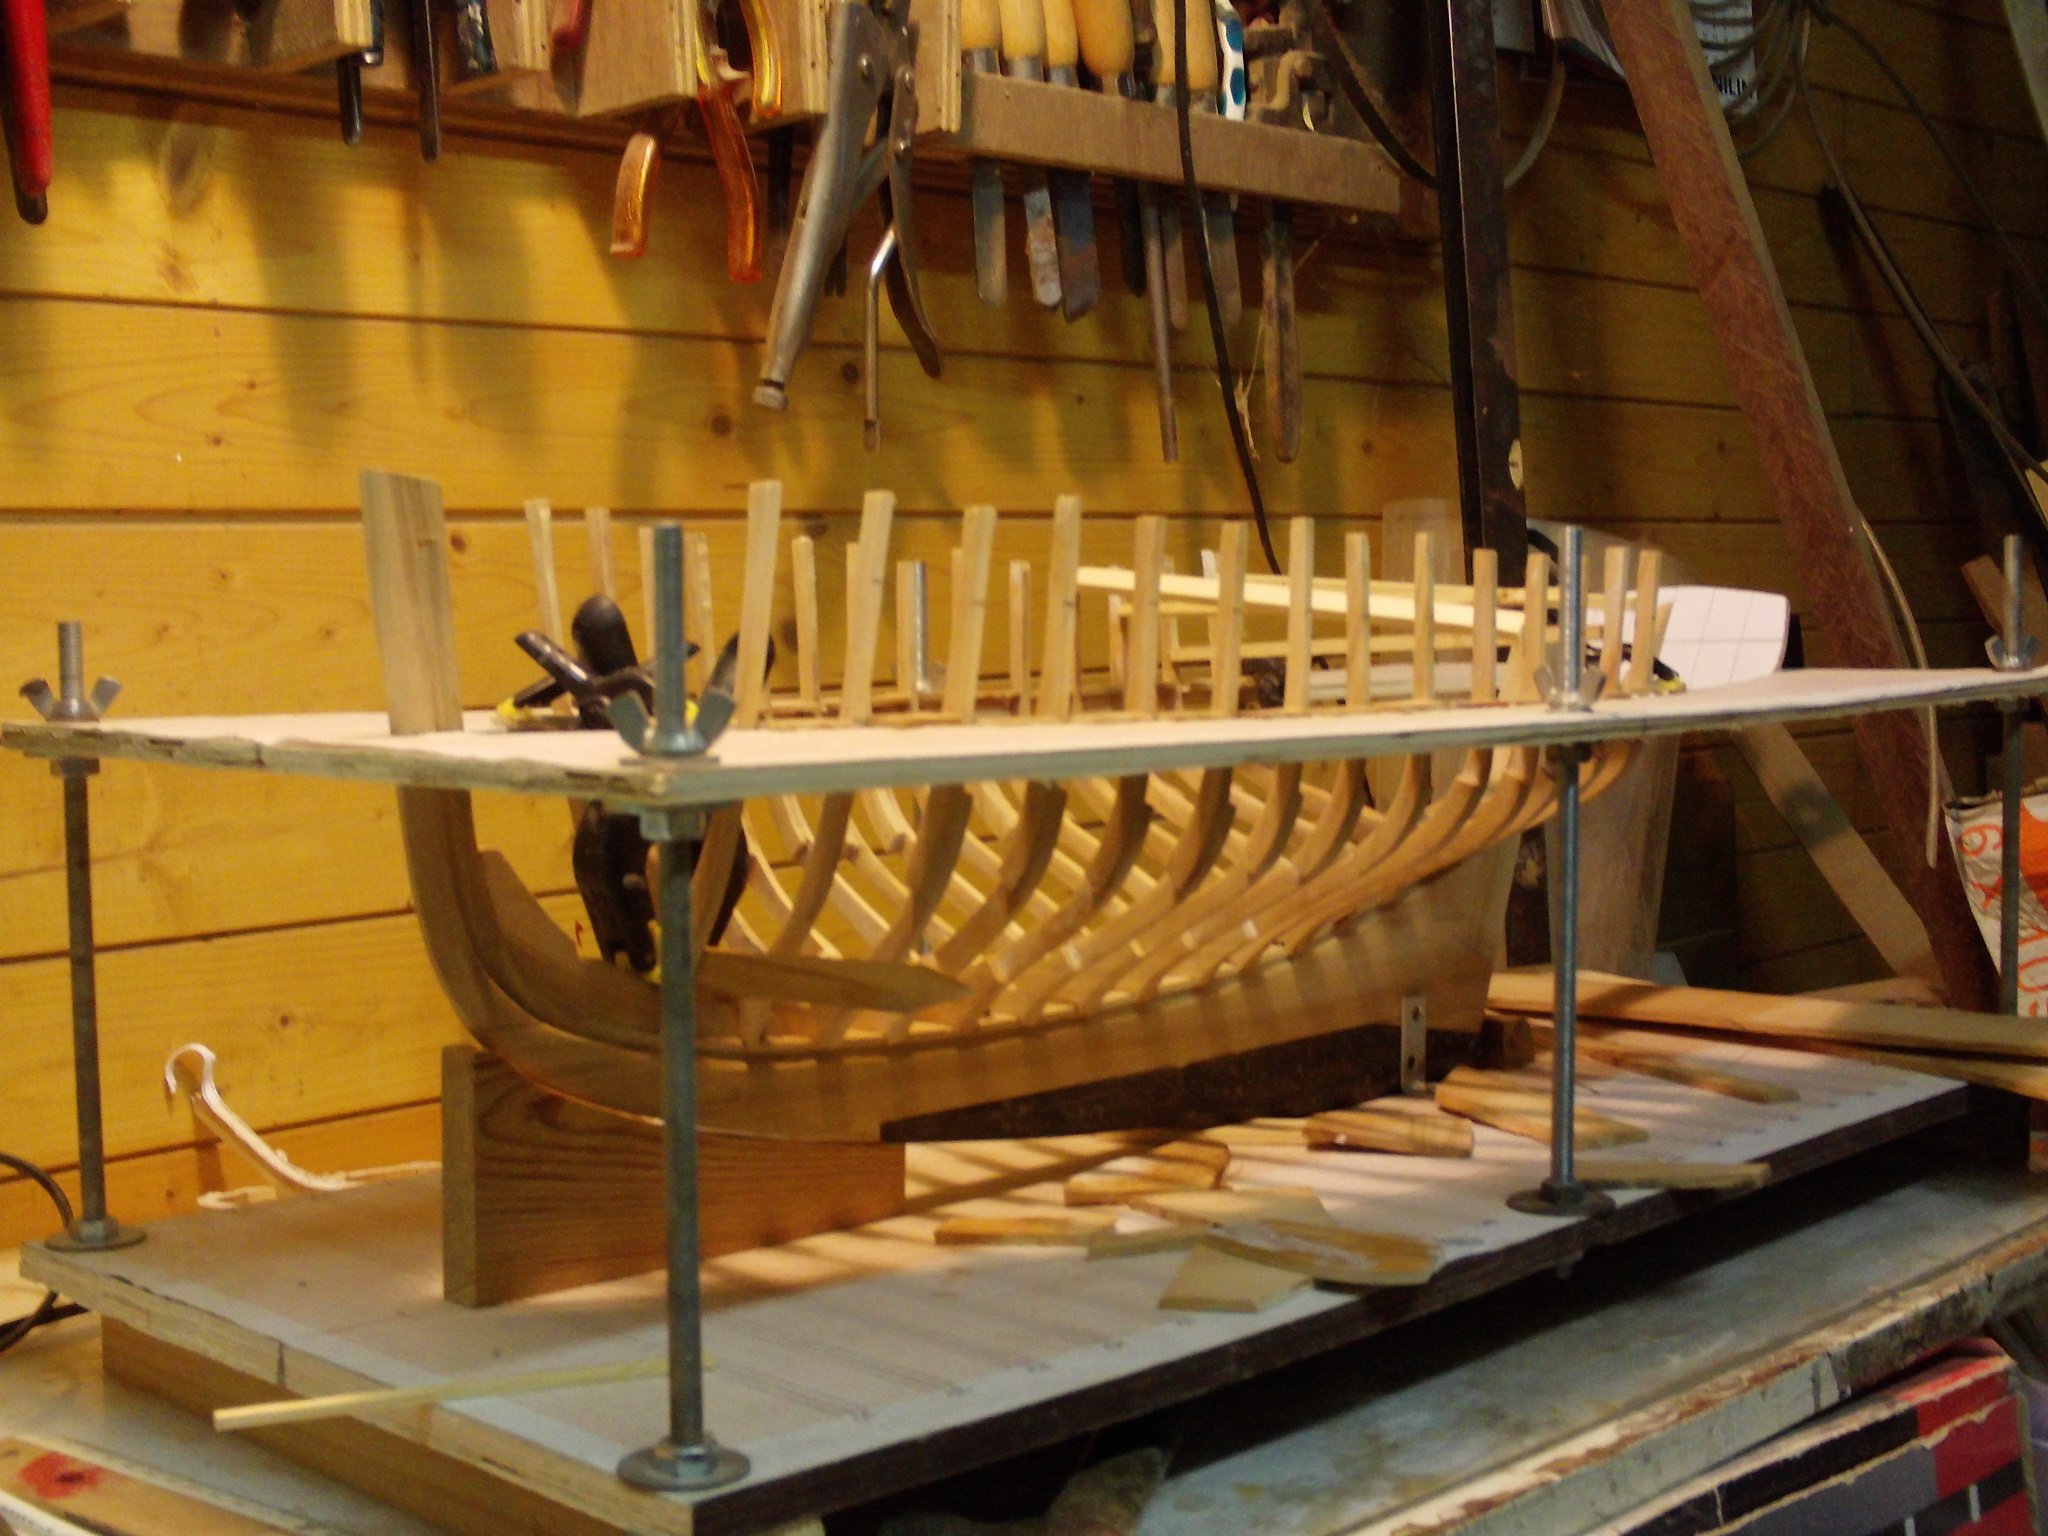
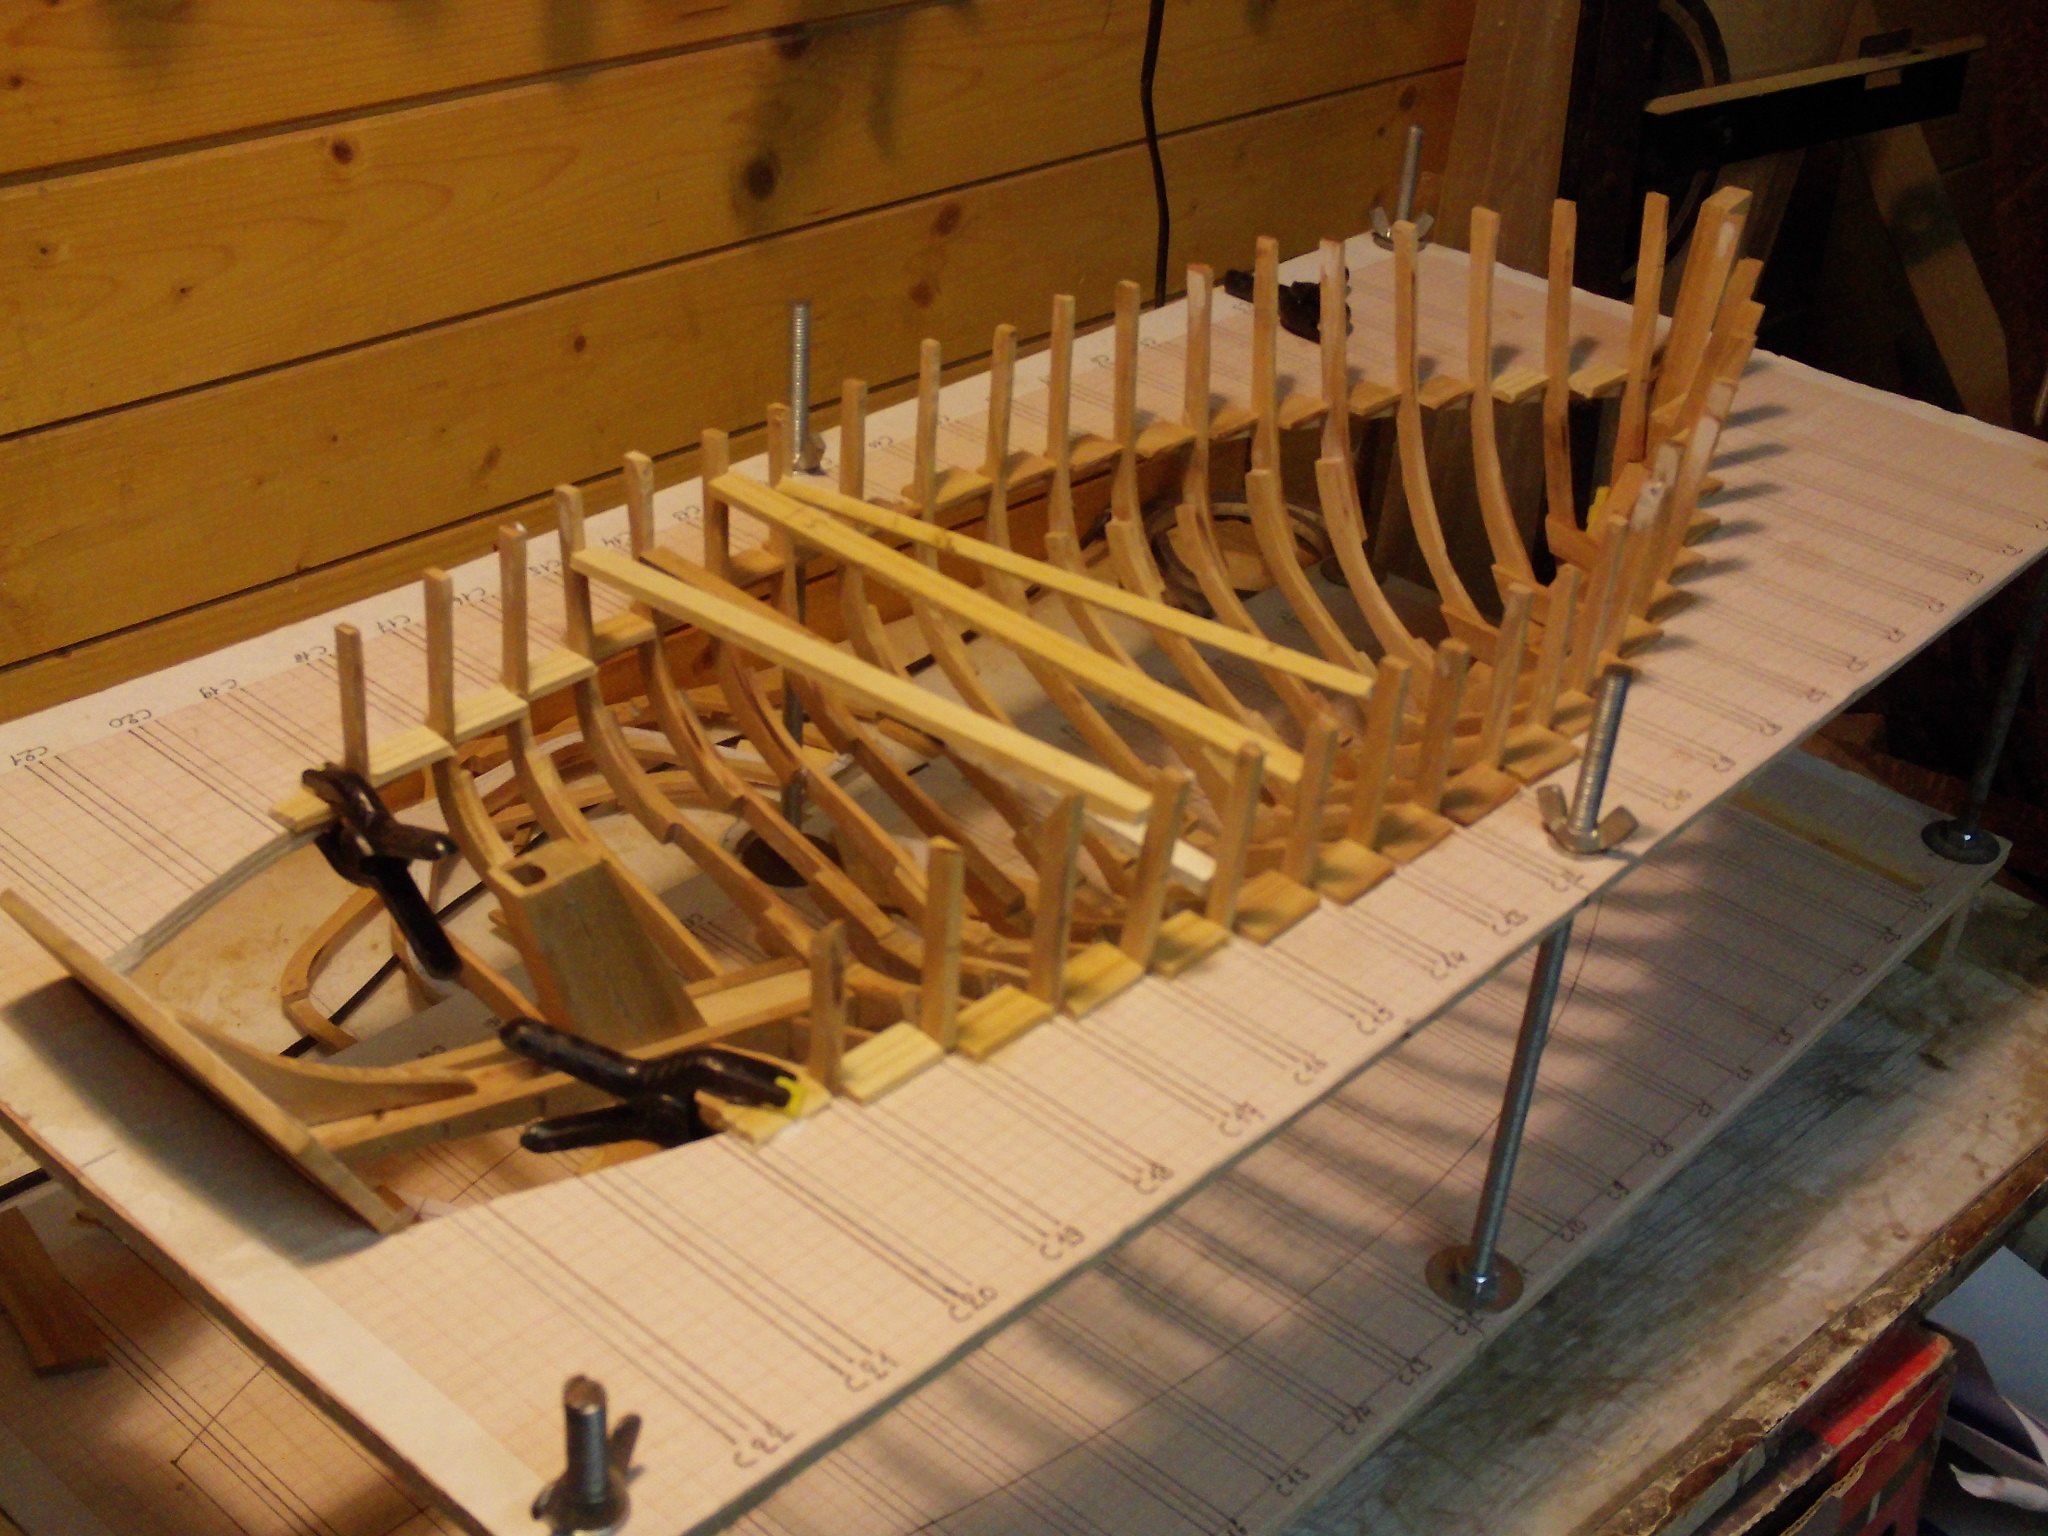
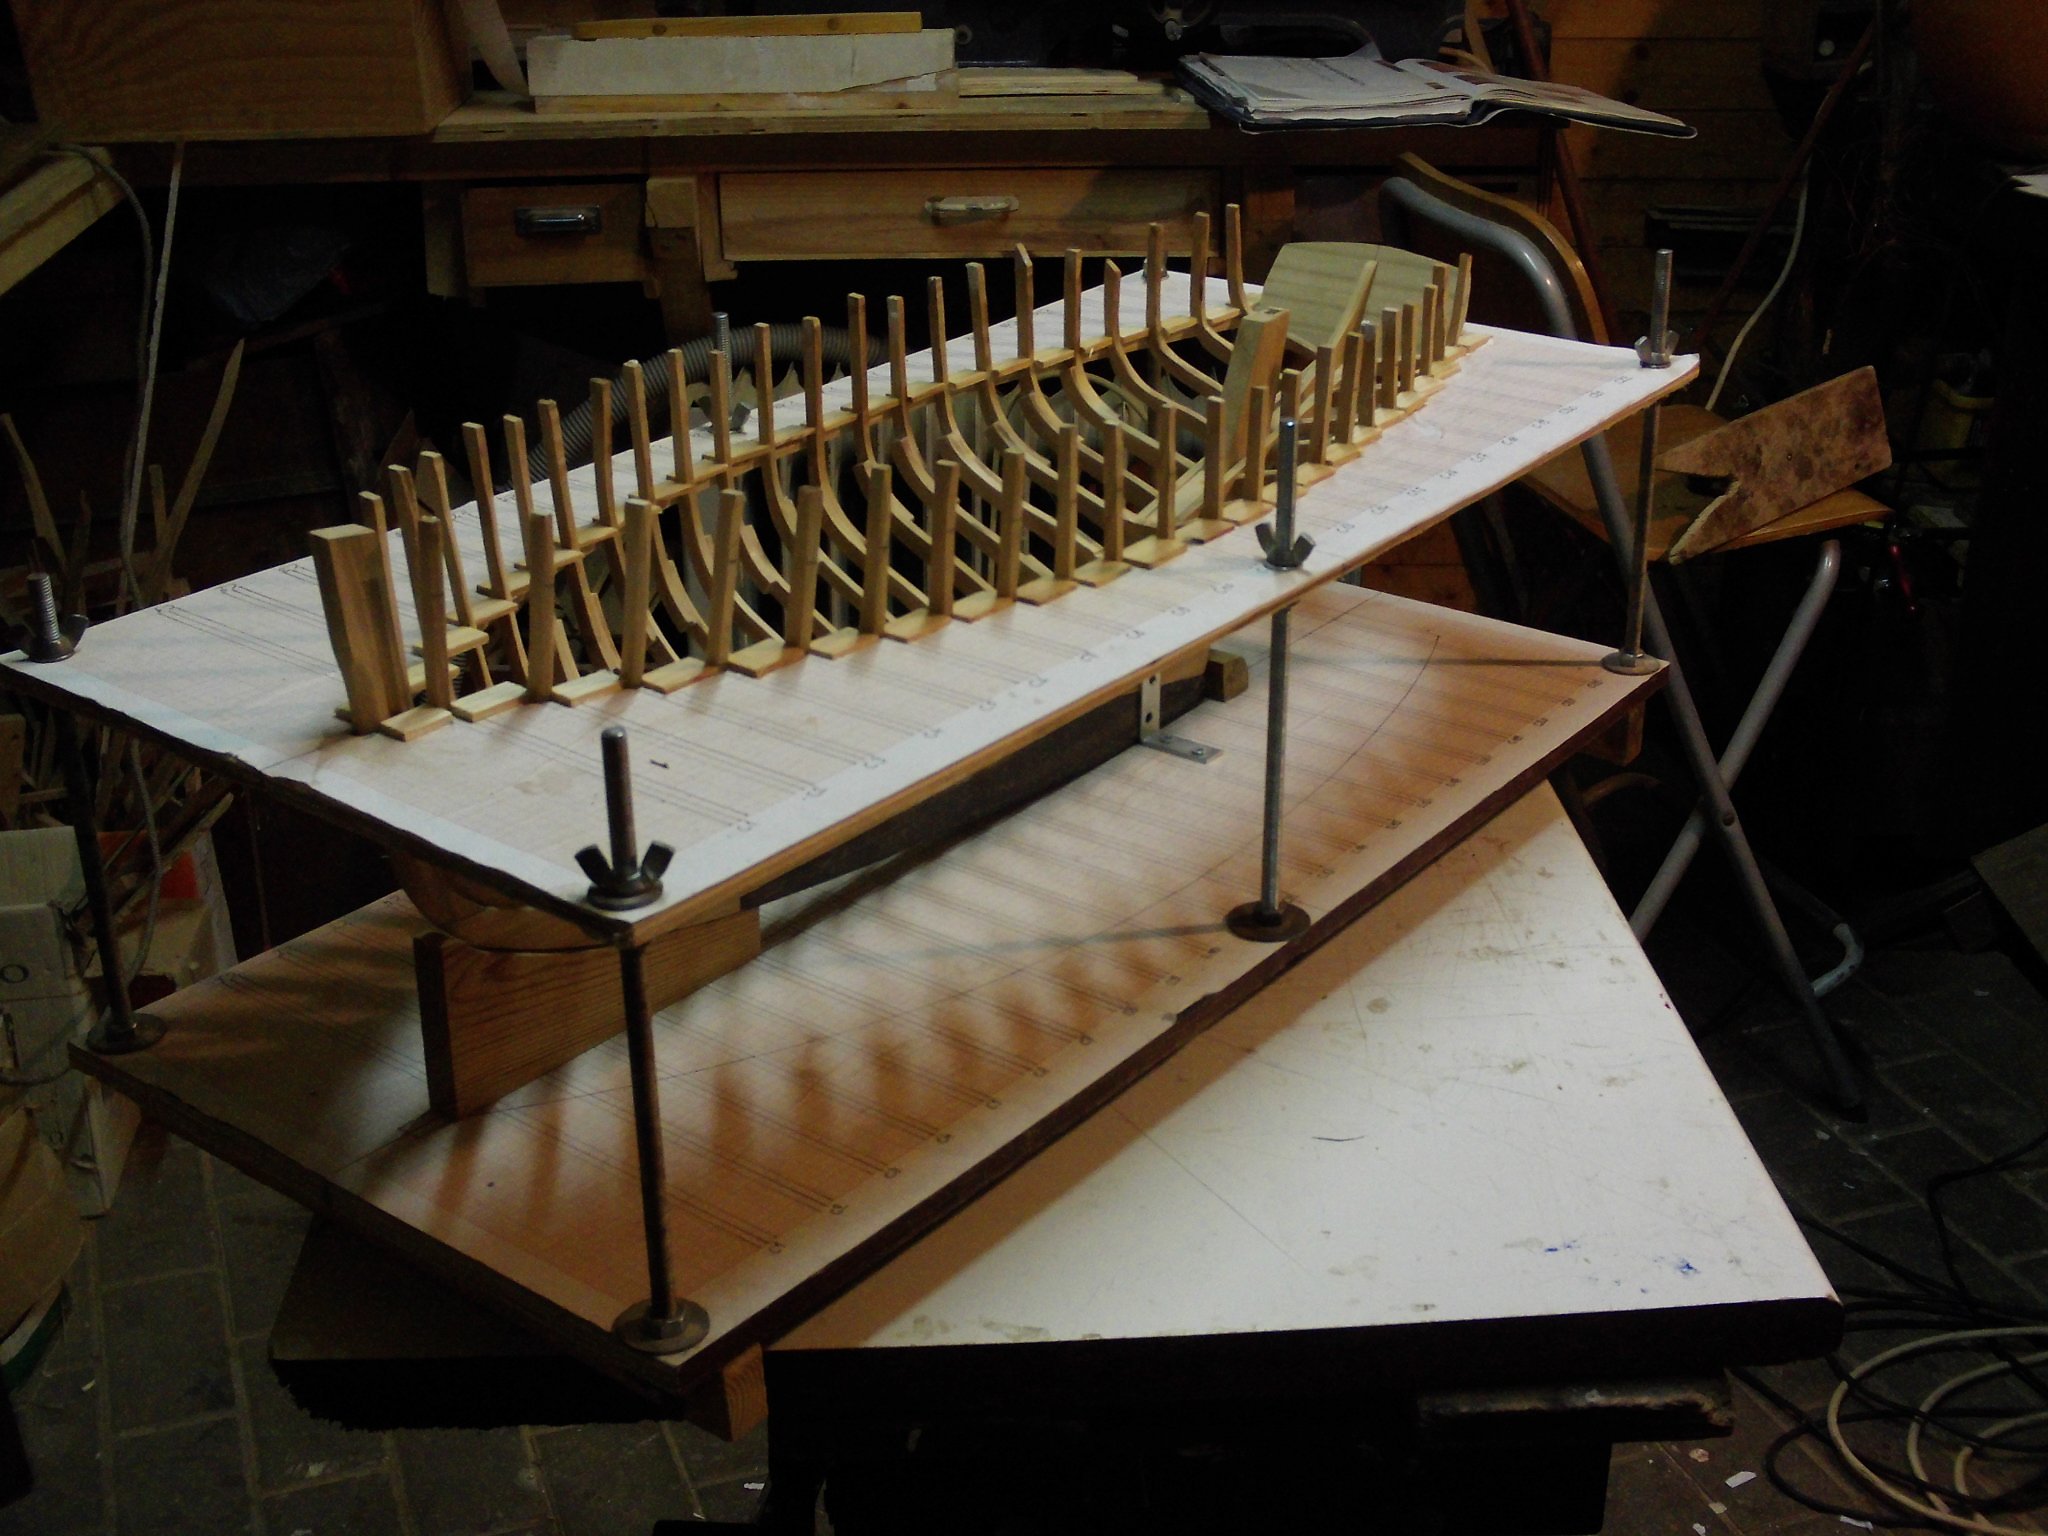
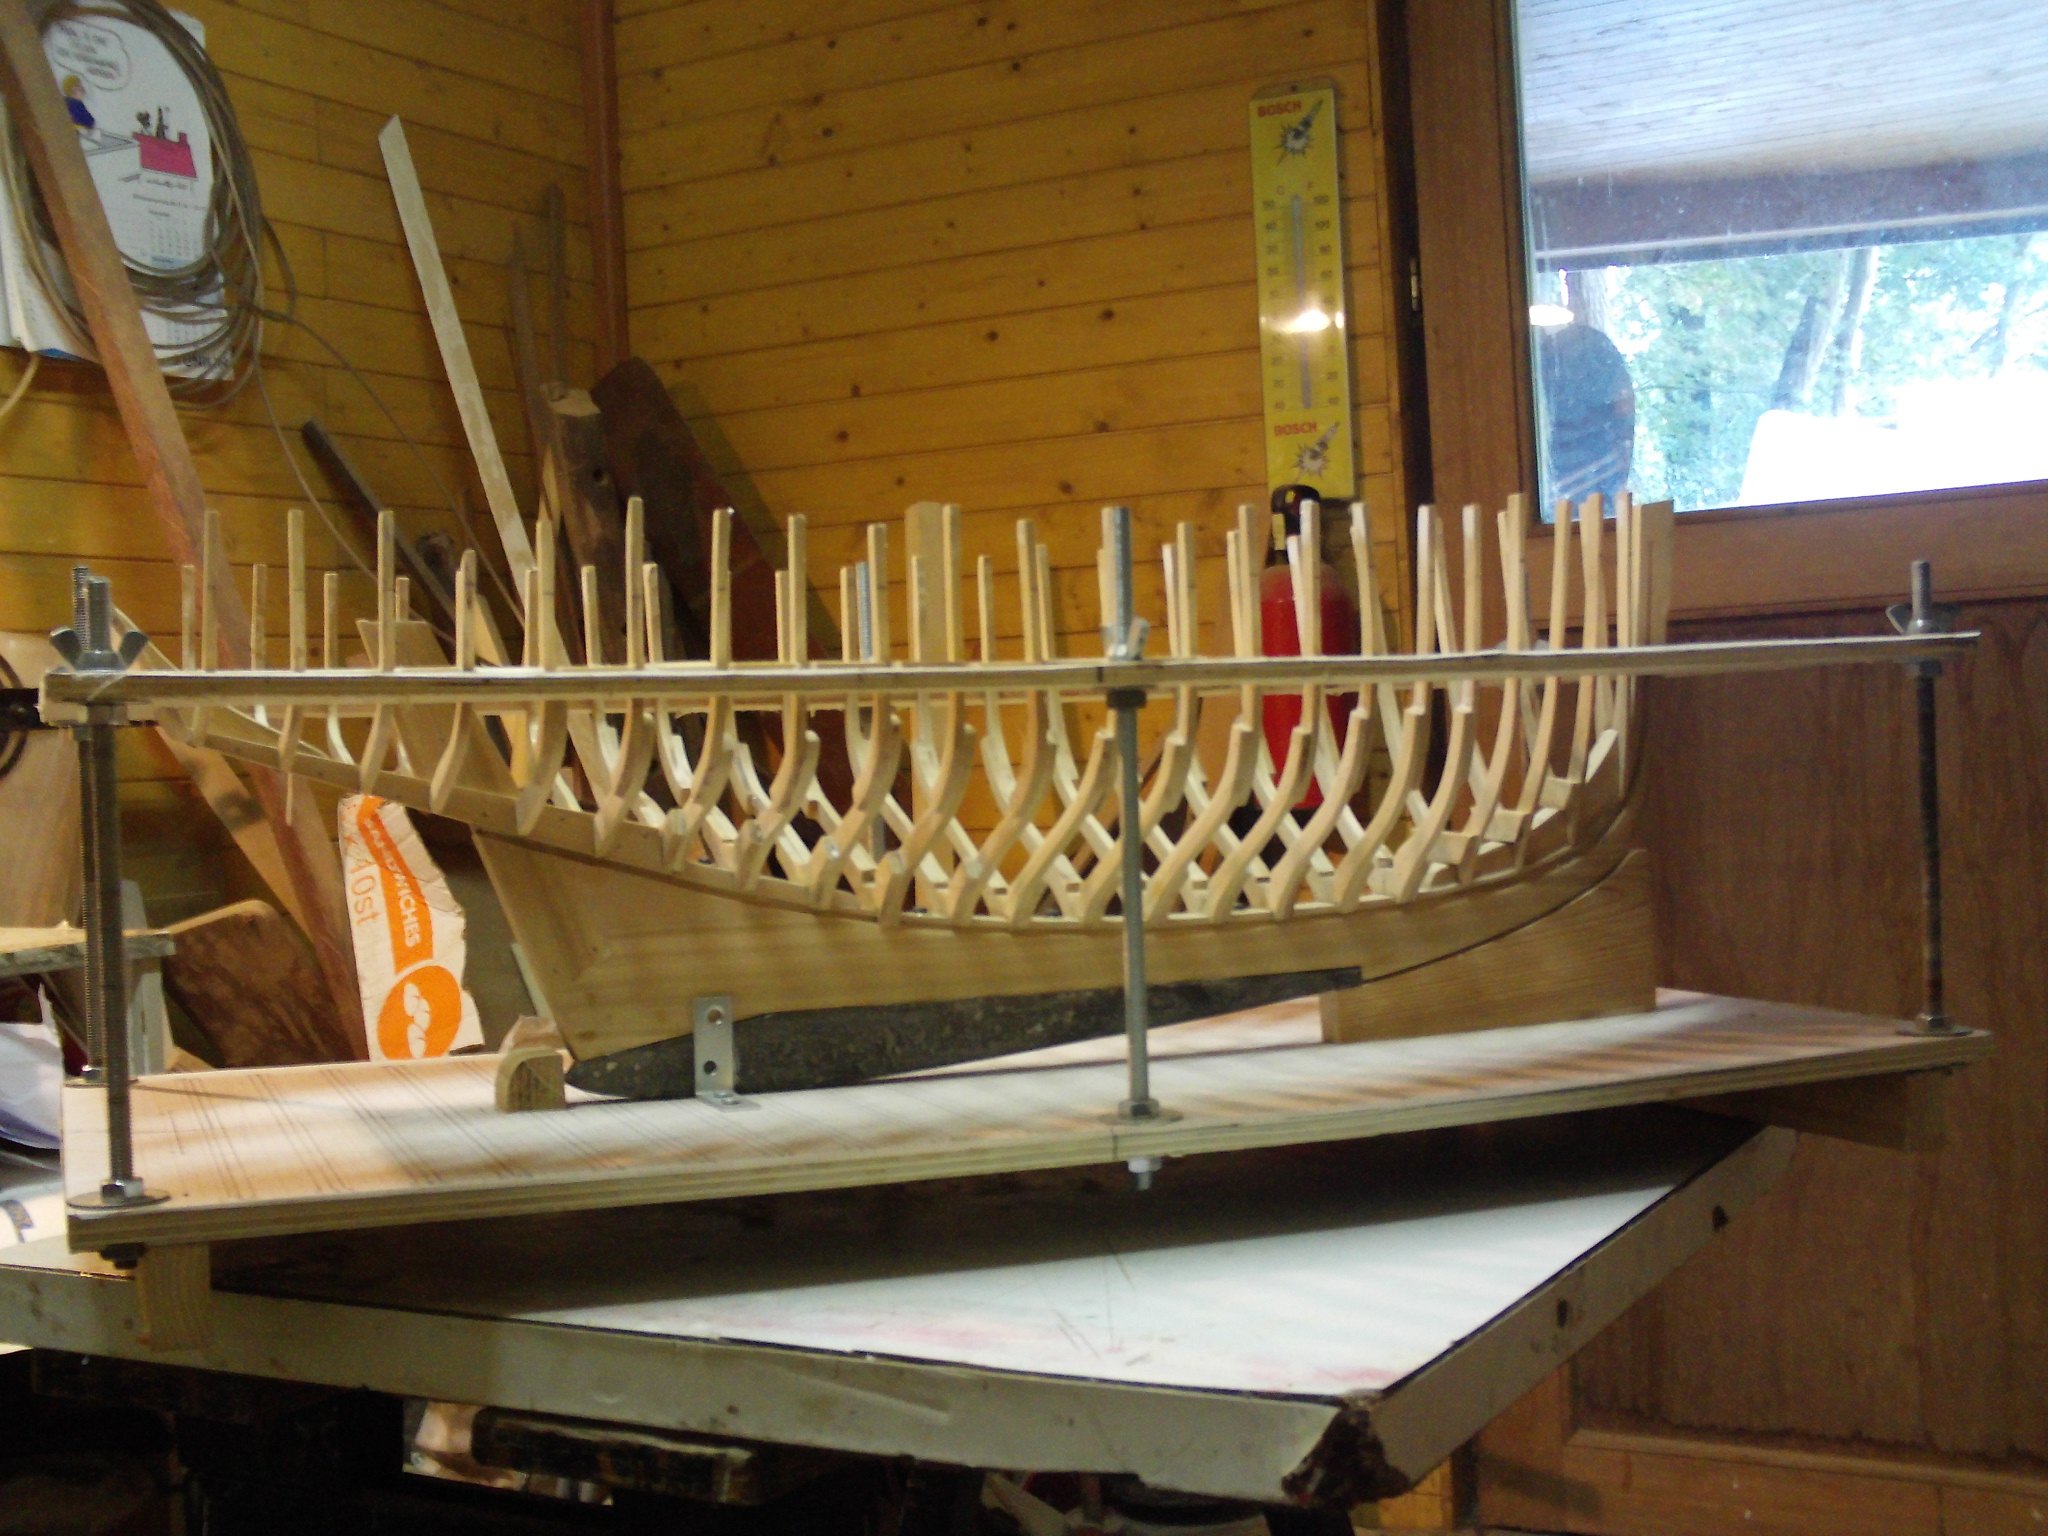
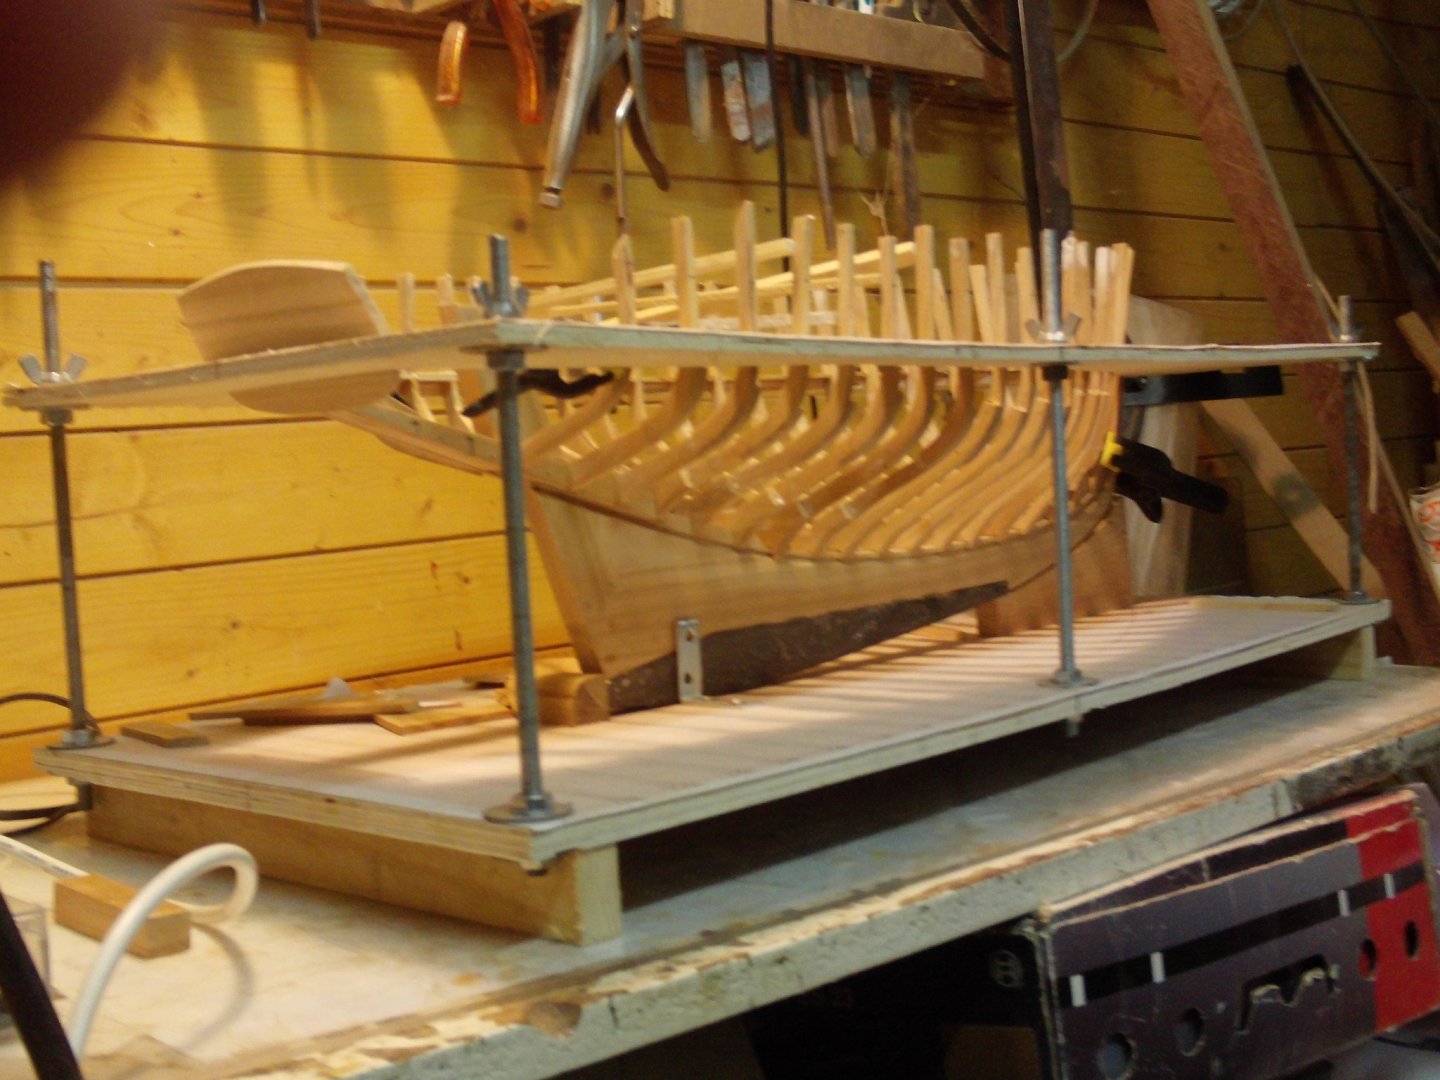
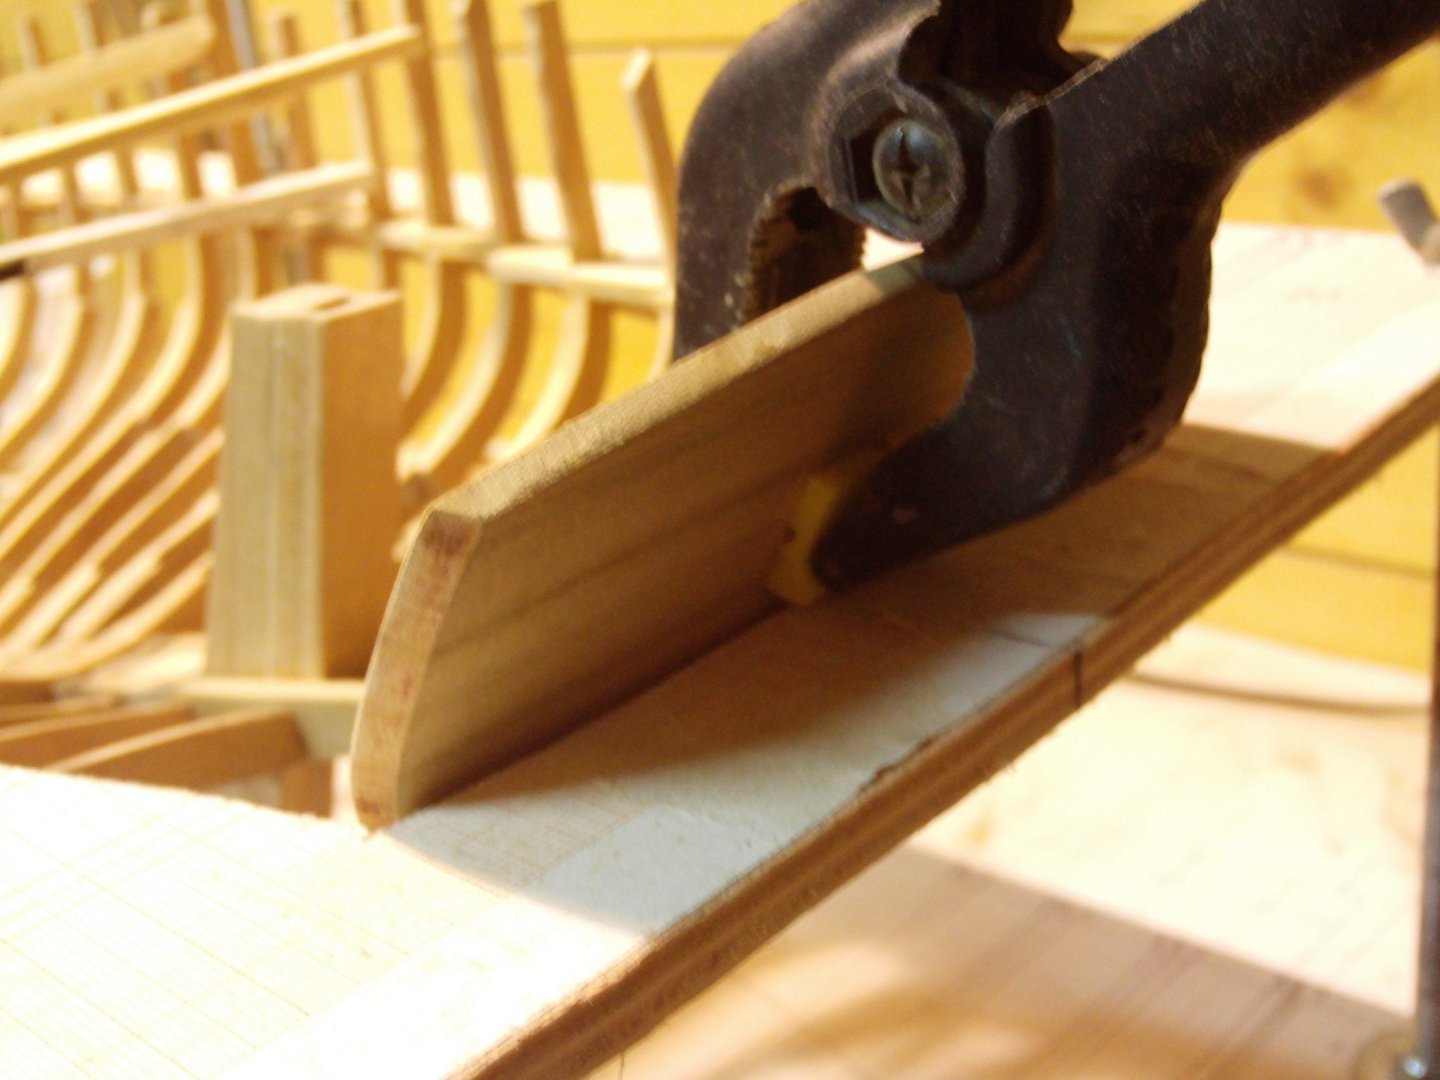
It takes a while before all frames are made and placed because in between I have to saw and plane planks to 4 mm thickness which is very time consuming. Before placing the after frames I sand the bevel to the transom sides and glue the transom into place. Finally, all frames into place. Thank you to follow. Thank you for the likes. Till next week!


- 168 replies
-
- 18
-
-
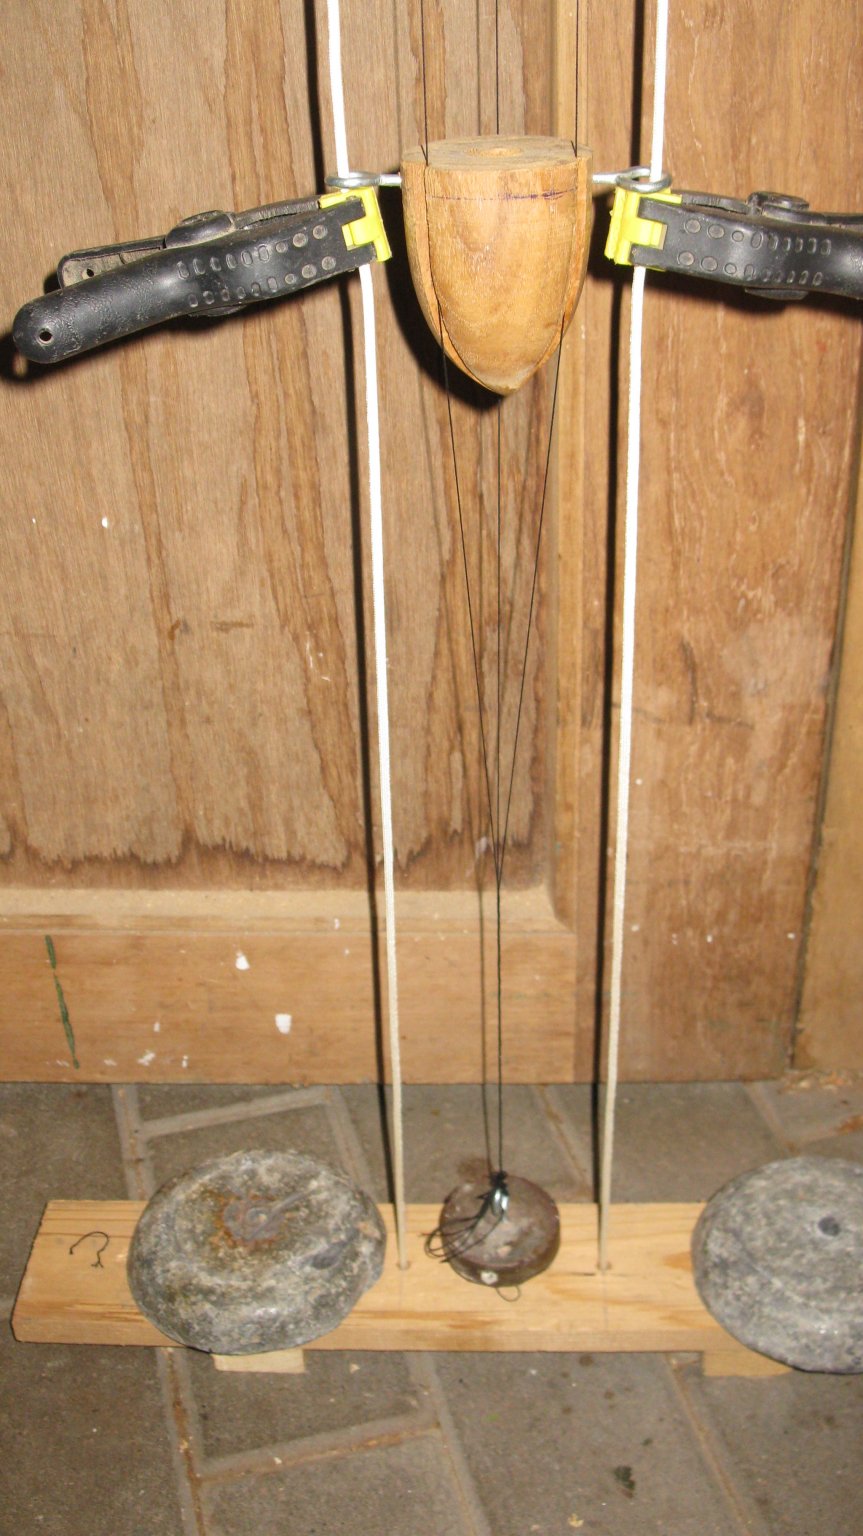
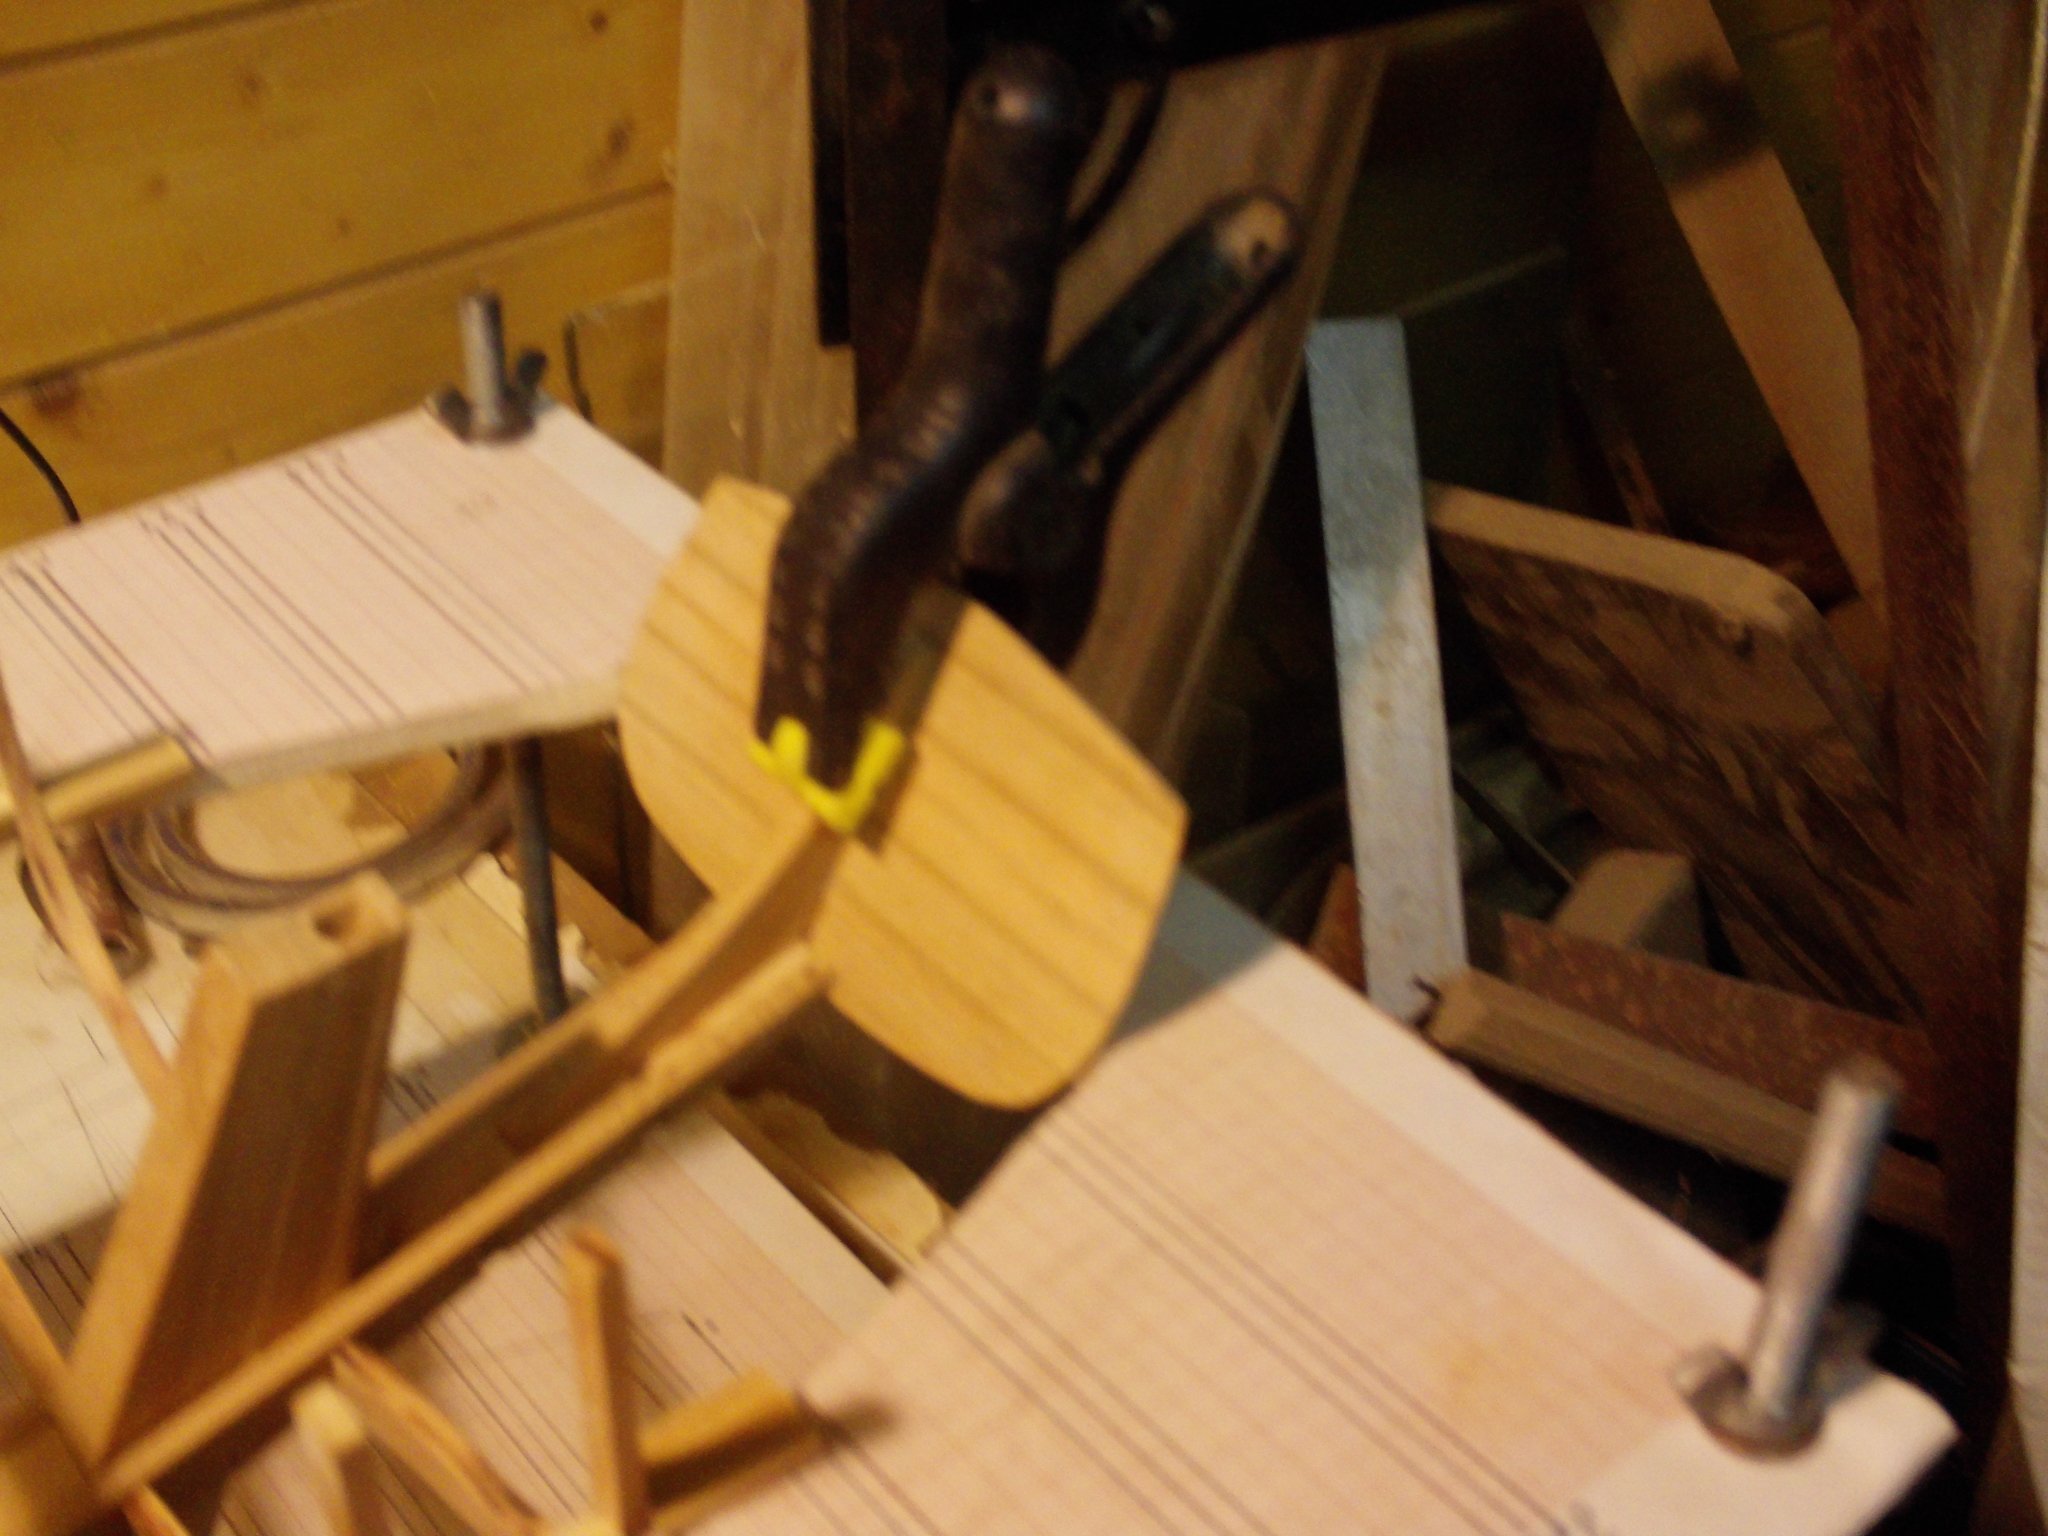
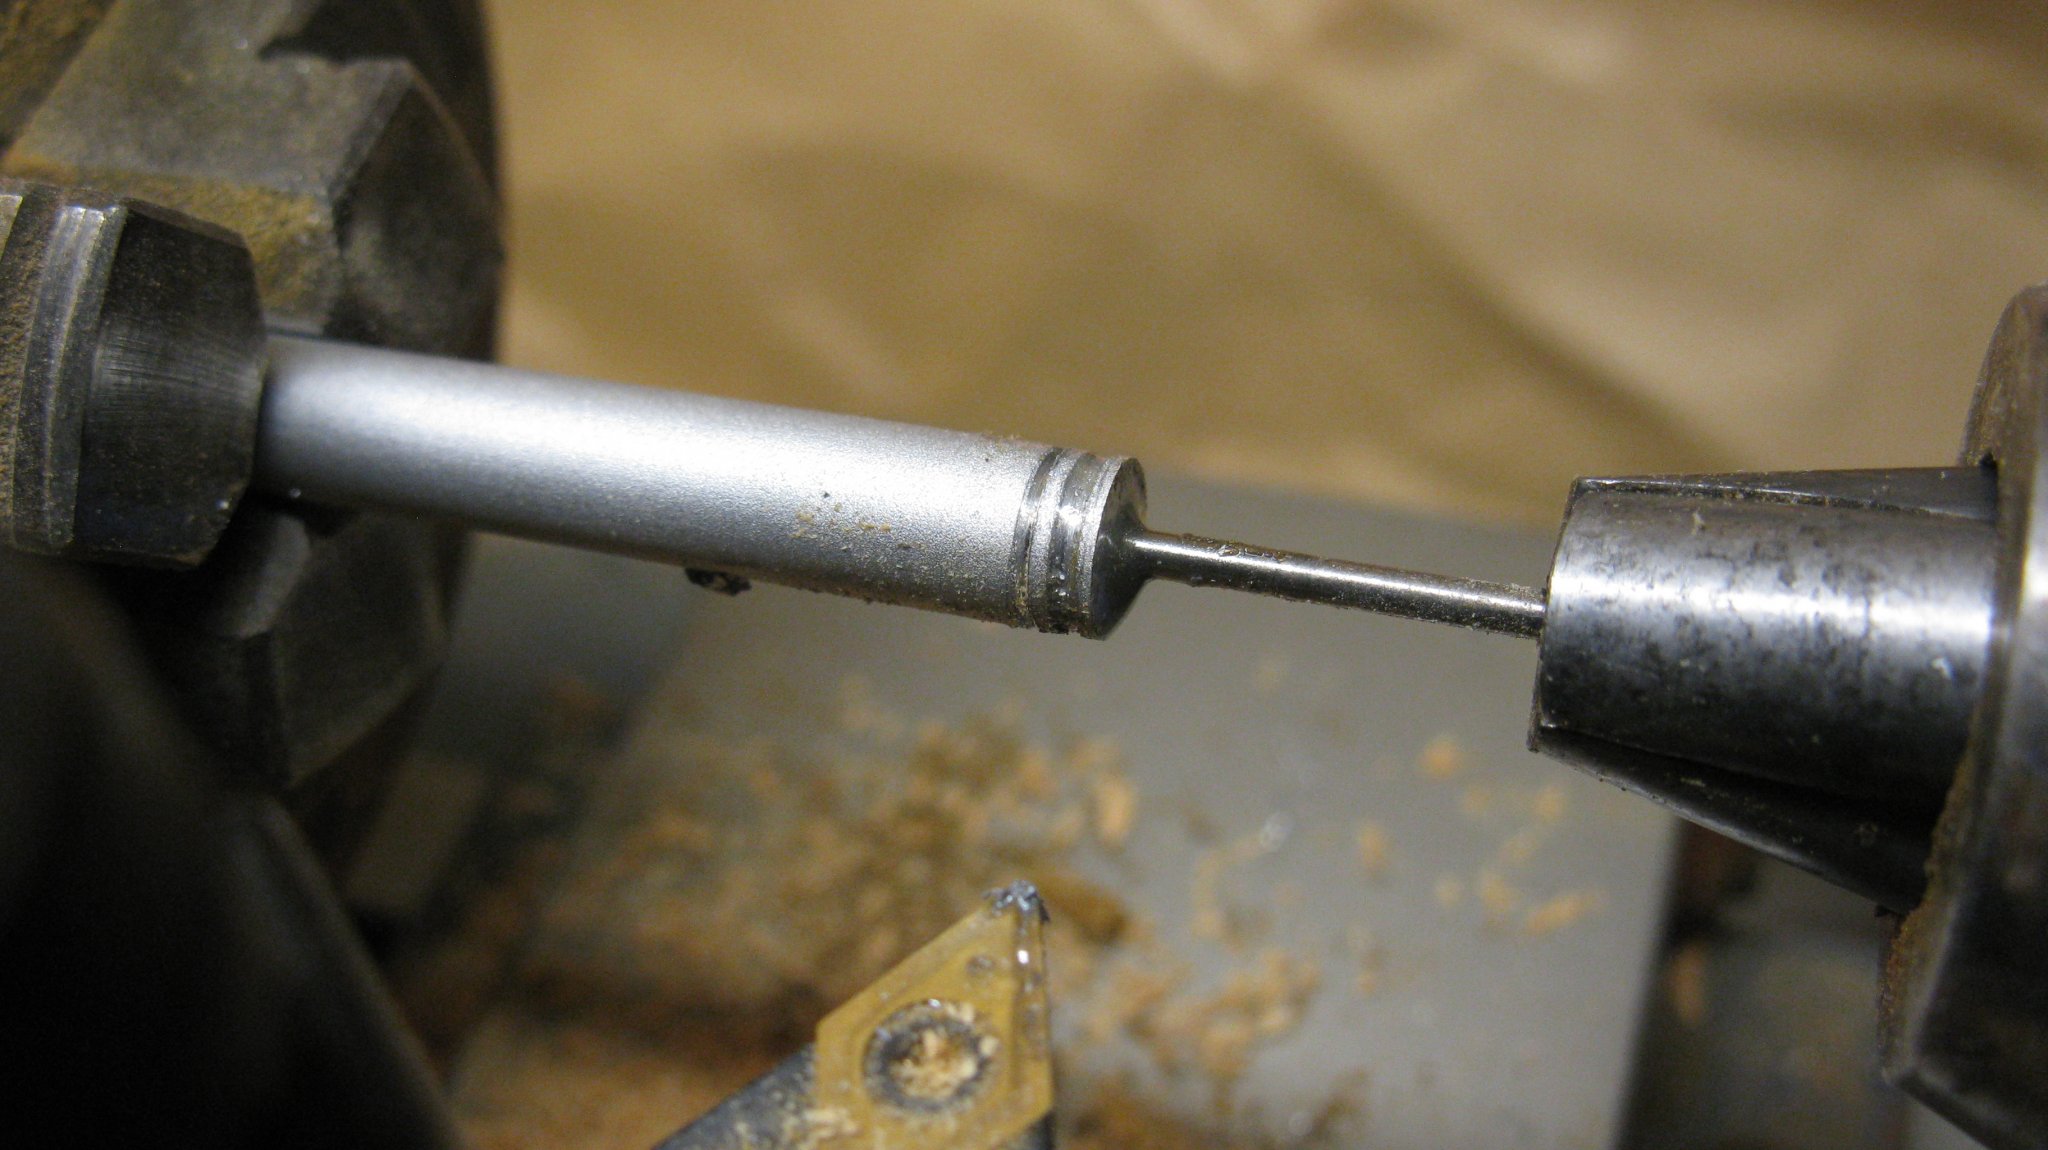
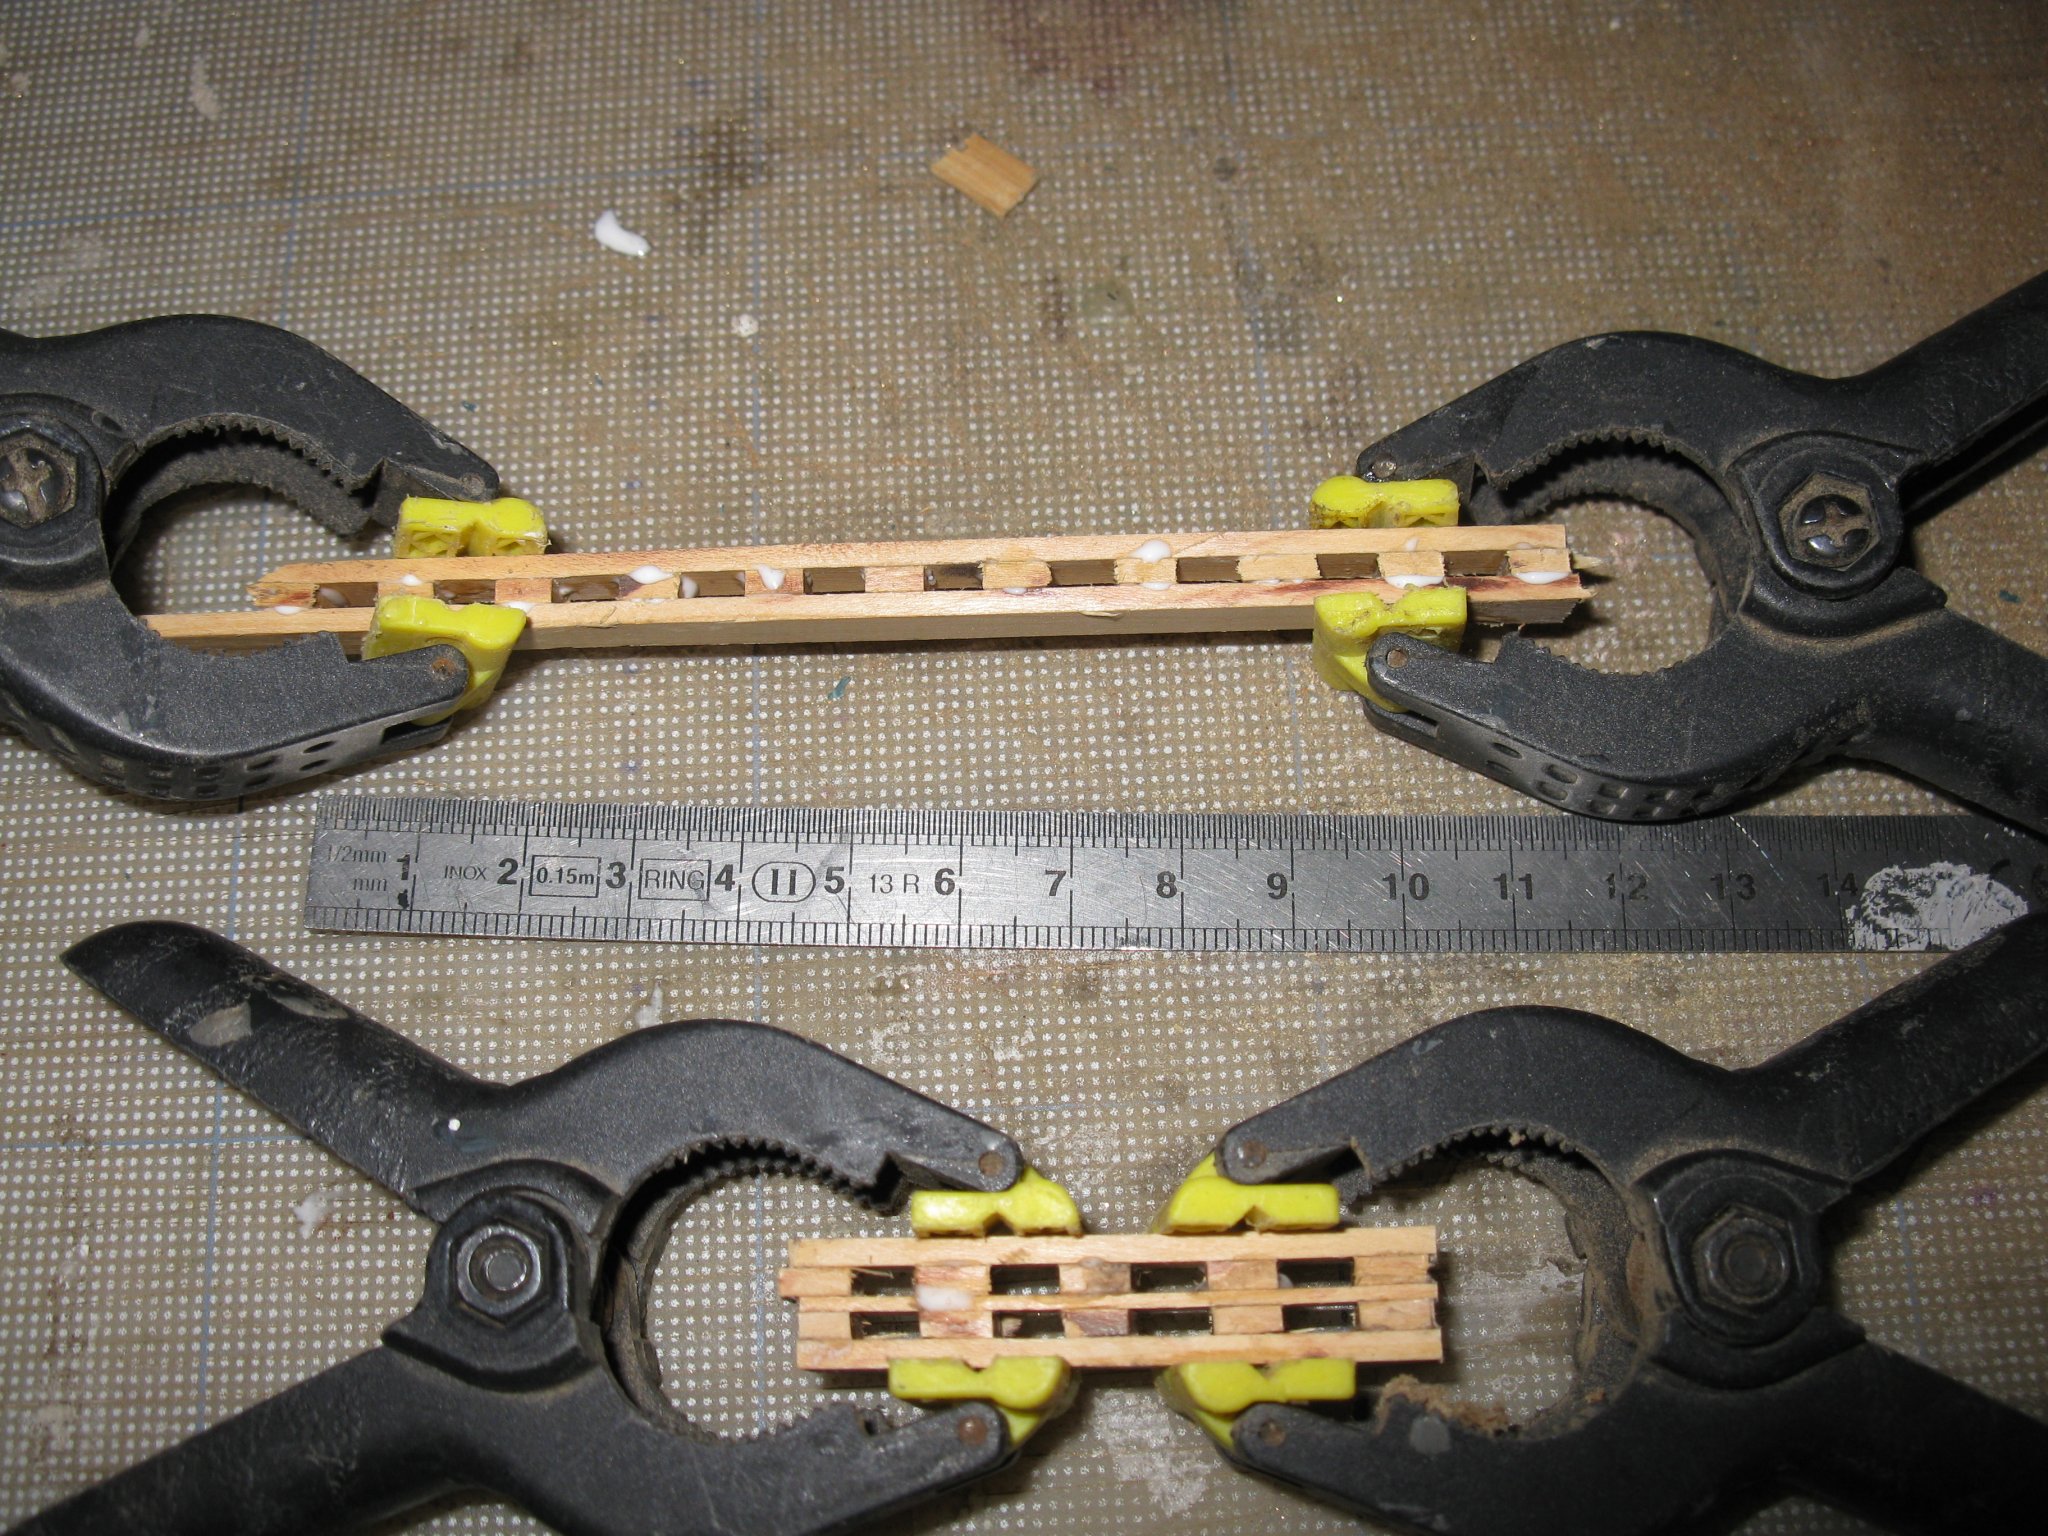
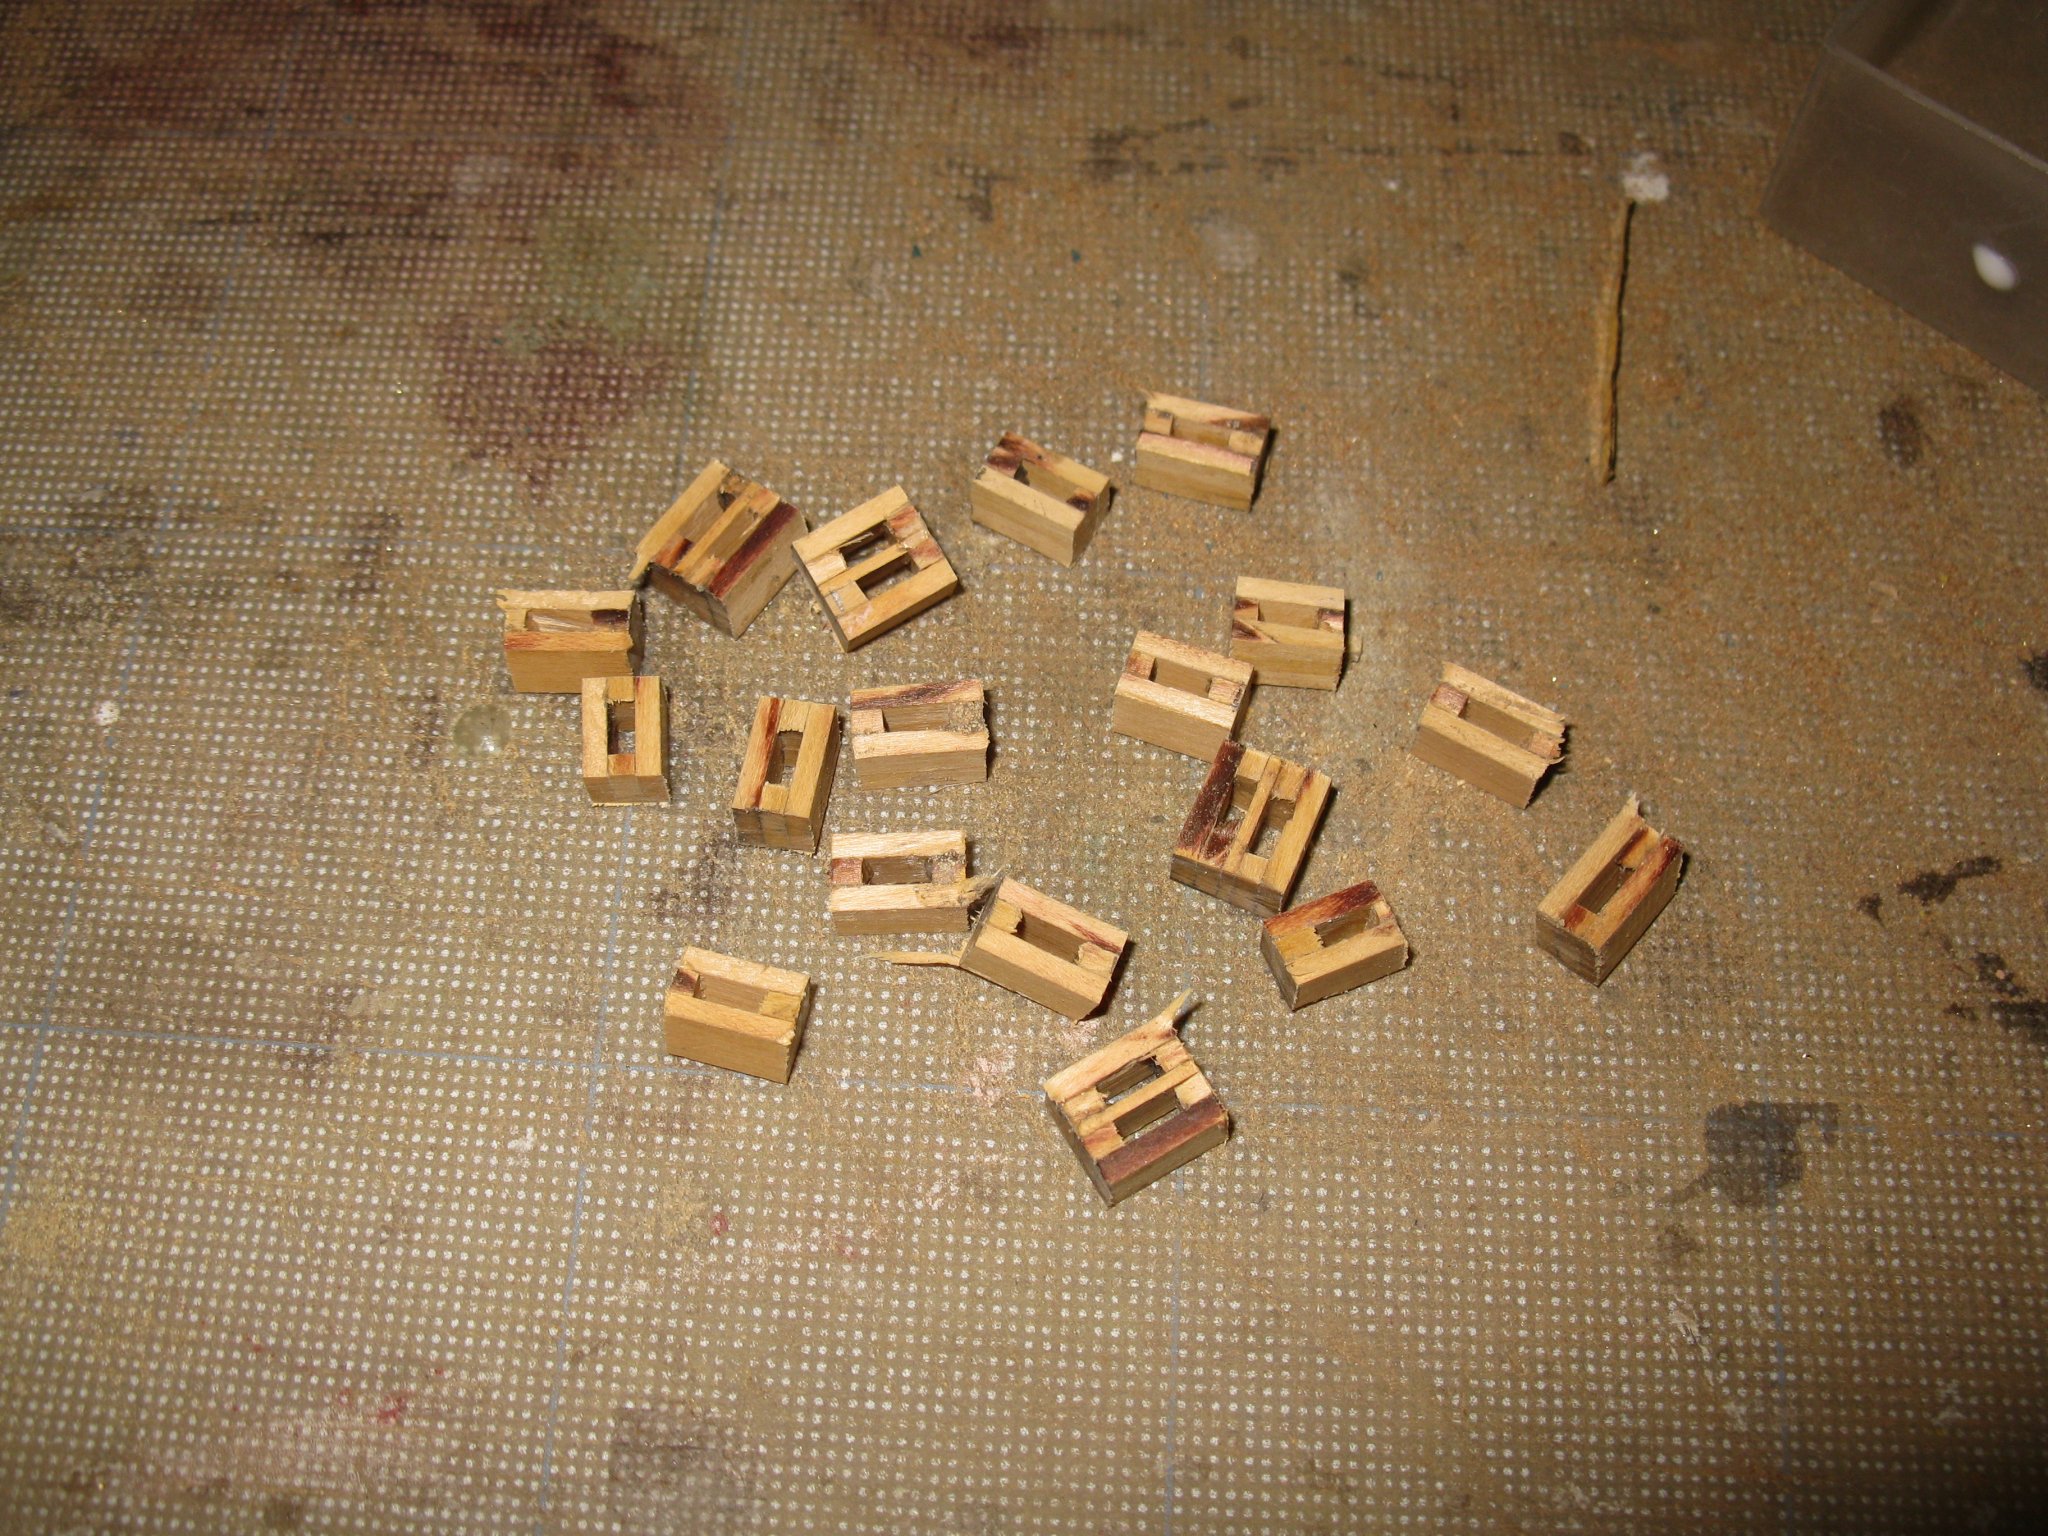
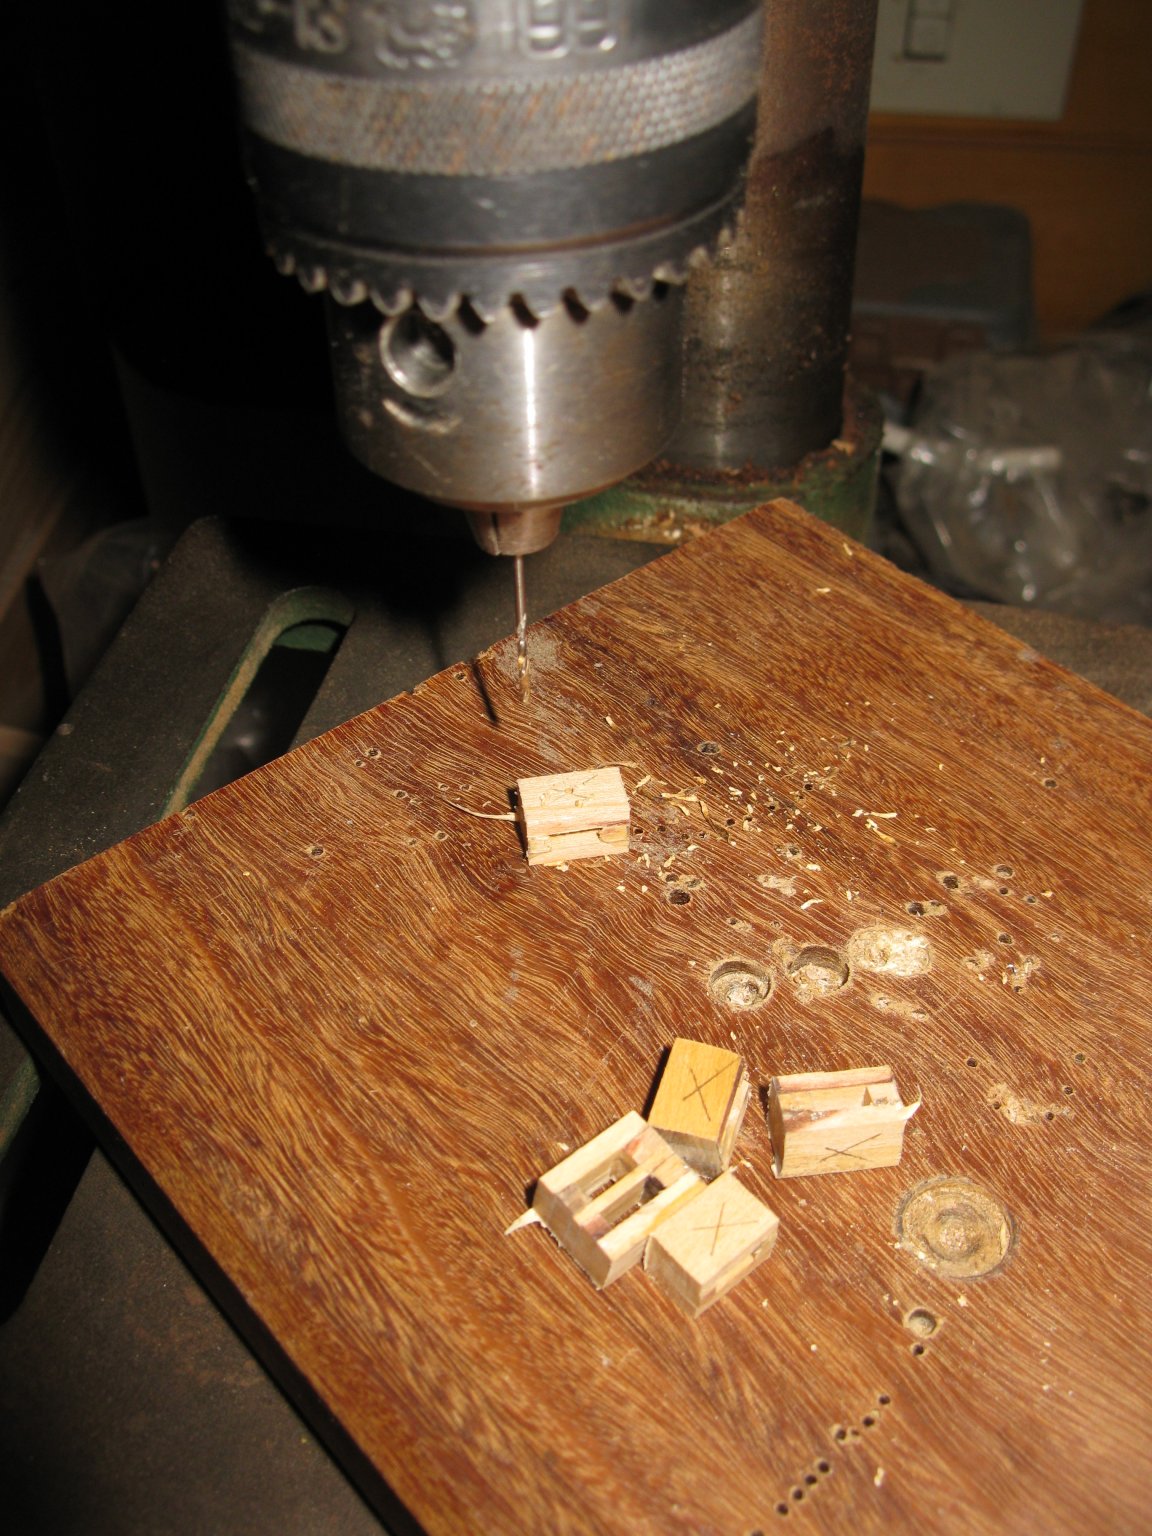
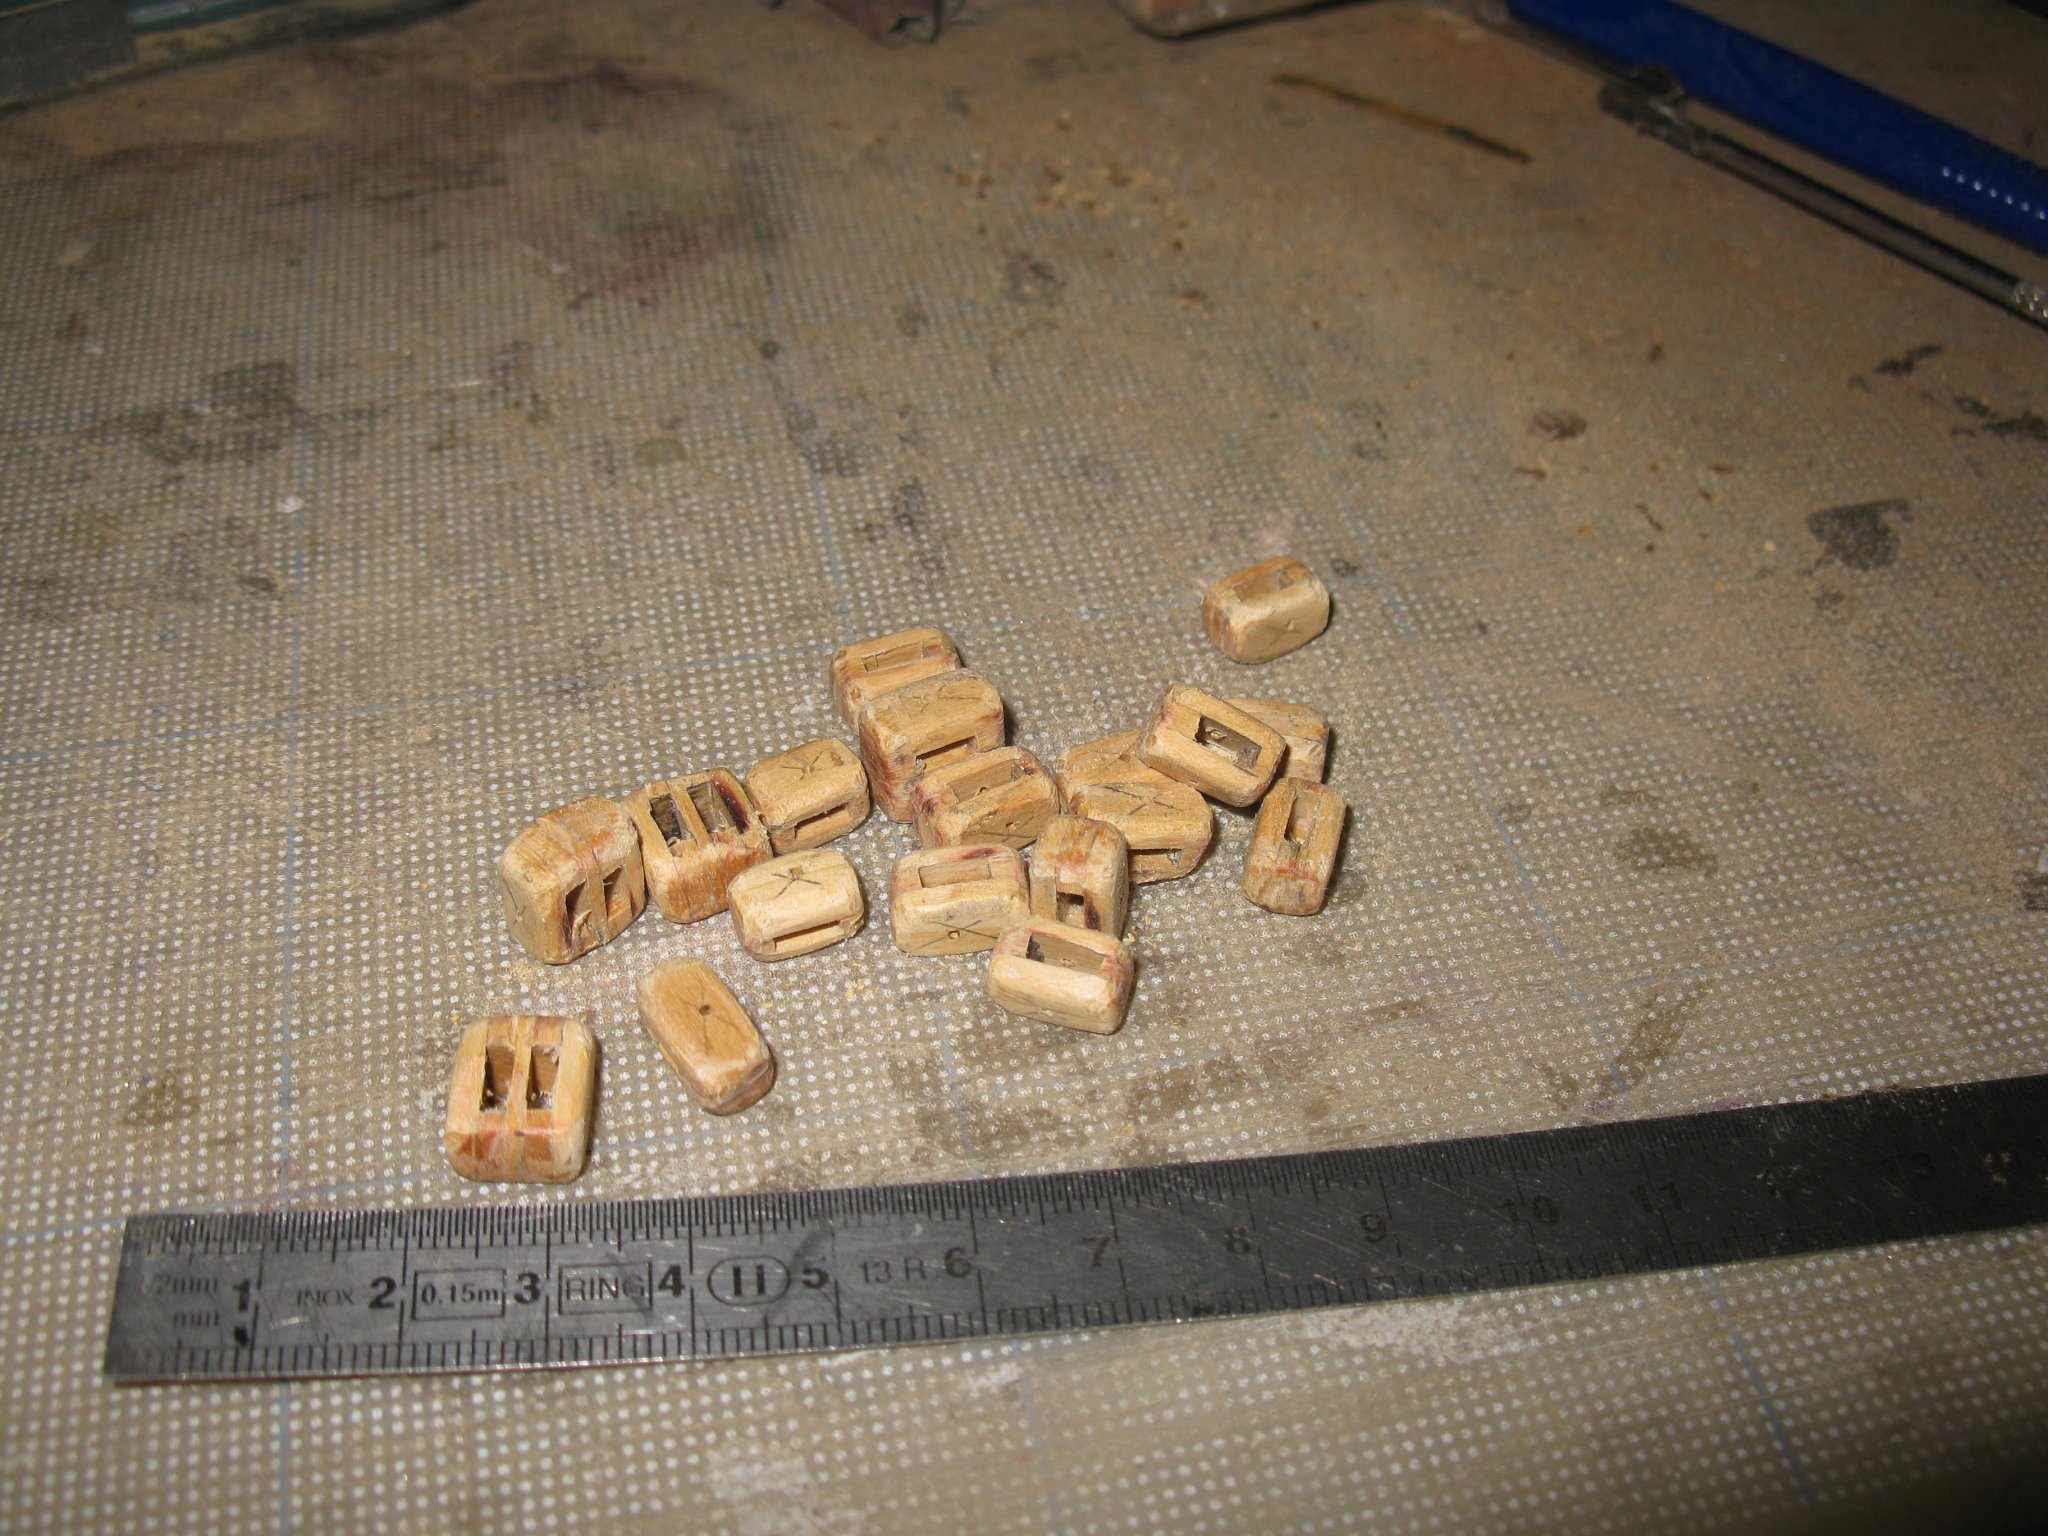
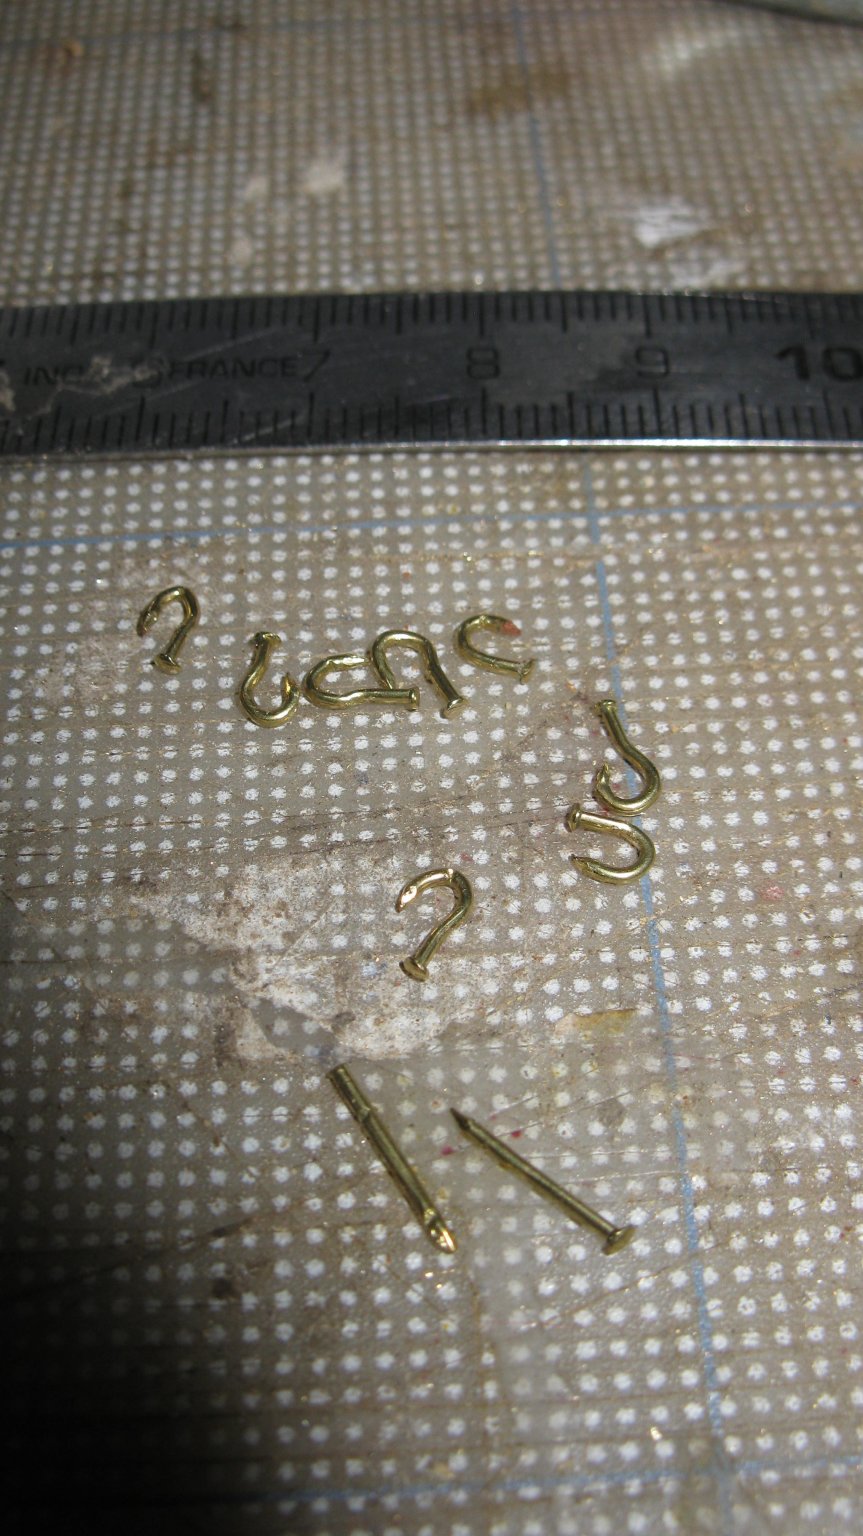
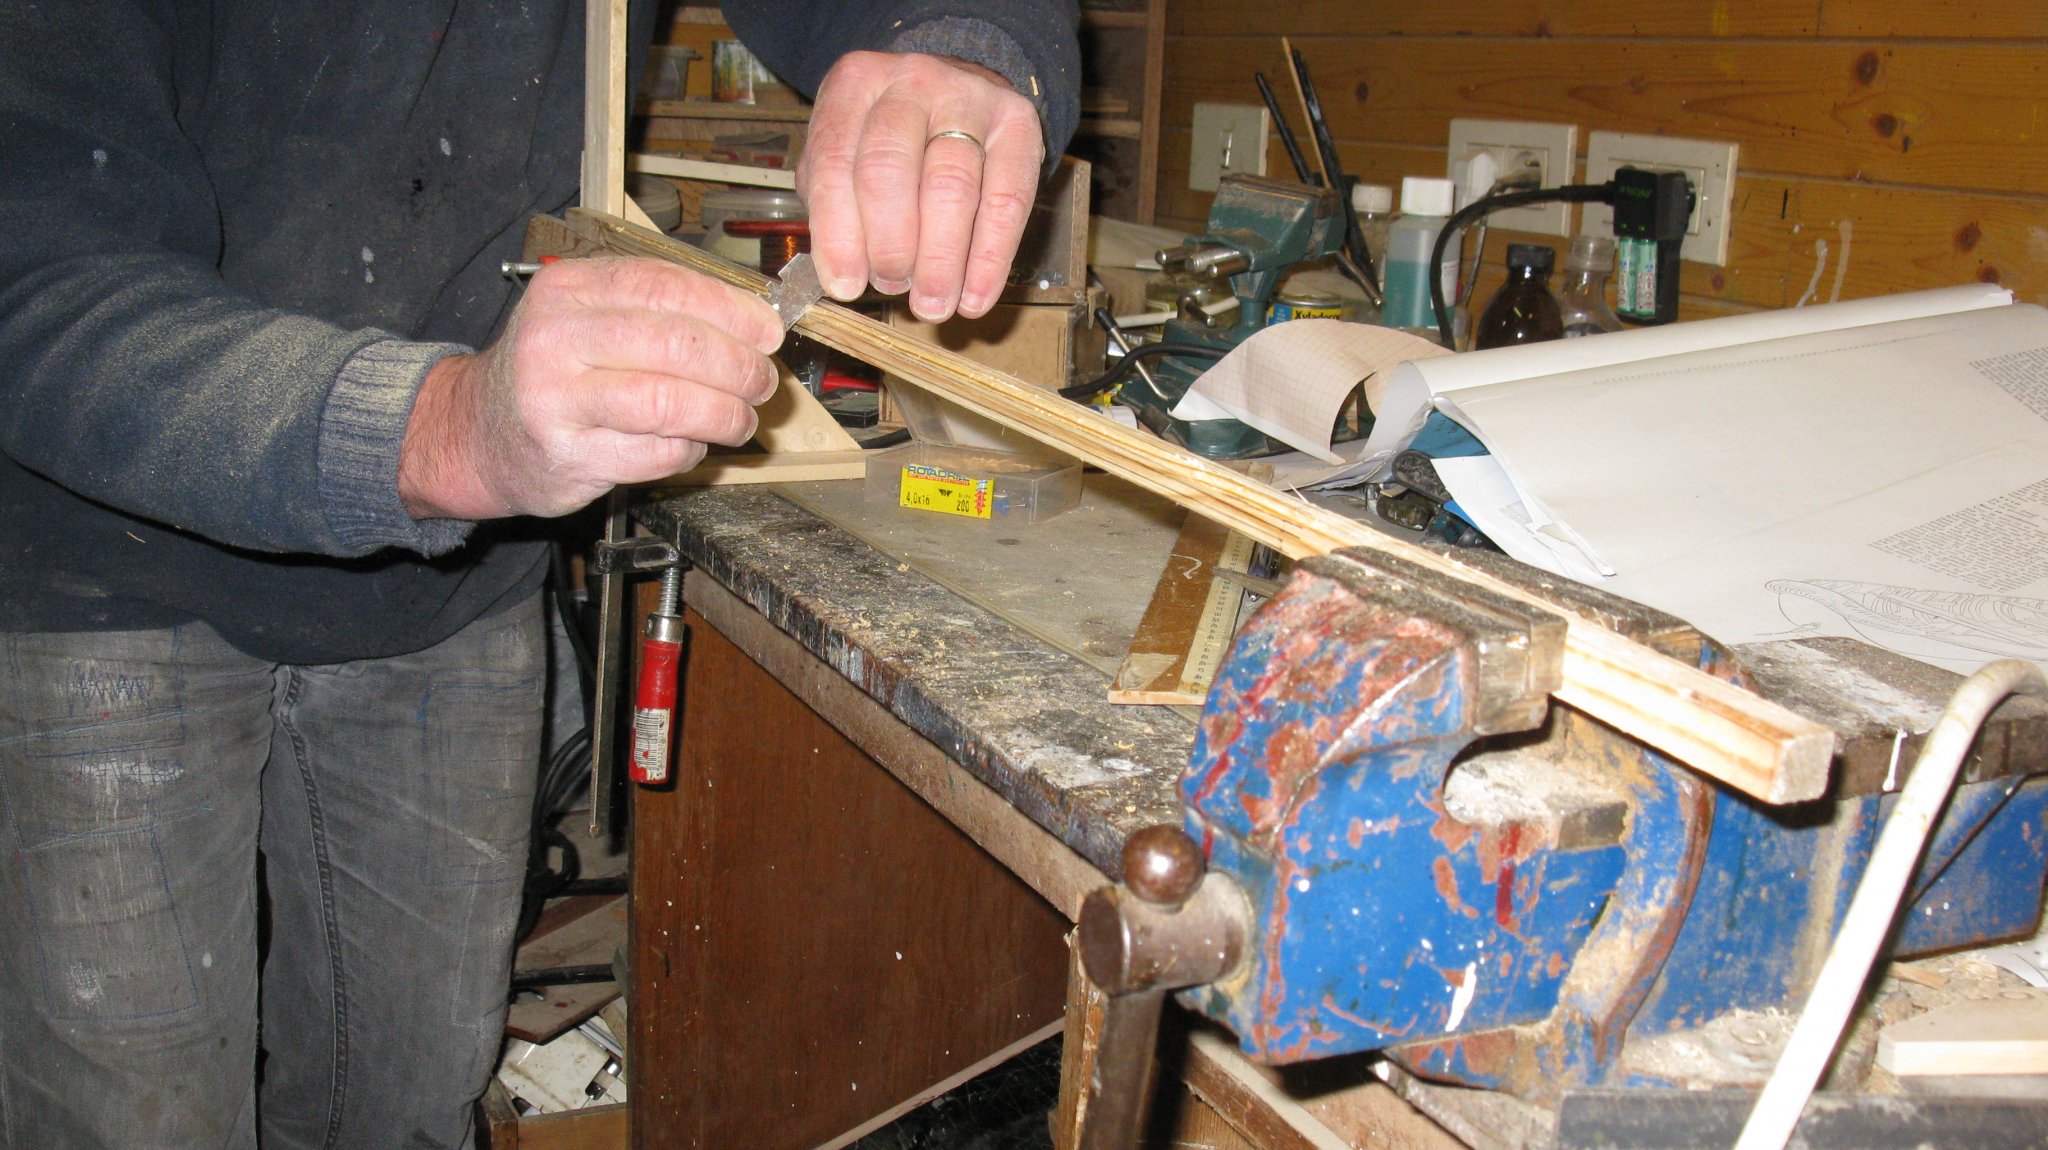
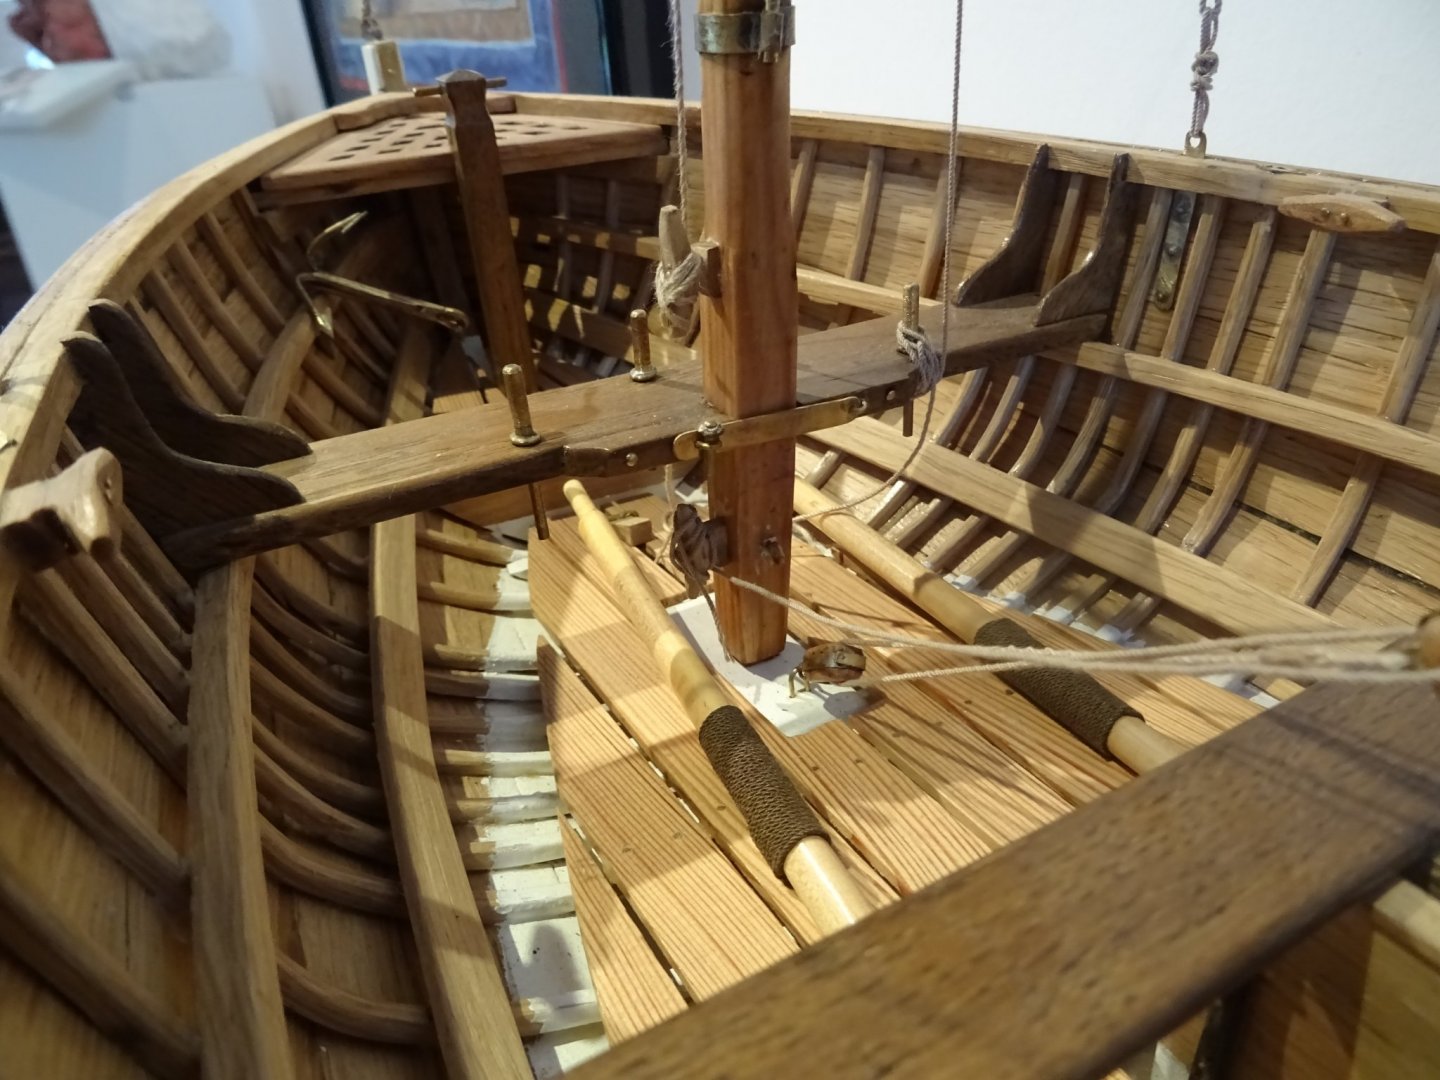
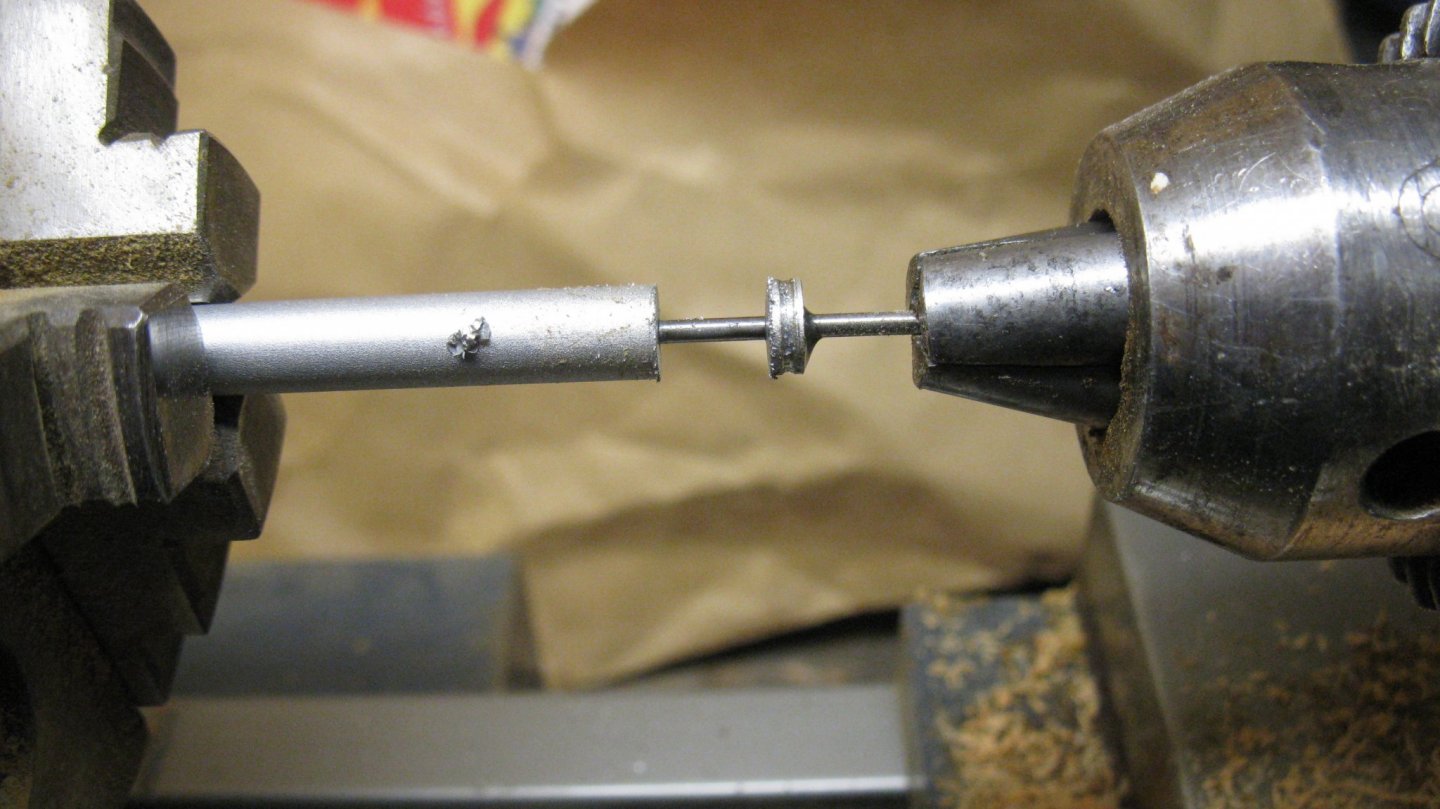
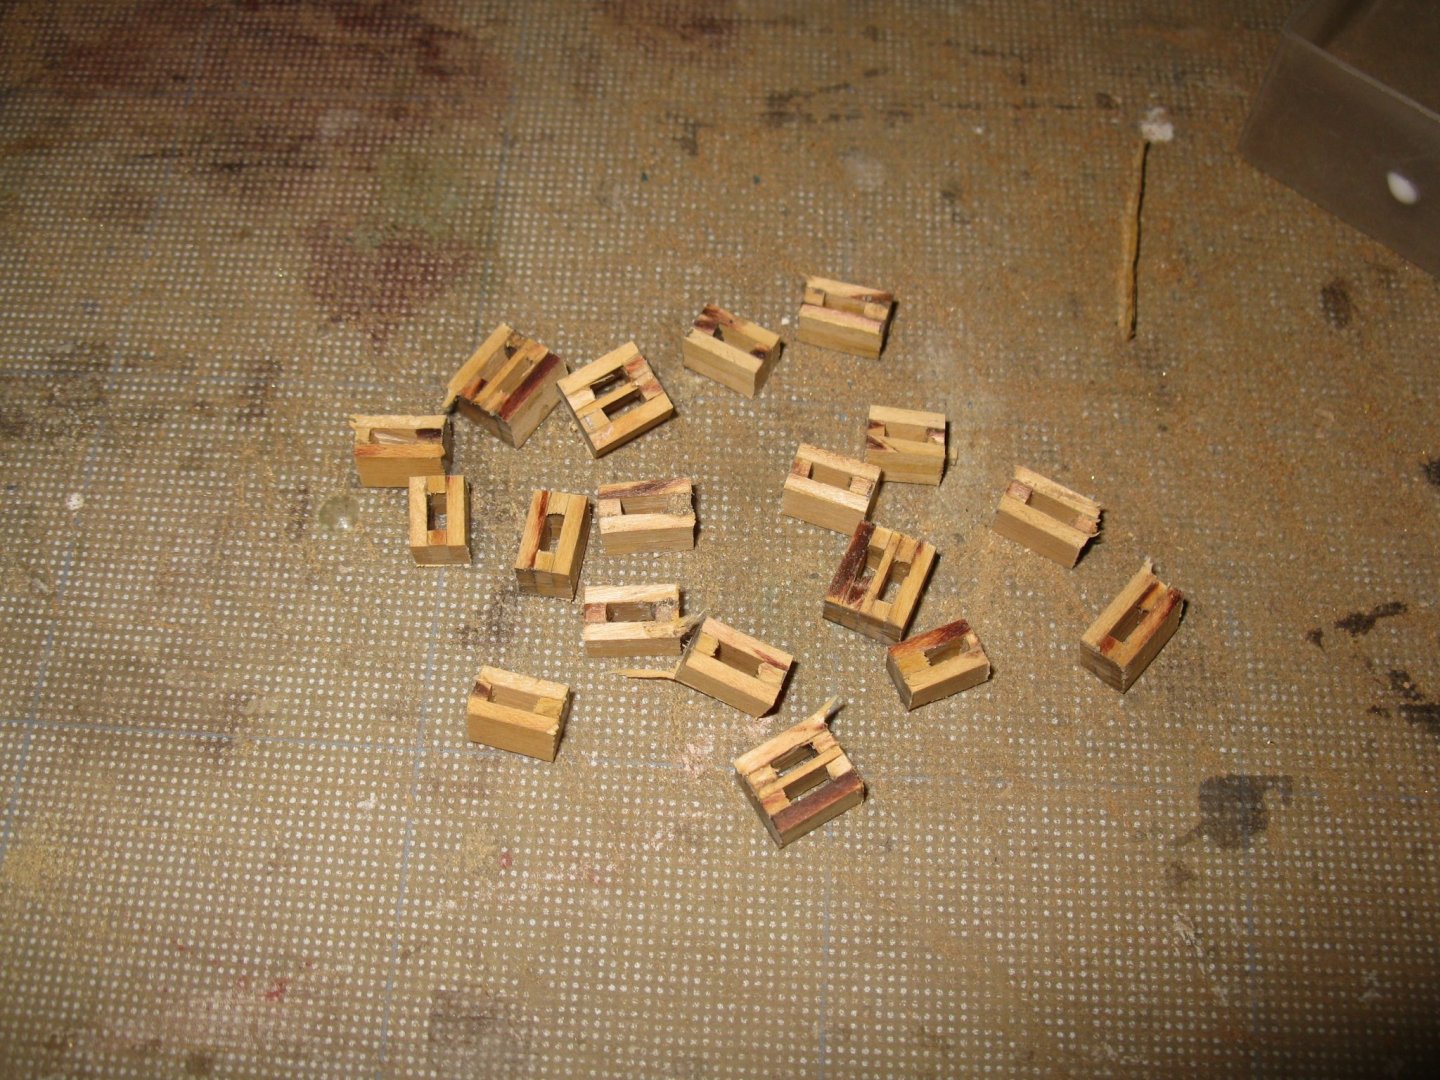
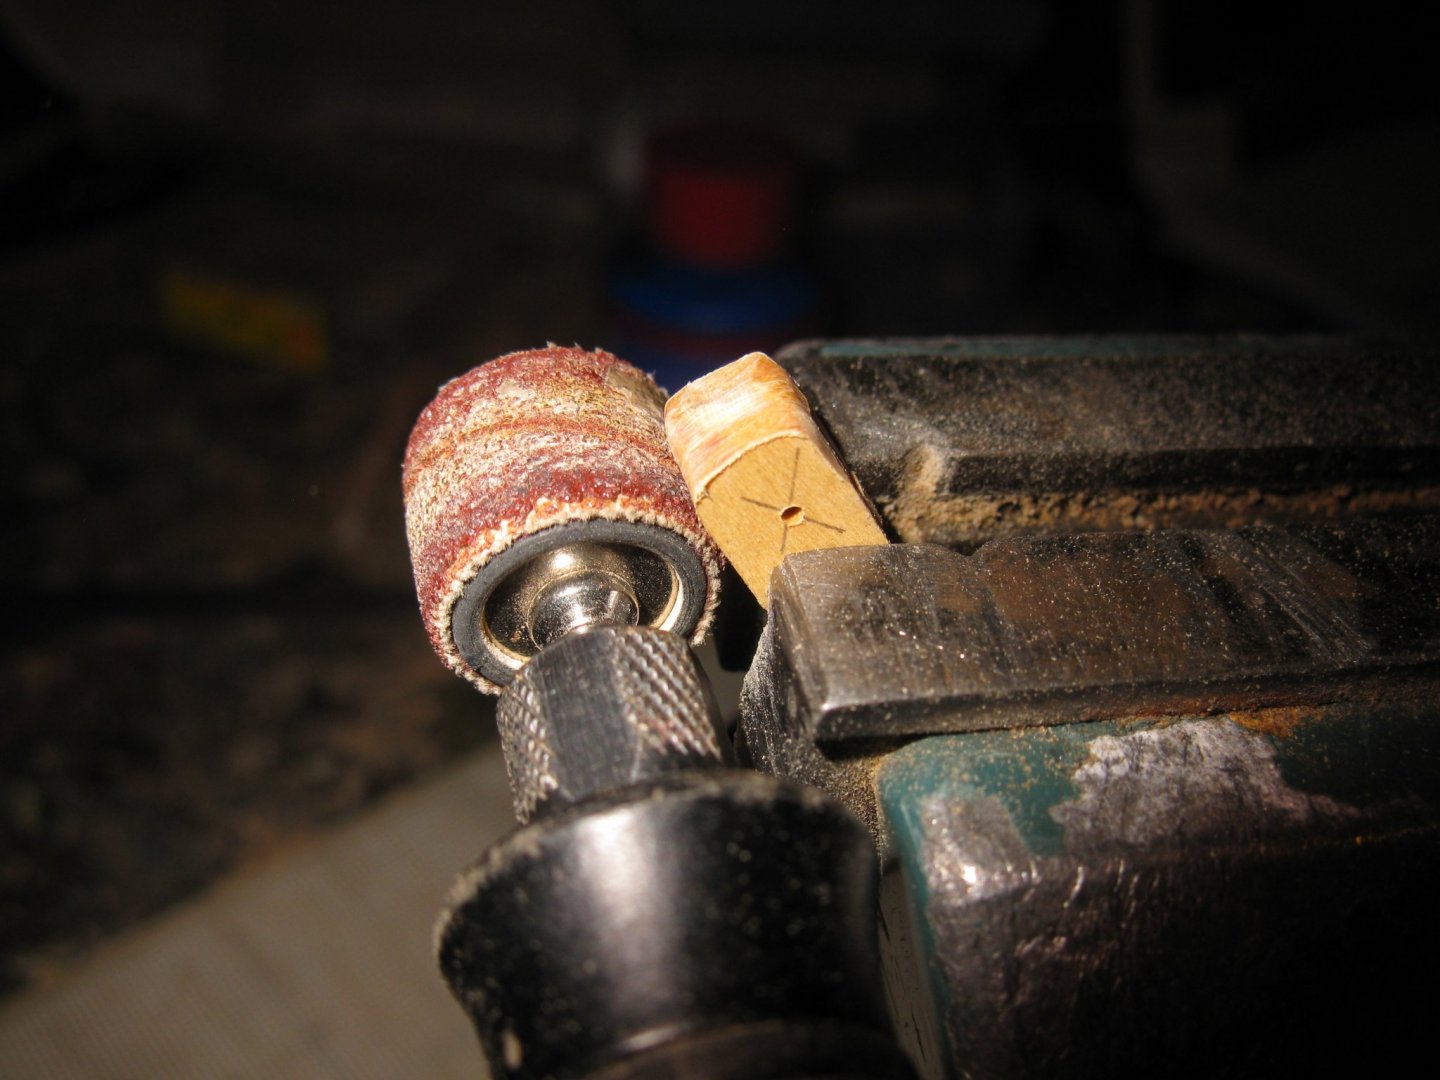
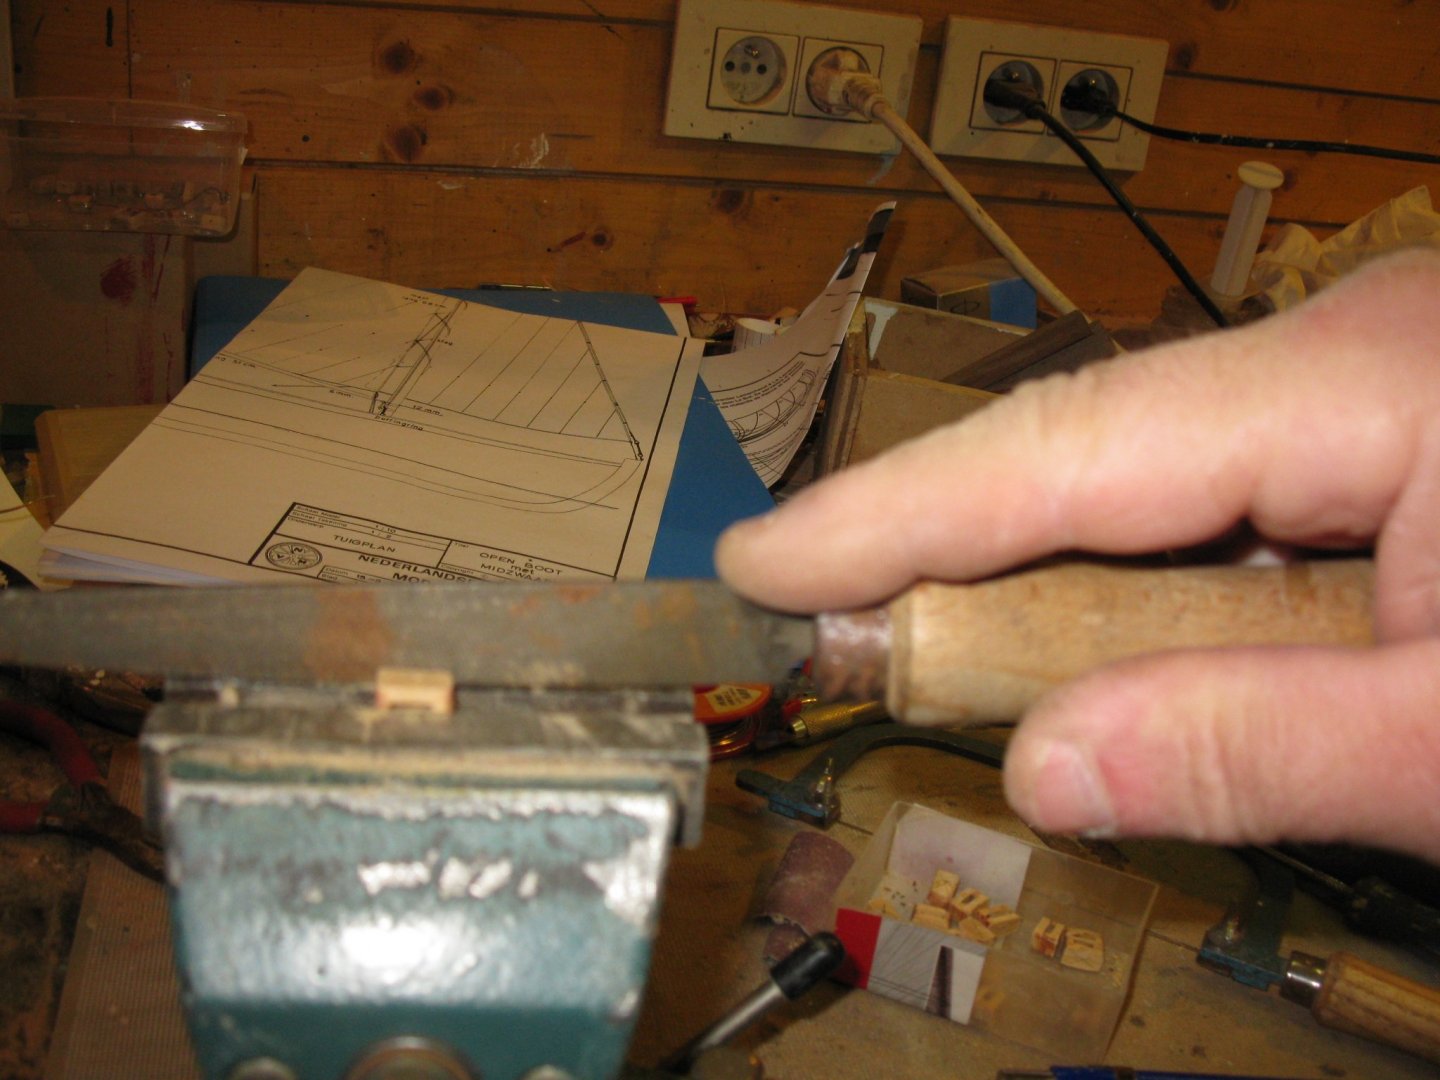
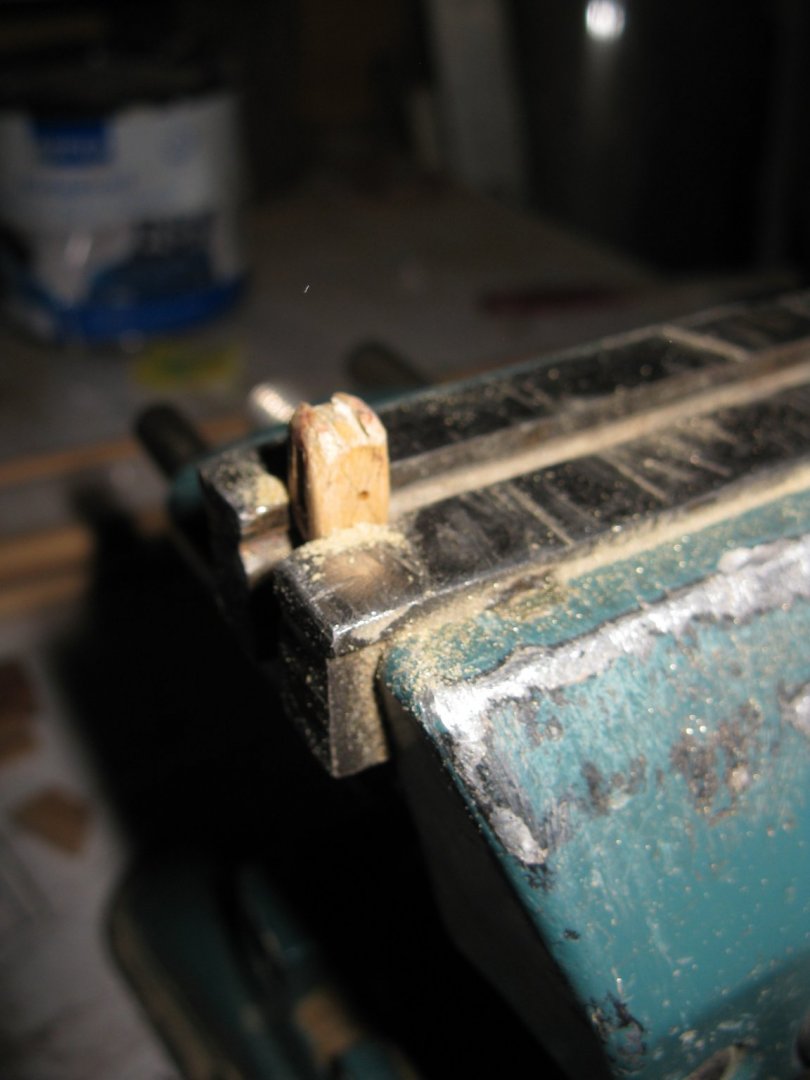
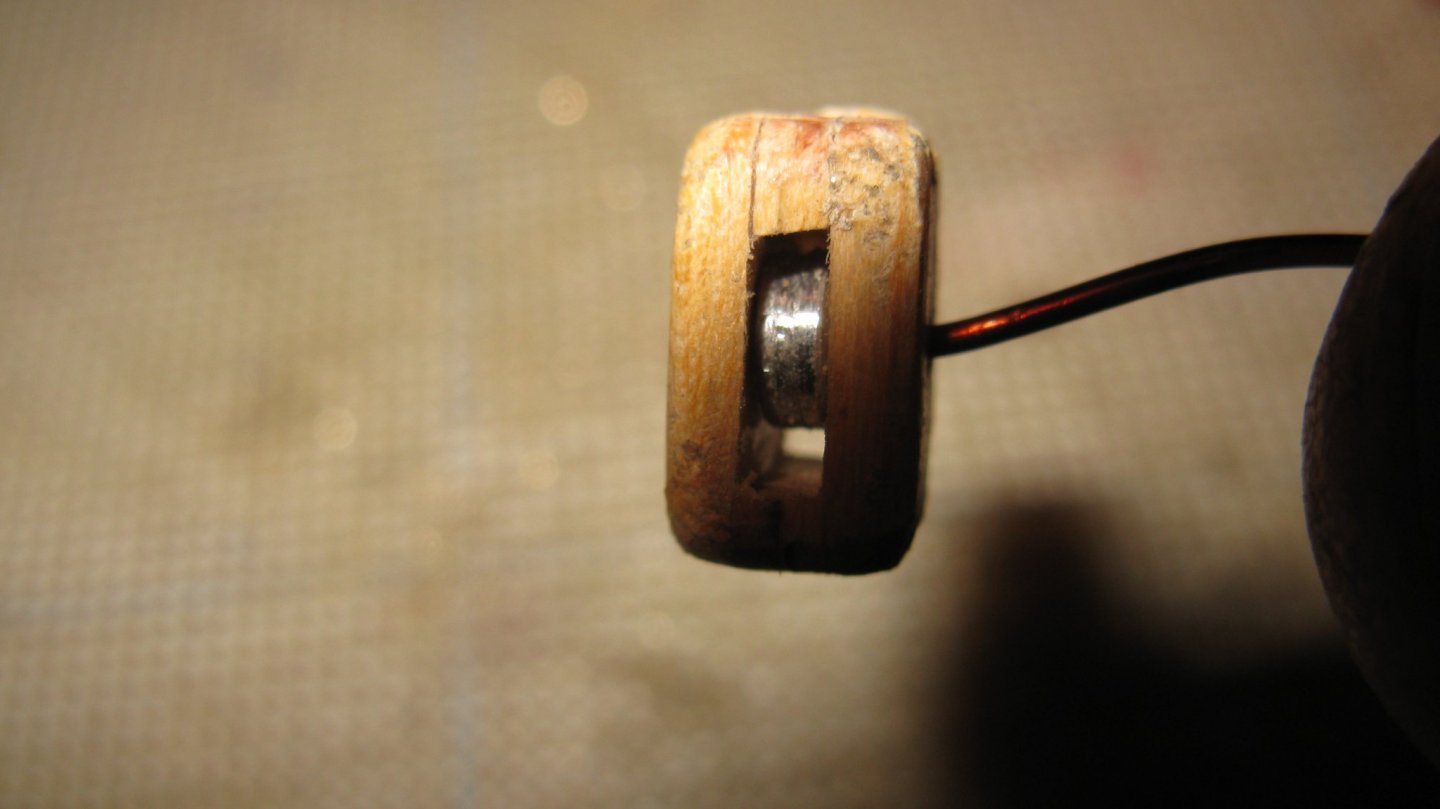
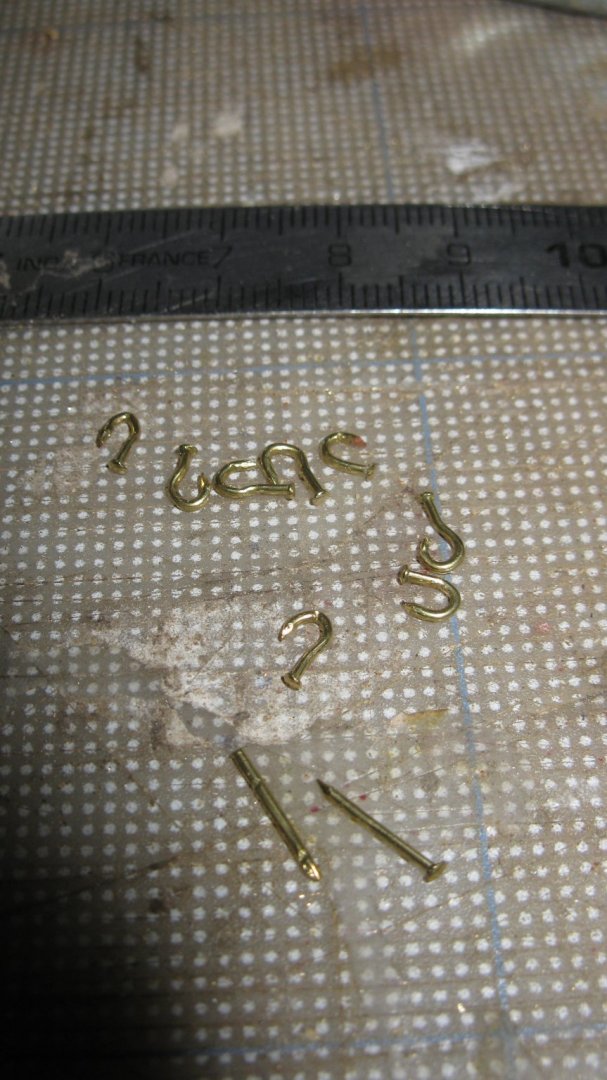
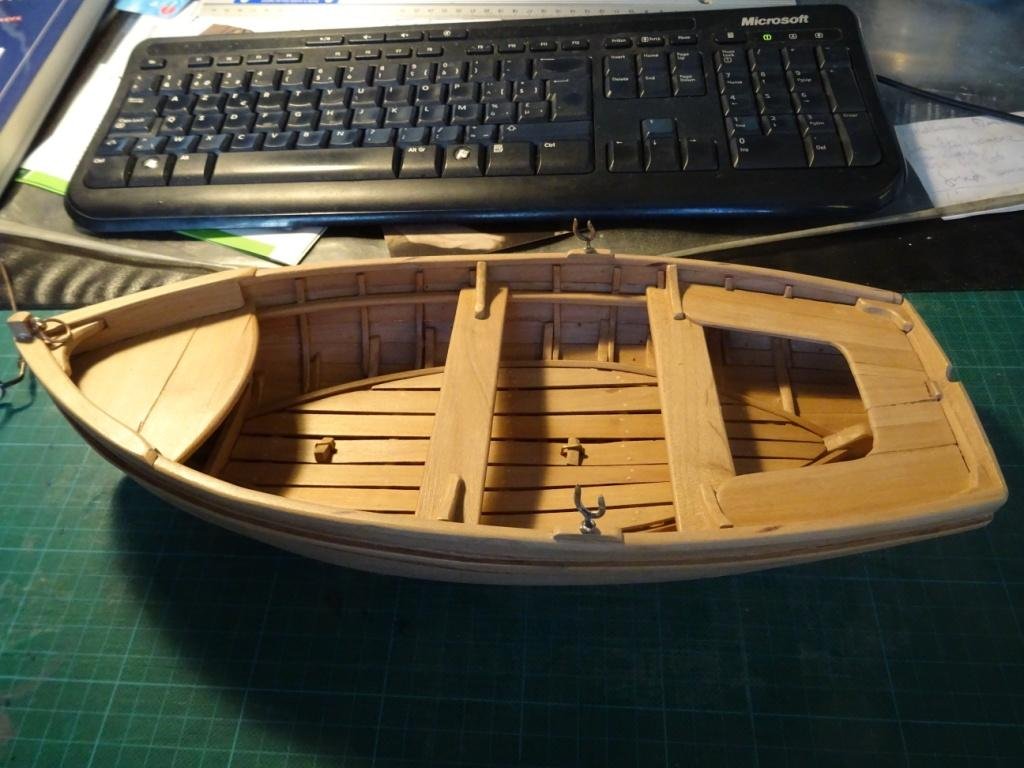
12. Rigging 12.1. Making the blocks I make the block sheaves from an aluminum rod. I need some double and some single blocks. I laminate them with apple wood. When dry, I saw them into separate pieces. I drill the holes for the sheave pins. Shaping the blocks with the dremel... ... and with the file. Making the scores for the metal straps. Placing the sheave. Soldering the straps. Some blocks are provided with a hook. I make the hooks by folding brass nails an solder them on the straps. The end result: Thanks to follow Thanks for the likes Till next week!


- 209 replies
-
- 10
-
-
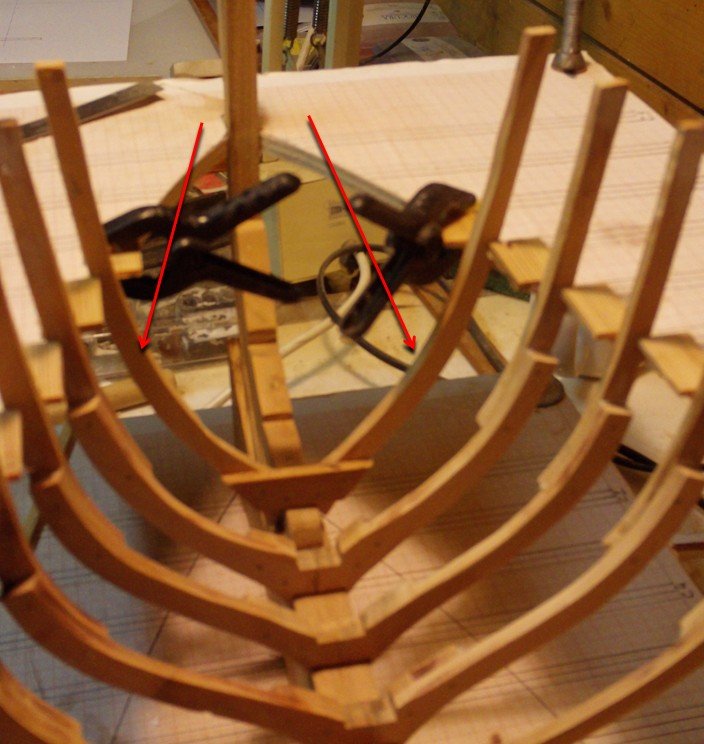
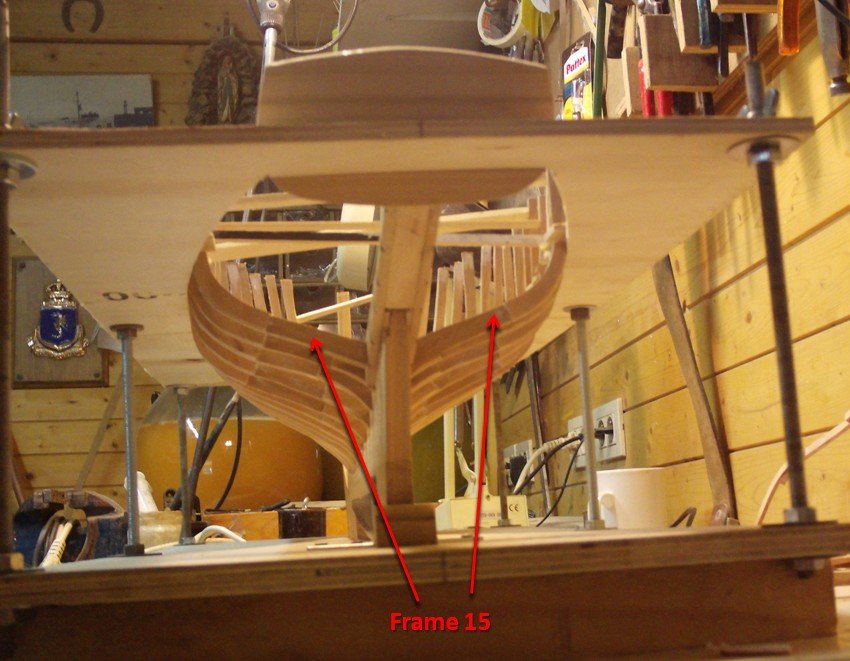
Thank you very much for your interest, Vaddoc, Keith, Michael and Druxey. Thanks for the likes! Continuing making and placing frames. Starting the fourth frame from the bow, the frames are half frames. Also frame 15 to 22 at the aft are half frames.

- 168 replies
-
- 17
-
-
So happy that you are back, Michael. I just looked to the detail picture of your tiller and compared with the tiller that I made for my anatomy project. What a difference! I'm ready to learn. Happy New Year!
-
Vaddoc, If you do not intend to paint the model, my choice would be pear. I don't know if you remember the small planking conversation we had on my gaff sail boat thread in October. I showed some pictures of a row boat that I was making as a kind of experiment to try out a planking method. It didn't turn out so good, but I finished the model anyway as a prototype to rebuild the model in the near future with another planking method. It is made of pear and matt varnished. If you ignore the planking and only look to the wood appearance pear does it very well. Bending the planks was not a problem. I didn't have to steam them. They are bent over a paint burner at the lowest temperature.
-
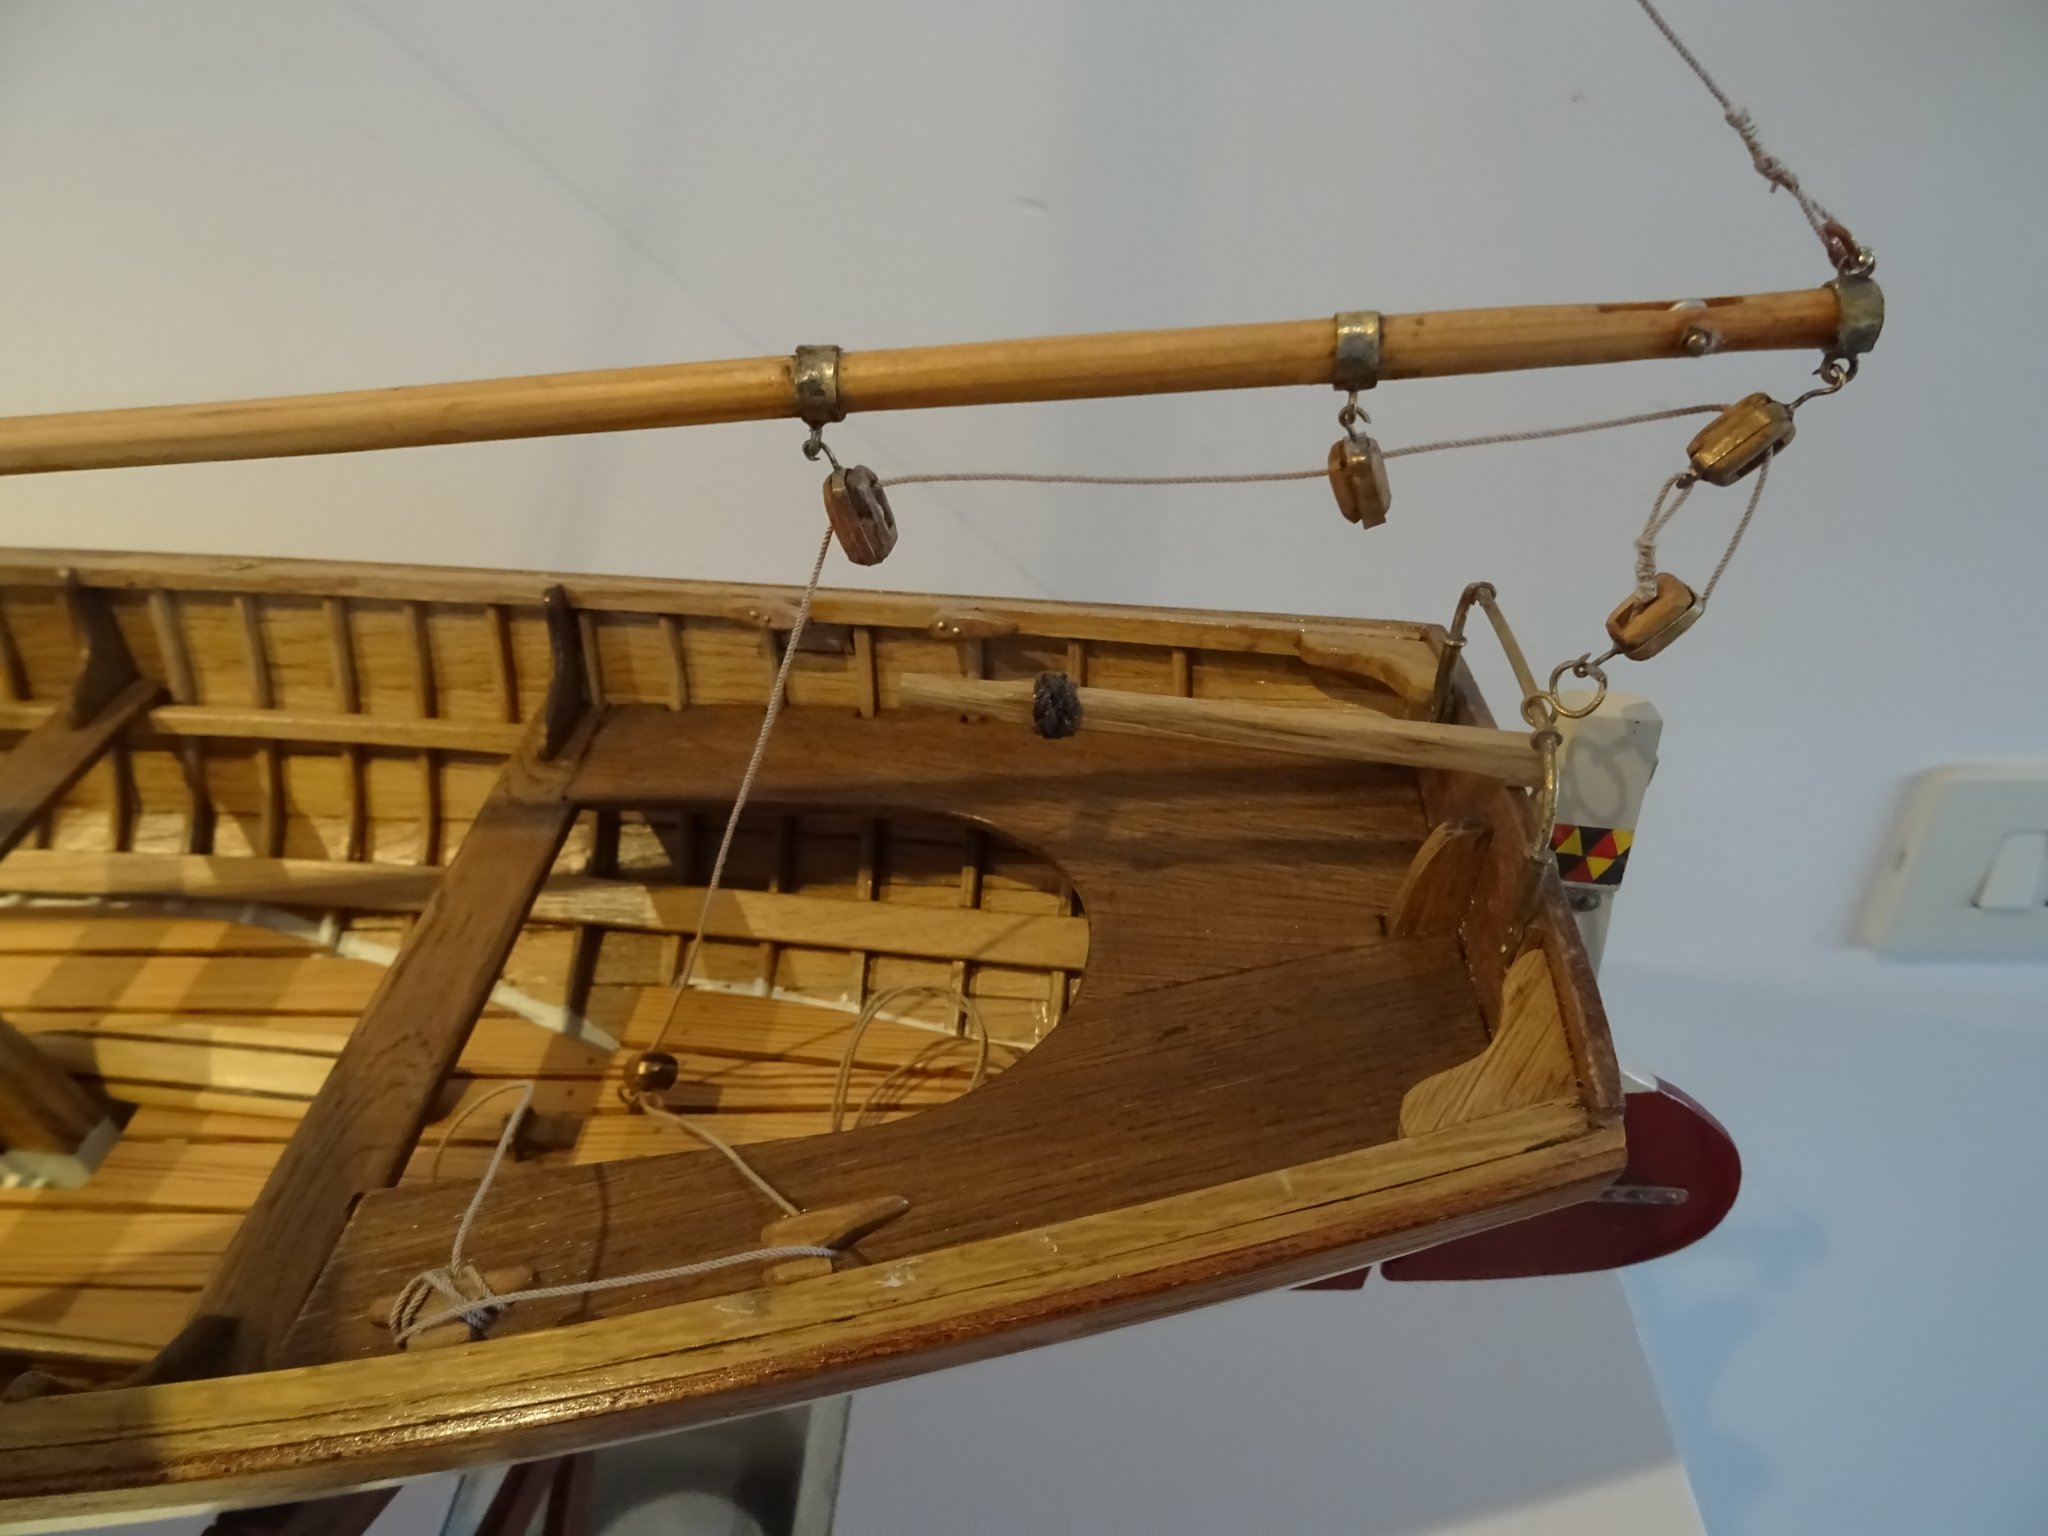
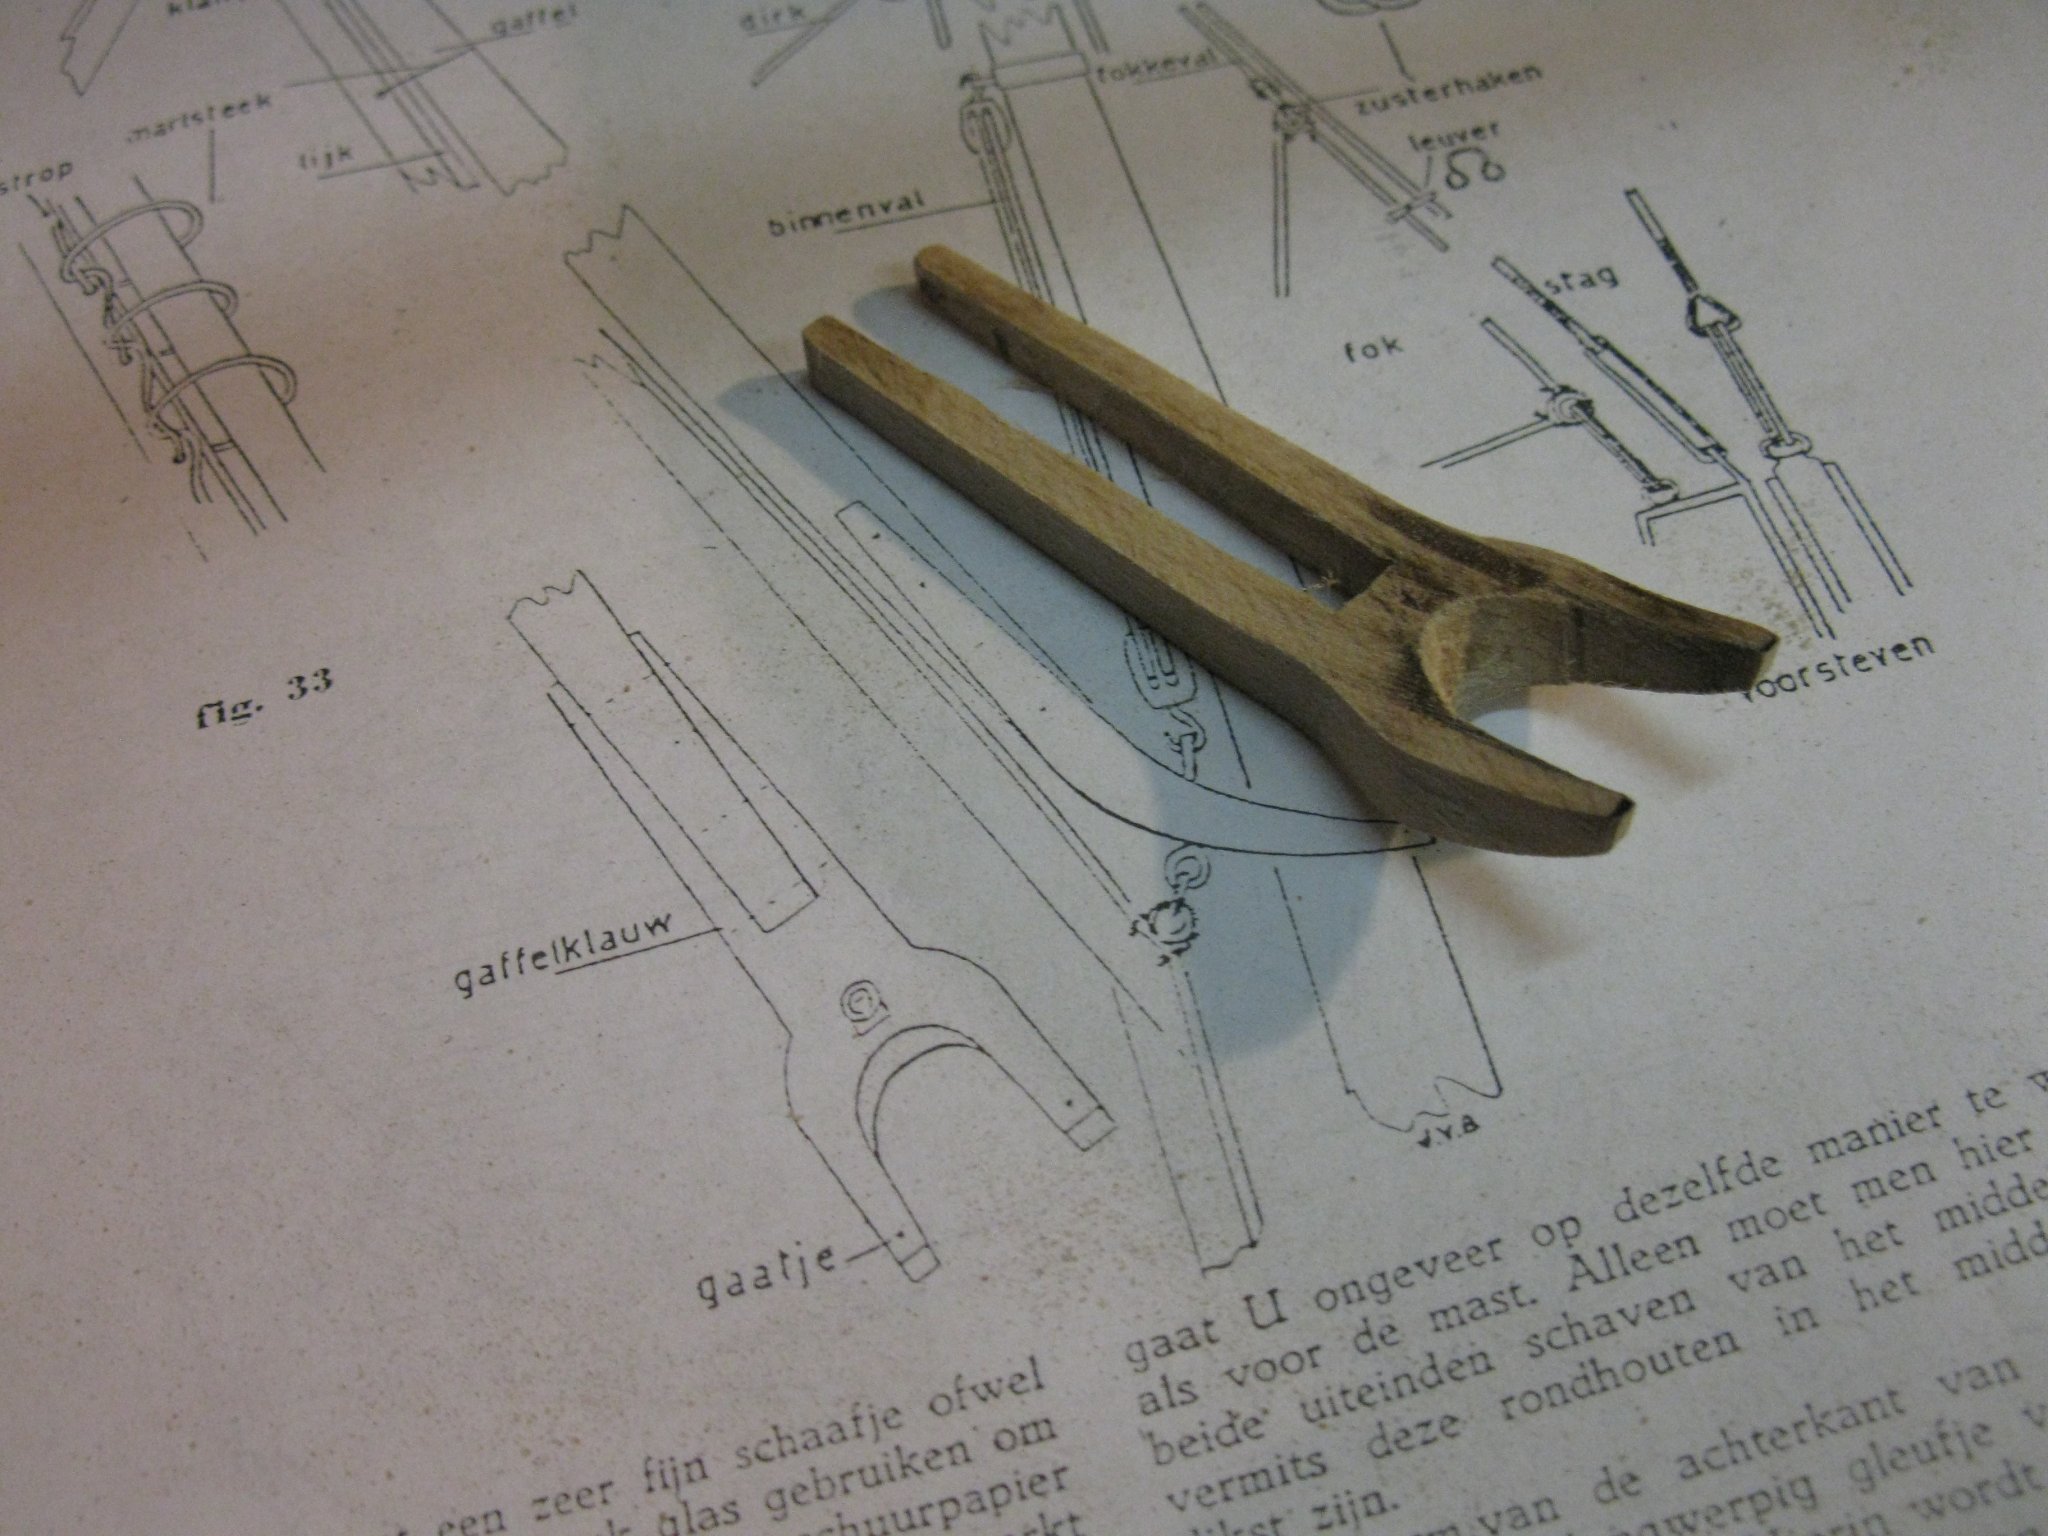
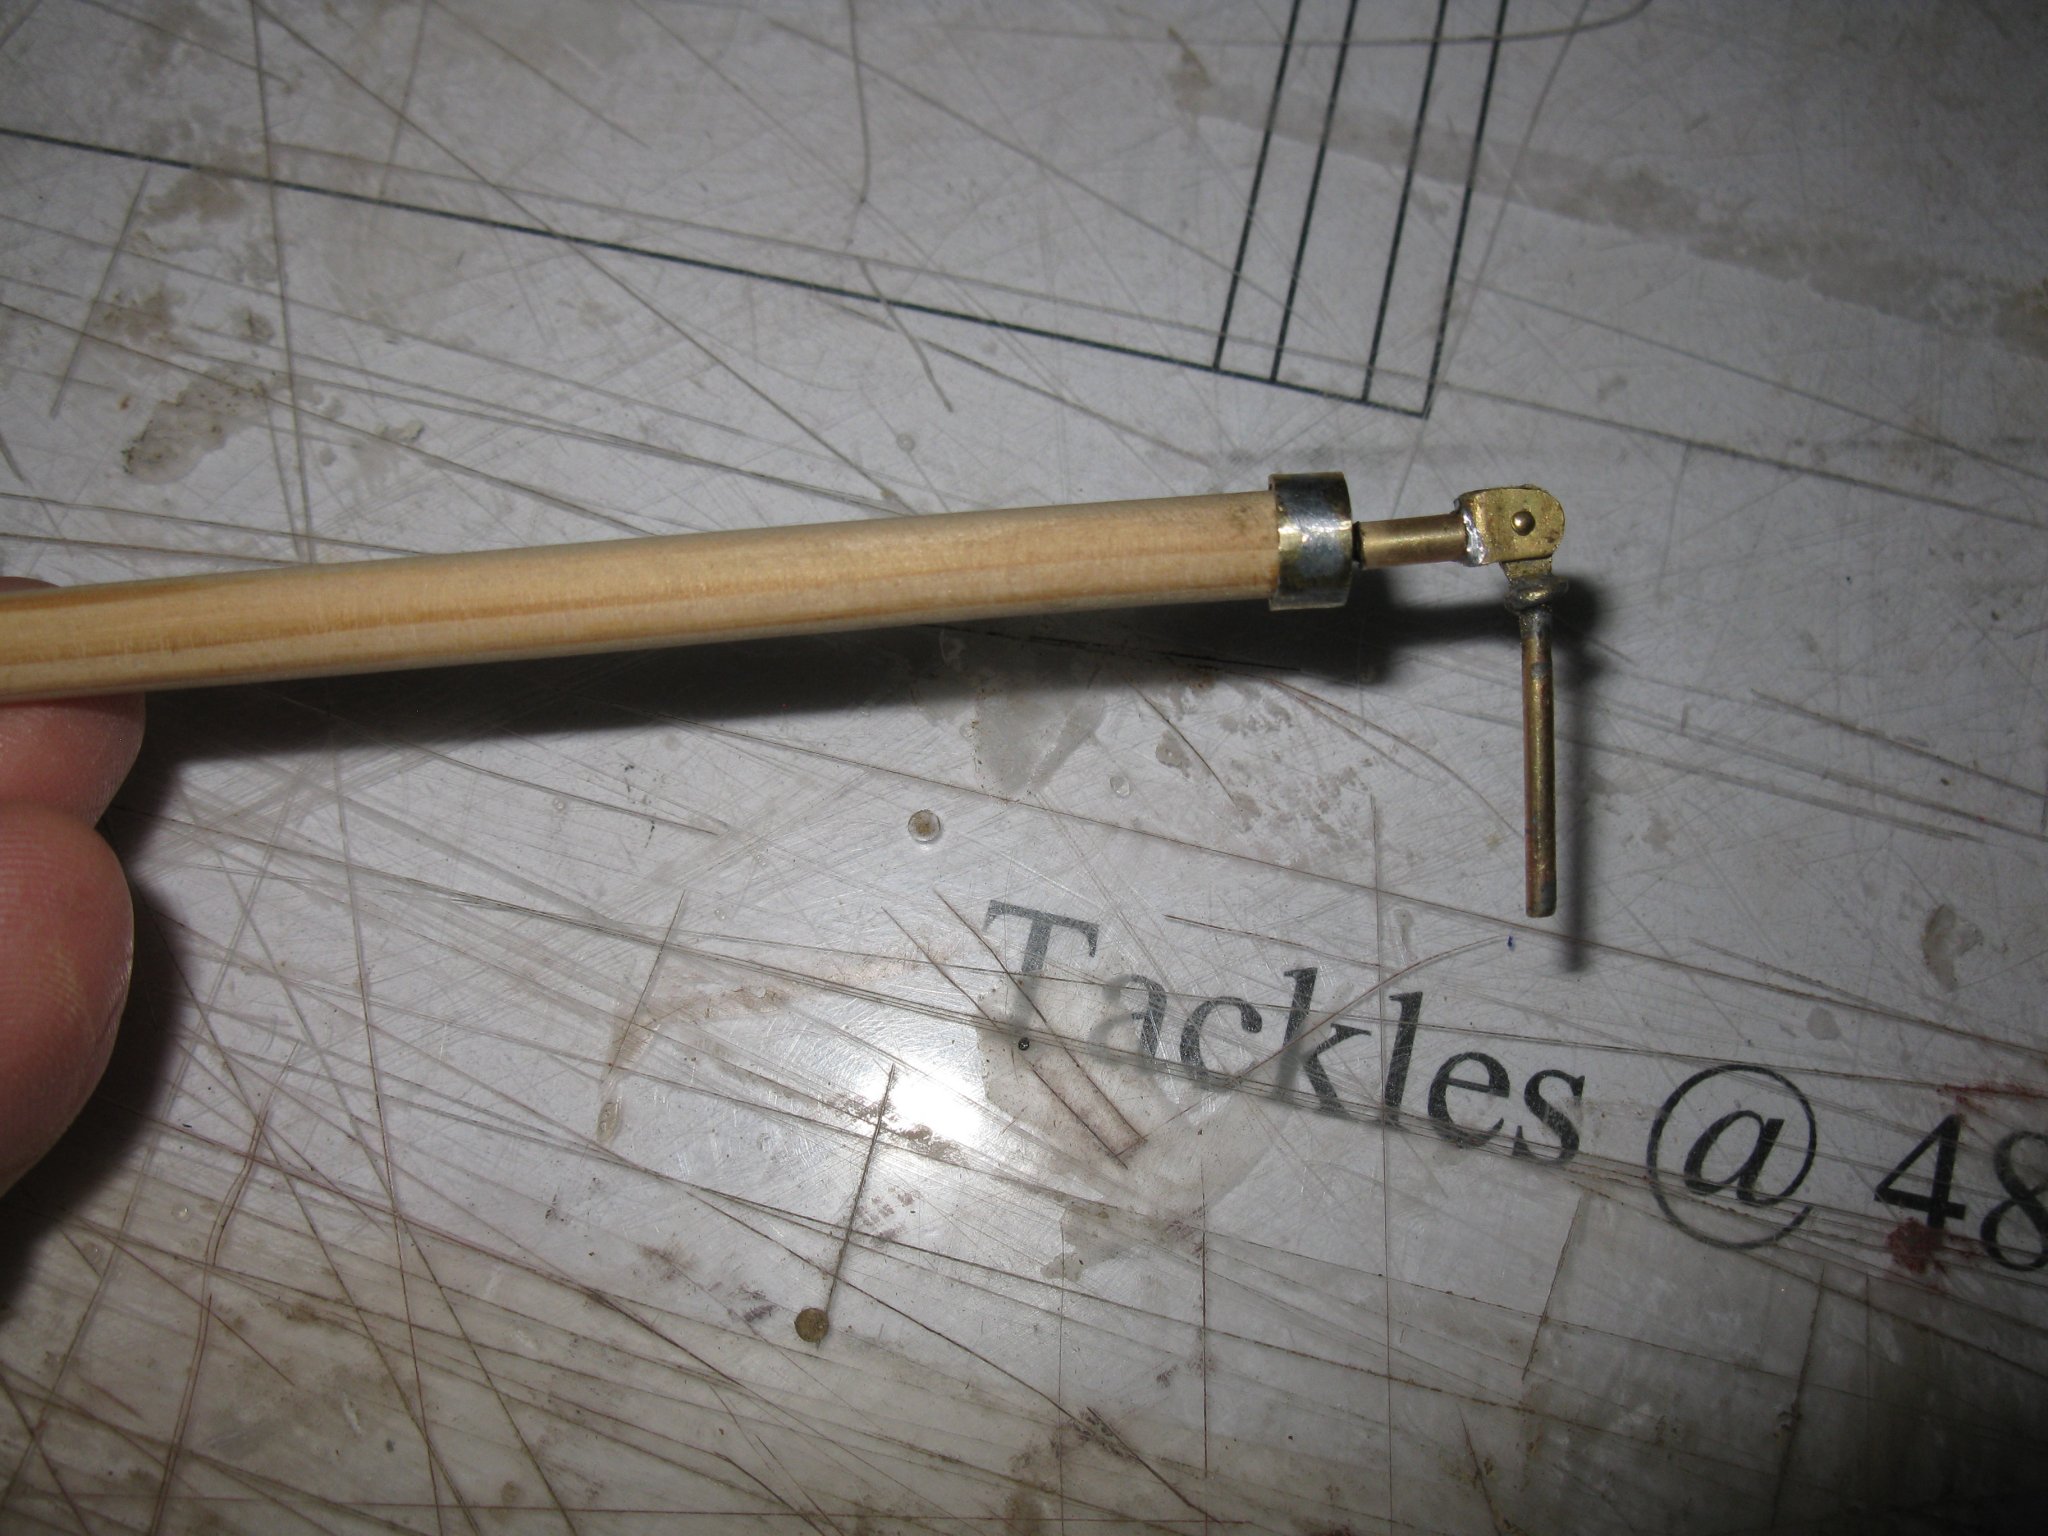
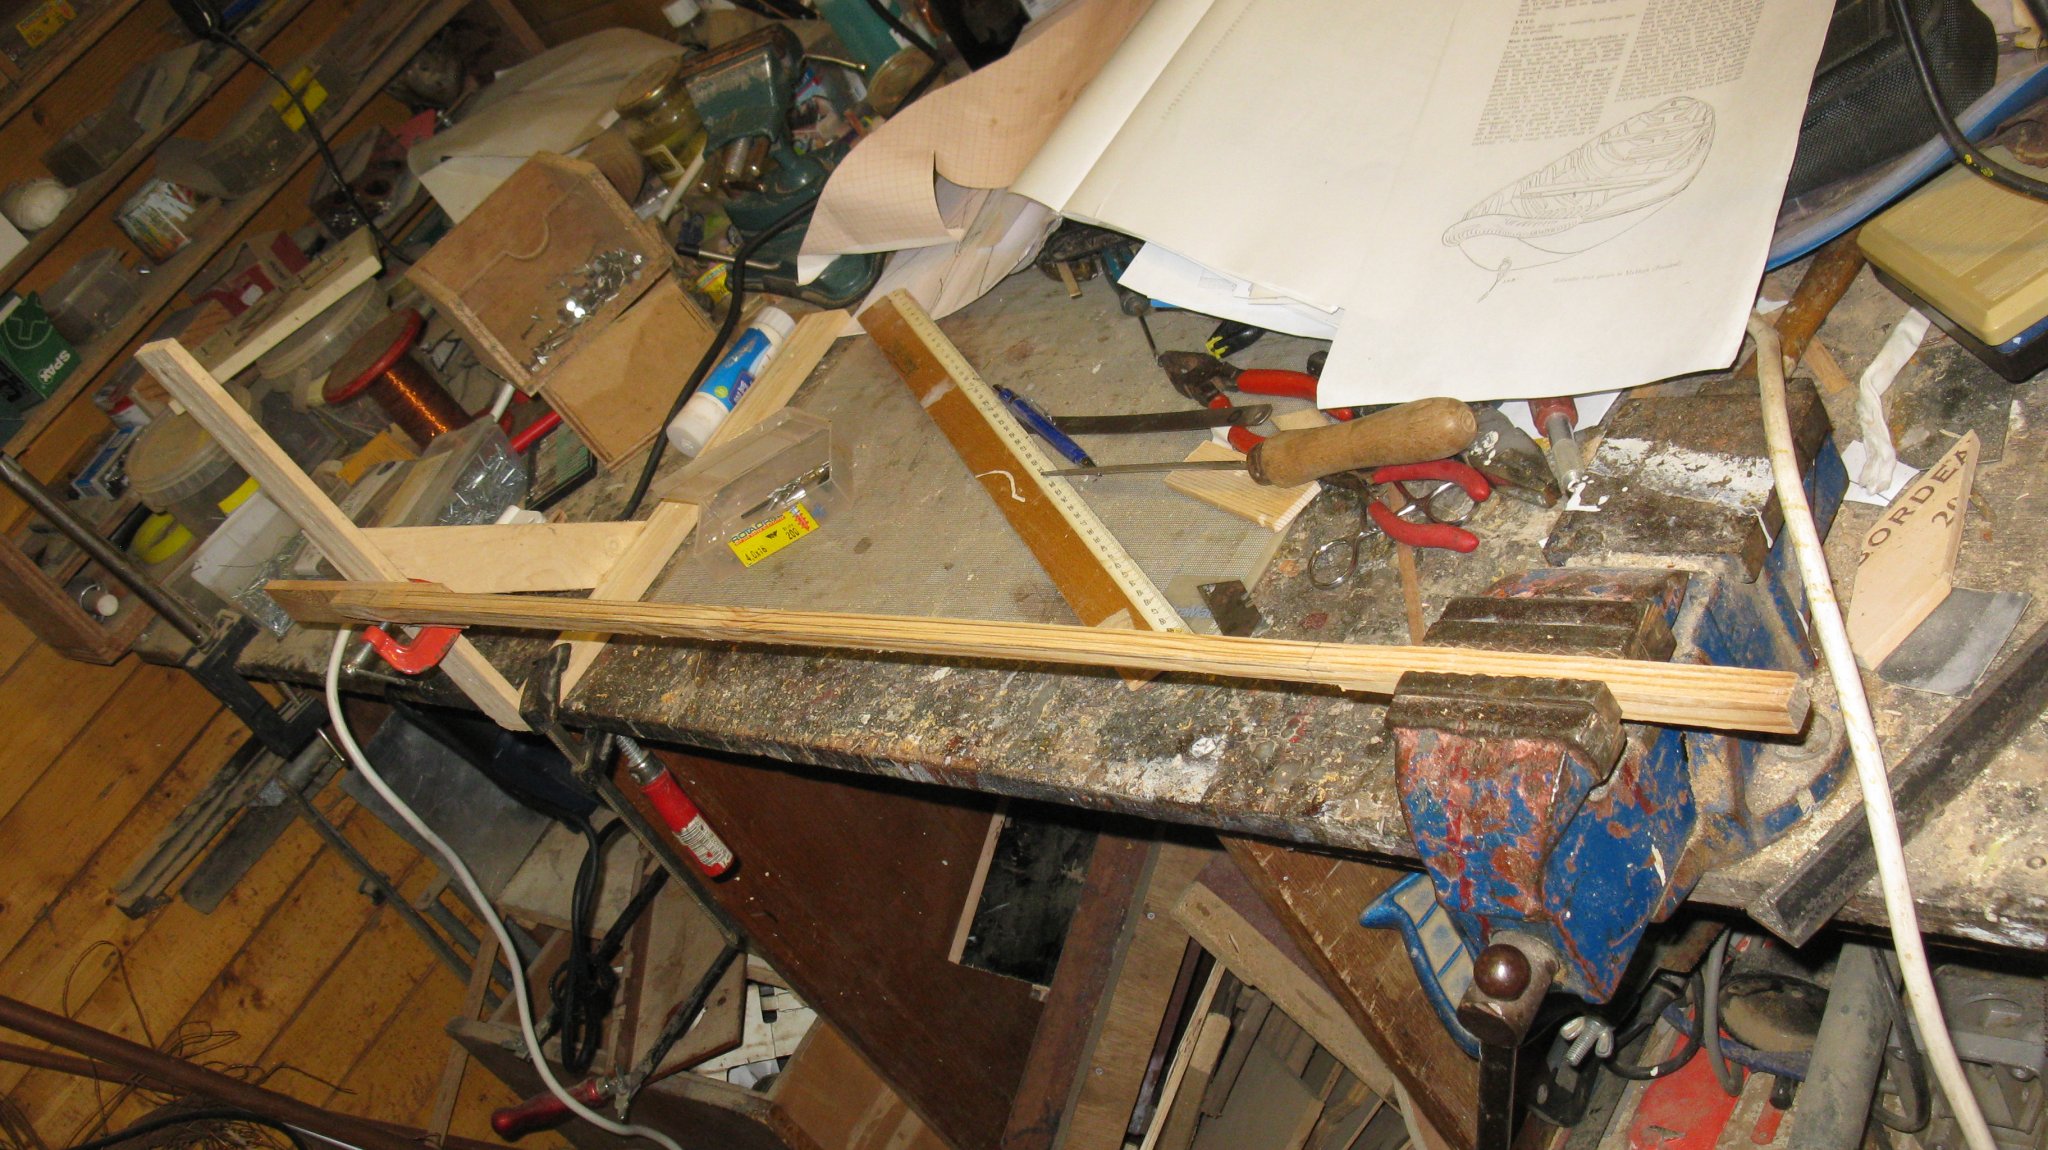
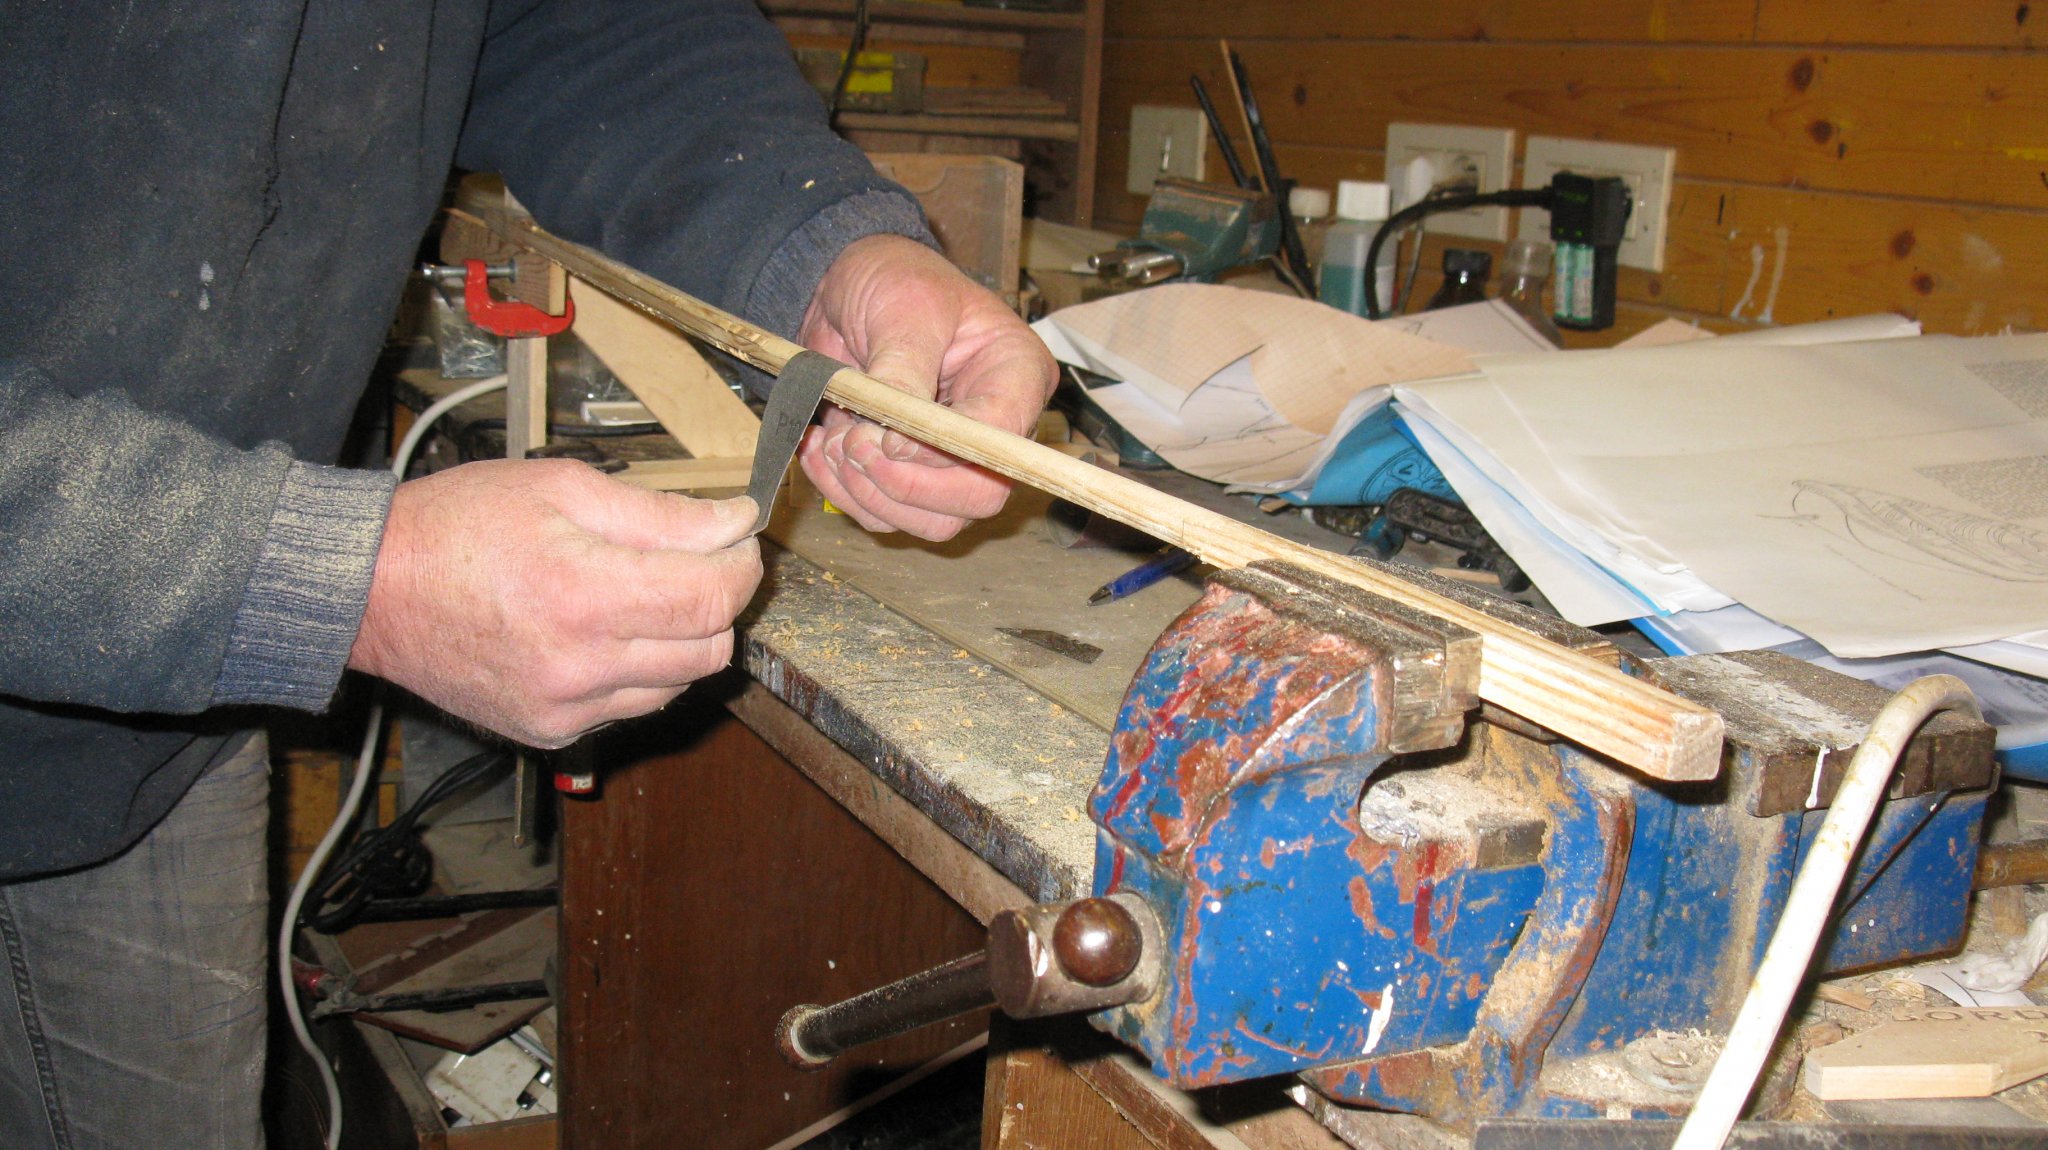
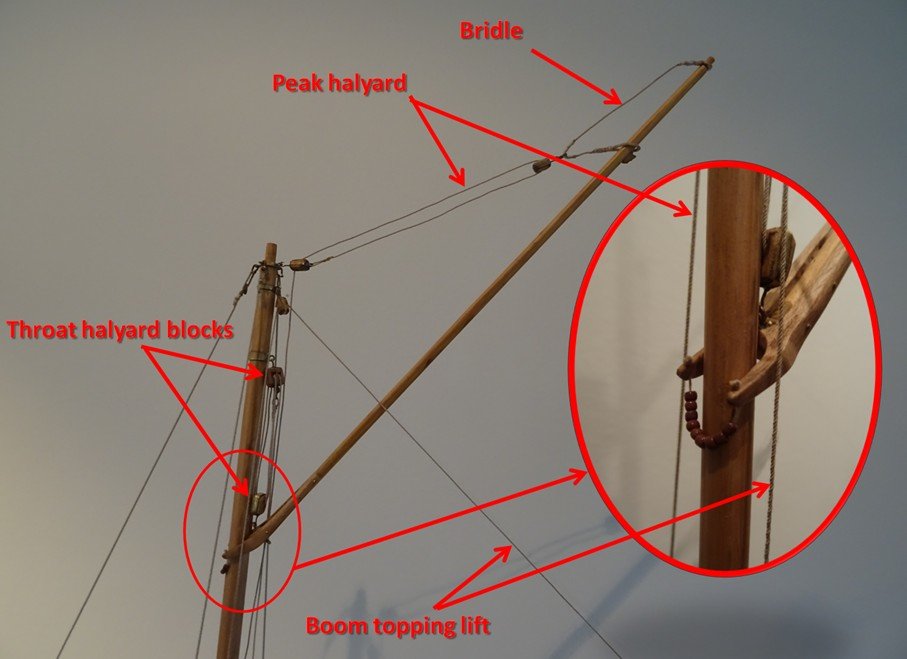
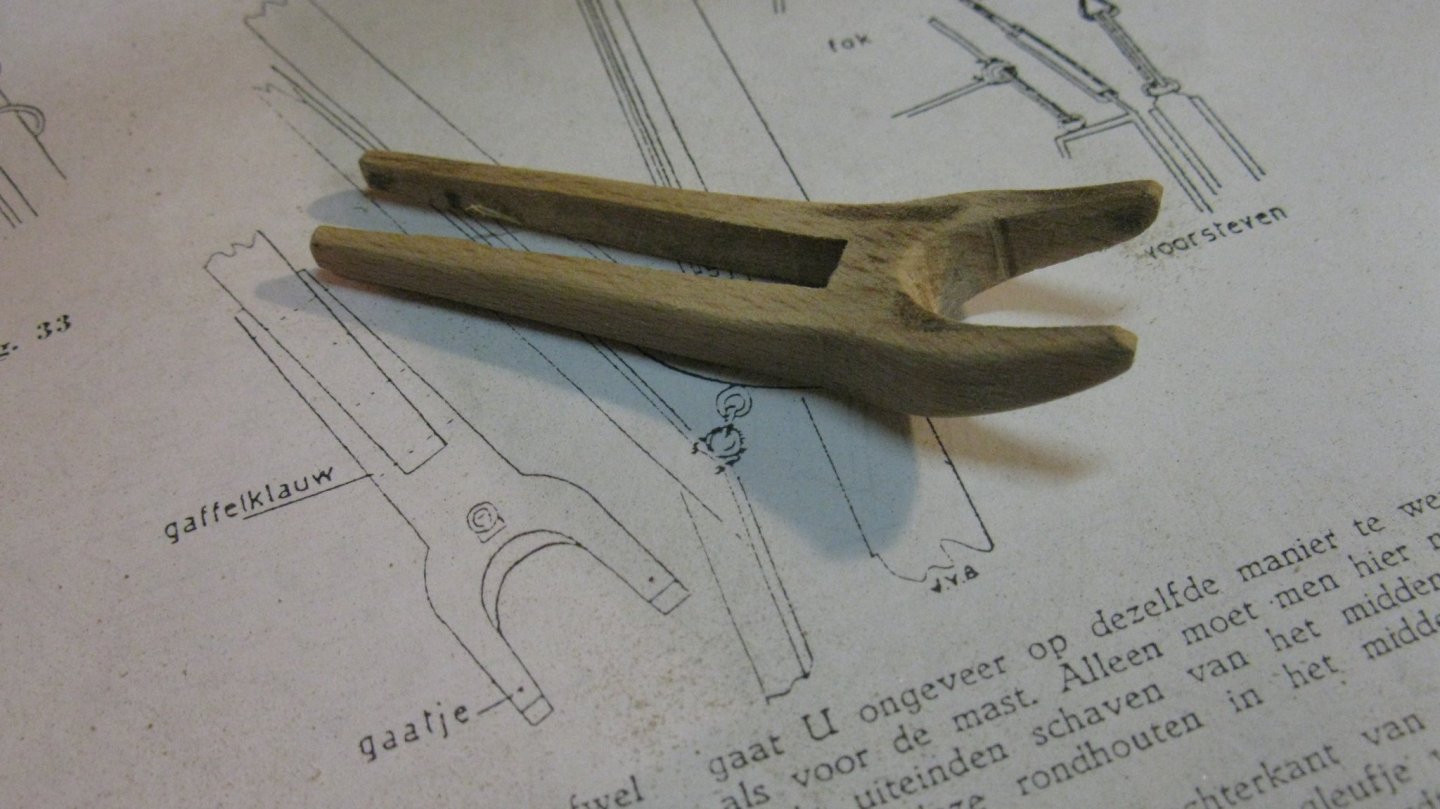
Thanks Nils, John Mark and Pete. 11.2. The gaff and the boom The gaff and the boom are made in the same way as the mast. I make the gaff jaws from a piece of beach. The gaff with the gaff jaws. The metal work of the boom: The gooseneck at the mast side: At the outer side: from right to left: a band with two ring at the outside; the upper ring is for the boom topping lift, the bottom ring is for the sheet block. a bit left of that band is a sheave built-in in the boom for the outhaul of the clew. finally there are two metal bands with a ring at the underside of the boom for two blocks to lead the main sail sheet to the bottom of the cockpit. Thanks to follow Thanks for the likes Thanks for the constructive comments Happy New Year for all of you Till next year!


- 209 replies
-
- 12
-
-
Thank to share your full planking story with us. For me planking as one the most tricky processes of modeling. It is always very relieving to see that some else meets the same difficulties as your self.
-
Vaddoc, This is a very interesting log. I planked a couple of models now with continuous planks from stem to stern. I lofted the planks with pencil and compass, not with a drawing software. It is very interesting (and for me also encouraging) that your CAD program produces strake shapes which are very similar to my solutions. I remain uncertain that this way completely corresponds to reality. I am very curious if then ship carpenters used 7m long and 0.58m wide planks to saw the middle strakes. It looks to me as an enormous waste of wood. I am very eager to see the sequel of this story.
-
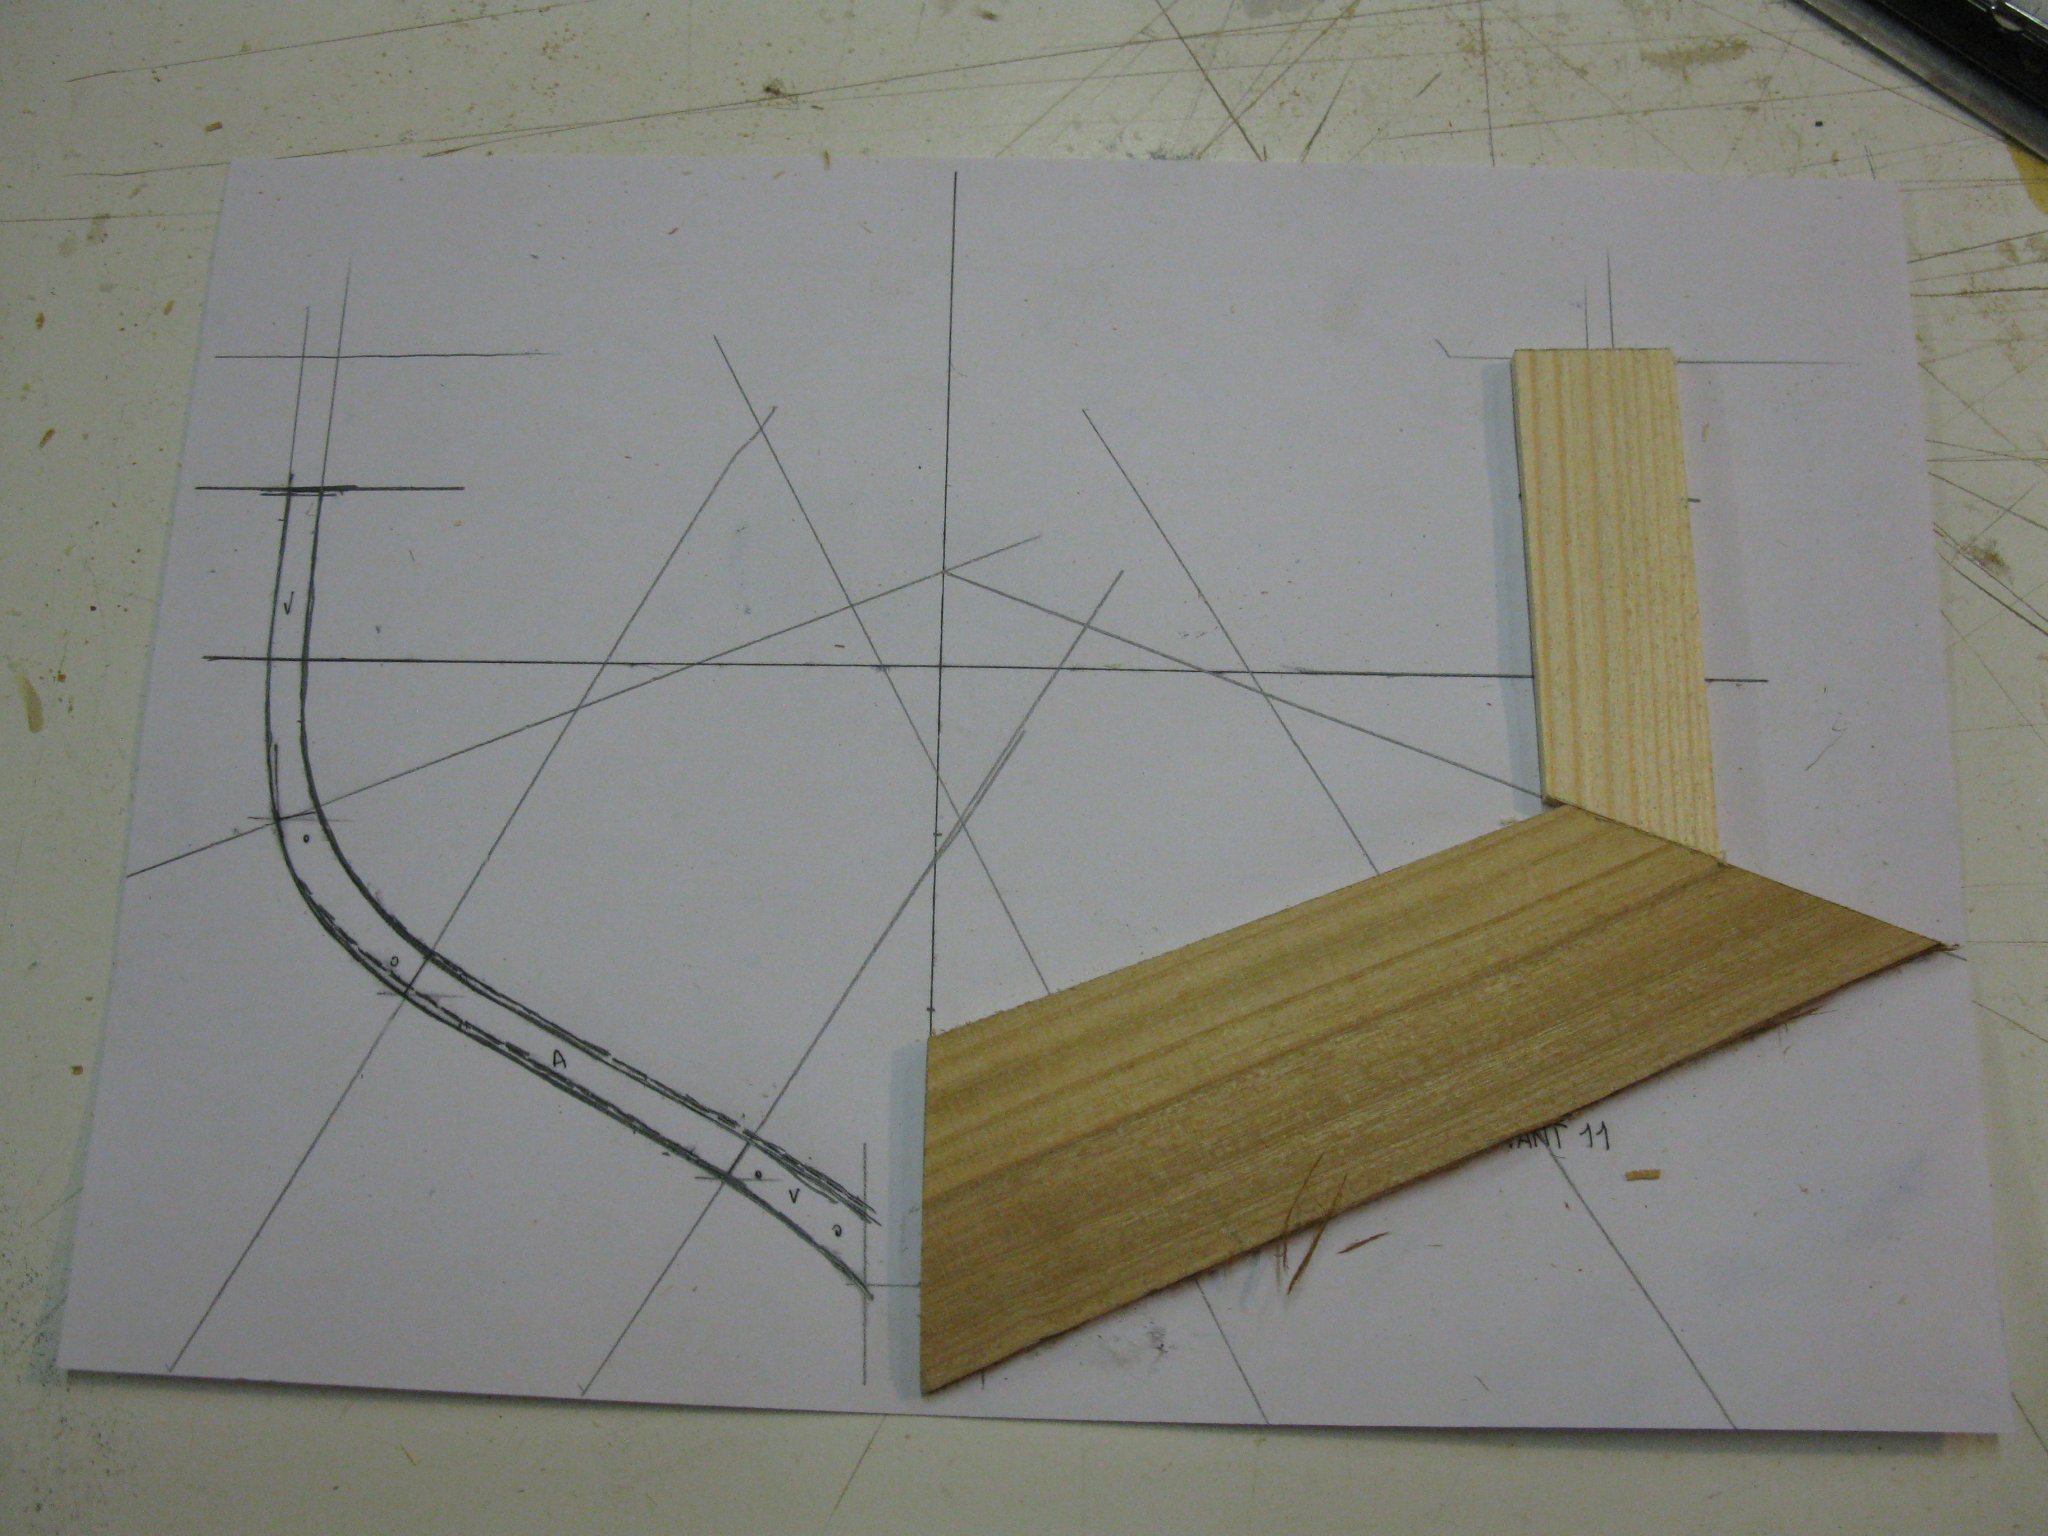
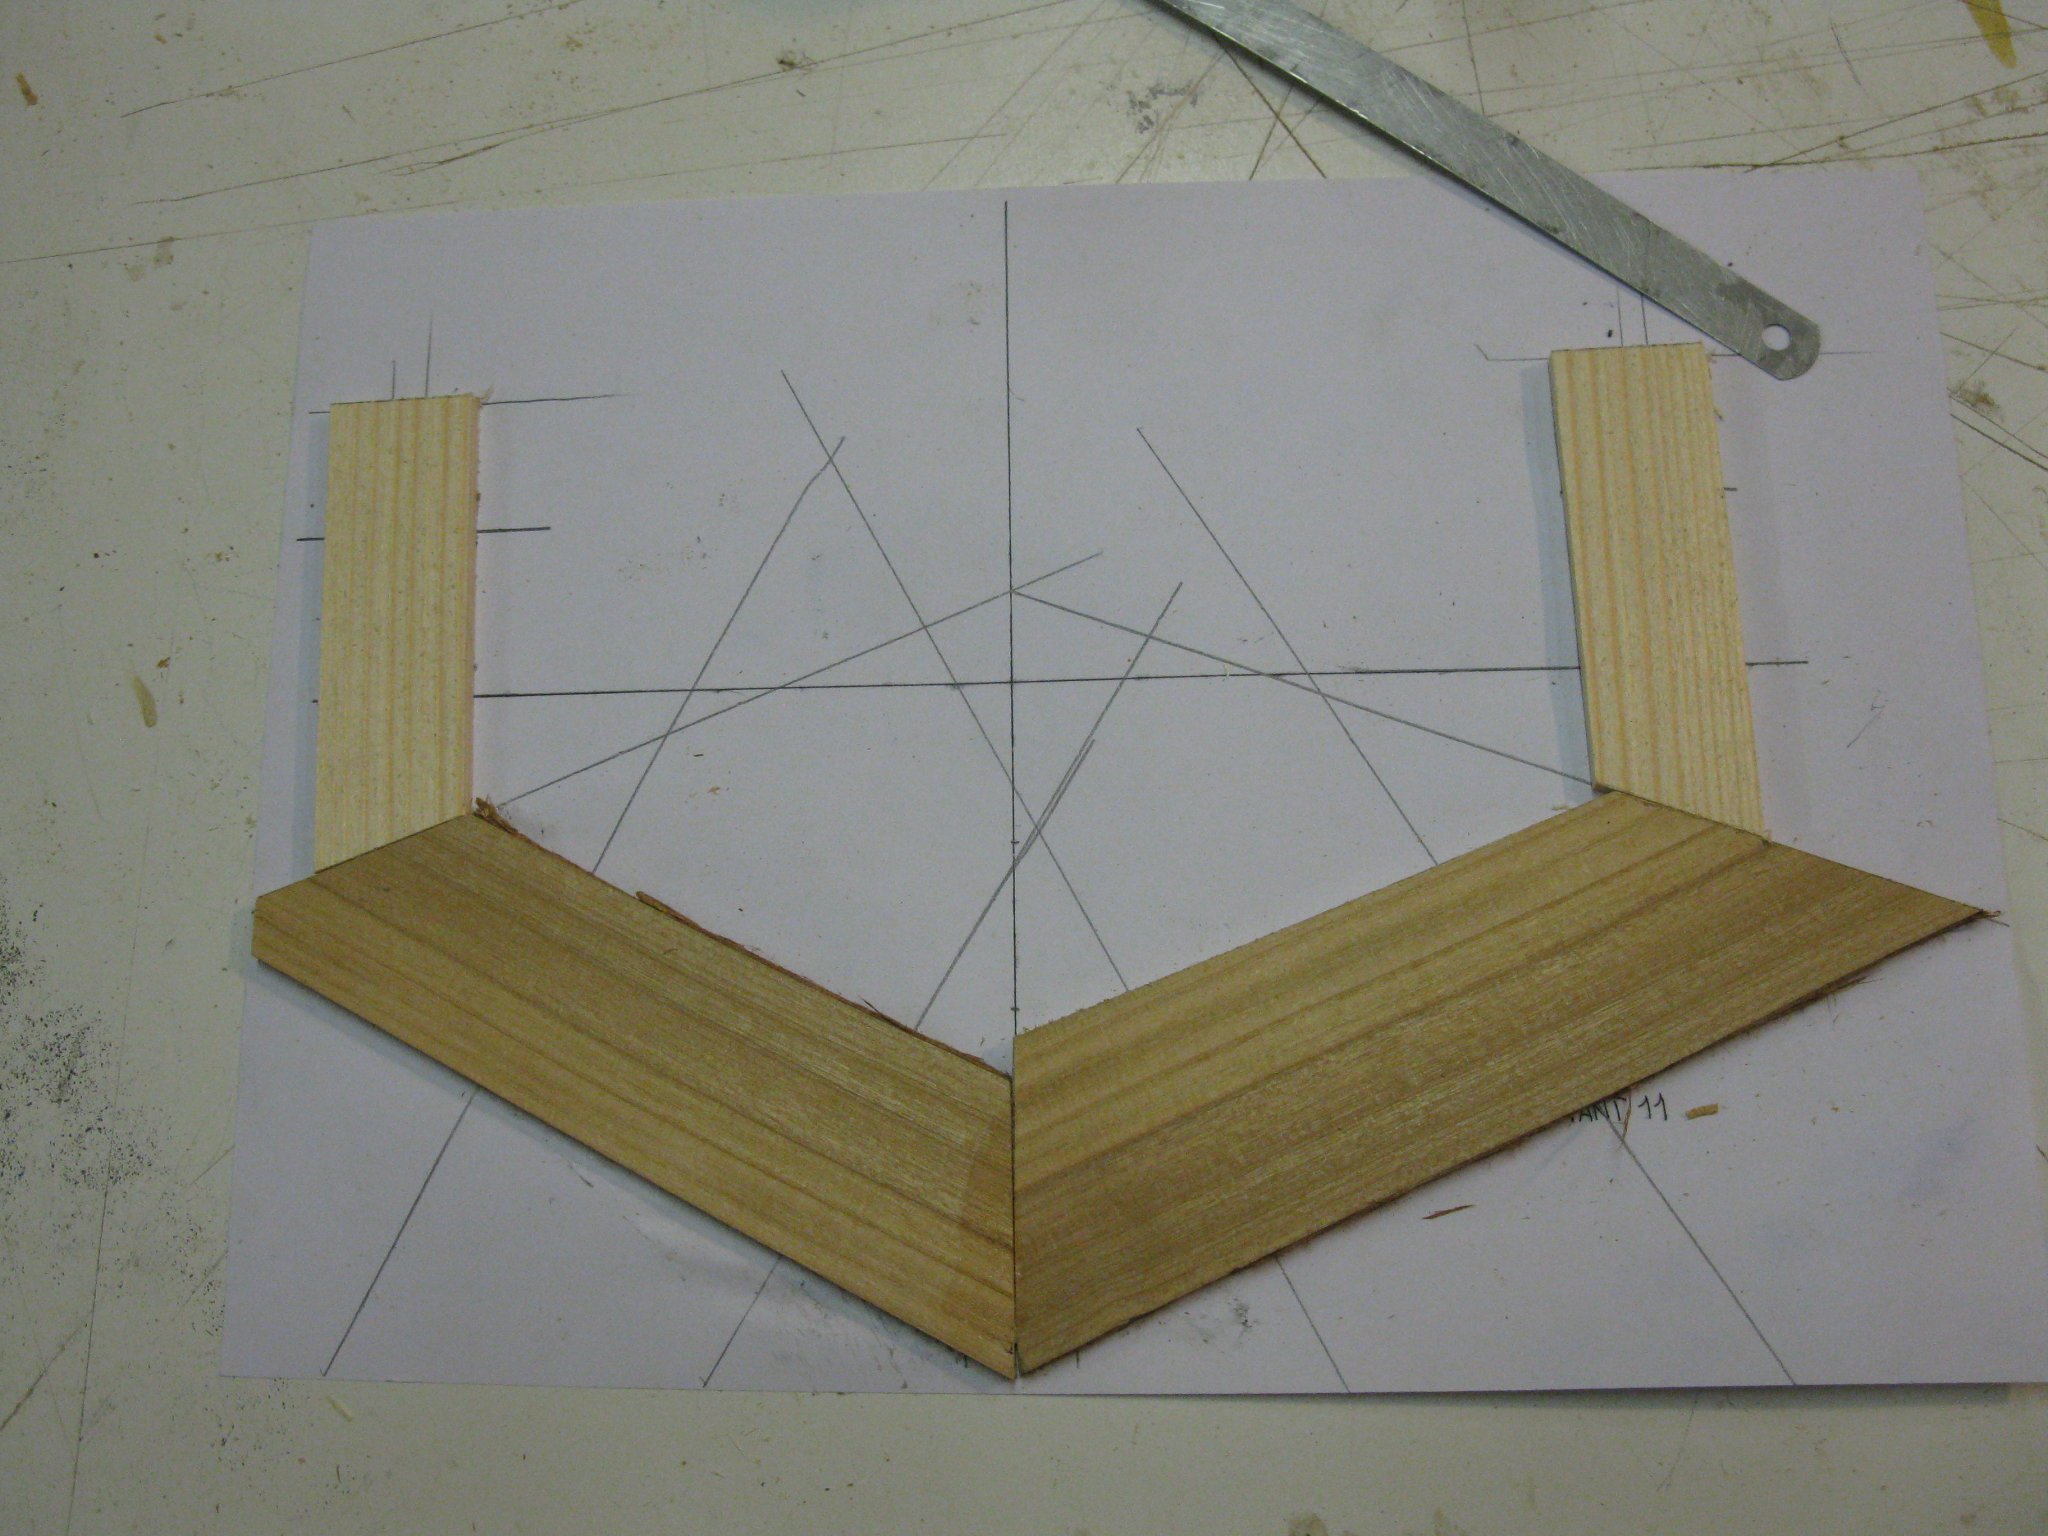
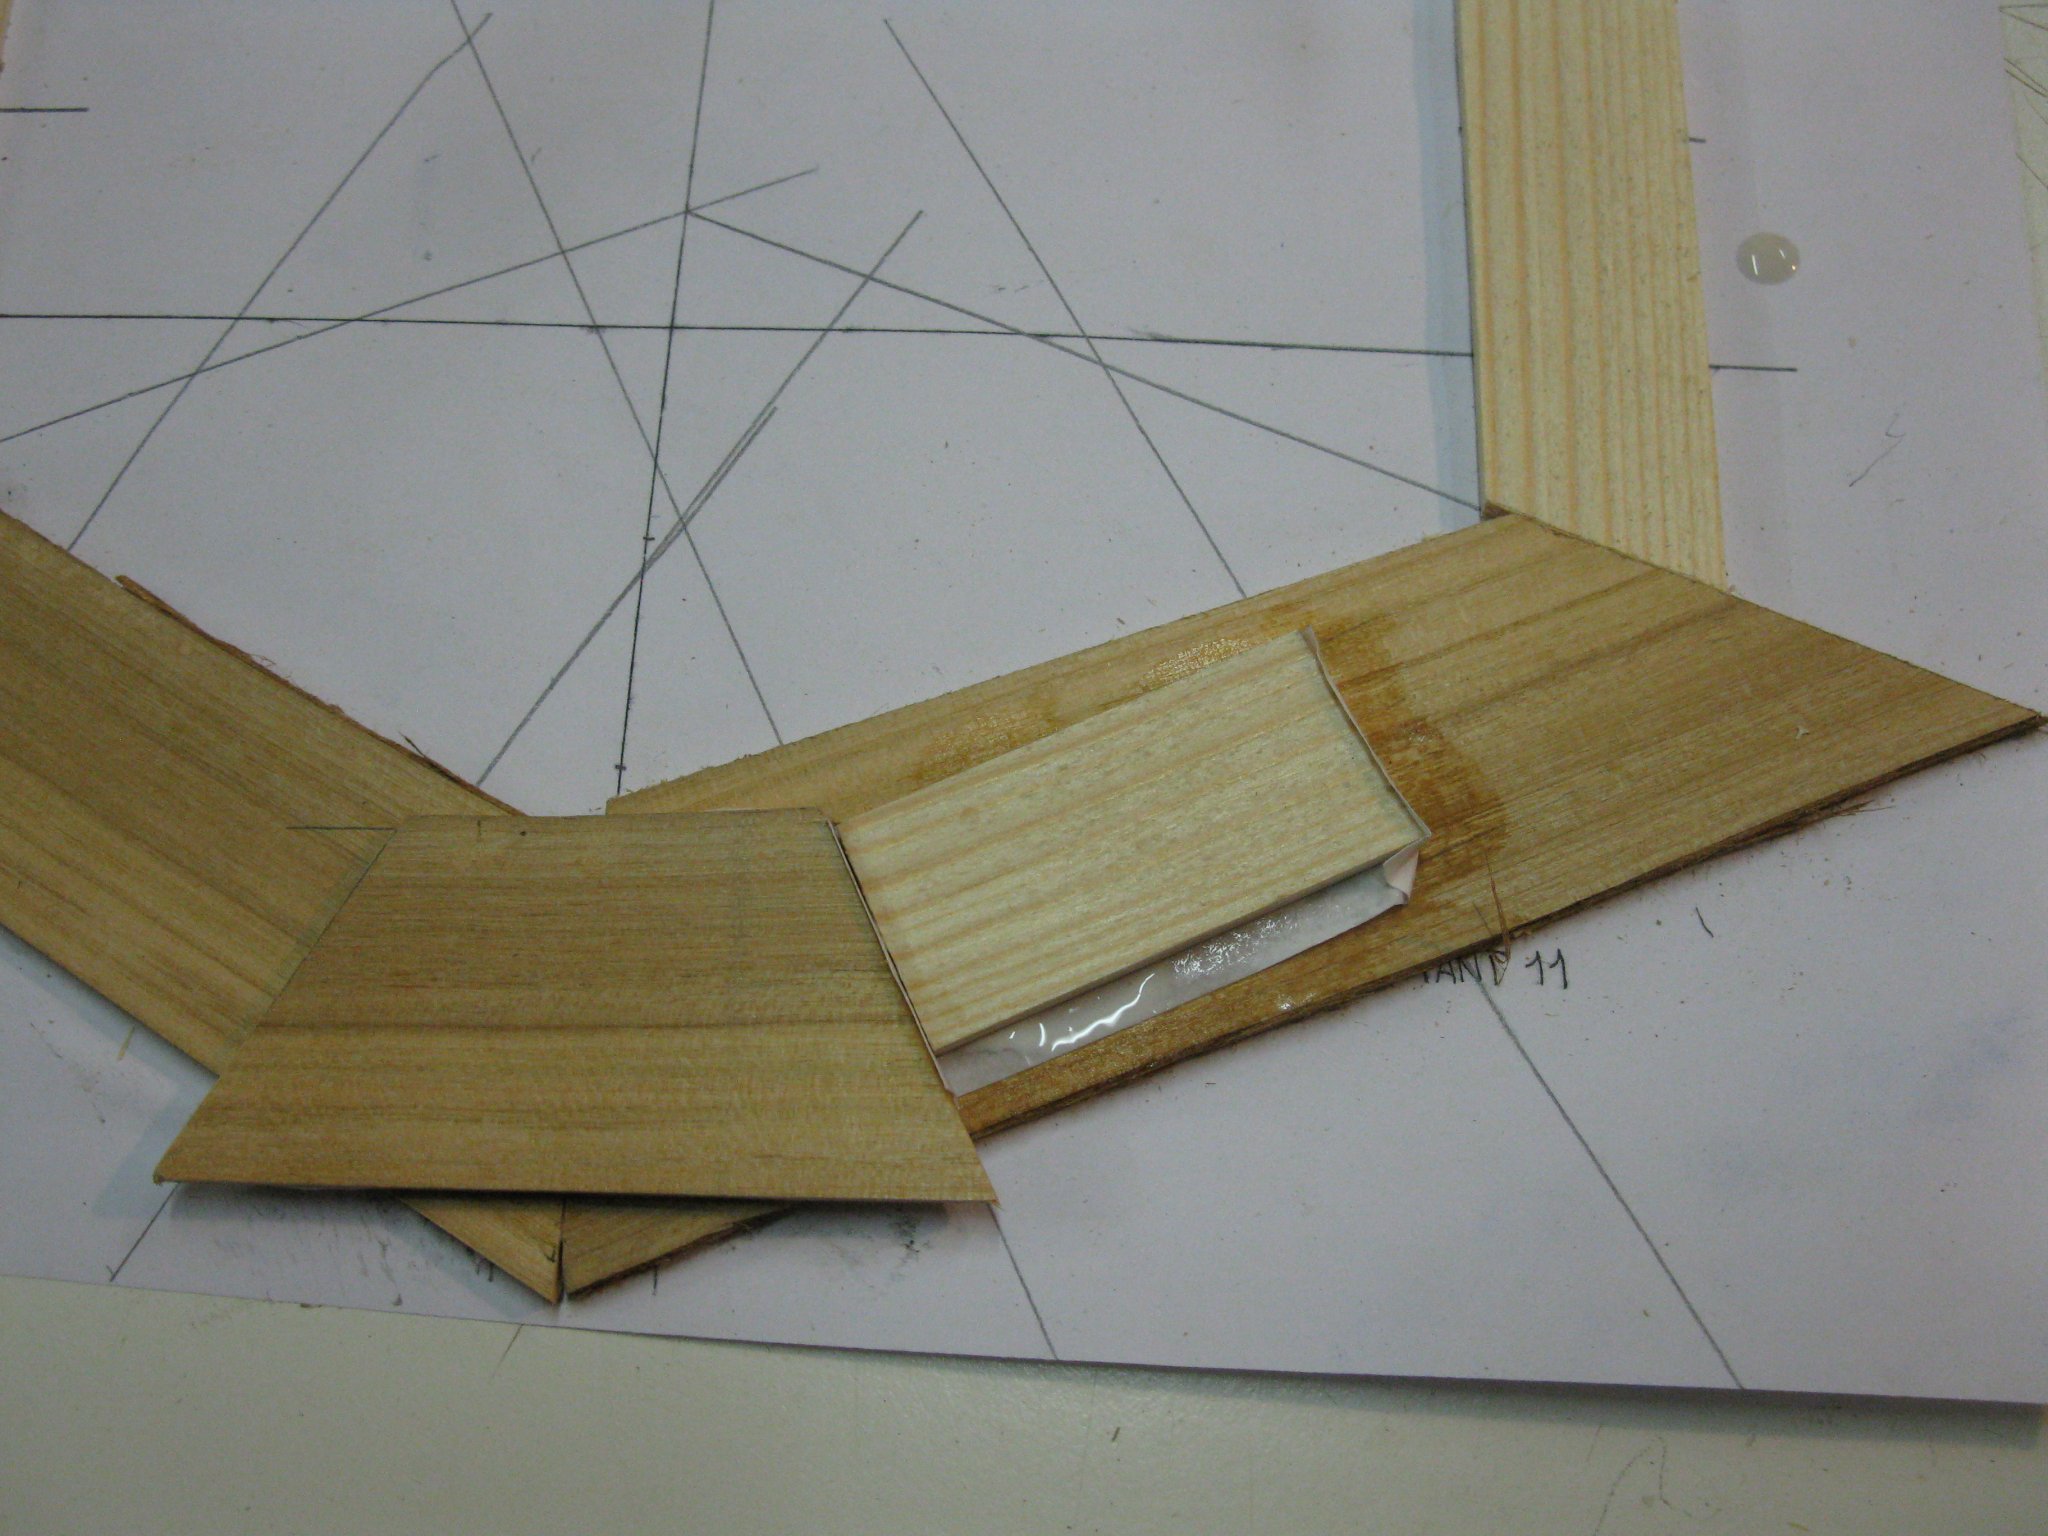
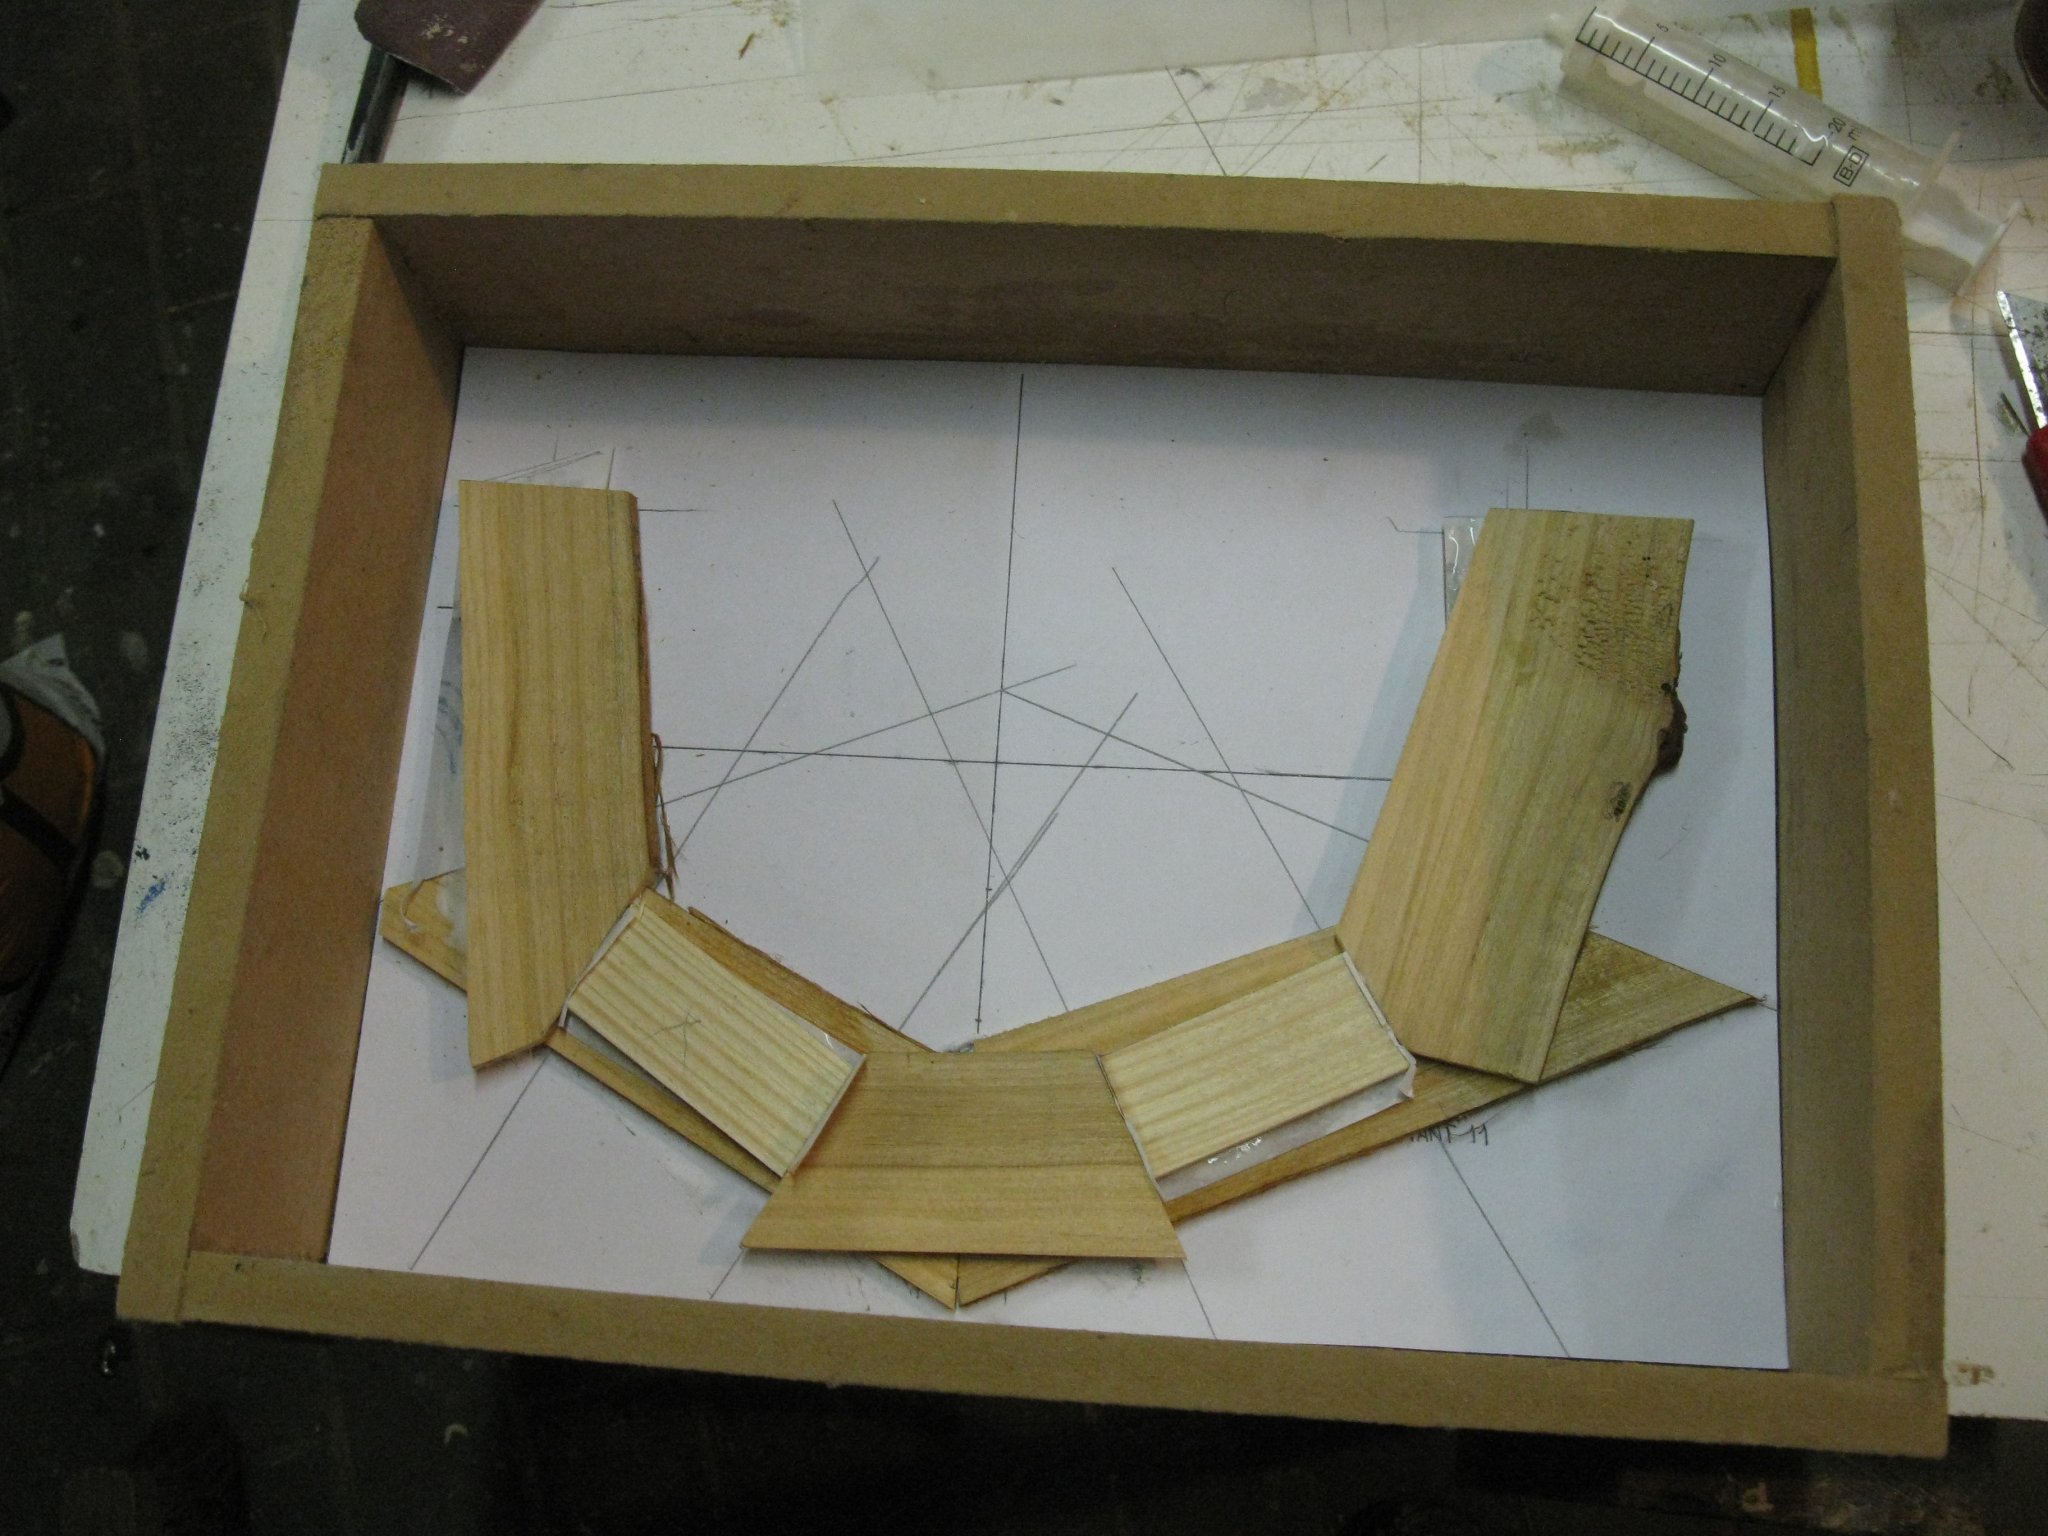
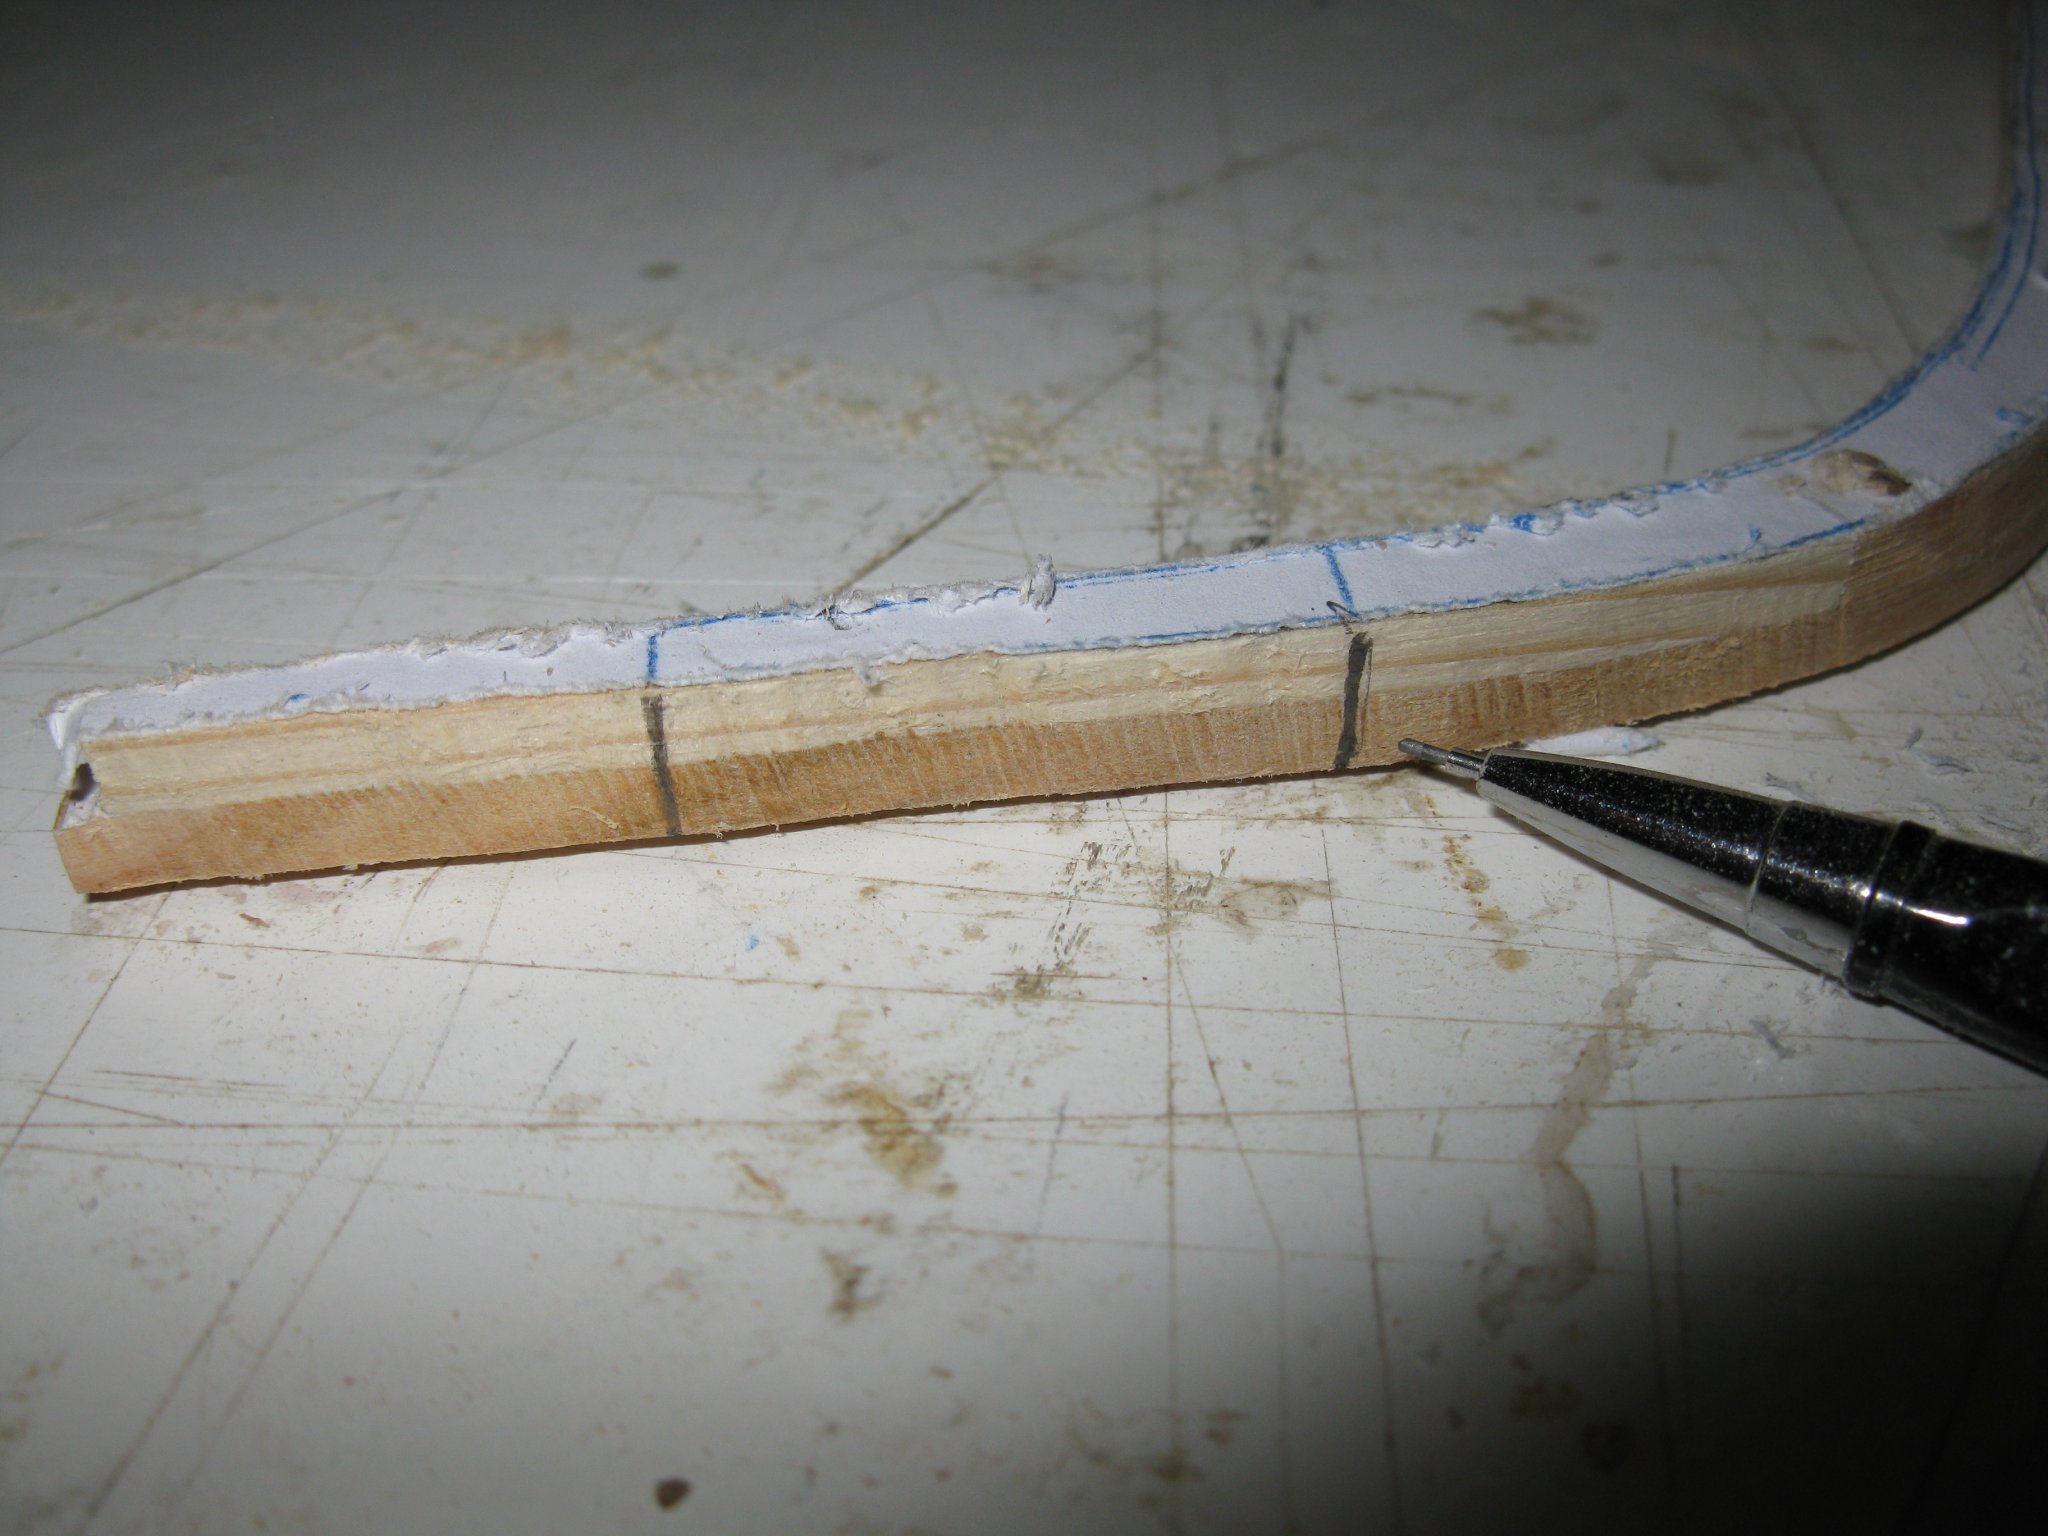
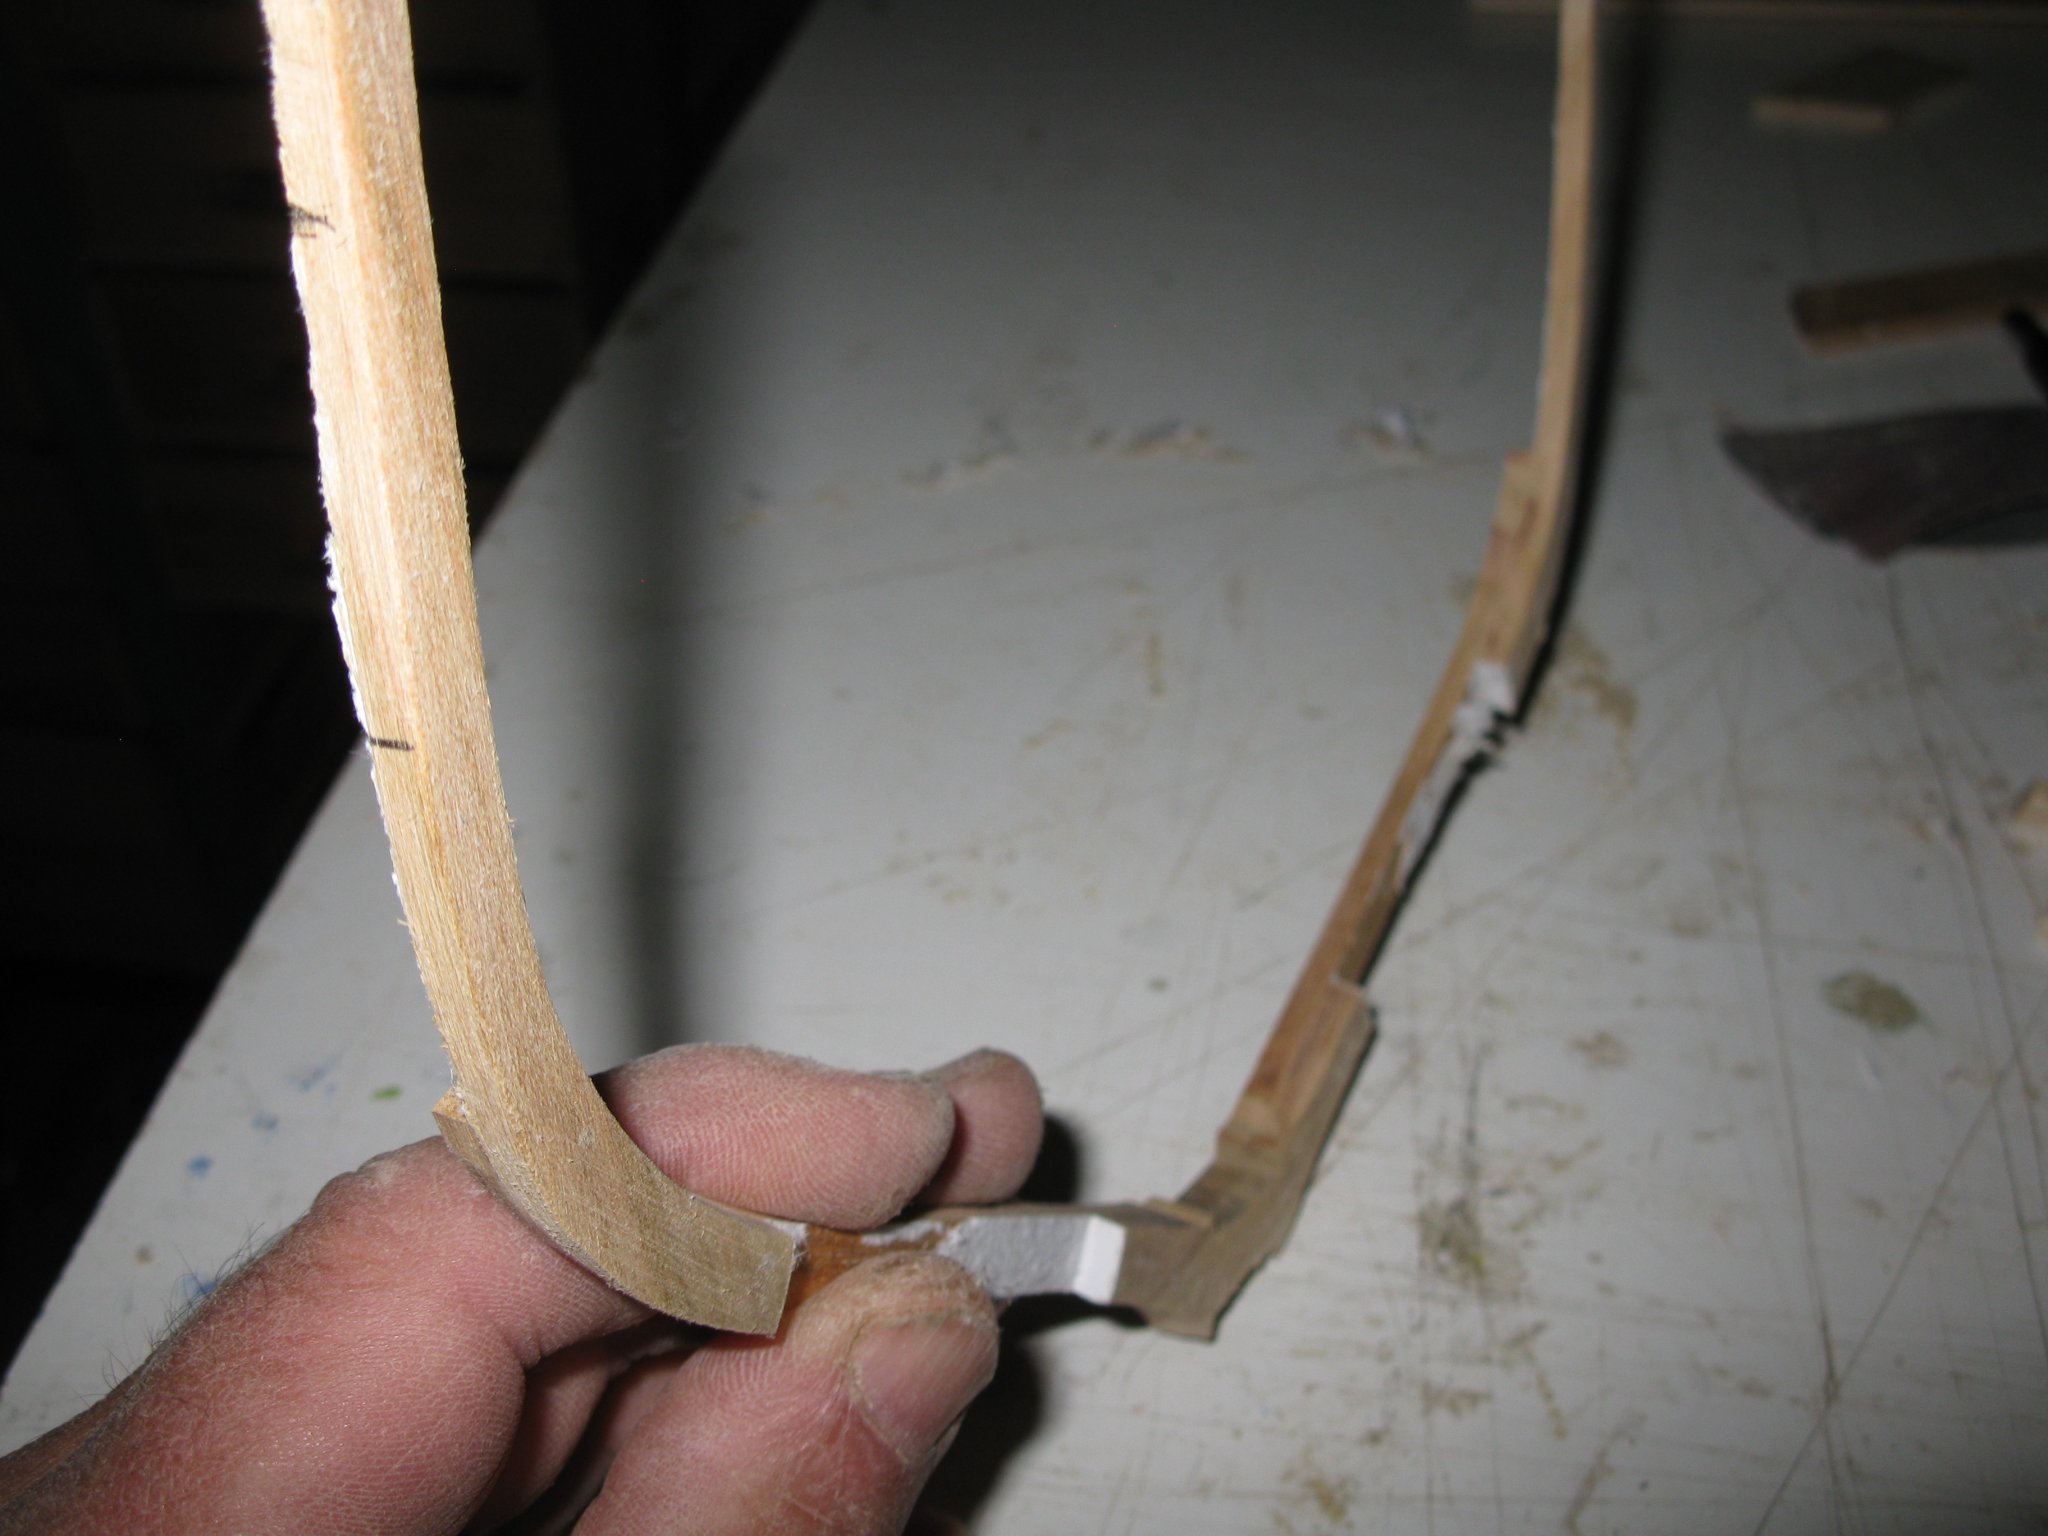
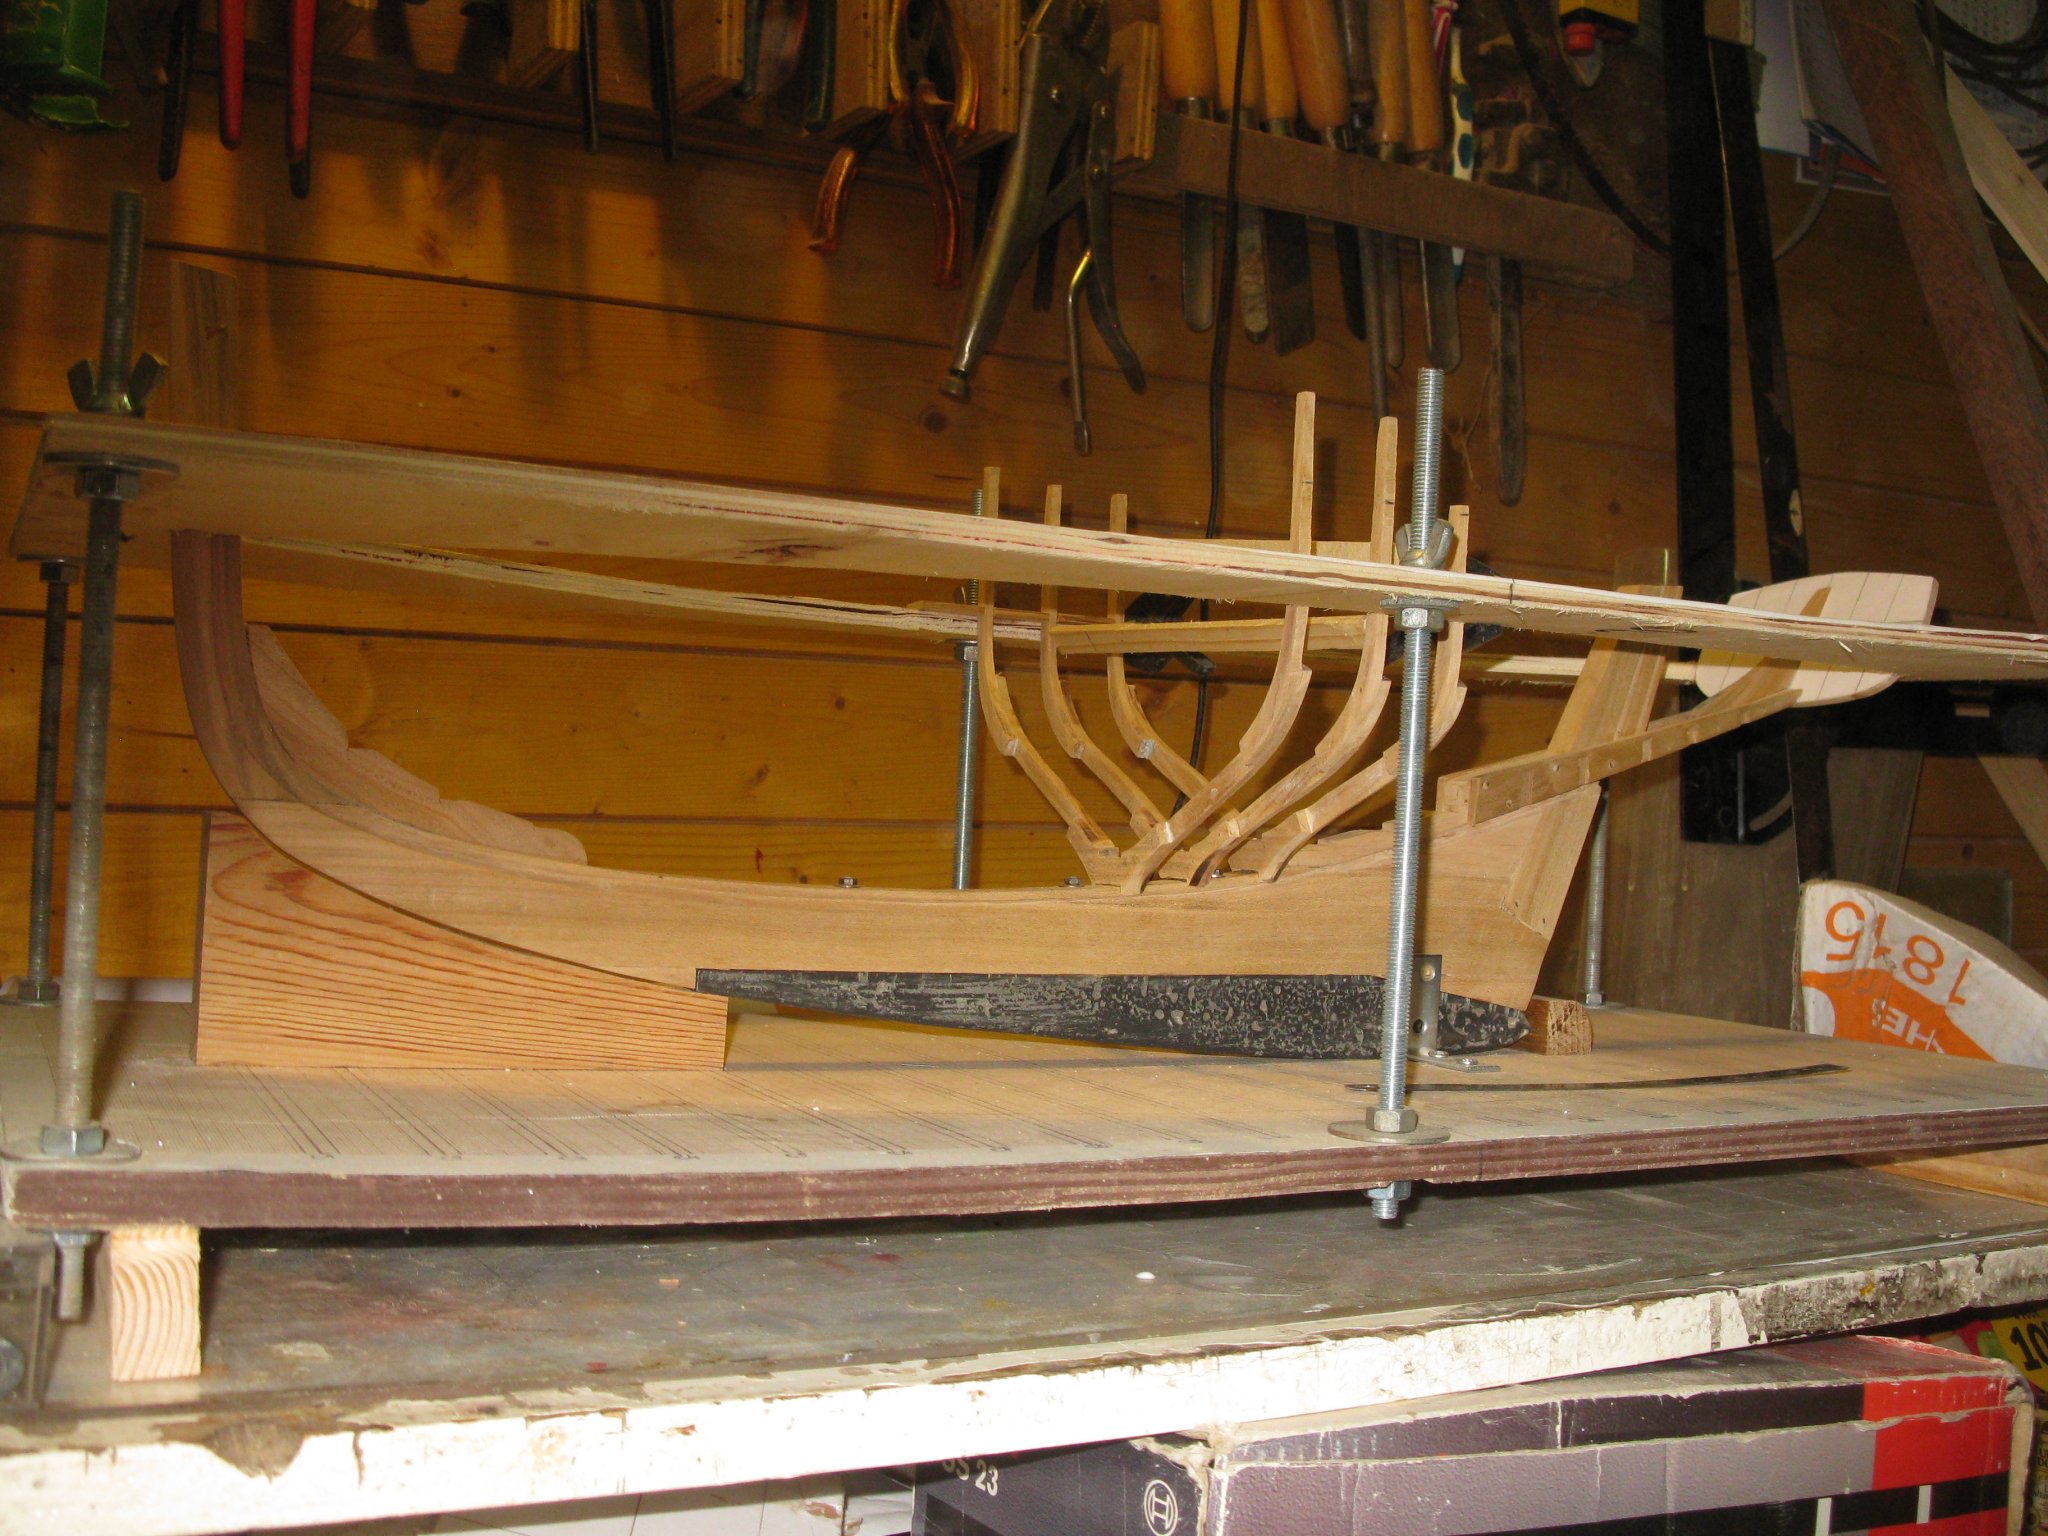
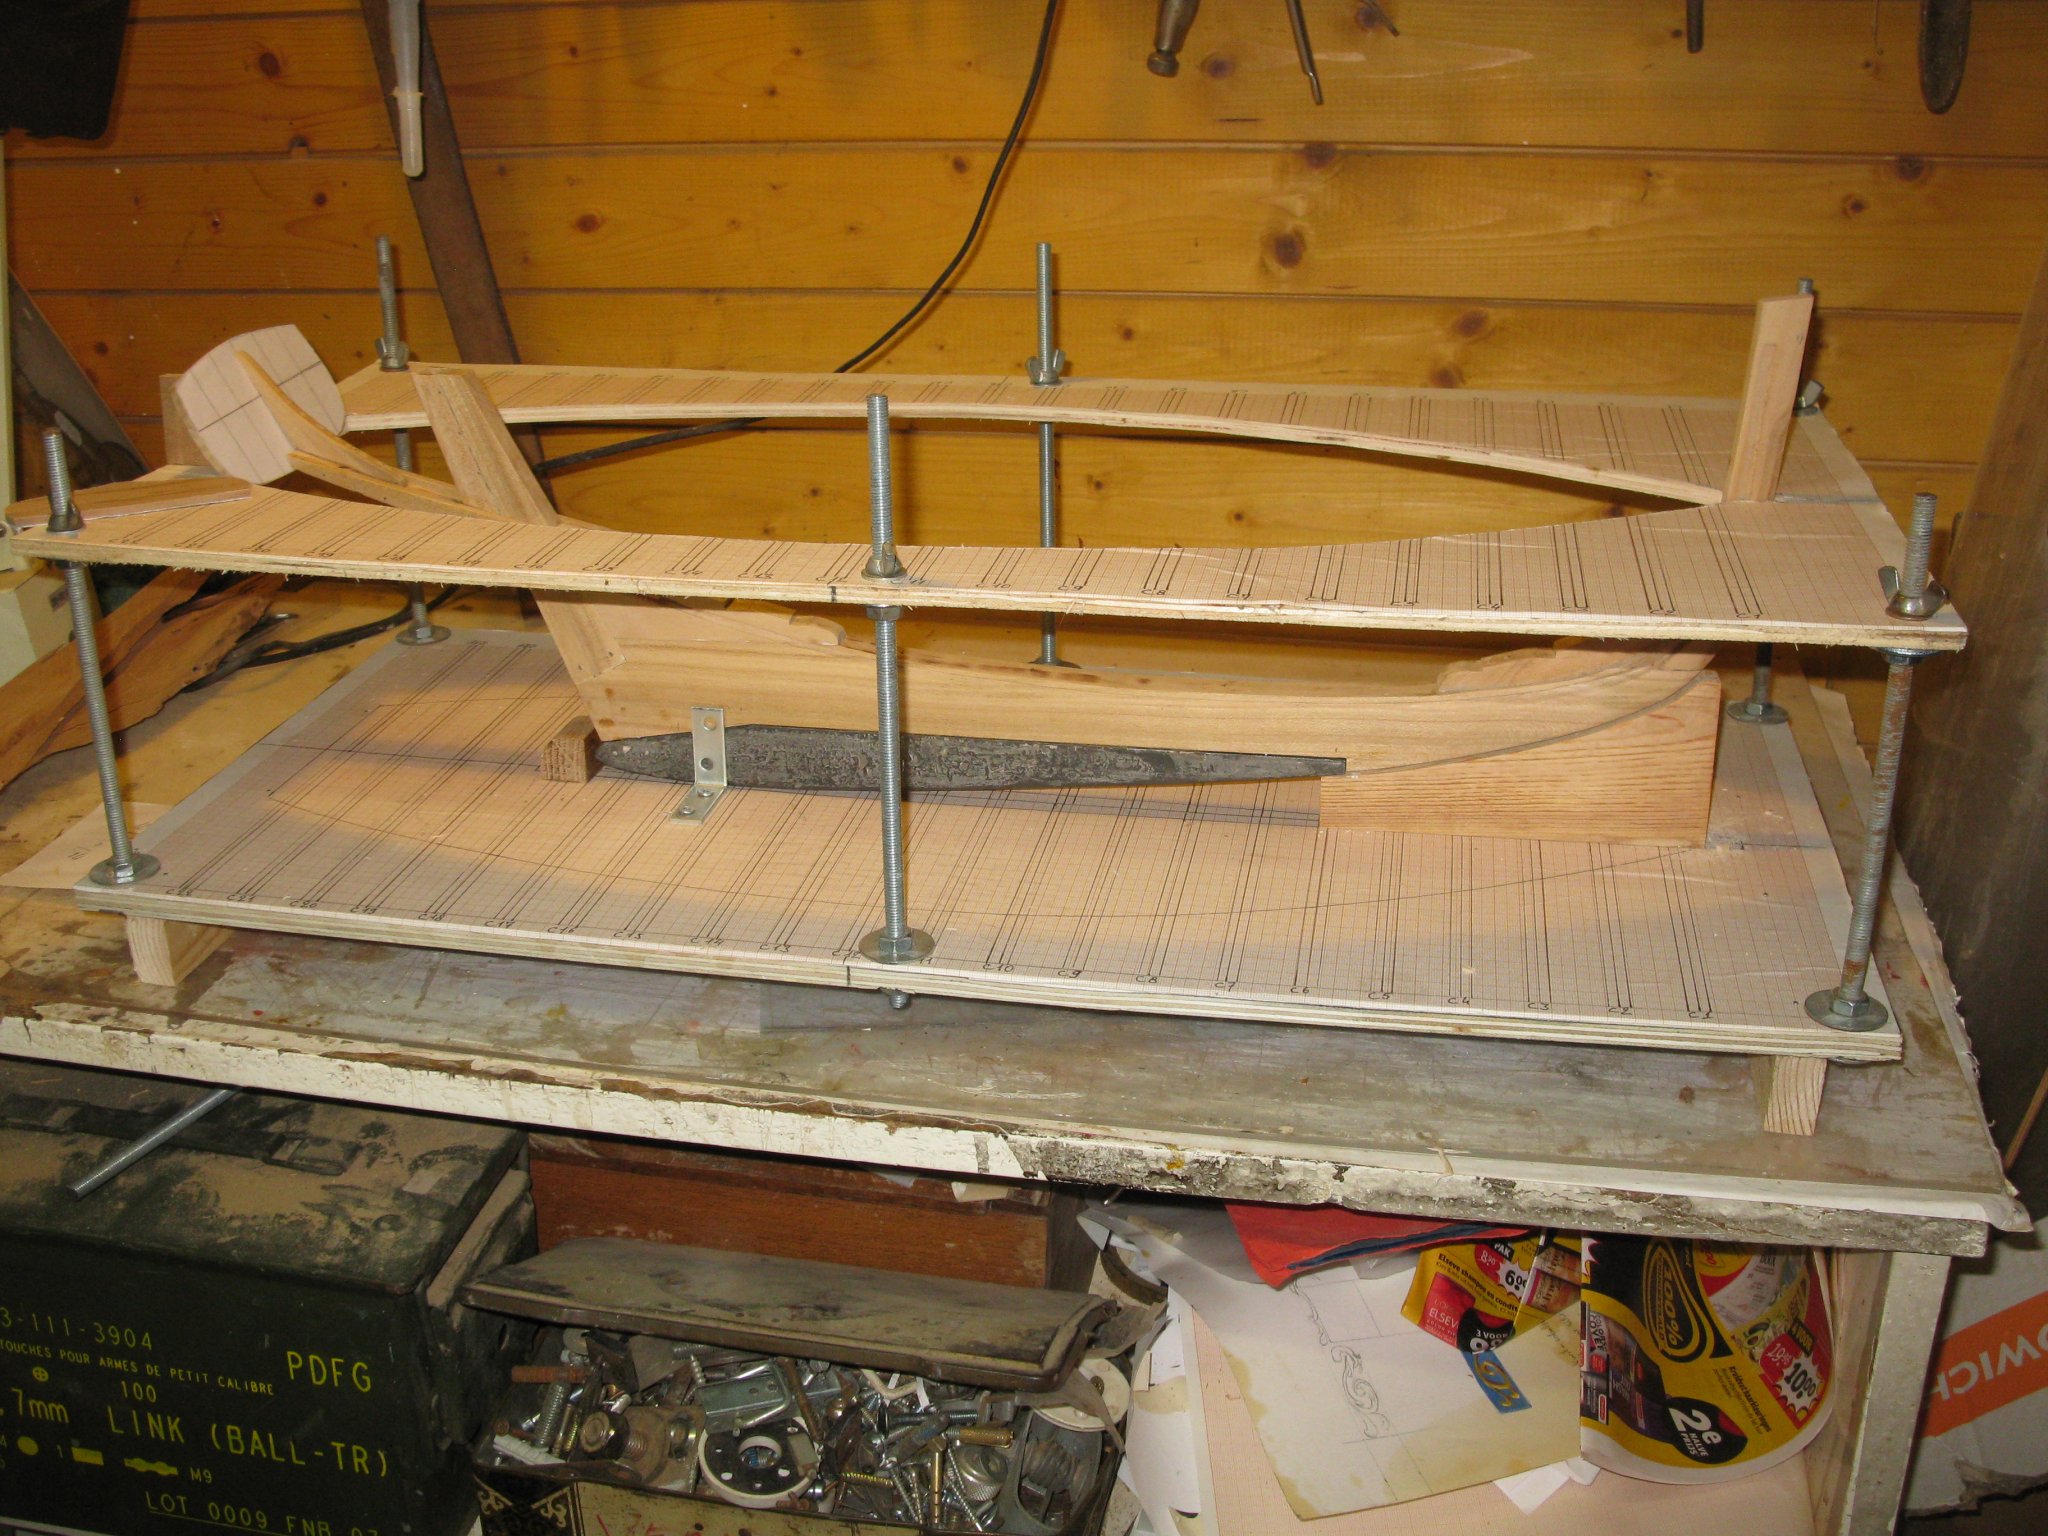
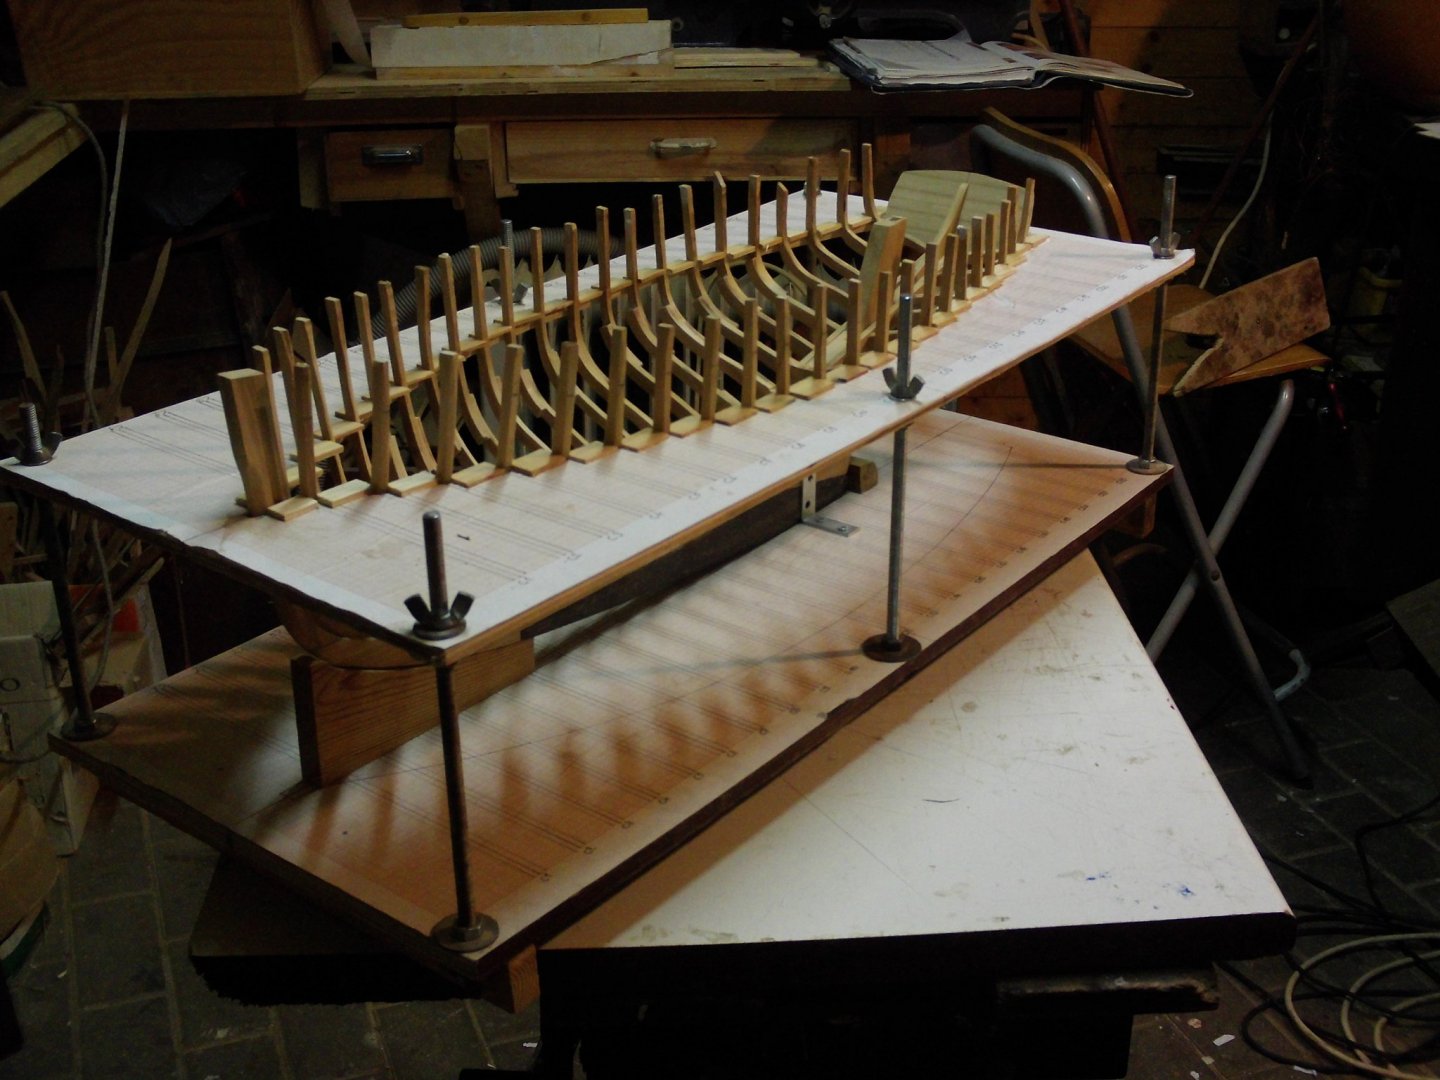
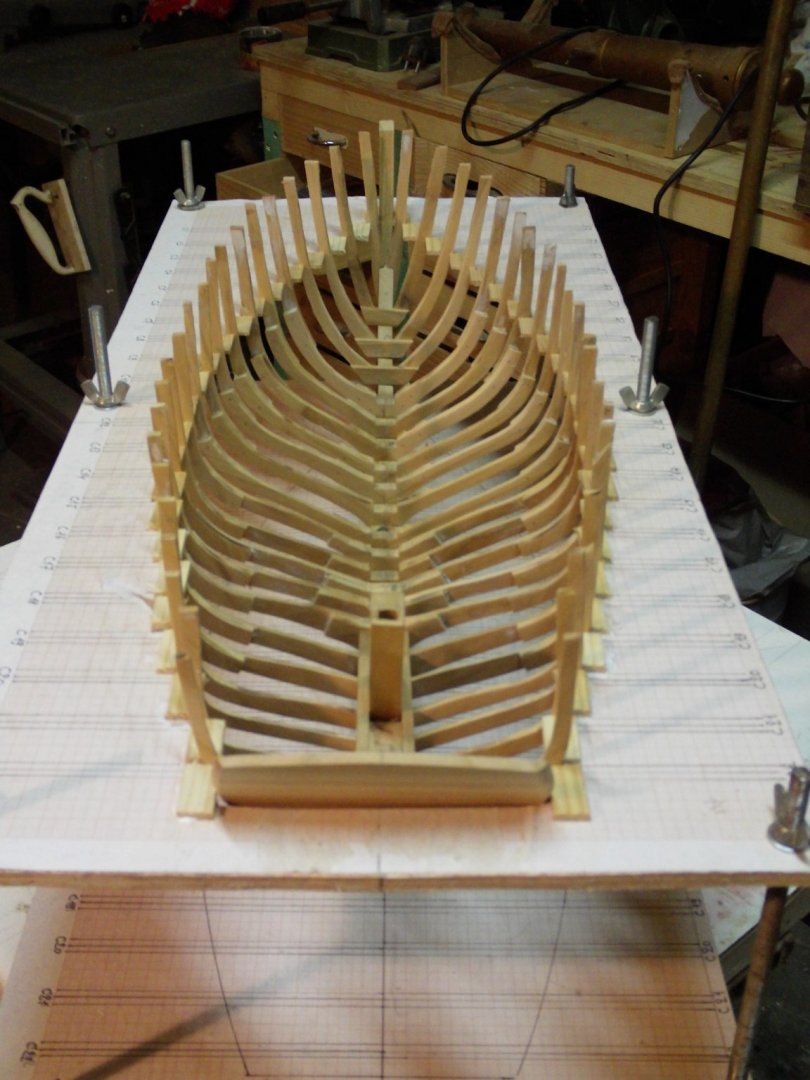
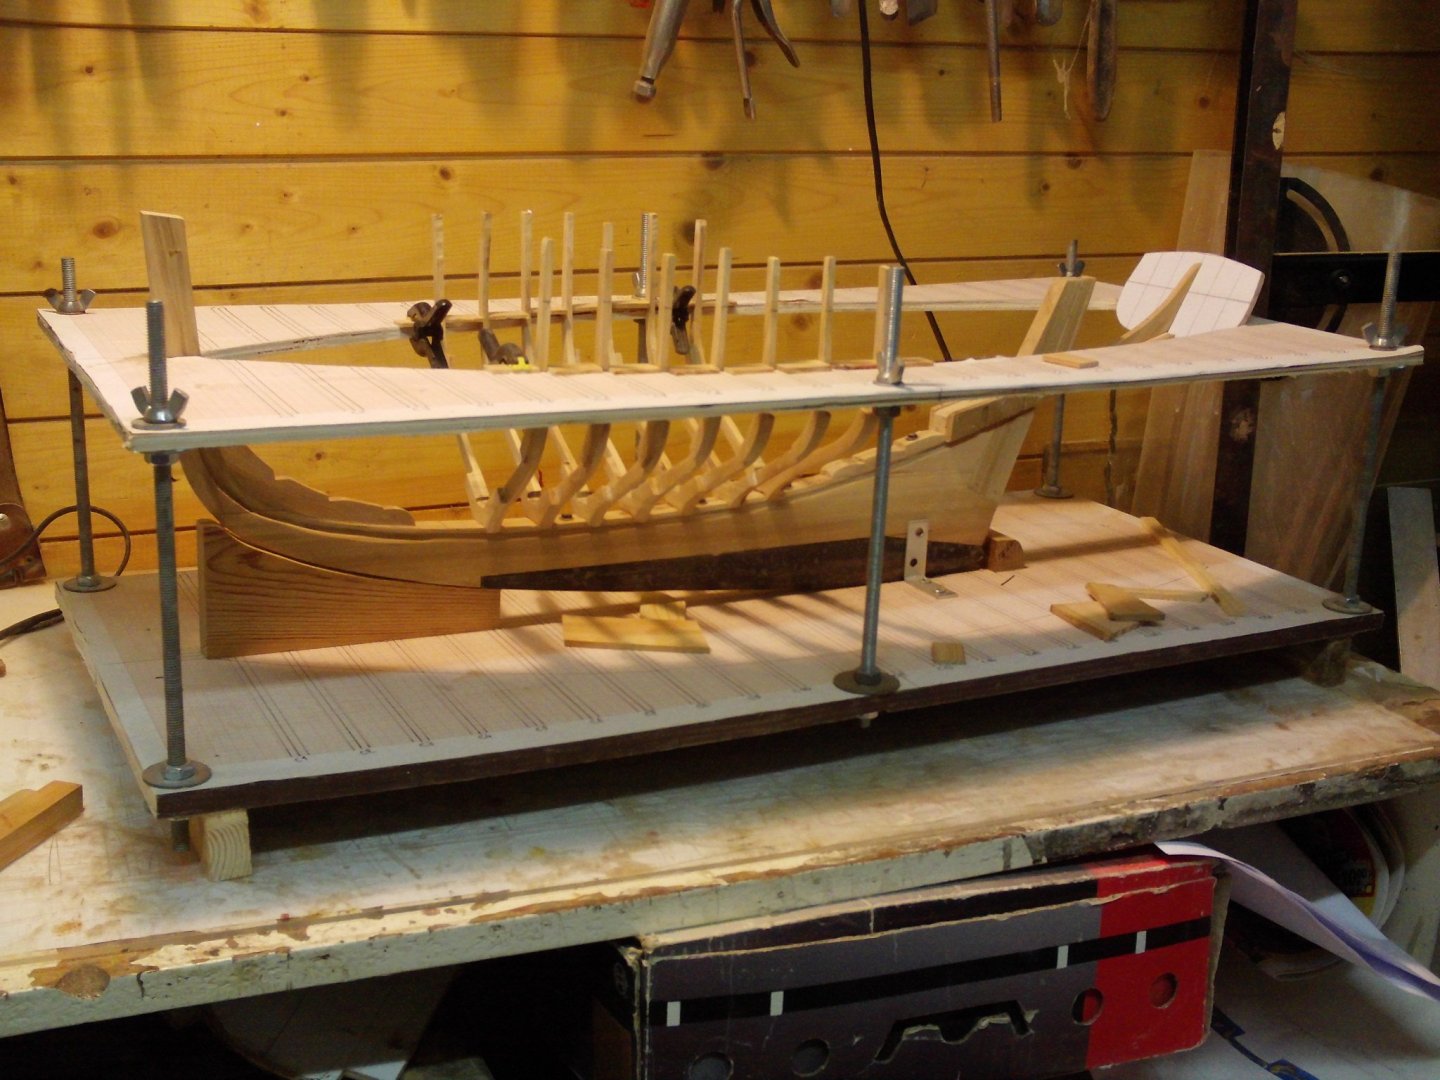
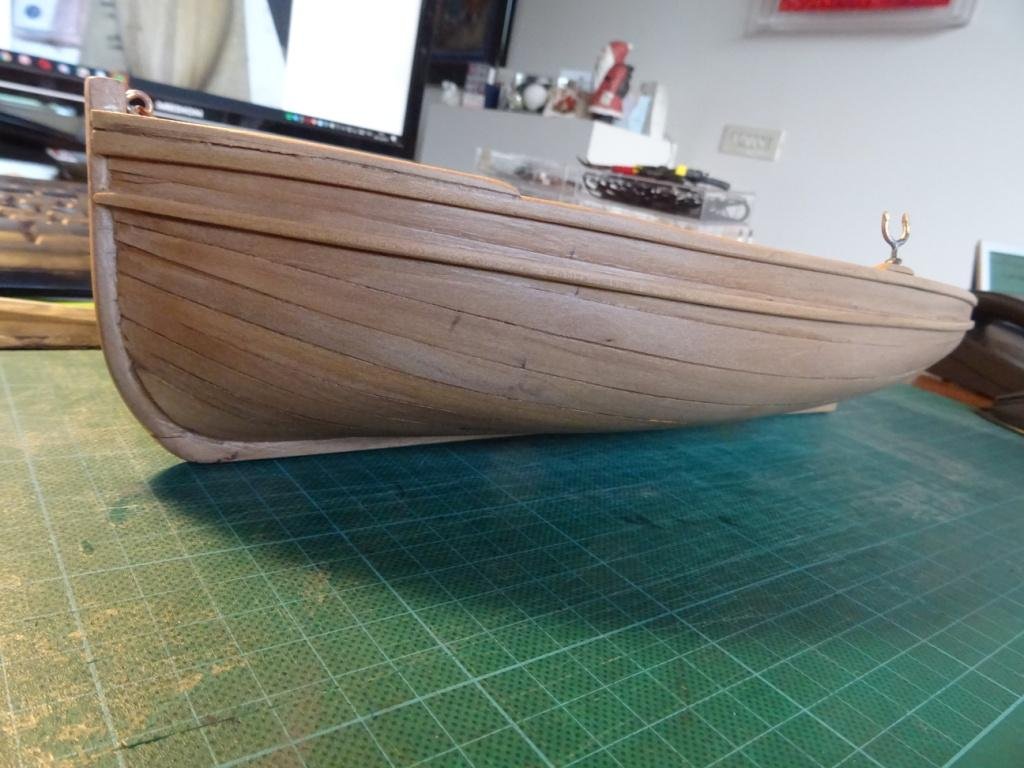
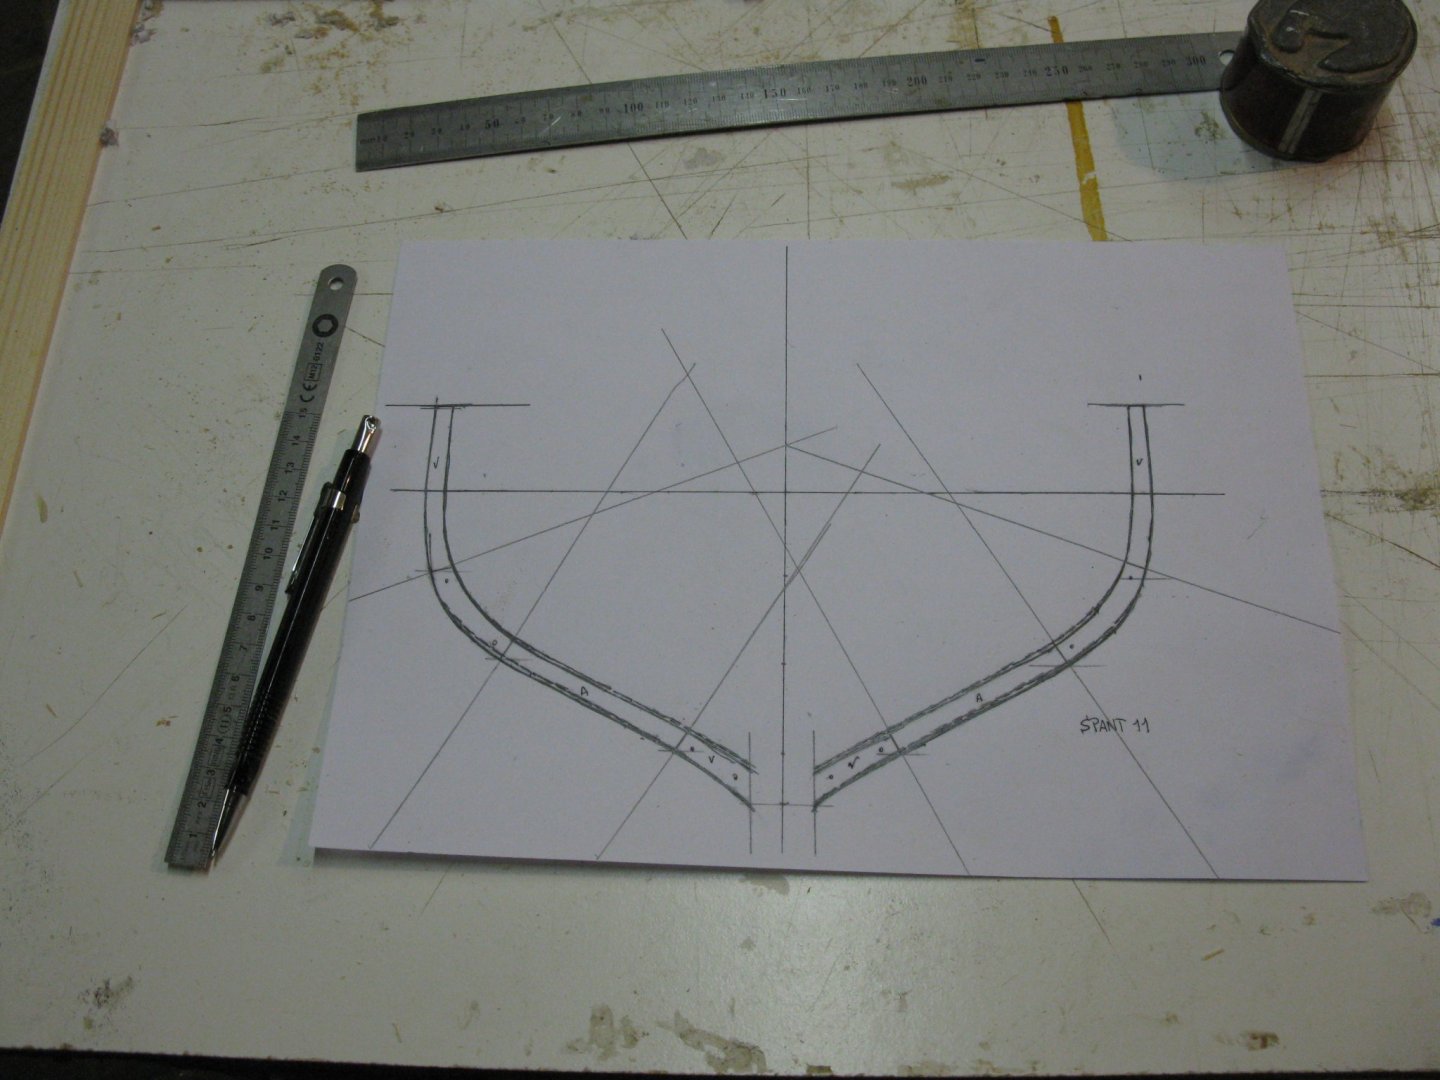
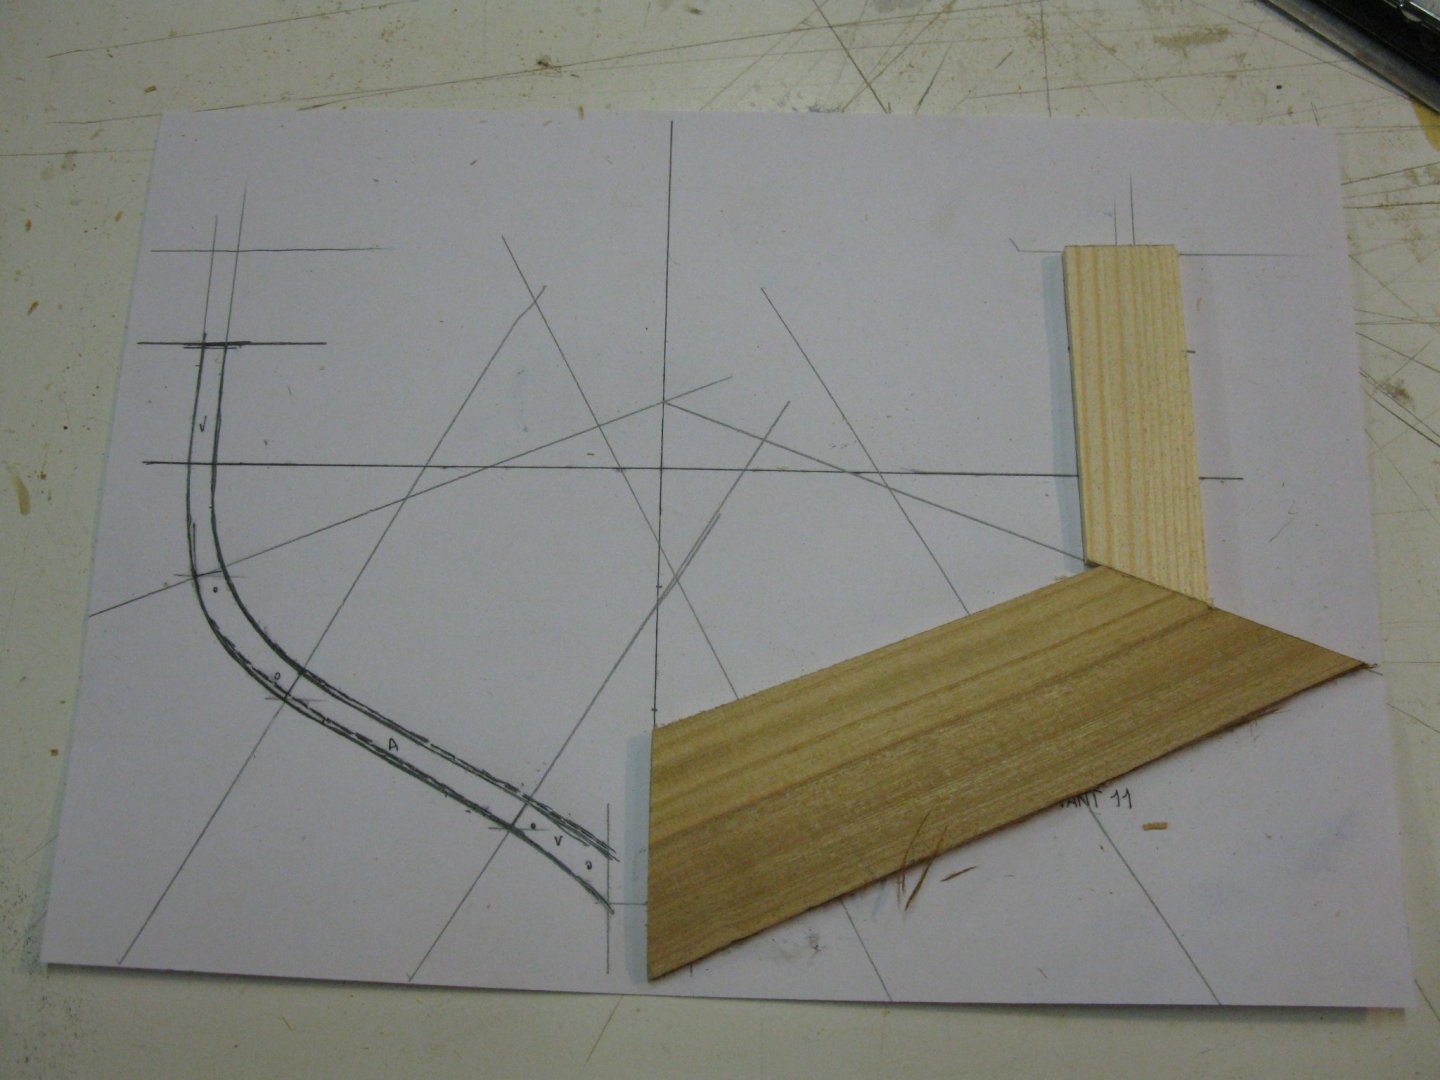
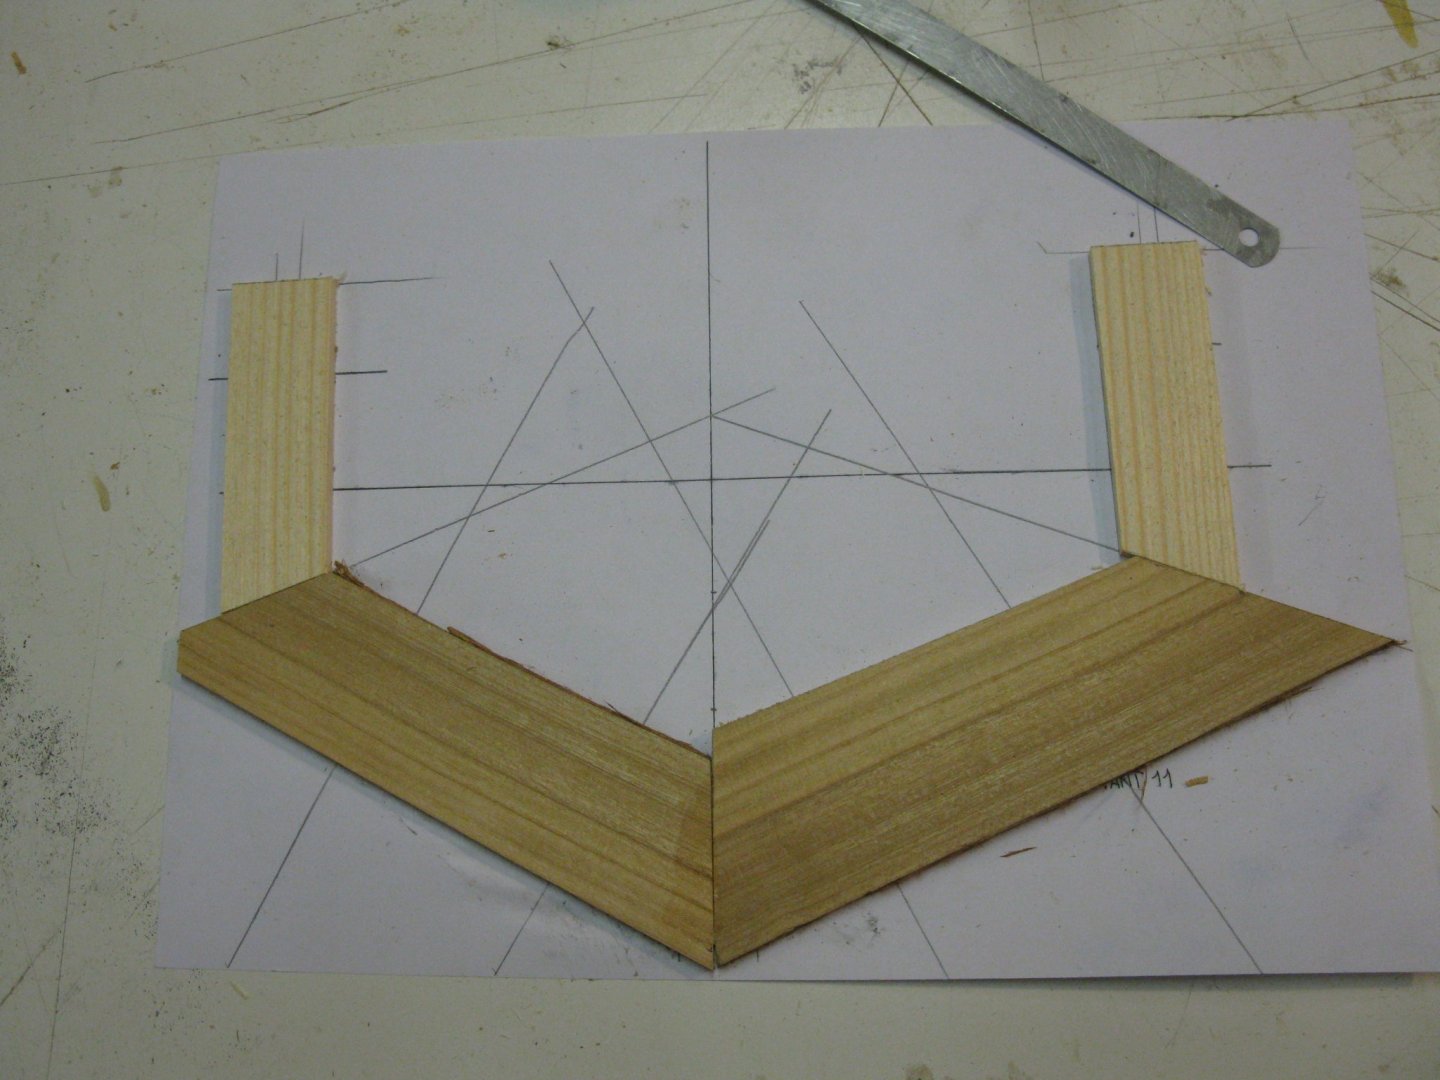
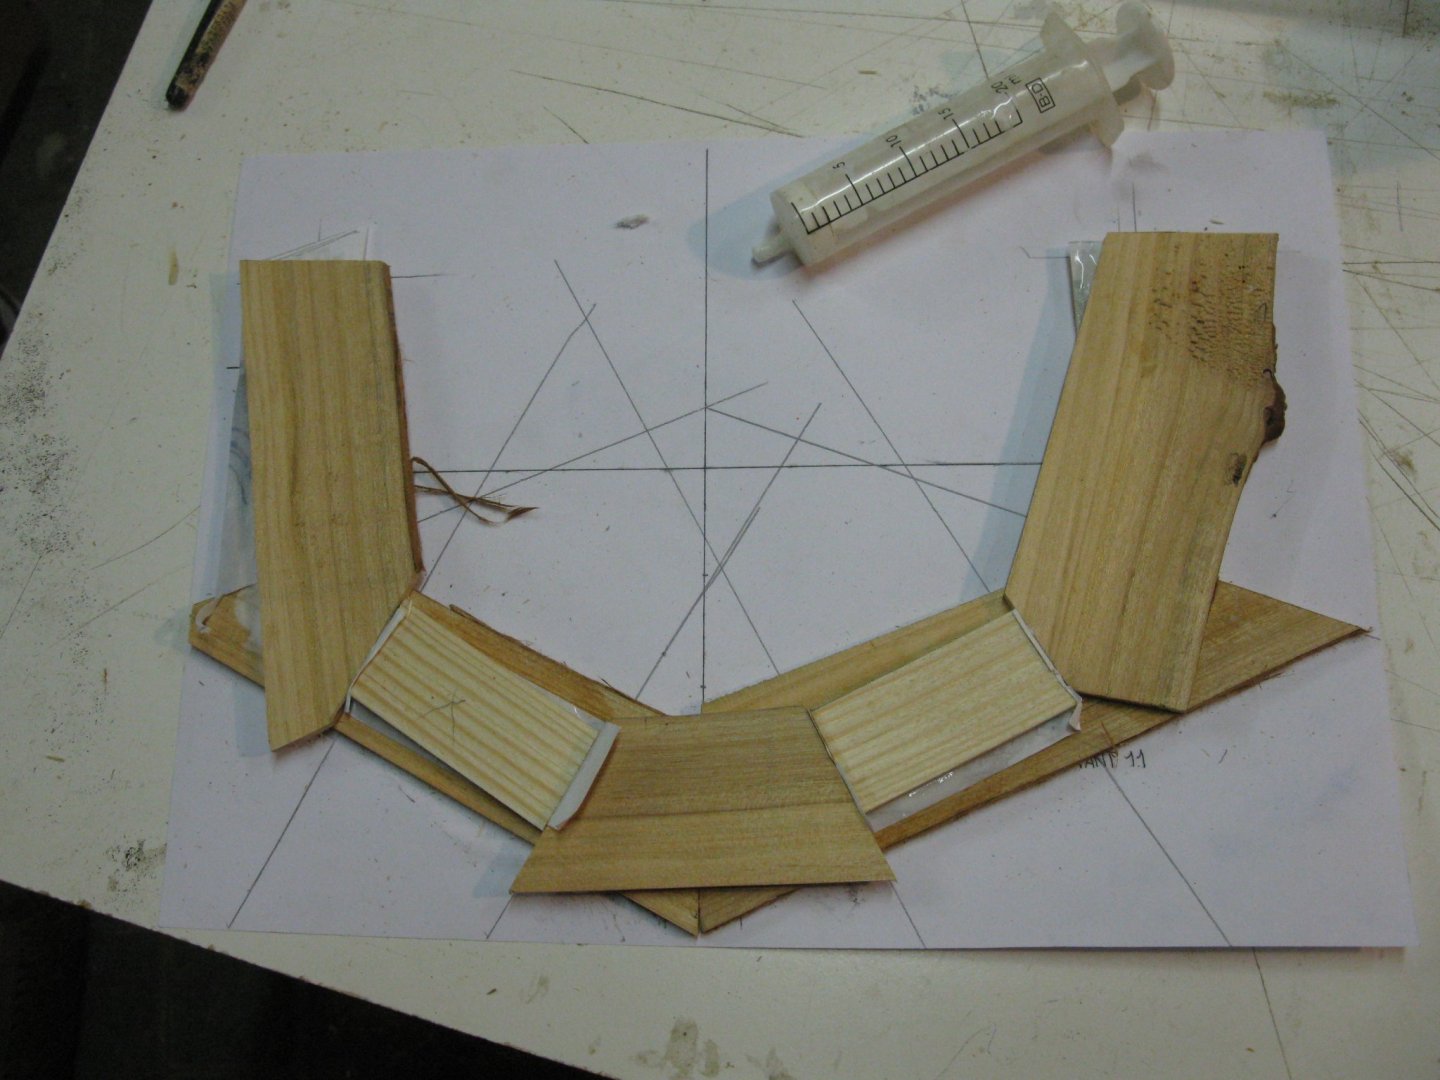
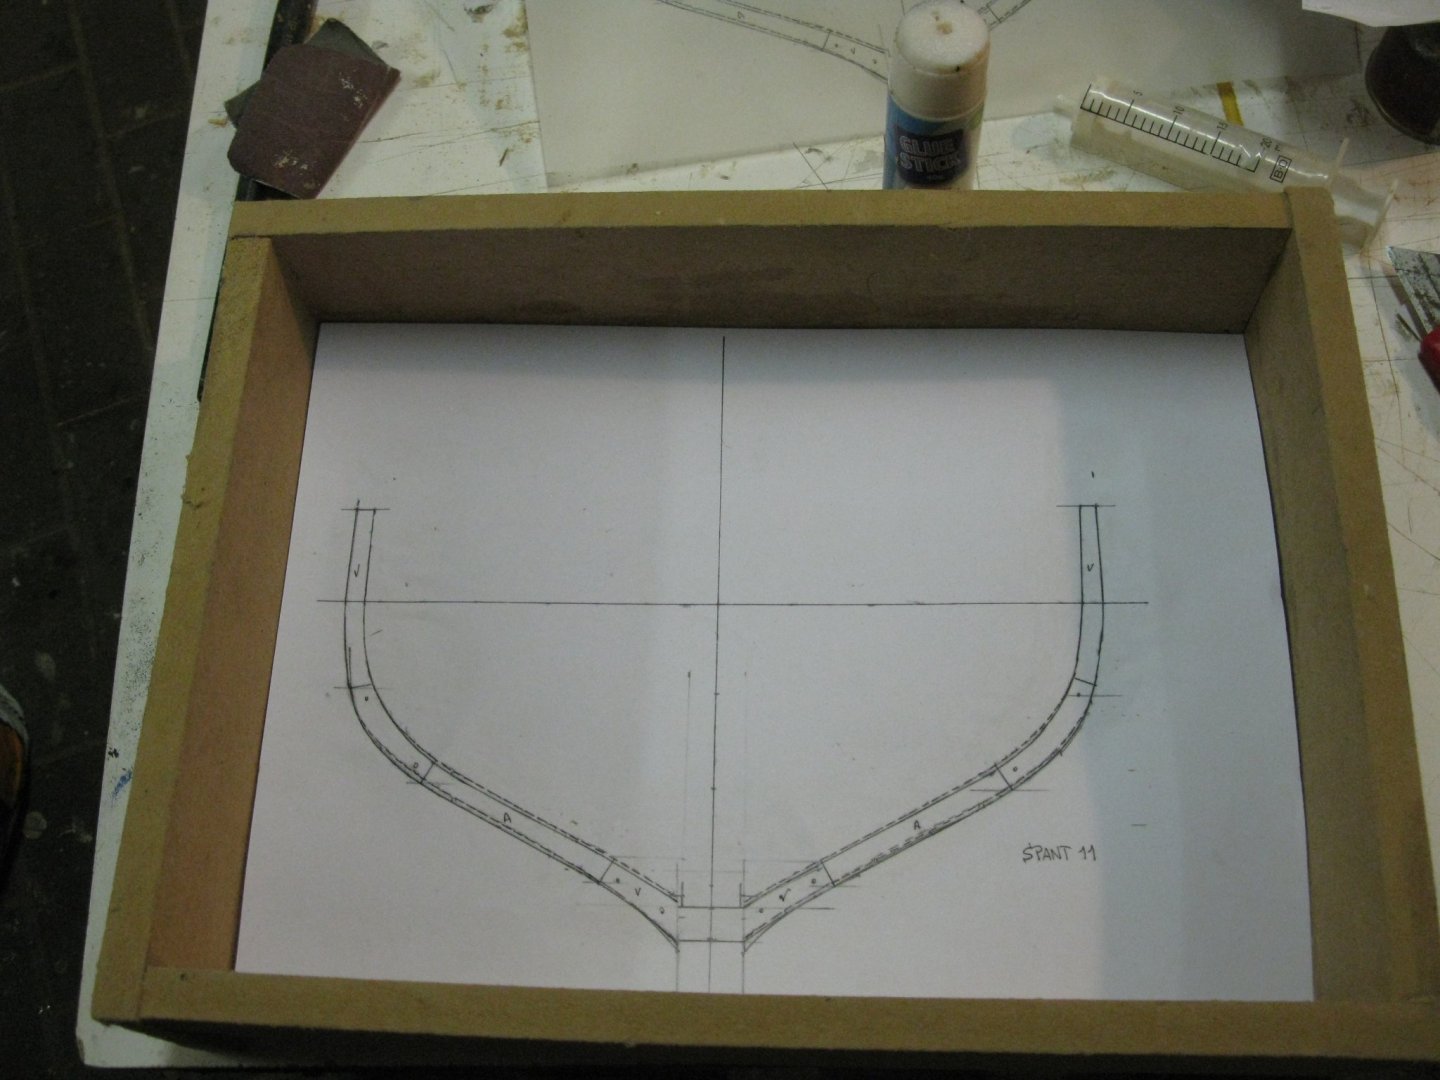
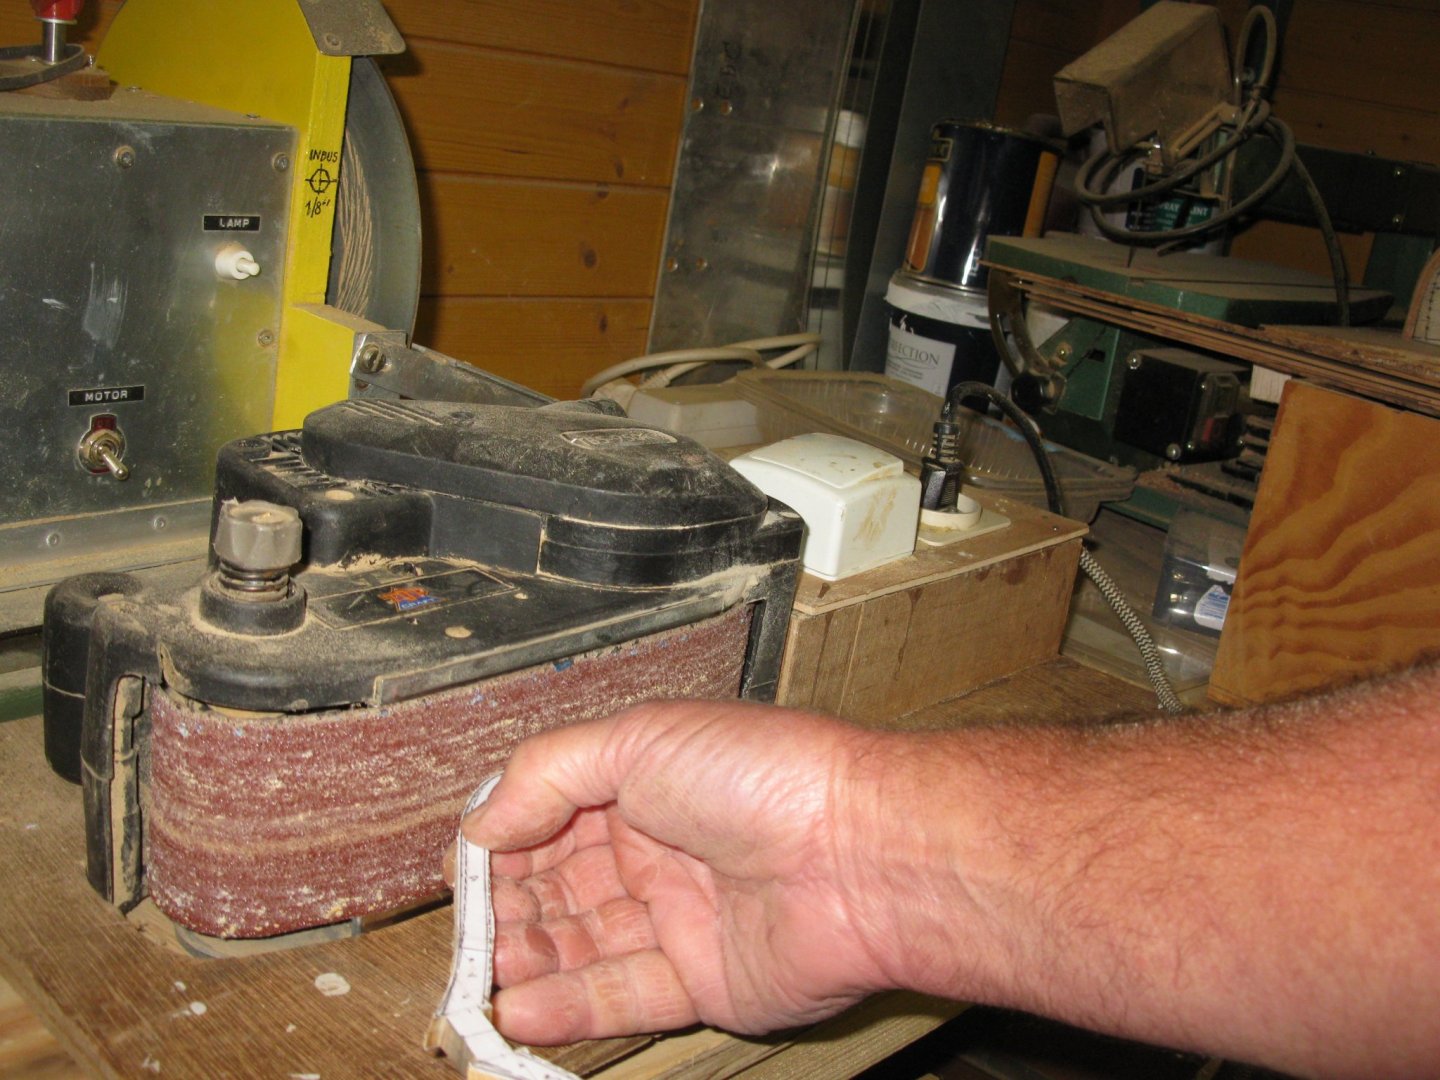
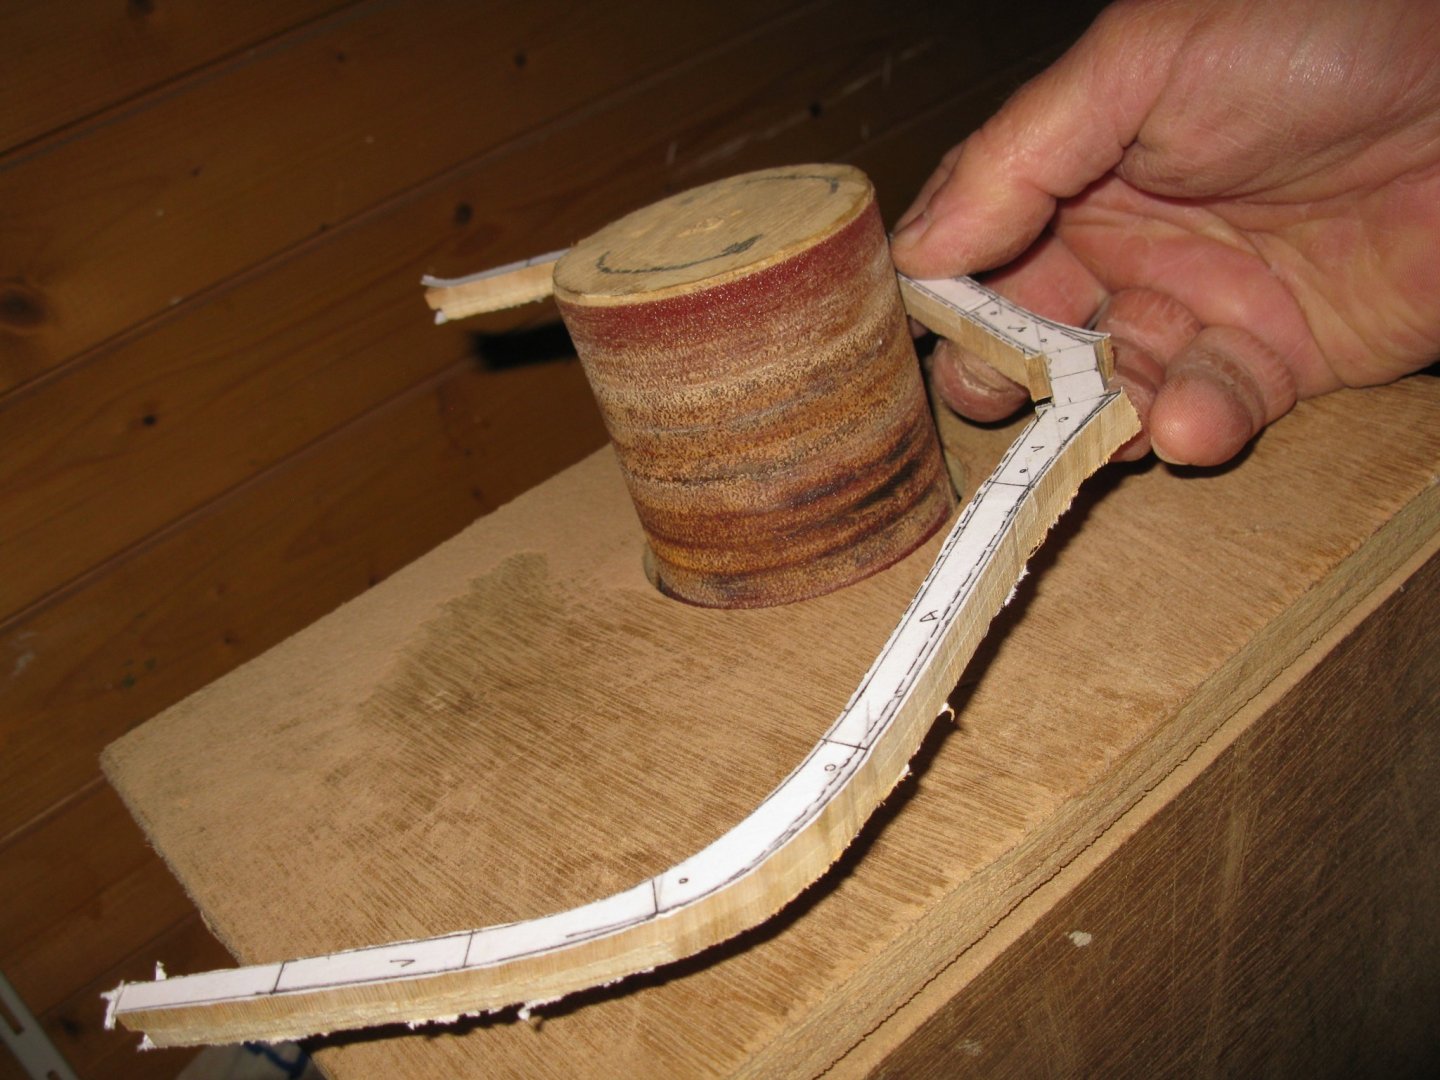
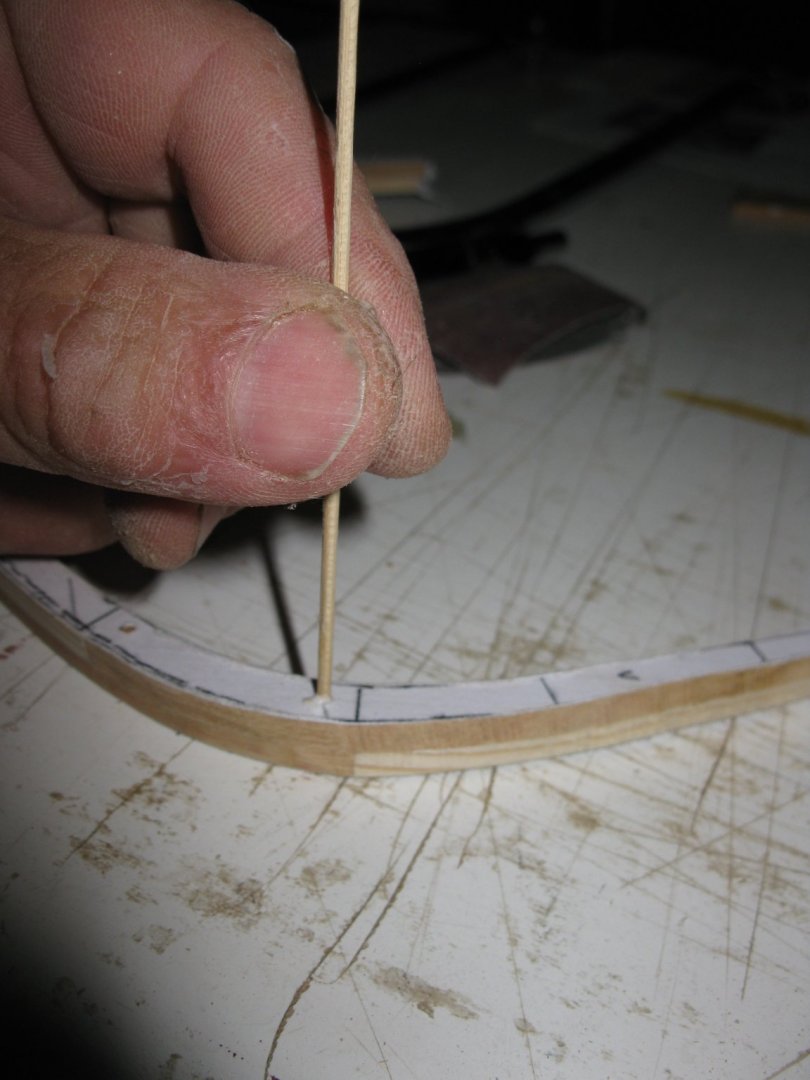
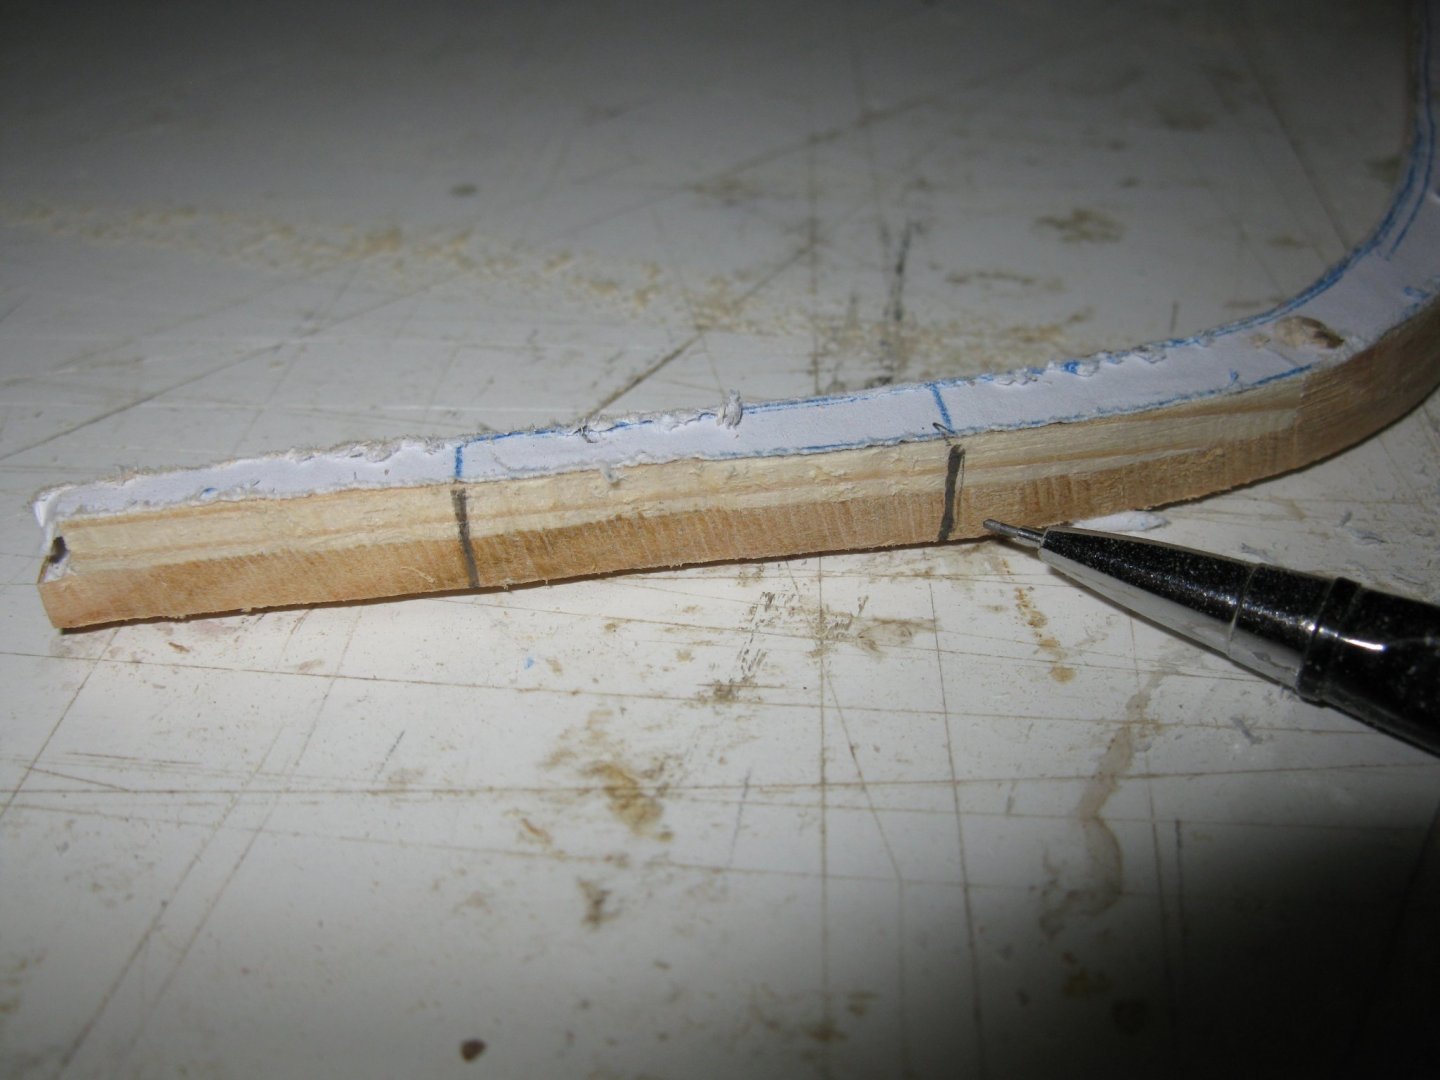
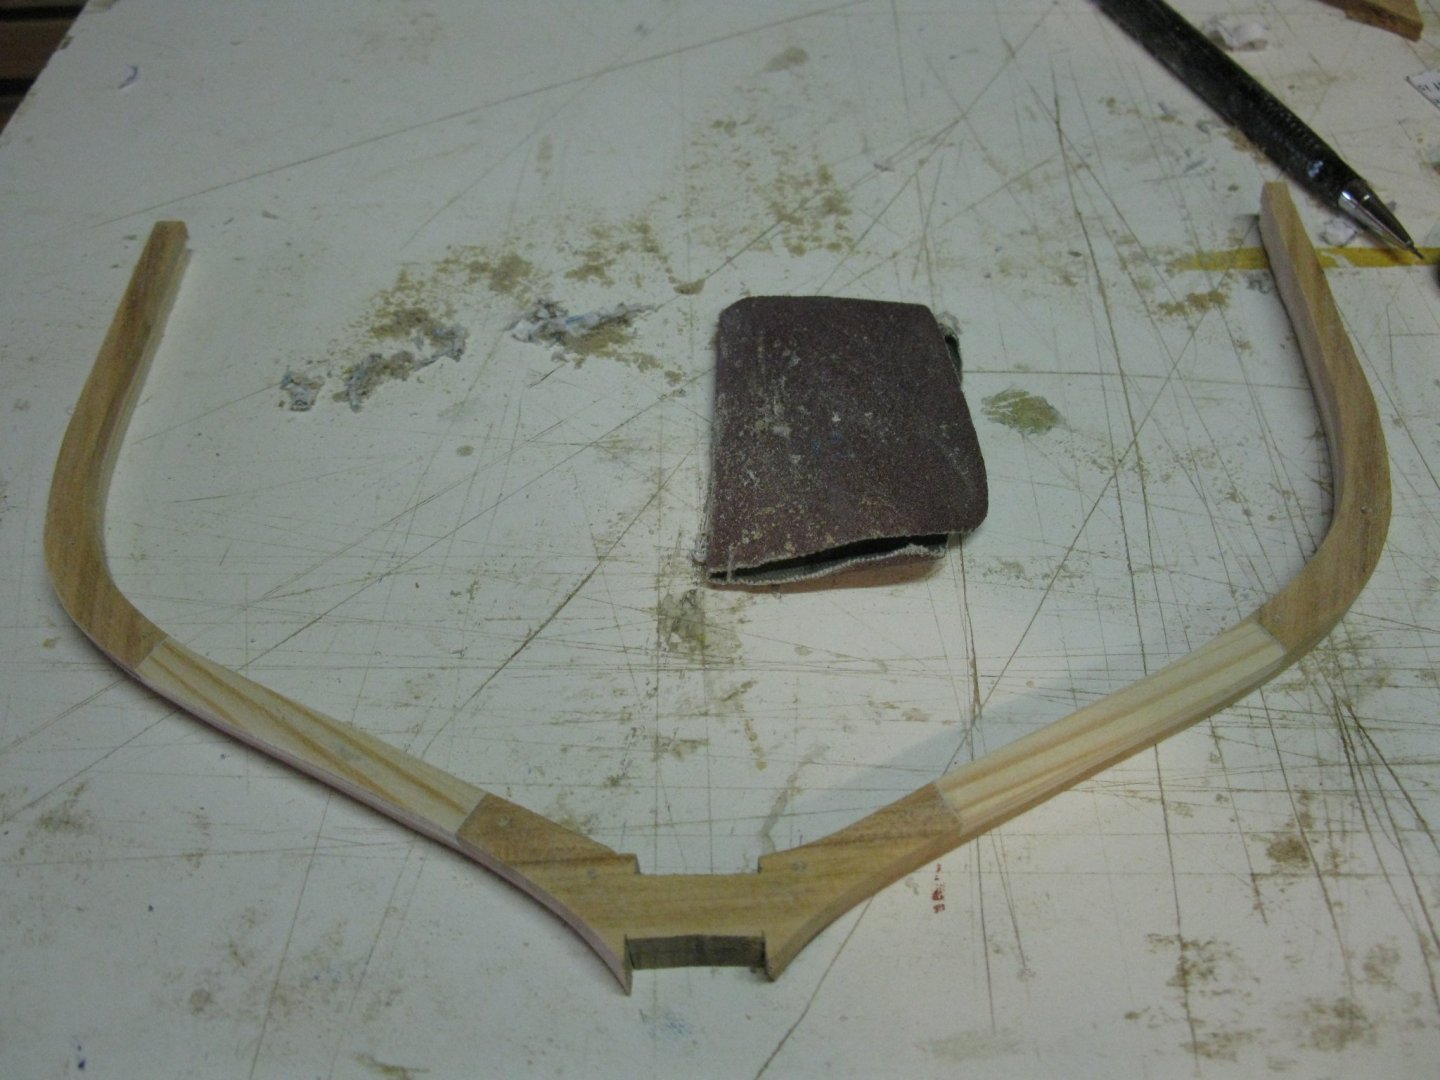
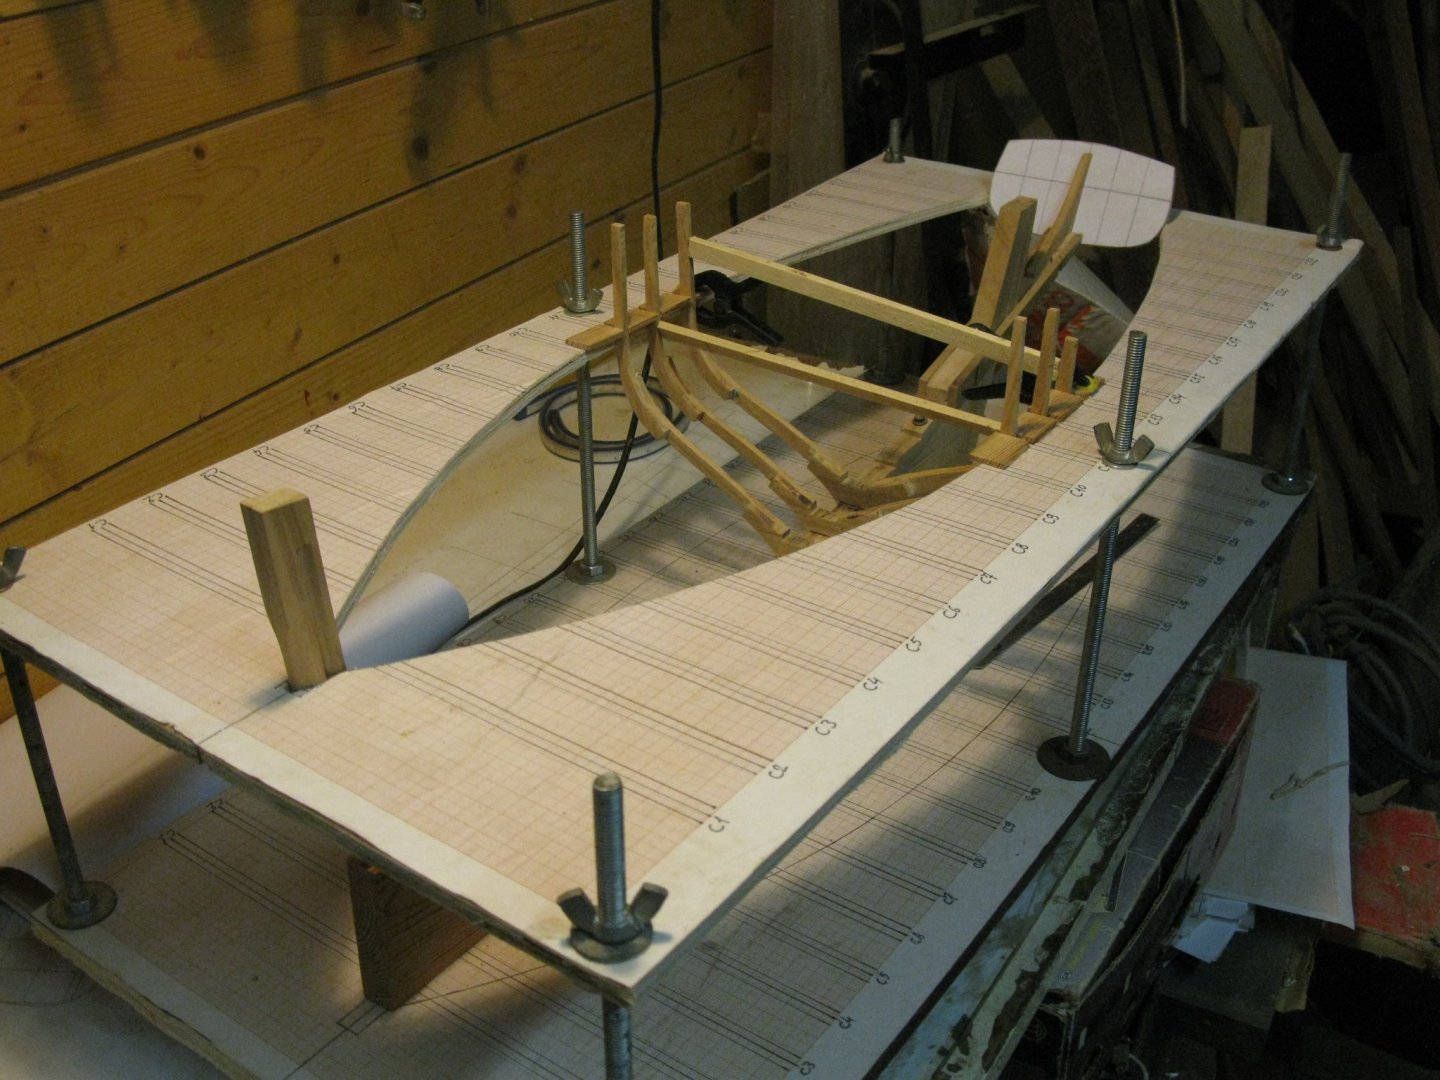
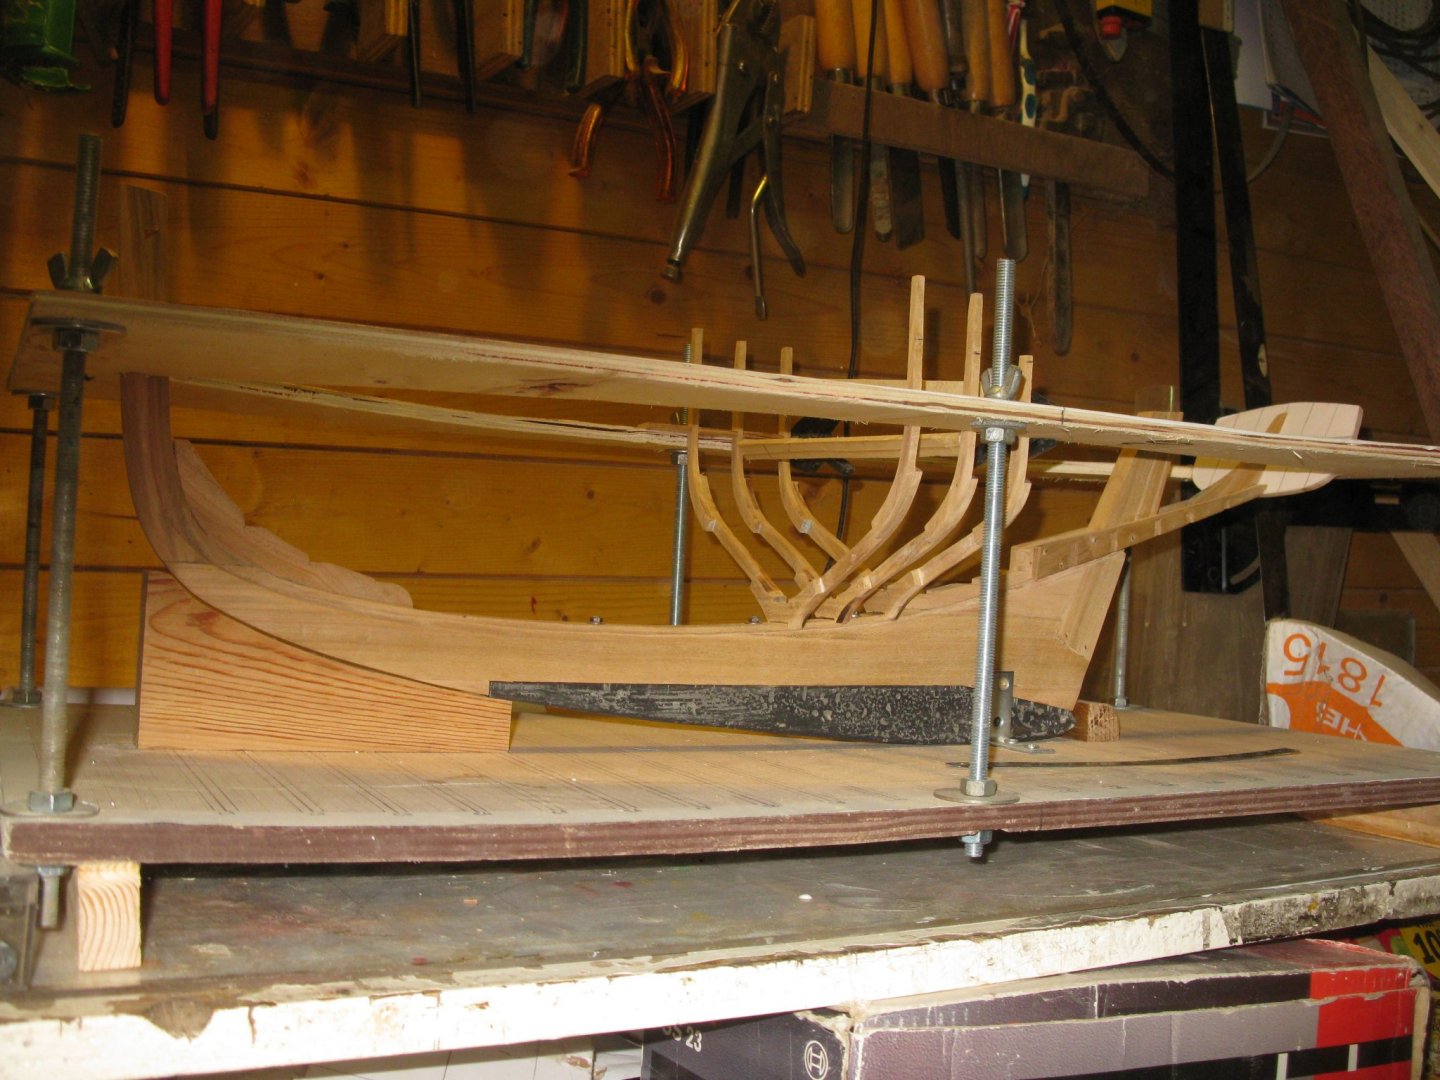
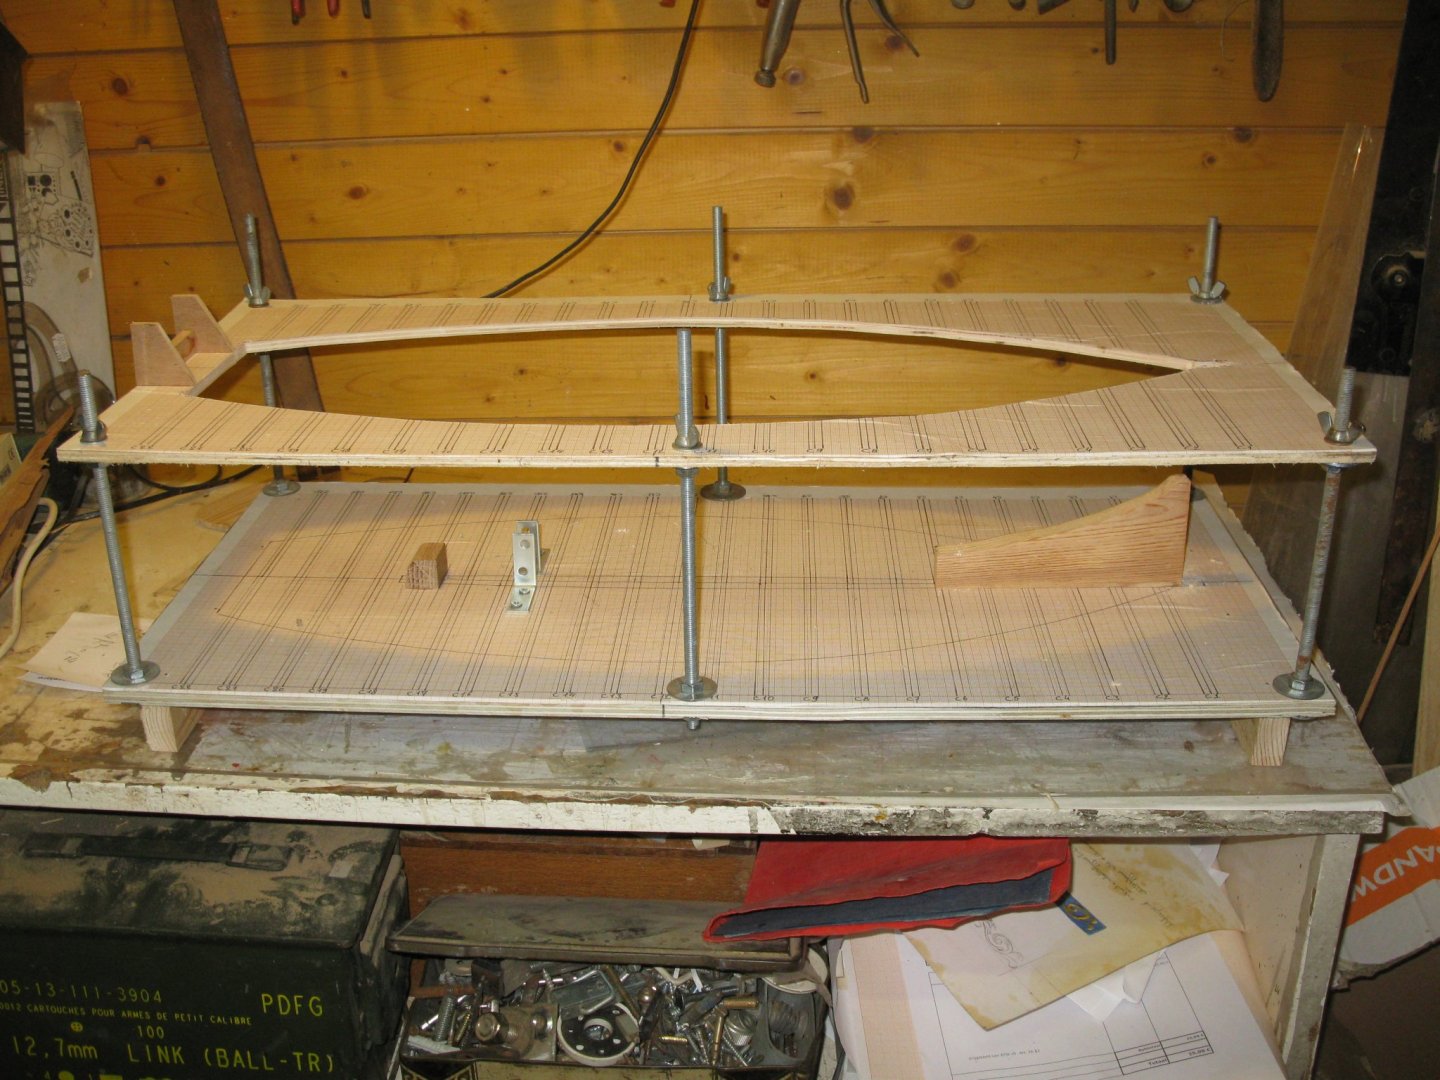
Starting to make the frames. I first lay a copy of the frame drawing on an upside down carbon paper and push through the drawing to obtain the frame drawing on the back side of the paper. The I extend the futtock ends with a long pencil line. The pencil lines help me to place the different parts of the frame. I glue the first layer on the drawing with a paper glue stick. The frames of the boat are single futtock frames which are only doubled at the joints. I find it easier to saw and sand them as fully doubled frames, so I glue temporarily spruce wood dummy futtocks which will be removed afterwards. I make the frames also some 2.5 cm higher than needed. First layer is glued. Only the cherry wood parts are glued together with wood glue. I beware to not put glue between the cherry and the spruce parts. Gluing the second layer. Also here I put only wood glue between the cherry wood parts. Where a spruce (dummy) piece comes on top of a cherry piece I put a piece of paper between it and glue the parts with strongly water diluted wood gluer. The whole frame is glued. Now I lay the frame in my 'frame box' that I used already for making the frames of my shrimper and the smack cross section. The inside measurements are exactly those of a A4 paper, sot the frame drawing just fits in it. The box makes it possible to glue easily another frame drawing on top of the frame, just in the exact position. This drawing will serve to saw out the frame. On top of the frame goes now a plank (A4 format) and some lead weights and the glue may dry. In the box is space for three frames on top of each other. After a couple of hours when the glue is dry, the frame can be sawn. Afterwards the sides (saw cuts) are sanded with the band- and disk sander. At the same time I sand the slope at the sides of the frame. I tree nail the double parts of the frame. Before sanding of the frame drawing, I mark the top and the water line on the sides of the frame. Now the paper can be sanded off. Foto 108 The spruce dummy futtocks can easily be removed with a small sharp chisel thanks to the paper which is glued between the two layers. When all the paper traces are removed, the frame can be placed on the keel. The first three are in place: Thank you for the likes Thank you to follow Thank you for your constructive comments. Happy New Year Till next year!


- 168 replies
-
- 20
-
-
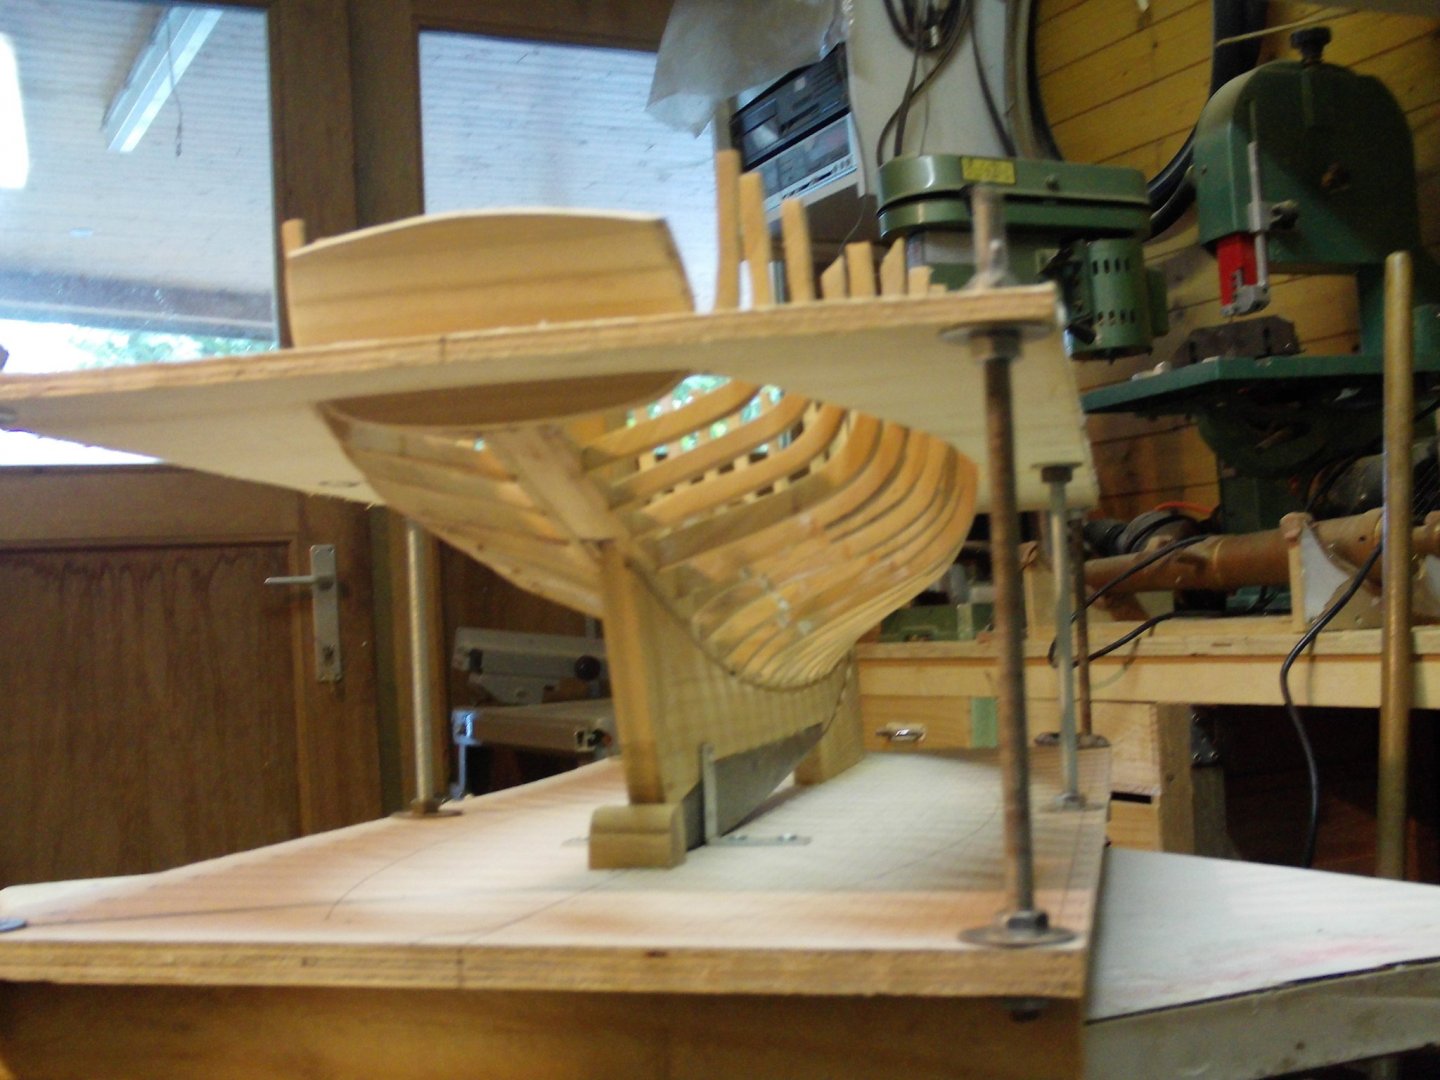
Before making the frames, I make the building board. Here I do not follow the handout. Mr Gerd Löhmann is a professional boat carpenter, he builds his model like he would be building the real vessel. I choose to use a more common model building method. My building board: Building board after the keel has been laid.

-
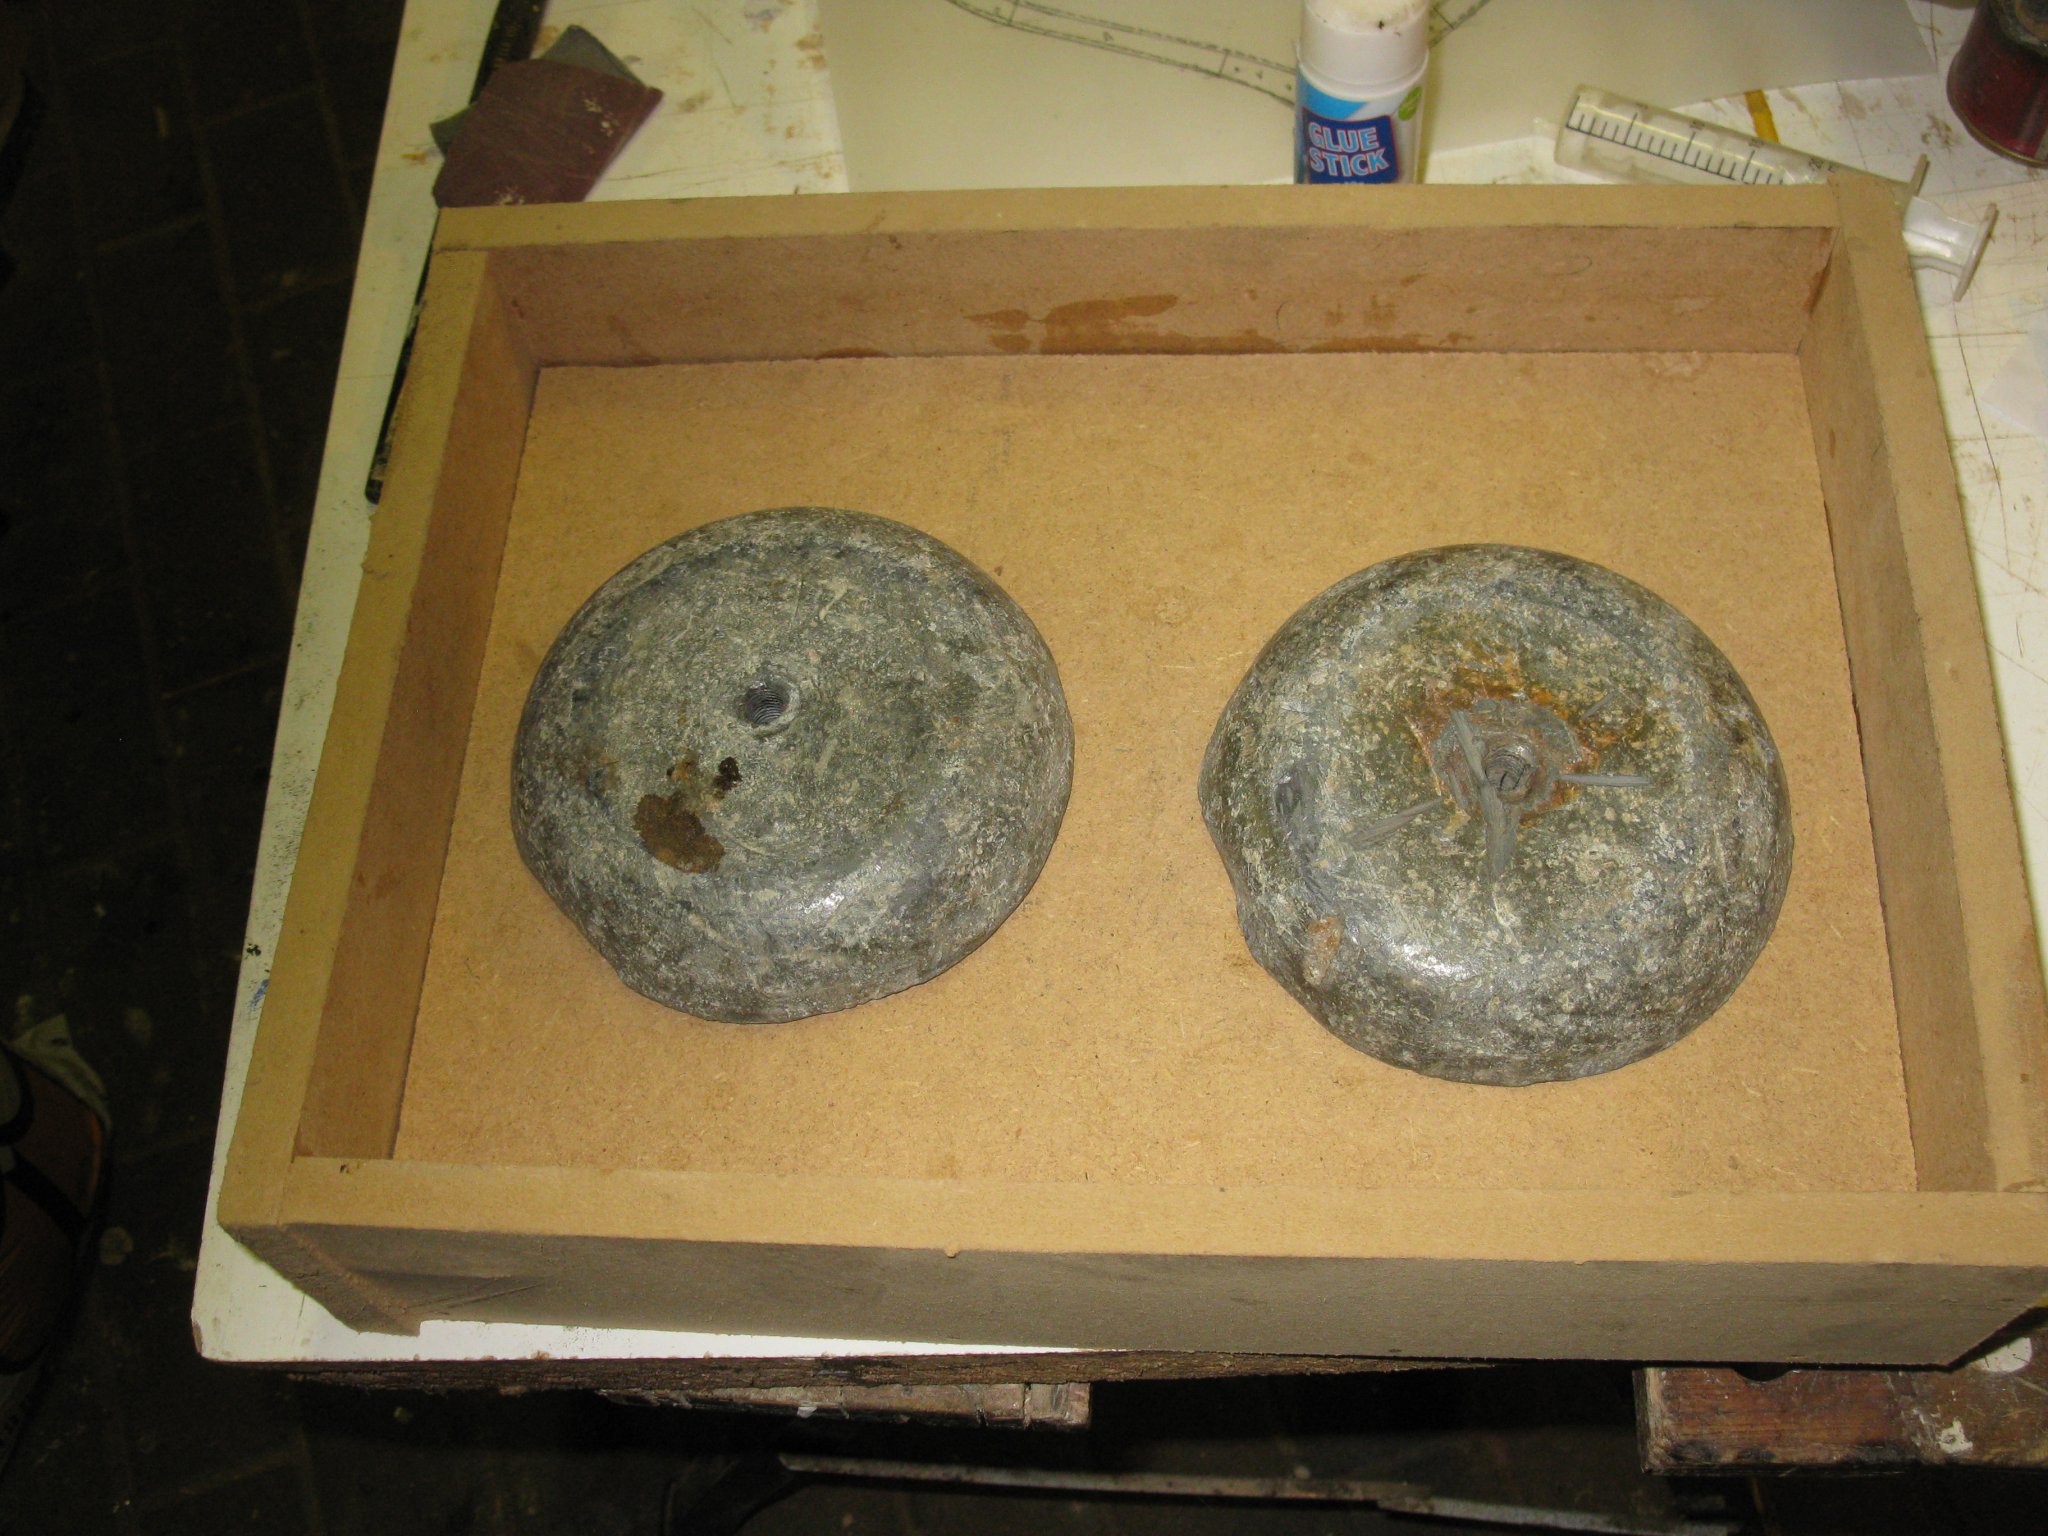
thank you for your comment on the frames Druxey. Druxey and David, Yes, I could experience myself how important it is to let a plaster mold dry completely before casting melted metal in it. Despite the mold felt and looked completely dry, there was some steam development which made the metal fizz, luckily it didn't spatter. Drying the mold out in the oven is indeed a good idea.
-
HMS ROYAL KATHERINE 1664 by Doris - 1/55 - CARD
G.L. replied to DORIS's topic in - Build logs for subjects built 1501 - 1750
Happy that you are back on the forum. What an amazing progress on the model.- 1,035 replies
-
- 5
-
-
- royal katherine
- ship of the line
- (and 1 more)
-
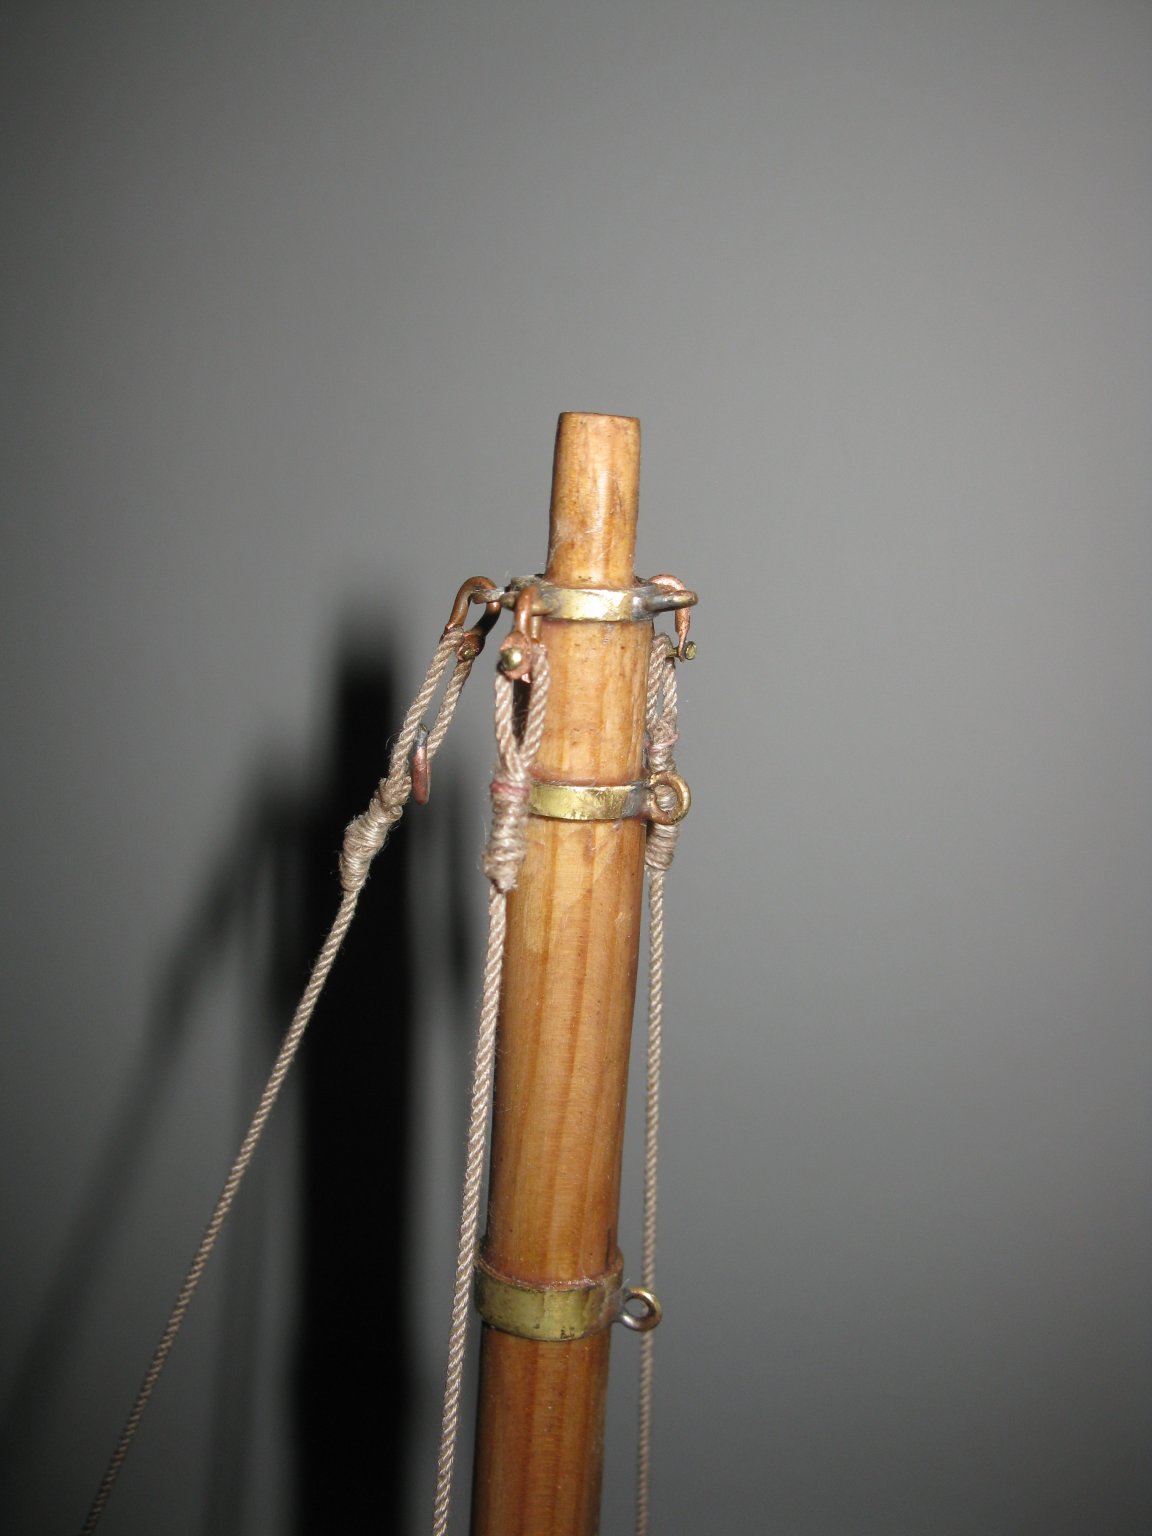
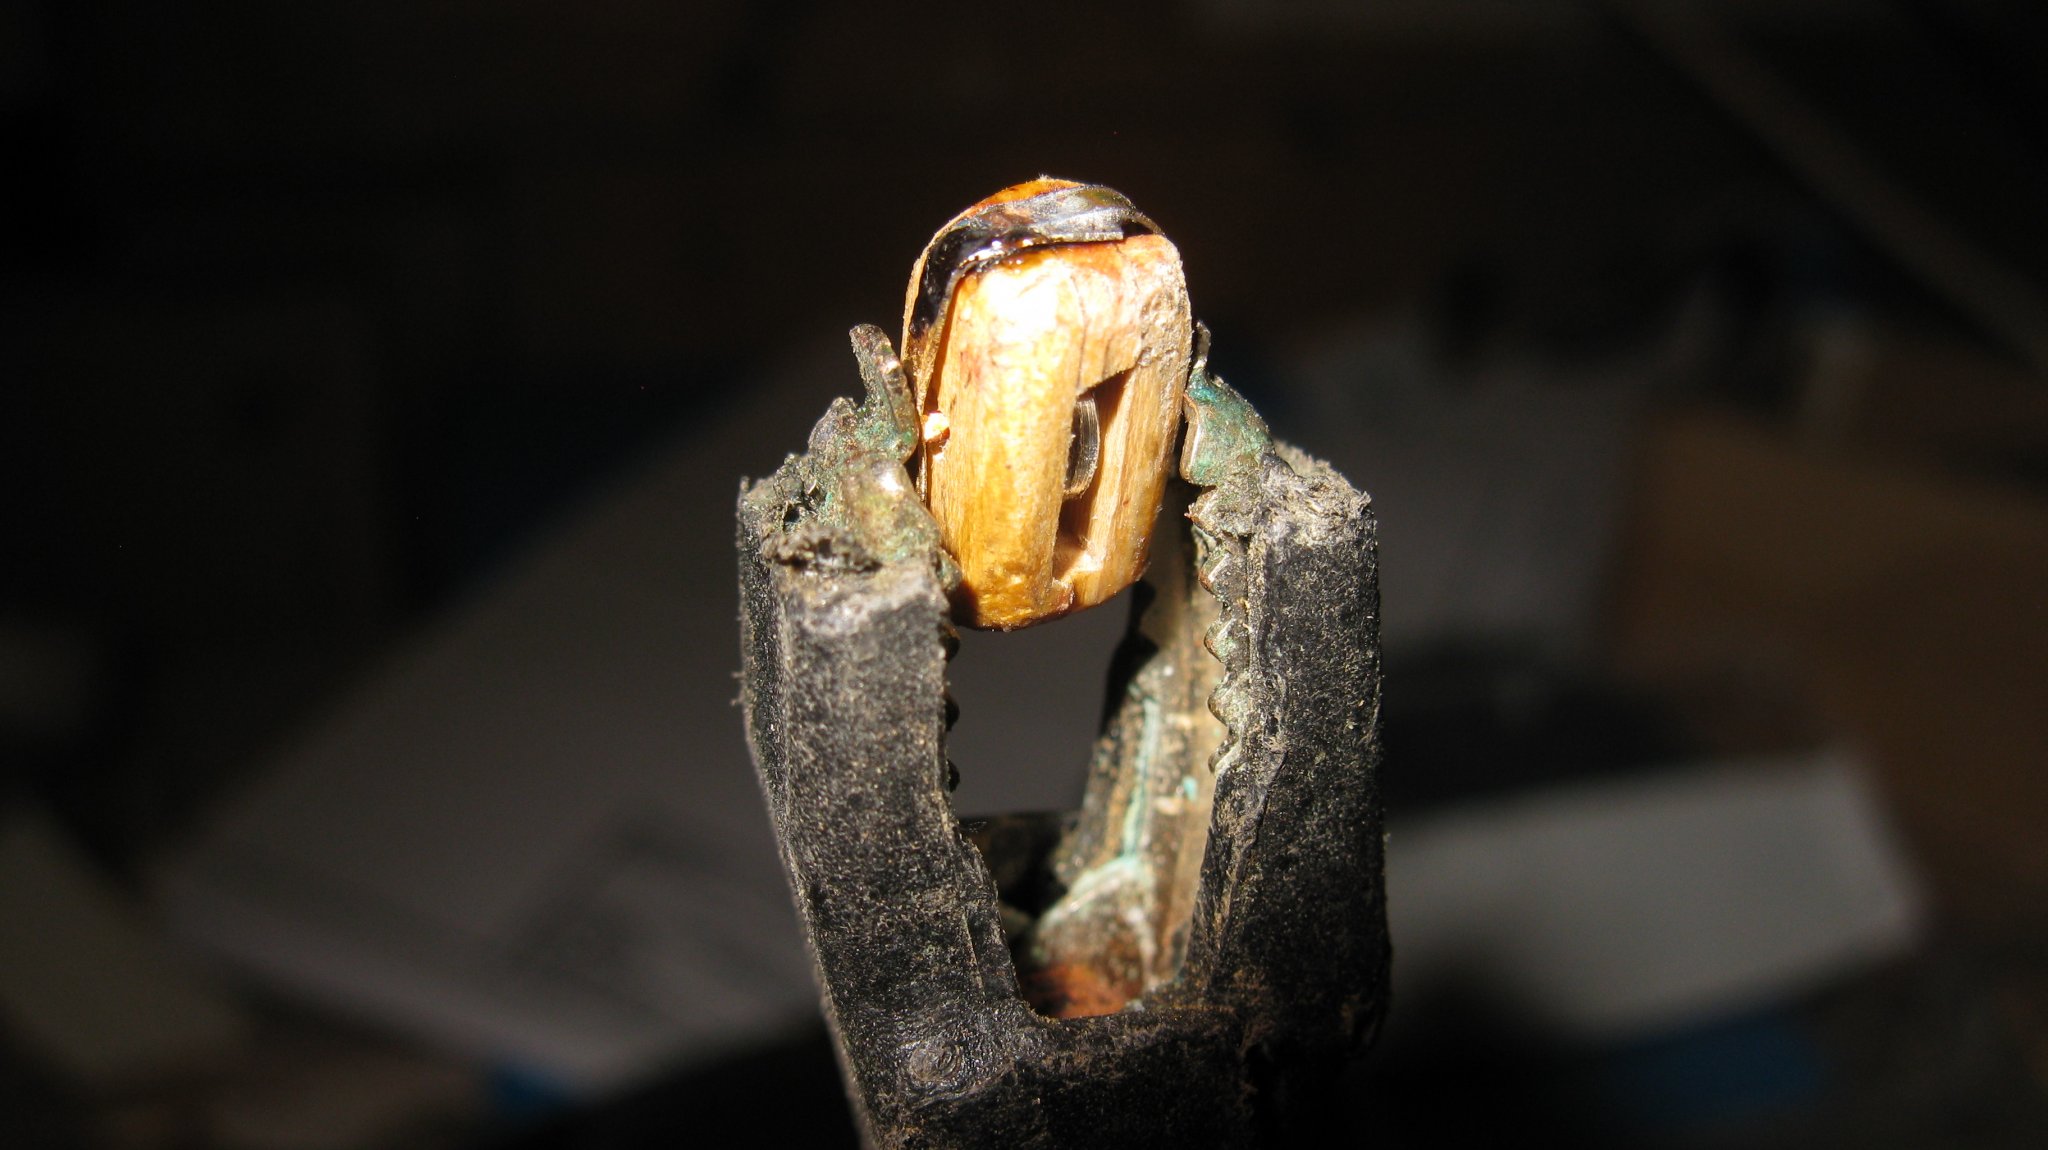
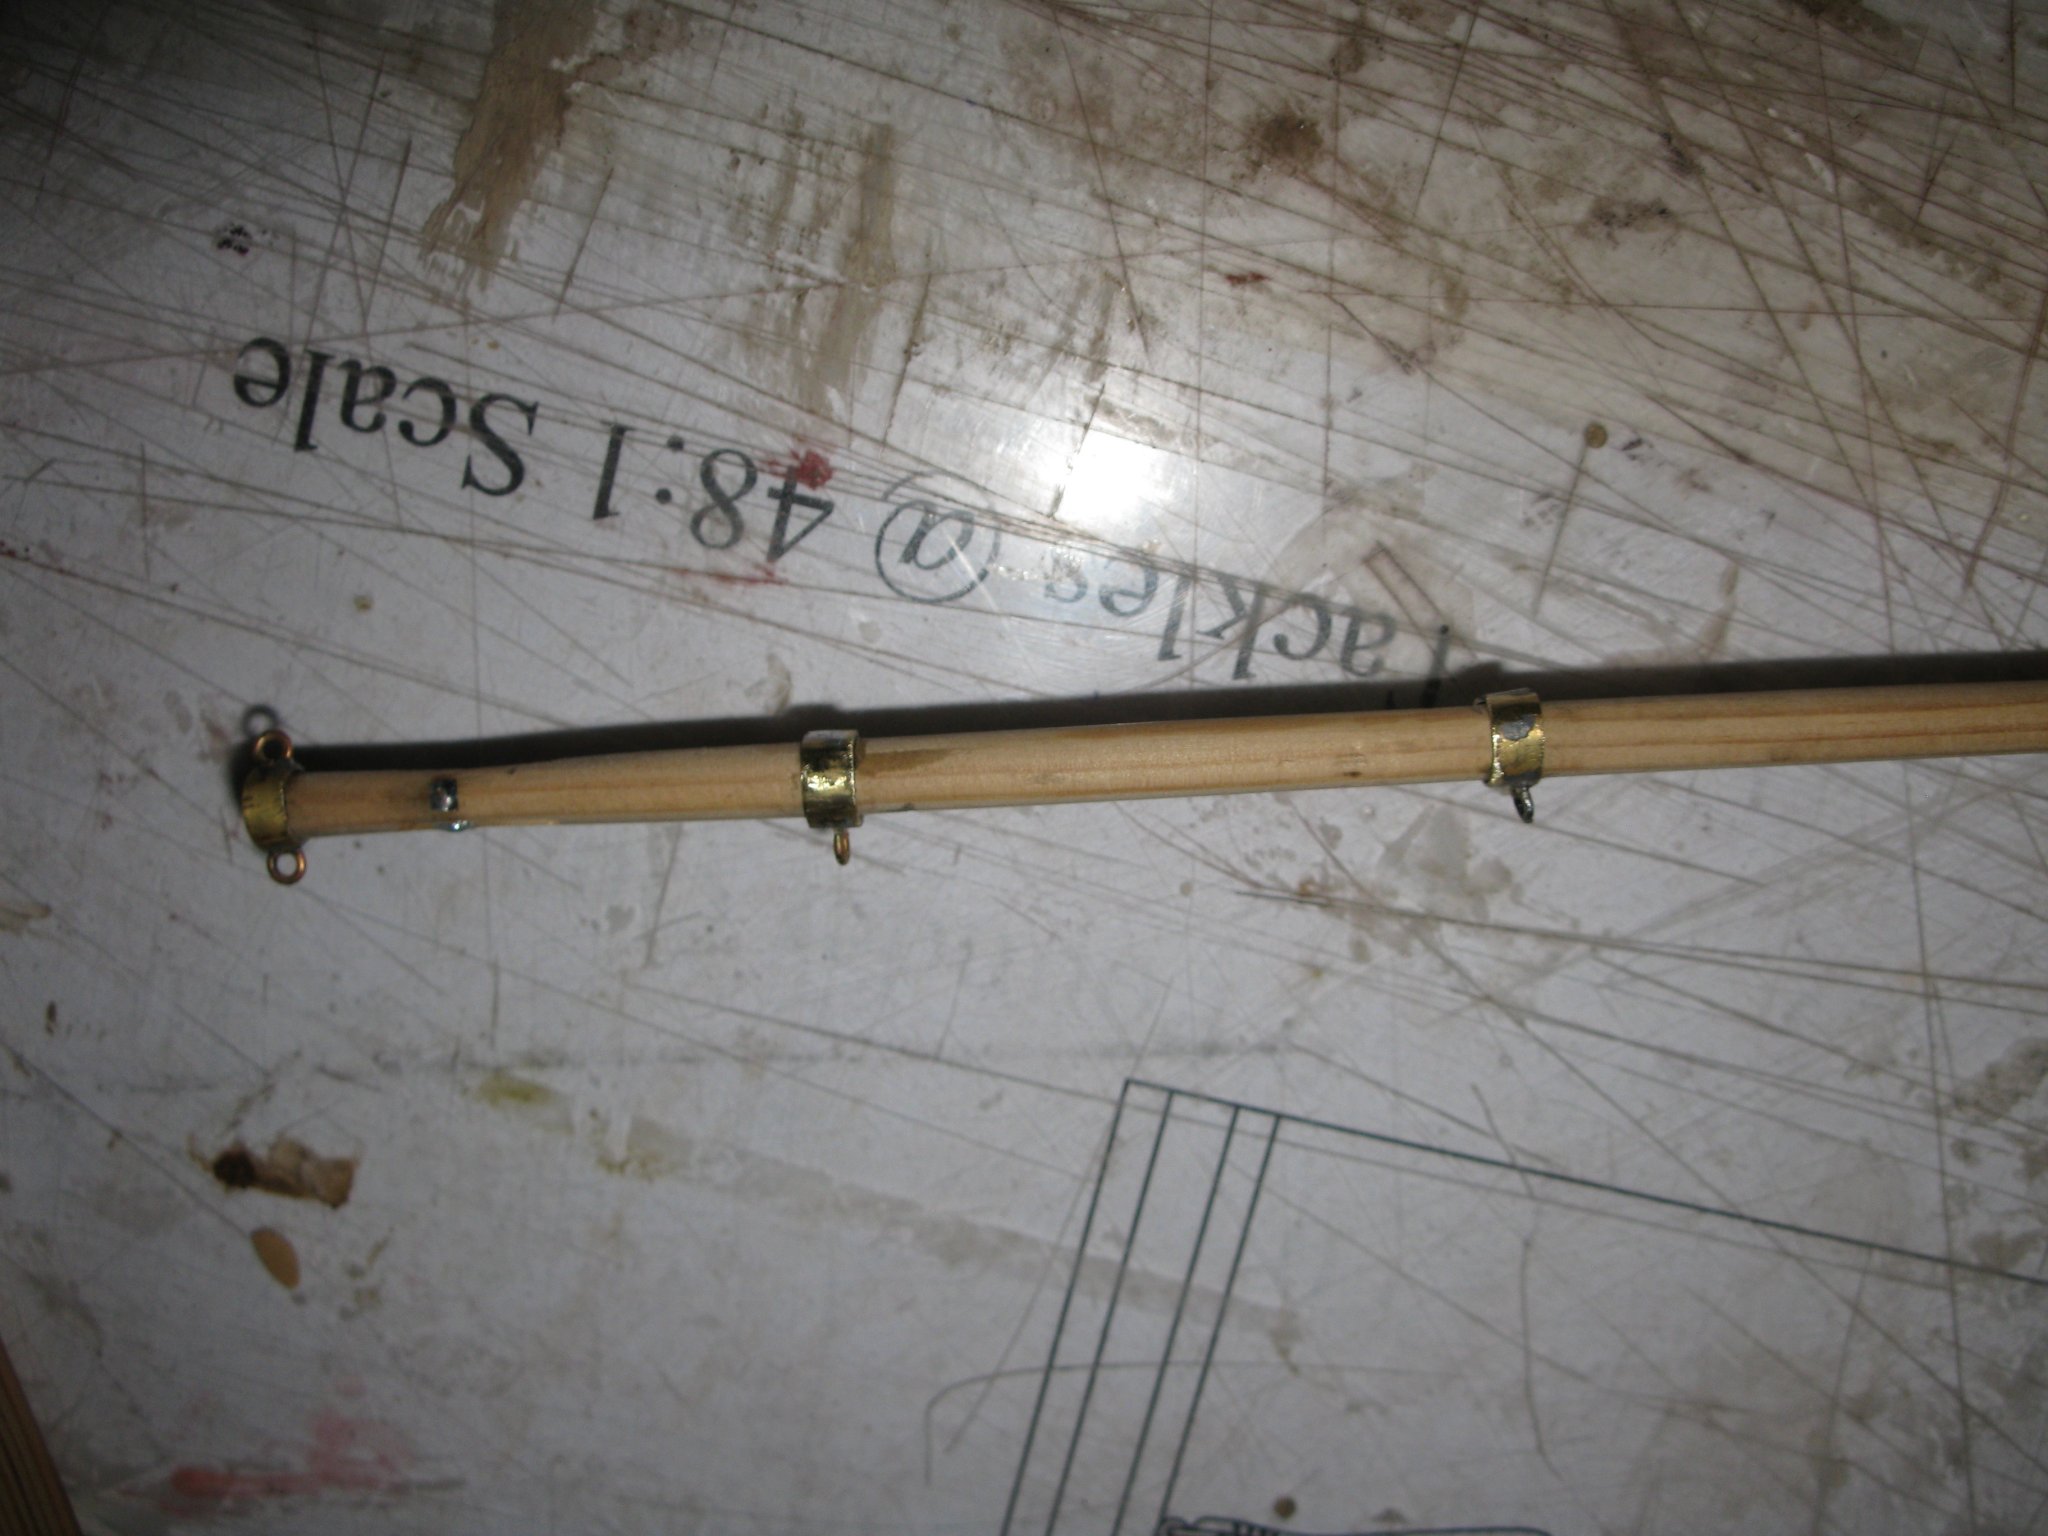
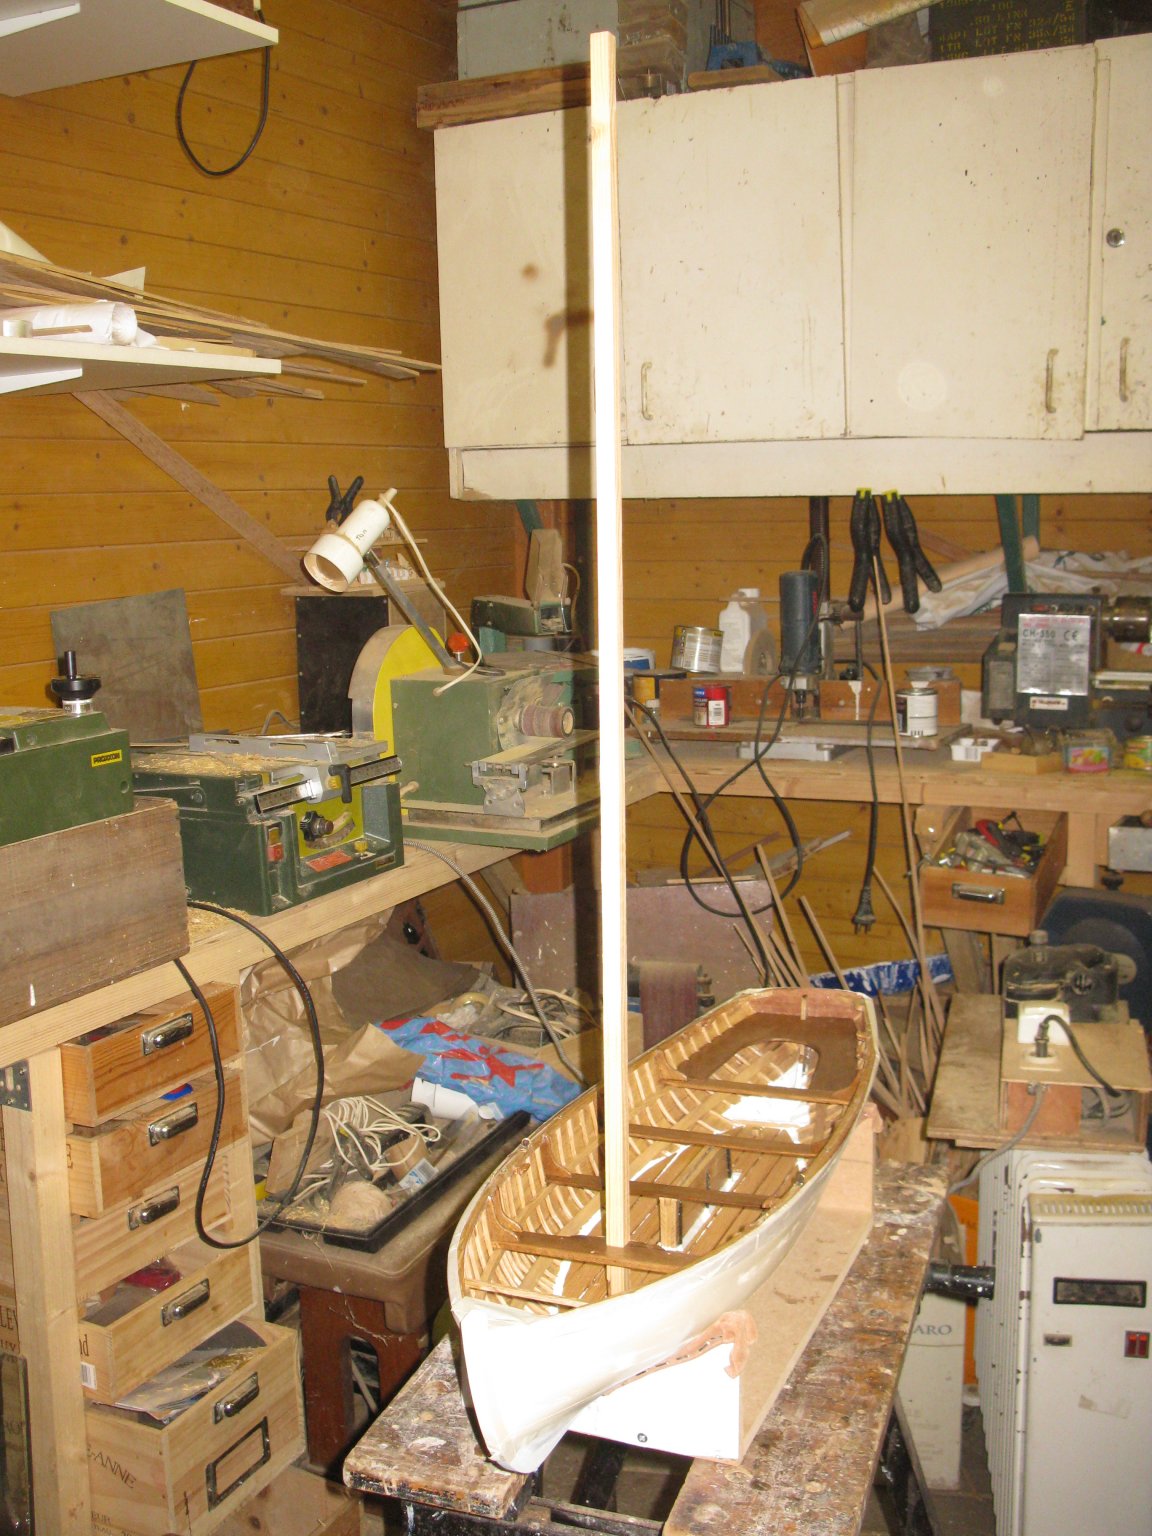
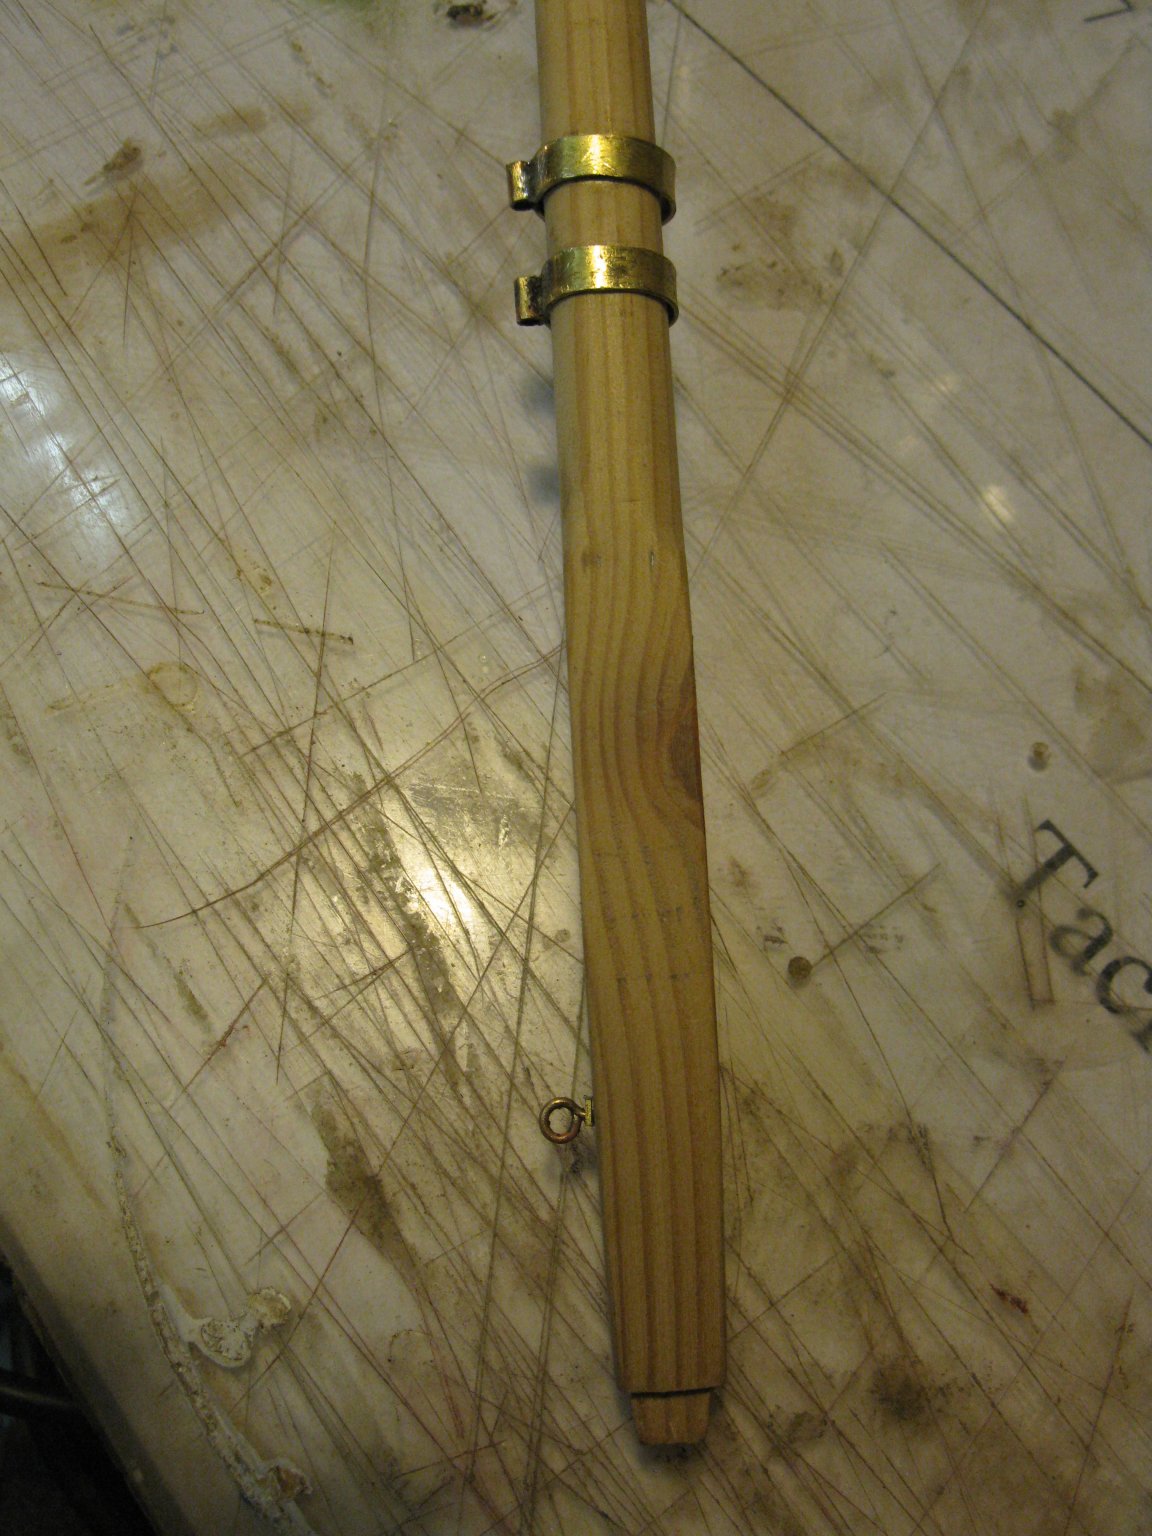
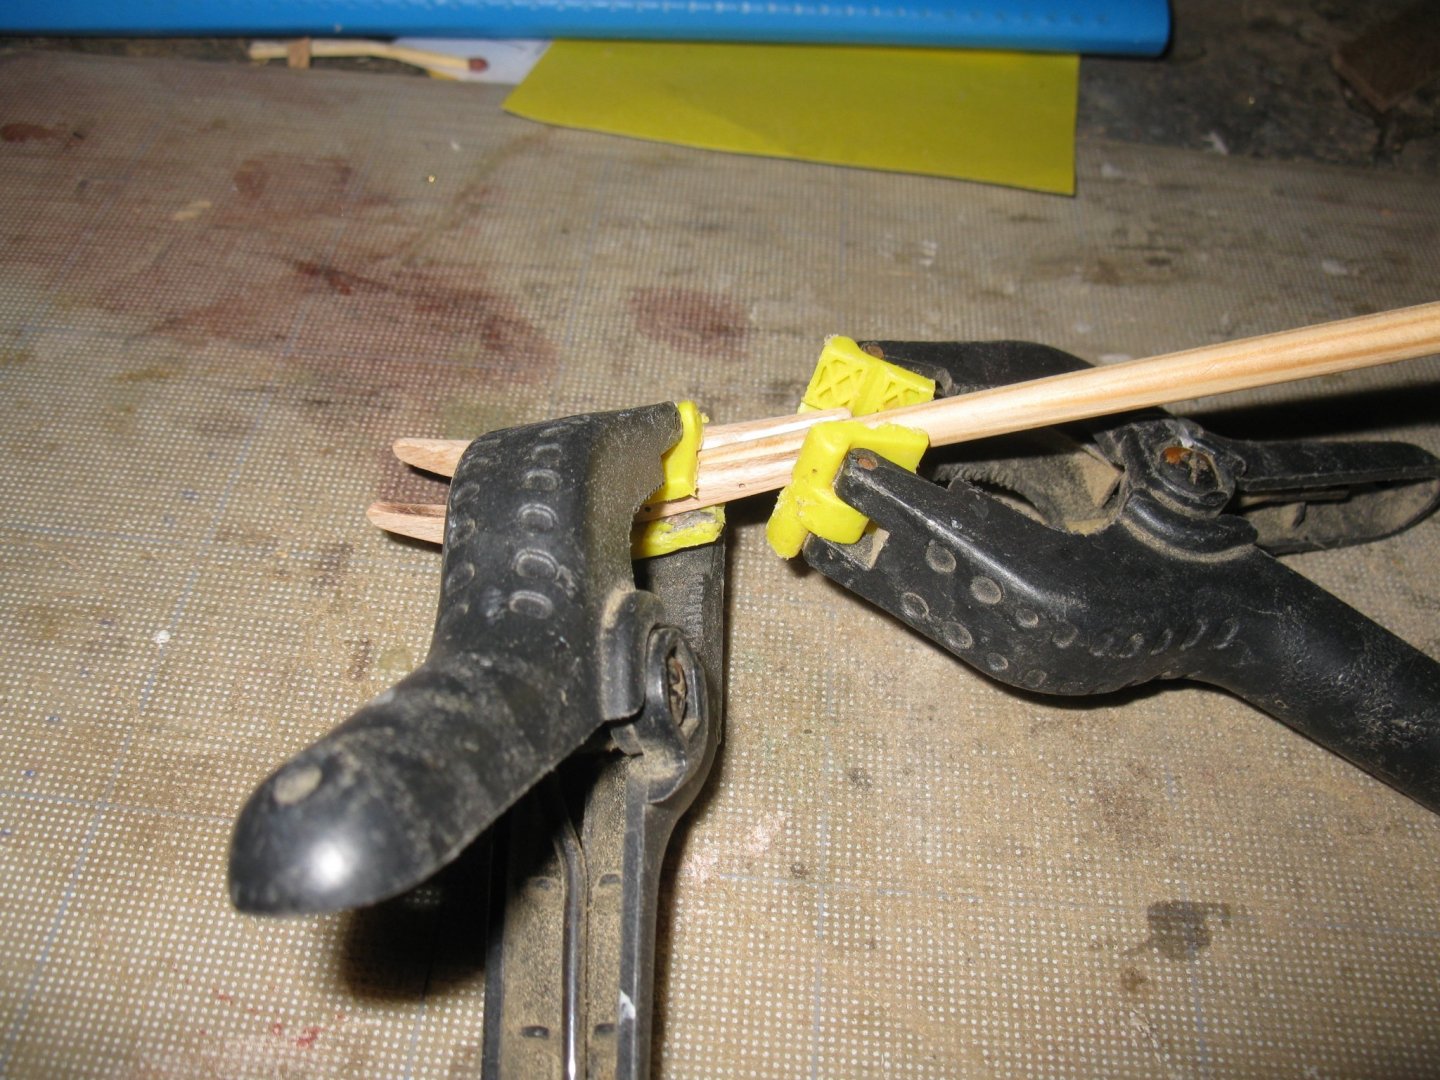
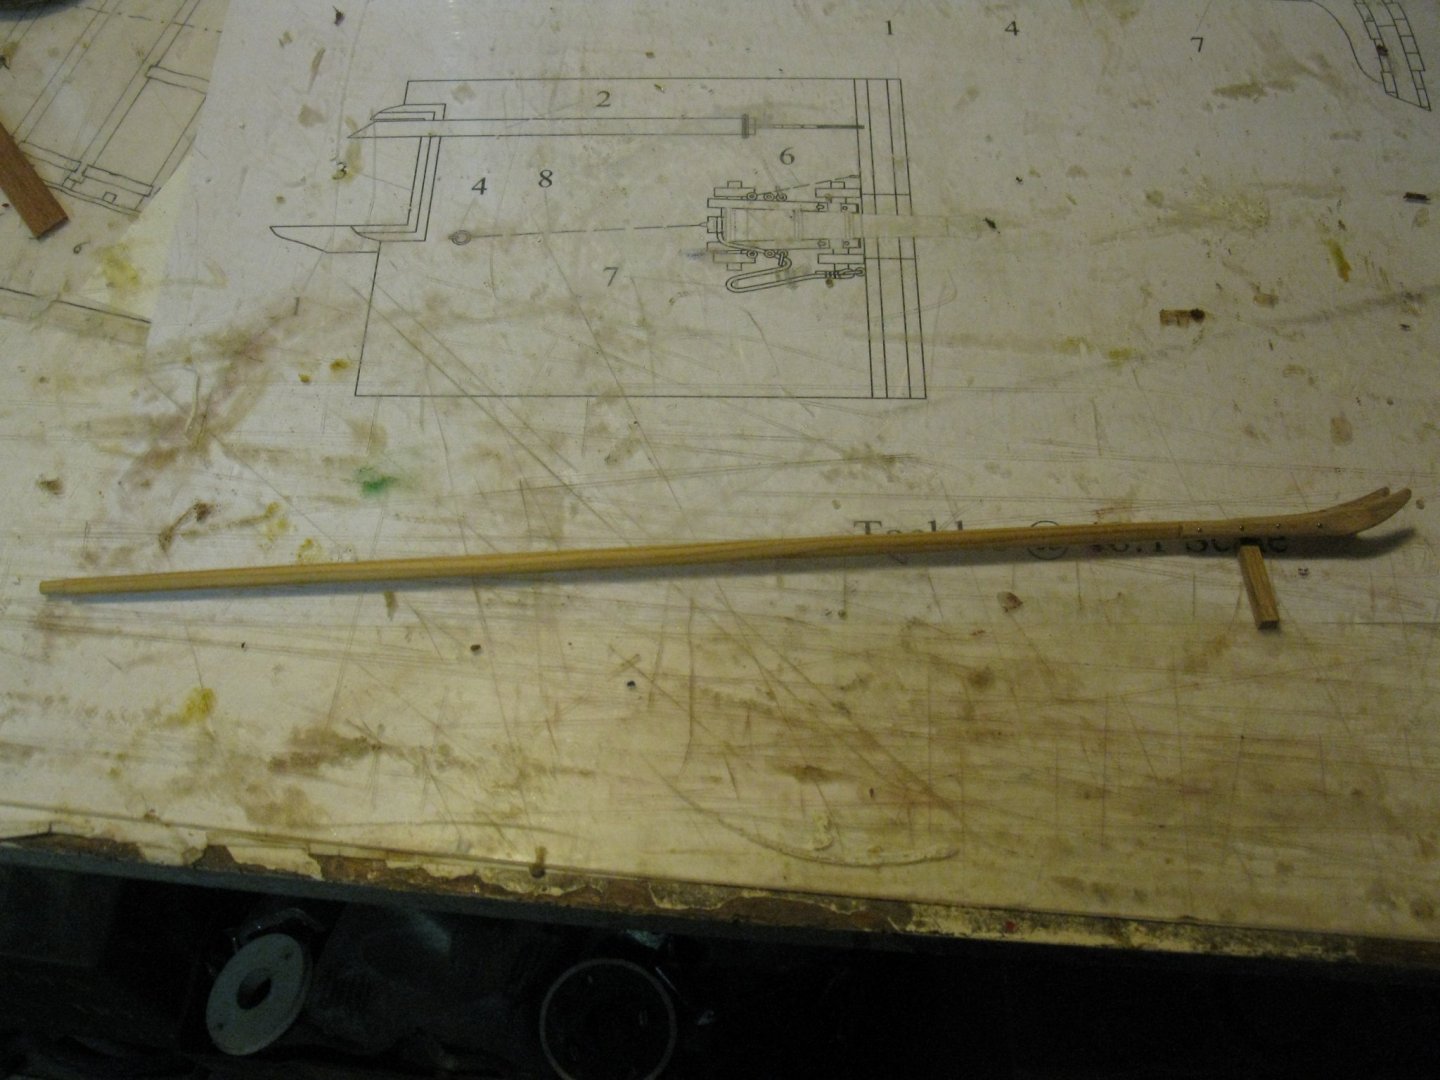
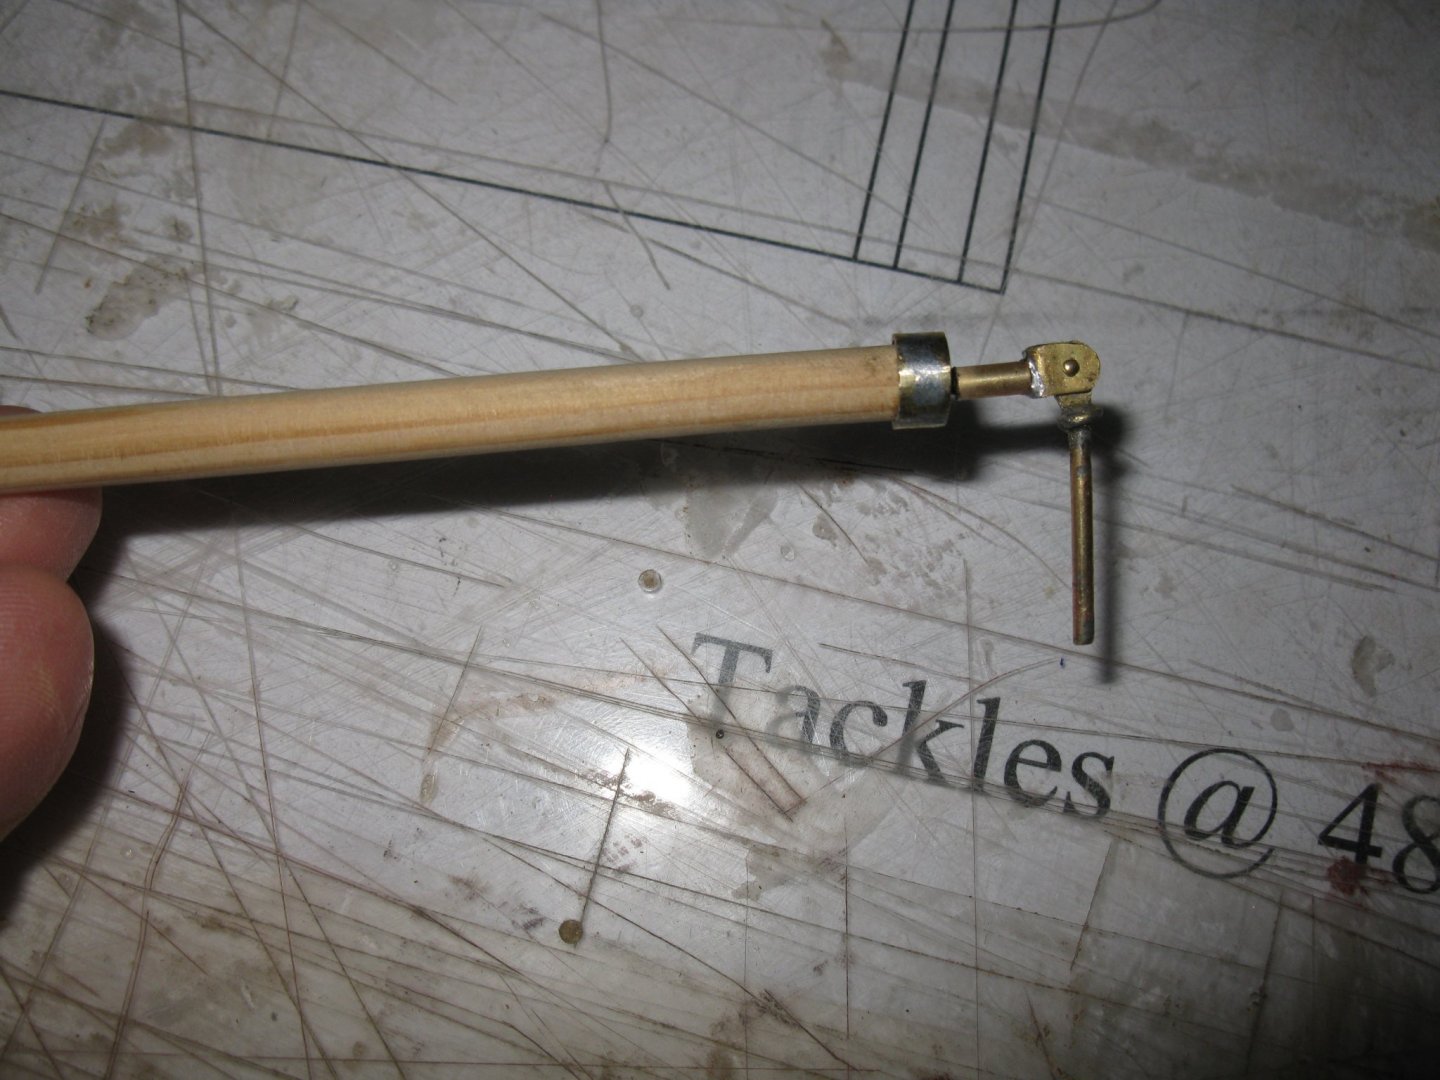
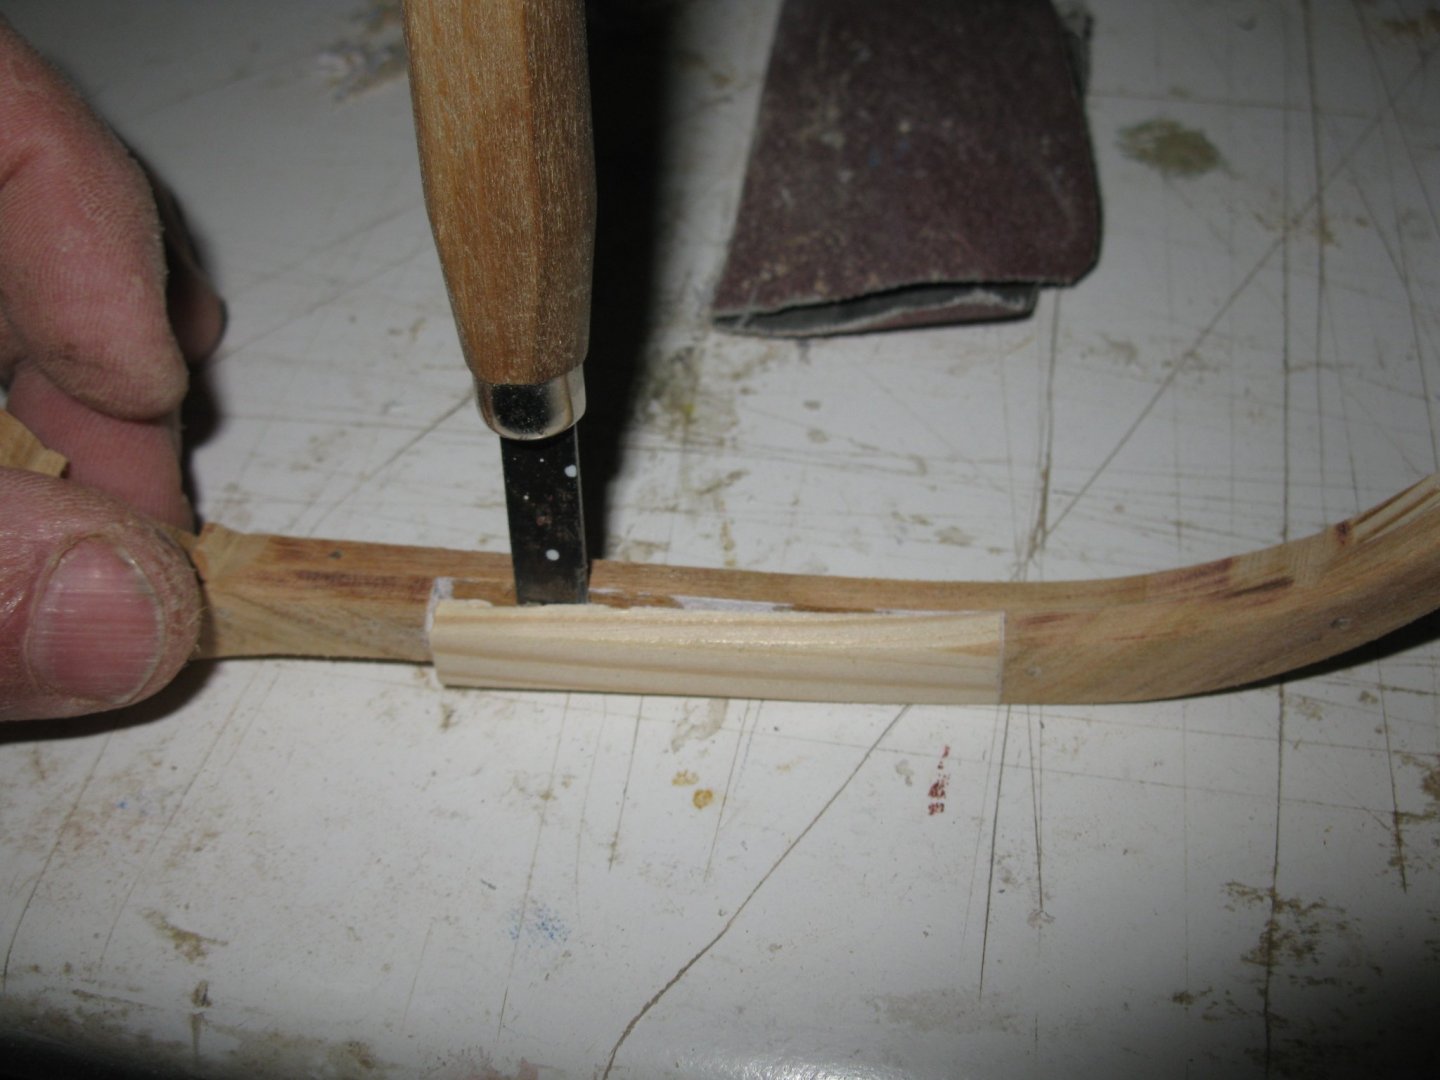
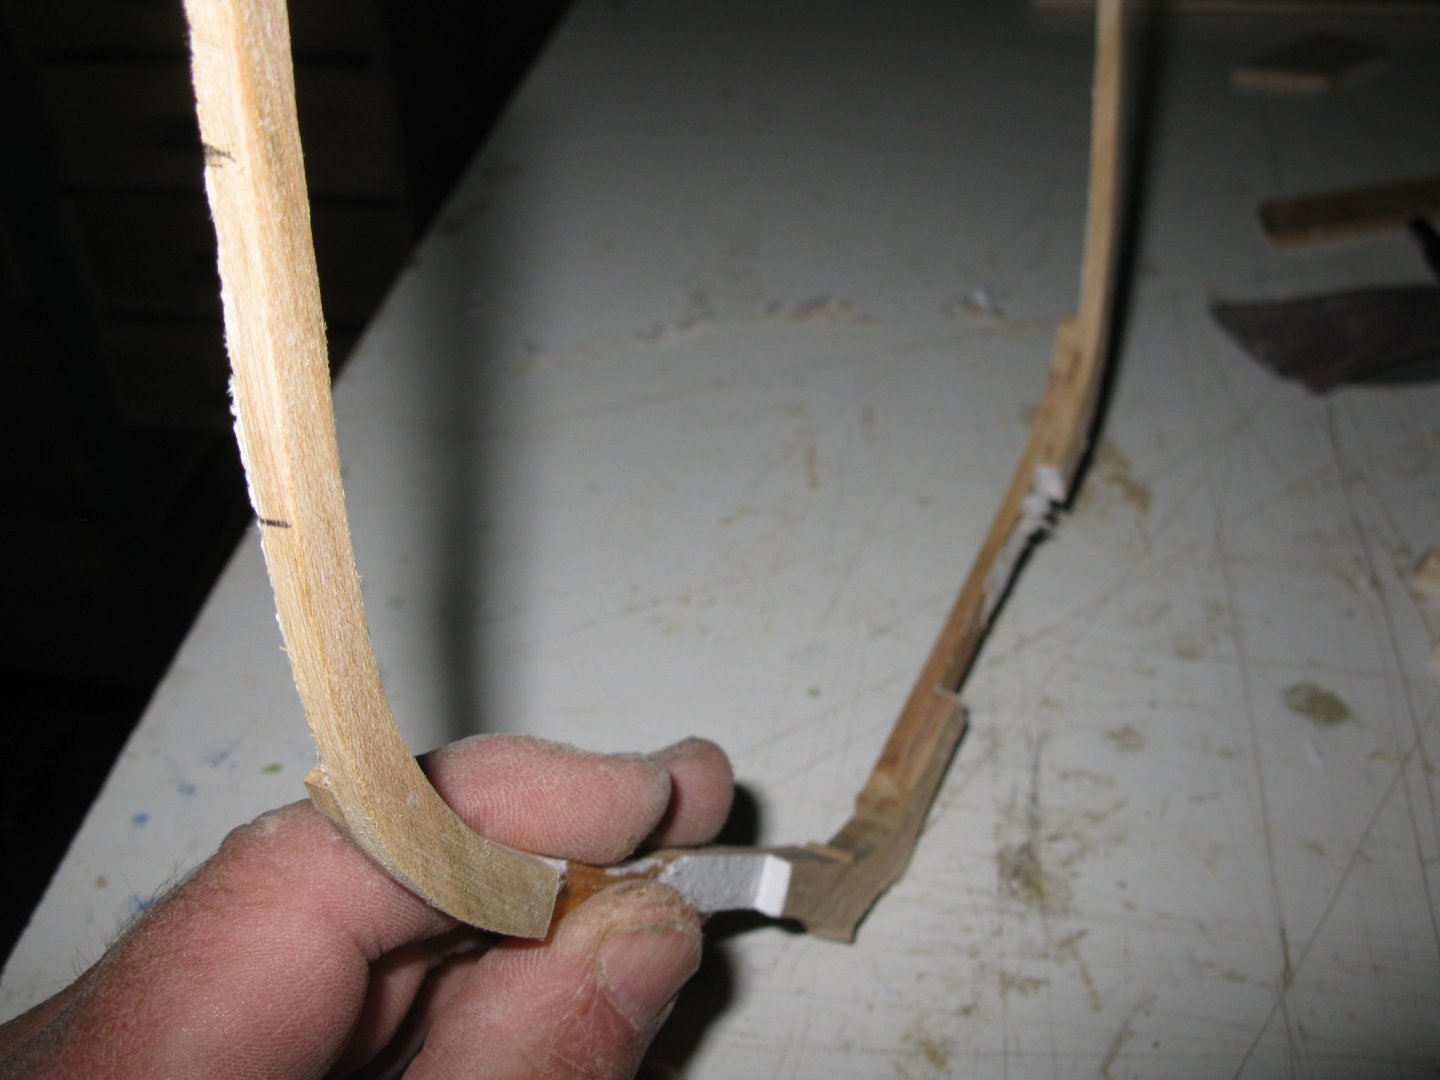
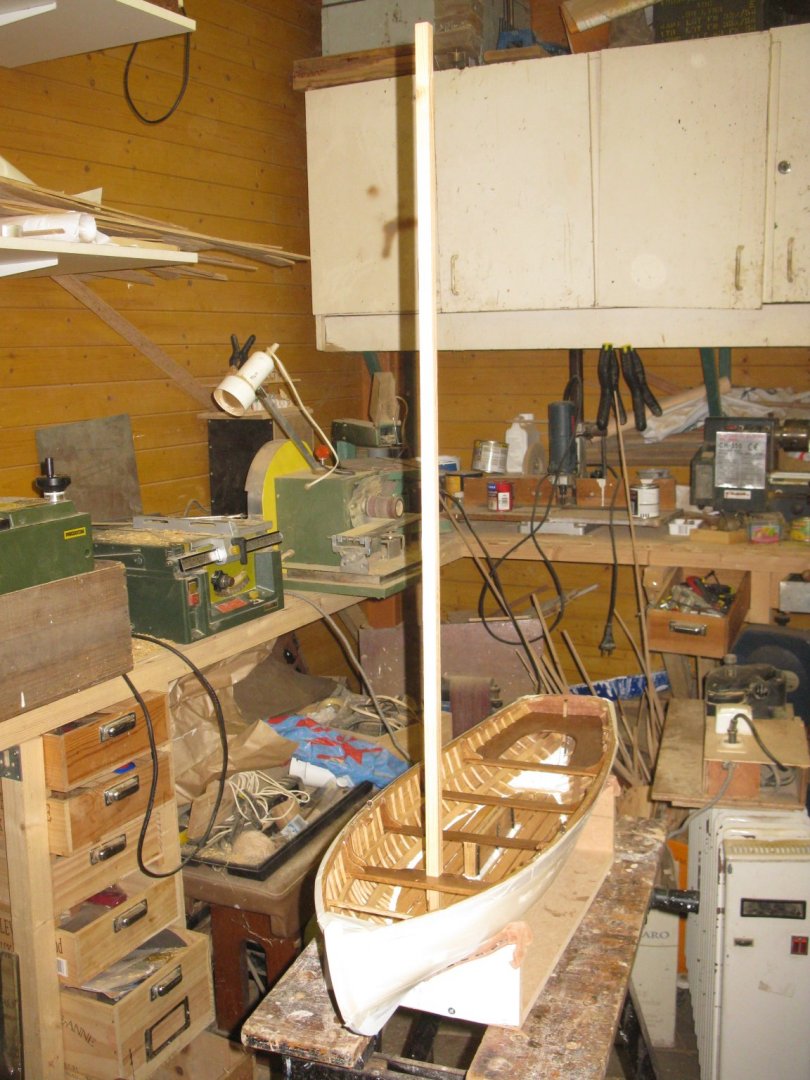
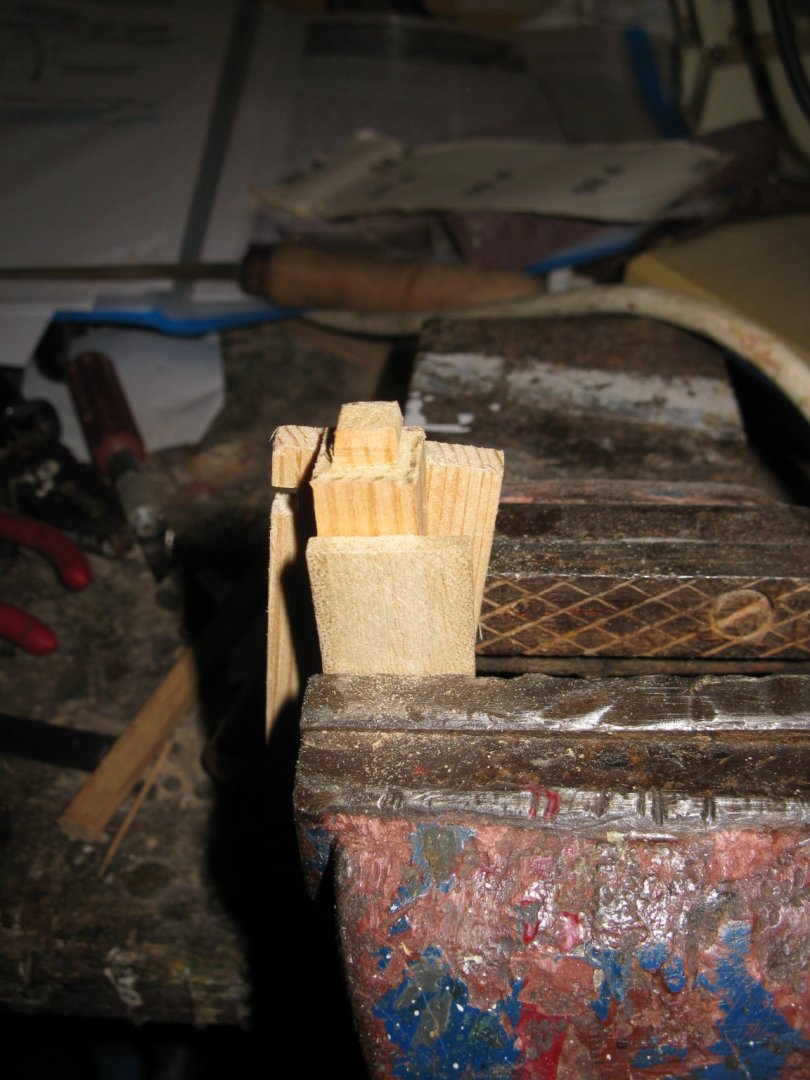
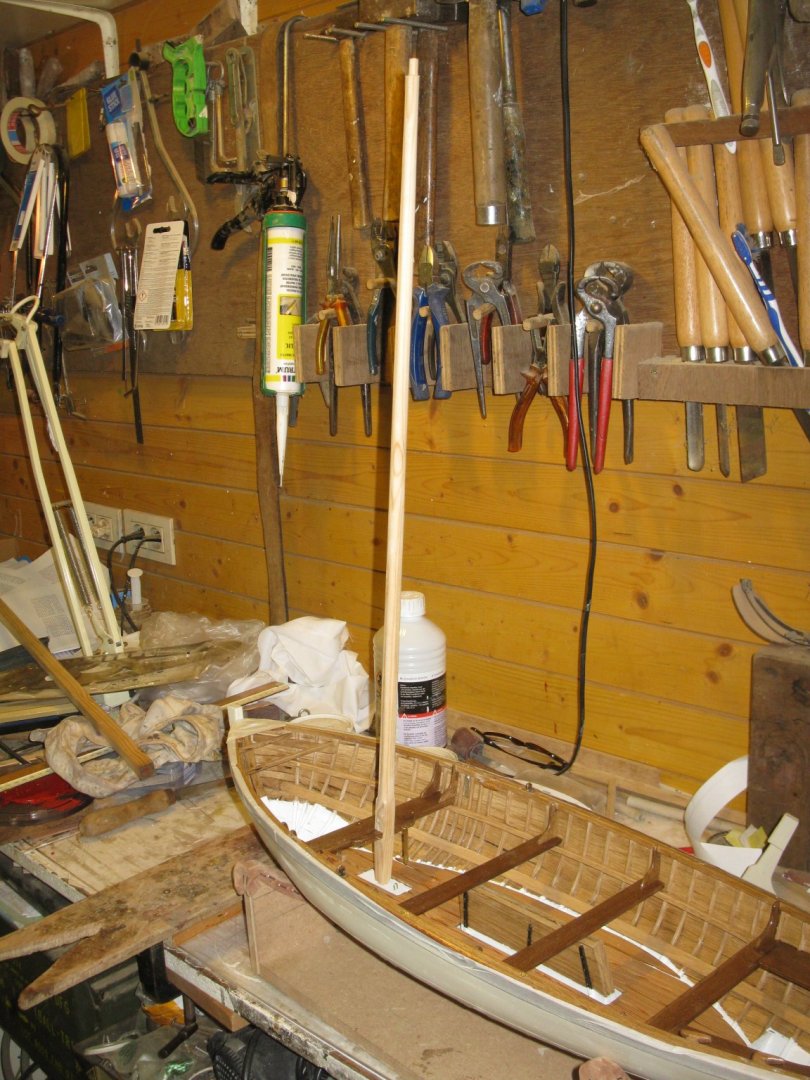
Part 11. The spars 11.1. The mast To make the mast, I start from a square pine stock. I first scrape the corners off to an octagonal shape. Then I sand it to a round shape. The lower part of the mast remains square. Sawing the mast foot. Fitting the mast in the model. The metal work of the mast: Lower part of the mast: The two rings on top of the picture are the gooseneck bands. The ring below is for the block of the down haul. Upper part of the mast: On top a band with four rings: Front and side rings are to hold the stays. The after ring will hold the block of the peak halyard. The two bands below with one ring are for the block of the boom topping lift (above) and for the double block of the gaff halyard (below). Thank you for the likes Thank you to follow Thank you for the constructive comments, Till next week


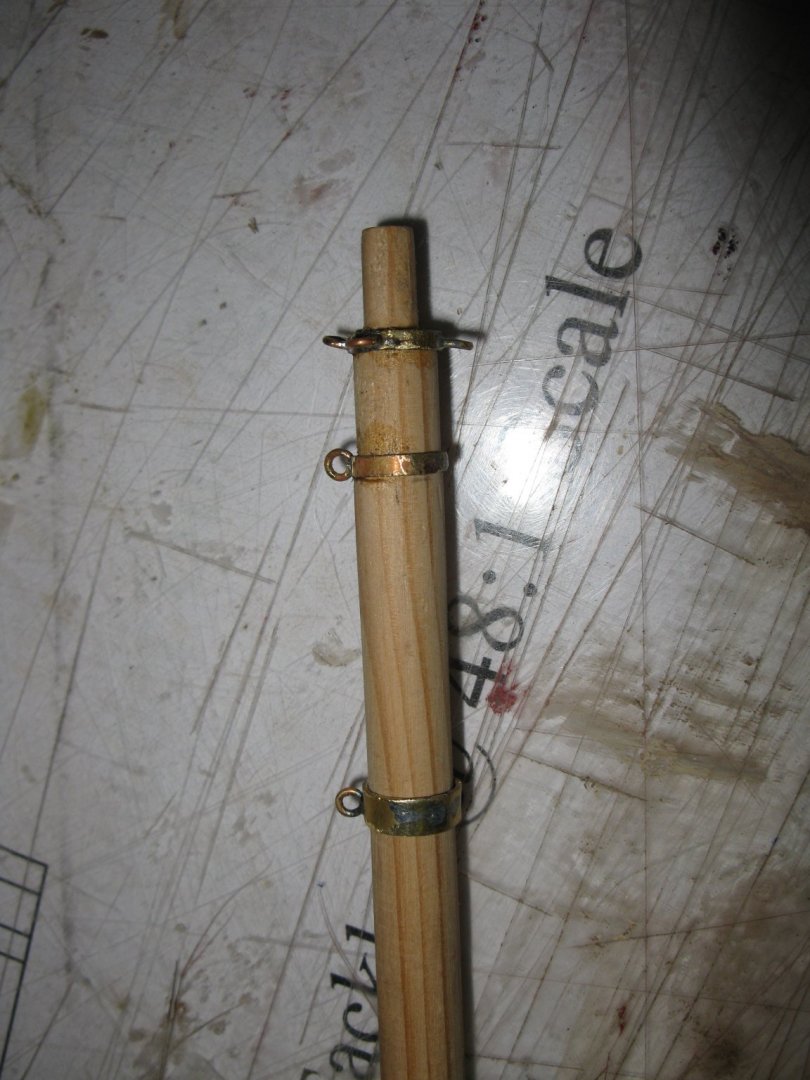

- 209 replies
-
- 11
-