HOLIDAY DONATION DRIVE - SUPPORT MSW - DO YOUR PART TO KEEP THIS GREAT FORUM GOING! (Only 20 donations so far - C'mon guys!)
×


G.L.
-
Posts
1,553 -
Joined
-
Last visited
Content Type
Profiles
Forums
Gallery
Events
Everything posted by G.L.
-

Naparima by Kevin Kenny - FINISHED
G.L. replied to Kevin Kenny's topic in - Build logs for subjects built 1901 - Present Day
using paper copies seems to me a good method. -
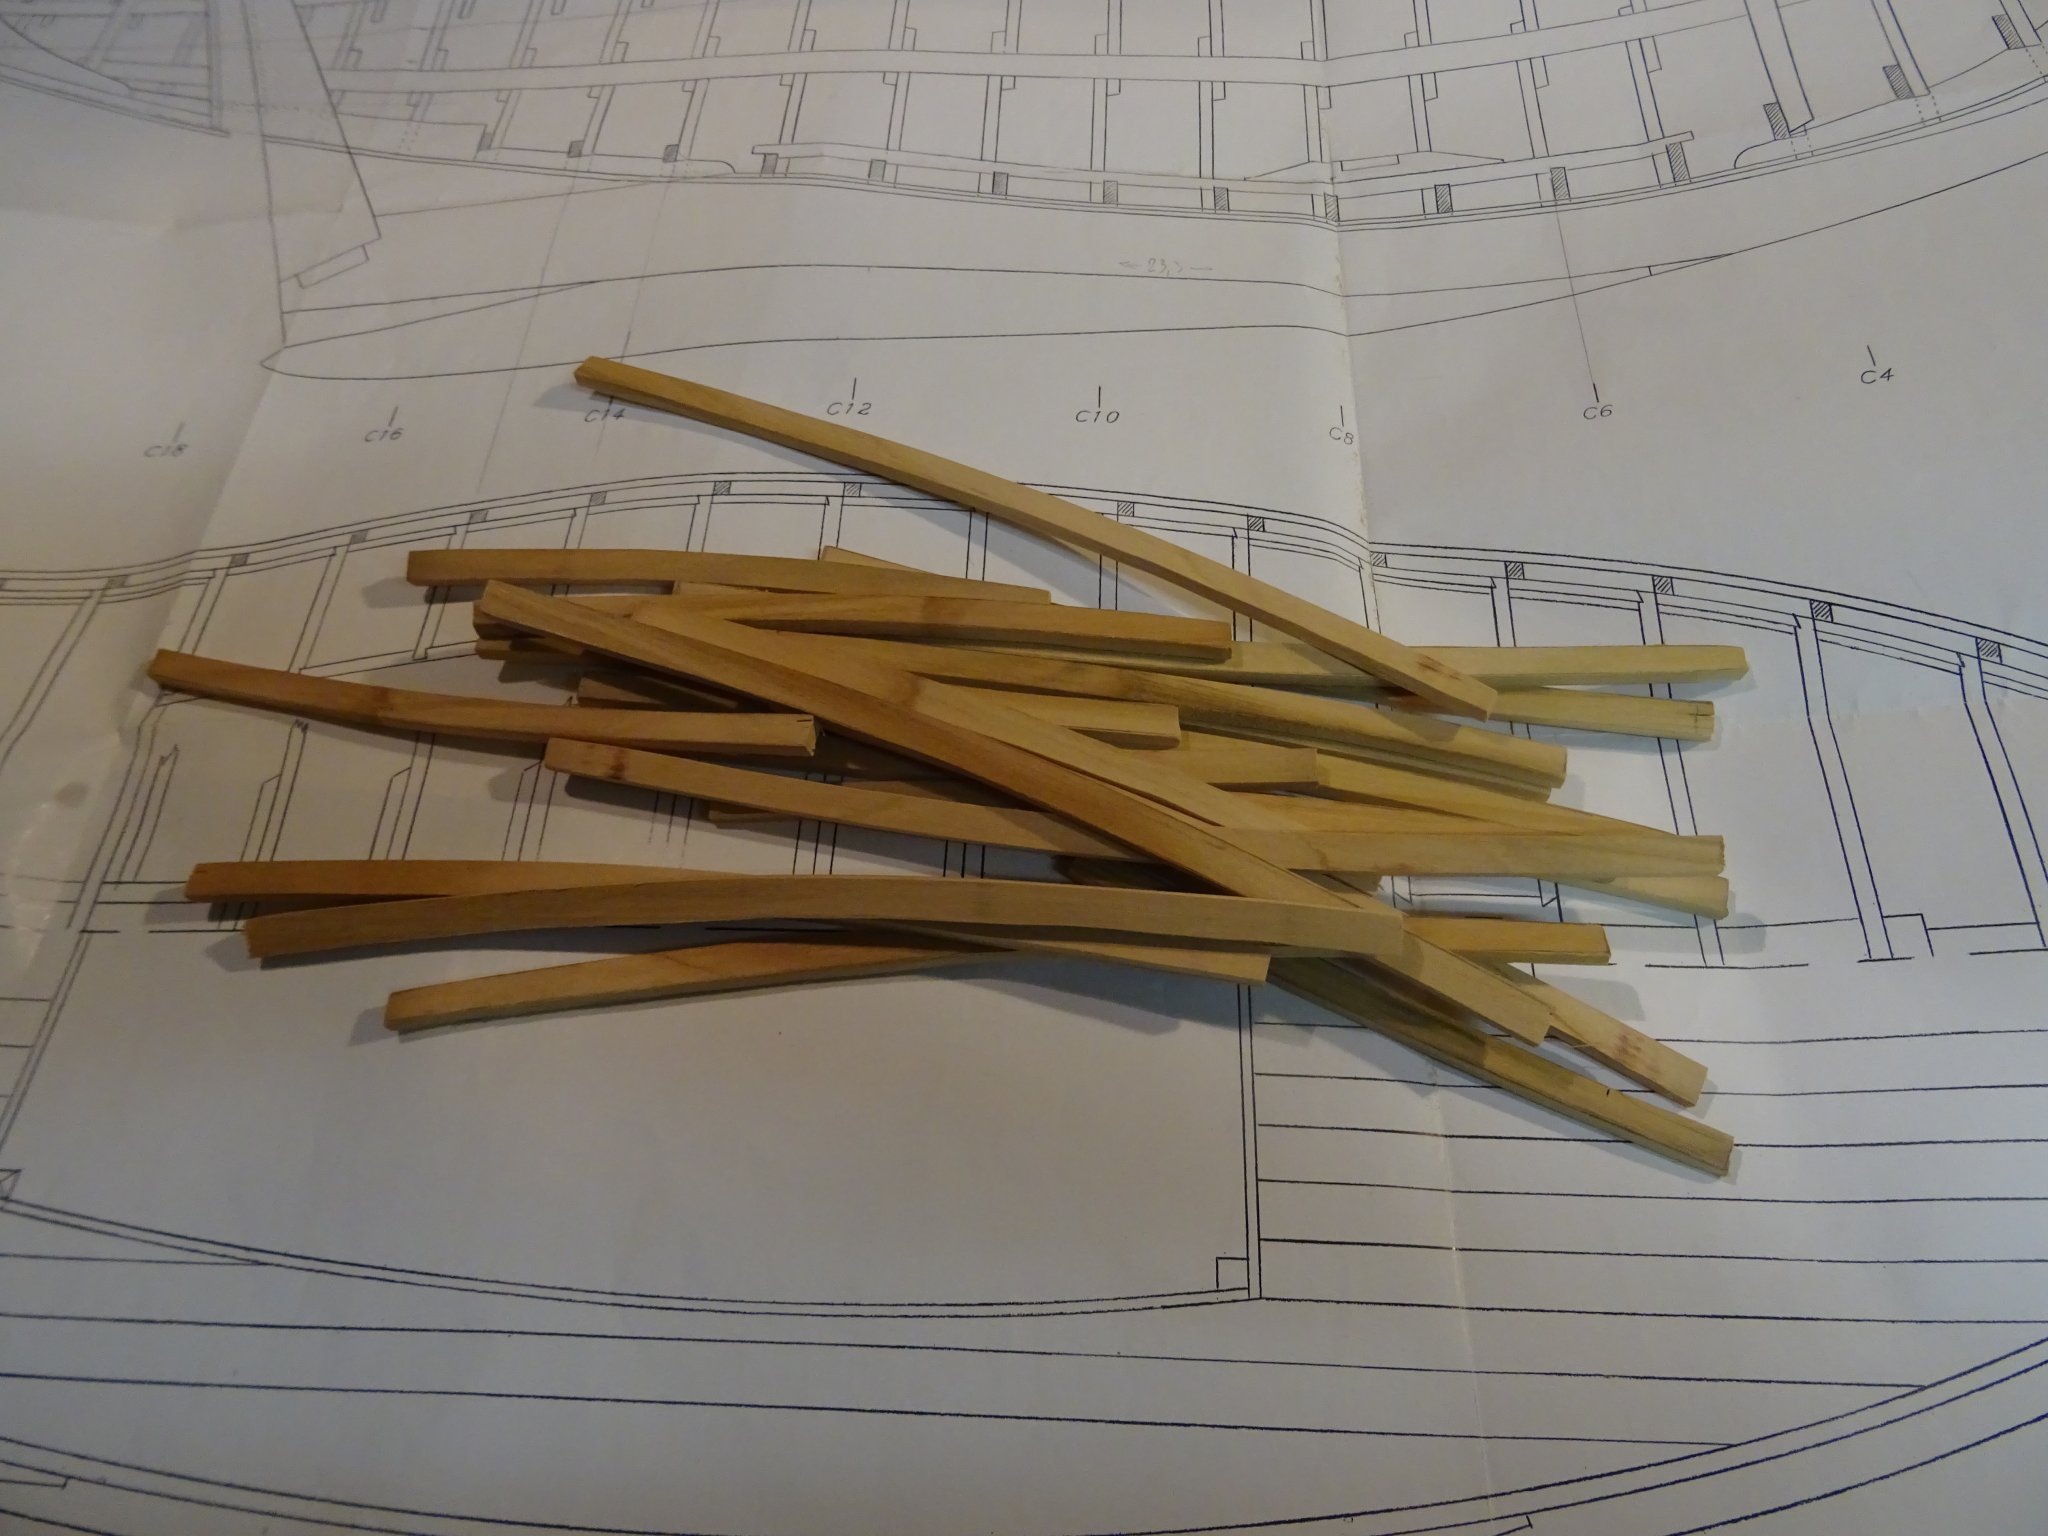
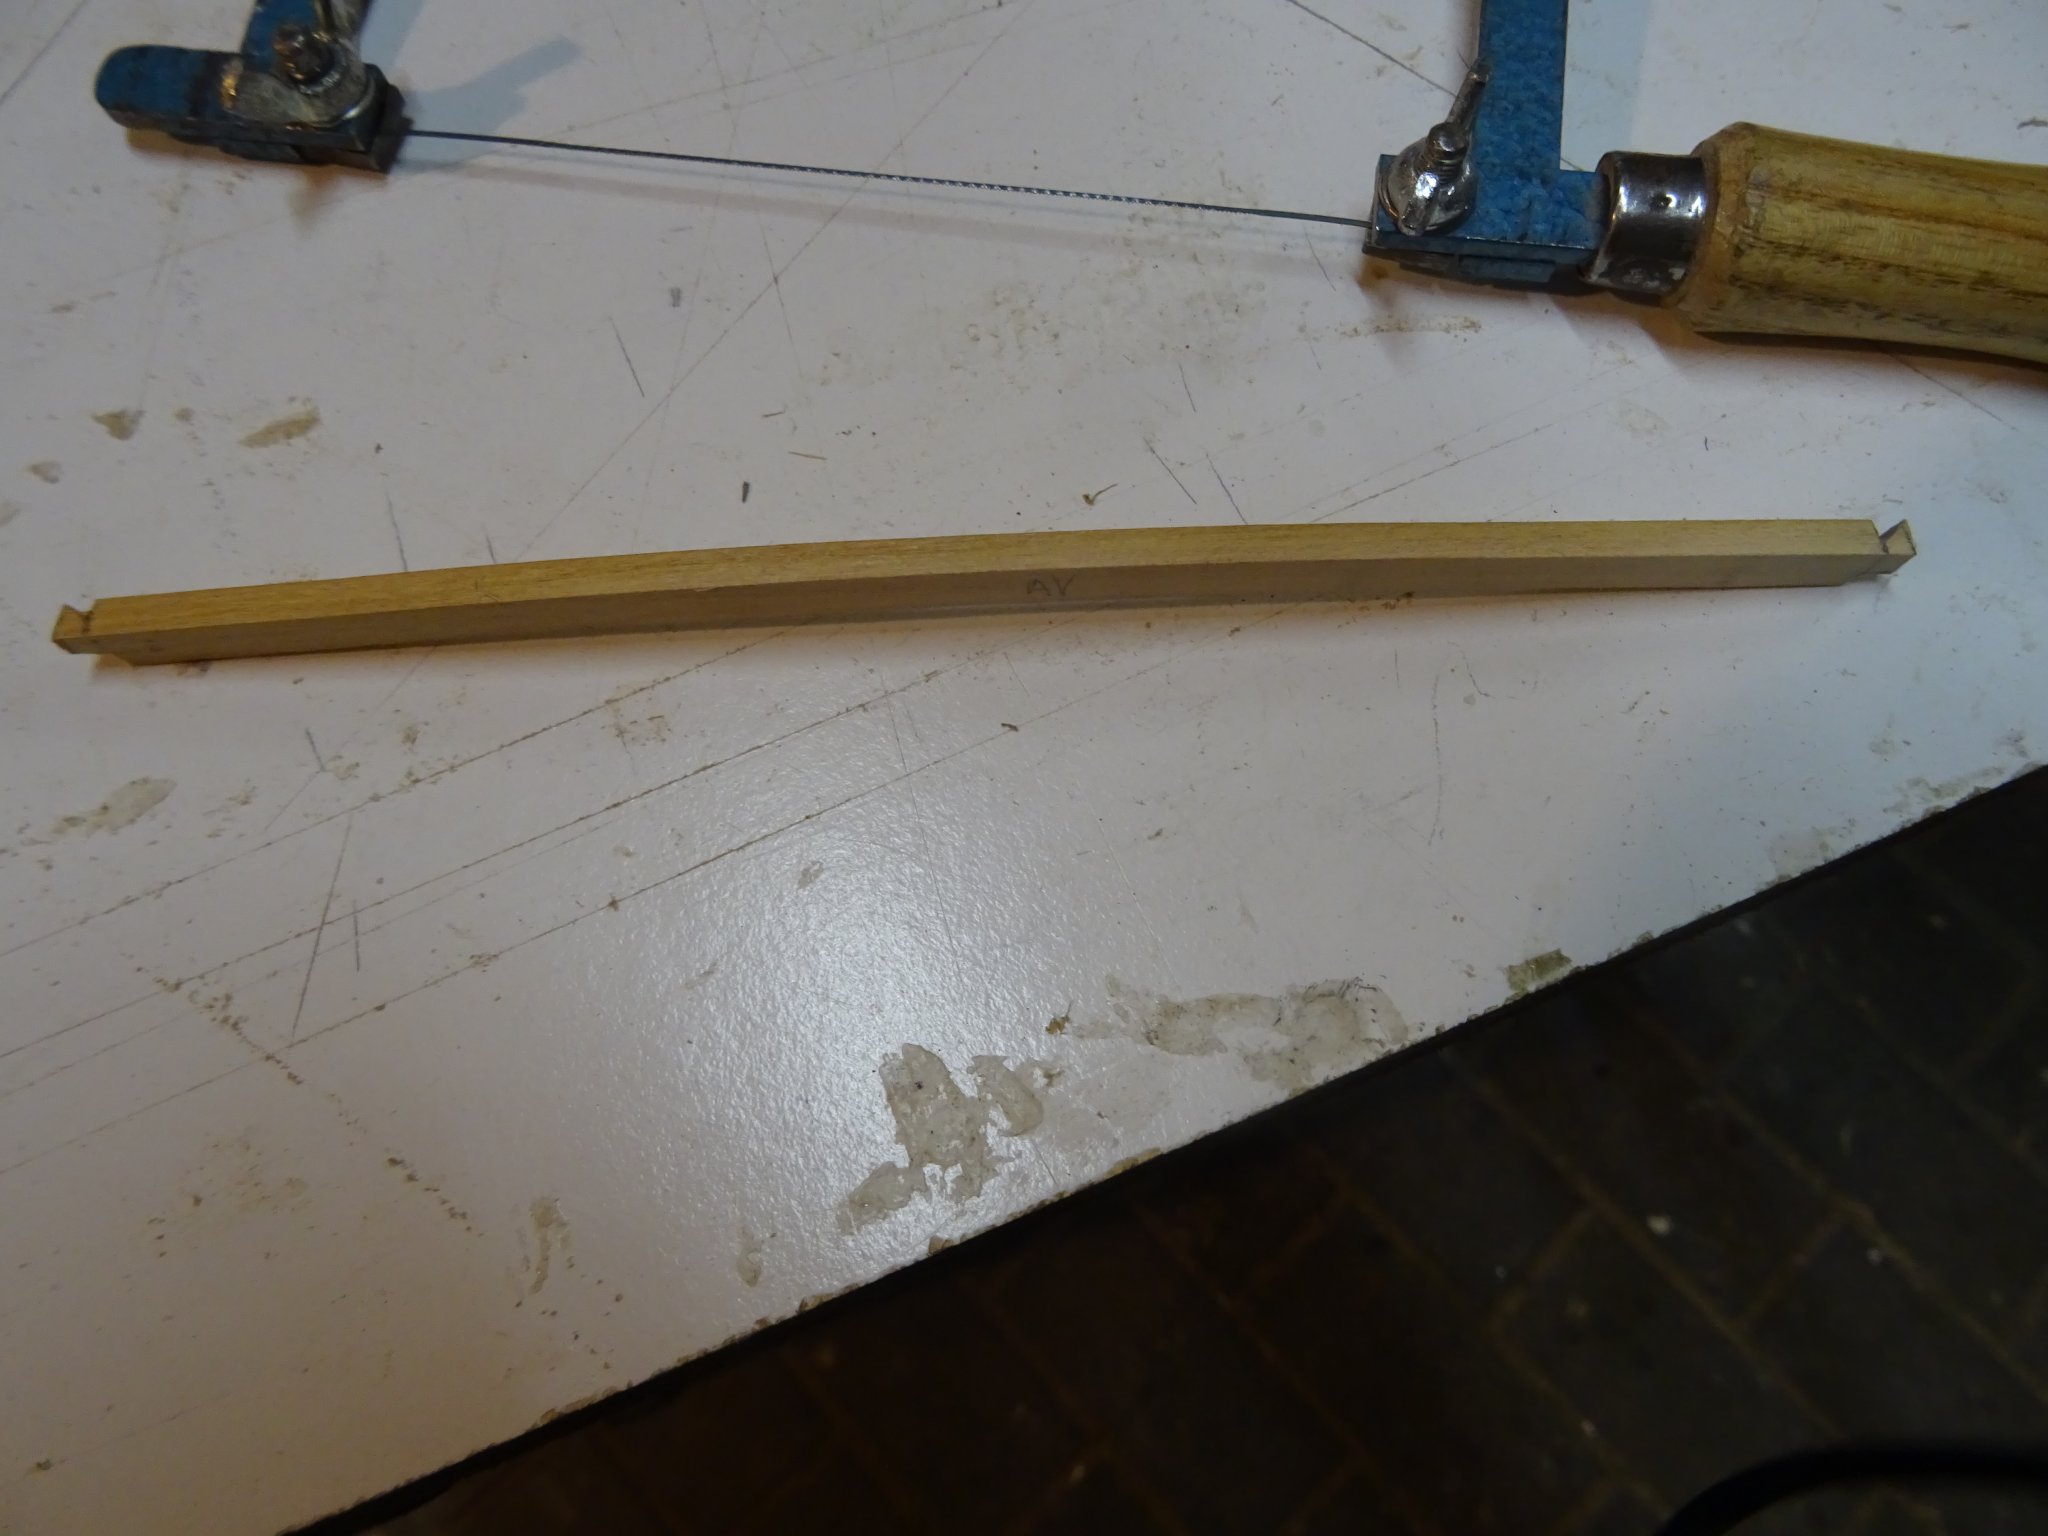
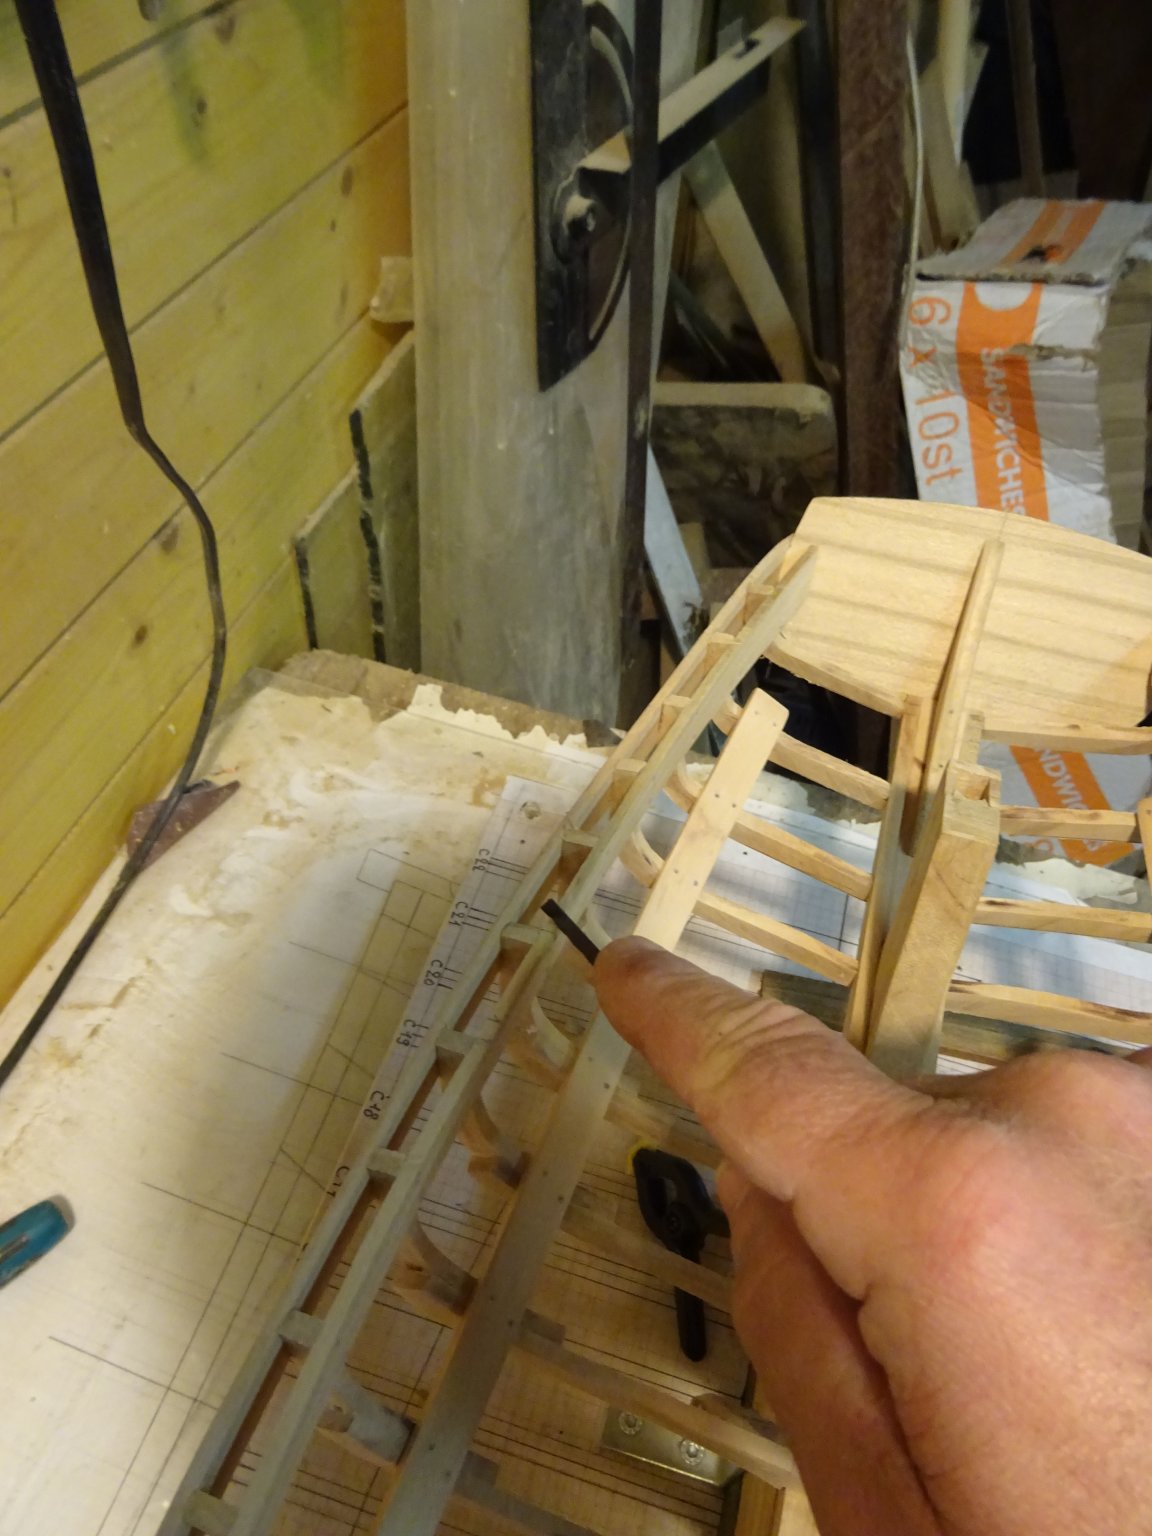
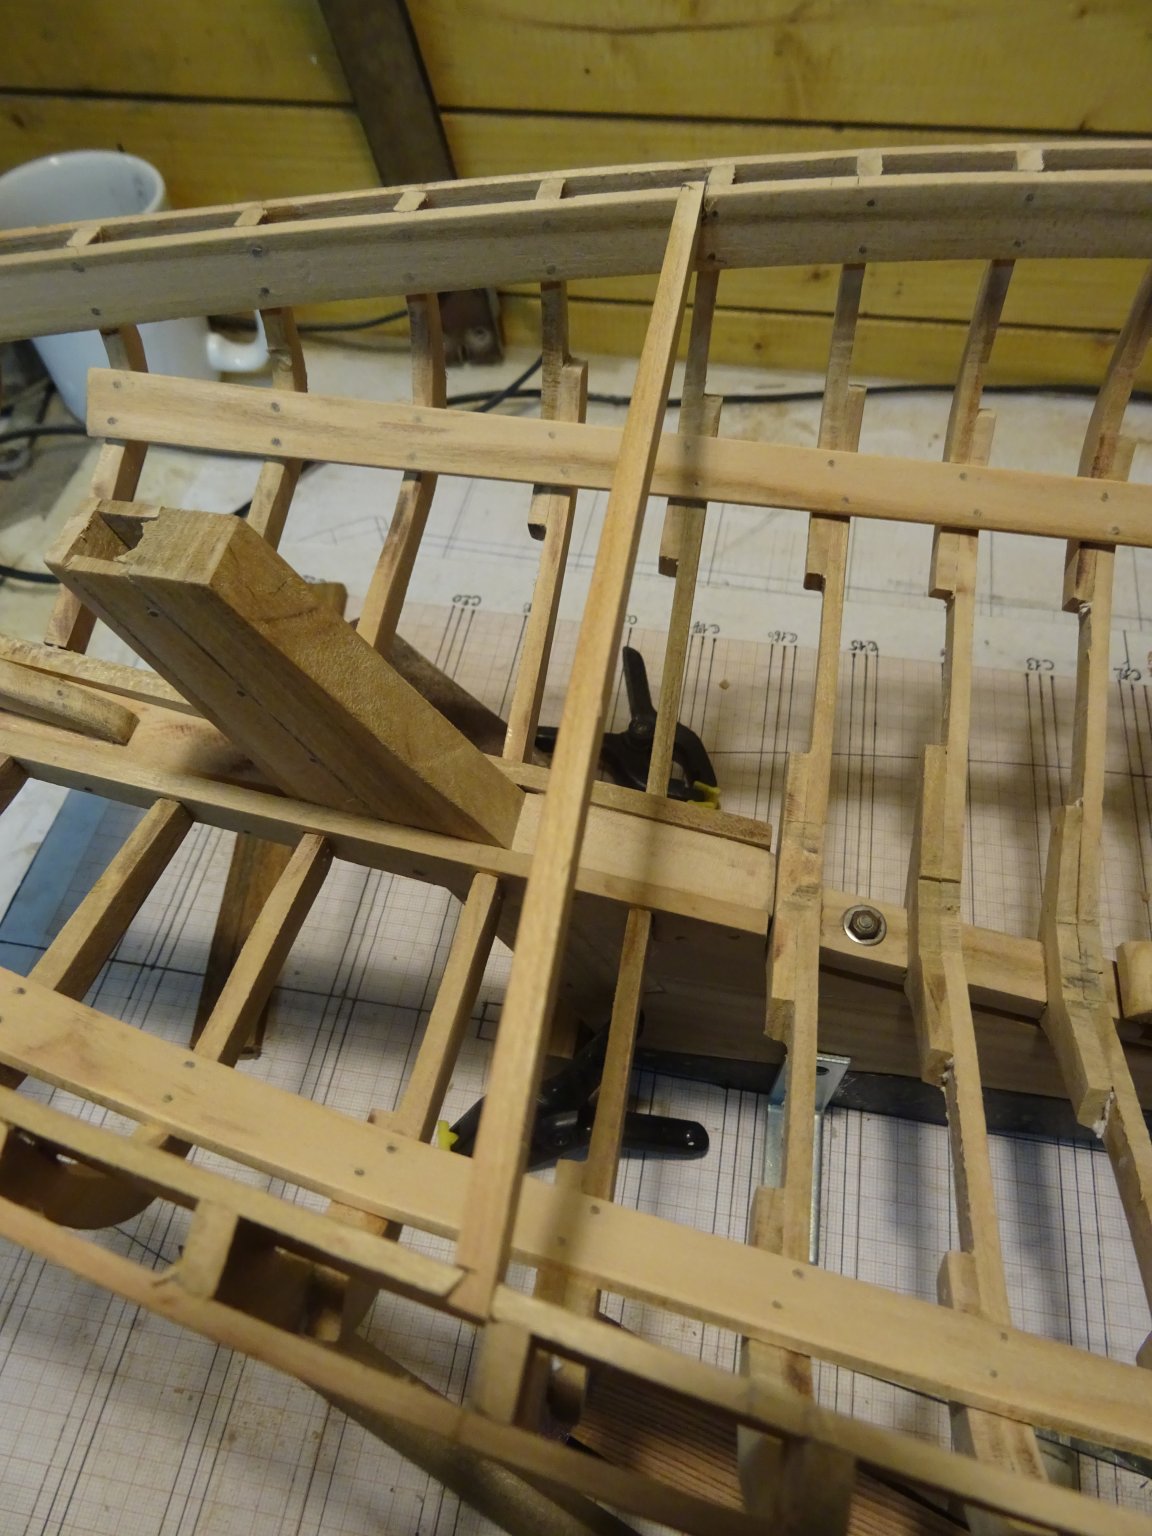
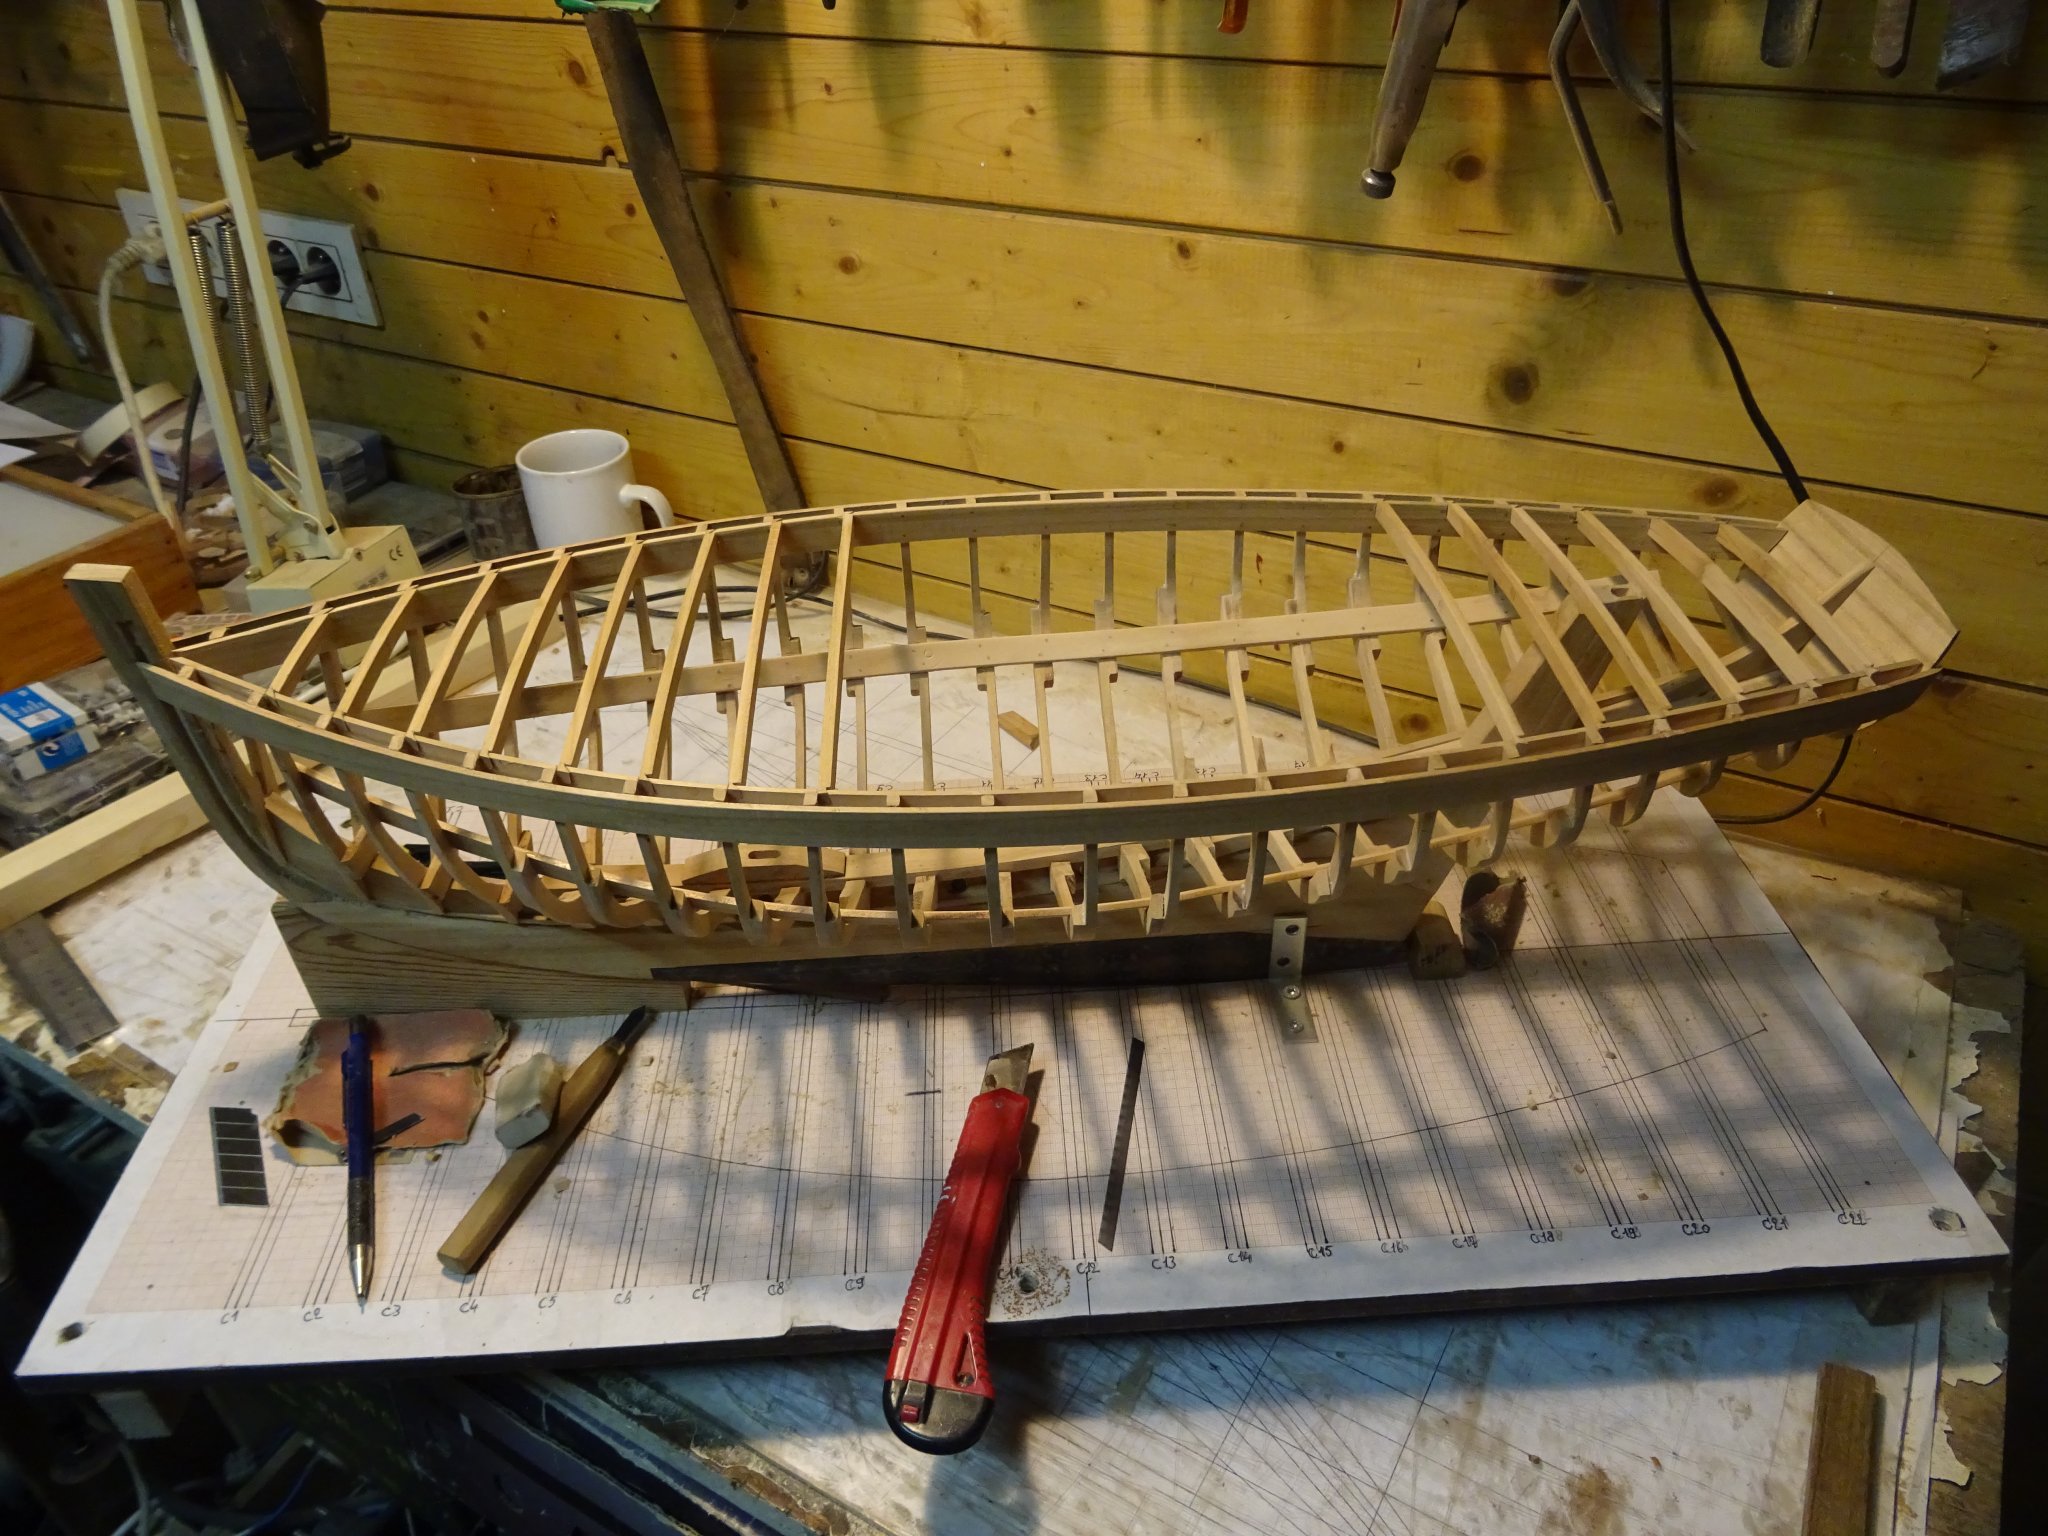
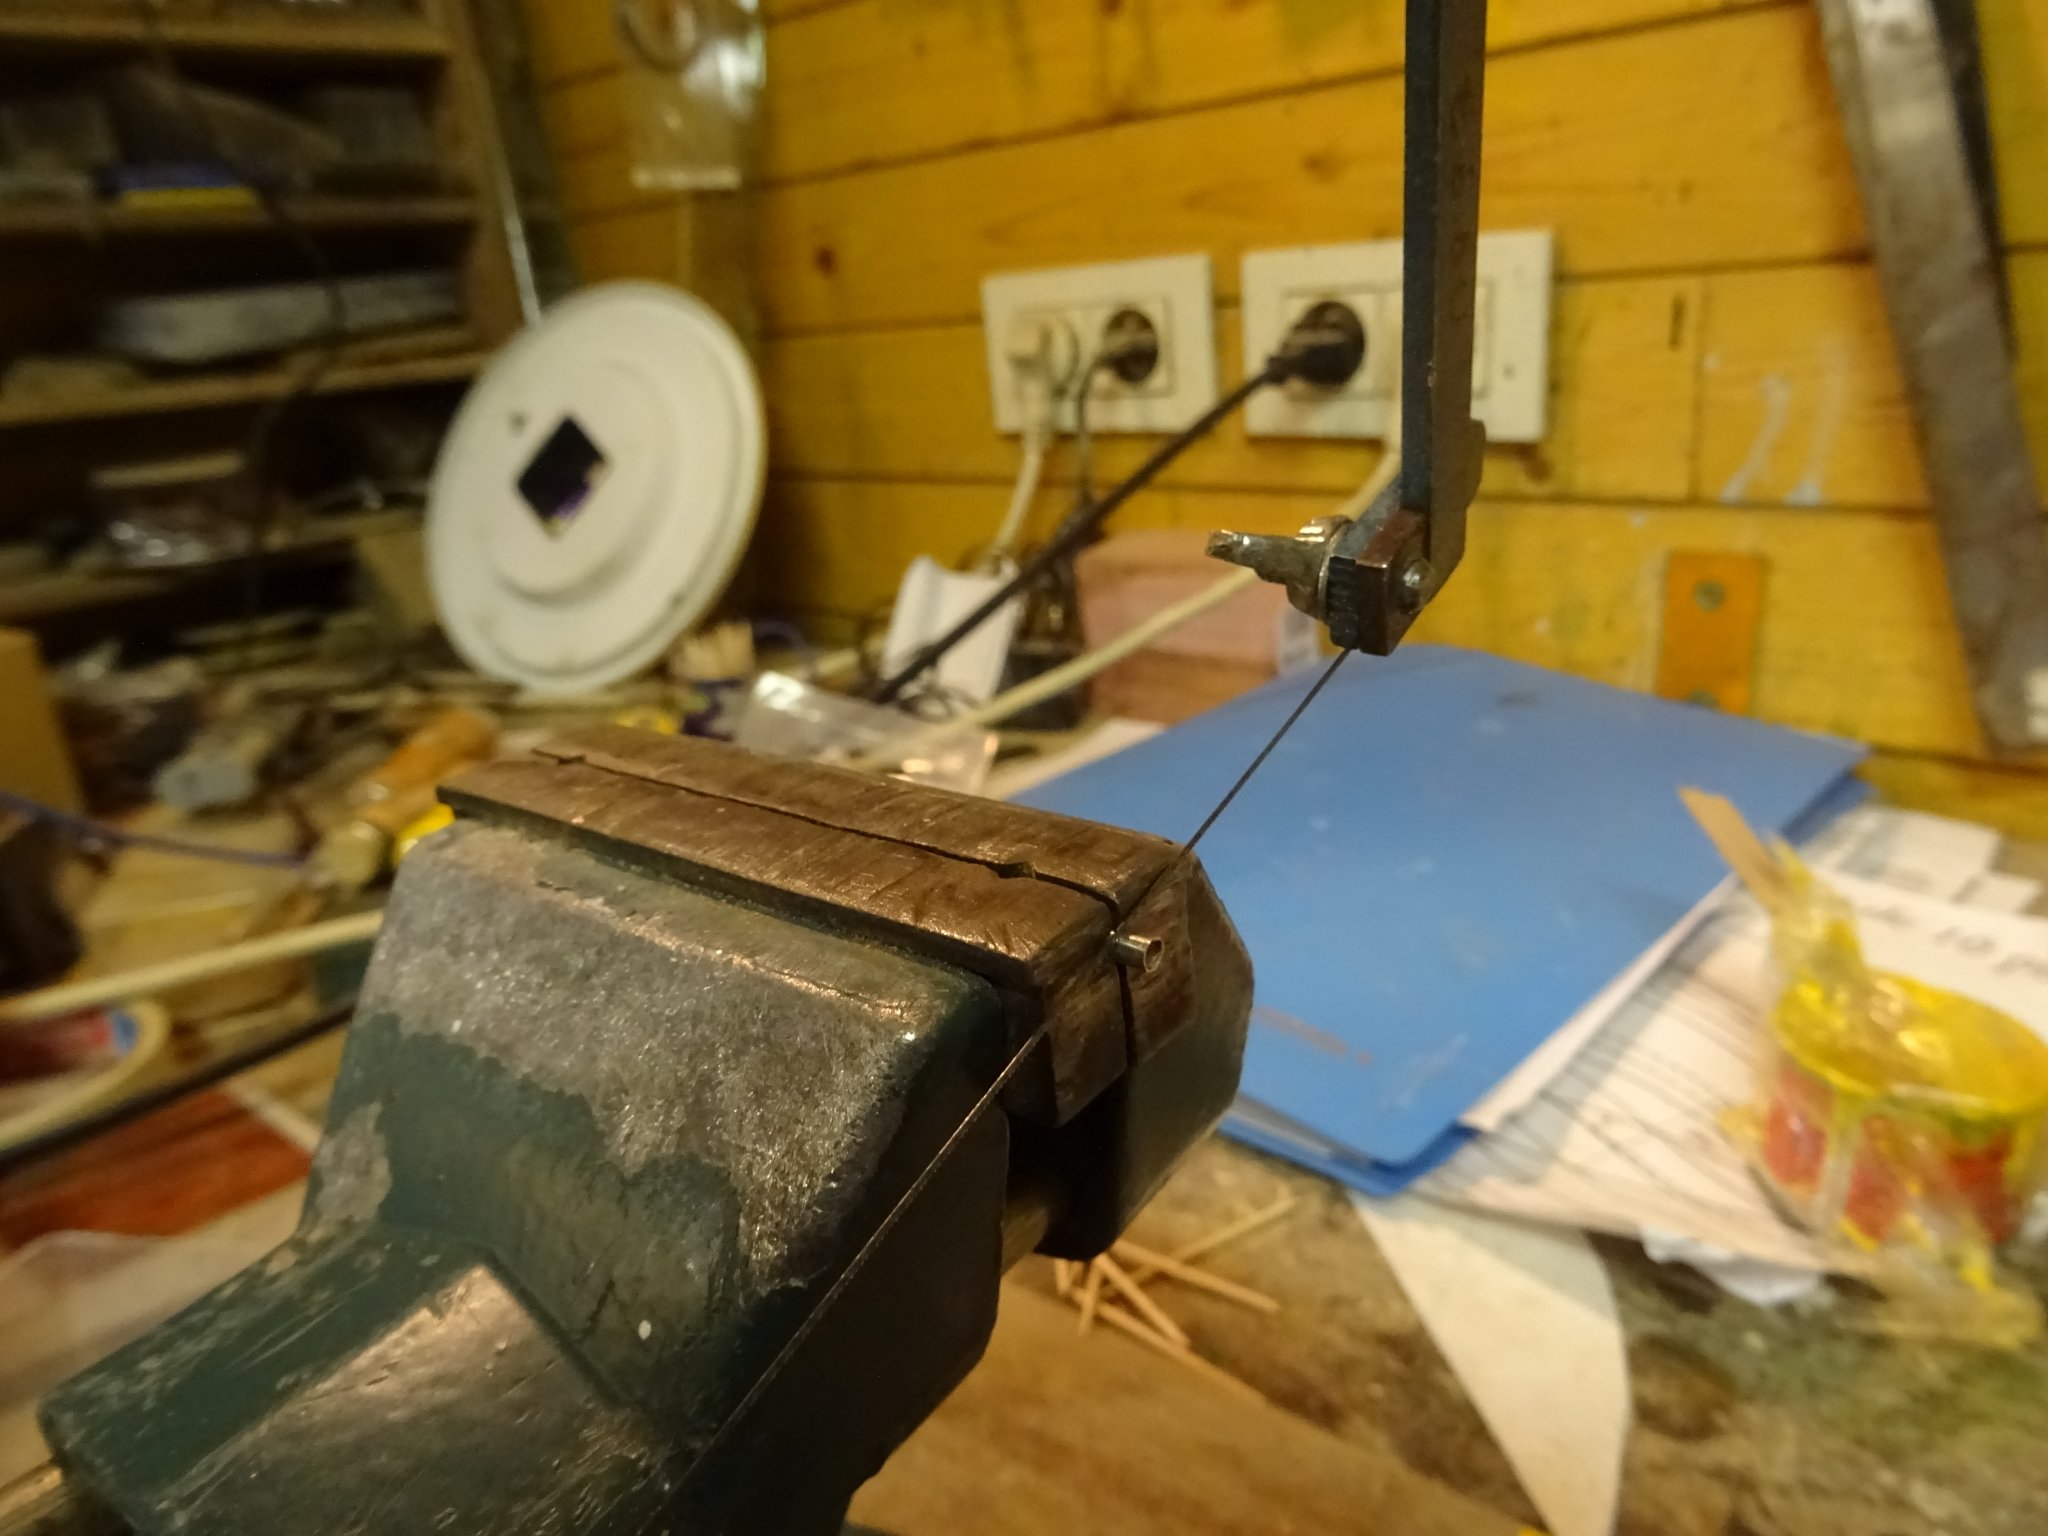
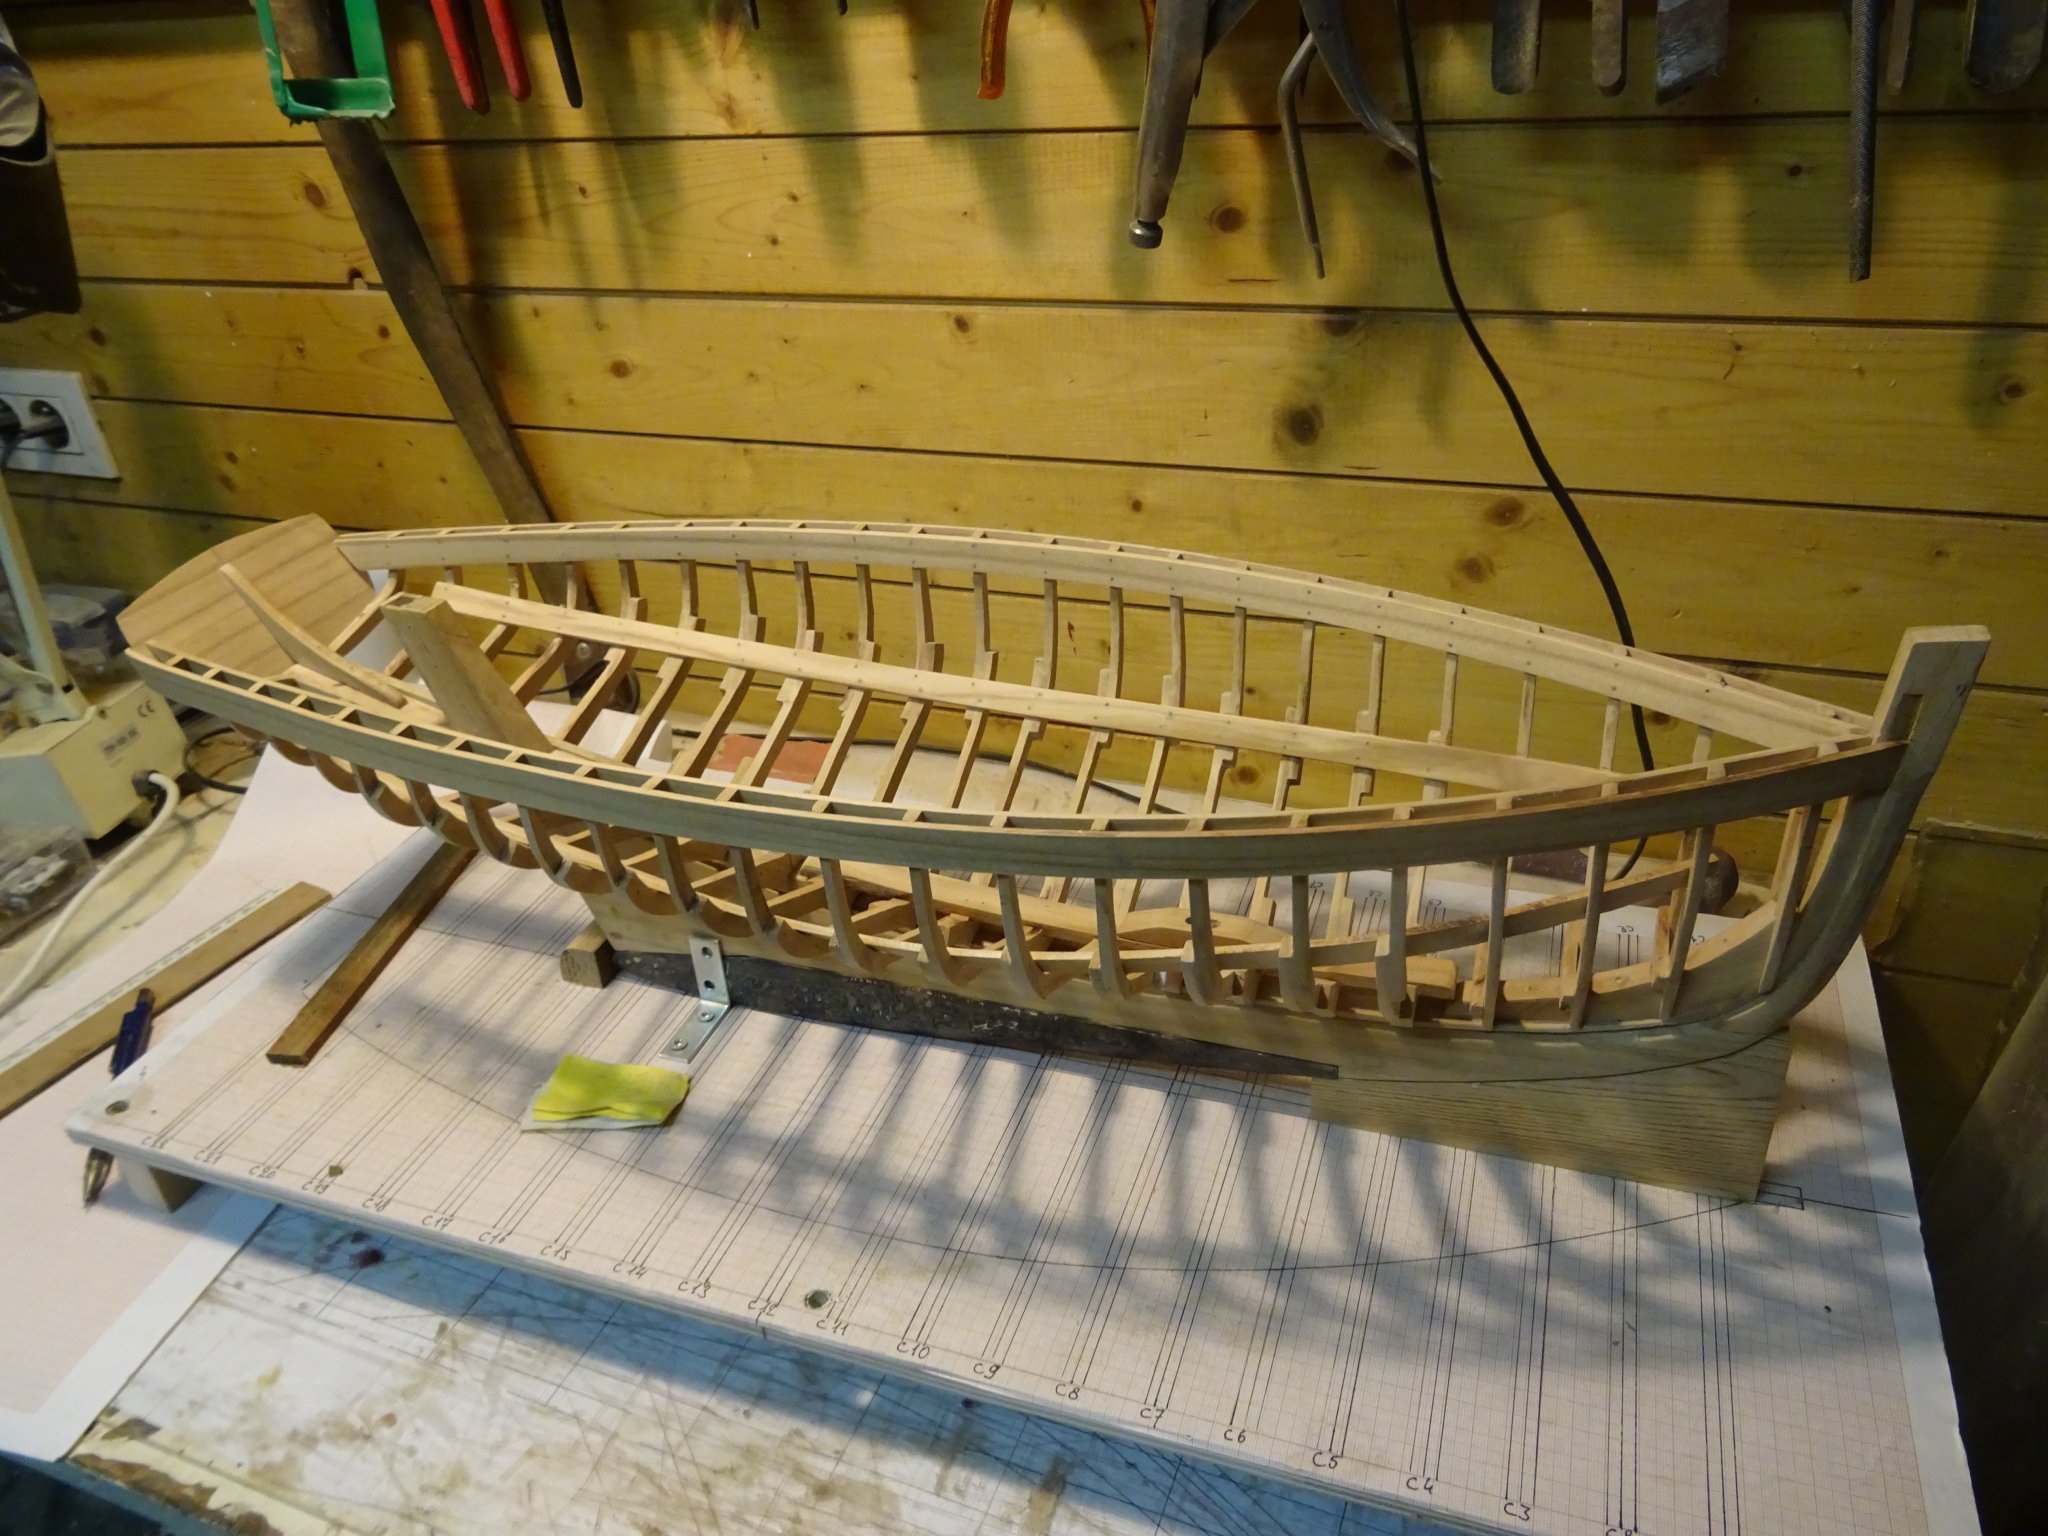
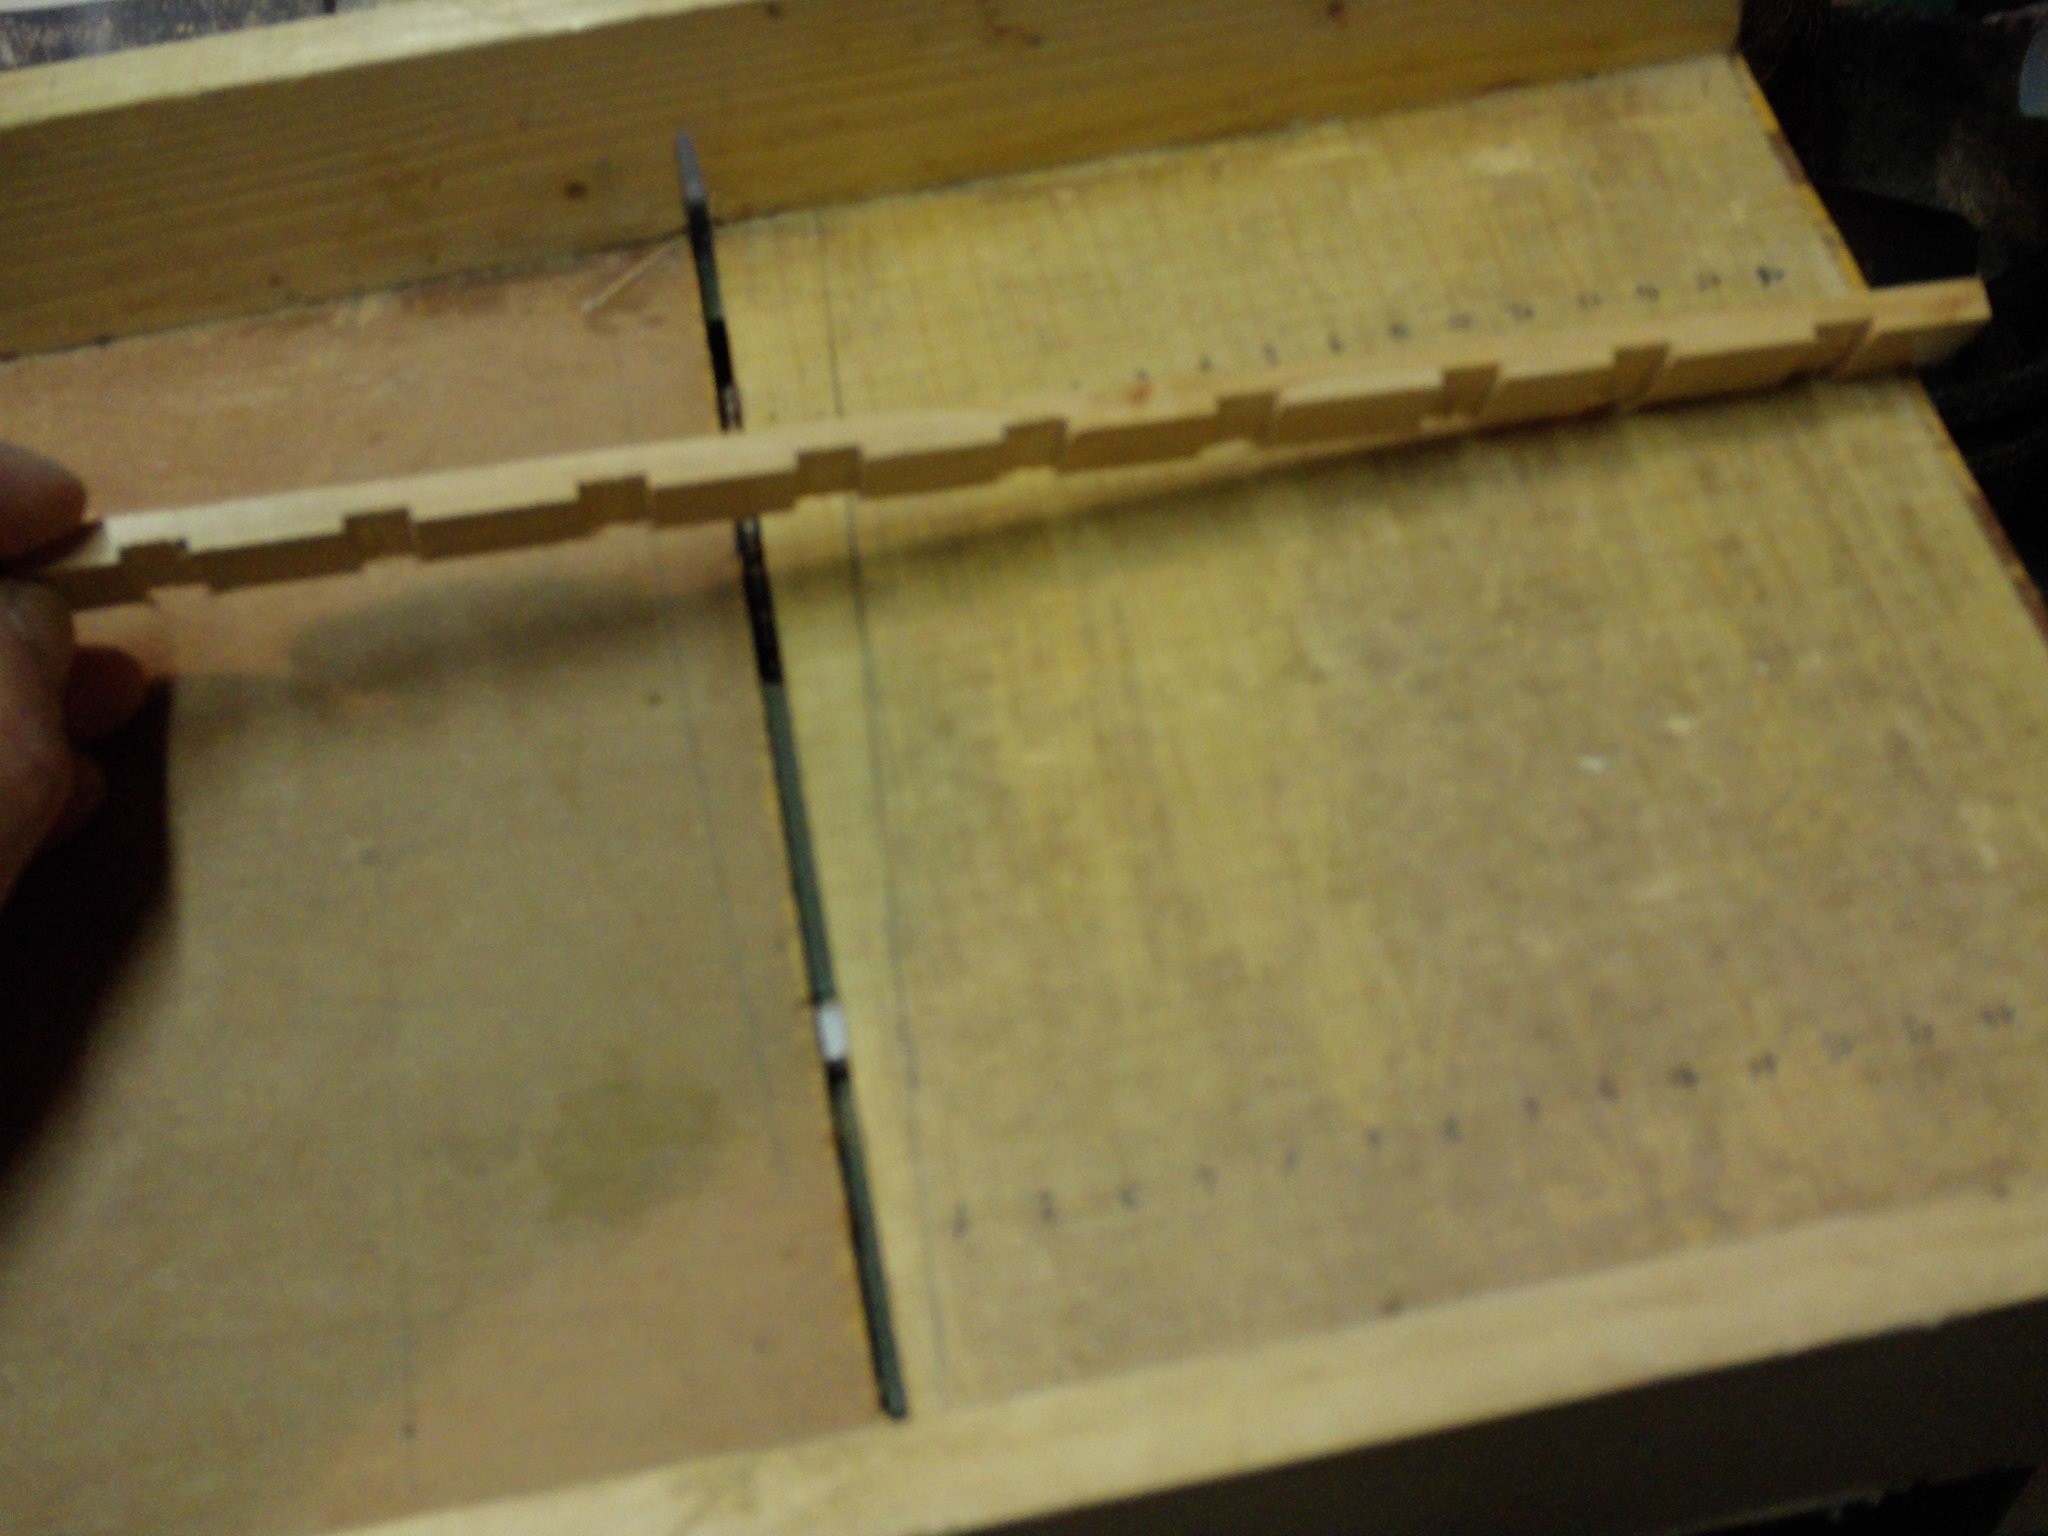
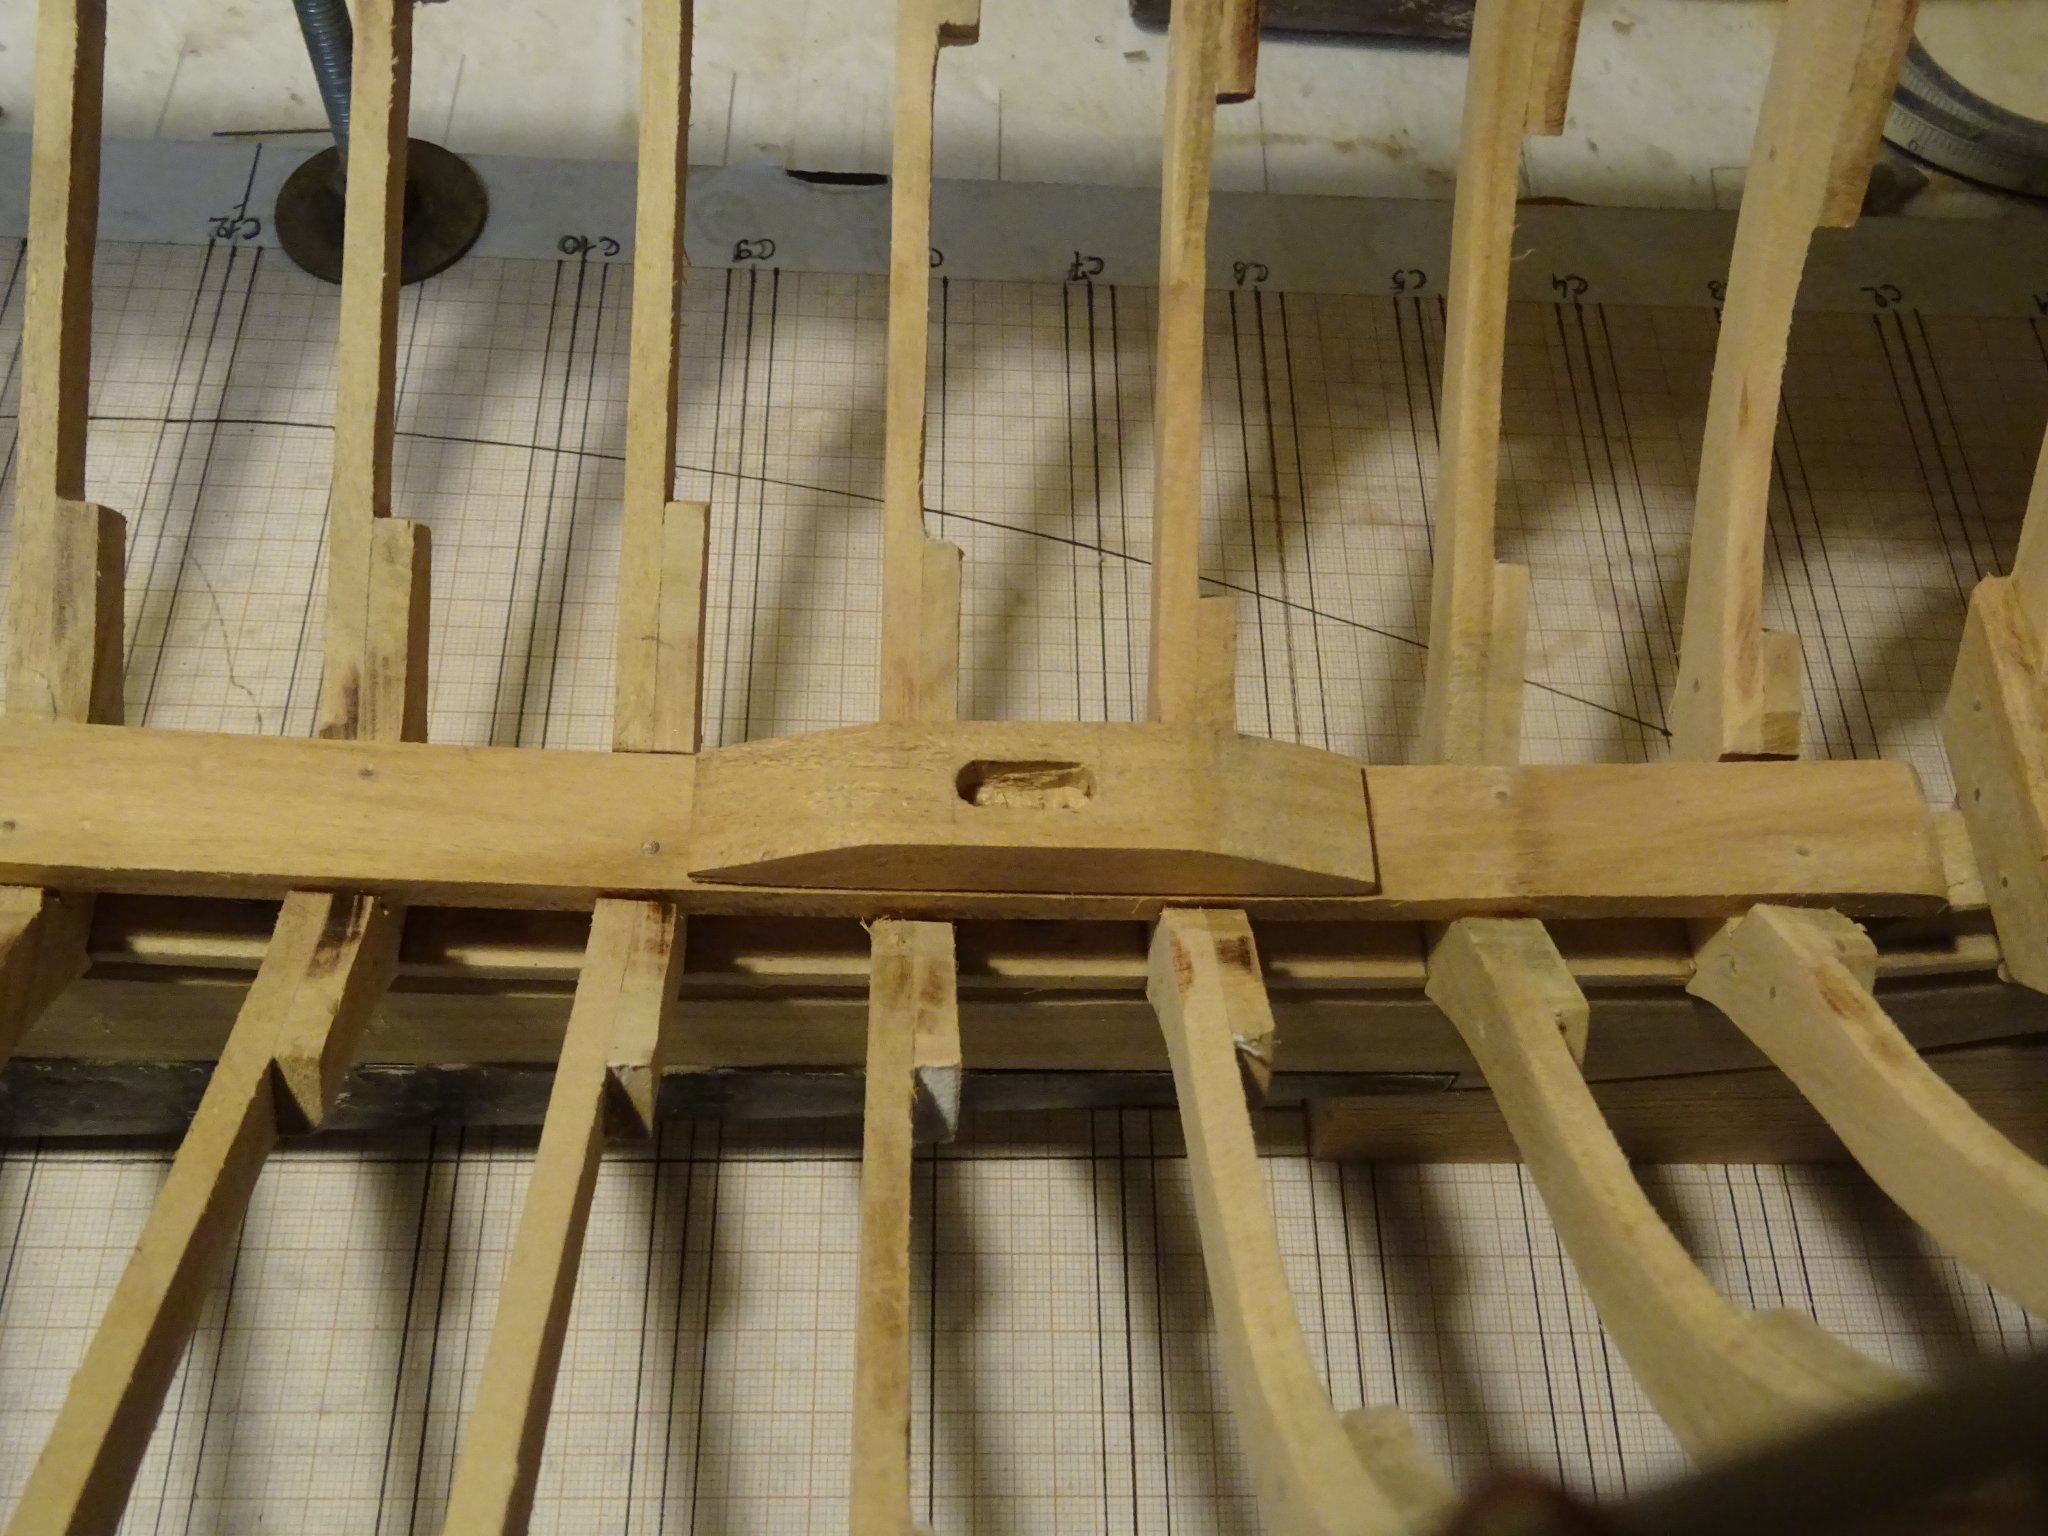
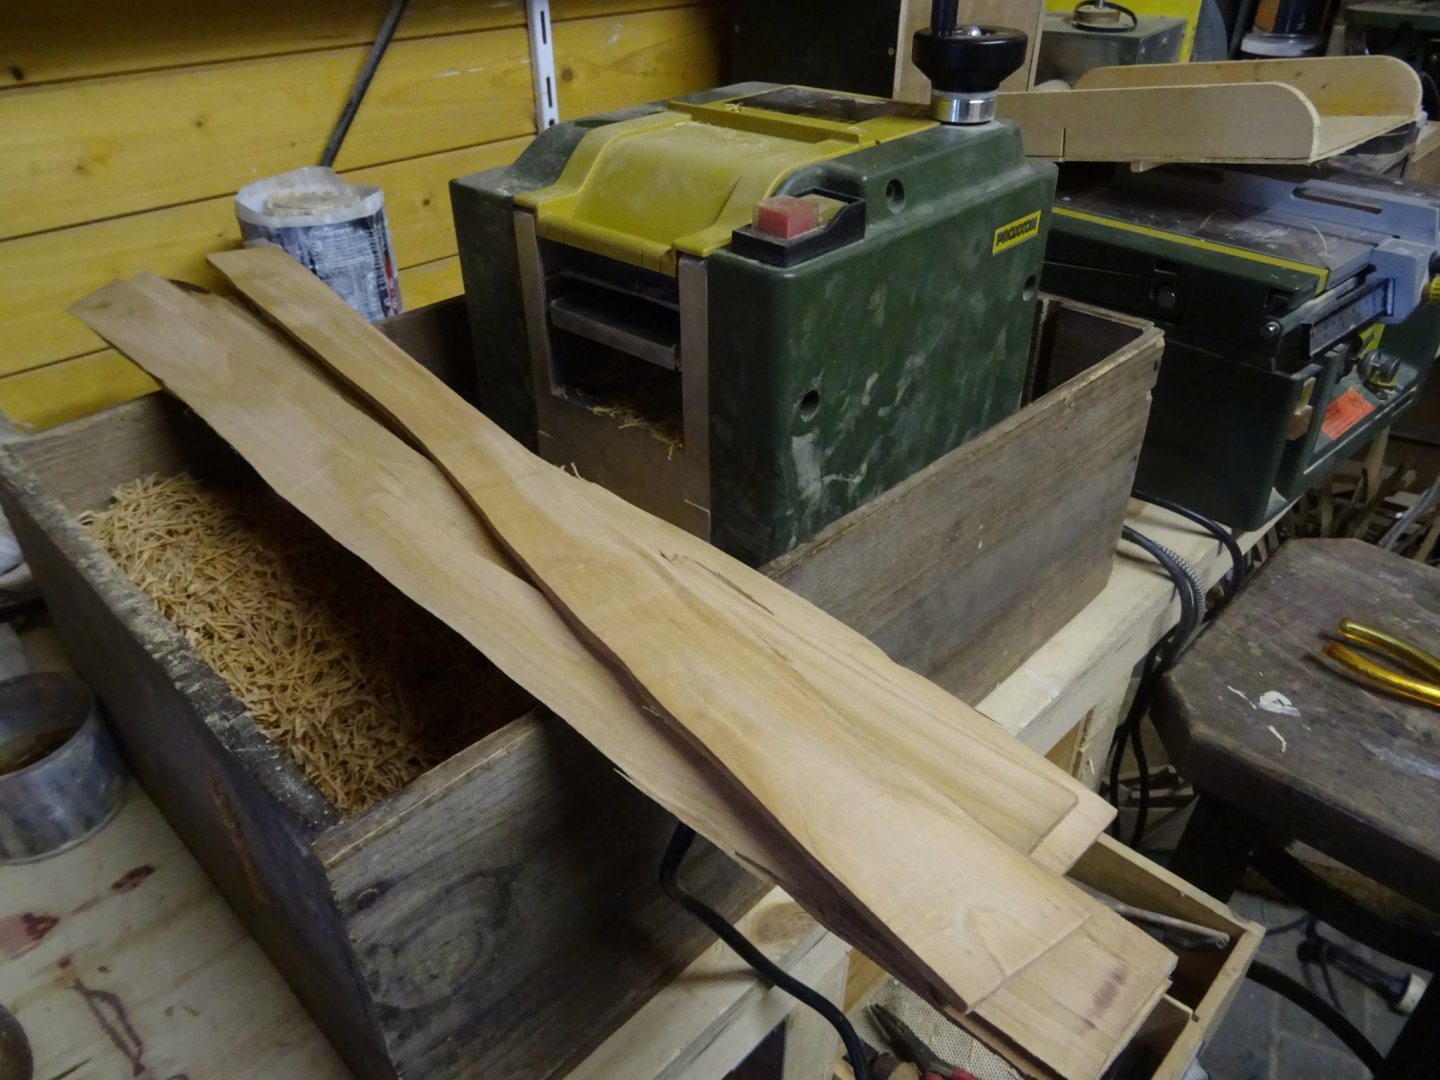
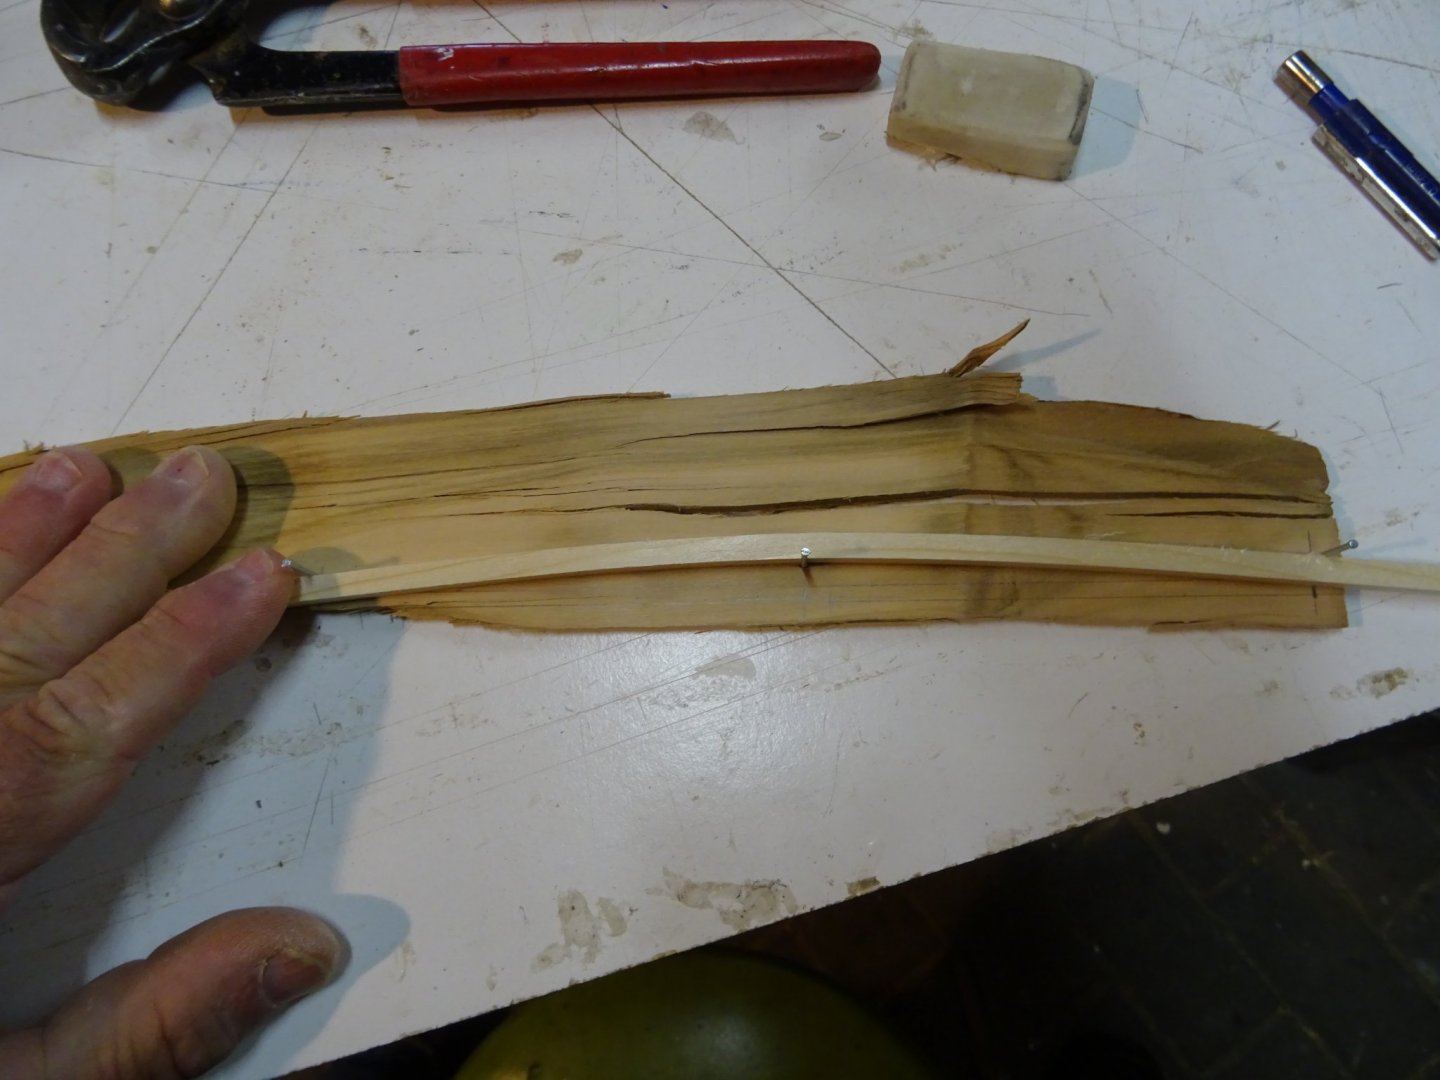
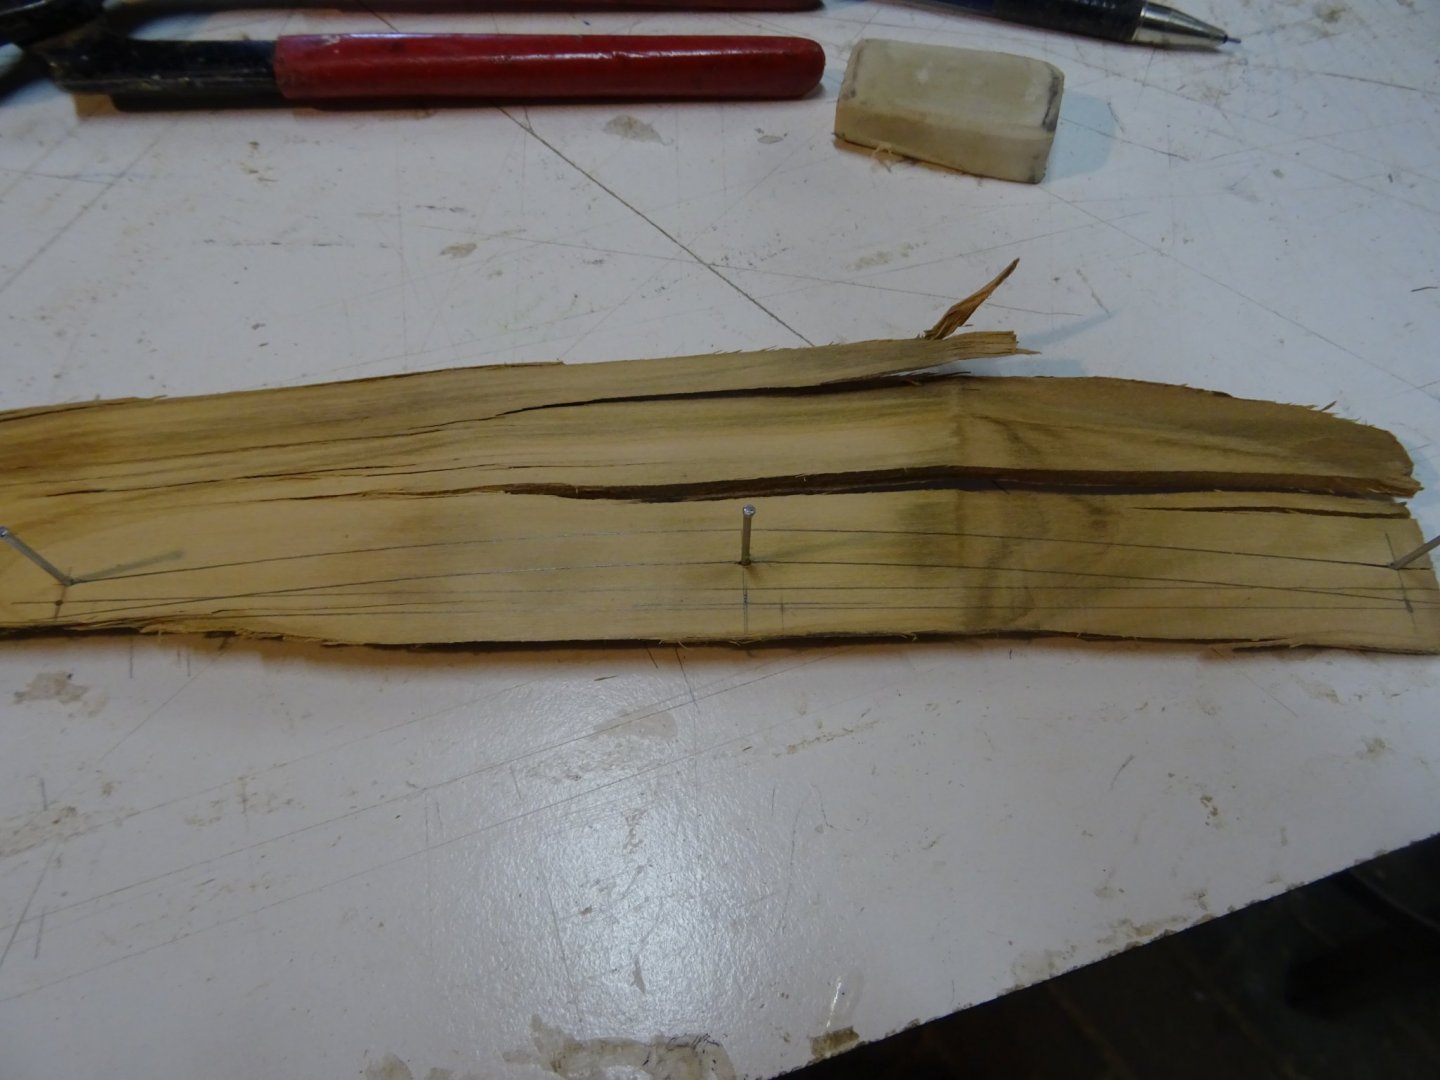
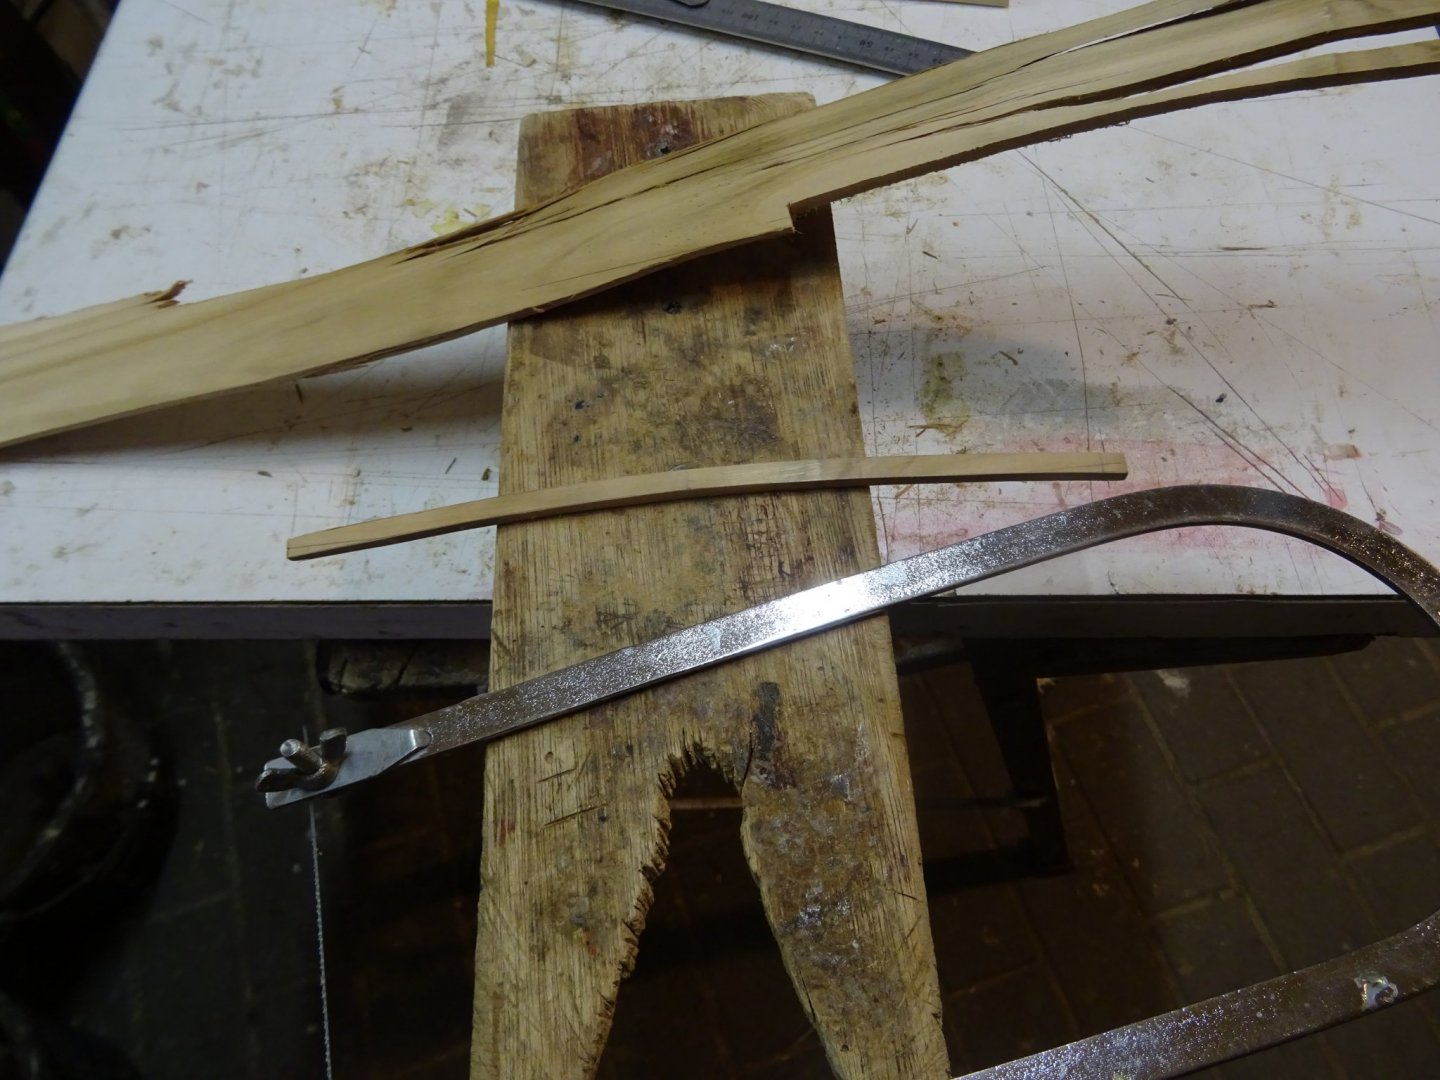
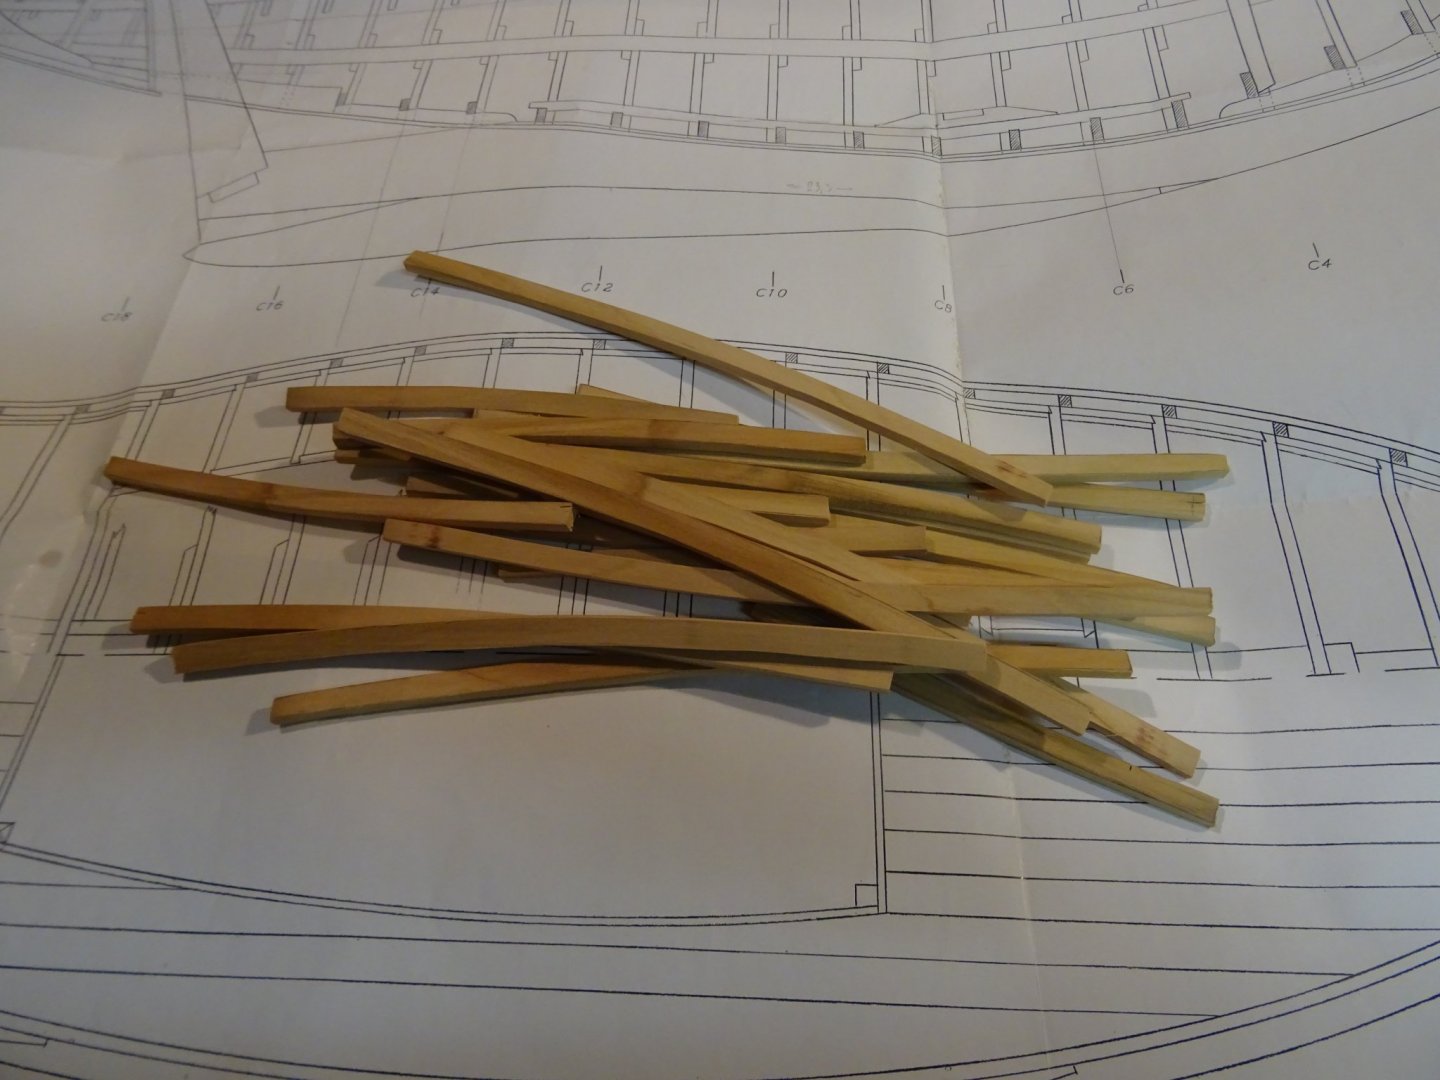
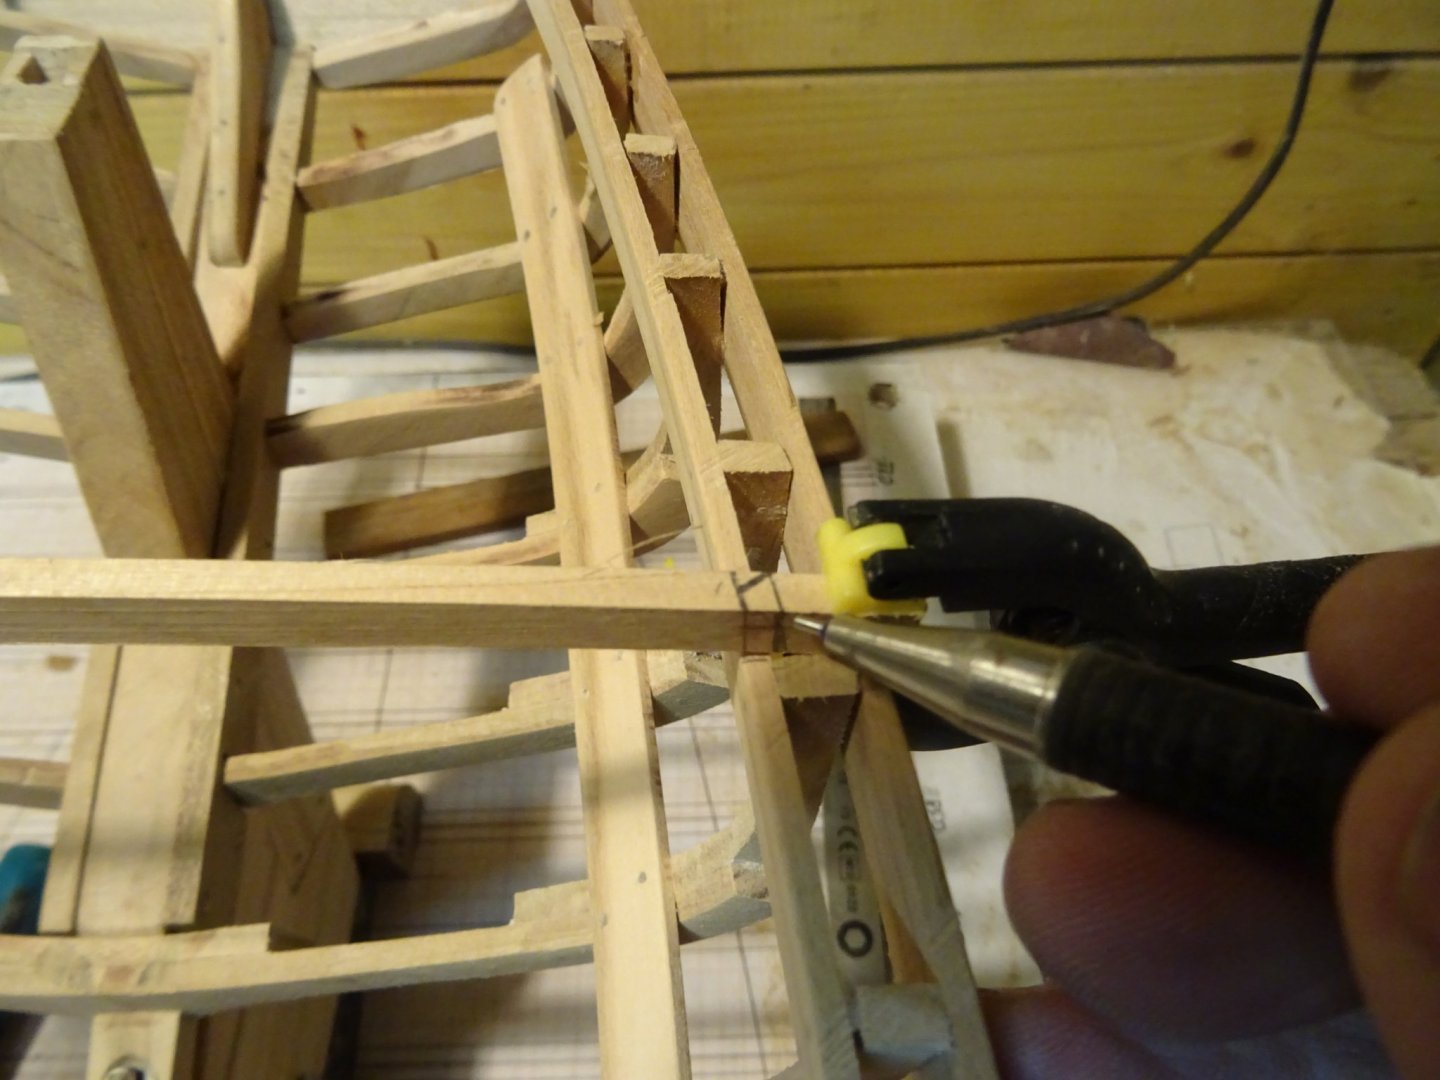
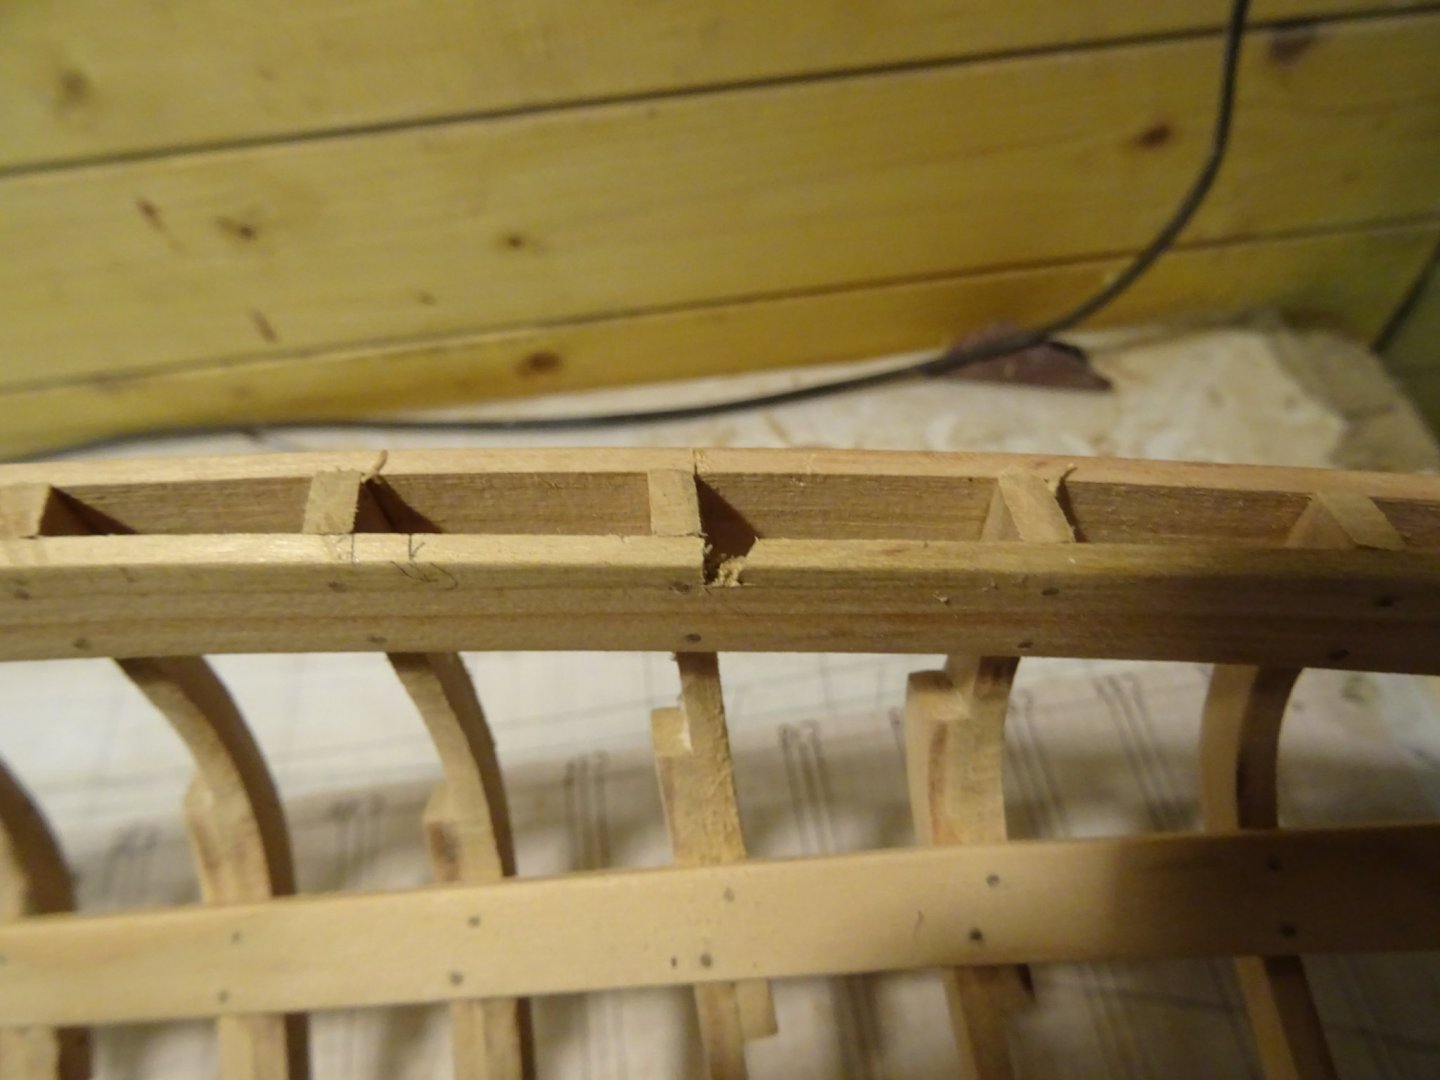
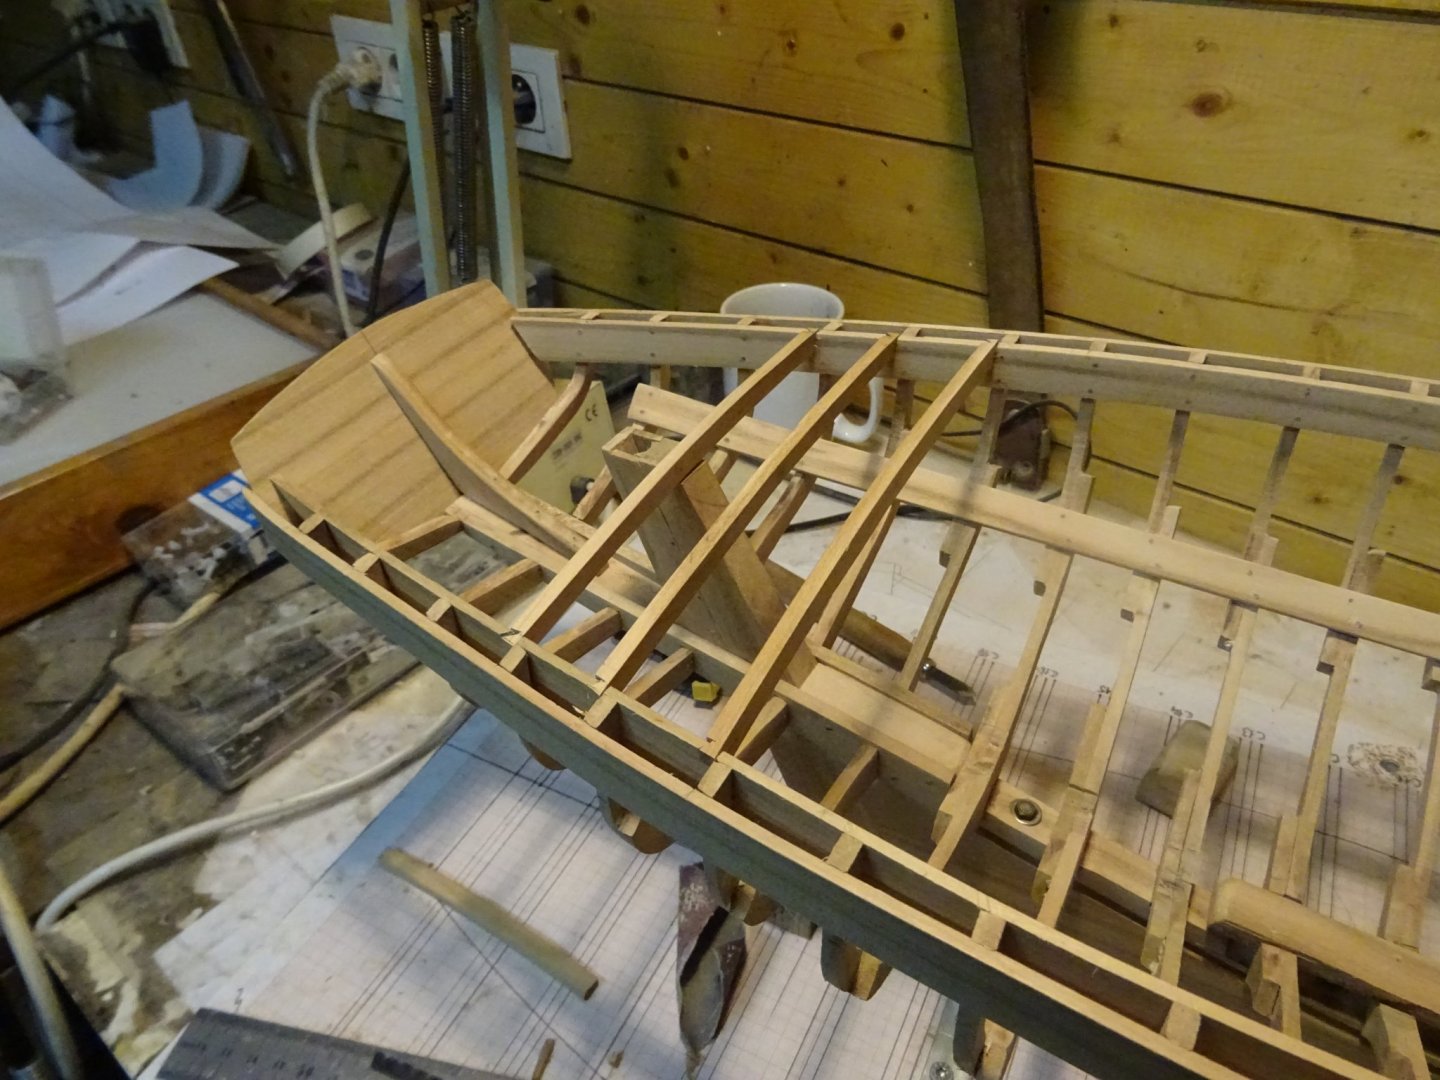
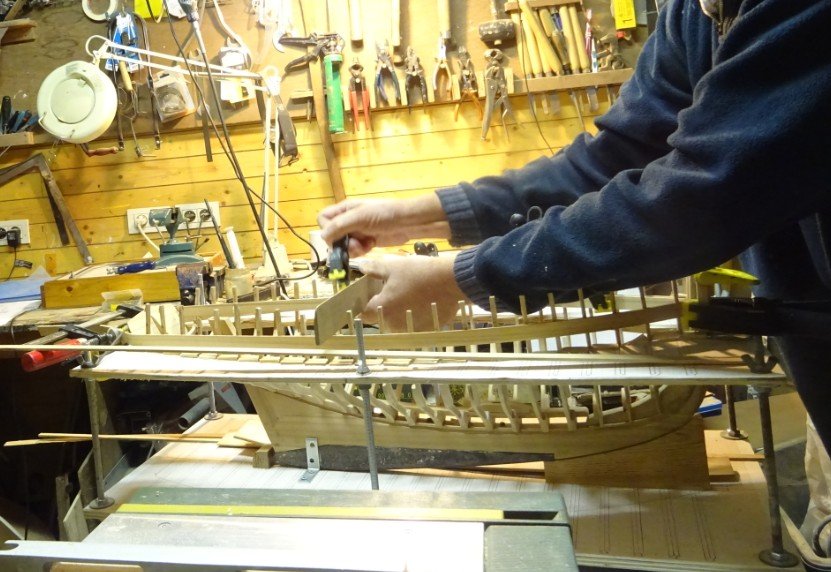
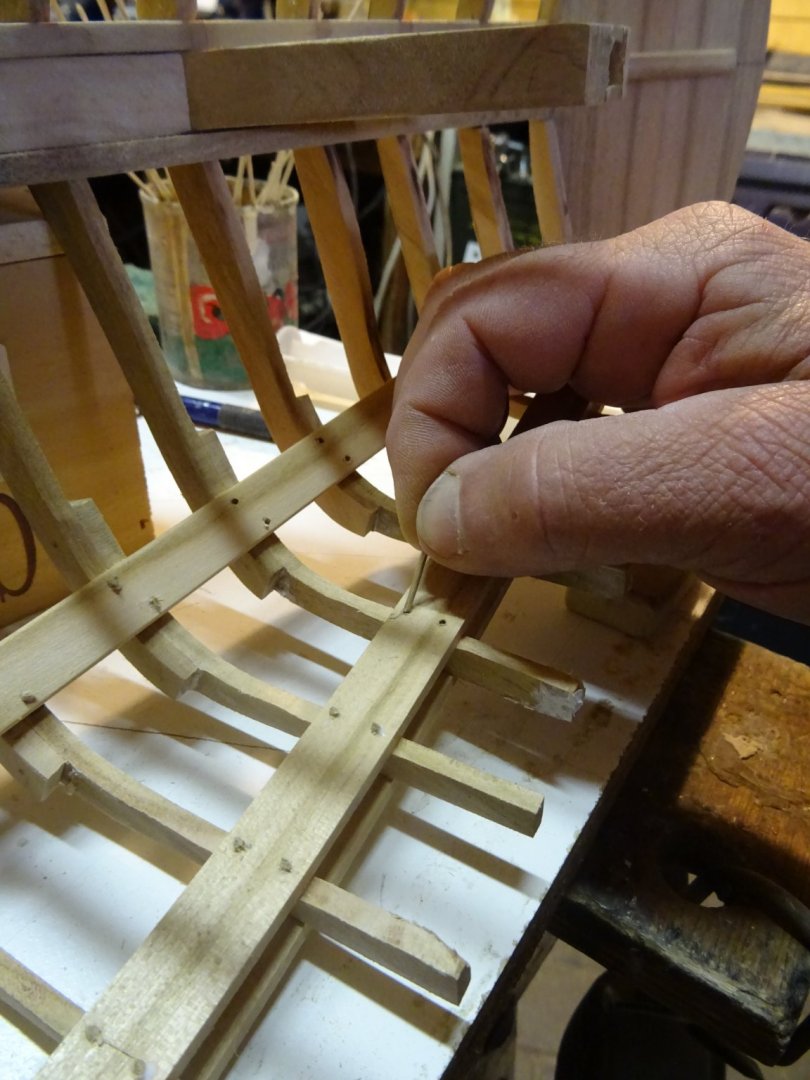
5. The deck structure Before I can start to make deck beams, I have to prepare some more wood supply. I saw some planks with the circle table saw and plane them to 4mm thickness. Drawing the deck curve on one of the planks with the help of three nails and a flexible pine lath. I saw the beam first with the fret saw... ... and sand it to the final shape with the band sander. This first deck beam will serve as template to draw the next ones. After I sawed an sanded enough pieces to start laying them. The deck beams have to be placed with a half dove tail. Drawing the dove tail on the beam. After they have been sawn. I saw the notches for the dovetails in the bean clamp with metal saw blade which is cut off. First deck beam placed. The two deck beams which bound the cockpit are placed. At the front of the helm port a notch has to be sawn to make place for the deck beam. Here the metal saw blade comes in handy again. Continuing to place the deck beams. All the deck beams in front and behind the cockpit are placed, time to start something else. But that is for next week. Thank you to follow. Thank you for the likes.. Thank you for your constructive comments. Till next week!


- 168 replies
-
- 23
-

-
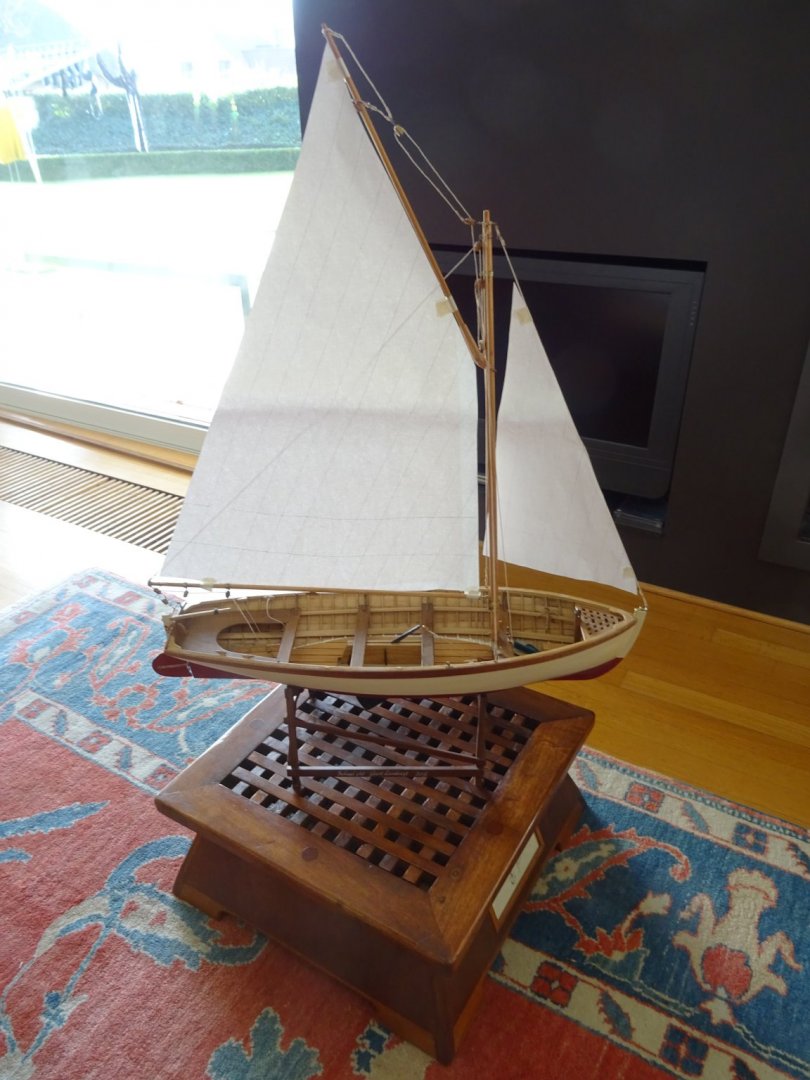
Thank you all for these friendly complements. And yes, I also like the lines of the hull very much. The Bretons knew how to build elegant vessels. It is hard to believe that this boat was even not 7m long.
-
Yes, impressive and very elegant.
-
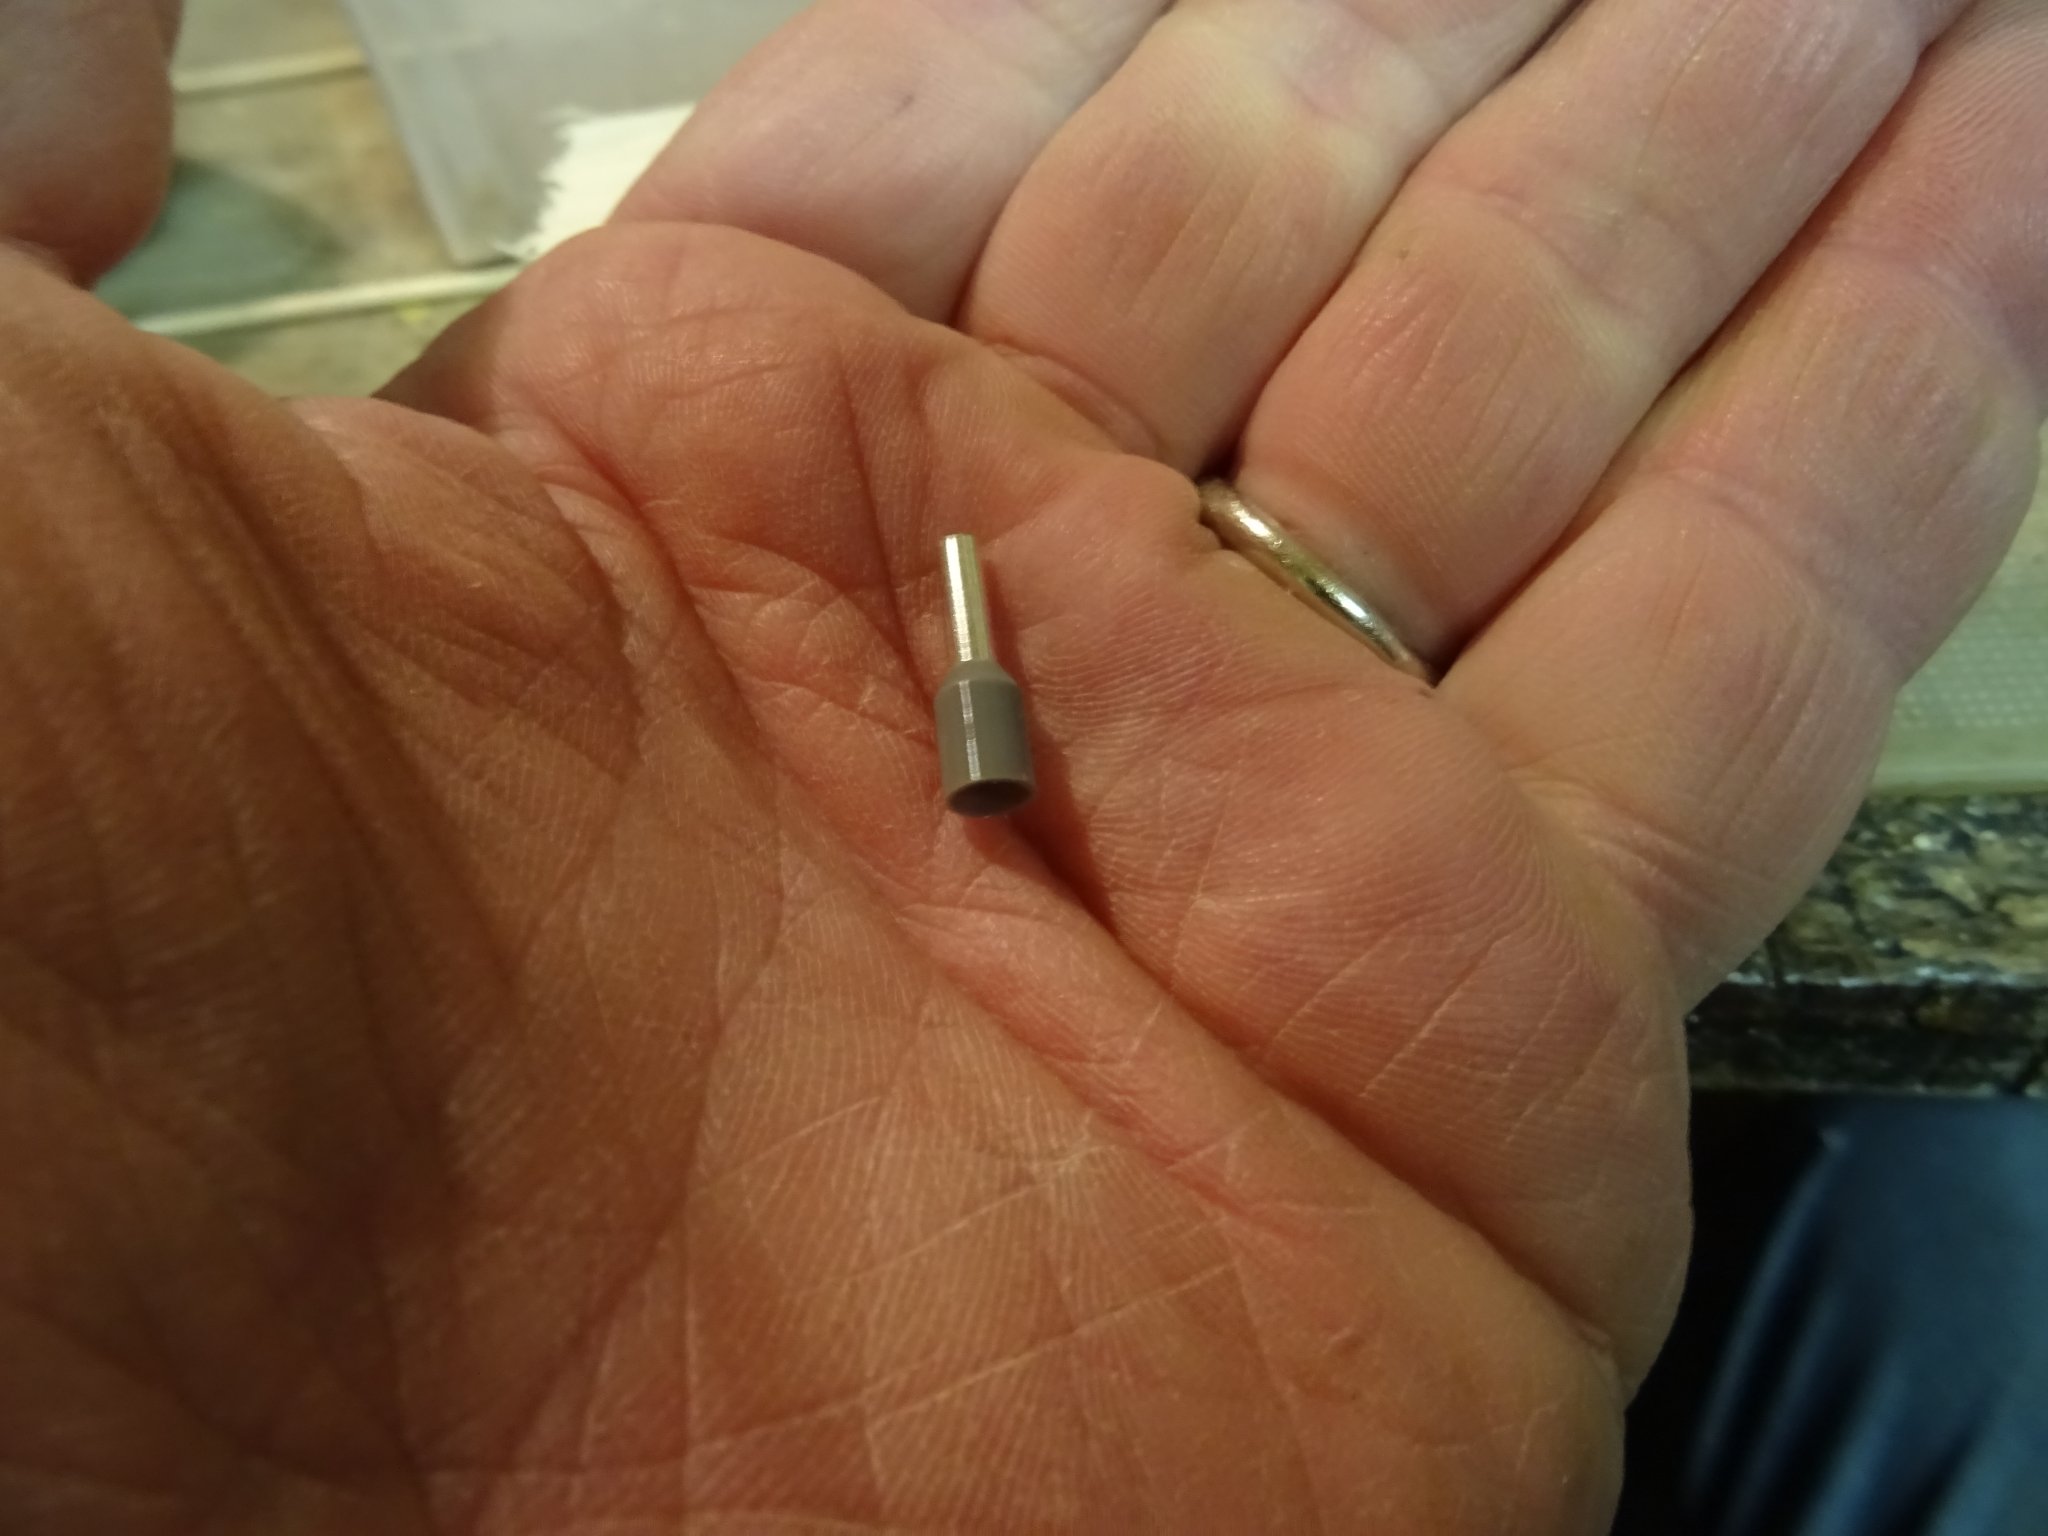
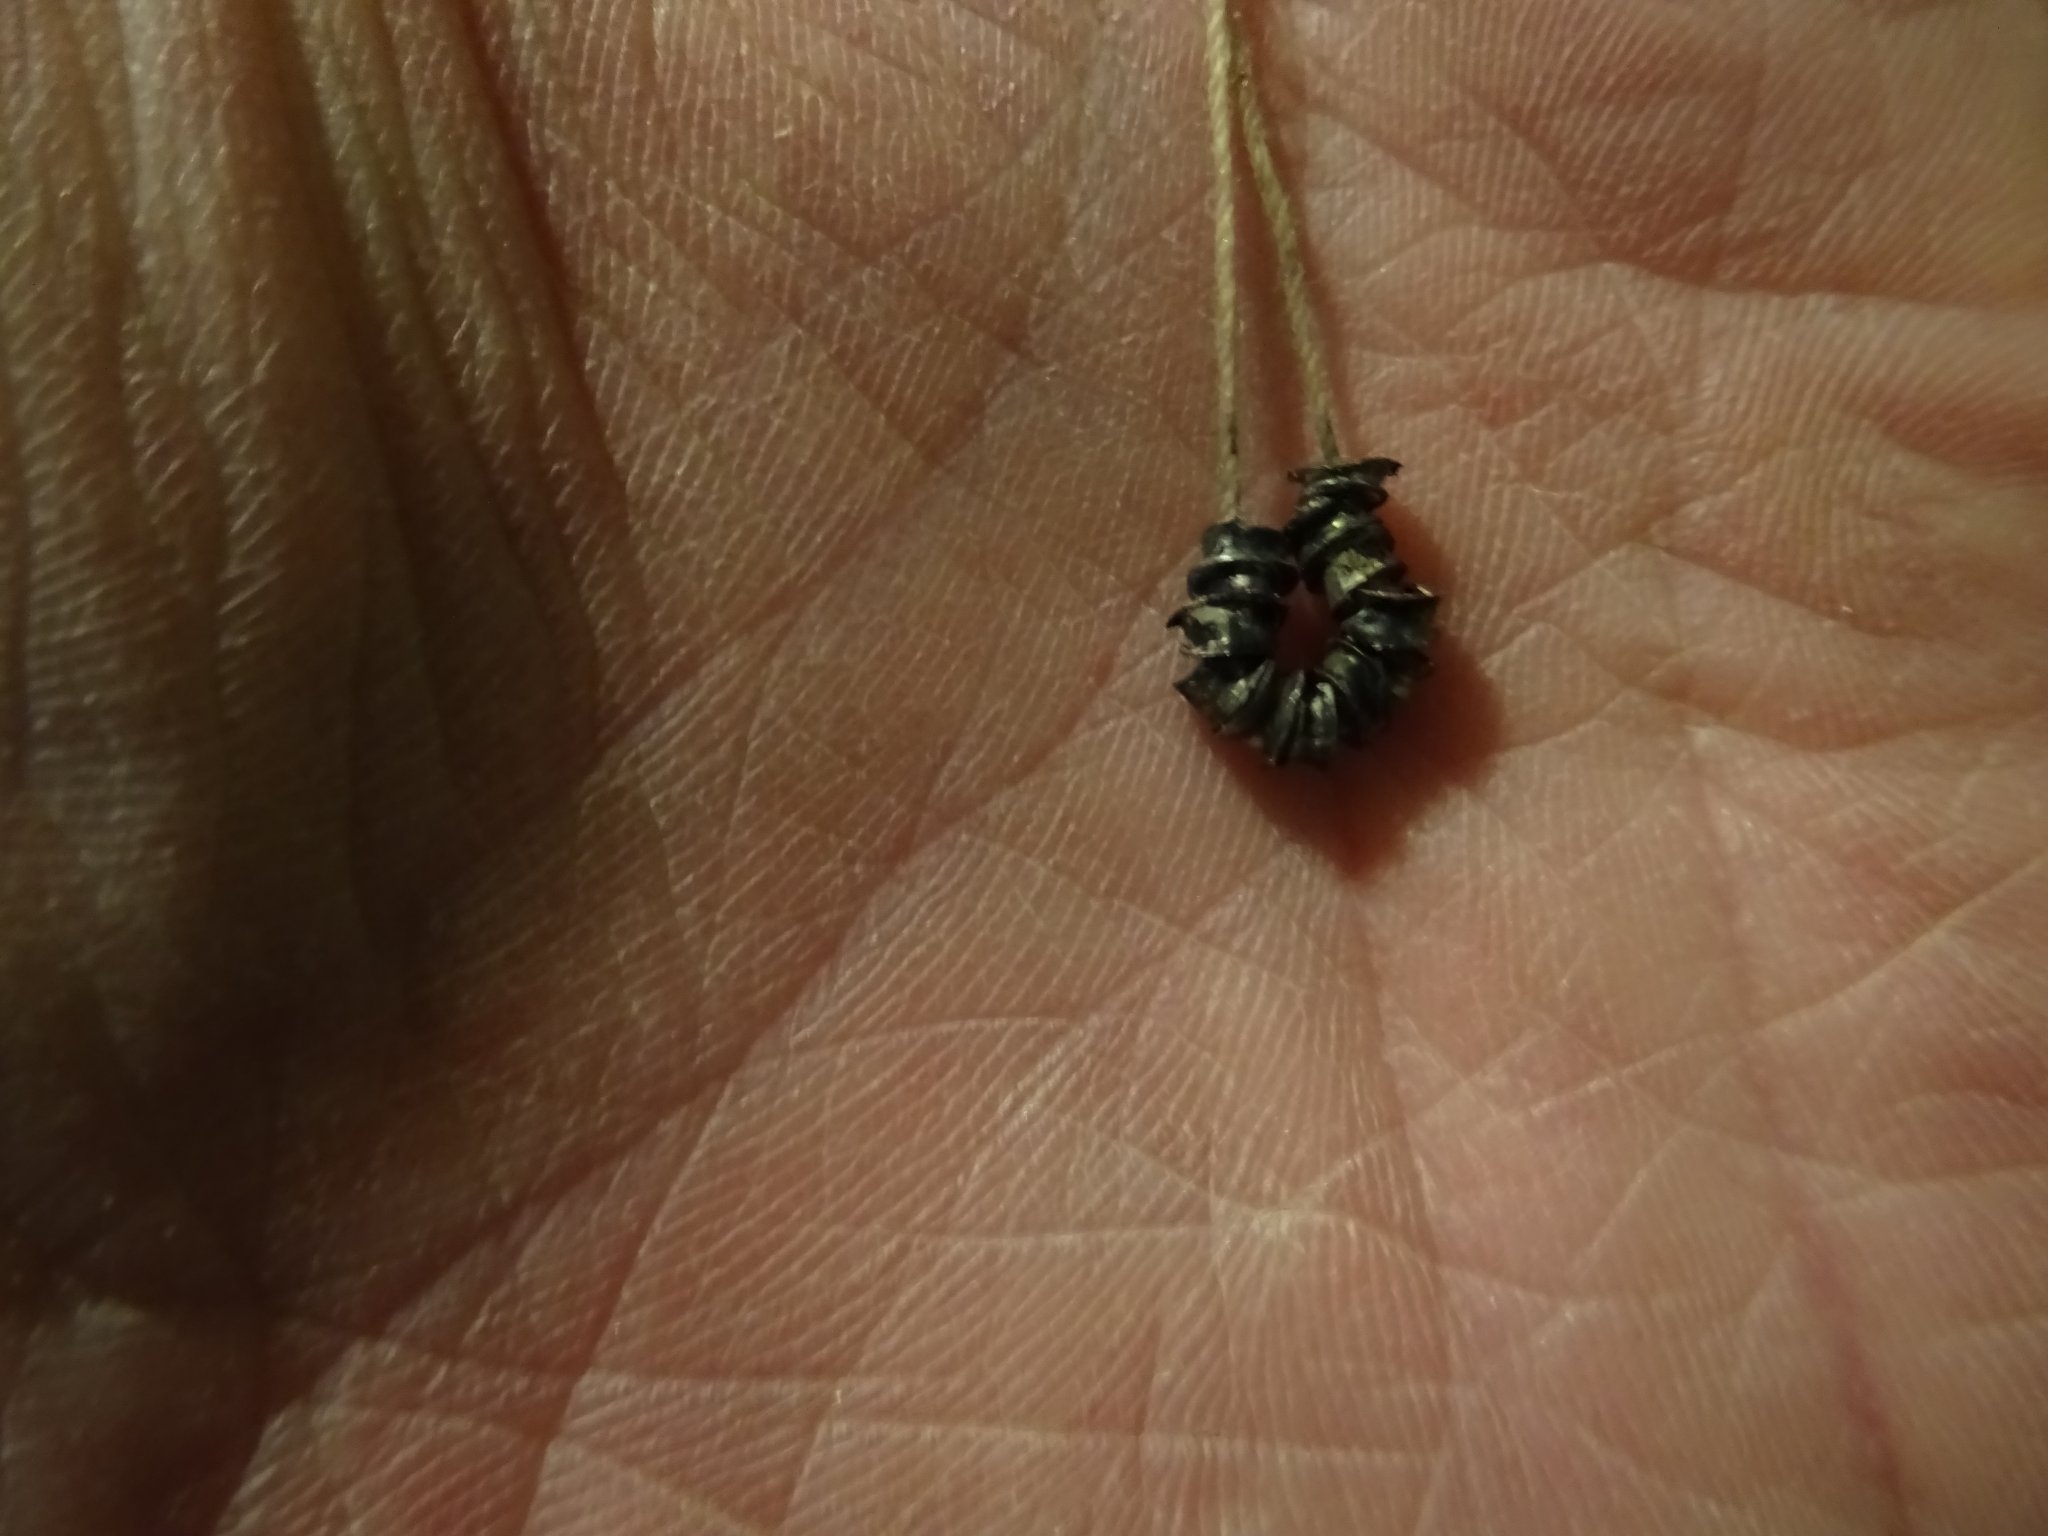
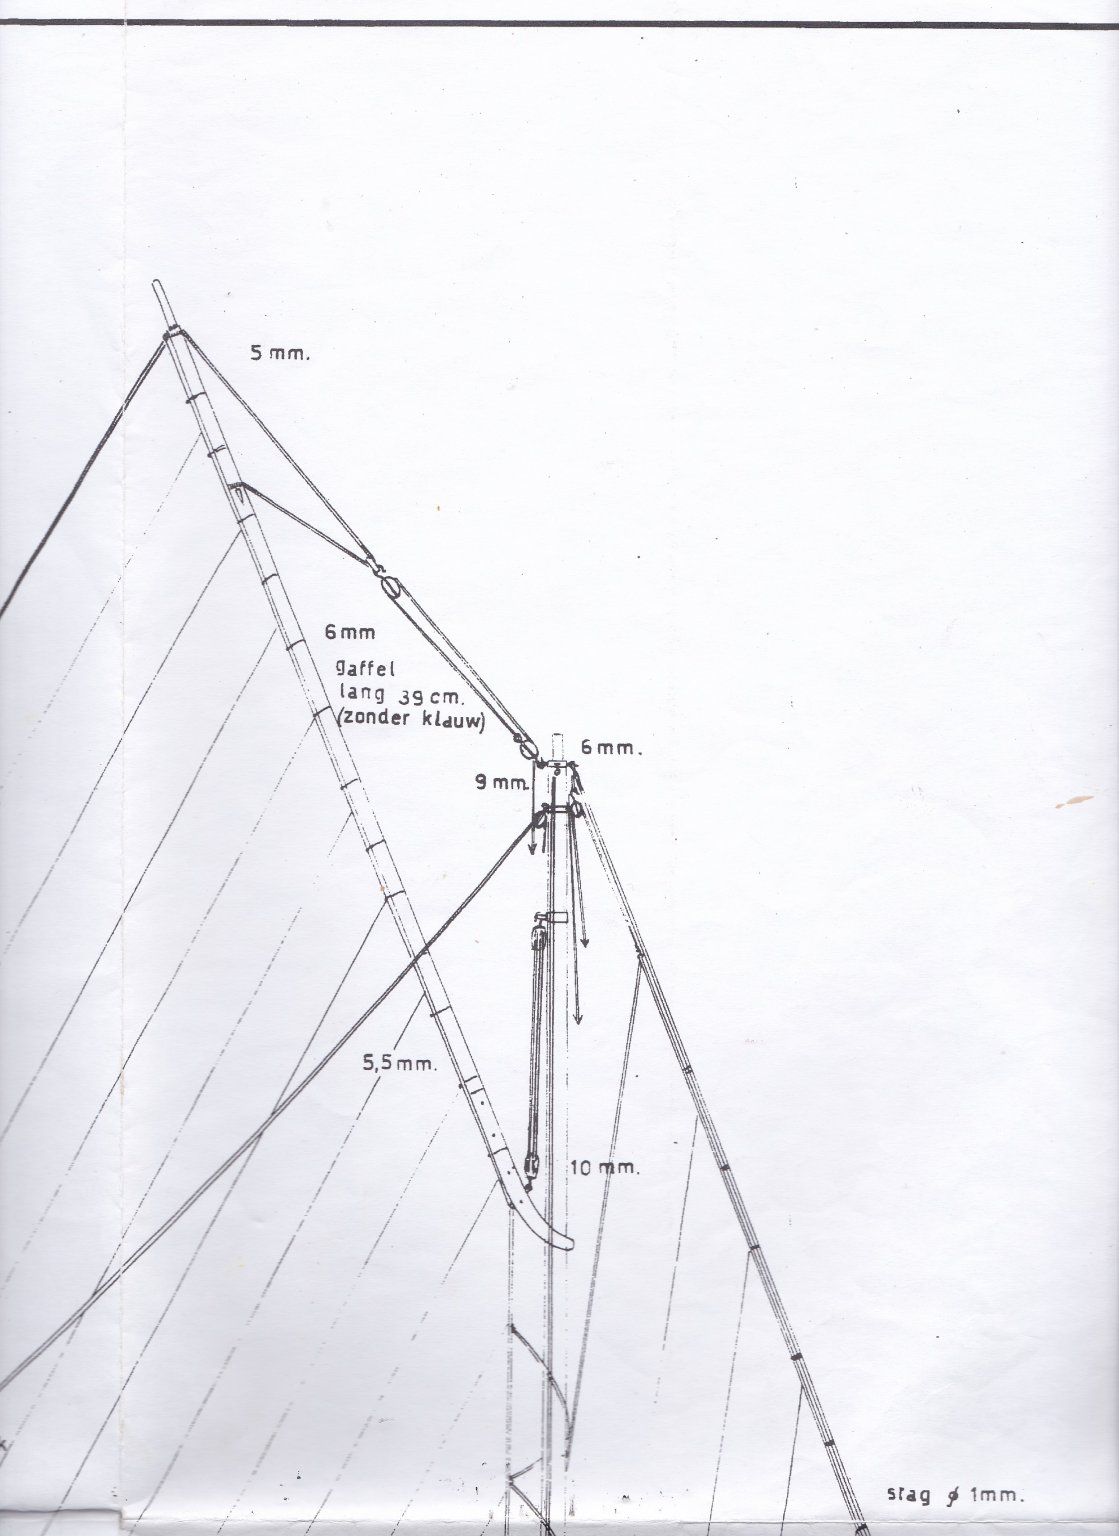
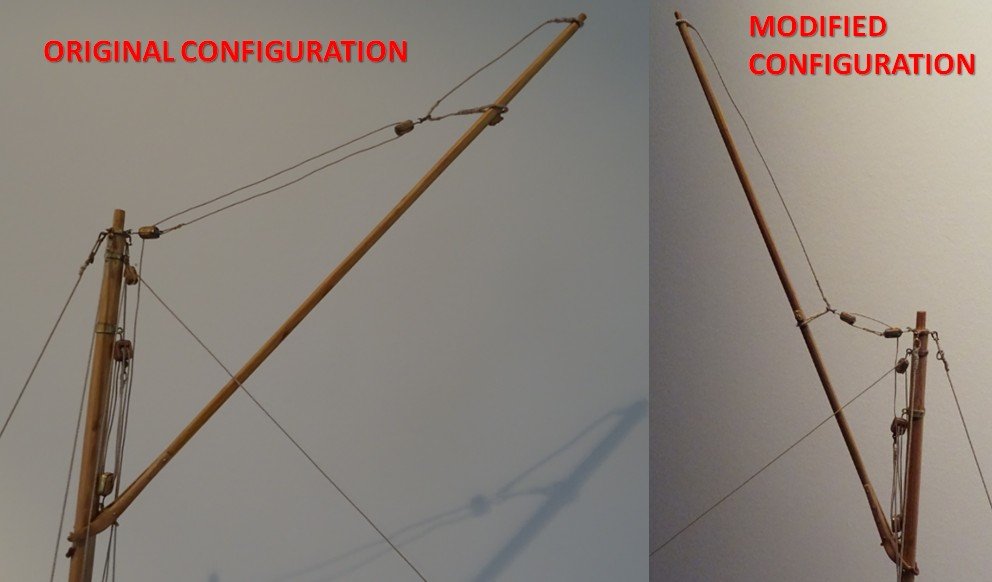
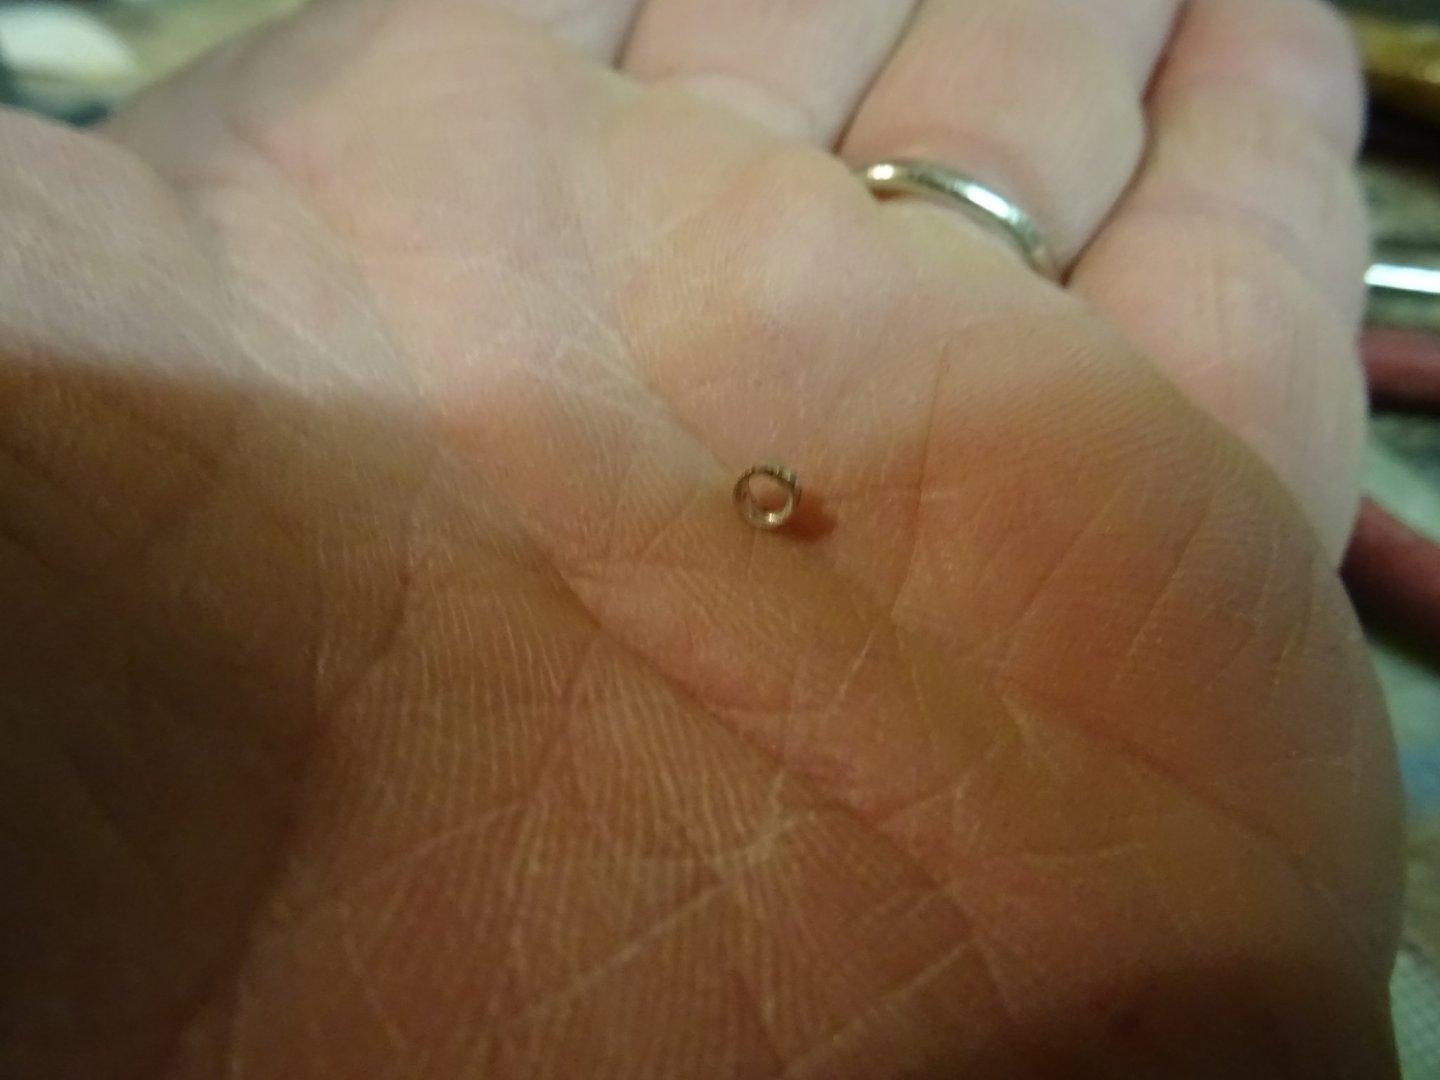
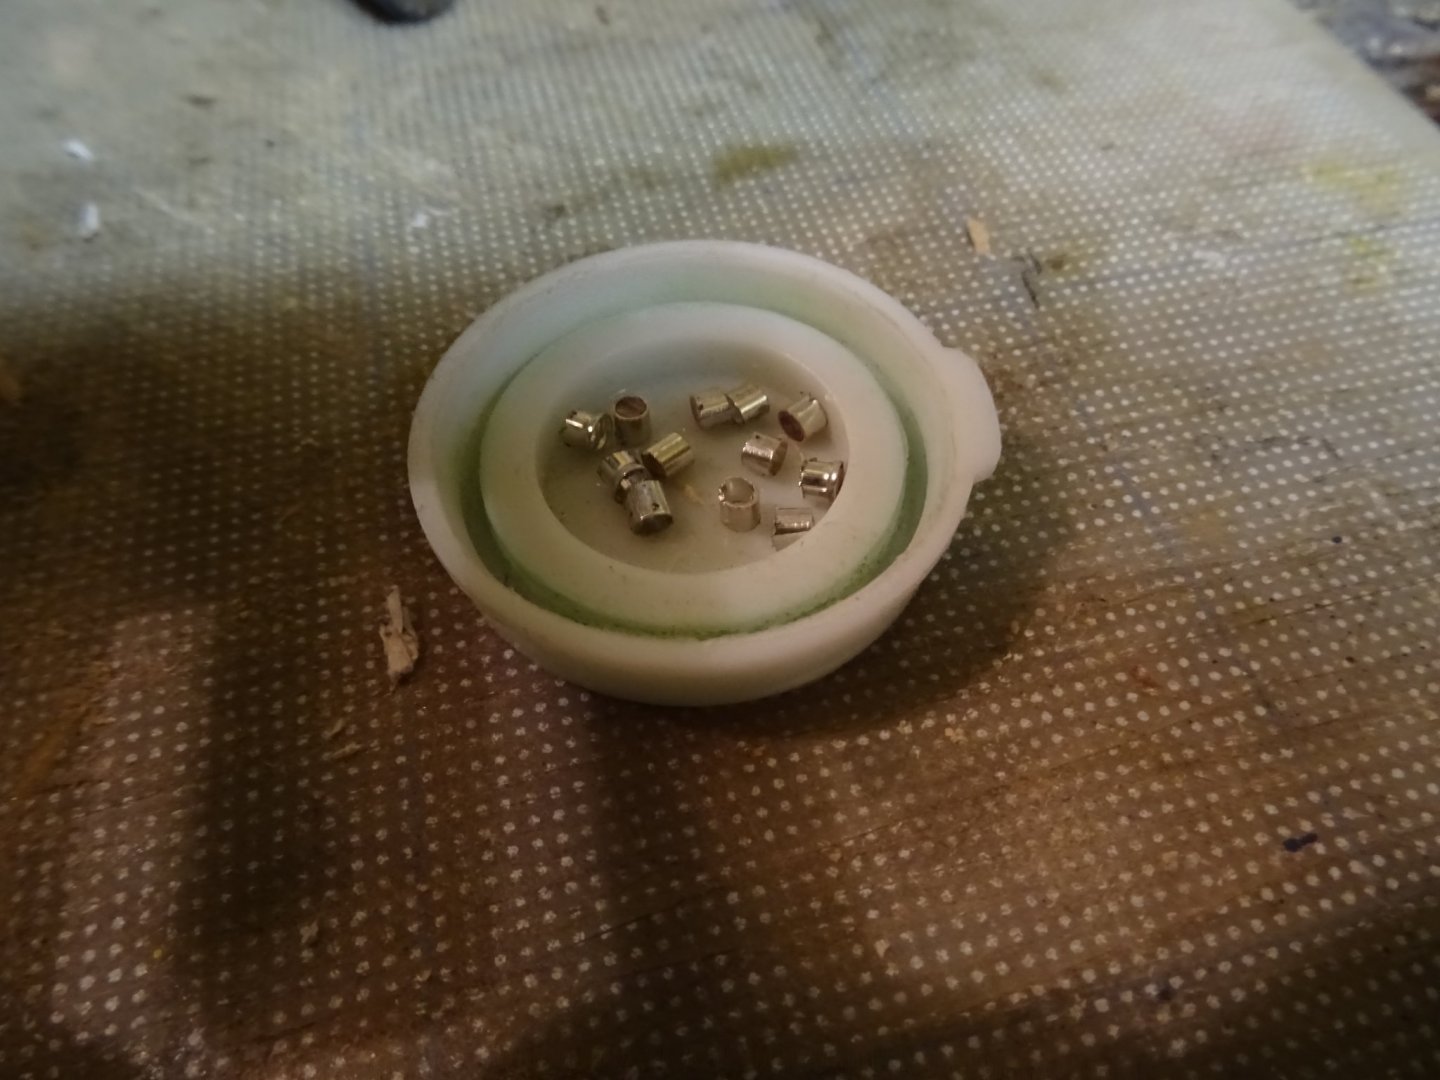
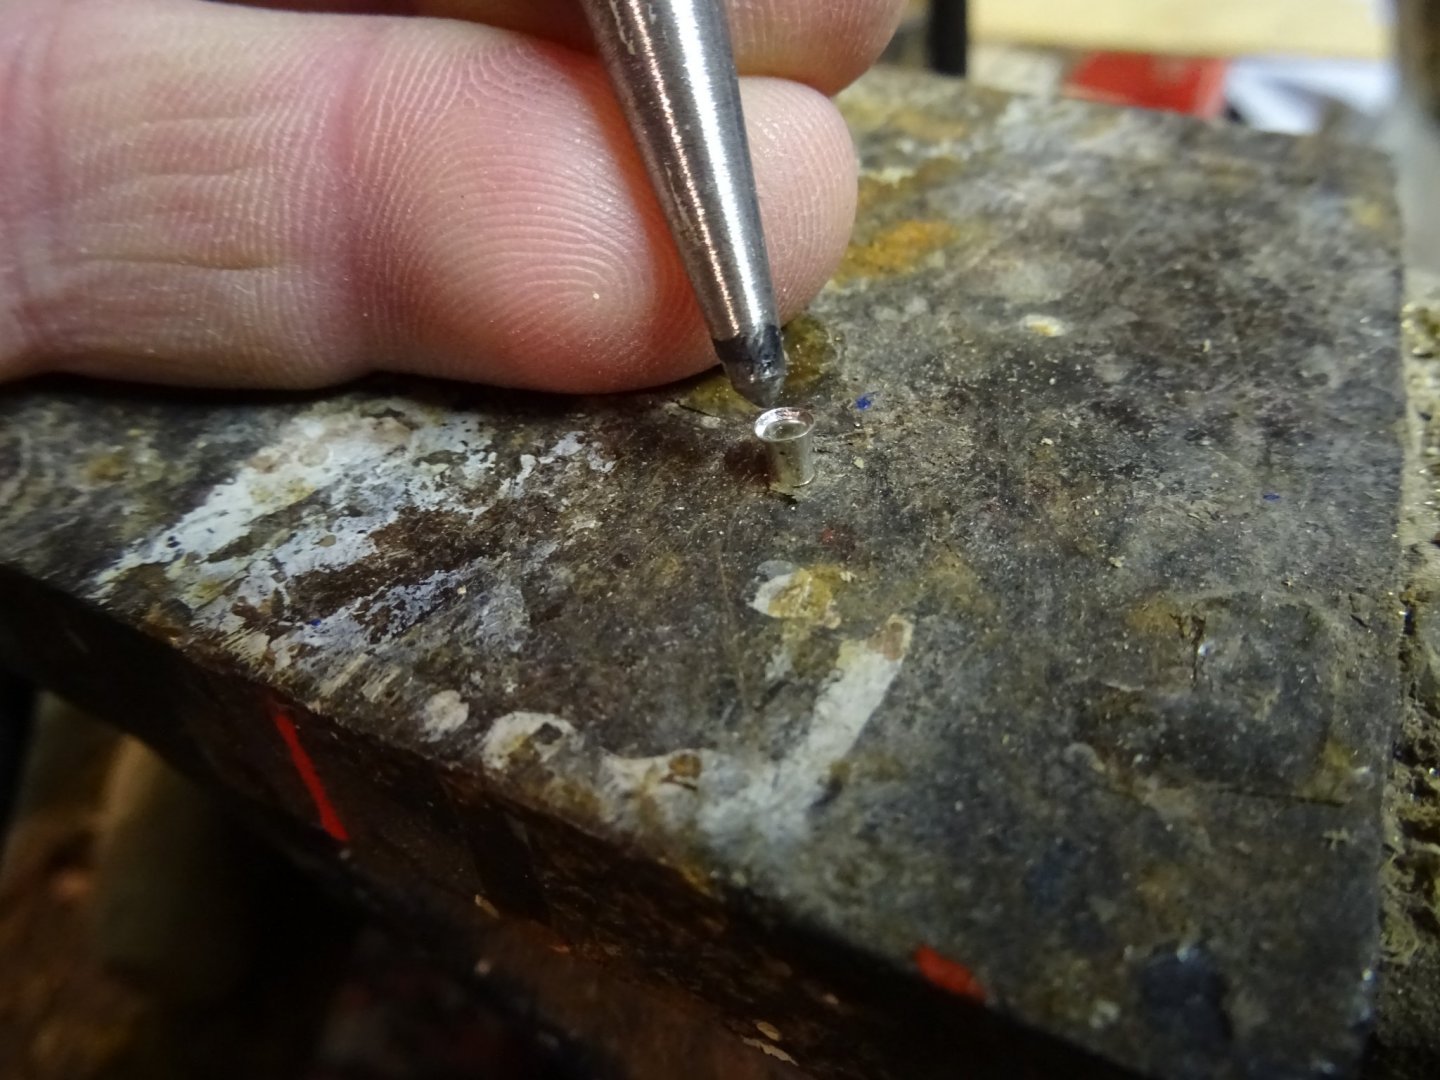
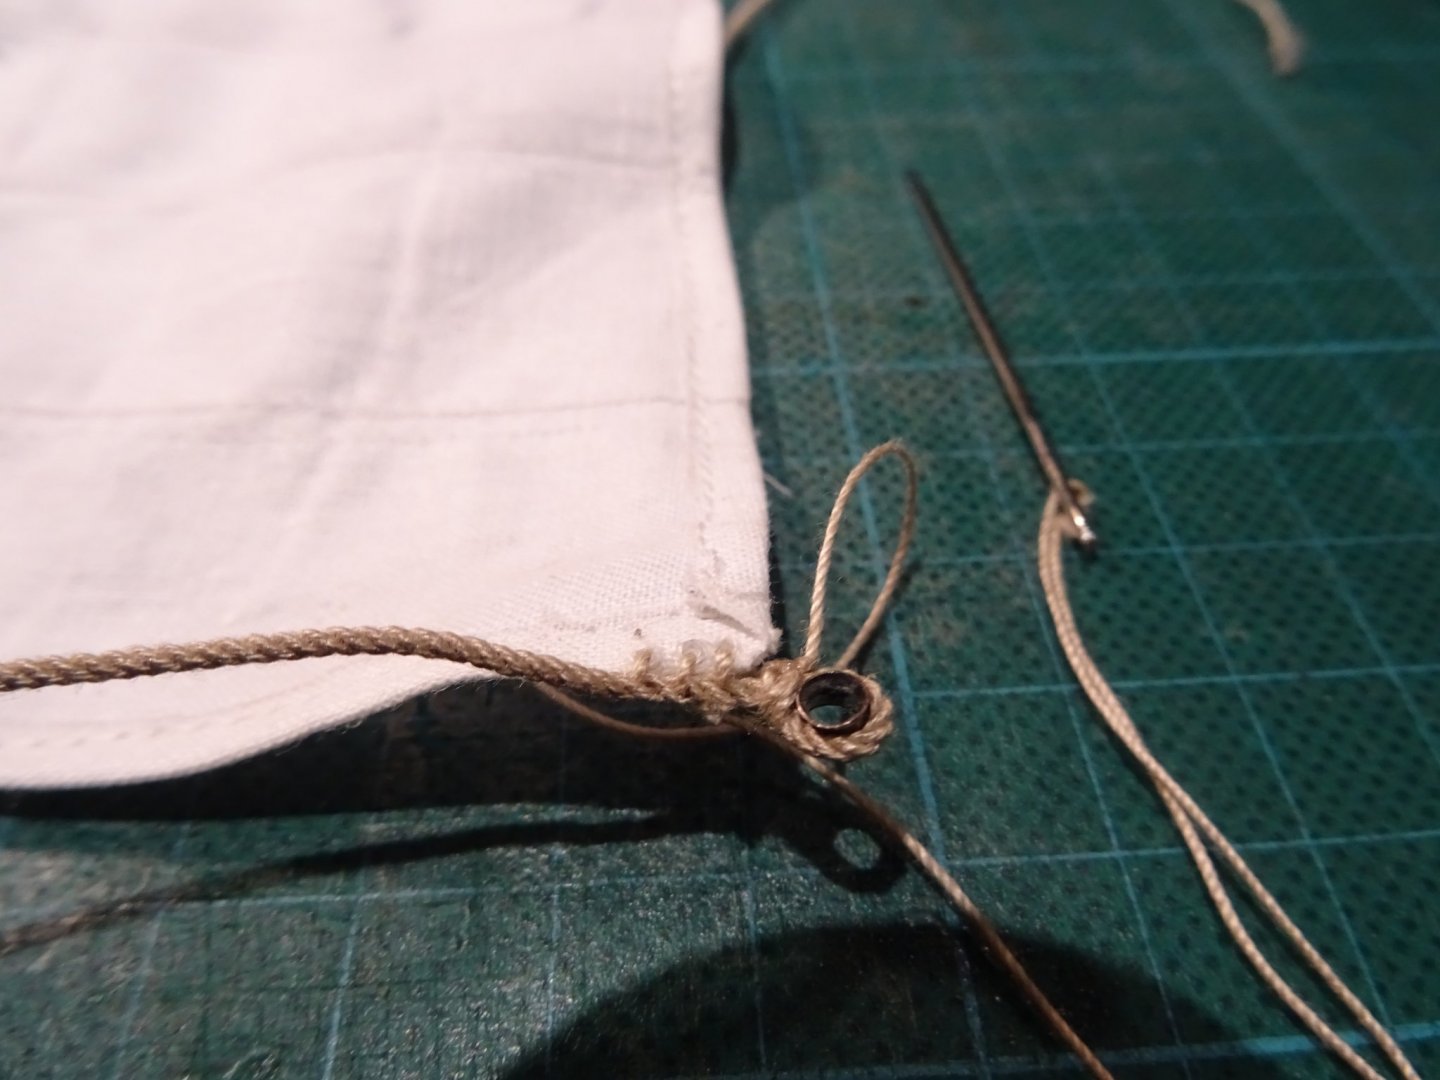
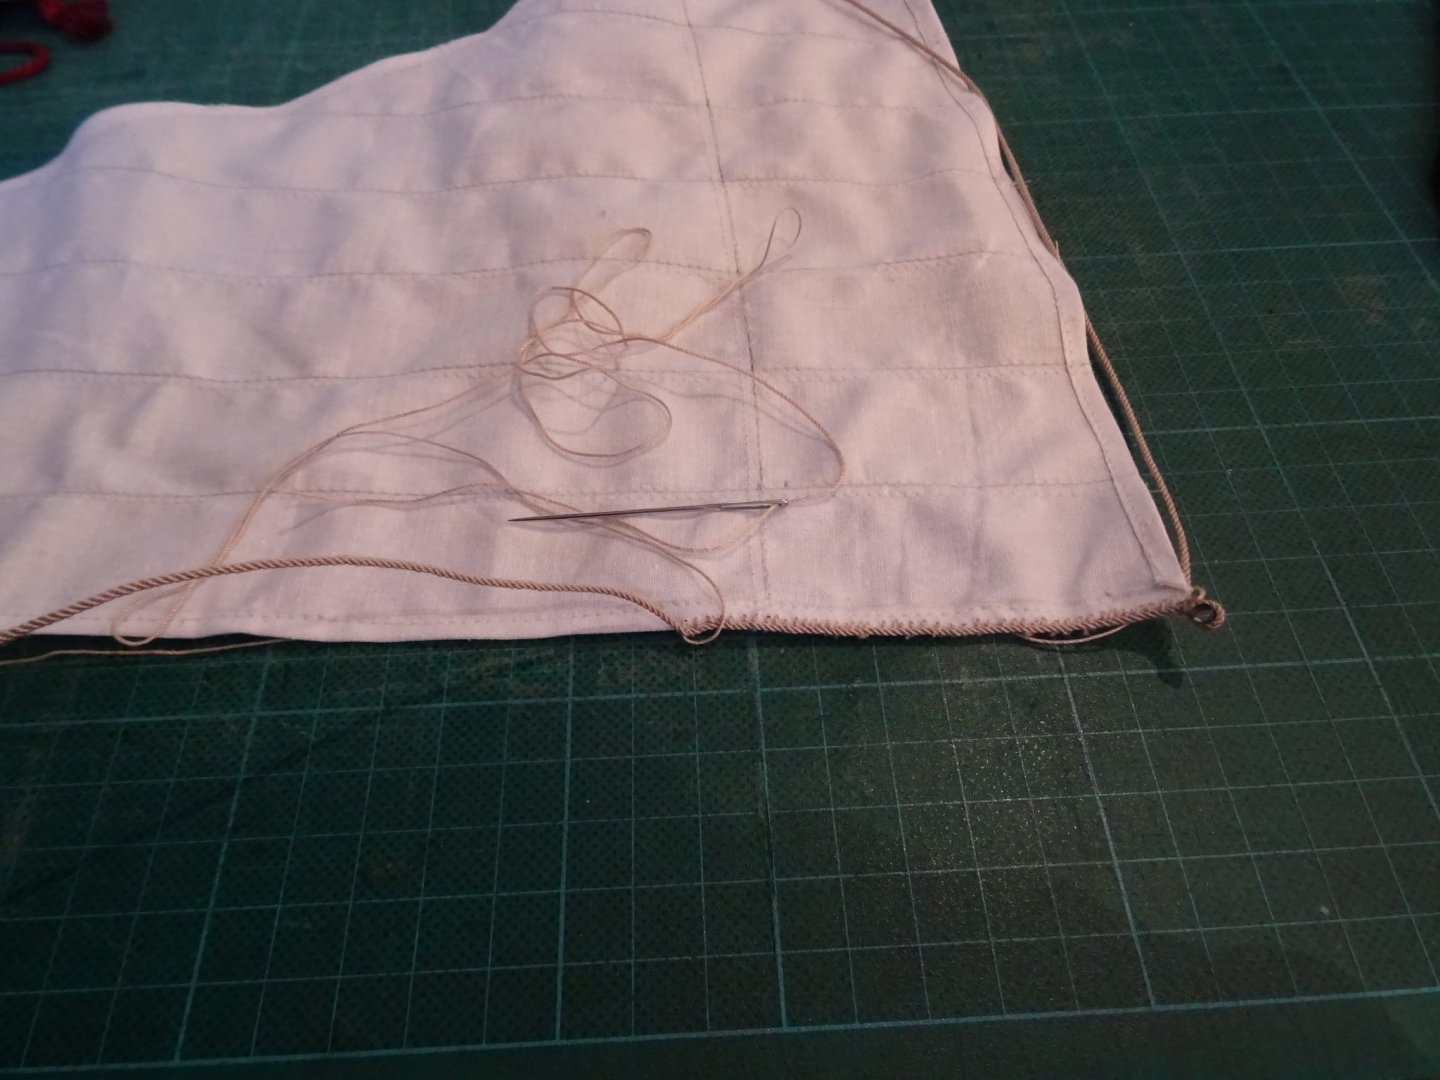
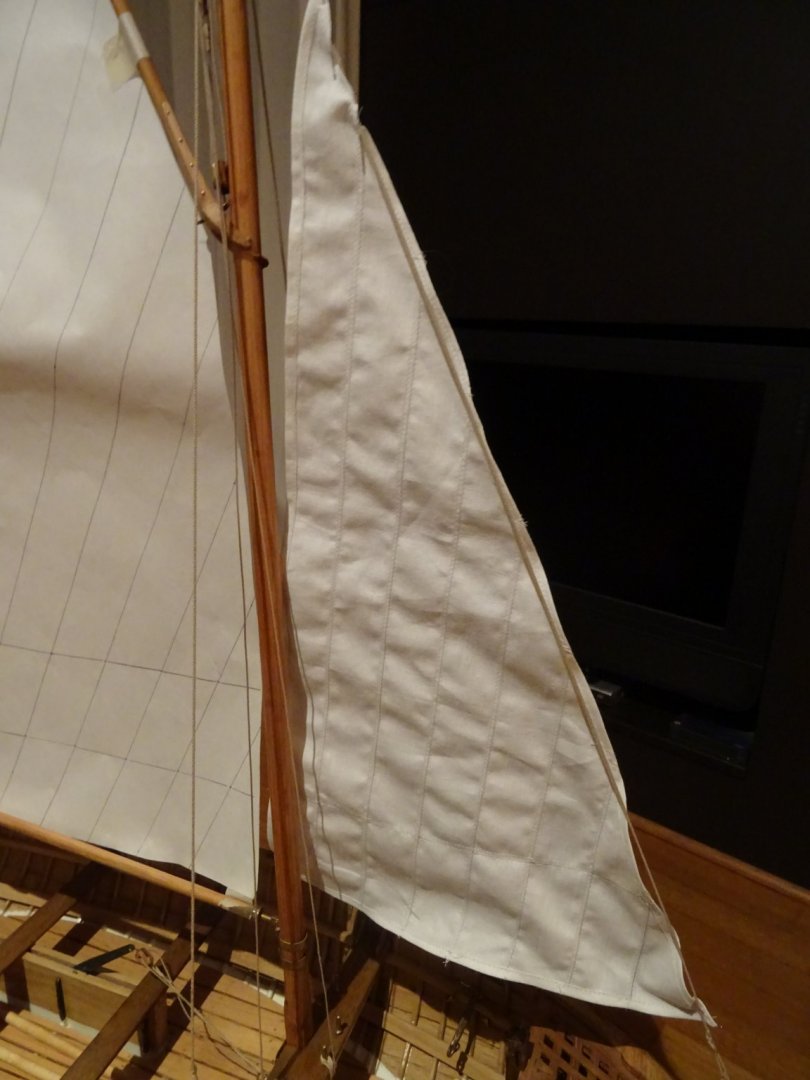
This week I started with modifying the gaff accordingly to the expert advice of Michael. Then I continue the work at the fore sail. Before starting to sew the main sail, I want to finish the fore sail. It will take a while because here are new skills that I yet have to learn. Around the sail a bolt rope has to be sewn. In the corners are thimbles. I think that I have seen the method to make them in the log of the Jaciente of Aviamator. I use electrical end sleeves from which I remove the plastic part and saw them in small sheaves of about 3mm each. Then I open the edges a bit with the help of a punch. And finally I weather the thimbles by soaking them a while in oxidant. Now it is again sewing work, this time not with the machine, but by hand. The thimble goes in the bolt rope at the clew. and the rest is sewing along the jib leach. That is where I am at this moment. Thank you to follow Thank you for the likes Thank you for your constructive comments Till next week


-
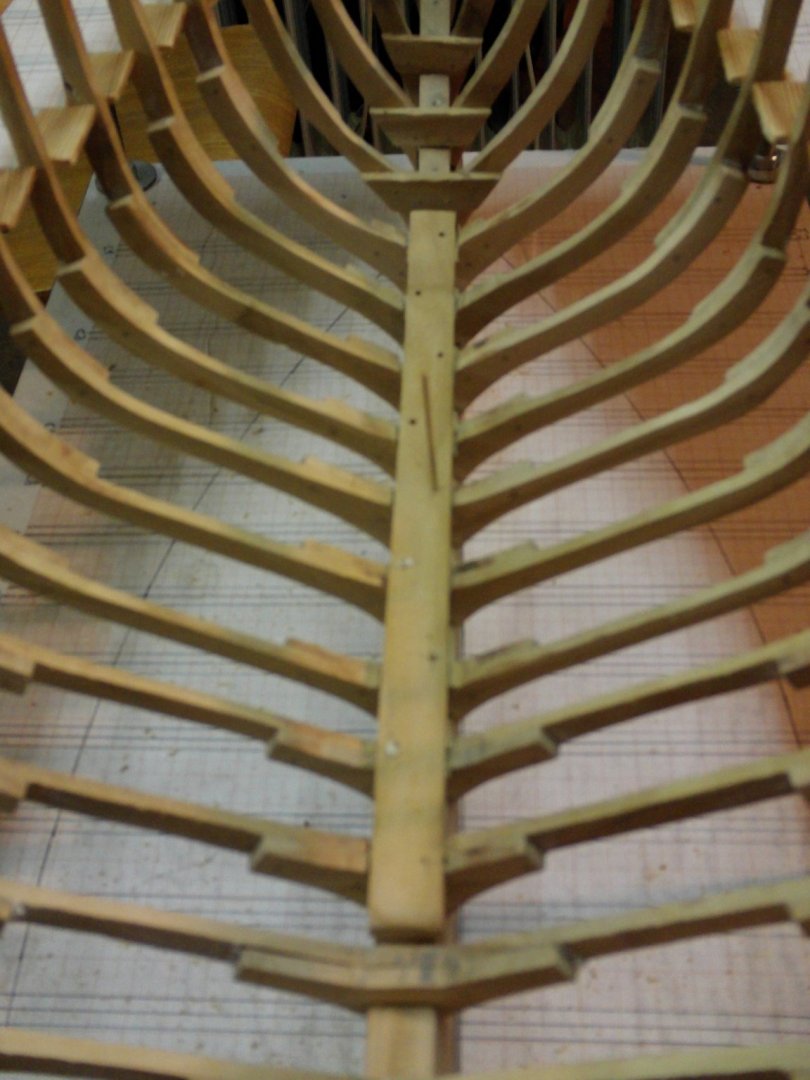
Amazing how you can do it with a computer, Vaddoc Thanks to show all the strake shapes next to each other. The shapes are very similar to those I tried to loft manually for my gaff sail boat. When I was doing it, it was always a surprise if they would fit or not. My longest plank was about 75 cm. As you see around the floor heads there the planks are very bent, you need a long and wide plank to make them. As I was a bit short of long and wide knot-free oak planks, I didn't want to spoil much wood. When bending the planks to place them, I cracked two of them, it was exiting to finish the job before all my oak was used.
-
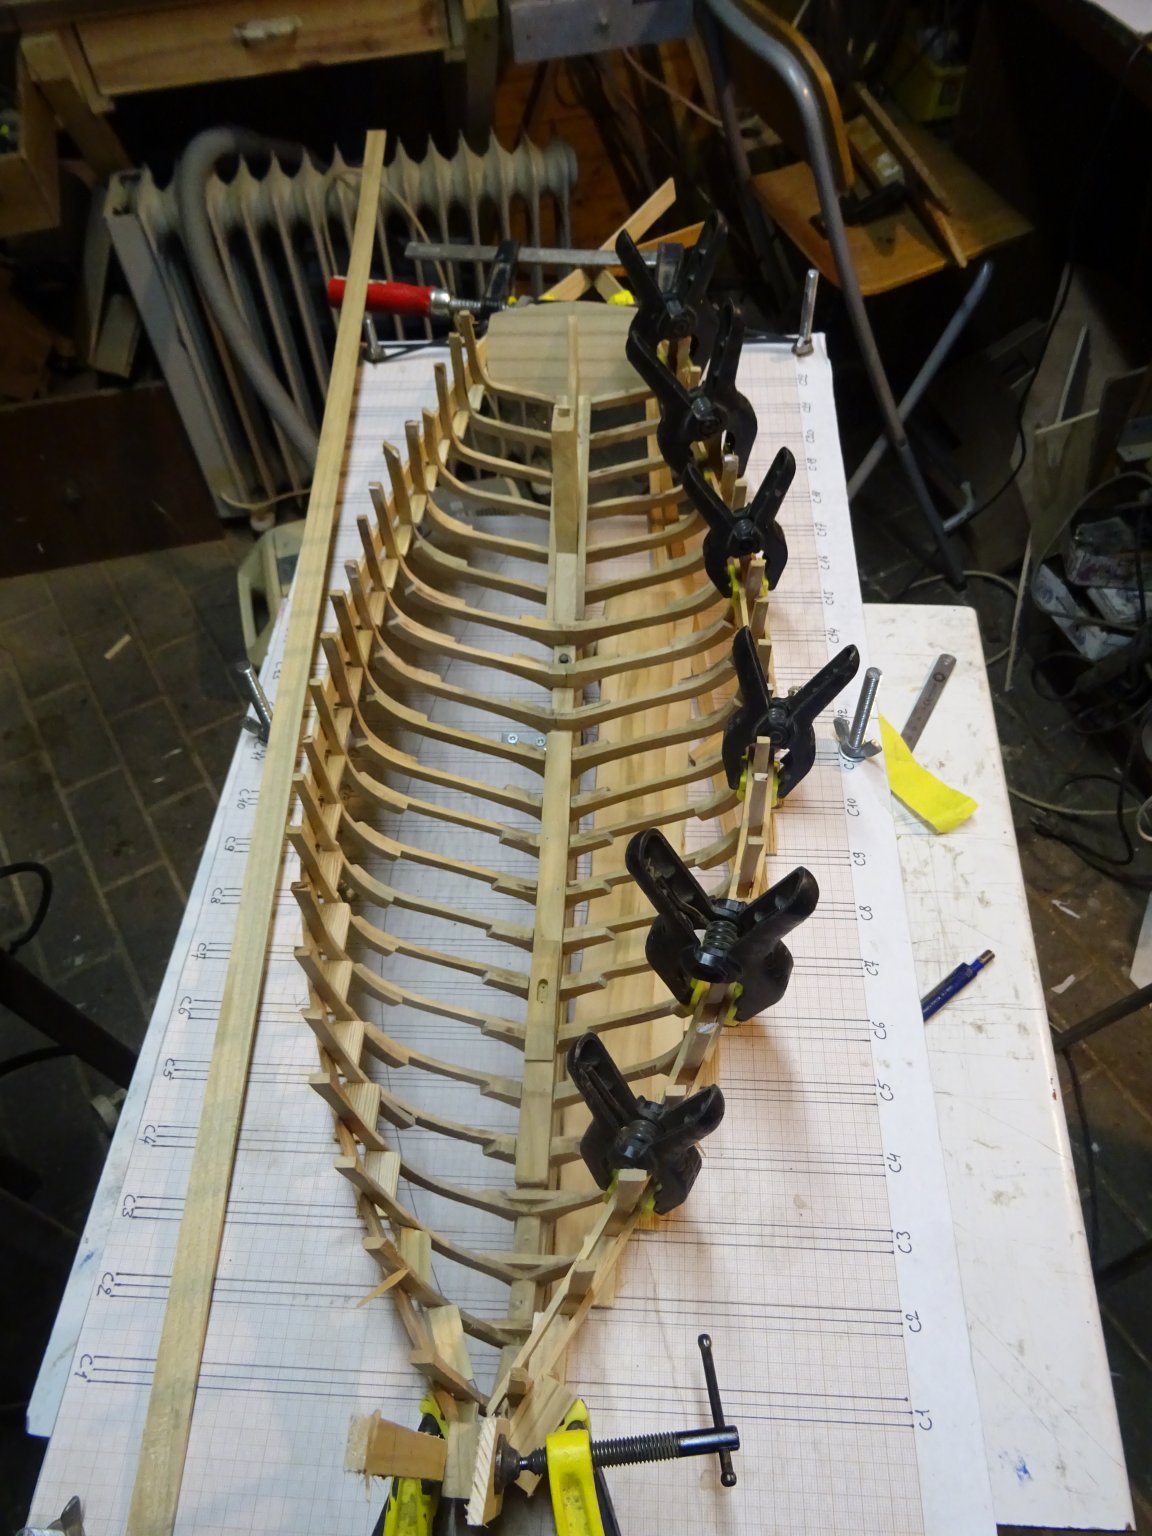
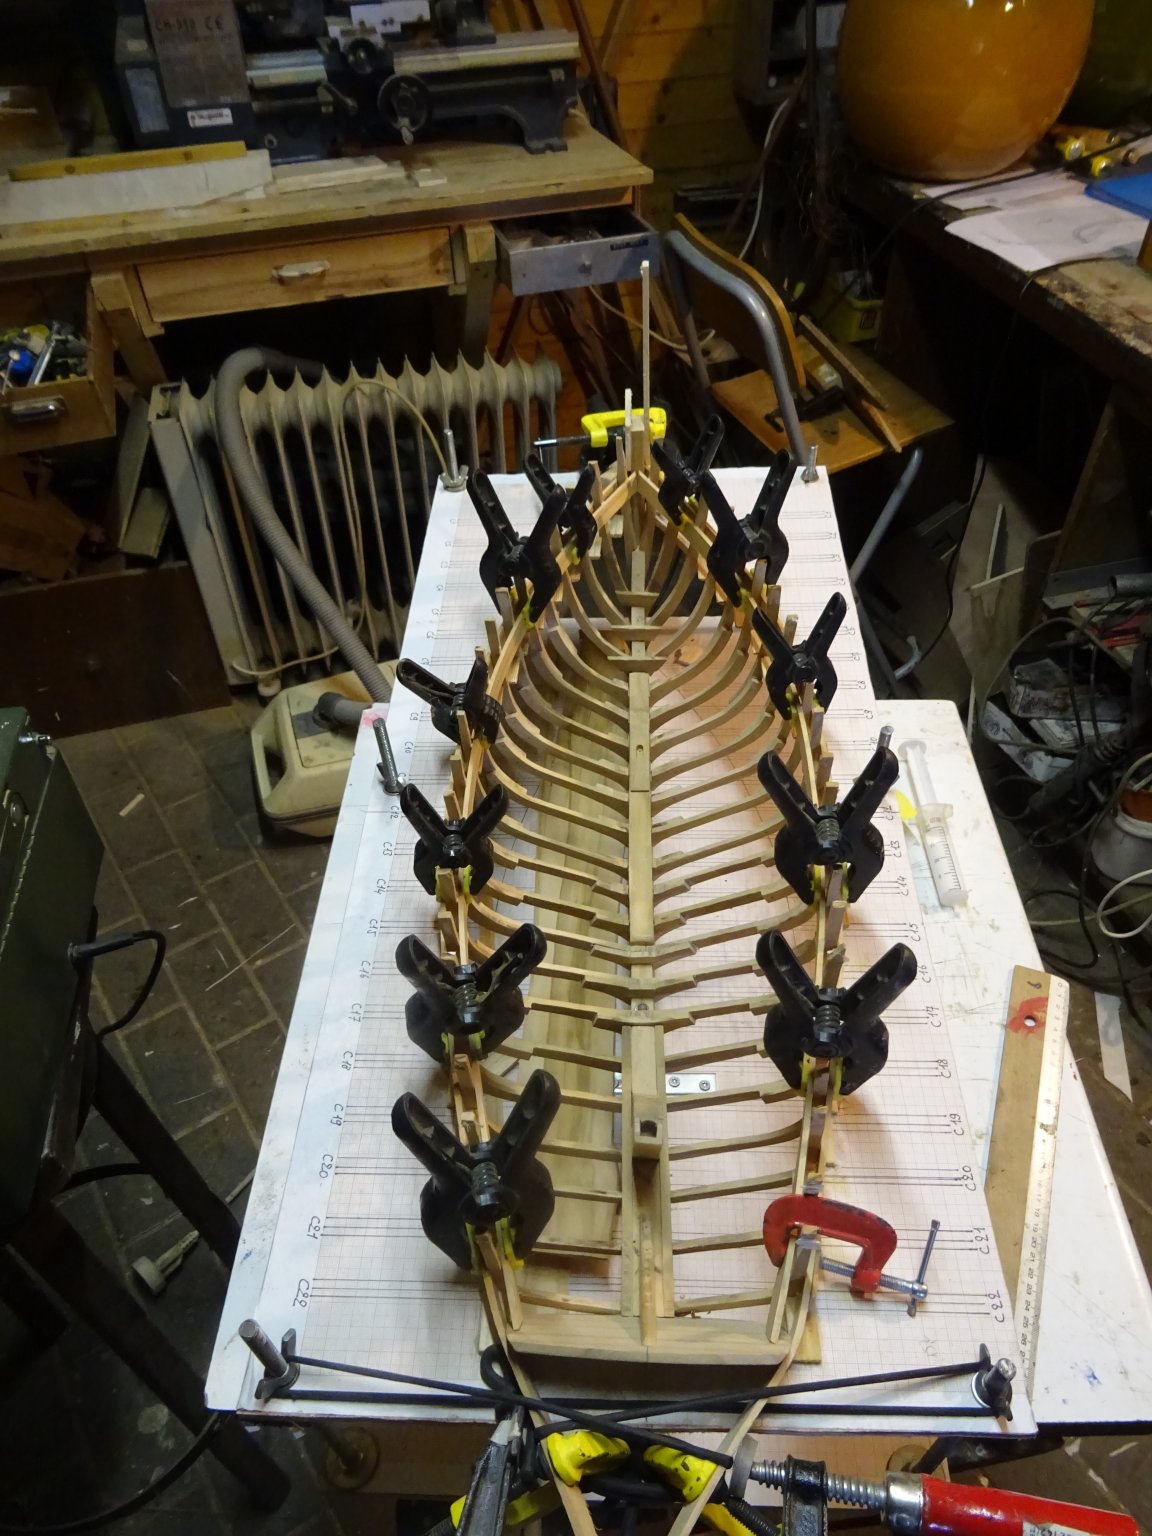
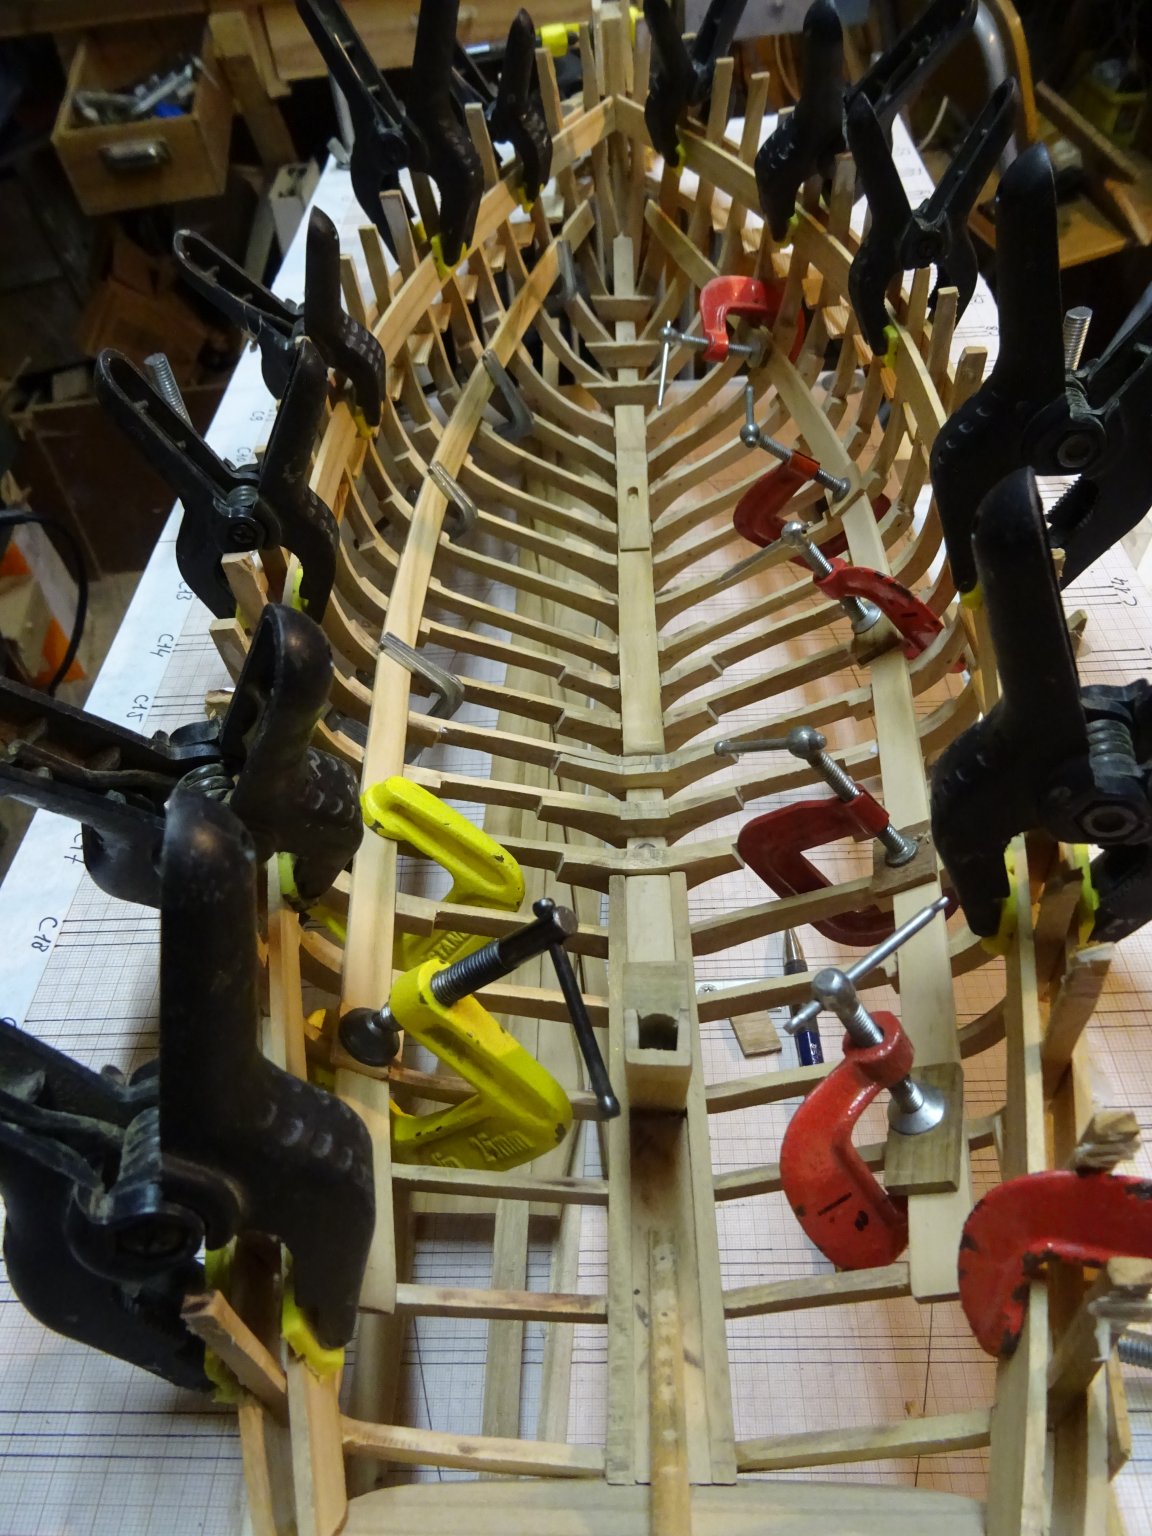
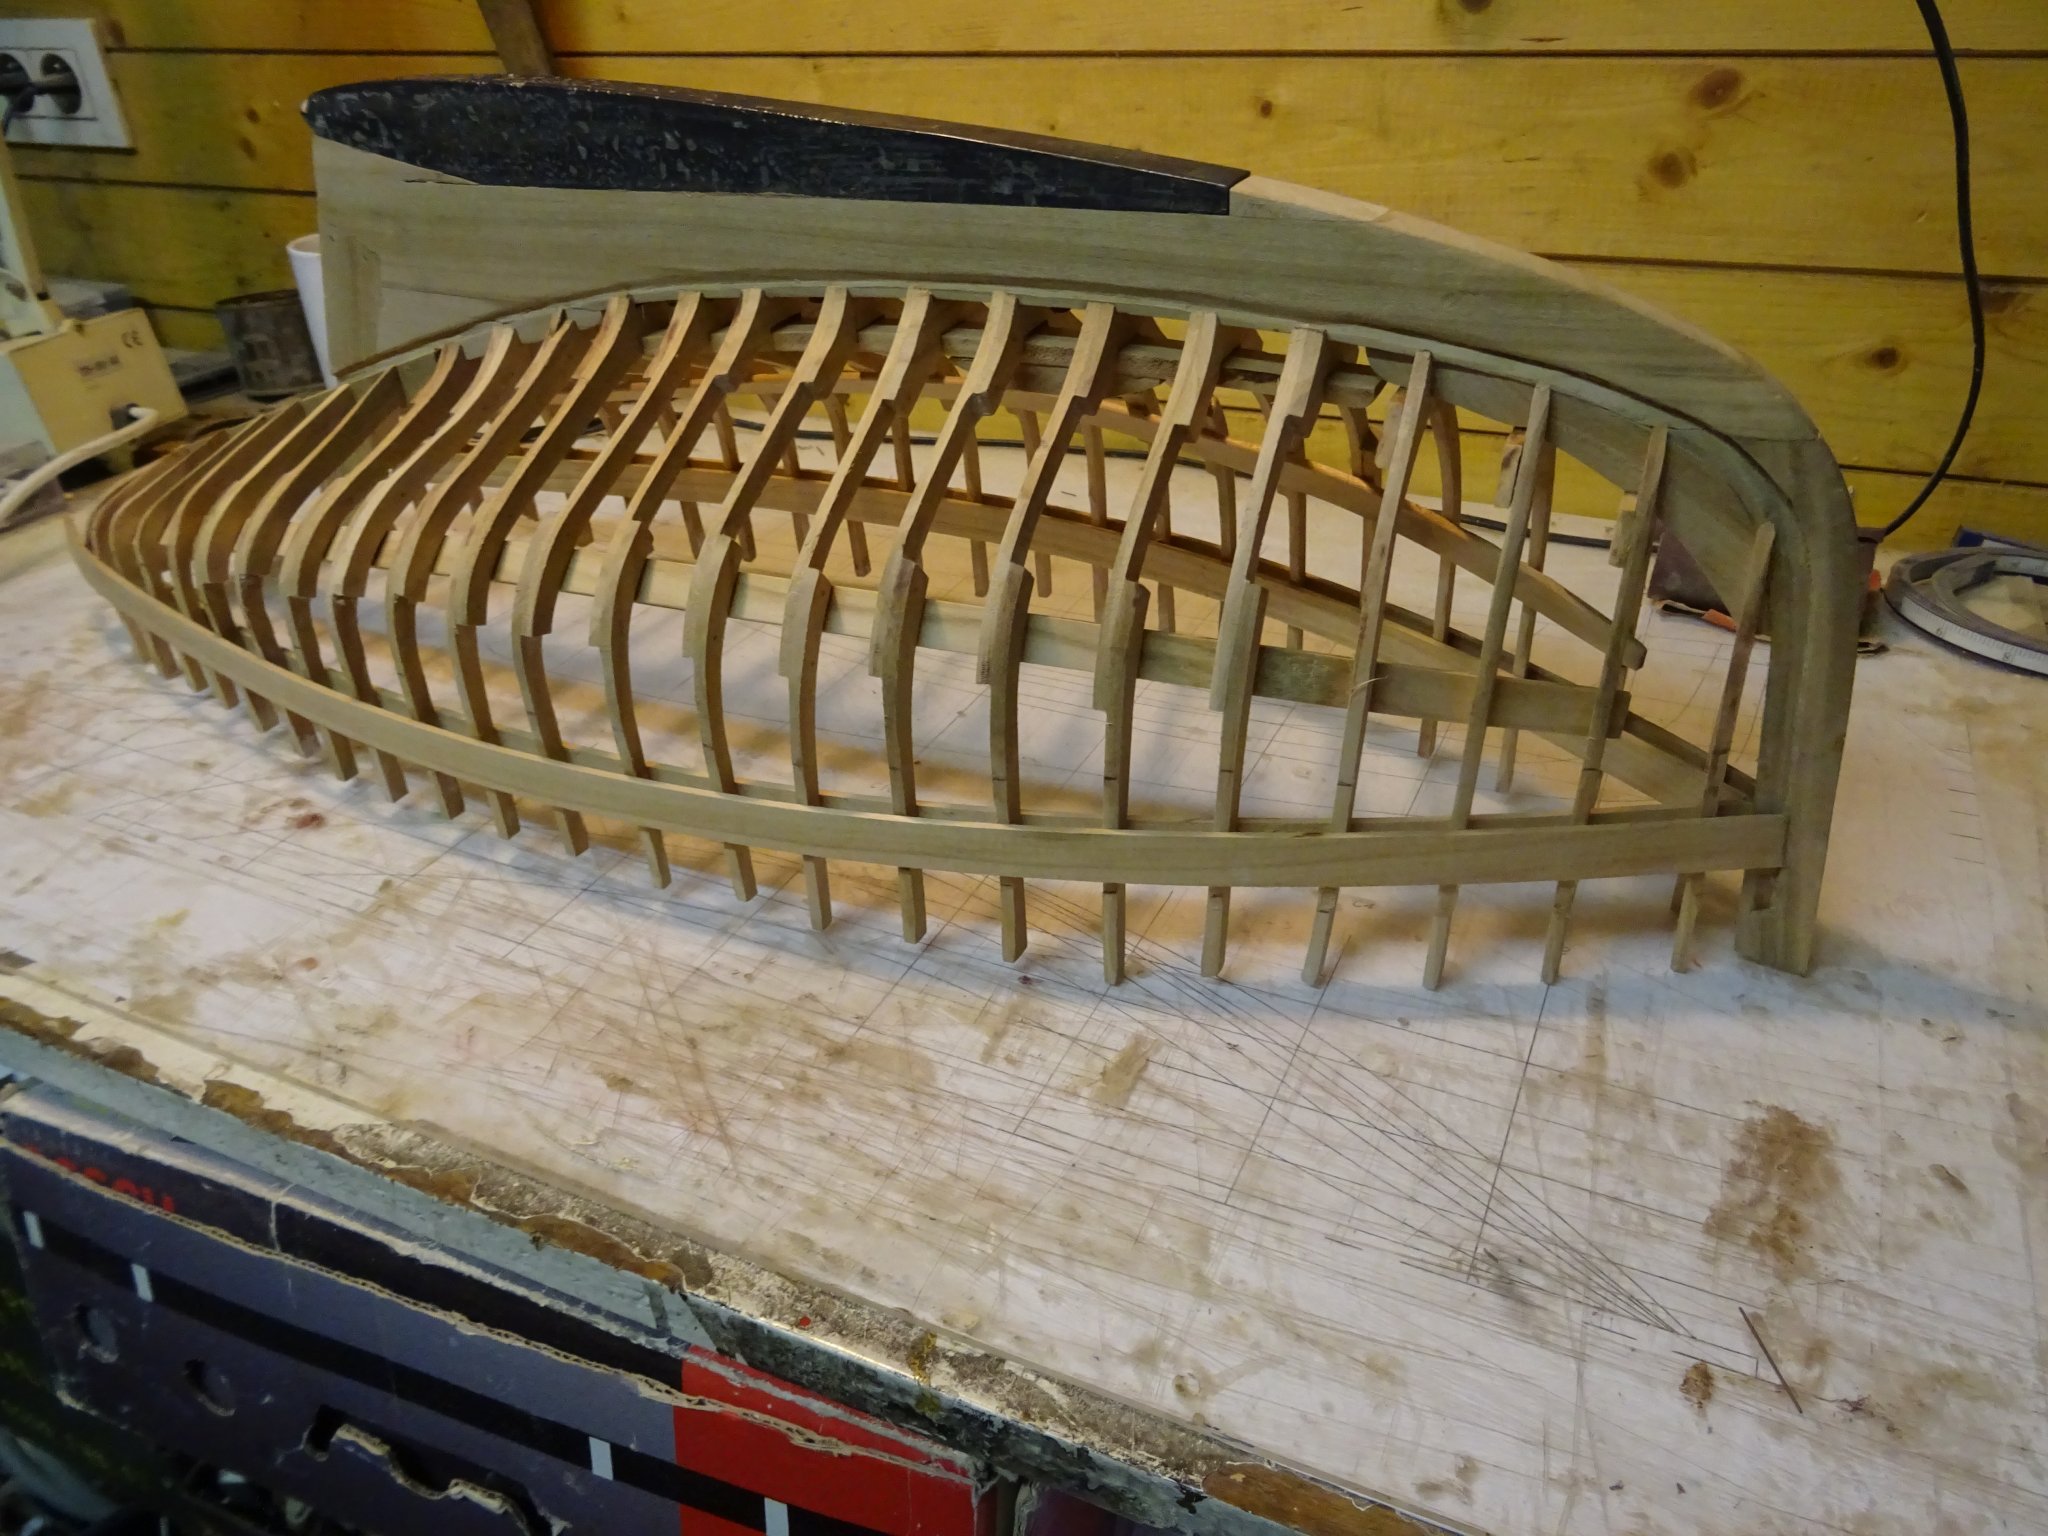
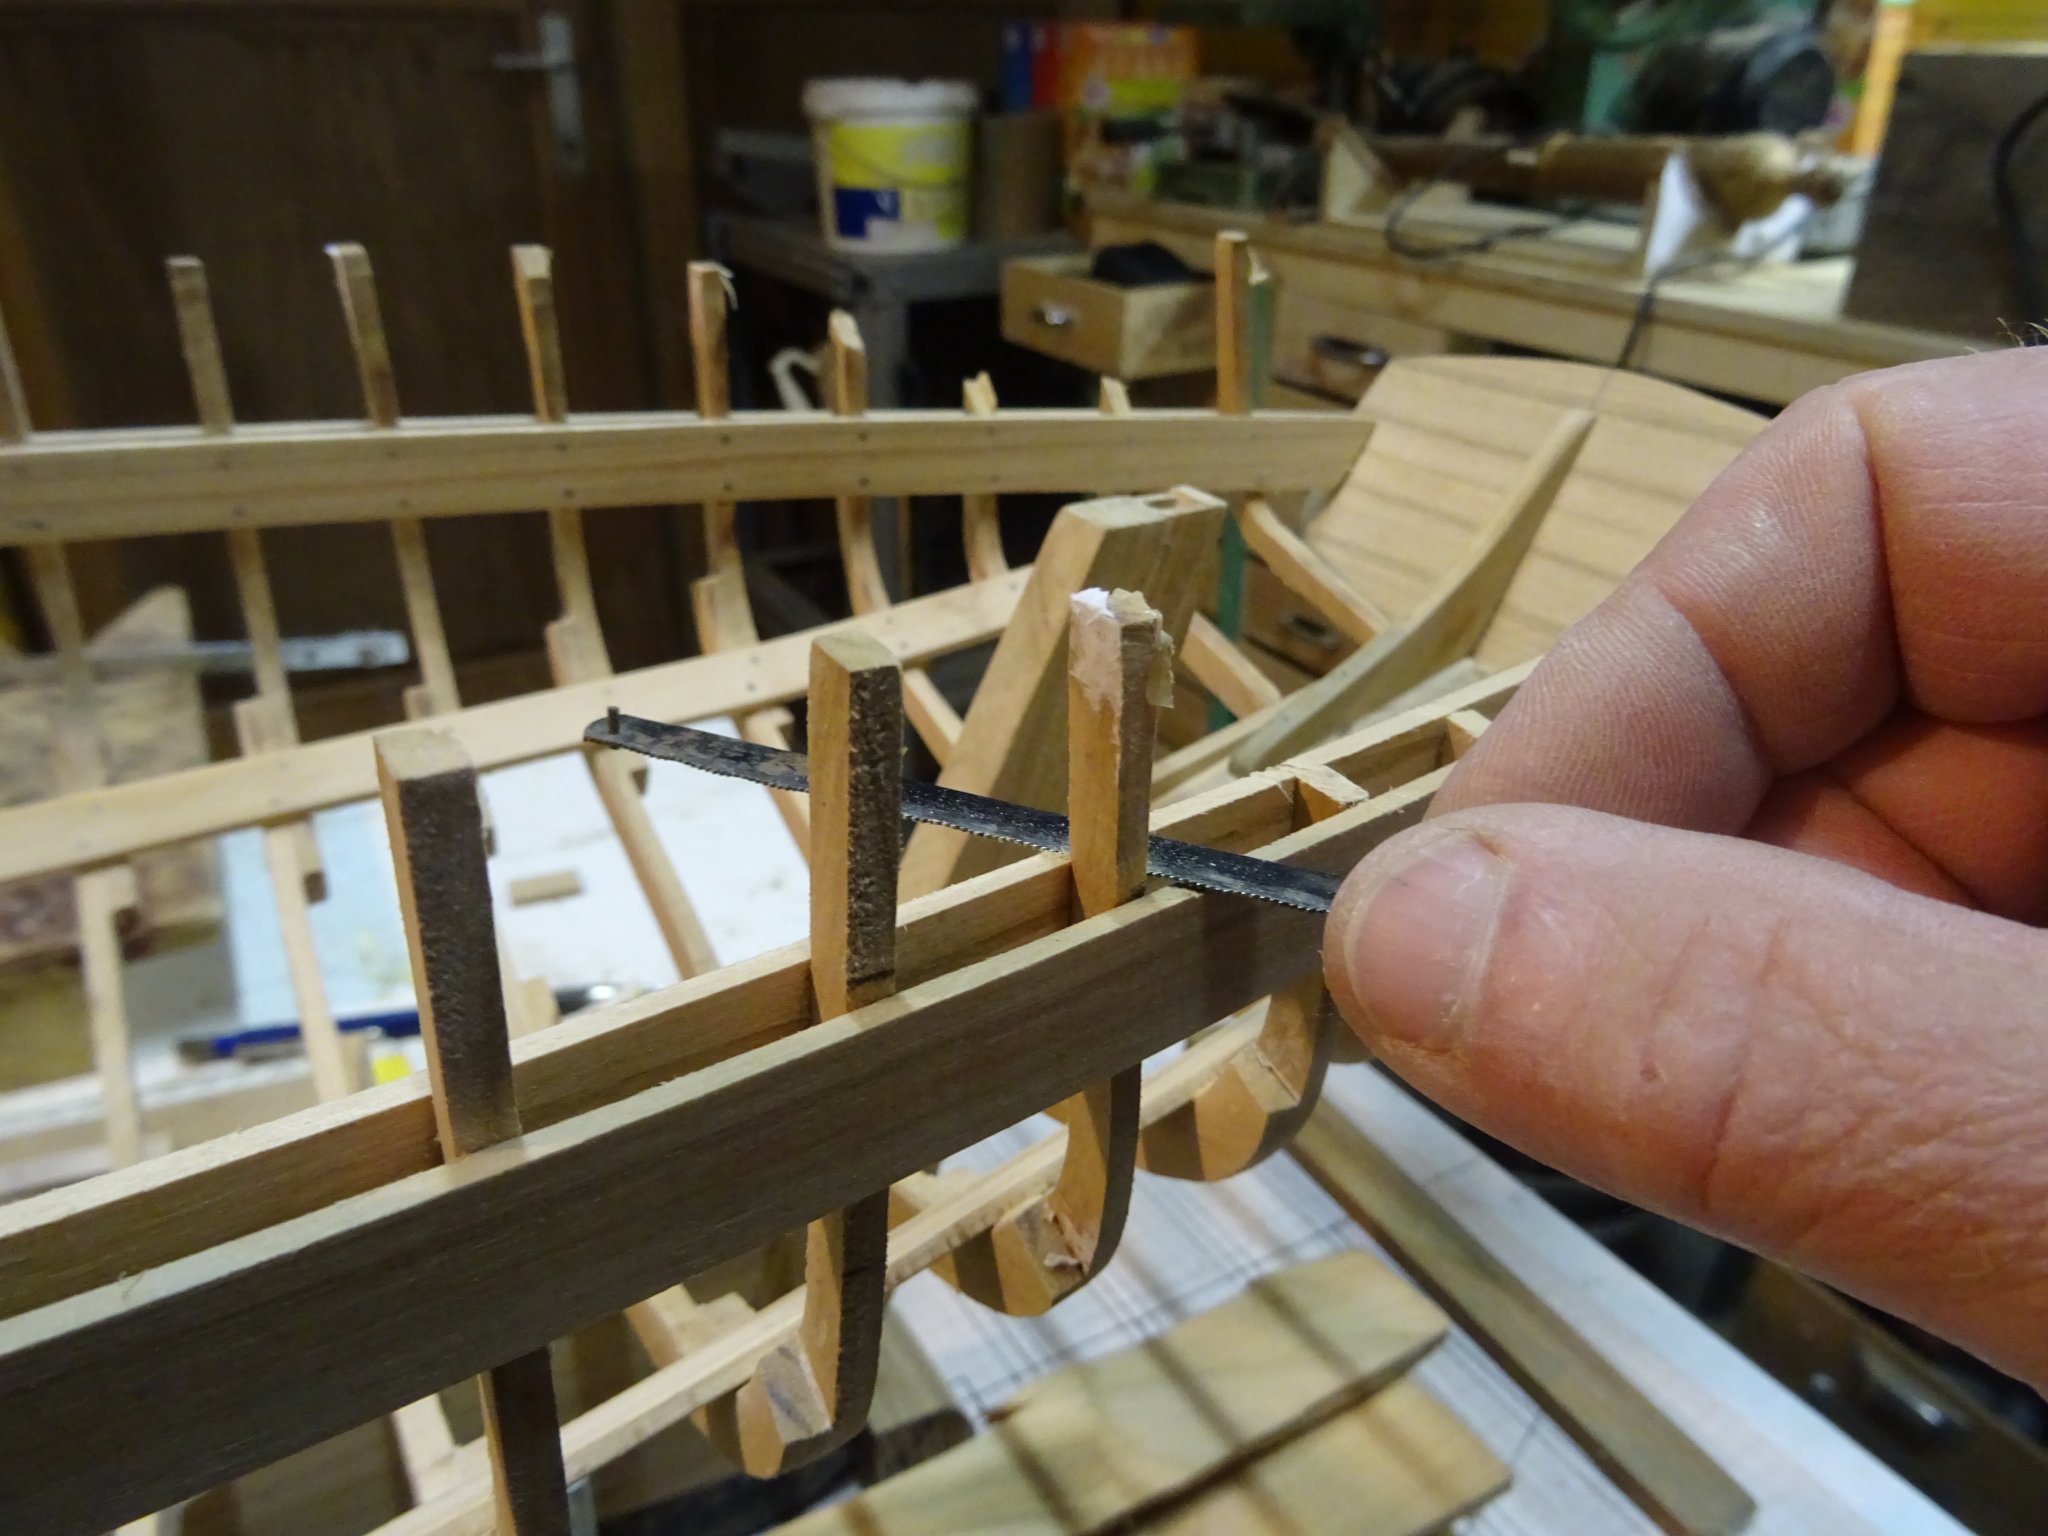
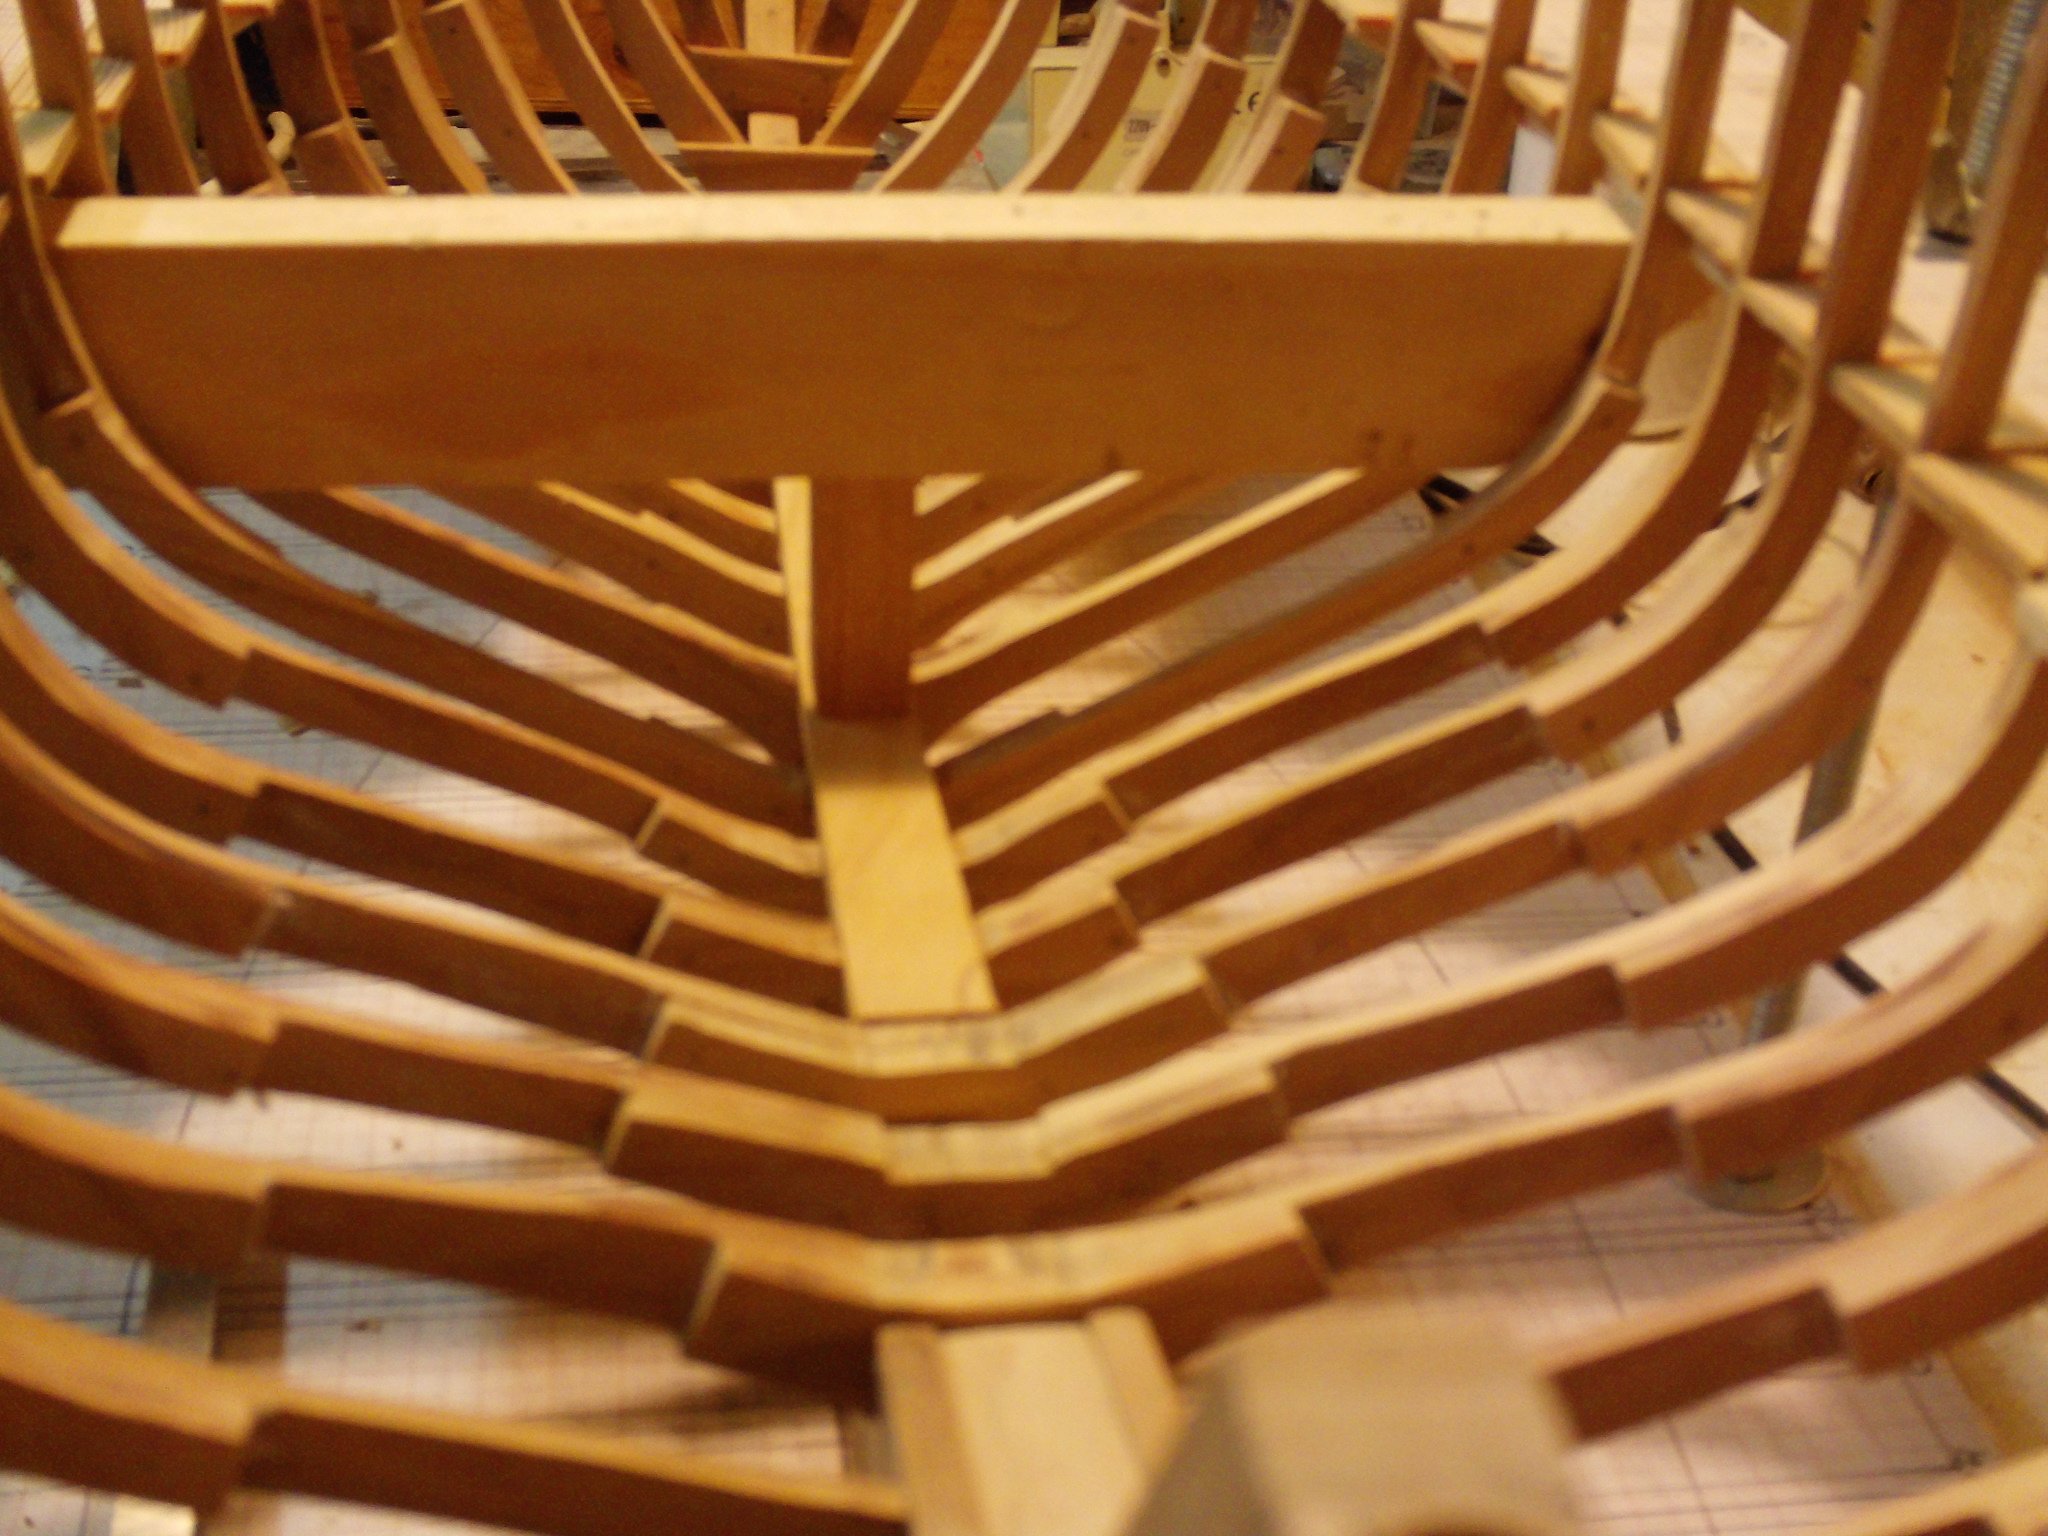
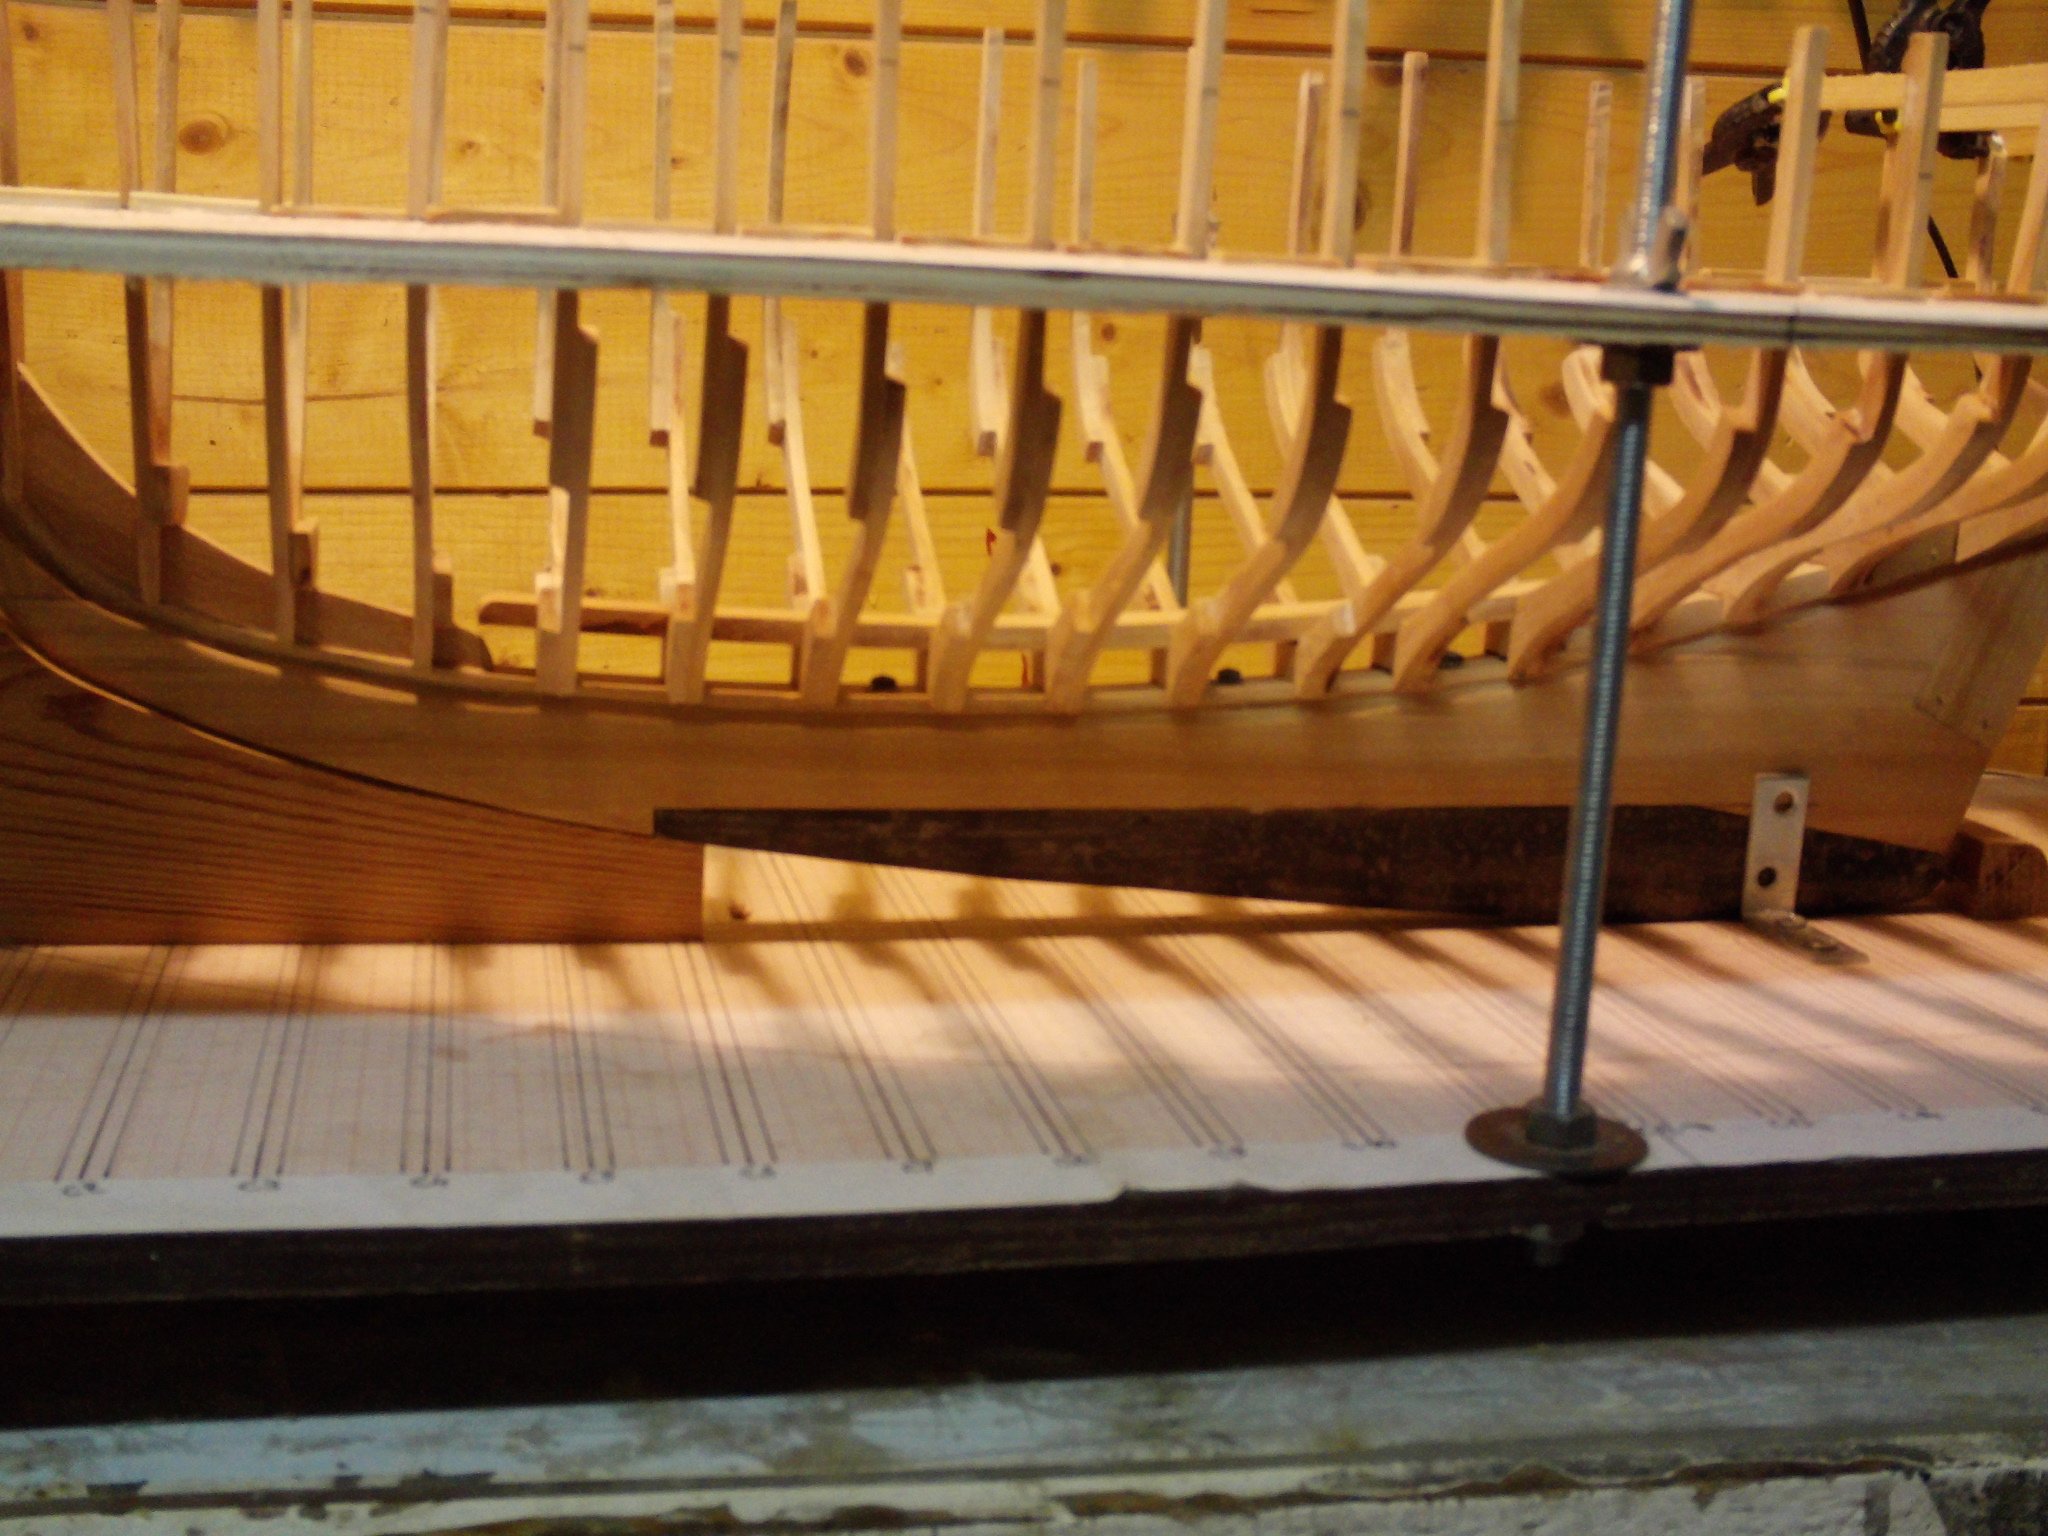
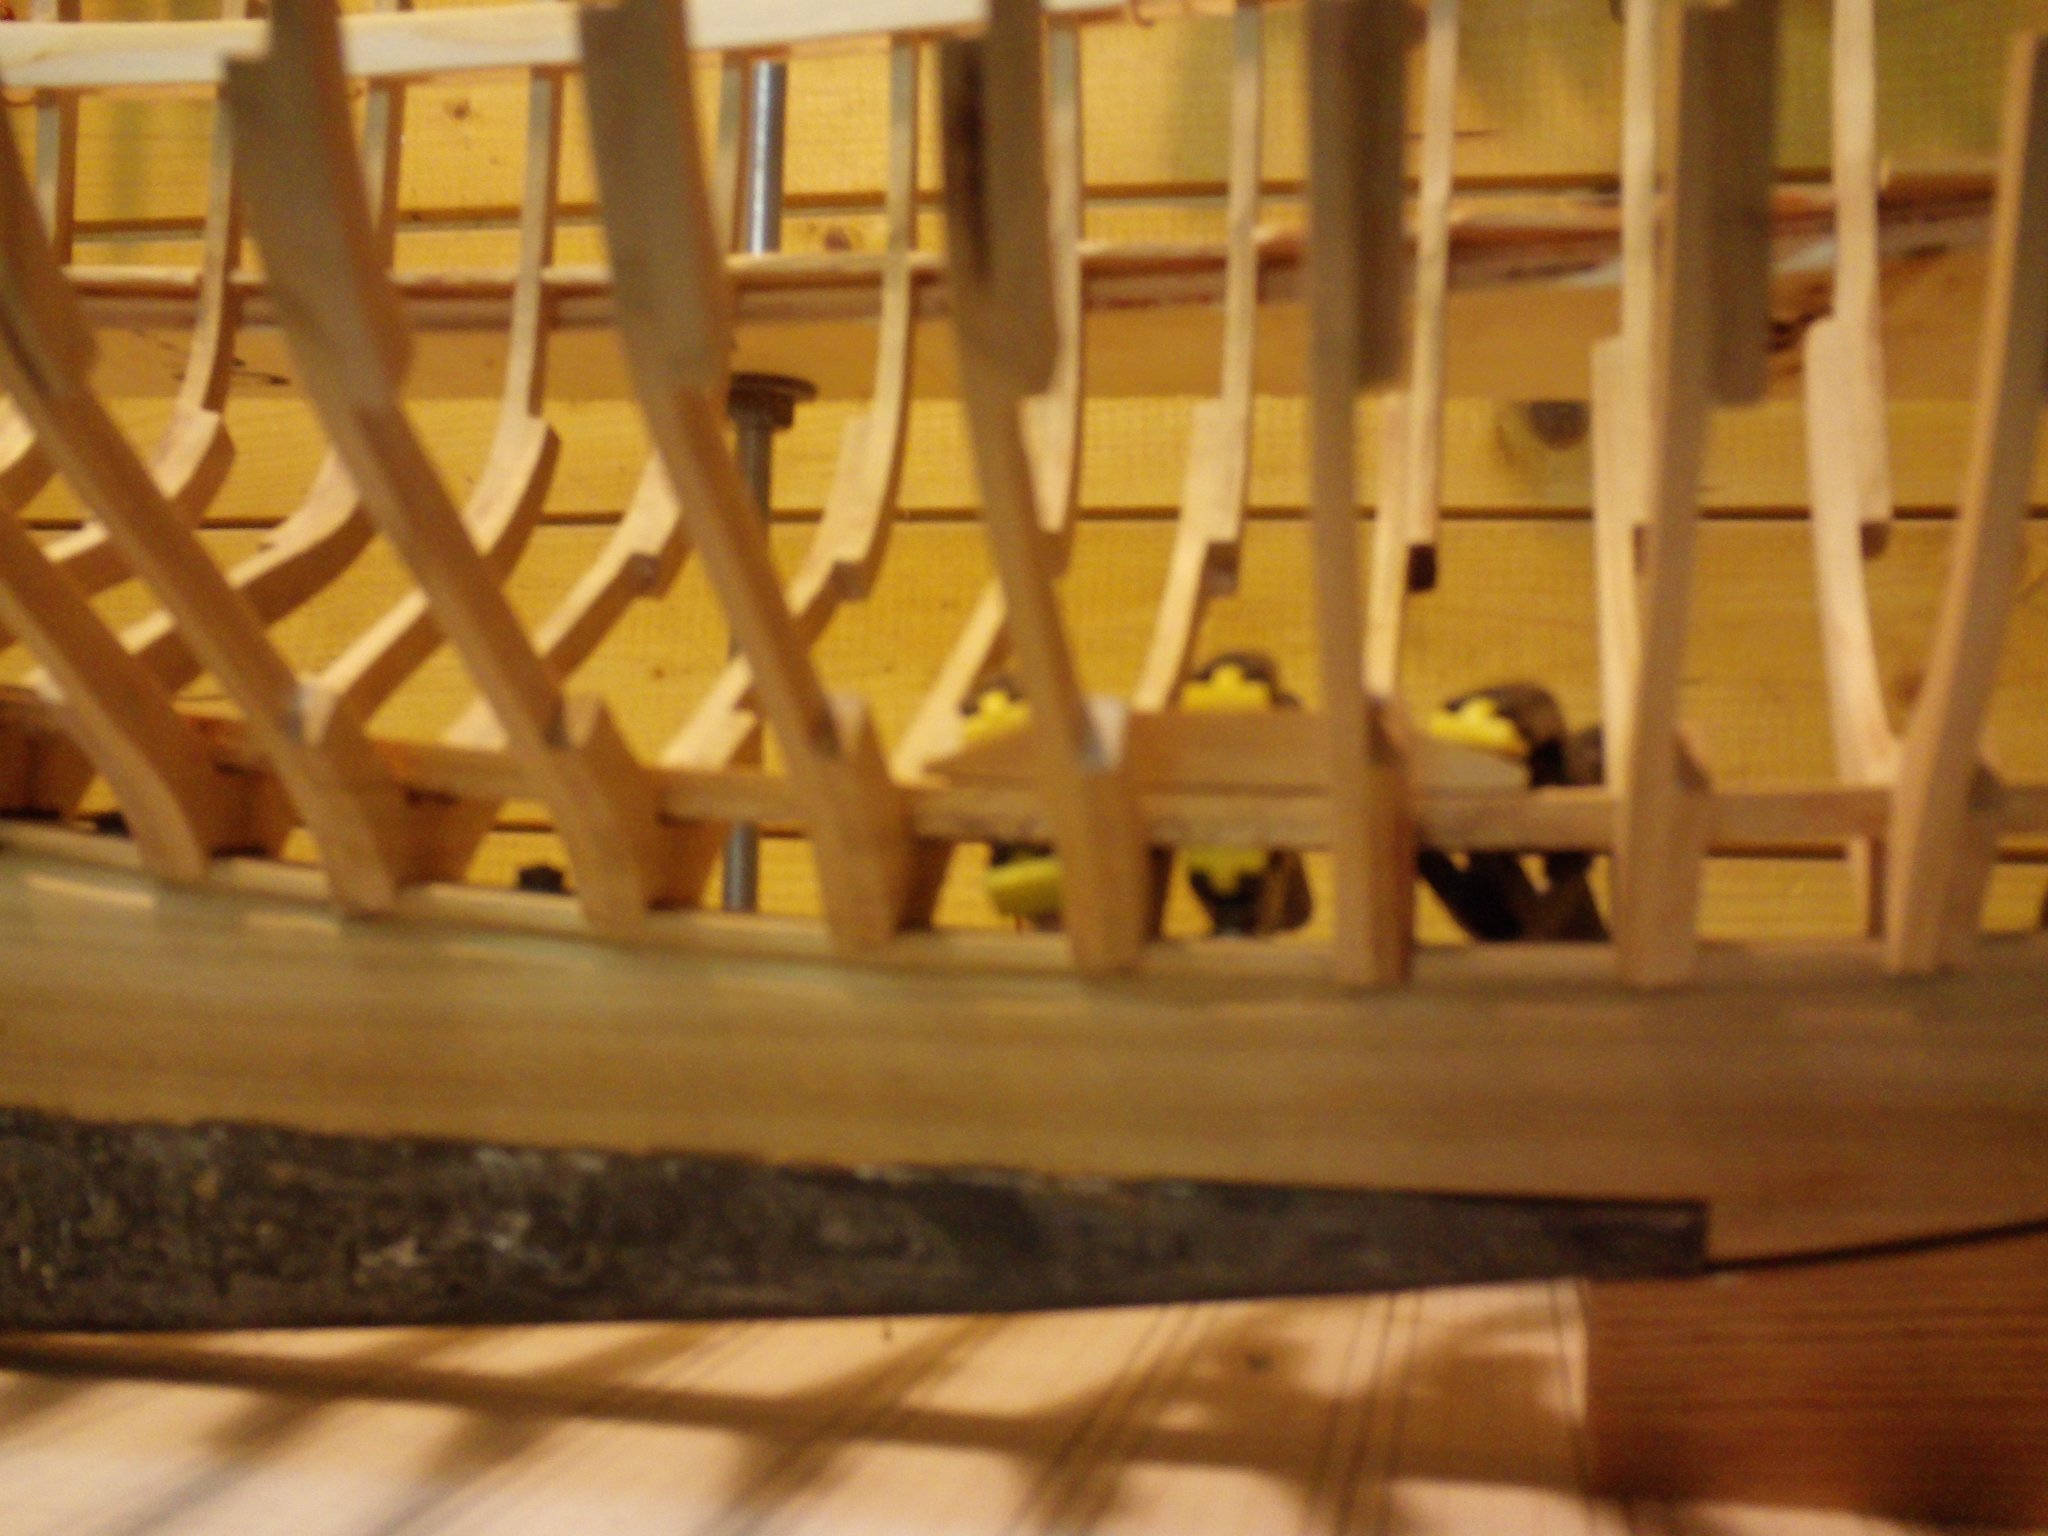
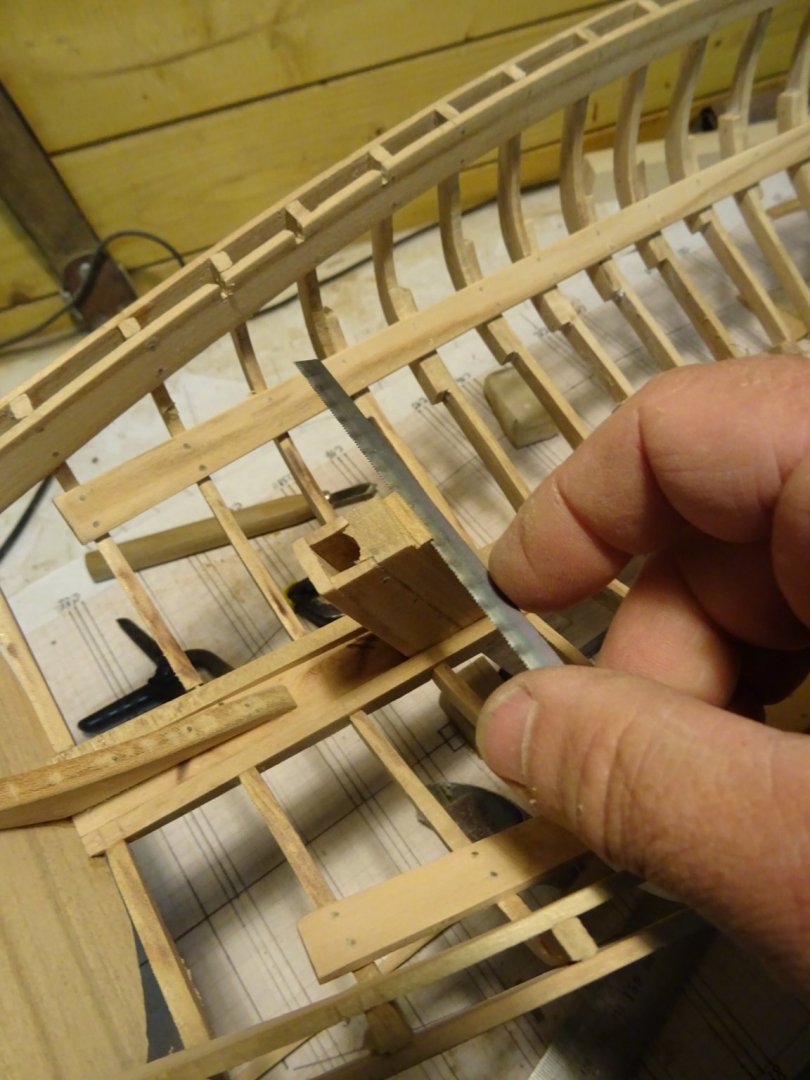
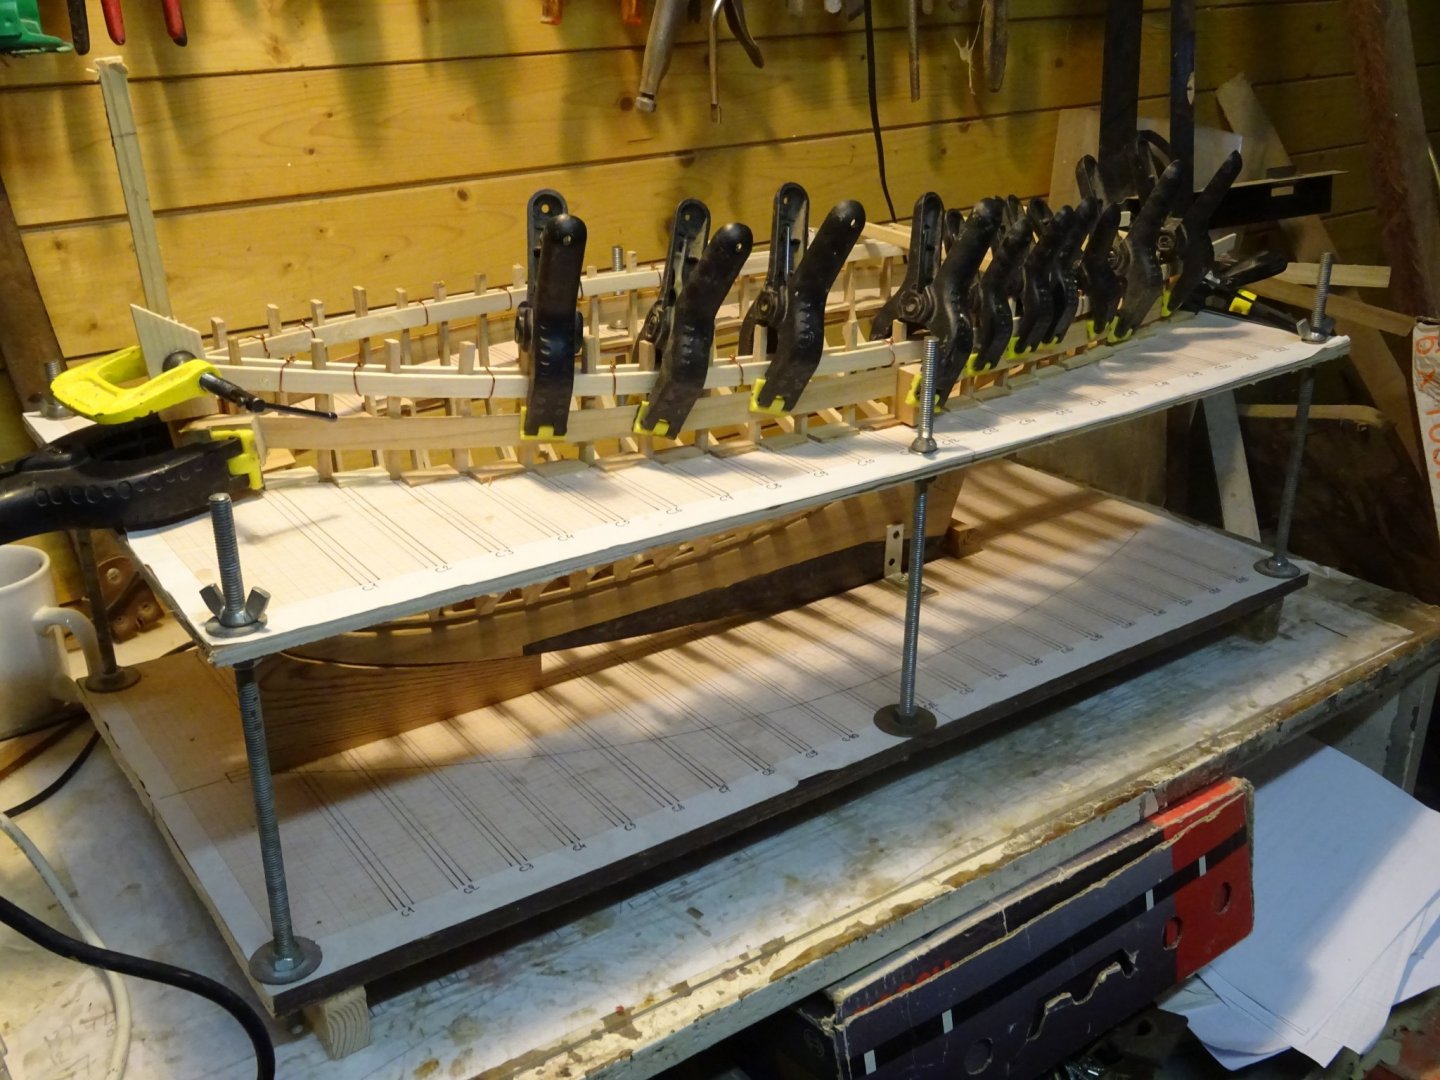
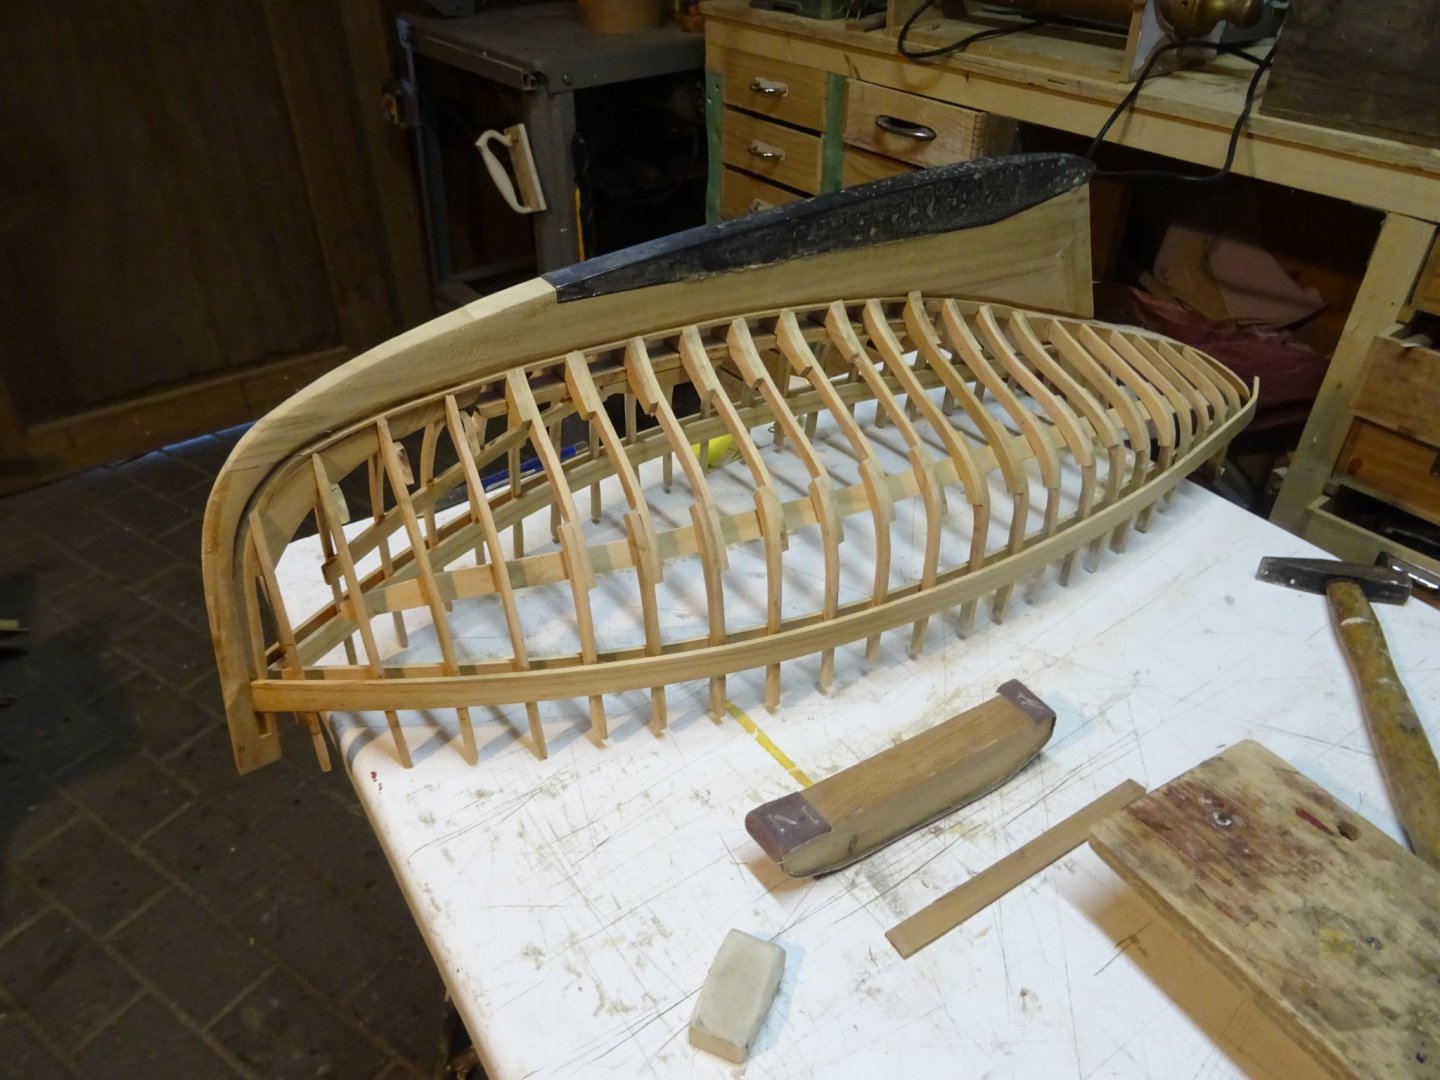
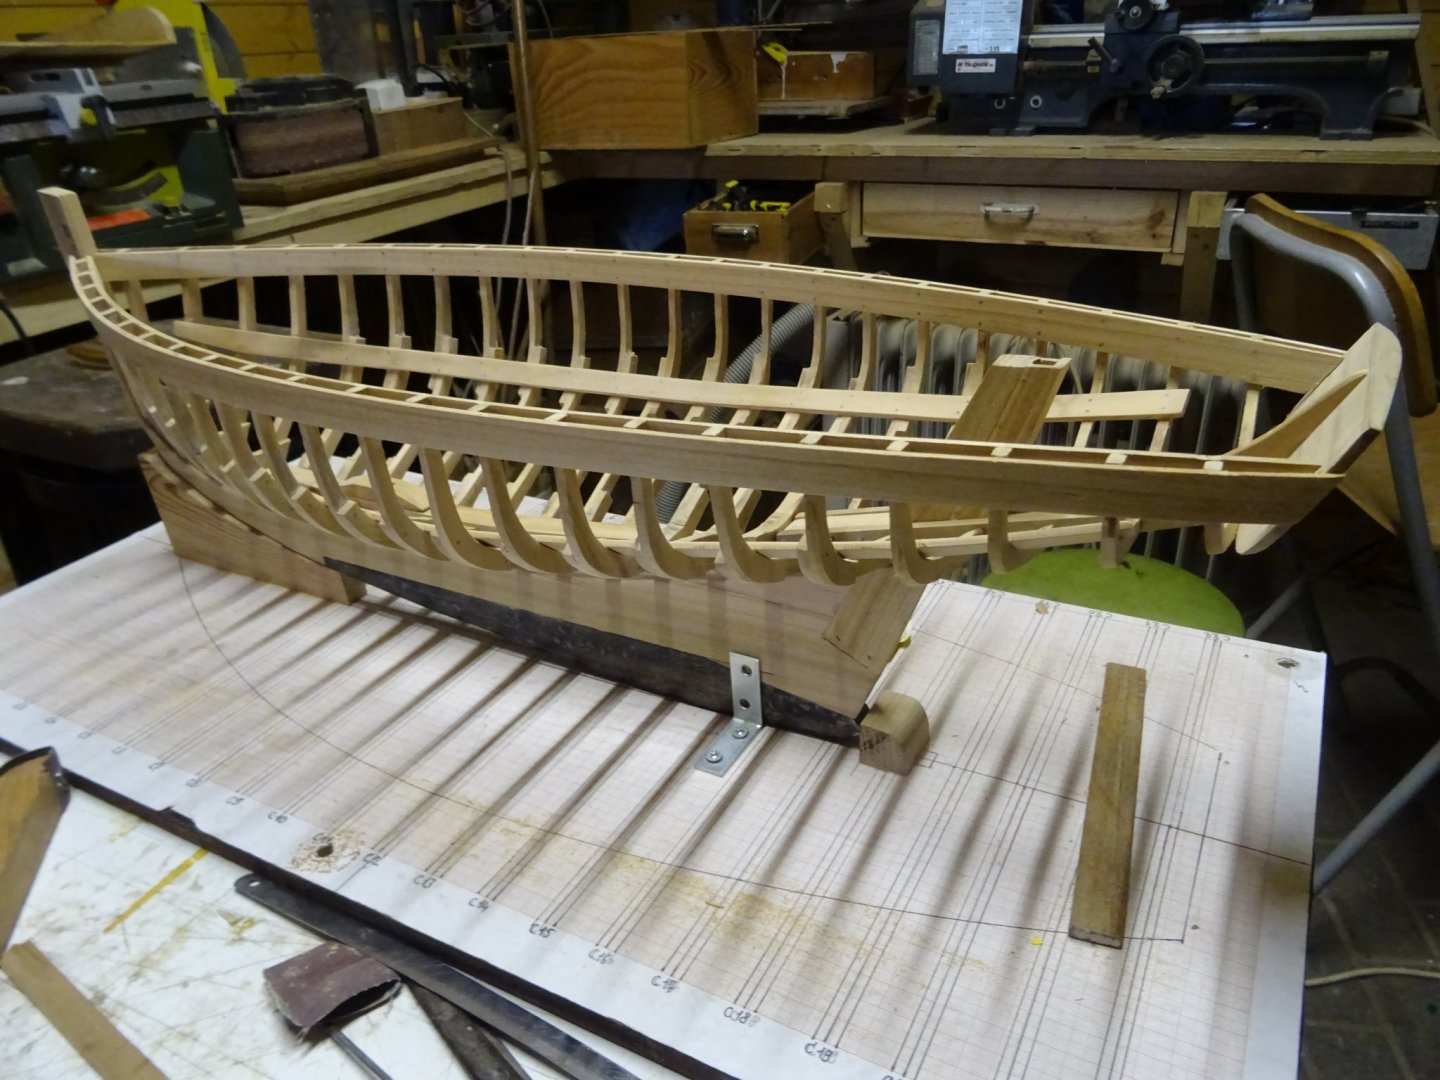
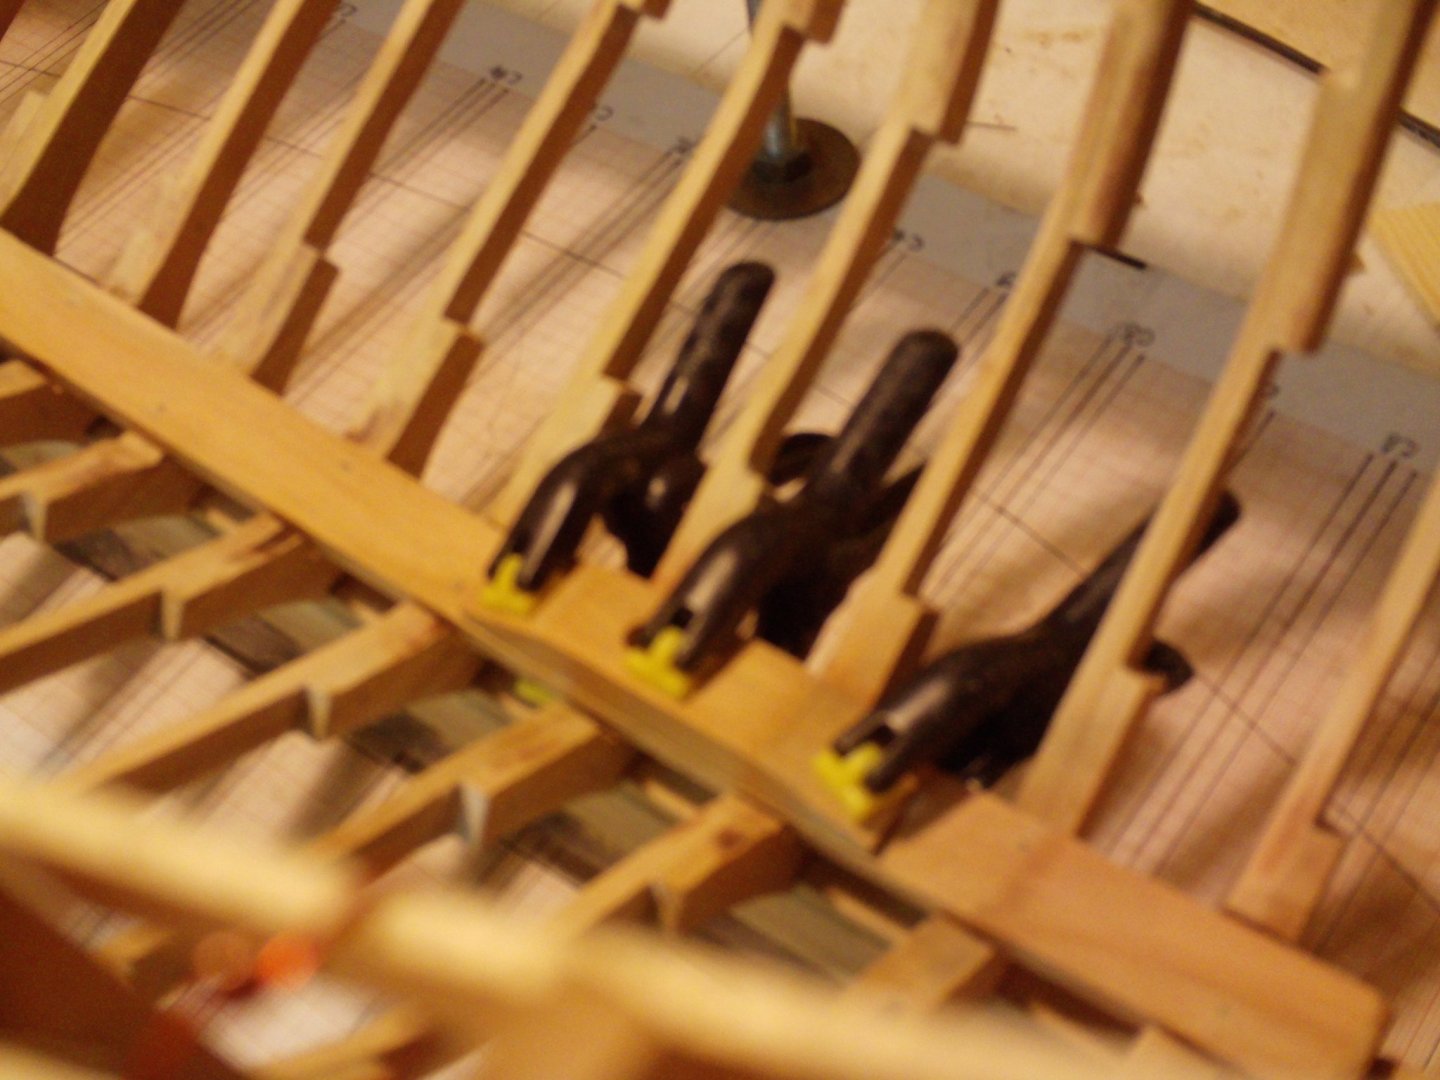
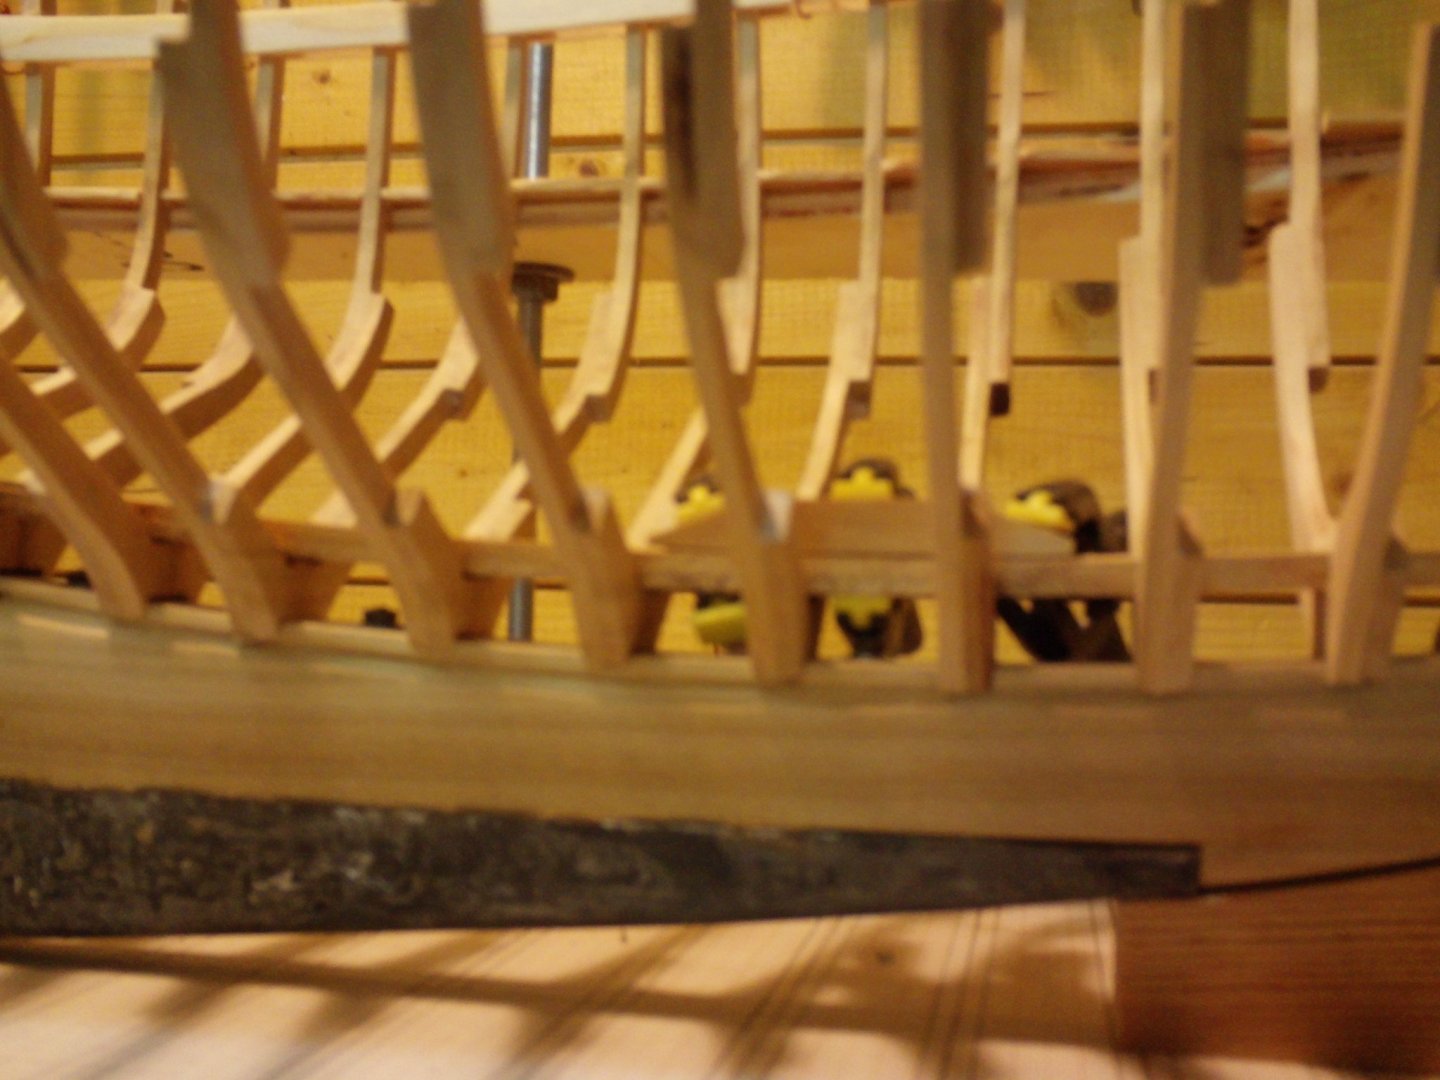
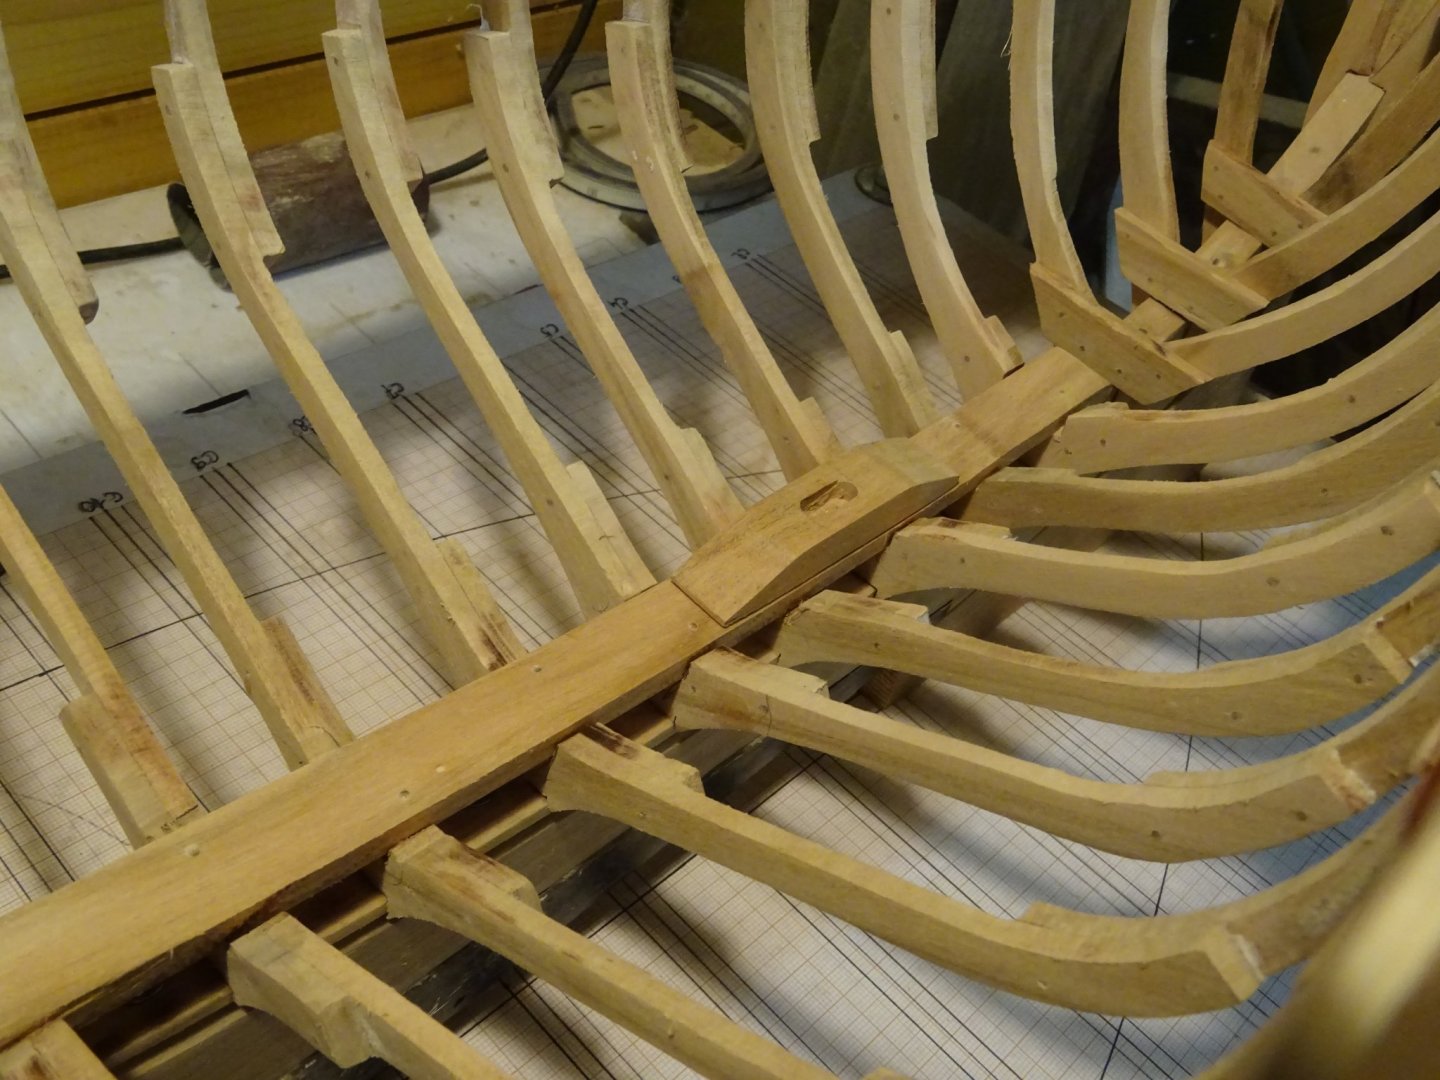
4. Wale, beam clamp and floor heads thick stuff Gluing the wale into place. When both wales are into place I place the beam clamps. They have to be glued at the same altitude as the wales, therefore I place a lath from wale to wale as a guide to glue the beam clamps. Now I glue the floor head thick stuff. The hull is now stiff enough to be taken out the building board ... ... and to be sanded at the outside. I tree nail the beam clamps and the floor head thick stuff at the inside of the hull before placing the deck beams. The wales at the outside can still wait some time. I saw the frames equal to the topside of the wales with a metal saw blade. Thank you to follow Thank you for the likes Thank you for your constructive comments Till next week!


- 168 replies
-
- 23
-
-
Thanks Yves and Vaddoc. And yes I will have to have to take more care in making sharper photos.
-
That's fine carving work, Jorge.
-
Michael, This morning, I went through my library to watch to other drawings of open gaff sail boats. You are definitely right: The bridle has to be spread a lot wider. The rig plan as drawn by Mr Van Beylen is not good. There is no need to consult other experts, I will change the gaff in the way you suggest. Thanks a lot for your advise.
-
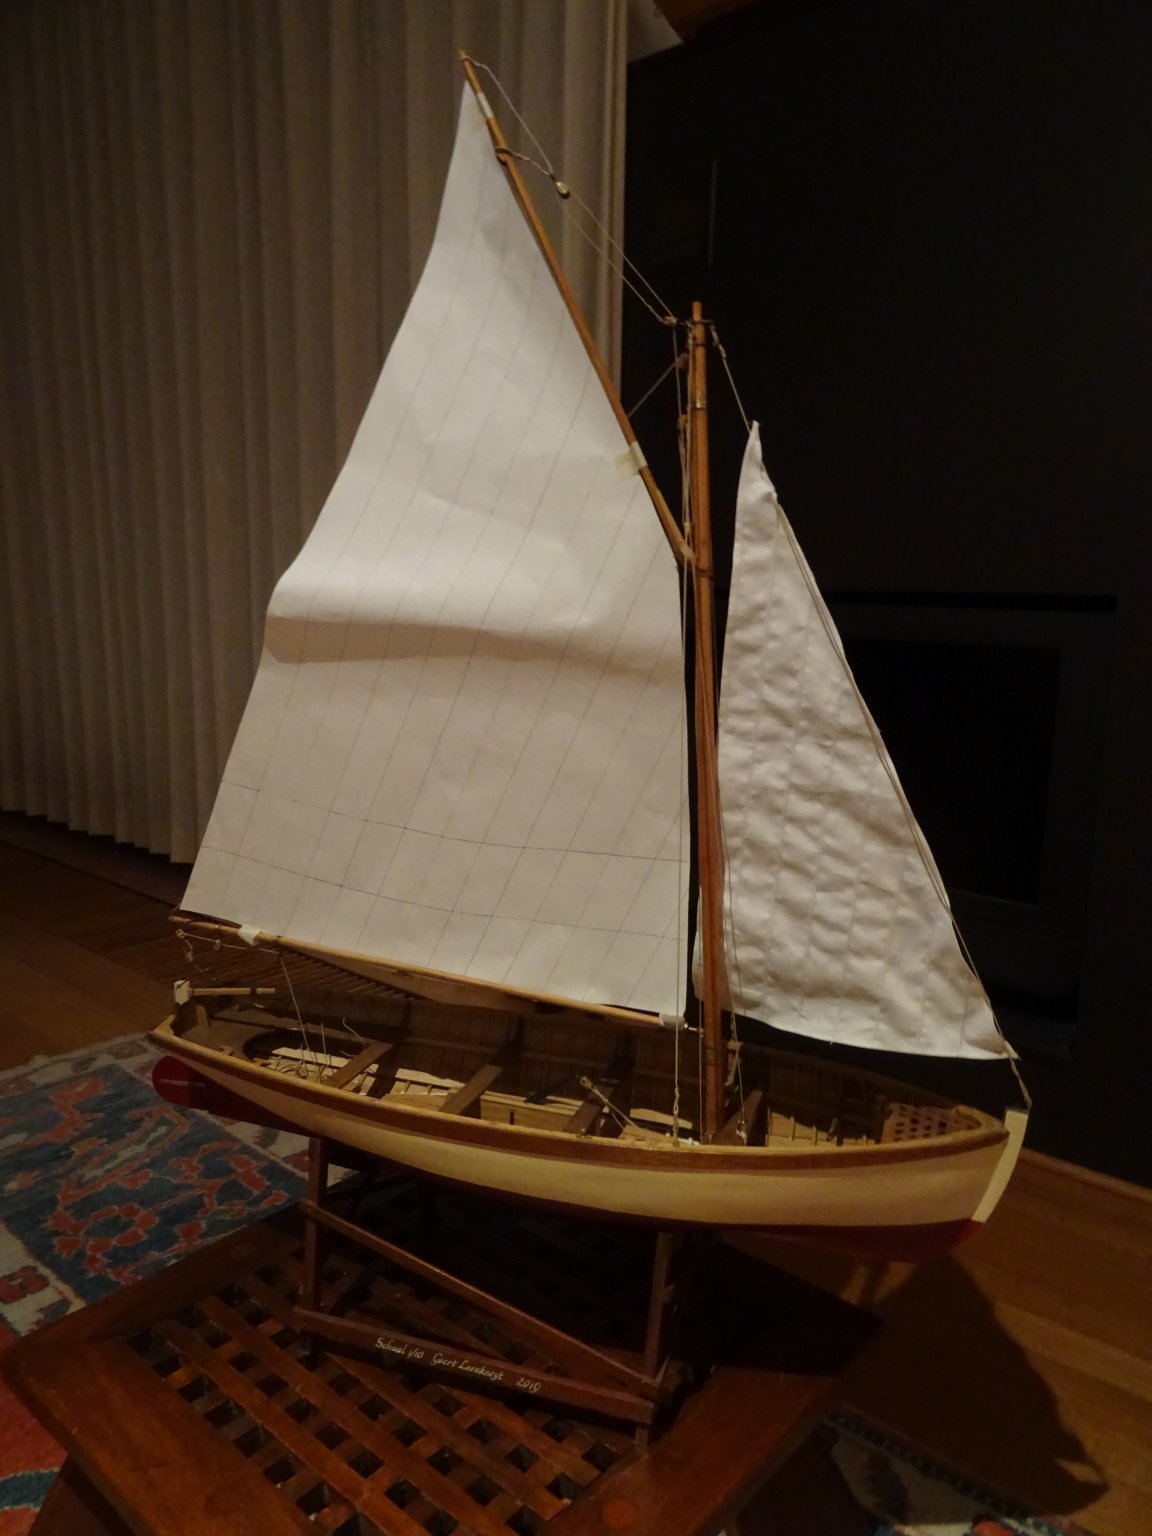
13. The sails I postponed it for as long as possible, but now I have to start to make sails. This model is already my second model waiting for sails. I will continue first with this gaff sail boat because the sails are less complicated than those for my Ostend shrimper. Nevertheless I will have learn operating my wife's sewing machine, so it will take some time and probably the progress of this log will slow down a bit. Anyway it will be more agreeable to work in the warm kitchen than in my cold workshop in this winter time. Today I made the paper patterns for the sails because this afternoon I will have the first lessons in stitching with the sewing machine by my wife. I have first learn to stitch long straight lines on a piece of cloth. When that works I cut the foresail accordingly to the pattern and I'm going to work with the sewing machine. For this run I have to concentrate fully on my work and did not make any pictures of the production process but when I make the main sail I will make it up to you. This evening the fore sail is sewed. There is still a lot to do at it, but I cannot resist to attach it to the model with the help of some pins. Thank you to follow Thank you for the likes Thank you for the constructive comments Till next week!

- 209 replies
-
- 10
-
-
Hello, Michael, I have not known Mr Van Beylen (the designer) personally, but you are probably right that he was not a seasoned sailor. He drew the boat as a modeler course. In any case I will take your remark with me to the monthly meeting with my local modeler friends next Saturday and look what their opinion is: stick to the original design of Mr Van Beylen or change the gaff and make a more seaworthy boat.
-
I mean the final layer. The layerthat will remain visible.
- 332 replies
-
- 1
-
-
- fluit
- abel tasman
- (and 1 more)
-
Marcus, I see you tree nailed the planks. Is that already the upper layer of planks?
- 332 replies
-
- 1
-
-
- fluit
- abel tasman
- (and 1 more)
-
Vaddoc, Michael, Keith, John, Moab, Pete and Gary, your encouraging comments are much appreciated. It pleases me very much that you like my work.
-
Hello Michael and Bedford, Thanks for your critical look at my model and for your useful hints. Boatbuilding technically your remark is probably correct. I made my model accordingly to the drawings (see below). The only thing that I can mention to my defense is that the boat is not designed to sail on open sea, but in sheltered waters like on a river or on a lake and probably only in nice weather. In such conditions the force on the gaff will not be so heavy.

-
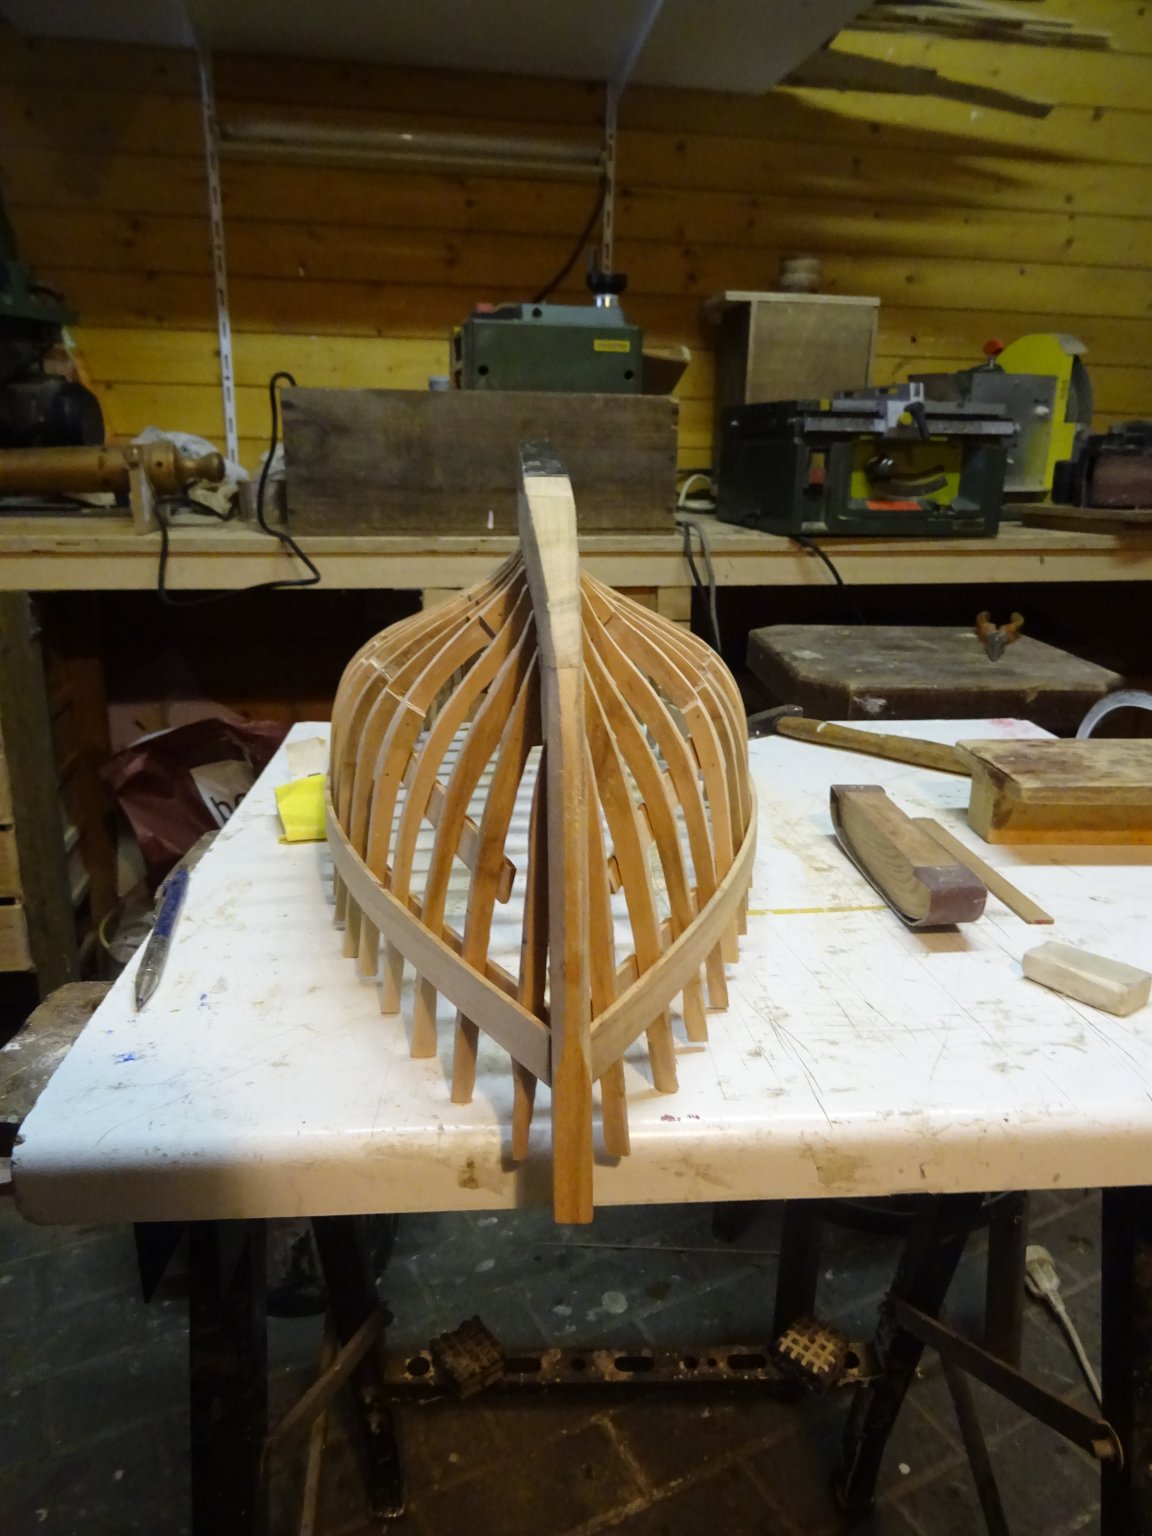
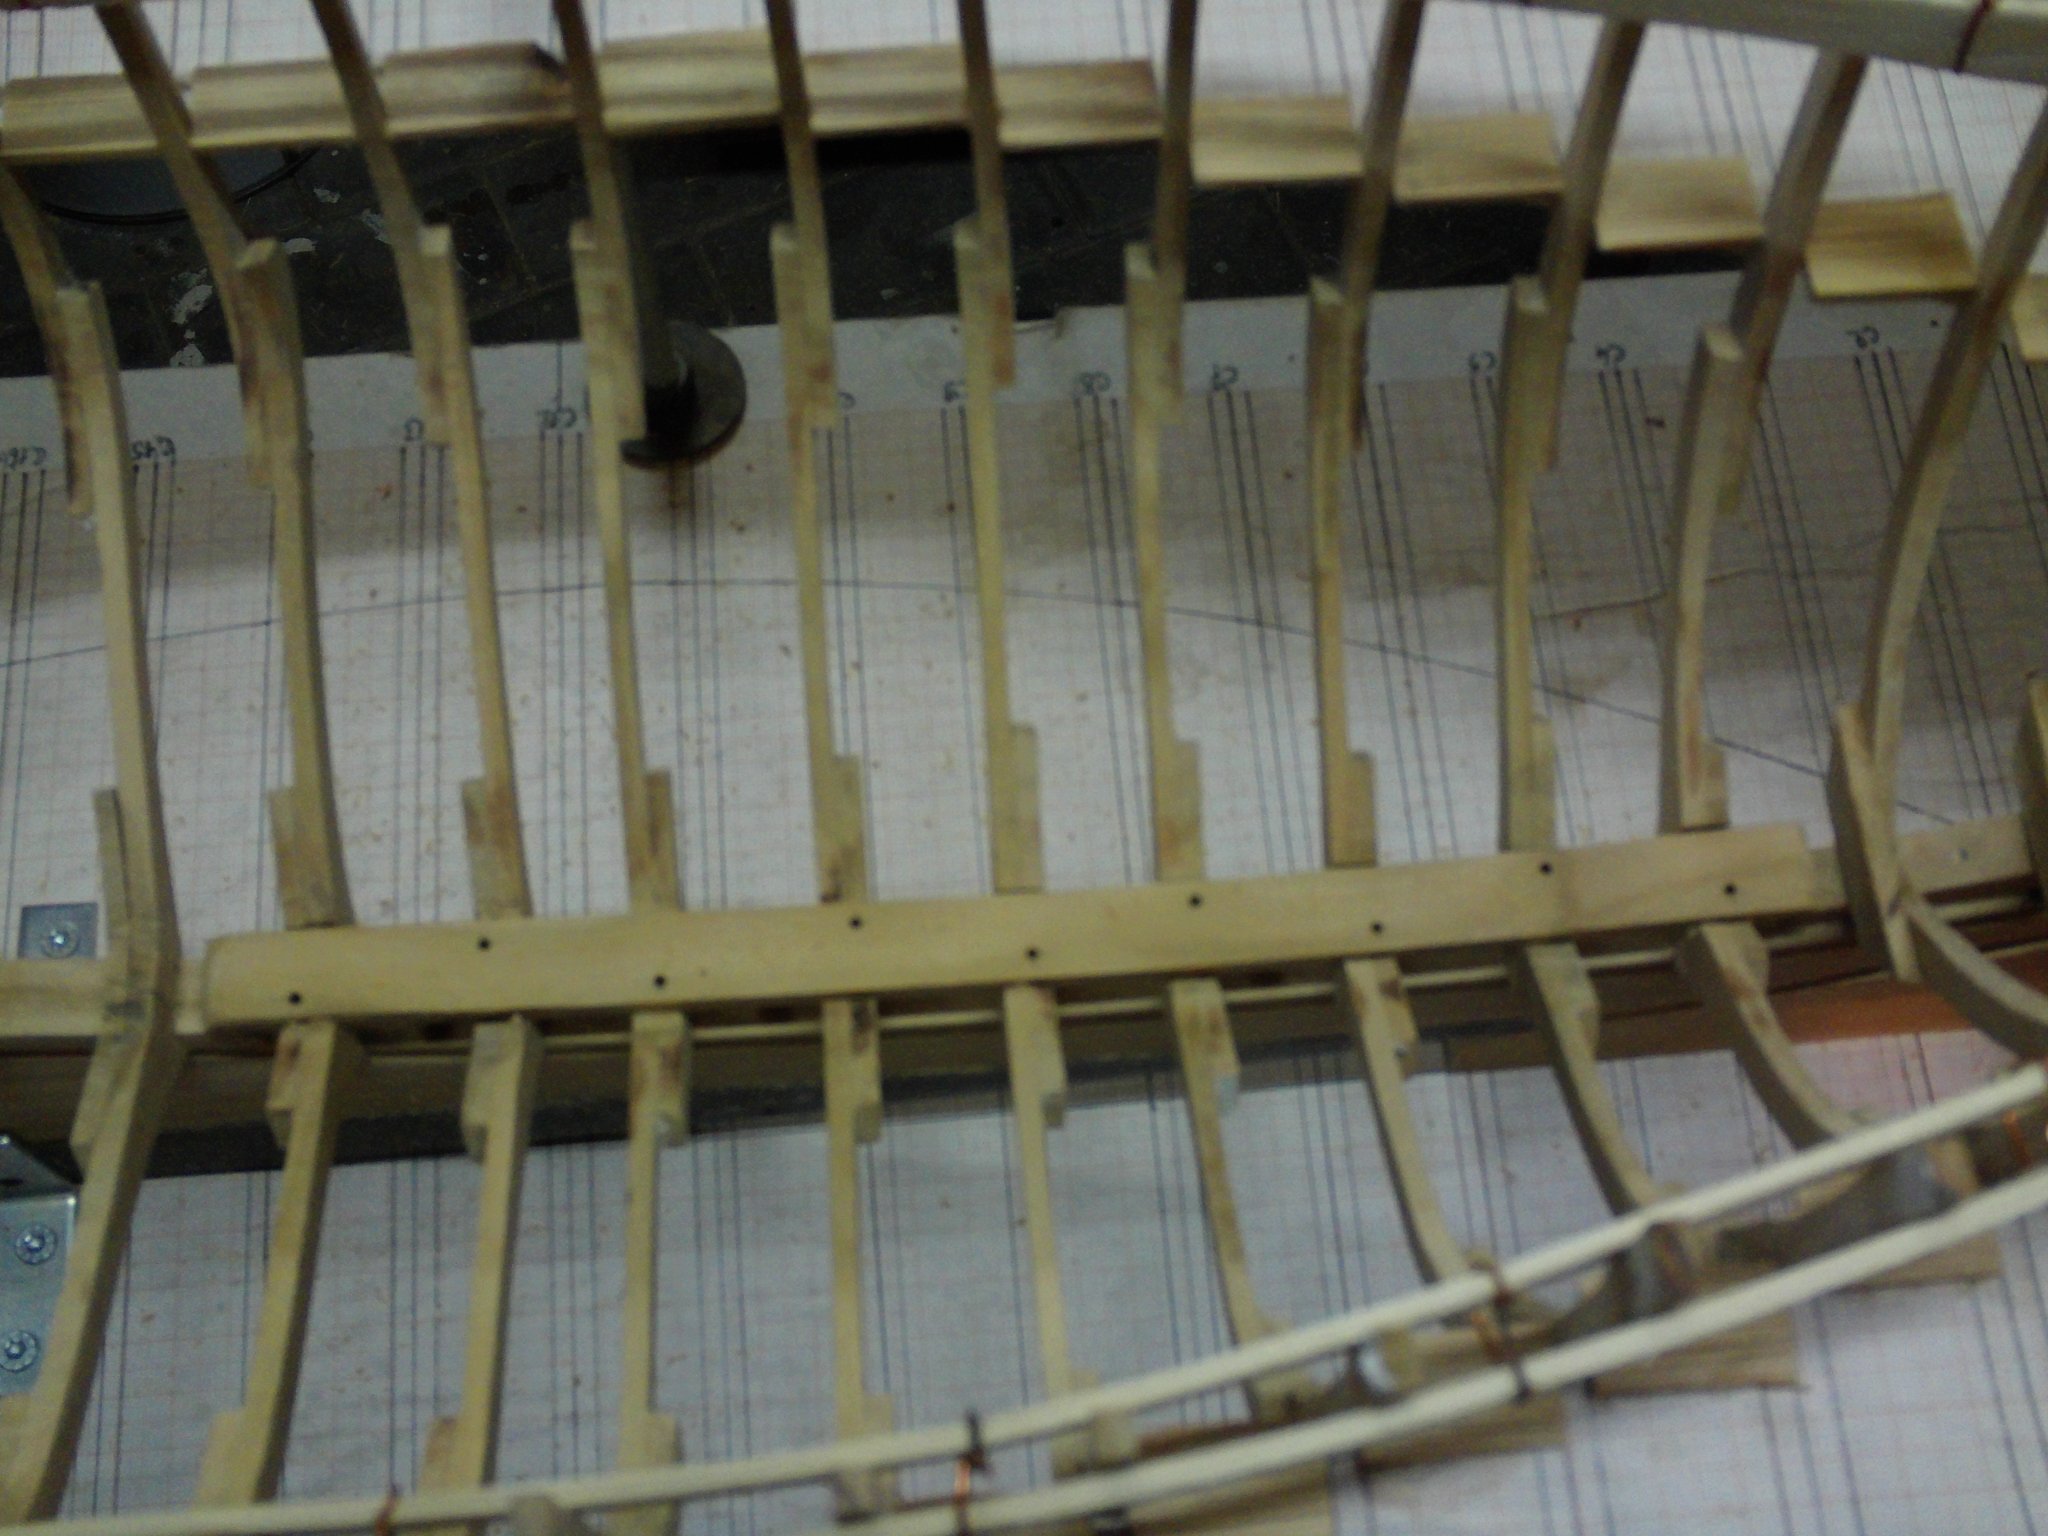
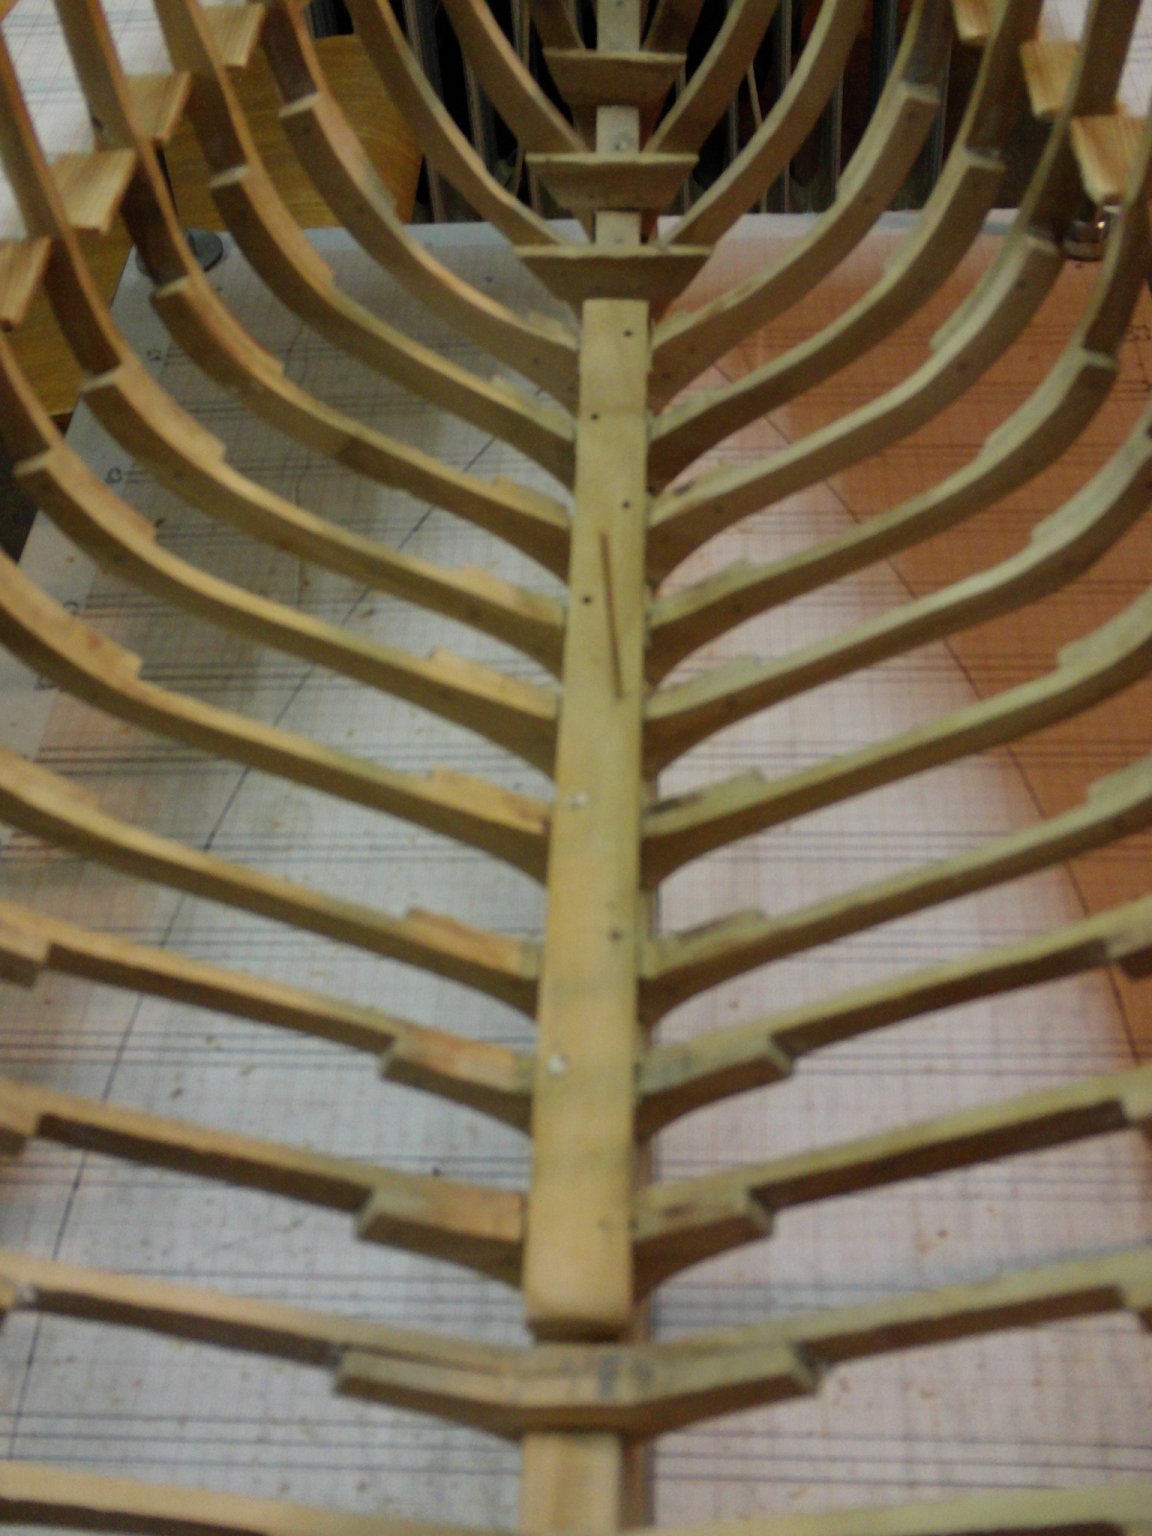
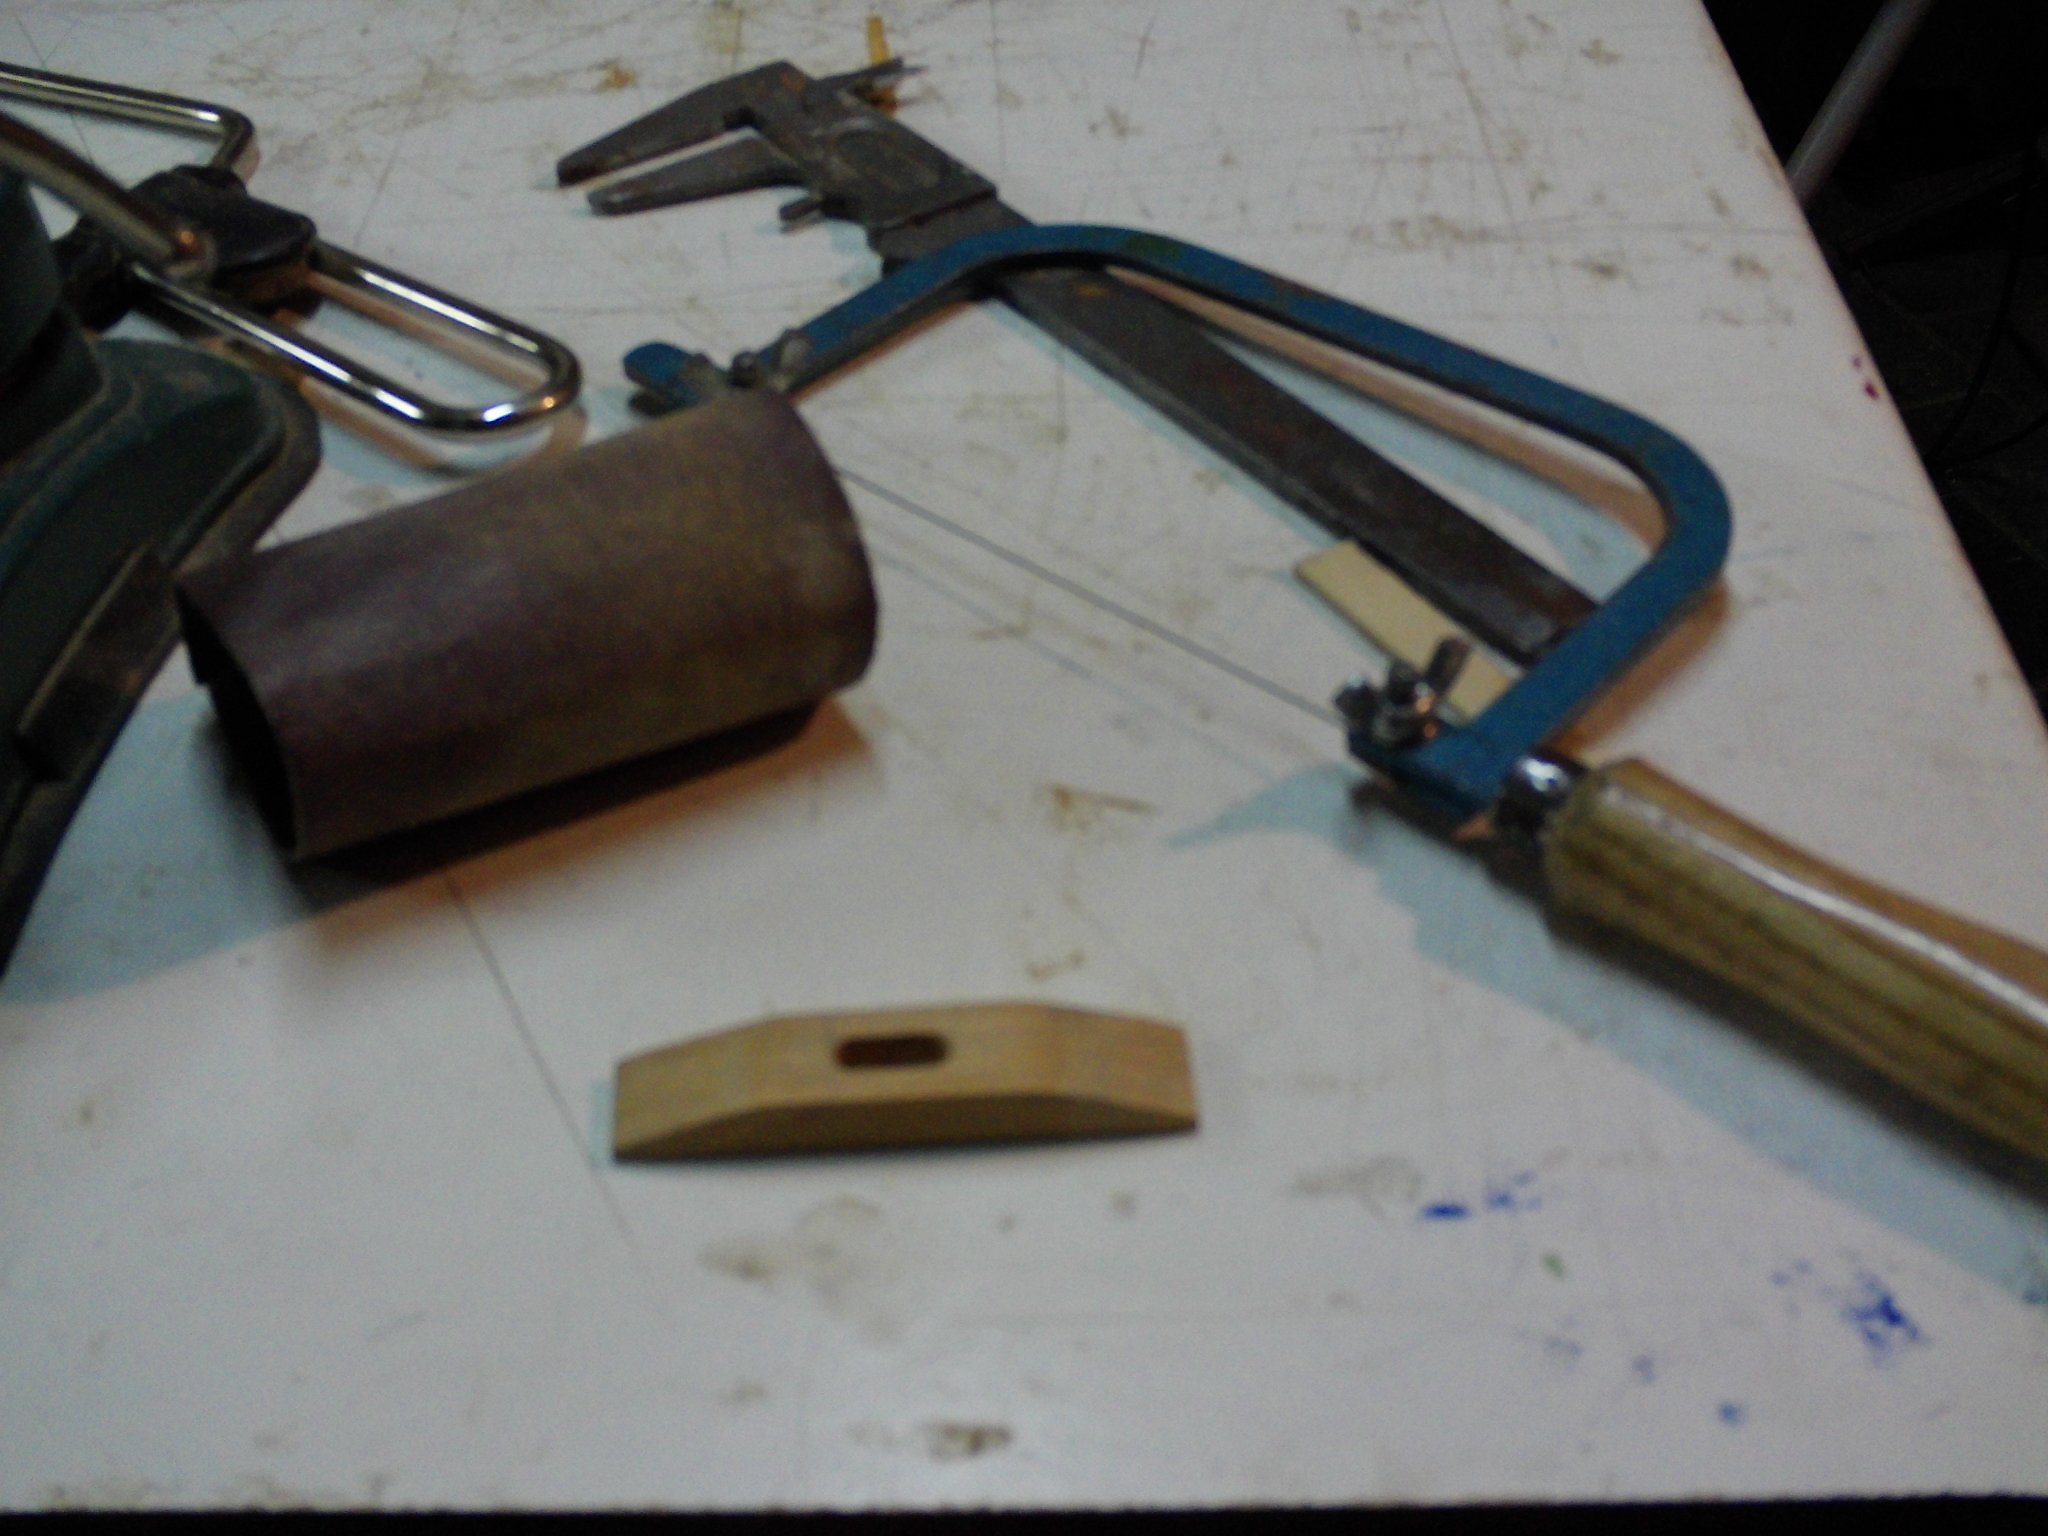
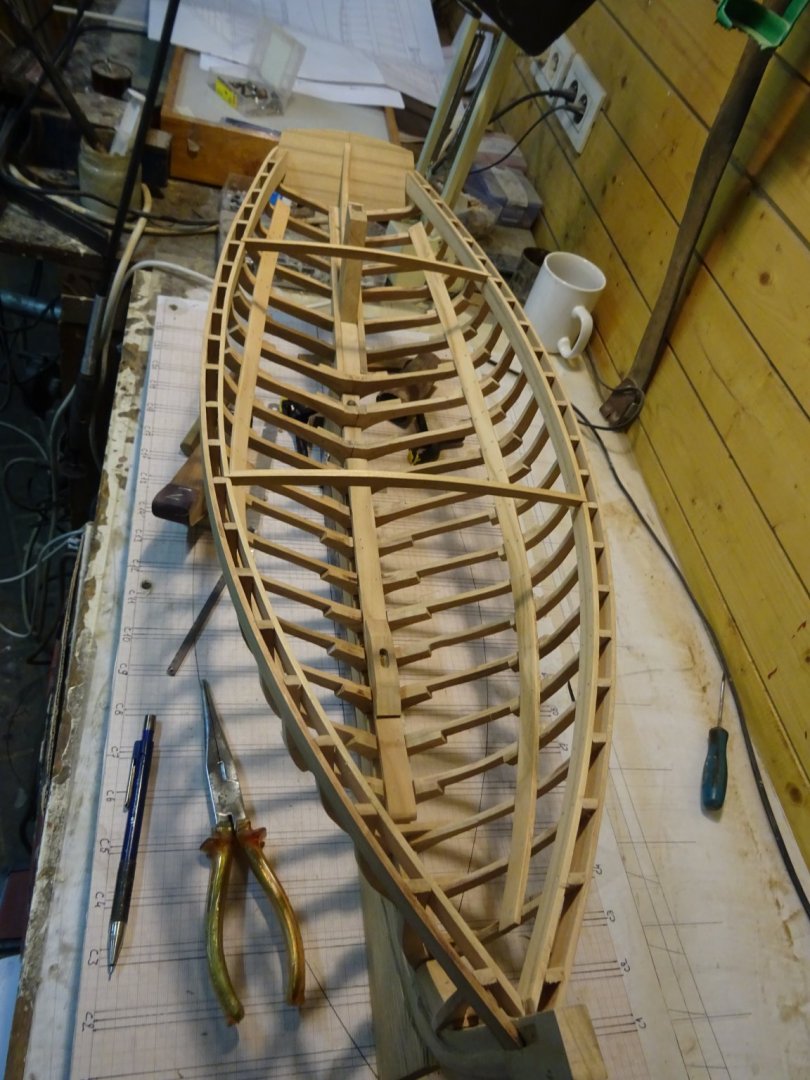
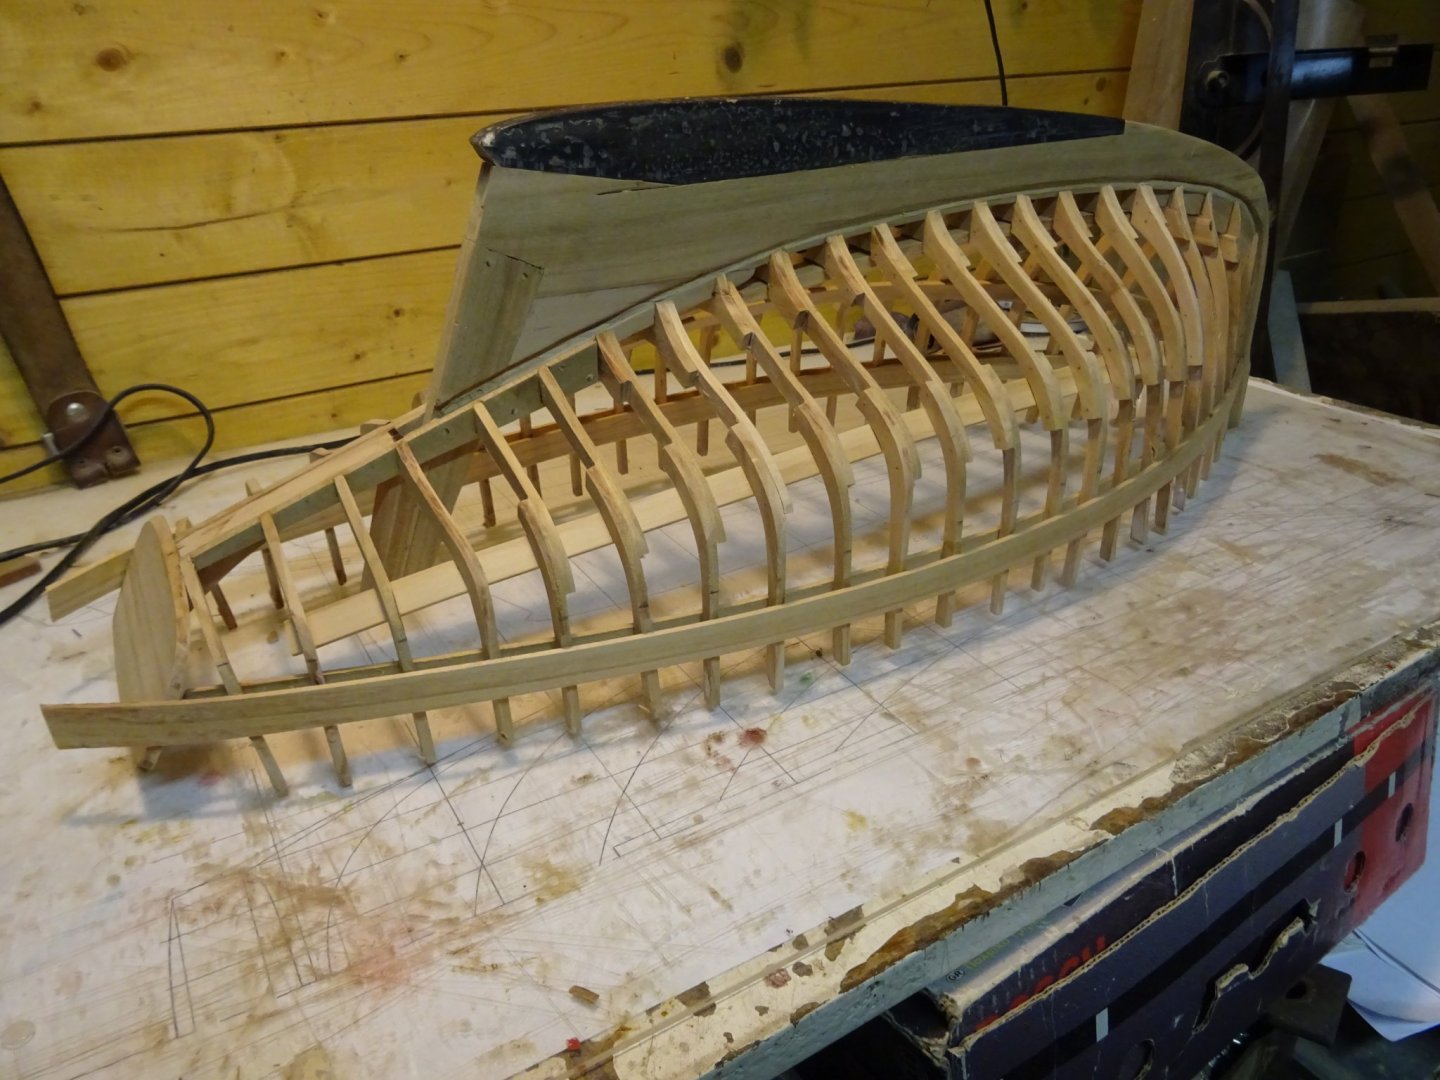
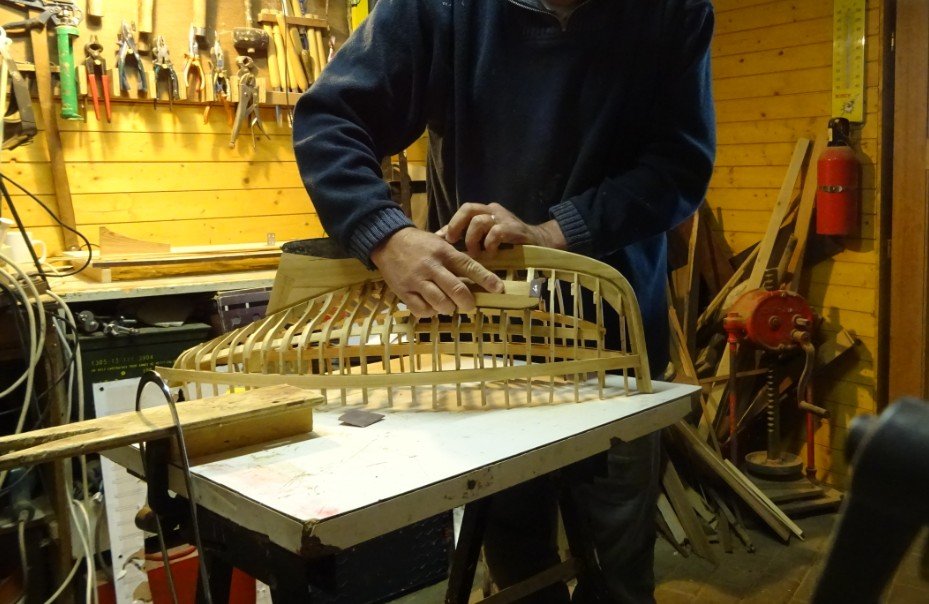
Thank you Gary. I am now passing to the next step. 3. Keelson and mast step Marking the recesses for the frames on the keelson. Sawing out the recesses. The top of the keel has a curved line so the keelson needs some force to be pushed into position. When gluing, I support is with a prop. The top level of the building board is a handy help to clamp it below. The keelson into place. I tree nail the keelson through the floor timbers into the keel. Before going further I sand the inside of the frames. I use a curved wooden sanding block on which I staple sandpaper of different grits. Making the mast step. I drill two holes in the block and chiseled the space between them out to one hole. Then I make the two sides sloping and finally I sand the bottom side into the same curve as the topside of the keelson. I see now that I was a bit lazy in making photos of the making process. Gluing the mast step. Thank you to follow Thank you for the likes Thank you for your constructive comments Till next week!


- 168 replies
-
- 19
-
-
Patrick, I believe you are underestimating your 'poor' brain. Myself, I prefer to work at two or three different projects at the same time. There comes always a moment that you have to cease the work at one model due to drying time, lack of material, further research or simply because you have had it for a while with that model. With a back-up model you can always continue.
- 756 replies
-
- 1
-
-
- galleon
- golden hind
- (and 2 more)
-
Hoping that spring begins early this year to give you the opportunity to continue.
-
HMS Pickle by mtbediz - FINISHED - 1:40
G.L. replied to mtbediz's topic in - Build logs for subjects built 1751 - 1800
Mustafa, this is going to be a very nicely rigged model. I like your working methods: simple, but very effective. -
Beautiful whaleboat, Paul. This was a very inspiring log, thank you for that. What a great idea to display your boat on the back of a whale!