

Jolley Roger
-
Posts
258 -
Joined
-
Last visited
Content Type
Profiles
Forums
Gallery
Events
Posts posted by Jolley Roger
-
-
21 hours ago, CDW said:
The fellow featured in the video passed away, the oil company exec.? That’s sad to learn.
Apologies, might have caused some confusion here.
The chap in the video is Ian Pringle, who is still alive and kicking and has now become an author Ian Pringle
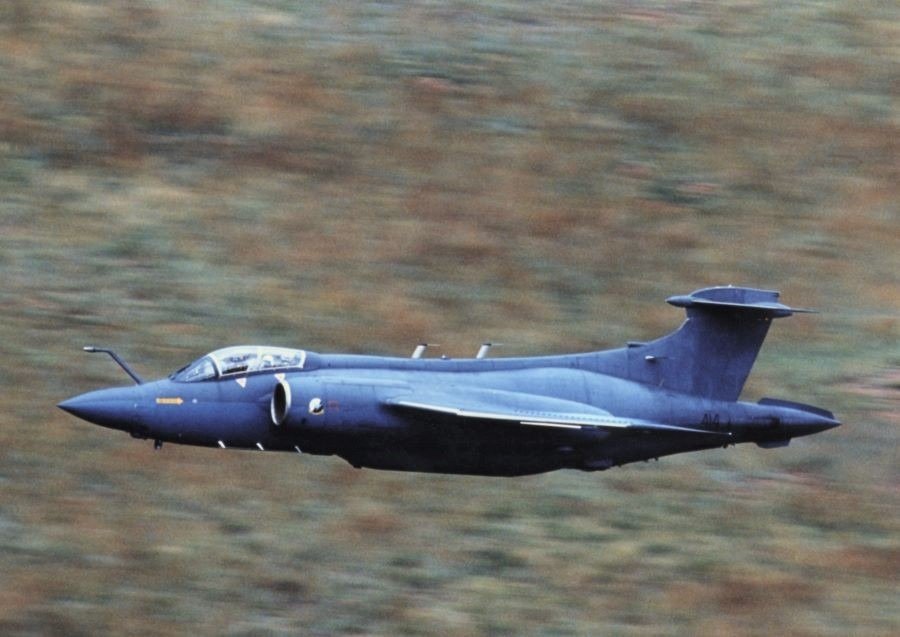
He used to own a Buc that was managed by Thunder City
Mike Beachy Head was the owner of Thunder City and he passed away in 2017.
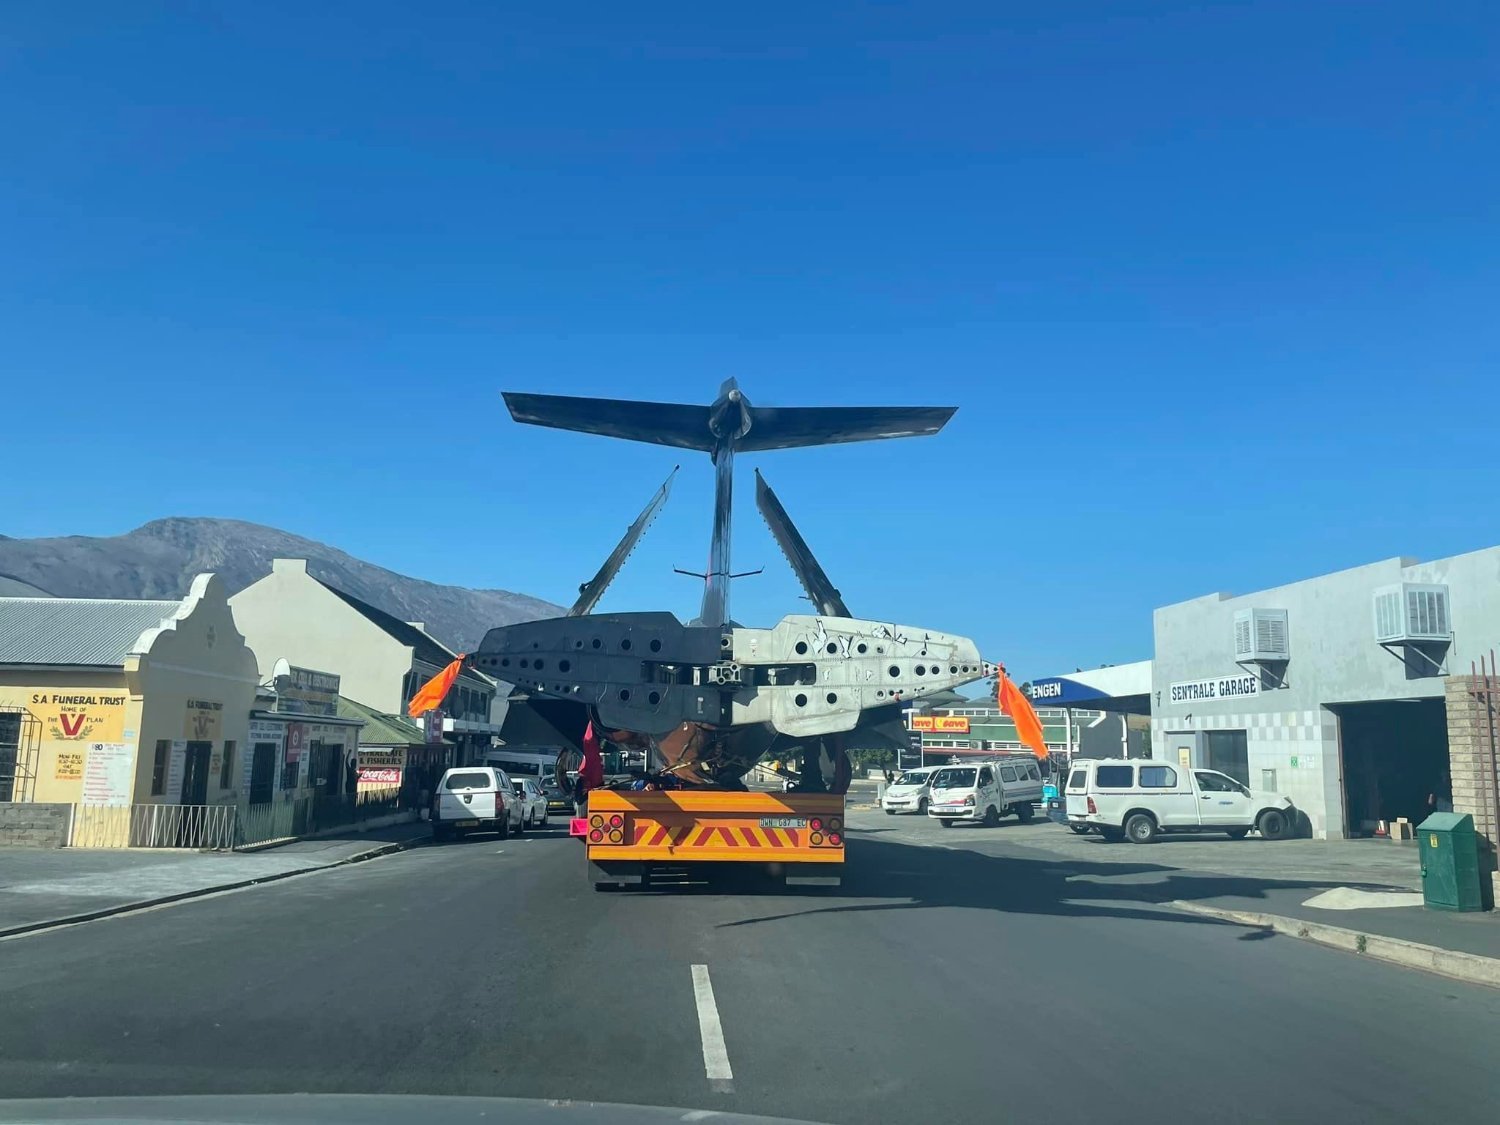
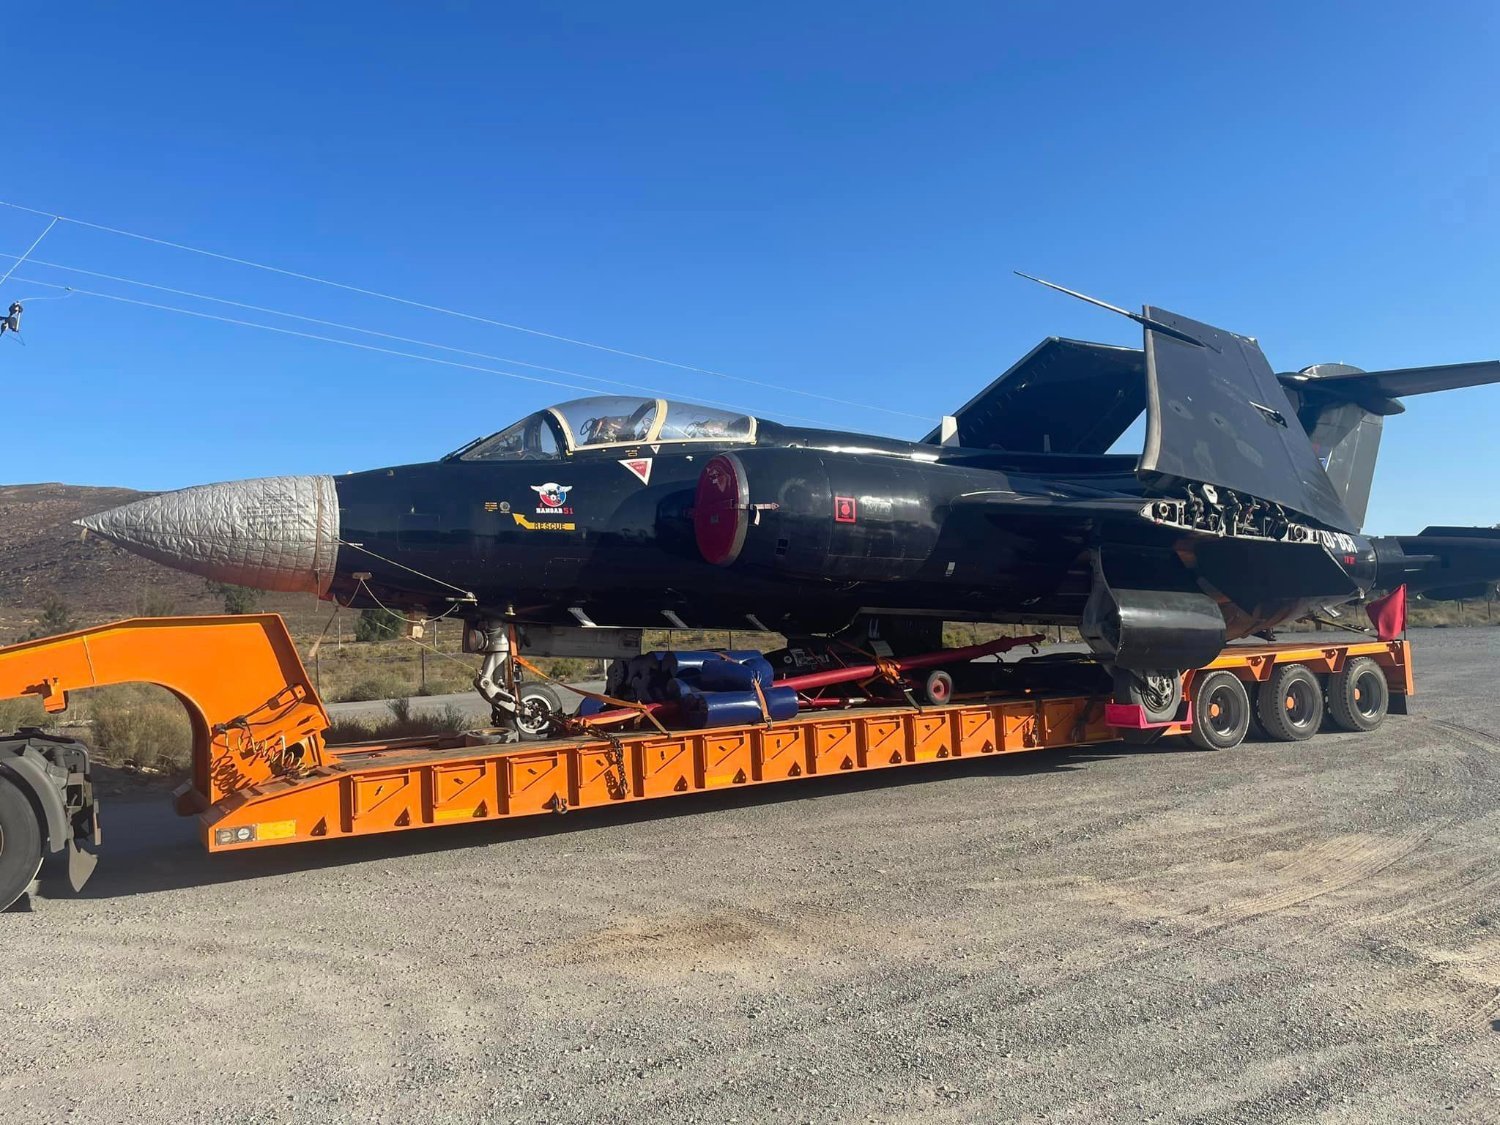
A company called Hangar 51 has bought the Buccs and has moved them by road from Cape Town to Port Elizabeth for restoration. (Dec 2022 and Jan 2023)


- yvesvidal, FriedClams, mtaylor and 7 others
-
 10
10
-
16 hours ago, Egilman said:
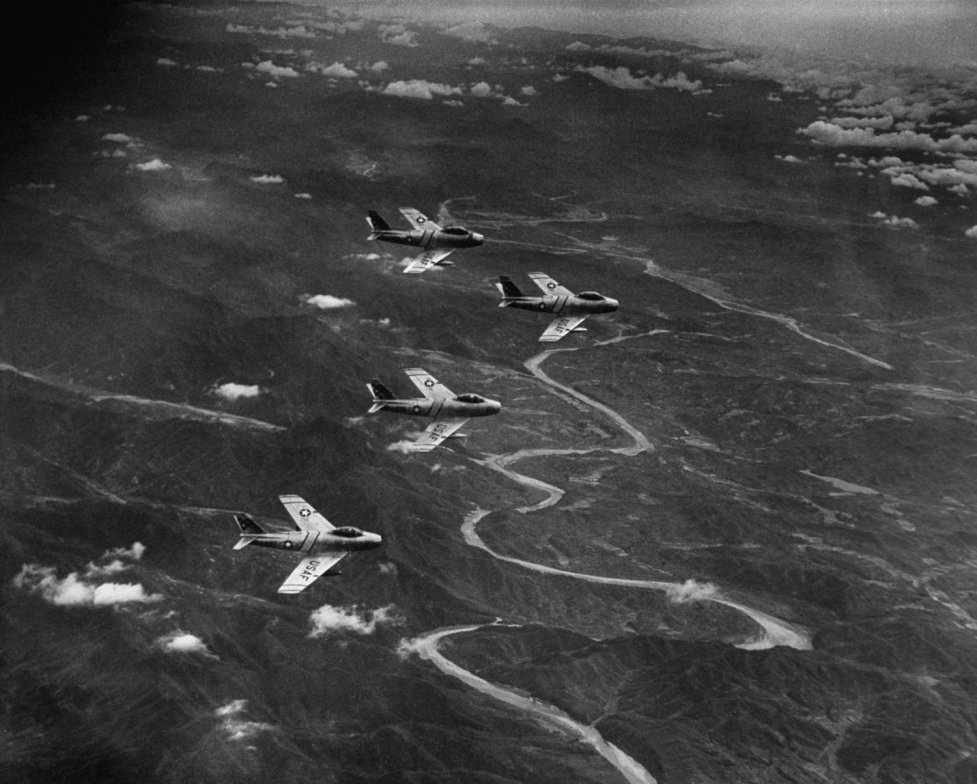
The aircraft above I presume is US based cause that looks a lot like the Nevada desert mountains in the background and sponsored by Shell Oil as well... (very deep pocket)
Cape Town, South Africa based. Thunder City, the company that owned them, is defunct now after the owner died of a heart attack a couple of years ago. Some of the collection has been sold off, so we might see a Buc flying again soon...
- Egilman, Edwardkenway, AJohnson and 4 others
-
7
-
A very much loved aircraft type in the SAAF as well, good old British engineering at its best!
-
-
Hi Egilman,
Your dolly sure looks the part! Is there any reason why you are not printing it instead of scratching it? Just curious as i'm no expert on 3d printing.
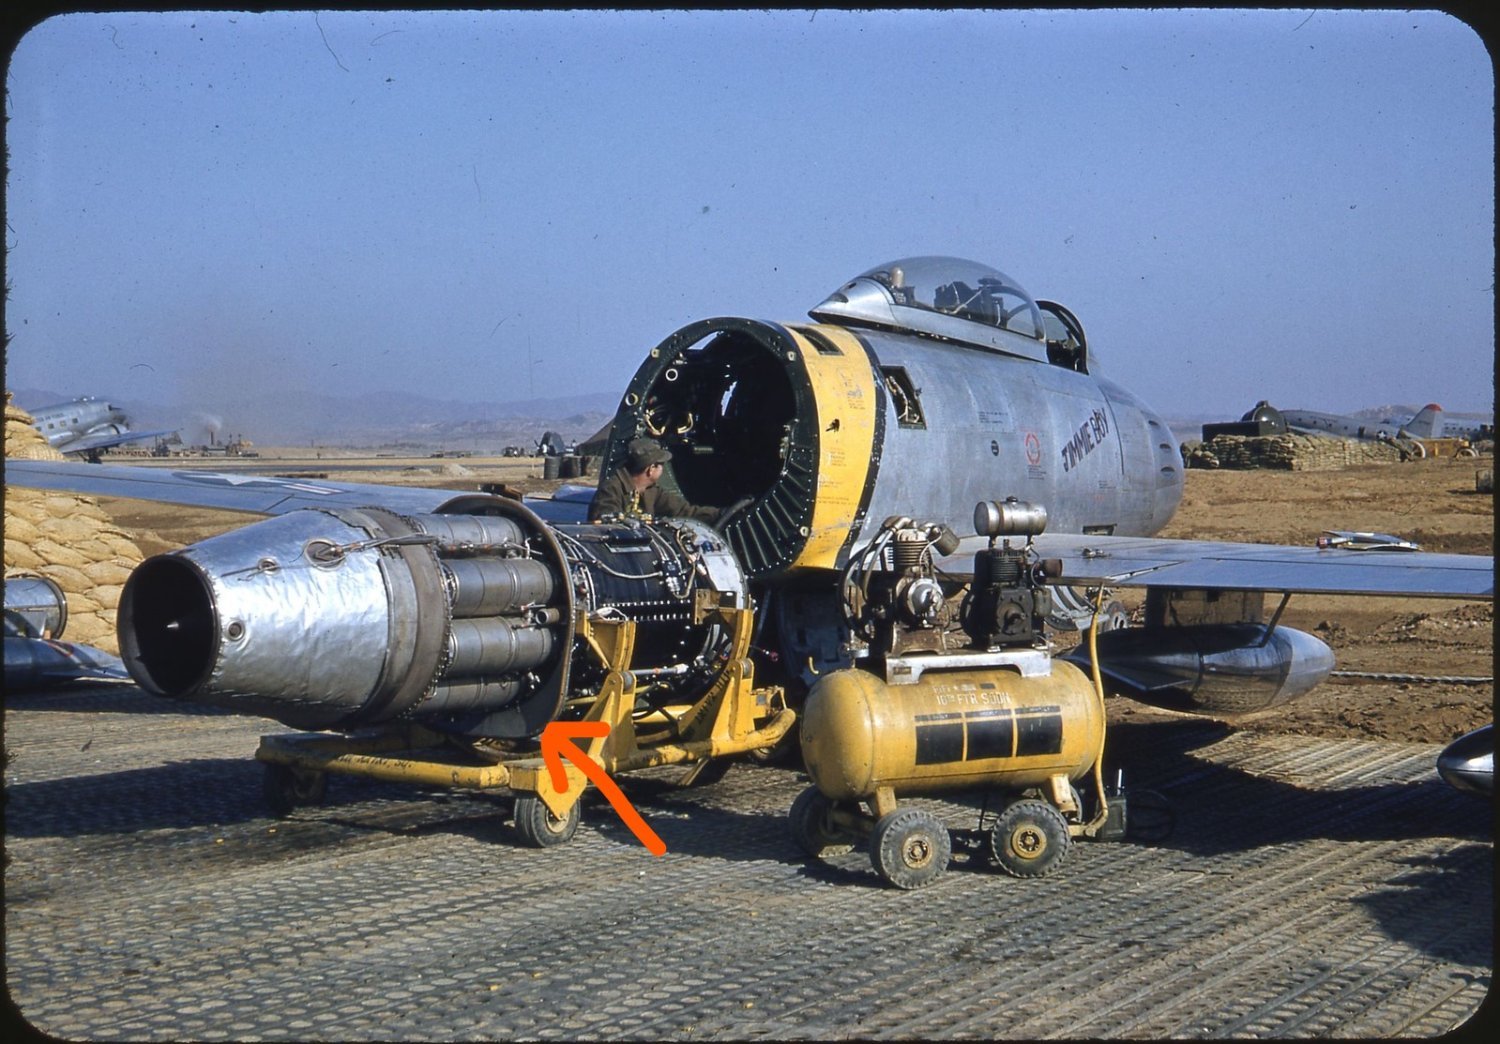
One other thing, as per pic below, I notice there is a 'plate' between the compressor section and the combustion chambers, assume it was to mount the engine correctly in the fuselage?

-
-
-
-
All the best with the upcoming procedure Egilman.
Absolute stunning work, don't think I have ever seen anybody in the aircraft modelling community do something similar, so looking forward to the printed prototype.
If you ever make this available to buy, i'm first in line🙂, i've got a Wolfpack F-86(basically a reboxed Kinetic) in the stash and a proper engine will make it so much better!
-
13 hours ago, Egilman said:
No Spanner in the works....
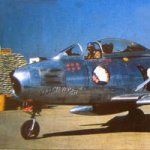
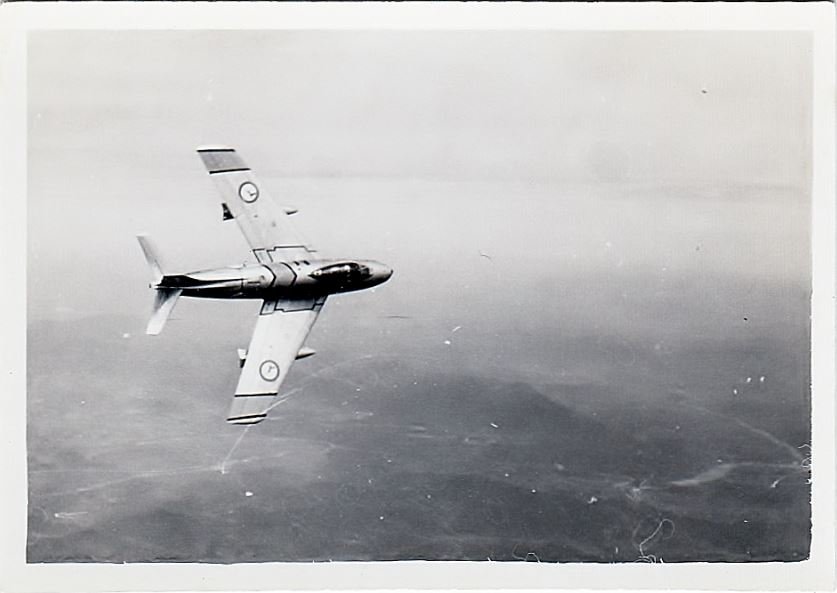
The SAAF flew two different versions of the Sabre in Korea, the F-86F on loan from the USAF and their own purchased Canadair Sabre 13 Mk. 6's (F-86F's built by NAA in Palmdale for the Canadian AF) those Mk. 6's had grey cockpits, the SAAF Sabre's of 2 sqd, on loan from the USAF had black cockpits....
Read here where where it is directly discussed... (By SAAF historians and modelers)
Negative sir, the SAAF purchased the Mk 6 after the Korean war, because of their experience with the F86 in Korea (i'm actually one of the 'historians' on the website you linked🙂)
But, i'm not here to argue this minor detail with you, i'm here to see you build this wonderful model, 99%+ of Sabres would have had all black cockpits
Would love to see you build the J-47 engine from scratch, lots to be learned
-
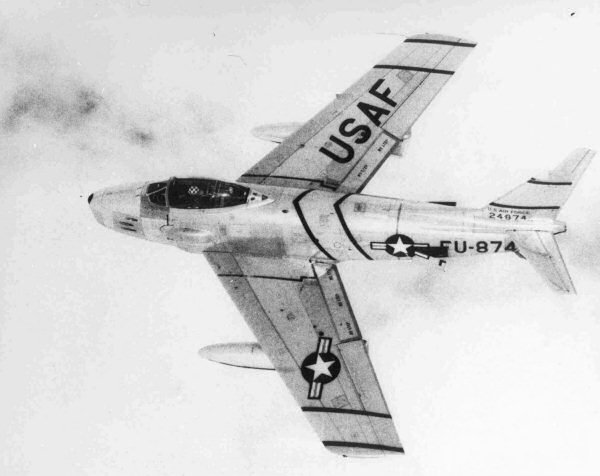
On 4/1/2022 at 12:01 PM, Egilman said:
The last image is a Palmdale (North American Aviation) built Sabre Mk 5 that is still in it's wartime configuration... This illustrates the black cockpit better than anything I could describe... Postwar, the Airforce decided that they were going to the aircraft grey cockpit with black panels (November '53) and all aircraft were to be switched to the new scheme upon the first IRAN (Inspect and Repair As Needed) so you will be very hard pressed to find any sabre aircraft with a black cockpit today, all of the currently flying refurbished/restored aircraft have a grey/black cockpit...
Just to throw a small spanner in the works😁
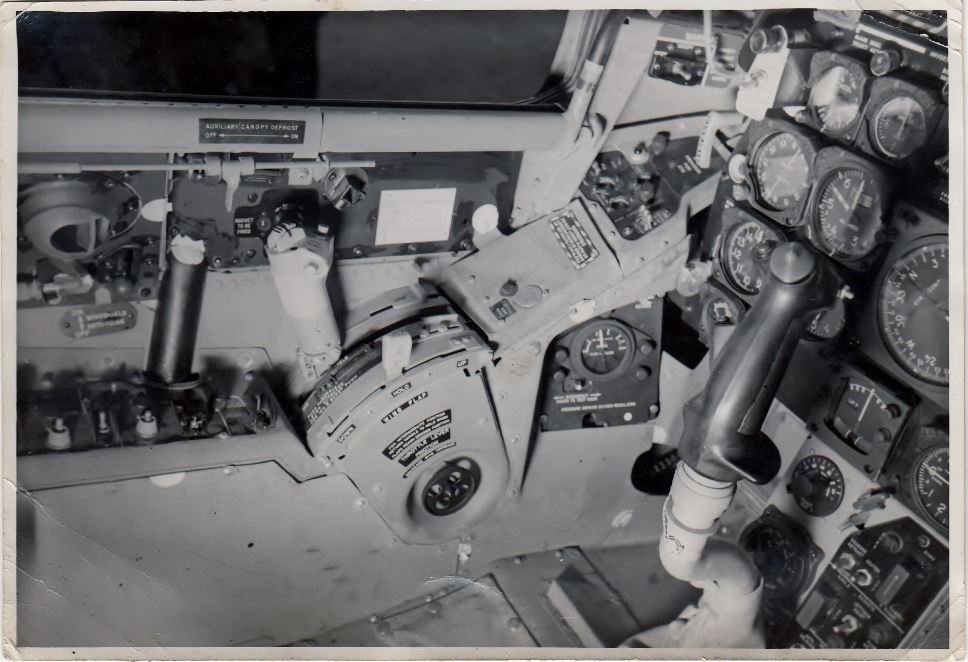
Below is a cockpit photo of SAAF F-86 616 with a grey interior taken by Lt G Thom. This aircraft was shot down on 21 July 1953 and Lt Thom became a POW for a short while. So there were some Sabres that already had grey interiors in the Korean theatre.
-
Following with interest, my favorite piece of military hardware!
- Edwardkenway, lmagna, Egilman and 5 others
-
8
-
Epic! Still in good nick too.
- mtaylor, modeller_masa, AJohnson and 3 others
-
6
-
On 2/6/2022 at 4:49 AM, Javlin said:
I am back on top of this one fellas already working should paint the pit this week researching the past research.
")
Finally!
Looking good so far
-
You can also try Rarewoods USA, they sell Buxus Macowanii, aka Cape boxwood which is very similar to European boxwood.
-
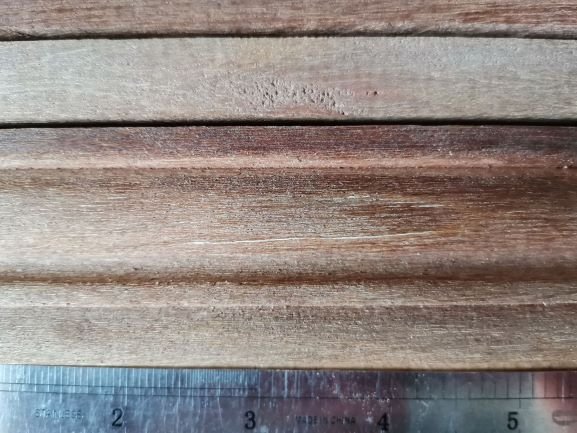
I've seen similar white streaks in a wood that we call Meranti over here, a cheap wood mainly used in the construction industry.
According to Wikipedia - They are sold under various trade names including "lauan", "lawaan", "meranti", "seraya", "balau", "bangkirai", and "Philippine mahogany".
Genus - Shorea
In my humble opinion it is not suitable for model ship building
This is a sample i have in my wood pile with a bit of white streaking
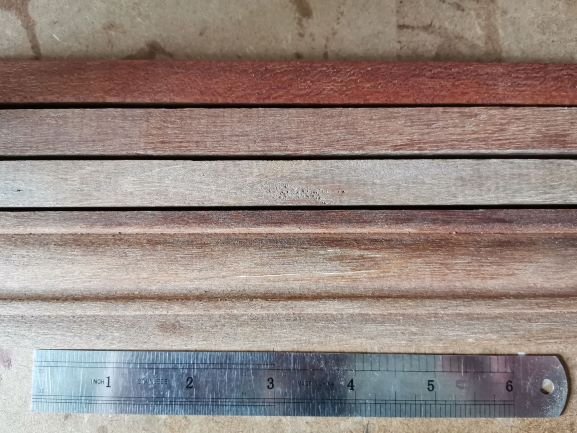
and some more from the same genus, but very different colors
- bruce d, mtaylor and thibaultron
-
2
-
 1
1
-
-
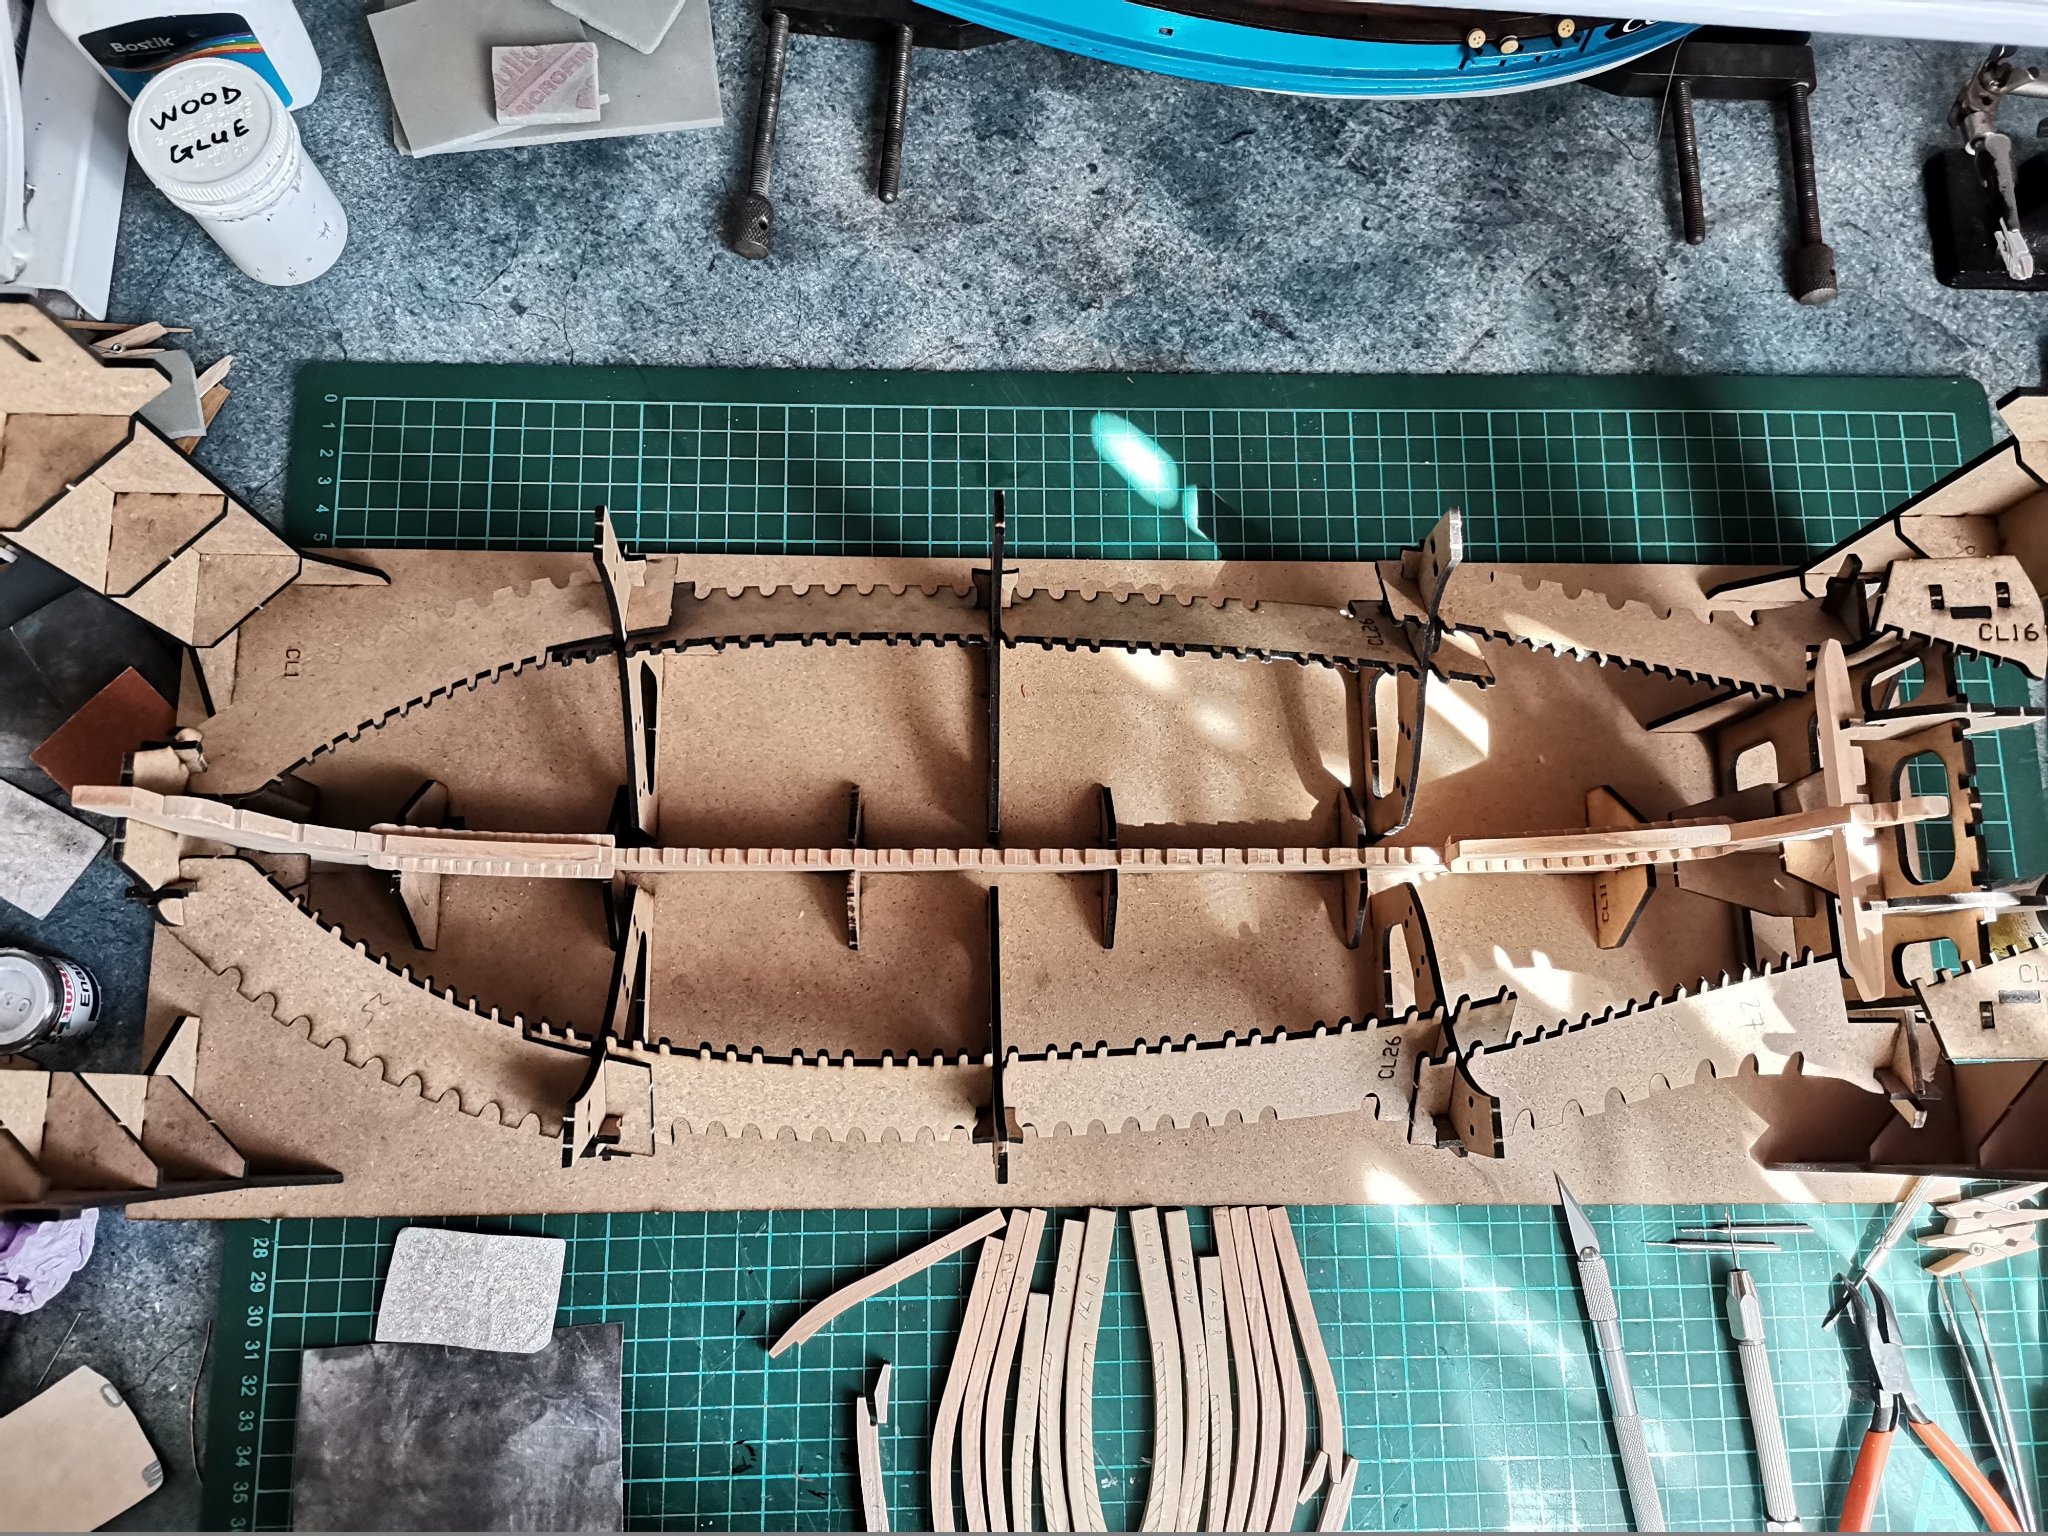
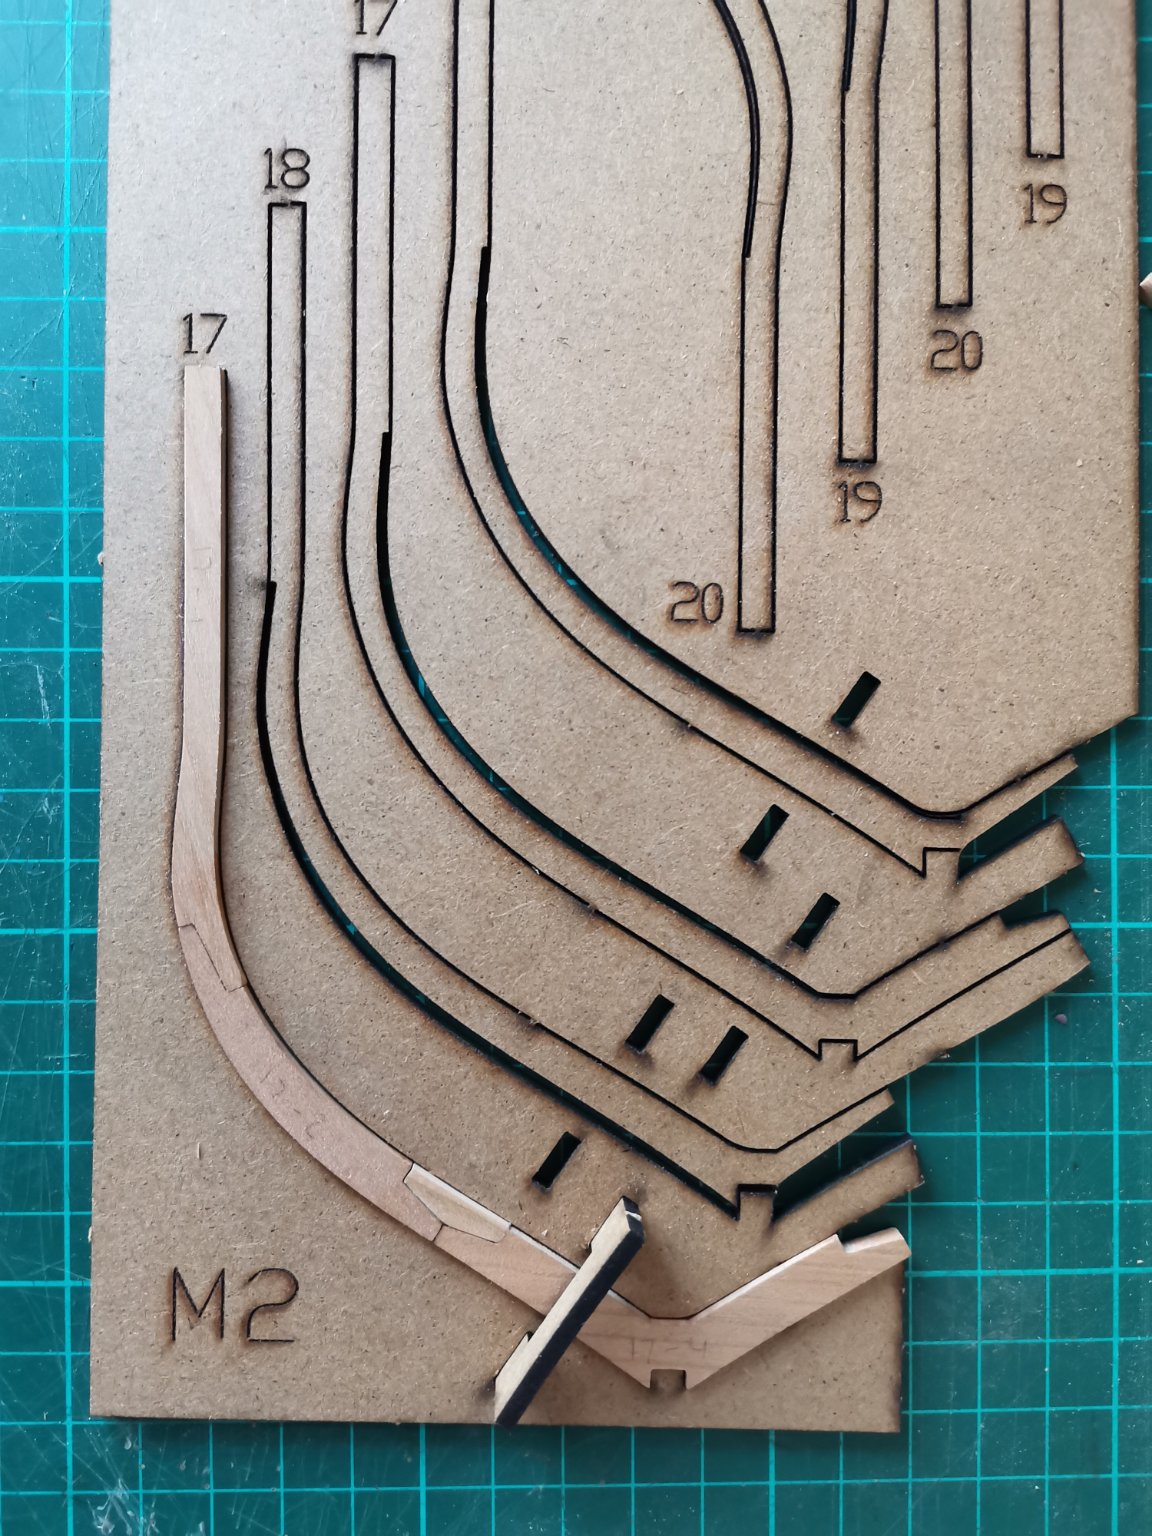
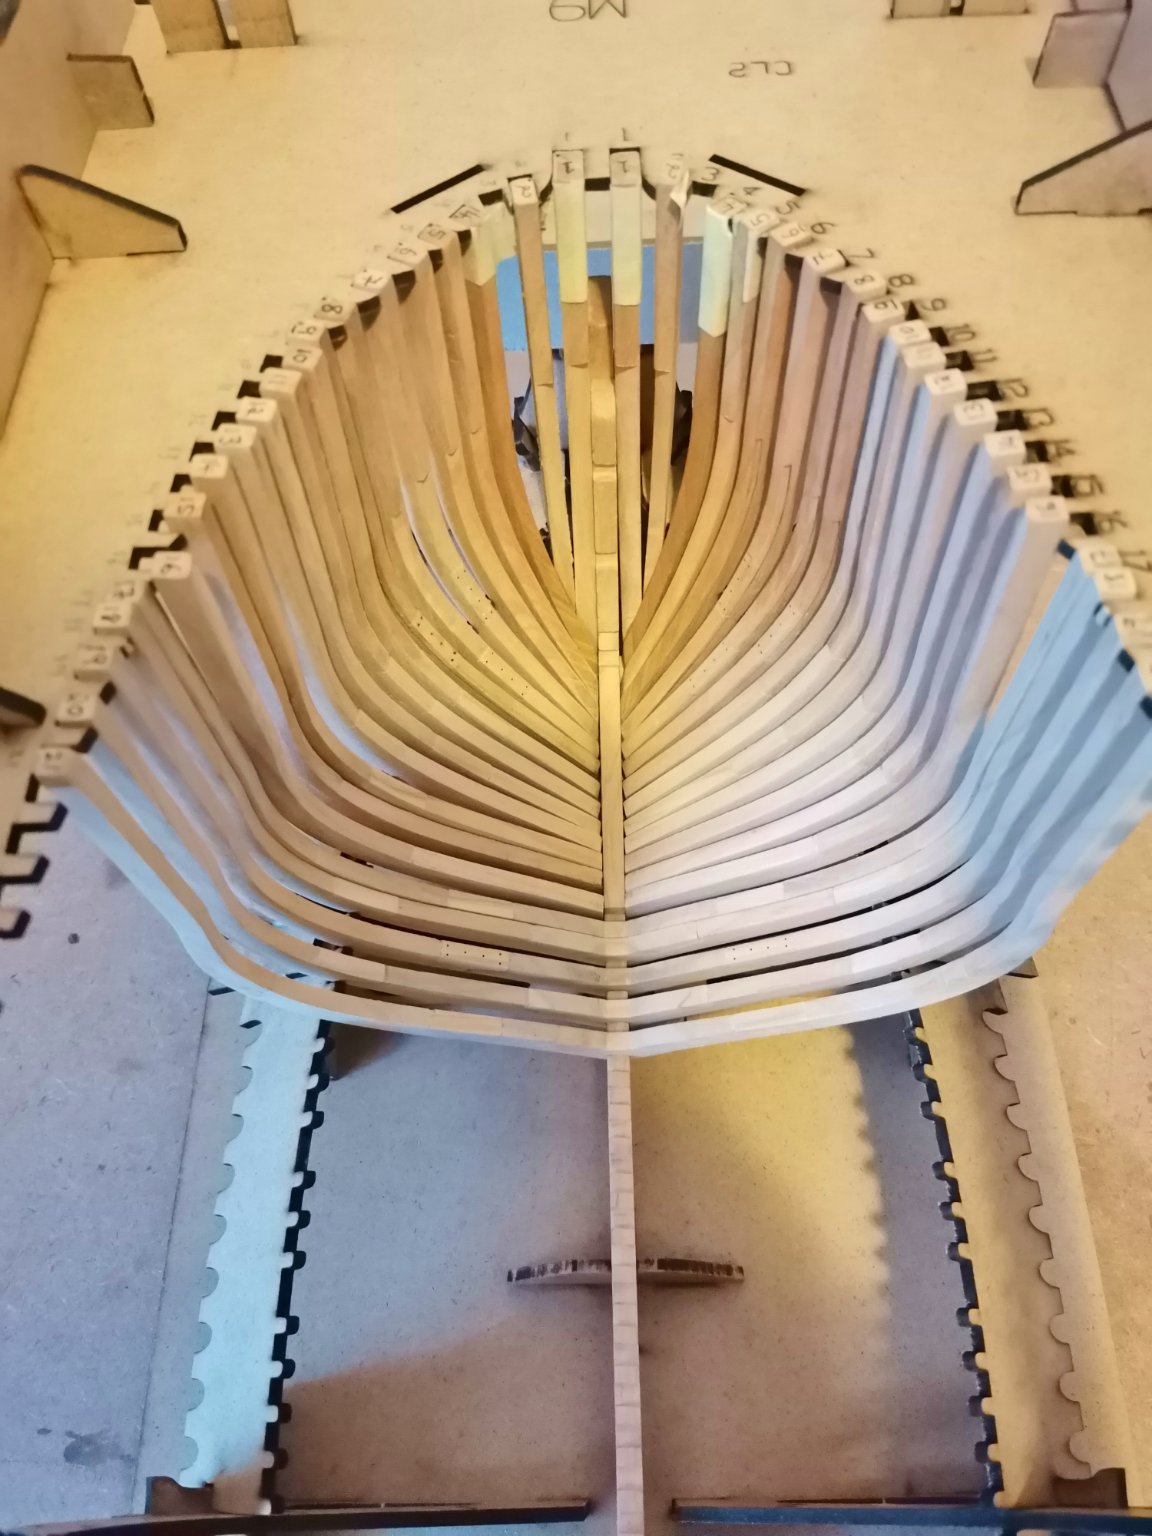
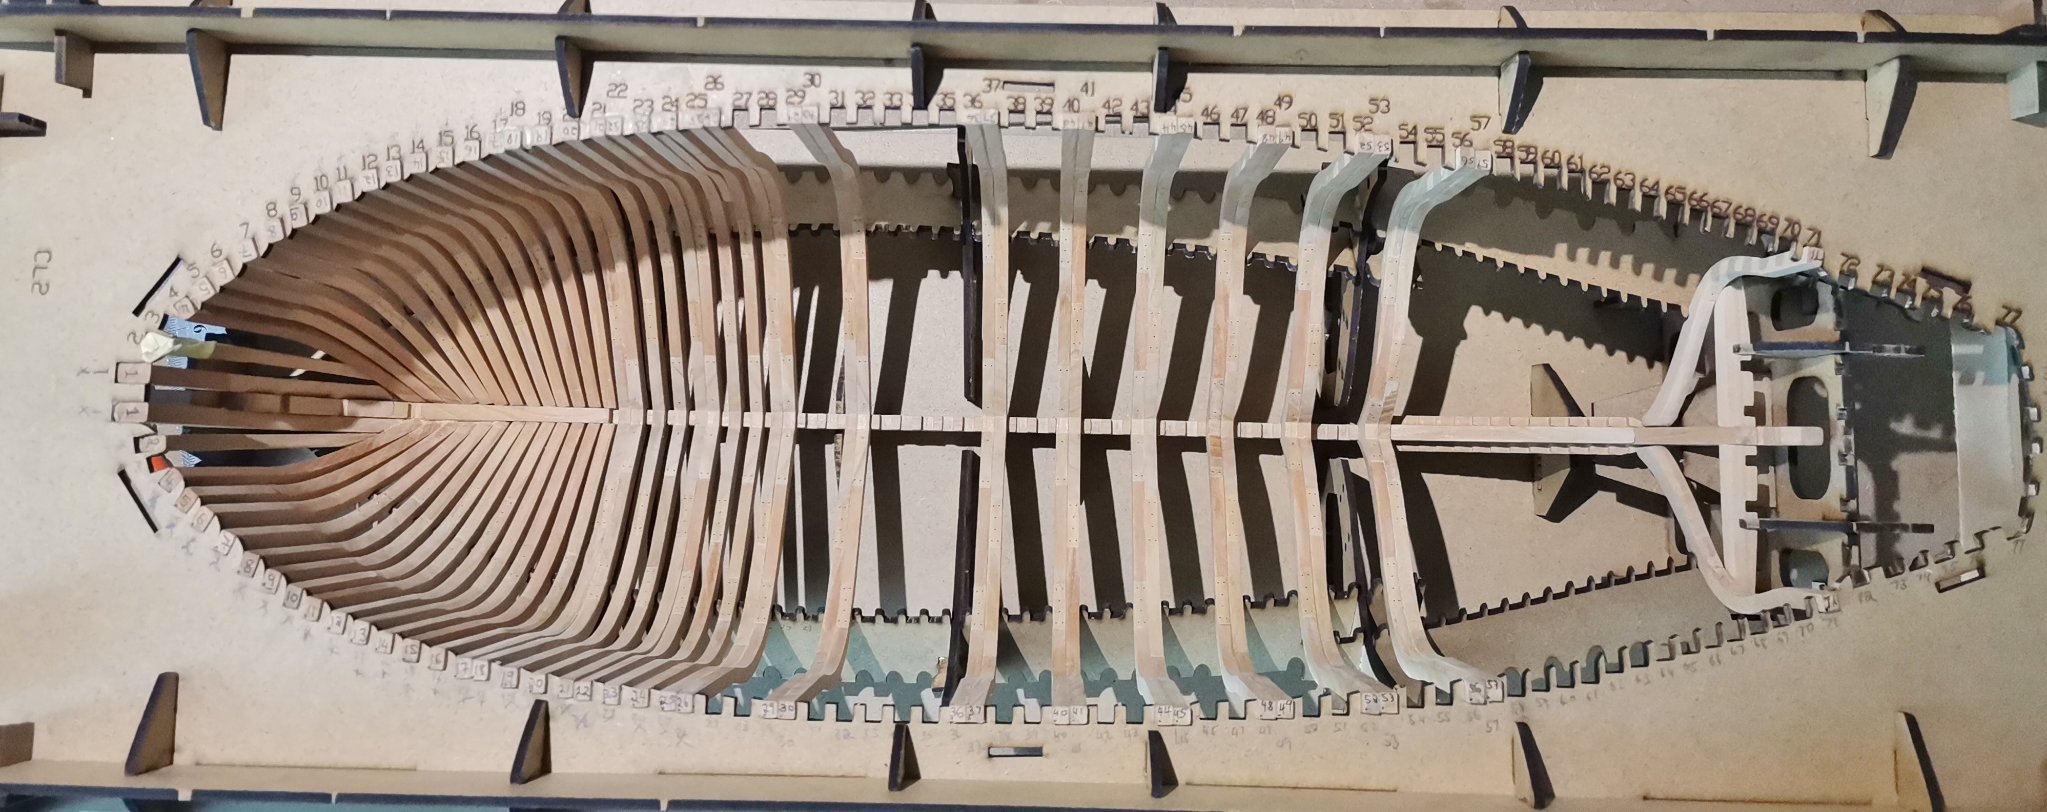
It is a pleasure to work with CNC parts, but it does come with its own challenges. I had a couple of sheets that was seemingly cut with a blunted CNC bit, that really roughed up some of the frames and it took a lot of extra effort to file/sand it back to a presentable form. Also reported by James H in his kit review here Alert Kit Review
-
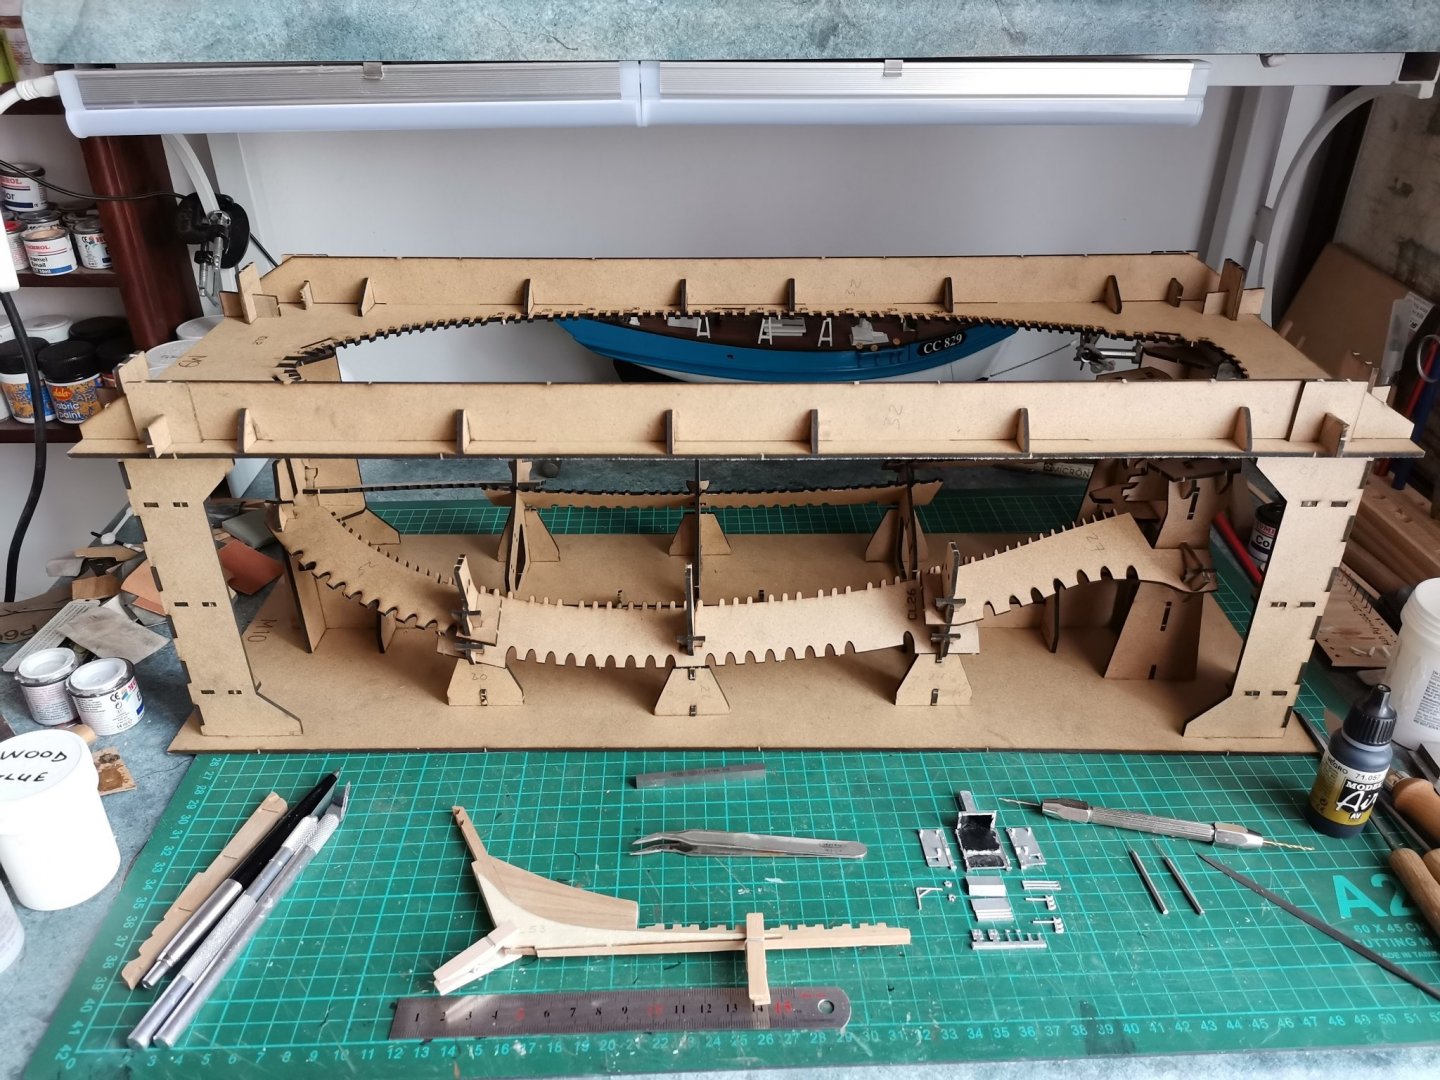
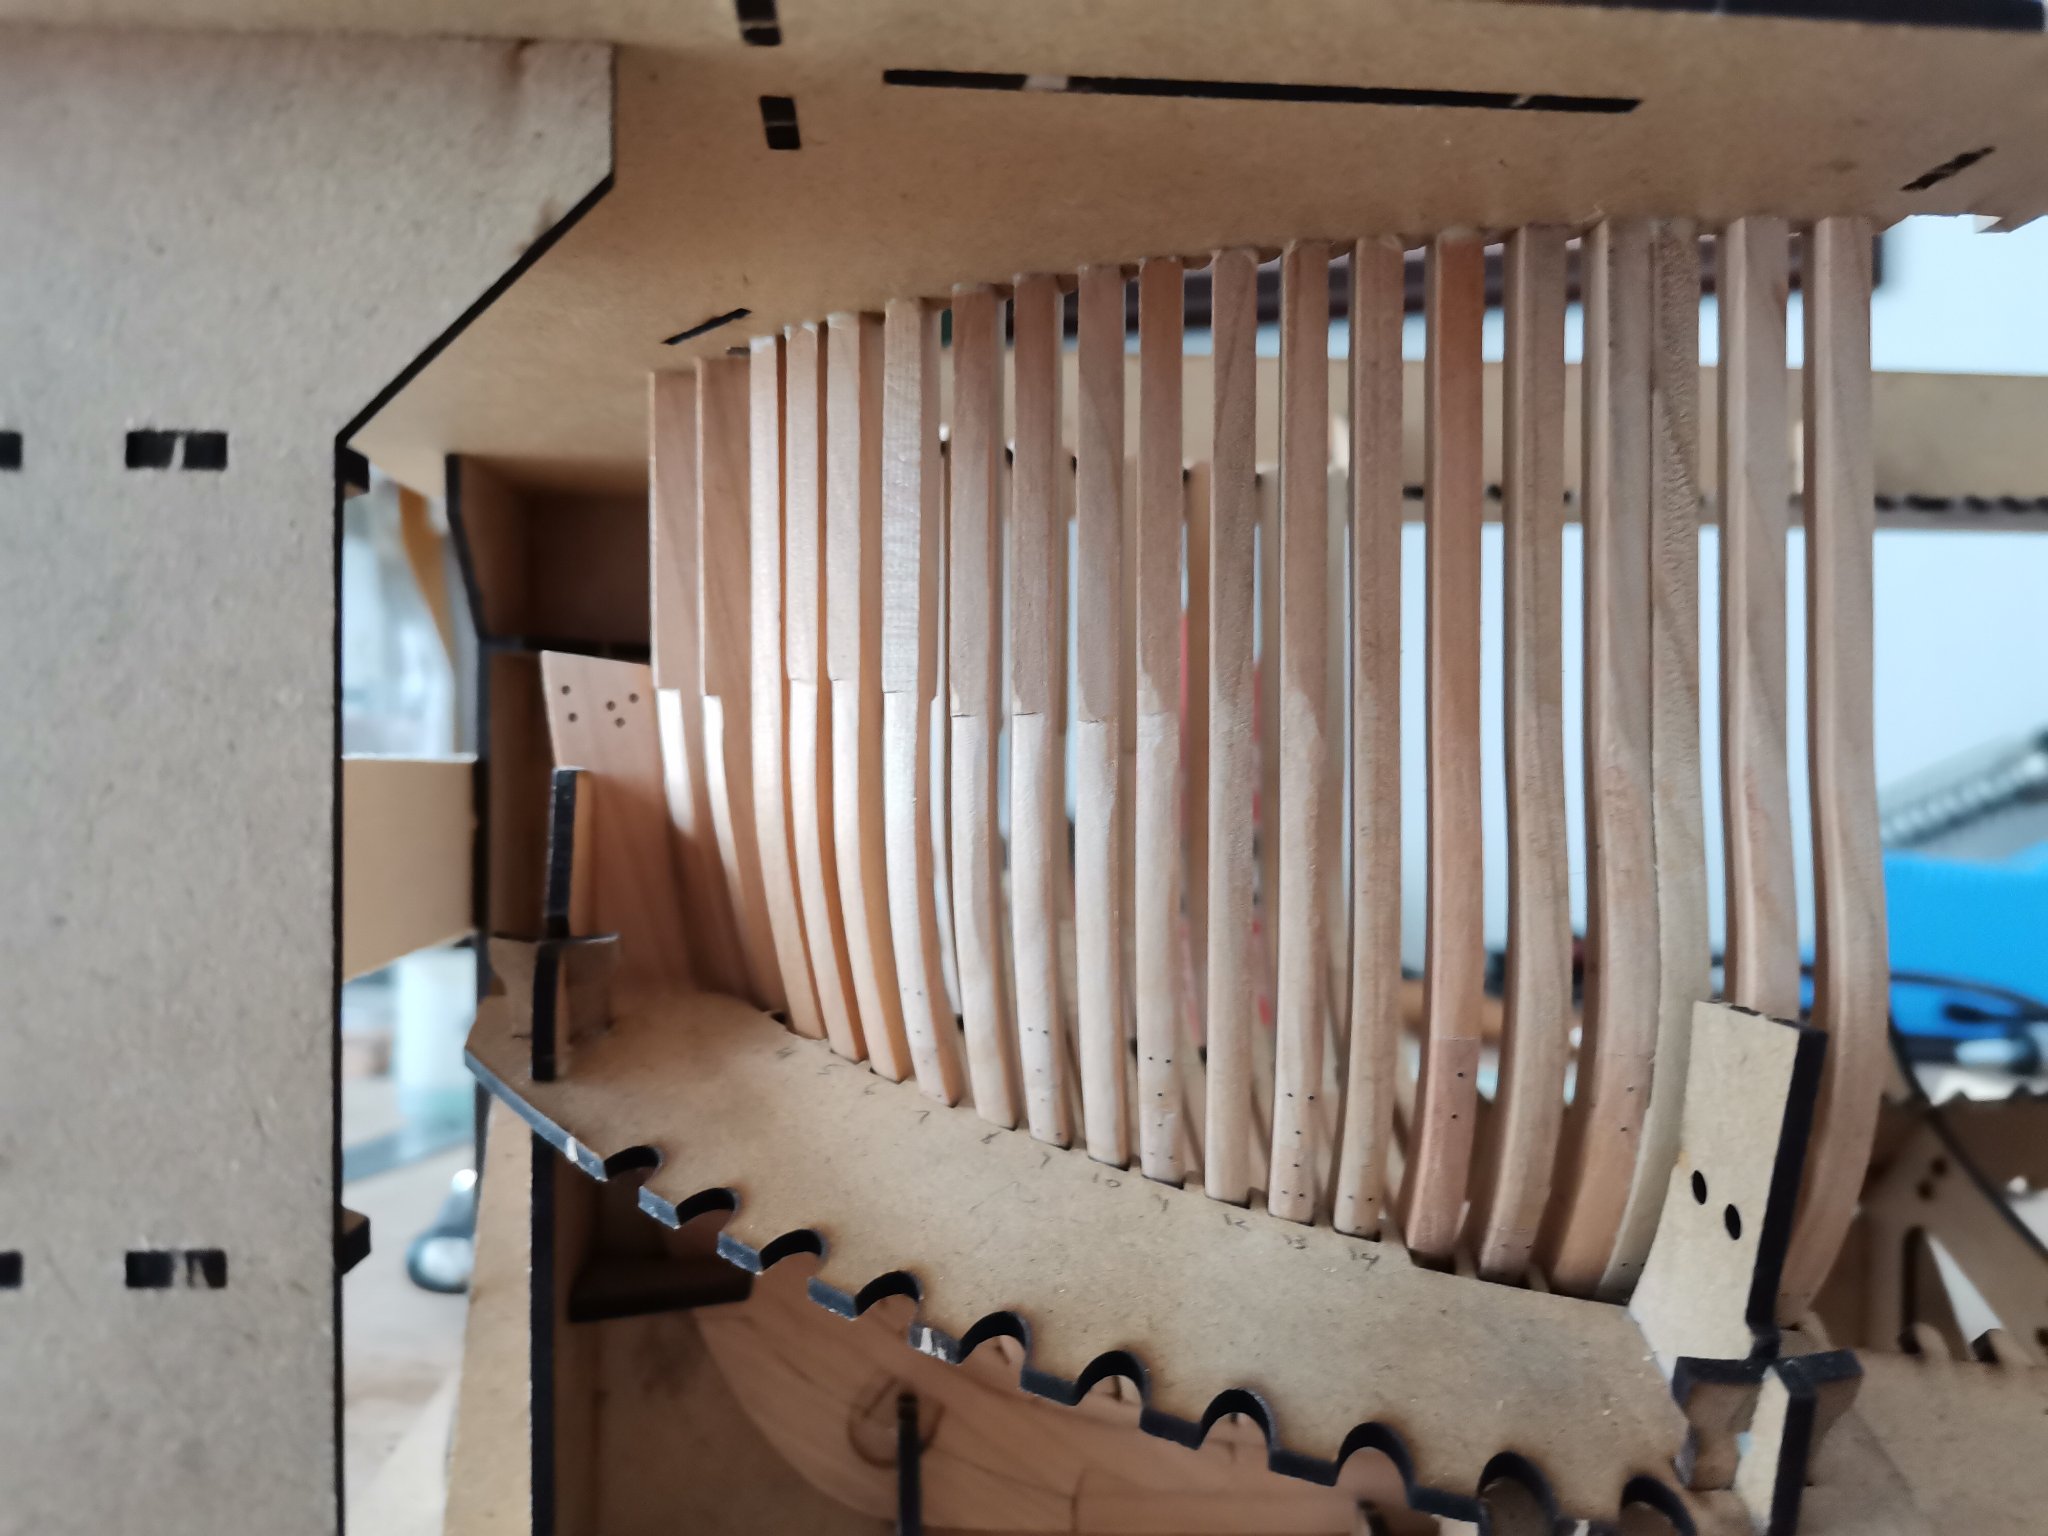
Framing is now complete.
Next up will be fairing the inside of the frames, which will take a couple of days.
All in all i'm surprised at how quickly this build has progressed, a bit more than two months to get to this point.
.thumb.jpg.328ea143fd29a96eef2858907f5fb039.jpg)
- marktiedens, Gazzarian, ccoyle and 5 others
-
8
-
There is a US company called the Small Shop that makes a couple of Photo Etch bending tools, mainly aimed at the plastic modelling community, but it should apply to any PE part
Not so much a tutorial, but the link have a small video clip explaining how it works https://thesmallshop.com/collections/photo-etch-bending-tools/products/sms003-4-inch-hold-and-fold
Application - from my experience, don't use a tweezer, it will launch a PE part into another dimension! I use a toothpick dipped in diluted PVA glue to move the parts around. Normally use CA glue to hold PE part in place.

-
-
Here's the links to two other kit manufacturers for the Mayflower, hope it helps, as both have capstans in their plans.
Model Shipways Mayflower plans
-
-
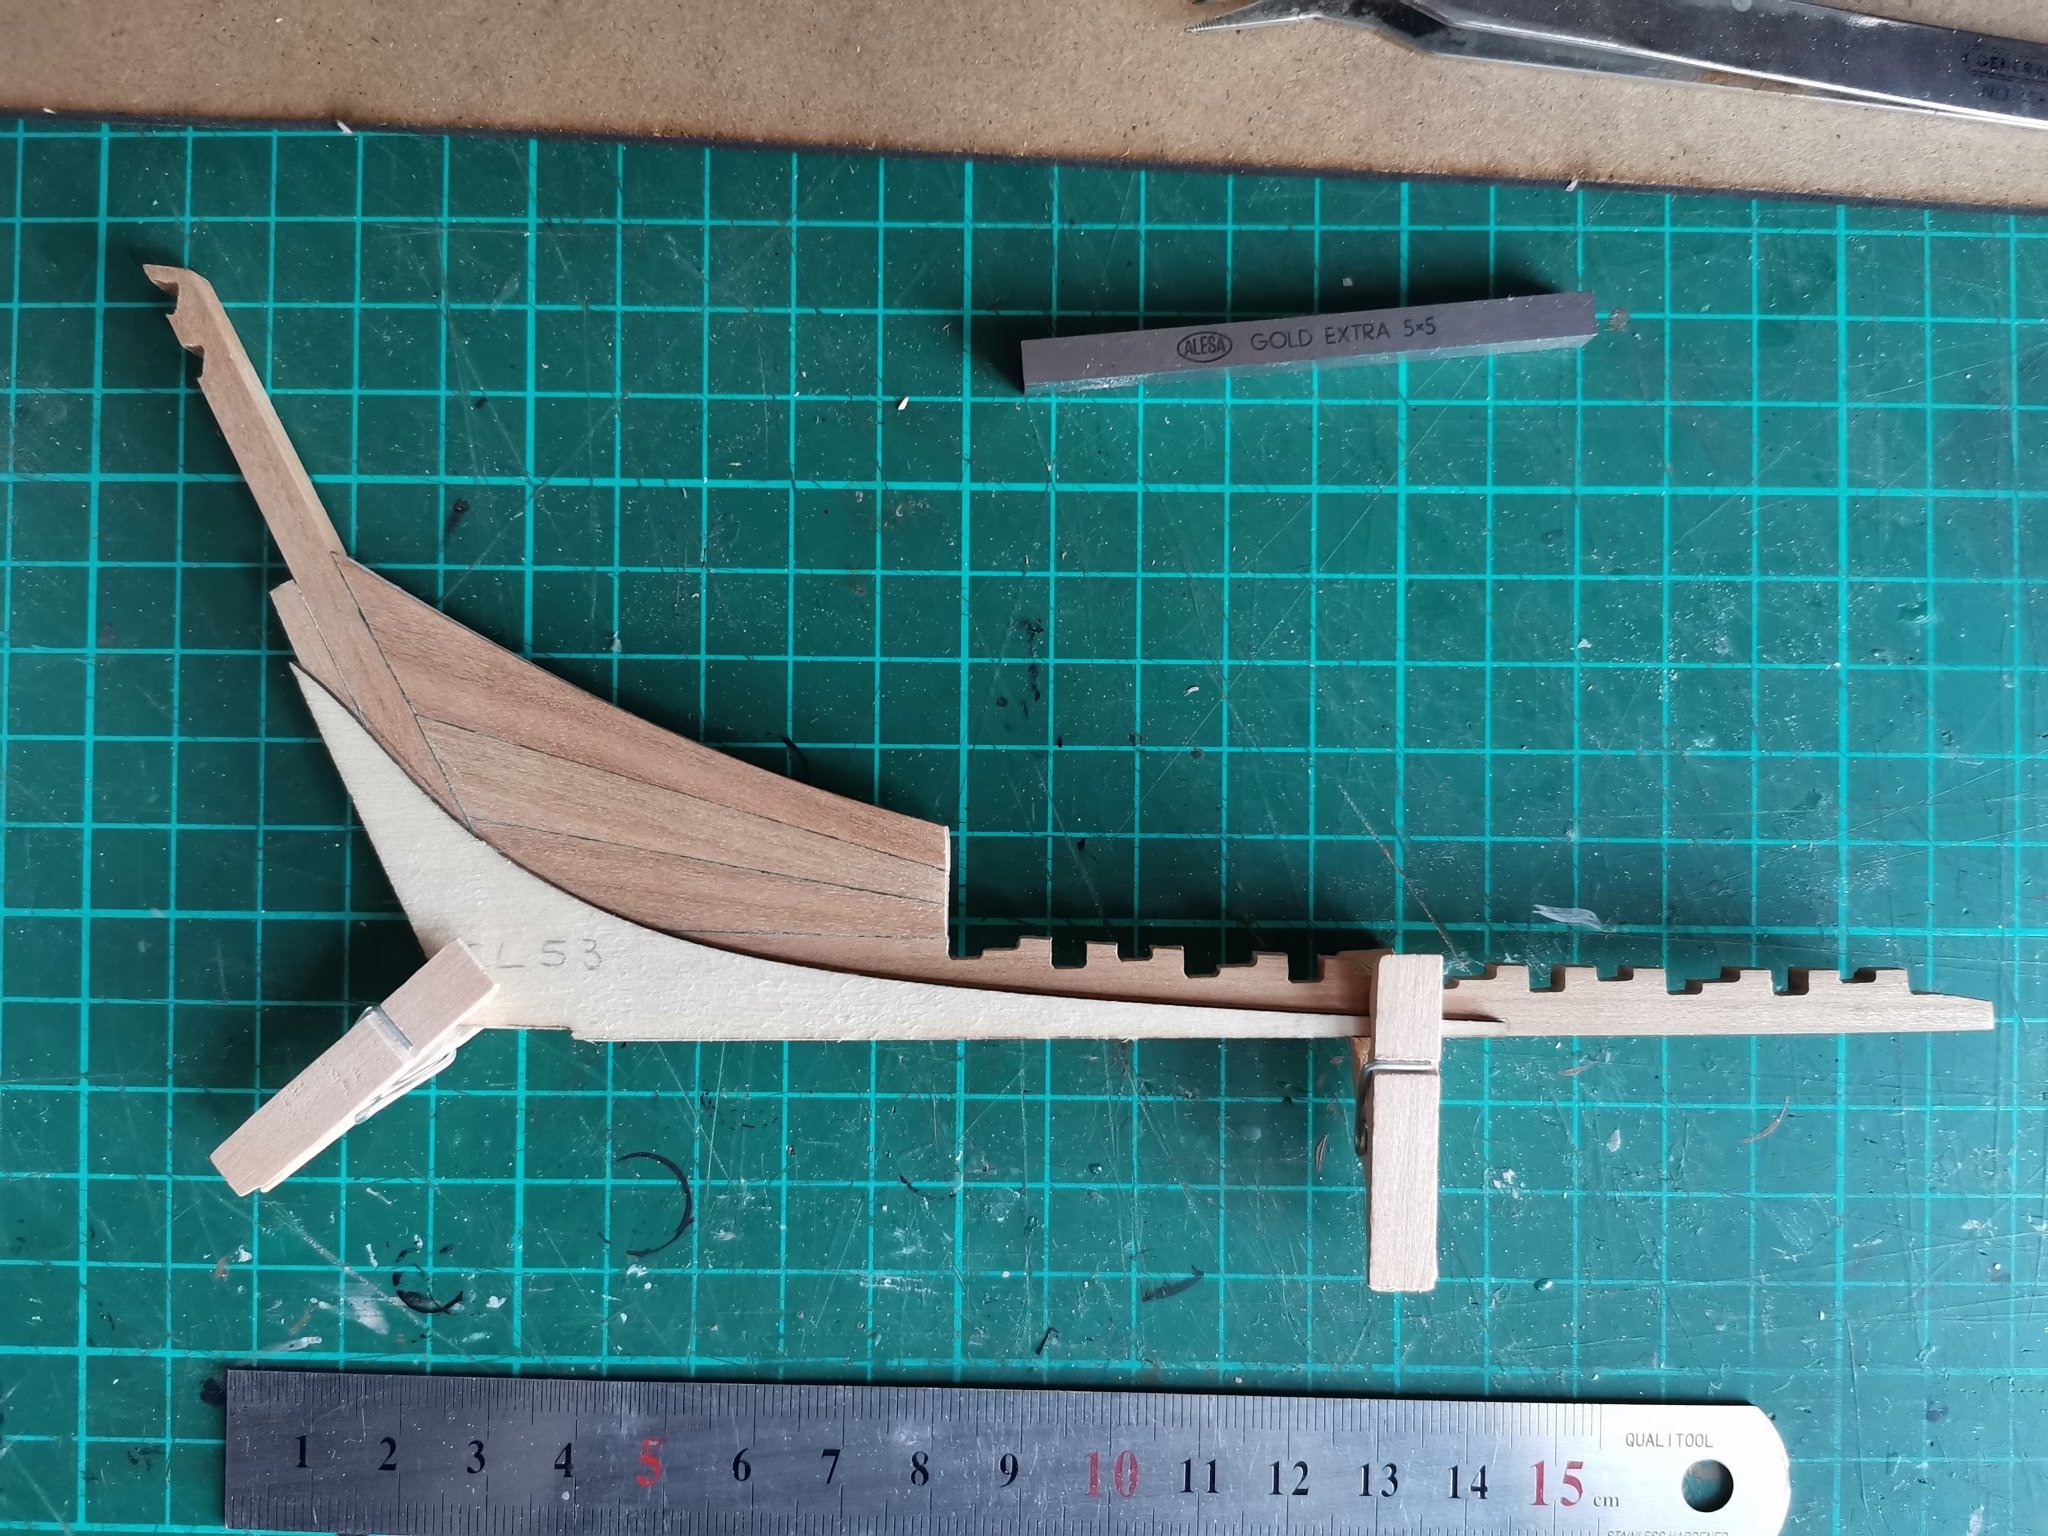
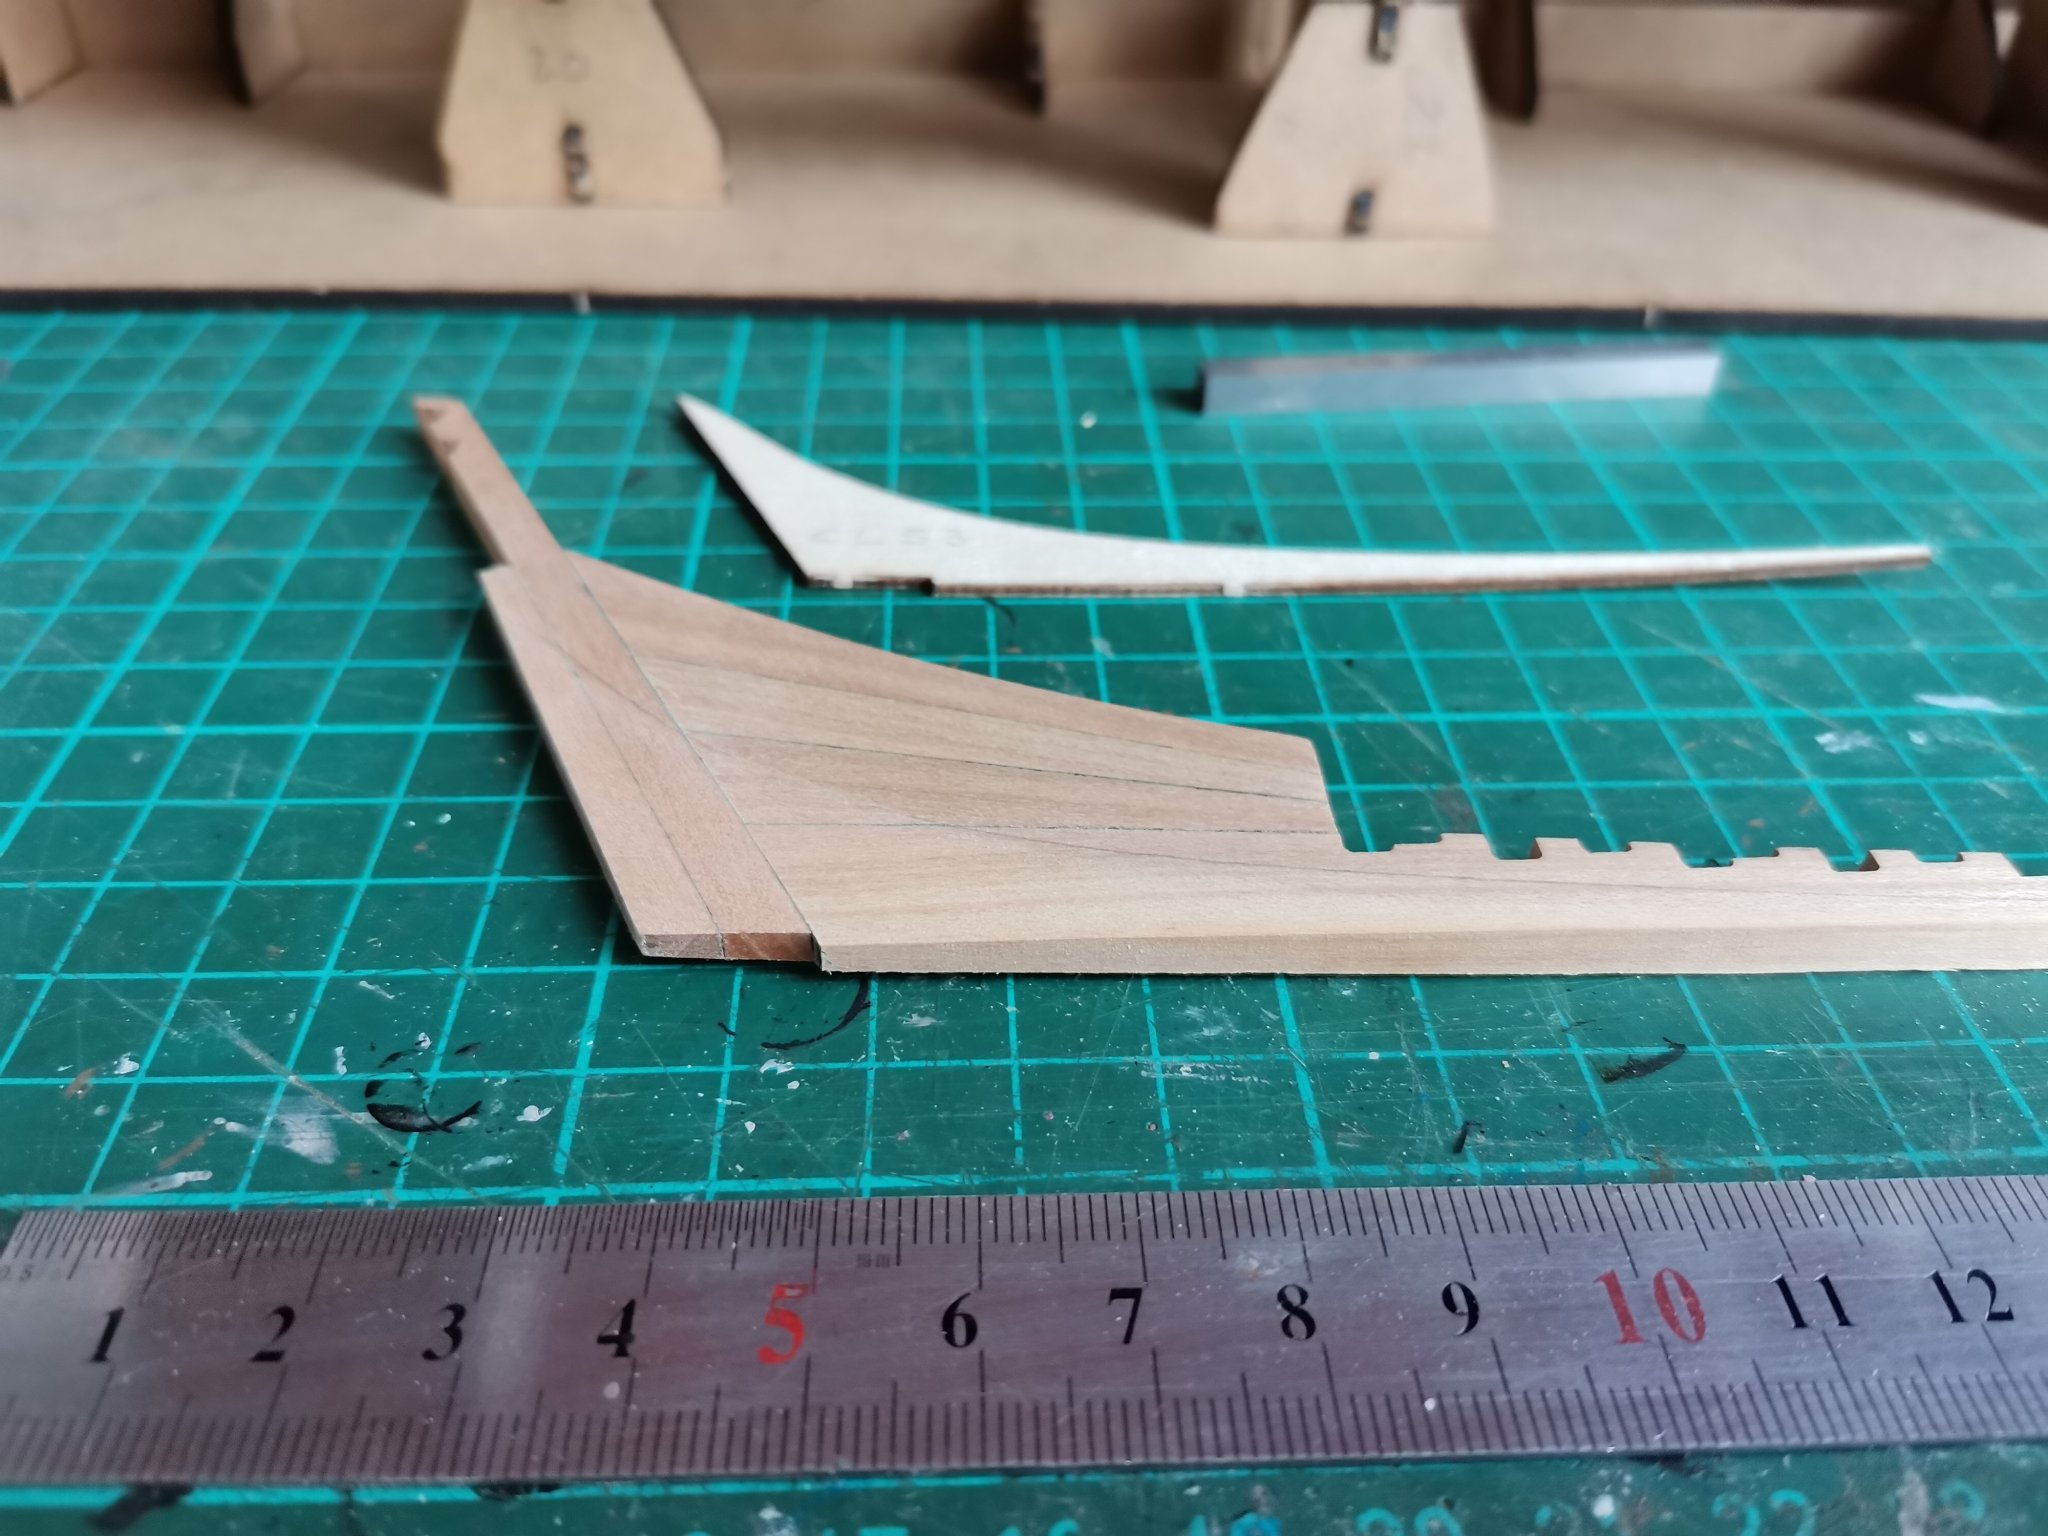
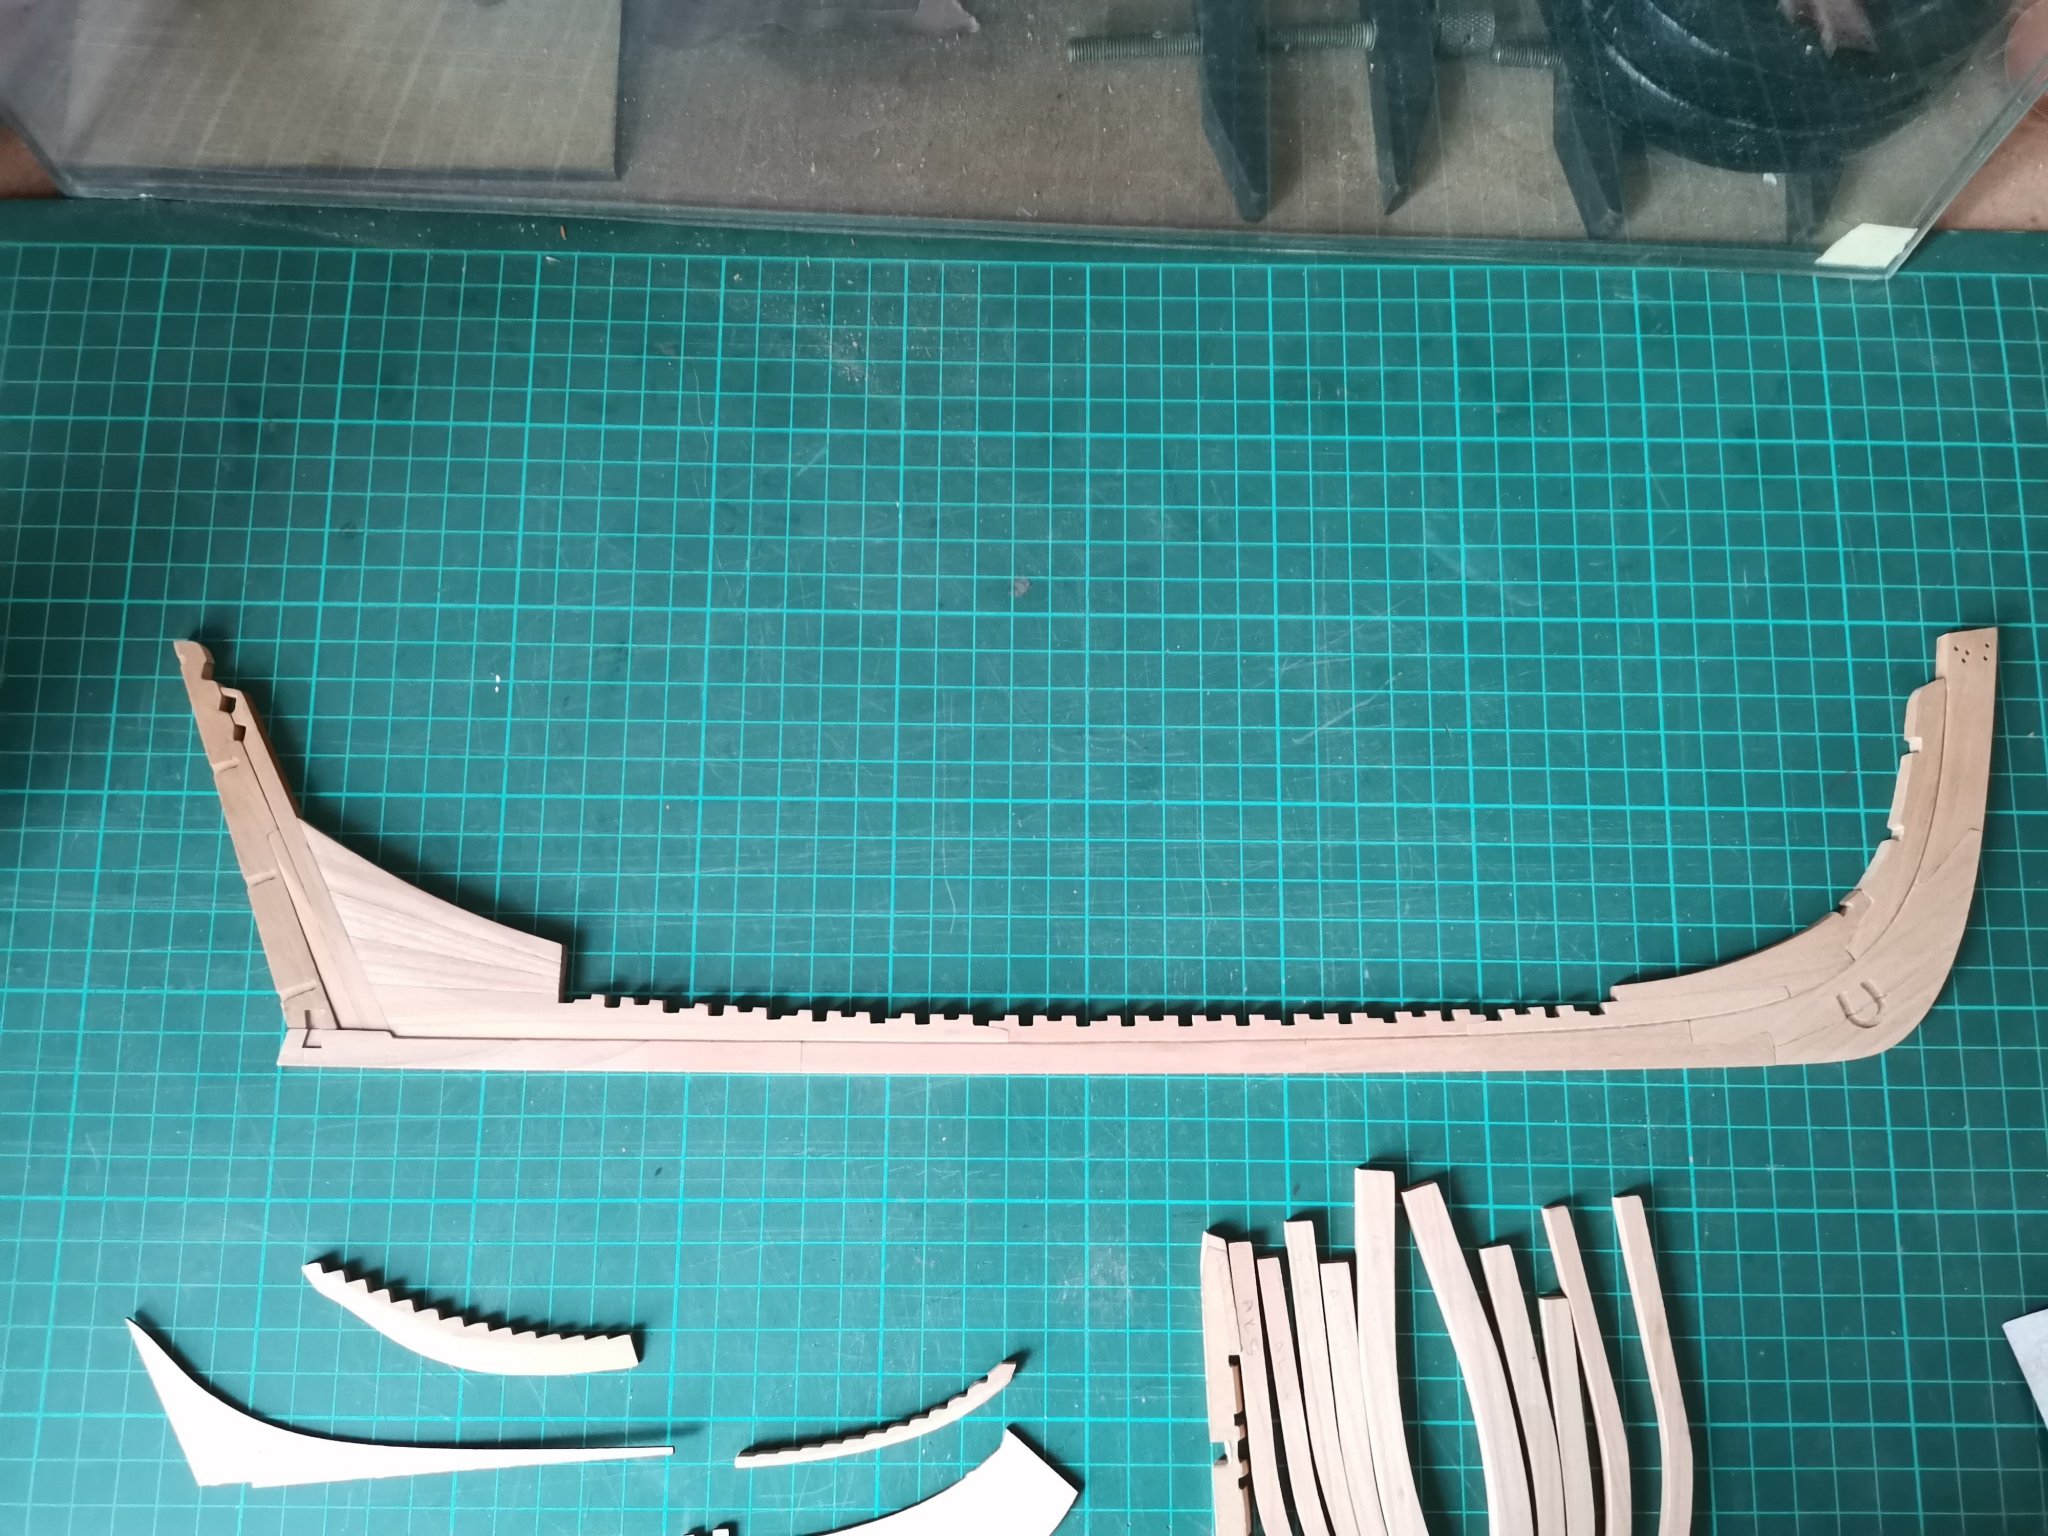
The building frame completed - a little project on its own. Altogether everything fits very well, a bit of filing here and there and everything slots together.
The kit provides a template for marking out the bearding line and placement of the rising wood at a later stage

and the deadwood after bearding being done

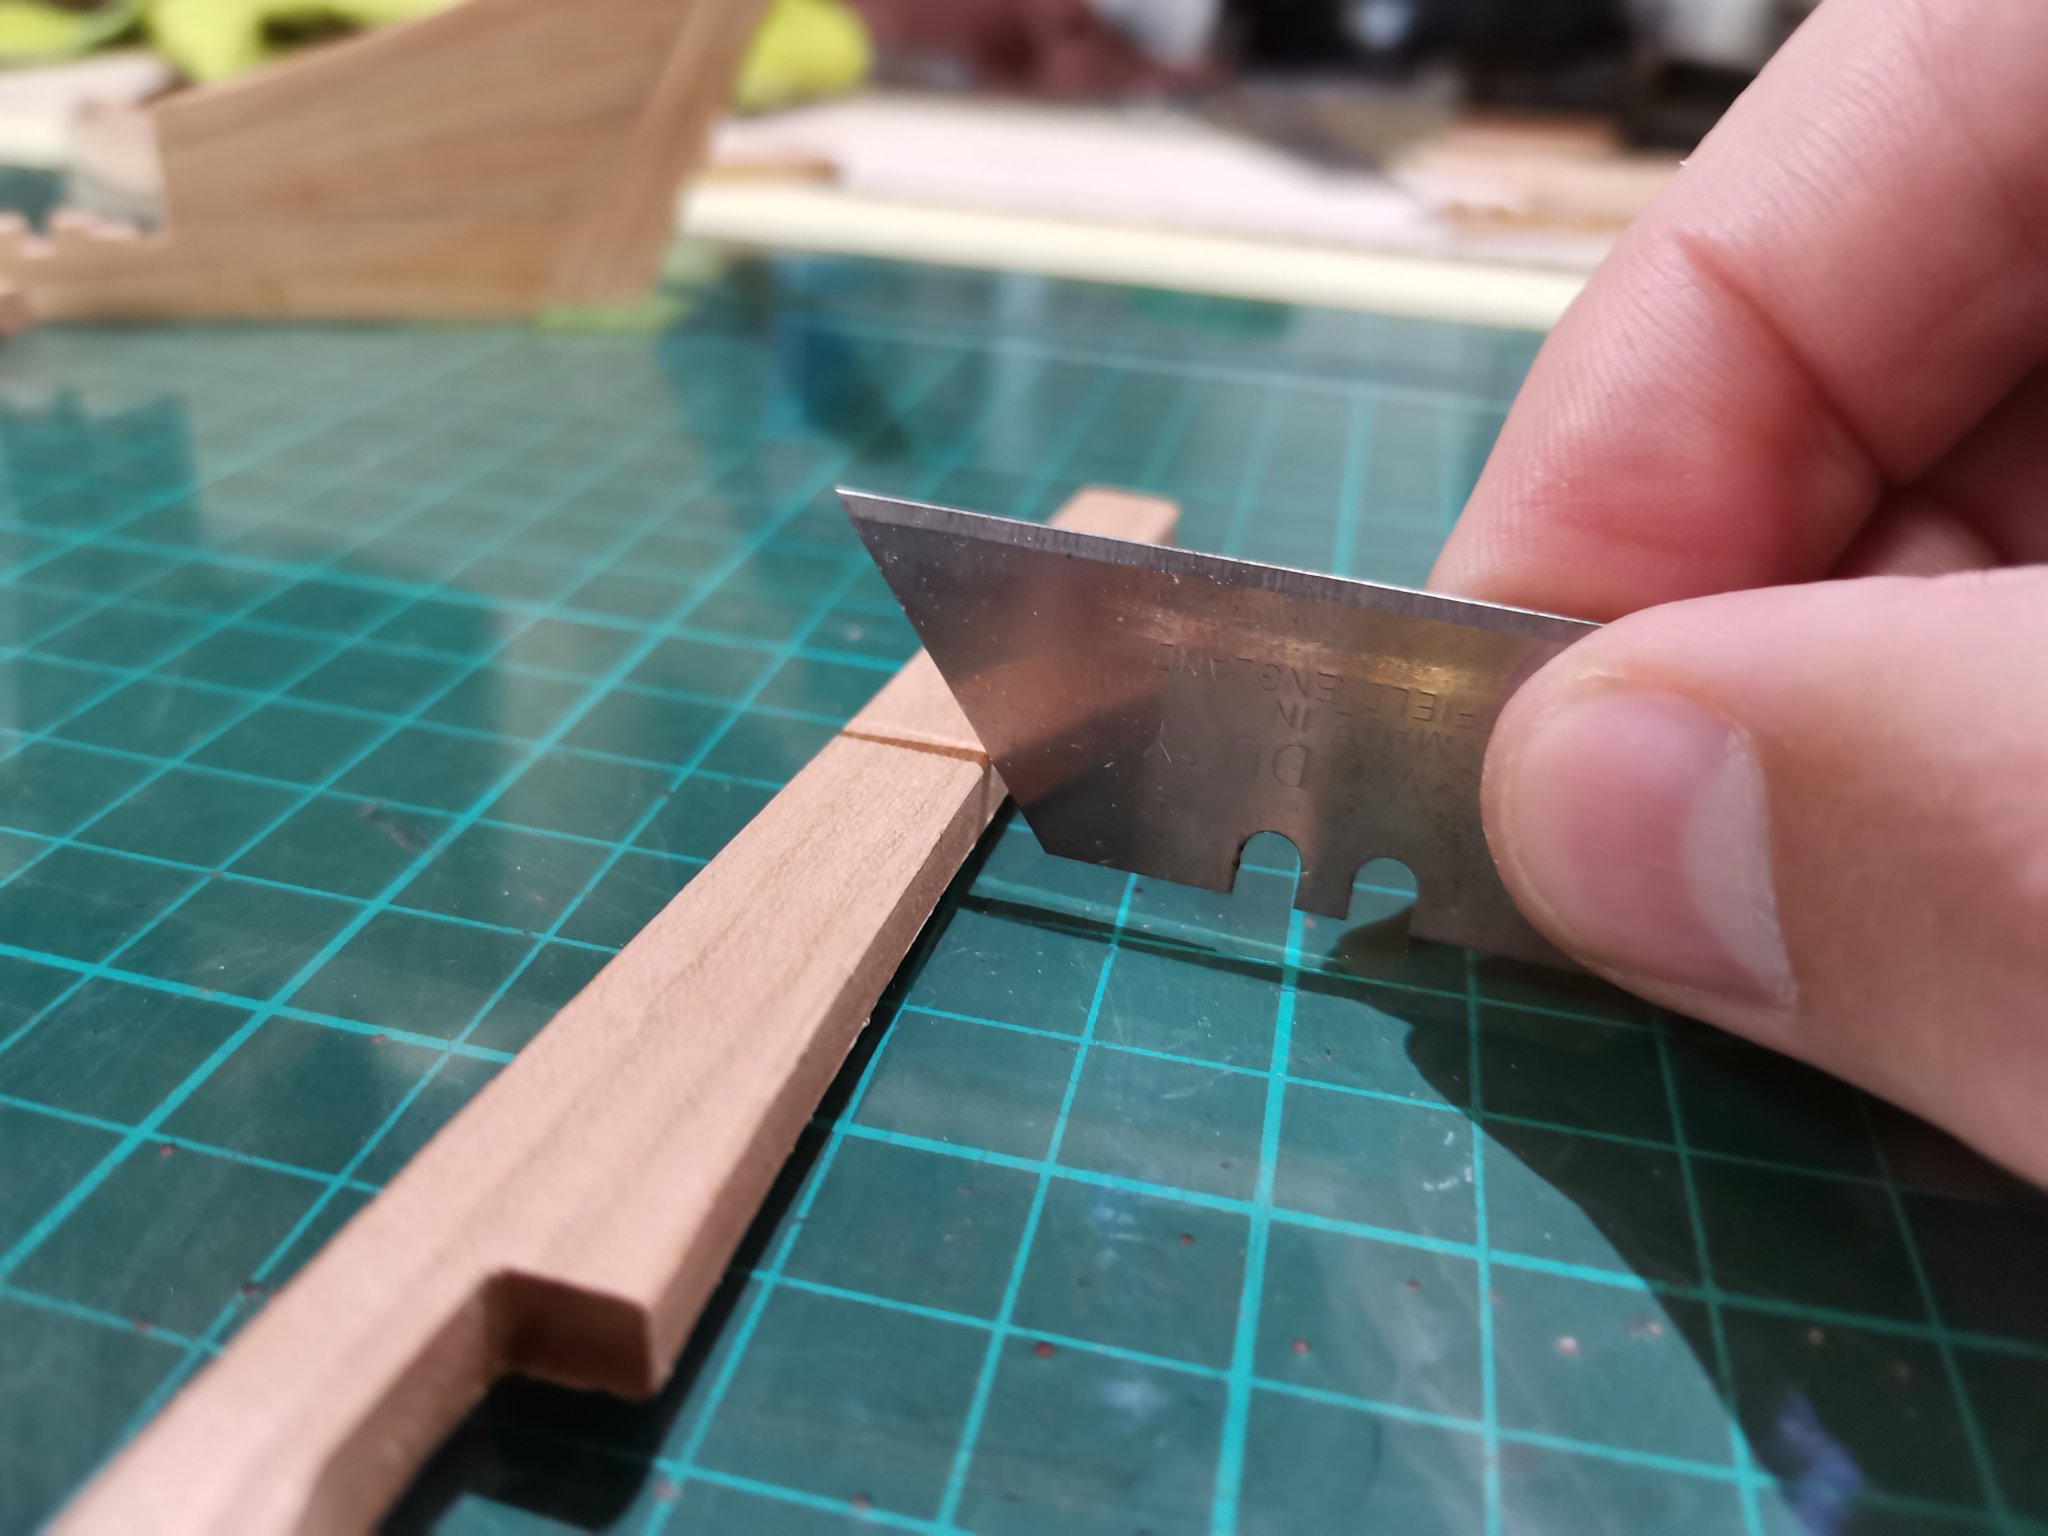
I then used an old utility knife blade to scrape the rabbet
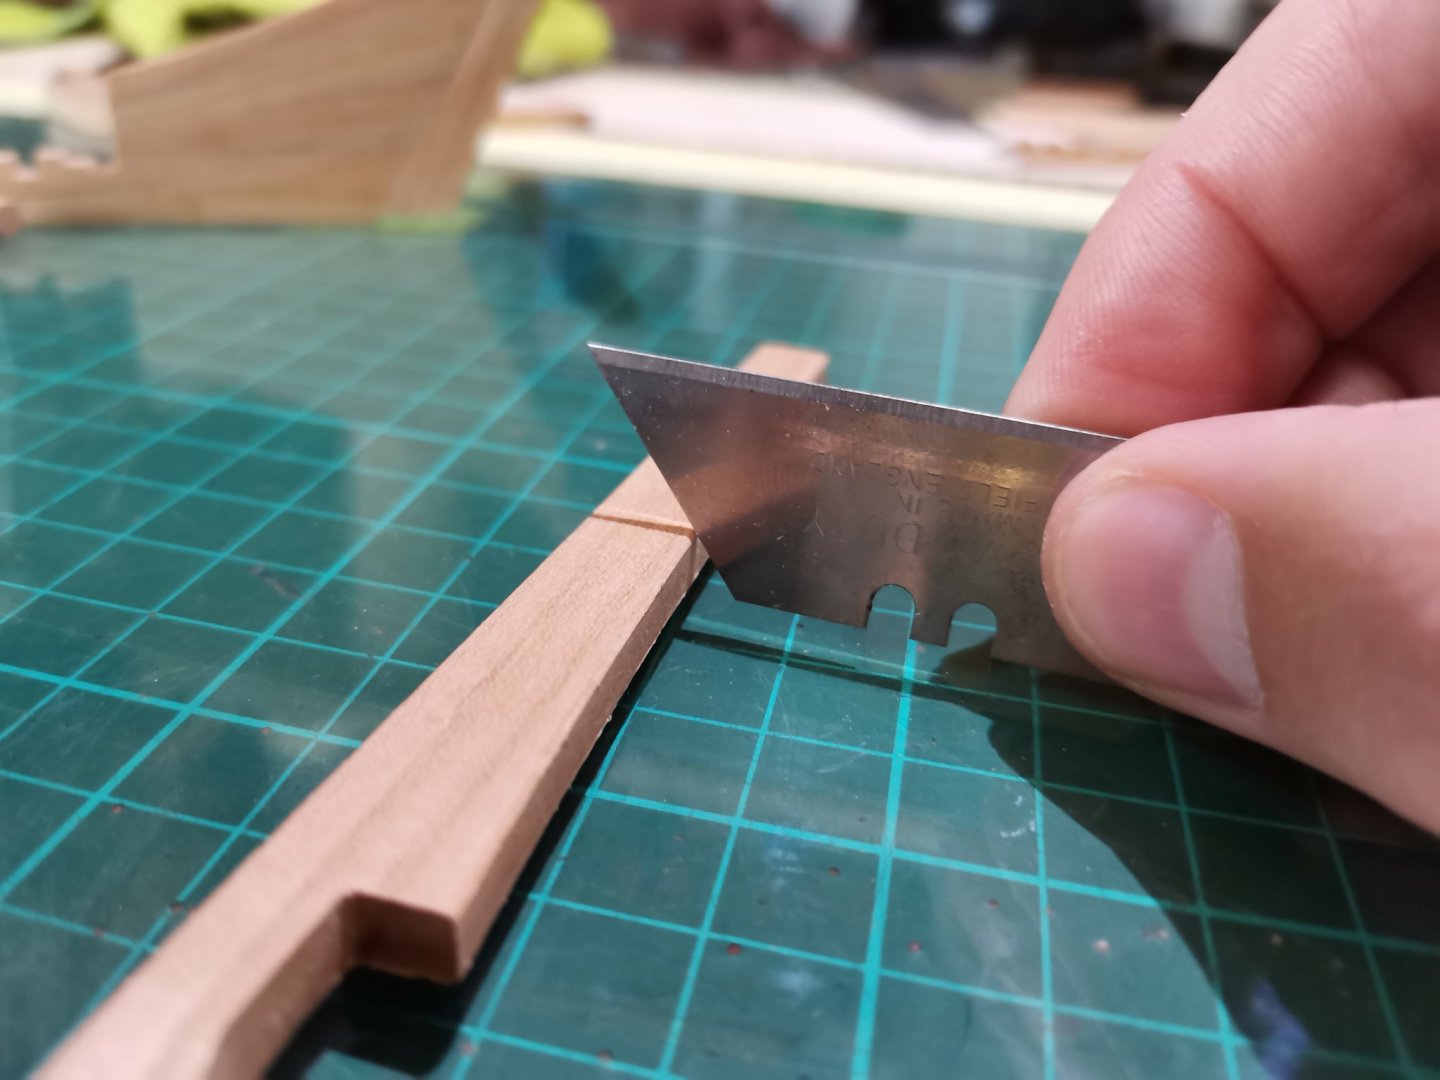
The keel in the template lying between two pieces of thick glass to keep it nice and straight
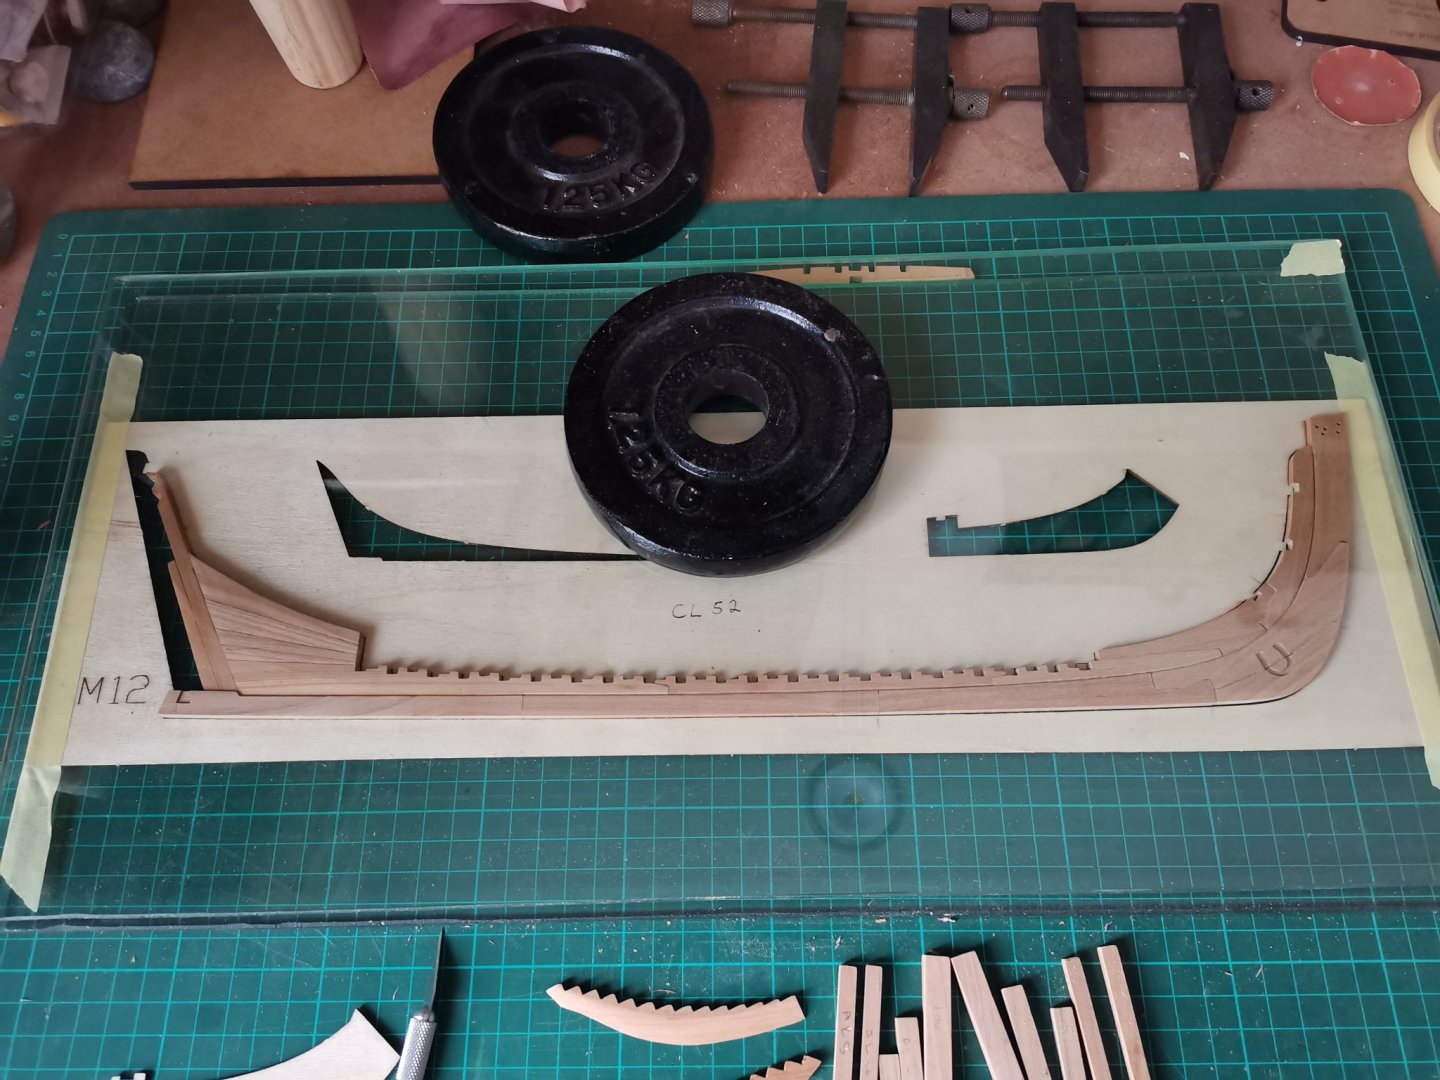
and the finished product, all going fairly smoothly so far.

- Edwardkenway, yvesvidal and dkuehn
-
3
.jpg.9c939791f5cf835c52c9573a5eb87079.jpg)


Blackburn Buccaneer S.2C by CDW & AJohnson - FINISHED - Airfix - 1:48
in Non-ship/categorised builds
Posted
Interesting, I see it's got the buddy to buddy refueling pod on.