MORE HANDBOOKS ARE ON THEIR WAY! We will let you know when they get here.
×


Remcohe
-
Posts
610 -
Joined
-
Last visited
Content Type
Profiles
Forums
Gallery
Events
Everything posted by Remcohe
-
 Good to see you back at work on the O19. Regarding the hinges, I knew you could do it Remco
 -
Beautifully executed Ed! Remco
-
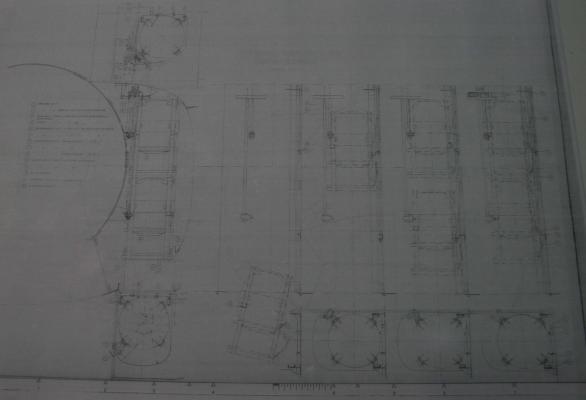
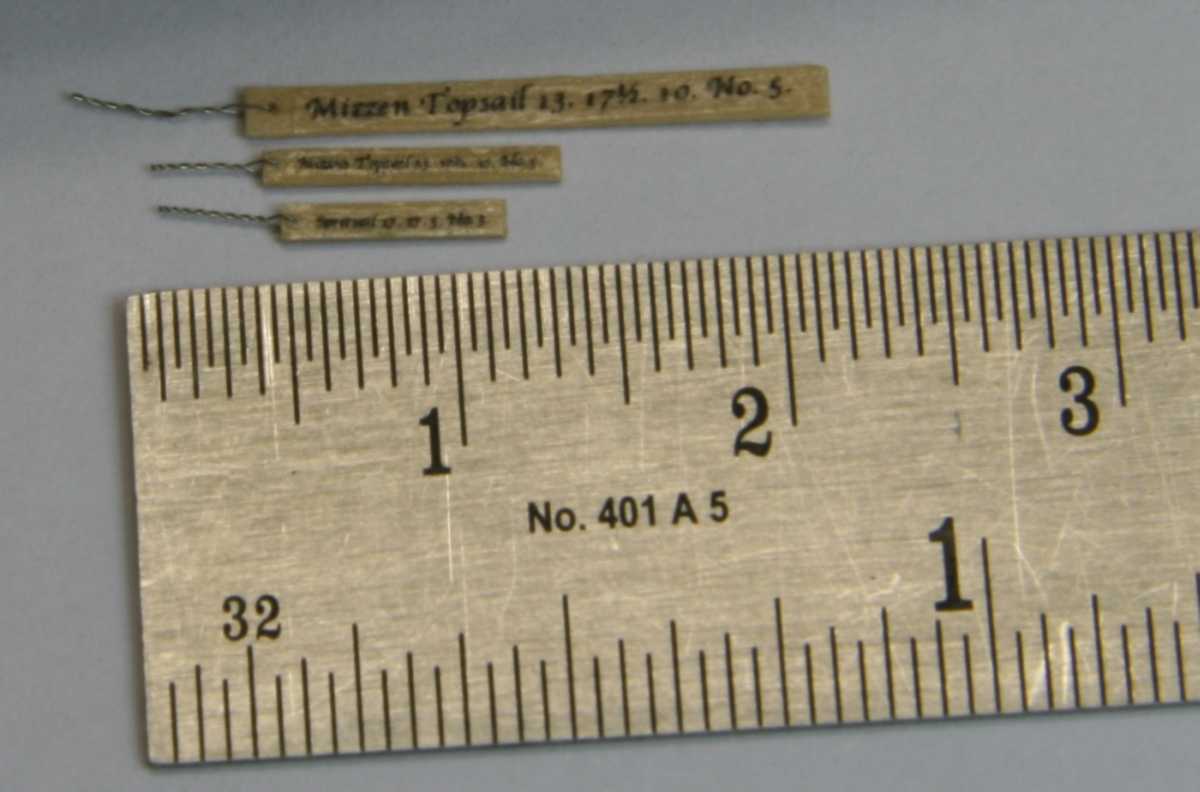
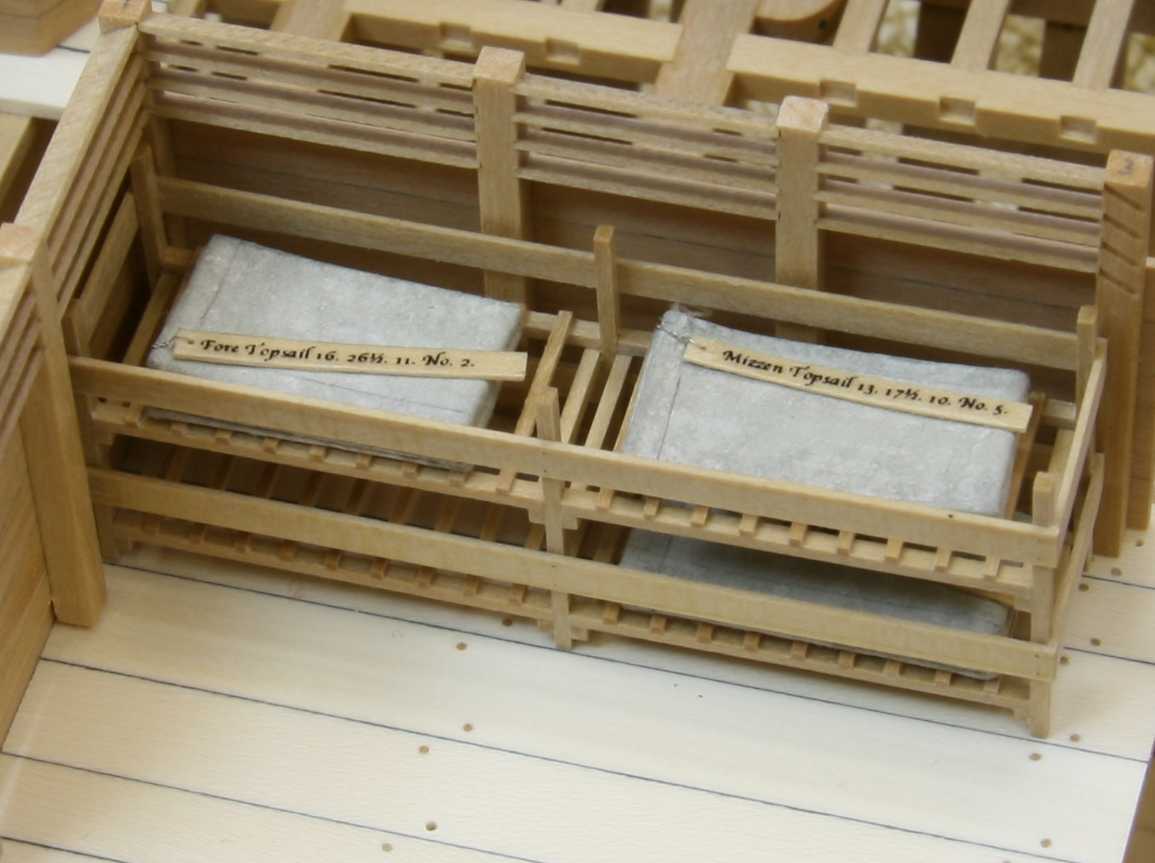
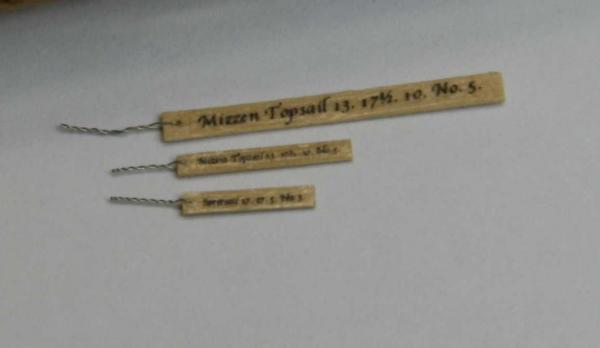
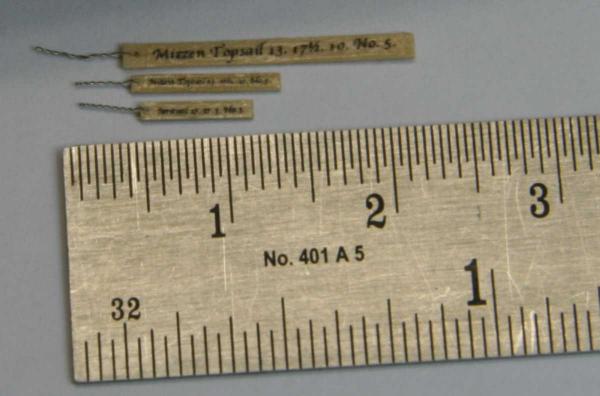
Thanks for all the kind comments Elia, its the effect of a little water on 120 gr paper Mark, no need to keep a book of photo's we have MSW Druxey, I thought the tally's were to big to, but TFFM describes them 3" 0' and I blindly followed this. So new ones are made(point taken) Michael, it's not a loose thread but a cringle (really!) Unfortunately the sails and tally's were already glued in place. Getting the tall's off did damage the sails a little Top to bottom, the original I used yesterday in 3pt font, then 1,5pt font and 1pt font, I'll use the smalles although the text is almost not readable, but who cares Remco
- 1,207 replies
-
- 20
-

-
- sloop
- kingfisher
- (and 1 more)
-
What a great start Rusty. Remco
-
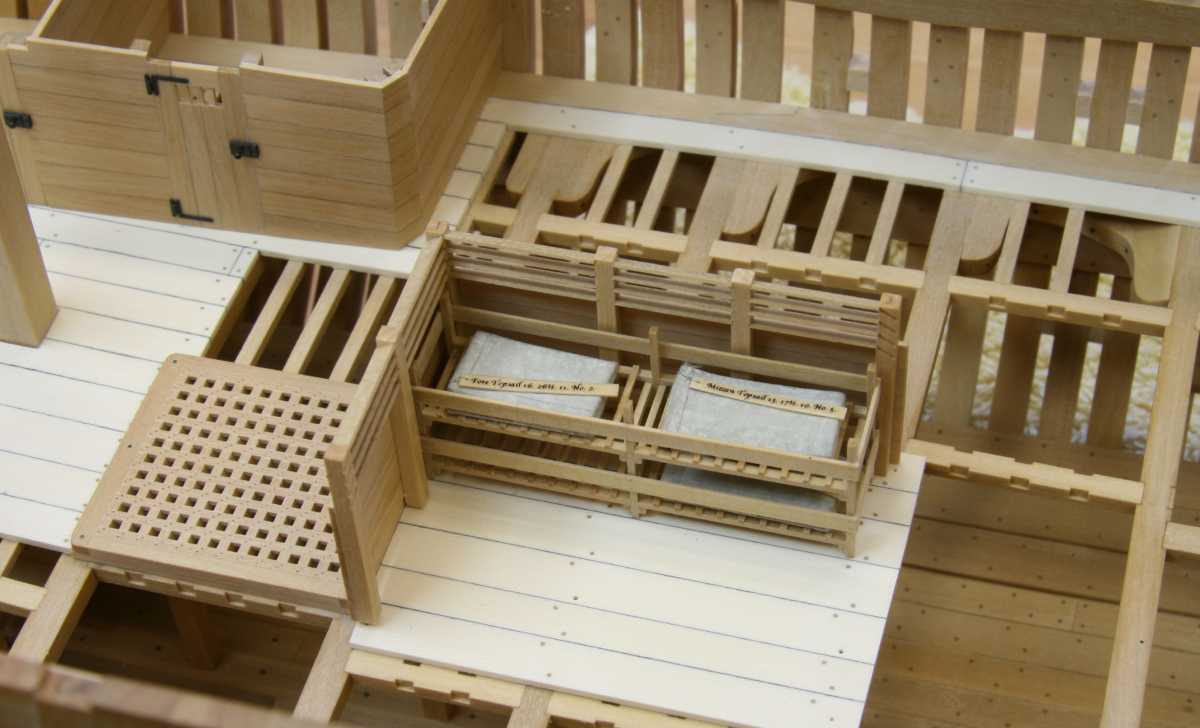
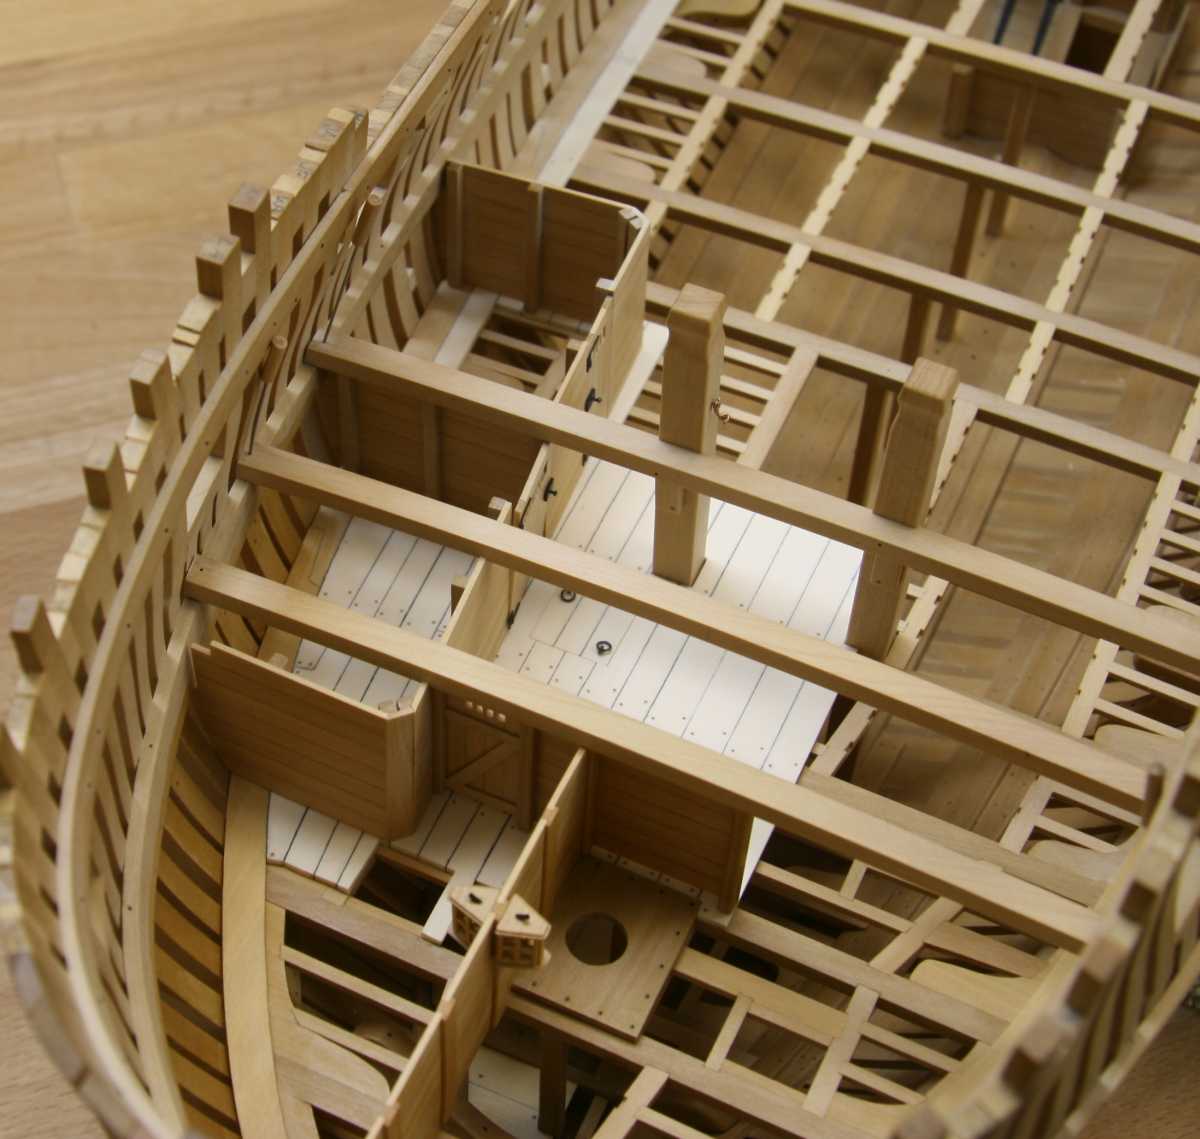
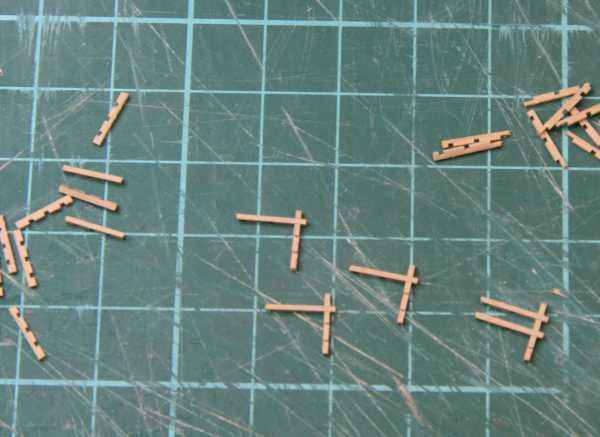
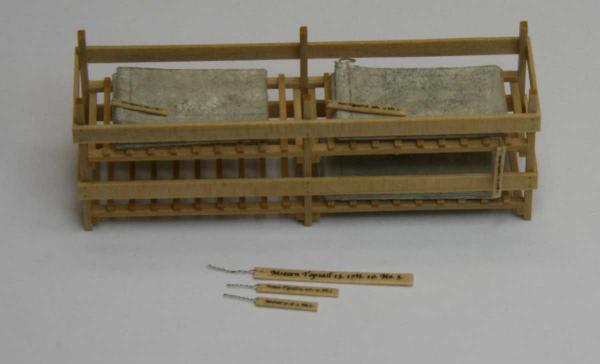
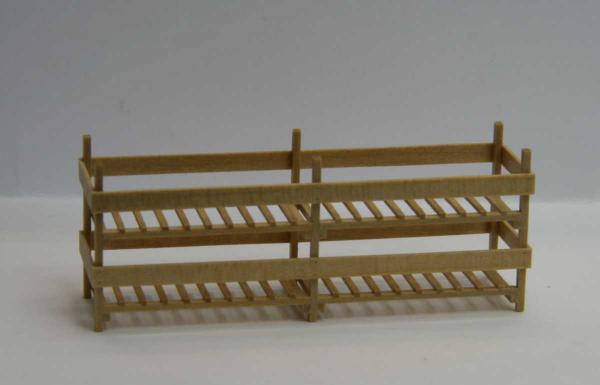
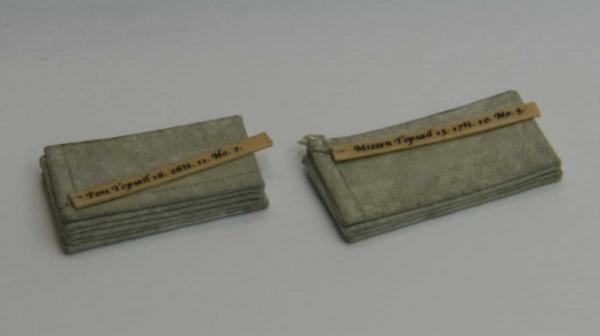
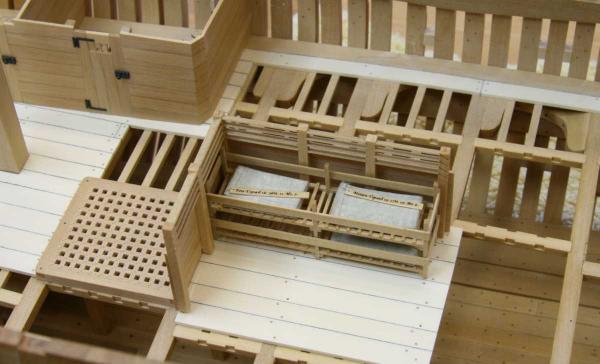
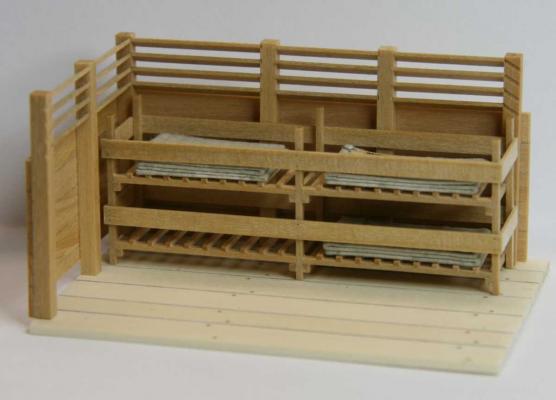
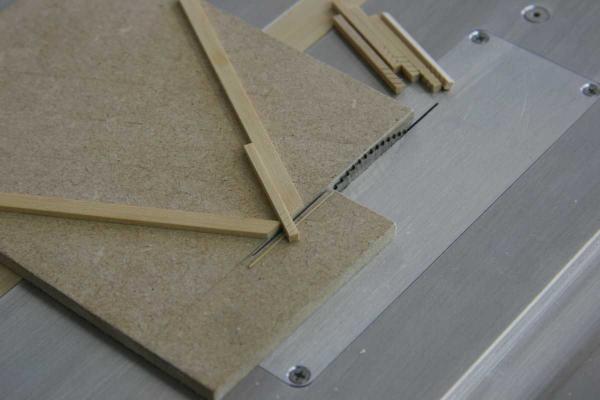
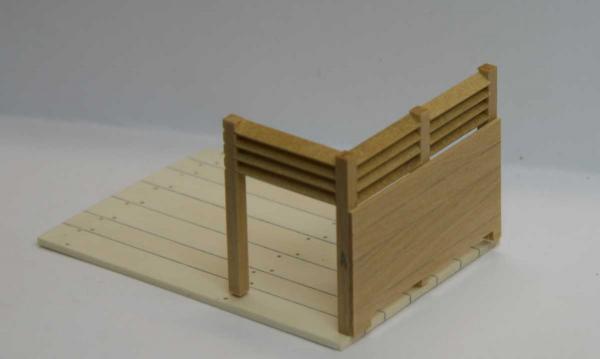
Greg, correct the blade has the same width as the index in strip. I made a second one for paralel cuts to make the beds for the sails. At first I tried to glue the battens with temporary spacers, but it wasn't as evenly spaced as I had hoped. cutting mortices for the battens made assembly a lot easier. For the sails I first got a piece of silk used for model airplanes. Although the fabric is great I could not fold them neatly even with an iron I could not get something I liked. Pretty expensive experiment actually, now I have a very big silk handkerchief with a hole in it...... So thick tinted paper was used. The writing on the tally's are home made decals. I'm not sure if I will build the other walls of the sail room or leave it open like this, I actually like it the way it is now having a better view to the storage racks. Remco

- 1,207 replies
-
- 29
-
-
- sloop
- kingfisher
- (and 1 more)
-
Really nice Ben, it's great to see an other Swan coming to life. Remco
-
Beterschap Piet. You will beat this like you did before, besides your way to young and have way too much to do before we let you go Remco
-
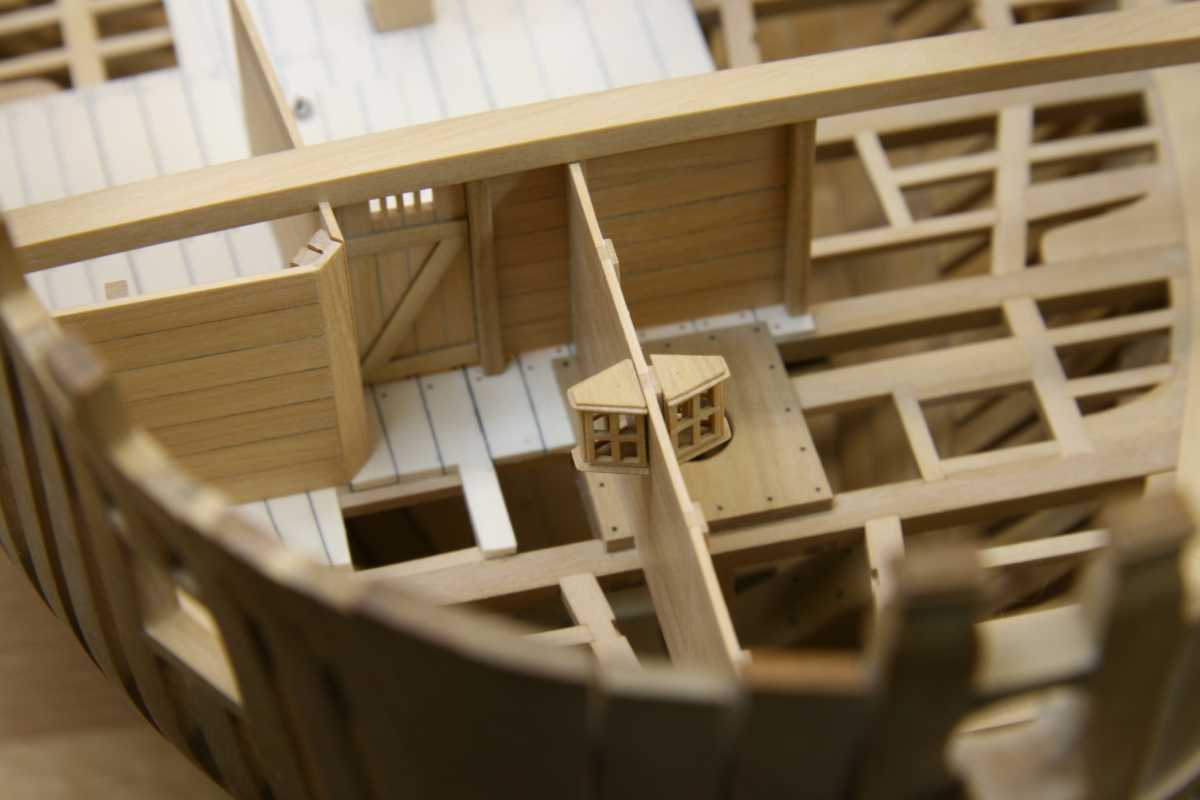
Thanks for the very kind comments. I started working on the sail room, a lot of preparation went into making a jig to cut the mortises for the loovers. After that was set up it was pretty straightforward (I thought, but making the different stanchions with the mortices on the right sides took more than one try....) The sail room will be made off the model, it's a big 3D jigsaw and I foresee trouble ahead to get the last side in place. But we'll see. I also got some fabric to make a couple of sails. I'm wondering if their shouldn't be racks of some sort to store the sails. Remco

- 1,207 replies
-
- 18
-
-
- sloop
- kingfisher
- (and 1 more)
-
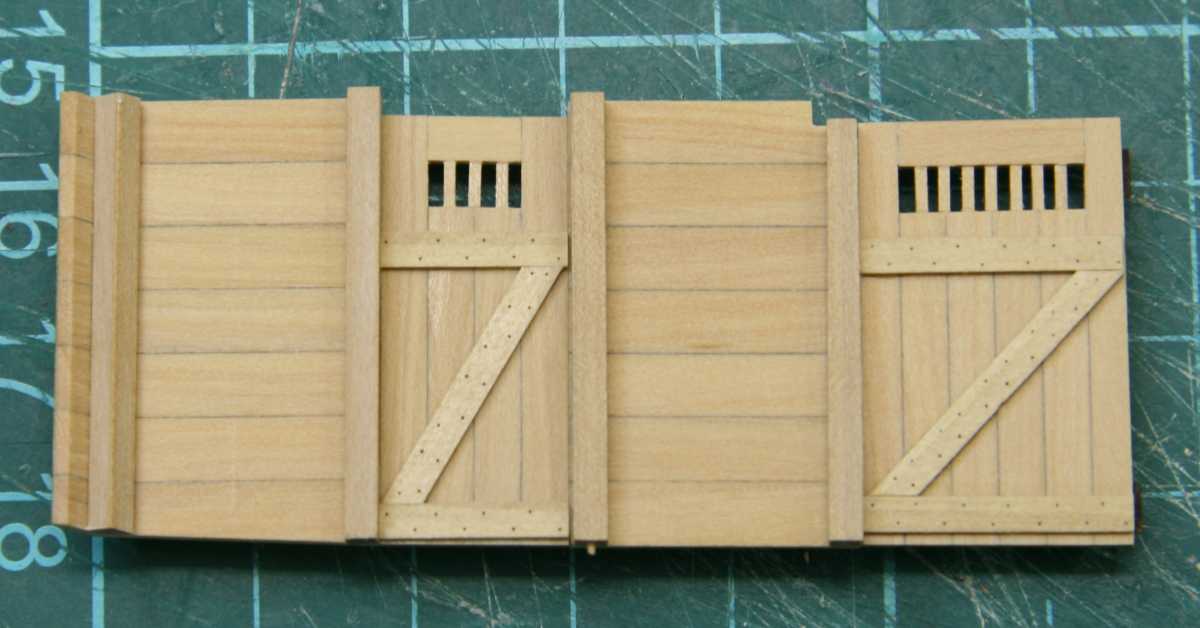
Very very nice Alex. Could you explain a little bit more on how you made the facet on the doorpanels? Remco
-
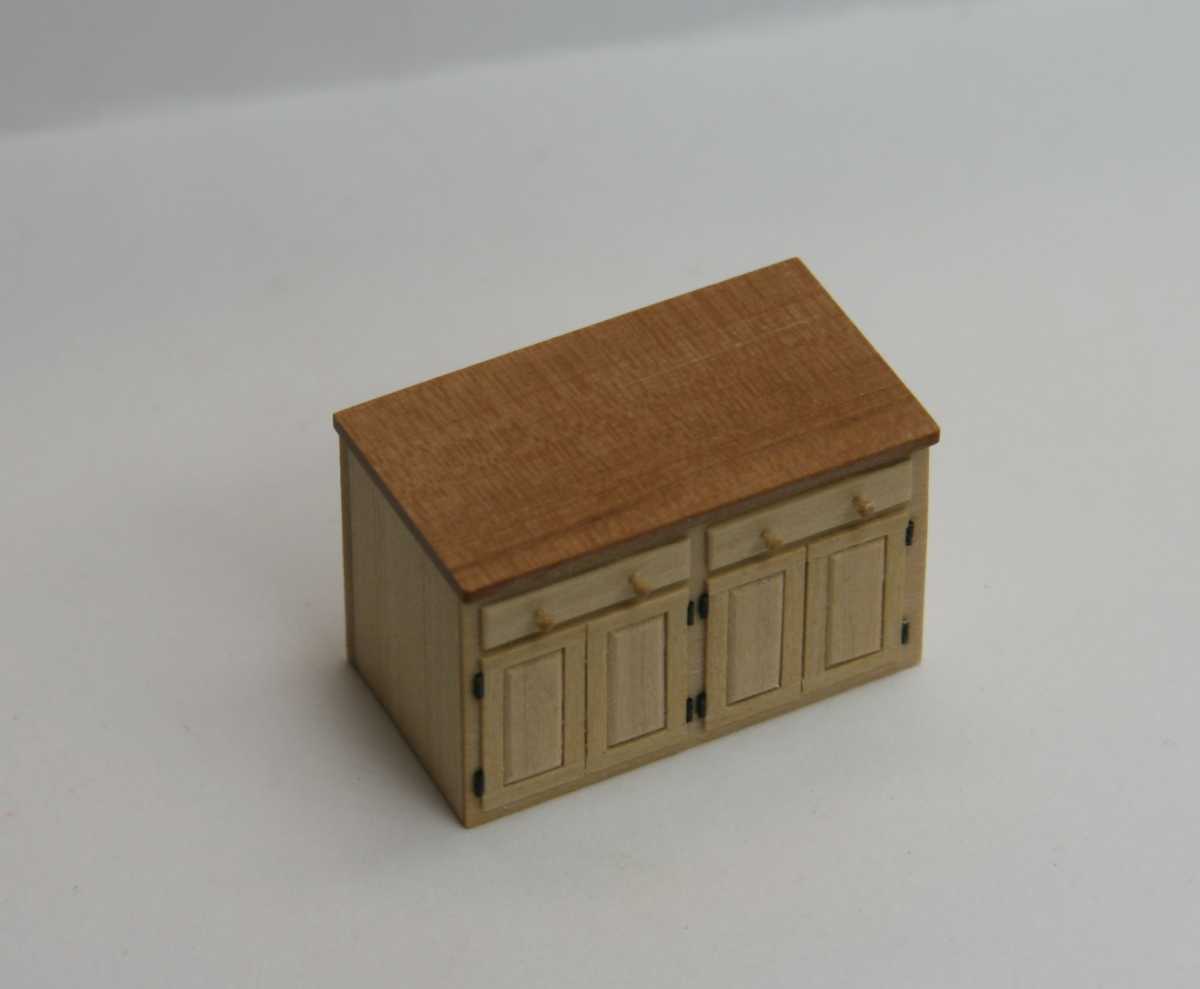
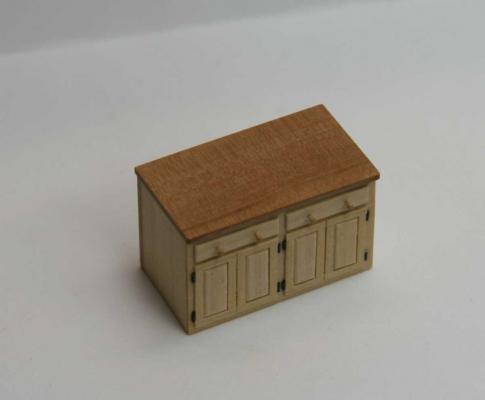
Thanks for the nice compliments. Sure, if I can hire you to do the drafting of the furniture, as I love your drawings. So just send your idea's and we'll make it a joint effort. The upper half of the cupboard as two features, one shelf for pots and one to hold plates, I got the idea of some pictures I found of galleys. Remco

- 1,207 replies
-
- 38
-
-
- sloop
- kingfisher
- (and 1 more)
-
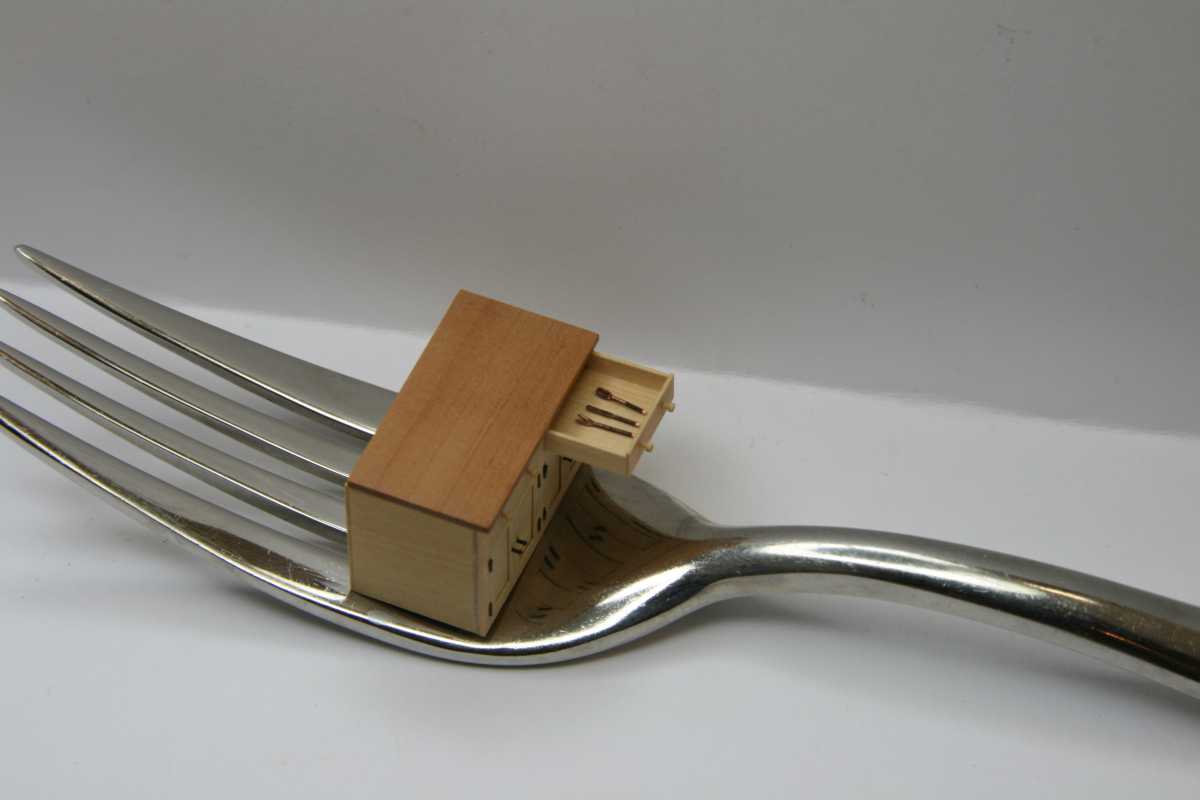
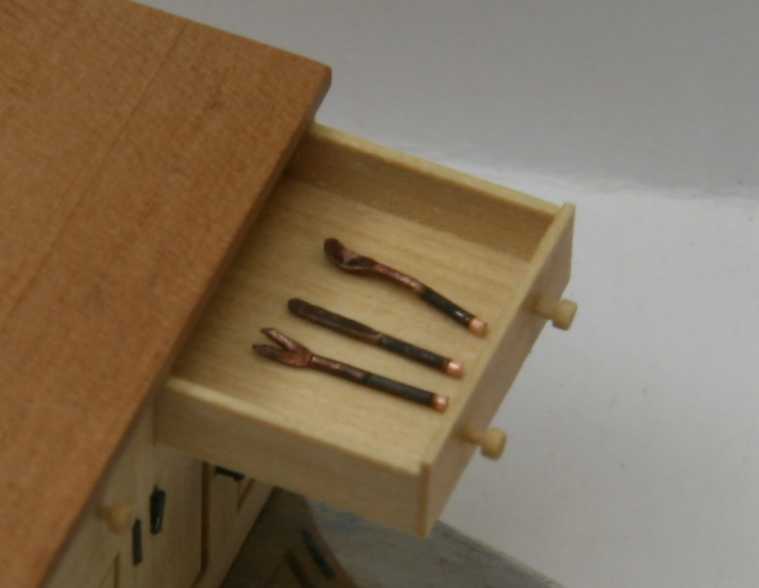
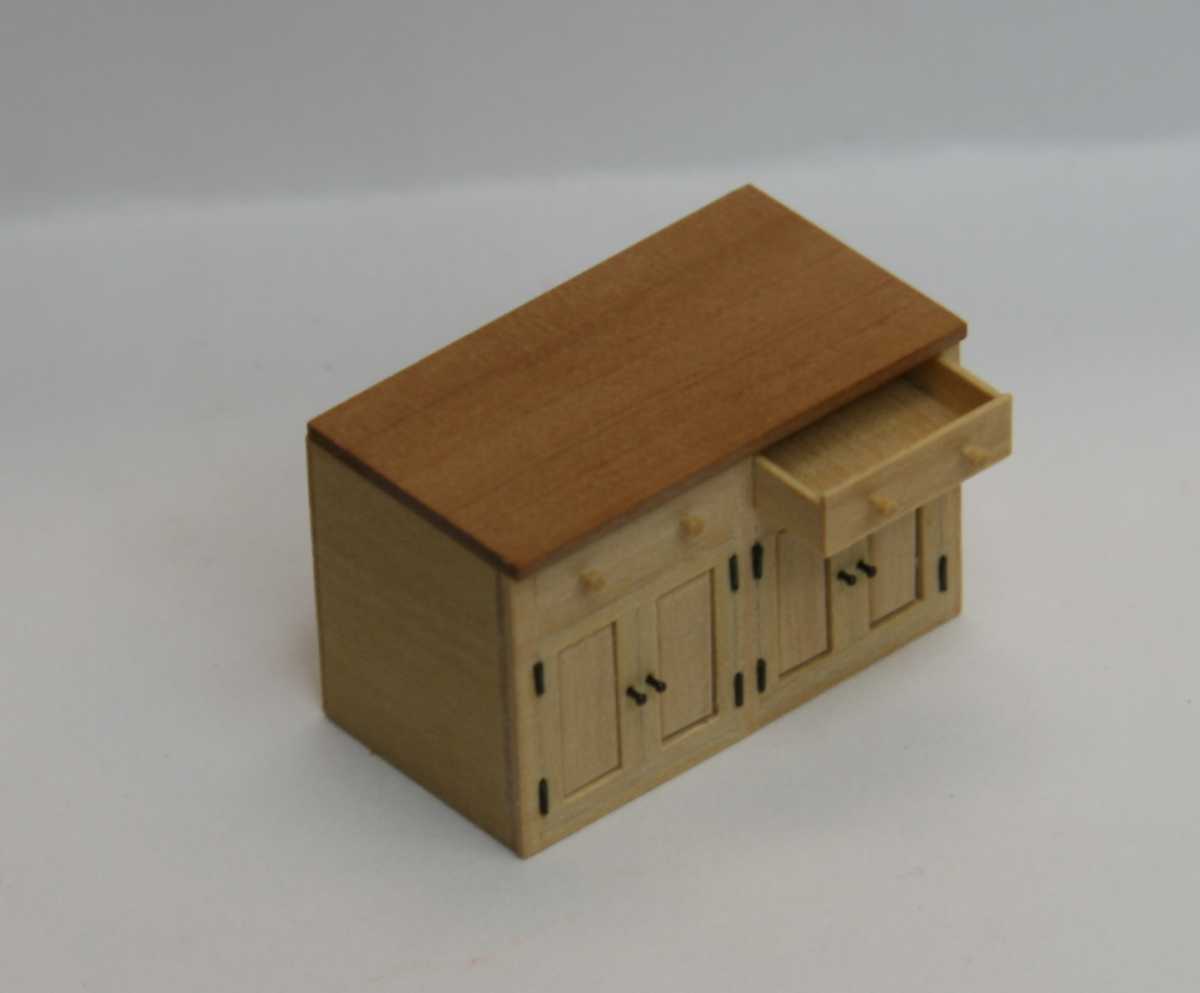
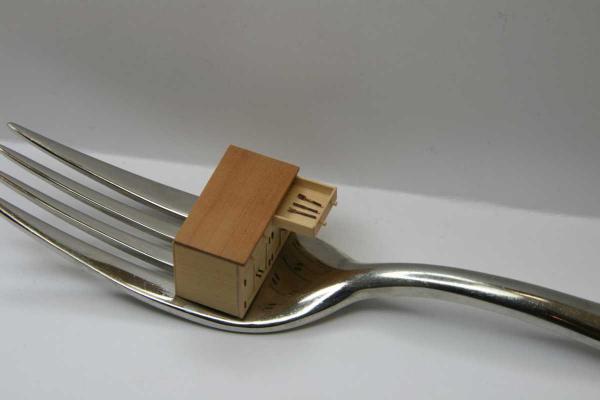
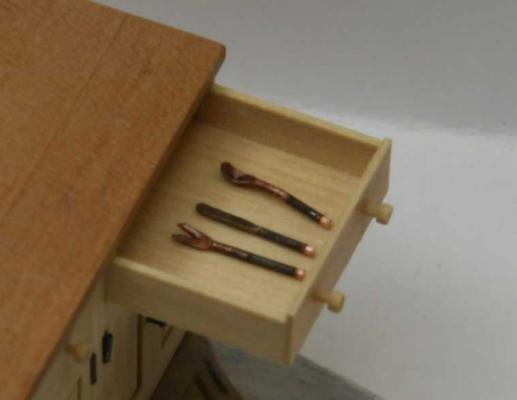
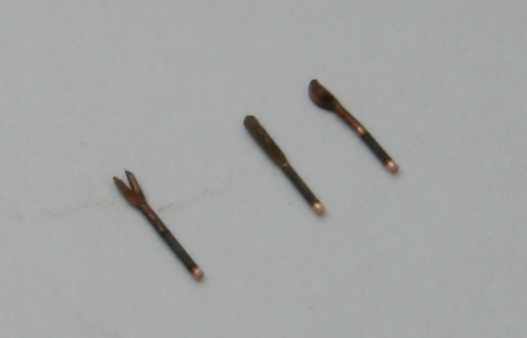
Thanks guys. Druxey, actually the drawers are made with half blind dovetails For the utensils I thought to just borrow the admiral's but somehow they don't fit..... Well a scaled down version then.... I leave it up to you to guess how I made these... Enough playing around let's get back to the serious stuff (but maybe next build a doll house?) Remco
- 1,207 replies
-
- 18
-
-
- sloop
- kingfisher
- (and 1 more)
-
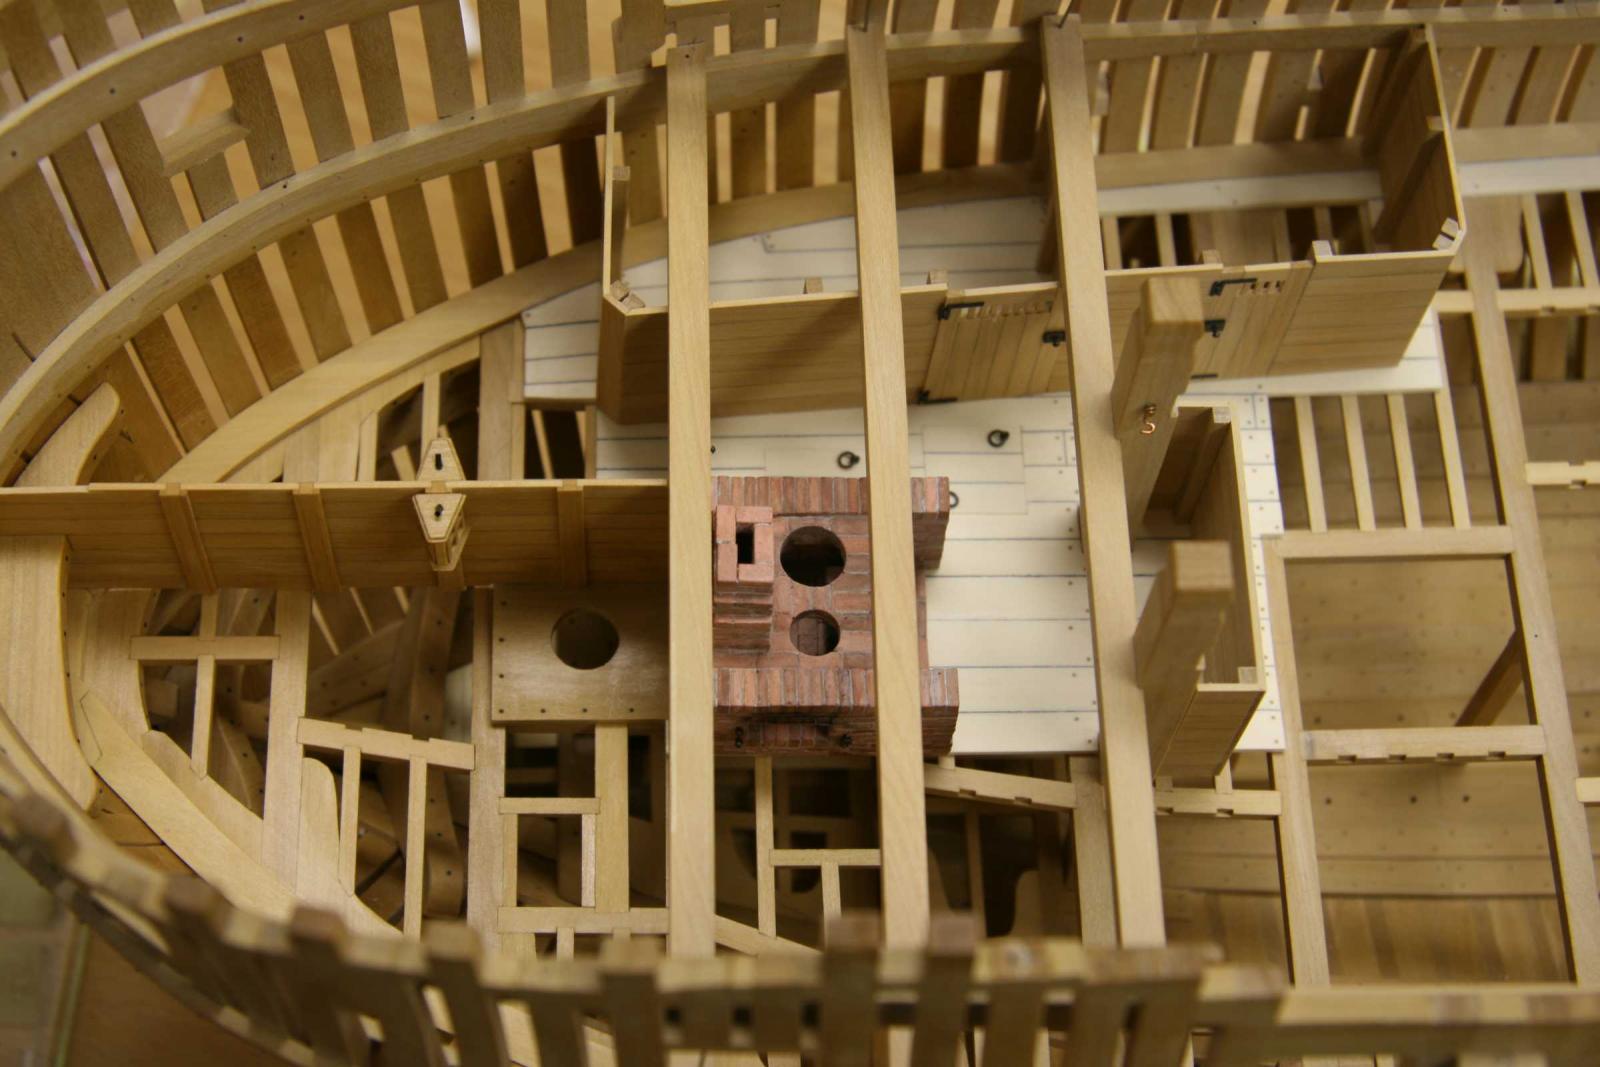
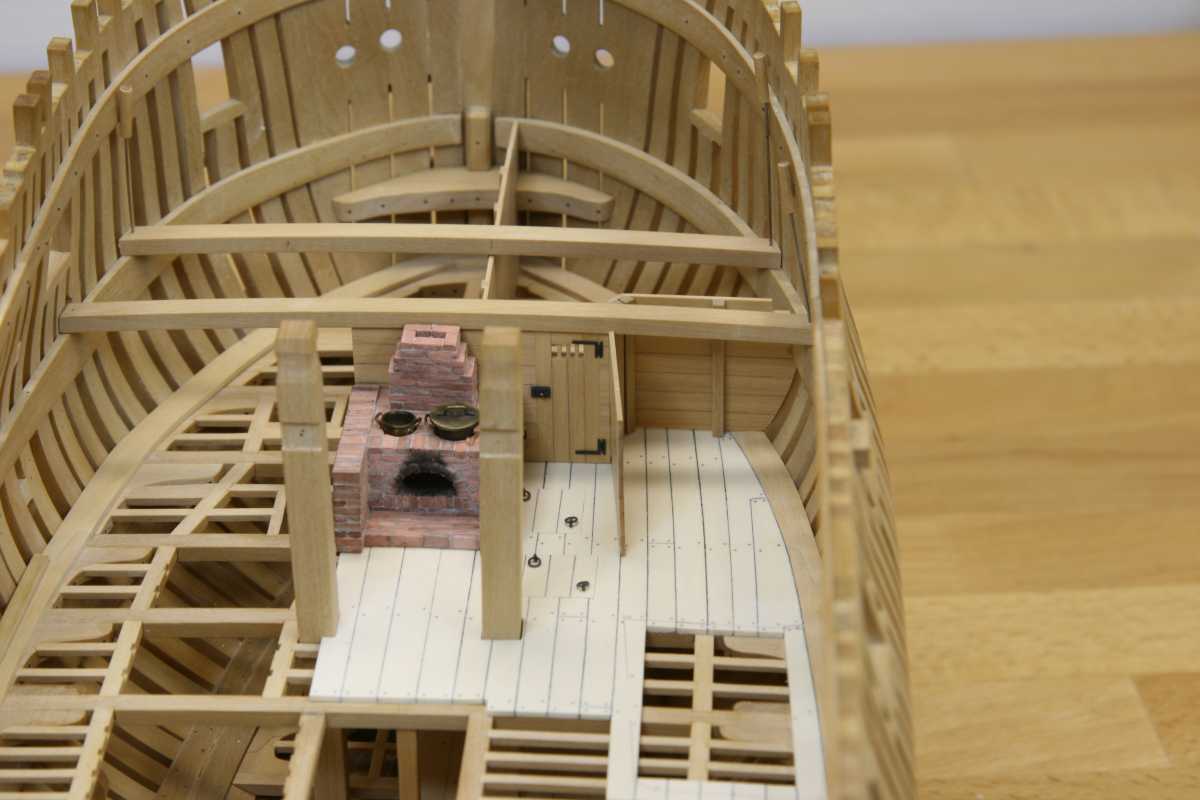
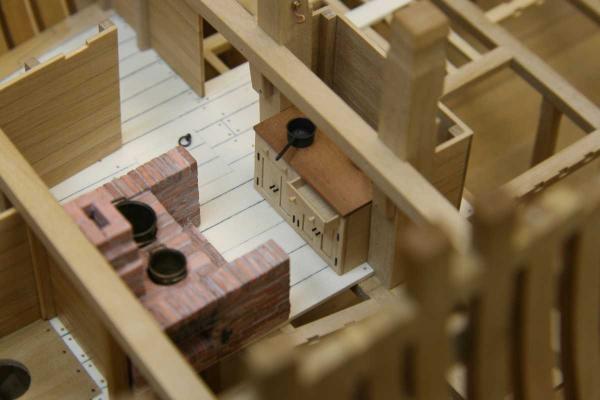
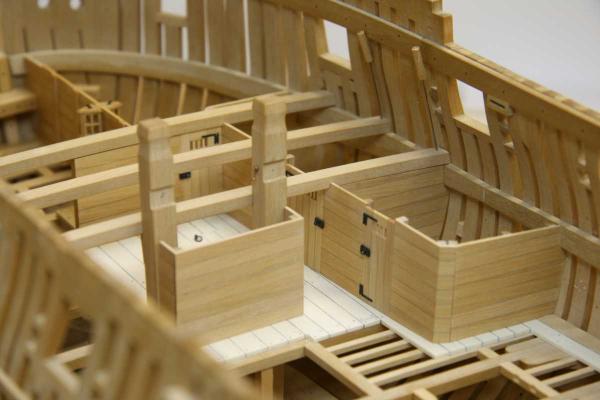
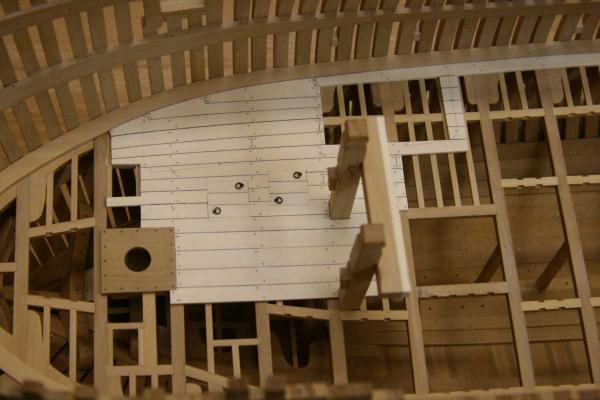
Interesting discussion, unfortunately my NMM plans don't show the position of the lanterns. Meanwhile I've made some storage space for the galley, I wasn't pleased with MKI so I build MKII with thinner hinges and a working drawer. Behind it I'll make an open cupboard. Remco

- 1,207 replies
-
- 22
-
-
- sloop
- kingfisher
- (and 1 more)
-
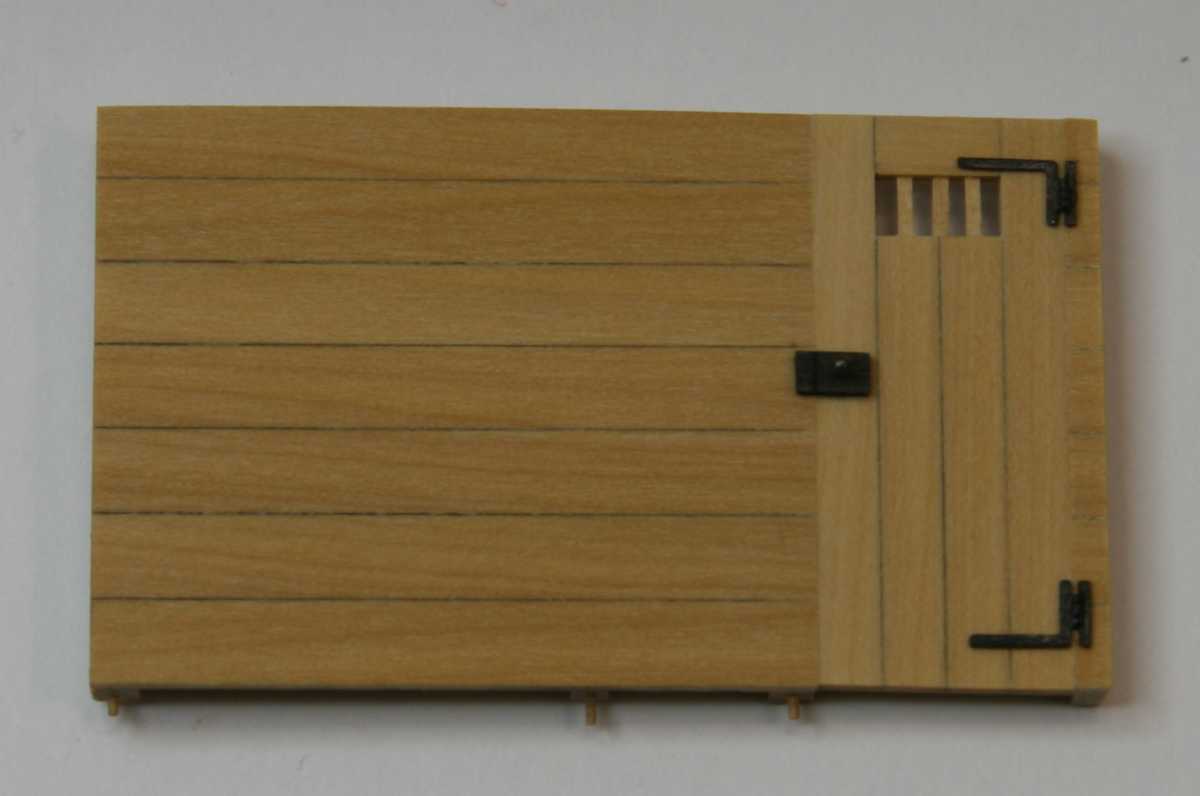
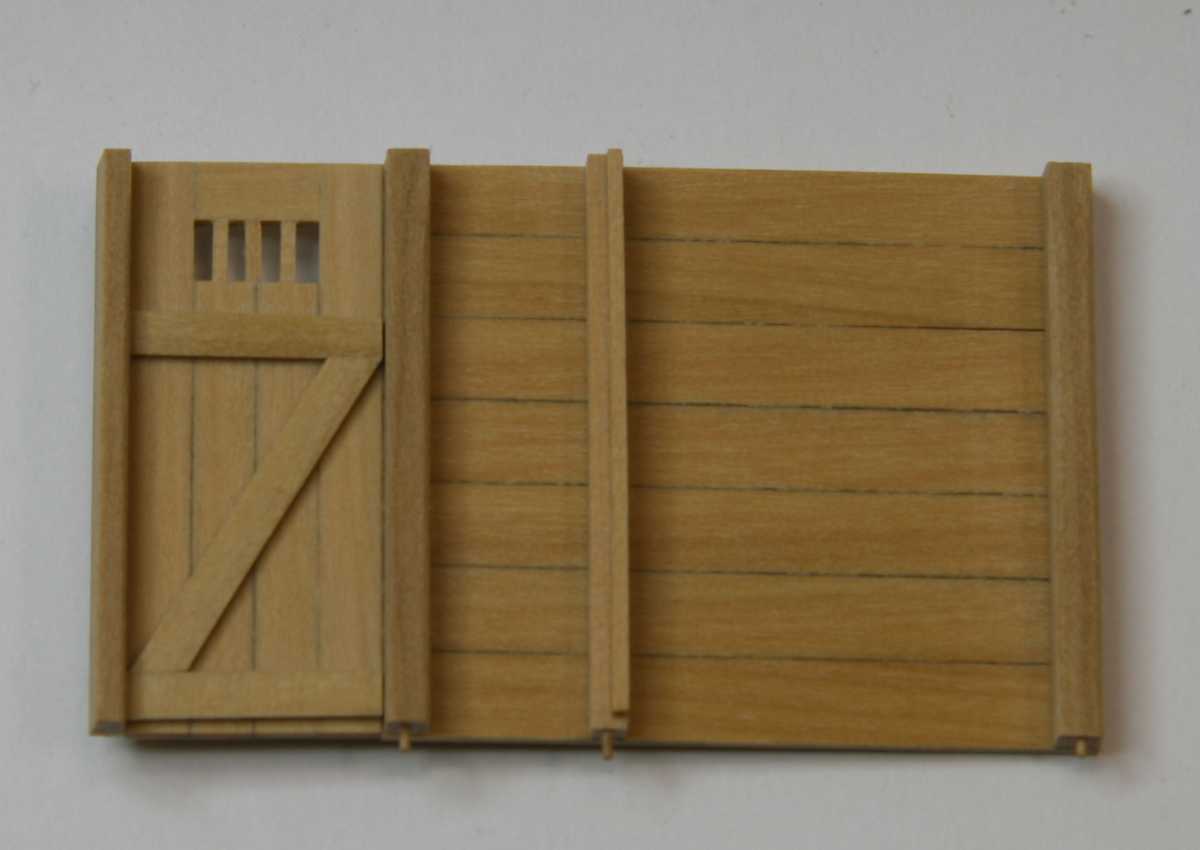
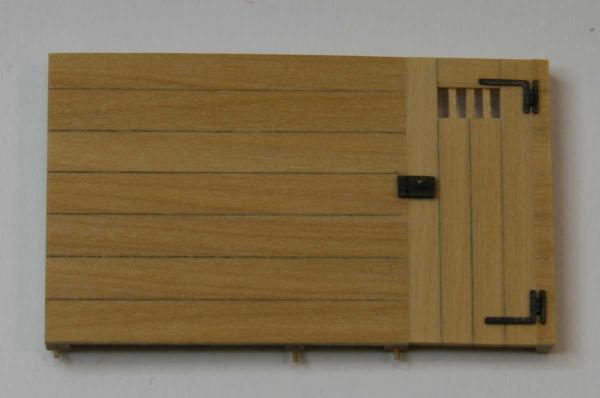
Thank you Sherry, but I just notice a big oops.... The lock of one door is on the wrong side
- 1,207 replies
-
- 1
-
-
- sloop
- kingfisher
- (and 1 more)
-
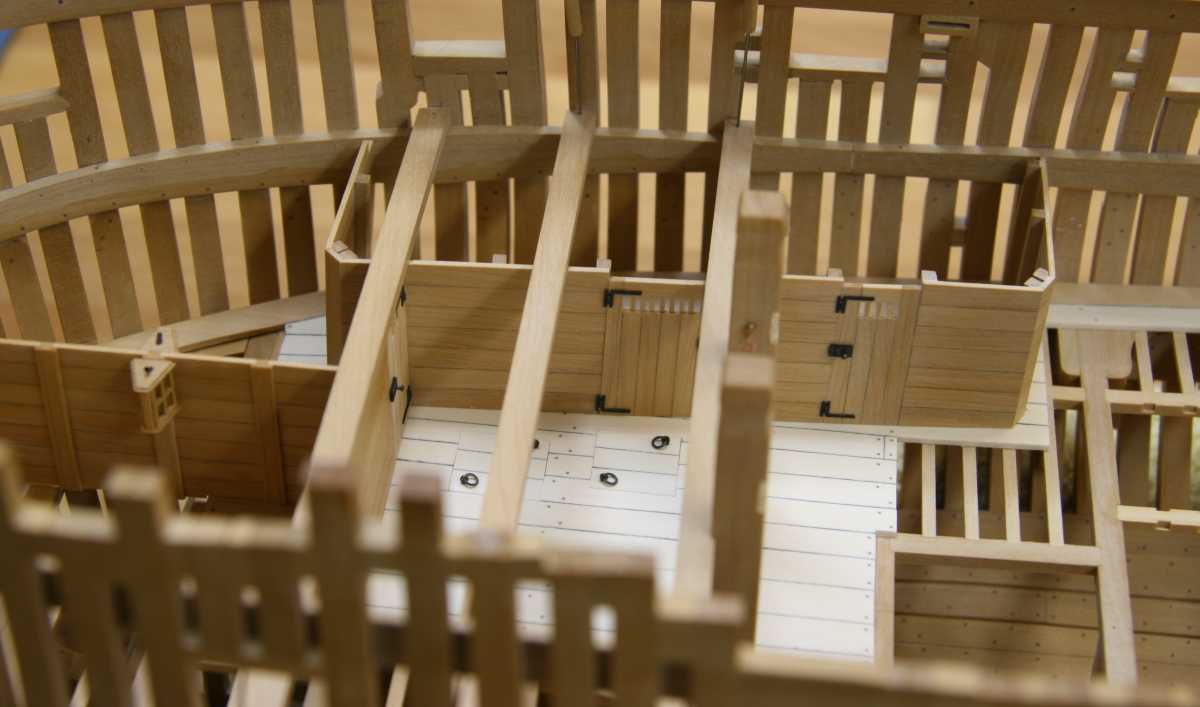
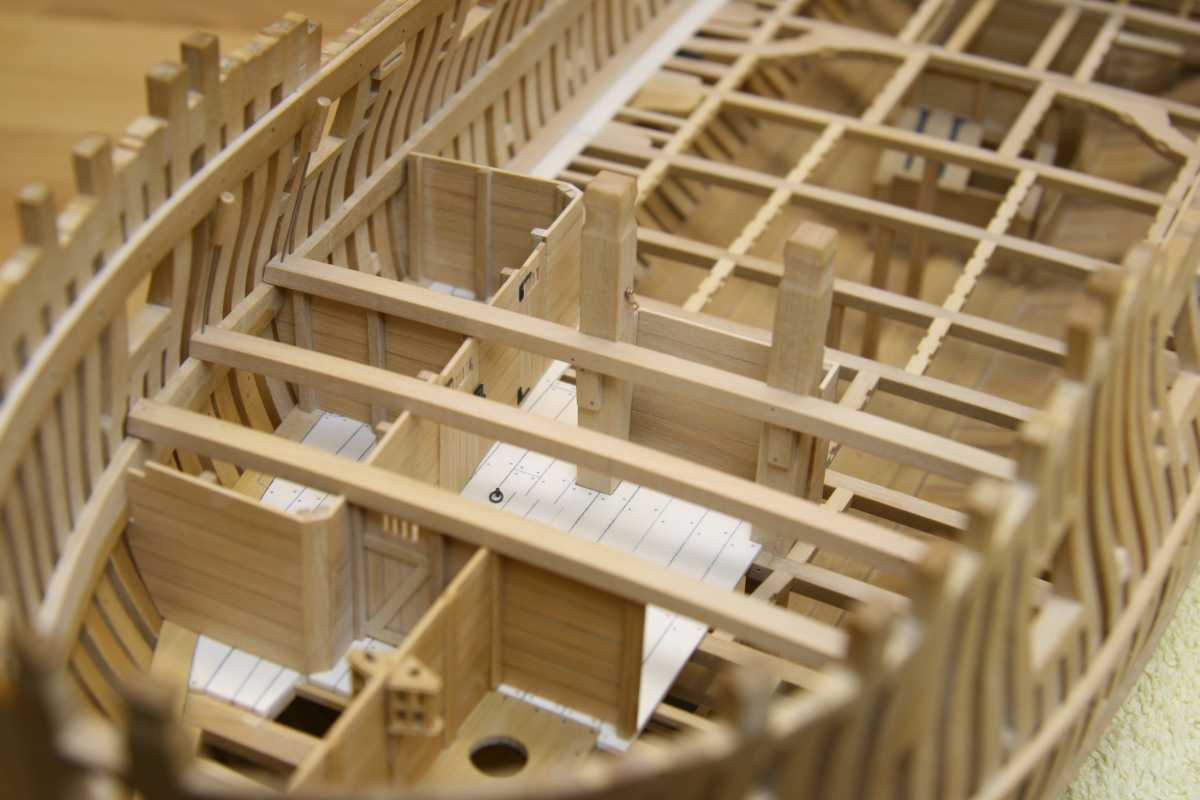
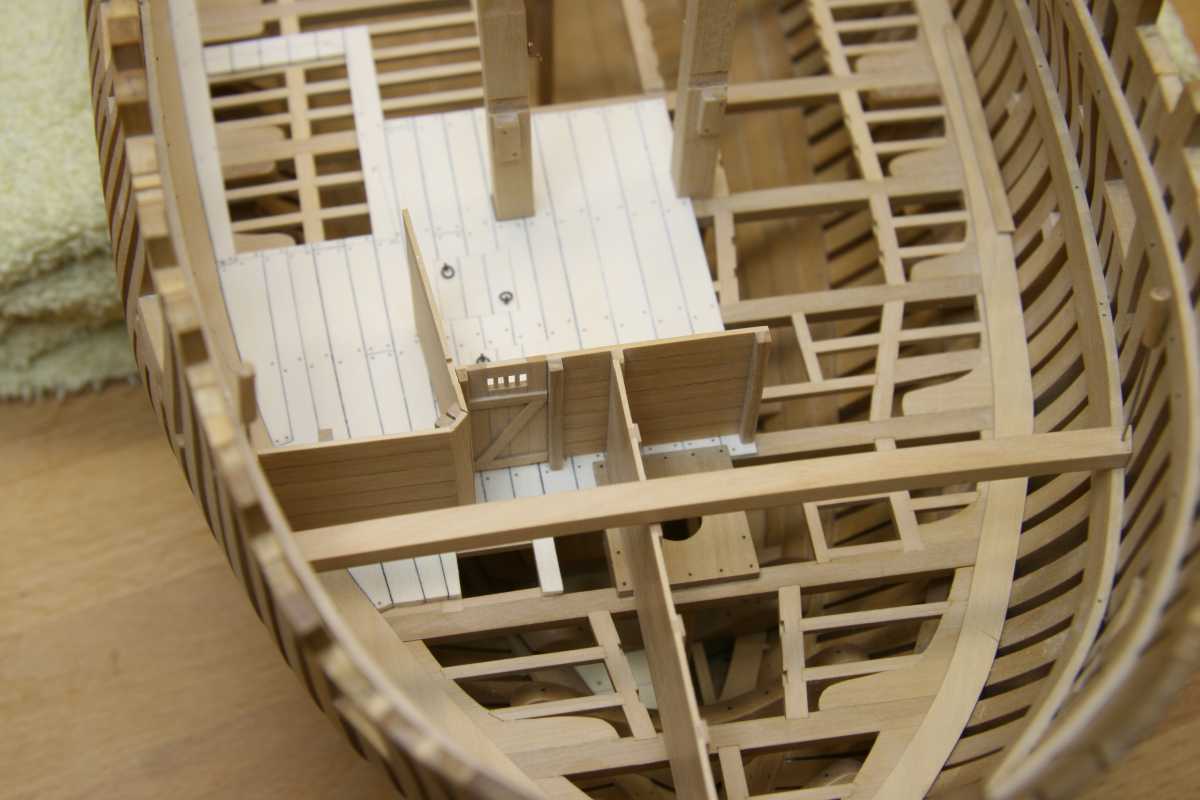
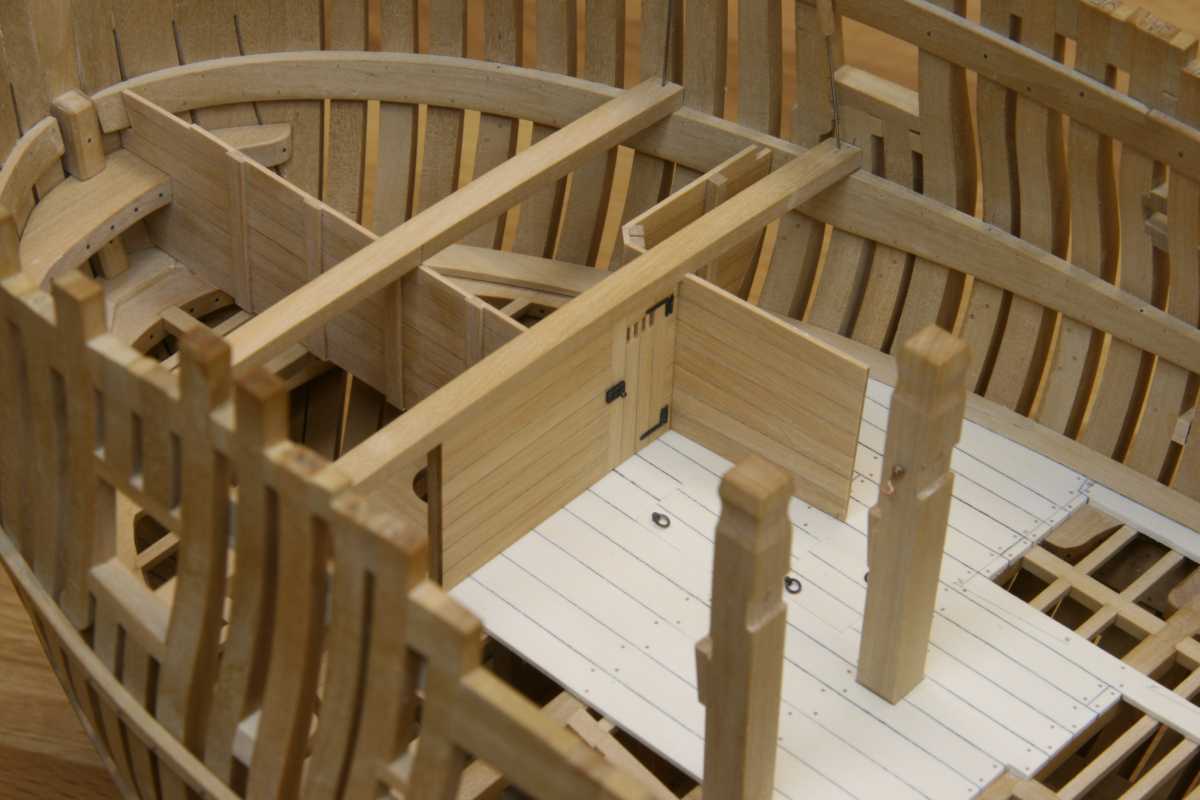
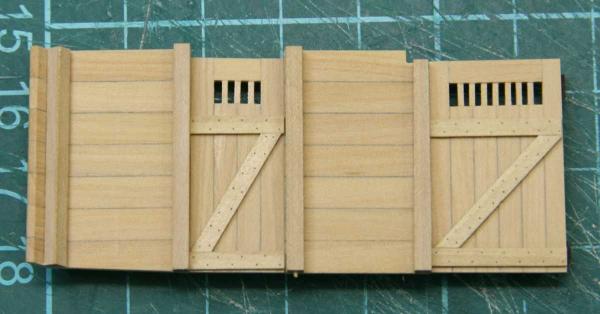
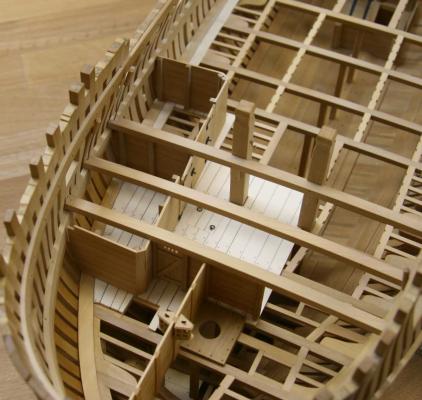
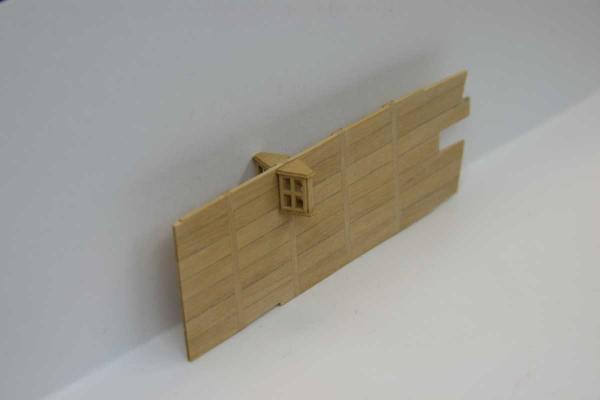
Thank you Druxey, Alex, Max. More doors, more bulkheads make up the carpenters store room and the carpenters cabin. There's also one between the bitts creating a small workspace for the cook. Let's see what I can do with that, I think a big cupboard makes sense. Remco


- 1,207 replies
-
- 17
-
-
- sloop
- kingfisher
- (and 1 more)
-
I wonder why the dye stains unevenly, I assume you took extra care to apply it evenly so there is no overlap on the layers? Is it the structure of the wood then, maybe an other type of wood will take the stain better and more evenly. I tested the same dye, although a darker color, on boxwood and that worked out just fine. Remco
-
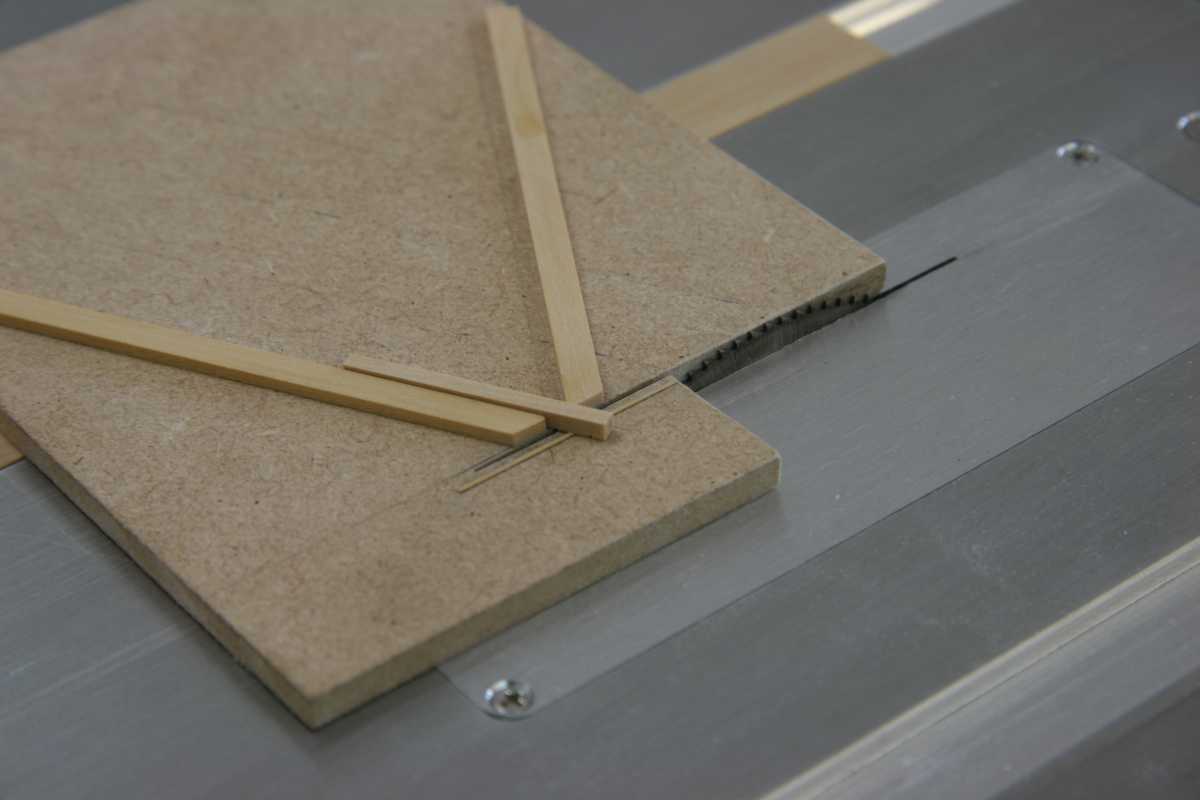
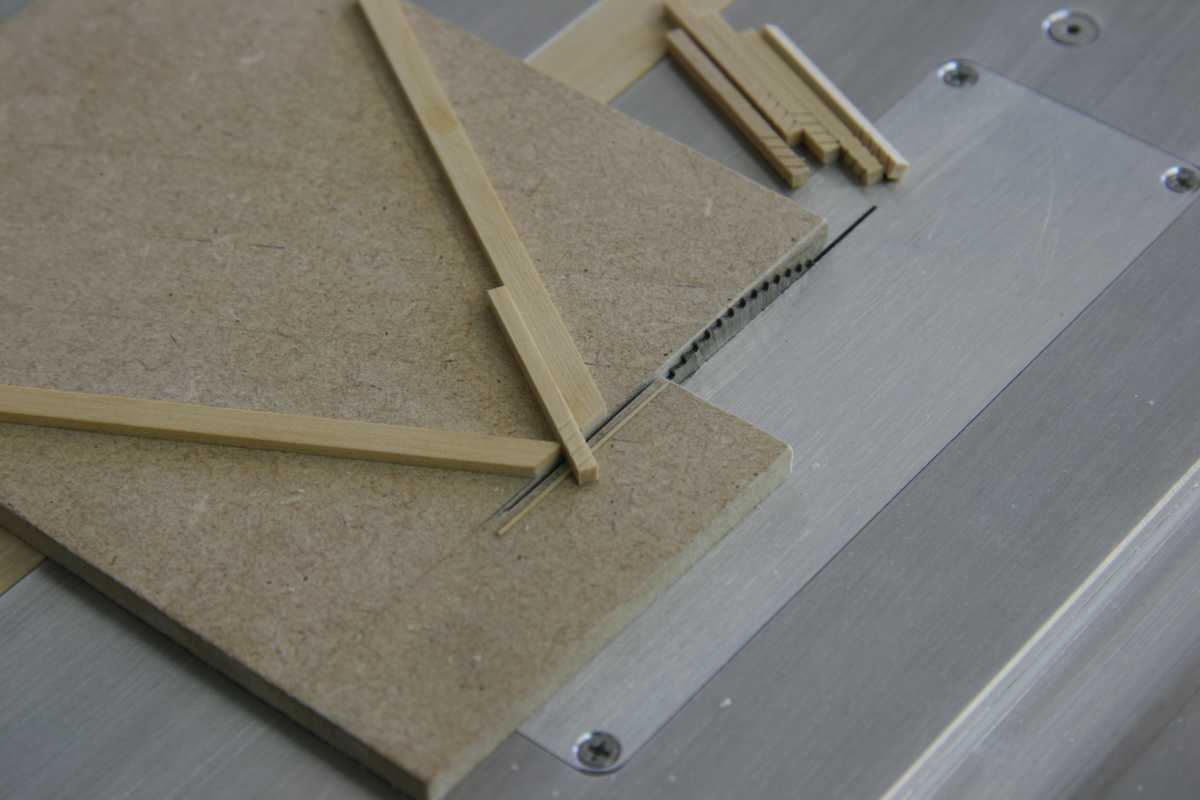
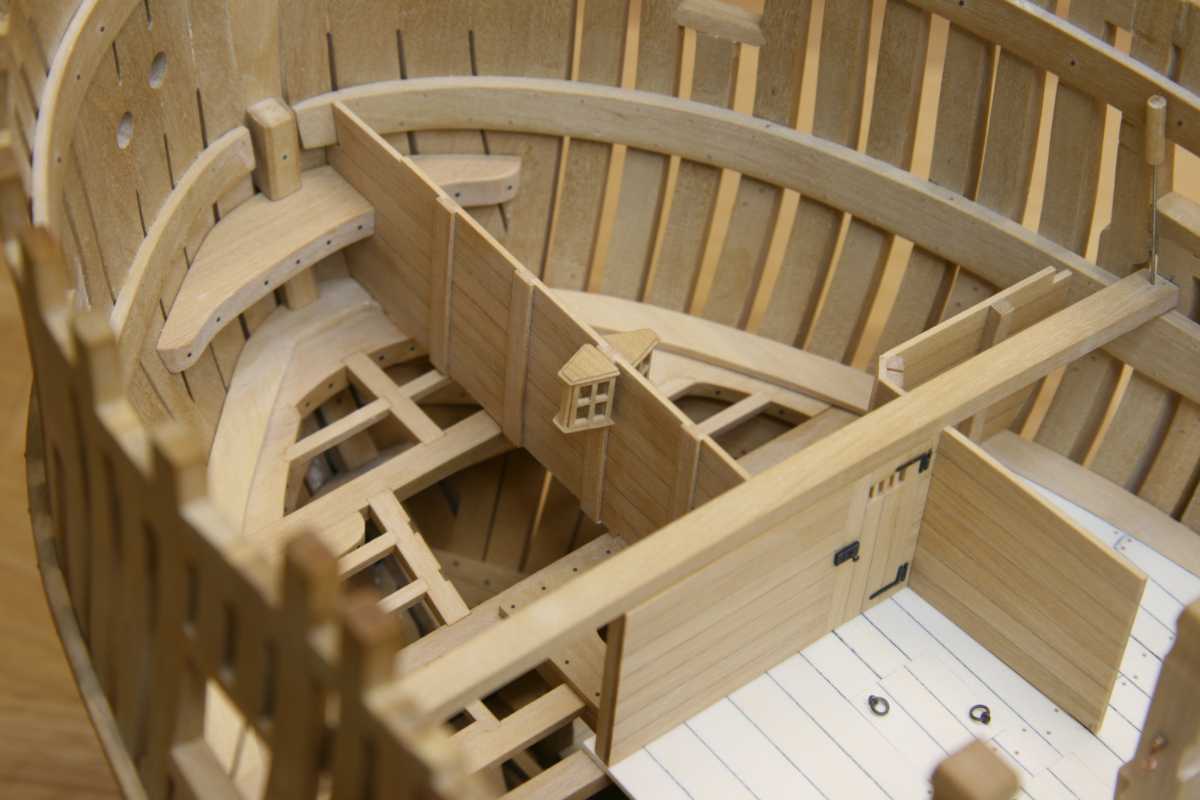
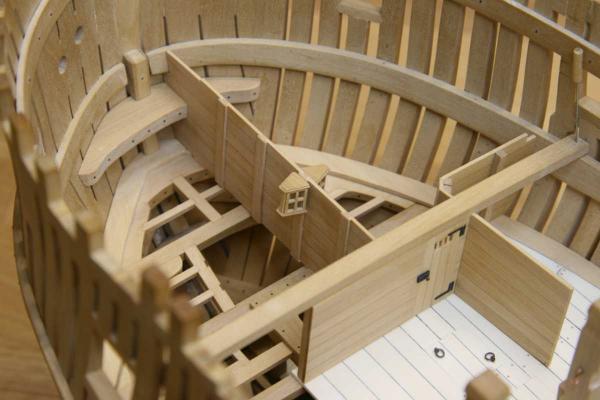
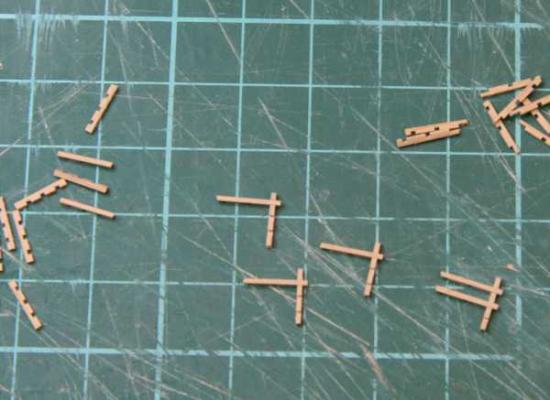
Thanks all. Yuk Grant Sure Daniel, the joints are tinted with graphite to enhance the joints. Otherwise the joints are almost invisible and the bulkhead will look like its made from one piece. Time to make some lanterns, the mullions were completely prepared on the table saw assembling was quite simple, once complete they were sanded down to the appropriate thickness Here they are temporary in place, I still need to add a vent but I'm not sure how long to make it, TFFM describes it should clear the deck head. Should it face away from the bulkhead or go up to the upper deck, some advice would be appreciated how I need to interpret this. Remco


- 1,207 replies
-
- 20
-
-
- sloop
- kingfisher
- (and 1 more)
-
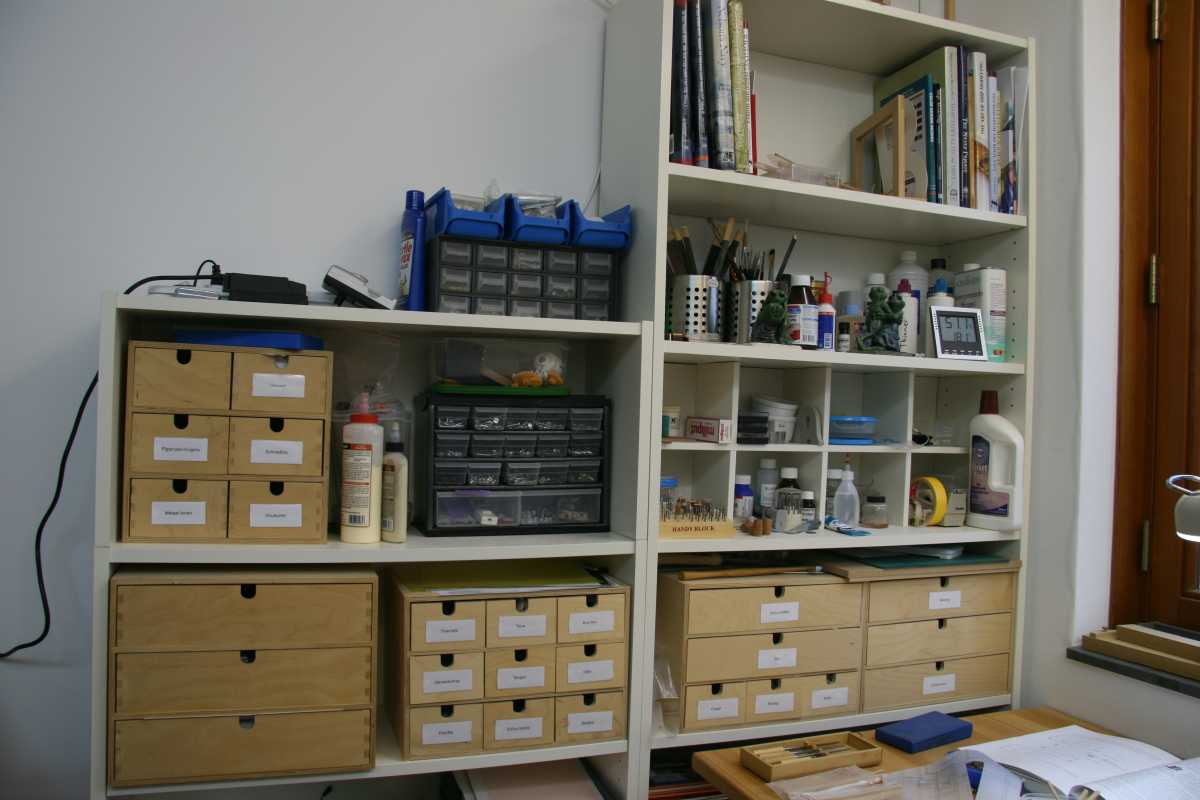
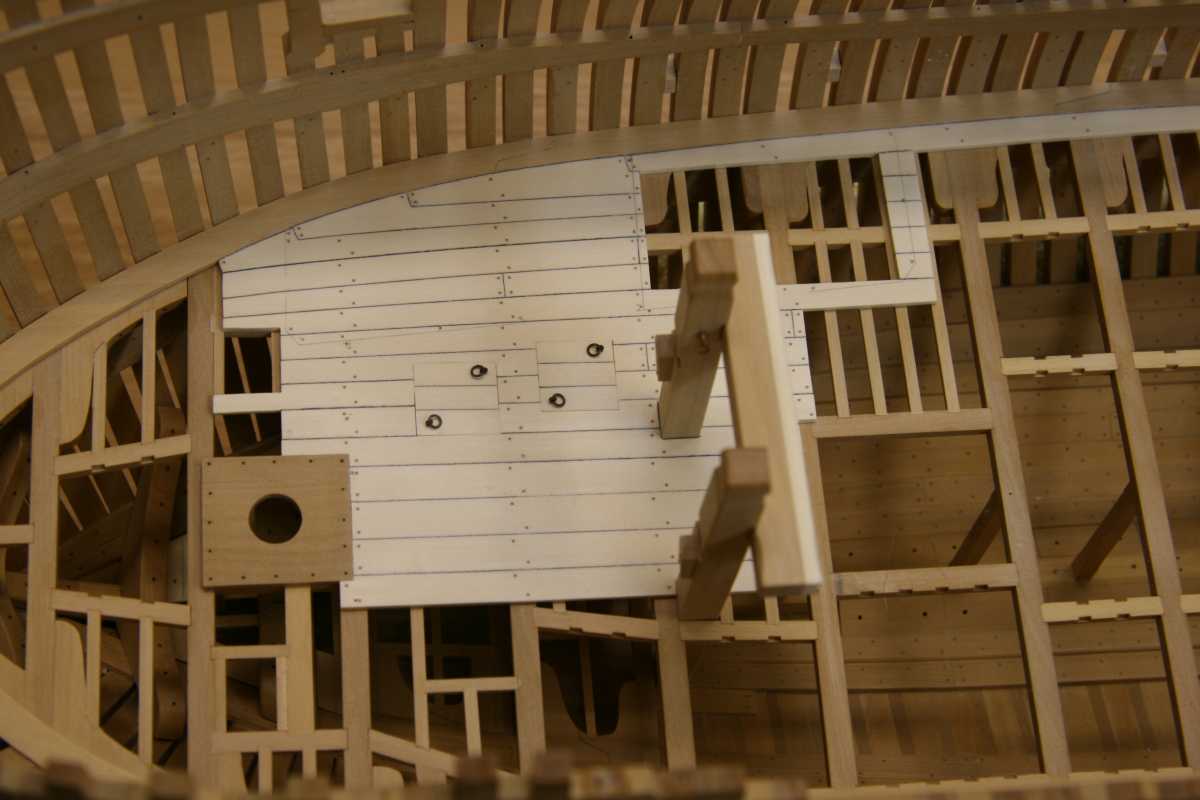
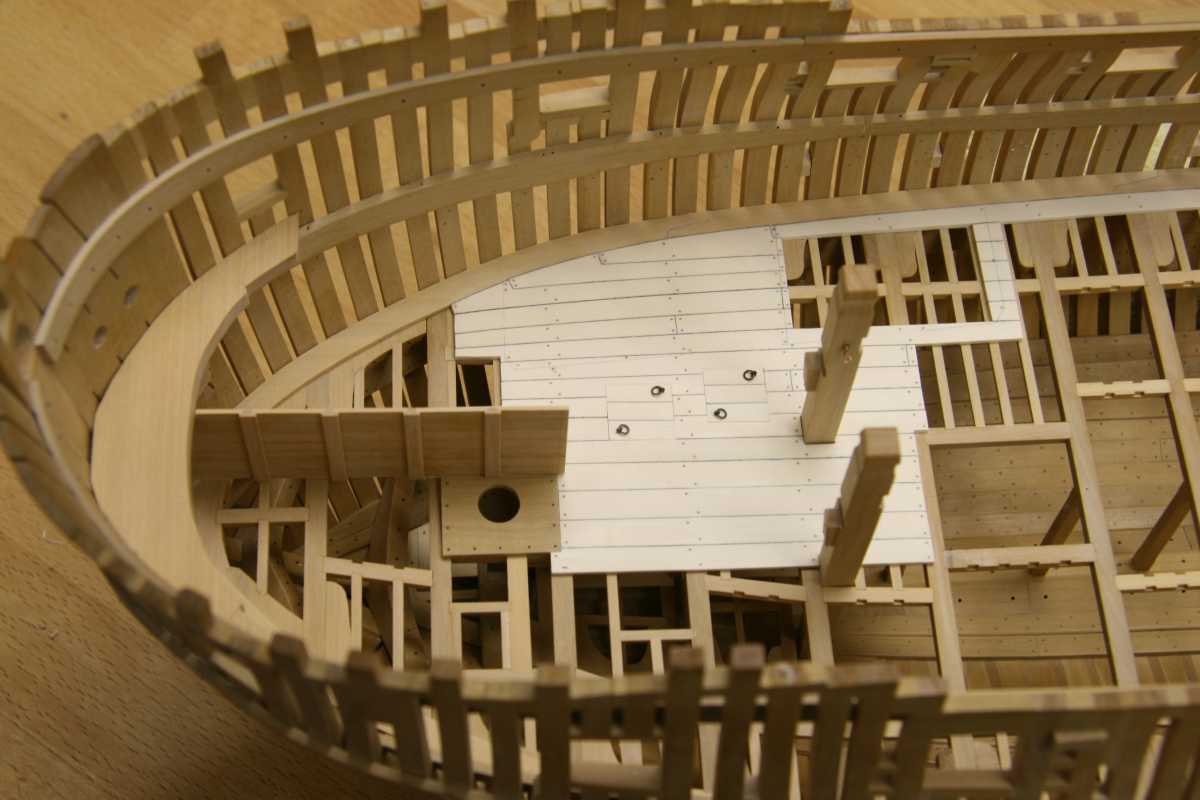
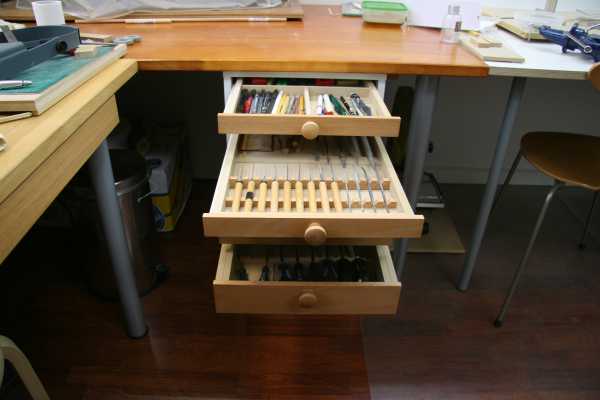
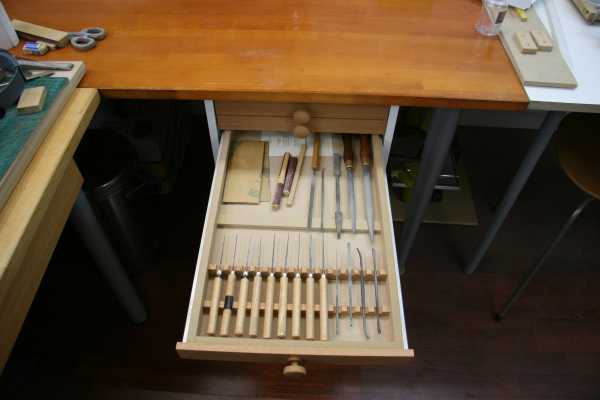
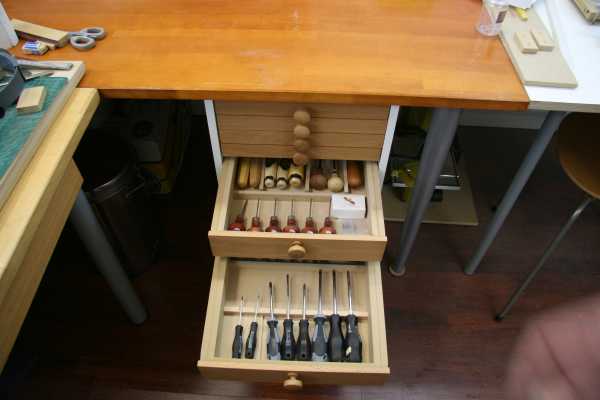
No can do John , but I can tell you it was a nice little project I can recommend to every one. Those shallow drawers are just great. Next to this I use Ikea's little boxes to store other tools and supply's unfortunately they don't sell this type any more, a real shame. I'm still looking for a better way to organize my sanding paper, keeping them in a big stack is not working... So back to making bulkheads, I use wooden peg's under the stanchions to temporary fit and adjust until I'm getting a fit I like. The cook's working space was not very big. Behind the riding bitt's there is another bulkhead drawn on my plan I thin I'll make a nice cupboard for the cook to store his pot's, pan's and other tools.


- 1,207 replies
-
- 27
-
-
- sloop
- kingfisher
- (and 1 more)
-
instead of holding your breath you can get a cheap tripod and have long shutter times without the risk of movement. I used to do it your way, but since I got the tripod taking pictures with greater field of depth is a lot easier. Remco
-
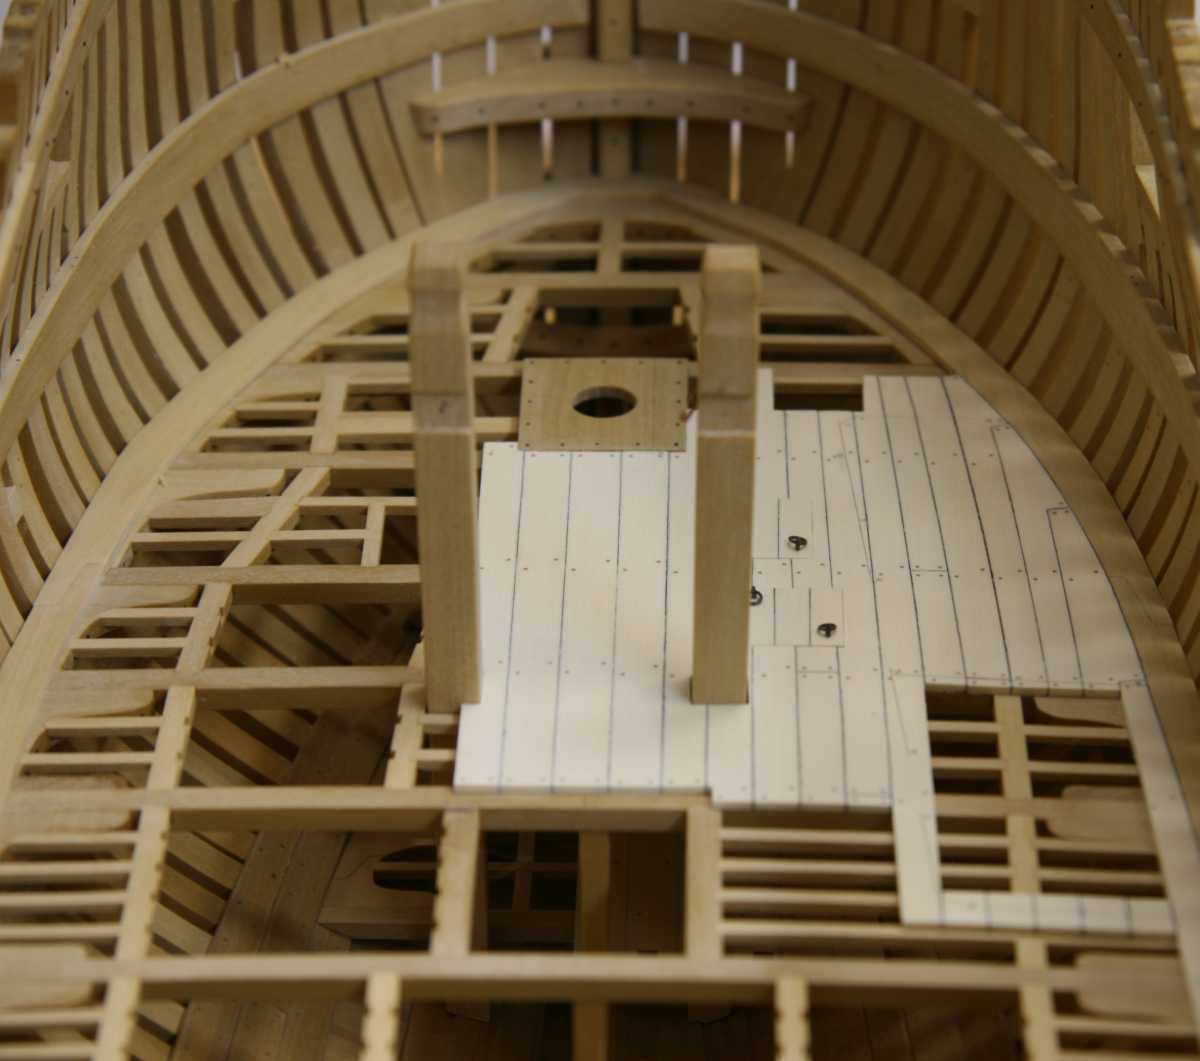
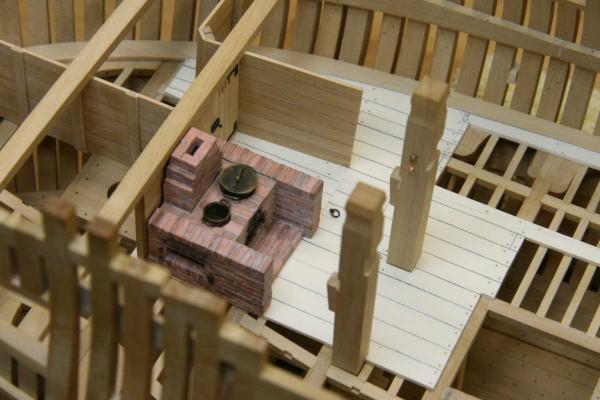
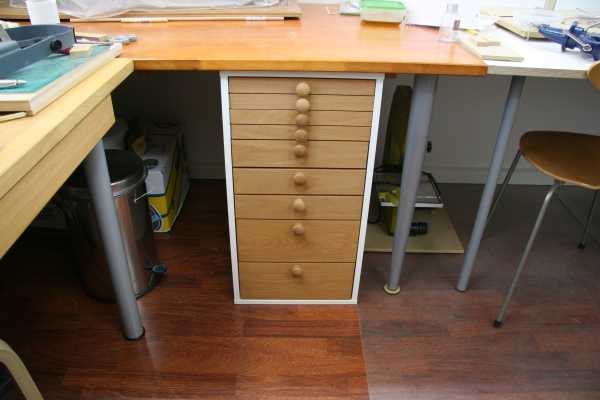
Thanks all for your kind words. You are welcome to come over and cook a meal on the stove. I've been busy with a side project, inspired by Geatans tool drawers I decided to rebuild one of my tool cabinets and upgraded a 5 drawer Ikea cabinet to a 9 drawer tool cabinet. After that is was time to add more planking (more than I had intended before I started on the hearth. And making bulkheads. Here the first is ready with added small strips to act as rebates The bulkheads are made from 20 cm strips, glued and then cut to size. I think this works better than my previous approach by gluing each strip in situ. Along the way I needed to make the upper deck hook to test fit the bulkhead. Remco


- 1,207 replies
-
- 21
-
-
- sloop
- kingfisher
- (and 1 more)
-
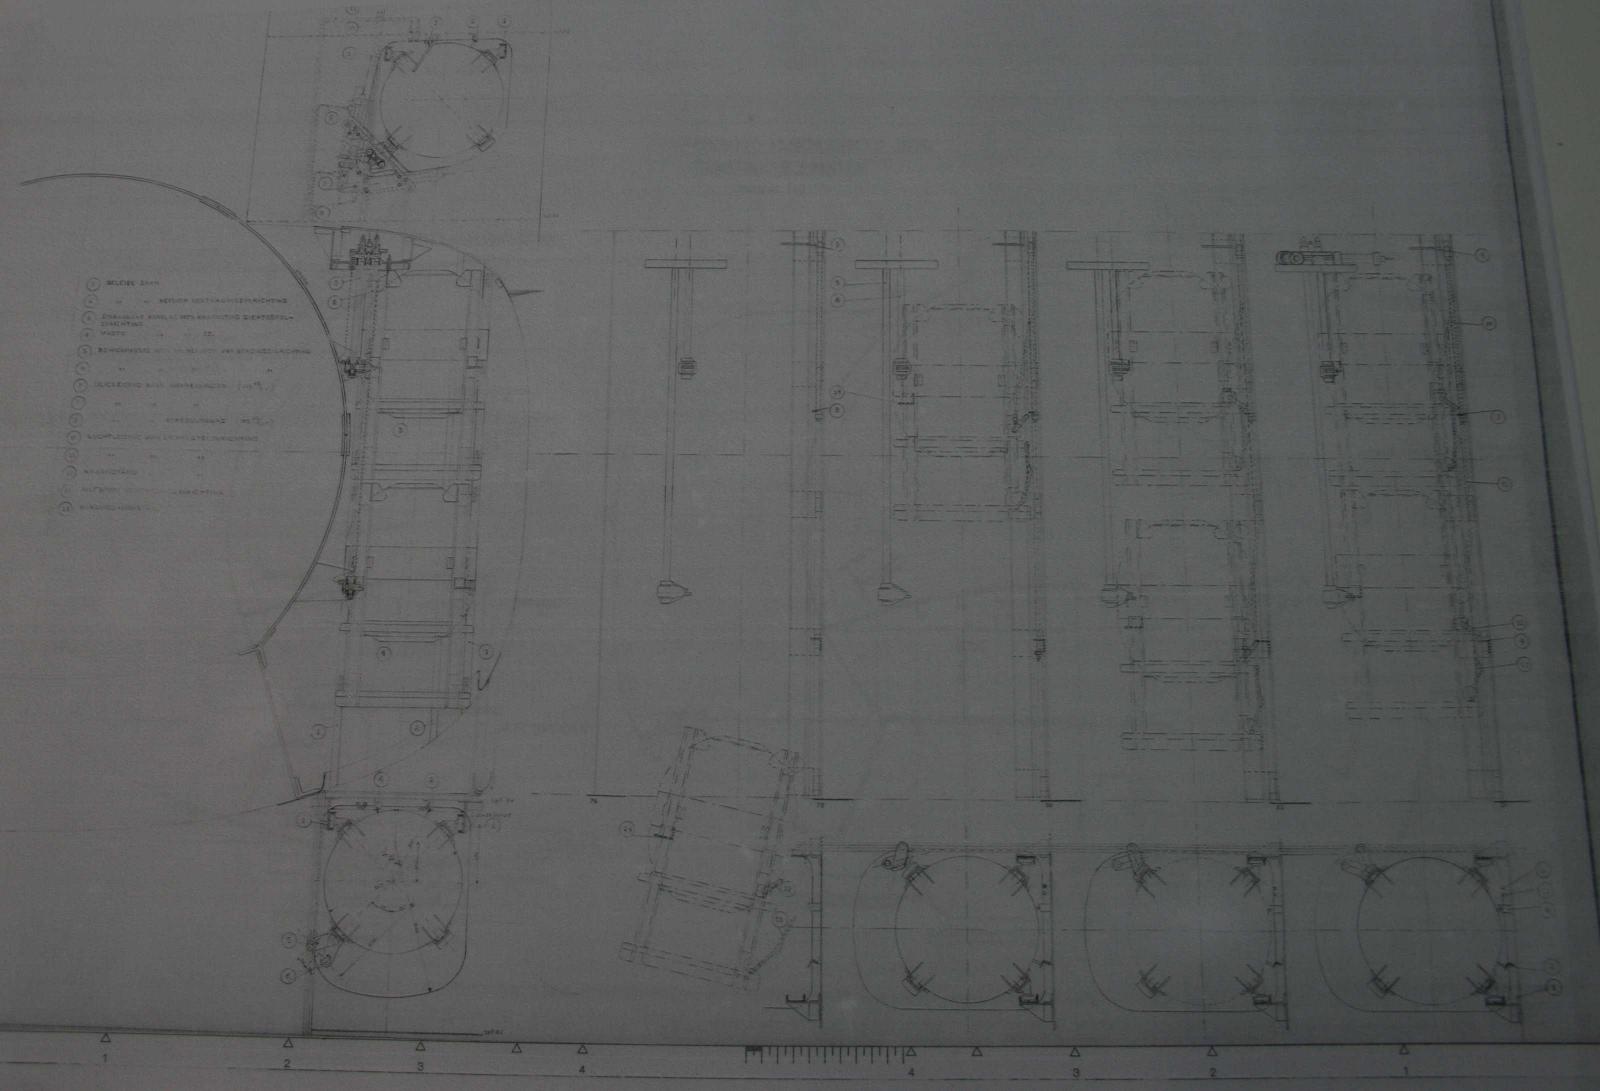
Great progress Piet! One of the drawings shows a lot of mechanics in the mine tube but I cannot make out whether it was released from the bottom or mechanically hoisted upwards in the tube. But the drawing suggest lids at the bottom too. Remco