DONATION DRIVE - SUPPORT MSW - DO YOUR PART TO KEEP THIS GREAT FORUM GOING!
×


Remcohe
-
Posts
612 -
Joined
-
Last visited
Content Type
Profiles
Forums
Gallery
Events
Everything posted by Remcohe
-

HMS Victory by Sven - FINISHED - 1:600 scale
Remcohe replied to Sven's topic in - Build logs for subjects built 1751 - 1800
Congratulations Matt, your model turned out really well! Remco -
Very nice Danny! We'll see when I get there, my capstans 1.0 definitely don't have retaining pins. I think Danny is pushing me now to make 2.0 Remco
-
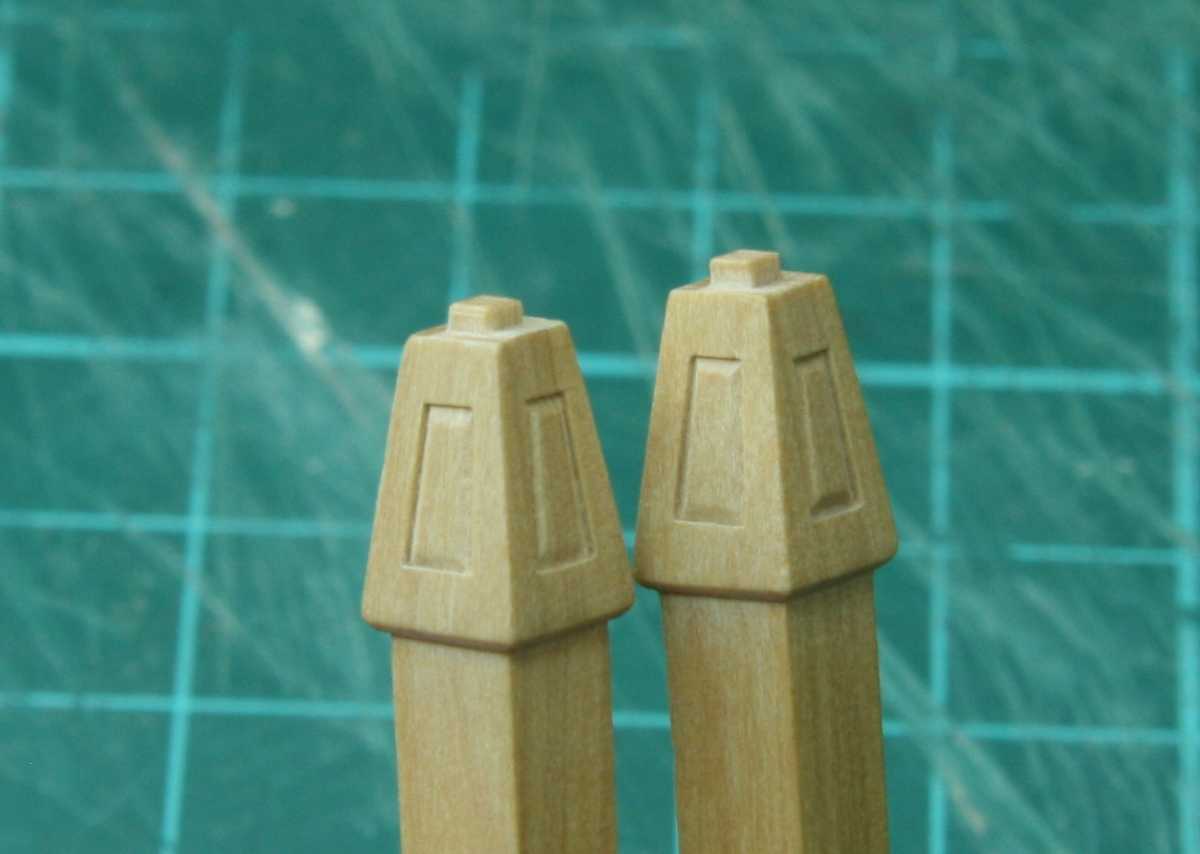
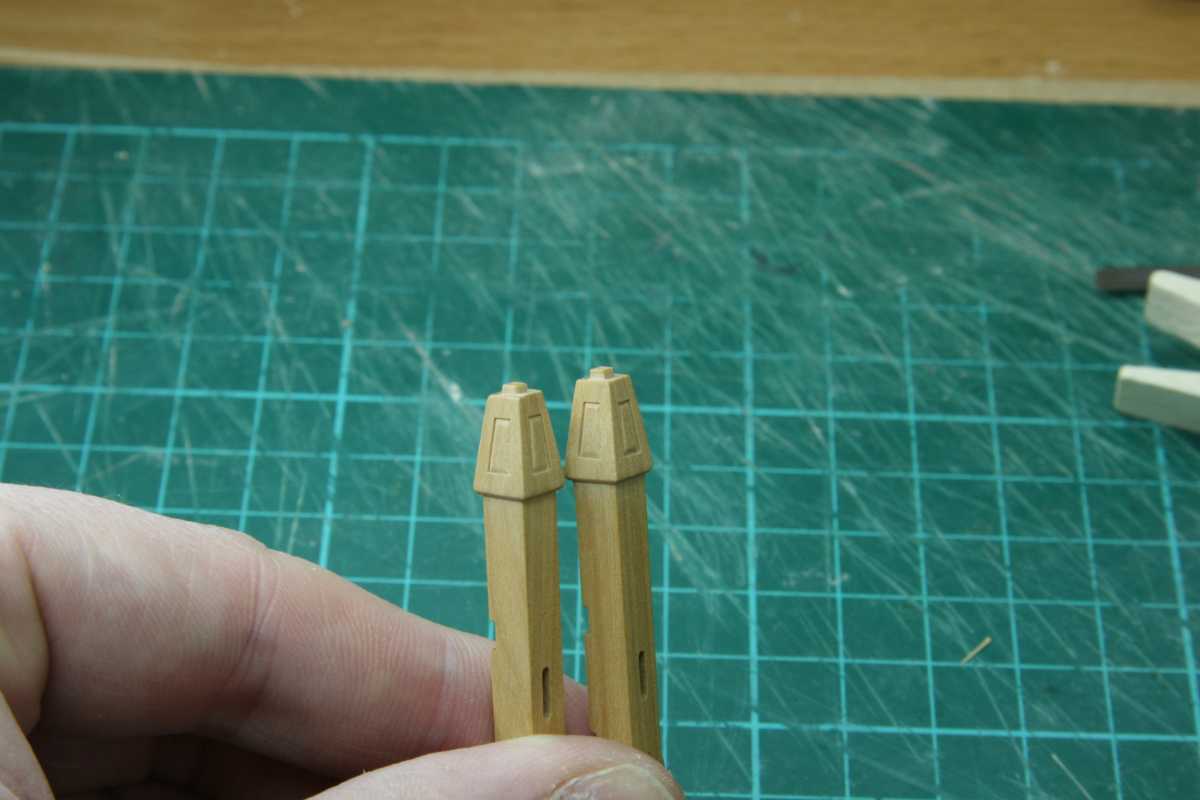
Not easy, those pieces are really tiny. Nice pillars too! Remco
-
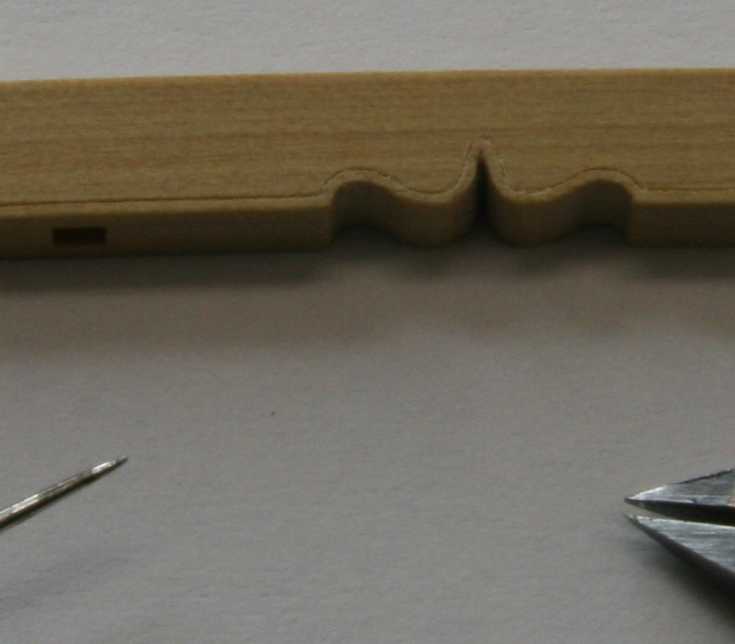
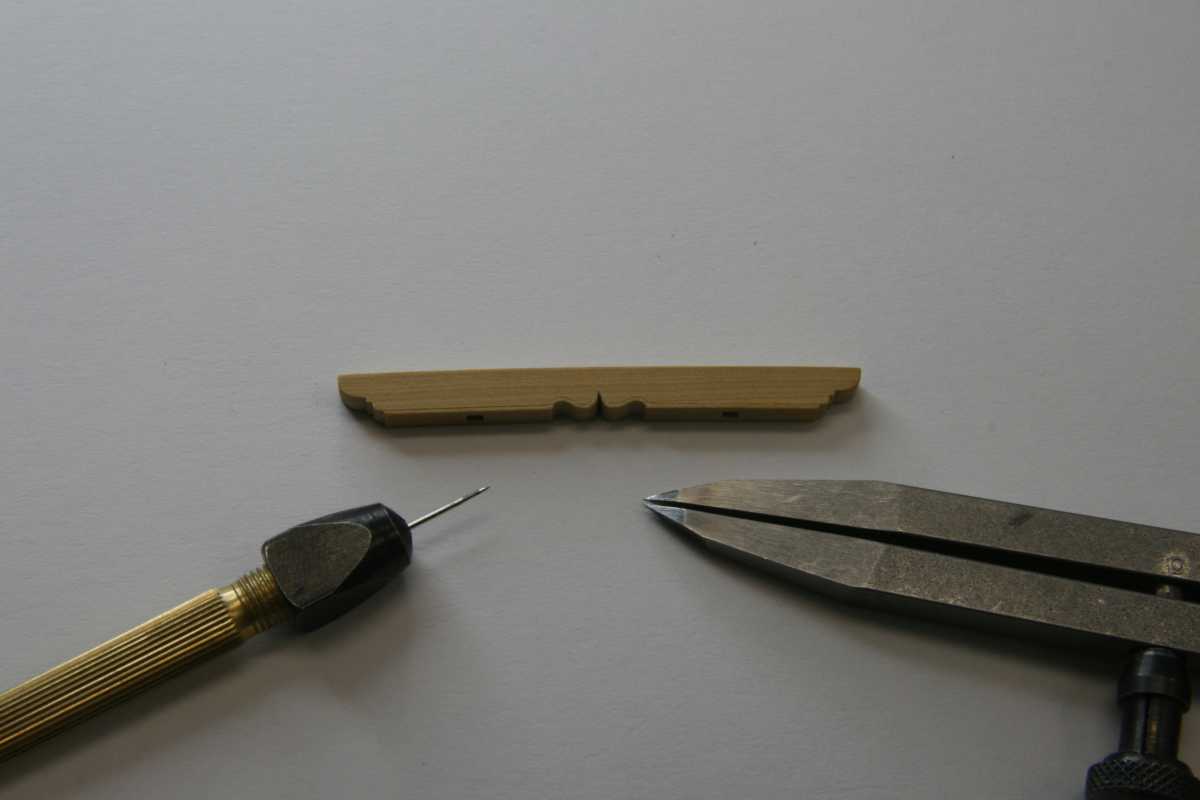
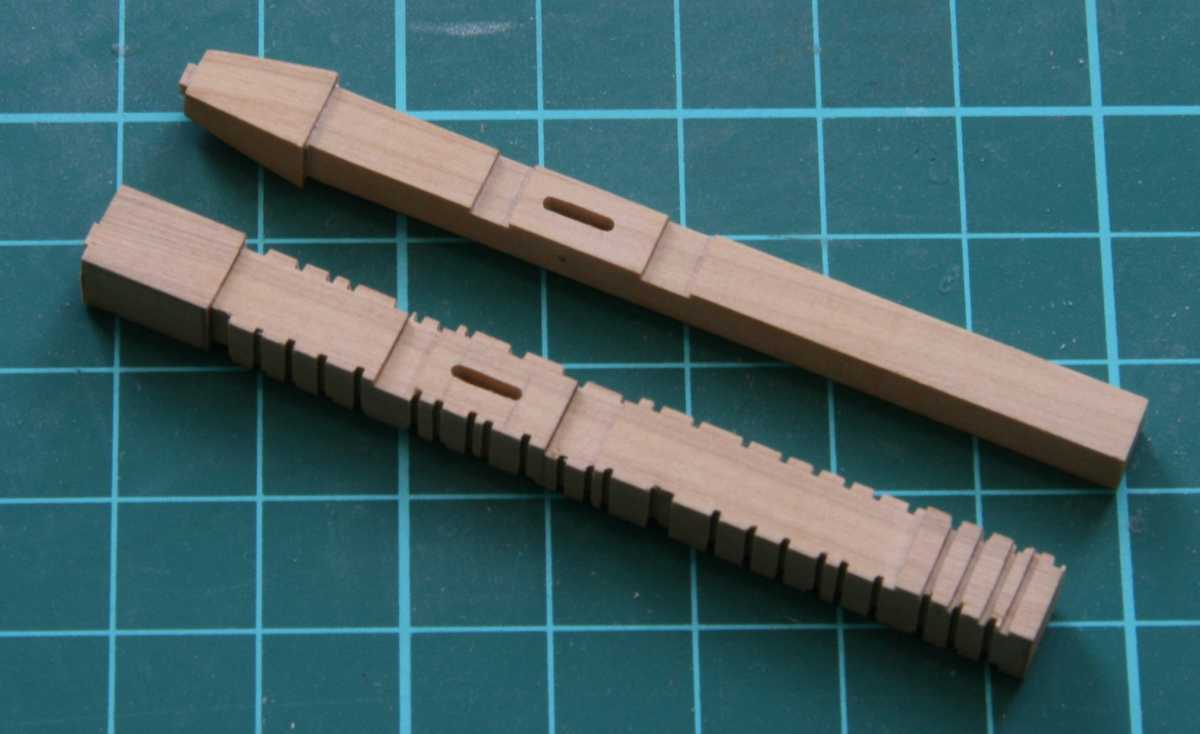
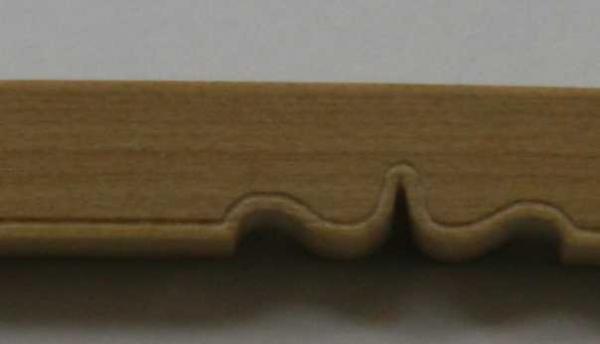
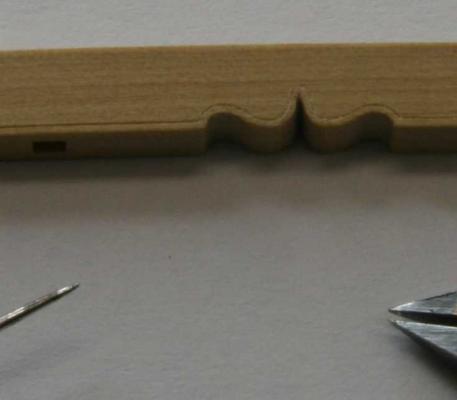
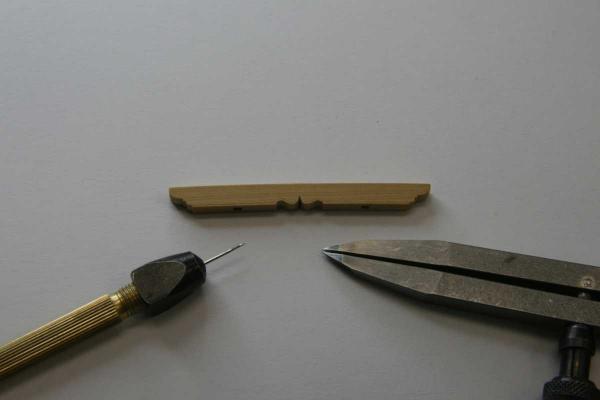
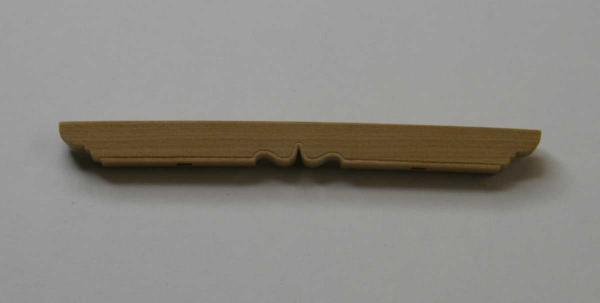
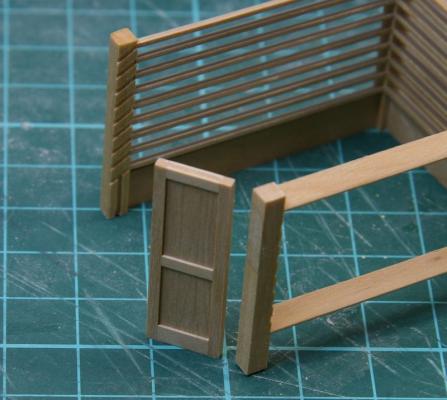
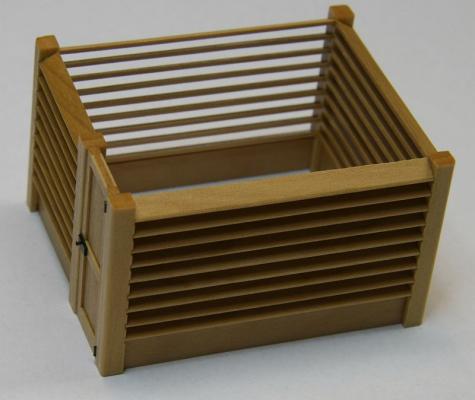
Thanks guys, I really appreciate the comments So how did I do it, the how-to was indeed like Jan noticed in the first picture. The divider was used to scrape a thin line evenly spaced from the bottom of the gallow. Multiple passes with very light pressure were needed to cut through the grain. In the middle the cut was done free hand. Then I used a slightly blunted threading needle to make the molding, again multiple passes and the wood shaped nicely. And yes Piet I do have some miniature 0.4 mm chisels made from hypodermic needles and thin steel but I use them elsewhere Remco

- 1,215 replies
-
- 11
-

-
- sloop
- kingfisher
- (and 1 more)
-
Looks really great Piet, it's nice to see the contours emerge. Remco
-
You could try an instrument maker. I got a banana box full of cut offs from a flute maker. I should have taken a picture of all the pieces he had in his stock to turn flutes from. That's was one to admire..... He got his from France from an old castle garden, he told me there is still plenty of box to go around... Remco
-
Thats a great picture Greg, to bad Annapolis is not on my route to the office. It's a bit heavy on the details added on the cross piece and bitt's for my liking. So I wasn't planning to do a mold and just make a test on a piece of scrap to see if it could be done. The result is shown here, I did it on the good piece anyway when I found out it worked out I think more subtile than the Annapolis model and better matching the rest of my KF. Remco
- 1,215 replies
-
- 14
-
-
- sloop
- kingfisher
- (and 1 more)
-
Sorry guys I hate to disappoint you, I already crossed that bridge, not enough links in the PE set to make a working one..... Just don't tell anyone Remco
-
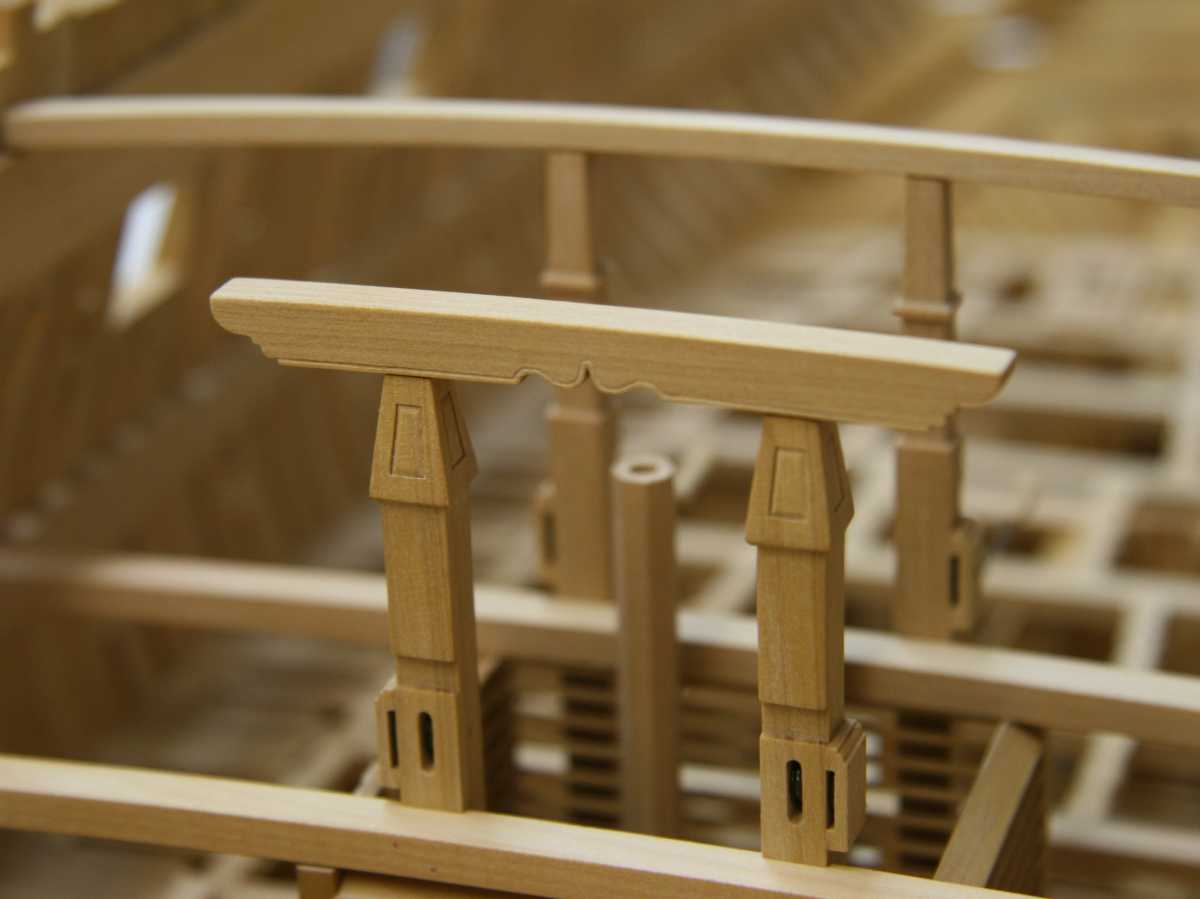
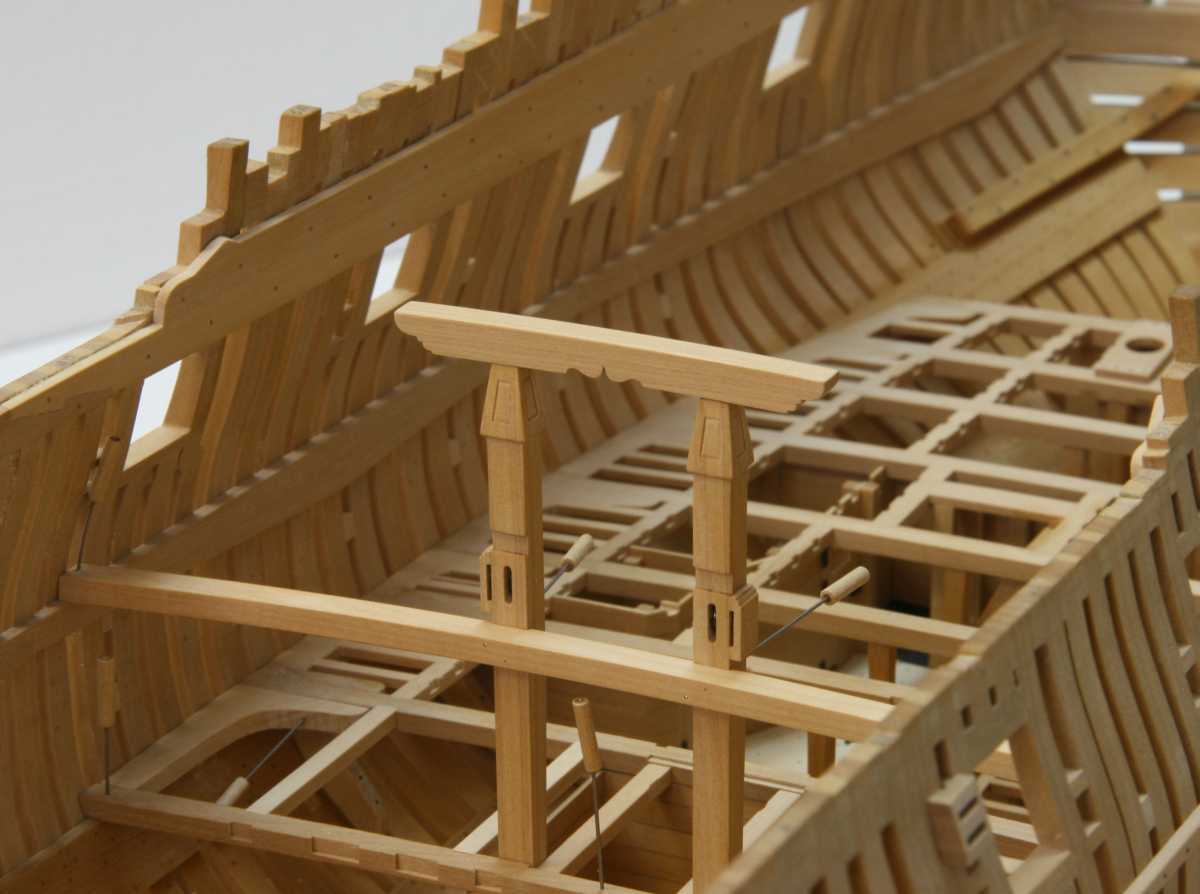
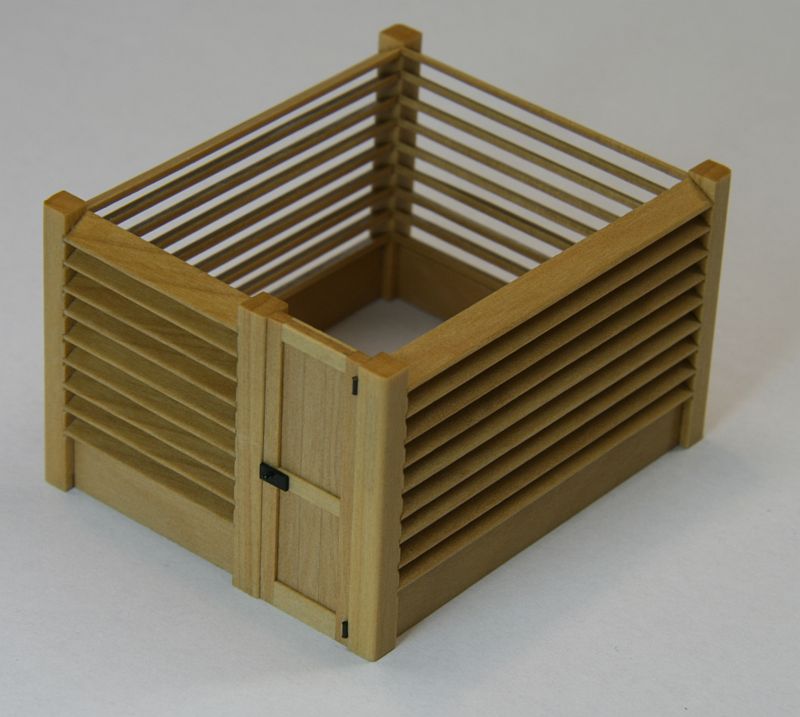
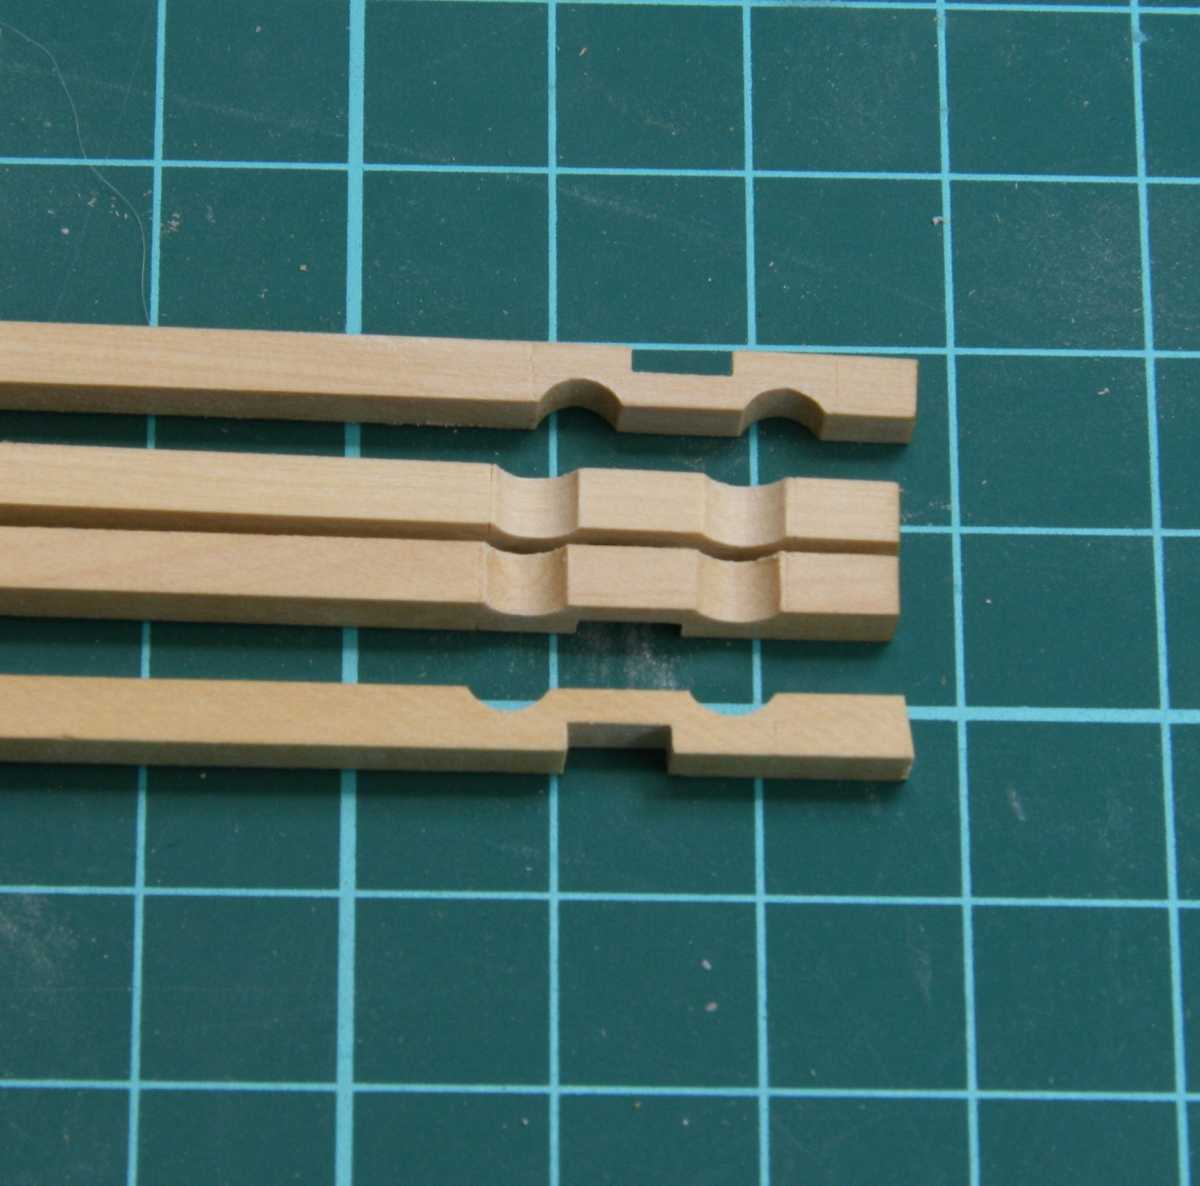
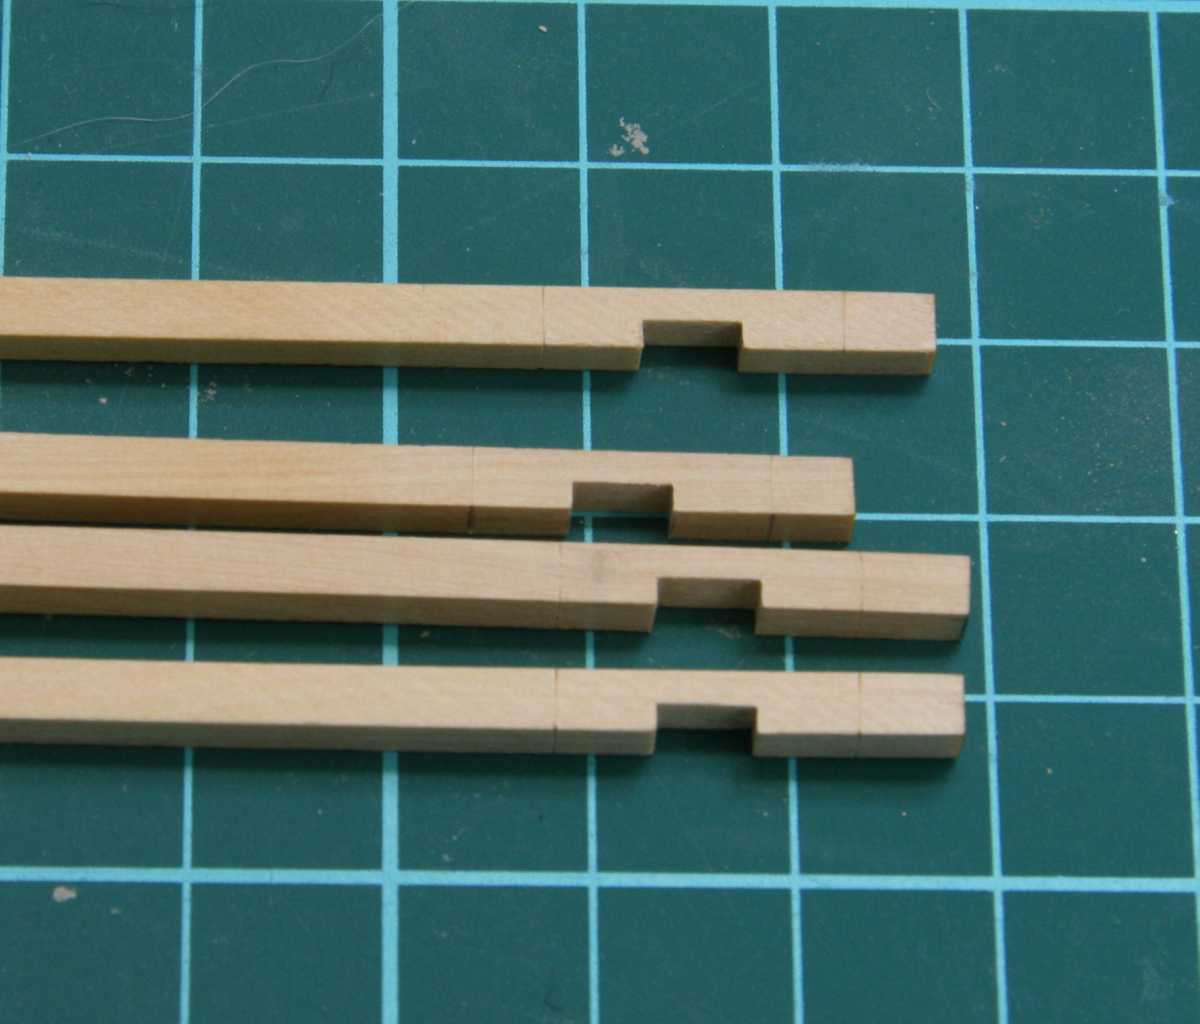
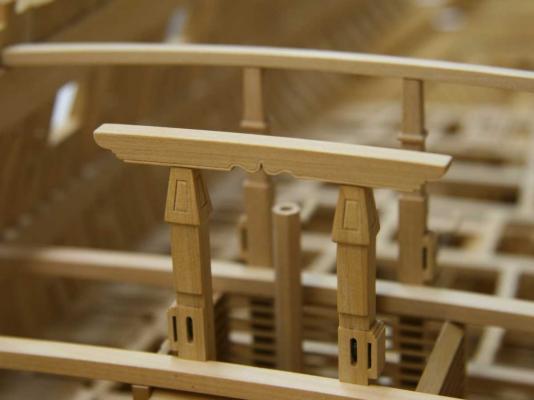
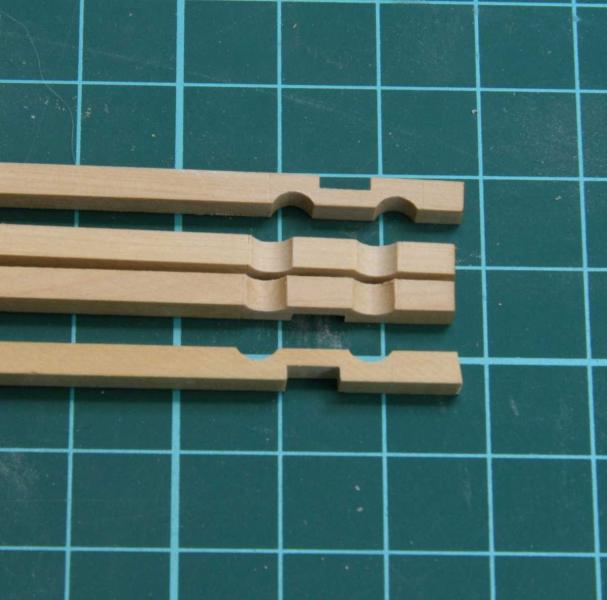
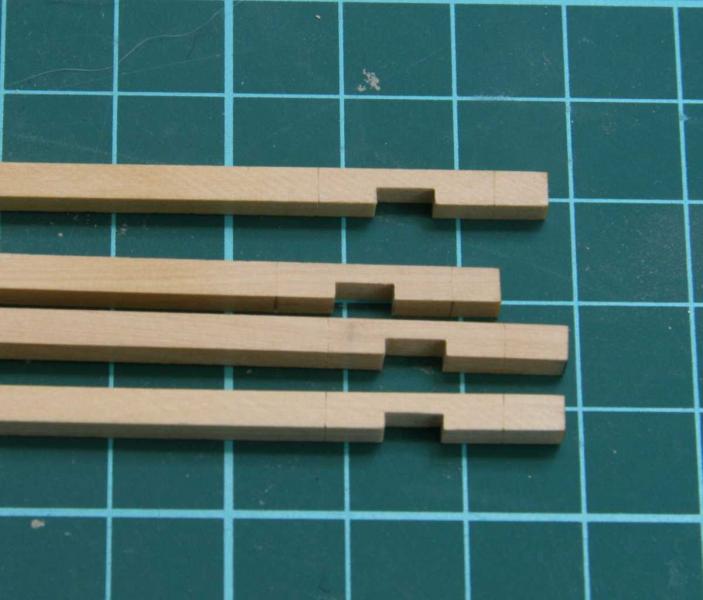
Thanks Greg that is really kind of you, but "My Swan was O.K" must be the understatement of the year I don't know Mark I don't have a copy of Napier, but I take it as a big compliment. MarkII, yep I cut them by hand, couple of real sharp chisels did the job. Thnx Christian Back to work, the Gallow is morticed/tenoned I wanted to give this a try after seeing Tony making tenons for the deck pillars. My hat is off to you Tony, it's a daunting task... Remco

- 1,215 replies
-
- 13
-
-
- sloop
- kingfisher
- (and 1 more)
-
HMS Victory by Sven - FINISHED - 1:600 scale
Remcohe replied to Sven's topic in - Build logs for subjects built 1751 - 1800
Really stunning Matt! -
Thank you for clarifying Druxey. Mark, I filed the hole in the mast partner at a slight angle, but as the mast partner is quite thin it's hardly noticeable. Greg, I didn't plan to, but now your asking..... I made a slightly different pattern than suggested in TFFM. Remco
- 1,215 replies
-
- 7
-
-
- sloop
- kingfisher
- (and 1 more)
-
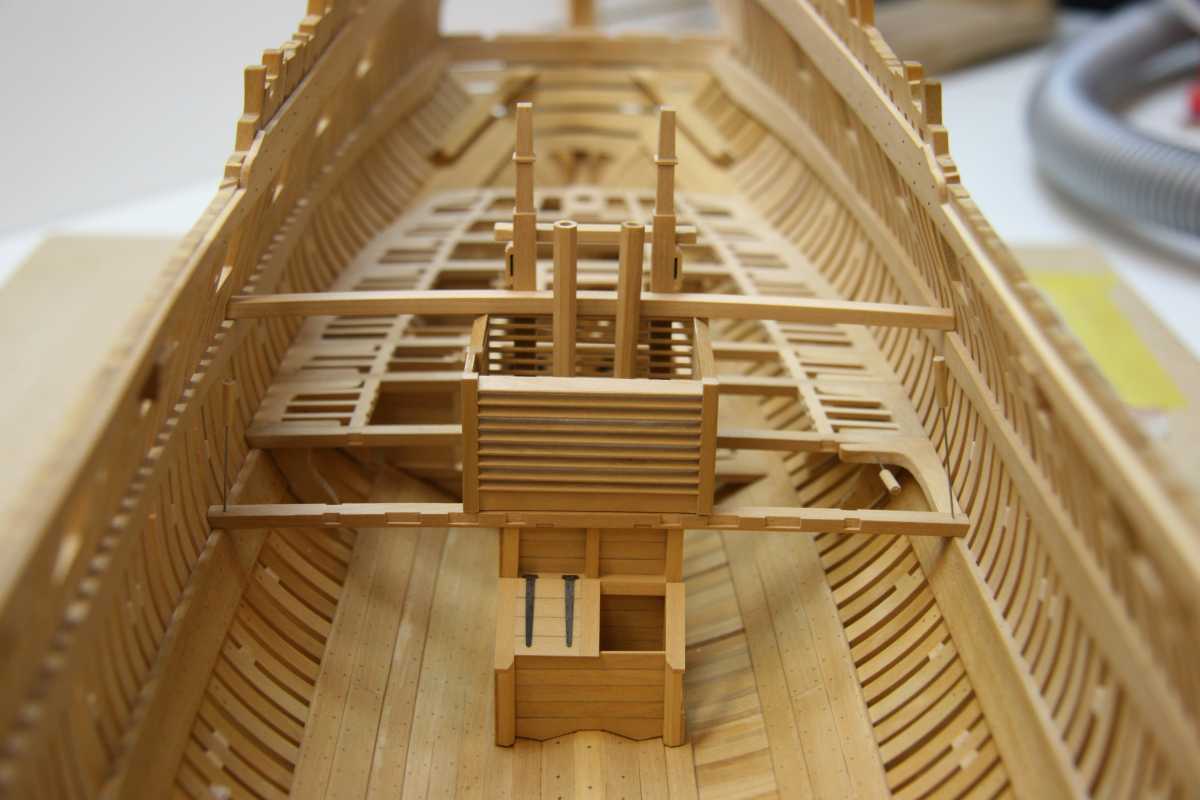
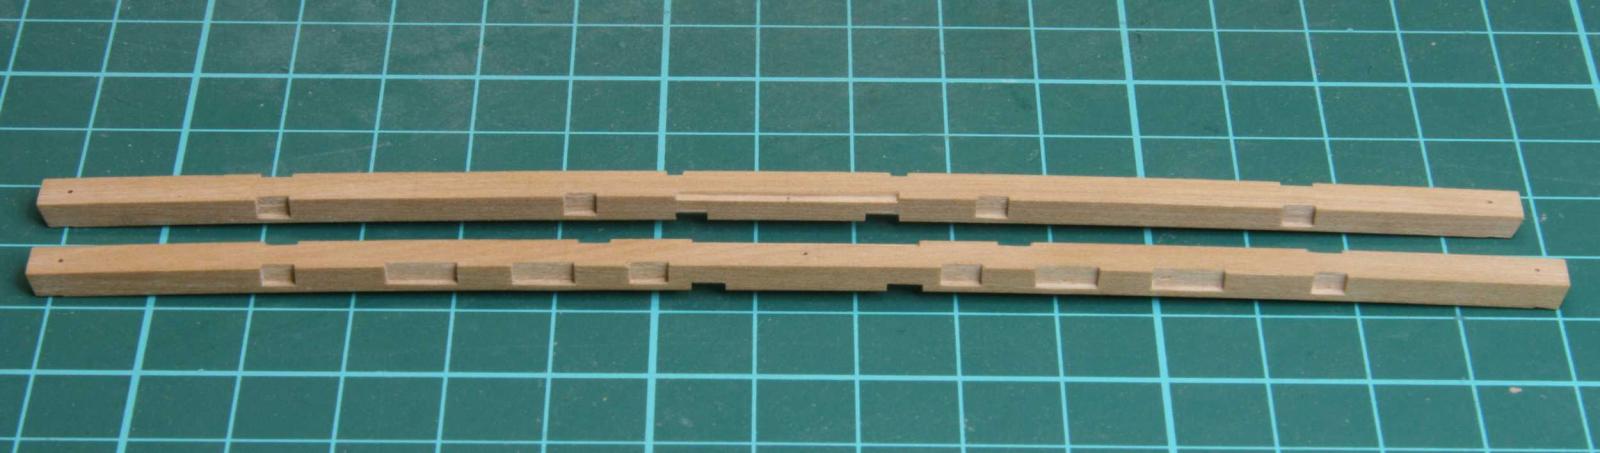
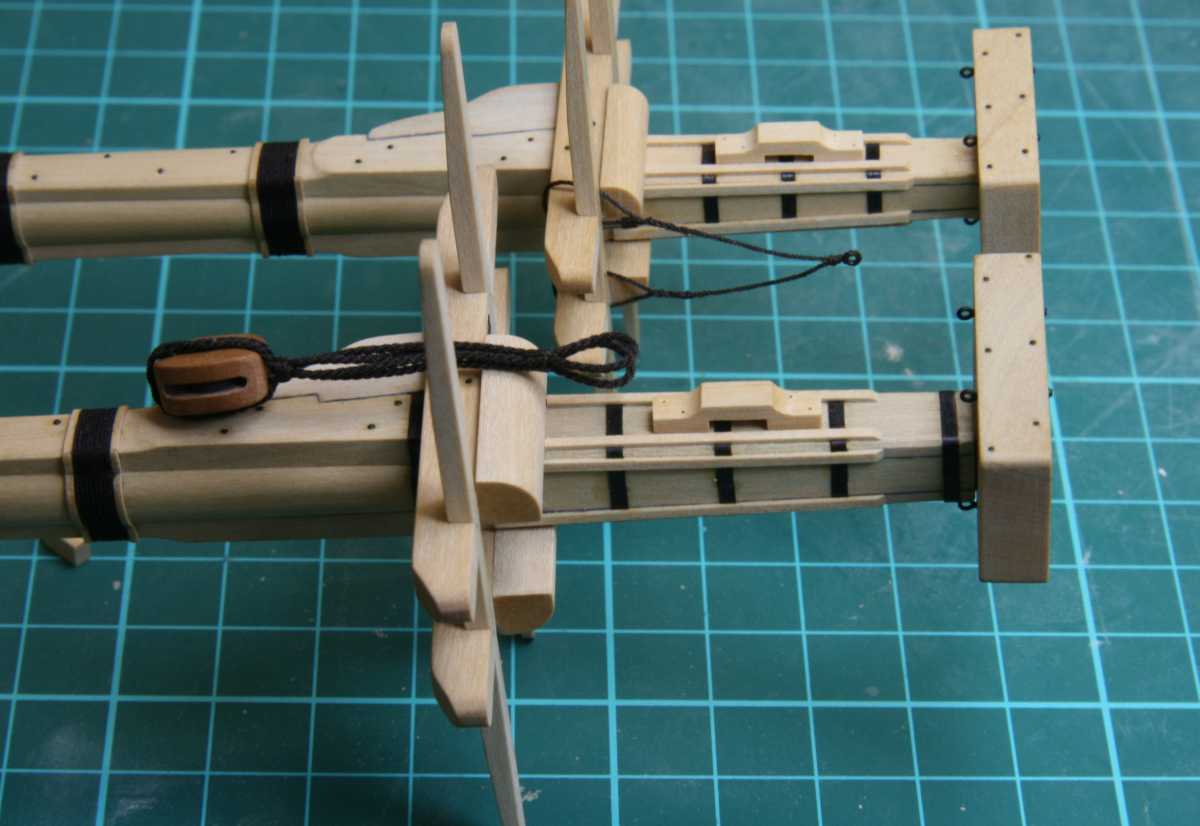
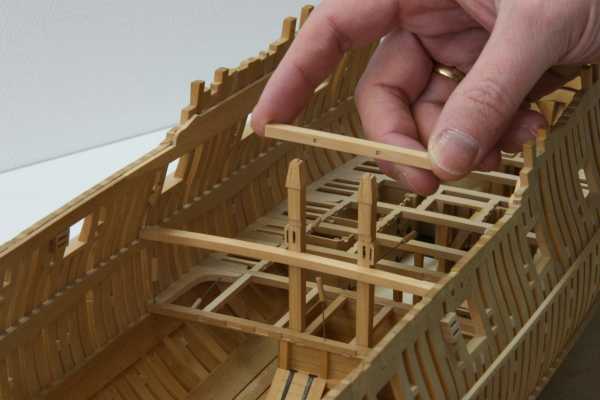
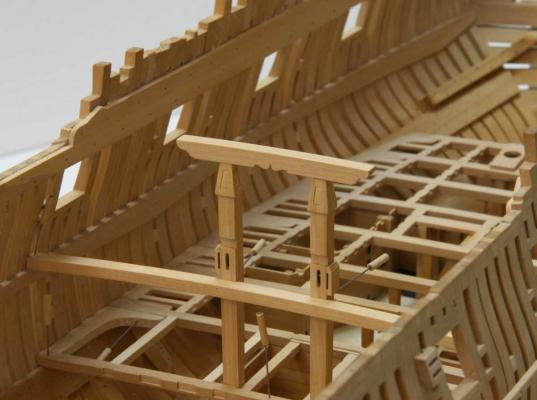
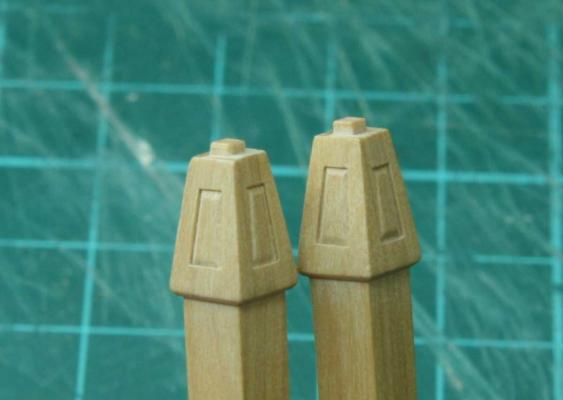
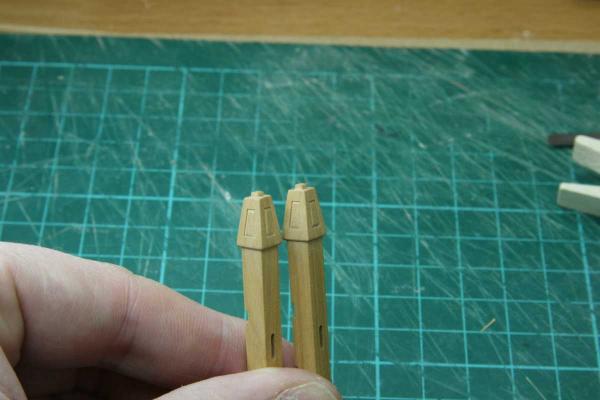
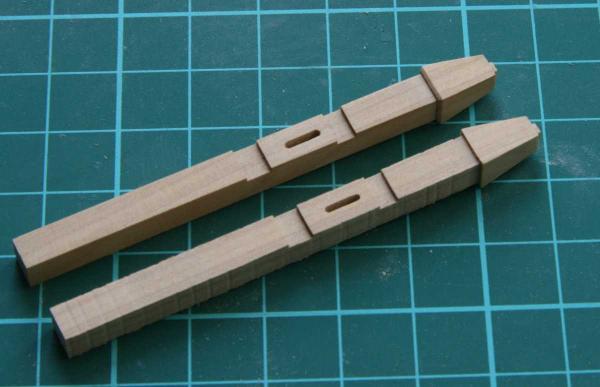
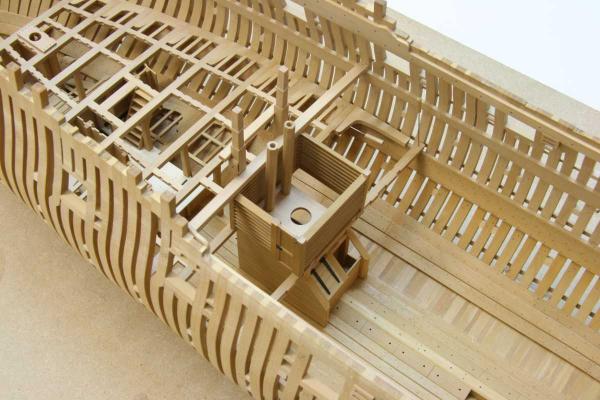
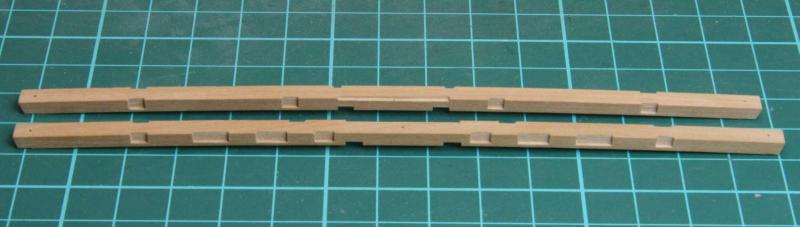
Thanks guys. Yes Carl time really fly's... I'm working on the main topsail bitt's. The score's for the deckbeam and cross piece were scored on the table saw as well as several scores to mark the thickness of this piece. The rest was removed using files and sanding sticks. I used a special angled sanding tick to add the small sloped face at the bottom edge of the head. Here they are test fitted next up is adding the shaves and the cheeks I'm not sure if the bitt's were also bolted to the upper deck beam, I'll will do botls so I can register the bitts with some pins. Remco

- 1,215 replies
-
- 8
-
-
- sloop
- kingfisher
- (and 1 more)
-
That is a clever way of approaching the gratings. I'll certainly give this a try as my results using the more common way on the table saw were quite poor. Remco
-
Very nice Mark. No rush indeed unless it is to get into the workshop. Remco
-
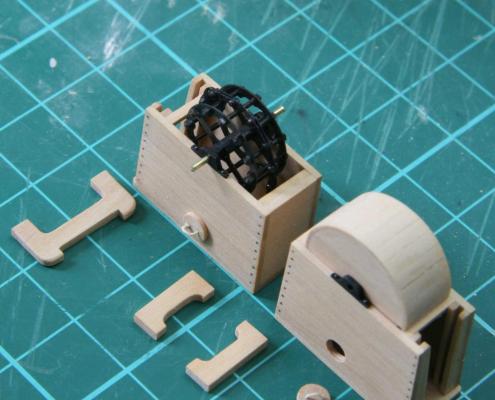
Nice pump chain . Are you speechless? Remco
-
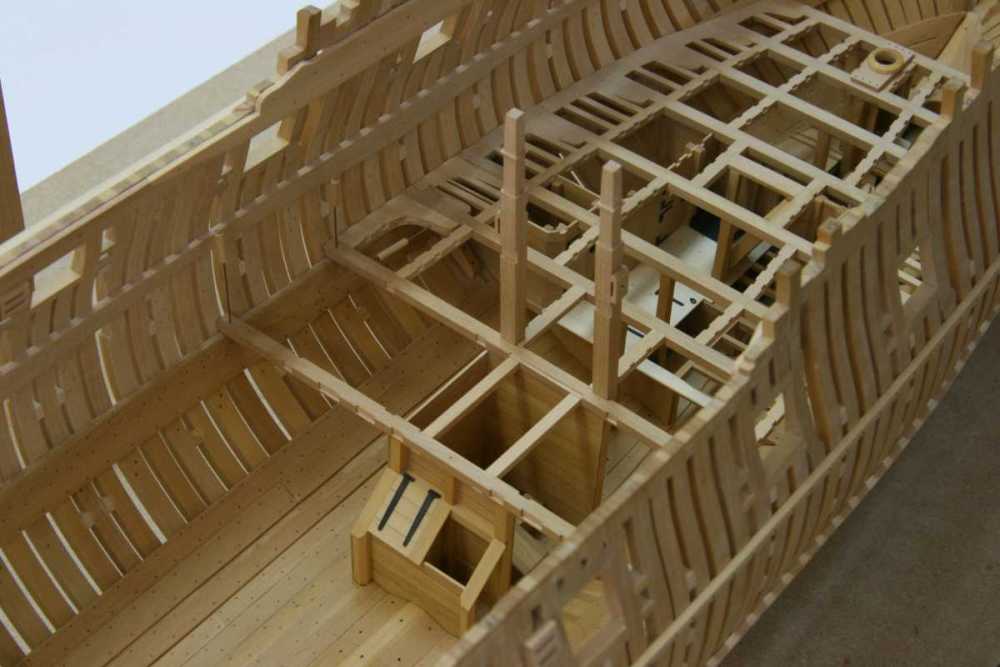
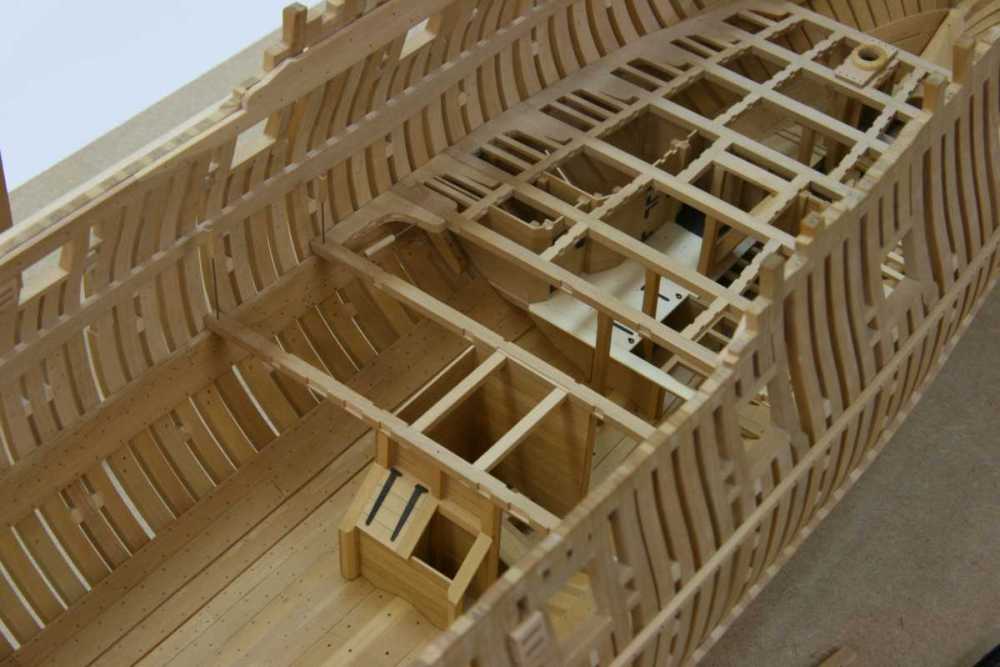
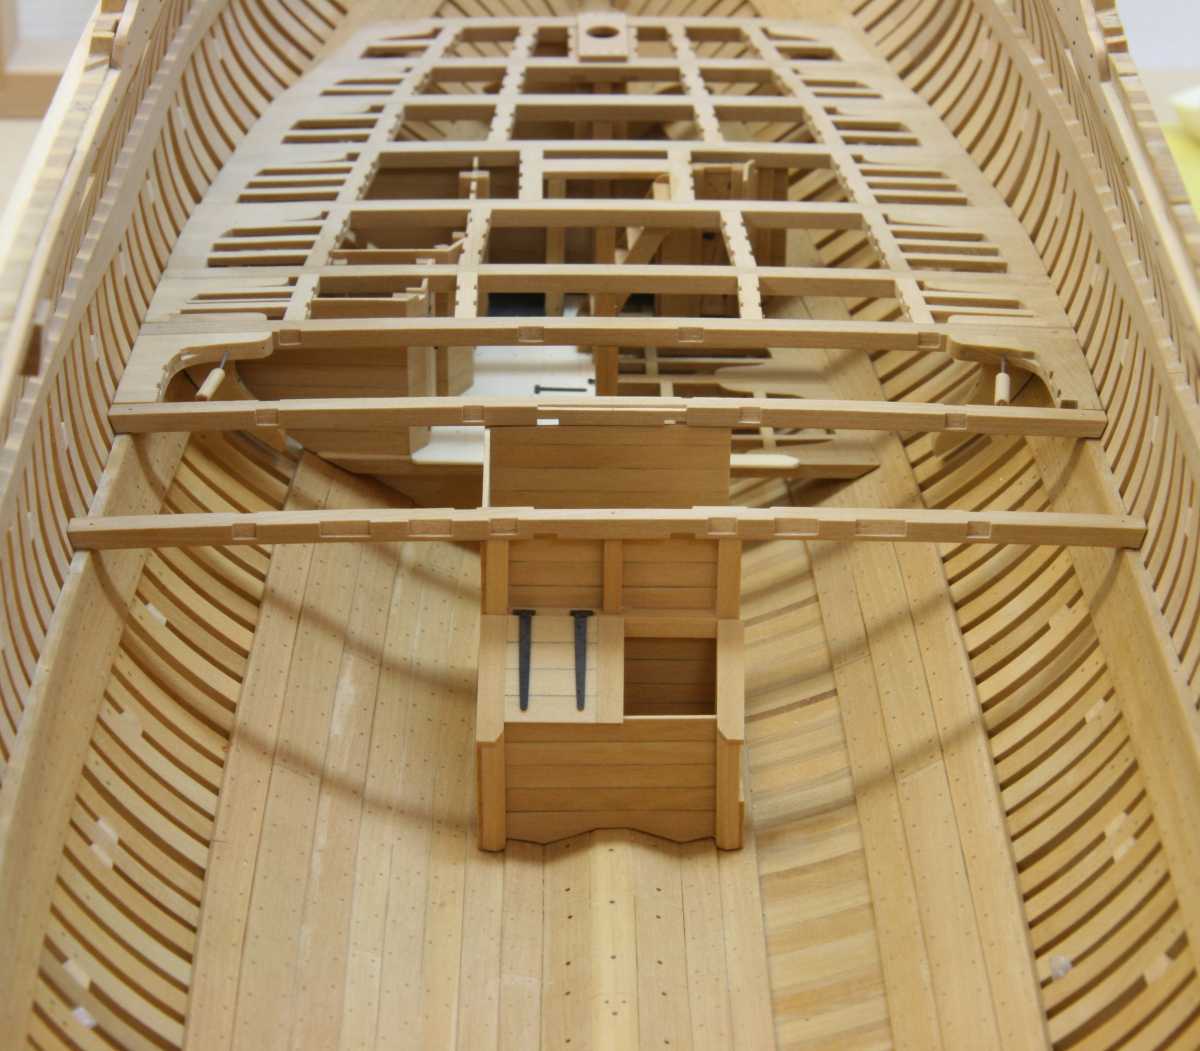
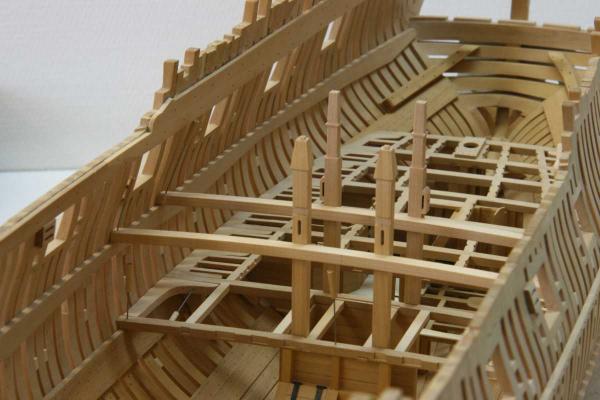
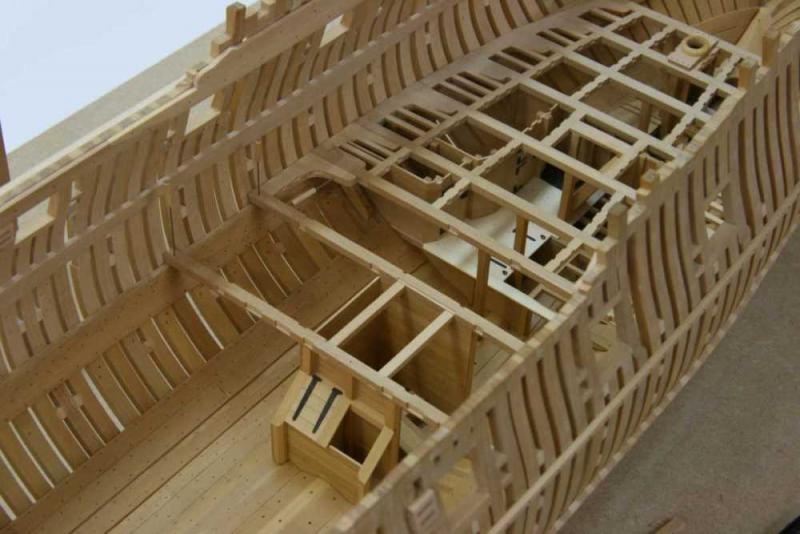
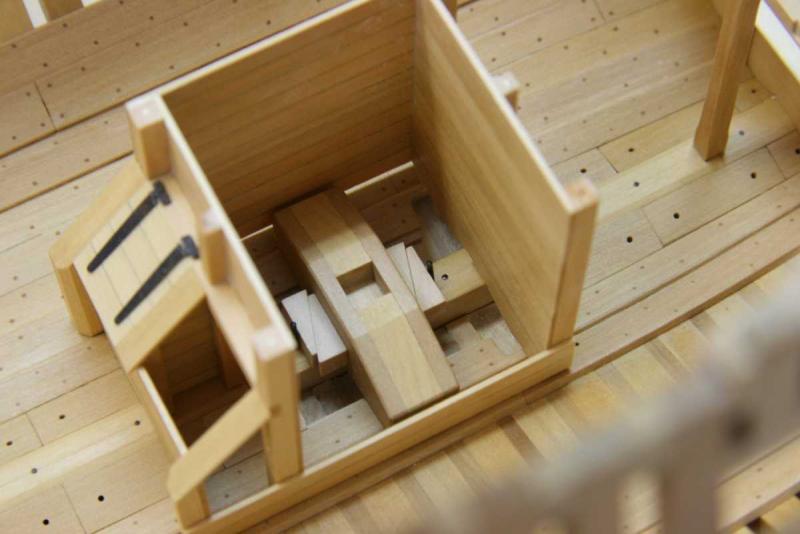
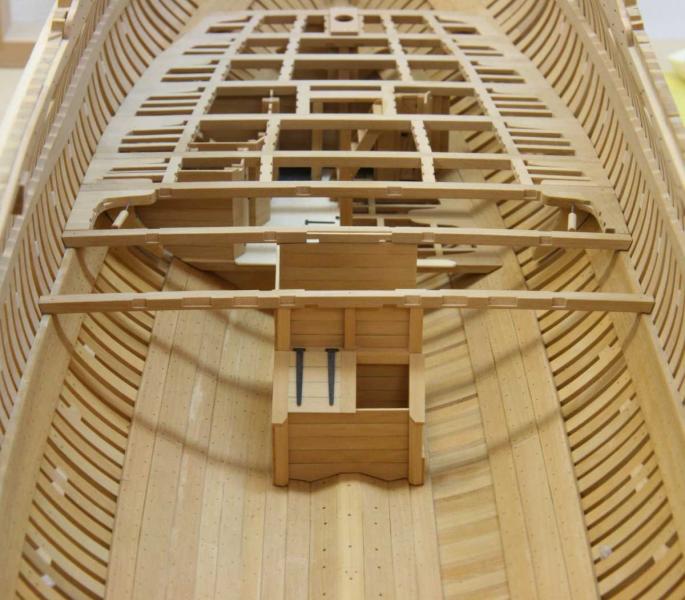
Thanks guys. Now is also the time to dryfit the upper well. I had made this one two years ago. Actually it didn't fit and some modification was necessarily, it was slightly to high but this was good as I also had forgotten to take the chamber of the deckbeams into account when I made the well. Removing wood is easier than adding Now it looks like this. I also made another set of hanging knees, nasty bits to make... I still need to get back into the flow of making beam, knee and ledges parts Remco


- 1,215 replies
-
- 8
-
-
- sloop
- kingfisher
- (and 1 more)
-
I guess I tuned in a little late for this build. You certainly go the whole nine yards when you say scratch building. You're even milling your own wood, something I don't dare even if I had the space and the budget to get the tools...... You're off on a very promising start. Remco
-
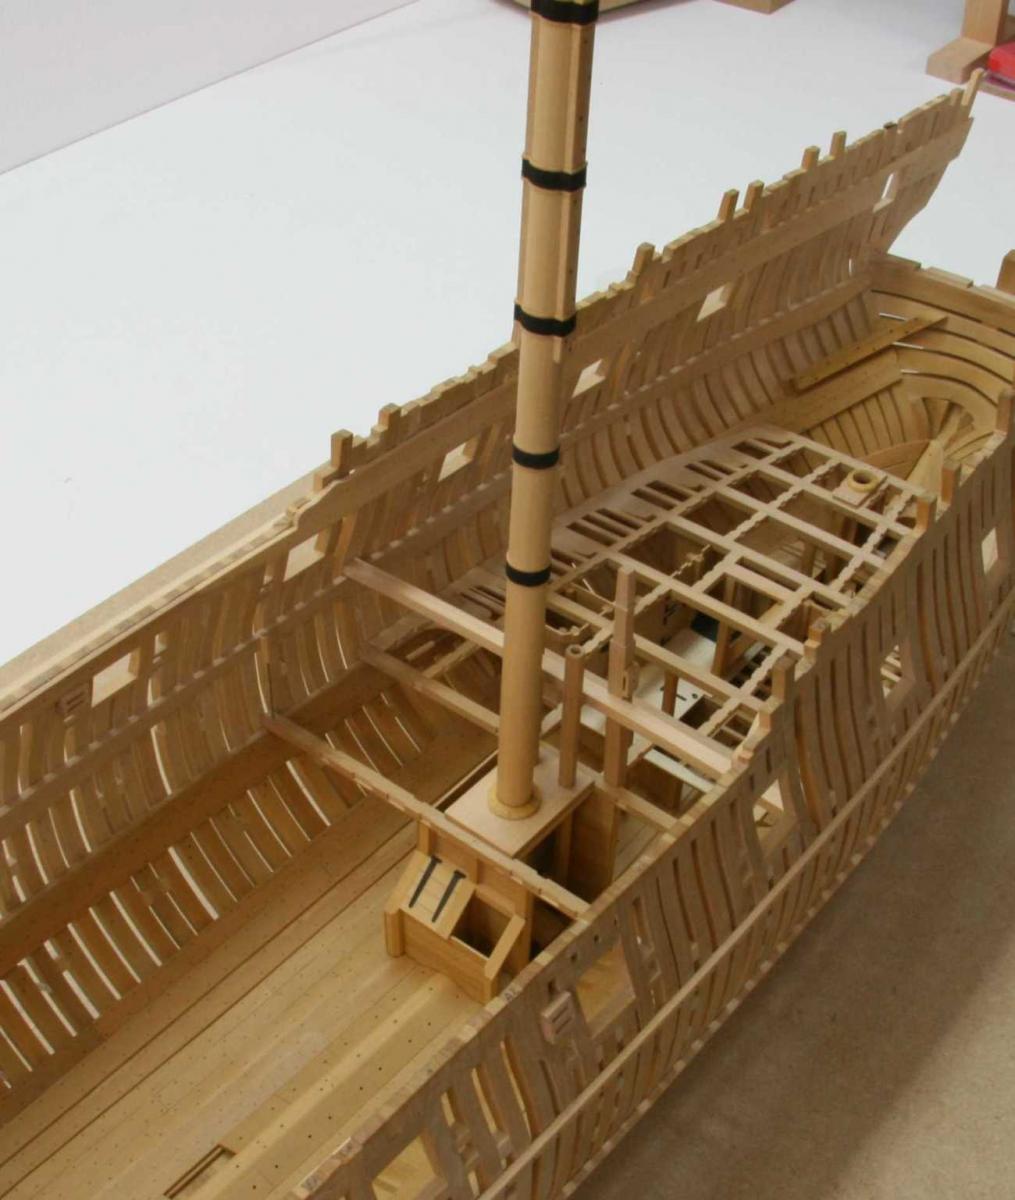
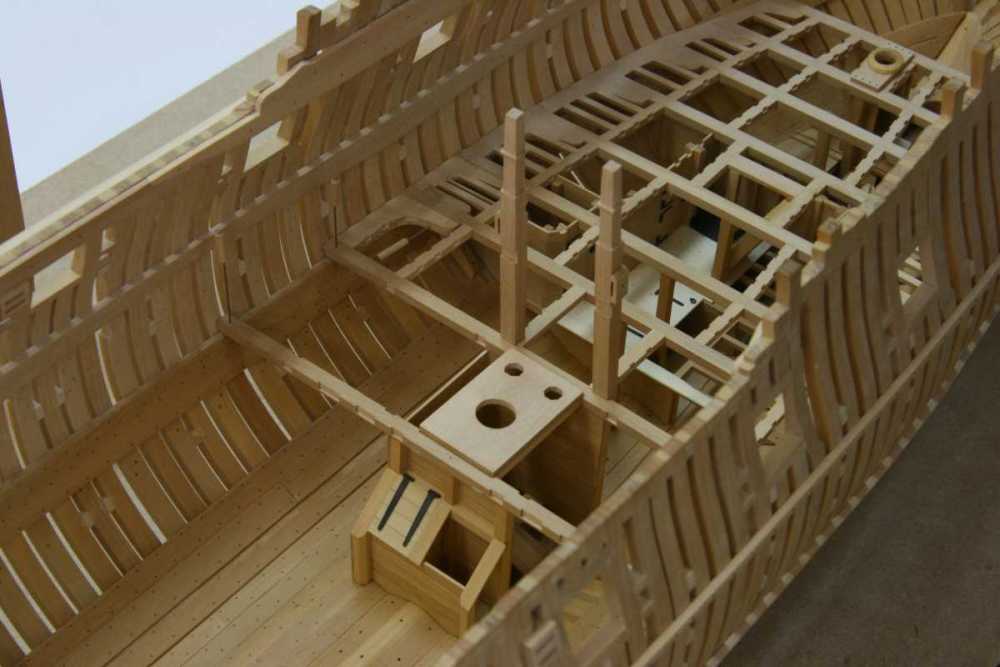
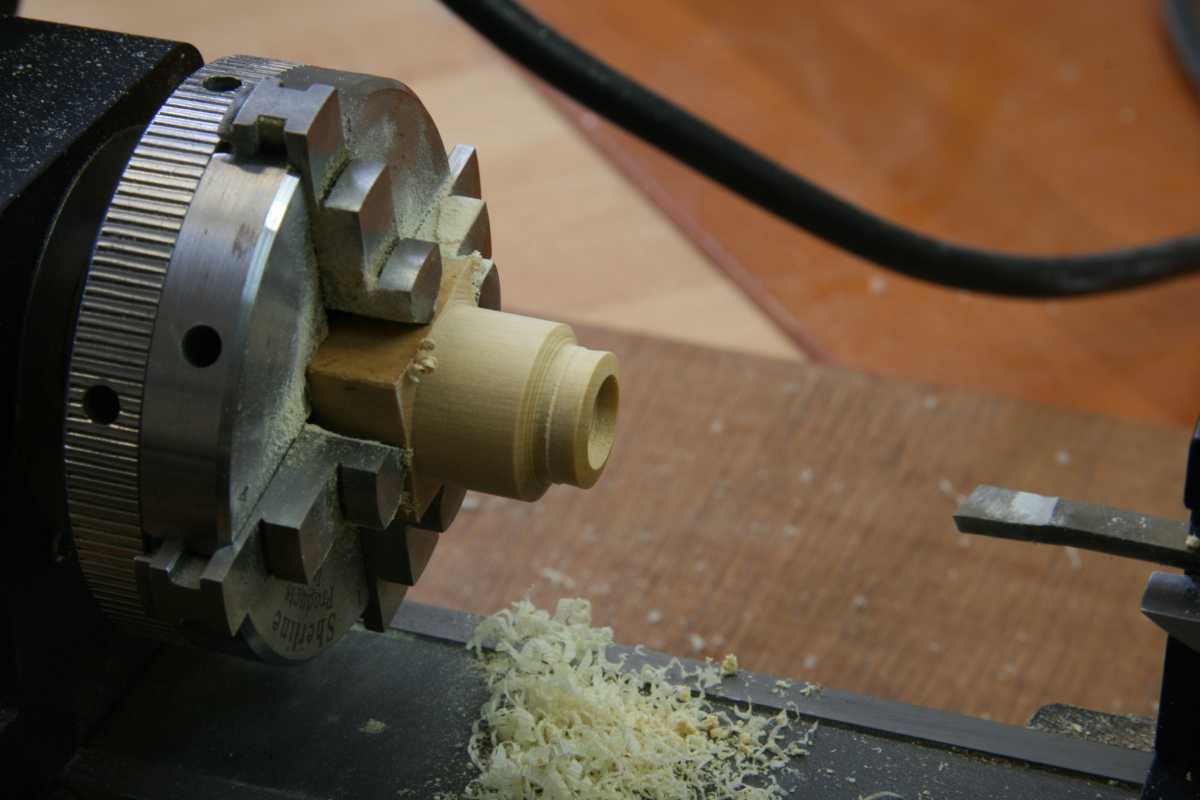
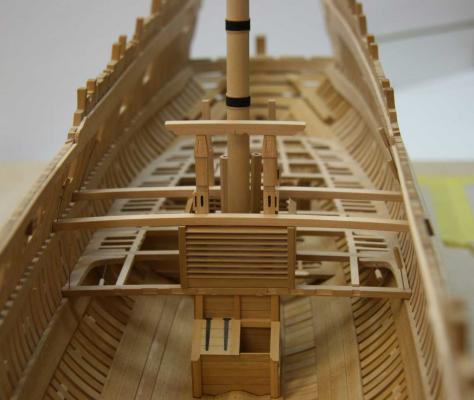
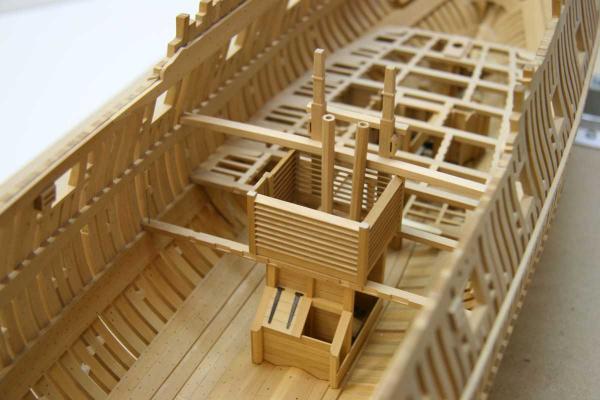
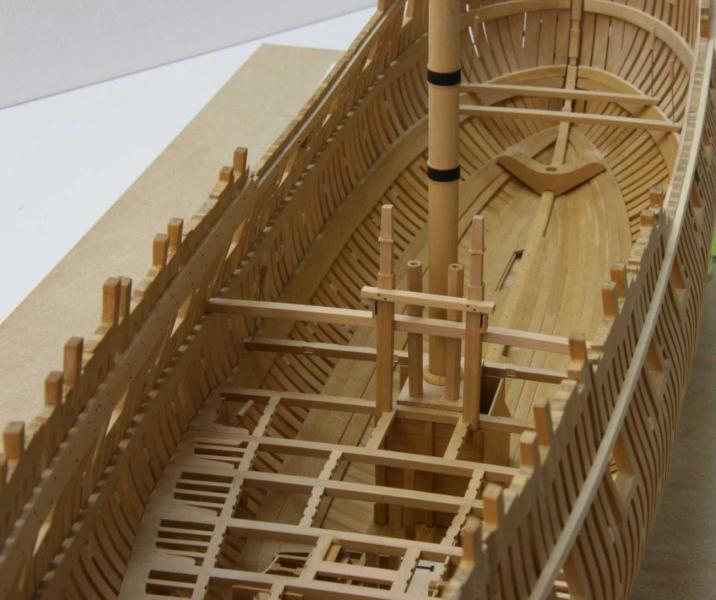
Thanks guys. Sure Bob, although I haven't found a safe place yet. .. Piet, the beams are cut on a scroll saw and sanded using a simple jig. I still have some pictures somewhere in my archive. Of course the mortices are hand cut That said, I had to take out the lathe to make the mast wedge. I used French Box which is a real treat to turn on a lathe. The mast step is hold in place with wedges Everything was dry fitted, this is becoming a cramped part of the ship and this is even without the cisterns The holes in the mast partner are cut using chisels and files Remco


- 1,215 replies
-
- 13
-
-
- sloop
- kingfisher
- (and 1 more)
-
You've done some great lofting there Piet. She'll be a very impressive model at this scale. I'm glad I could help you out with a small part of the research, I now how much it means to you to build the O19. Remco
-
Thanks guys. Druxey, the cleats aren't fixed yet, I'll first make the lashings, but this needs to wait until the stays are in place. Probably some years from now........I'll make the cleats for the foremast a little smaller, I found them a bit on the large side too. As the masts are now finished to a point I'm going to store them it's time to return to the hull. Remember I started making the mast so I could position the mast partners. What a fun few months of deviation from the path this has been, can't wait to return to the mast. Maybe as a side project somewhere down the road. Now it's back to deck building. Plenty of challenges here to like this beam with all the mortices..... Remco
- 1,215 replies
-
- 9
-
-
- sloop
- kingfisher
- (and 1 more)
-
Hi Bob, I think you'll find yourself quite at home on the dark side, Remco
-
Piet, great to see you've started the log of you fathers O19. Your family has been part of a sad chapter of our history, I'm glad you are still her here to share it with us and that you're now able to make this special tribute to your father. Remco
-
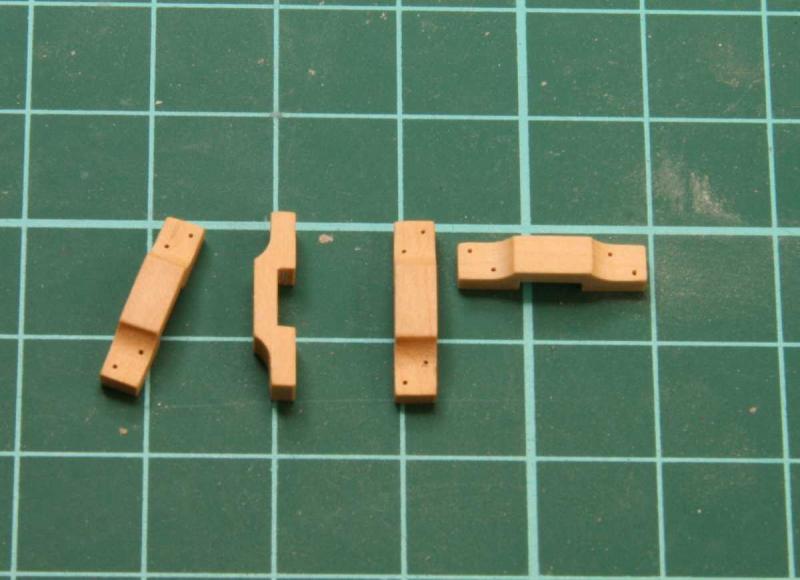
Thanks all! Greg the squares are 1 cm so a bit larger than you thought. Time to make the cleats that will support the blocks from the mast. For one second I thought of setting up the mill but decided to make the cleats by hand. Glad I did, it's fun to do and there is something about cutting wood with a well honed chisel. A couple of files did the rest. I made the cleats for both the fore and the main mast the same size, not sure if this is correct. Remco

- 1,215 replies
-
- 12
-
-
- sloop
- kingfisher
- (and 1 more)
-
Congrats Bob, she turned out really nice. Yet another fine model that has the signature of your fine craftsmanship. Remco
- 103 replies
-
- 1
-
-
- picket boat
- model shipways
- (and 1 more)