MORE HANDBOOKS ARE ON THEIR WAY! We will let you know when they get here.
×


Remcohe
-
Posts
610 -
Joined
-
Last visited
Content Type
Profiles
Forums
Gallery
Events
Everything posted by Remcohe
-
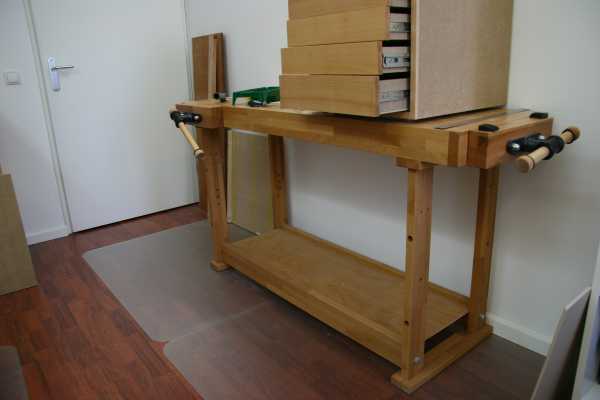
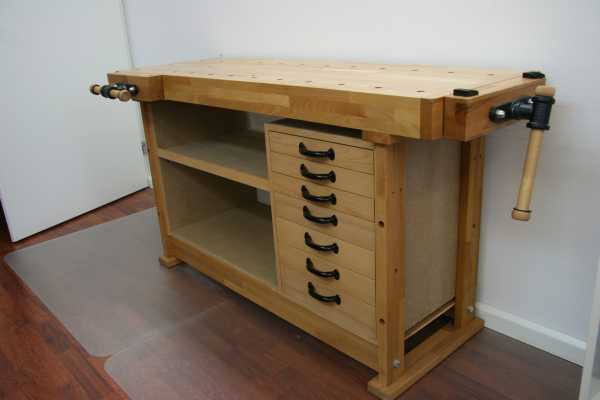
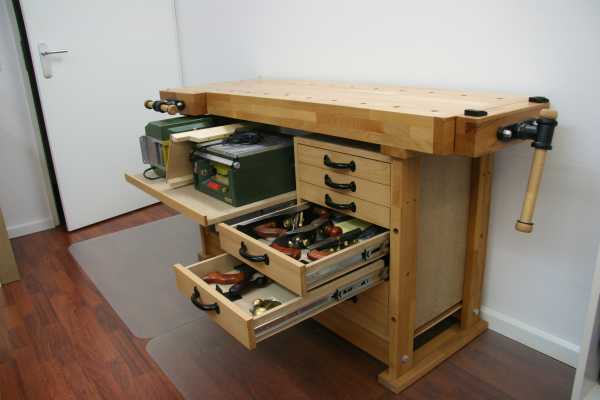
 I've been away from my log way to long, vacation, sickness and other projects kept me away from my Kingfisher. Time for an update, although a little off topic. I wasn't very pleased with the storage space I made under my workbench so it was time for a big upgrade. More drawers and a sliding platform to keep the power tools within practical reach. Always nice to do a full size project. Here's before, during and after. Stay tuned for updates on the KF Remco
- 1,207 replies
-
- 30
-

-
- sloop
- kingfisher
- (and 1 more)
-
I would also turn the cannons 180 degrees so the wide end is closest the pouring hole, the other way around adds the risk of trapping air. Remco
-
The prop blades are looking really nice, I couldn't tell they do not match the profiles I send you, they look great. Now the biggest challenge is to produce 8 identical blades. But with your metal skill this should not be any problem Remco
-
Sherry, like Ed mentioned, adding a vent will greatly improve your results. I see your mold lacks one now, you can just cut one with a knife. Remco
-
Looking really sweet Bob! Remco
-
Sweet Piet. Is the little diagonal support arm installed on the wrong side? Now the load pulls on the arm instead of compressing it, putting a lot of tension on the bolts keeping it in place Yeah, busier workbench, it puts life into your shop Remco
-
That sure is a fine set of clamps. Remco
-
Piet, The deck is beginning to look really busy, I like it very much. It will draw the eye across the model and put life into your model. In my eyes you already surpassed the model shown in Den Helder just because of this. It really has an atmosphere. Good luck in limbo, nobody likes it there.... Remco
-
Piet your hardware skills are admirable, but if it's only possible to make such nice parts through self mutilation you should really reconsider. We don't want to turn your build into an episode of ER. Please be careful and please continue to show the results of your skills Remco
-
What a wonderful case Grant, the modern design goes well with the ship, the case does not distract from the model like the one of the Cutty Sark. It's probably a 3 man job to get is on and off. And a high ceiling to maneuver Remco
-
The mines look great Piet. The engravings too, one engraved pulley wasn't enough uh? Thanks again buddy, although I do hope they don't stand out to much after they are inserted in the brackets. Imagine 200 hundred yeas from now, historians digging up the Dutch National Archives for the original drawings as to explain these strange markings on a contemporary model. That would be hilarious... Remco
-
Those Knightheads look good Ben. Take your time with the bollard timbers, they will challenge you even more from here on. But then again you have a fine mentor looking over your shoulders and he'll guide you past the pitfalls on this part of your journey. Remco
-
Congratulations Gaetan. You were already a Master Craftsman in my eyes. Good the Guild decided likewise
- 728 replies
-
- 1
-
-
- le fleuron
- 64 gun
- (and 1 more)
-
Very very clever marking tool! Remco
-
Karl lovely, you work at incredible speed, and still maintain beautiful quality. I like you used a cross section, having all the details and still visible after installing all the decks. How did you make the 'nails' on the gratings? Remco
- 662 replies
-
- 2
-
-
- bonhomme richard
- frigate
- (and 1 more)
-
To bad most of the mine details are hidden by the bin. Still looking great Piet. Remco
-
Ahhhhhh Piet I thought you were pulling my leg mentioning to engrave the pulley's, but you're actually pulling it off. I am honored to be actually named on you model and also that you let me help you a tiny bit to accomplish your wish to build your fathers sub. A BIG thank you. Remco
-
Wow Piet, the mines are becoming little models on their own. True very tiny bolts can be purchased from scalehardware(even working types) but making them yourself does give additional satisfaction Remco
-
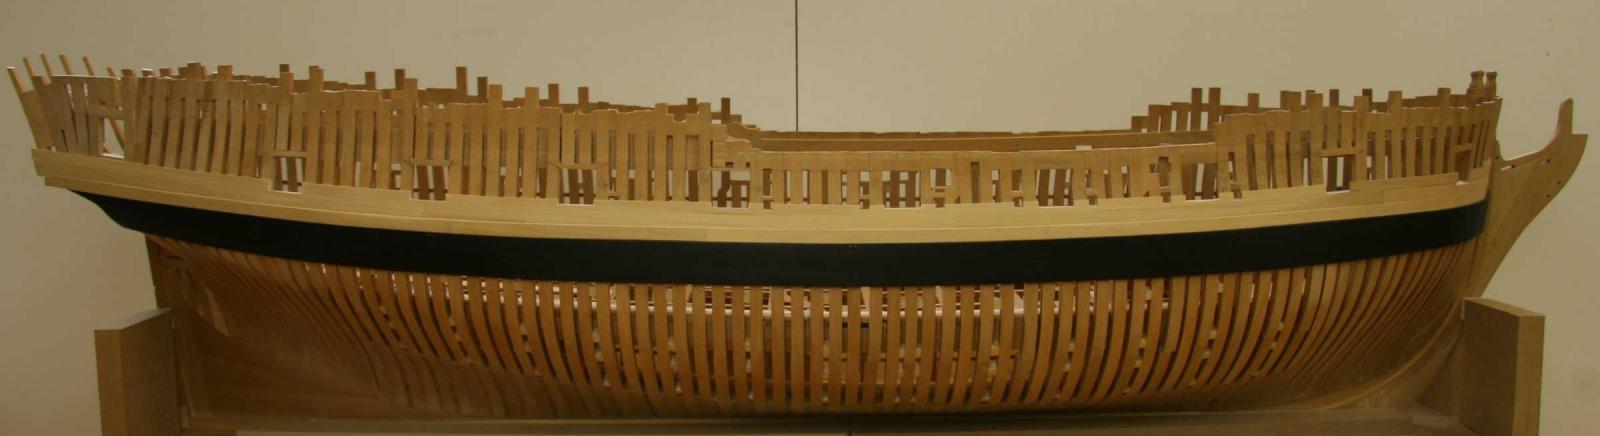
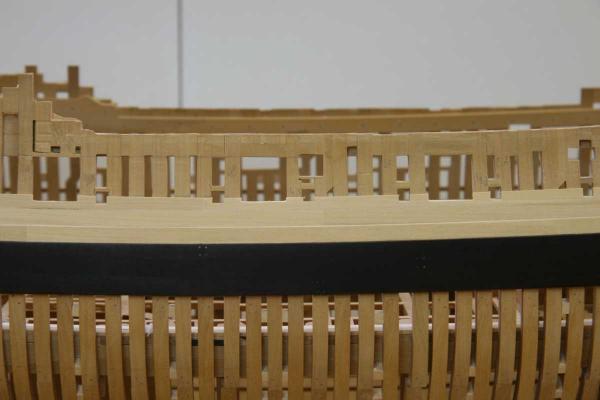
Planking continued, the black strake (that won't be stained black) and the first strake above it. The openings for the ports and sweep ports are roughly cut. The joints are tinted with pencel lead, it does not show now but it will when the finish s applied. I'll be taking some shore leave and be back in a week. Remco

- 1,207 replies
-
- 29
-
-
- sloop
- kingfisher
- (and 1 more)
-
Very nice Danny, it looks like a difficult part to make. Remco
-
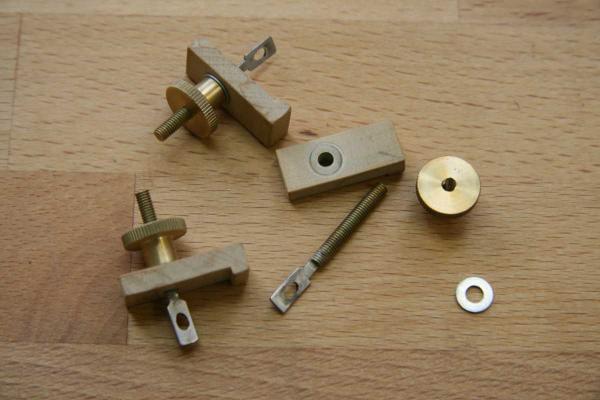
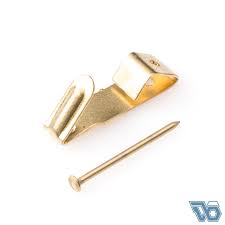
Here you go Tom. A small plate is soldered to a piece of thread rod. I made plates from those little hook's you can nail to the wall to hang a small picture from. The device is locked at the back of the frame with a cocktail stick. At first I used wing nuts as I could not find thumb nuts, the thumb nuts work way better as you can tighten them with one hand, with a wing nut this will take you much longer, not good when the glue is drying while your applying the clamps. Remco
- 1,207 replies
-
- 12
-
-
- sloop
- kingfisher
- (and 1 more)
-
Thank you Rich, Tom. Tom I bought them, it's called a thumb nut or Rändelmuttern in German. The rest of the clamp is home made and they work brilliant. I can make a picture of a disassembled one if you like Remco
- 1,207 replies
-
- 1
-
-
- sloop
- kingfisher
- (and 1 more)
-
what is the ideal modelling table?
Remcohe replied to AON's topic in Modeling tools and Workshop Equipment
Rich I like the idea of this turntable. I was thinking of using a separate Lazy Susan when I start rigging, but I see the benefit of this set up. Remco