Check out our new MSW Sponsor Innocraftsman
×


michael mott
-
Posts
5,195 -
Joined
-
Last visited
Content Type
Profiles
Forums
Gallery
Events
Everything posted by michael mott
-
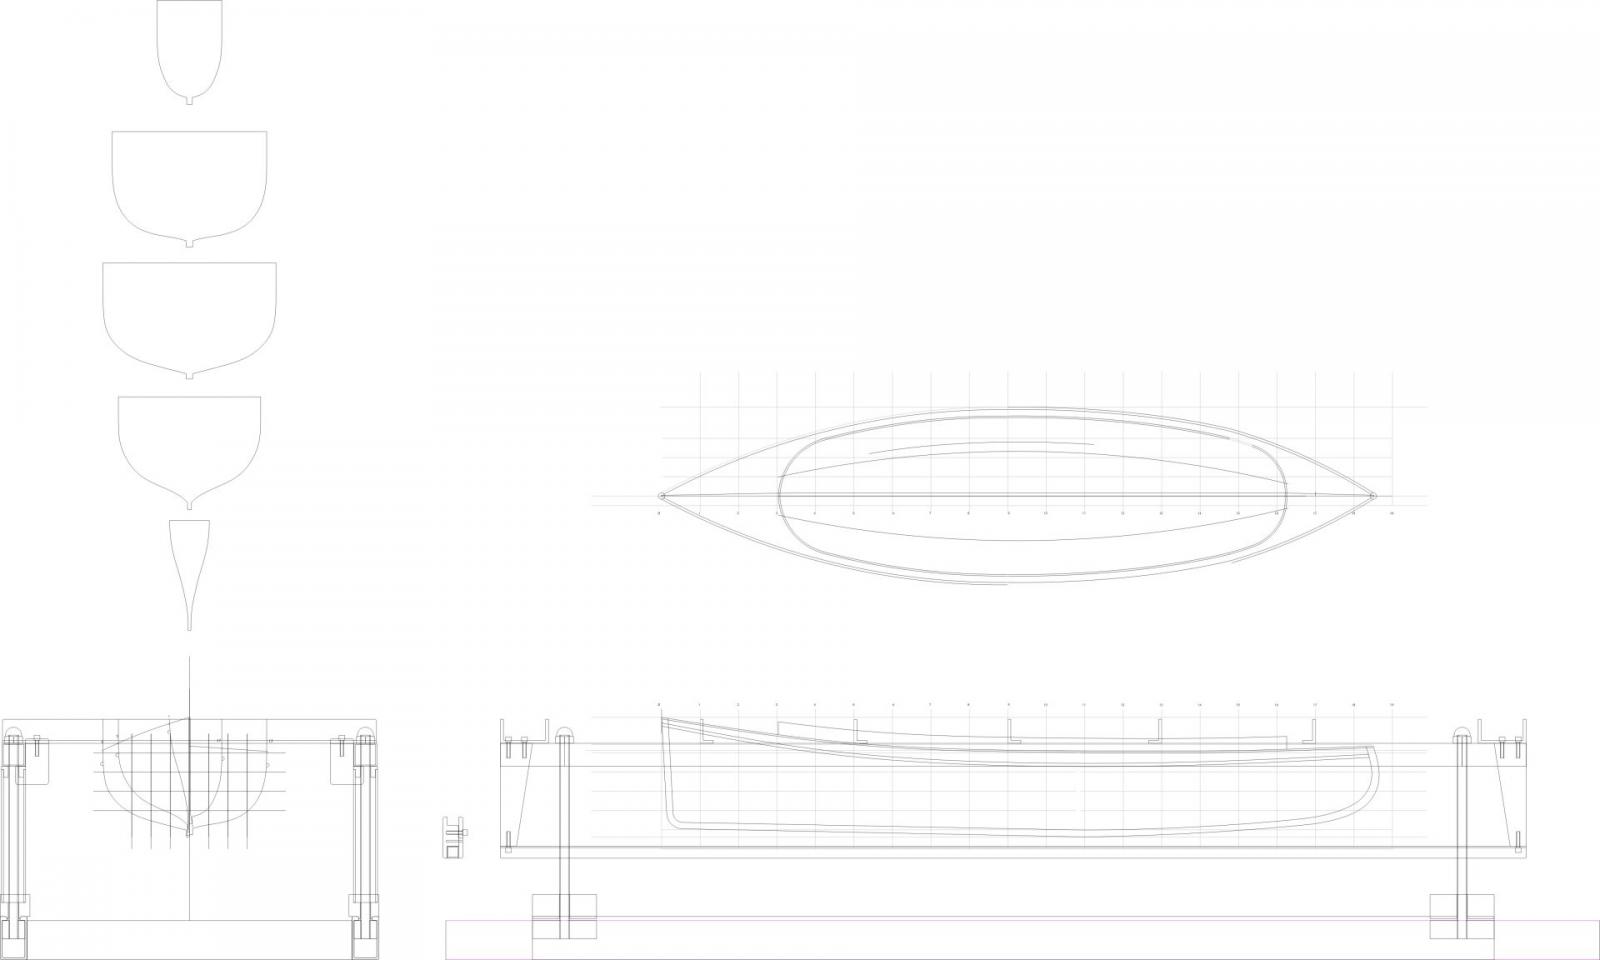
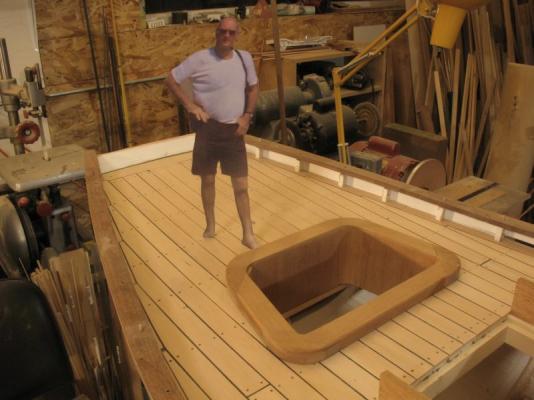
 I have been slowly working on the drawing for the construction of Skipjack and now I have got the moulds drawn for assembling into the building jig. Next task will be to cut out the moulds and the keel and then add the stringers ready for the steam bent frames. Once the frames are formed I will then begin the planking.in Castello boxwood. Michael
-
Pandora by marsalv - FINISHED - 1:52
michael mott replied to marsalv's topic in - Build logs for subjects built 1751 - 1800
Thank you that makes sense. Michael -
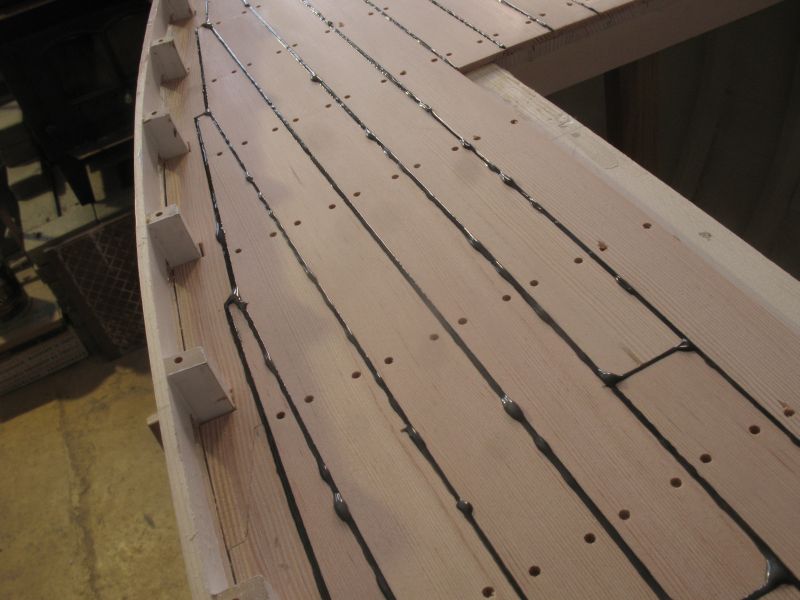
Good morning Tom. Hopefully these two photos will help, the glue was first diluted just enough to be able to be squeezed out of a large diameter hypodermic needle #25 the needle needed to be filled a few times for each run. I was able to lay the needle in the v groove between the planks and drag the needle toward the stern while squeezing the glue out. It was nerve wracking for sure because I did not want to spill any. the glue shrank when it dried so there were at least three applications of glue. Once the glue was fully cured I used a cabinet scraper to remove the lumps and blobs. I have to admit that mini me helped in the tight corners Michael

-
Very interesting, the video shots under water were great. Michael
-
Pandora by marsalv - FINISHED - 1:52
michael mott replied to marsalv's topic in - Build logs for subjects built 1751 - 1800
Marsalv I have not seen this done before. I am very impressed with the cleanliness of the treenails and of the resulting holes in the sacrifice block. given the shape of your cutting edge and that there is no clearance for the cutting waste, I am also surprised that there is no discolouration or burning of the wood. First question, are you cutting at high low or medium speed? Second question, do you have to make short cuts and retrieve the drill a few times for each treenail? (raise and lower the cutting edge) Third question, how do you extract the treenail from the needle? or is it still attached to the sacrifice block? regards Michael -
Russ it is great to see some progress on your schooner, the deck furniture is looking good. Michael
-
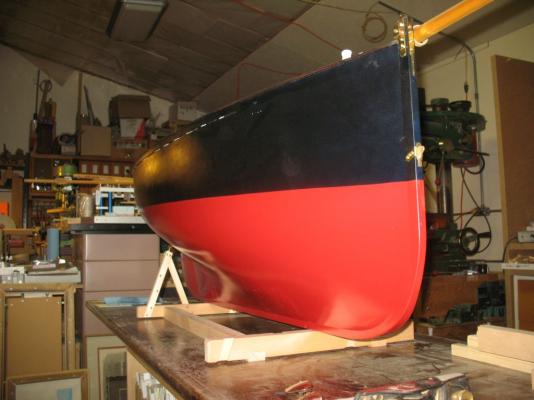
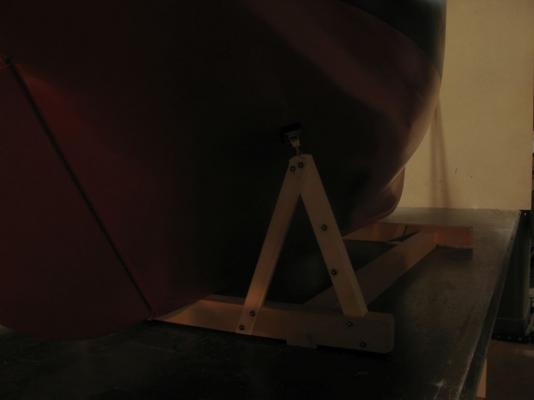
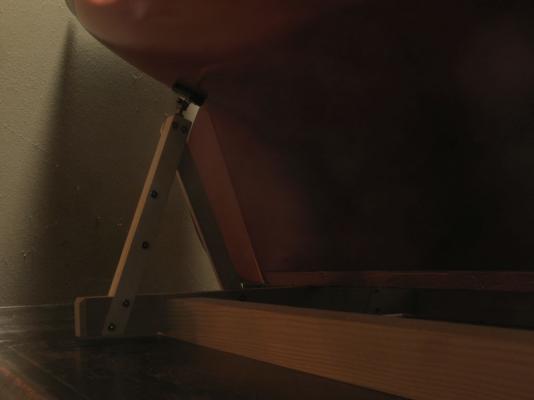
managed a little more work on the cradle this evening. the longitudinal beams 12x10 were cut from some clear fir and they were mortised into the cross beams. The cutter is now supported by the new pads and is quite stable, more so than the former cradle. Michael

-
This is very interesting Jeff I will be following along, and BTW it was great meeting you in Edmonton at the Edmonton Model Ship Society. the Magnet Idea is neat, one work of caution those ceramic magnets can be quite stubborn in not wanting to separate, my thought would be to use a bit of tin can as a mating piece rather than two magnets of even fridge magnet material which is a nice thin sheet that you can cut with scissors, and they are a dime a dozen as well. The Tig filler rod is one I shall remember. Michael
-
Good morning Omega, having re read McNarry's book once more I was unable to find any information about his method of construction. He di though rite a previous book that described the methods he uses. it is long out of print and is called "Shipbuilding in Miniature" published by Percival Marshall in 1955. There is most likely somebody on the forum who has that book. Michael
-
SS Vinal Haven by TBlack - FINISHED
michael mott replied to TBlack's topic in - Build logs for subjects built 1851 - 1900
Tom, I am surprised at the size, This whole digital photography gig that we all take part in with our models is extremely deceptive. All along i kept thinking that your model was twice the size that it is. I know that the scale was talked about and and i understand all that but we or at least I loose track of all that looking at the pictures. It is great to see her in the presentation ceremony. Now who are all the fine looking gentlemen in the picture? Michael -
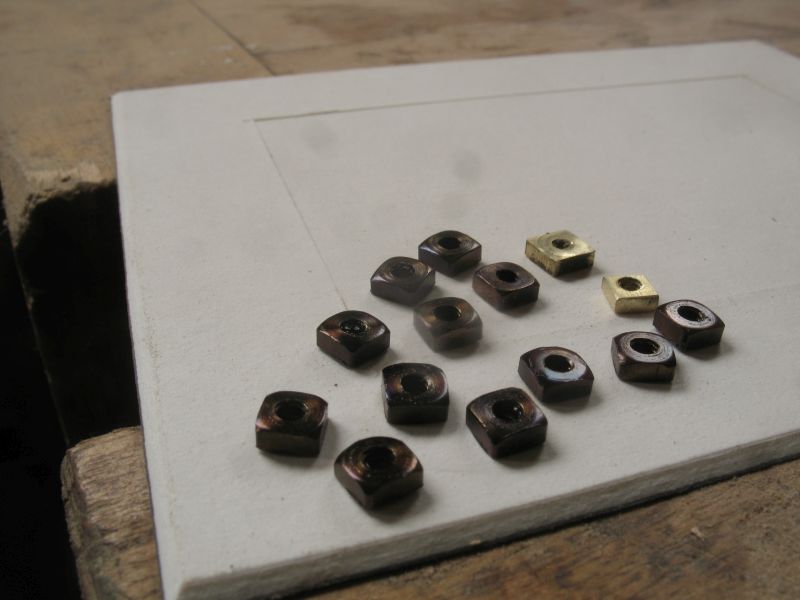
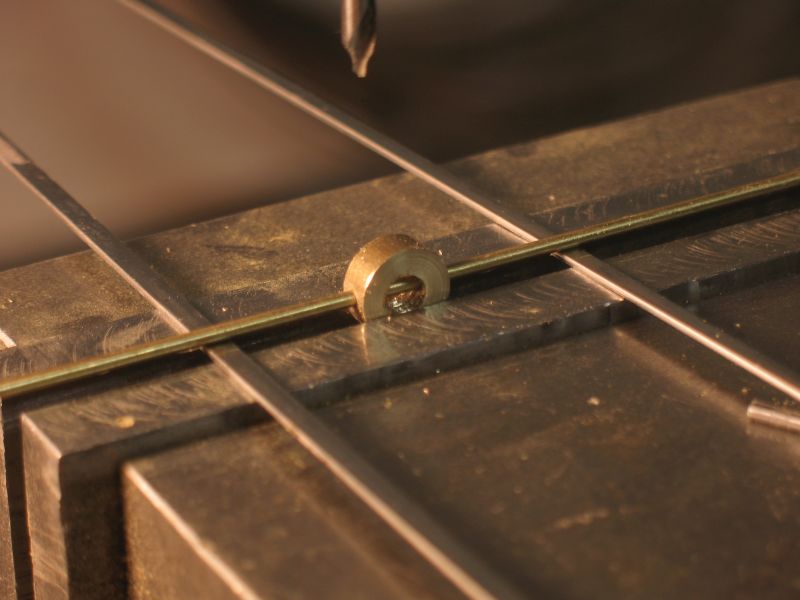
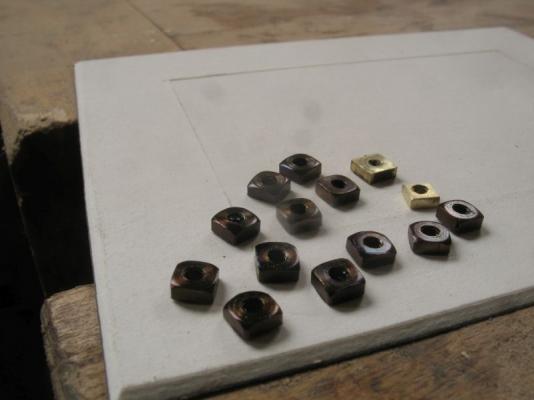
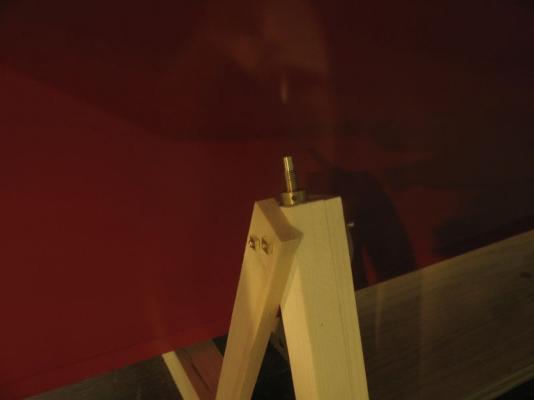
Keith the thing with the nuts is that there is one on each side and the bar through the wood is a piece of 3/32 brass rod that is threaded at both ends. Michael
-
Thanks to one and all for looking in and the kind words and all the likes. Keith, The washers will be brass so there will still be a contrast colourwise. I could counter bore but then it would be harder to tighten the nuts without a special wrench. the finish is pretty durable for what it is a thin oxide coating at the surface of the metal. the only reason for quenching in oil it so that the steel doesn't rust. the oils is just left over drainings from adding 10 w 30 to the care engine. I always drain the oil into a glass jar for oiling the machines. Michael
-
Hi Omega will see if there is any info about it in his book later right now I'm off for a sail Michael
-
Such a beauty here is another link from the builders site. This image link shows the hull plates clearly. Michael
-
Hi Omega, this model reminds me of the one that McNarry did where he shows all the frames fretted out after he faired them to shape as a block first.(page 54 of his book "ship Models in Miniature"). What wood did you use for the frames? It really is a stunning piece of model work. Michael
-
Hi Nils Congratulations on your grandchild, one of life's great moments. Now regarding that cutter! I agree with Omega We need to see it finished. Sneaky work on your cutter Pete, I would also like to see some pics of the stern construction. Sorry Nils I just had to get those in. Your work on your rigging looks great, just imagine how quickly you would get the rigging done on the cutter.... not more than a few hours I suspect. Michael
-
Hi Tom this is an interesting take on the "bread and butter" method of hull building. looks like a great start. working on the two halves this way would make the fairing a little easier I would suspect. almost a cross between a solid hull and a bulkhead hull, if planking is not going to be highlighted and just painted and coppered I can see how this would speed up the building of the hull. Michael
-
Denis intriguing work, I am looking forward to seeing how this is all going to come together. Michael
-
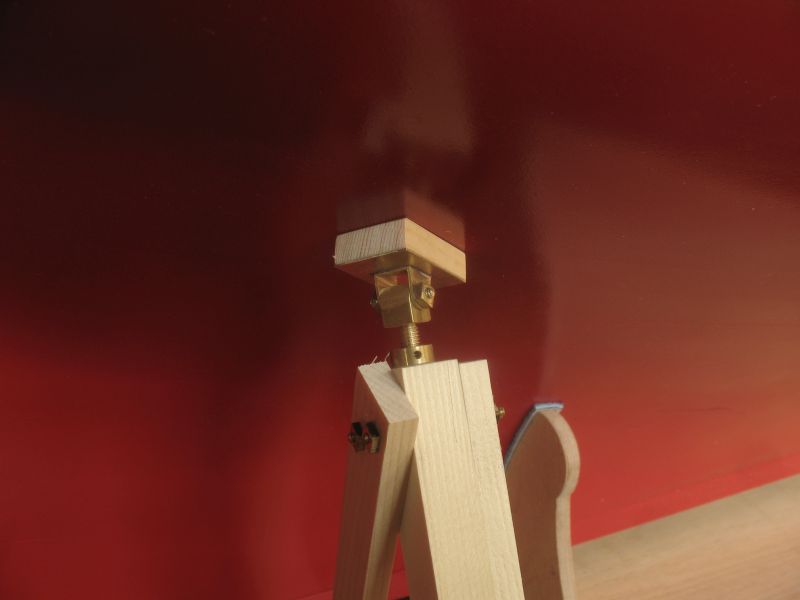
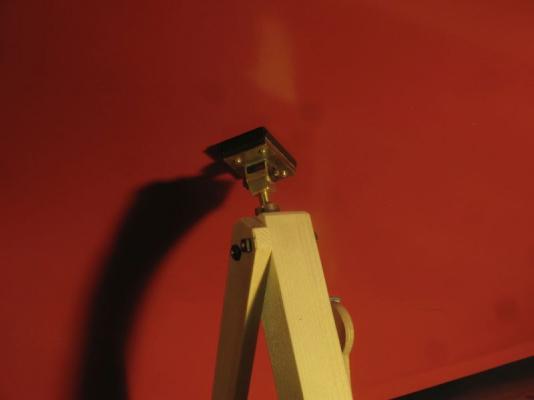
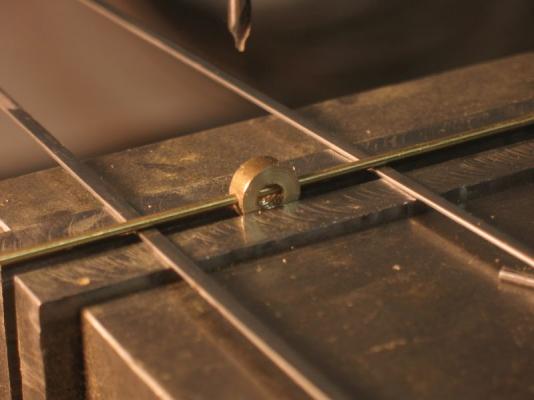
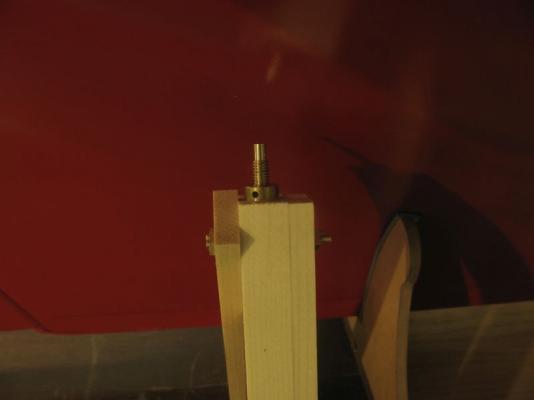
Thank you all for your comments and likes. I was not happy with the way the brass square nuts were looking, so made the decision this morning to replace them with blued steel ones, this entails a bit more work but I prefer the results. the only thing is i also need to make the washers as well now because the nuts on the wood are not good practice. The new steel nuts are first bored then the top surface is shaped with a file as the steel is spinning, then parted off and tapped in the vice, by tapping the nuts after they are parted off I can use the first tap only and there is very little clogging because the tap distance is short. after the nut is tapped then it is put onto a threaded mandrel and buffed. then while still on the mandrel it is heated through the tempering colours until the purplish blue is reached then quenched in water and then oiled. I added the leather to the wood blocks and also the retaining screws for holding the wood to the swivel plate. There is a few more hours of making the nuts before moving on to the bow supports. Michael
-
Piet the model continues to improve with all the details she is looking great. Piet you could have a look at these Turnbuckles that are for 1:87 scale Glad to here the surgery went well on the carpel tunnel, from personal experience I know that in a few weeks she will be a much happier camper. Michael
-
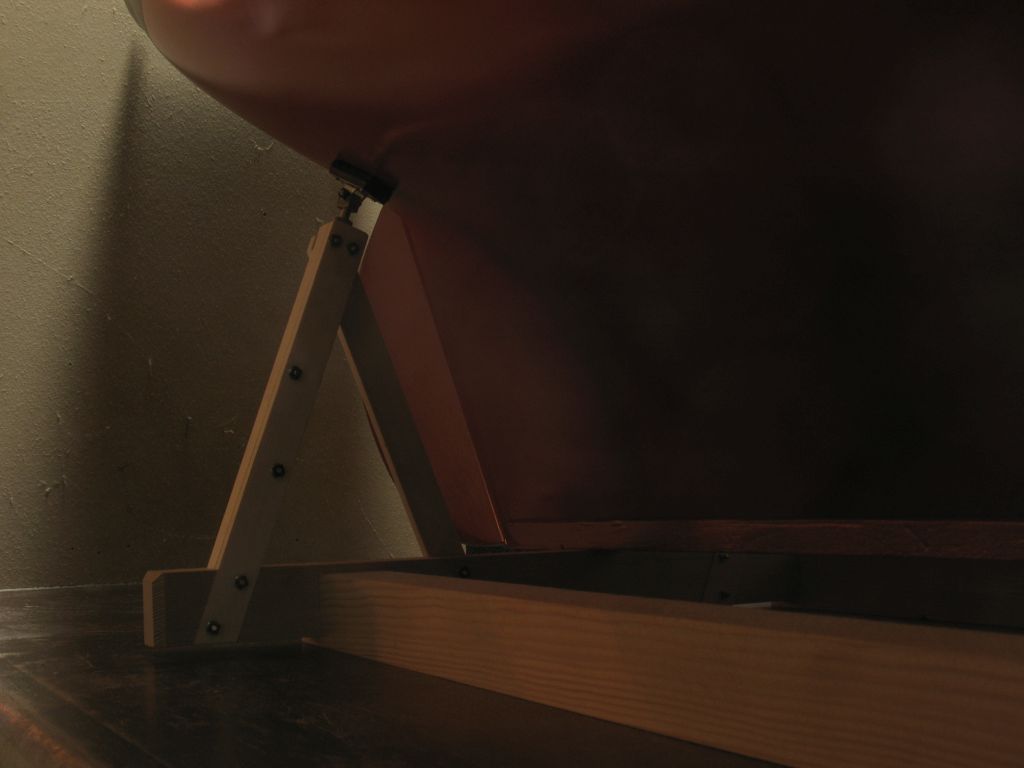
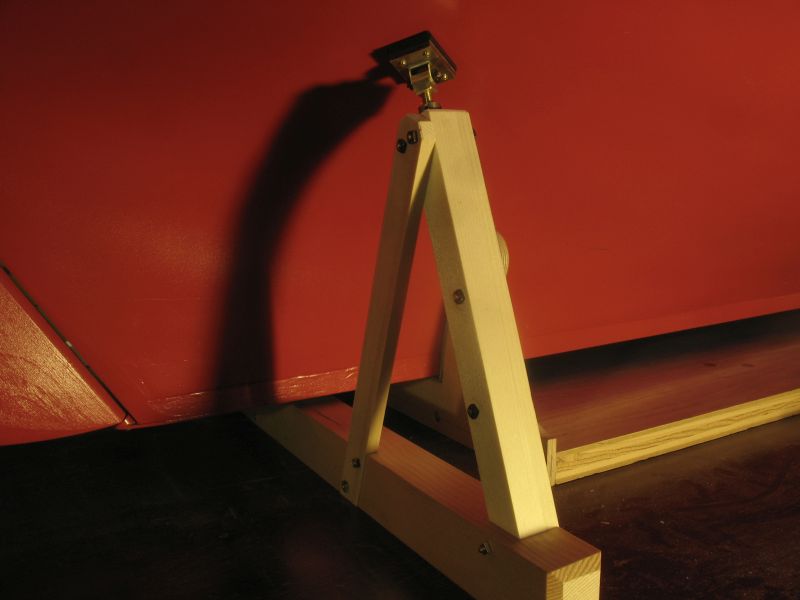
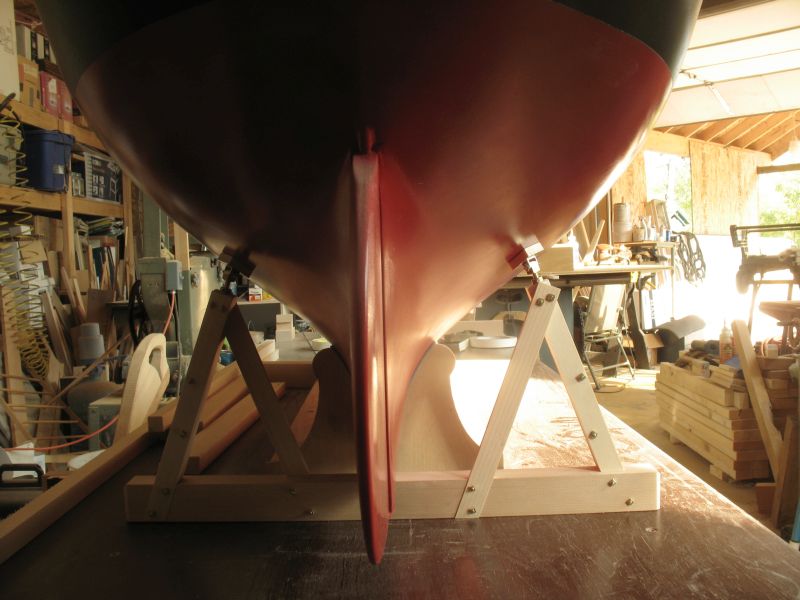
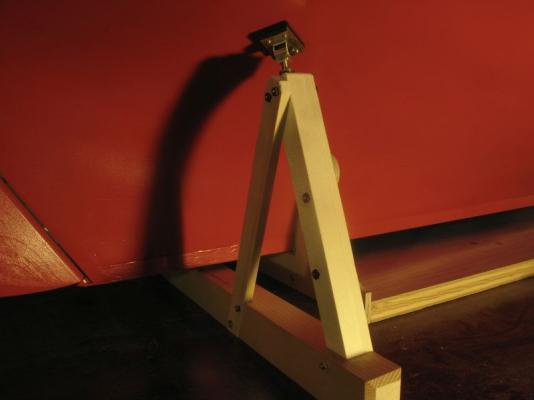
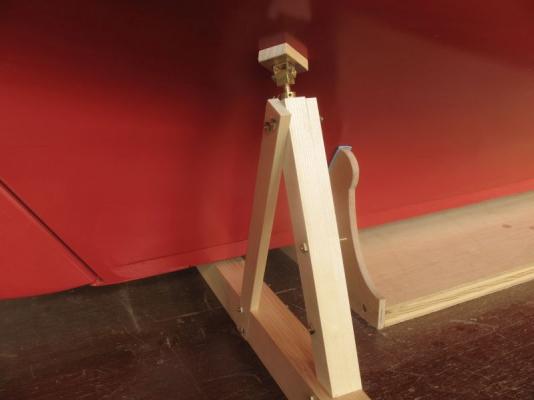
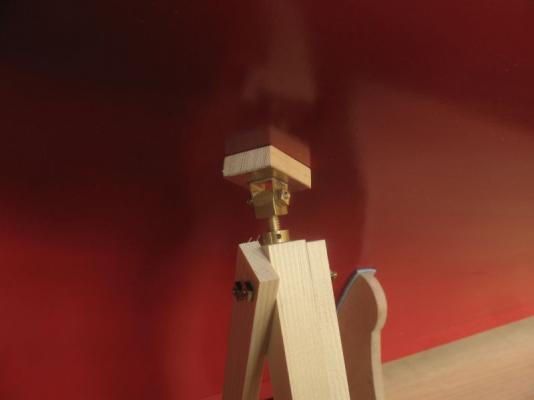
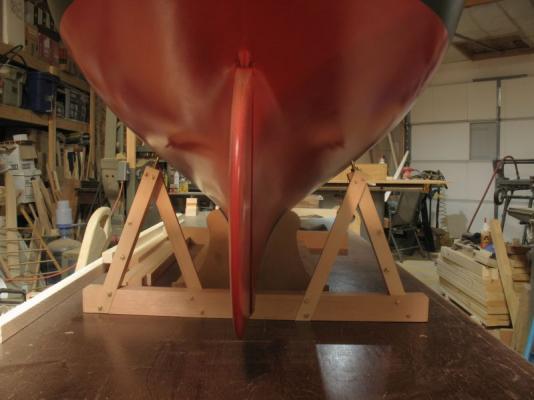
Bedford, Tom, Denis, thanks for your kind words. Al those who added likes thank you they are appreciated. Tom the ends were making me cautious as well. This ought to calm you down Denis the idea of an adjustable slip actually seems like a great one, it had not occurred to me that way. There will be some leather wrapped over the wood block., I am pleased with the way they work. They are part of a new way of supp0rting the model to replace the little stand it is presently sitting on. Denis there is definitely another build on the horizon. I have the plans for an 8 foot Shamrock V, by Rene Sarao of Nova Scotia as one option. Michael

-
Thanks for all the likes managed a little more work on the supports this evening. The first picture shows the adjusting screw it is 1 1/2 inch in diameter and the threaded collar is rotated with a 1/2 inch bar inserted into one of the 4 holes. In order to ensure that the holes were at right angles to each other I set up a couple of bars (scrap stainless steel out of a used wiper blade) to support the 1/2 inch bar before drilling the other hole. The stern support are only needing the swivel pads and then a bit of clean up on the bolts then I can move on to the bow supports Michael

-
Just found this and a great job of bringing the kit up to snuff. A beautiful looking model Michael
-
Cutty Sark by NenadM
michael mott replied to NenadM's topic in - Build logs for subjects built 1851 - 1900
Nenad My thoughts are with you at this time. Our journey through life weaves an intricate path of joining s and losses sadness and joy, the wonderful thing is there is usually much more joy than sadness. great news about your family successes. Michael- 4,152 replies
-
- 1
-

-
- cutty sark
- tehnodidakta
- (and 1 more)