Check out our new MSW Sponsor Innocraftsman
×


michael mott
-
Posts
5,195 -
Joined
-
Last visited
Content Type
Profiles
Forums
Gallery
Events
Everything posted by michael mott
-
 Omega those little boats are sweet, did you take many shots of their construction?, I also noticed that they have different kinds of floor boards. what is the length of them? Michael
 -
Mark and Steve, folk have been building model internal combustion engines for years this page illustrates just a few and here is a water-cooled one I don't think I will have any trouble getting it to work. Mine will look a lot prettier than this one though. I am presently researching the Buffalo 3HP motor. there is a lot of very interesting information in this book Mark the glue is LePages Carpenters glue. Thank you all who took the time to read the last entry and for posting the like. Michael
-
HMS Leopard by gobi71 - 1/300 scale
michael mott replied to gobi71's topic in - Build logs for subjects built 1751 - 1800
Thank you Gabriel for the information. I had to smile you make it sound so easy, and like all tasks, I imagine it took a while to learn just how to do that. Michael -
The Byrnes Saw "inside and around"
michael mott replied to nobotch's topic in Modeling tools and Workshop Equipment
Markus I like the chopsticks device. however I would use a sled rather than the mitre gauge. I realize that you are using a very small saw. and understand the waste issue with regard to production methods. I find that sometimes we follow along a line of thinking that boxes us in, I have done this many times where because I have used a particular tool or method, I seem to be locked into that tool or method and attempt to do the next job or task using it instead of thinking about what the big picture actually requires. As you pointed out using the chisel with the mirrored surface give a perfectly clean 90 degree cut exactly illustrates what I am saying. I am fortunate to have a large number of good tools that I have acquired over many years, and like yourself they are used for much more than model ship building. It has been my personal preference to use larger tools that are capable of cutting small sizes to good tolerances that to attempt to use small tools that are pushed to their limit cutting large stock. All that said I am enjoying seeing your innovative attachments and ideas for this very high quality small machine. Michael -
Nice work on the stanchions Alan, that 12awg copper is the most useful material and there is miles of it laying around. Michael
-
HMS Leopard by gobi71 - 1/300 scale
michael mott replied to gobi71's topic in - Build logs for subjects built 1751 - 1800
Gabriel, your work is very inspiring to look at. can you explain the difference between the picture that shows the frames that are glued with the newsprint and the one that shows the frames with the spaces between. How did you remove the newsprint and get the spaces? The interior work is amazing! Michael -
Hi Bob the plan is to go for the make and break. I have watched a few Video's on the web of some of these old marine engines and they are really neat to hear in operation. Thank you all for the likes. Michael
-
you really are doing a fine job on all the detail upgrades Joe. Michael
-
Very well executed Kees, weathering is an art and you have excelled at it. the picture of the boat with the sand are very convincing. Michael
-
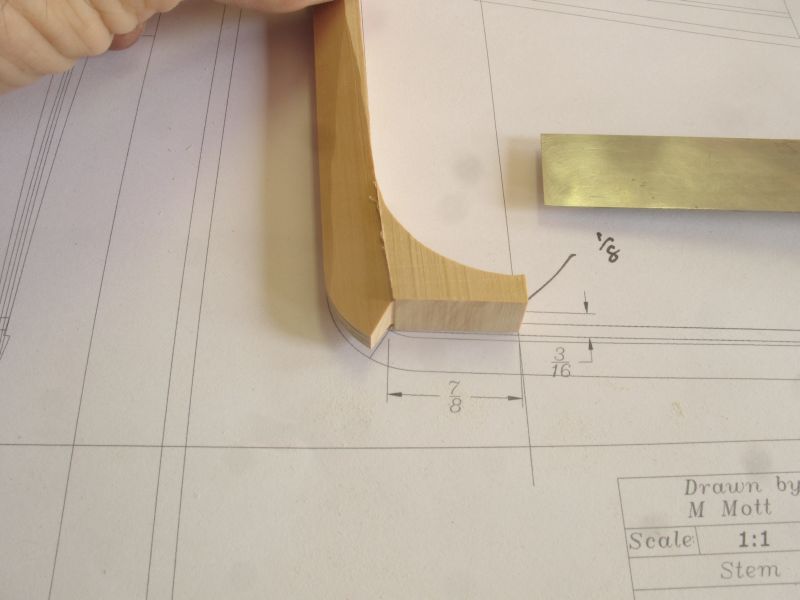
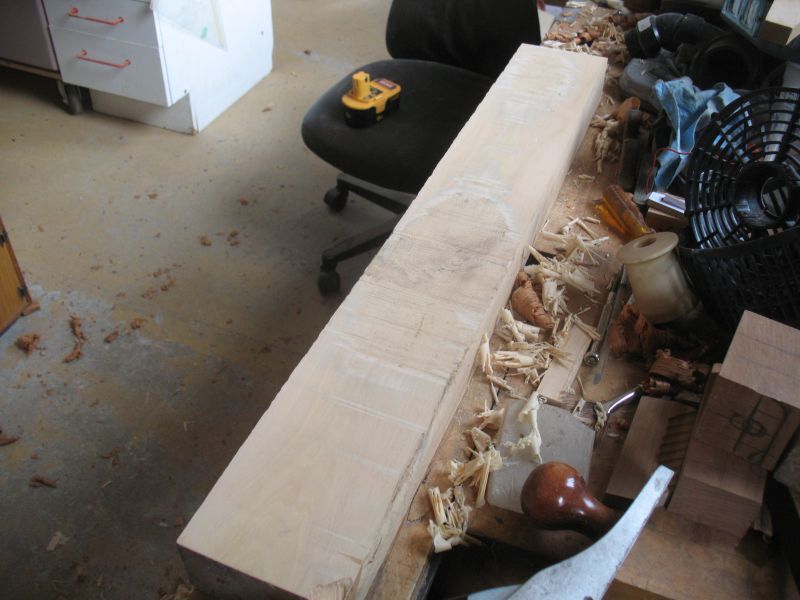
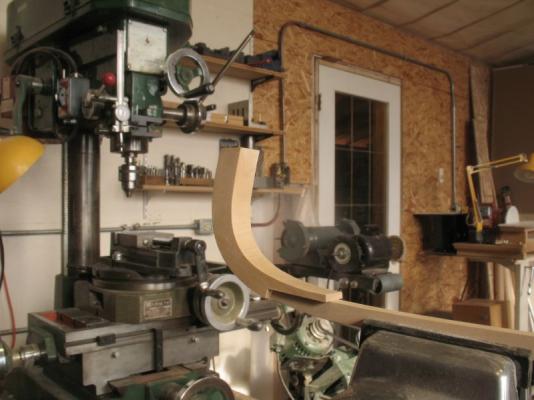
Thanks Bob, I roughed out the stern today and glued it to the keel. first pic show the patterns on a piece of 1/2 inch thick Castello. The stem was curved enough that I thought it best to scarph a couple of pieces rather than cut it out of one piece. Glued to the keel Before I finalize the carving of the sternpost I will add the keel plate. Michael


-
Looks like you are going to have a fair bit of work before Christmas, brings a smile to my face watching these builds. Michael
-
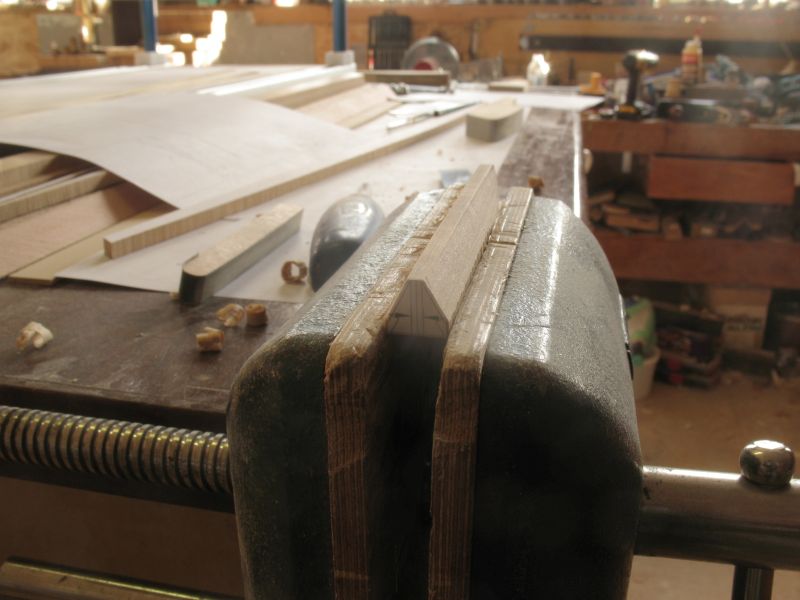
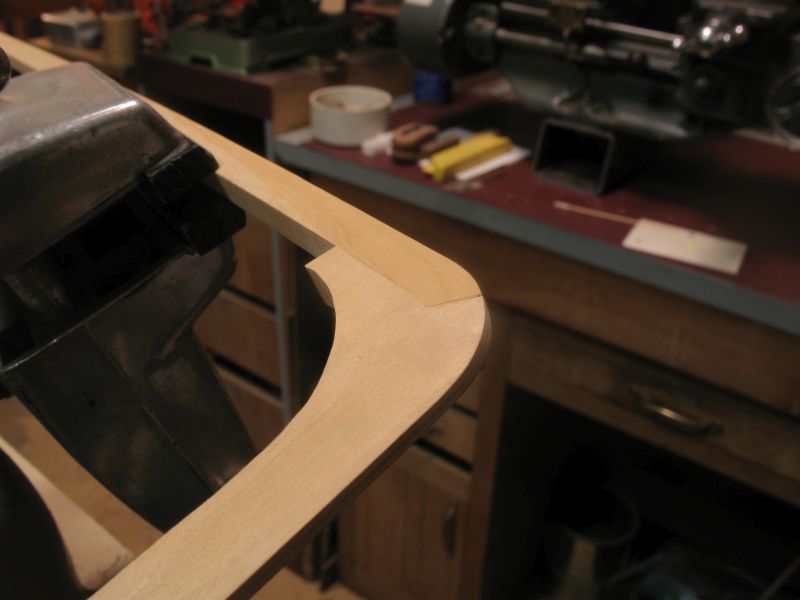
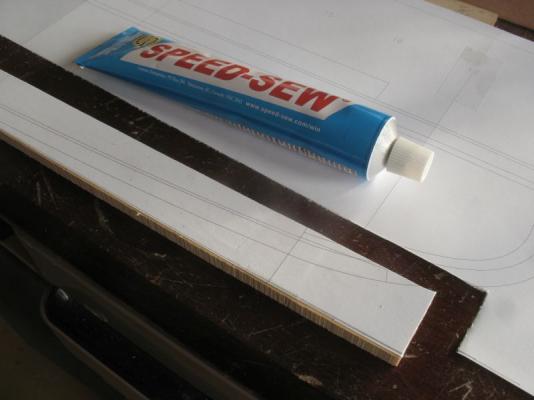
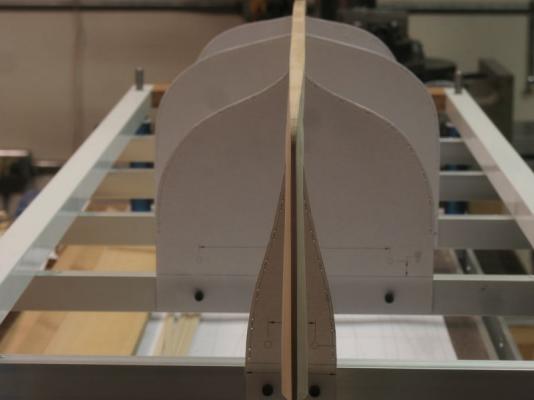
Thanks for all the likes. Steve Thanks for the kind words, the proof will be in the pudding. I began cutting the keel and stem today I did not have any paste to glue the paper to the Castello so I did a test with the speedsew and it worked and the stuff works like rubber cement, and rubbed off the wood leaving no residue. used the bandsaw to rough cut the keel and the jewelers saw to cut the stem then used a 3/4 inch paring chisel to rough down the stem before gluing it to the keel for final shaping. There is still some final paring to do between station 1 and 5 but it is shaping up well. I can see why now the preponderance of Castello used in model boats, this is the first time I have used it and I'm lovin' it, what a joy to carve. I will leave the stem for now and get the stern fitted, after that I will add the keel plate then shape them together for the garboard, once that is done I will be able to attach the assembly to the station bulkheads on the frame, then the ribbands for the ribs. Michael


-
Nice Job on the addition Alan, I am following along. Michael
-
Jack , thanks for the picture of the Elco launch these early launches were just so elegant, I can see why so many are preserved and cherished. Thanks again to all who posted likes. Michael
-
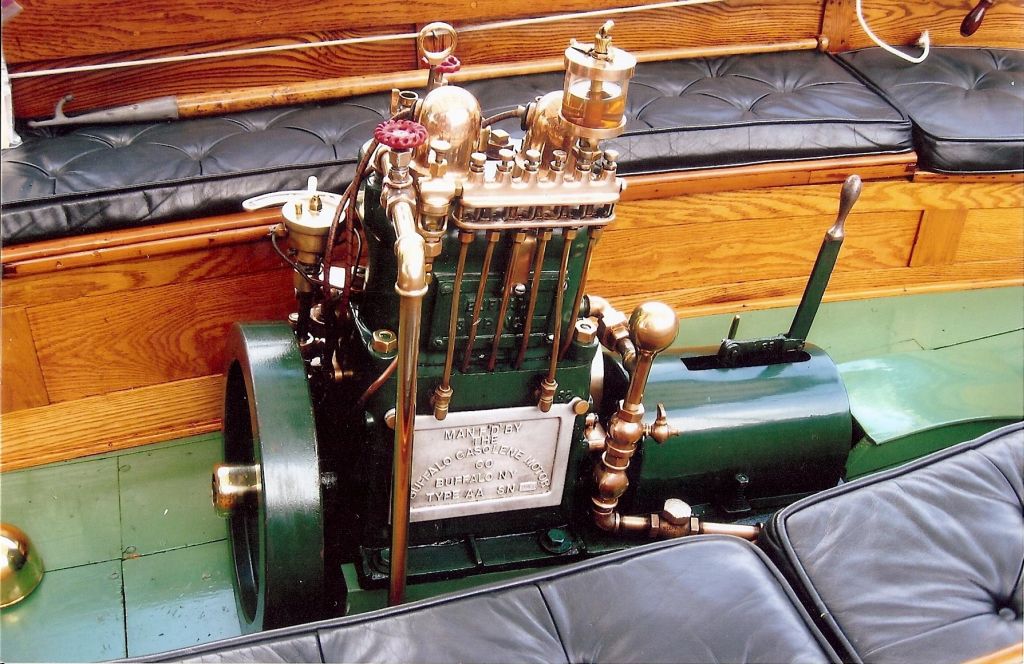
Hi Omega yes you read that right I will make an operational petrol engine for Skipjack. Michael
-
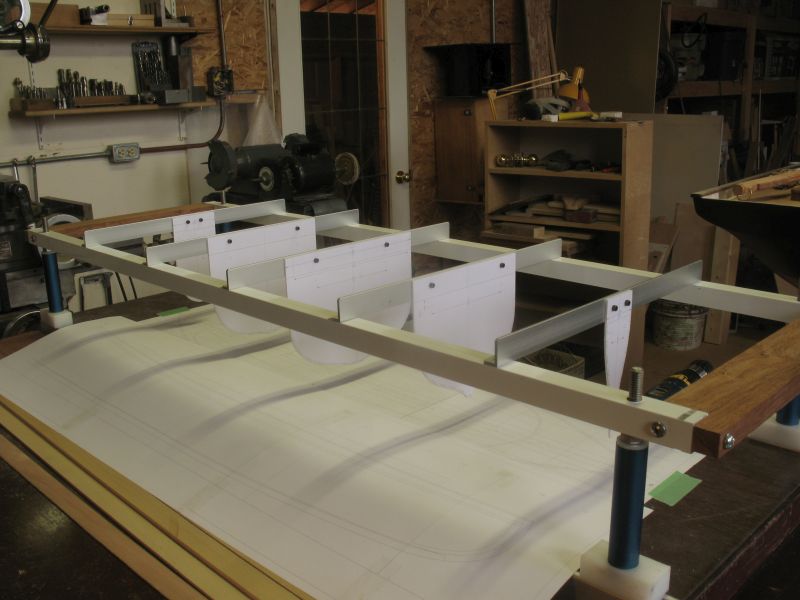
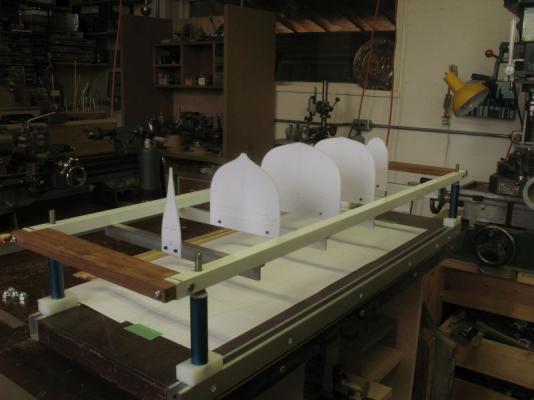
I agree Bob, that is why I cut my teeth on projects like this and this I am up for the challenge I figure it will be about as tricky as building this was. When I was 17 I built a working overhead valve internal combustion engine model using off the shelf bits and pieces. it was crude but it ran. I have learned a few things since then though so it should be fun, I am glad that I did not choose one of those large runabout racers with the big engines though, Like the one in the Gar runabout I posted on the other thread. today I finished the molds and mounted them Two of the cross beams were not exactly extruded square so I had to add some .008 shims to counteract for it, to get the mold to be square with the base. Also cut a wider piece of the Castello for the keel, since it is only 17.3 feet long I wanted to make it out of a single timber. Thank you to all who "liked" the last entry. Michael


-
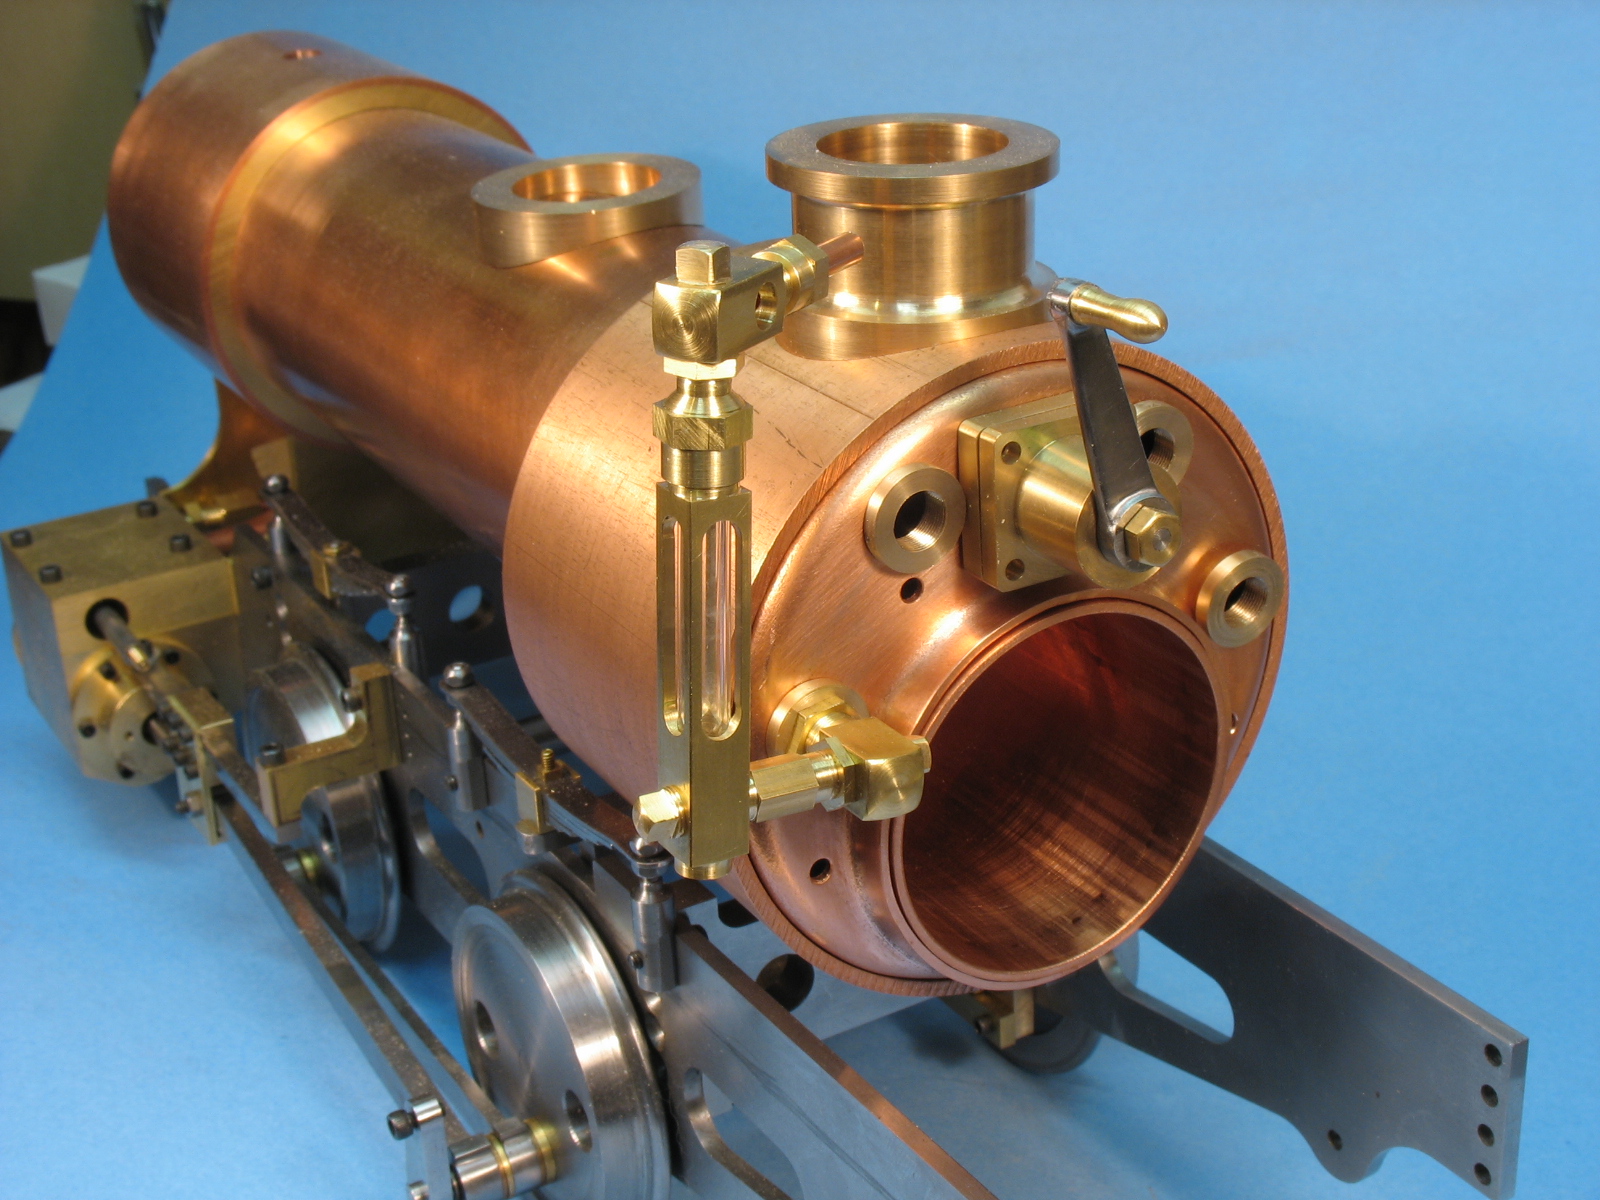
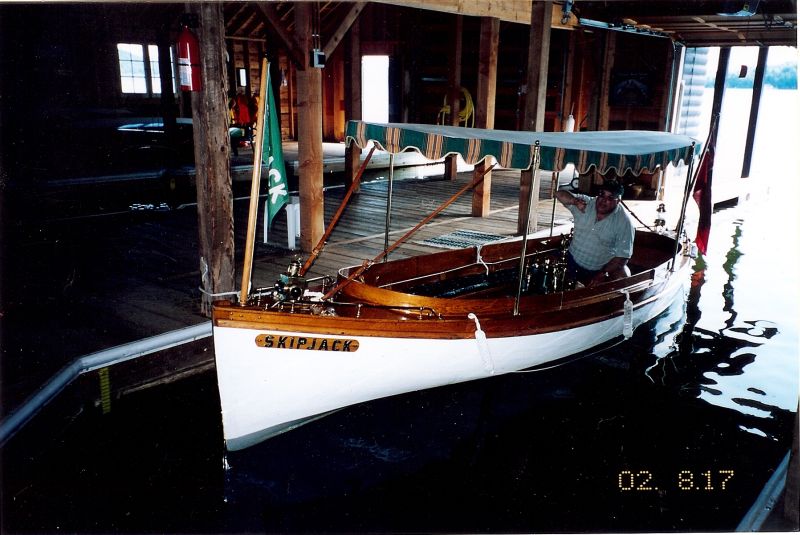
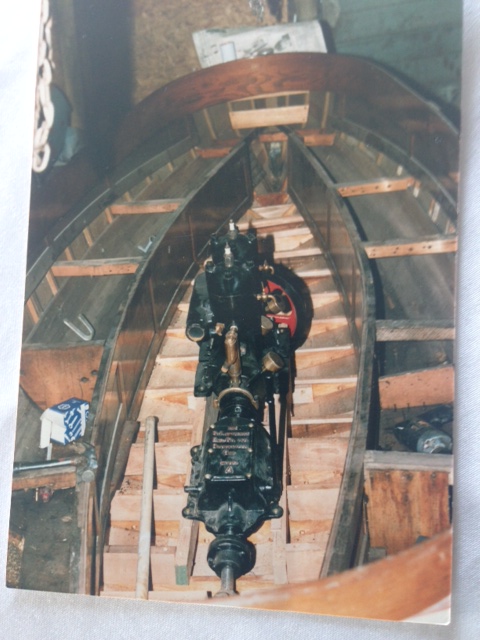
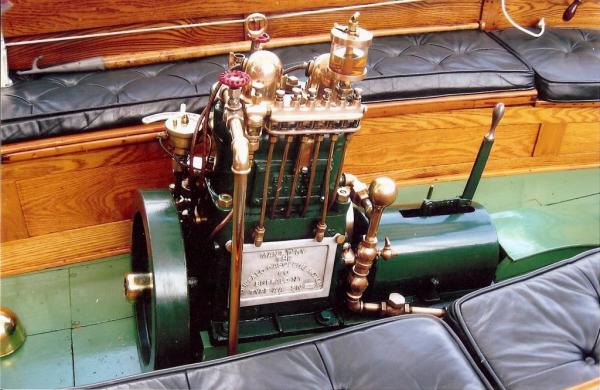
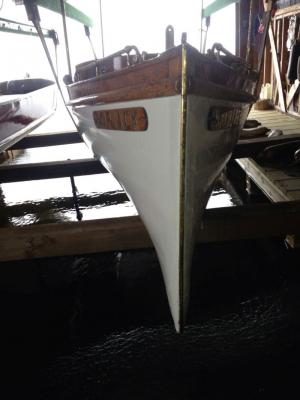
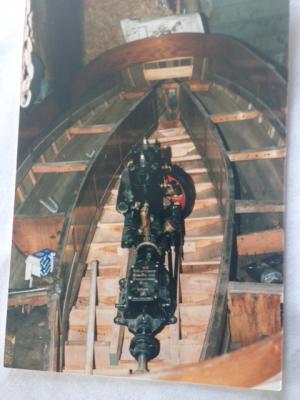
Steve, Omega, thanks for your great comments here is a link to an overall shot at the Port Carling boat show where I first saw a picture of Skipjack. The Port Carling boat site includes a lot of pictures of the classic wooden boats, Skipjack is near the bottom half of the pictures and this Gem near the bottom of the page. It would be fun to visit the show and see some of these boats in person, but i am lucky enough that Roger is being very helpful in sending me pictures and taking measurements of various details for me. This is Skipjack's engine that I also propose to make. And an overall of Skipjack in her boatshed. Michael

-
Those are great little drawings Piet! Very nice of Daniel. Regarding the display case, Do you have the proper length heater for bending the corners? it is pretty tricky doing it with a good heat gun. The ends will also need to be machined after the bending to square them up, because it will curl a little right at the bend. If you are able to get a local plastic fabricator to make it for you it would be money well spent. I speak from experience. When I was making models of architecture commercially I used 1/4 plex and glued all the corners, Truthfully one of my staff did it because he was really good at it. the top was 3/8 and it was routed with a 45 degree bevel on the outside corners and then frosted this helped to hide any imperfections (some tiny bubbles) and created a visual frame that was minimal. Michael
-
This is great news, Jeff. Michael PS I'm not going to Edmonton tomorrow.
-
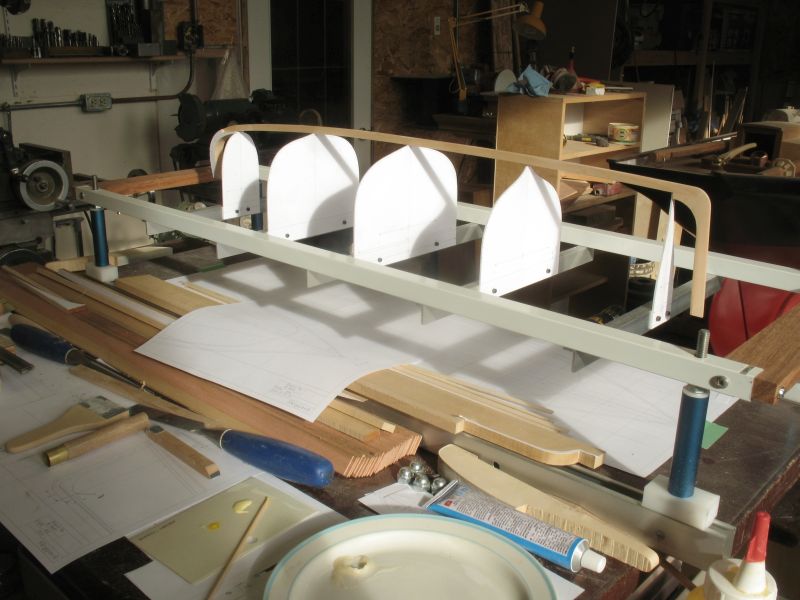
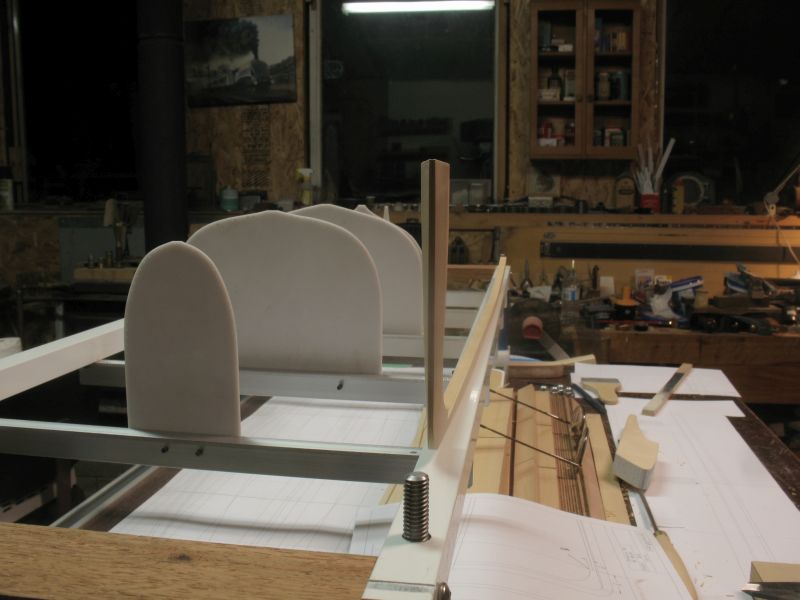
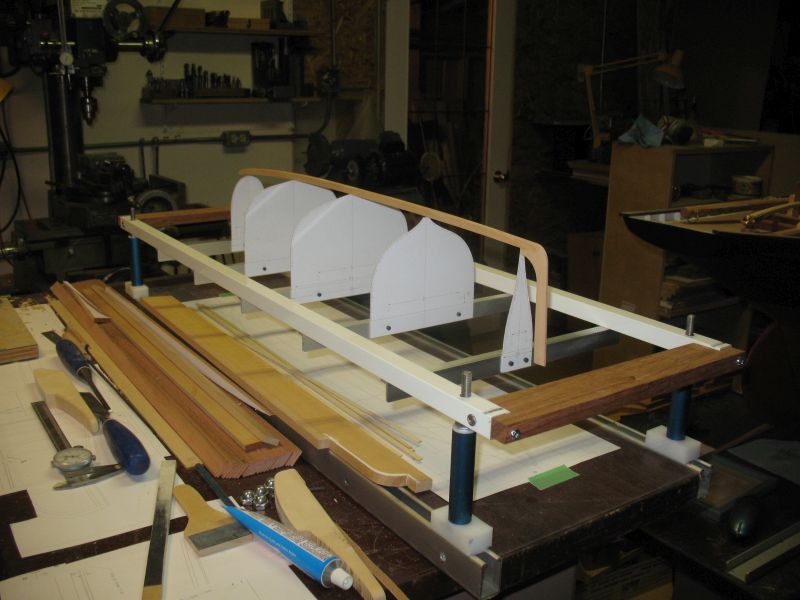
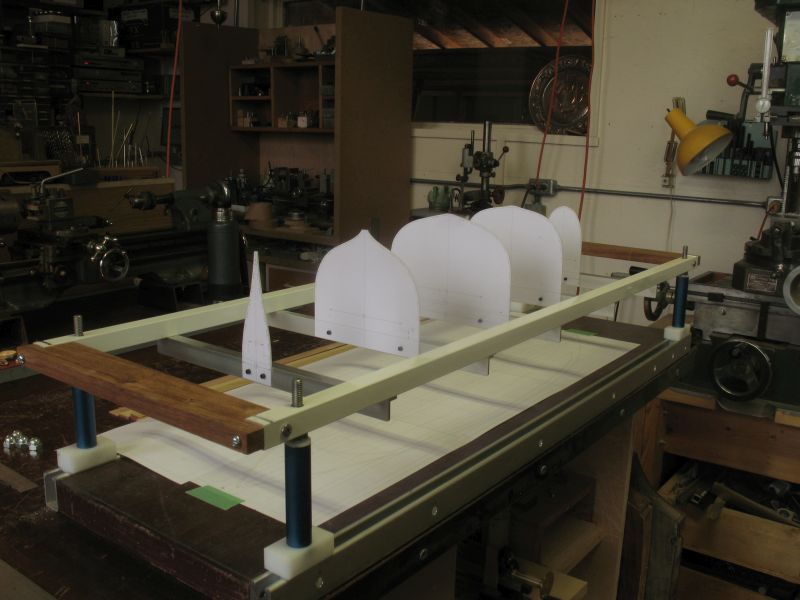
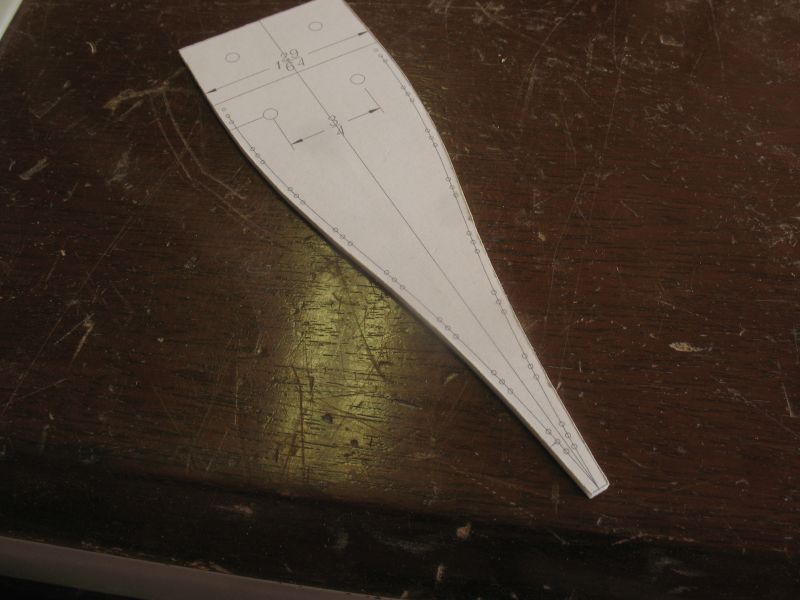
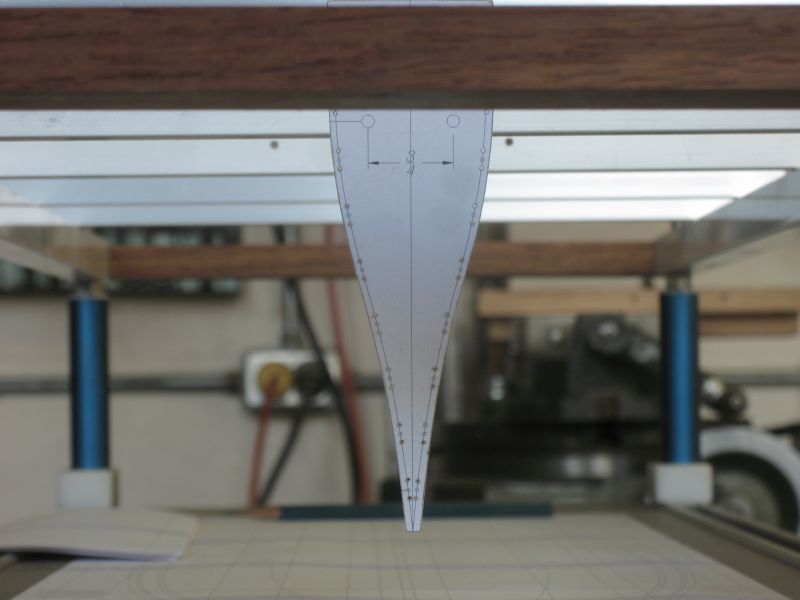
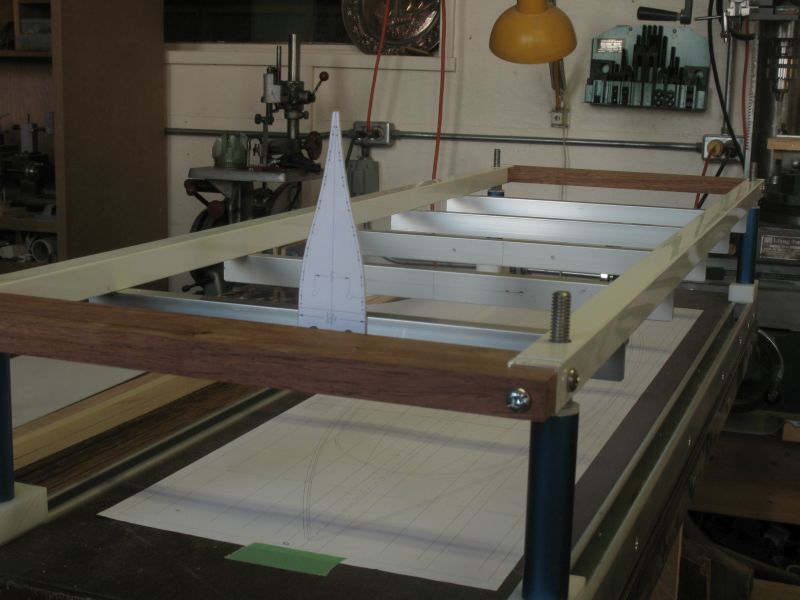
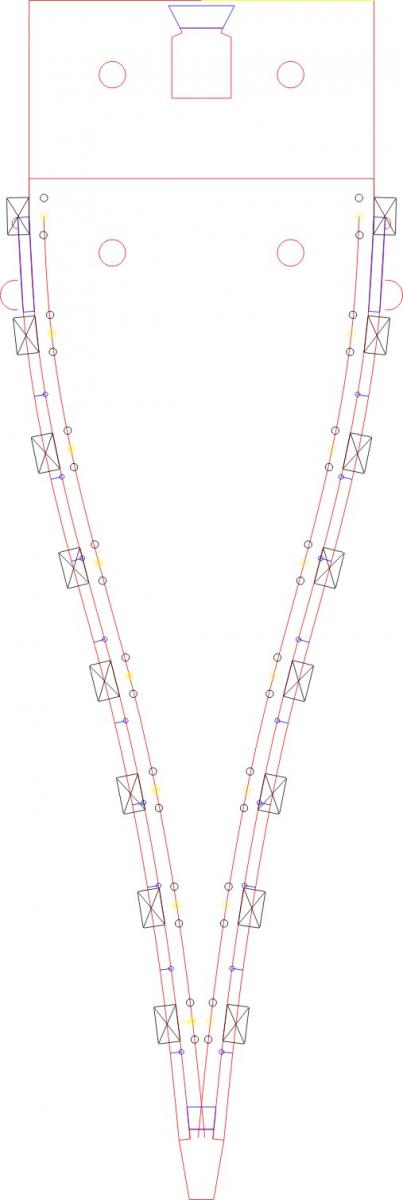
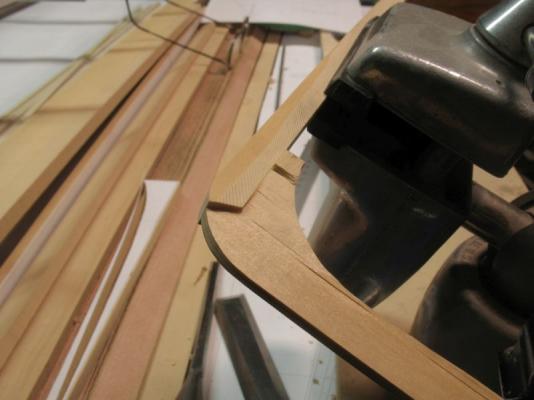
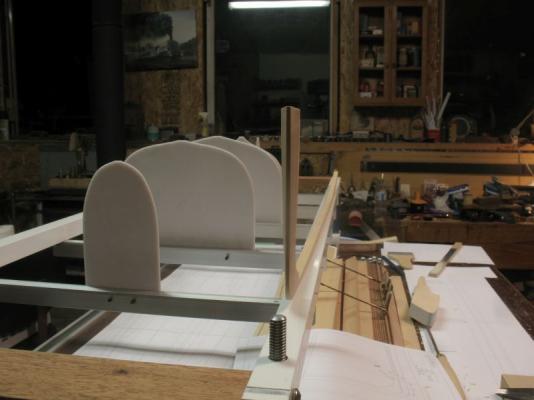
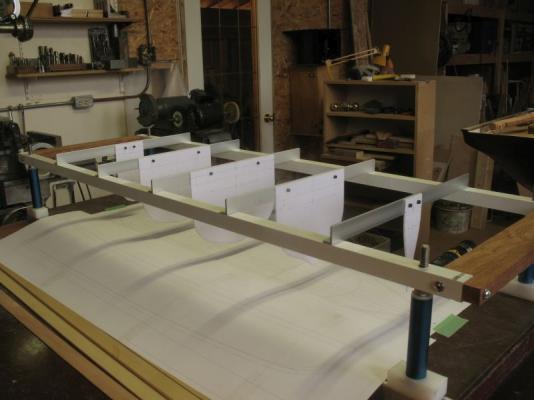
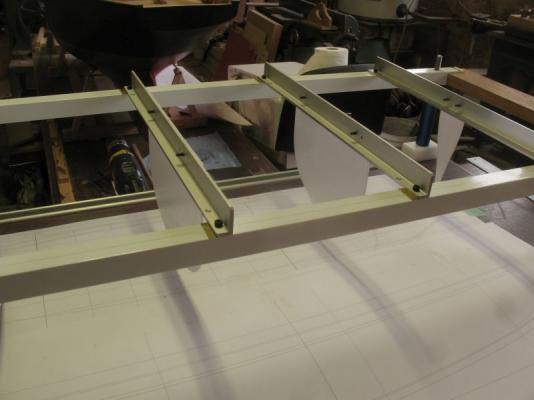
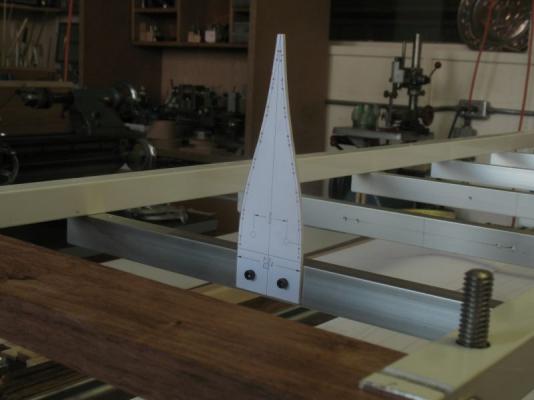
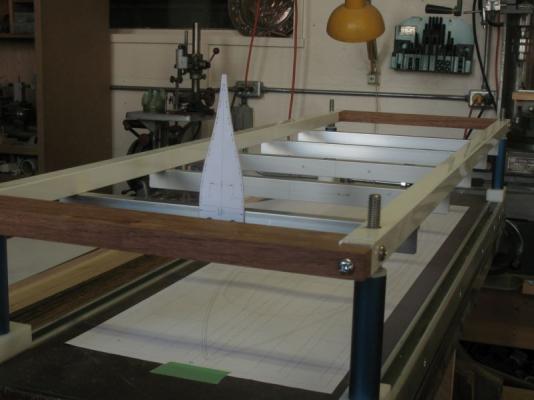
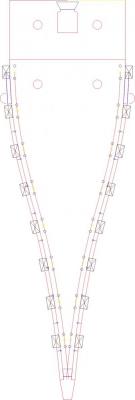
Thanks for looking in Ed, sometimes I wonder how I get anything done because of the clutter. My wife does yoga ,I do my stretching stepping around over and between stuff which amounts to the same thing. Today I made a few changes to the way the cross beam are attached to the frame. I thought it better to make it less cluttered by fixing the beams with some 5x40 allan head cap screws rather than the big wooden clamps. The frame will be easy enough to add new locations for further beams down the road on the next boat to use this frame. the present locations are spaced 4 feet apart (6inches). By bolting them it avoids any possible slippage, and helps to increase the overall rigidity. The new station molds are made from 1/16th inch white plastic that is sold for the sunshine ceilings. It will be easier to tie the ribbands to the thinner sheet. here you can see the first mold with the holes marked before they were drilled for the eight ribbands. the drawing is attached with double sided tape. here is the mold drawing #1 bulkhead 1.pdf Now to work on the rest, the plastic cuts very nicely with the jewelers saw and require very little clean up. Here is the fine bow on the real boat Additional thanks to all who have added the like option, it is very motivating. Michael


-
Beautiful work as always Ed. Michael
-
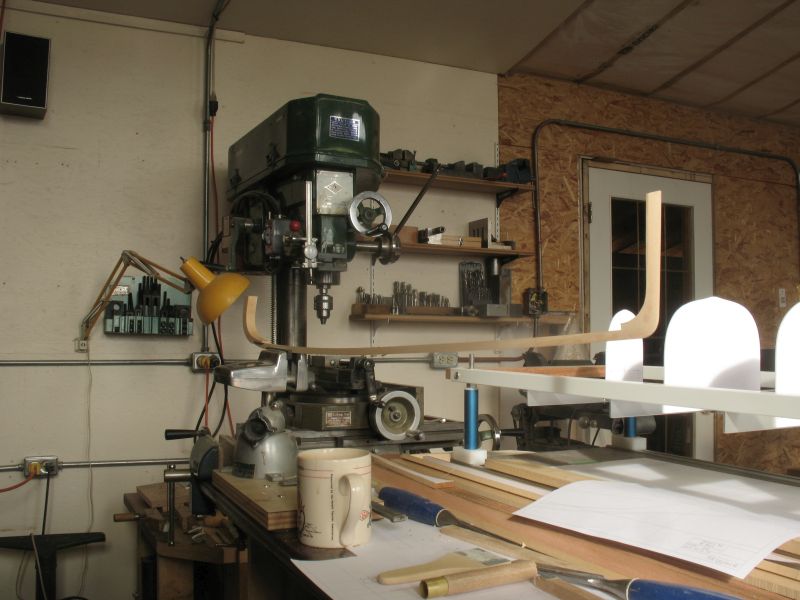
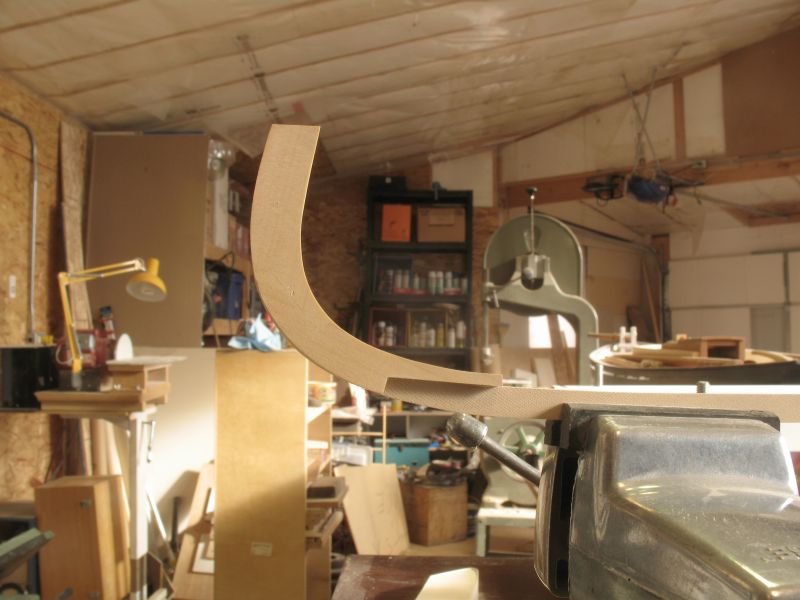
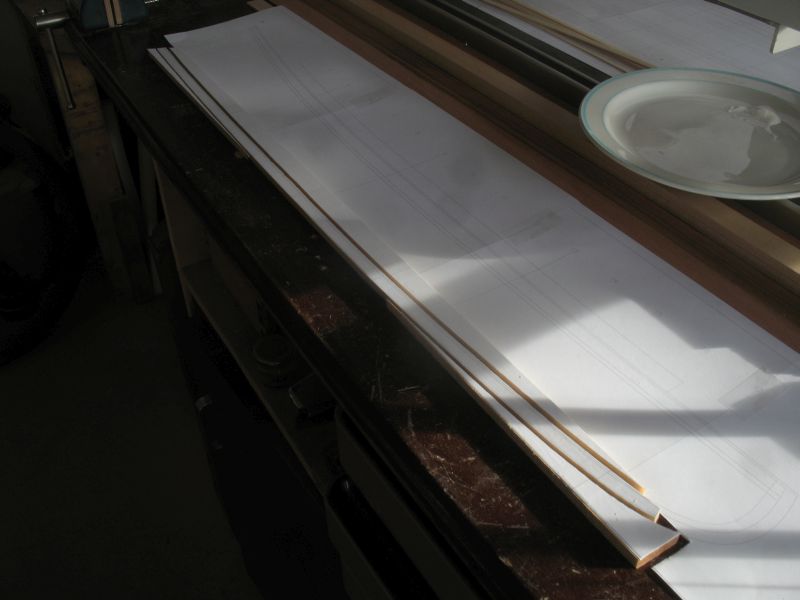
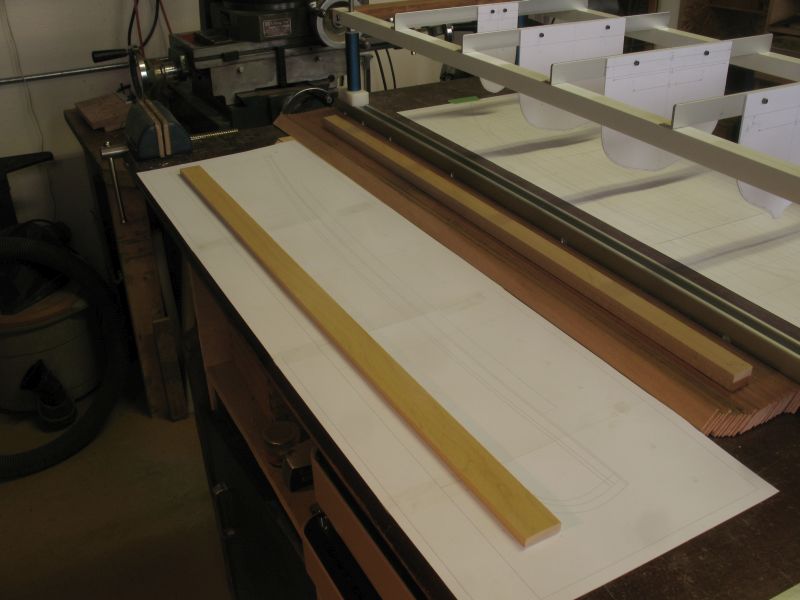
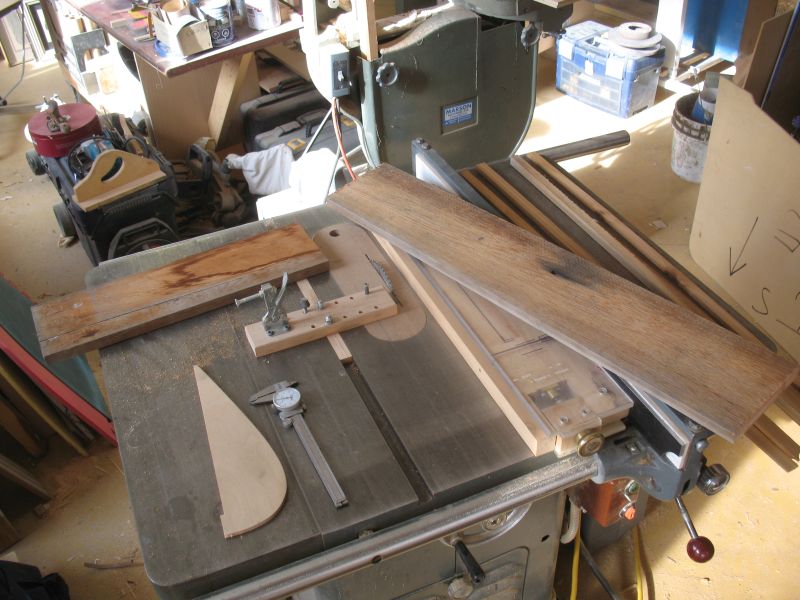
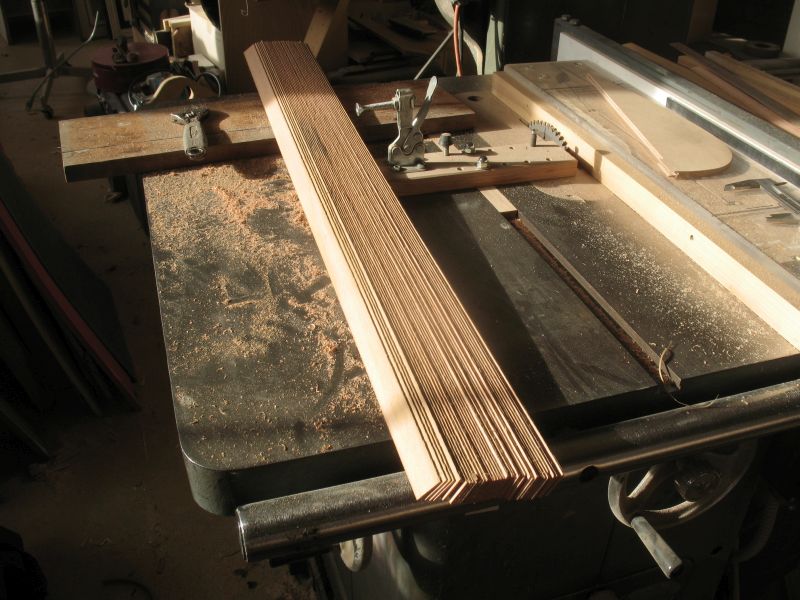
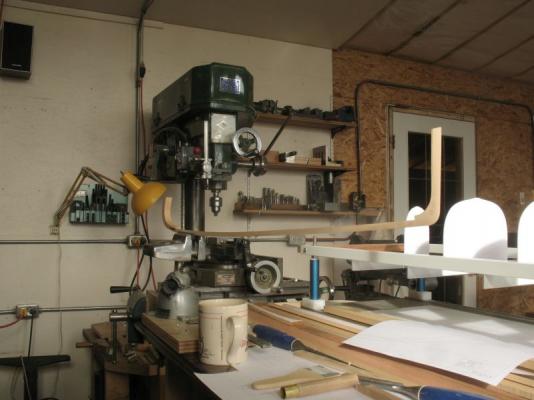
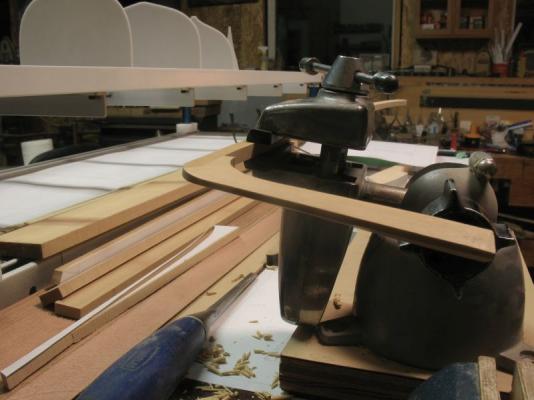
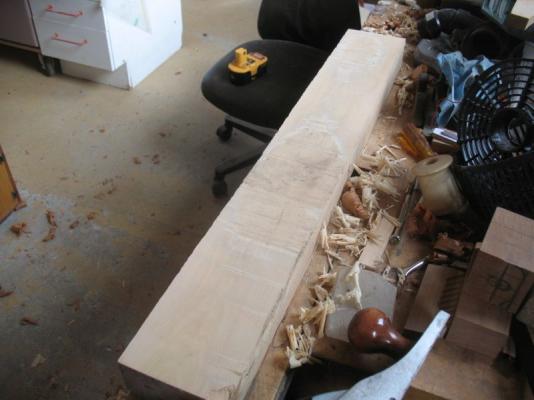
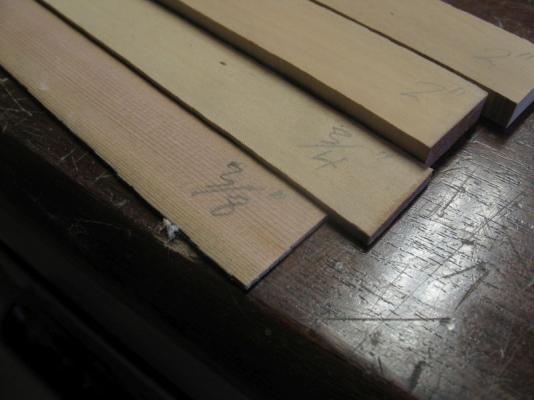
Thank you for the likes. Earlier today I worked on preparing some of the materials for the building. first I made the decision to use Cedar for the planking, because I don't have any Yellow Cyprus, the piece of Western Red had some very tight grain and the board was big enough to give me 38 boards 32 inches long by 3/4 x 3/64 inches. I also cut some of the Castello Boxwood 28 inches long and then cut some 3/4 x 1/4 and some 3/4 x 3/32 inches this will be used for the keel and keel plate, I will use the bandsaw to cut the shorter taller pieces for the stem and stern. I really liked the way the Castello cut on both the bandsaw and the tablesaw. I ended up changing the tablesaw blade from a carbide tipped one to the hollow ground steel finishing blade The Castello is straight off the tablesaw, the Cedar has been sanded because I used the thin carbide ripping blade. Now I need to cut some ribbands, I am leaning towards some tight grained Fir 5/32 x 3/32 32 inches long, I will need to check my stock. Michael


-
Good evening Mark, my thoughts are to add at least 8 or 10 ribands to each side evenly spaced. My understanding is that the ribs on the full size are 3/4 by 1/2 inch. In rereading Roger's notes there is a plate on top of the keel that is 4 inches by 3/4 inches and tapers toward the bow and stern. this plate forms the upper side of the bearding line for the planking and gives a greater area to attach the garboard strake. I am going to make the keel, keel plate, stem and sternpost out of the Castello Boxwood. I need to make the ribands strong enough to not deform when I set in the frames. something that has crossed my mind is to use some thread to hold the frames (ribs) to the ribbands while they set. The fir test frames were pretty flexible, however I am also going to test the Castello for the frames as well, they will be 3/32 x 1/16th full size on the model. I am planning on following the curve at the extreme ends of the bow and stern this will prevent twisting them too much it is hard to tell a great deal from this picture Evidently the ceiling boards which significantly strengthened the hull, they are 1 1/2 by 3/4 bead and cove. have to go guests just arrived Michael
-
Nice to see another larger scale small craft. Michael
-
Dr. Per, Thank you for posting that artists information those truly demonstrate the human ability to share the joy of the universe, using a beautiful material of nature. Michael