michael mott
-
Posts
5,200 -
Joined
-
Last visited
Content Type
Profiles
Forums
Gallery
Events
Everything posted by michael mott
-
 Bob I see that you are coming to this problem from the logical step. Revisit the templates and adjust accordingly. I am sure that you will move forward with certainty. I look forward to the next step. Michael
 -
Microlux Tilt Arbor Saw Problems
michael mott replied to capnharv2's topic in Modeling tools and Workshop Equipment
This issue seems to me that of wanting to use thin blades to save on the costs of cutting up expensive raw materials ie. exotic hardwoods. I again will go back to the same comments that I made earlier, "slitting saws" were not designed for cutting strip-wood they were designed for slitting metal with lots of lubricants. Speed seems also to be a concern, given the time that it seems to take to build models with exotic hard woods what is the rush with regards to making strips? I have posted elsewhere that making thin strips of wood can be accomplished with full sized commercial saws or with hand tools. I think and this is my own personal opinion that we get pulled into having to do something a particular way because we are led to believe that this should be possible, and sometimes it is not necessarily the best way. That said I am a firm believer in using the right tool for the job. The best intentions of those selling "Model Making Tools" might not be the best tool for the Job. and further to that the makers of such Model making tools had certain limitations in mind when they designed those tools. I fear that sometimes they are pushed beyond their limits, and then the toolmaker is blamed. I will get down off the soapbox now! Michael -
Excellent work Ilhan. Michael
-
HMS VICTORY 1759 by isalbert
michael mott replied to isalbert's topic in - Build logs for subjects built 1751 - 1800
Albert, it is good to see that you are posting again the continuation of your magnificent build. Michael -
Good Morning Carl , thanks , Yes I did stand on a stool but I'm not good with heights so I thought it prudent to lower the model to complete the work on the topmast fittings. I have been involved in a few other projects that have needed to be taken off the plate so have only managed a few minutes here and there nothing of consequence this last week or so. I am hoping that by Wednesday next week I will be able to get some decent work done. every time I walk by the model I give the mast a pull to one side and pretend that she is in the water heeling over a few degrees and smile to myself. Michael
-
Microlux Tilt Arbor Saw Problems
michael mott replied to capnharv2's topic in Modeling tools and Workshop Equipment
Tony thanks for your kind comment. Offhand I do not have an answer to your question, but what about the various U tube demonstrations, I have seen a couple of them admittedly for an unrelated subject, it is not a resource I use very often, but I know that some of it is very good. The other thought that comes to mind is to visit a model engineering group, these are the folk who build the most amazing things with small machine tools. The link I provided is one of many, just a start. Michael -
Microlux Tilt Arbor Saw Problems
michael mott replied to capnharv2's topic in Modeling tools and Workshop Equipment
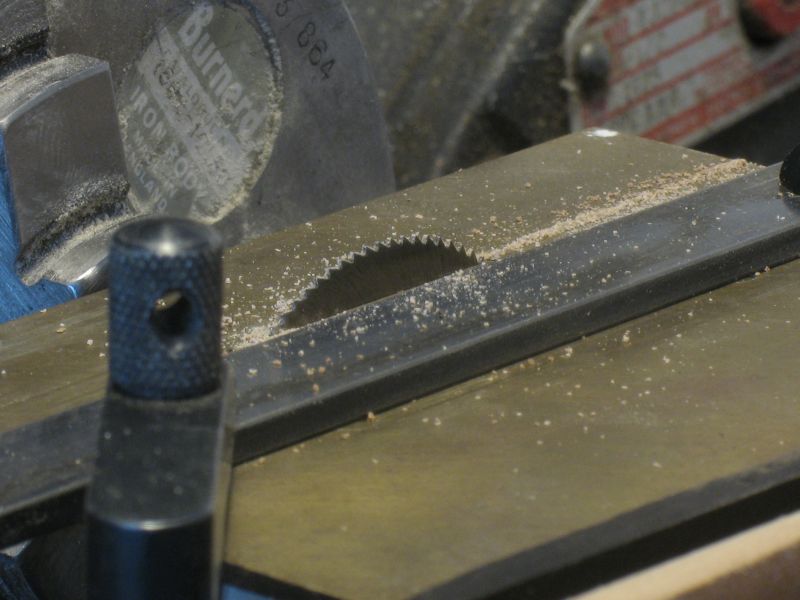
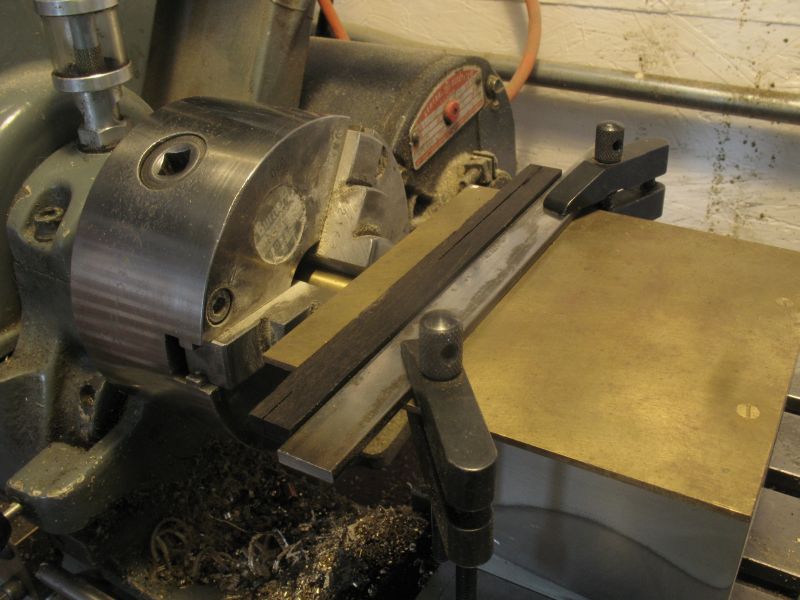
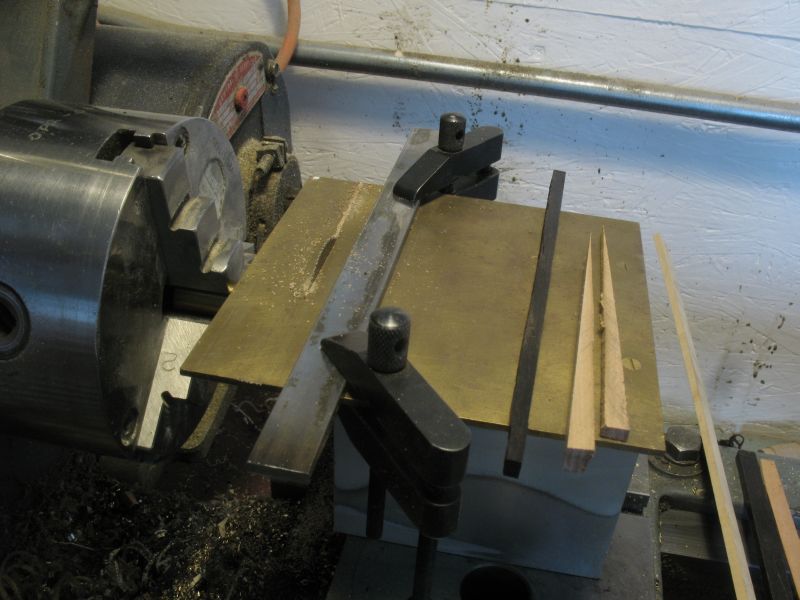
Because I was curious about the power and speed issues with the slitting blades I set up an experiment on the lathe to test my thoughts about the power and speed. The 3/16 thick ebony was cut at 375 RPM The Apple was cut with the back gear set and the speed was 25 rpm The slitting saw was 1 3/4 inch diameter x .014 thick The slower speed was harder to feed through but did not burn or clog. Neither did the ebony. My conclusion from this limited experiment is that with a slow speed you need a lot of power or a gear head drive that will not bog down, A rheostat generally reduces the amount of electricity to create the slower speed and so the motor cannot operate with full power. Michael


-
Exquisite finish on the hull Dan. Michael
-
2 and 3 look like suspects to my eye. Michael
-
Microlux Tilt Arbor Saw Problems
michael mott replied to capnharv2's topic in Modeling tools and Workshop Equipment
Interesting pictures Harvey I would be curious as to what happens if you wax the blade after cleaning the resin off it and then try the cherry again. I just thought about the issue of the fast Vs slow speed. Does the motor slow down as a result of a rheostat or is the voltage modulated but at full power. if it is a rheostat then that would be why the motor bogs down at low speed, it would be underpowered. Michael -
Enjoy your vacation John. Stag is coming along very well. Michael
-
Microlux Tilt Arbor Saw Problems
michael mott replied to capnharv2's topic in Modeling tools and Workshop Equipment
Harvey I just had an Idea, what happens if you run you blade at a very low speed and with the blade up as high as it will go? Michael -
Microlux Tilt Arbor Saw Problems
michael mott replied to capnharv2's topic in Modeling tools and Workshop Equipment
Harvey I have just read through this entire thread, I do not own either a Proxxon or any other small saw. From what I have heard so far I see a number of things that you need to take into account. 1) The first thing is that the very fine slitting saws were not designed for cutting hard wood, they were designed for cutting metal with a lubricant. 2) the issue of the vibration and wobble is caused by the blade buckling from the heat. this is as was suggested that the space between the teeth is filling with wood and the blade then acts like a solid disk with no teeth. 3) use a blade with courser teeth. Think about how the blade on a bandsaw works or a jewelers saw you are faced with the same issue when cutting a thin sheet of metal with a jewelers saw one need to have at least 2 teeth that will sit on the edge of the metal so that it does not fall into the space between the teeth however on the circular saw the teeth are not at a right angle to the material being cut so the very fine teeth have a much more difficult time. 4) If you raise the blade to its highest position then the teeth will be more vertical and so less teeth will be engaged with the material being cut. 5) The best solution is to use a blade with fewer teeth. I did take a look on the net at the Proxxon saws and also for slitting saws. and the 80 tooth would be your best bet. Michael -
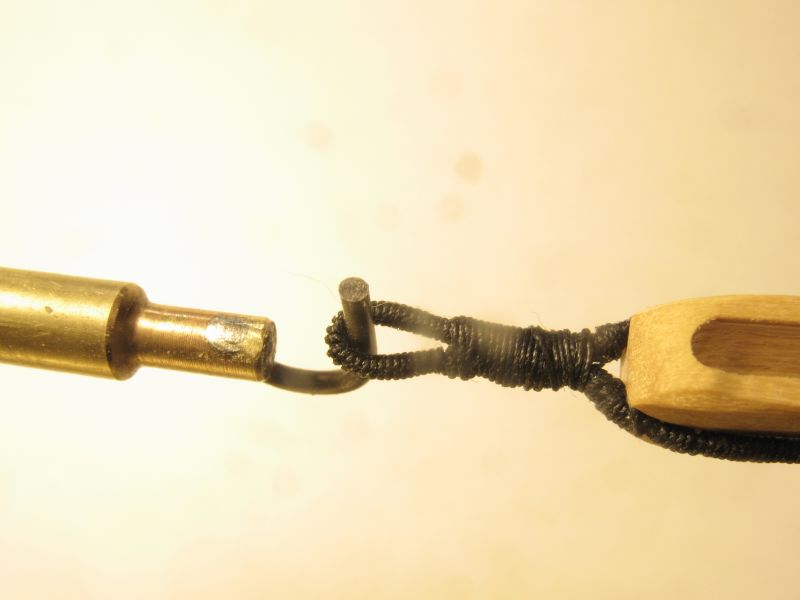
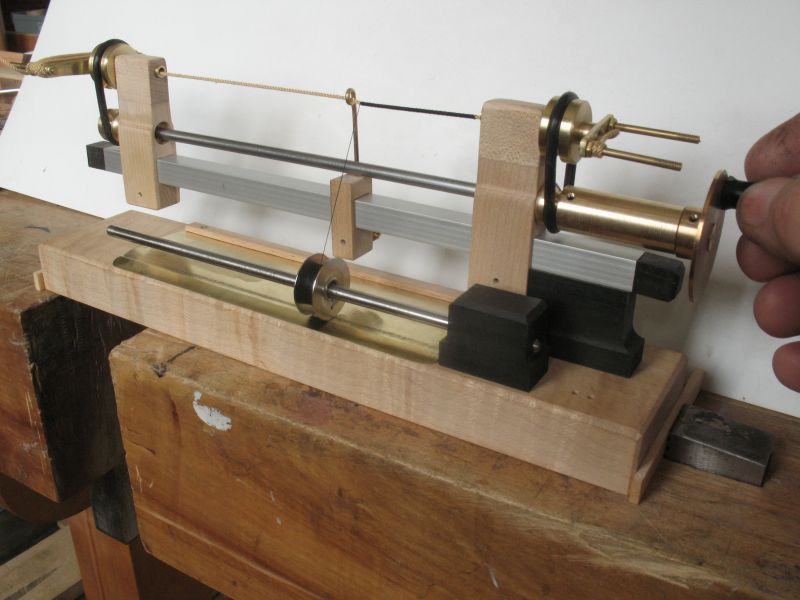
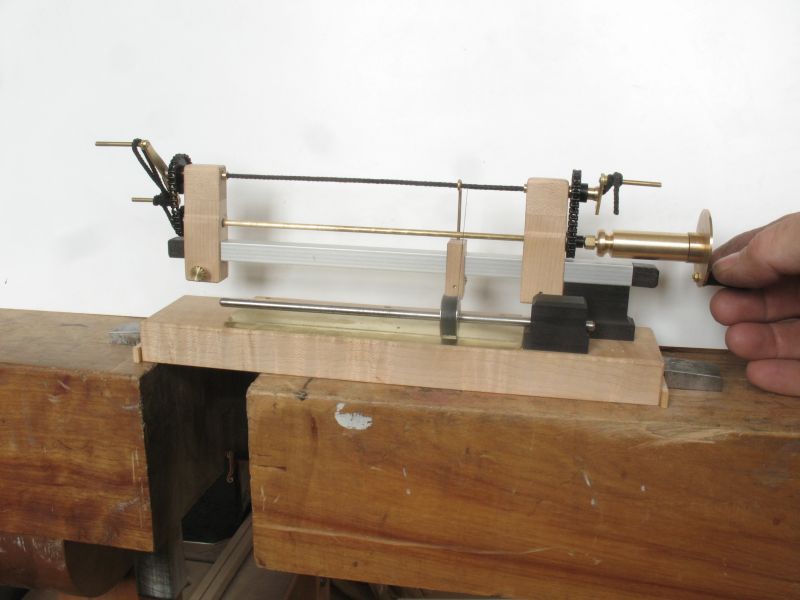
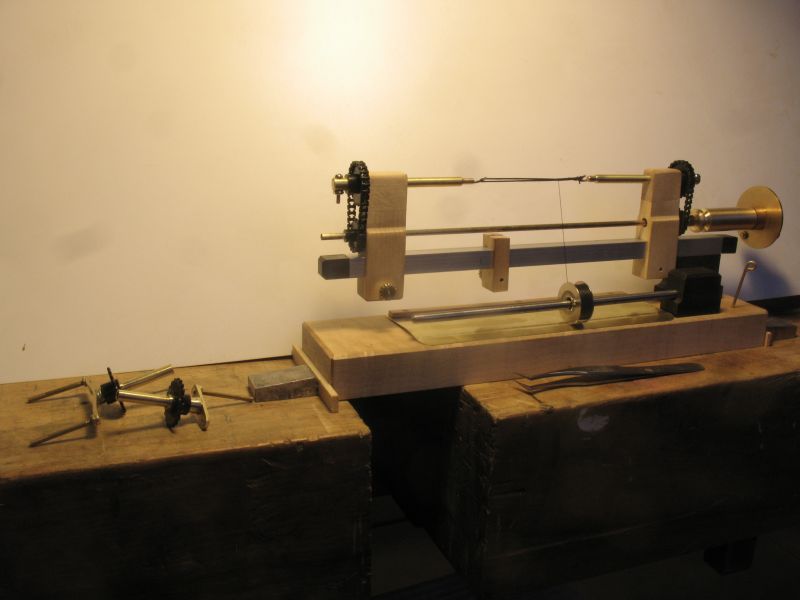
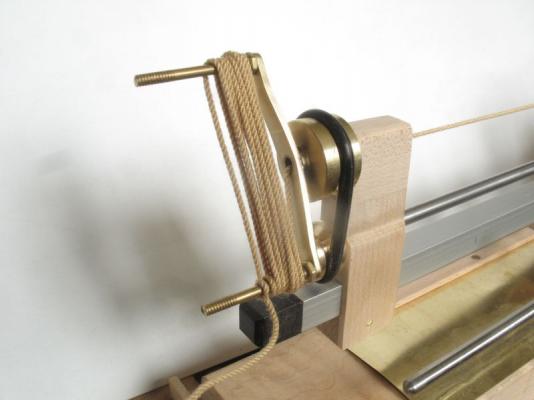
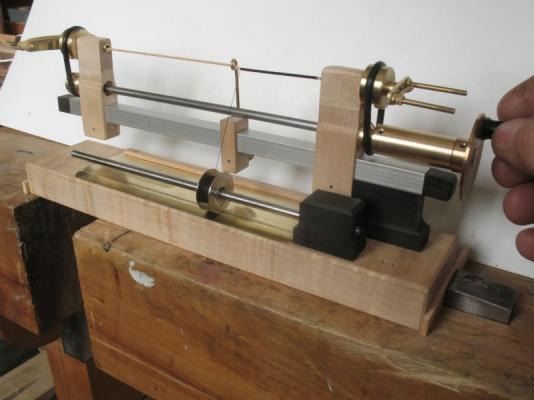
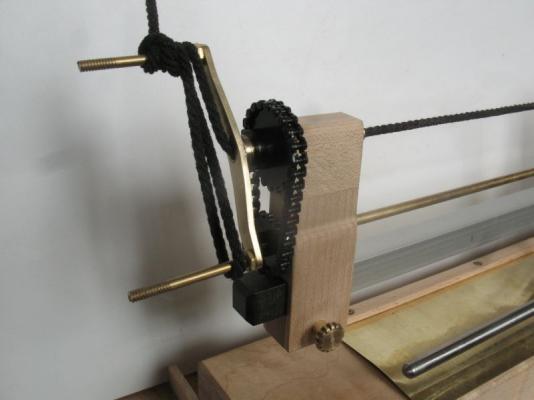
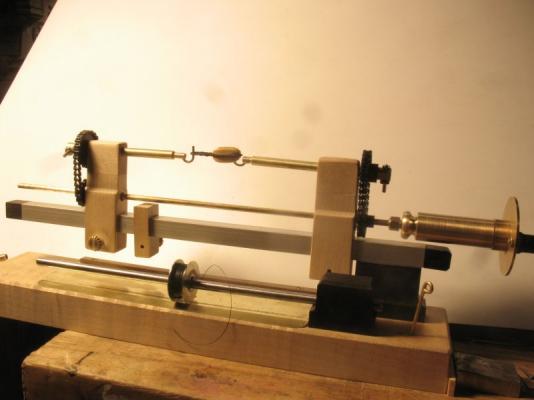
As a result of watching Alexey's video of his machine at work I realized how much superior his design is compared to the one I made. I went to work to make my one work better. Thank you Alexey for sharing your design, I hope your sales go well. The thing that I originally did not understand was the need for some sort of gearing and so that is why my original design did not have any, having used mine I realized why the need for the gears. So because I already had the basic structure I added a way to transfer the motion from one end to the other by adding a second shaft and some O ring drive belts not perfect but a much better way. Also I added the wings to the top shafts to wind up the the extra rope which is so much better than having fed through the plastic tube. (hey I am trainable) Because the O rings on the brass were slipping more than I would like I searched through the scrap gear box looking for some gears to give a positive transfer from end to end as in Alexey's design, after some hours mucking about with re-machining some gears, I remembered the Servo-link gears and chain I had purchased for some model train stuff I was working on a while back. As they said in one of the Monty Python episodes "this was the turning point for the Dinsdale Brothers" Sorry I just couldn't resist. The Servo-link stuff was perfect . The next part was the main reason for the exact sync making the Becket which requires two hooks that rotate the same speed. I am able to swap out the serving shafts for the hook ones. after serving the strop and binding the ends together so that it is a continuous ring slipping it over a block and adjusting it so that the connecting area will be under the seizing. And a final shot it is a bit untidy but I know that this will improve, the one thing that was a bit of a problem for me was the block wanting to come off the hook, so a modified hook will be in order. Again big thanks to Alexey for sharing his design, One of the great things about this site is the willingness of members to share their findings, (and windings) Michael


-
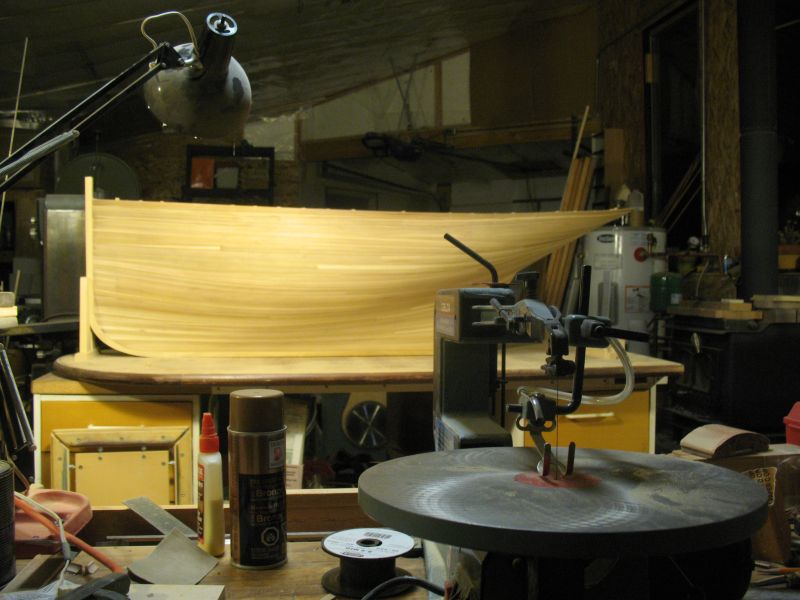
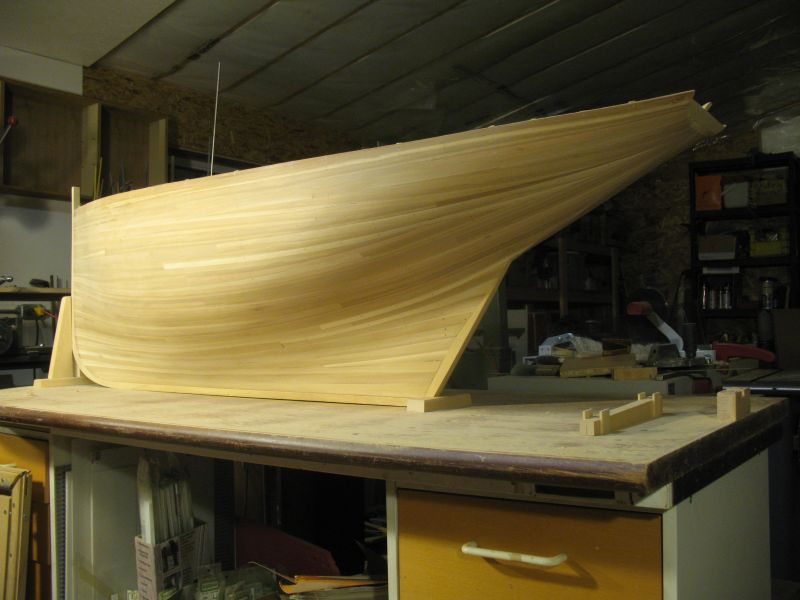
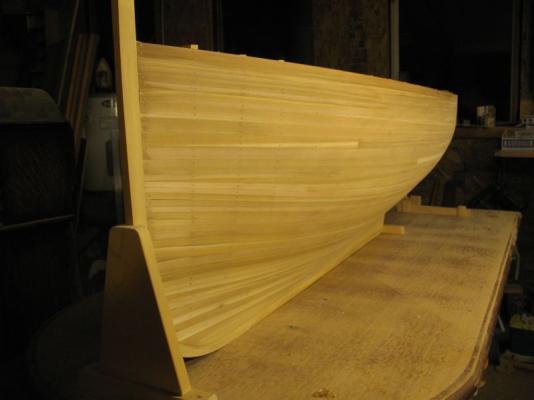
I respectfully have to disagree, it depends on the type of hull and how you will be finishing it. this is western red Cedar on my hull. Michael


-
Hello Jamie, just checking in for the first time, I enjoyed the rebuild of your log I did not see it first time. impressing work with the chisels to fair down the solit wood. all the small rigging details were good to follow as well. Michael
-
Funny I didn't think they had photography that far.... back I could be wrong of course... have been many times before Michael
-
Waiting for the next step....... Michael
-
Lends a whole new spin on 3D printing. Michael
-
SS Vinal Haven by TBlack - FINISHED
michael mott replied to TBlack's topic in - Build logs for subjects built 1851 - 1900
I would imagine a gimbled stove in the galley Michael -
Nice clean work. michael
-
So did you properly half lap the slats on the hatches? inquiring minds want to know! Looking good Sir Michael
-
ancre Le Fleuron 1729 by rekon54 - 1:24
michael mott replied to rekon54's topic in - Build logs for subjects built 1501 - 1750
Rekon your work is a work of art! you make it look easy but we all know how much time and knowledge it takes to transform an idea into a three dimensional piece. Your work is inspiring to say the least. Michael -
ancre Le Fleuron 1729 by rekon54 - 1:24
michael mott replied to rekon54's topic in - Build logs for subjects built 1501 - 1750
Yes, thank you for sharing these amazing work of craftsmanship. Michael -
Danny thanks for the explanation it is just the Monty Python mind that I have been given that makes want to question everything.Back to whenever, [Ere' wot are you doin' puttin' that beam there 'aven't I told you to do what I tell you] it just bubbles up now and then.thinking of the crew that were building these amazing vessels. Michael