HOLIDAY DONATION DRIVE - SUPPORT MSW - DO YOUR PART TO KEEP THIS GREAT FORUM GOING! (Only 20 donations so far - C'mon guys!)
×


michael mott
-
Posts
5,198 -
Joined
-
Last visited
Content Type
Profiles
Forums
Gallery
Events
Everything posted by michael mott
-
 Hello Walter it is great to see that you are progressing with this interesting build. Michael
 -
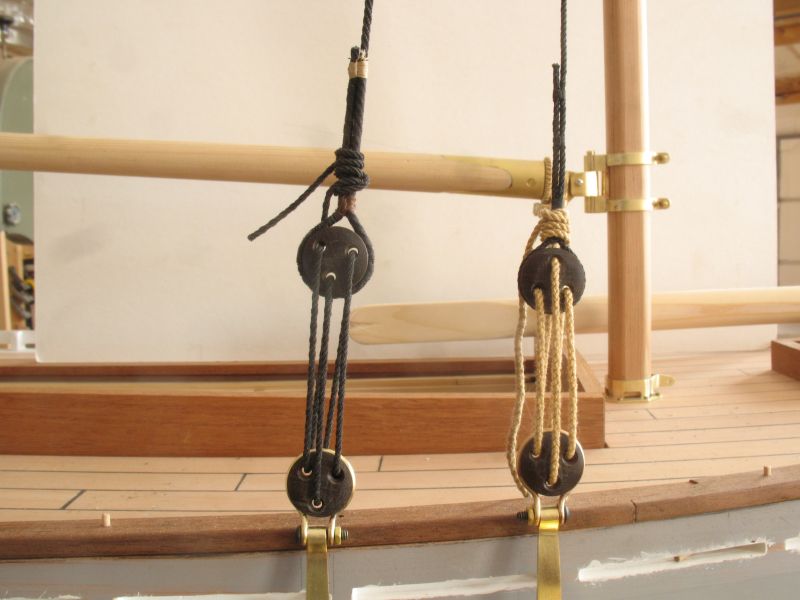
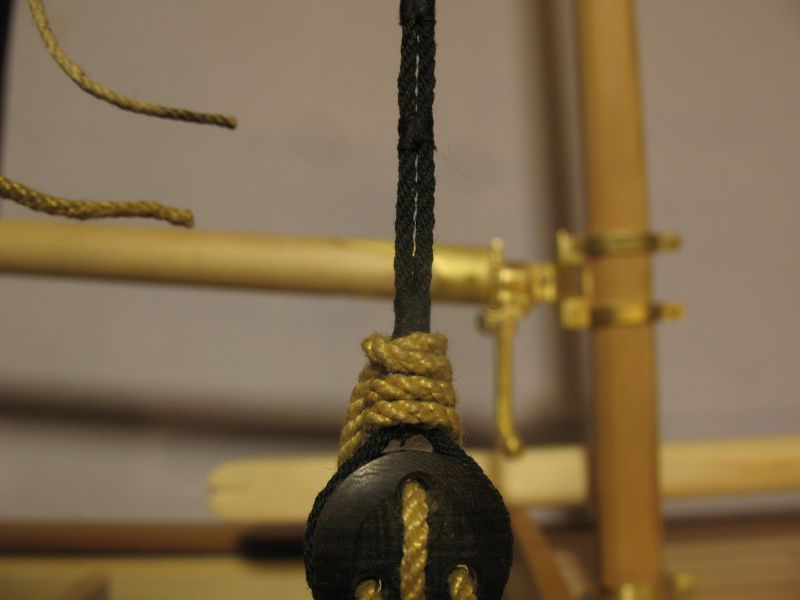
Well it has been a Good Friday. Sherry, thanks for your comment on the new shroud test. Russ, Thanks, I will need to make enough lanyard now for all four sets of deadeyes, it will be simple 3 stand rope which will be much mor flexible than the 4 rope that I used for the new test. Carl, The jury is still out on the light verses dark rope for the lanyards, I have seen it both ways on the photos of the cutters and smacks. John, thanks for the info regarding the seizings. Mark thanks for your thoughts. I really do like making the small tools and devices. I am interested in your ideas about the adjustable stop. The snow is finally melting here still a fair bit to go yet before the lake thaws out there were still ice fishermen out there this afternoon. Michael
-
Hi Mario, I really enjoyed this build the first time round, I am happy that you are reposting it. Michael
-
Karl , Absolutely exquisite!! you inspire me to do better work. Michael
- 662 replies
-
- 1
-

-
- bonhomme richard
- frigate
- (and 1 more)
-
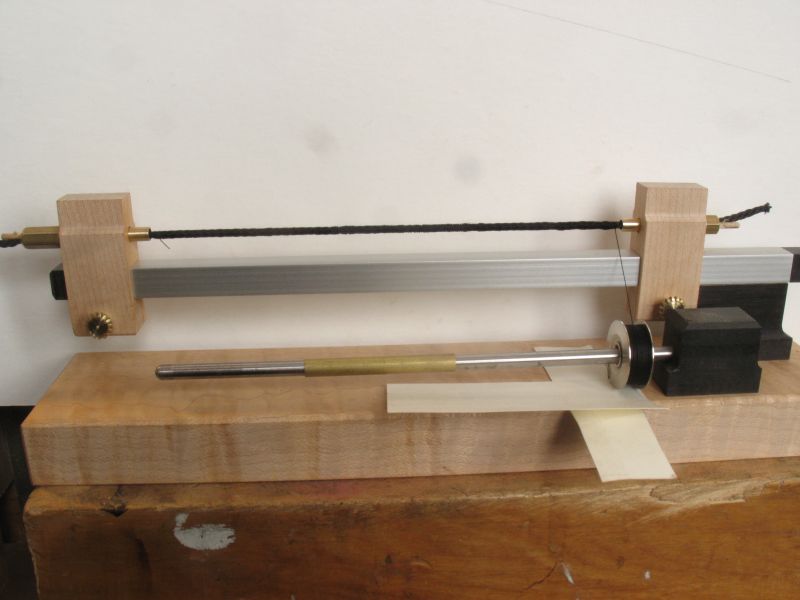
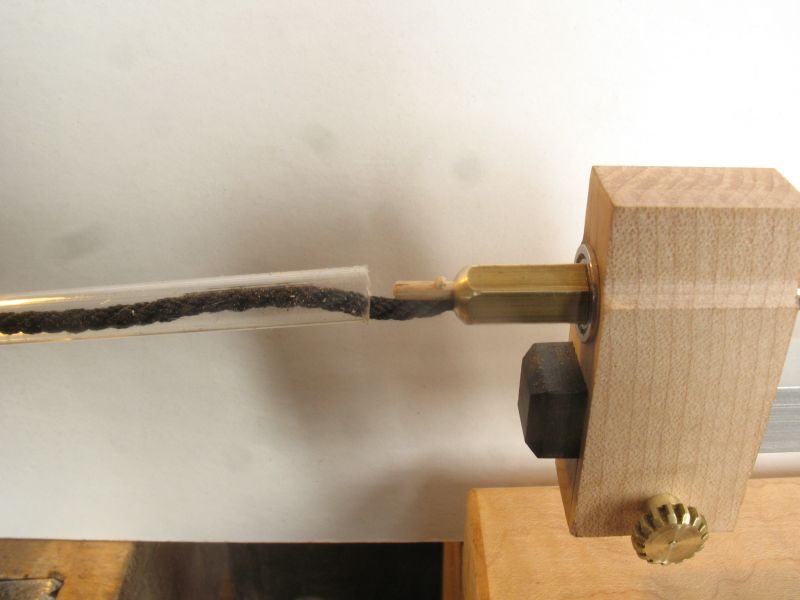
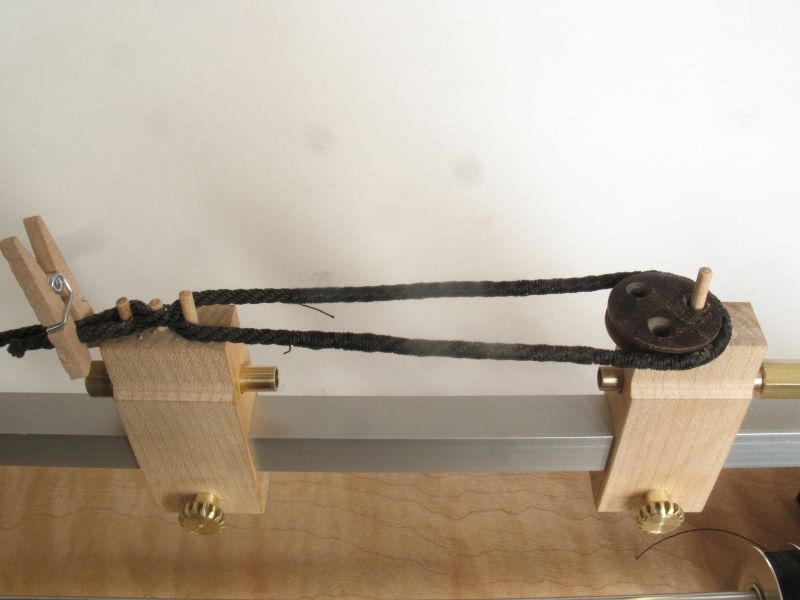
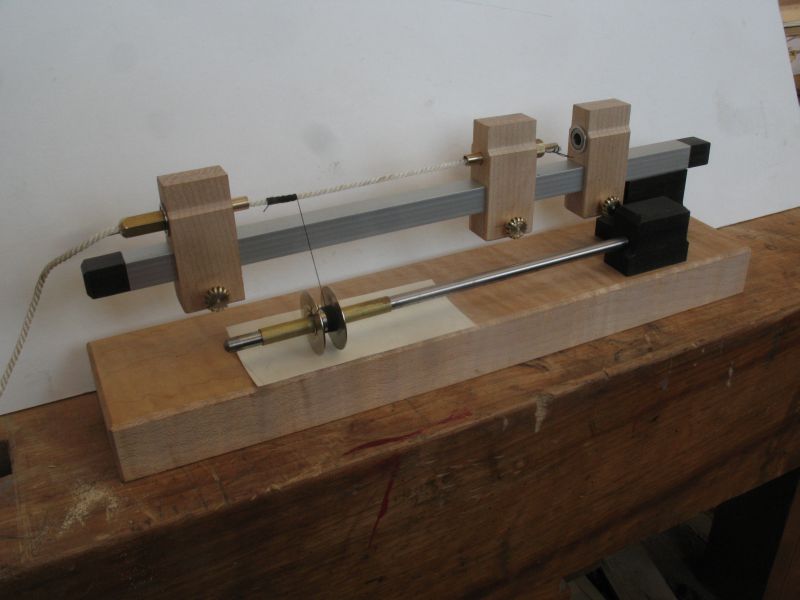
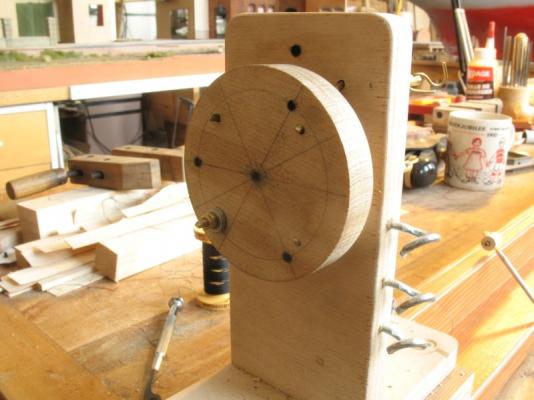
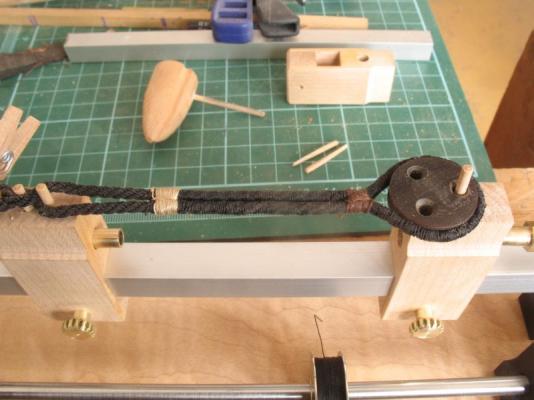
First a modification to the ropewalk by adding some more holes in a square configuration allows for the easy winding of shrouds. A simple and quick change to set up. The issue of the long end is solved by laying it in one of those clear plastic shipping tubes that brass tube comes in , I actually needed 2 of them as the shroud was longer than 36 inches. Procedures become clear as we figure out stuff and the winding was done at the left hand side which although worked well enough, I needed to be careful because the shroud was being wound up to the right it was in an unwind mode to the left . I will swap the rotators end for end so that the winding one is to the right side that way the shroud will be wound up all the time. As the serving is being laid on. This will have the added advantage of allowing the some of the served end to be fed through the winding end if a longer section of serving is needed . The shorter distance between the rotators helps to reduce the amount of tension needed to keep the shroud taught when serving. The other thing I notice was that the bobbin came off the brass centering sleeve, this had the effect of letting the bobbin sit on the wood base, this gave the bobbin enough friction so that the tension of the windings were consistent and also the bobbin was pulled along the length by the thread that was feeding onto the shroud. By doing this work slowly and by simply turning the rotator by hand the lay can be very easily controlled and it really does not take that long. The way of clamping the deadeyes used the basic principle of pegs in a hole. the seizing then went easily, A change I would make on a new one would be to add a little more distance between the aluminum bar and the shroud this would facilitate an easier access for my big fingers, Of course tweezers and dental hooks would also help. Michael


-
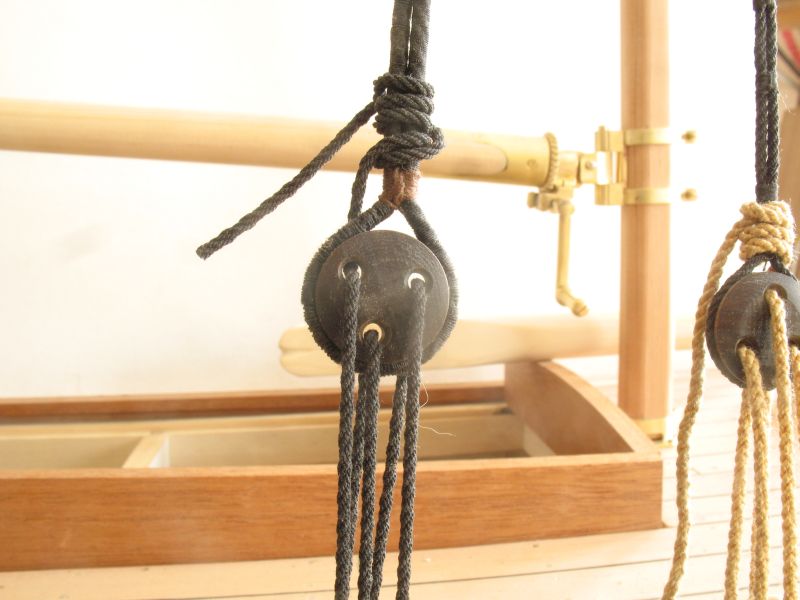
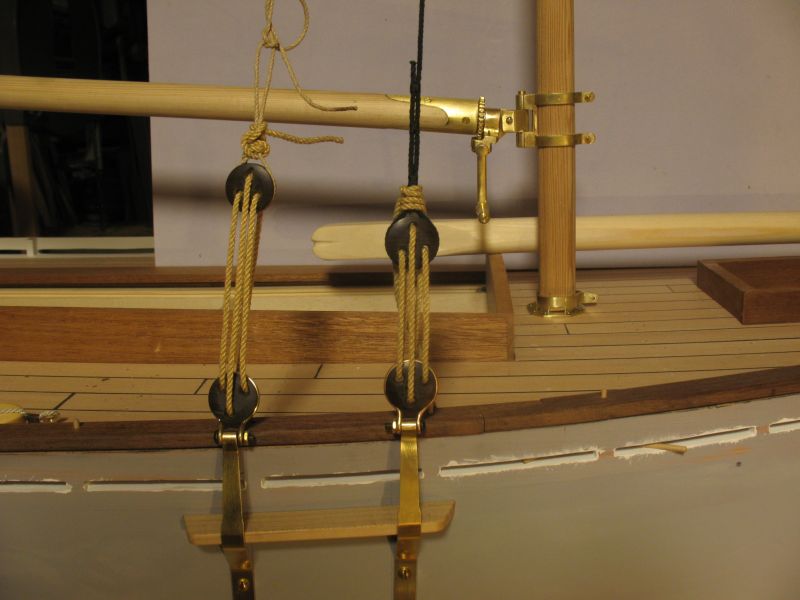
Set the new shroud up in the serving machine and did the serving. Next time I will switch the rotators end for end so that the turning is done from the right hand short end of the shroud this will make the long loose end continually in wind up direction instead of an unwind direction. I also noticed that when the bobbin came off the brass sleeve and was loose on the 3/16 shaft the bobbin sat on the base and created just enough friction that it wound up nicely and traveled along by being pulled by the wind. I will see if this will work for the full length on the next one. The other advantage of switching the feed end is that I can feed some of the served end through the right hand rotator to serve a longer length if needed . laying the loose end inside the clear plastic tube that some of the metal tube comes packaged in worked a treat. The clamping method finally became clear as began working on the setting of the deadeye, simple pegs in the top. I looked at a couple of different weights of seizing thread and also different colours I like the contrast with the lighter colour and I like the heavier Koban next to the deadeye ,so next trip into town I will pick up some tan coloured Koban A quick look at the new shroud in situ, I used some of the first shroud as a lanyard, It is not as flexible as a 3 strand rope so I will make some black rope for the lanyards. Michael


-
I found a little time this evening to have a go at another shroud. I did not take any pictures this evening I will take some tomorrow. I reset the whirl end of the ropewalk after making the 4 ropes of 3 strand I increased the number of threads in the 3 strand rope to 6 per strand from 3 in the first shroud. I drew a square layout on the circular disc and drill a new set of holes. The rope strands were even now. and the shroud formed up really nicely on the ropewalk. the new shroud is .093 Diameter the first one was .062. In scale the .093 works out to .7 inches which is just under 3/4 inch in scale. it is actually closer to 23/32 in scale numbers. It looks much better on the deadeye. Now I can use the .062 as the lanyard. Also tomorrow I can see how it looks on the serving machine. Michael
-
Daniel I liked the shape of the first hull better, although the lpanking on this one is a little crisper. Michael
-
Nice Russ, sometimes i have a difficult time sorting out the size of some of these parts. Close up photography creates the impression that so much of this model work is big, when it is not big at all. Michael
-
Doris I have to echo what Anja said I cannot think of anything else to say. Michael
- 883 replies
-
- 2
-
-
- royal caroline
- ship of the line
- (and 1 more)
-
Dee Dee, your rudder fix is good, Looking forward to seeing the rest of the build. Thanks for the kind words about my build. Michael
-
Pretty neat Bob, I too thought that you had used brass even though you said it was card. Michael
-
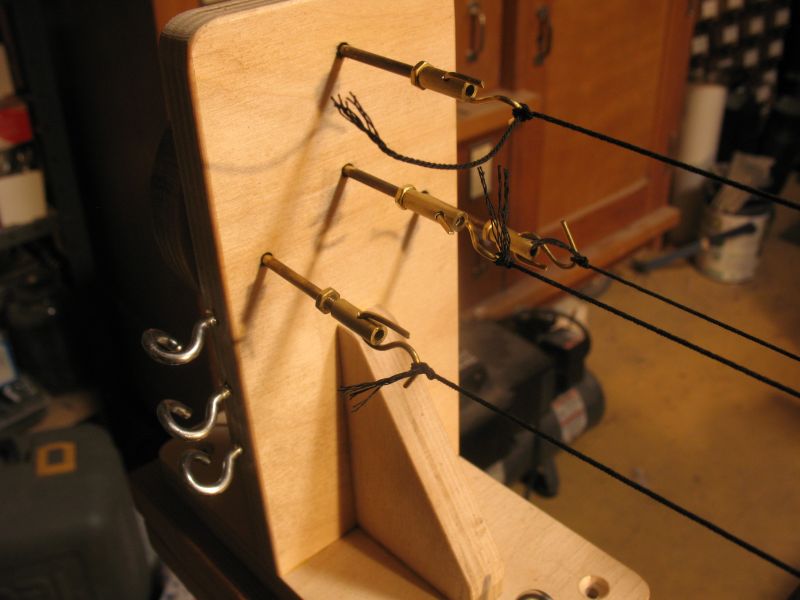
Bob thanks for checking this out. Druxey, funny you should ask those questions, because I was wondering myself just how to deal with the end that did in fact flap around as you say. So I haven't been out to the shop yet this morning I had to deal with our heating system. Anyway my thoughts about flapping around are to slide the loos end through a 36 inch length of brass tube, that way it can rotate all it wants. How does everyone else deal with the flapping end? The other thought is to let the loose end dangle over the end of the bench. The second question regarding the second clamp it is a spare and I should have made 4 not three. I was thinking of some different clamping devices for doing the seizing around the deadeyes. Michael
-
USF Confederacy by Rustyj - FINISHED
michael mott replied to Rustyj's topic in - Build logs for subjects built 1751 - 1800
Wow those parts are tiny, the bow looks very sharp indeed. michael -
Carl, It is funny I got so focused that I realized by 3:30 in the afternoon that I had not eaten anything all day. Plus I had all the supplies. Good morning Druxey, I made 3 slides anticipating other clamping ideas At the moment it really need not be stored there. and it just taking up room. Had I been thinking it through I would have made 4 or the two that are in use a little wider at the top. It is a work in progress. That's my excuse and I'm sticking to it. Michael
-
:D Michael
-
Nico I think you are short changing yourself on the canopy. The rest of this superb build could support a full canopy done with thinner cloth. Michael
-
Sherry I echo the comments above. Michael
-
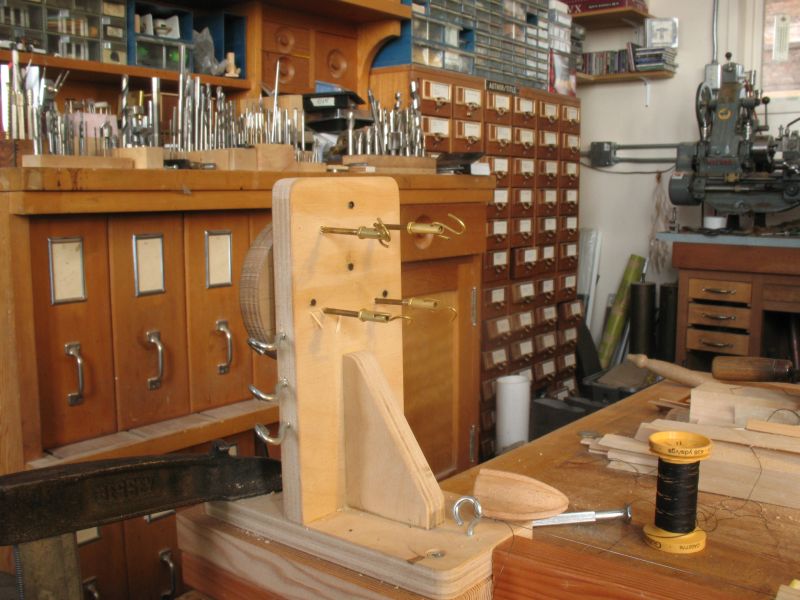
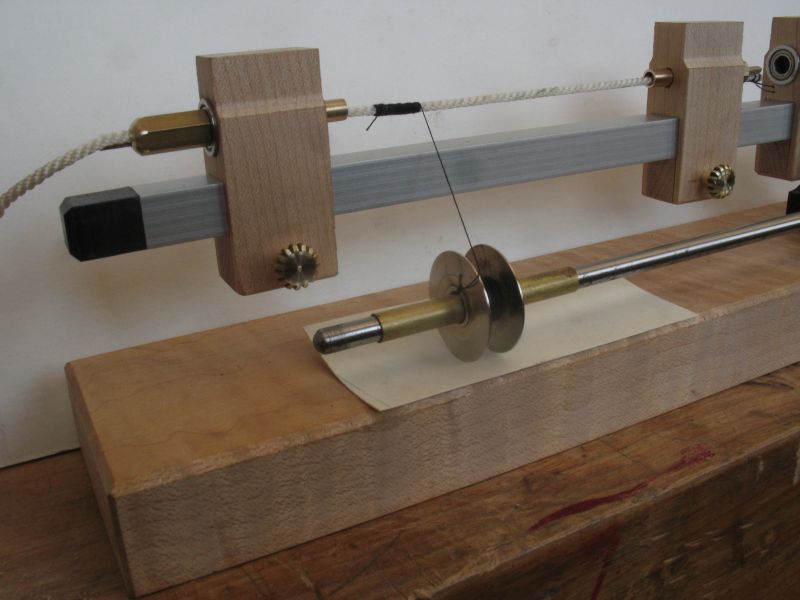
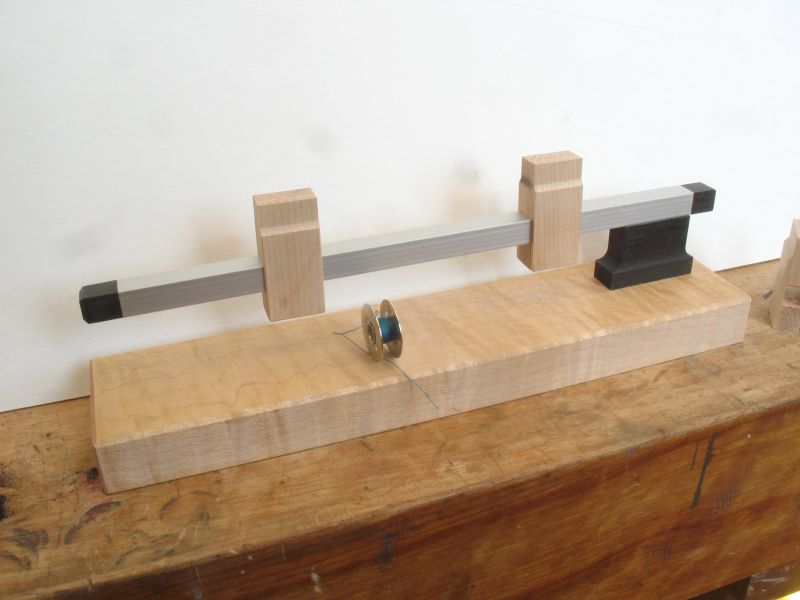
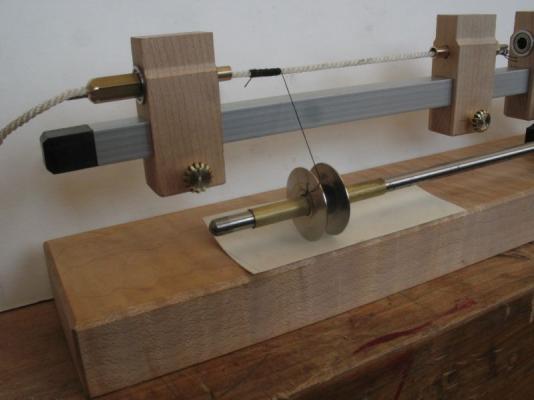
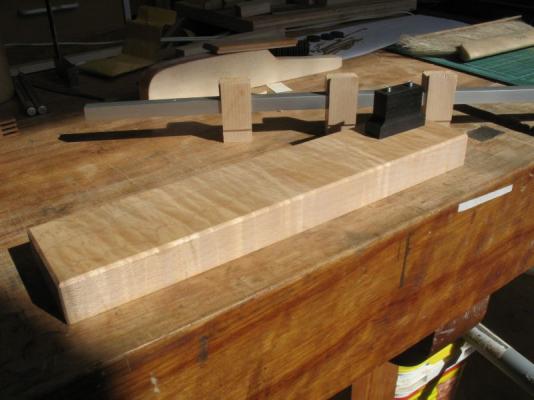
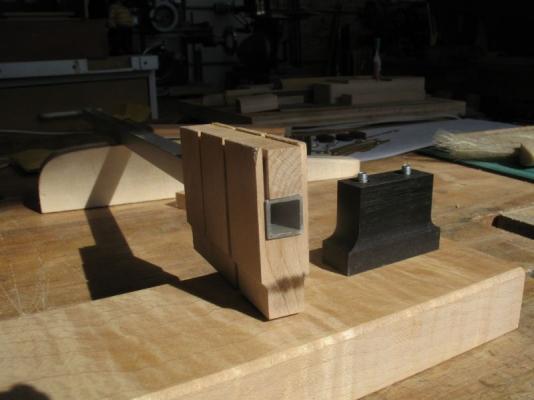
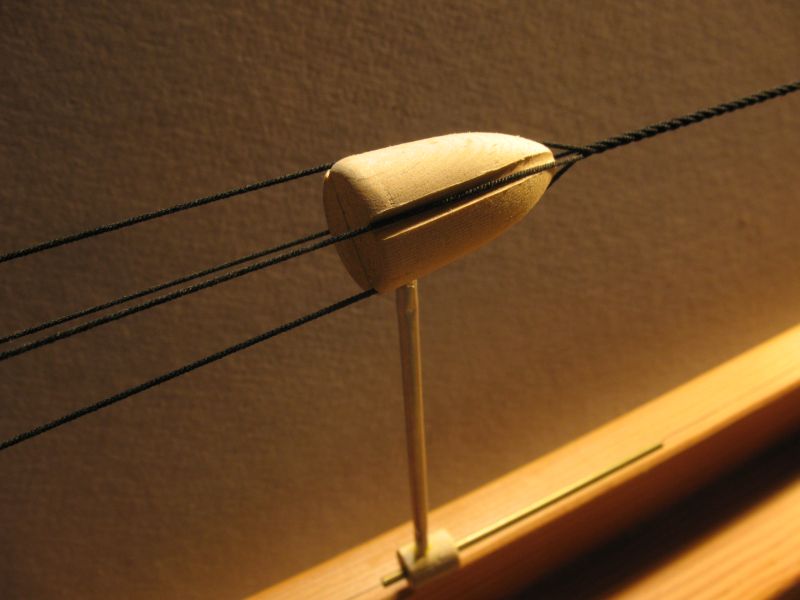
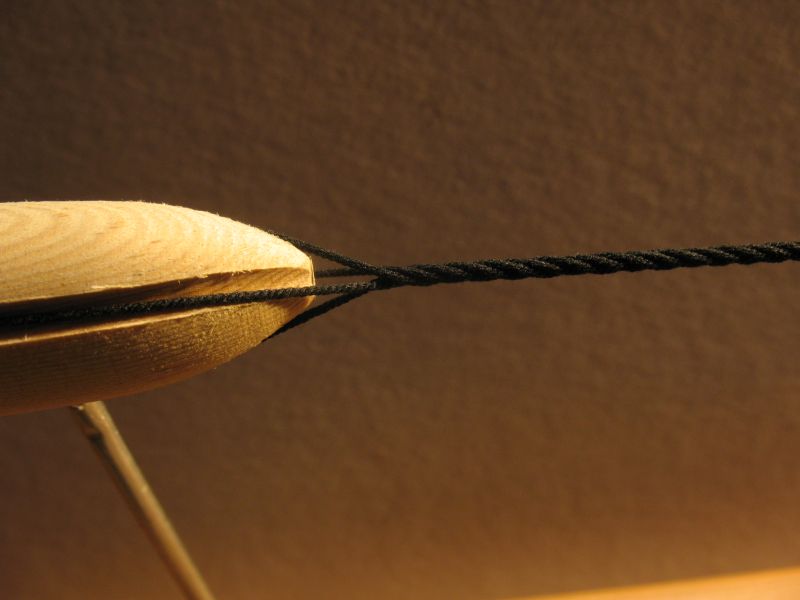
I could have added to the other thread I suppose but it wasn't my serving machine. After getting frustrated with the tiny bit of serving that I did yesterday I opted to make a tool that was a little flexible in its uses. Raiding the scrap boxes for wood and metal after doodling while having the early morning coffee I came up with a design that I hope will serve me well enough. I found a nice piece of Fiddle-back figured Maple for the base, a short length of 3/8 anodized aluminum tube, some scraps of Ebony. The sliding maple blocks on the aluminum tube were made from salvaged maple I found at the dump.a while back. I cut a channel in the block first with a 3/8 end mill then glued in a block that was 1/64th thinner to the back side this was in order to allow it to slide and to act as the base for the threads for the locking thumb screws. I shaped the ebony just because I could. I mounted everything on a single pedestal so that I could slide them off and put on different clamps or devices yet to be imagined. I also thought I was being original until I noticed that a lot of other fine builder had used sewing bobbins for the thread. That universal mind just keeps cropping up. The end caps in the aluminum tube are ebony. I used Dafi's method of clamping the rope in the rotating holder just simple tapered wedges. the rotators are turned from a length of 3/8 brass hex stock.and are a snug fit into the small shouldered ball races that a friend gave me, he was a helicopter mechanic, and the bearings get replaced after so many hours. I have hundreds of them all different small sizes. If anyone needs a couple let me know. The thumbscrews were turned from some brass pinion stock that I have had lying around for years and since I do not have a knurling tool this was the next best thing. they are threaded 4x40 The rod for the bobbin was set so that the bobbin could just turn freely and with a layer or two of card slid under to add tension. It can also just slide off. I did not get into the complexity of gearing as the hex rotators turn freely enough. A clamping arrangement will be added to the tops of the sliders for doing the seizing of the shrouds around the deadeyes. That's it for now. Michael


-
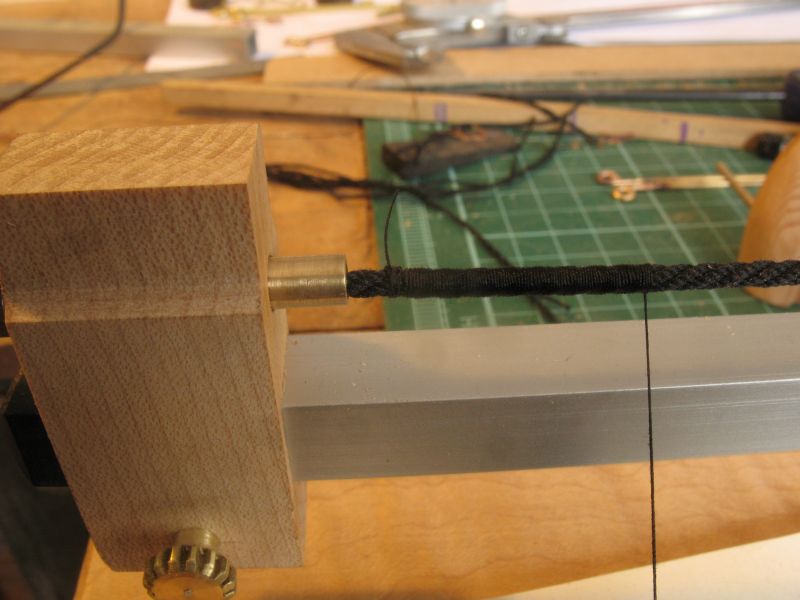
John, Russ, Doris, Carl, Popeye ,and Bob, thanks for dropping by. Today I whipped up (pun intended a little serving tool that will also be able to be used as a clamping jig. I will post full details on the tools and jigs section. Here is a shot of the tool in action I used black on white for the photo. The sewing bobbin which can be easily loaded on the sewing machine is a slide fit on the shaft and close enough to the base that a layer or two of card acts as a brake. I used Dafi's method of securing the rope in the tubes with wedges, The tubes are running in ball races to reduce the friction. The slides cad be easily slide off the aluminum bar. and locked with the little thumb screws Michael.

-
Matt your model and work is absolutely stunning!!!. Michael
-
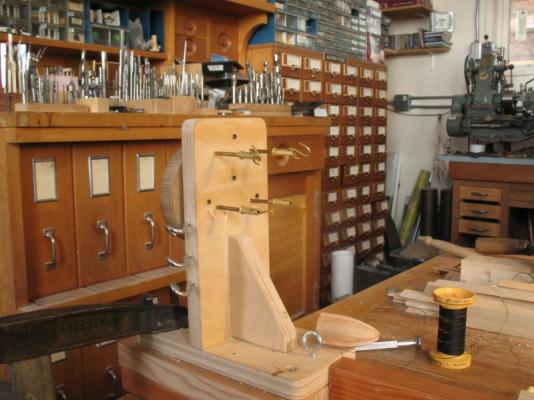
Russ, Sherry, John, Germanus and Alex. Thank you all for your kind comments. I picked up some Gutterman Black No 50 cotton thread today and followed Longridge's method of using 4 x 3 strand ropes, I only used 3 threads instead of 4 in the three strands of the smaller ropes I should have used 4 threads in each strand. It was a lot of work regardless. The four ropes each rope was formed from 9 threads instead of 12, so I ended up making the shrouds a little on the light side. I did some seizing with the same No 50 threads and test fitted the shroud rope around one of the deadeyes, I was a little disappointed because of the mistake with the numbers of thread in the smaller ropes, because this made the shroud 16 threads thinner than it should have been. I need to make a serving jig and a better clamping method than the crocodile clip stand for doing the seizing. I am also thinking that a geared powered ropewalk with be the ticket, So I will have to get cracking on one of those as well. I must admit I got tired of winding by hand. Michael
-
Kip Great to see you back up and running. I will be out on the Island later this spring, visiting my son and grandsons. I hope to be able to get up Island and visit. Michael
-
David, Beautiful job on the sails and the whole build. Michael
-
Looks great Bob, I am suddenly hungry for a banana. Michael