HOLIDAY DONATION DRIVE - SUPPORT MSW - DO YOUR PART TO KEEP THIS GREAT FORUM GOING! (Only 24 donations so far out of 49,000 members - C'mon guys!)
×


michael mott
-
Posts
5,198 -
Joined
-
Last visited
Content Type
Profiles
Forums
Gallery
Events
Everything posted by michael mott
-
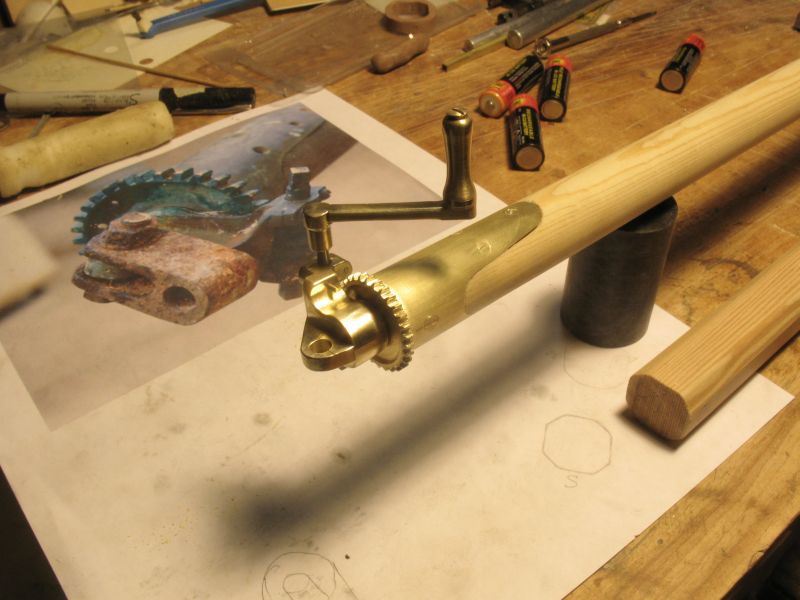
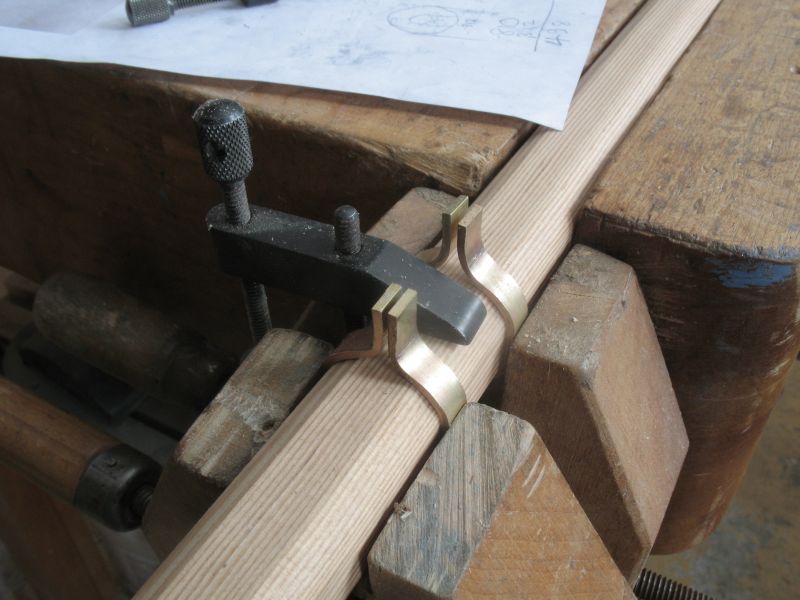
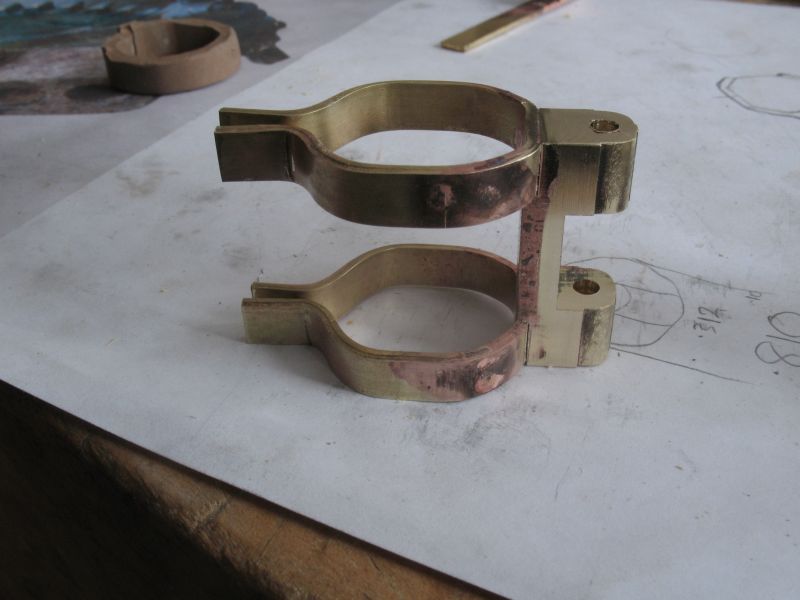
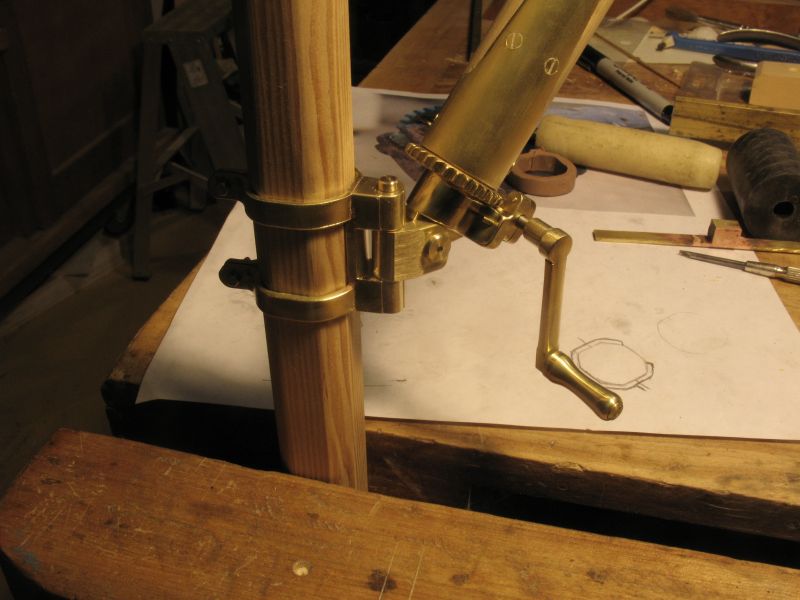
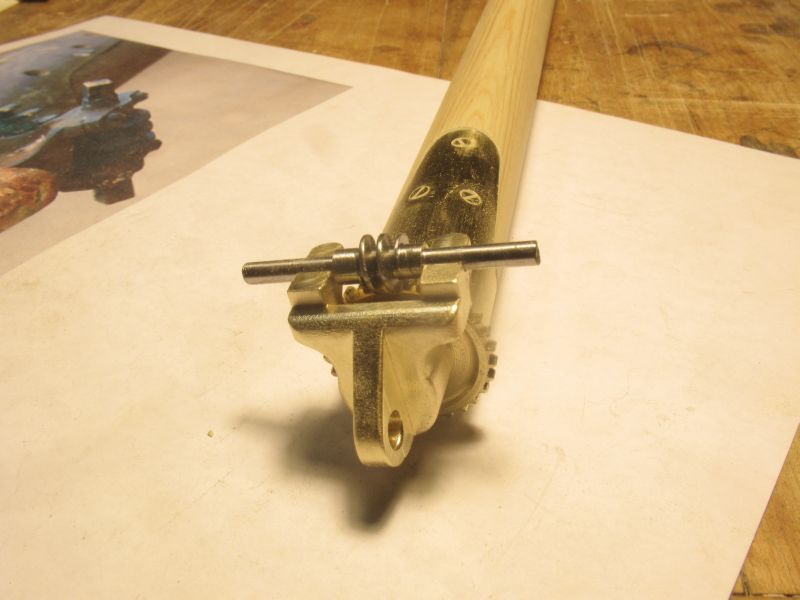
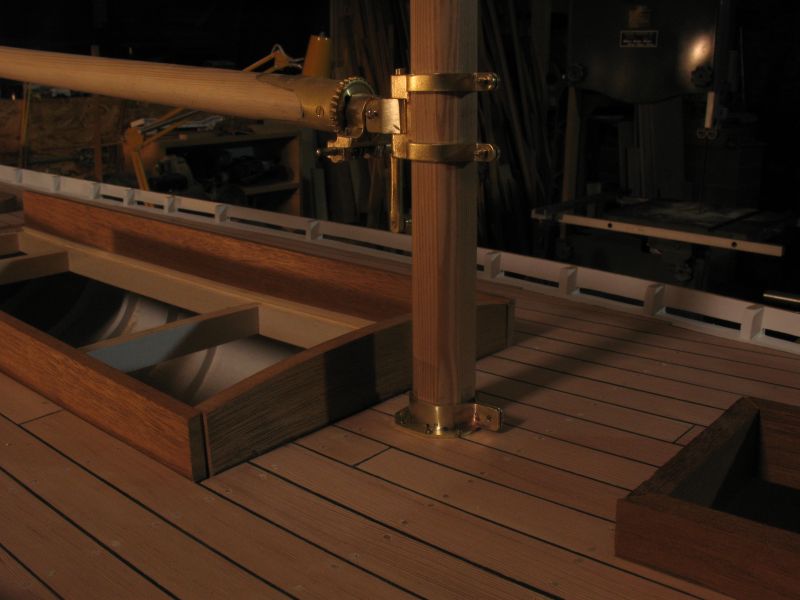
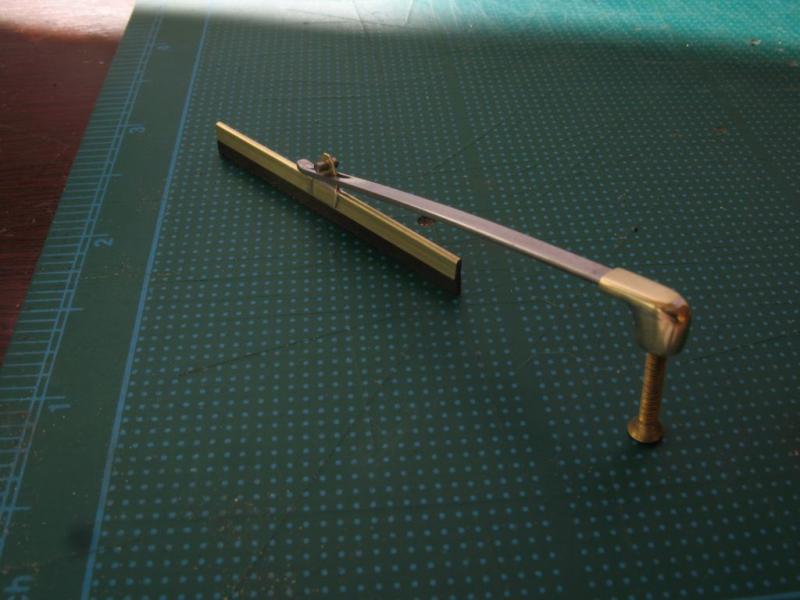
 Goose-neck Part 2 continuing on this picture does show the roller reefing that inspired my version. the worm was held in place with two retainers that were filed up and bolted with 2x56 round headed machine screws, the shaft through the worm is 1/8th diameter filed square at each end, so the the reefing can happen from either side. The part of the goose neck that is fitted to the mast was inspired by one from Cockwells web site . The first step was to machine up the block to mate to the boom(this needed extensive fining to allow the boom to swing when I mated the two parts together) the top and bottom straps were silver soldered to the block this also annealed the bands. I used this same technique for the base step band. The soldered and formed piece. ready for clean up, .. files, emery paper , steel wool . Final assembly end of roller reefing Michael
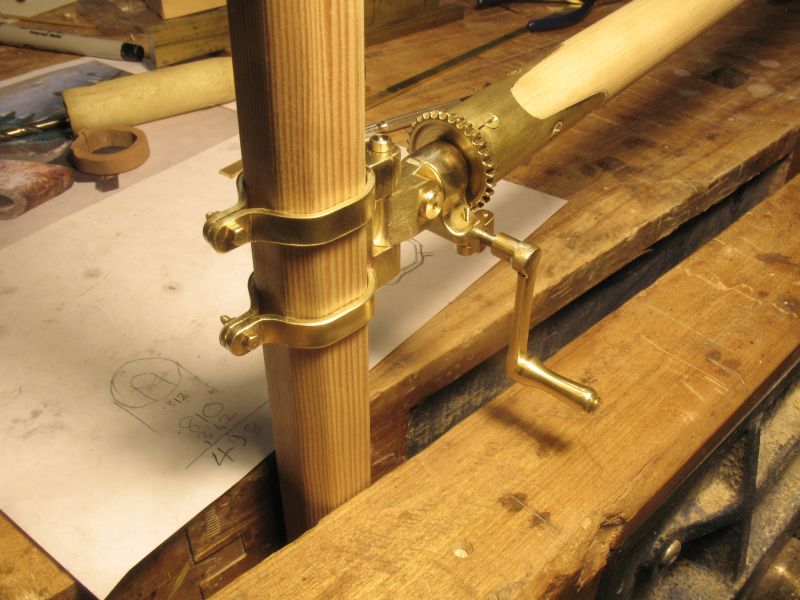
-
Russ thanks, for those words, I must say when I was about 15 I went to the Round Pond in Kensington Gardens in London and I saw a model of a gaff rigged boat it was a good size and I was smitten by the superb detail on that model, it took me 45 years to get my rear in gear to make a boat similar in type. Michael.
-
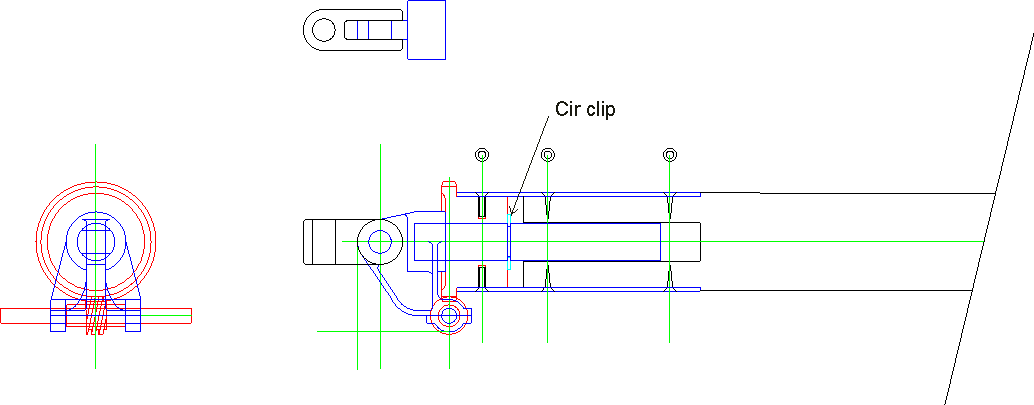
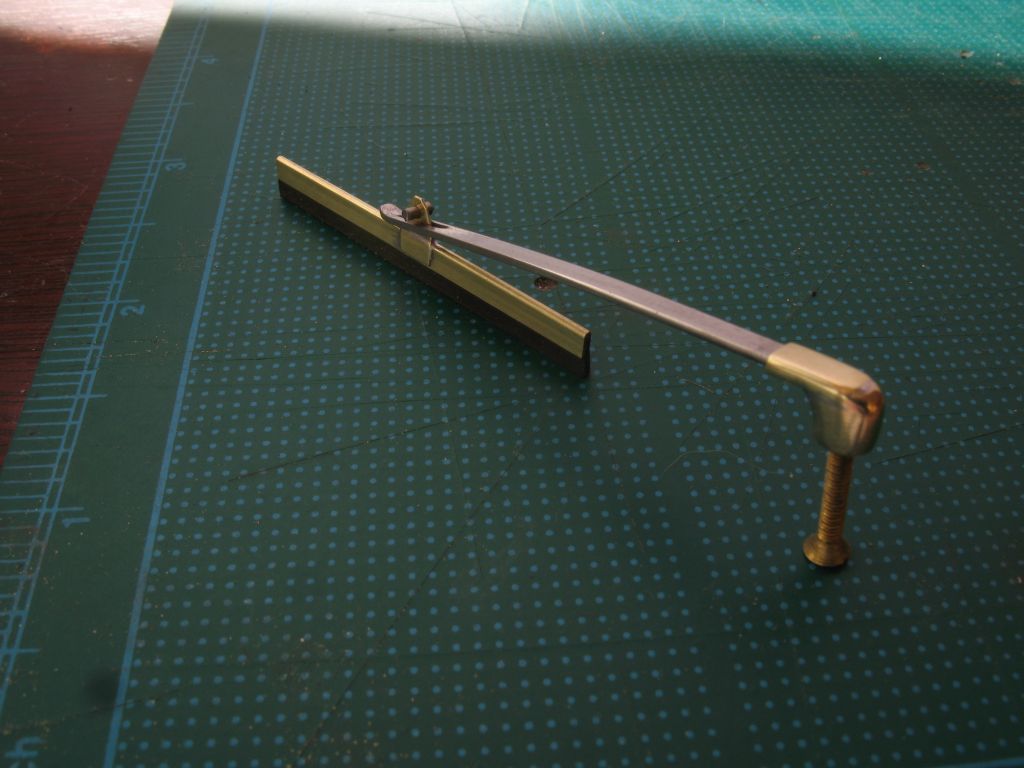
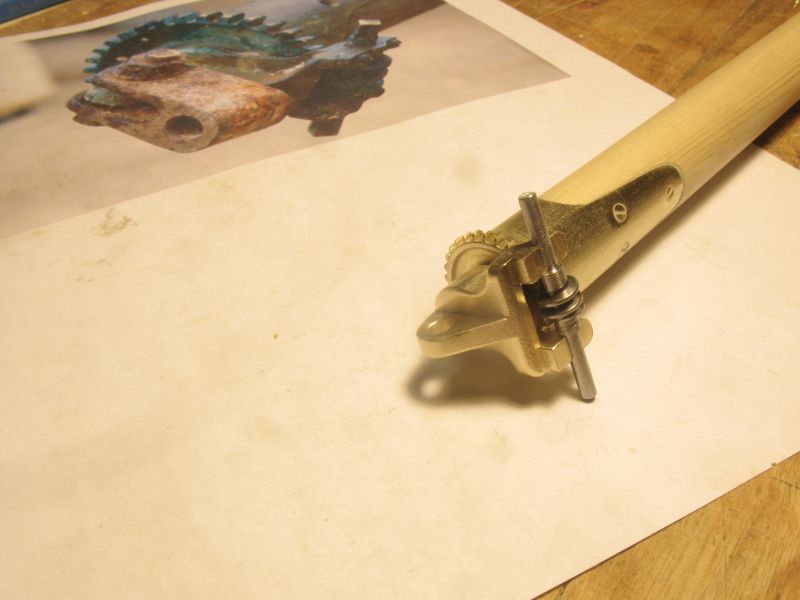
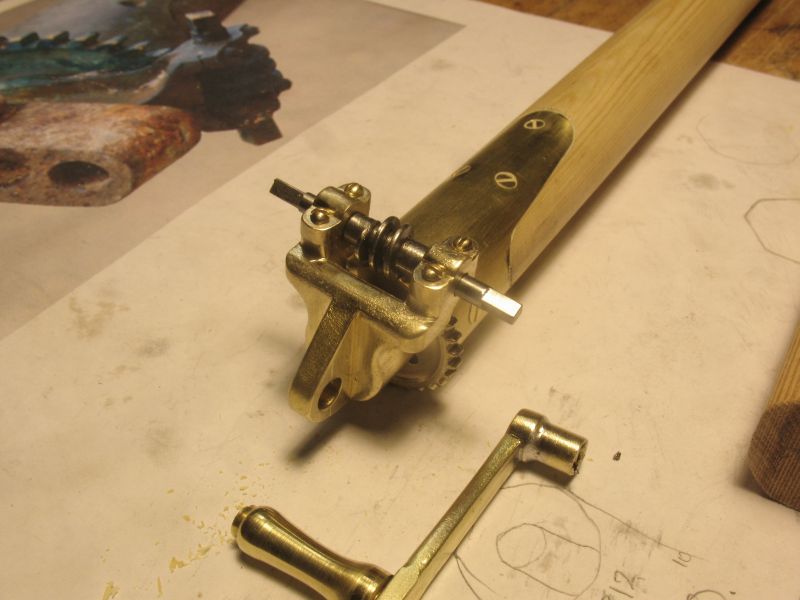
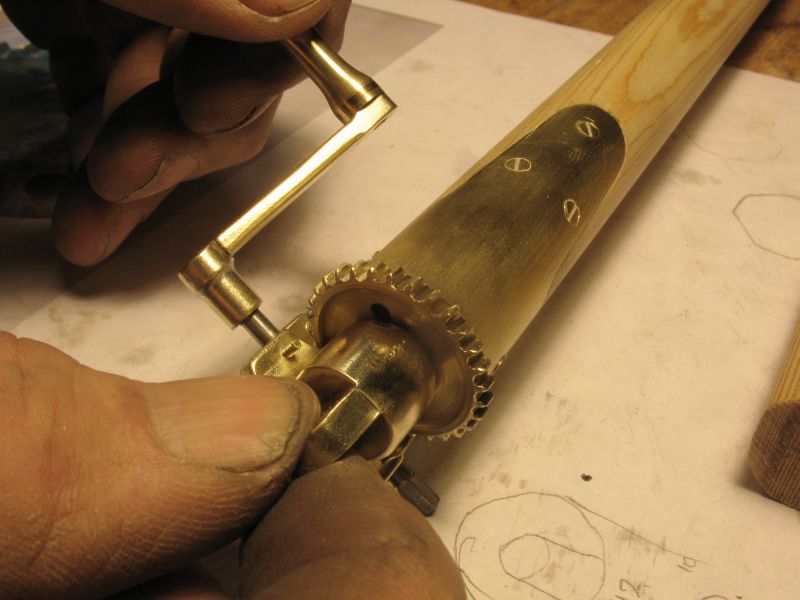
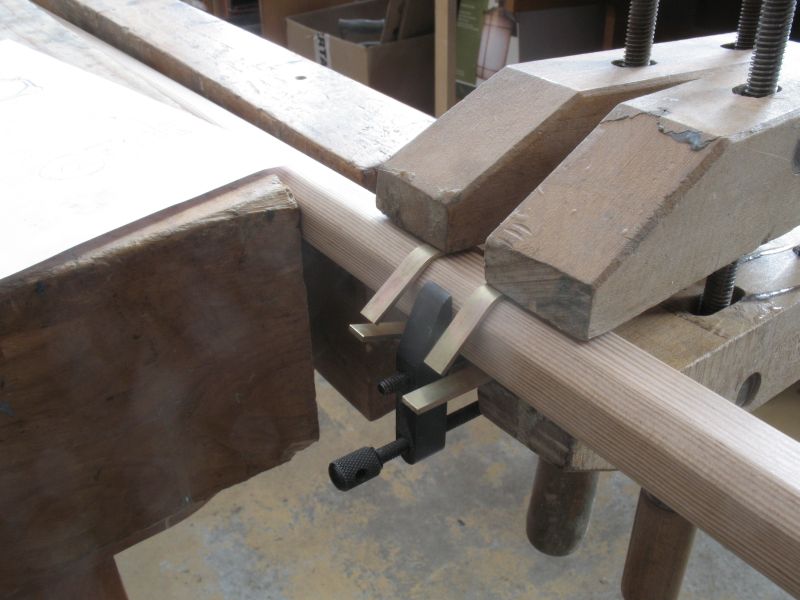
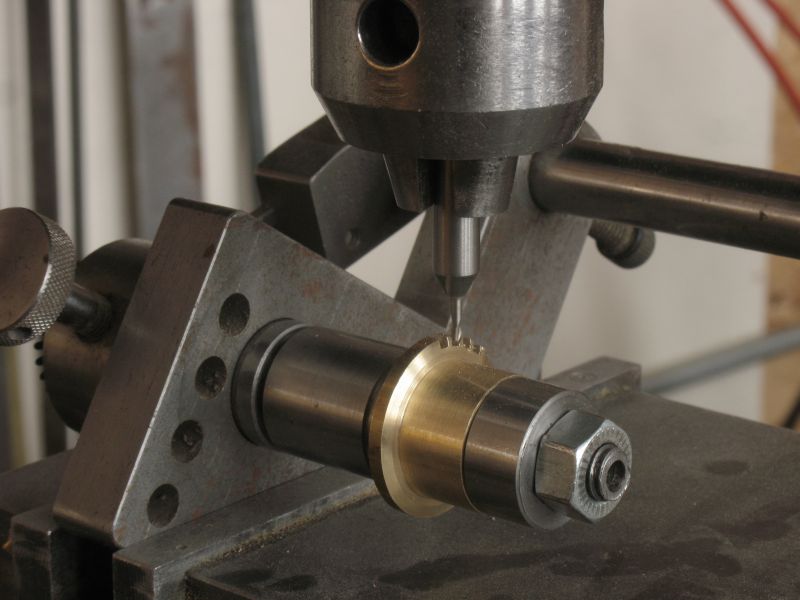
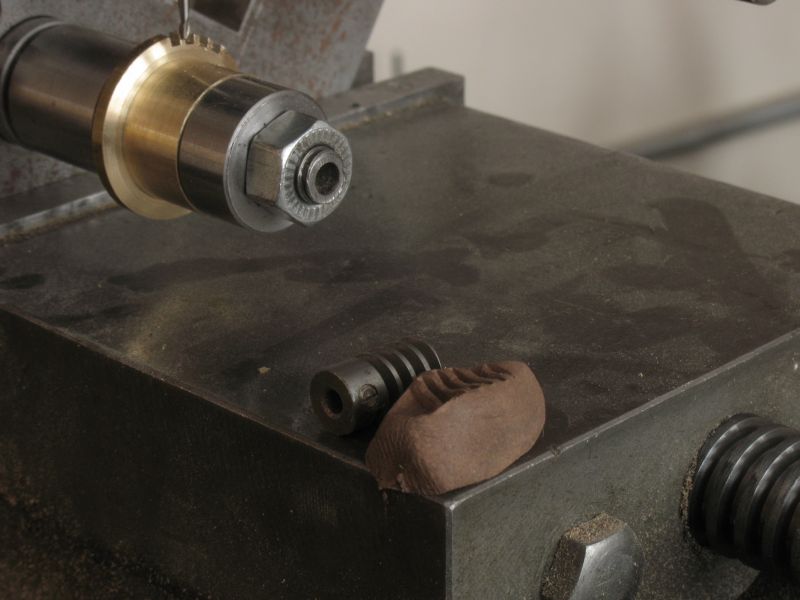
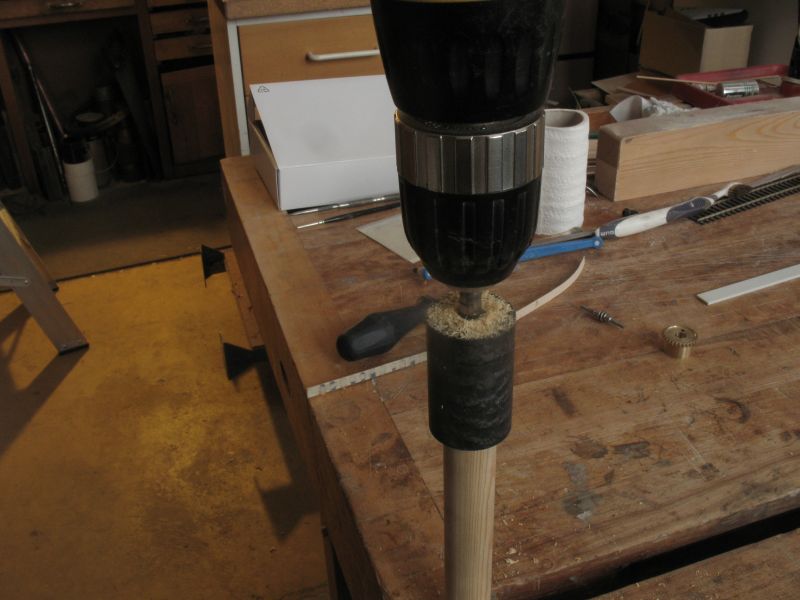
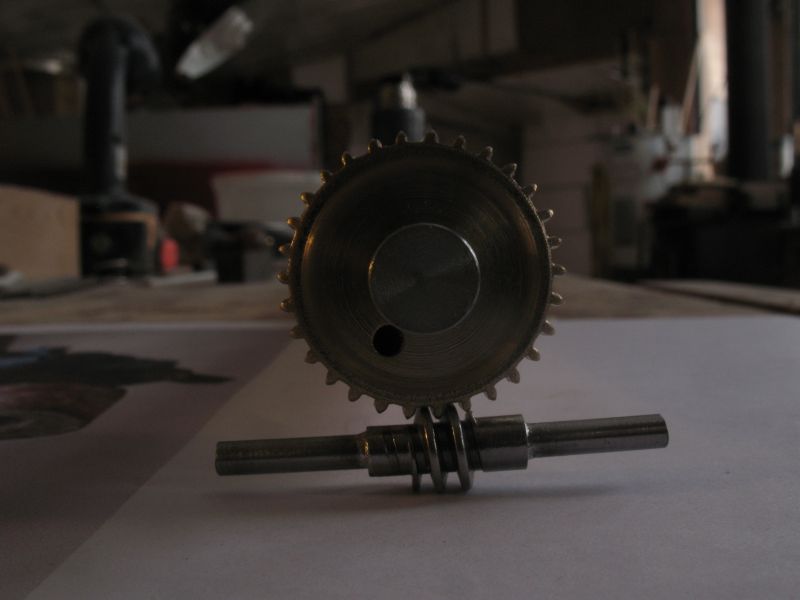
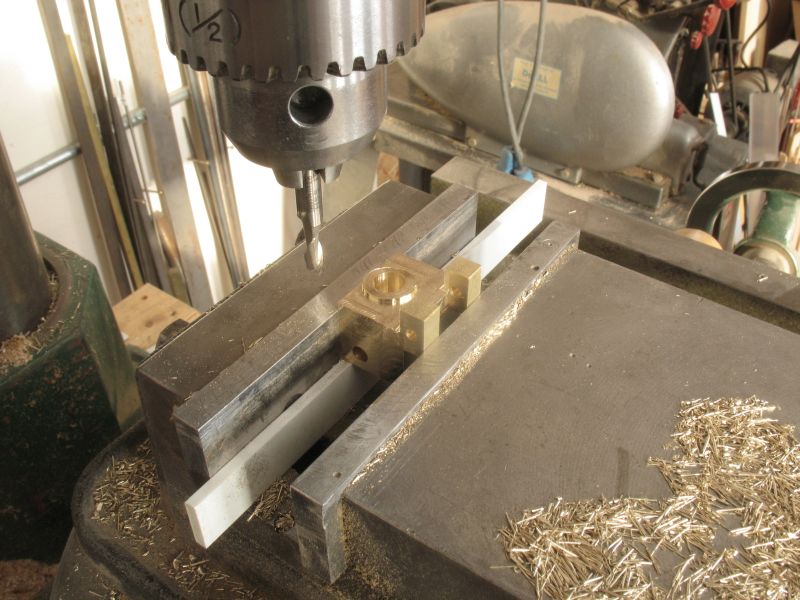
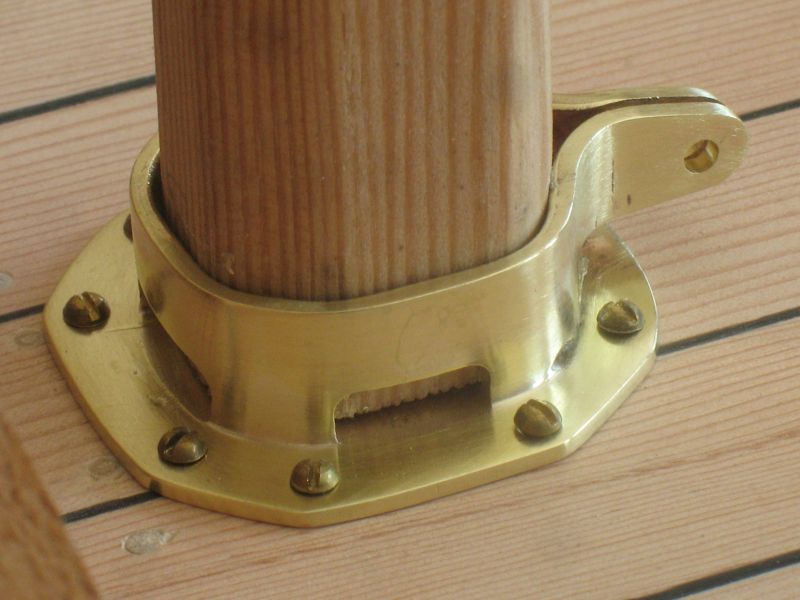
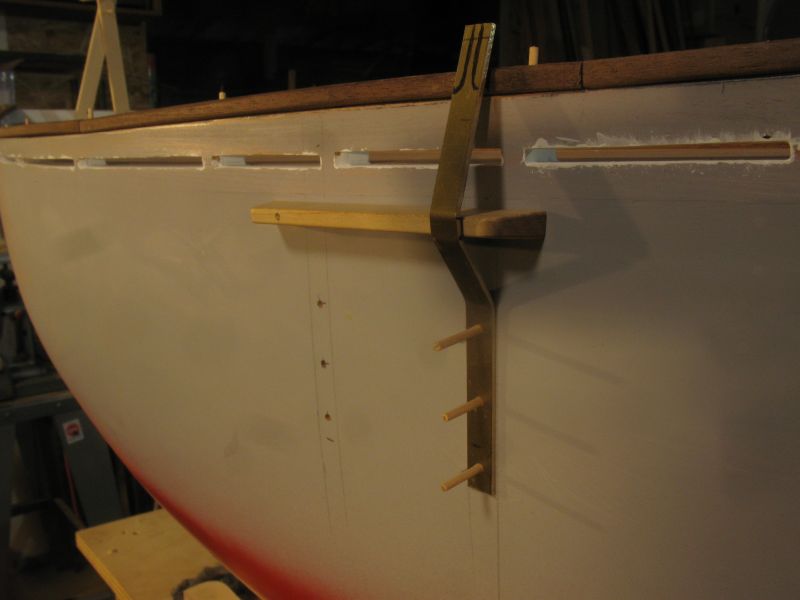
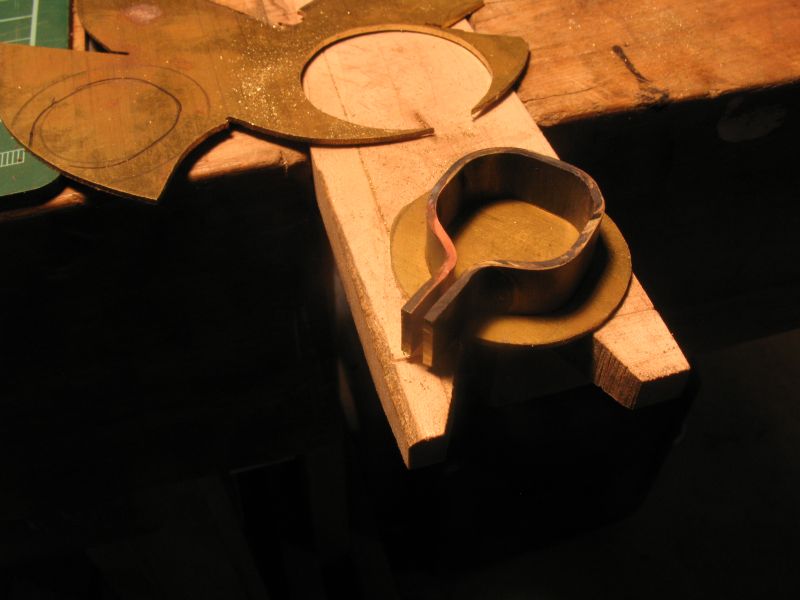
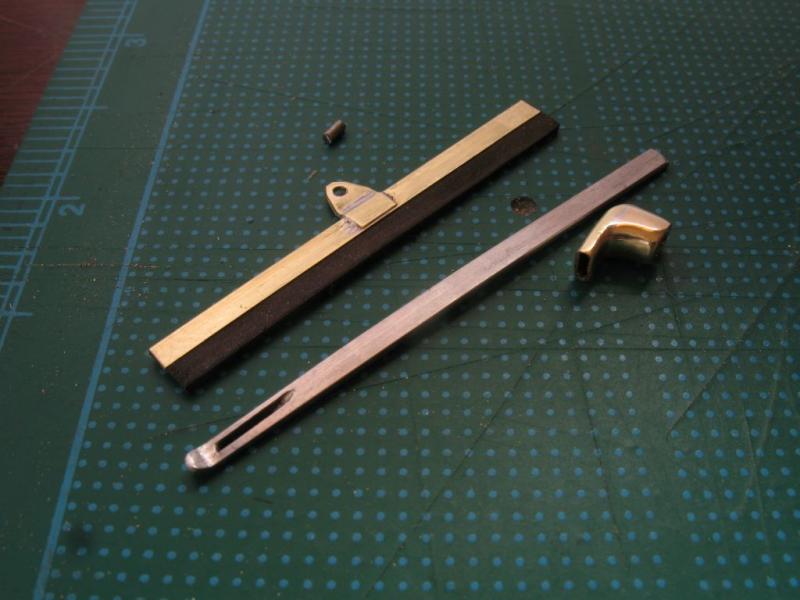
Tim, Bob, Daniel, Carl, Druxey, thank you very much for taking the time to look in and share your thoughts. Mark, The Mast step was pretty straight forward I annealed the .062 brass wrap around piece first(heat to red then let cool)then folded it around the wood first by using a small clamp to hold the strip evenly in the centre of the strip. once it was u shaped then clamping across the sides and finishing the wrap. The bottom edge was cleaned up on a sheet of 240 emery paper carpet taped down on a flat board of MDF. I then silver soldered the wrapper to the base sheet with the lowest melt temp easy-flo solder ( I forget the temp) The clean up was done with sanding sticks and the hole was slotted by clamping in the mill vice and using a 1/8th 2 flute end mill cut the slots which entailed rotating to do the stern abd port and starboard sides. The relief on the bow or clamping side was fretted out with a jewelers saw. a final clean up with medium steel wool. Here are some step by step pictures of the roller reefing and the goosneck. The roller reefing was inspired by a photo on the web and I cannot remember the site so I cannot show the photo. I had a worm drive in the scrap box and needed to make worm gear to match (loosely) so I stuck the worm into some Milton Bradley mock up clay(auto-body design clay, plasticine would have worked equally well) to see the angle to rotate the vice. I have the mill vice sitting on a 12 inch rotary table on the mill. then using a 30 tooth clock gear out of the scrap box as an index I used a 1/16 end mill to rough cut the teeth. The worm was relieved at each end to leave just a few turns in the centre. The end of the boom was drilled out by using a bushing jig that was turned up on the lathe. Next the goose-neck piece for the boom, this was machined from a 1 inch cube of brass and had a 3/8 drill rod shaft soldered in with soft solder. The section slide into the boom the boom was held to the gear with a piece of brass tube machined down to the right diameter from a 3 inch brass 3/4 inch plumbing nipple. the boom was chiseled to accept the brass tube-like sleeve the gear was attached with brass machine screws. and the boom with #1 wood screws. End of Part 1 Michael


-
Or you might consider making it out of brass, it would definitely last longer..... useful on the next boats deadeyes Michael
-
Dale I like the new boat. These smaller boat to a larger scale are really appealing. Michael
-
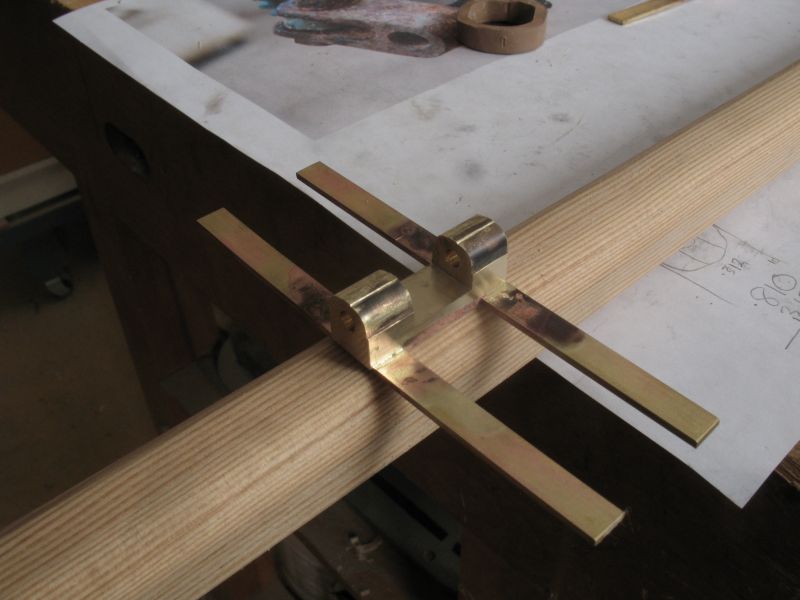
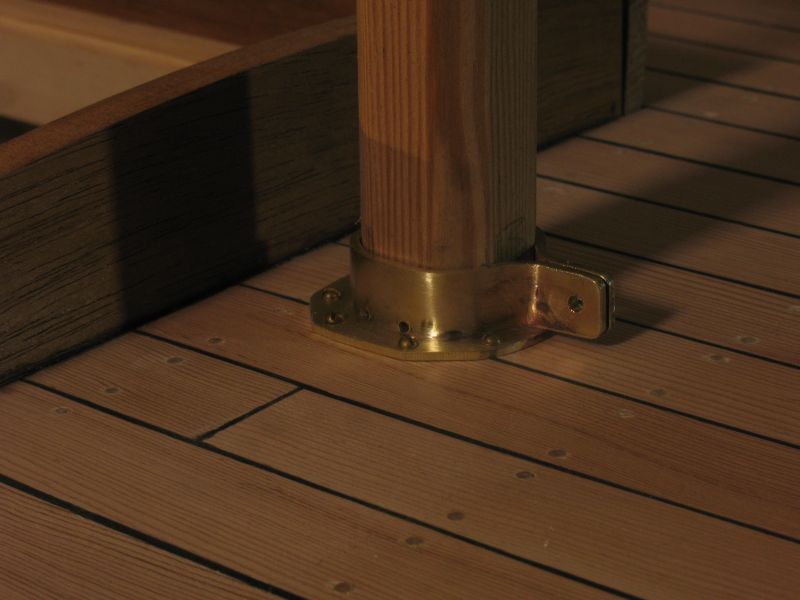
First question, in the back of my van and onto a trolly with bicycle wheels the mast will be an easy take down. Second question The ceiling in my shop slopes from 8 feet at the north wall (where the mill is) to 12 feet at the windows overlooking the lake. so no problem in either case. Popeye thanks for the kind words. Carl here is the modified mast step. the openings will not create any capillary now. Also began working on the set up for the shrouds. I am going to roll the top of the chain plate to create a loop for the deadeye shackle. the scale size is 2 3/4 x 3/8 metal strap. michael
-
So you are not only a superb model builder, but also a dab hand at composing evocative photographs! Michael
-
Elia, Russ, thanks for your kind words. Carl said All the more reason to rework this little item, with much bigger openings. Michael
-
Shucks, I have to wait until next winter? Michael
-
Klimi, your planking looks good and even, I will follow along. Michael
-
Russ those deadeyes look to be 3/32 in diameter, what is the size of the holes? I remeber you showing the jig somewhere but I cannot find it. Michael
-
Paul, it is great that you are getting the log back up. The volume of detail you are putting into the model is amazing. Michael
-
SS Vinal Haven by TBlack - FINISHED
michael mott replied to TBlack's topic in - Build logs for subjects built 1851 - 1900
Tom, the bench looks great! I really am enjoying the way this steamer is turning out. I like the simplicity of the superstructure. An eight foot long one of those on the lake would be a hoot! Michael -
Harvey and Bob, thanks for looking in sorry I did not acknowledge you last night. Mark, I am estimating about 65lbs worth of lead ballast using used wheel balancing weights.I think the bowsprit needs to get the angle lowered a bit. Carl, The base sheet is .050" and the wrap around part is .062", I used easyflo silver solder, I was annoyed that I did not take enough care in placing the solder because it filled in some of the nice half round sections that I filed into the upper part. That is why I had to drill the holes. I am tempted to make another one or take this one apart and redo it. The half rounds would not allow any water to sit in the inside like a round hole would. It is still snowing today accumulation is now up to the top of the picnic table. I'm getting tired of the cloudy snowy days. Michael.
-
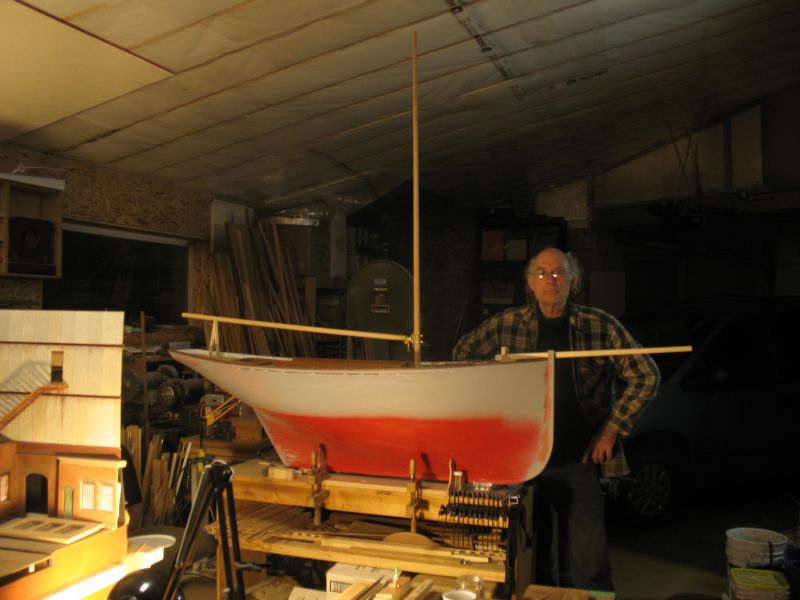
A bit more work on the big build today. I started to bring the rough bulwark rail into shape, while waiting for paint to dry. This evening I started the base of the mast, the mast will be stepped on the deck with the king post underneath to the keel. Fretted out the base sheet and annealed a strip and bent it around the base, Cleaned up the parts with a file and silver soldered them together, It still needs a bit of clean up I do that tomorrow. I drilled some drainage holes at the base to let any water out of the base of the mast. Now a long shot, the mast is a snug fit in the fitting. so I was able to get a sense of the whole thing. and big me checking things out. Michael
-
It is not actually that difficult to make them The rubber is bicycle inner tube rubber a little bit if .003" shim-stock folded over the rubber. Michael
- 552 replies
-
- 4
-

-
- maine lobster boat
- Midwest Products
- (and 1 more)
-
Daniel, I am not sure that I will be doing any planking on this model, perhaps when I get a little better skilled at the small stuff. Thanks for the link, Johns work just blew me away. Michael
-
Excellent work sir! I have found a pair of very heavy short length tweezers used by the watchmaking folk to be of great use with these tiny bits. I also got tired of filing away my fingers. Ill post a picture in favourite hand tools. Michael
-
Good to see you back building again Robbyn, nice work on the hull planking. Michael
-
Hi John, thanks for the info, Like John said we make choices early on and get to apoint that learning a new set of software tools at this stage is not something I have the inclination or the funds to do. I am not one to use the free stuff much and I like to have original software registered so as to get the support when needed. Although I am now happy that i can use the PDF into Autocad basically I'm covered for my needs. Michael
-
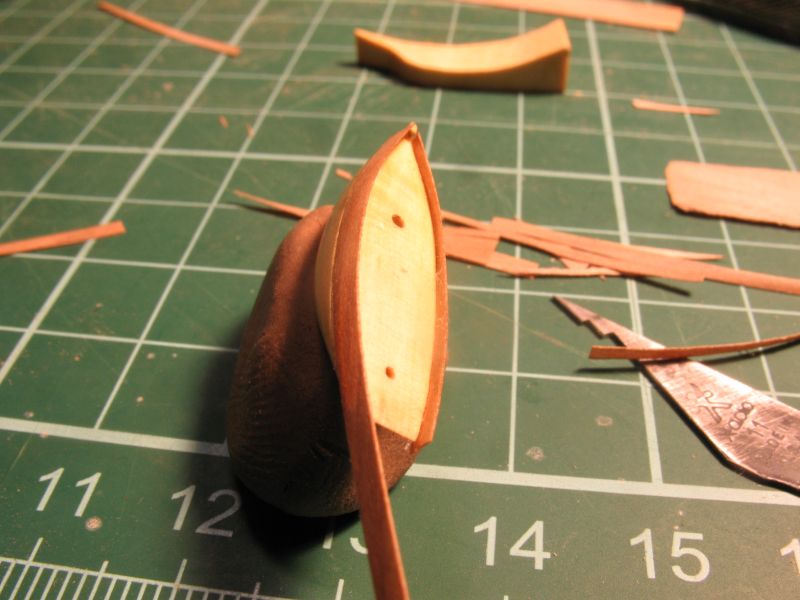
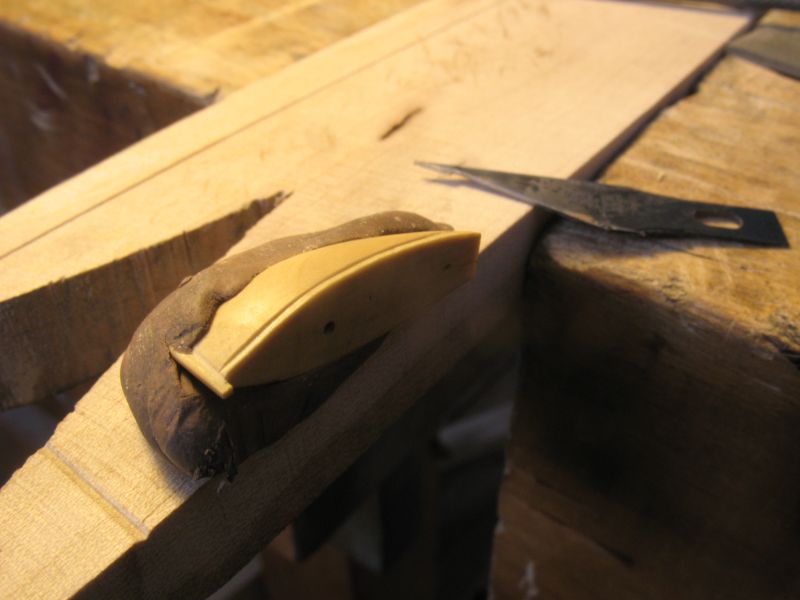
Mark, Harvey, John, Popeye, and Matt, thanks for your kind words. Yes Matt the translucence did surprise me a little because the apple wood was quite dense. I measured the thickness and it was scraped down to .005" which in scale is still way to thick. if it were blown up to full size it would be 2.5 inches thick. I cut the curve out with a pair of regular scissors and then the curl by pulling between my index finger and thumbnail. the hardest part was getting the glue on. I used a dental pic and put the glue in the tip of it, I could have used a pin as well I suppose. Once the glue was good and set I used a tiny sanding stick with 600 grit and gently stroked back and forth lengthwise to get them down to the right size above the deck I also used it to shape the transom once it was glued on. Michael
-
Well John putting the bulwark on was tough enough for me. it is amazing what the camera sees that I don't. this is all for now. Michael
-
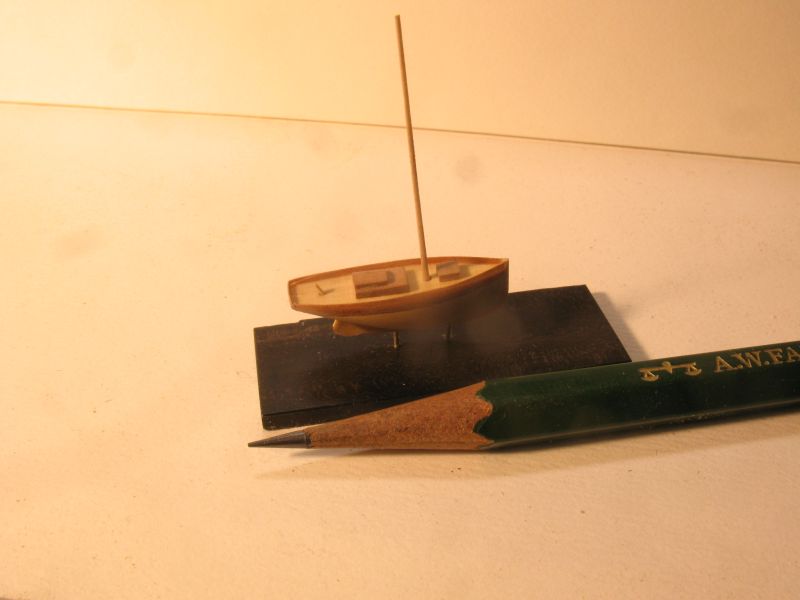
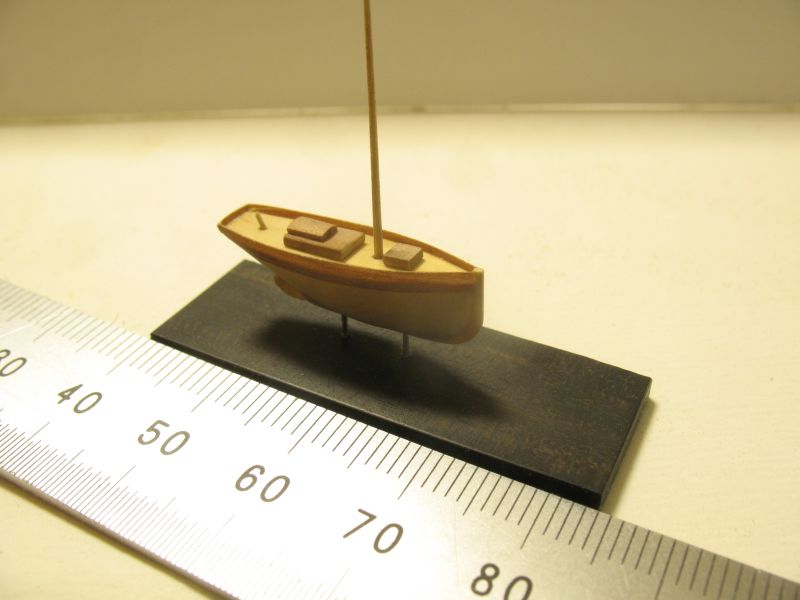
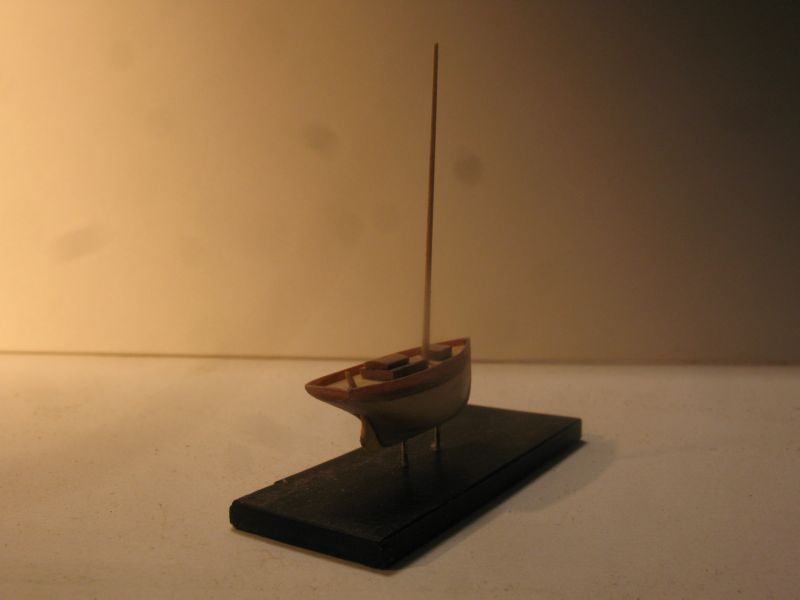
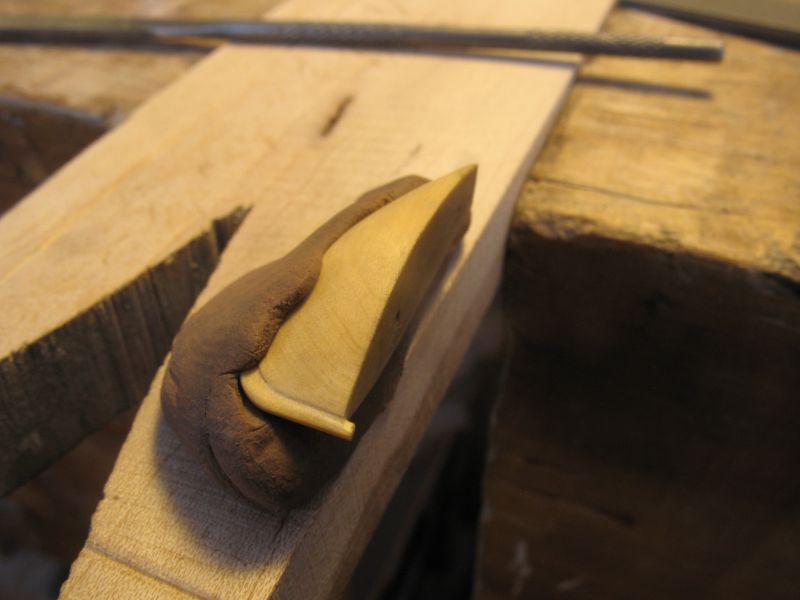
Håkan, thanks for the compliment I did a little more work on the mini pilot cutter today I worked on the final shaping of the deck. Tricky little devil to hold. Then I remembered the Milton Bradley mock up clay. Heated up an exacto blade to cherry red and let it cool down so I could file the notch for recessing the hull to accept the bulwarks. I cut some .005" apple and also some white lilac so I will see how each look before deciding. The white lilac smelled like aromatic cedar which surprised me. Michael
-
ancre Le Coureur 1776 by obi - 1:48 - lugger
michael mott replied to obi's topic in - Build logs for subjects built 1751 - 1800
Hello Robert, very nice planking, the wood looks like Jellutong am I correct? Michael -
Oh, Thank you for correcting my thought. Now I can see better the size. Michael