
MORE HANDBOOKS ARE ON THEIR WAY! We will let you know when they get here.
×


michael mott
-
Posts
5,195 -
Joined
-
Last visited
Content Type
Profiles
Forums
Gallery
Events
Everything posted by michael mott
-
 Klaus I'm still picking my jaw up off the floor!! What scale is that? Michael
- 883 replies
-
- 1
-

-
- royal caroline
- ship of the line
- (and 1 more)
-
Doris it is great to be following along with this build. Your model building skills are are amazing and inspirational I am so glad that you are sharing this build with us. Michael
- 883 replies
-
- 3
-
-
- royal caroline
- ship of the line
- (and 1 more)
-
Klaus I think that your method of obtaining the rest of the frame shapes from the lines template is a great one, I shall keep it in mind. Michael
-
Tim looks like you are doing a fine build. michael
-
Ed I just get lost for words following what you are accomplishing with your skill and dedication to this craft. Michael
-
It was this comment John that prompted me get involved with this! Daniel, I hear what you are saying with regard to the smaller scales. Popeye, Sometimes I think I am dreaming too. Thanks for the compliment. Michael

-
Beautiful workmanship Greg. Michael
-
Popeye, Bob, Tim, Thanks for stopping by. Well working on the rudder I did resort to using the optivisor, I try not to use one if I can get away without it. I think that is why I mostly work on large stuff these days, but this was just too much of a fun challenge. The next task that will need some figuring out is to reshape the sheerline to accommodate the bulwarks and to leave the stem proud a little. Michael
-
Plain laid ropes from 0,2 mm up to cable laid ropes 2 mm
michael mott replied to dafi's topic in Masting, rigging and sails
Daniel your tutorial on how you are making your ropes was very informative and taught me a great deal thanks for taking the time to document and notate the different types and methods. Michael -
Daniel, seriously insane! now that you know how to make the big blocks next to the cannons, what about the smaller ones? Michael
-
I like this Idea Dafi, I will build myself one. Michael
-
Eric, the final planks look very nice. I find It is extremely satisfying working with air dried wood. There is a richness to the wood because it has not been cooked. and it till has its natural oils in it. Michael
-
Daniel, my you work fast. this will be a sweet little model I am looking forward to seeing how you do the rigging. Michael
-
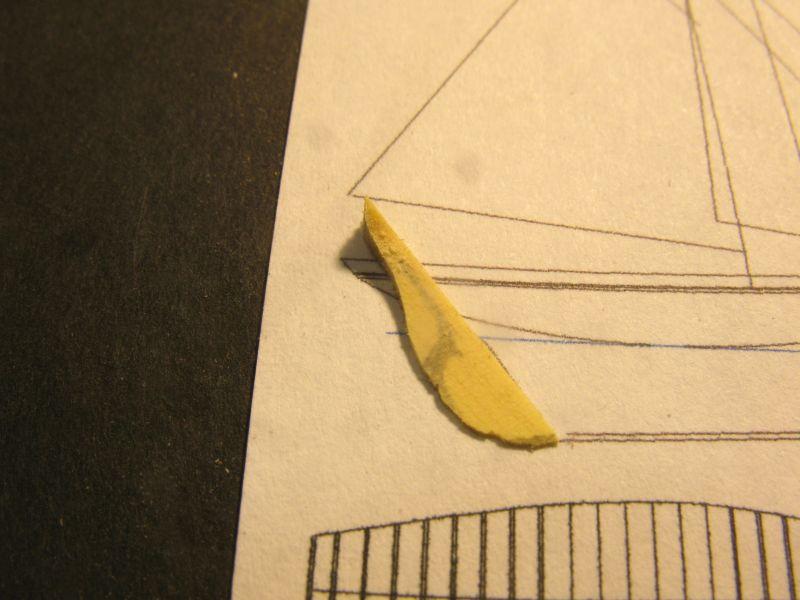
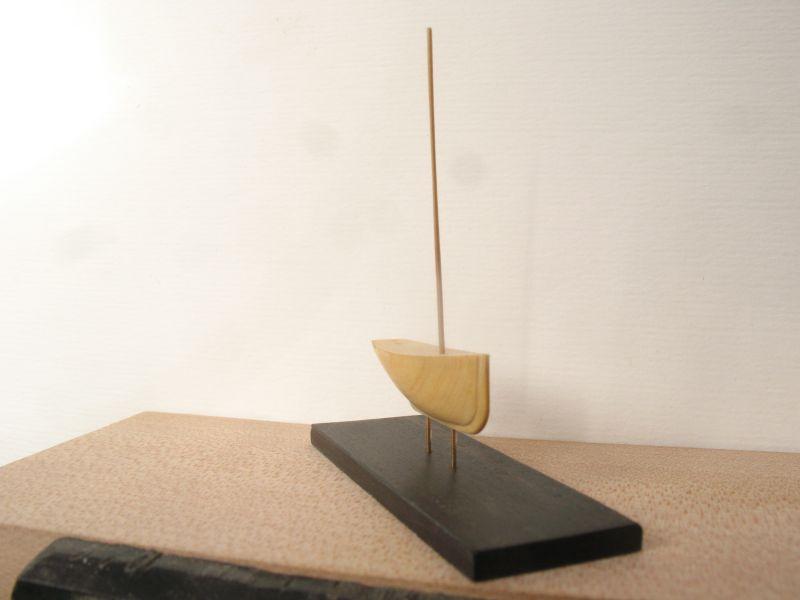
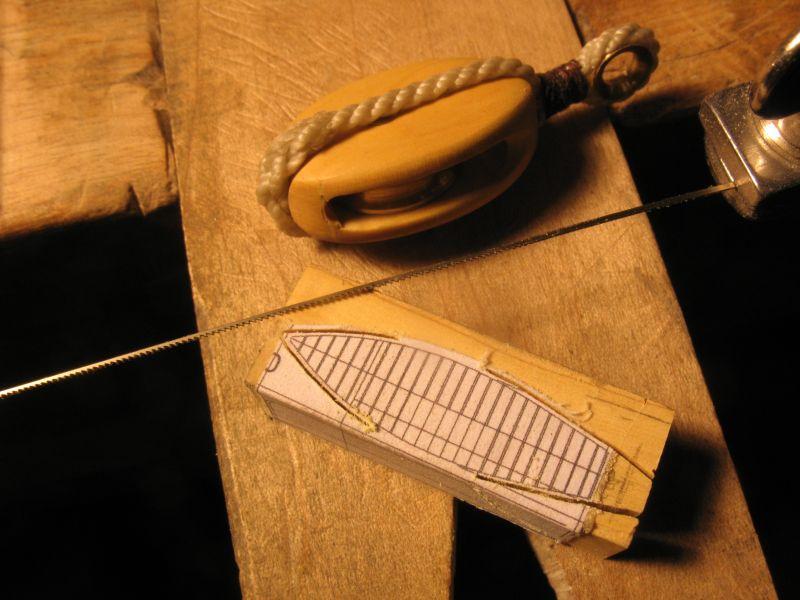
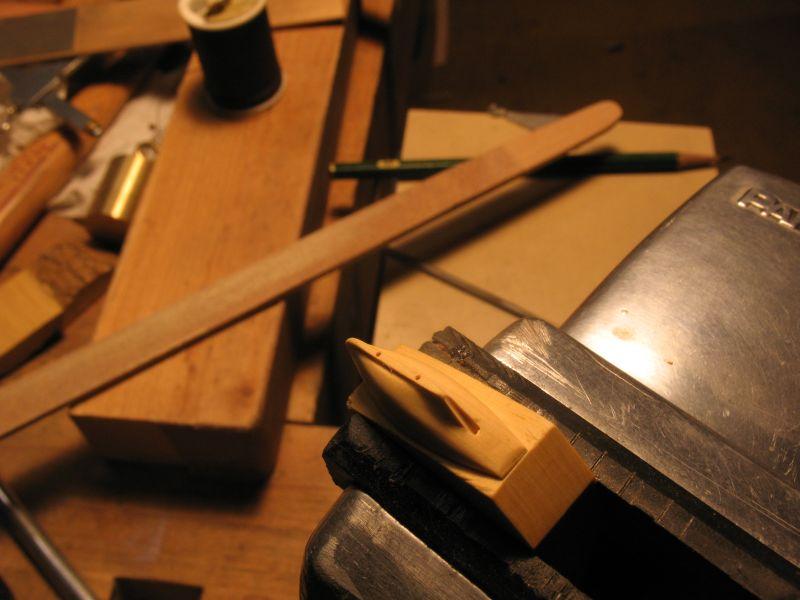
John, thanks, it is fun, and break up the tasks which gives my mind a variety of focus. Mark, absolutely, the small cutter works out to a scale 12 inches long LOA as a model in the big one. Harvey, thanks for your kind comment Druxey, thanks for the compliment and actually it is quite the opposite I find it easy to switch scales, I have been a "rubber gauger" all my life. (Sorry about the reference to railways) the top off cut looked promising for the proper rudder. Fretted out and ready for shaping, The rudder was a little tricky to hold and it took five minutes to find it after dropping it, I think it did a sycamore seed thing as it fell. When it was almost finished I snapped the shaft which was carved as an integral part of the rudder. I glued it with some ACC and since it is hidden inside the hole through the hull, and there will not be any sideways torquing pressure I will leave it. At the moment it is just a very light push fit and it does swivel from side to side. I was reading that Donald McNally actually planked the decks of all his ships with actual strips of planking. ...... I'm thinking about it. I Also shaped a new mast out of maple and tapered it to .010" at the masthead and .024" at the base, I am pleased enough with it now. Michael
-
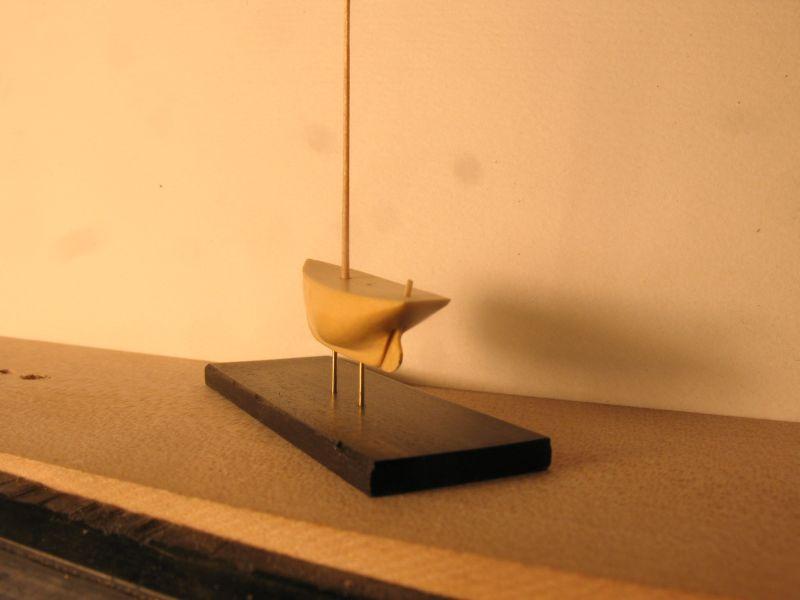
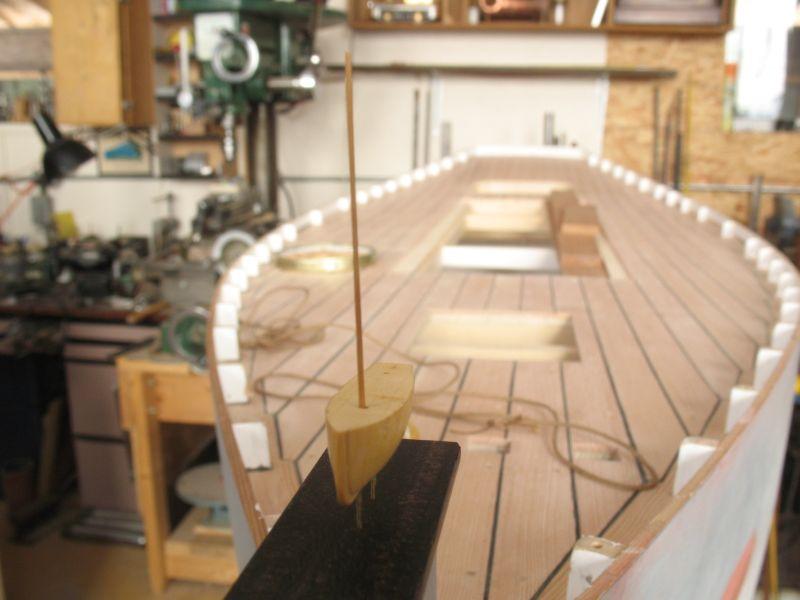
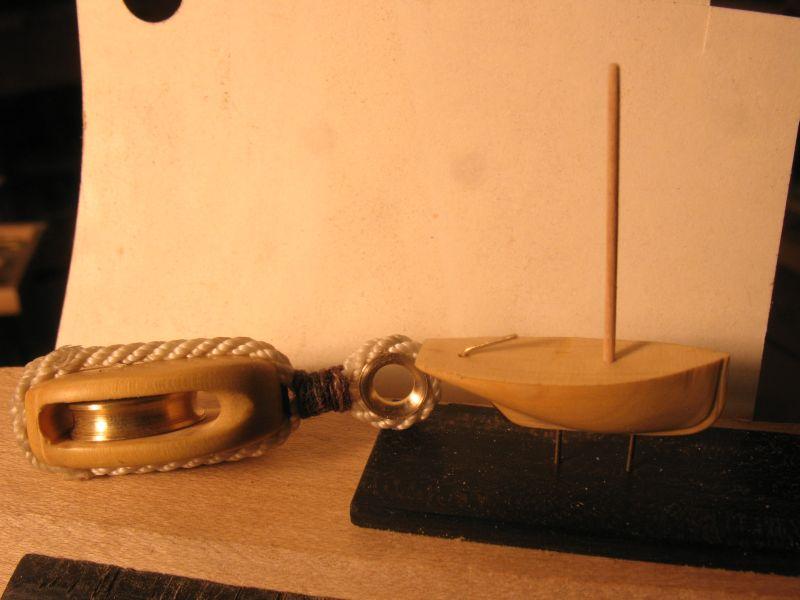
Bob Thanks for looking in on the tiny build. I have a whole new appreciation for Donald McNarry let me tell you. It took me an hour to make a new mast that is a scale 12 inches in diameter at the base. .024" it is bamboo I used a draw plate and a sanding stick but did most of the final sizing by scraping with a knife blade. It looks like the mast now needs a bit of tapering, it is definitely tricky working with these big splinters. The photo shows the mast to be smaller at the middle than the top I did not see that while working on it I will try some other woods for this small stuff. Here is mini sitting on the stem of the 1:8 and a shot in daylight with the thinner mast. I took out the 12 inch thick tiller handle. Michael
-
Molasses, I love one of the opening lines in his book "Ship Models in Miniature" One of my favourite models of his is the HMS Royal Charles (c1666) an 80 gun 3 decker at a scale of 64 feet to the inch 64' to 1" the model is only 3 5/8 long Michael
-
One of the dangers of not cutting the wood fairly early is the potential for the log to check often badly. I have found that by cutting the wood into fairly decent sized billets or planks depending on how big the log is is to sticker it and stack it in the open air but sheltered from the weather. even if it is a small log say 2 to 3 inches in diameter, Cutting it up into 12 to 18 inch lengths and then re sawing it into some planks, then using some Popsicle sticks as stickers, and hold the lot together with some bicycle inner-tube rubber bands will help the wood to dry more evenly. It is also good to put paraffin wax on the ends of the boards to slow down the rapid evaporation from the ends. I have dried Maple, Yew, Apple, cherry, Lilac(absolutely beautiful wood) Willow, Birch Poplar and Spruce. it is fun being able to harvest your own wood Michael
-
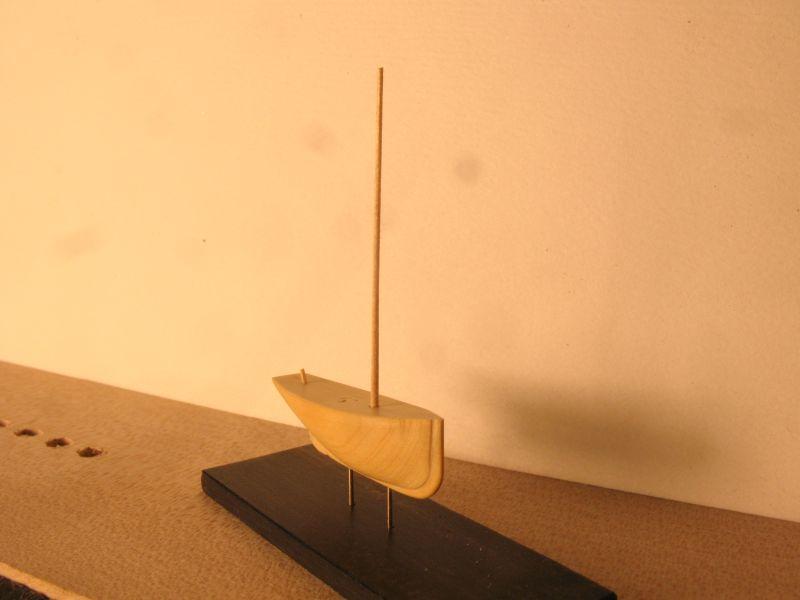
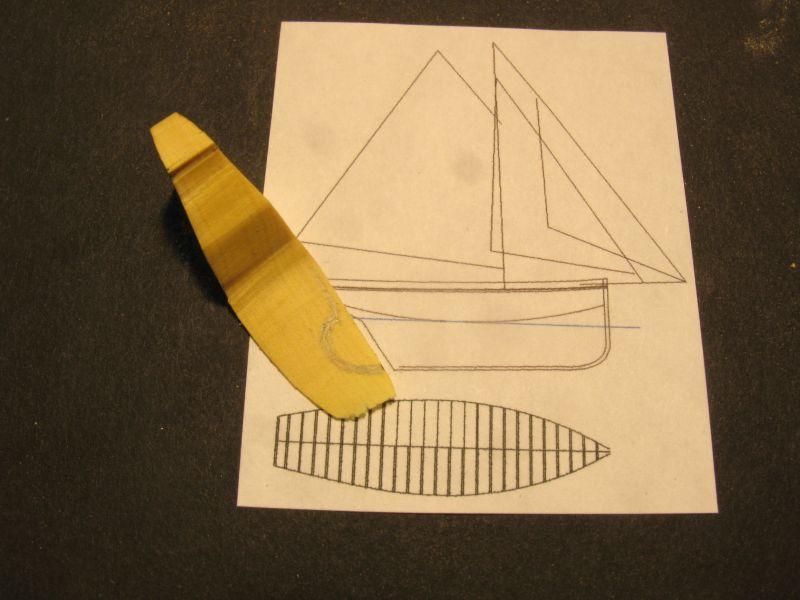
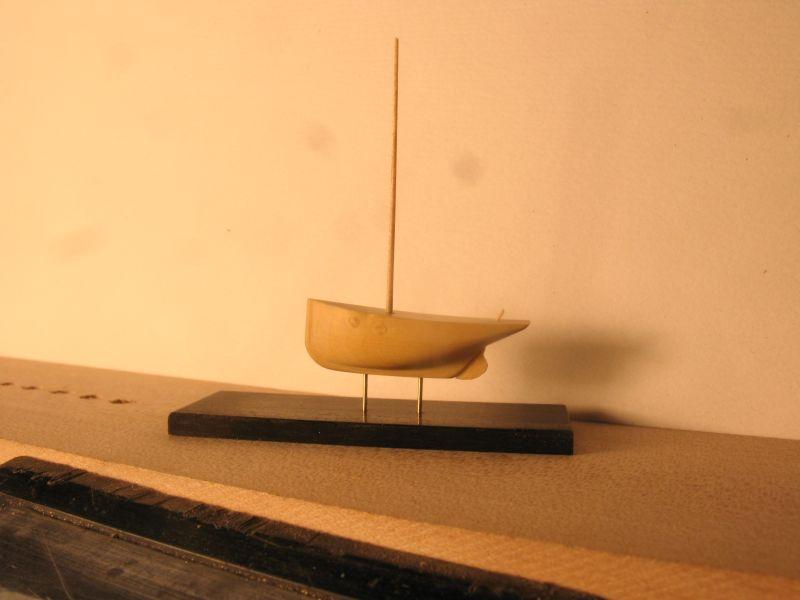
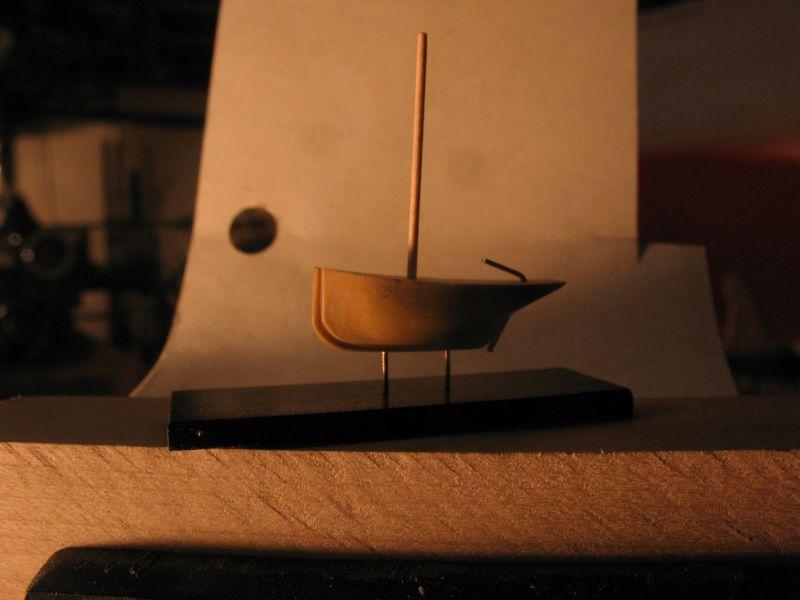
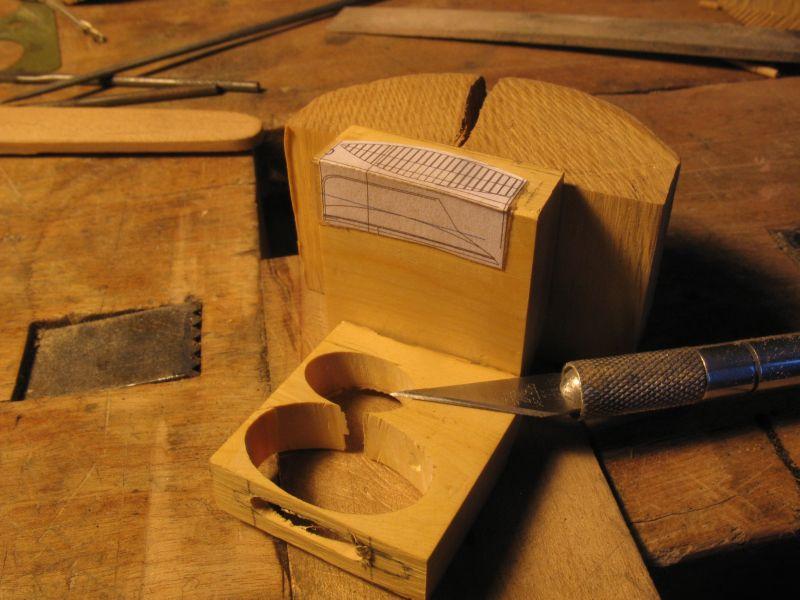
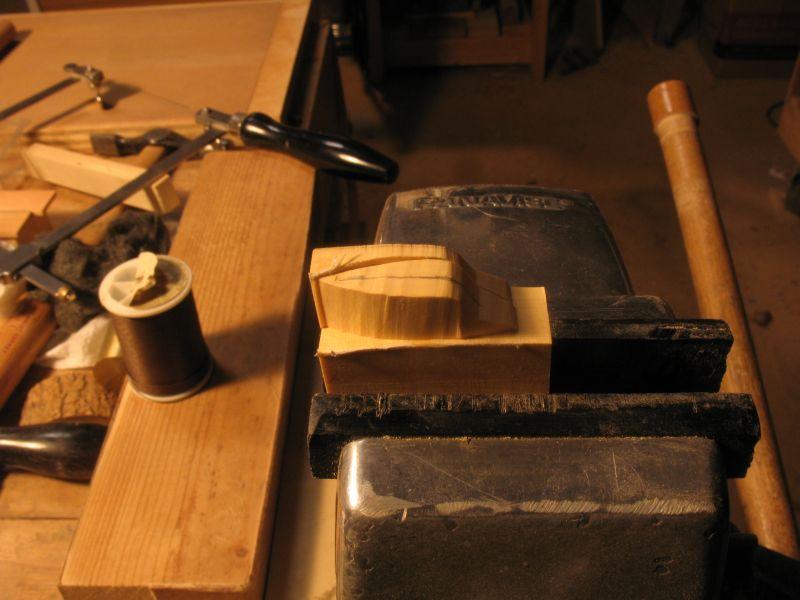
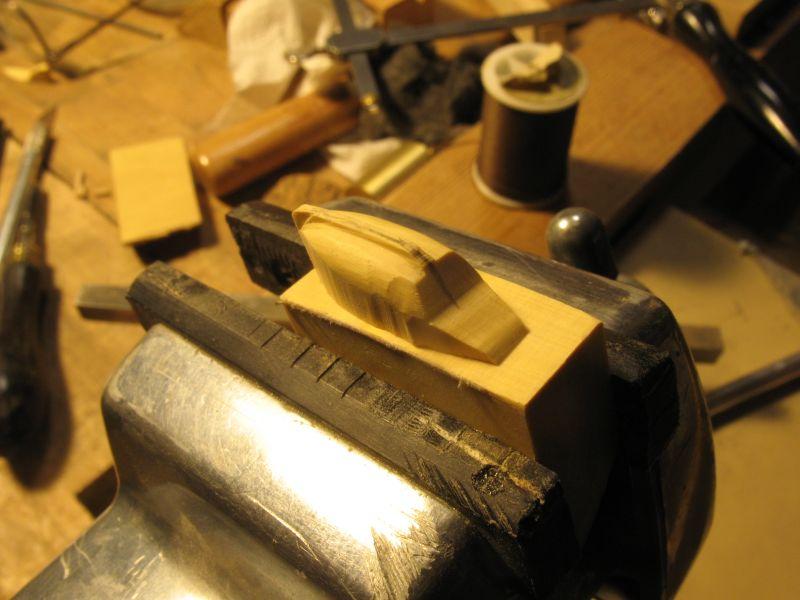
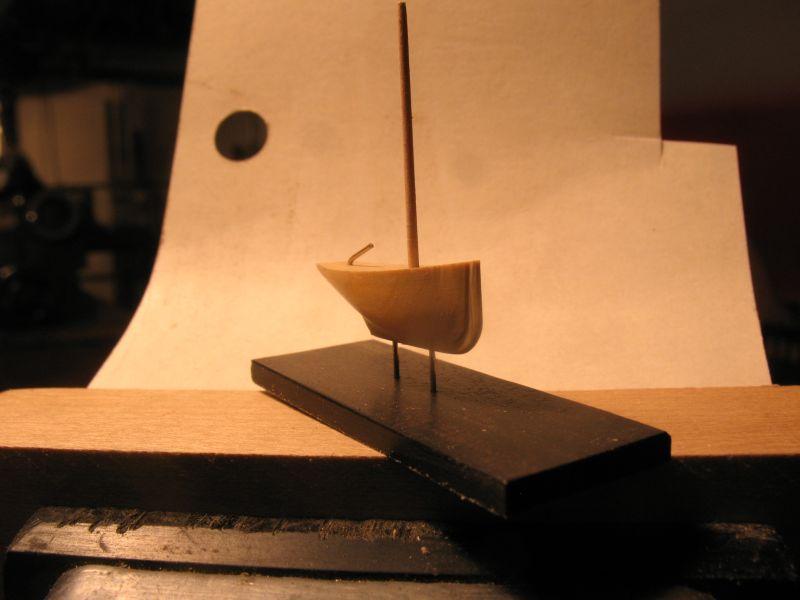
I thought that a challenge to build a small model at 1:500 scale similar to the ships in bottles might make a satisfying change from working in 1:8 scale the hull is carved from a small piece of the English Boxwood I decided to use the larger part of the block as a holding jig so I carefully fretted out the profile and plan with a jewelers saw, by not completing the cuts I was able to hold it easily until the end. The hull blank was reatached to the cut along the deck line saw cut with a little acc glue. The beginning carving most of the actual carving was done with the #11 blade then some files. Some .024" holes were drilled for mounting to a board and a similar hole was drilled for the rudder. The first trial assembly to get an Idea of how it will look. I think that the mast is a bit big in diameter yet and the hull still needs a bit of fairing in a couple of spots. Three quarter from the bow Still a fair ways to go but I am satisfied with the progress this evening. The brass tiller is just a placeholder it is a bit on the big side. Next the bowsprit and topmast gaff and boom. Michael
-
Great to see your build log back Stephan. Michael
-
Remco, those blocks are looking quite superior, as far as the hole size it would be good to use one of the standard rod sizes that is about the same size as the rope strop diameter. I found it useful to drill the hole before doing any of the rounding and shaping I laid out the shape with some 45 degree elipse templates. Michael
-
Ed thanks for adding the picture with your hand it gives me a much better sense of the scale of the model you are working on. Michael
-
Molasses, I am in awe of the scale of the work you are doing. working at large scales is a much more easy task. Working at your scale shows great skill. Donald McNarry's work is large by comparison and he would be smiling with his hat off looking at your work. Glad to see that you are pushing the limits, and that your build log is back. I am learning a great deal. Michael
-
Hello Pasi, welcome back your model look really fine. Michael
-
Russ, thanks. Mark, I take that as quite a compliment. John, I'm workin' on it give me some time Michael