HOLIDAY DONATION DRIVE - SUPPORT MSW - DO YOUR PART TO KEEP THIS GREAT FORUM GOING! (Only 69 donations so far out of 49,000 members - Can we at least get 100? C'mon guys!)
×


michael mott
-
Posts
5,200 -
Joined
-
Last visited
Content Type
Profiles
Forums
Gallery
Events
Everything posted by michael mott
-
 The plating layout drawing is quite interesting Kevin, the shape speaks to the whetted surface area of the hull in a way that I had not considered before, and demonstrates why the sterns of classic racing yachts are the shape they are they have much smaller surface in the water apart from the fin. The model is looking great. Michael
 -
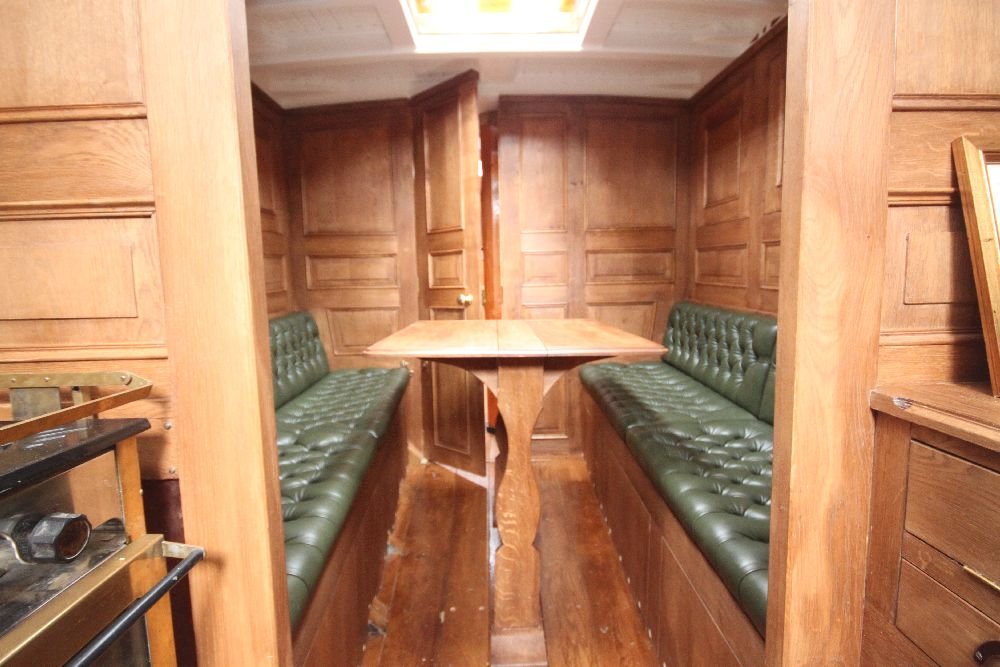
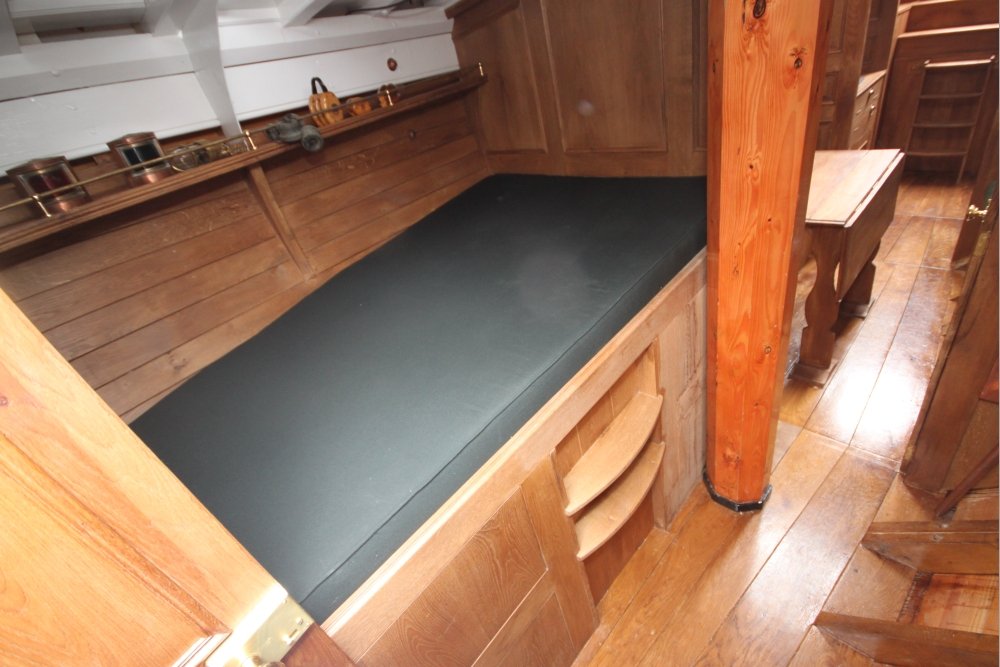
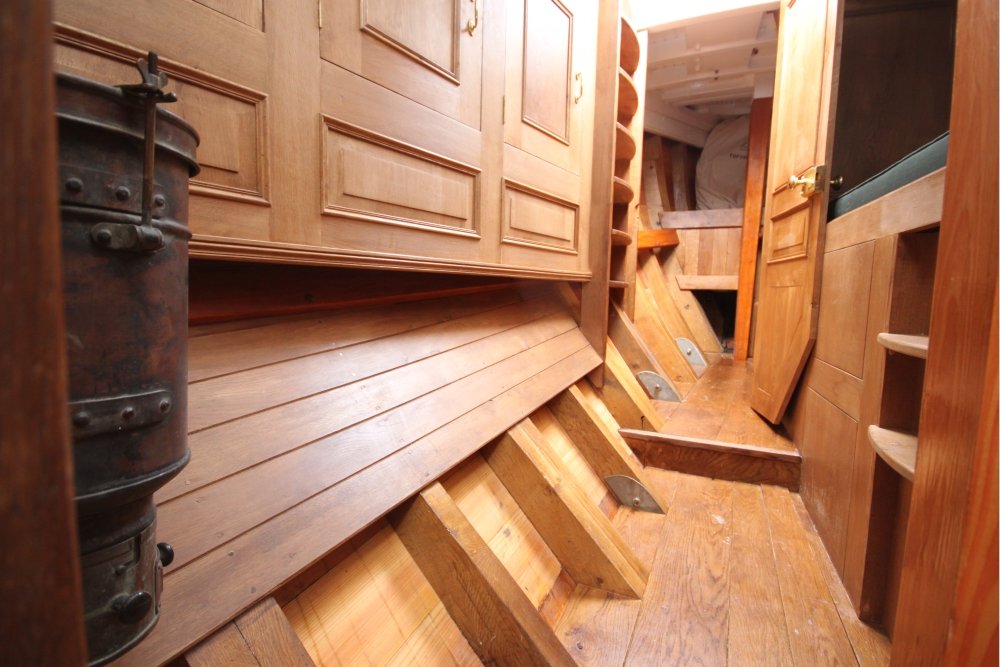
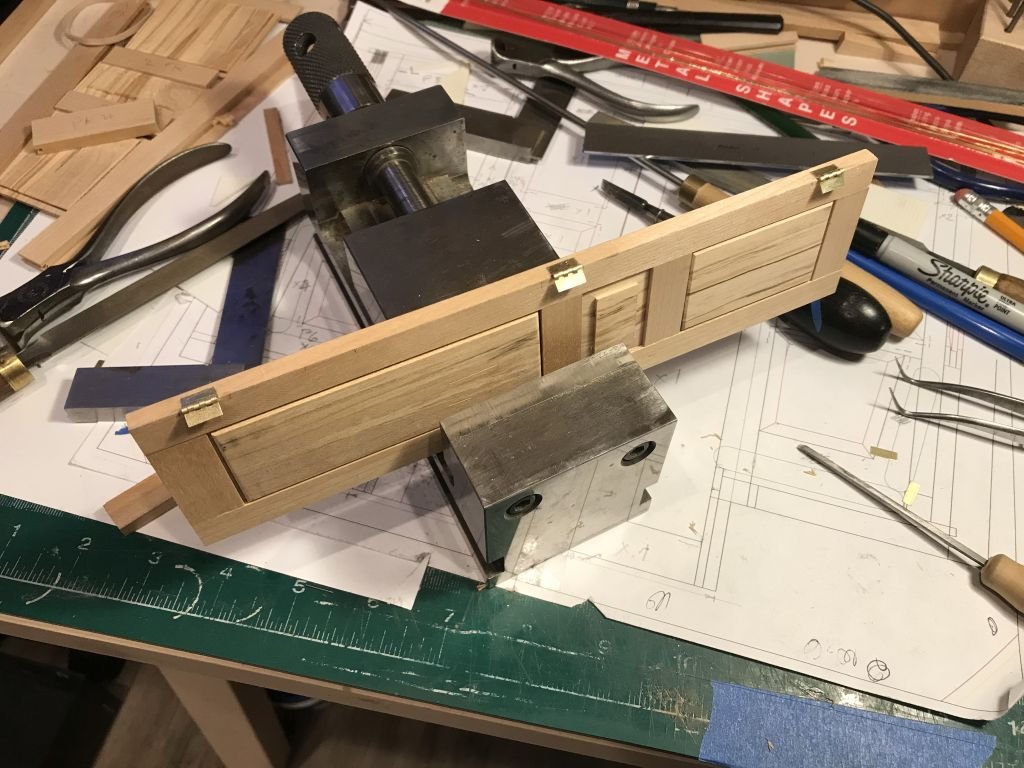
Hi Bob thanks for your comments, they are interesting. For the purpose of this conversation regarding design I will add four pictures of the interior of Integrity built recently by Stirling and Son These pictures are from web over the last few years some of these pictures were originally on Stirling and Sons site and a yacht brokers site and do not appear to be there any more. so they have the copyright. and I credit them for that. If this contravenes the law then I will remove them, my only intent is for clarification of this conversation. This is a plan of the yacht Integrity I have been using these images as my guide for the interior of my Model cutter which is a rough example of the cutters of the late 1800's early 1900's it is not a model of any particular boat but draw upon things that I like that are on various cutters. When I began this model back in 2012 I had no idea about plank on frame model boat-building although had many years of commercial model-building going all the way back to 1966 when I built the mechanical arms for the Movie 2001 while working for a small model-building company in Acton called All models Engineering so I figured what could be so difficult about building a model of a sailboat.........Yeah right! did I have a lot to learn, and it is a continuum that is still unfolding everything that I have learned about model boatbuilding I have really learned in these last 8 years. I spent so many years build very accurate models for other people following their plans that were challenging but not in a way that was totally satisfying and during those years I did not do much in the way of model-building as a hobby that was the last thing I wanted to do. My goal is to learn and to stretch my skill level by taking on challenges that I have not done before (probably a character flaw that was programmed at birth) but I have fun following these rabbit holes. Back to this model if you go back over the build log you can easily see that I have redone many things and had to re-thing all sorts of areas this is a result of not having a working background on this particular type of boat. I have designed and built a yawl which I sailed successfully for a few years using an old fiberglass hull as a starting point. This has given me a better understanding of the physics of sailing. Because i lived at the lake when I started building this model. Tthe hull is based on the Model Maker Plans for a fishing smack called Kingfisher which I purchased in 1972 the plans called for the model to be about 18 inches long. Well as soon as an 18 inch model gets 10 feet off shore it looks like a toy I wanted a model sailboat that had some scale to it (I also had lots of room and a 12 foot ceiling) So I chose a scale that would bring those plans up to about 5 feet the hull from stem to stern is 63 inches the bowsprit is an additional 21 inches I chose a scale of 1 1/2 inches to the foot because I knew it would give me the opportunity to make working details and use real nuts and bolts (at least the big ones) 1/32" = 1/4 inch so the ratio 1:8 it is also much easier on my aging eyes. In the beginning I also was going to radio control this model, so the interior didn't matter this was a model of the outside of this boat. As I continued this journey my ideas changed (the beauty of not being restricted to a model of a particular prototype) and so the elements on the model had to change, none of this model is precious its all just stuff that is the foundation for learning what looks good to my eye (sort of like an abstract painting) If I need to change something it get changed I don't have any qualms about that at all. That stuff goes into the used materials boxes whether it be metal, wood, cloth, to be recycled into something else down the road. So I moved away from the lake and back to the city, and the model was put aside for a while while other challenges tickled my mind (now the loco is aside, but it is of a particular prototype even so one has to make compromises because you cannot sale molecules) now that I am back to sorting out this cutter I realized that it will spend far more time on display than in the water why don't I put some interior into it, but it has to be removable in order to put the lead ballast into it when I do get to sail it. As long as it can sail and I sail it at least once or twice That will be good. I looked at many pictures of cutters and smacks and the Gentleman's Cutter by Stirling and Son which is a modern cutter drawing upon tradition values of design and integrity just hit a chord for me in many areas. So I am using its aesthetic as a guide for my own ideas and the limits of what I have to work with. I hope this answers your question Bob about where I am going with this..... its a moving target to coin a phrase. Now that that is out of the way I began fitting the hinges to the forward bulkhead door They are fitted into some chiselled recesses and taped down ready to drill the holes, then when the hinges are complete I can work on the door lock and handles Michael

-
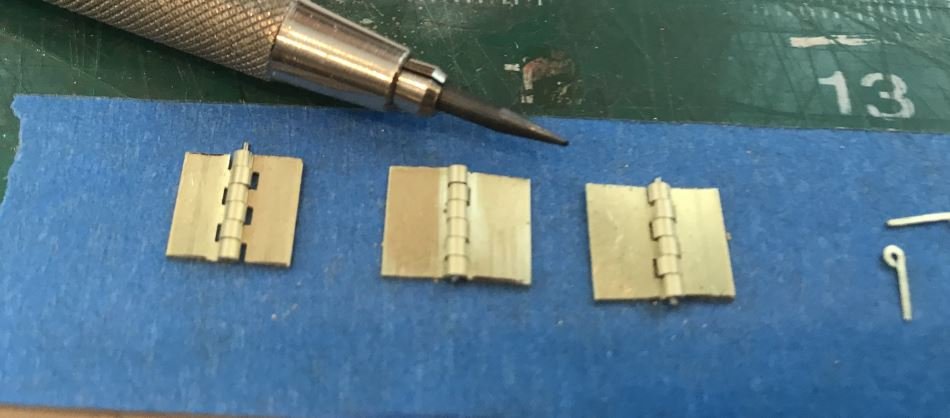
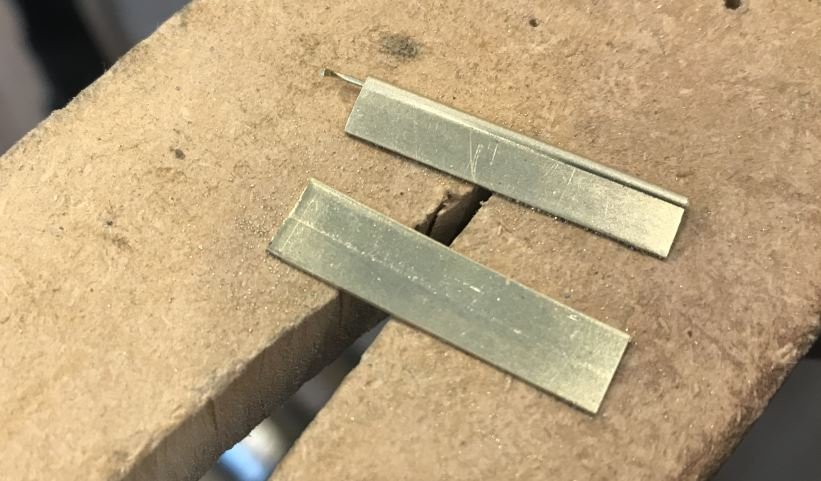
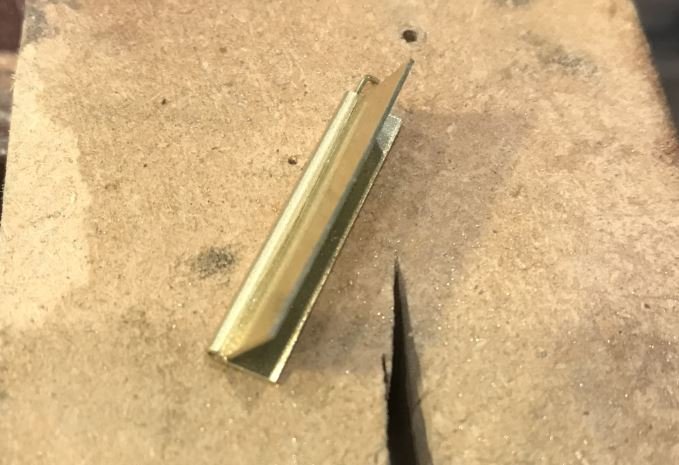
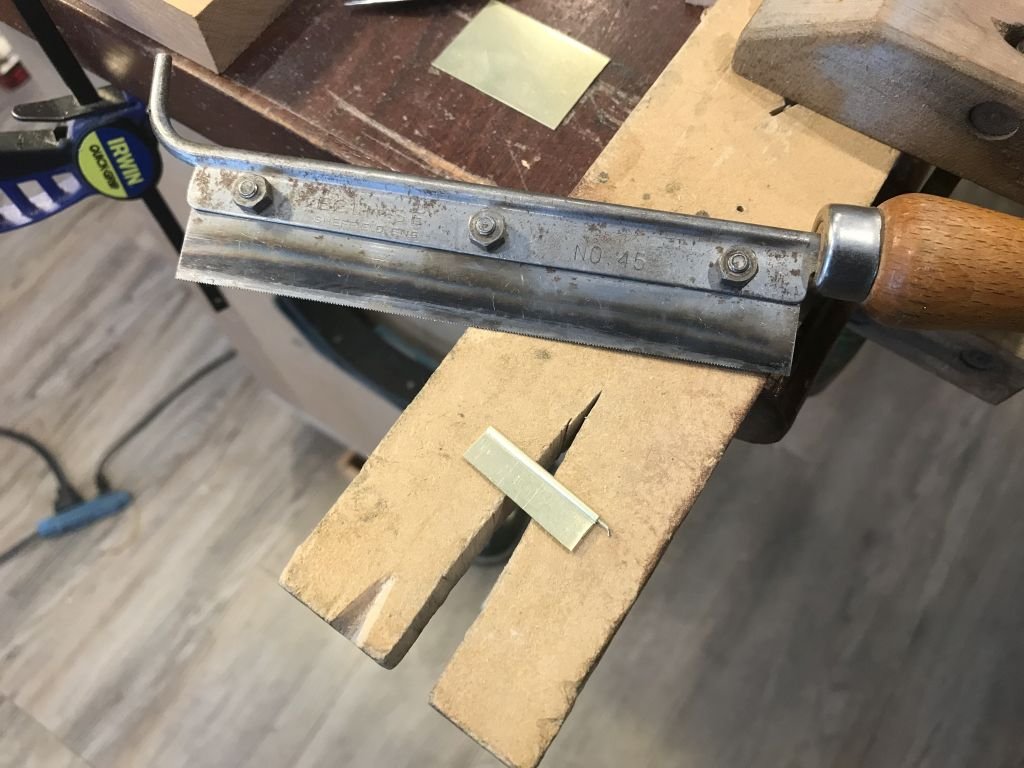
Thanks all Before finishing the forward bulkhead location and fitting in place I needed to add the hinges to the door, this requires more substantial hinges than for the cupboards so I followed a slightly different approach without annealing I folded some .016" brass in the same manner as before but I cut off one side of the fold with my old No 45 Eclipse razor saw I only cut 90% of the way through then bent it away and down a couple of times to released it through work hardening it. Then instead of using a wood support I used some 1/8th brass. The three hinges are now roughed out time for some lunch. Michael


-
Workshop Essentials - Favorite Features
michael mott replied to Justin P.'s topic in Modeling tools and Workshop Equipment
Absolutely make your workshop a nice place to be and don't set up things that will be difficult to access, I remember somebody saying once do not put one thing on top of another to save space in the drawer , shelf etc, because that means you have to move something to get to something else, it is a rule that most of us break by the way and we admire those that can stick to it. Michael -
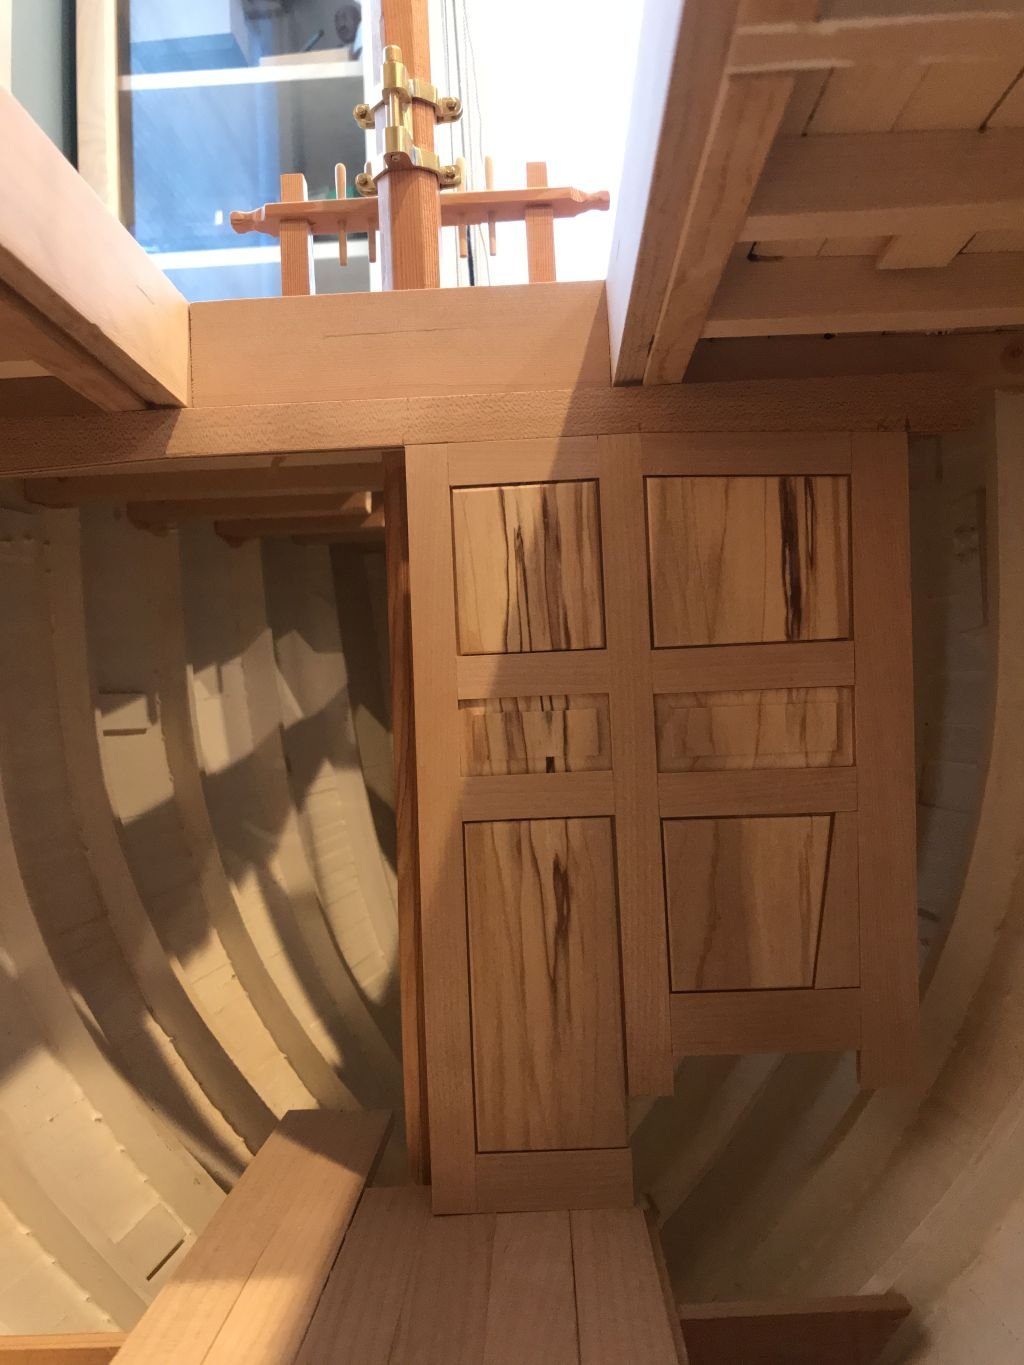
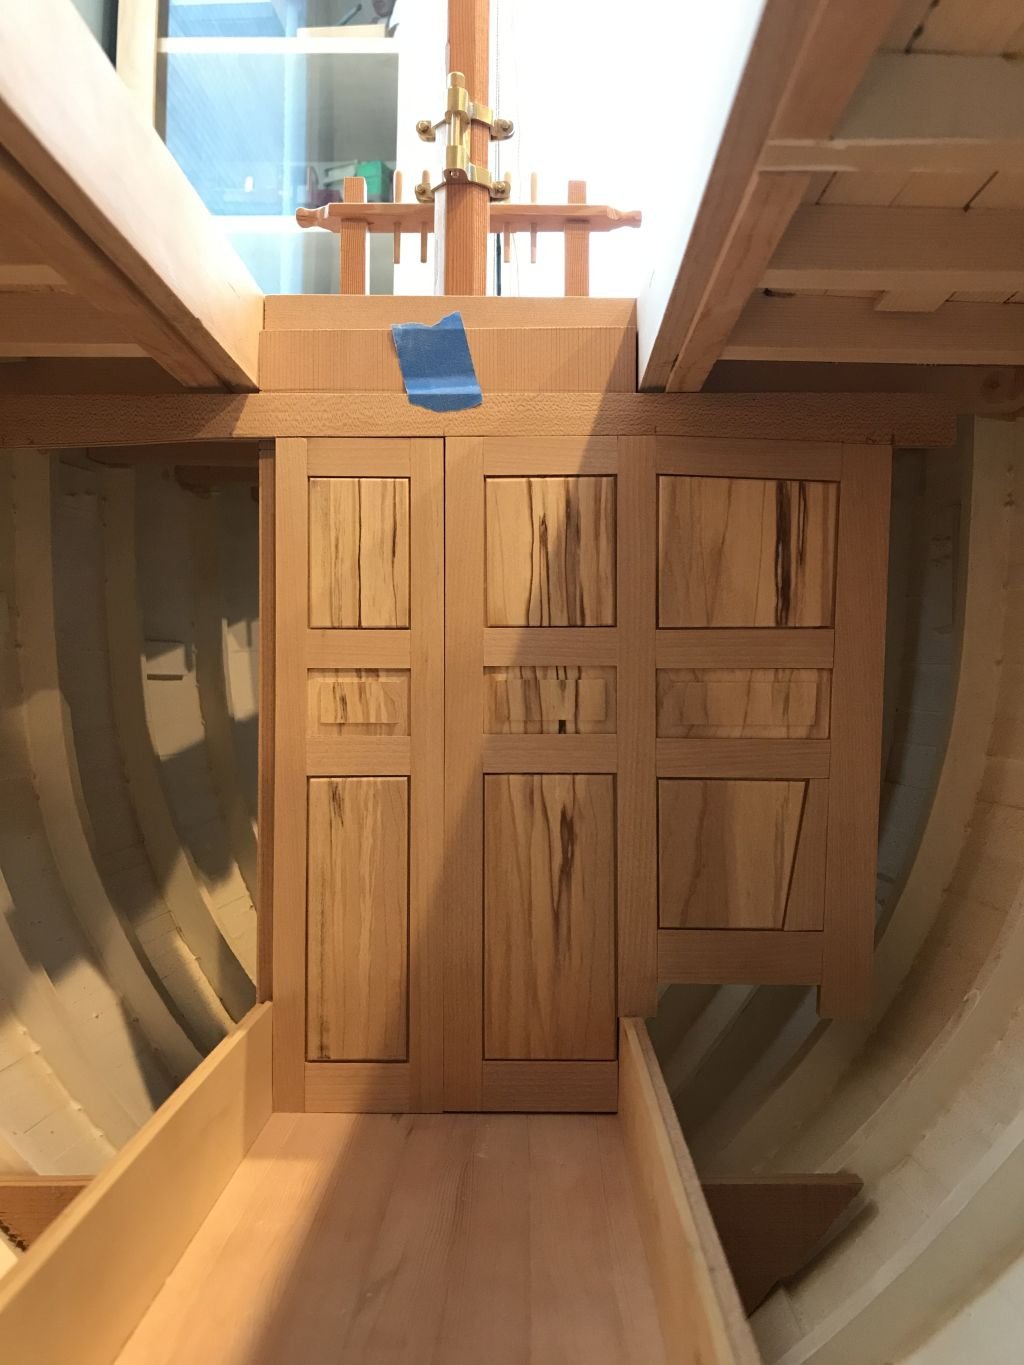
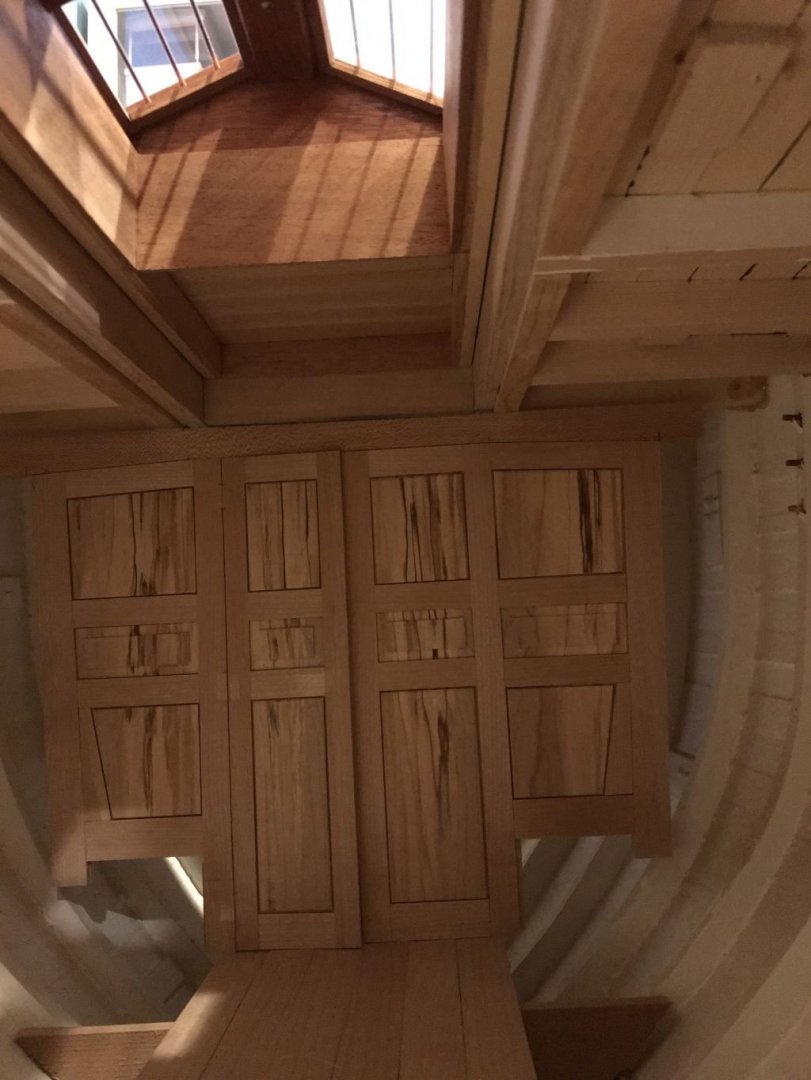
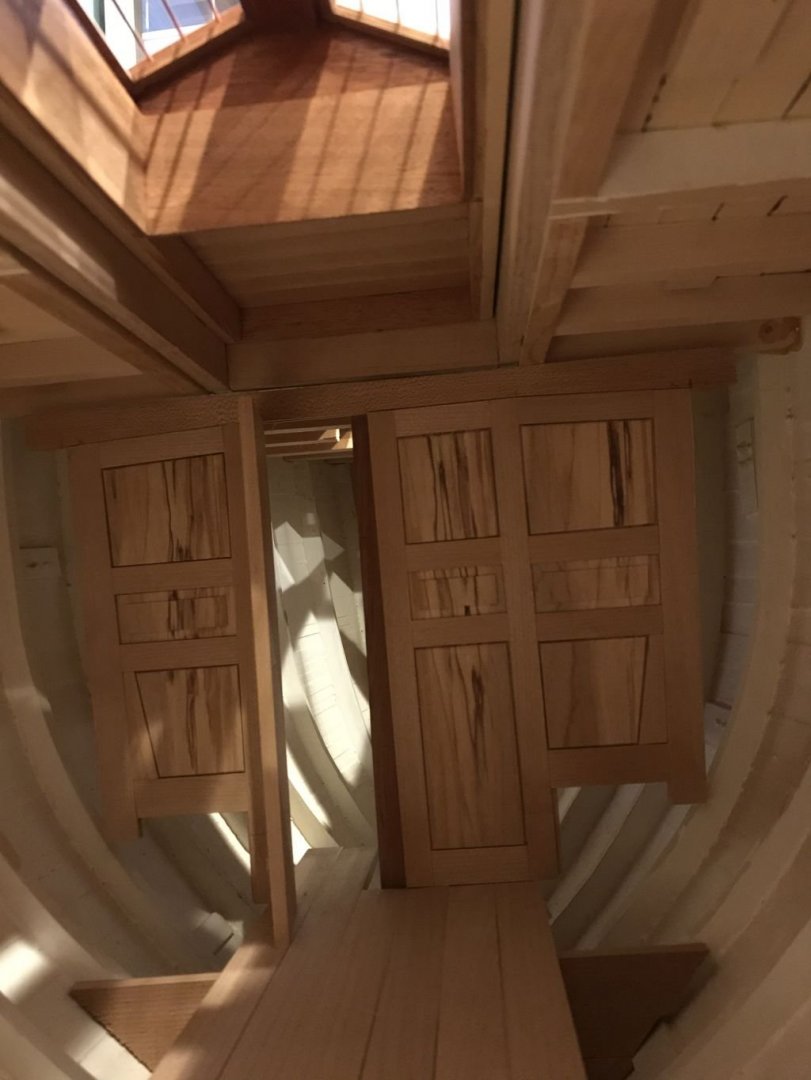
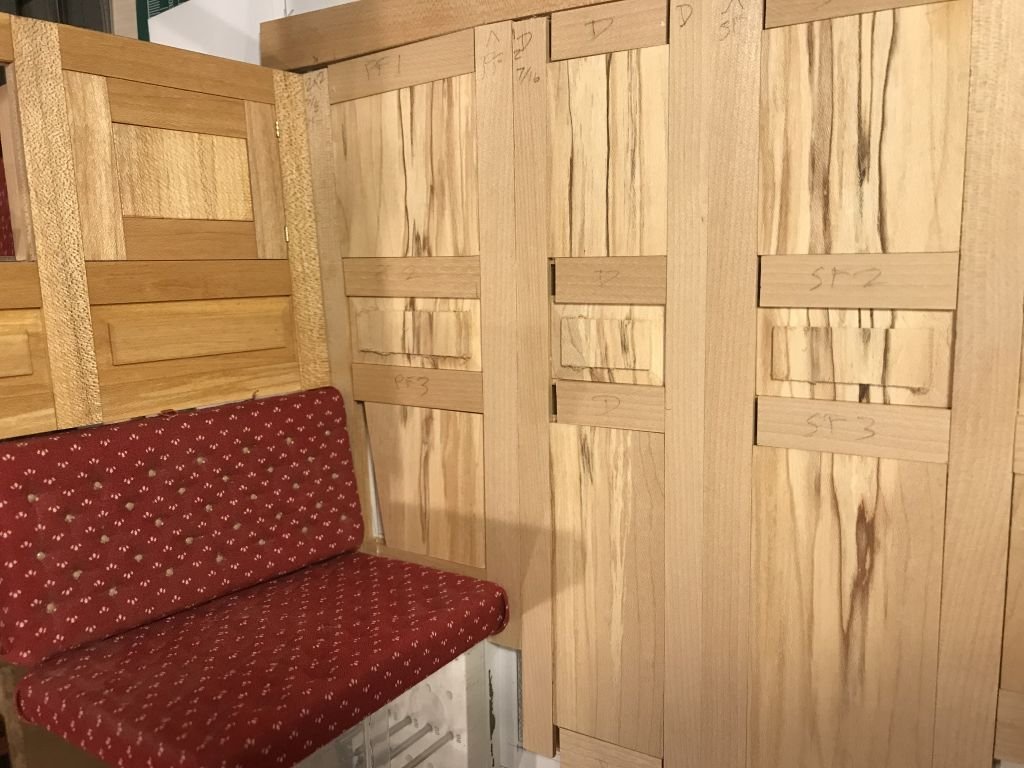
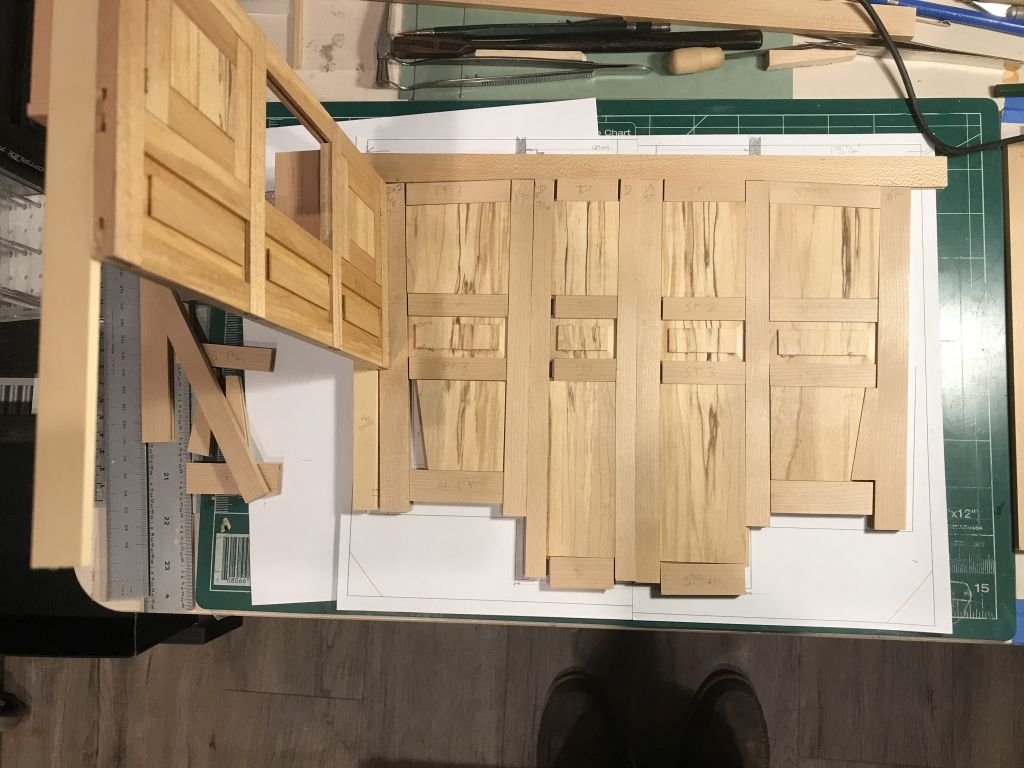
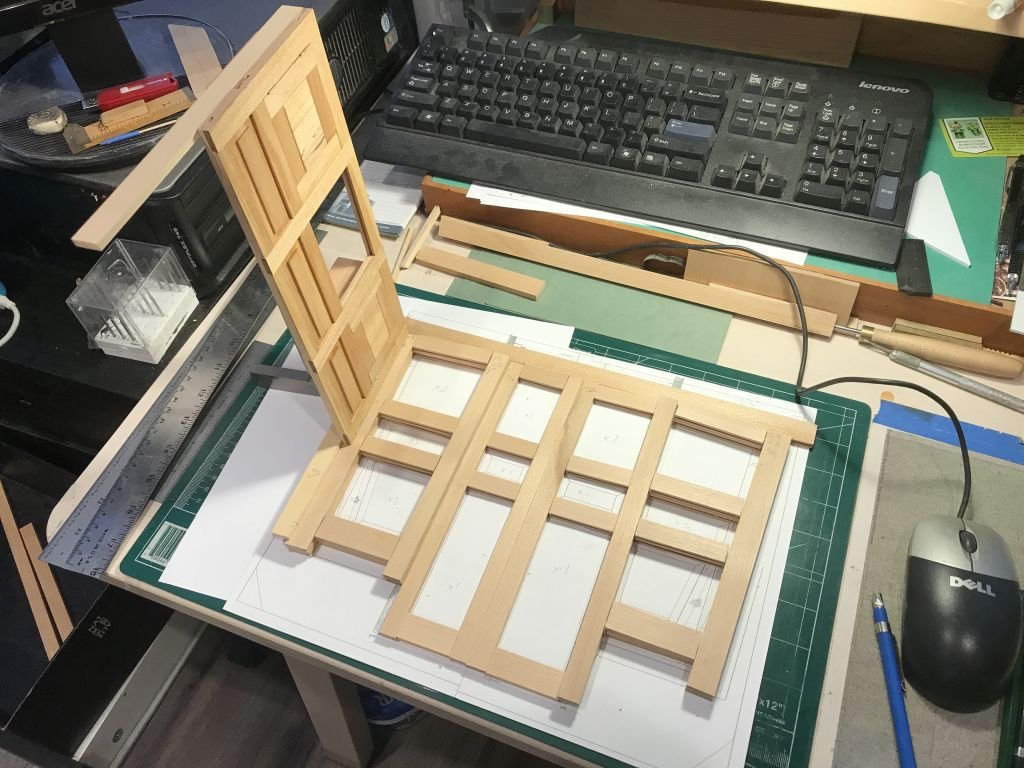
Thank you everyone for your kind comments they are appreciated. While working on the paneling I discovered that I had in my quest to have the floor and the end wall fit through the opening in the deck I had overlooked the issues of the door opening and not fouling the area below the seat cushions, I had been so concerned with the integrity of the floor component and that it be easily removable that the stile next to the door with the hinges was wrong I had made it too short because I had a bit of tunnel vision thinking about the strength of the floor box. this picture shows the problem My thinking was focused on the side panels and how they would slip in and lock into place. so when I placed the panel into the boat it looked like this. You can see the problem. So I decided to take off the solid end wall behind the paneling and removed the short side walls that gave the inset some integrity and had a rethink. By removing the solid panel it opens up a whole new vista which is better, My it would have been better to have thought about doing the interior before getting to this stage. so now I find myself working in some tight spaces, I need one of those magic reducing spells to miniaturize myself. Oh well! so now without the side walls and end wall. In order to give the floor a better integrity I cut some new maple floorboards that run the full length of the kitchen dining area these are just laid on top of the old fir floor loose at the moment. Now with the port side panel included after adding an extension to the stiles on both sides it looks more like the one inside Integrity which I am using as a general guide. And this then makes having the door opening make more sense, because I can see through into the forward area around the mast. All I need to do now is figure out how to make all this work. I am having a lot of fun even if I take two steps forwards and one step back half the time. Michael


-
Cutty Sark by NenadM
michael mott replied to NenadM's topic in - Build logs for subjects built 1851 - 1900
You will prevail Nenad! And happy new year to you. Michael- 4,152 replies
-
- 3
-

-
- cutty sark
- tehnodidakta
- (and 1 more)
-
Paul we call them filing buttons, it is usually a piece of steel like a smooth bobbin that is hard and acts as a guide for filing once you get to the bobbin you cannot file any further. Michael
-
Lovely work on the pawl Keith filling it with mahogany is a great Idea. I will save that one for later. Michael
-
Congratulation Javier! seeing the pen next to the model, then with the hatches removed is a testament to your skill with these exquisite models, everything else speaks to that as well of course. Michael
-
Doris, it is such a pleasure to see the wonderful sculptural elements that you make that adorn the ships that you build. Having watched your videos about how you work with the modeling clay, and realizing that your comment about easy to do with every day tools is a result of years of practice, a keen eye, and an artistic talent that is rare. Thank you for continually sharing your work with us. Michael
- 1,035 replies
-
- 3
-
-
- royal katherine
- ship of the line
- (and 1 more)
-
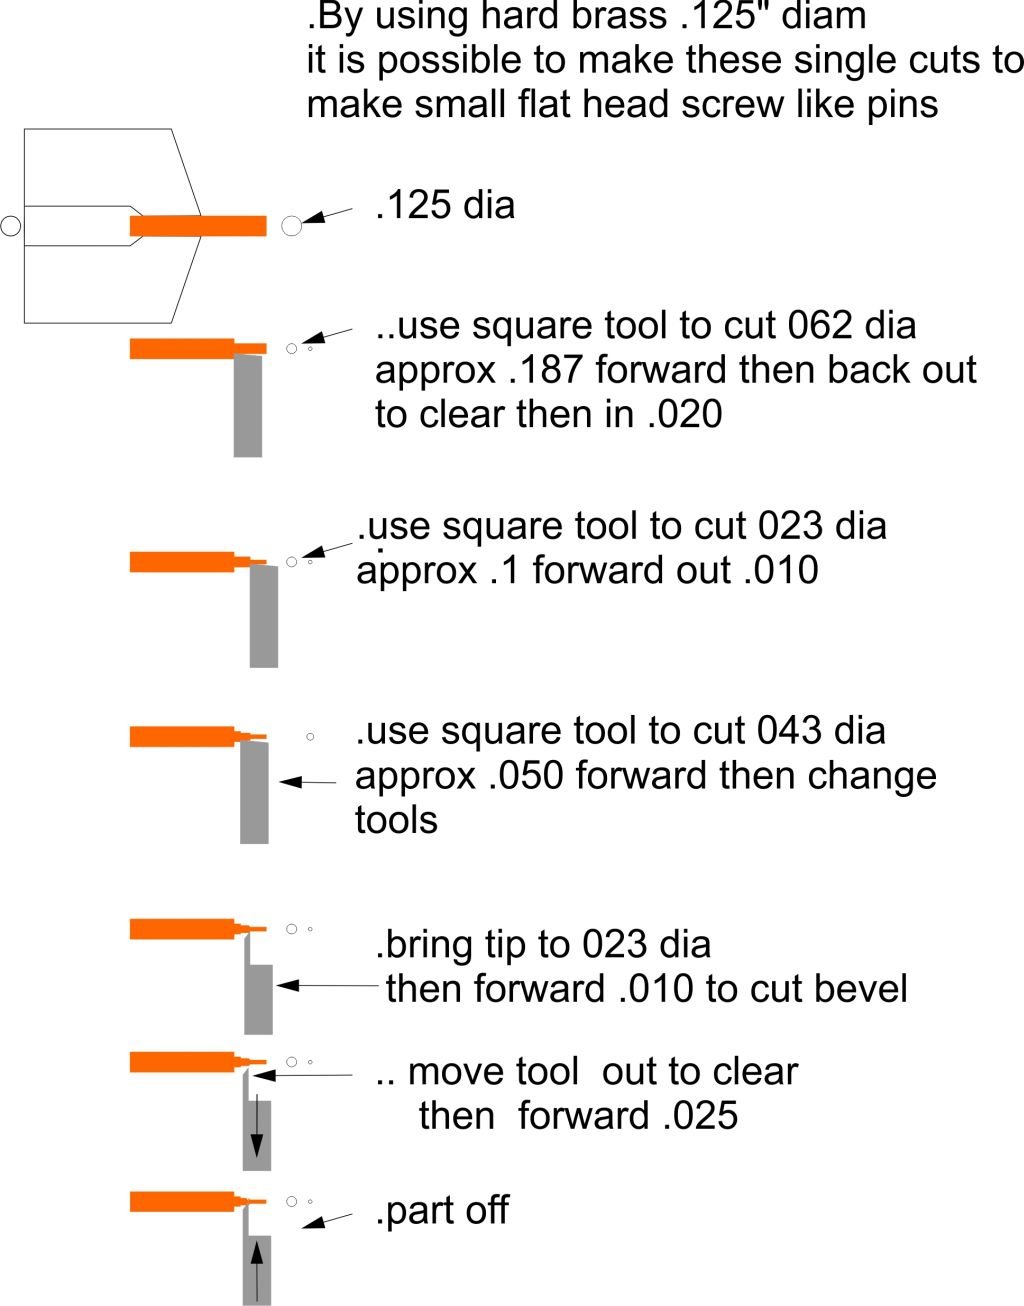
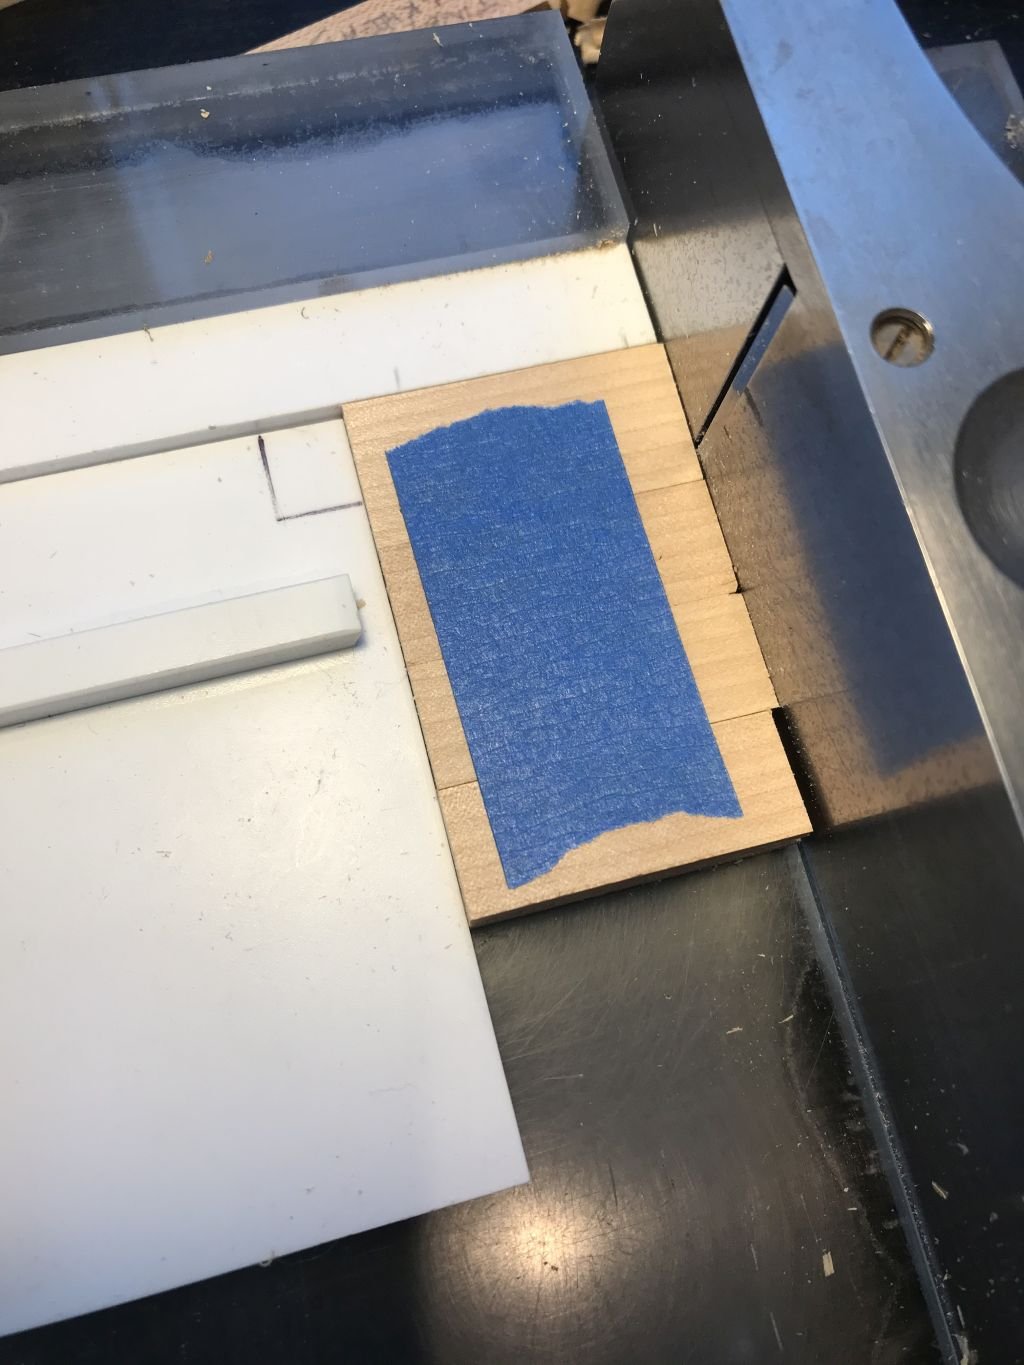
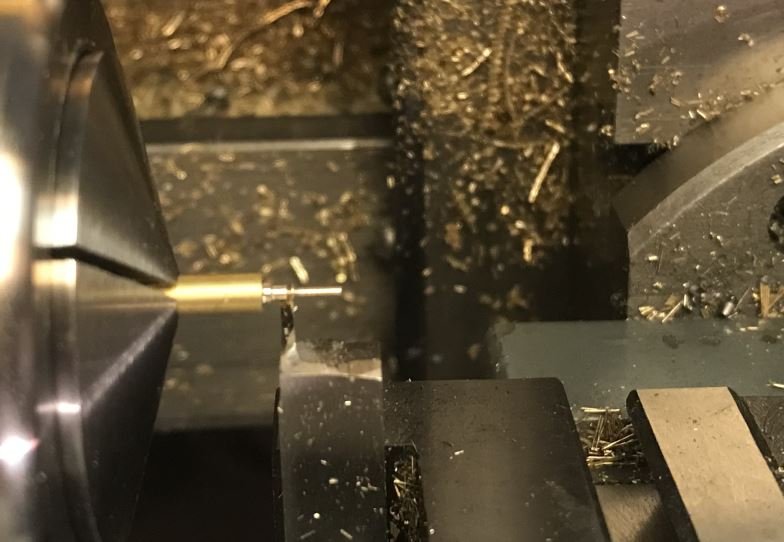
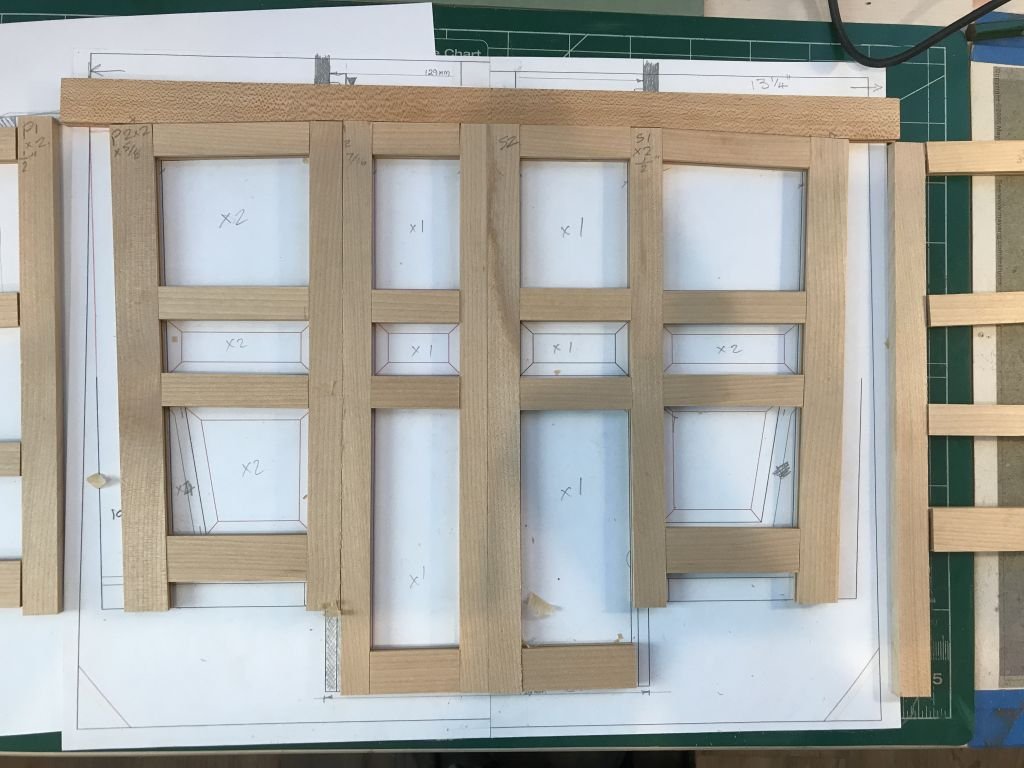
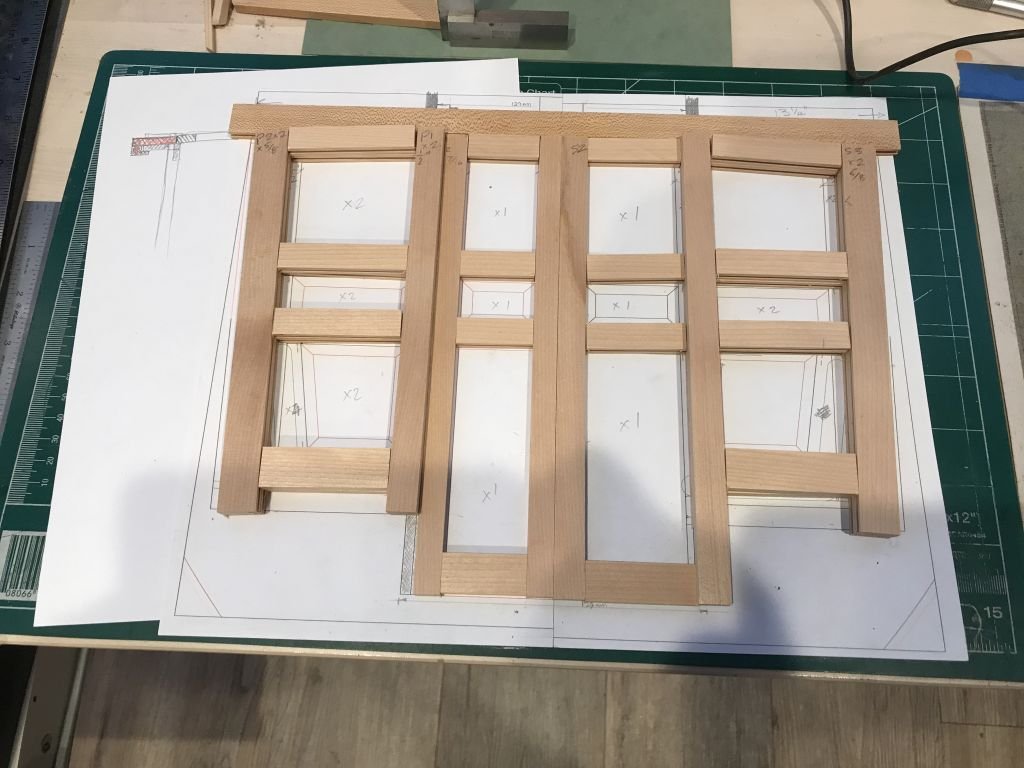
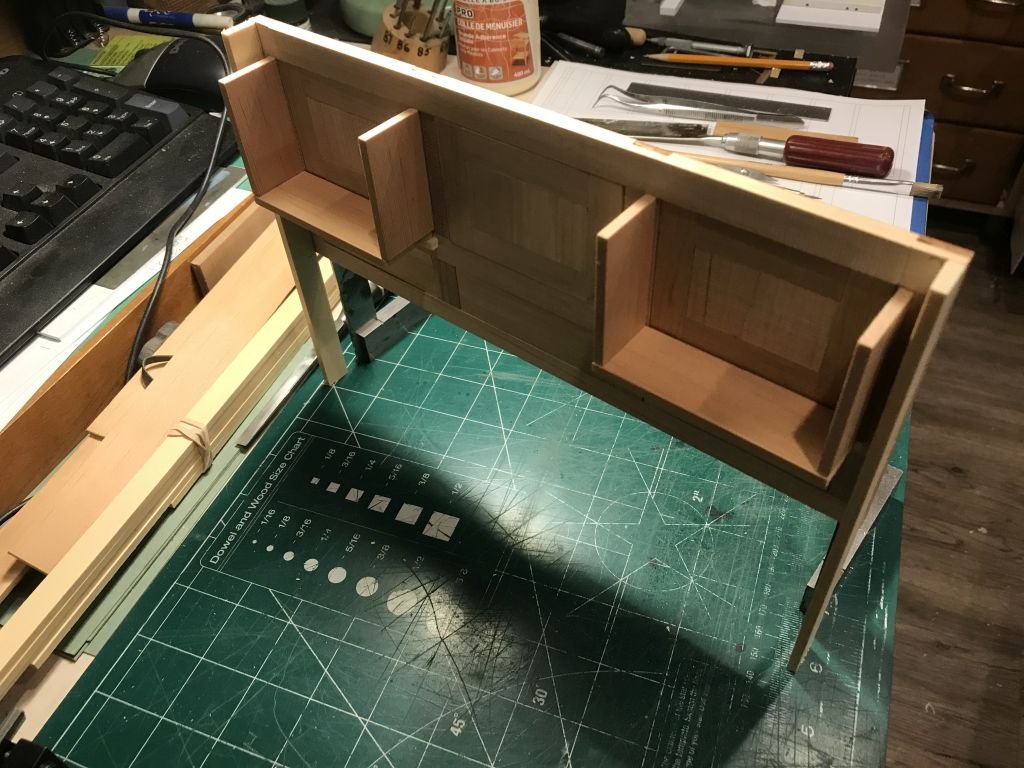
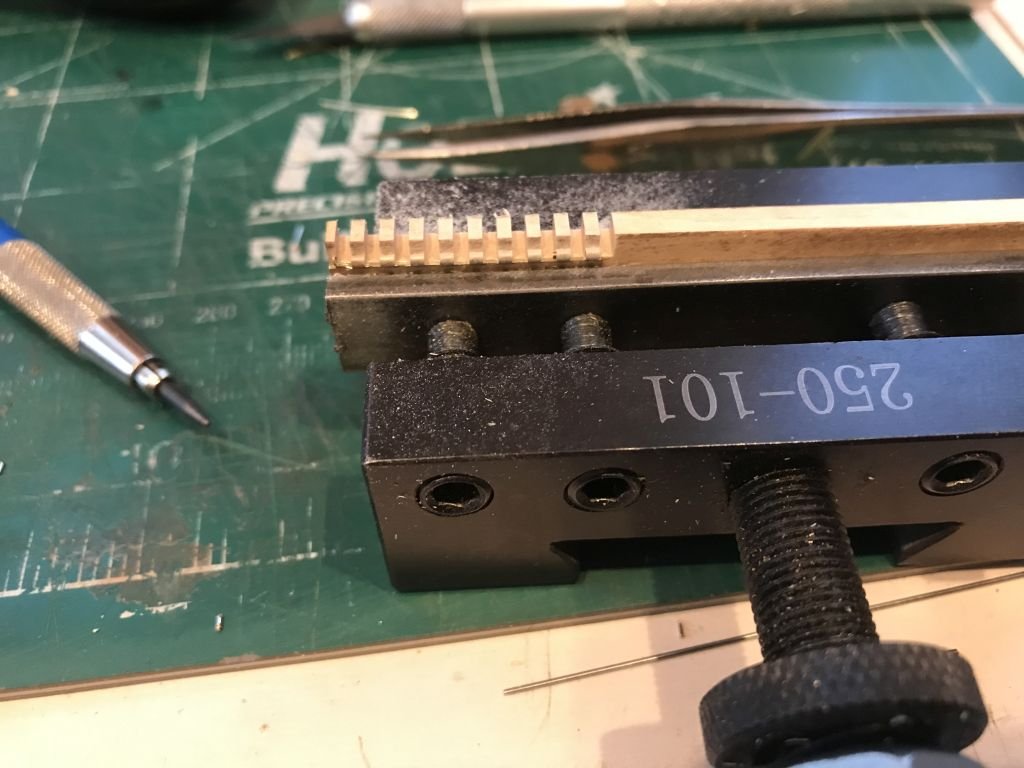
Well now that we agree we all had hair we can move on. first for Pat the sequence for making the screw like pins then mounted in the pin vice to cut the slot. I spent the afternoon fitting the rails and stiles to the plan I used the shooting board a lot to trim pieces to length. Then prepared some more salted maple for the bulkhead panels, some trimming still need to be done to bring the panels to the correct widths. This is the material I picked up for the cushions. And this is the way they will look with the buttons , these are cotton seat cushions from one of the garden railway carriages. That's all for today. Michael


-
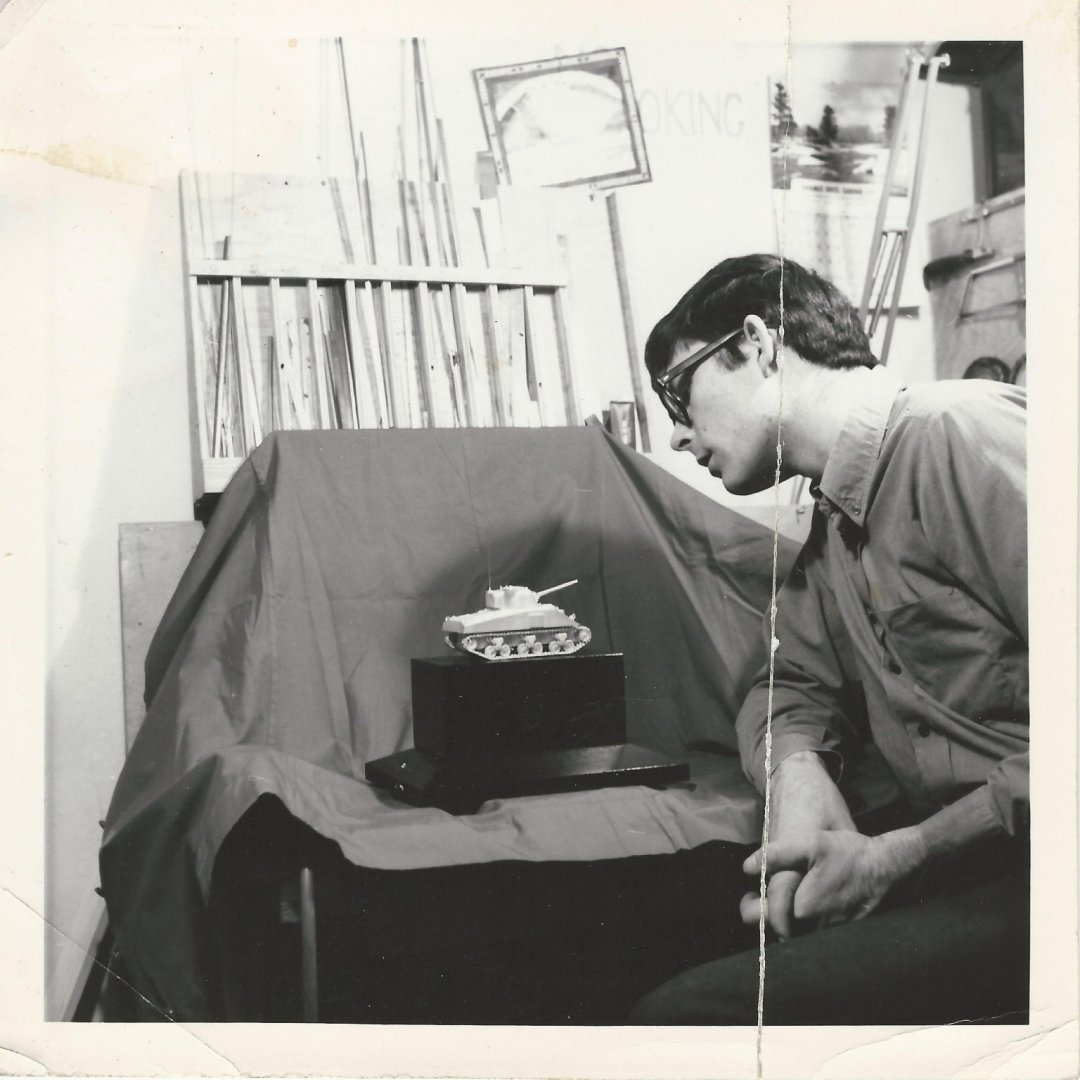
Druxey thank you, yes I had hair in those days I was 19 years old. Bob thanks for the link. I shall sort something out. Michael
-
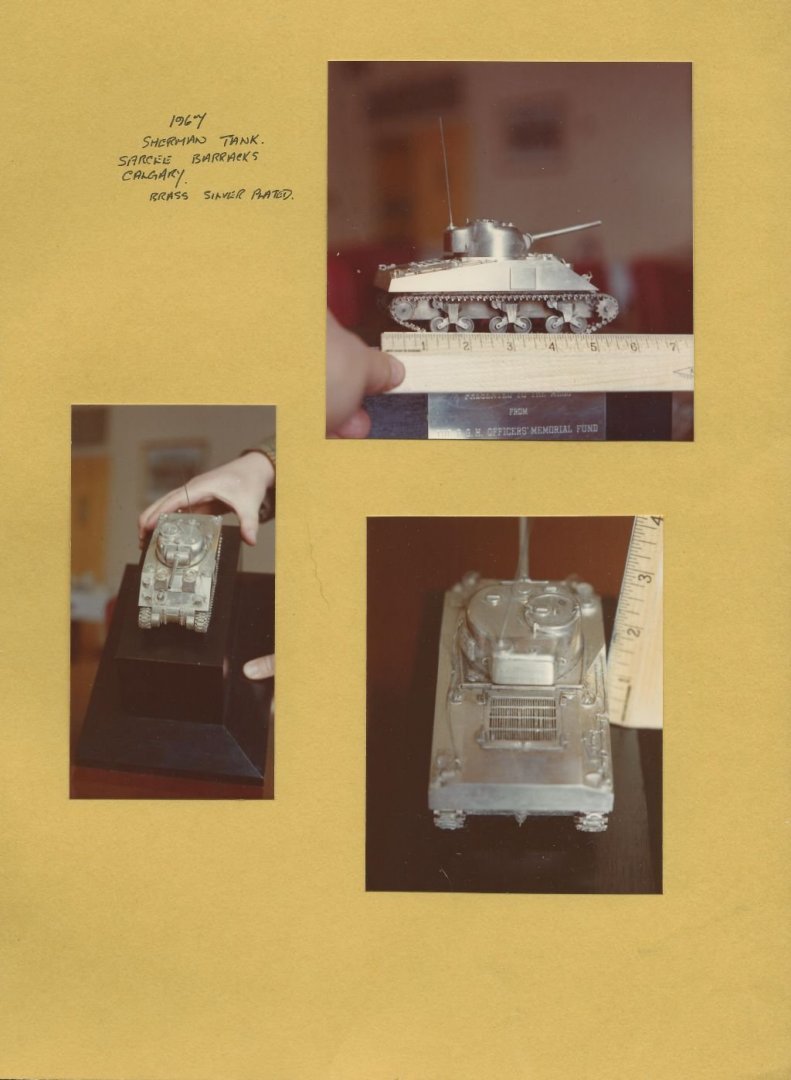
Pat Thanks, I will draw up the sequence that I used, it might take a day or so. Steve funny you should mention that, The very first model that I made when I came to Canada was a silver plated model of a Sherman Tank that was used in the second world war that helped to liberate Holland I made it for the Sarcee Barack's Silver collection. it was a 1/72 scale model and the track actually worked there were 1571 parts that were made to complete this model. I folded a piece of paper with my name age address and that I made it, and placed it inside the model before it was delivered. I had forgotten about this until you mentioned the idea so yes I will do that perhaps in the charts locker. Michael
-
Nice proportions Steve, I like the way the gaff lines up with the forestay, It really shows the benefit of the gaff rigs versatility. Michael
-
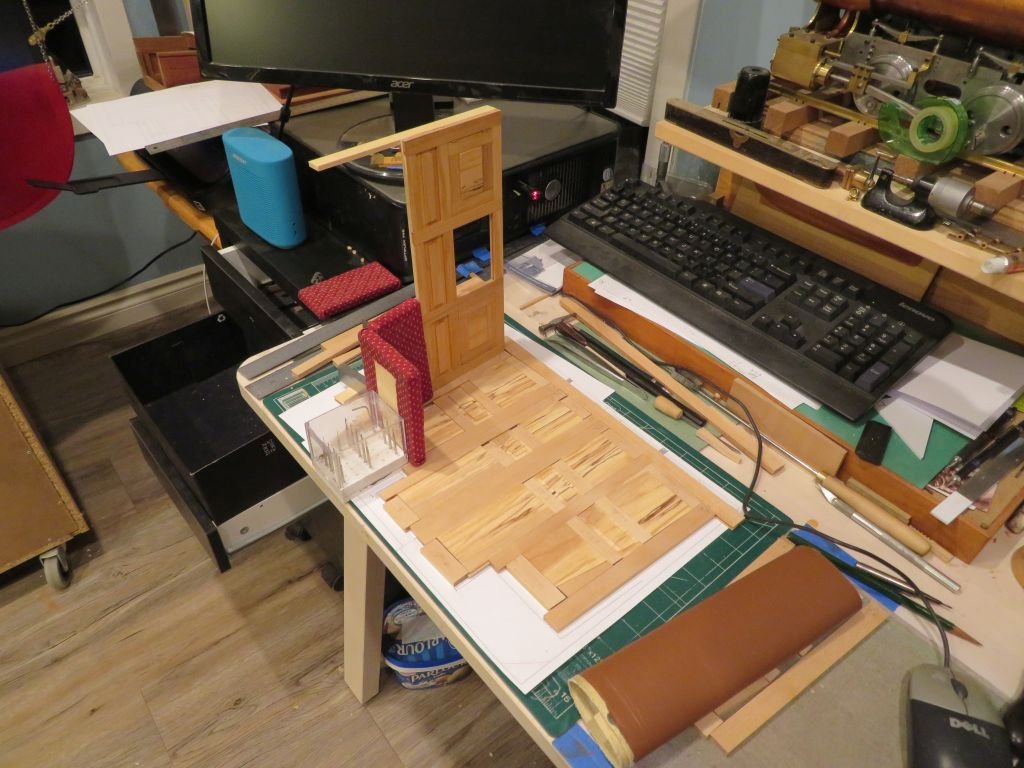
Thank you All for your kind comments, and also to those who are following along quietly. I spent the morning sorting out the forward and aft bulkheads for the dining area had to scratch my head a few times. This afternoon was spent prepping the materials for them. I have decided that the forward bulkhead will be made to include the sides of the seating areas, and will have a location tab at the edges to locate the forward ends of the side panels, the aft bulk head will form as parts of the cooking area and as there is no door they are smaller and will also have a location tab for the aft end of the side panels. A couple of shot showing today's progress Michael
-
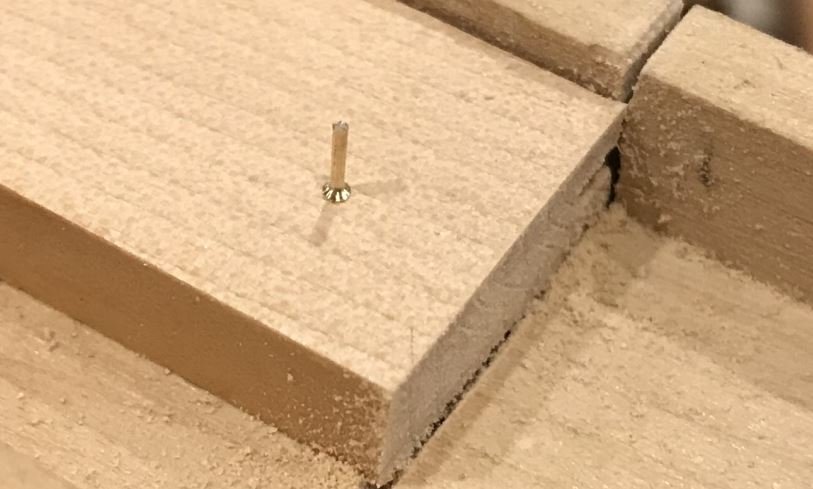
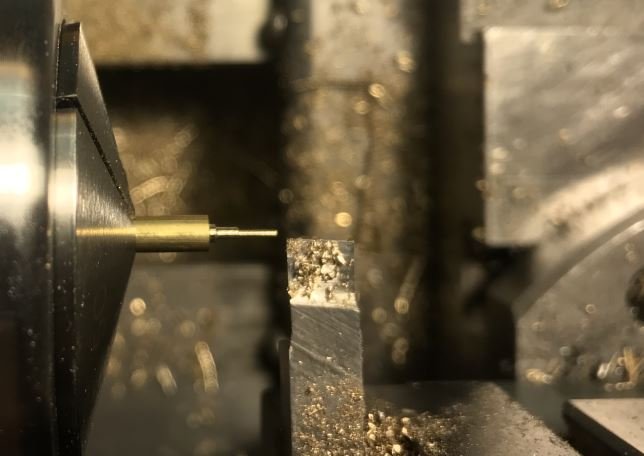
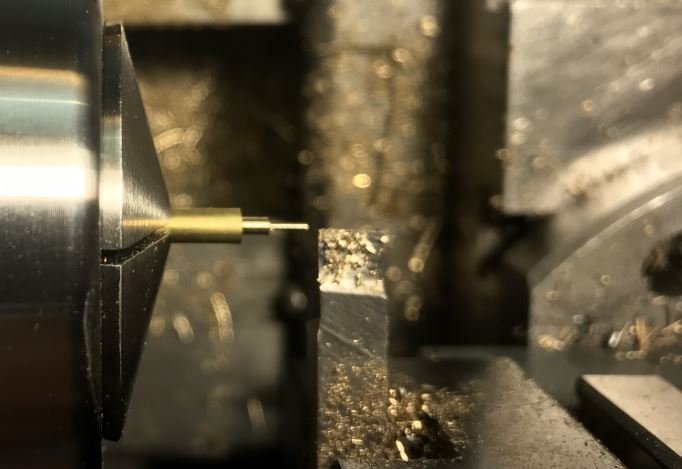
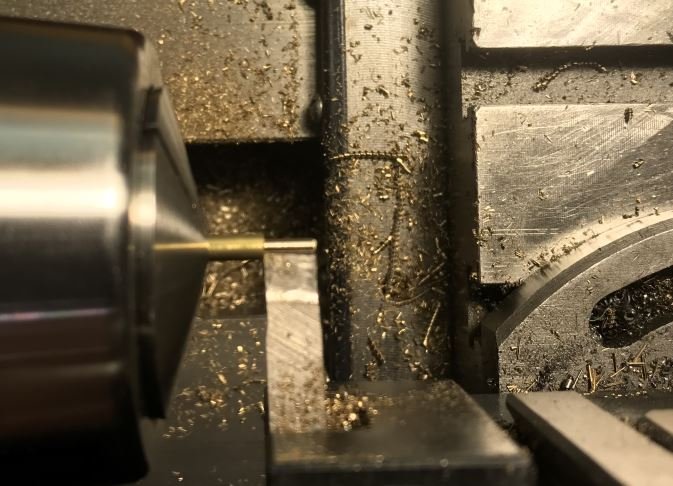
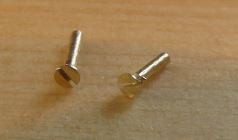
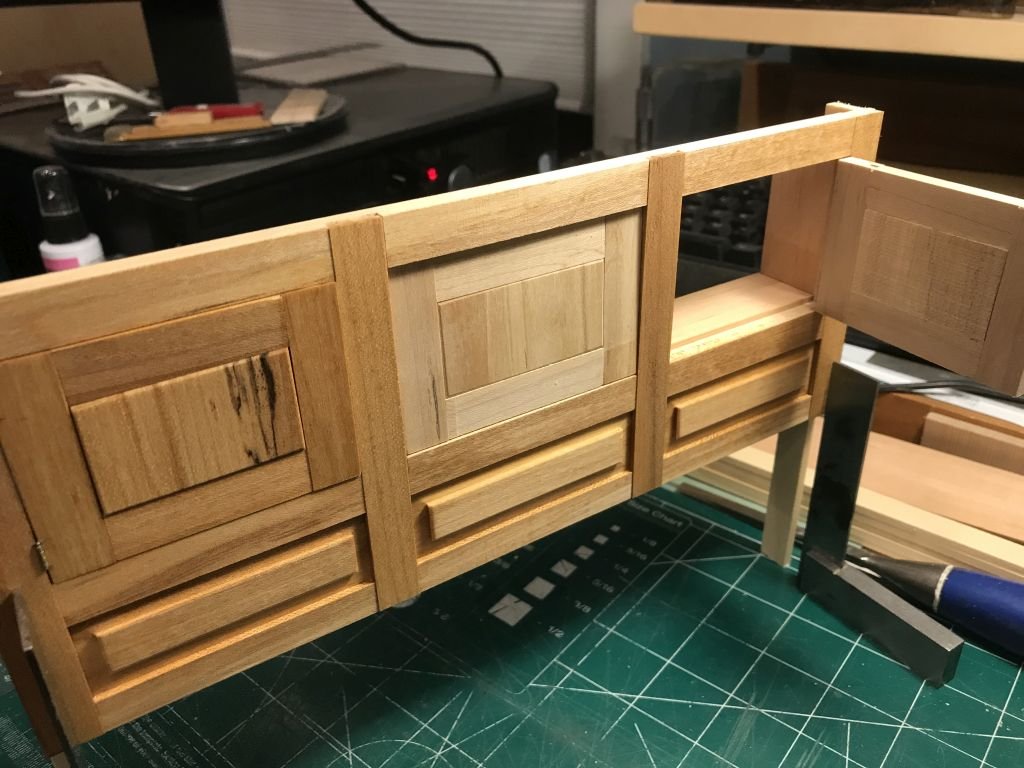
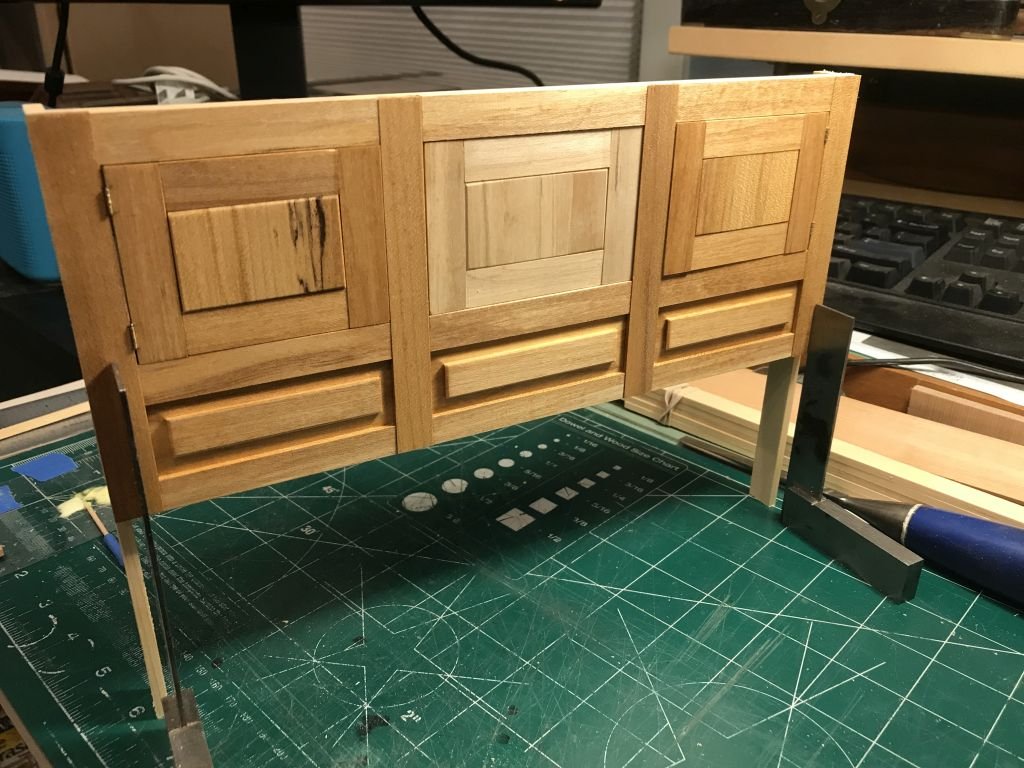
Spent a few hours this morning mucking about with turning tool form, working at making minute screws from hard brass which turns better than the small brass plated pins that have heads that are forged and require some very careful cleaning up in order to create the fake screws. I eventually came up with the formula for the smallest screws they have a .5mm body with a 1mm head. This afternoon assembled the top half of the port side paneling after finishing the forward cabinet door hinges, I glued on the rear vertical supports and boxed out the interiors of the two cabinets. I am still deciding haw to deal with the middle panel. yesterday I picked up some very nice tan material for the cushions. The insides of the cabinets are recycled extremely fine grained old growth clear fir that came from the redwood garage door The frames around the redwood panes was old growth clear fir. I put a coat of Tung oil on the maple it has a nice glow. Michael
-
Beautiful workmanship Javier. It is also great to catch a glimpse of the collection behind in their individual cases. Michael
-
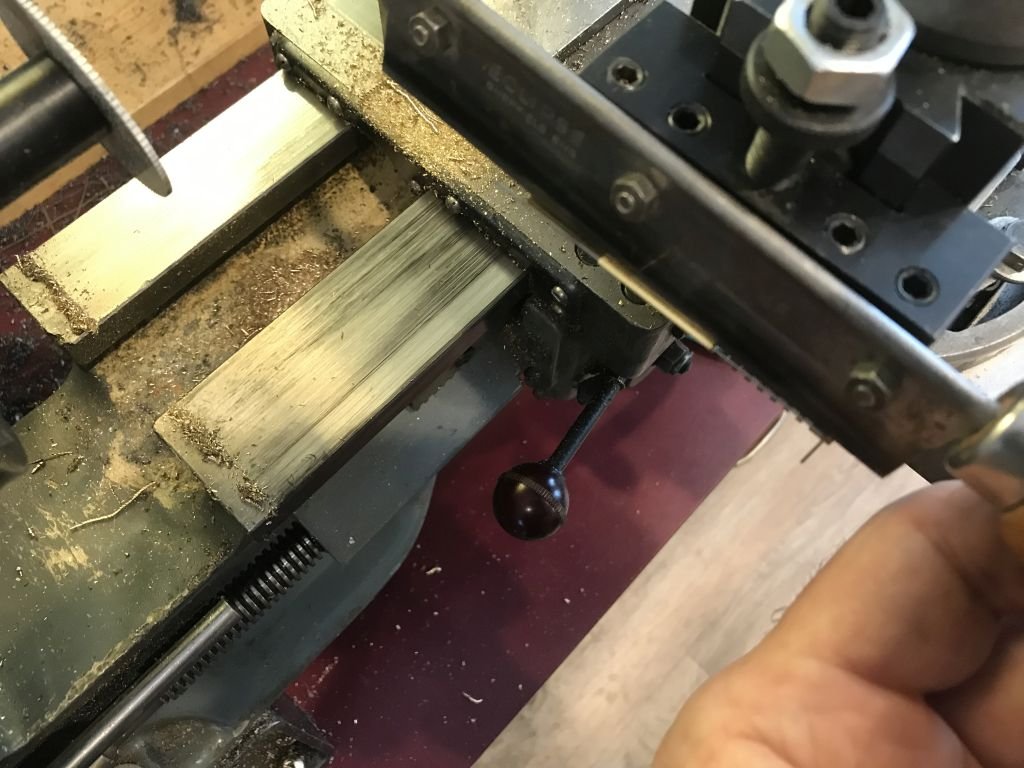
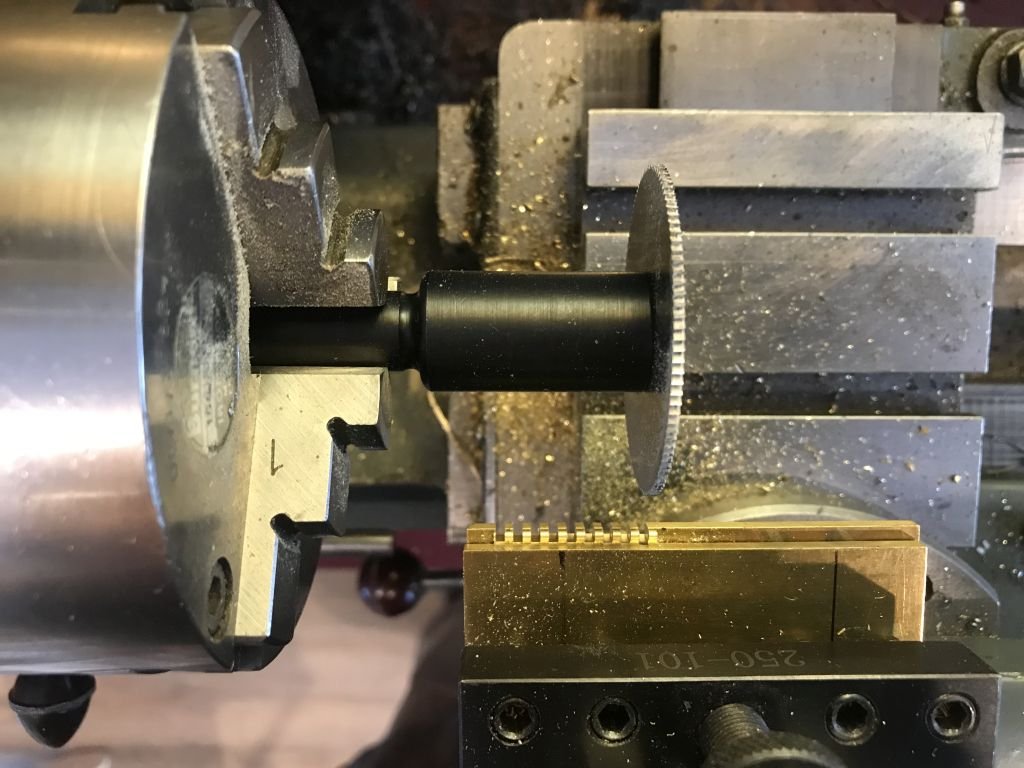
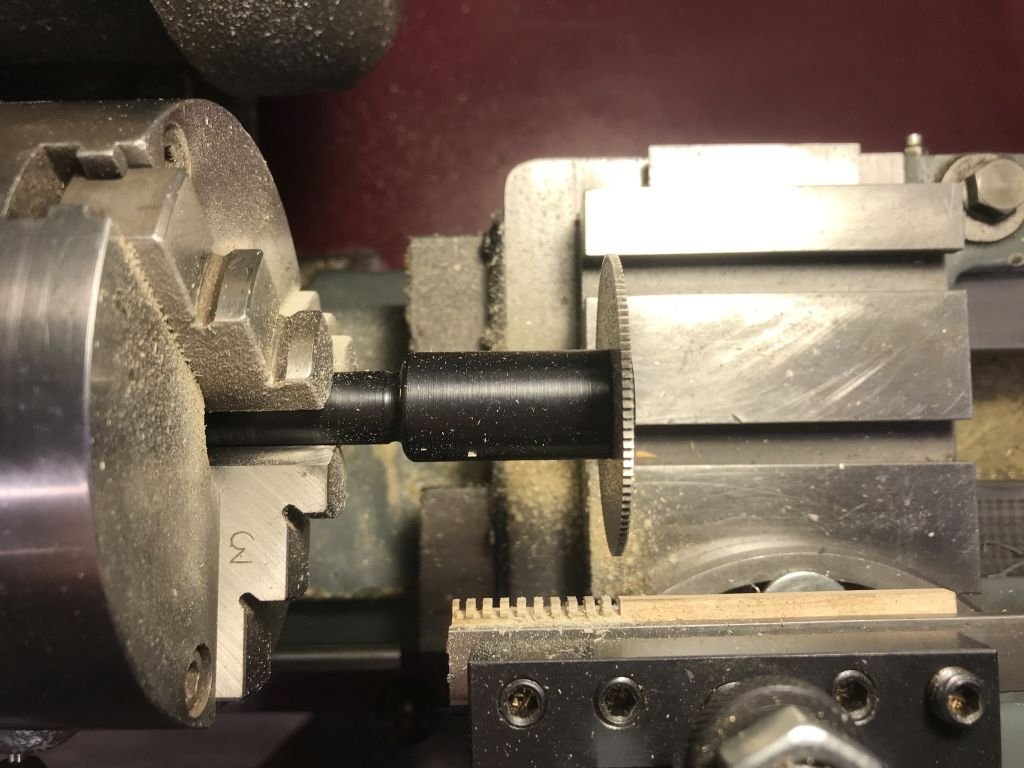
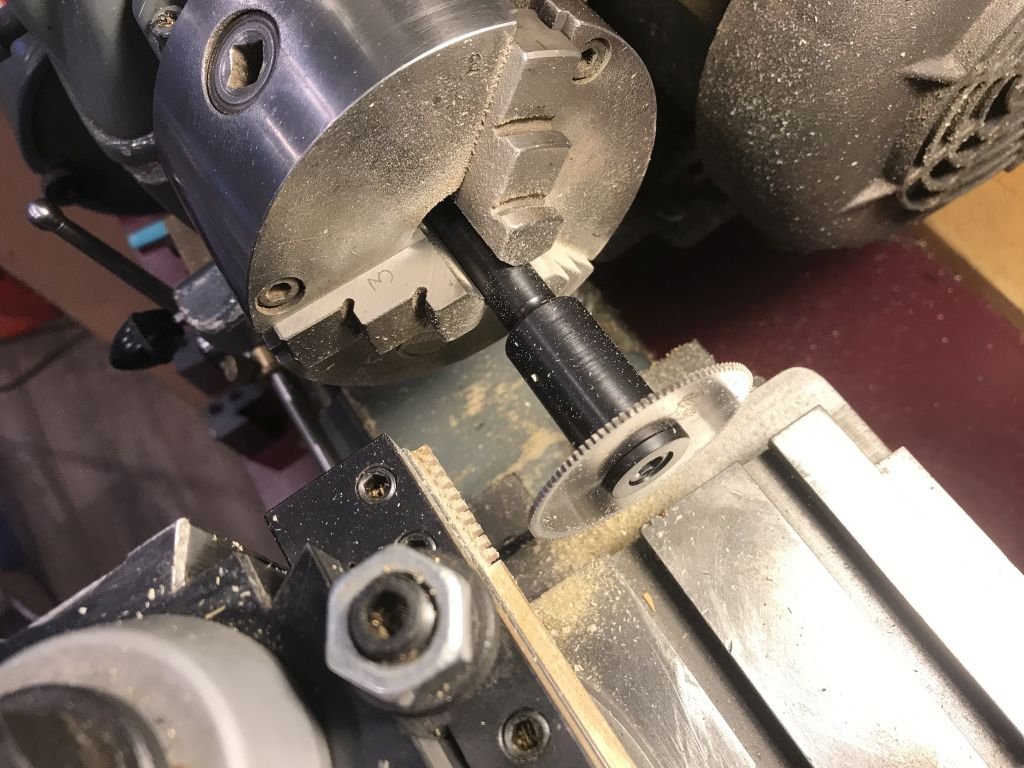
I picked up my new slotting saw and arbor yesterday I like the way it cuts. I also prefer using the lathe for making the slots rather than the mill The worm on the quill is a bit worn and the very fine depth adjustment is still able to be done but is much more fiddly that on the lathe when making multiple increments for slots on the lathe I just need to index the carriage along the bed. All the same issues really but easier to deal with on my lathe. Ah the joys of backlash on old machines (50 years) Nice clean cuts these are .057" which is the thickest width on the 2 inch diameter saw with 110 teeth Michael
-
Well Gary not according to some learned members of this site. From a logical perspective though having the moisture, dust , able to fall out via gravity makes much sense to me. There are some "known knowns; there are things we know we know" about brass. "We also know there are known unknowns; that is to say we know there are some things we do not know" about brass. Sorry Carl I couldn't resist. Michael
-
Nice clean work, the hull has very graceful lines especially the sheer. michael