michael mott
-
Posts
5,200 -
Joined
-
Last visited
Content Type
Profiles
Forums
Gallery
Events
Everything posted by michael mott
-
 Hello Kris perhaps a library book on fretwork what type of scroll saw are you using? Pictures please. michael
 -
Hi Keith what sizes and what brand are you using, the ones I looked at on the net that are 1" or 1 1/2 inch diam were $100 -200 which is beyond my budget. Michael
-
Thanks for the link Eberhard, I will likely make a holder similar to the one shown for some future works, there is some other very interesting parts to that link as well. I made a really quick crude fly cutter from a spare Allen key, ground the width to .064" and set the brass up in a toolholder with the Castelo backing 'all pretty jury rigged. The speed of the lathe is not quite as high as the mill and it being only a single cutter the slots are not quite as crisp as the slotting saws, I ordered one today will be here tomorrow. After a bit of fettling it actually cleaned up quite well and assembled OK. so proof of concept works. I do have a small boring bar that will take small 1/8 square HSS tool steel but it is set up with a BSW (55degree angle not 60) cutter for boring a new back-plate for my C5 collet chuck for my Myford the first back-plate was beautifully threaded 1.25 x 8TPI (even if I say so myself) however it should have been 1.25 x 12TPI...... don't ask! so that is why I used the Allen key fly-cutter.

-
Cutting brass sheet
michael mott replied to Landlocked123's topic in Metal Work, Soldering and Metal Fittings
As a person who uses a jewelers saw a lot Eberhard is correct in that the support needs to be flat. When cutting very thin sheet that needs to be curved it also helps to glue it to some thicker substrate like 1 mm ply (model aircraft supplies) even styrene sheet works in a pinch. Michael -
Thanks for the information Vaddoc, I looked at your video. It is my personal preference to use precise tools where I can. Abrasive cut off discs and sanding discs are dispensable items as such that they wear away as they cut by abrasion much like a grinding wheel does only because they are thin they wear away much faster plus they eject those same particles as they revolve at high speed. A slotting saw is high speed steel and is ground to precise thicknesses with 90 degree square edges at the cutting face and for the most part remain at the same distance from the center of the axis of rotation through the extent of the operation and beyond. The only equivalent I can think of that I am sure you can relate to is the line drawn with a 4b pencil that starts with a sharp point at the beginning end of a 36 inch line and is a wider width at the end of the line than at the beginning of it, verses a rapideograph pen that remains the same for the entire length. I am biased of course, I have a Dremel that spends most of its time in the drawer, as it has been supplanted by different tools. the last time I used it was to cut rail in situ on the garden railway. Michael
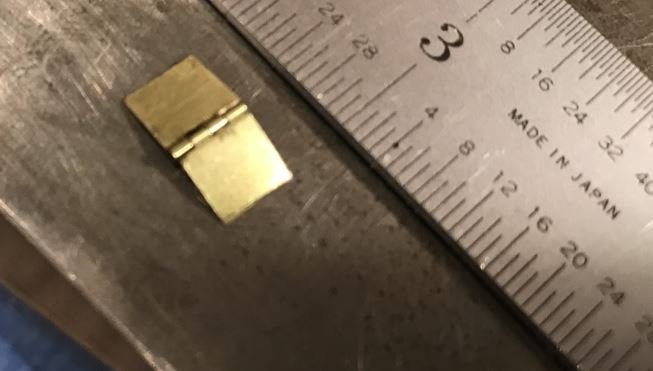
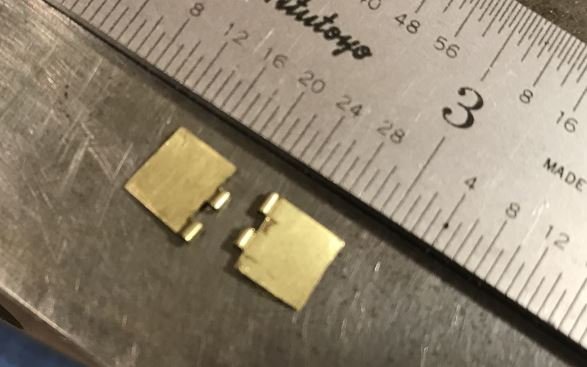
-
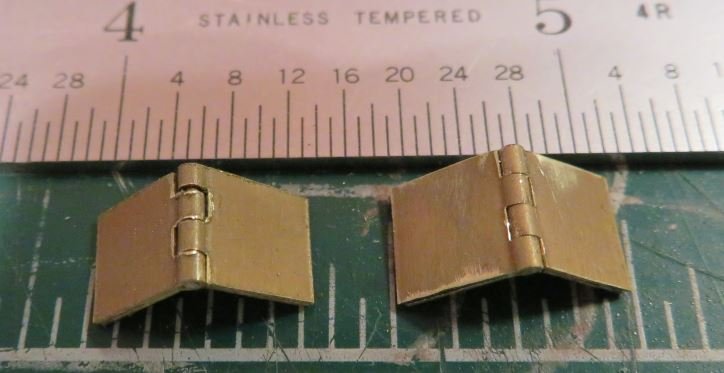
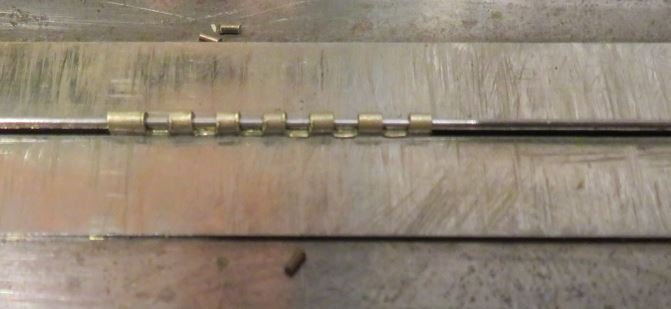
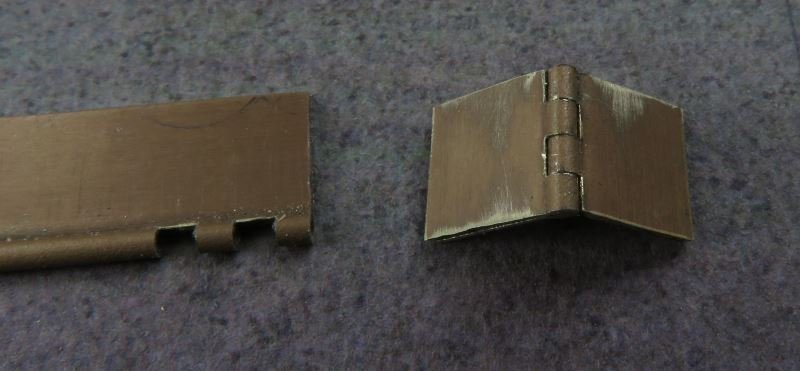
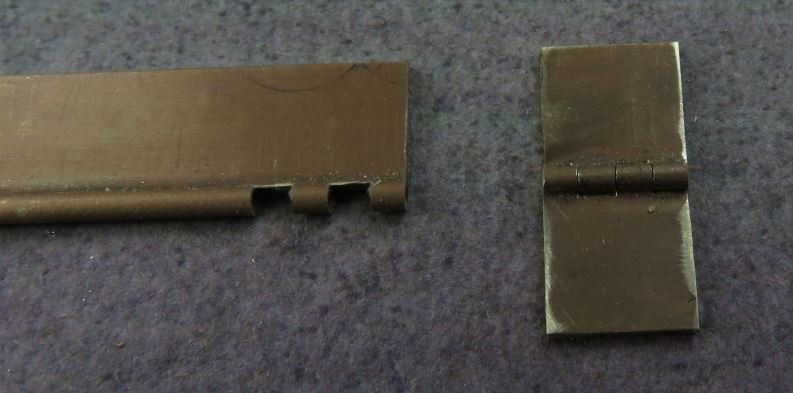
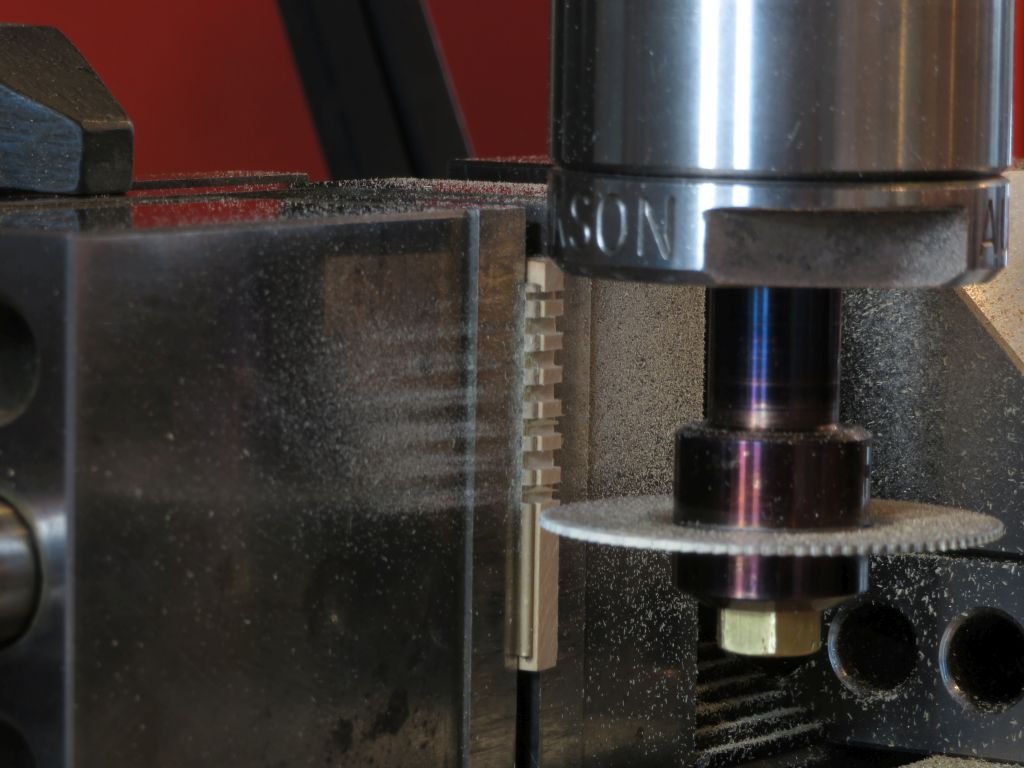
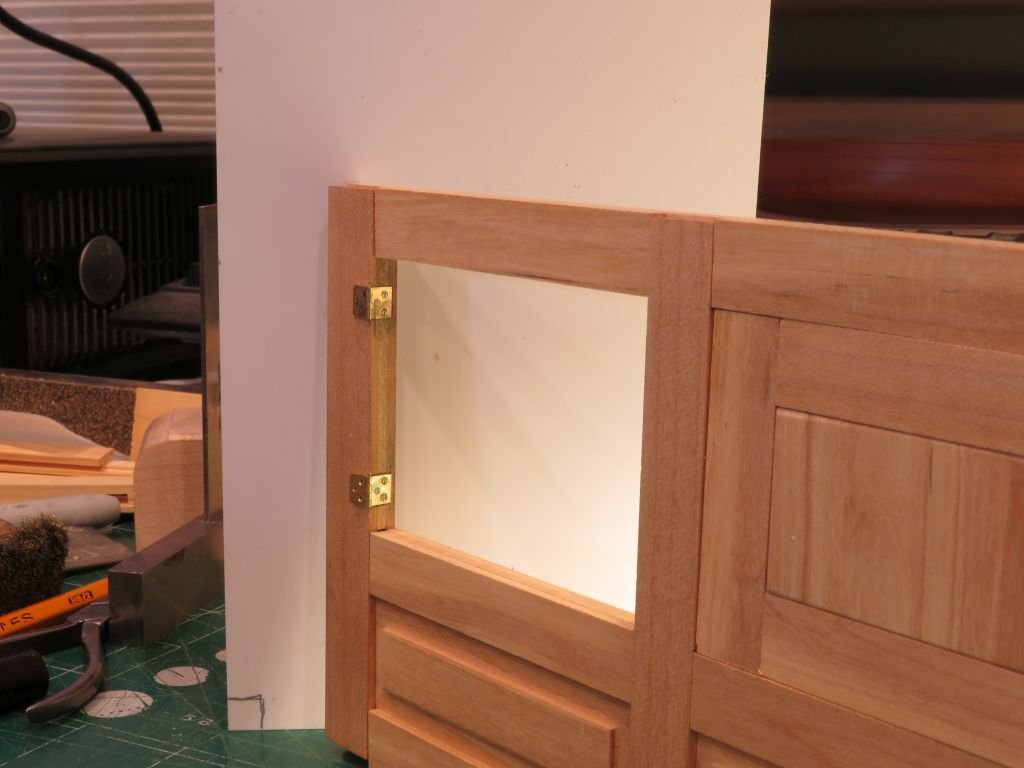
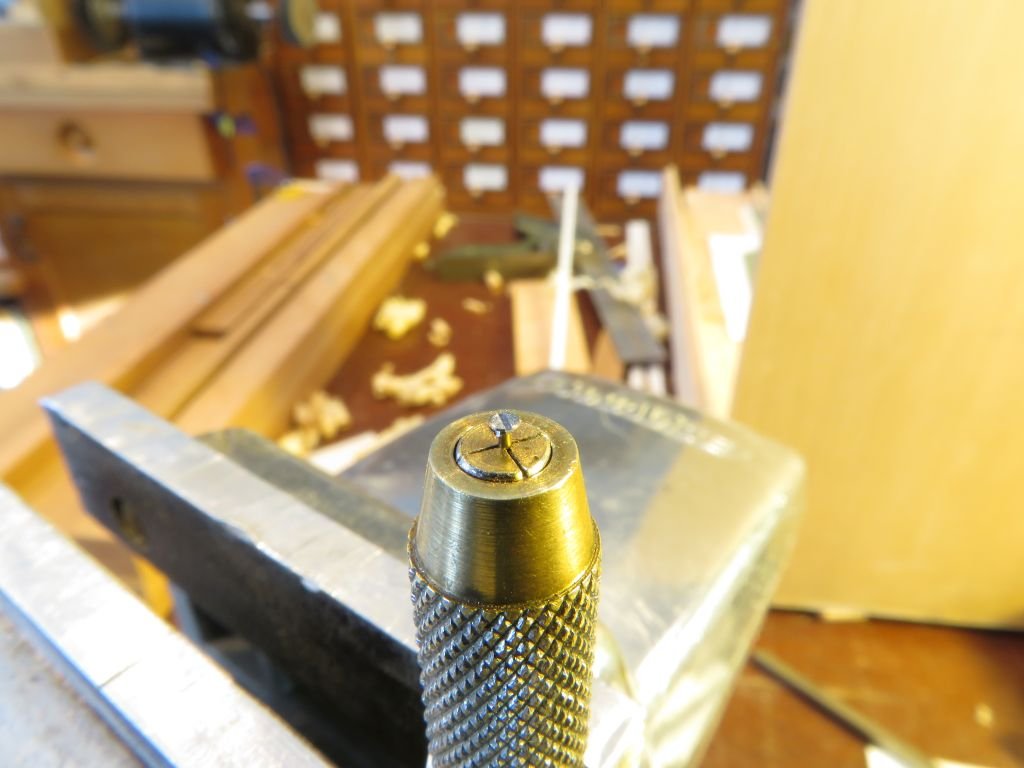
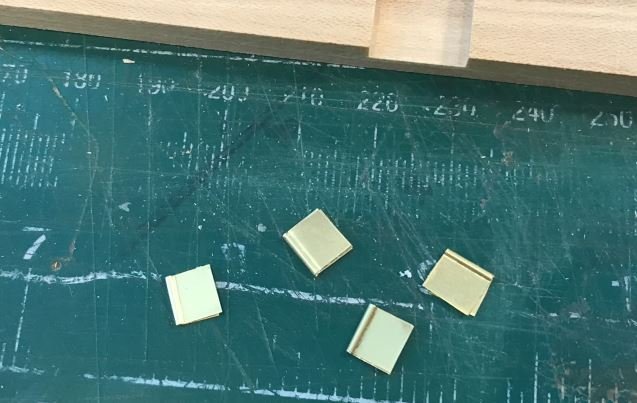
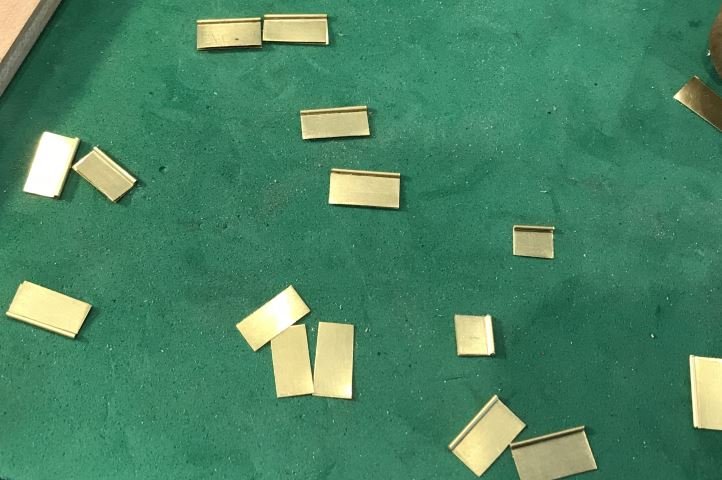
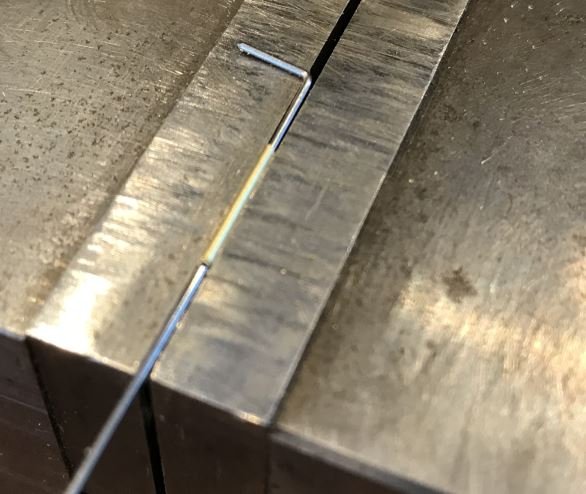
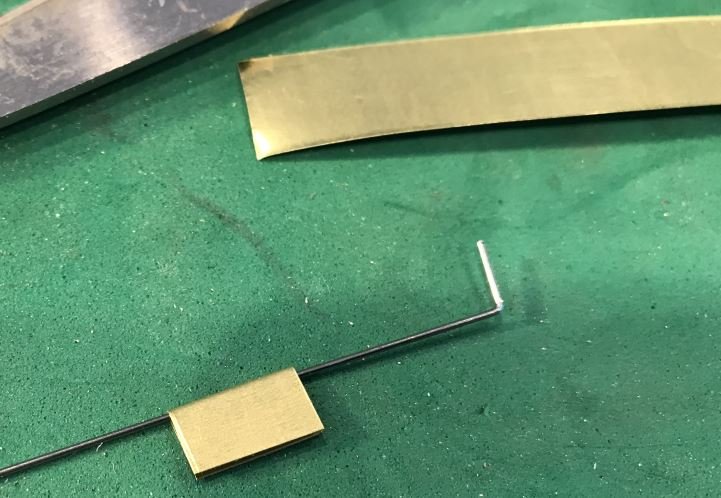
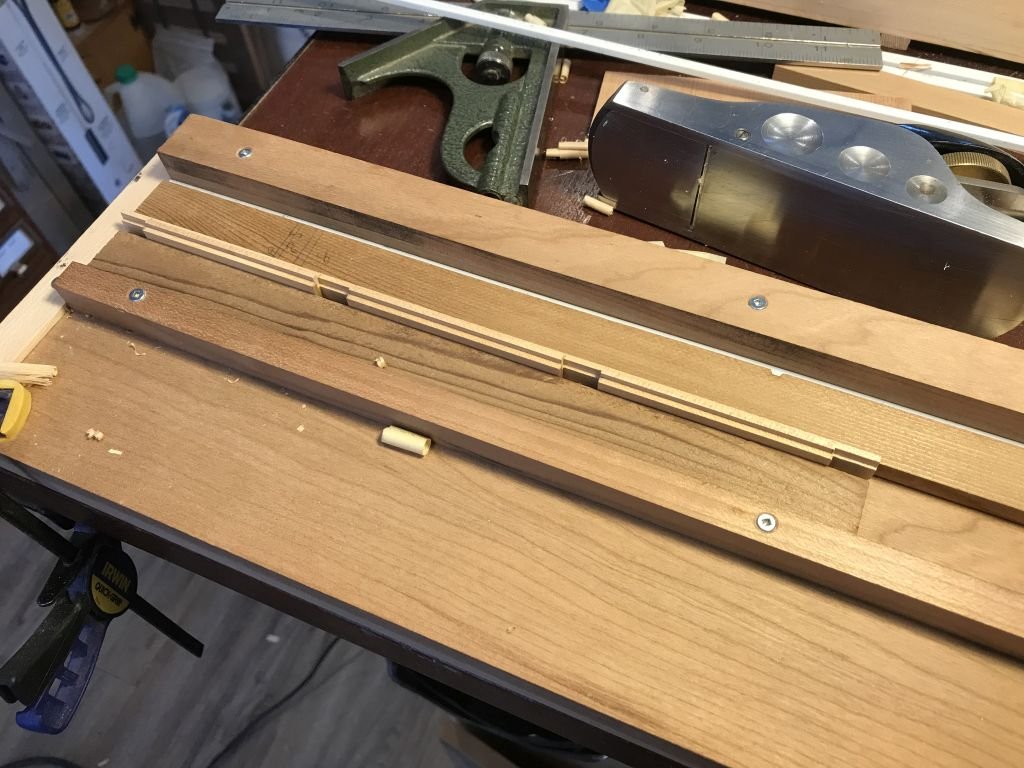
Hi Vaddoc, I use epoxy for some applications but I cannot see using it on the Yellow cedar for any reasons, The issues I had were caused by trying to shortcut the building process of cabinet work in miniature. The yellow cedar is indeed a beautiful wood for model work the one drawback is that it is soft and marks easily. That said I will be using it for other model cabinet work but will use it in the same way that I worked the hard maple. I finished the first set of hinges, which were laboriously slow to make. After reading Dan's comment about how he made his hinges, I am guessing that they are smaller than mine I thought about building a miniature saw but decided against that for now and did an experiment with my slitting saw on the mill The saw I used is only 1 3/4 in diameter and 1/32 inch thick so in order to get 1/4 inch tabs I had to make double cuts. I used some .010" annealed brass for the hinge body but used .028" brass wire instead of the soft Iron that Dan used. I think that .008" brass might be better. I folded a length of about 1 1/8th inch to form the long piece then set it up in the grinding vice with a piece of Castelo as a backing to support the brass while the cutter was fed into the brass. tomorrow I am going top purchase a slitting saw that is .064" and 2 1/4 inch in diameter this will allow for a longer piece to be slotted because I will have better clearance, and wont have to double cut it will make the indexing that much easier. After removing the strip from the vice I cut two pieces and to my surprise the fitted together without any fettling so this will be the method going forward. The ten thou is a bit too thick though so I will use the 8 thou brass shim. Michael
-
Yes Dan thank you. I think I am going to have to sort out a miniature table saw. Michael
-
Beautiful work Dan, I remember when you did that, your hinges look really great! in the picture with the hinges on the coin it appears that the metal that was inside the pin sections is still there, how did you cut the slots? it was some time ago and I cannot remember your sequence. Michael
-
Hello Vaddoc, your comments about the wood quality are interesting. At my local hardwood supplier "Chanin Hardwoods" I went in looking for some straight clean grained Cherry, he had a couple of lifts of highly figured Cherry but no straight grained Cherry, his comment to me was "why would you want such a boring looking grain?" I occurred to me that model builders and the rest of the world who use wood have two different criteria and it has to do with the differences in scale, and aesthetics. Highly figured woods are desirable when juxtaposed well in furniture and mill-work. I am assuming that the supplies of clean fine grained wood is getting more scarce because of the reasons noted above. Ours is a marginal market compared to the industrial scale of the furniture companies who are the likely drivers of the hardwood cutters. It is only a guess on my part though, I am guessing that the suppliers of the wood for our models are at the mercy of the vagaries of the wood cutters. Last but not least the good wood is getting used up through various practices of increased production and damage and wood grows slowly. Michael
-
While it is great to have some fun on this site, I really appreciate the scholarship that is so evident in many of the logs, what a great use of sharing knowledge for the benefit of the rest of us.. Michael
-
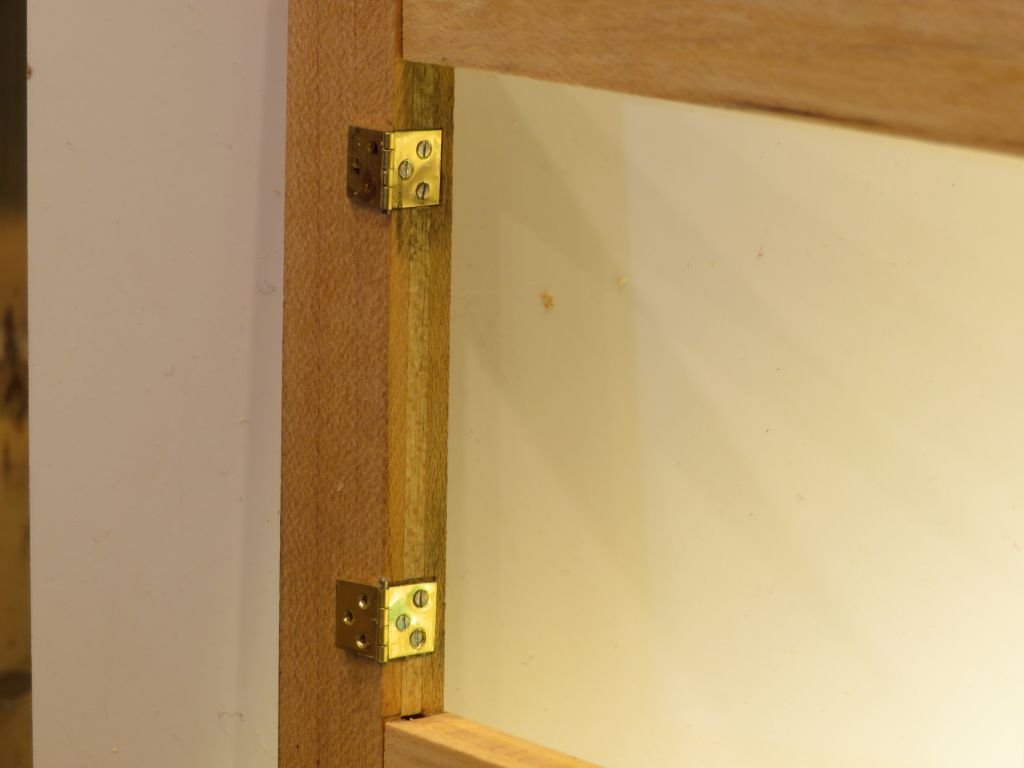
Michael - I was always taught that the slots had to be aligned vertically!!!!!!!! There is always one nit picker in every crowd.....🧐 It was a great deal of work unscrewing the screws and adjusting the bight on the screws with micro slivers into the previously used holes then rewinding them in just enough so that they were tight at the right point Had to de-burr the underside of one of the flat head screws because the slotting machine had left a slight burr on the feed out side of the screw which I had missed that was holding the screw up slightly causing the slight out of alignment. however I managed to get it put right. So I hope all the purists are satisfied now. I shall be more careful on the door and the rest of the hinges.😀 Yes I know there is a little gap in the bottom corner, "Charlie" is planing up a little wedge of maple to fill it in.
-
Hinge man hmmm Fixing the hinges required some tiny "fake screws the head is .049" and the body is .020" A bit fiddly to fix to the stile but practice will eventually make it feel easier. Michael
-
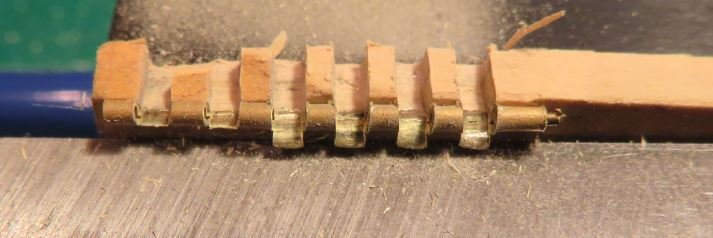
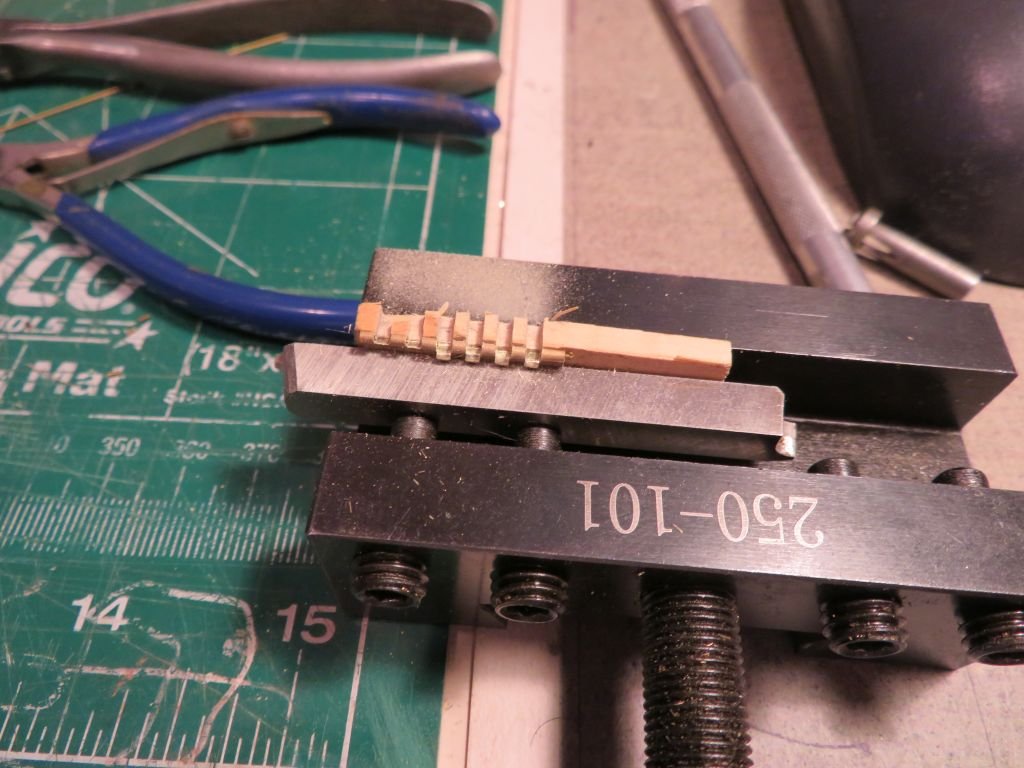
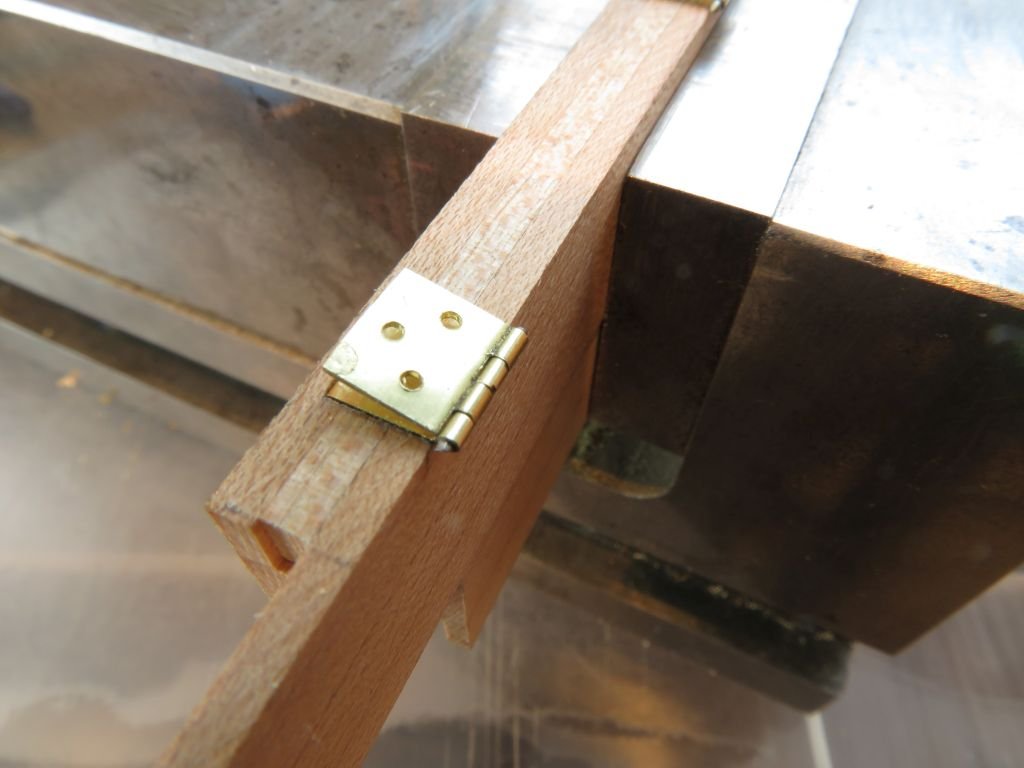
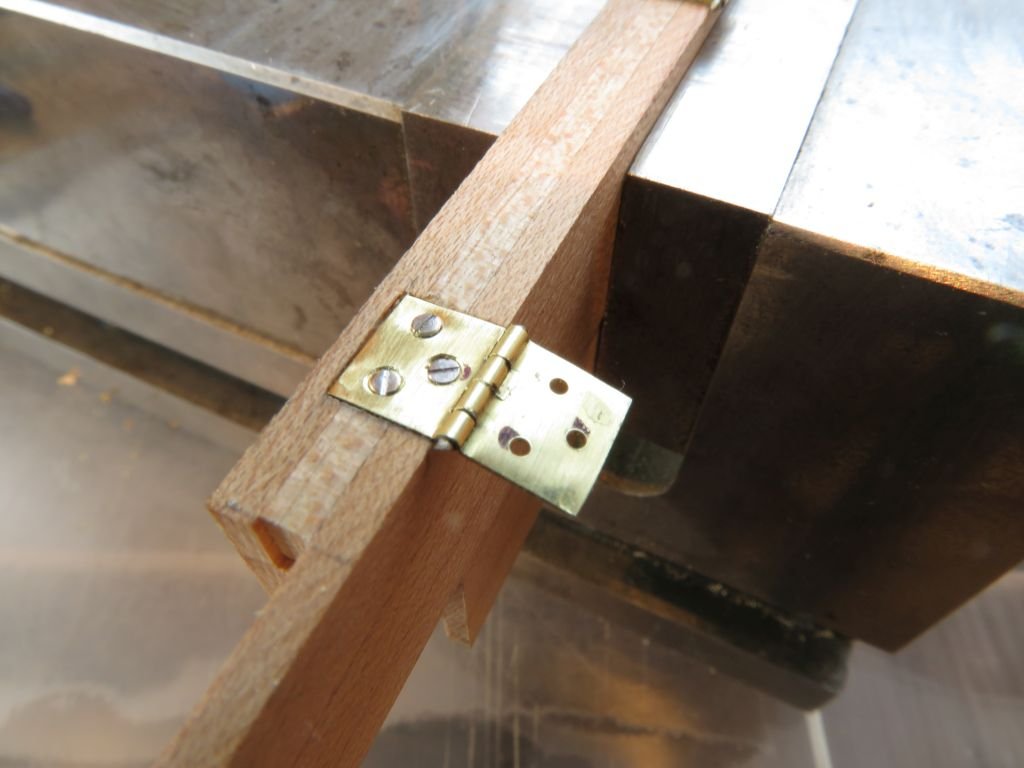
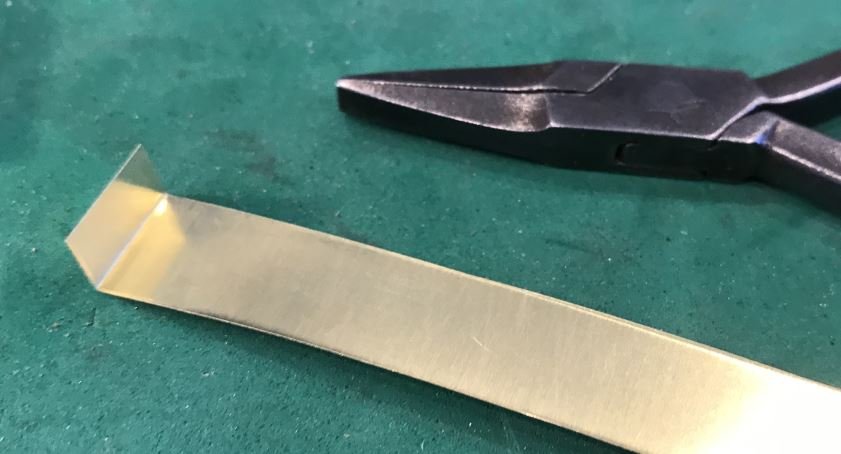
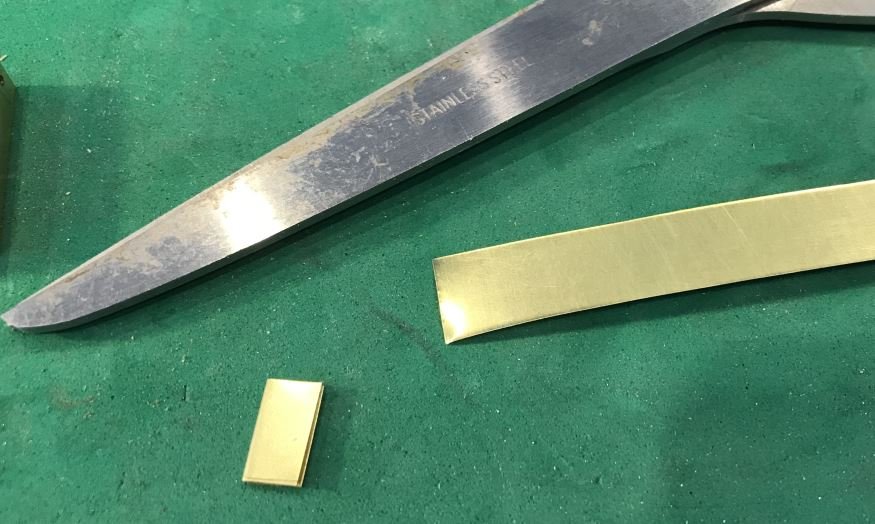
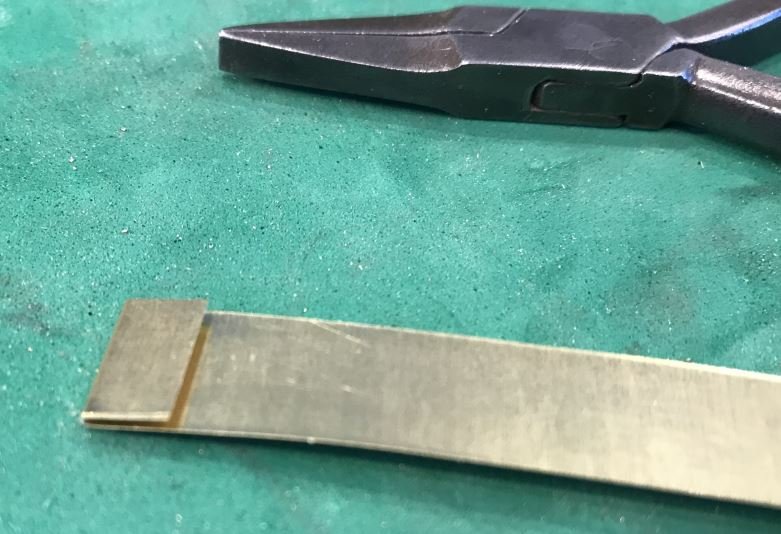
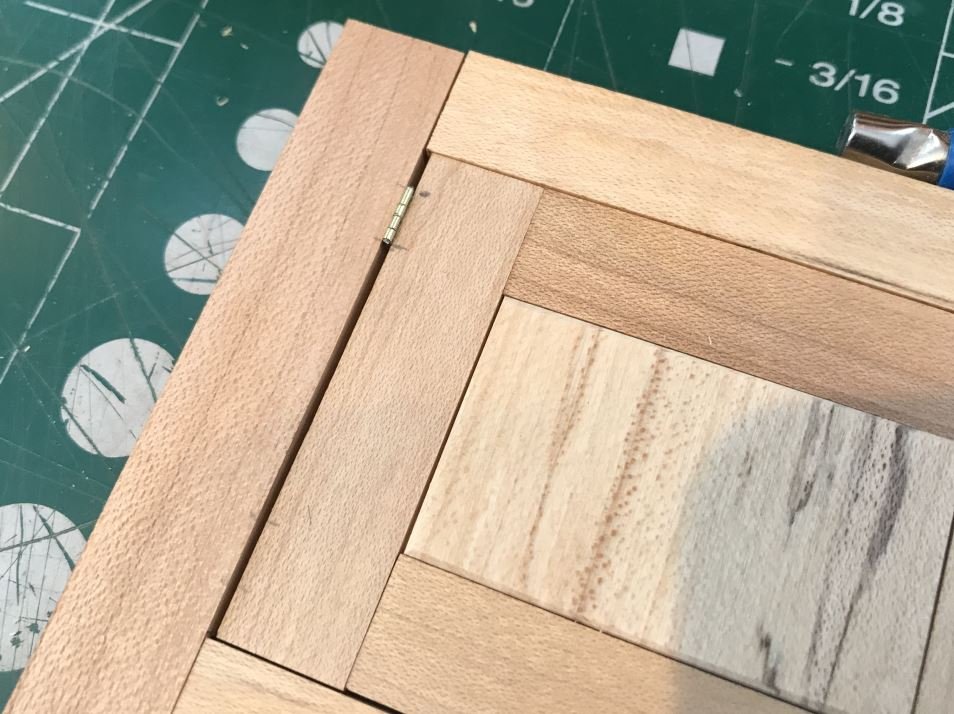
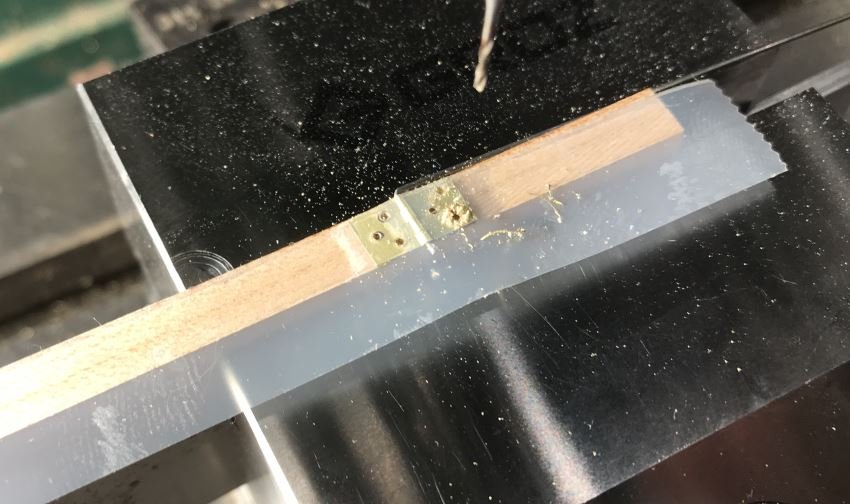
Sorry Pat, I have my own "honey do list" Working on the little hinges for the doors the sequence is as follows. The .005" brass strip was bent to a right angle with a set of pliers then folded over with my fingers then snipped off with the scissors Slipped over the .025" steel rod , the right angle bend in the rod made it easier to handle and also for twisting the rod in and out of the hinge the folded brass was then lined up so that as the jaws of the vice closed they squeezed the brass tightly around the rod this took a bit of practice some of the pieces actually sheared off one of the side making it exactly the way the full size hinges look but they will get used for something else later, I wanted the folded one that were full then cut 4 that were scale 2 inches (1/4") these were slipped onto the short leg of the rod to make lining the brass up in the side of the vice to file the edges even, with a # 8 cut jewelers file filed the slots with the same file added the pin I used the thickness jig with some spacers to hold the rails and stiles upright in order to plane down the fillers in them because after deciding to make all the top panels opening I did not need them and it would have been difficult pinning the hinges into place. i really like using this jig it has become a very useful addition to my tooling. marked the holes to be offset from each other and used a 1/16th end mill to cut the recess for the hinge on the stile used the simplest of ways to hold the hinge on a waste piece of maple to drill the .030" holes. some magic tape with a little help from my fingers, it worked surprisingly well this shot shows the hinge positioned to mark the stile and door for the hinge recess it is all just loose fitted so that I can take it apart to cut the recesses. Michael

-
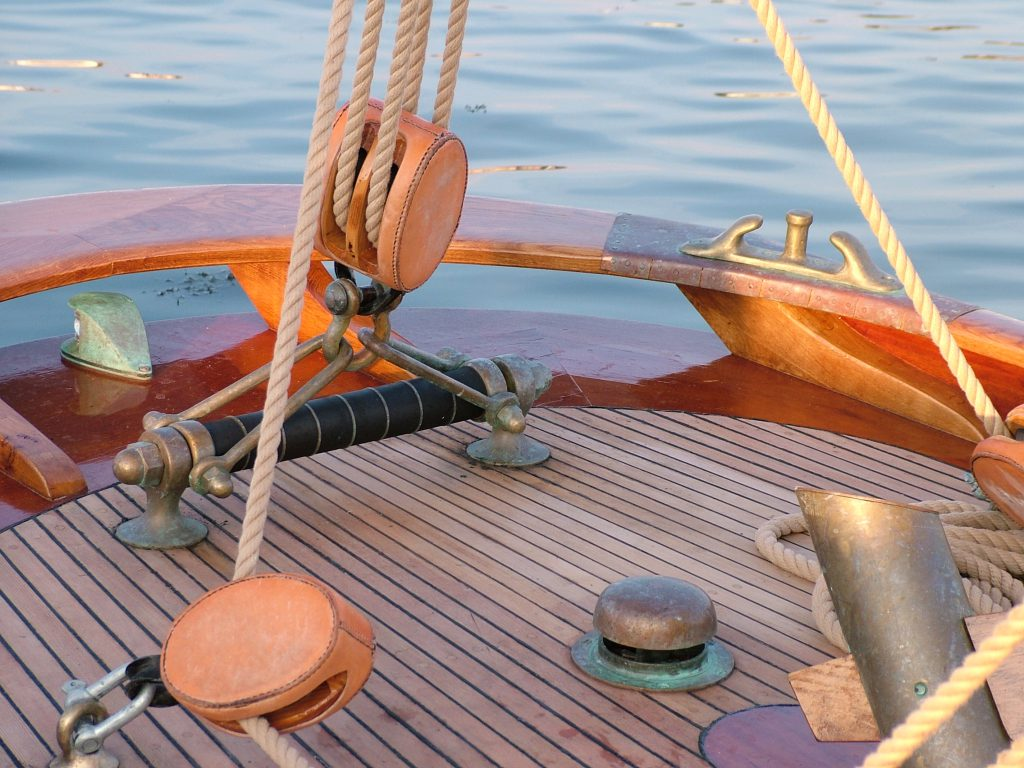
This image of integrity's shock absorber shows the same type as the one on Kieth's model http://www.stirlingandson.co.uk/wp-content/uploads/2016/07/Stirling-and-Son-Gaff-Cutter-Integrity-Details1-1024x768.jpg Michael
-
Geert "The only thing that I can mention to my defense is that the boat is not designed to sail on open sea, but in sheltered waters like on a river or on a lake and probably only in nice weather. In such conditions the force on the gaff will not be so heavy." Thanks for your explanation of why you made it the way you did. The actual physics of the arrangement in the drawing would still put a much greater strain on the Gaff regardless of the weather conditions. Please I hope you don't misunderstand my intention It is my opinion the whoever drew that arrangement likely was not a seasoned sailor. That does not detract from the superb model that you have built. Michael
-
Hi Walter it is on hold while I do some other work. I am trying to finish up the Cutter. and have also done some work on a steam locomotive. I am sorry for you loss, healing does take time. I am glad that you are able to find some peace in your modelwork. Michael
-
Very impressive work, the 5mm square grid really brought it home as to the tiny scale of this wheel.
-
This model will be a showpiece of brasswork never mind the rest of this beautiful build. Michael
-
I find the the iPhone pictures are sometimes upside down when I load them up to the computer, I use Ifanview (free photo editing tool) to resize and to orient them. Hope that your fix works well on the keel. Michael
-
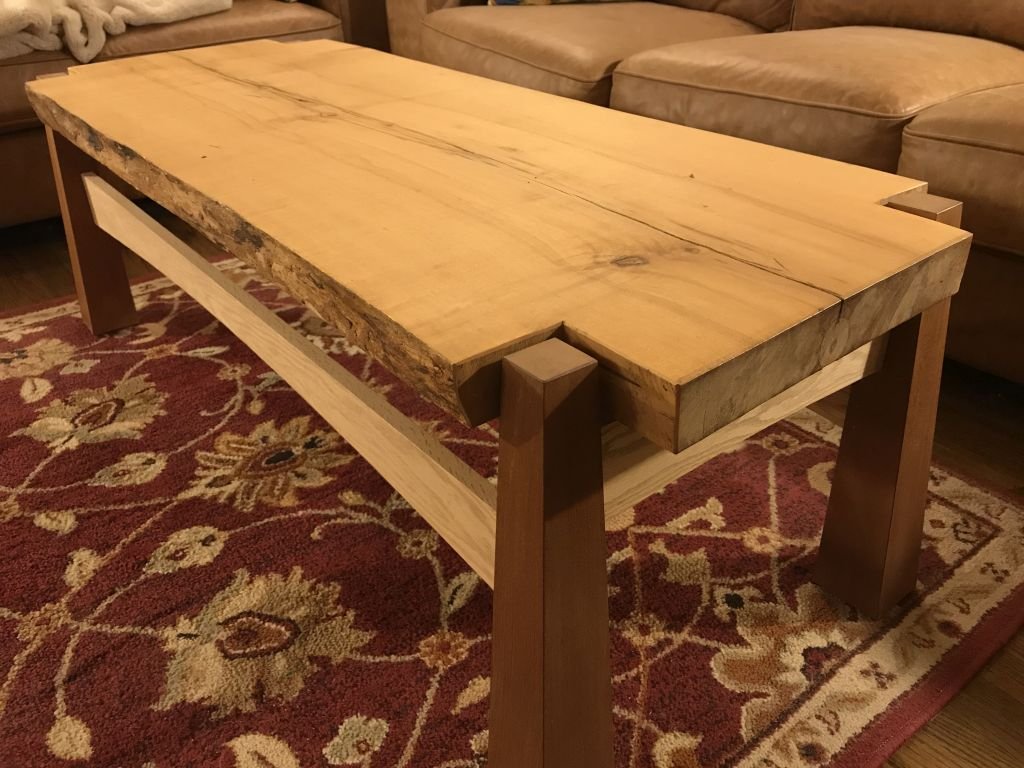
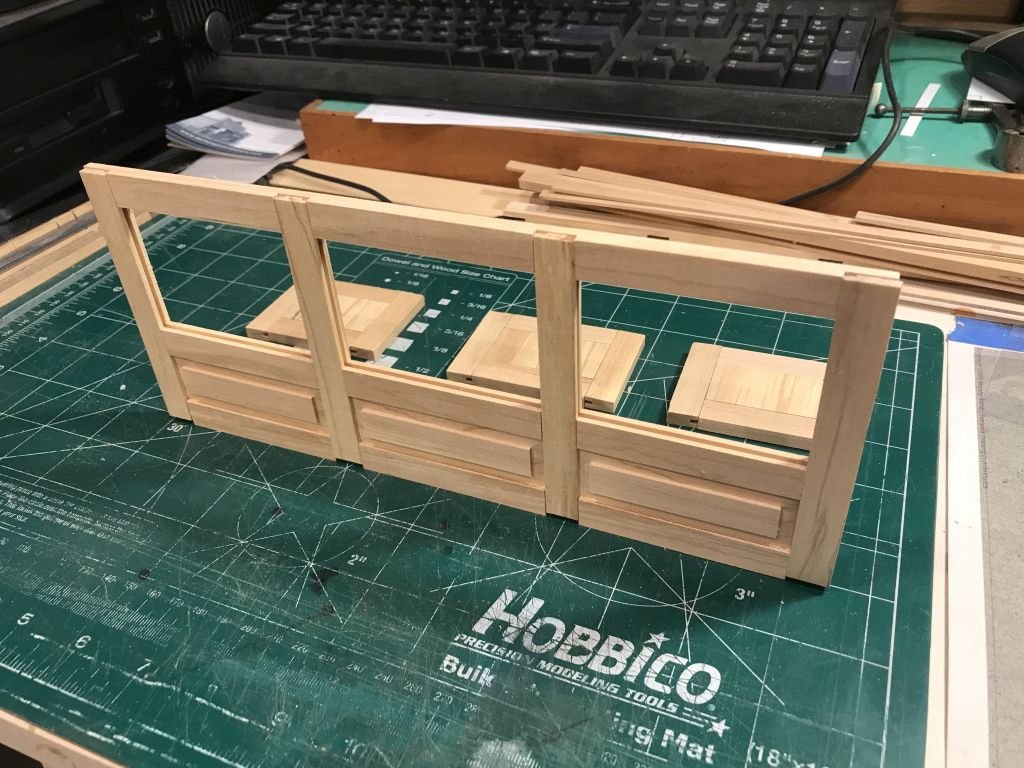
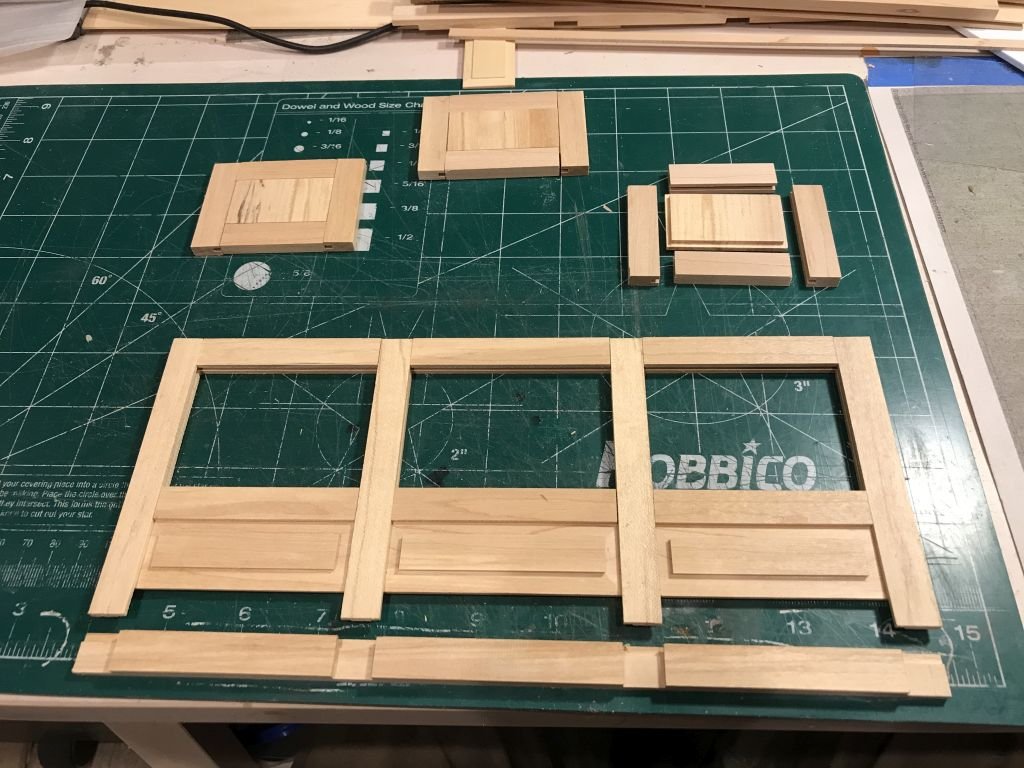
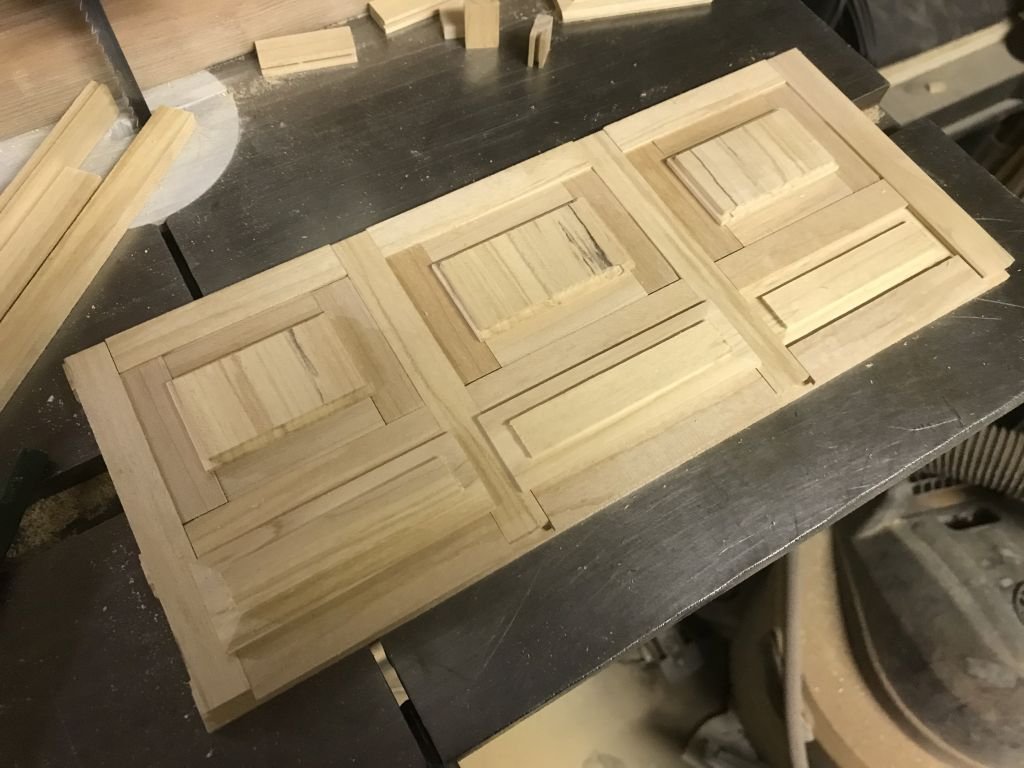
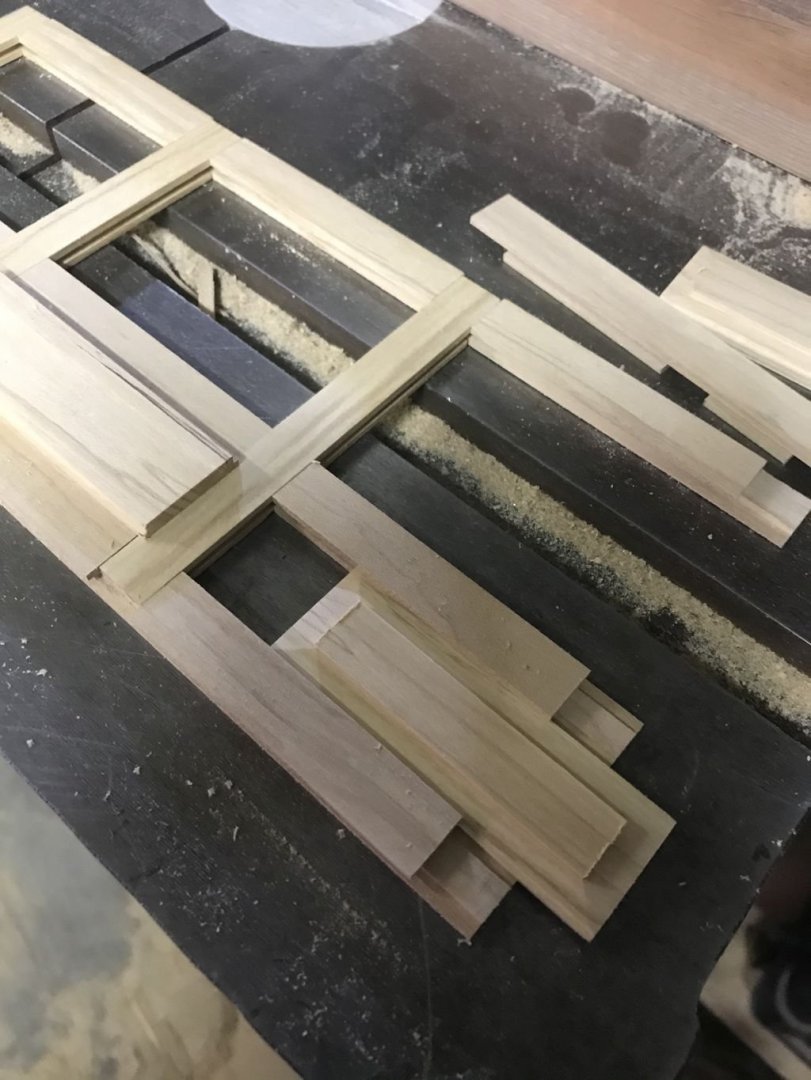
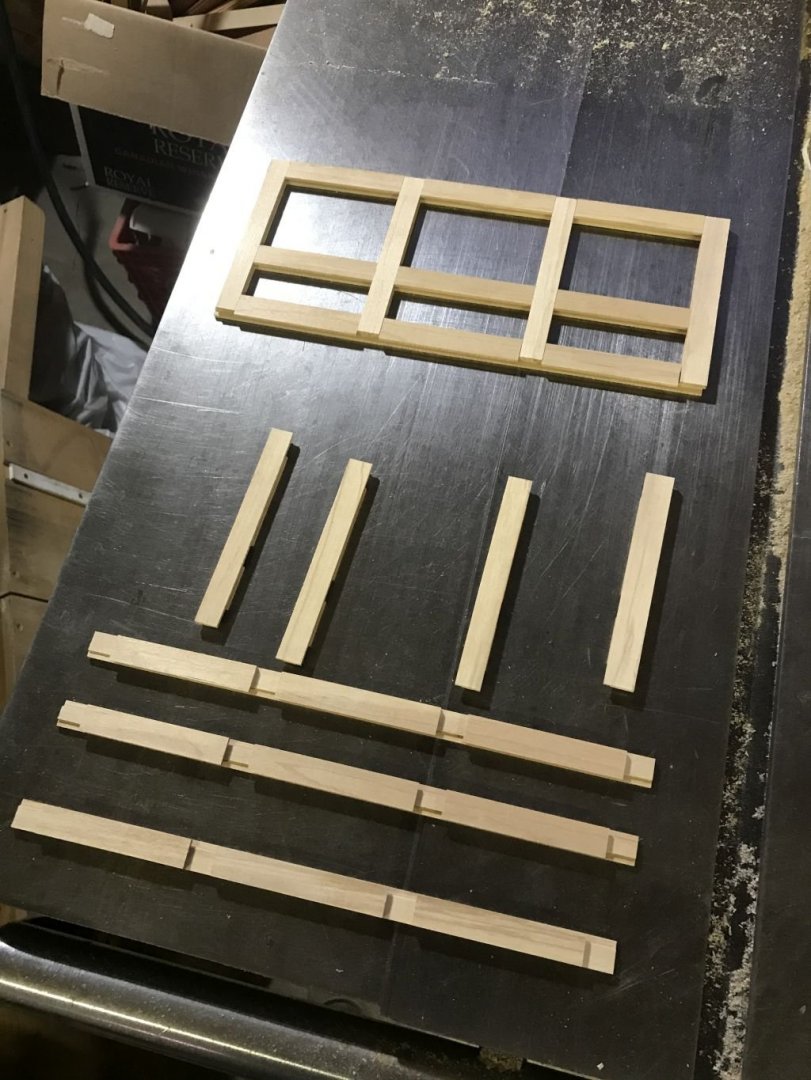
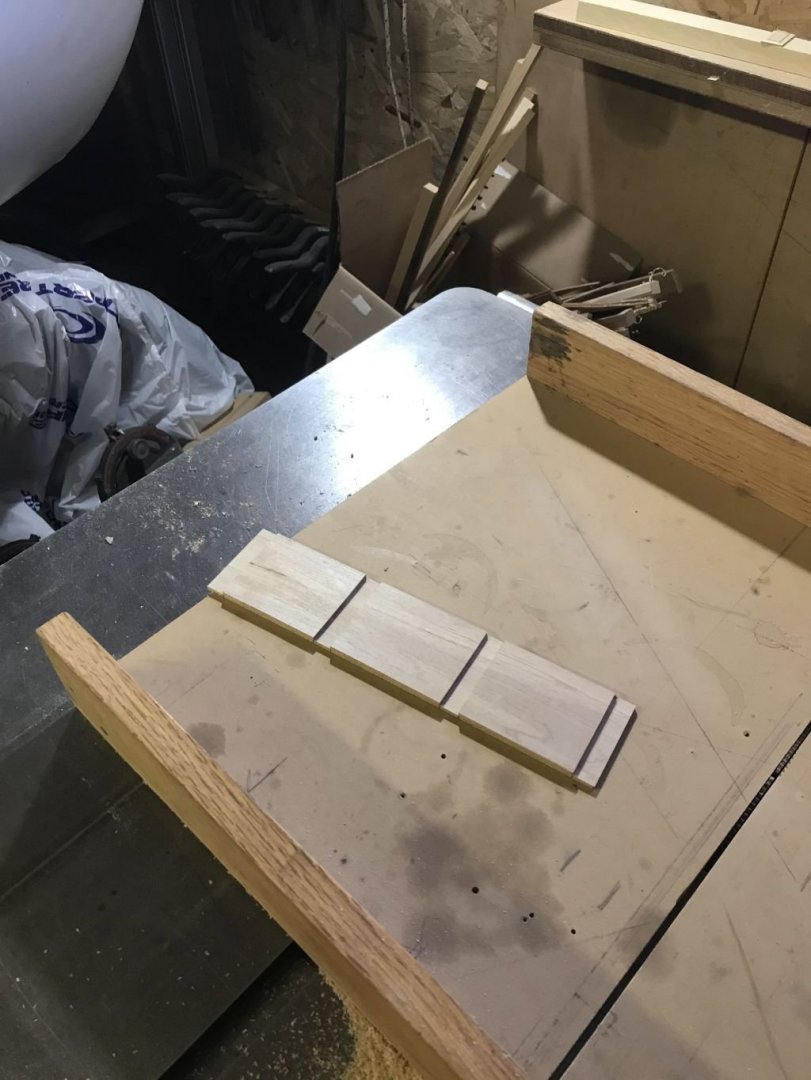
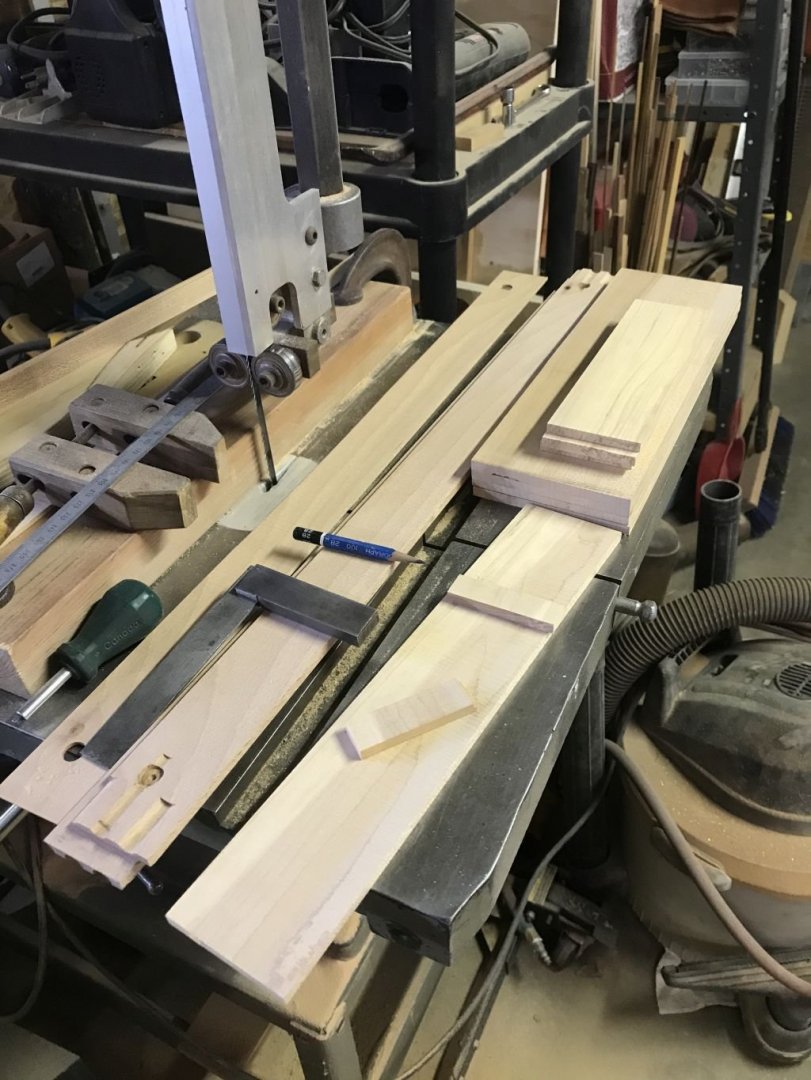
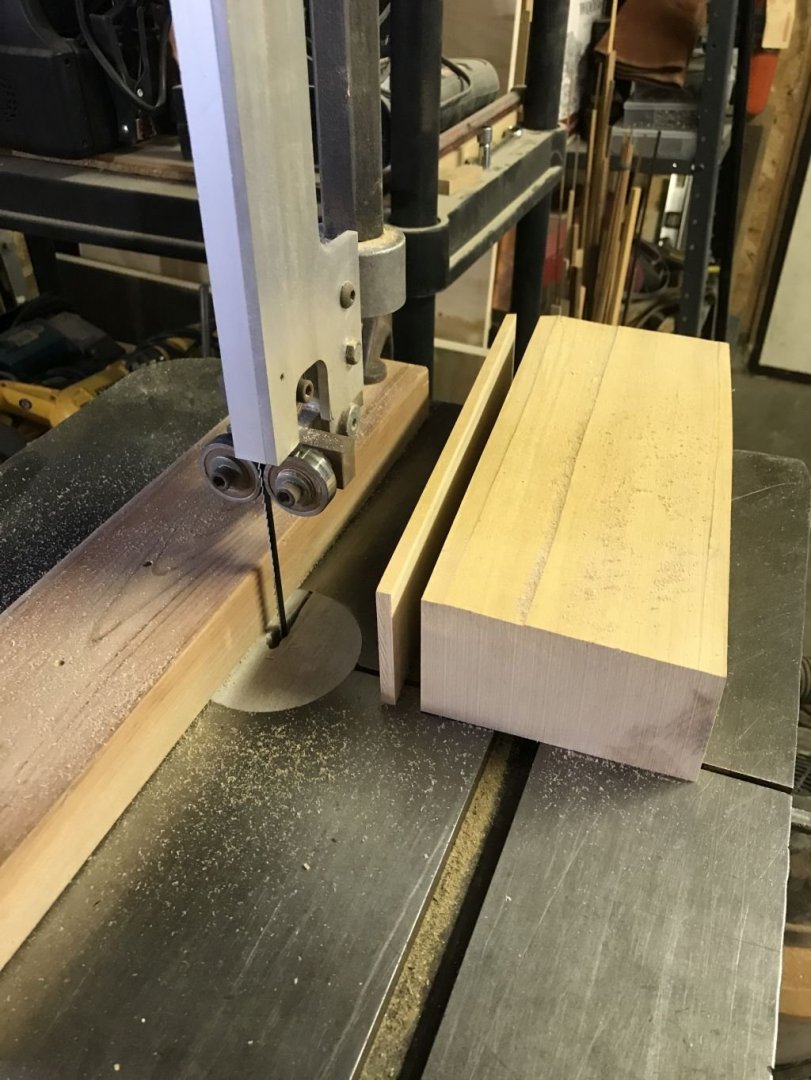
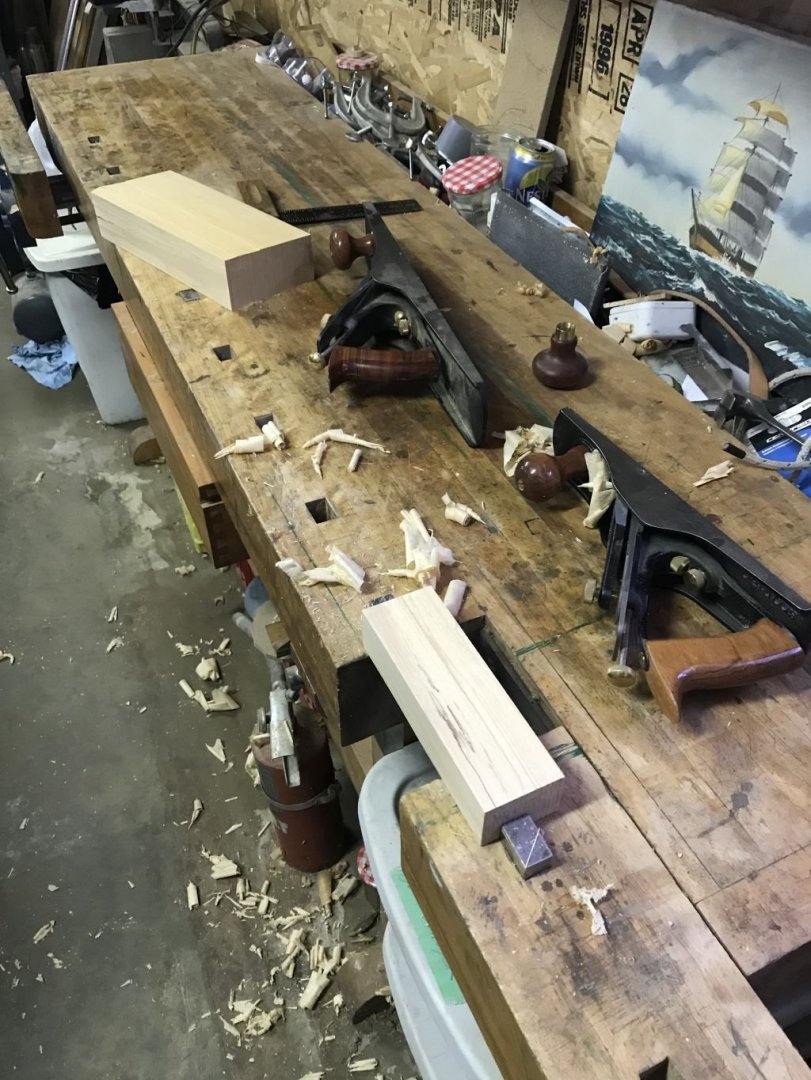
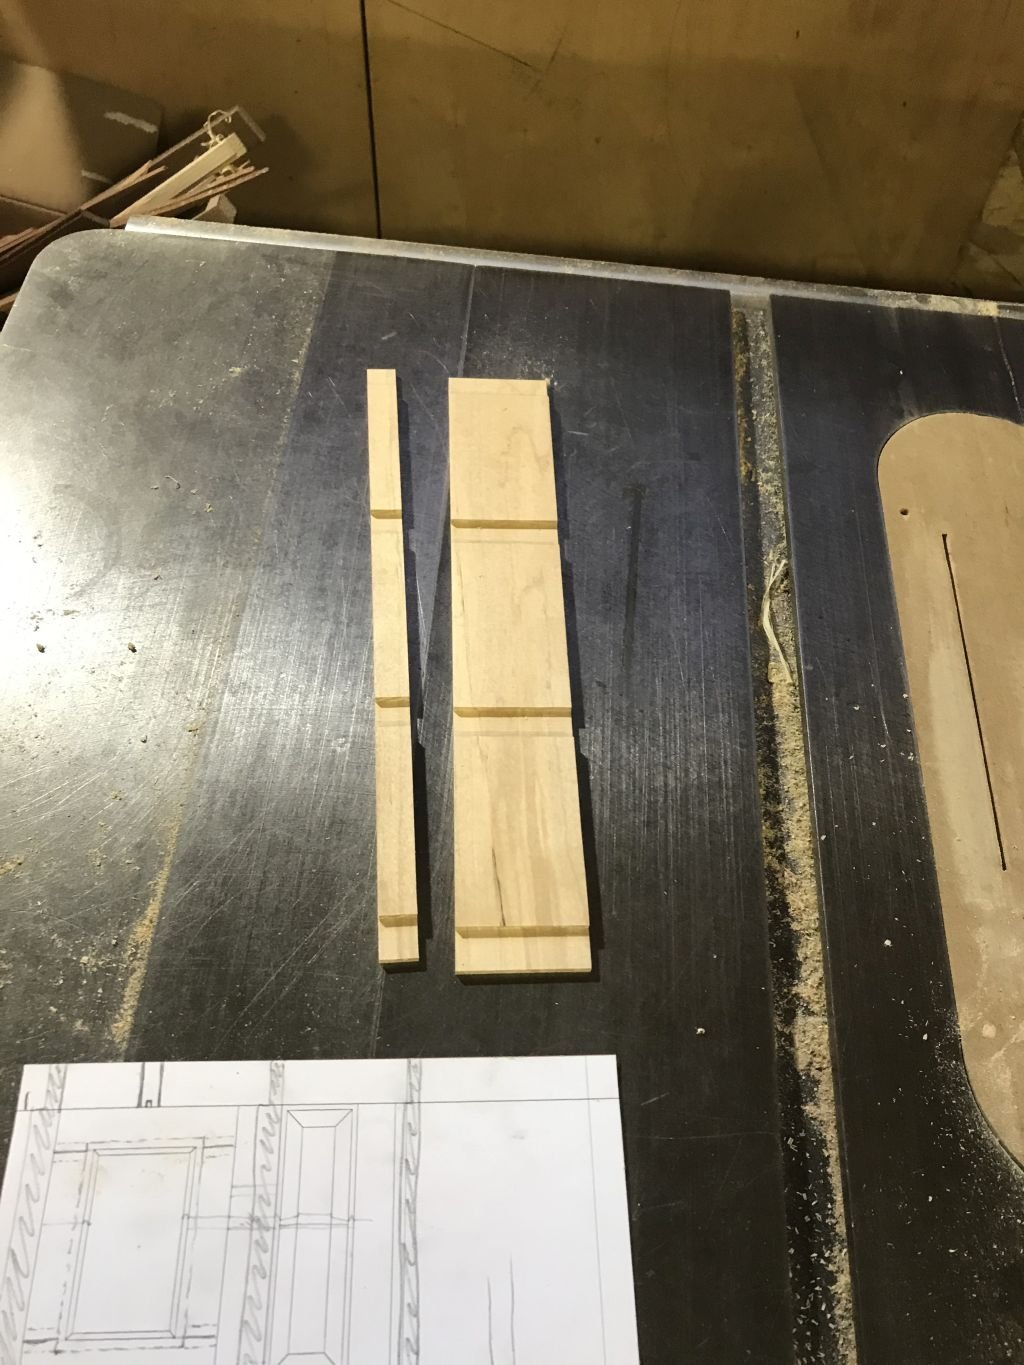
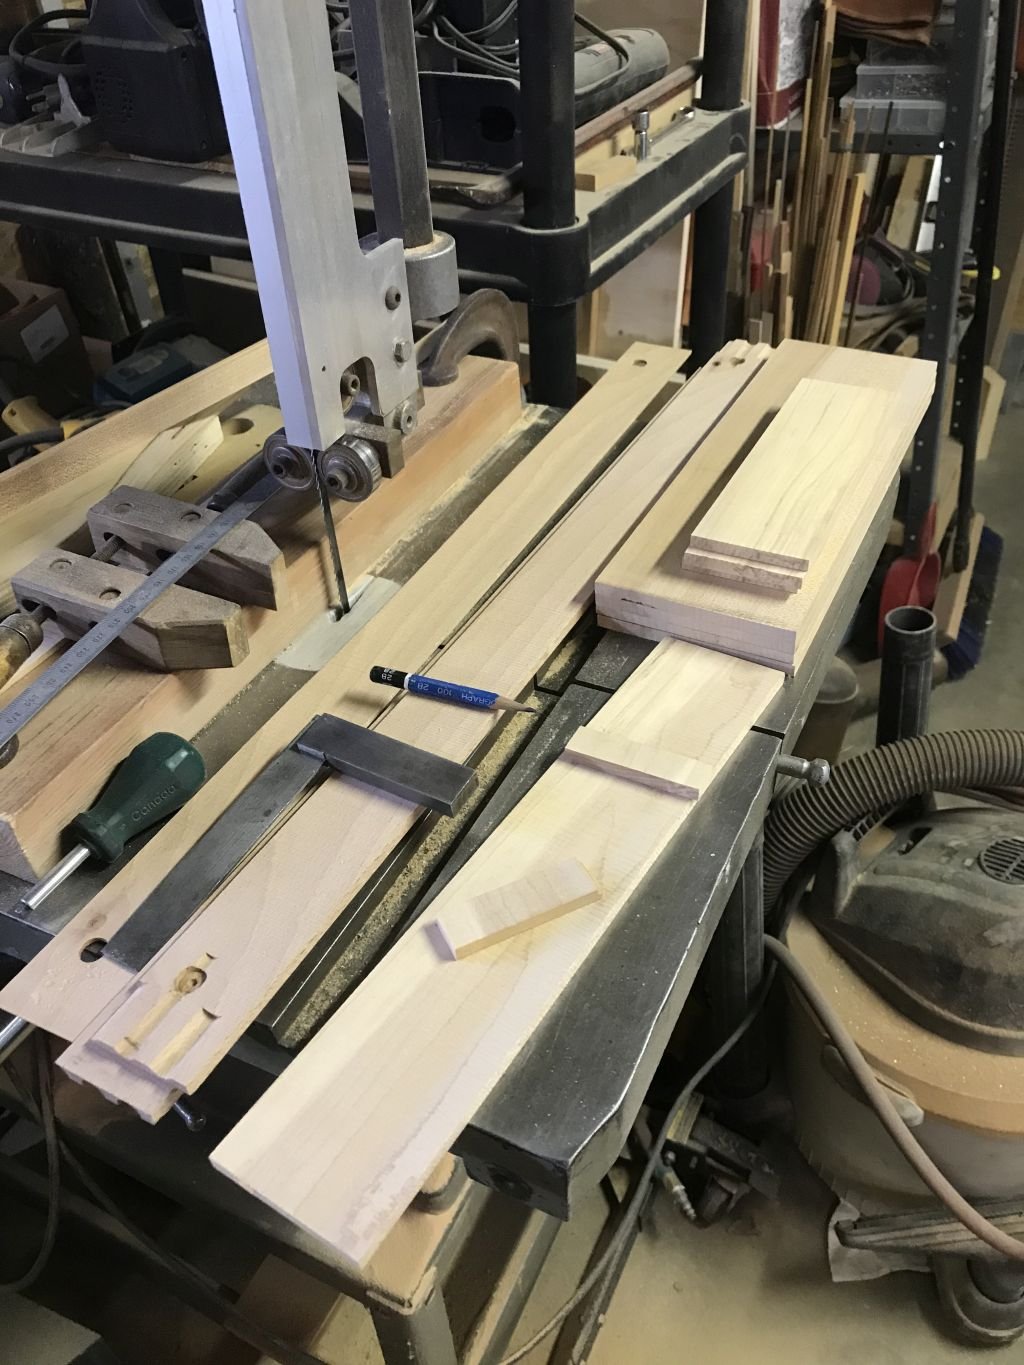
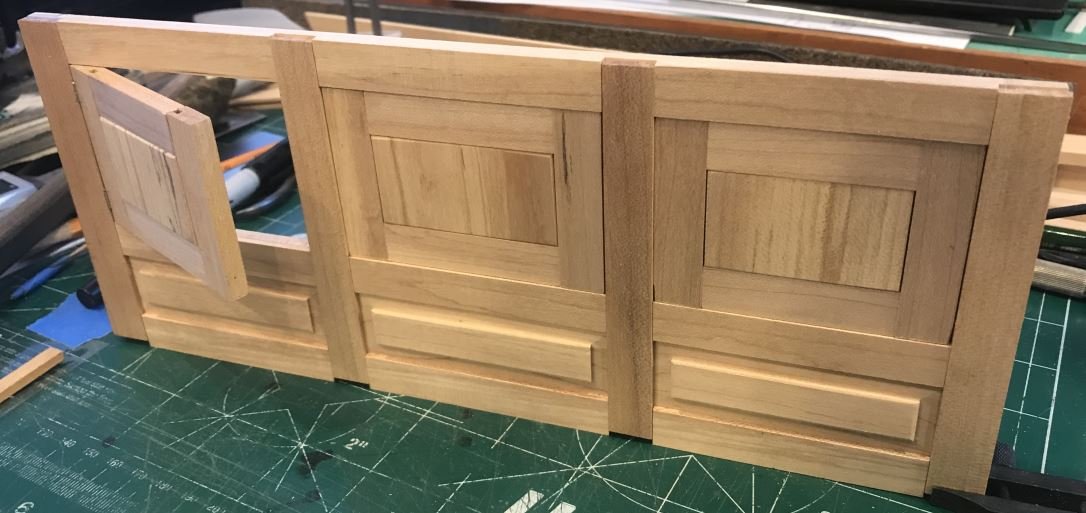
Made me laugh out loud, its a good job I didn't have a mouthful of tea. So the afternoon was much better. In 1976 I acquired a log of rock maple, one of the students when I was working as a technician in the sculpture lab at the U of A asked me if i wanted some maple, because his grandfather was cutting down some big Maple trees in Nova Scotia, I said sure, and didn't think much more about it. a couple of months later I got a call from Canadian National Railways freight Dept telling me that there was some wood on the loading dock and could I please pick it up. There was this 6 foot length of 24 inch diameter rock maple Green standing upright. I had to pay $360 to take it away. I had it laying around for a couple of years eventually moving to the back of a workshop I was renting in 1978 where it sat in the rain and snow for another year. then I chainsawed a slab out of the center about 3 inches thick to make a coffee table, planing it "flat" after the chainsaw was a task that took a couple of days of concerted effort. it sat on a couple of rocks for a few years, then My son took the top to Victoria BC and sat it on a couple of round stumps, then a few years ago gave it back to me when he moved to Whitehorse Yukon. Because I was going to move back to the city I wanted to give it a "better" support structure, so settled on some bits of Mahogany and Ash, it turned out well enough. So back to the Maple the rest of it was cut up into some 2 inch and 3 inch sort of quarter sawn slabs, that i put up in the rafters of the shop. A fair bit of the wood had some spalted areas that were cut up into 1/4 inch veneers and I have been using it for odds and ends ever since. today I chose a nice block that would be enough to make all the new paneling and using the bench planes Bandsaw and table saw prepped all the materials. squaring up two side of the blocks Slabbing off on the the bandsaw. Next the planed side pieces that were going to be used for the rails were dado-ed for the stiles These parts were then cut lengthwise and the same was done to the pieces that were going to be the stiles this gave me the basic structure all half lapped together. The rails and stiles were then given a small dado groove lengthwise so that the panels could slide in. The next shot shows all the parts The top panels will get glued together then the two outside panels will get the dado groove and some spline material will hold them into the groves in the rails and stiles. Now I was able to take them into the model shop I am thinking about the reveal on the top panels i think I am going to keep it more simple and not so busy. you can see some of the black spalting on the left panel insert The three bottom panels were slid up into the framework before the bottom rail is placed. And here it is freestanding with no glue yet. I should have done it properly in the first place, but thought it would be easier the other way. One lives and learns. I am hoping to get these finished off tomorrow. Michael