HOLIDAY DONATION DRIVE - SUPPORT MSW - DO YOUR PART TO KEEP THIS GREAT FORUM GOING! (89 donations so far out of 49,000 members - C'mon guys!)
×


michael mott
-
Posts
5,200 -
Joined
-
Last visited
Content Type
Profiles
Forums
Gallery
Events
Everything posted by michael mott
-

Cutty Sark by NenadM
michael mott replied to NenadM's topic in - Build logs for subjects built 1851 - 1900
Nice looking Dog Nenad..... but how does it see where its going with all that hair over its eyes? Michael- 4,152 replies
-
- 7
-

-
- cutty sark
- tehnodidakta
- (and 1 more)
-
Wow, Iain those decks look superb, are the decks more accurate than the foam? if that is the case could you not set the hull up in the cutter and remove the area and make a new part out of foam to drop in? The other thing that this brings to mind is of course the order of cutting, which I am sure has already occurred to you. I am really enjoying seeing this application of the present state of this technology, and just think about what is next. Michael
-
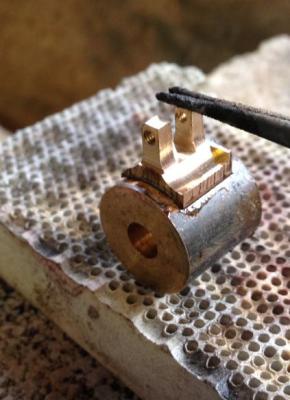
Thanks for the compliment Druxey, and thanks for all the likes. Just a small update after filing the first side to a closer shape I needed to clamp the opposite side but the conditions were now different and it did not want to clamp the same as the first. Here you can see that the base has been thinned down a lot. The solution was to soft solder the base to the 9/16 rod this will be helpful also when it comes to drilling the mounting holes for attaching to the mast. Michael
-
Druxey it just gets better and better, The presentation on the base looks perfect.The burl worktop is pretty top drawer too. Michael
- 641 replies
-
- 12
-
-
- greenwich hospital
- barge
- (and 1 more)
-
Nah.... I think you should past a print of Turner's Rain Wind and Steam over the TV and set up the room as a model room, well you could turn the bed into a Murphy bed for when company stays over. Michael
-
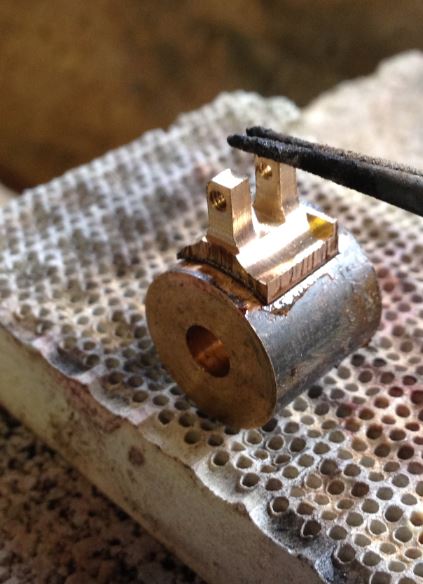
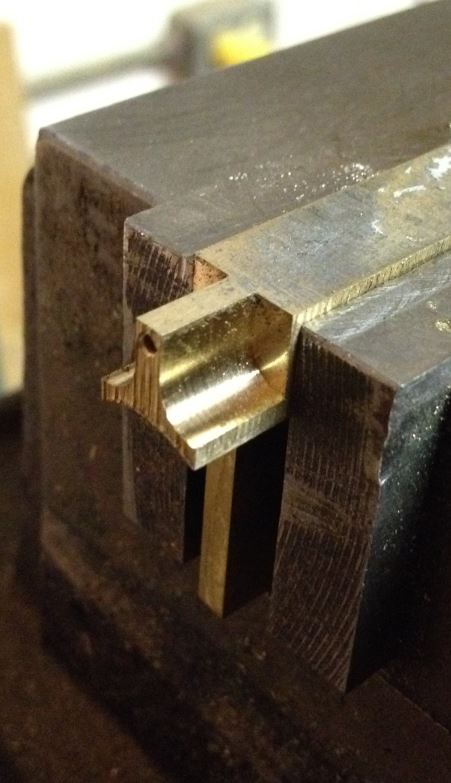
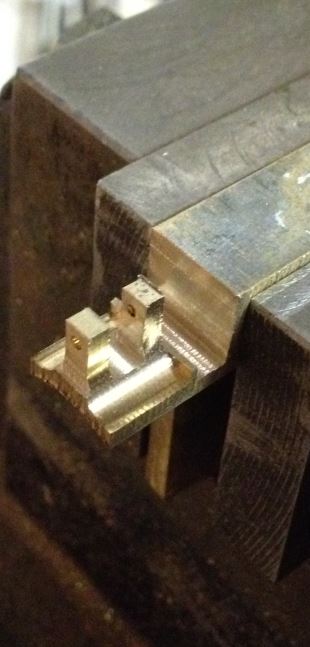
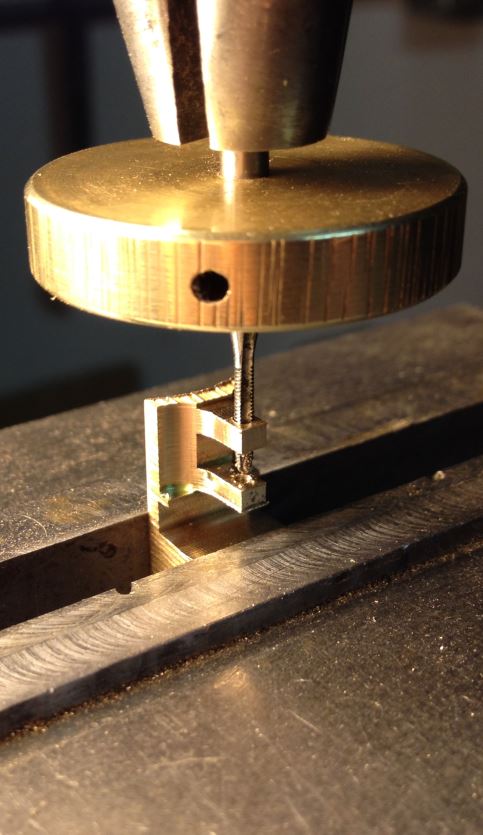
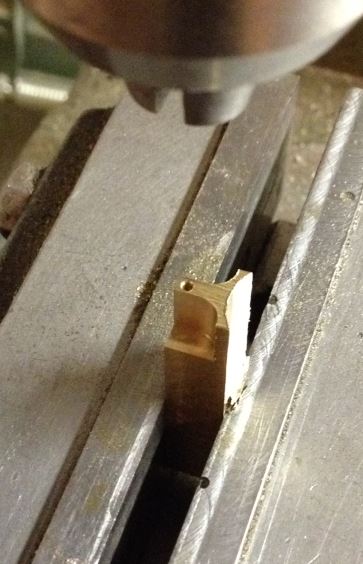
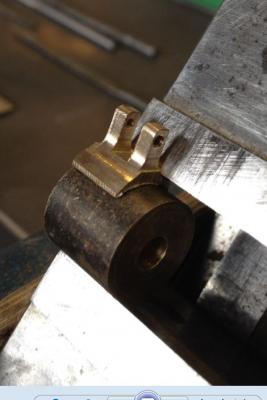
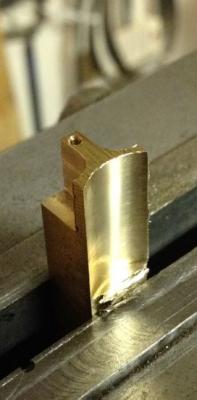
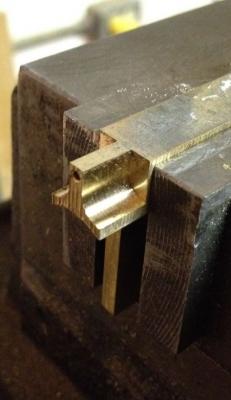
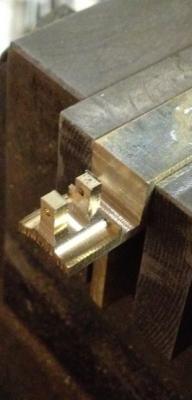
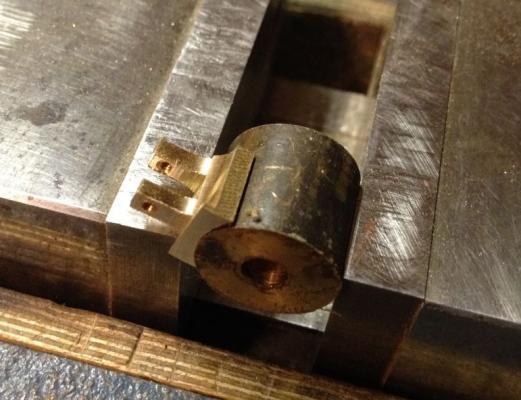
Wow five pages in. There is so much amazing shipbuilding going on in these five pages, so I had to do a lot of reading catching up as I scrolled down looking for my own. Oh I know there is a quicker way, but this was so much more fun and educational Belated thanks to all the comments and likes that I missed here in the last month indeed a whole month has passed where does the time go? In order to get my head back into the Herreshoff mindset if that is at all possible, I went to the catalogues of the replica hardware and looked at a lot of pictures for the rigging. I have made a start on the classic goose-neck that Herreshoff used for the small boats. The line drawing in the product catalogue shows that they were sized for 3 1/2 to 5 inch diameter. The printed off the page 7 sheet drawing of the goose-neck is exactly 5/8 inch in diameter which is the scale diameter as the low end of my mast. A great bit of serendipity. After doing a small scribble in my sketchbook detailing the steps to create the piece in bronze and what cutters to use to rough out the form. Then rummaging around in the scrap box produced a small bar of said bronze about 1 5/8 inch long by 3/8 wide by 11/32 thick checking the cross section with the plan of the goose-neck it was just a little bit larger covering the plan view. This first pic shows the drill chuck I took the picture after all the first steps of milling and drilling the hole for the pin, I do not want to give the impression that I used this chuck for milling, I have commented on this practice in previous posts, and never mill with the drill chuck. In order then: I set the bar vertical in the mill vice, and milled straight down with a 5/8 end mill so that it cut the resulting chord to match the edges of the 3/8 width. The mill was retracted and the vernier dials on the mill were all set to zero, the end mill was changed to a 1/4 diameter mill then the edge was lined up with the opposite side and the in out axis reset to zero then offset first to the left by .172 inches next I took .020" cuts into the block for .250" this was repeated until I reached a depth of .3 inches, in retrospect I should have gone .350 deep. The mill was returned to the starting point at zero and then offset to .172 and the same depth cut was repeated on the opposite side. again the mill was returned to zero and then changed up to the drill chuck all I had to do was reset the in out with a pointer to the edge so that I could index the piece in by .062" I then drilled it out to the .3 depth with a .047 drill after using a centre drill to ensure that the bit didn't wander. this concluded the first set up in the vice. the bar was reset horizontally so that the gap could be milled out, if I had had a T slot cutter this would not have been necessary as I could have slotted it while still vertical. I changed the chuck in the mill back to the milling one and set up a 1/8th end mill and milled the gap and a small relief at the top and bottom. Next I switched the bar back to the vertical position and carefully reset the position so that the .047" drill slid easily back into the previously drilled hole it is a bit nerve wracking but I needed to tap the hole in the bottom bar of the body 0x80 and I wanted to make sure that it was all in line, it is so easy to break these small taps the pivot pin for the boom will thread into this later. Now comes the work with the files and sanding stick of wet and dry paper. I cut off the milled end of the bar and clamped it in the precision vice. Remember I mentioned it would have been better to go to a depth of .350" on the first machining well the small tab is the reason. I had to file this extra bit off, it can be seen in the next picture. I used a small piece of 9/16 brass rod to act as a clamp jig. That's all for now, this evening I will continue with the filing. Michael


-
Mark yes it silver solders (braze) well, I am not sure which flux it has been a while since I soldered some. Michael
-
Tool for Shaping Brass Strip
michael mott replied to mikiek's topic in Metal Work, Soldering and Metal Fittings
The main thing to remember is what are you using the metal for. As mentioned earlier the brass, copper silver will all work harden you can experiment with this aspect by taking a small strip 1/6 x .010 fold it over in a vice or pliers and un-fold it then refold it it will get hard and brittle at the fold and if you do it too much it will break if you are using it for mast bands etc I would anneal it first use a small scrap of wood the same section as what you need the brass to wrap around to practice with. I don't have the book described but have done a lot of work with brass over the last 50 or so years. Michael -
This is a really important piece of advice, If I might be so bold as to add a further comment, if you buy a saw make sure that you also get an assortment of blades. These come in different types and sizes. blades for wood are generally coarser than those for metal. today I was cutting some .010 thick brass and I used a #7/0 blade and the brass cut like paper. The other thing that is one of the most important aspects of using a jewelers say is to get the work you are cutting to a comfortable height, I find that chest height is the most comfortable, keep your forearm horizontal and your upper arm vertical hold the saw with a firm but light grip, you are always pulling down on the cut. These things are hard to describe if you have a chance look at a few of the videos on line. Michael
-
Mark is there a particular reason why you could not use a silver coloured metal like stainless steel perhaps, I only ask because I have seen the KS Engineering rack full of all sorts of stainless sections and of various sheet thicknesses, admittedly not as easy to work with as brass but authentic. Michael
-
silver nails
michael mott replied to michael mott's topic in Metal Work, Soldering and Metal Fittings
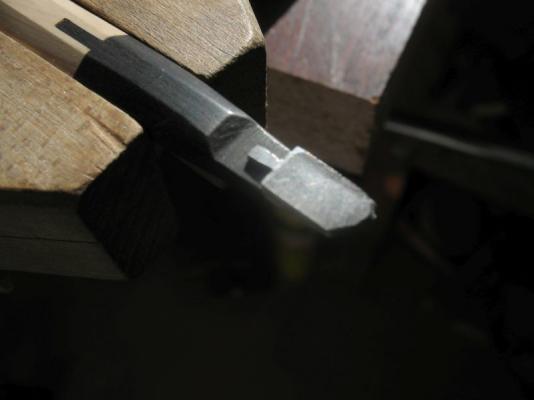
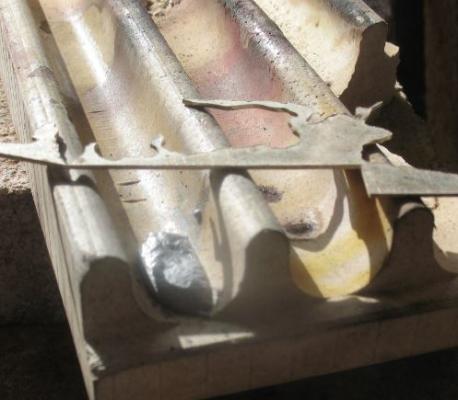
Thank you Bill and thanks for all who added likes. silver is one of the most amazing metals that we can work with. it is the most electrically conductive, the most thermally conductive, and the most reflective metal according to the free encyclopedia. It is also easy to change. I also needed a couple of pieces that were thicker that anything I had in the silver scrap box. I took a small off-cut from a small silver map I made in the late 70's and melted it with the propane torch, it melted very quickly and cleanly into a small oblong blob. This was then squashed and formed in the vice and with a polished small ball pein hammer using the flat side into a small wedge like shape. Next this small piece was filed into a clean wedge and then using the jewelers saw (the thermally conductive part I can attest is very fast) cut a very shallow dovetail to lock the silver to a piece of Ebony. This was then filed to form the final shape that I was after. Michael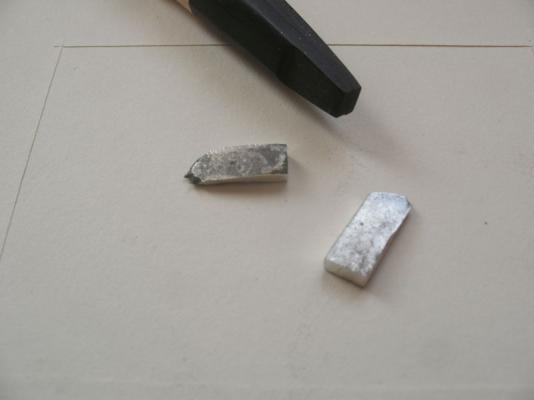

-
Chuck those last two shots look fantastic the ropes look very natural it look like you nailed it perfectly. Michael
- 1,051 replies
-
- 6
-
-
- cheerful
- Syren Ship Model Company
- (and 1 more)
-
Very nice work on the Ebony Alexandru, it is a tough wood to work. Michael
-
Chuck, thanks for your response, and for all the rest regarding my question. If the coils are to be left on deck I would suspect from a purely practical point of view, it would be a short term thing. Your photograph of the modern rope coil appears much more natural in the same manner that those in your third picture appear. Gravity would have a pretty quick effect on a moving deck and the coils would most likely slump a little most probably to one side. Your thoughts about old time contemporary feel make sense, Conventions are always interesting in my view "we've always done it that way" the implication of course, why change? Greg you raise a good point Many years ago I built a model for a court case in which the client won, it was of an electrical power line set up that during a storm caused a fire and destroyed a business, the city was sued for negligence. The only way I could accurately depict the catenary curves of the hanging cables was to use extremely fine HO model chain for all the wires. Finally Chuck in your own picture the coil on the extreme left looks the most convincing to me. Cheers Michael
- 1,051 replies
-
- 5
-
-
- cheerful
- Syren Ship Model Company
- (and 1 more)
-
Chuck the hanging coils look great, I am curious about the coils on the floor the rope looks odd stacked vertically like that, would it not fall beside itself either in or outside the first coil? Michael
- 1,051 replies
-
- 5
-
-
- cheerful
- Syren Ship Model Company
- (and 1 more)
-
Druxey it is great and fantastic that you are getting all the easy bits out of the way first, What I am looking forward to is the Cabin. Seriously though this is one very amazing piece of shipbuilding. Michael
- 641 replies
-
- 7
-
-
- greenwich hospital
- barge
- (and 1 more)
-
Congratulations Pete. your fleet just keeps getting more refined. Michael
- 258 replies
-
- 4
-
-
- buzzards bay
- herreshoff
- (and 1 more)
-
Well now that you have had a bit of practice when are you going to start the real models? A stunning collection Sir Michael
-
Well.... you didn't take this little gem on to be a cakewalk did you? Michael
- 641 replies
-
- 3
-
-
- greenwich hospital
- barge
- (and 1 more)
-
Bob what a little gem, The paneling really sets it off. Michael
- 348 replies
-
- 4
-
-
- pequot
- cable ship
- (and 1 more)
-
Druxey I want to use the term exquisite.... but it just doesn't seem adequate somehow, I just sit and shake my head and smile mouthing the word Wow. Michael
- 641 replies
-
- 7
-
-
- greenwich hospital
- barge
- (and 1 more)
-
Rusty nice work on the hull very clean, you must be pleased. Michael
- 310 replies
-
- 2
-
-
- cheerful
- Syren Ship Model Company
- (and 1 more)
-
silver nails
michael mott replied to michael mott's topic in Metal Work, Soldering and Metal Fittings
Tom sent you a PM Funny thing Druxey I had to make a couple more today and the last one was a devil. Michael