HOLIDAY DONATION DRIVE - SUPPORT MSW - DO YOUR PART TO KEEP THIS GREAT FORUM GOING! (Only 13 donations so far - C'mon guys!)
×


EJ_L
-
Posts
2,246 -
Joined
-
Last visited
Content Type
Profiles
Forums
Gallery
Events
Everything posted by EJ_L
-
Welcome to MSW Don! Best of luck to you on your first build.
-
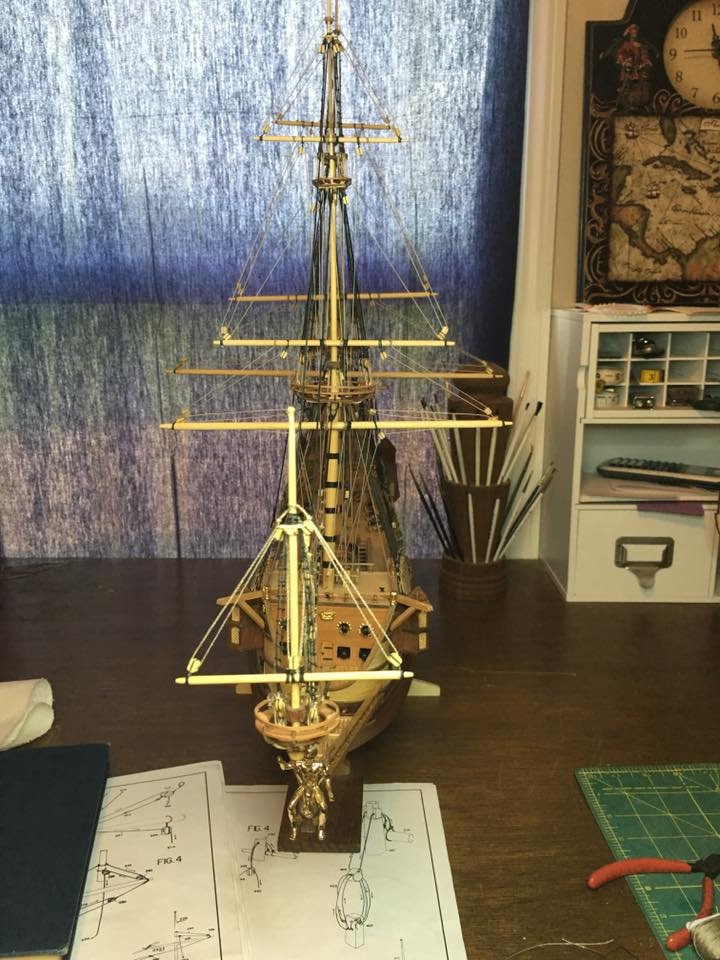
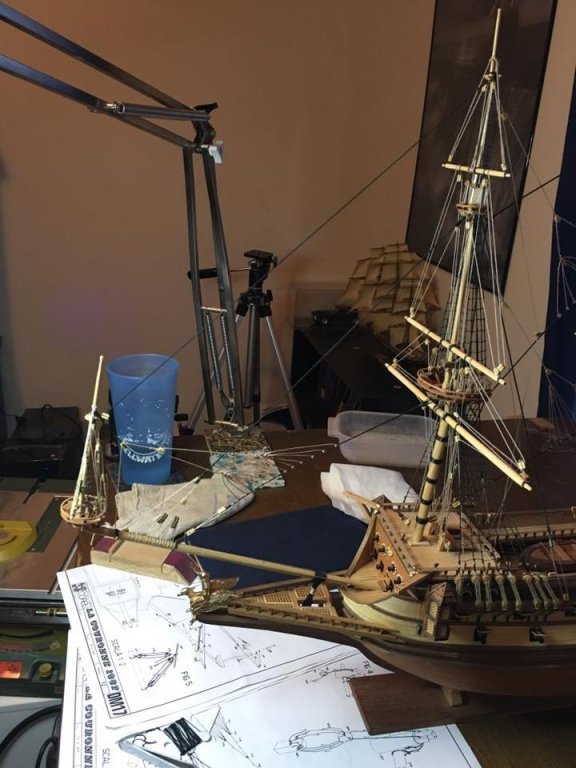
 Thanks everyone for the nice words and the likes! The major components left for the rigging other than that last yard are just the braces. While there are a lot of them to do, they are relatively easy to rig compared to what has been done already. Other items are the anchors and stern lanterns and I will also add all the rope coils at the belaying pins and on the deck where needed. May be a few other things I'm not thinking of but those are the main things to do.
- 608 replies
-
- 4
-

-
- la couronne
- corel
- (and 1 more)
-
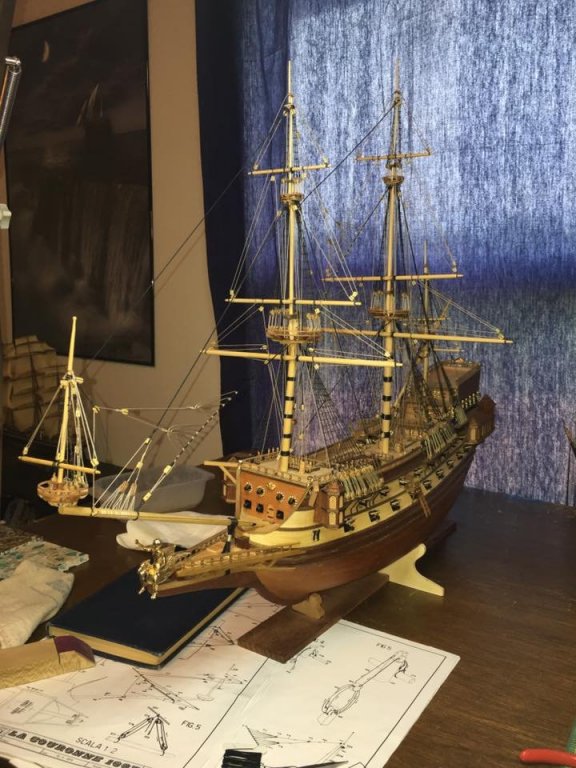
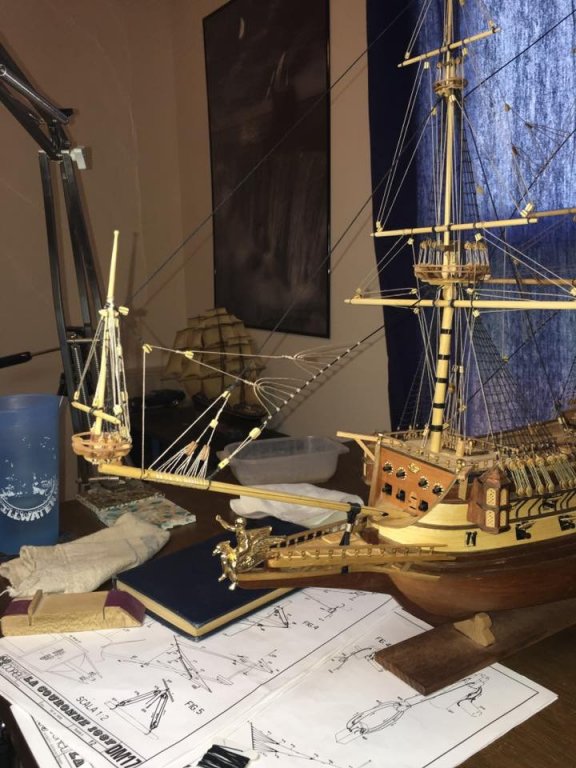
I've returned to La Couronne's ship yard and work has progressed nicely with the rigging of the spritsail topmast yard. I also finished the last crows foot and am ready to rig the spritsail yard next. That will be the last yard to go on the build! I'm fairly certain that unless something derails the plans, I am on the final push to the end of this build and am planning on staying on this one with out breaks till she is done. That means lots of updates for you all to enjoy! I still have several things to do but the end is close at hand and I am ready to reach it. Exciting times ahead! For now, here are the latest updates.

- 608 replies
-
- 13
-
-
- la couronne
- corel
- (and 1 more)
-
Good start on you lower planking. Just be careful at the bow that the planks don't start climbing on you. It happens very easily and can throw off the entire layout. Best of luck and I'm looking forward to the next update!
-
Foremast rigging looks great! Ropes are nice and tight. excellent job!
- 291 replies
-
- 2
-
-
- bounty
- billing boats
- (and 1 more)
-
God start on the fairing of the frames. Also smart to place those filler blocks at the bow. They will help put a lot when you go to plank.
-
Great work! The little details really bring the model to life.
- 653 replies
-
- 4
-
-
- trabakul
- marisstella
- (and 1 more)
-
Sjors, Marc, Don, Michael, thank you all for the compliments! I wasn't entirely sure what the intentions of the kit were with the original chase ports being so big. From what I have see on most ships, they were either the same size as the side ports or smaller as the guns for those ports were often a much smaller caliber or even just a swivel gun. If the instructions addressed it, I either couldn't find it or it was in a language I do not read and did not feel like translating out of laziness. The stern below the balconies has been a large mystery on this build as what little is shown of the stern all focuses on the decorations and not the structure. That is understandable to an extent as most people build this ship for her decorations and not those 4 chase ports or the rudder but, it would have still been nice to have a little more detail shown on one of the drawings.... Don, well I do not know if you will get your wish very soon as the next build that I plan on once La Couronne is done will be a scratch build cross section of La Couronne but, at least you won't have to learn how to spell a new name! The next full ship build that I am planning is looking like the Royal Louis. My plan is to show the evolution of French ships of the line during the 17th century. Royal Louis would make a great one to end the century on however, there is little information, drawings etc., for me to go off of to model that particular version well. The only kit available is of the Royal Louis of around 1779. While not of the 17th century actually about 100 years after Soleil Royal, I think this may be a better presentation. With the slow changes of ship building and rigging practices, the early attempts by the French are well shown now with Couronne and S.R.. Modeling a comparable ship that now carries the full range of nautical changes that have evolved of the century of time will, in my opinion, be a more dramatic display. However, that build is far down the road as the funding for that project does not yet exist and I do want to do my cross sections for each ship I build.
-
Thank you and a big welcome to Marvin and all the folks at Scale Hardware! Always good to see new sponsors and after taking a stroll through your online store I can see some great products that I'm sure I will be adding to current and future projects.
-
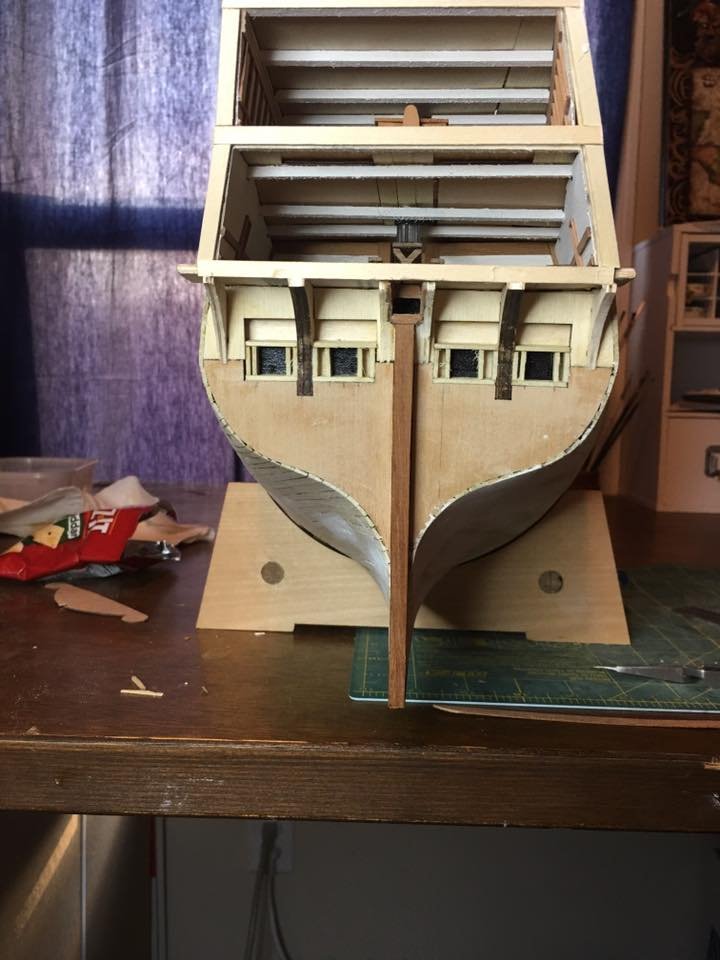
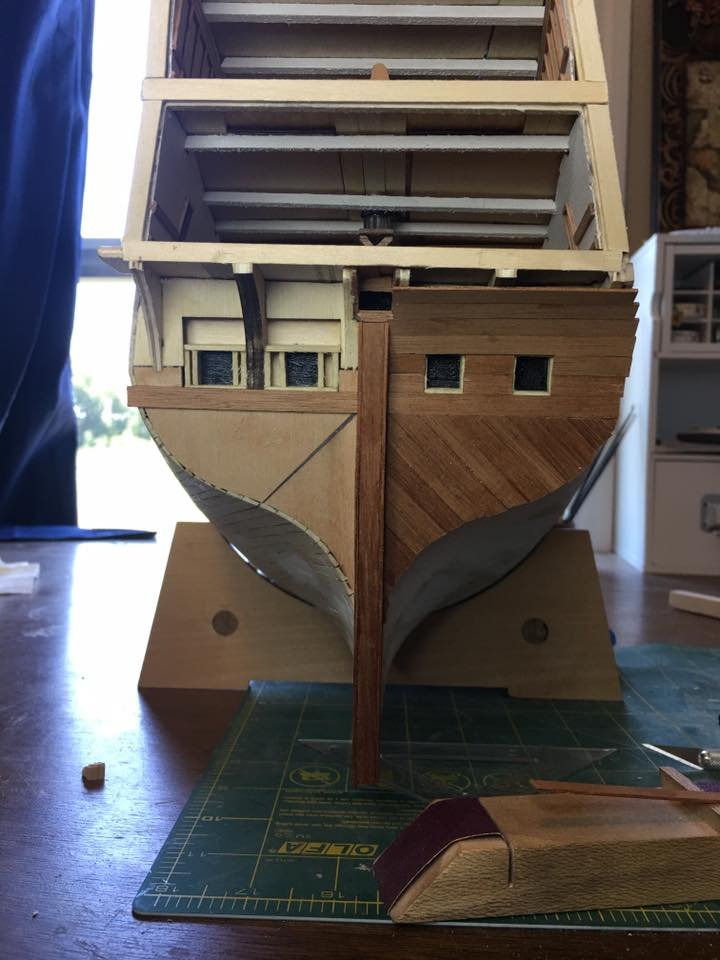
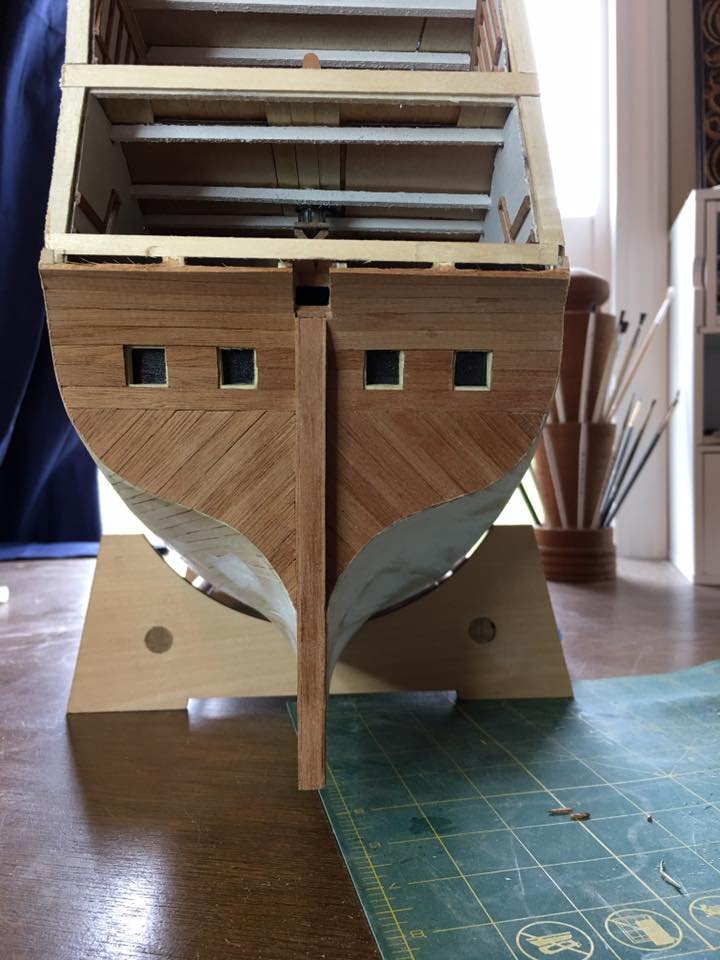
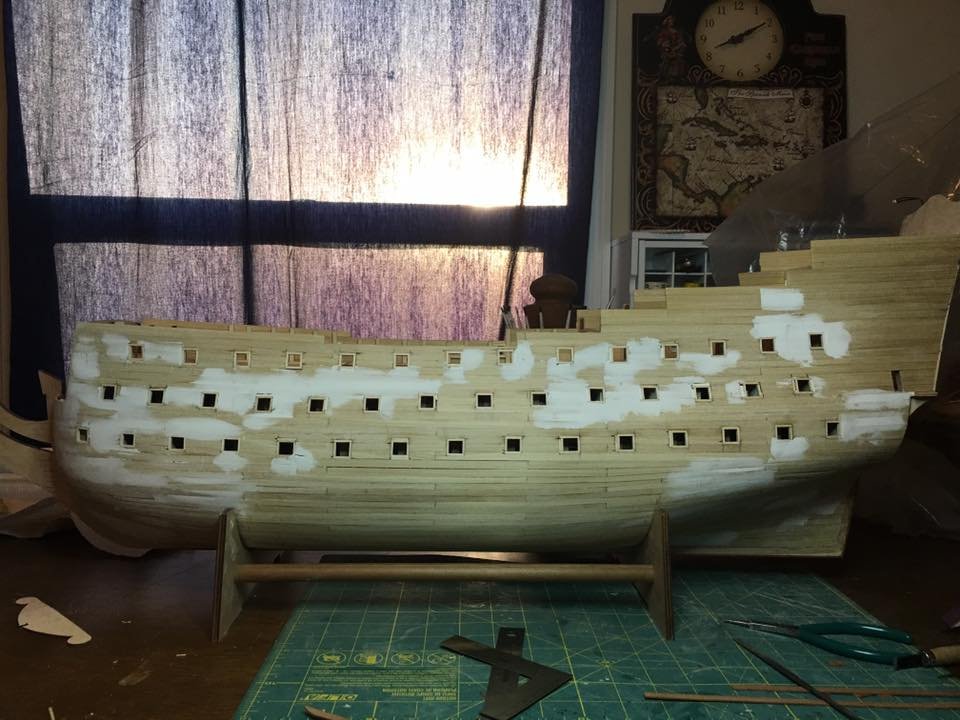
Port side gun ports are in place, hull is sanded and ready for the second planking! Started working on the stern below the cabin balconies. Framed up the stern ports and planked up to the balconies with the finish layer. Going to take a break on her for a little while now before I really dive into the second planking. There is a lot of it but the second layer tends to go faster than the first and once I get going on it, I like to see it to the end. So before that I want to work some more on La Couronne as she is nearing completion. I may push to finish her up before I return to this log so it may be awhile before there are any new progress pics on here.


- 961 replies
-
- 14
-
-
Sal, Glad I found your log early as it is always nice to get in at the beginning. You are off to a good start on the initial framing. Kit looks nice and I'm looking forward to seeing this build as it is on my list of future builds so it will be good to see how the kit stacks up. Looking forward to the journey!
-
Hi Martyn! Good to see another S.R. build on here as I am building her myself at the moment. Looks like you are off to a great start on her planking. She is a beast of a hull to plank so i can understand wanting to break up the monotony of planking. Those boats turned out nice. I like how you decorated them. While I can't speak to historical accuracy, they add an interesting element that makes them stand out. That is something rarely seen on the ships boats as I think that many of us gloss over as a necessary part of the build but not one that gets a lot of attention. Nice to see something different! I got my seat pulled up and ready to follow along!
-
Sjors, Don't know how I missed the start of this build but I've found some room in the back and a little popcorn leftover so I'm ready to join in! Looks like you are off to a fine start on what should be a fun build.
-
Woohoo physical work! It will be nice to start seeing all your planning take shape. This is going to be a very interesting build as I rarely see builders mutilate their plastic hulls. By the way, nice shop!
- 2,696 replies
-
- 2
-
-
- heller
- soleil royal
- (and 9 more)
-
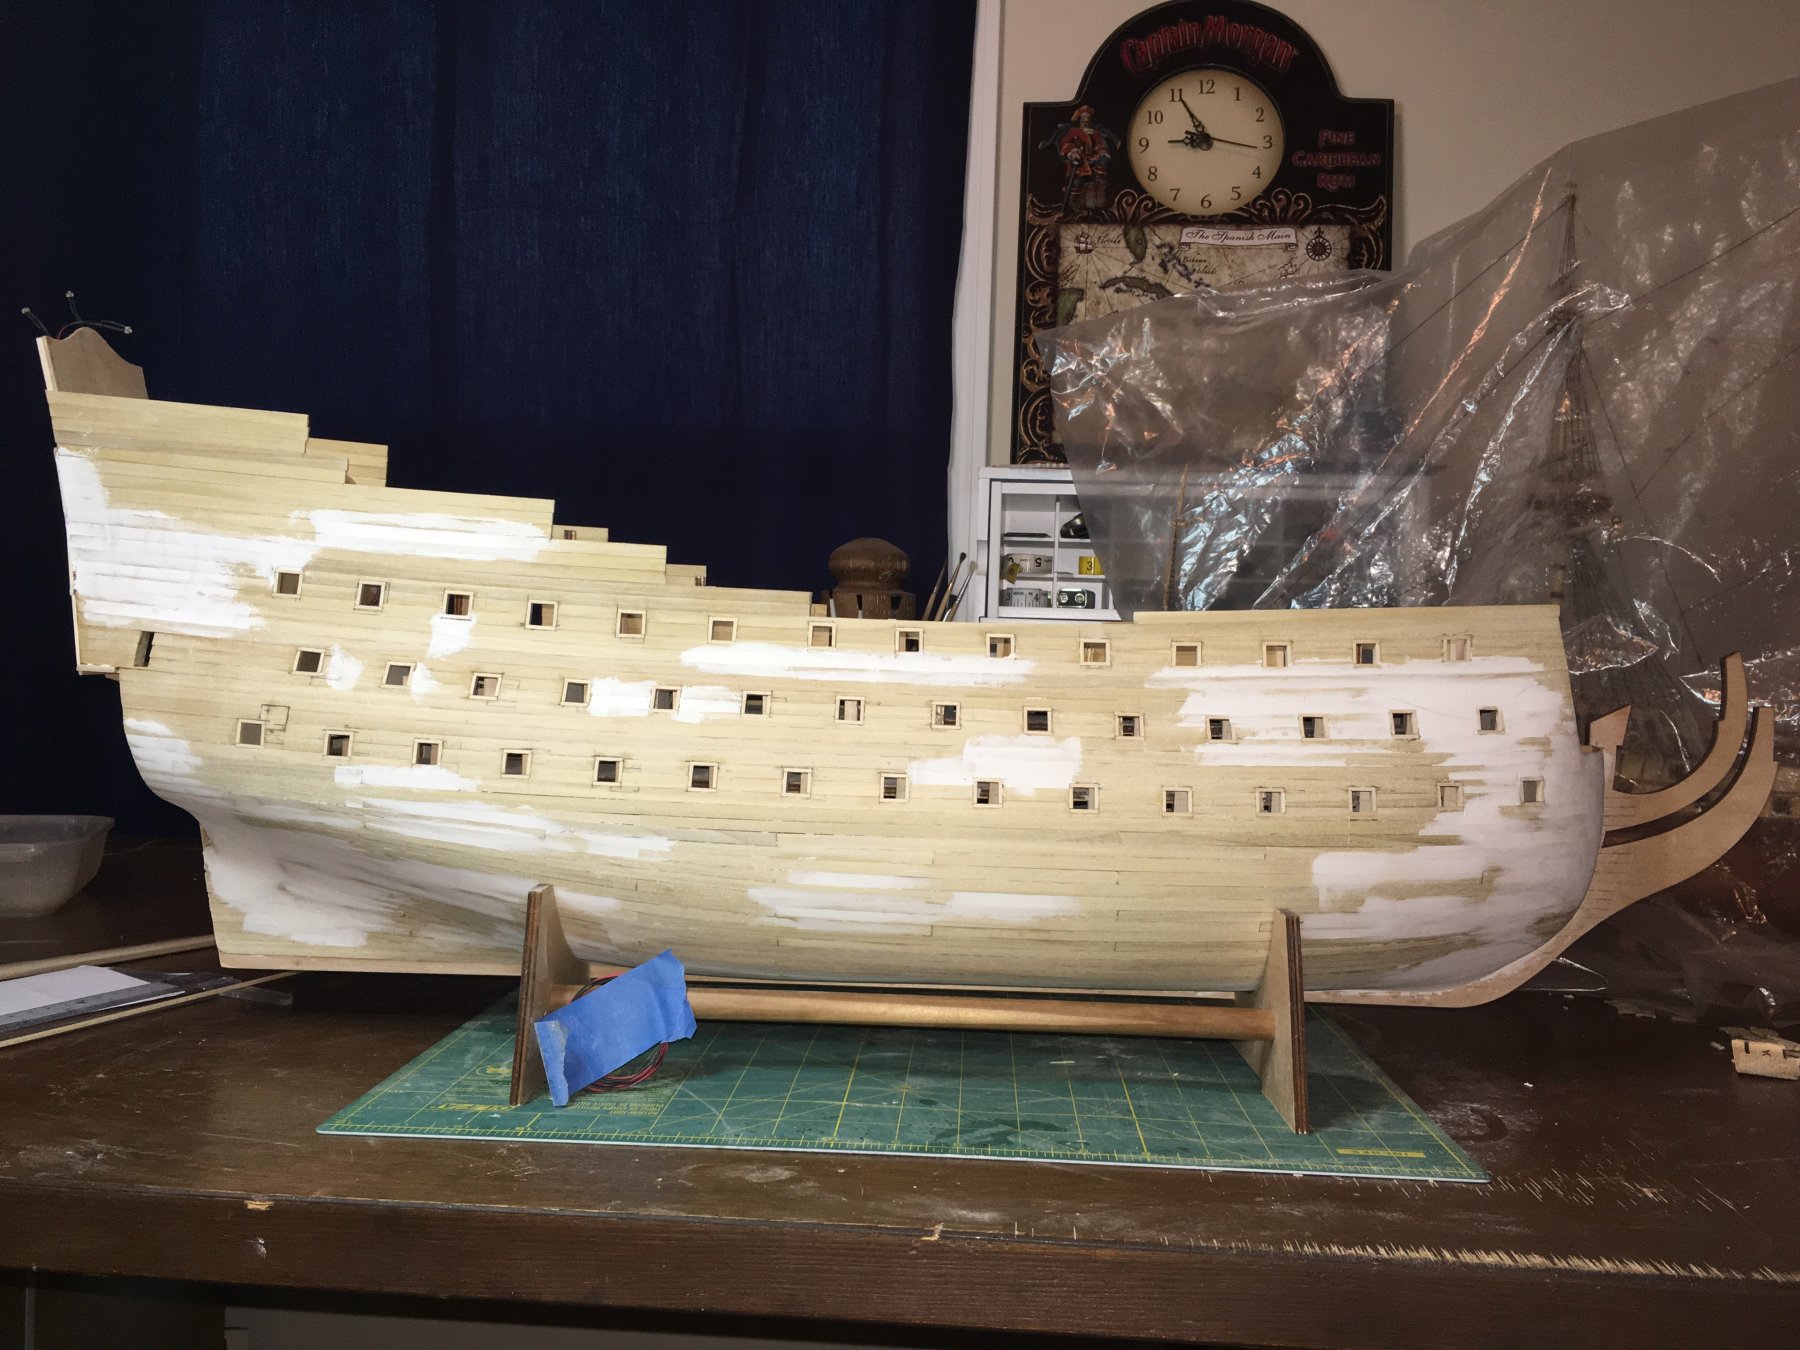
Sjors, I use piping for a lot of storage. Wood strips, dowels and model railroad track all have their tubes out in the garage. That is originally what I was using for my ship wood as well until I got this cabinet. I meant to post this a couple days ago but I did finish up the starboard side gun ports and more sanding. She is starting to look good on that side now. The port side is also well underway and I am hoping to have the ports finished up in a couple more days and then more sanding on that side. Once both sides are where I like them I will build out the stern and the 2nd planking will start. If I can manage it at work, I am hoping to get a 4 day weekend this weekend and should be able to get in some long build days.

-
Those lights are very well done. The dissipated light makes a nice soft glow that looks like lantern light. Great addition!
- 213 replies
-
- 3
-
-
- la couronne
- 74 gun
- (and 2 more)
-
Definitely do a log for it. That would be fun to follow along with. I'll keep an eye out for when you do get started.
- 291 replies
-
- 2
-
-
- bounty
- billing boats
- (and 1 more)
-
Thank you everyone for the compliments and likes. The end is getting closer all the time and the next push on rigging will bring it even closer. Only a few major items remain, bowsprit yards, braces, anchors and stern lanterns. Some other minor things and maybe some rework depending on how I feel and she will be complete! By far my biggest build to date so I am rather excited to see the finished ship.
- 608 replies
-
- 2
-
-
- la couronne
- corel
- (and 1 more)
-
Very nice work. Your model is making a strong argument for doing furled sails at the minimal. I've never worked with cloth sails, only the plastic vacuum formed kind and truthfully I have always been afraid I would not do them justice so I don't model them. A furled sail like you have done though, that I feel confident I can do!
- 481 replies
-
- 1
-
-
- rattlesnake
- model shipways
- (and 1 more)
-
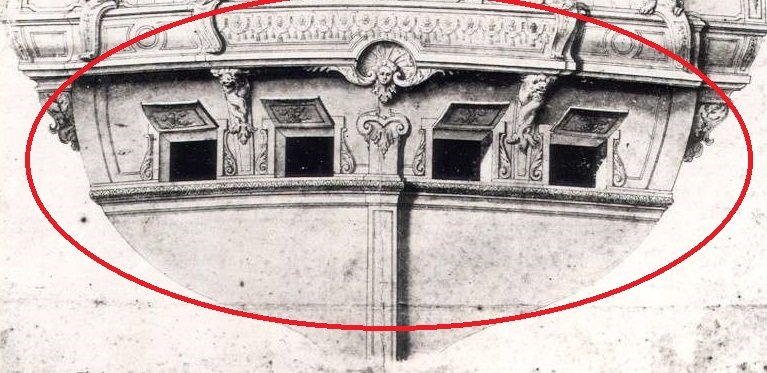
Marc, Thank you for that. I was fairly certain that the round up is the way to go but the drawings I had either do not show it at all or make it appear to be flat. Flat did not see right but I could not tell and I have learned not to just assume that all ships were built similar no matter how much sense something makes. I will model it that way! AS to the model in the photo, I do have some more pictures of it. I can post them later on when I get home. THey are mostly of the stern as I collected them when I was looking at different versions of the stern configurations.
-
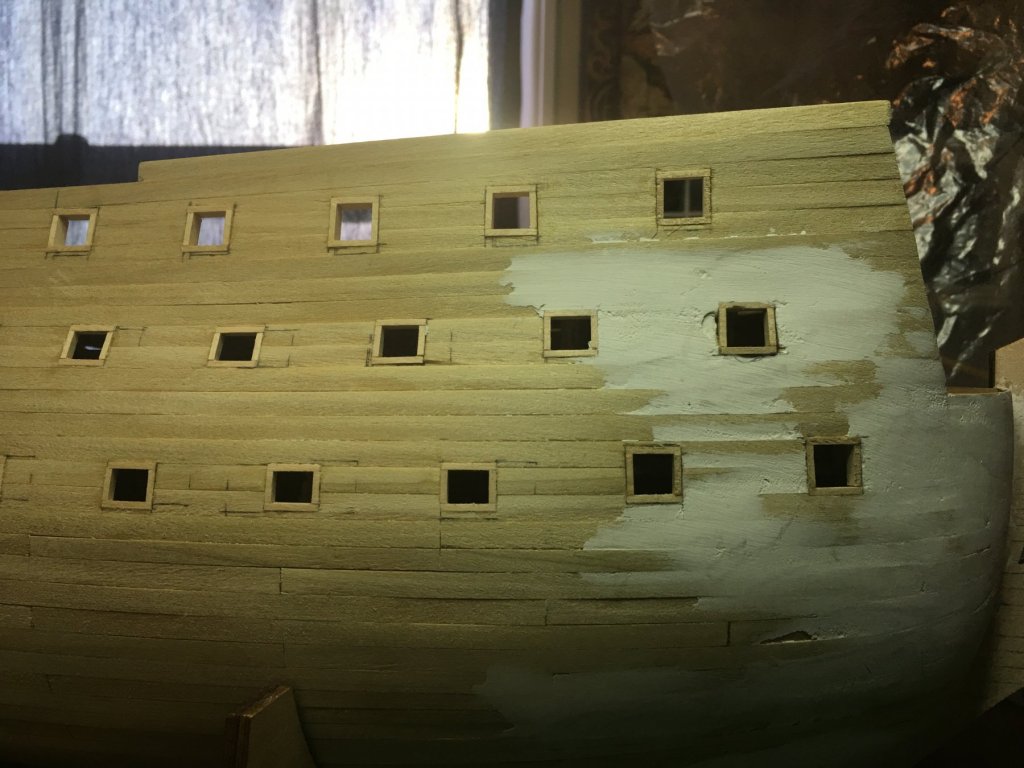
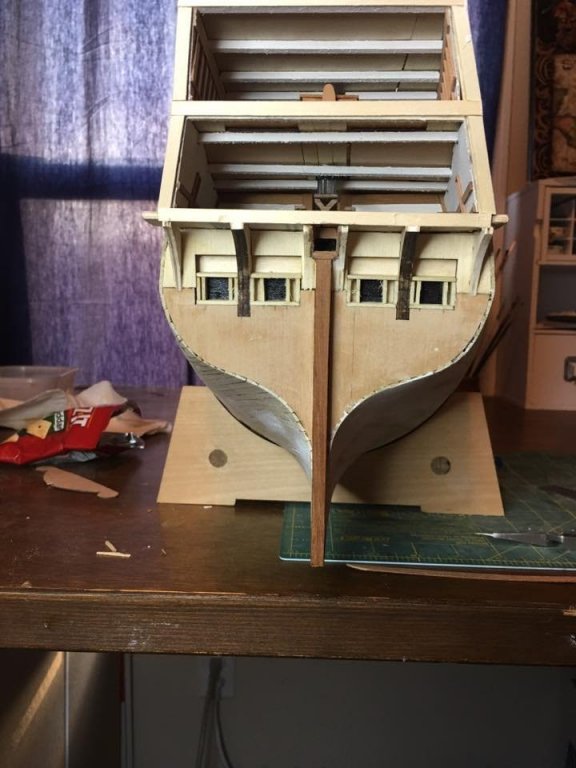
Progress continues on the gun port framing. 3 hours of build time tonight have left me with 3 ports left to go on the starboard side. Should have them done tomorrow and then more filler and sanding. There are lots of imperfections but the filler and the sanding should be light at this point so no big stress there. I will have pictures later this week when there is something to actually see. To all my S.R. scholars, I am in need of guidance. On the stern at the aft gun ports, does the transom remain flat and the just the balcony supports curve or does the transom follow the curve of the balcony supports. I have seen it both ways and am wondering if anyone knows how this should look. Below are pictures of the area in question. On the drawing the transom appears to be flat and just the supports curve. On the model, and I have seen this on a few of them, the transom itself takes on the same curve as the supports. I am quickly approaching a point where I need to make the decision on how to frame and plank this area so any input would be greatly appreciated. On this model it shows the transom curving with the balcony supports.
-
Thanks for that Michael! That is almost too simple, I don't think I ever would have thought to do that! Yet another reason I love this site as often we get tunnel vision that having another persons perspective adds a great solution that we would never have seen. Well, I have now achieved my daily goal and learned something new.
-
Great job indeed! The end result is what really matters and if you found a method that achieves a finish you like, then it is the right way!
- 228 replies
-
- 2
-
-
- gunboat
- model shipways
- (and 1 more)
-
Been hard at work but I feel like it has mostly just been chasing my tail. I finished framing all the starboard gun ports Friday night but something had been bothering me. I got up, left the room and played with the dogs for a while and when I came back in I realized that the bottom two rows of gun ports were shorter than the top row. Width was great but they were all squatting. I measured them and they are in fact shorter. I could not figure out how that happened as I have measured them time and time again what happened?!?! and why were the top ports all the correct size? Then I realized what I did. I did not oversize the height on those port opening for the framing. Still don't know how I missed that but I caught it. So now I get to go back through and re-frame the ports in order to make them all the correct size. On the bright side, while I still have rework to do on the port side gun ports, I should just be able to transfer over the dimensions from the starboard side and rework them once instead of the 4 times I have reworked them on this side..... I wish I could say that simply pulling the dimensions off the prints would work, and the would normally but, with the interior modeling I am doing there is no way to make the kit plan layout align with the actual decks. So, here I go. Already fixed a few in this picture and got in a couple more since it was taken. The repair work is going fairly fast so hopefully in a few days I will have some forward progress to show. Then I get to fix wood filler and finish sanding the hull and repeat on the other side.