HOLIDAY DONATION DRIVE - SUPPORT MSW - DO YOUR PART TO KEEP THIS GREAT FORUM GOING!
×


EJ_L
-
Posts
2,246 -
Joined
-
Last visited
Content Type
Profiles
Forums
Gallery
Events
Everything posted by EJ_L
-
Welcome to MSW Martin! I wish you the best of luck and happy building where ever the hobby takes you!
-
Welcome to MSW Jeff! Great to have you with us. Best of luck to you on both your current build and your future Victory!
-
 I've always gone bow to stern with my rigging. No real reason just the way I rig. I've heard some people like to rig from the middle outward so you are not reaching over lines. I keep meaning to try that way but habits can be hard to break. I think it is mostly whatever way you are comfortable with but like you said, new ideas and reasoning are always welcome!
- 291 replies
-
- 2
-

-
- bounty
- billing boats
- (and 1 more)
-
Doing this part of the build right is a slow process but will pay out huge in the end. I agree with David in checking your alignment everywhere. It is not uncommon for a frame to have a dip on the lower hull and a hump on the upper side. Even the laser cut frames can have problems and so go slow and slide that plank up the frames from bottom to top and make sure they are all correct. Your planking will be a lot easier and will indeed go faster if you do. As for the actual bending, there are some good videos and discussion topics on the site for bending without water. I have not used this method much myself yet as I still prefer to soak my wood and then use a modified soldering iron to bend my planks. My biggest advice with plank bending is if you use water to soak the planks, be sure they are dry before installing. Water causes the wood to swell and when they dry they shrink. That causes gaps in the planking. As long as you dry them out first, and yes heat from a hot air gun will do this faster, you will be fine. Again, if you have not done so, check out the tutorials section as there are lots of good ideas, videos, and pictures there as everyone does this a little different. Good luck!!
-
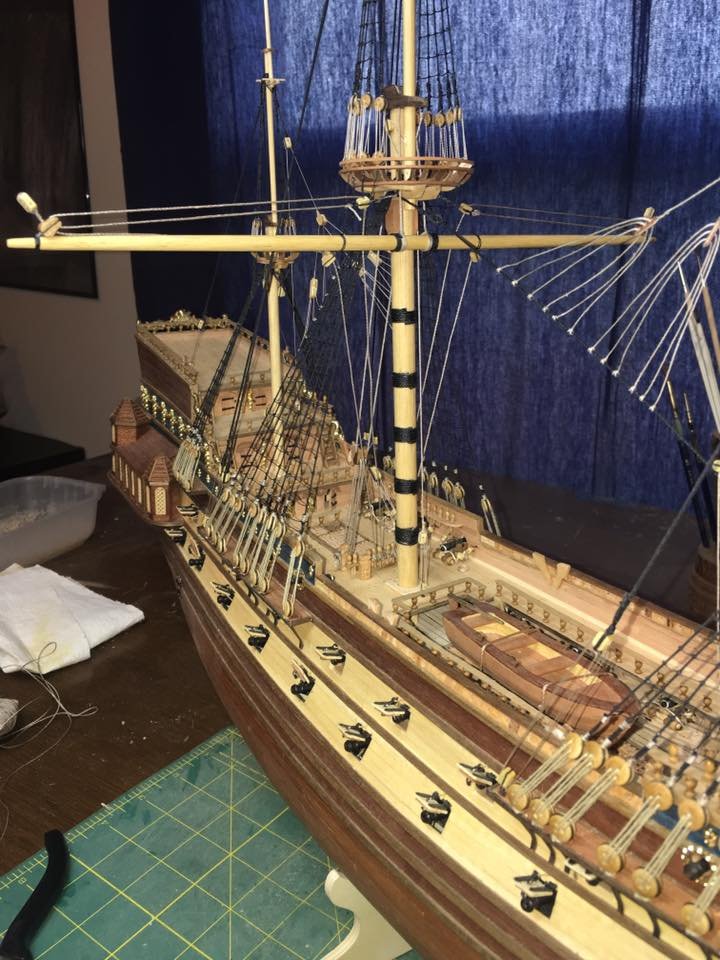
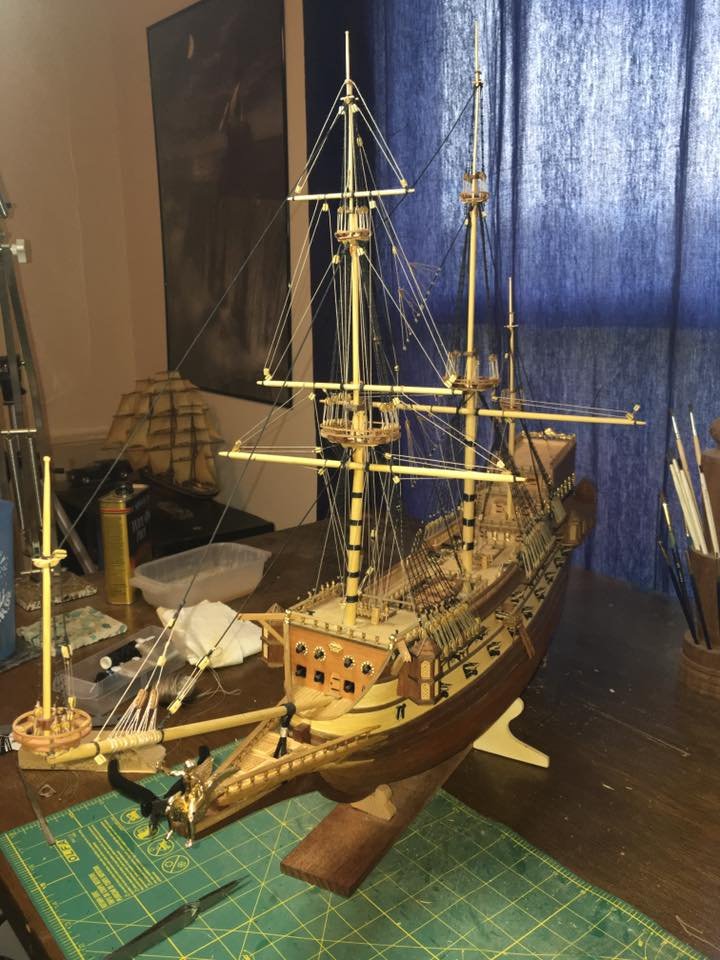
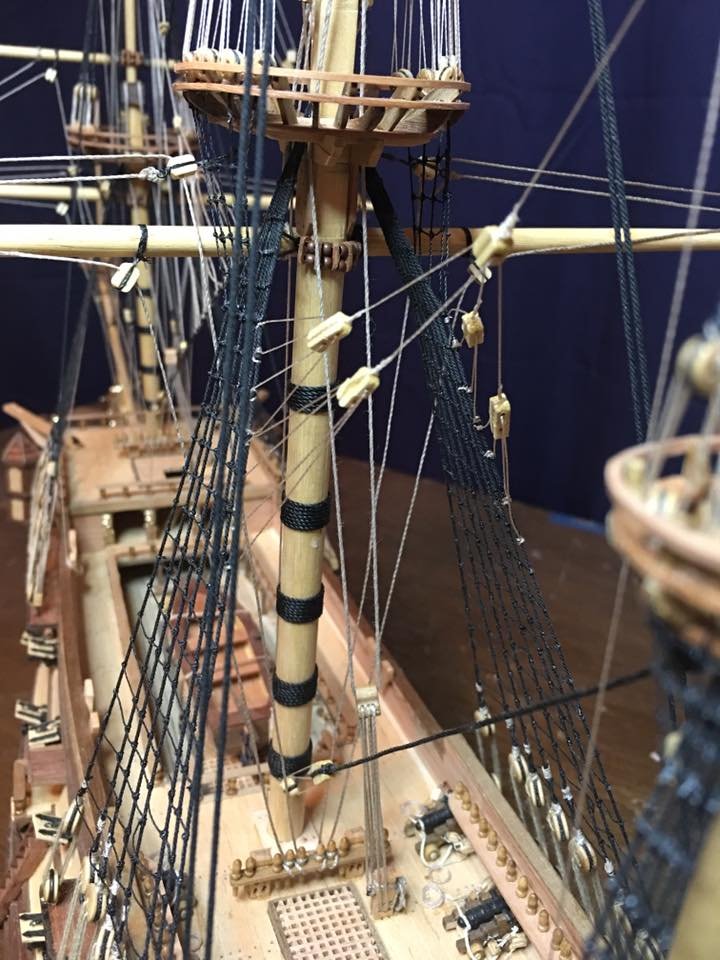
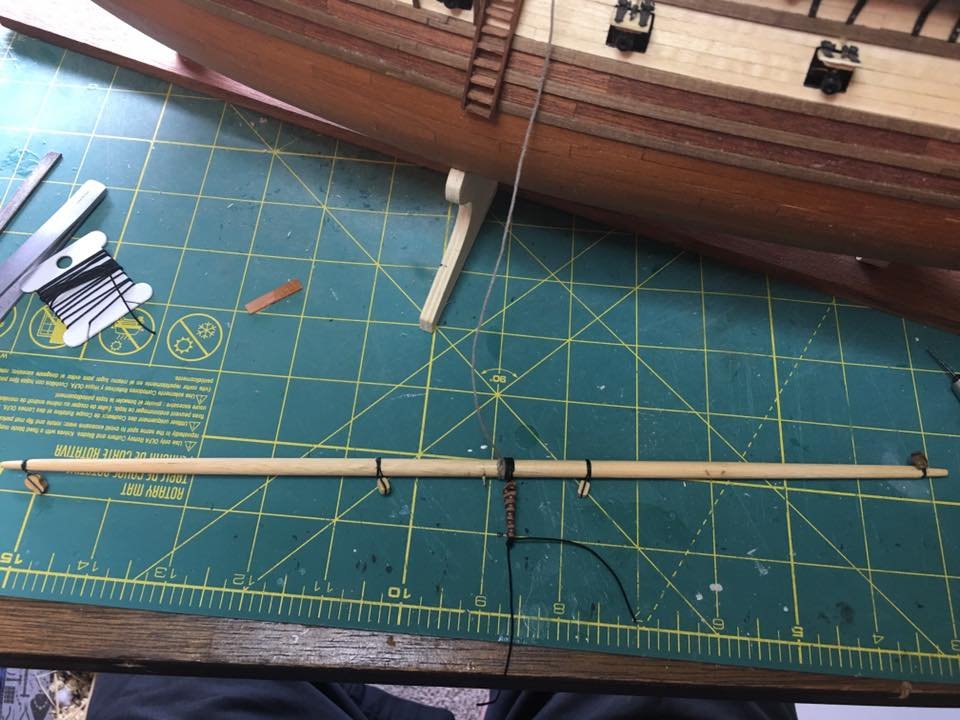
La Couronne's ship yard is open again this weekend. Didn't get as much build time in as I was planning but I still managed to get the main course yard bent to the main mast and all the associated rigging in place. With that yard, she has reached her widest dimension at 13". What is nice about that milestone is now that I now have verified all three dimensions that I need to accurately design her display. Next up will of course be the main top and main top gallant yards. Rigging the main top yard is fairly straight forward and as I already have it shaped and blocks attached, it won't take much to finish. the top gallant though has another crows foot rig which have been equaling a full days worth of work by themselves. Maybe next weekend.... Enjoy the update!


- 608 replies
-
- 13
-
-
- la couronne
- corel
- (and 1 more)
-
I will admit, this is probably the fastest S.o.t.S. build I have seen but, with the excellent workmanship you continue to display I cannot fault you on speed. In fact it is even more impressive! The weathering is also coming along very well.
- 322 replies
-
- 2
-
-
- sergal
- sovereign of the seas
- (and 5 more)
-
Very nice. Your Victory is a great looking model also. I always like showing different ships side by side even when they are not the same scale. I find it interesting to compare the various aspects between the ships, rigging, guns, deck furniture and decorations. Always cool to see how the same items changed over the years and adapted to the various ships.
- 291 replies
-
- 2
-
-
- bounty
- billing boats
- (and 1 more)
-
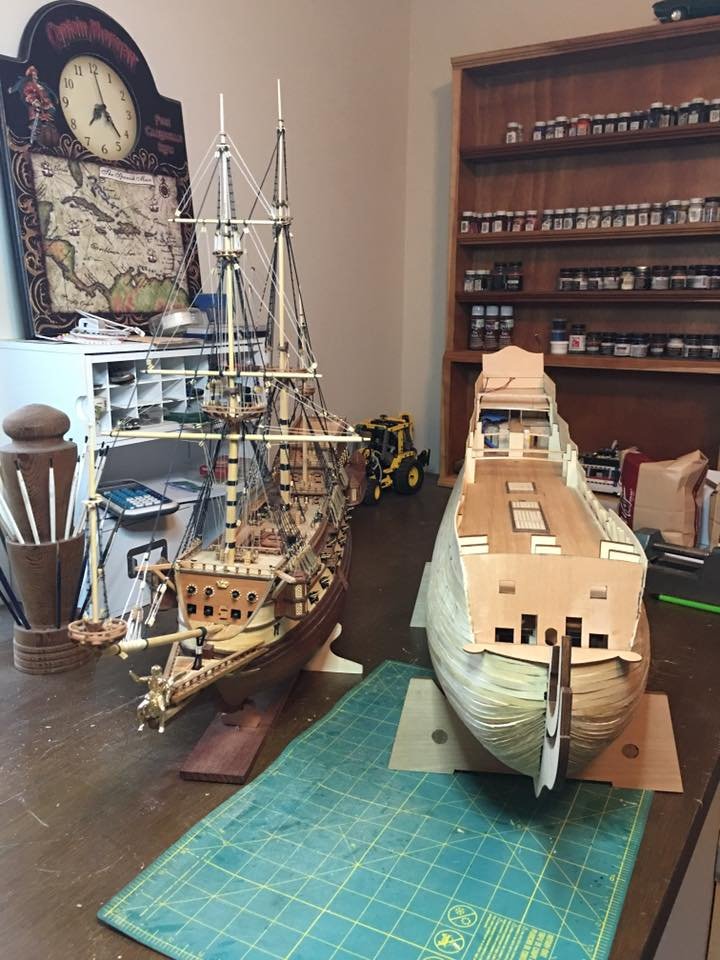
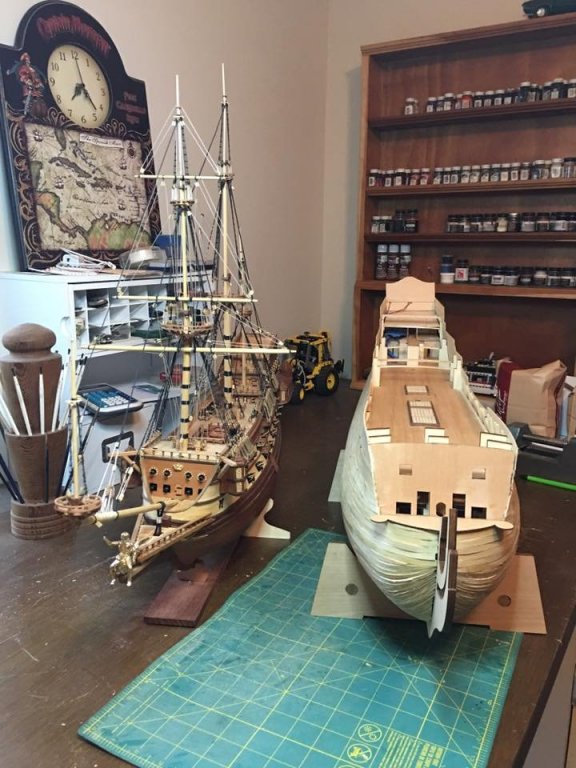
Thank you all very much for the compliments and likes! I have no idea yet where SR will be displayed. I'm still working on the details for La Couronne's display as she is needing a fairly big shelf also. May need to build a marina off the back of the house... Sjors, it is a double planked hull for which I am thankful! Right now I plan on planking her in mahogany with the wales and trim in walnut much like I did with Couronne. The kit calls for everything to be walnut and while I like the look of walnut, I like the lighter mahogany on the hull better. This also keeps the color schemes similar between two ships of the same nation. As for sanding, I will be able to use my power palm sander for a lot of the initial rough sanding, knocking down high spots and evening planks. I will have to do most of the sanding though by hand in order to get the curves properly shaped and smooth. Also I can already see a lot of wood filler work and that will be by hand also. I have a 3 day weekend the last weekend of May and that is one of my plans is to start sanding on her then.
-
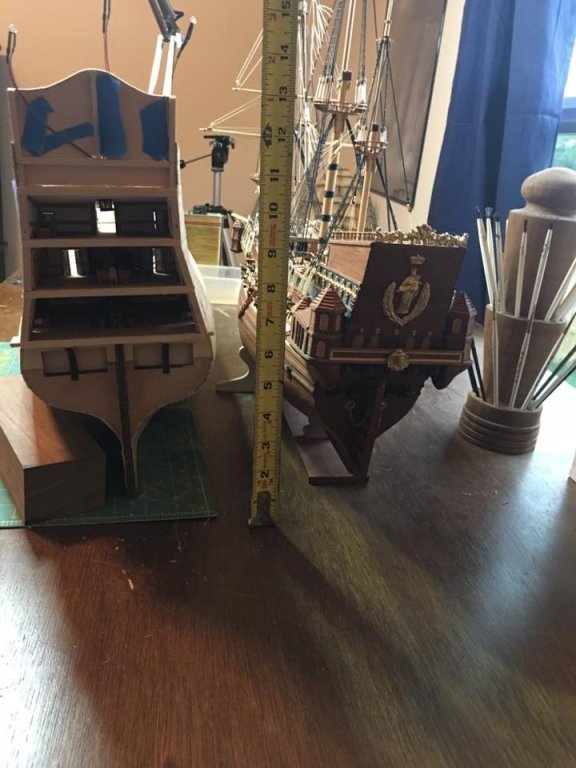
Thank you Anton and Denis for the nice words and to the likes! Here are the comparison pictures of Soleil Royal next to Couronne. I could fit Couronne's entire hull inside S.R. she is that much bigger! Of course this is just the size difference between the models, not the actual ships as they are not the same scale. While S.R. would have been larger than Couronne in real life, I do not think she would have dwarfed the other ship that drastically! Well, enough playing around. I have a lot of work left to go on both models so I better get back to them. Till next update, enjoy!

- 961 replies
-
- 14
-
-
Impressive! That is a whole lot of decorations to fit into a small space and you have done an excellent job! The fogged acetate does make believable glass for the time period also. I have used it myself of past builds and have liked the look. Looking forward to the next update!
- 322 replies
-
- 2
-
-
- sergal
- sovereign of the seas
- (and 5 more)
-
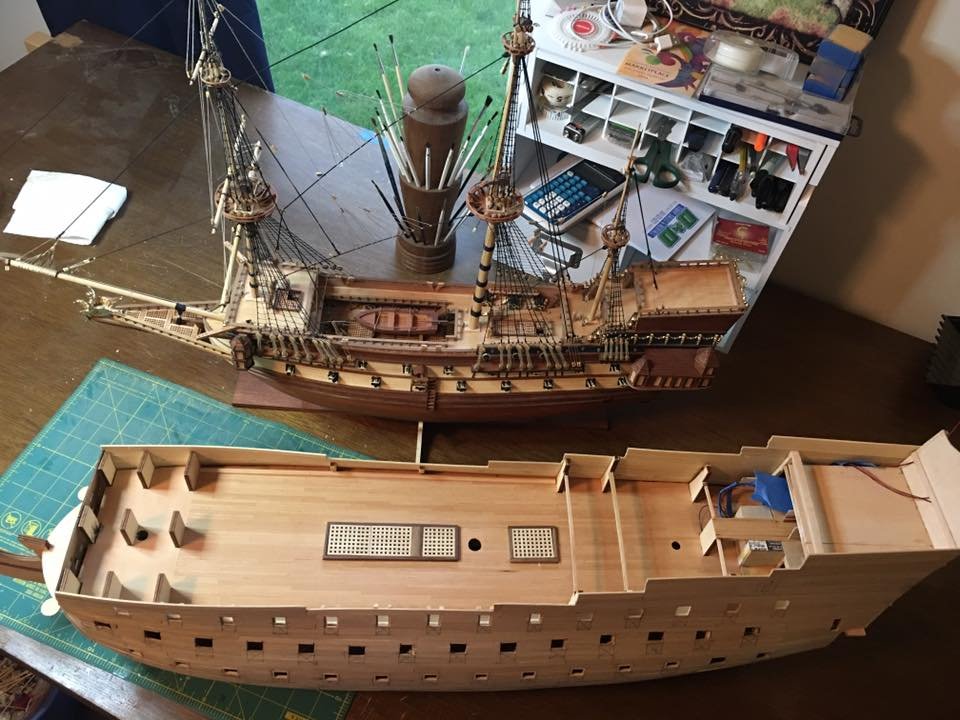
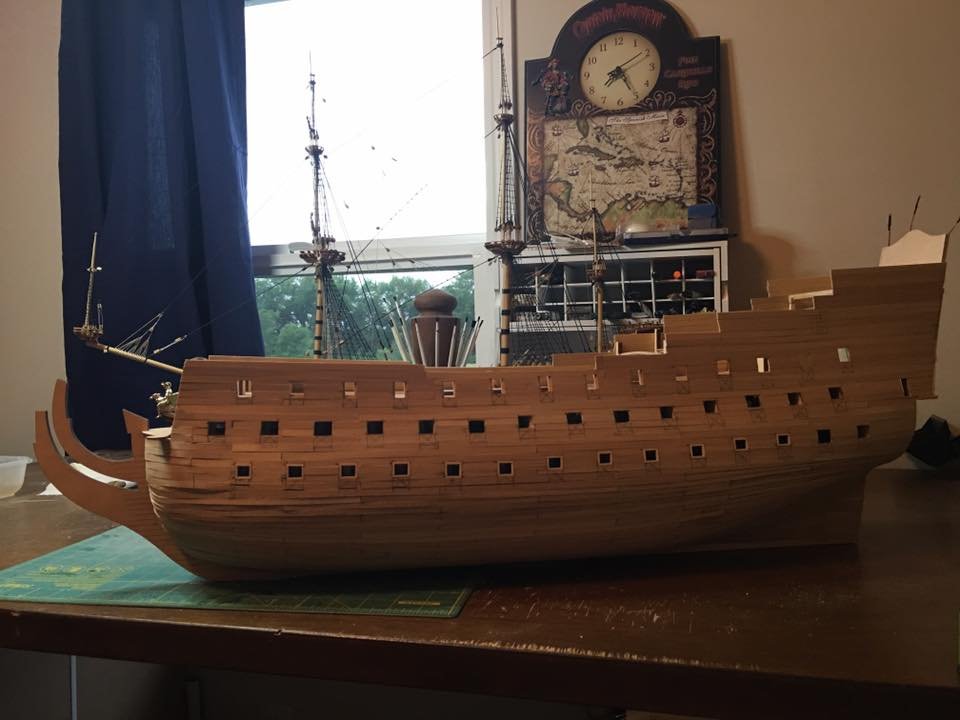
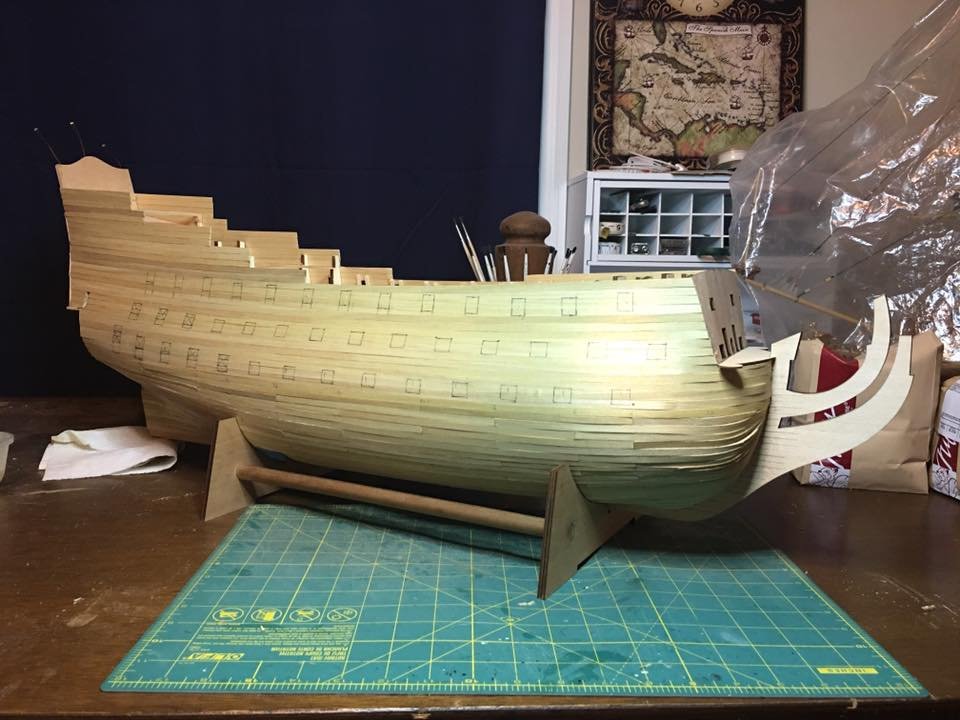
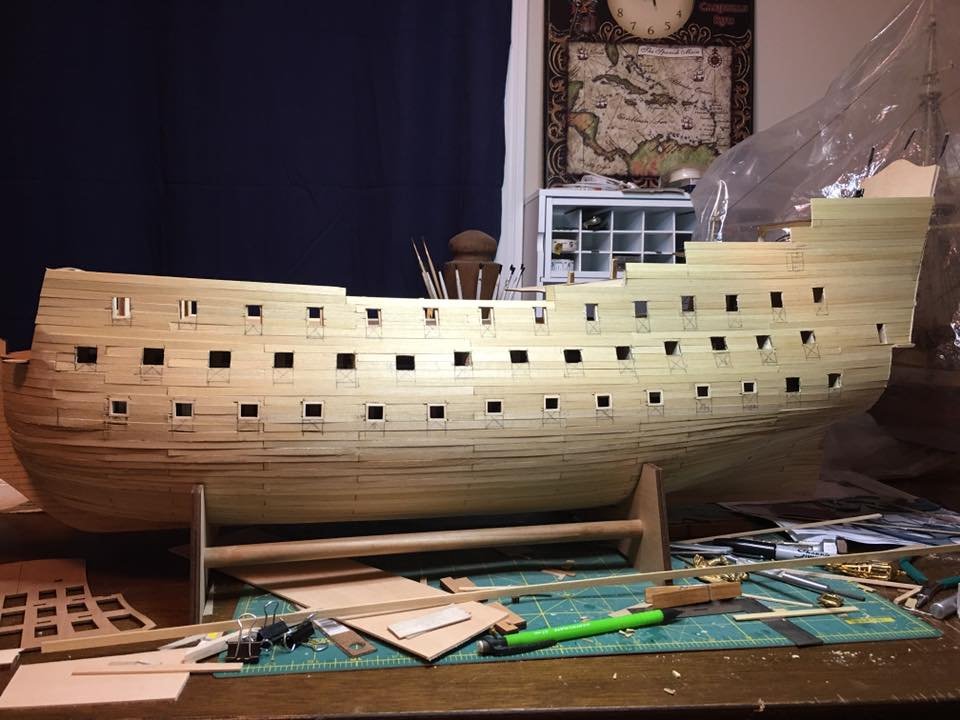
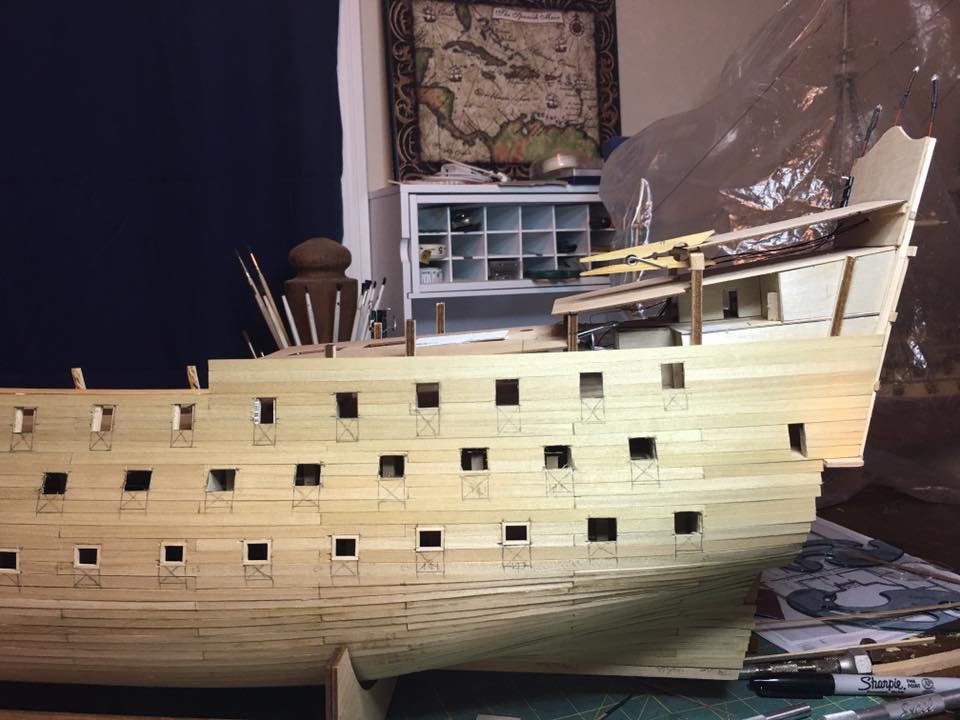
Well, she is rough, lumpy and in desperate need of filler and sanding but I now have a complete hull for my S.R.. I also finished laying out the starboard gun ports and am ready to cut them out. Once that is done then the long hours of sanding begin along with fine tuning the shape of the hull can begin. Now that the hull is built up, her actual size can start to be truly appreciated as she is a large model and sitting next to La Couronne, that size is even more impressive. I will take some side by side pictures soon when I uncover Couronne to continue her work. Should be tomorrow unless something comes up. Enjoy the updated pictures and as always thanks for watching!
-
Practice made perfect! Denis, very well done on those railings. They will make an excellent addition to the ship.
- 453 replies
-
- 5
-
-
- thermopylae
- sergal
- (and 1 more)
-
A piece of art indeed! Those decorations are fantastic! Regardless of if you are modeling this ship or any other with this level of decorations, there is a lot that can be learned from and inspired by your build. Keep up the excellent work!
- 322 replies
-
- 4
-
-
- sergal
- sovereign of the seas
- (and 5 more)
-
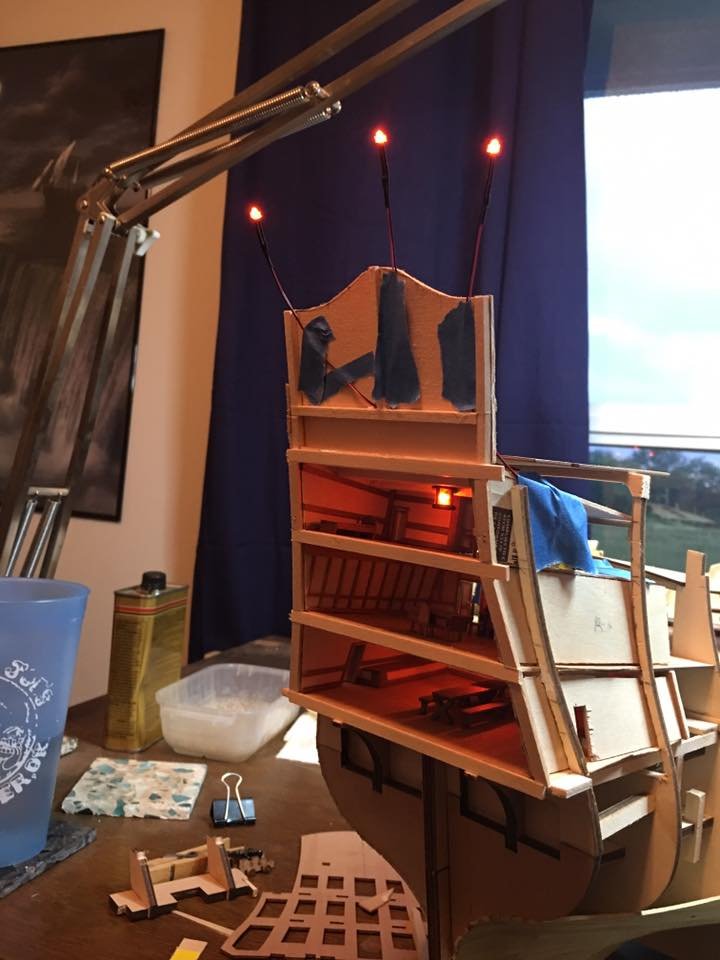
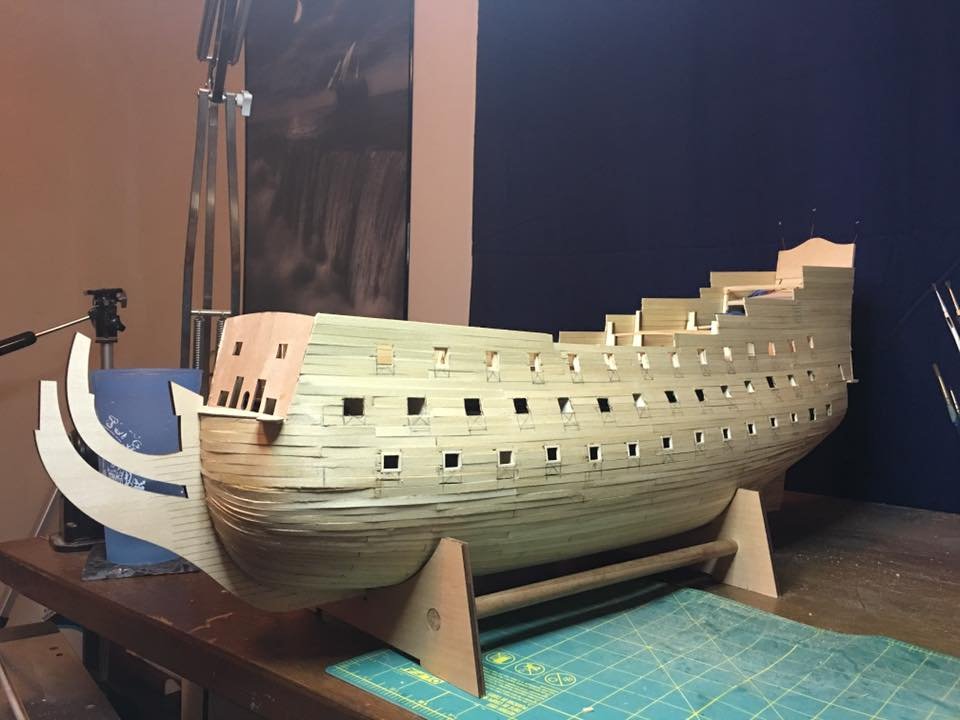
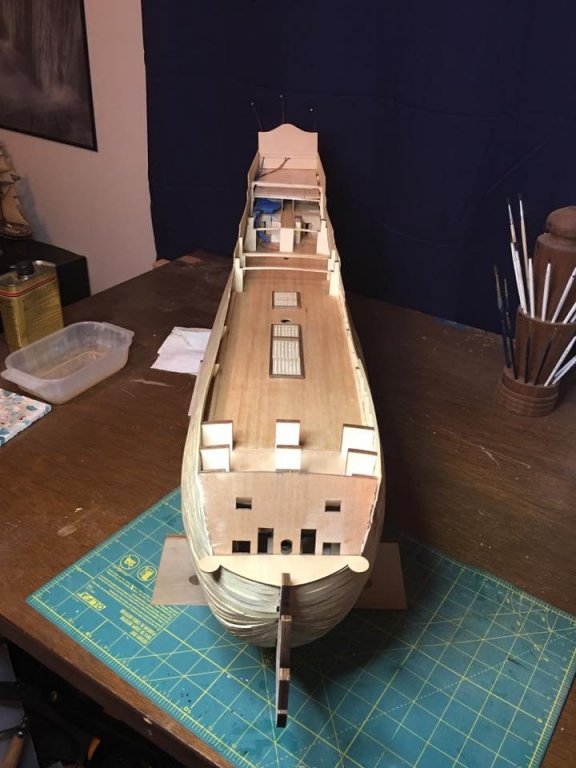
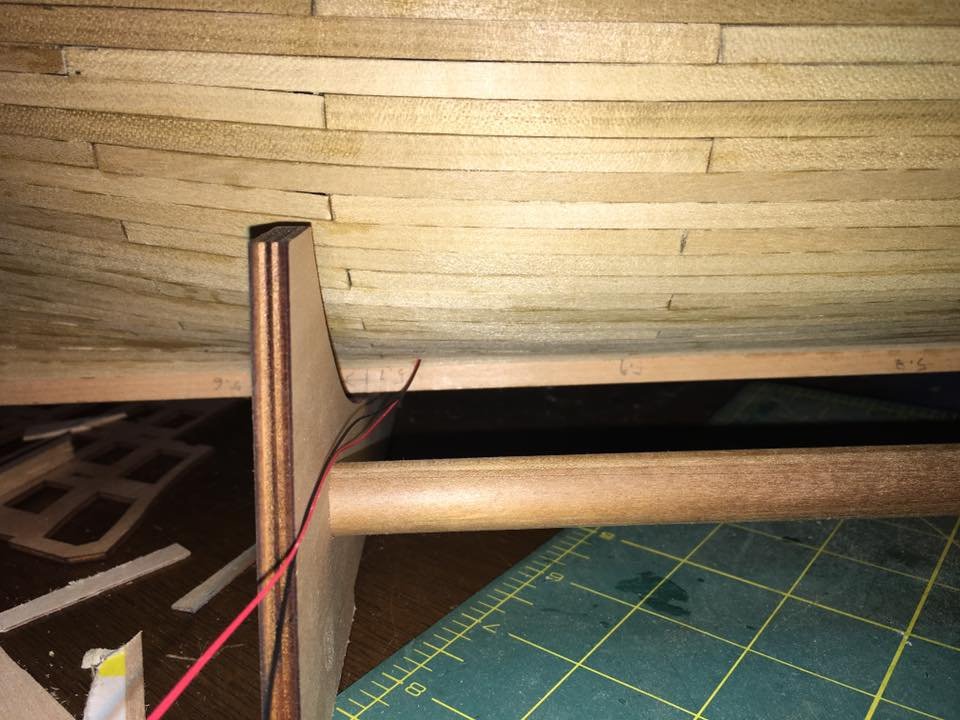
A little more work over the past couple days. I went ahead and laid up some more planking and now the rough profile can be seen. Lots of fine tuning to go but it is nice to finally see her full shape. I also finished wiring up the lights and got the wires tucked away inside the hull, and pulled down through the bottom. I plan on tucking them in tight to the keel on the side that will face away from view and turn down the display stand. I have a switch that I will hook up that will allow me to turn them on and off. Time to rest and I have a busy weekend with the Admiral as she is graduating with her Masters degree so I do not know how much build time I will get but, when I get back into the shipyard it will finally be time to start closing up the starboard hull.

-
Marc, you know that a full scratch build is going to be in the future anyway. May as well bite the bullet and go for it! Actually I know what you mean by capable but not yet ready. That is precisely why I am still kit bashing my S.R.. Plus I'm not opposed to building the same ship again down the road when my skills are more fine tuned to the task. Michel Saunier, I will also offer my thanks for your assistance to Marc on his project. The information has been both helpful in my own build and also very educational. A large part of why I love this hobby is learning about the ships I am building and your research has been a great gift!
- 2,696 replies
-
- 1
-
-
- heller
- soleil royal
- (and 9 more)
-
Hahaha!! Well it's true. I think everyone of us must enjoy some degree of torment in order to build these things!!
-
With a hull this big, there will be plenty of elbow pain no matter what power tools get used. And I get to do it twice with double planking!
-
I've been reading a lot about people using fly fishing line for rigging extremely small elements. I have not used it myself yet but I think it would work better than wire as it is far more flexible yet still very strong. Let us all know if you find those scale able seamen! I've been looking for those myself for years!
- 74 replies
-
- 1
-
-
- Marine Model Company
- Joe Lane
- (and 2 more)
-
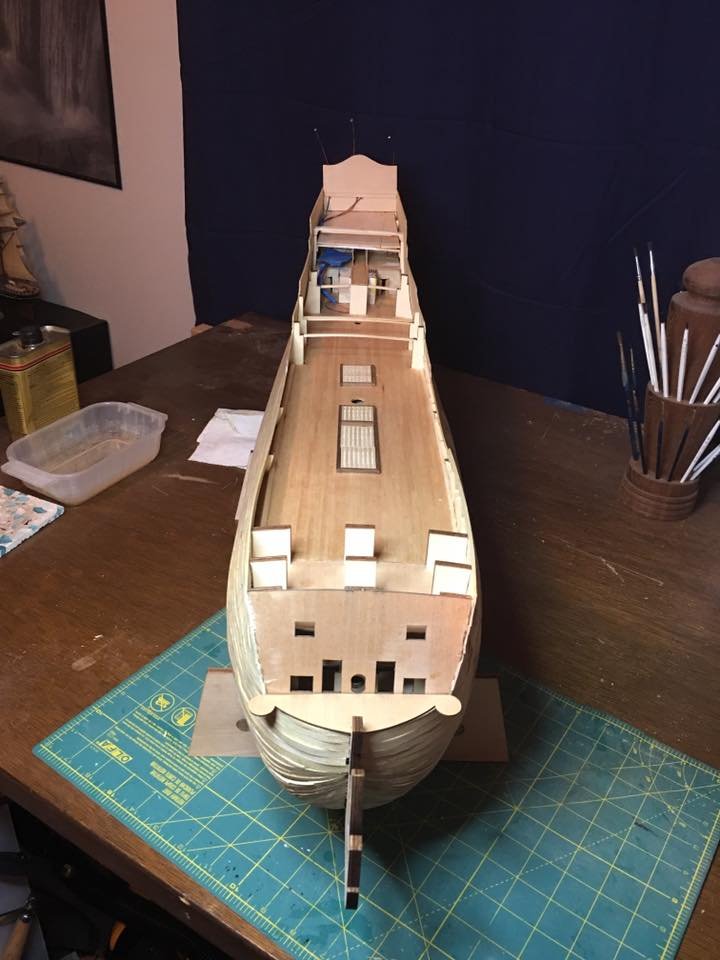
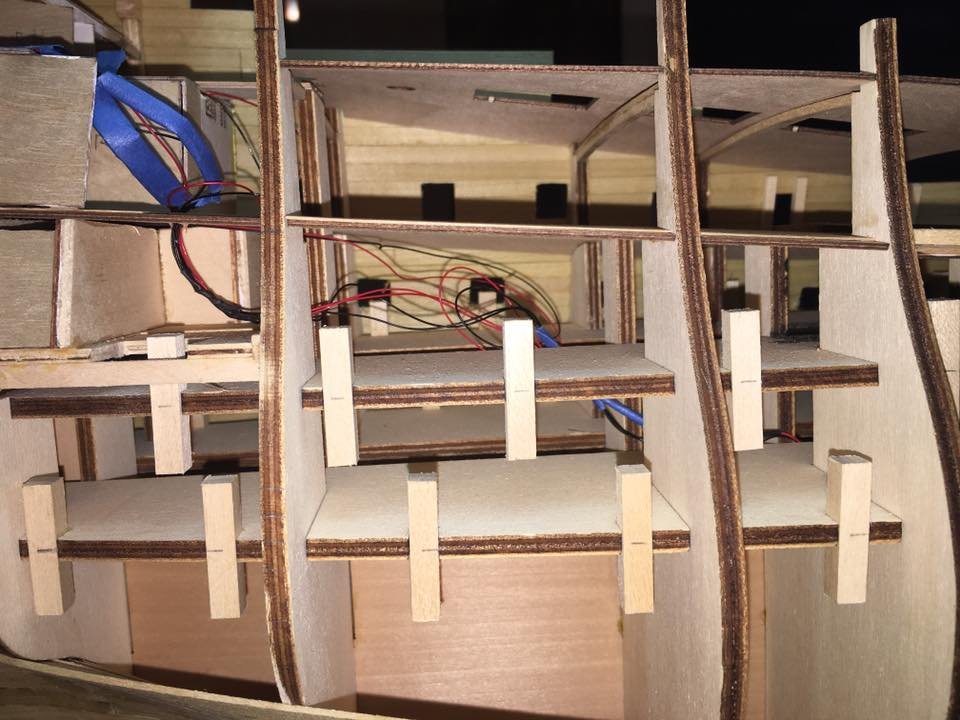
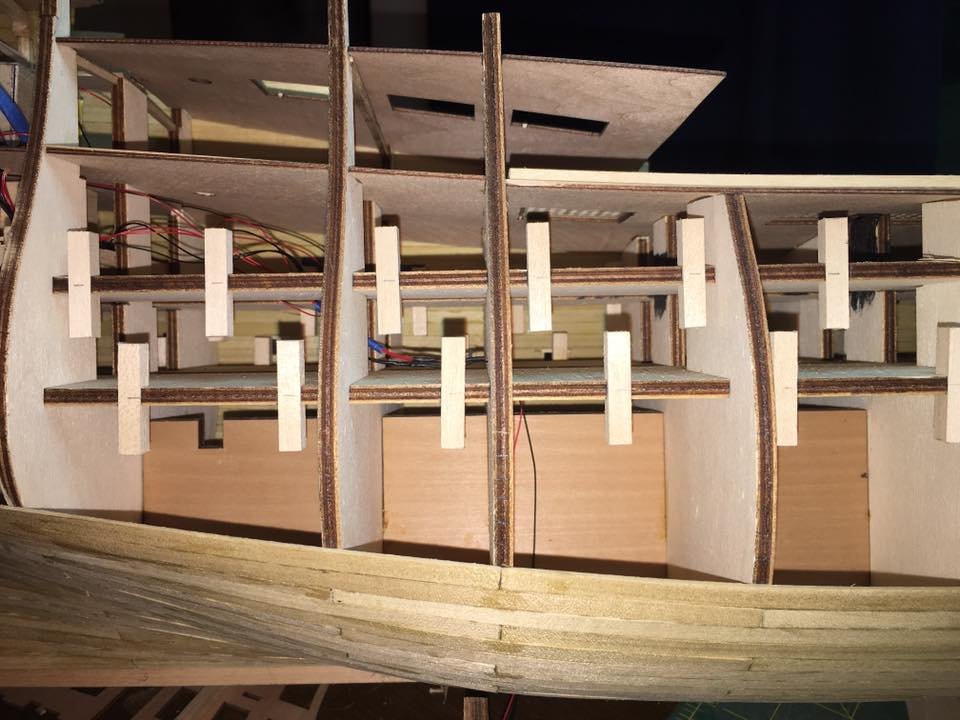
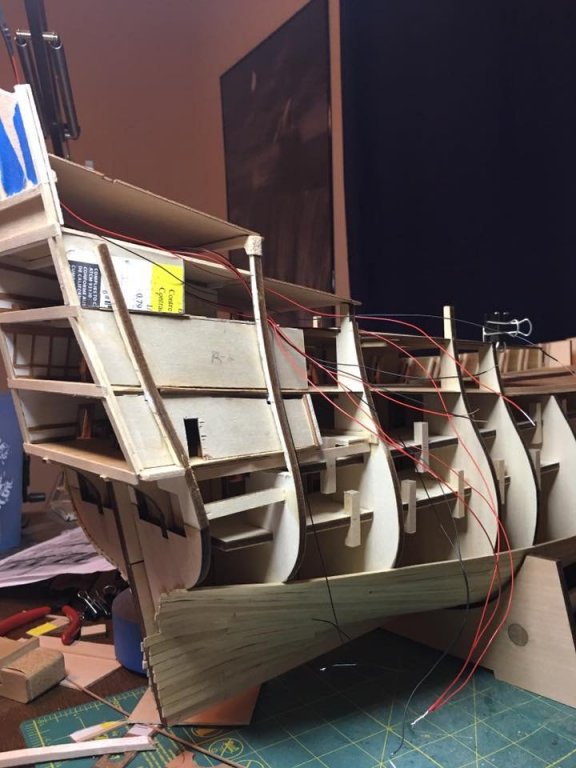
Thank you all very much for the nice words and to all the "Likes". I love modeling details like this as these are what create those surprise wow moments when people peak in the windows and discover there is stuff to be seen. It was always one of the fun things I like to do on my model railroad for the same reason. It just adds more awe and wonder when you can not only see a great exterior but also a detailed interior. My plan for sanding the hull and protecting the interior is simply tape at the moment. When I go to do the heavy sanding, I will close off the openings to the cabins as best I can with blue painter's tape. That should keep the majority of the dust out. However, I do know that it won't hold it all off and so once done I will take my airbrush and just use a light pressure to blow out the remaining dust. I always blow off a model when I'm done sanding anyway so this isn't anything unusual I will just have to be careful to not knock anything loose. In the event something comes loose which is likely with those chairs, I will still have access through the stern windows. The framing I am doing prior to the sanding is just the rough outline framing to allow the planking to install where needed. The windows and doors will not be fully framed and so I will have plenty of room to get in with tweezers to reset anything that comes loose. That brings me to recent work. As you can see some of that framing has already started. I also had to run the framing on the taffrail to allow for the lantern light wiring to install as well as the start of the framing for the quarter and poop decks. With the wiring in place I can tie them all together to clean up that mess of red and black guts spilling out of the hull and close up the starboard side as well as topping out the planking on both sides. I ran out of the wood I was using to frame the gun ports so a run to the Hobby Store is in order soon so that can be completed. I will have to get the Admiral's permission to take out the Good Ship Visa though as she knows a trip to the hobby store for $10 worth of wood means I will return $100 poorer financially but richer in wood, tools, supplies or just something cool I could not live without! Enjoy the picture updates and thanks for stopping by!

-
Having a few ships of the same nationality displayed side by side to see the progression in designs is what I intend to do with my builds only with the French instead of the British... for now at least... Good start on those quarter galleys. Getting those angles right gave me a lot of trouble as they just kept not looking right and I kept picturing the captain sliding down the steep slope of the deck every time he tried to use the chamber pot!
- 322 replies
-
- 2
-
-
- sergal
- sovereign of the seas
- (and 5 more)
-
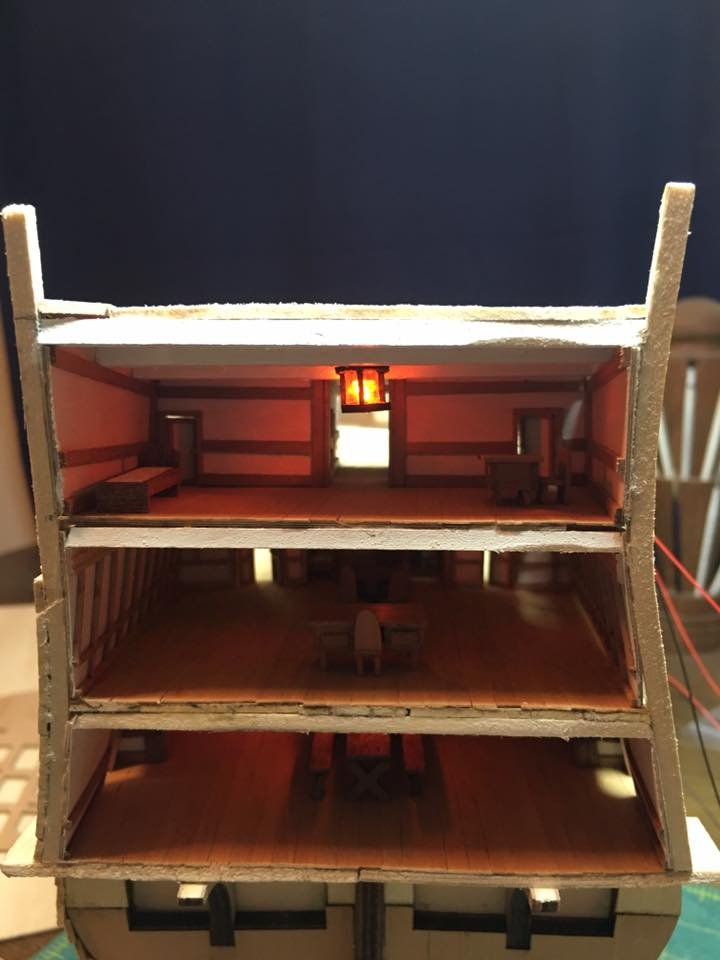
Thank you as always to the compliments and the "Likes"! Always appreciated! Those long build days are wonderful! The down side is when you spent 8 hours straight and only have one side of the shrouds ratted down and you have to point out what you did to the Admiral as in her eyes it looks the same as it did that morning.... Well, I didn't spend 8 hours today but the couple I did manage to get in real quick allowed for the completion of the Captain's cabin. Next up I need to start building the framework for the stern. As I will not be using the kit provided window frames as they are set to the 5 window pattern and I am going to model the 6 window pattern, I will have to scratch all the framework for it. Truthfully this is a better solution anyway as the cabin build outs have caused the floors and side bulkheads to change alignment and no longer fit the kit piece very well. The other thing this allows is for me to run the wiring up inside the framework for the stern lanterns. Once those wires are in place I can close up the remaining hull and begin the dreaded sanding phase...

- 961 replies
-
- 11
-
-
The cross section will be completely scratch. I will be able to use dimensioning from my current build for reference as well as I kept the extra wood that the false bulkheads were cut from so I have a template for the shape of the hull for framing. With those I can adjust the scale as needed. It it will be a fun challenge that I am looking forward to doing soon! I will have a log and I will try to keeps a step by step accounting of how I do it. May need reminders in that area though...
- 108 replies
-
- 3
-
-
- mamoli
- constitution
- (and 2 more)
-
She is looking like a first rate ship more and more with each update! Beautiful work! I'm enjoying seeing how your details bring her to life! Many of the designs on these these ships were inspired by castle warfare. Tall turrets or in a ships case stern and forecastles allow for a high ground and defensible position while providing an advantage to fire down upon enemies. Galleons being already built in this method gave an established basis of design to work with. The challenge came in how to make her stable with the weight and movement of a hundred canon. Obviously some ships were far more successful than others.
- 322 replies
-
- 3
-
-
- sergal
- sovereign of the seas
- (and 5 more)
-
Great start Eddie! I've learned to always budget in extra wood for any build. Either the kit is short pieces, the supplied wood is of bad quality or I just screw up too many times and need more! As for drinking and building, I too am still working on that mystical combination of drink and quality workmanship. While I have learned a lot of reasons why this shouldn't be done, I am of the mode of thinking that practice makes perfect and if I keep trying I will eventually find a good combination.
-
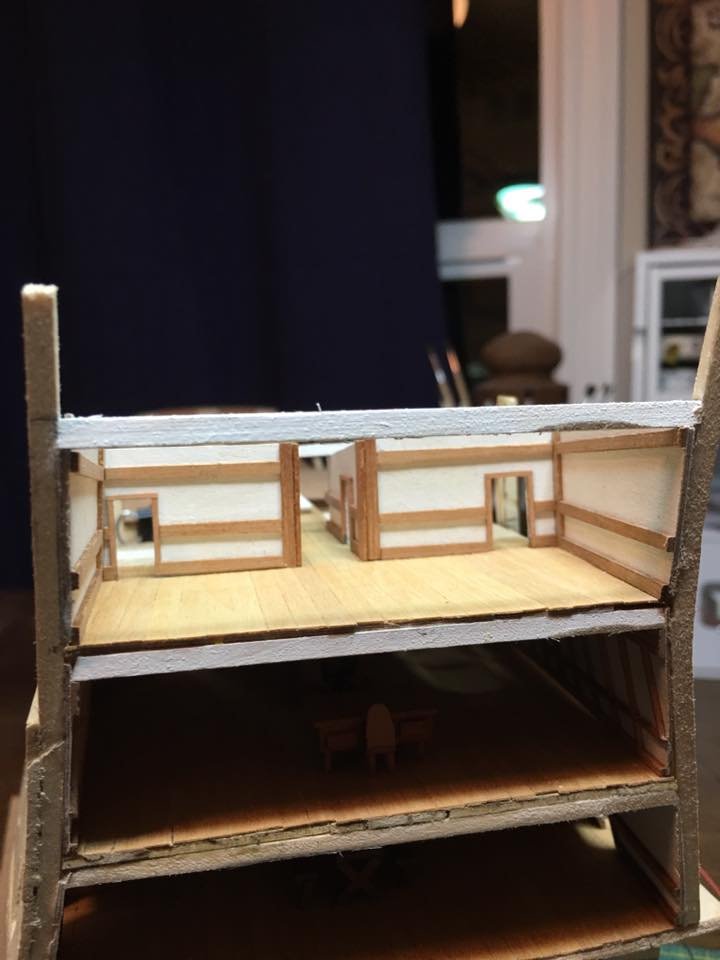
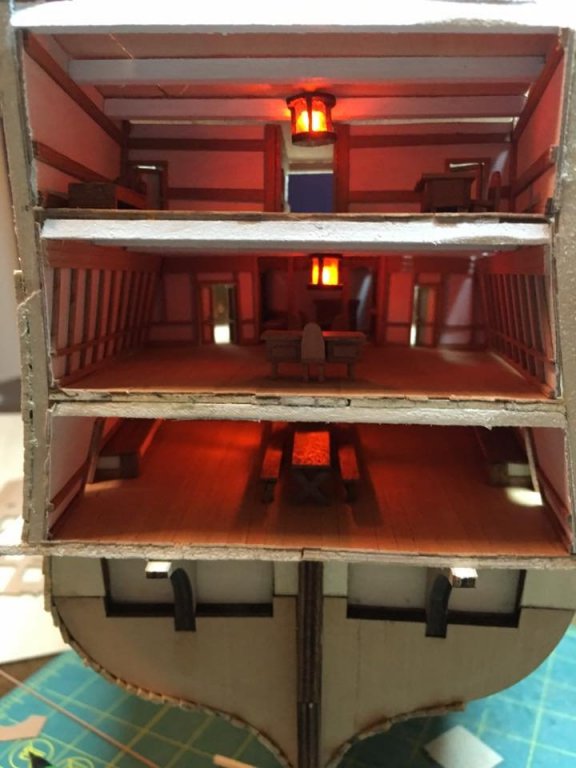
Just a quick update/preview of the Captain's quarters. Bulkheads are going up, floor is planked and doors and furniture will be appearing soon.