HOLIDAY DONATION DRIVE - SUPPORT MSW - DO YOUR PART TO KEEP THIS GREAT FORUM GOING! (Only 72 donations so far out of 49,000 members - Can we at least get 100? C'mon guys!)
×


EJ_L
-
Posts
2,246 -
Joined
-
Last visited
Content Type
Profiles
Forums
Gallery
Events
Everything posted by EJ_L
-
 Great start on your deck planking! I like the use of the mahogany for the edges. Really makes them pop out at you and adds a little something extra.
- 453 replies
-
- 5
-

-
- thermopylae
- sergal
- (and 1 more)
-
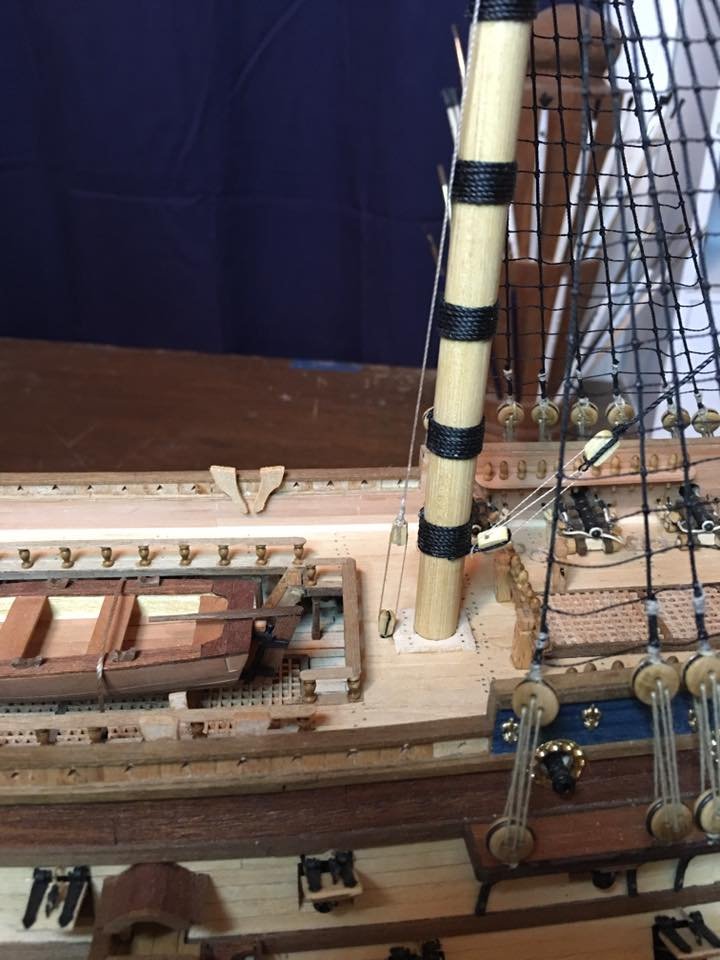
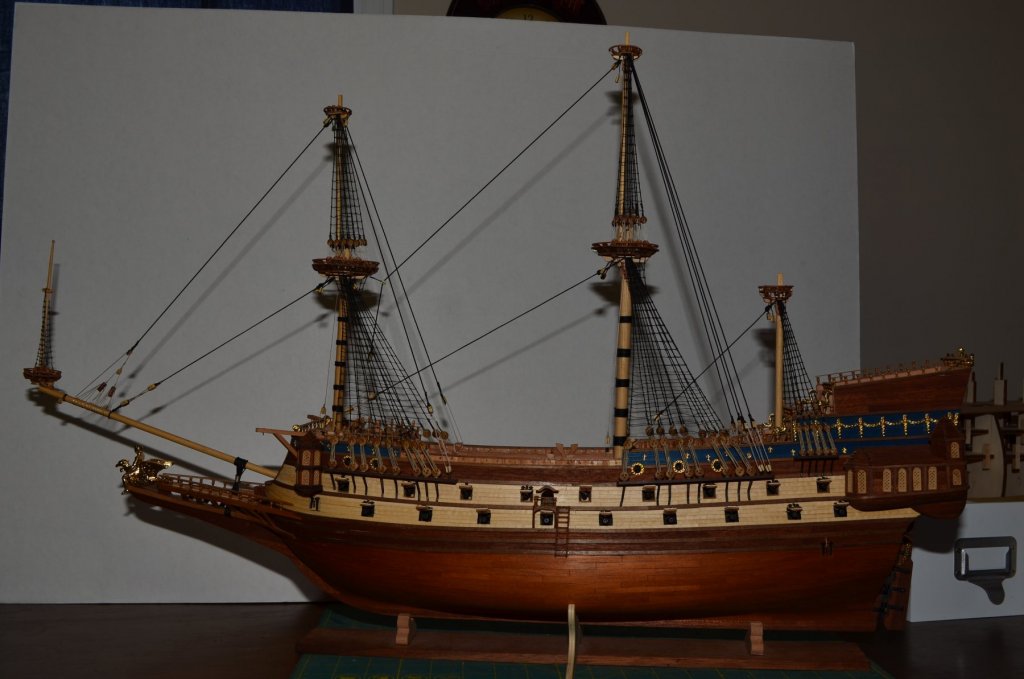
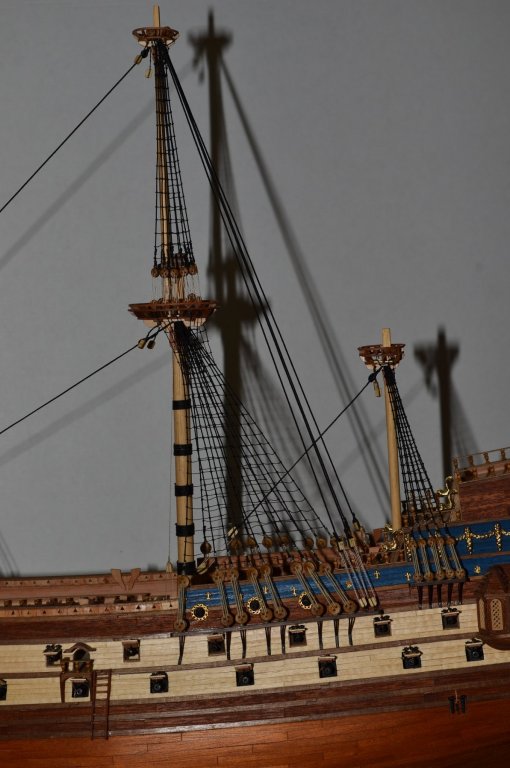
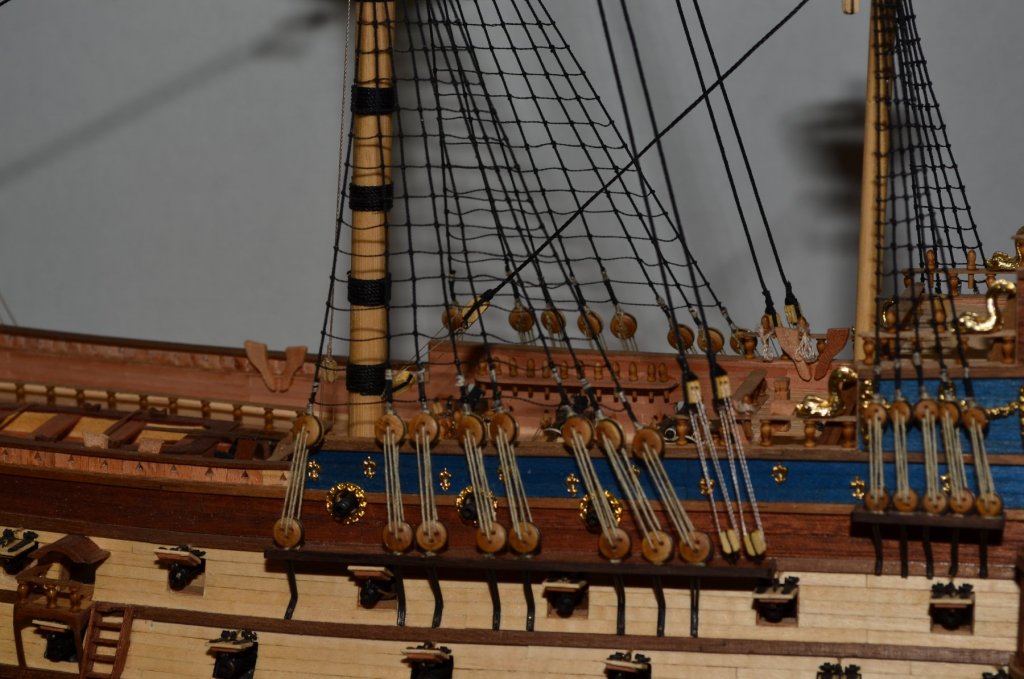
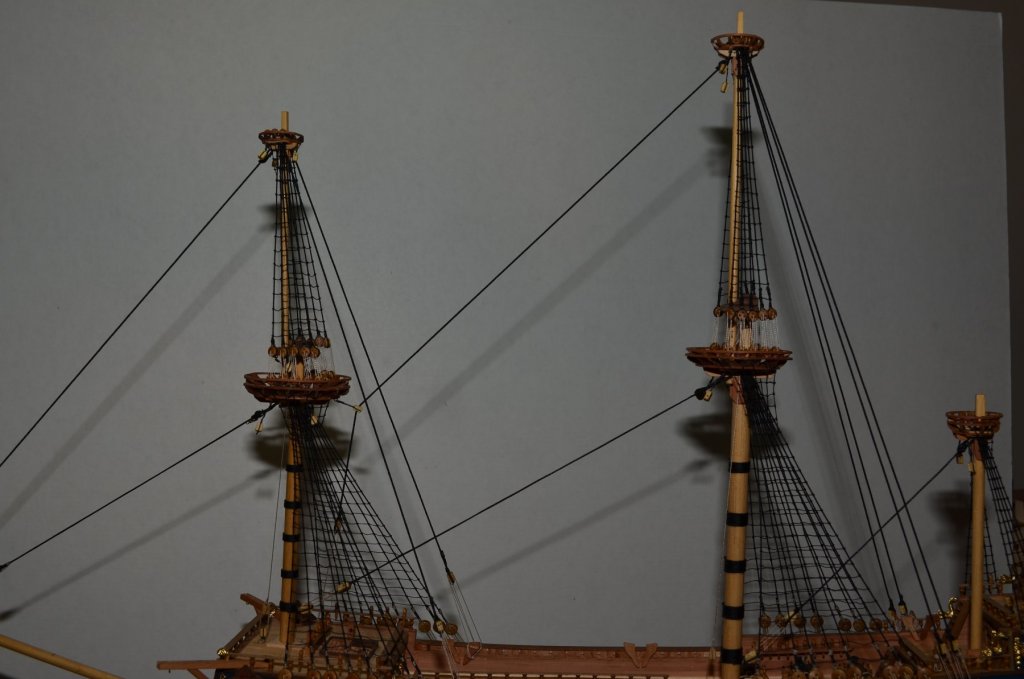
Ratlines and stays on the main top mast have been completed! This finishes the last of the large mast sections. I plan on working on S.R. for a while and advance the planking some more on it but, when I return I think a bigger push will be in order. I plan on building the mizzen top mast as well as the fore and main top gallants and all the flag staffs. There is not much rigging needed for them and as there are no more platforms to build the construction of those masts should be relatively simple. Plus, that will finish up mast construction and then I can start on the yards! I must admit that with every new line I rig I tend to spend more and more time just sitting back and looking at her and I am getting more and more excited about seeing the finished ship. Still months away but it is much closer to the finish than the start!
- 608 replies
-
- 15
-
-
- la couronne
- corel
- (and 1 more)
-
Congratulations Elijah!! That is a great feeling when you complete a build. I am looking forward to seeing your pictures as well as what you do with your next build!
- 701 replies
-
- 2
-
-
- phantom
- model shipways
- (and 1 more)
-
That is awesome! I try not to think of it as being immature but instead maintaining childlike happiness and wonder at the world around me.... 😂😀 Of course I am currently rolling around on the floor with my puppy and trying to type this on my phone so maybe the Admirals are on to something.... 😜 Im glad I could bring laughter into your build. It is always a good relief as I know I sometimes find myself stressing a little too much when building. Good to relax!
-
Shrouds and ratlines have taken over this weekend! While I didn't quite get them all done, I made a very good dent and should probably be done with one or two more hours of work. I am also rather please to say that I even built the shroud pairs correctly this time! So, I hope to finish up the ratlines later this week and then rig the stays. I am ready to be done with ratlines!!!!


- 608 replies
-
- 8
-
-
- la couronne
- corel
- (and 1 more)
-
Excellent as always and very life like especially in that last picture. Looks just like you were standing on the deck looking up at it.... Nice detail catch there. I never noticed them myself till you pointed it out. Just something more to make your model truly incredible!
-
Great information Marc! Be sure to thank Michel Saunier for me and all of us in your next correspondence. I do hope that one day all of this research gets published in a book for the benefit of us all. These 17th century ships while famous and admired by all really do lack a lot of information. Even the Vasa being physically present where she can be studied still leaves a lot of blanks to be guessed in. I do hope that more people with the knowledge and expertise to do so, find a way to discover and publish their findings so we can learn more about these great ships.
- 2,696 replies
-
- 2
-
-
- heller
- soleil royal
- (and 9 more)
-
It looks like it is made for a steeper climb. Maybe a "stock" design for the ladders to the upper decks which are more vertical in design than where this one is placed.
- 108 replies
-
- 2
-
-
- mamoli
- constitution
- (and 2 more)
-
Your welcome for the support and thank you for this wealth of information about S.R.! It has been invaluable to me for my own build and as there are not too many others building this ship right now on MSW, it is good to have another person to bounce ideas off of.
- 2,696 replies
-
- 3
-
-
- heller
- soleil royal
- (and 9 more)
-
I second Mark on this and say go for it! I would be willing to bet that you will be fine tuning this build until the moment you put her up in the case for display so you might as well get started with the next phase. Seriously, your drawings are looking good and I think having them on the computer will help you make those fine adjustments that is hard to do on paper.
- 2,696 replies
-
- 2
-
-
- heller
- soleil royal
- (and 9 more)
-
All these little components are coming together nicely and are gradually making bigger and really nice cabins. Looking forward to seeing them all in place aboard your Thermopylae as they are really going to bring her to life. Excellent work!
- 453 replies
-
- 4
-
-
- thermopylae
- sergal
- (and 1 more)
-
I try not to think of how much work I still have left to do overall as it can become rather frustrating. Instead, I try to keep a close up view and stick with small goals. Complete a mast and a top, finish rigging a set of shrouds and ratlines, things like that. Mini goals make me feel like I am accomplishing something as I cross them off.
- 213 replies
-
- 5
-
-
- la couronne
- 74 gun
- (and 2 more)
-
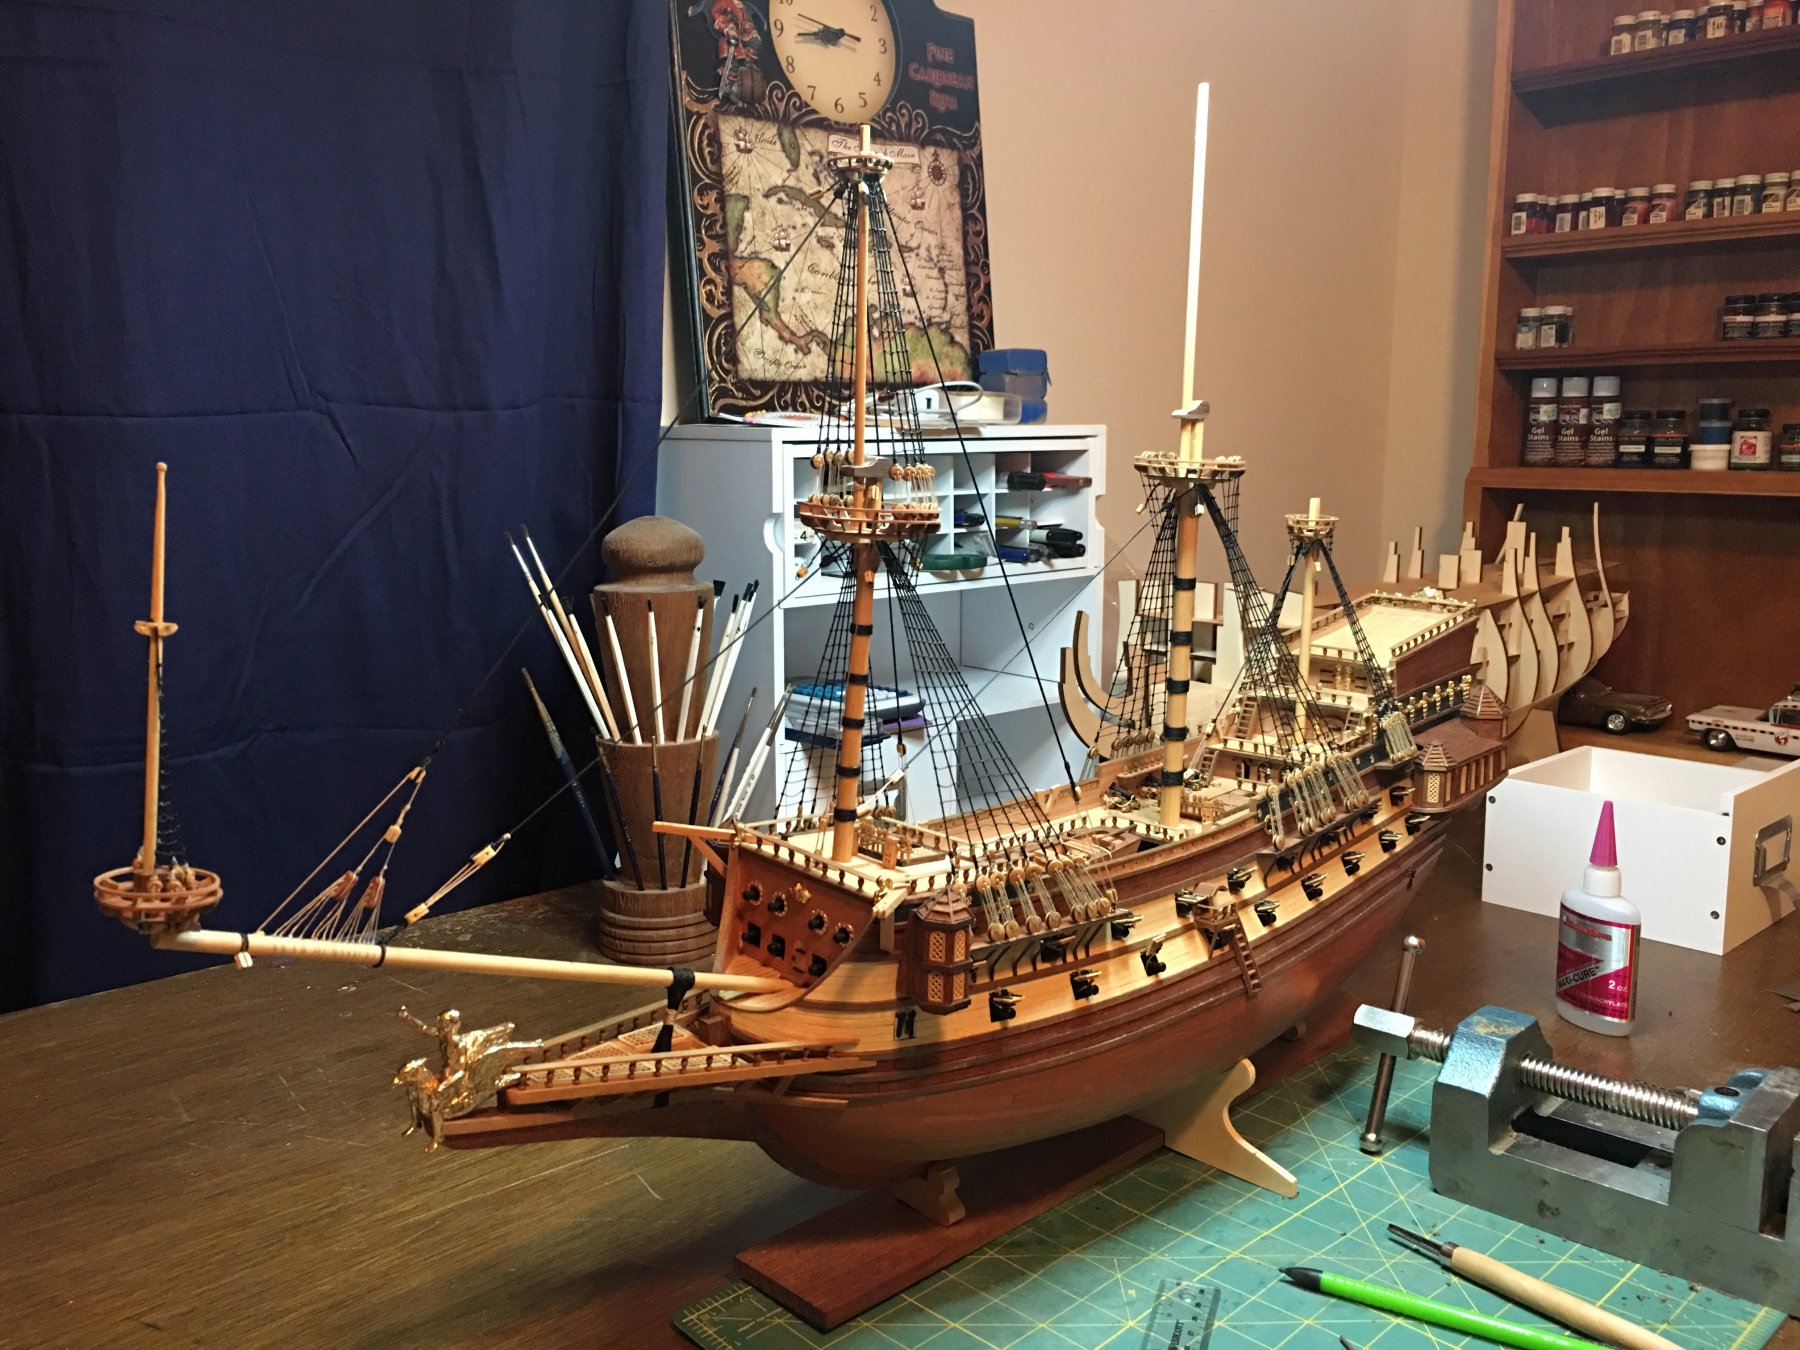
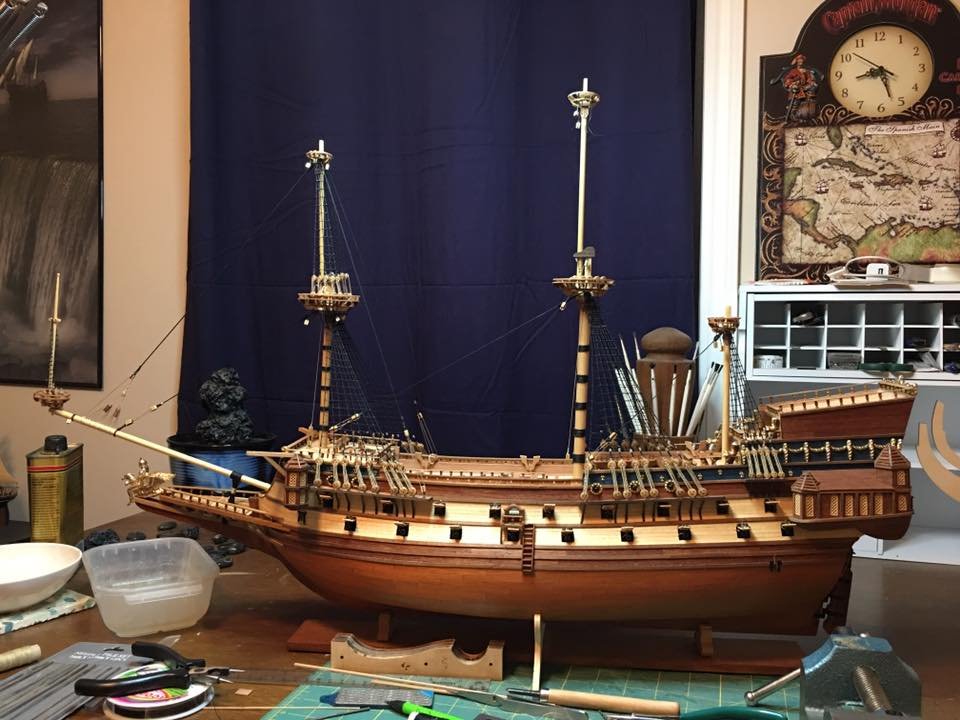
Popeye, right now the ship is around 34 inches long and I believe her finished length will be close to 44 inches. This has been the first ship that when I am planking I either have to shift the ship left and right in order to plank both ends or roll my chair back and forth! All of my previous ones I could just angle differently for the ends. Her size is admittedly taking some adjusting and getting used to. It will be nice though later for the detail work. I keep thinking that many ships are built in 1:48 scale. My S.R. is 1:77 which is already quite big. In order to build a 1:48 scale version of her, she would about 59.5 inches long or just short of 5 feet! I am 5-11 so I would be only about 1 foot taller than the model if we were laid side by side. Now that is a crazy thought that now I actually kind of want to try out... Yes, she will be double planked as well. The nice thing with that is while yes, I do have to plank this large hull twice, the second time is usually much simpler as the hull shape is made and I just have to keep the planking in alignment. Still, lots of work and lots of hours. I rather enjoy it though so no problem there.
-
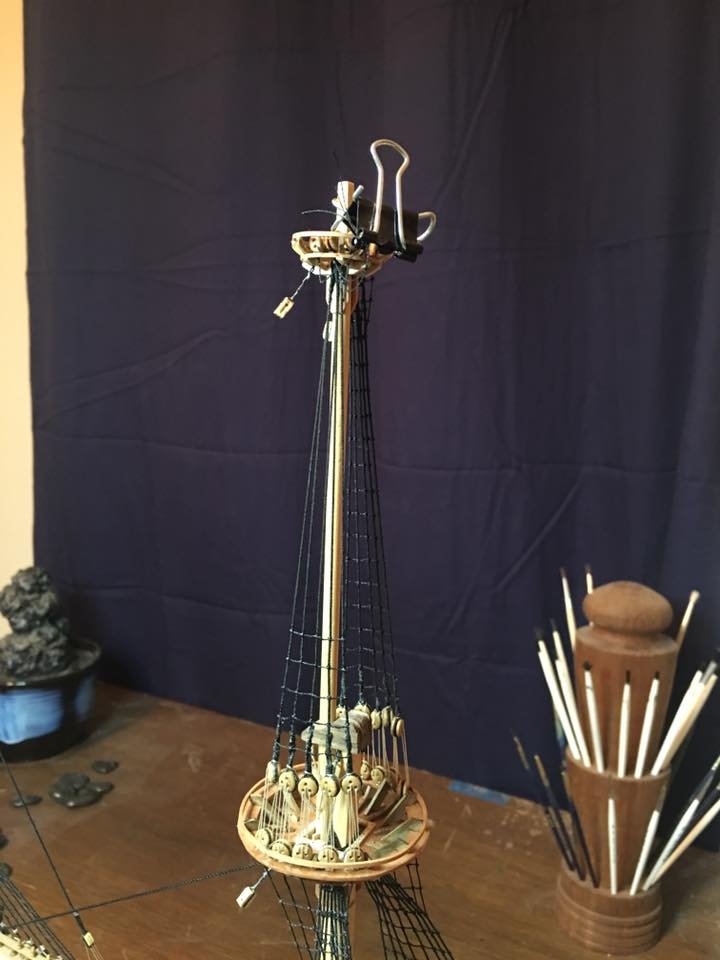
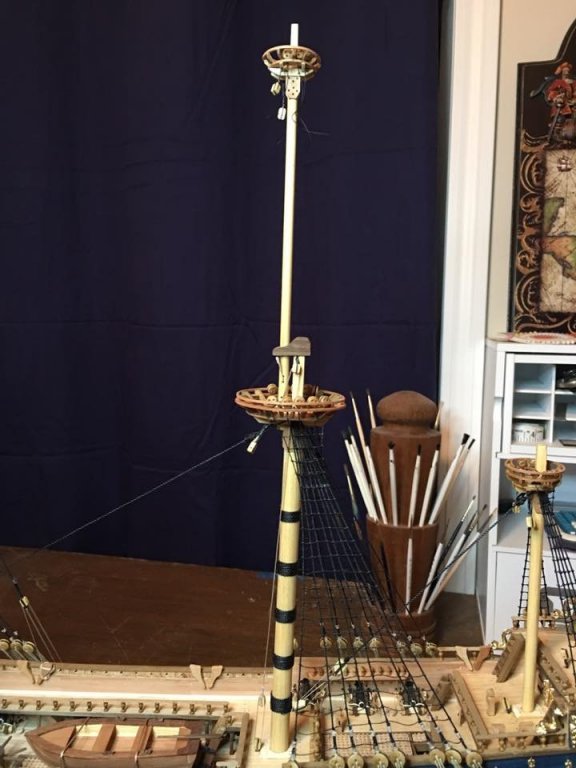
Main top mast is built and in place! With that I have also completed the last top for this ship. As neat as those round tops are in appearance, they are a pain to make. Next build session will start the shroud rigging which means that nothing exciting will be seen for a few days but with the weekend coming up I may get lucky and get in some longer build hours and get it done. Afterwards the stays will go up and surprisingly the stays for the main top mast are quite simple when compared to the ones on the fore top mast. In looking ahead the rigging is fairly straight forward for a while until I get to the top gallants and the lifts for some of the yards. Then the crows feet come back. The more I read about them and experience trying to rig them, the more I understand why they vanished relatively fast in favor of much simpler rigging. I would not have wanted to be the sailors tasked with trying to repair one of them while at sea. Ok, enough chat for now, enjoy the pictures!

- 608 replies
-
- 10
-
-
- la couronne
- corel
- (and 1 more)
-
Time consuming but not impossible... I think that should be the theme for model ship building! The knee looks good. All those custom parts will improve the overall look and it will make you feel good just knowing you did all that work.
- 108 replies
-
- 3
-
-
- mamoli
- constitution
- (and 2 more)
-
She truly is an incredible build! I would love to build one that size but that may still be a while down the road. Till then, I will enjoy yours!
- 213 replies
-
- 3
-
-
- la couronne
- 74 gun
- (and 2 more)
-
Welcome to MSW!! I'm looking forward to seeing some of your tips for working with copper as new ideas are always welcome. Your Egyptian boat builds also sound very interesting as they are outside the normal builds that we see everyday. Best of luck to you and I look forward to seeing pictures of your work!
-
Welcome back to MSW Michel! Best of luck to you on your Beagle build. I look forward to seeing it!
-
She sure is looking good. I'm enjoying seeing all the color on her. Very sharp!
- 291 replies
-
- 1
-
-
- bounty
- billing boats
- (and 1 more)
-
Nice work on those crows feet. I have several sets of those to rig myself and I am going to have to remember the fly fishing line trick. The euphroe blocks are a bit tricky to make and I actually think my first attempt ended up being to big but yours look great!
- 481 replies
-
- 1
-
-
- rattlesnake
- model shipways
- (and 1 more)
-
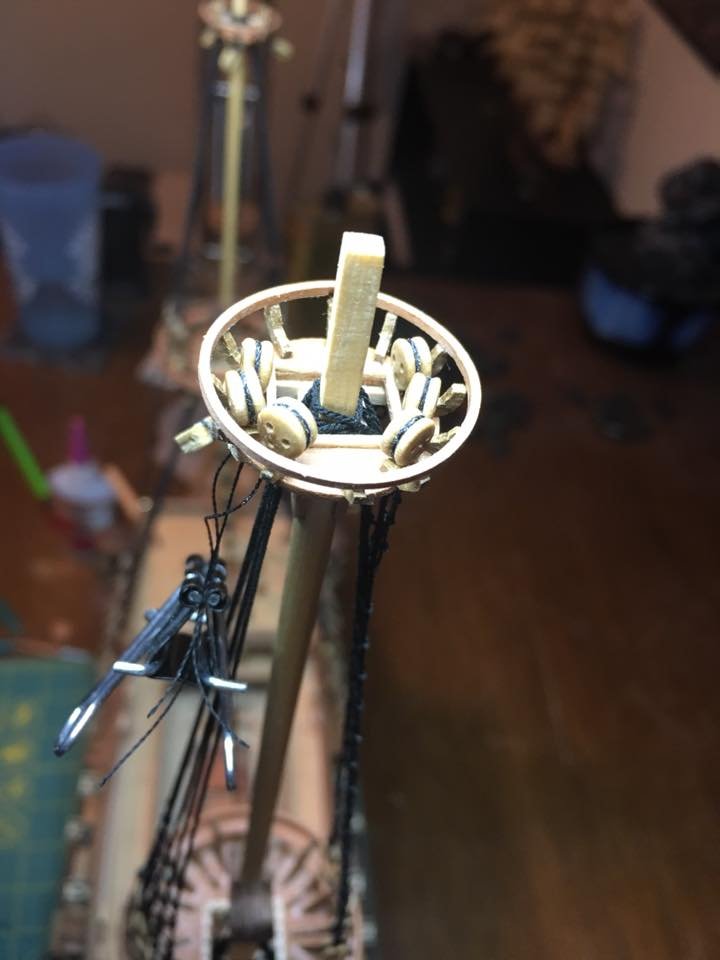
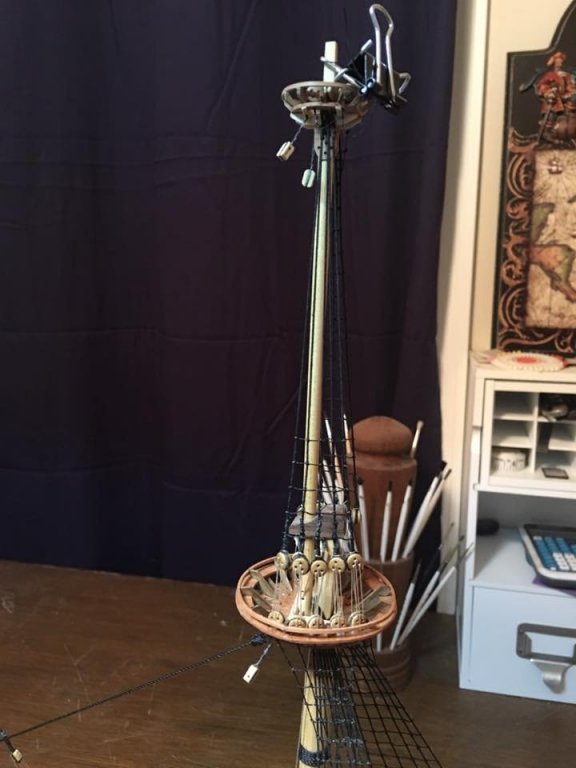
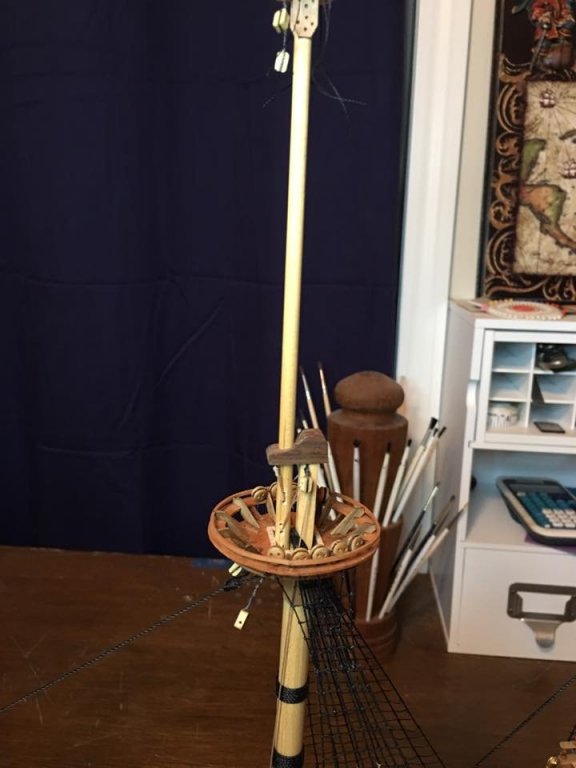
Started work on the main top mast tonight. Not a lot done yet just some basic shaping and sizing and started to carve out the cap. She is getting taller all the time now. It is one thing to say that she will be 2 feet tall when finished but it is another to see it in real life! And to think, Soleil Royal will be even taller!! Sometimes I understand why the Admiral thinks I'm a little crazy... Anyway, more will be coming soon I just wanted to update the log and show that I'm back in La Couronne's shipyard again.

- 608 replies
-
- 8
-
-
- la couronne
- corel
- (and 1 more)
-
Welcome to MSW! Nice job on turning that table into a shipyard. Looks like you will have a nice place to work on your Albatros. Best of luck to you on your build and I look forward to seeing your progress.
-
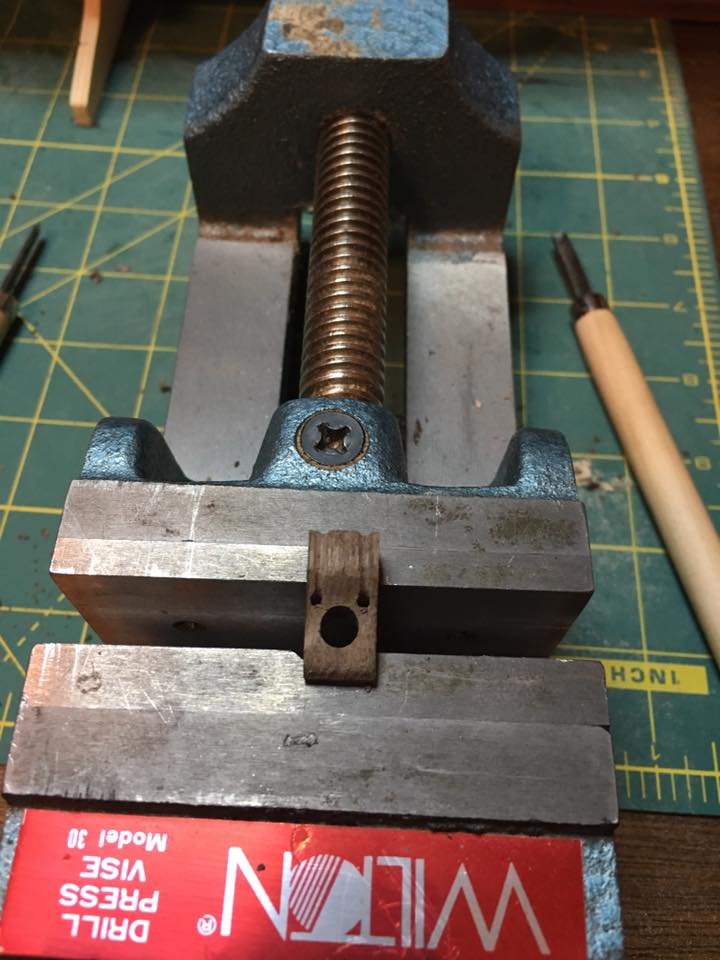
Ugh, the sanding part.... yeah, I'm already looking to see if I can use my electric palm sander to hit the really rough stuff then finish by hand. That is one of those jobs suited for sitting on my back porch with a few adult beverages while I sand and sand and sand and sand and sand..... Thanks for the compliment Zoltan and to all the likes! No matter how many times I see them it always feels good to see that others are enjoying the build with me.
-
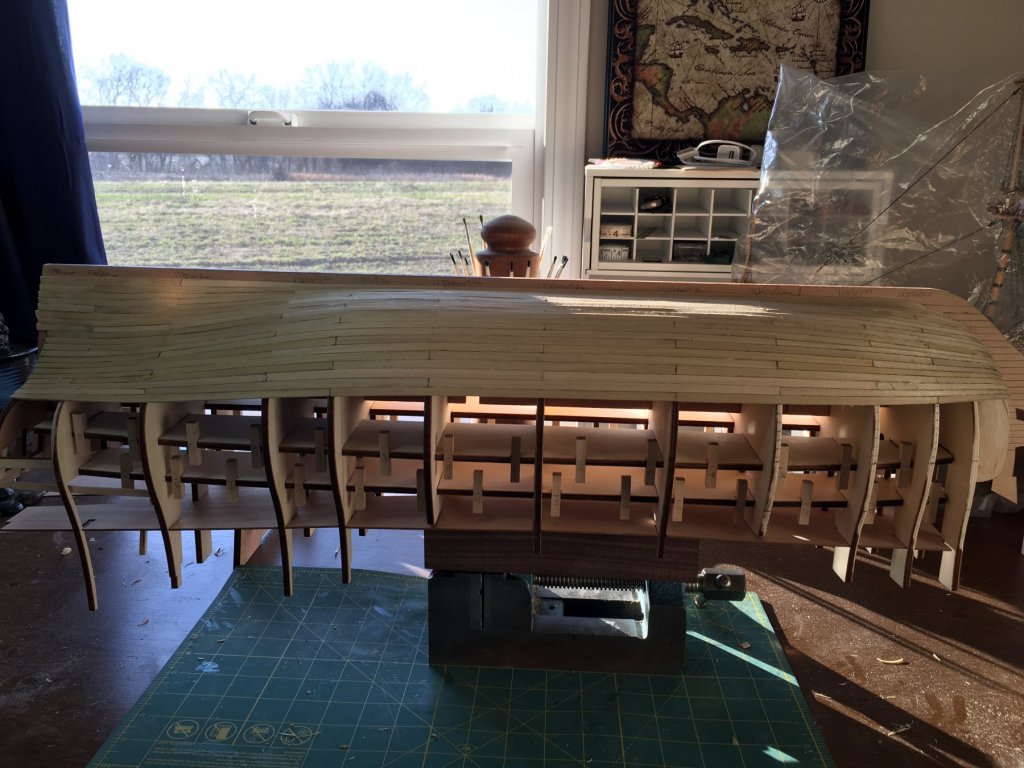
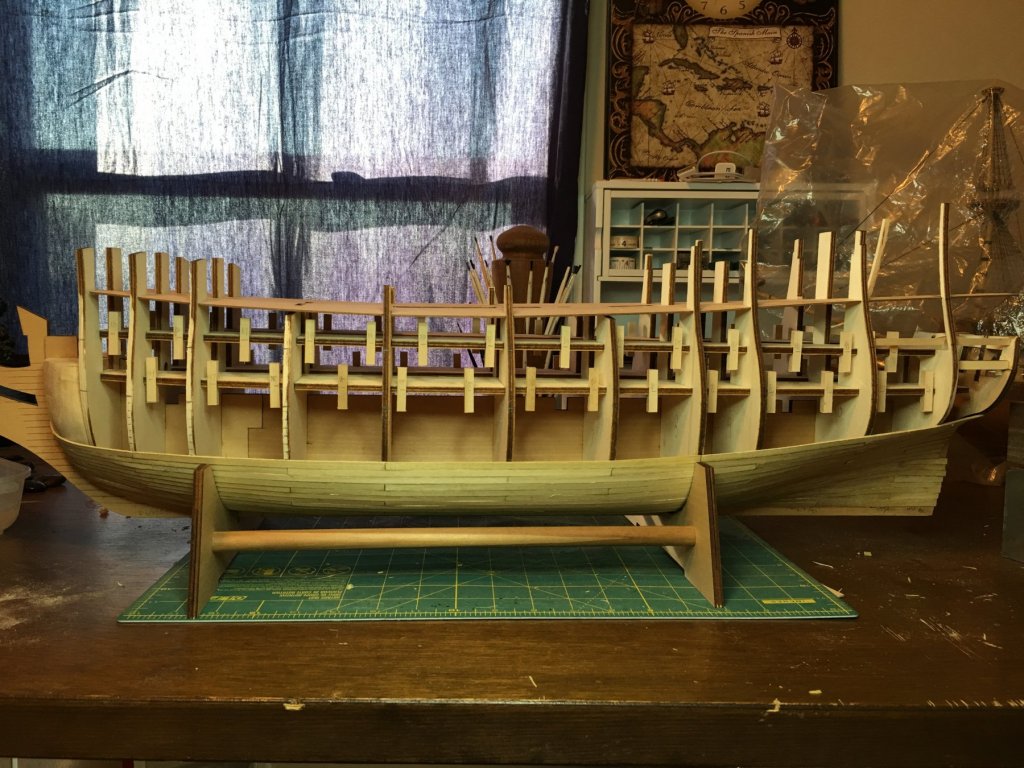
20 strakes are now completed on the port side and I have to admit I am much happier with the way this side has give compared to the other. Now it is time for another break in planking to go work on La Couronne but up next is where I have to start making some bigger decisions. The next push will take the planking up and over the two false gun decks which by itself is not a big deal however, with the modifications I am wanting to do to attempt to detail the cabins, I need to finish figuring out how to build them. I am also debating on if I will add any planking or other details that could be seen down through the gratings to the lower decks. Also the false deck for the weather deck still needs to be set in place and I would like to plank it over before the sides are up. I need to set the foreward most bulkhead at the bow so I can shape the hull planking to fit that angle and there are many other little details and things that I keep thinking of doing before the planking closes off the interior. I have a feeling that that there will be lots of hours coming up soon of test fitting and research more that actual building. On the plus side, this log will start to get a lot more interesting as more than bad planking will soon be shown!

- 961 replies
-
- 11
-
-
Welcome to MSW Richard!! Good to have you with us and I wish you all the Best of luck on your next ship build. You are in the right place to improve your skills and make this model better than your previous. I look forward to seeing your build!