AntonyUK
-
Posts
1,190 -
Joined
-
Last visited
Content Type
Profiles
Forums
Gallery
Events
Everything posted by AntonyUK
-
 Hi. Yes after some reading.. Chuck is correct. Now I was schooled in Cornwall. And the flag without the Irish one is called the King's colours. ...It's my age. Sorry Chuck. Regards Antony.
- 269 replies
-
- 5
-

-
- Queen Anne Barge
- Syren Ship Model Company
- (and 1 more)
-
Hi Chuck. The true Union Jack in your post is incorrect. This is the King's colours. Have a look here. The flag has a top and bottom https://en.m.wikipedia.org/wiki/Union_Jack Worth looking. Regards Antony.
- 269 replies
-
- 3
-
-
- Queen Anne Barge
- Syren Ship Model Company
- (and 1 more)
-
Some criteria for starting a new group project
AntonyUK replied to Chuck's topic in Group Projects on Model Ship World
Hi. The carving idea would be splendid idea. It's one of my failings in model ship building. Something basic to carve and advice on tools and timber choices. Differently up for this idea. Regards Antony. -
Hi Chidokan. I am answering for Alex.. His reply is no. As he is now finding so difficult to do anything with his hands or arms. He does like to watch me as I am working. Regards Antony.
-
Outstanding Quality throughout Antony.
-
Hi. Thanks bob. I forgot that CMB has everything... ordered Hi Kees de mol. Im'e glad you like it. Regards Antony.
- 99 replies
-
- 3
-
-
- turtle ship
- korean
- (and 1 more)
-
Hi. Thank you for all the likes. Progress is good. Made the ladders for the upper deck today and fitted then. Made the remaining handrails. And tidied up my man shed. Sealing the roof when time allows next week. Just going to use clear varnish and sanding to get the finish required. Need to find some rope that 2.5mm approximately. Bit stuck on this ATM. Lots of sewing to be done on the sails. Well that's about it for now. Thanks for looking in. Antony.
- 99 replies
-
- 2
-
-
- turtle ship
- korean
- (and 1 more)
-
Hi Aydin. Give it time and you will be fine. No rushing back to the construction just because I want a update Regards Antony.
- 414 replies
-
- 3
-
-
- riva aquarama
- amati
- (and 2 more)
-
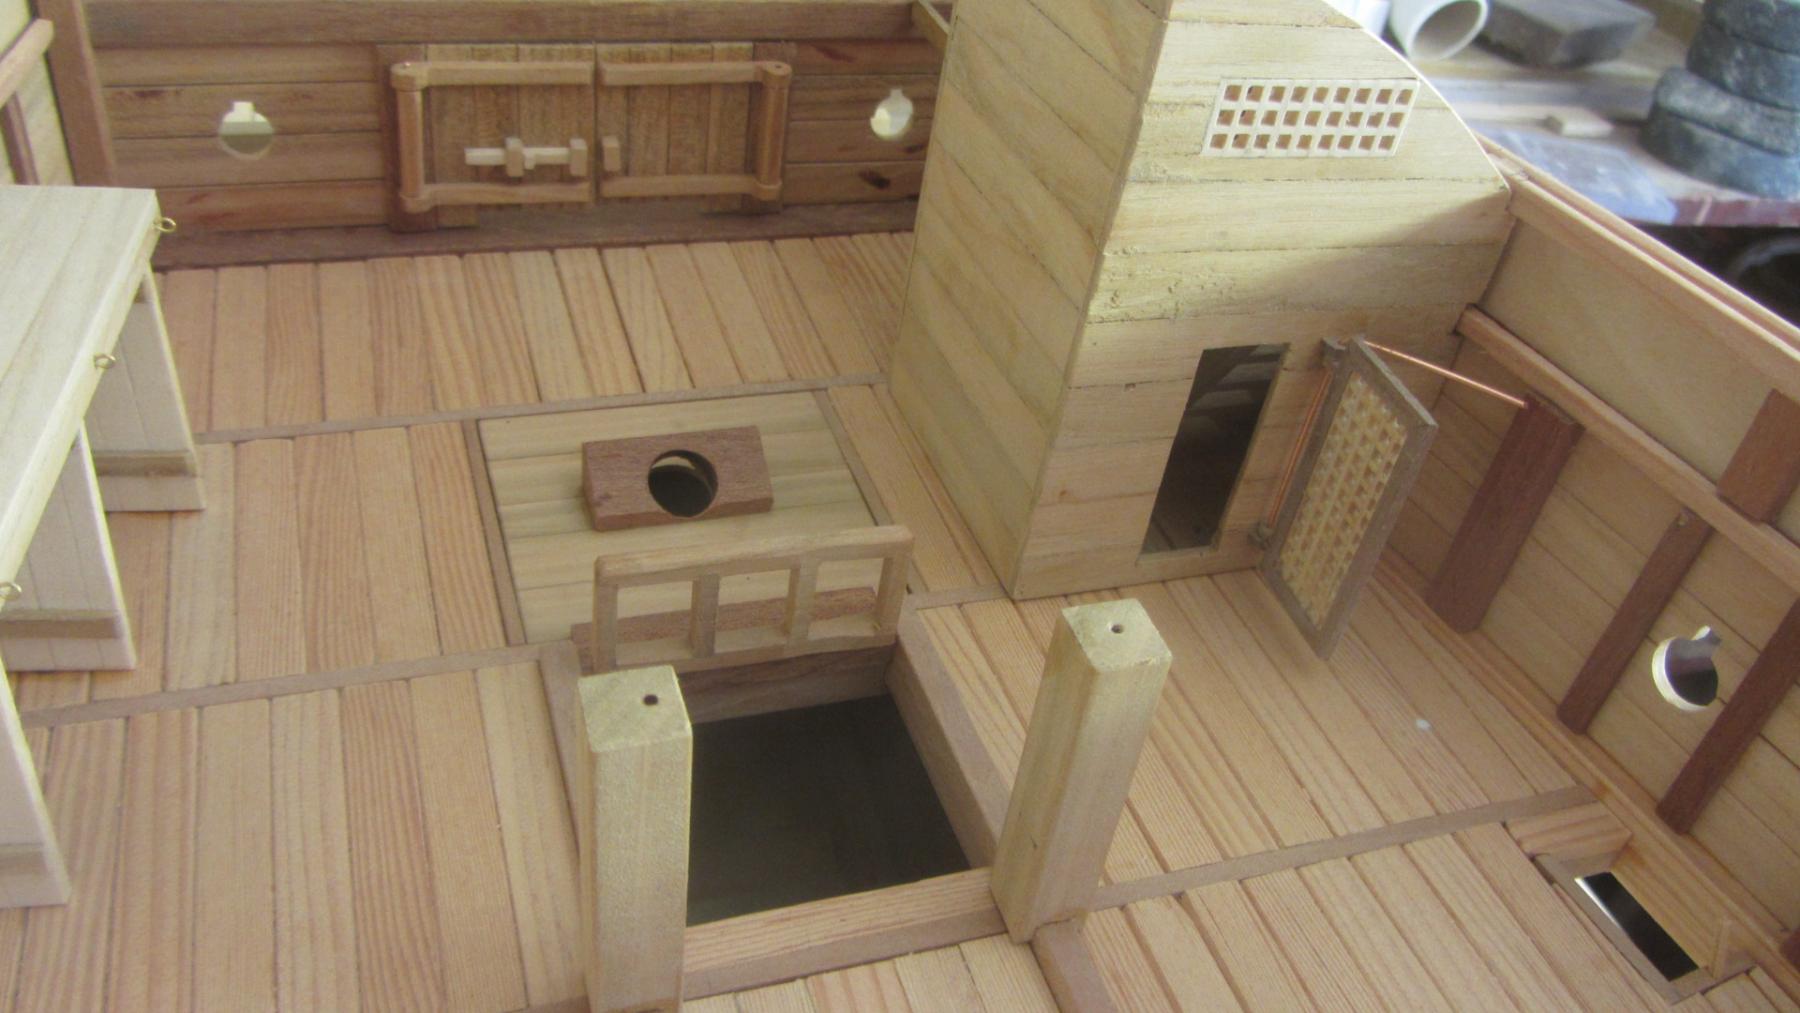
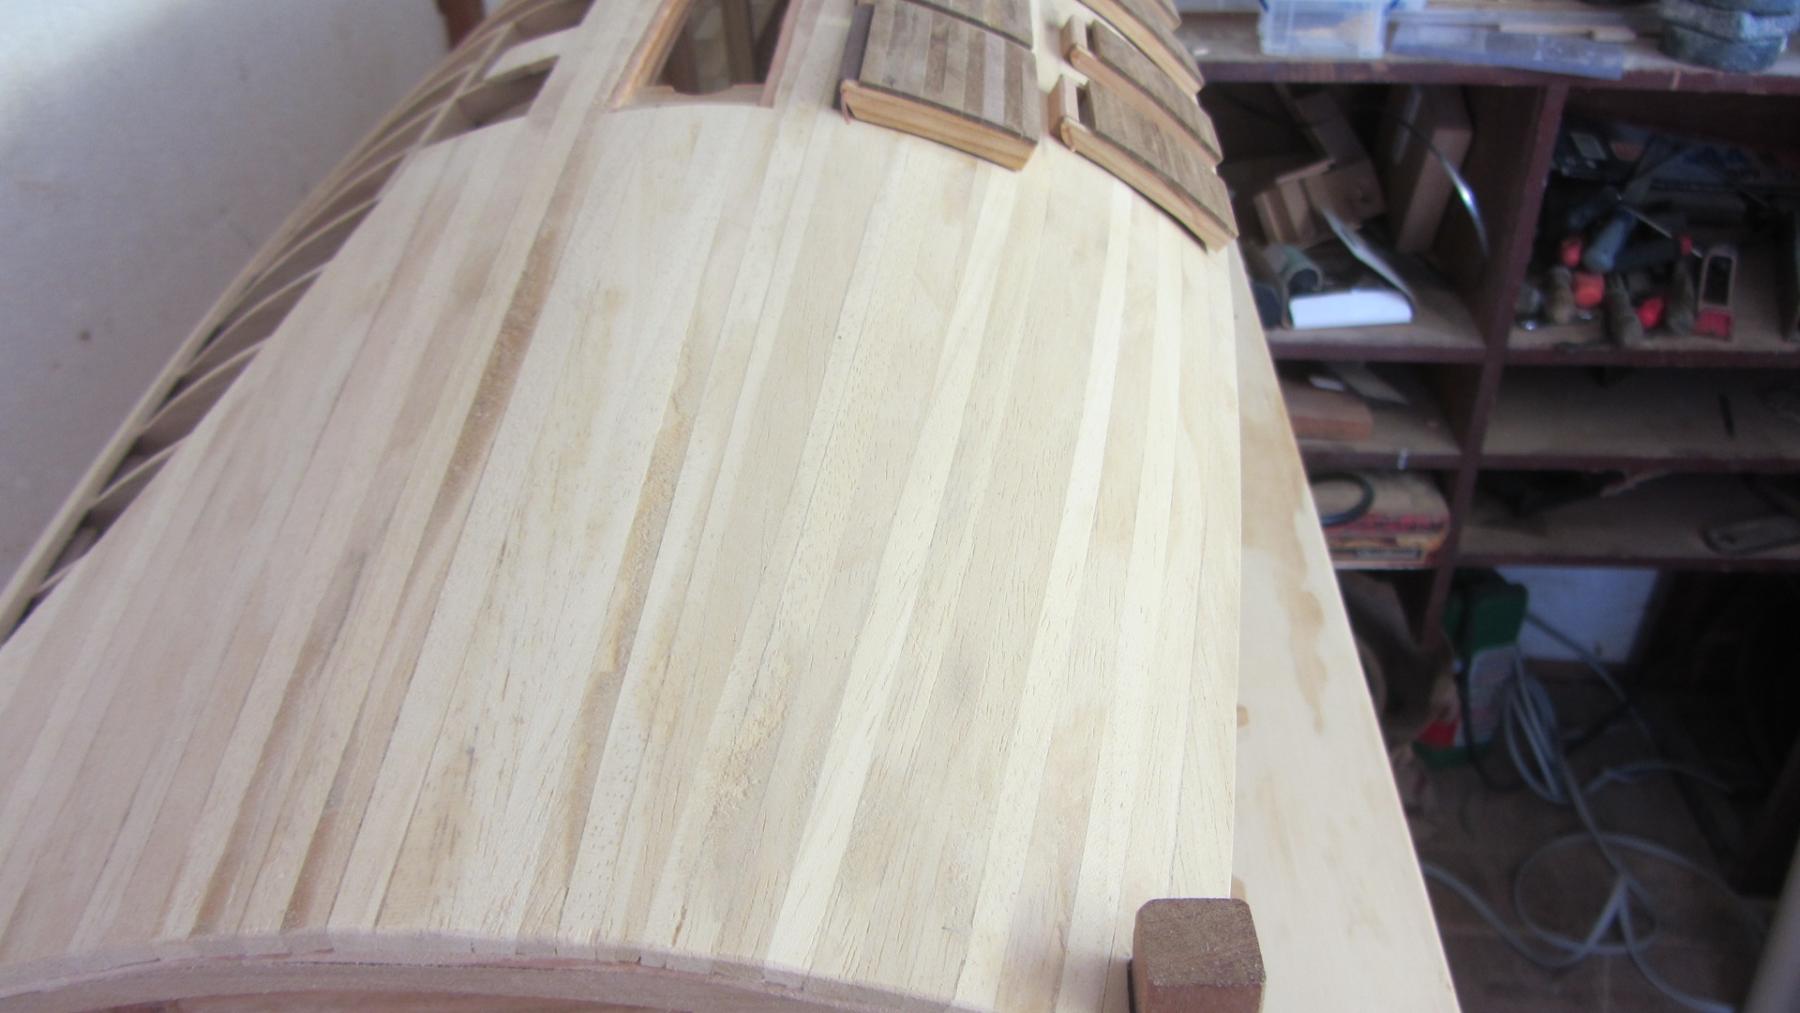
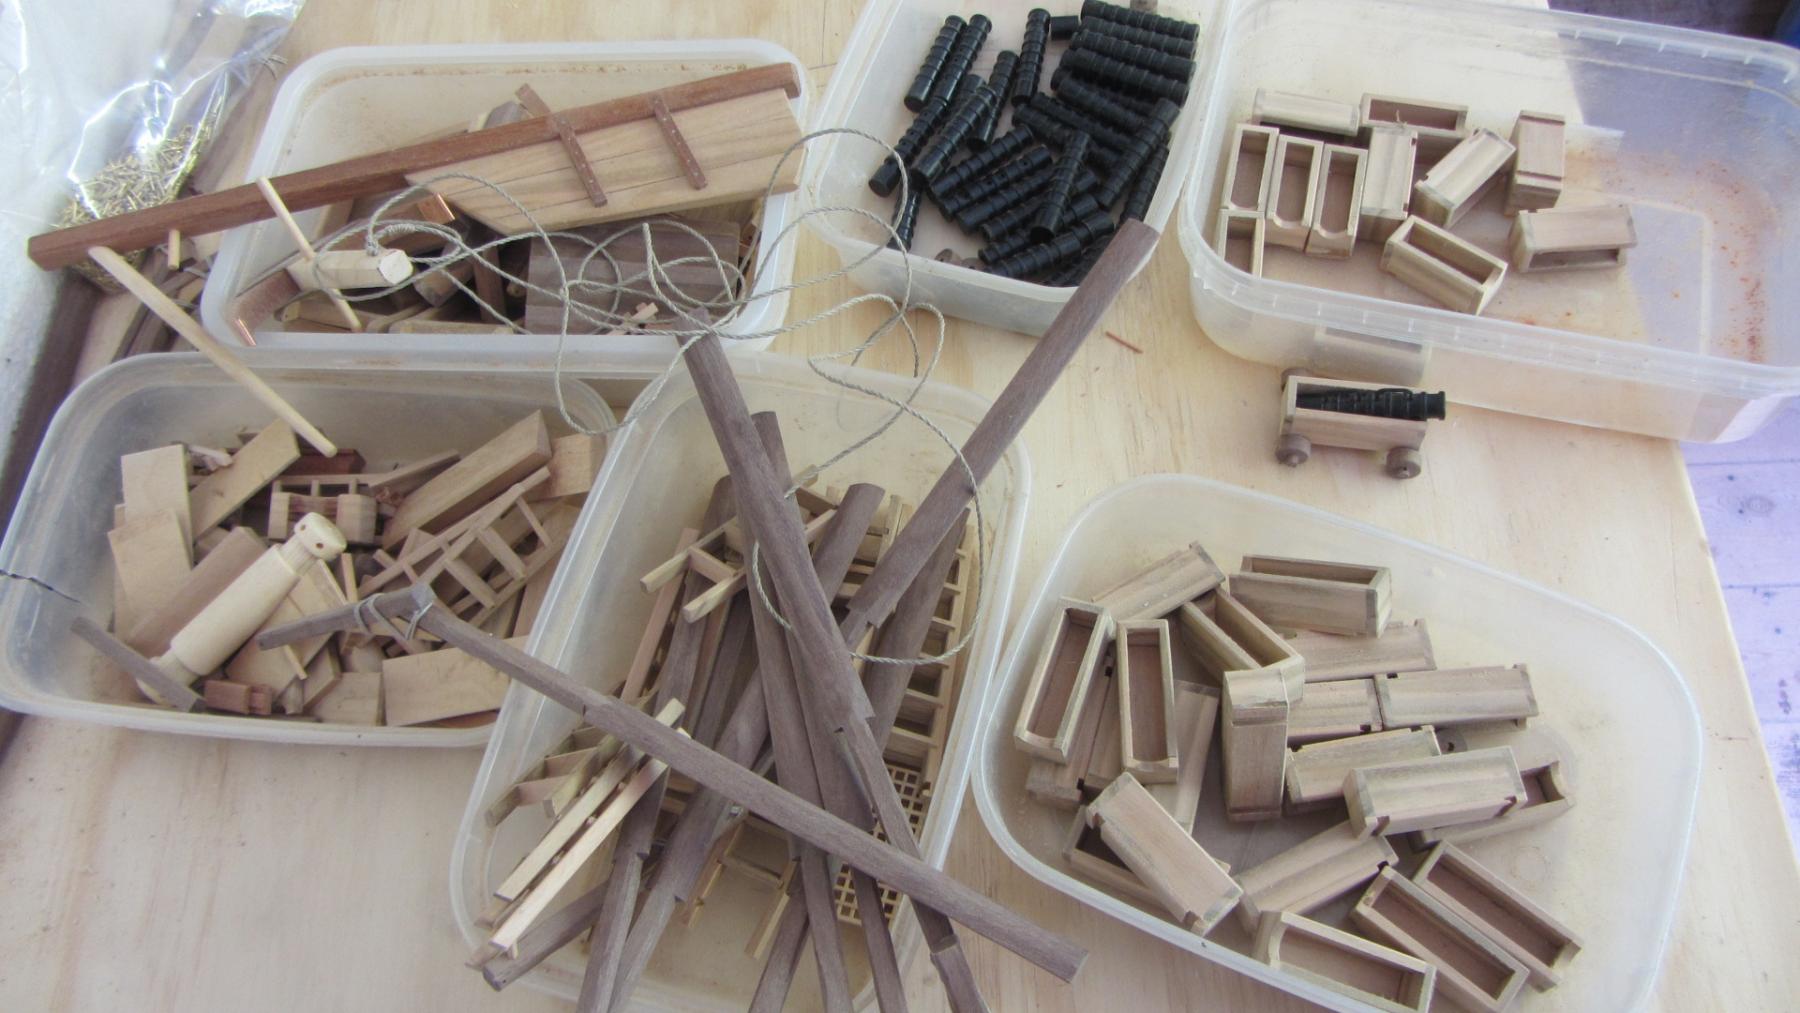
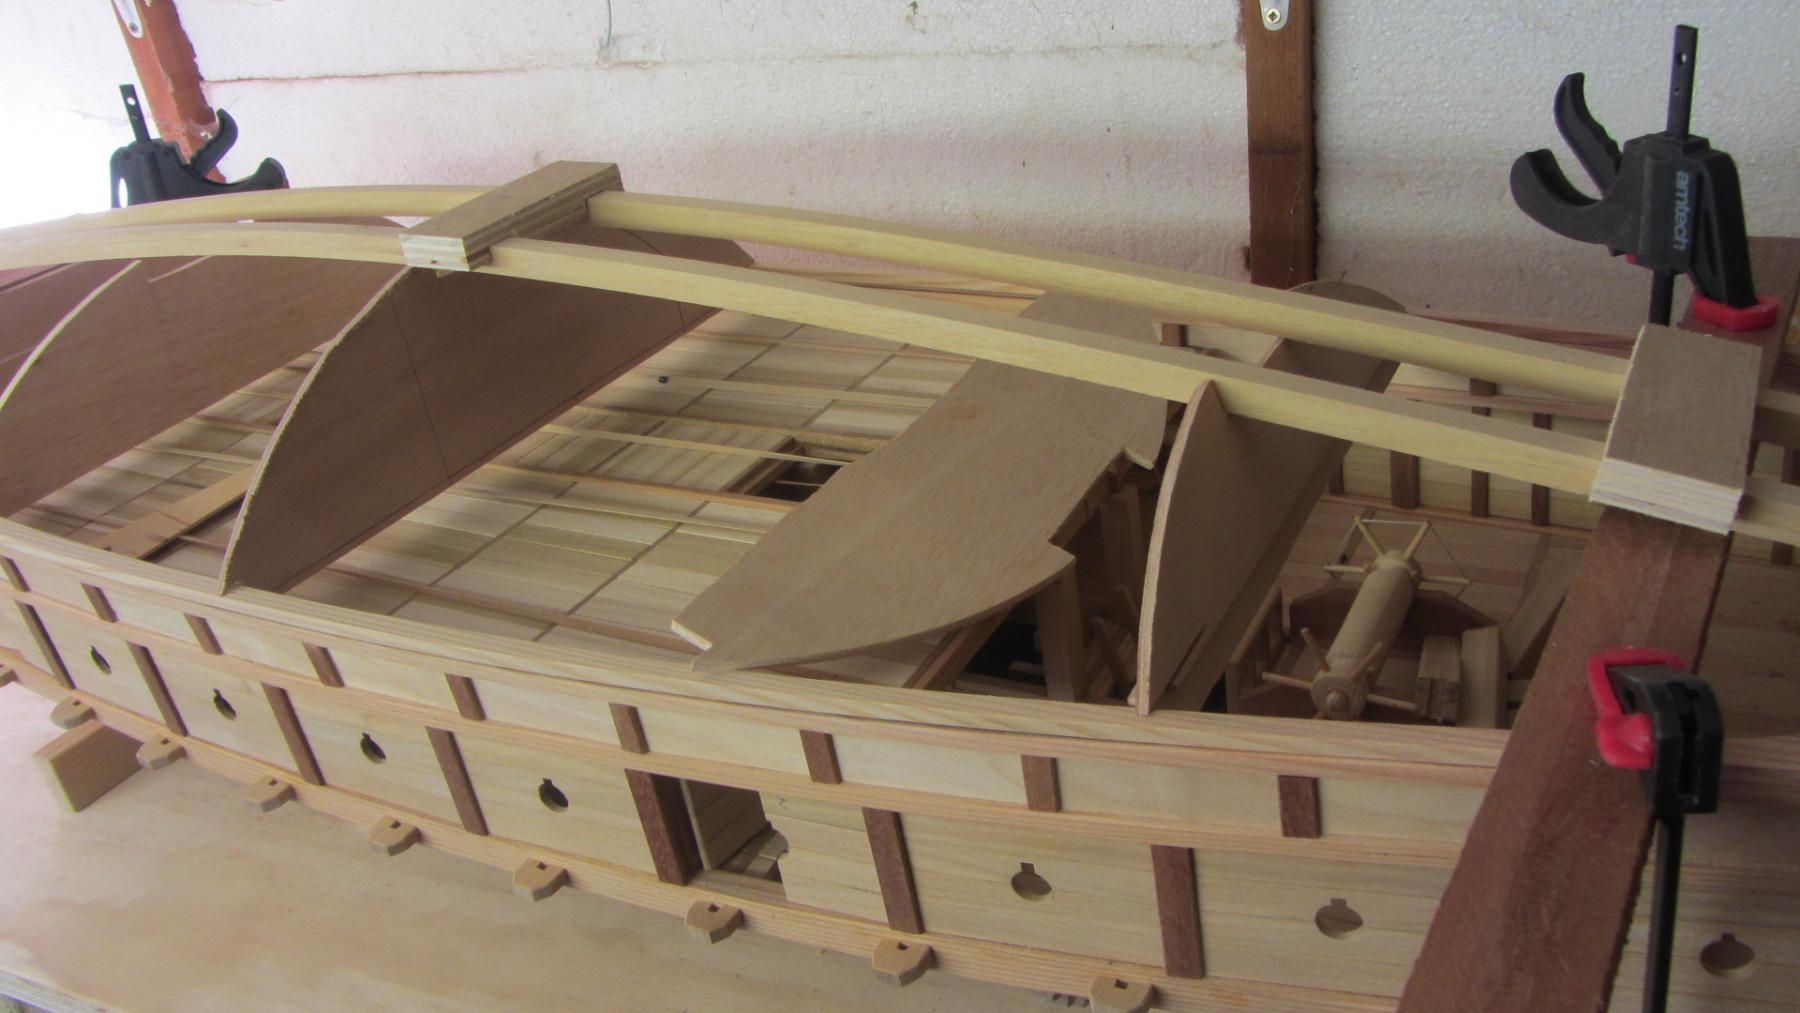
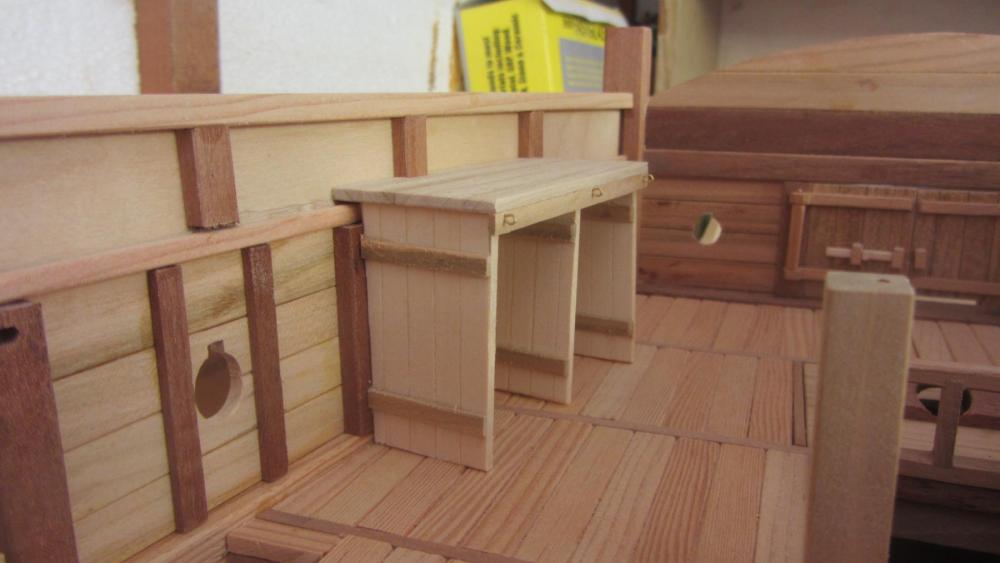
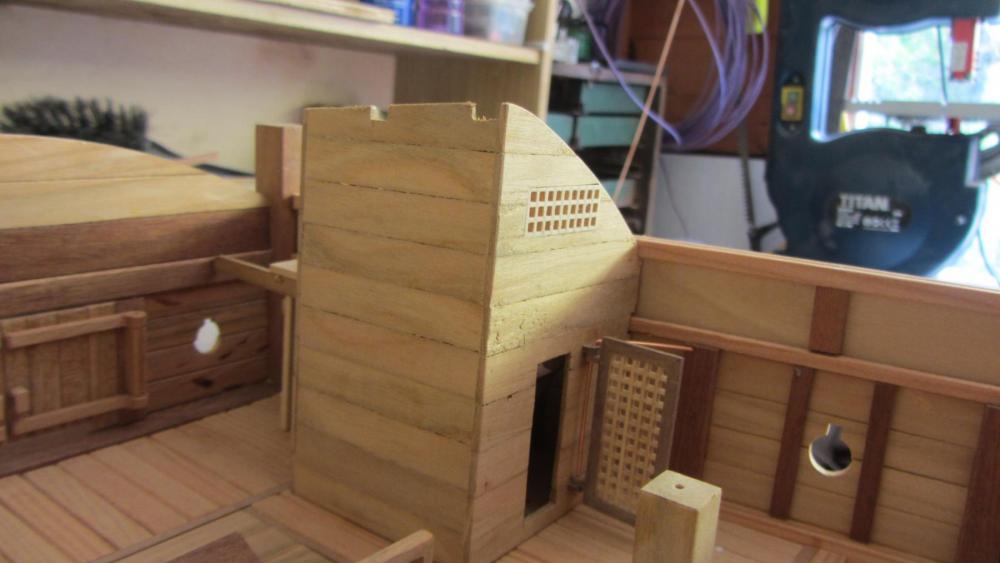
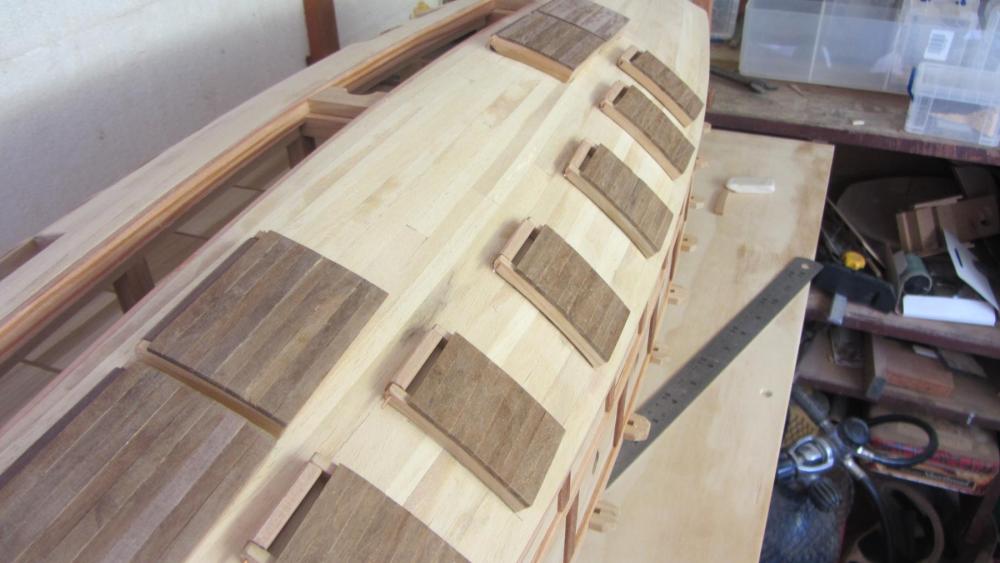
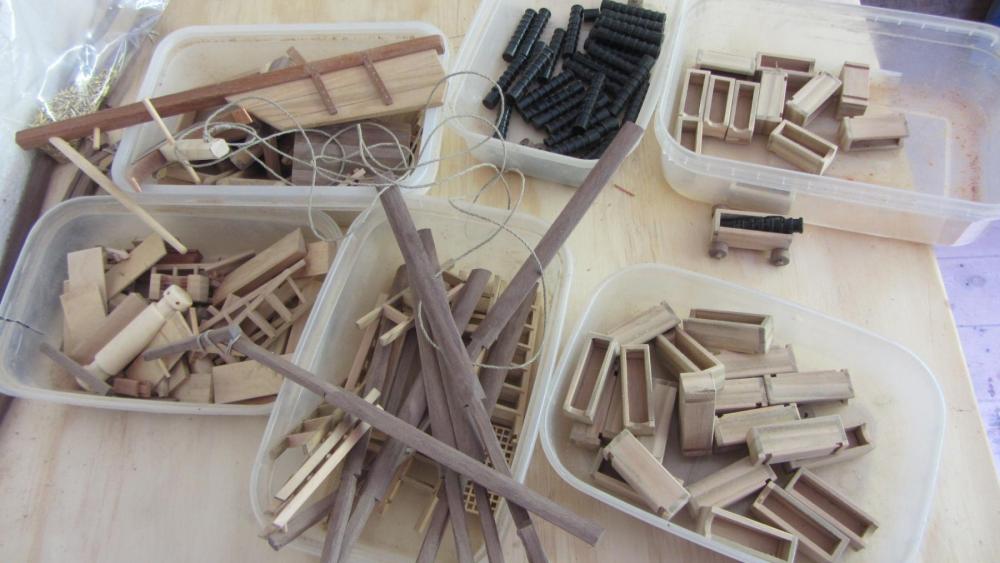
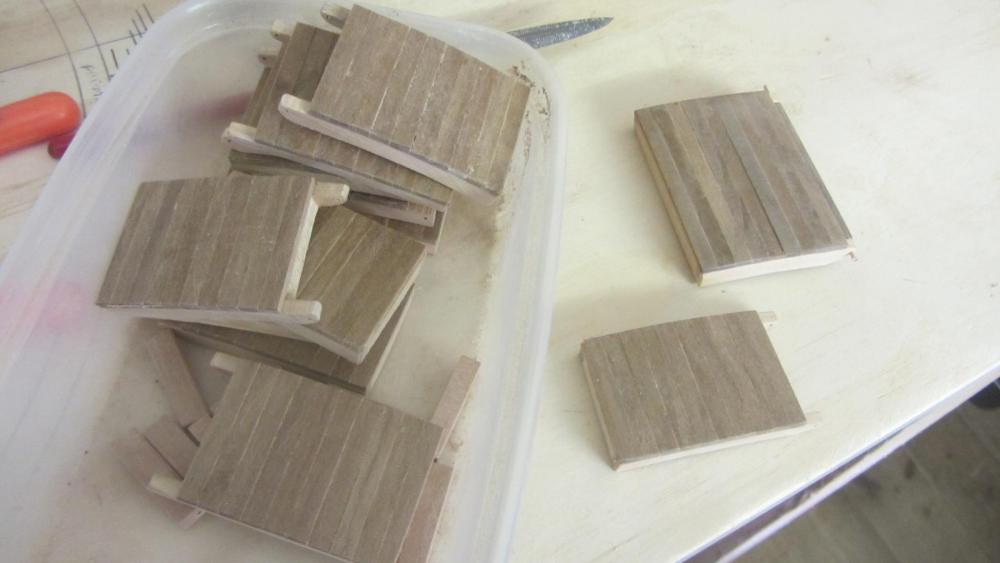
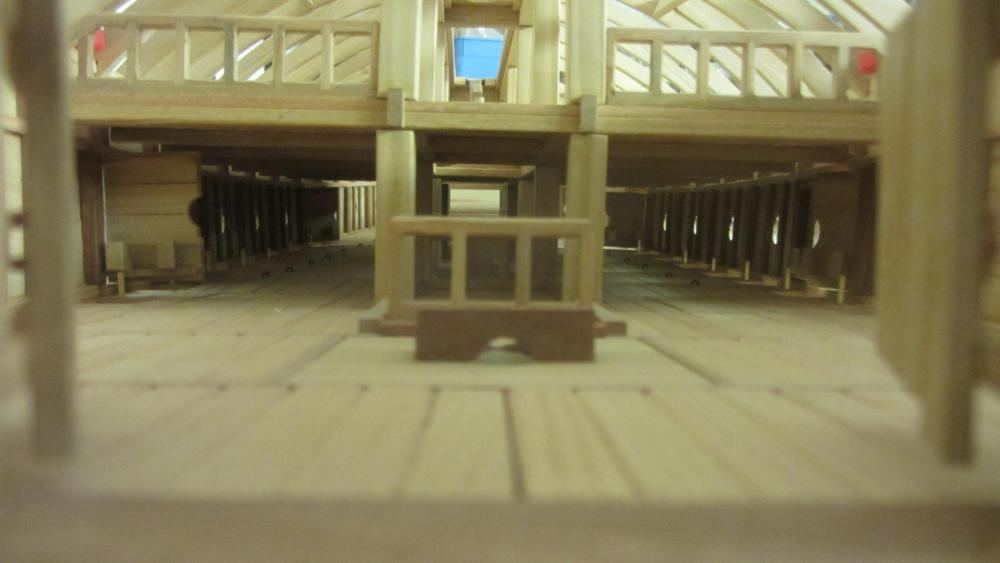
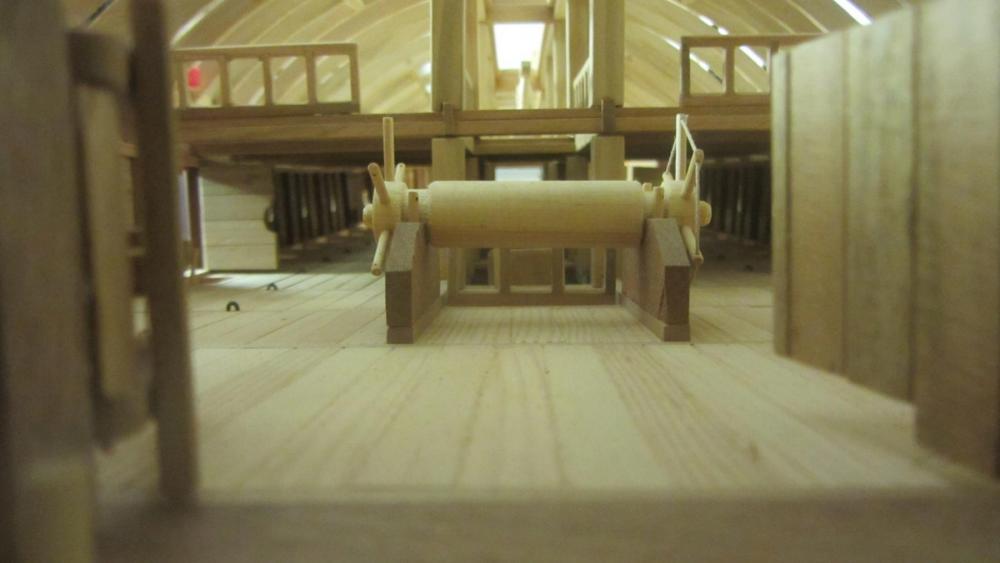
HI. Again sorry for the lack of updates. The captains cabin.. He is the only person to have his own sleeping and private area. The crews head's Just a hole in the deck to the sea or river.. 2 handles to hold on too. Very basic. Captains quarters and another head behind. Not sure I should be using the term "Head" as they has there toilets in the stern area. View of the roof after planking and sanding. Will add the copper hexagonal plates after sealing the wood( Makes it better for the adhesive to stick). Roof hatches and gun port hatches added. The gunports are add because if the reading that I have done and the fact that the upper deck would have no purpose. ( I have never known the Korean people do anything with out purpose). View with the gunports opened. The guns.. The carriage is very basic and just a box. The handles are much to long and will be trimmed before fitting. Not sure on how the elevated there guns.. Just boxes of all the bits I have constructed. View showing the cutaway area. Never done a cutaway before... But Im'e pleased with it. Might break the no paint rule and do the cutaway edges Red. and another of the cutaway. Will add the hatches after I have given them the cutaway. And the last one.. of the hatches. Have put them opening in the downward direction.. Some drawings show opening lateral. it it was me I would have then opening from the top. More defence for the crew. Thats it for now. Thanks for looking in. Regards Antony.


- 99 replies
-
- 14
-
-
- turtle ship
- korean
- (and 1 more)
-
Hi Aydin. I am getting withdrawal symptoms. More updates please. Regards Antony.
- 414 replies
-
- 2
-
-
- riva aquarama
- amati
- (and 2 more)
-
Hi. I am 100% with Don and the sanding method and the filler blocks. Cost is little and the help is huge. Nice steady progress on the model. As people are saying minutes spent now saves hours later. All the best. Antony.
- 69 replies
-
- 1
-
-
- lady nelson
- victory models
- (and 1 more)
-
Hi Sjors. I will give the popcorn a miss and watch this grow. Laser cutting looks to be very good. And the parts fitting locks together very nicely. Regards Antony.
-
Hi Nigel. Nice work on the tutorial. I used this method on the Victory with good success. http://modelshipworld.com/index.php/topic/3593-hms-victory-cross-section-by-antony-scale-136/page-1?hl=victory You make it much better than my method. Regards Antony
-
Hi Patrick. I wish my wife would send my to my man shed. Don't think she has ever sent me as yet. Most of the instructions that were created by Amati are poor. Find a build log and follow there lead. Tony ( Tkay11) is good to follow. Test all assembleys before committing with glue. But I think you know that Keep the photos coming. Regards Antony.
- 69 replies
-
- 2
-
-
- lady nelson
- victory models
- (and 1 more)
-
Hi Patrick. So a man of few words Nice choice of a kit for beginners. Lots of builds on the forum for The Lady Nelson.. catch up on the reading and look at the parts and the plans. Have a clear understanding of the sequence of the build. If you have any droughts then ask. Will follow along as I do like my cutters. Regards Antony.
- 69 replies
-
- 2
-
-
- lady nelson
- victory models
- (and 1 more)
-
Hi E&T. Very nice progress. Nice work on the Bow area. The ice channels give a rather strange look to the bows. It always amazes me on how easy you people put together a Stern architecture. So many different angles and compound angles makes these area a nightmare for me. Well done.. just amazing work. Regards Antony.
- 346 replies
-
- 3
-
-
- terror
- polar exploration
- (and 2 more)
-
Hi Aydin. The kit one is the correct scale size. The motor set one is the best proformance size. Use both....Not at the same time In a show fit the scale ones. When on water use the proformance ones. Very nice progress. Regards Antony.
- 414 replies
-
- 5
-
-
- riva aquarama
- amati
- (and 2 more)
-
Hi Aydin. Very nice work. Yes to the wetting of the planks. But watch the shrinkage. That's why I use a hot soldering iron with a purpose made adapter on. Nice easy build log to follow with some really good hints and help. Regards Antony.
- 414 replies
-
- 2
-
-
- riva aquarama
- amati
- (and 2 more)
-
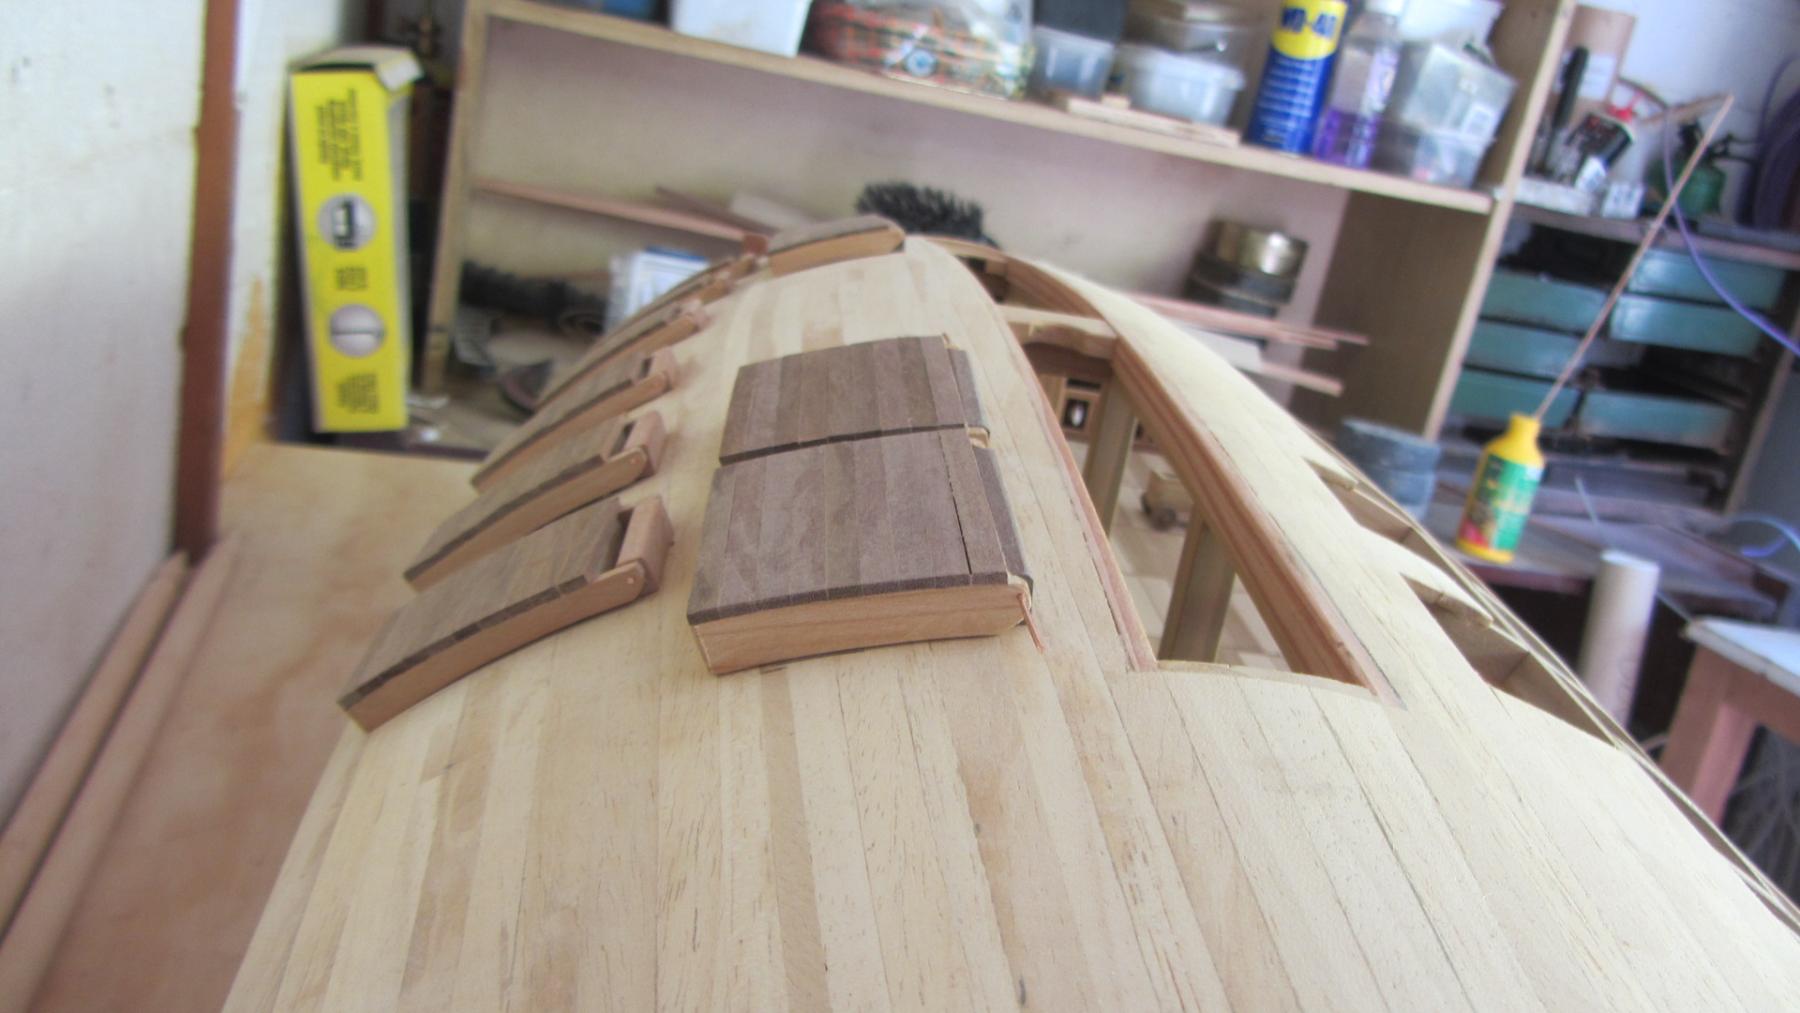
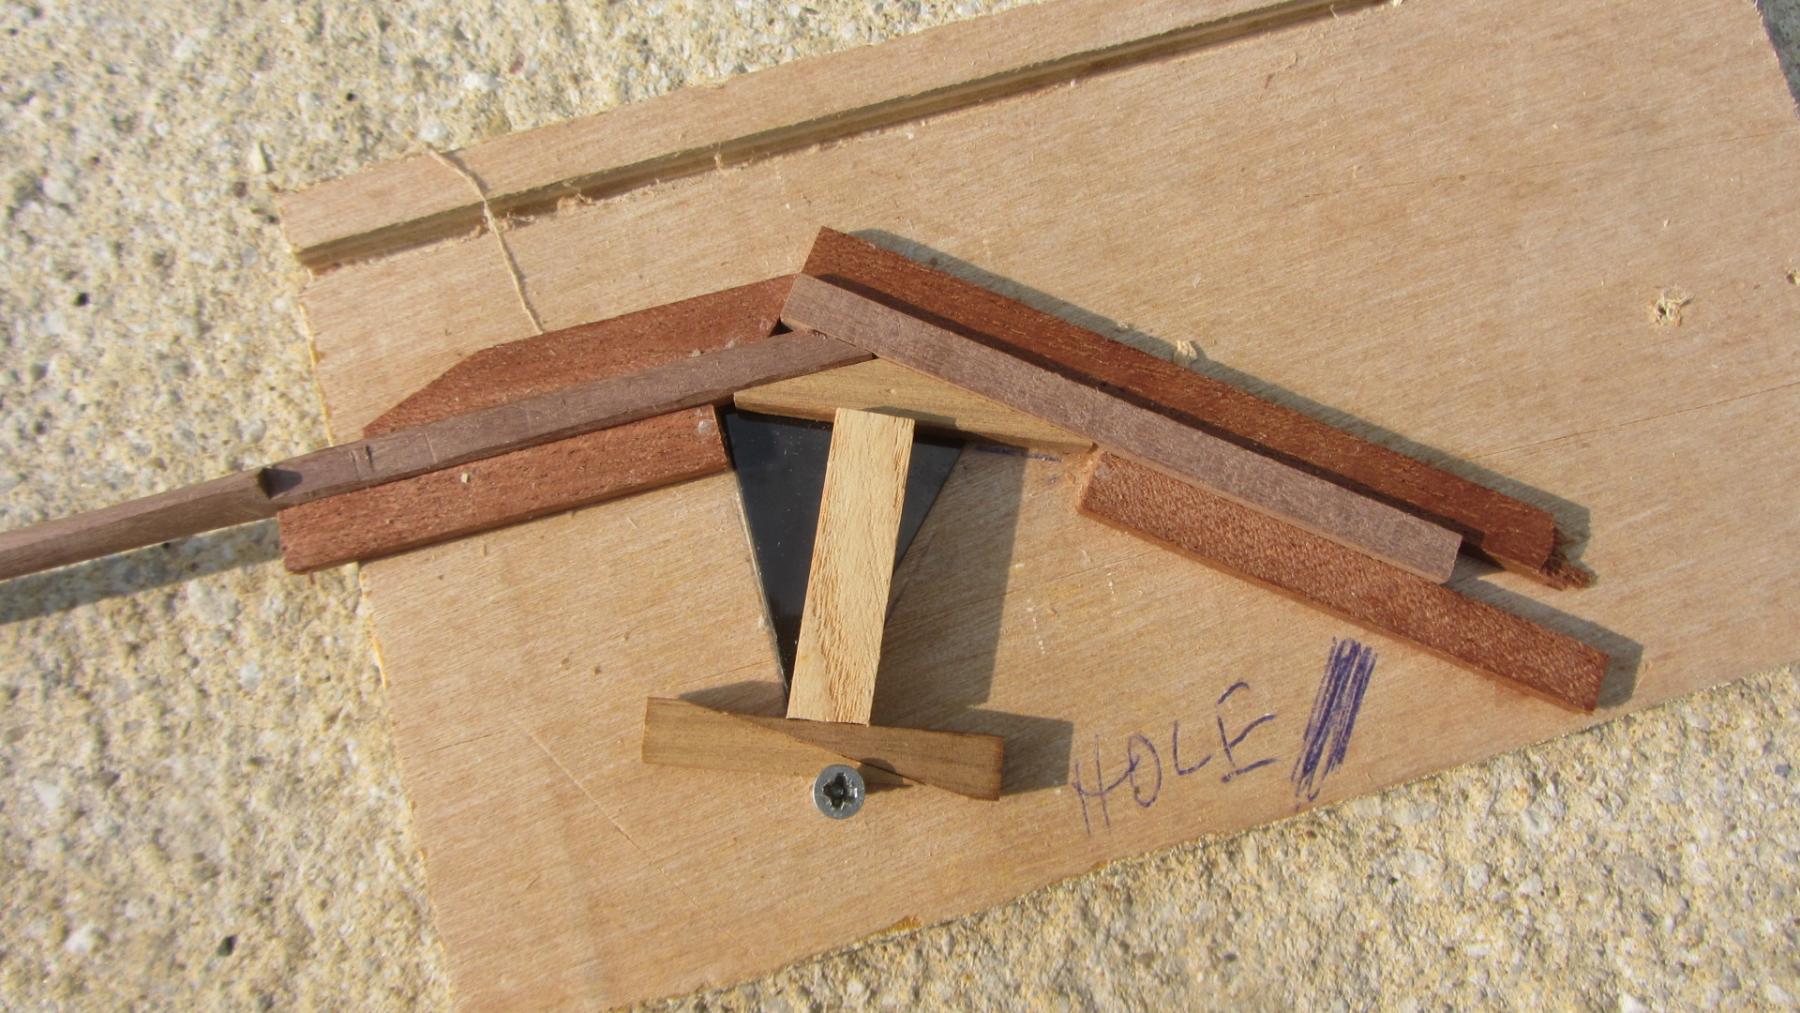
Hi. Thanks for all the likes. Thank you so much. I like the last photo looking into the Bow door and up a bit. The curves were easy. Made a jig for the cutting and another for the joint angles. Roof planking started today. Planks are tapered and beveled to fit.Cannons and planking on on the books for tomorrow. Regards Antony.
- 99 replies
-
- 5
-
-
- turtle ship
- korean
- (and 1 more)
-
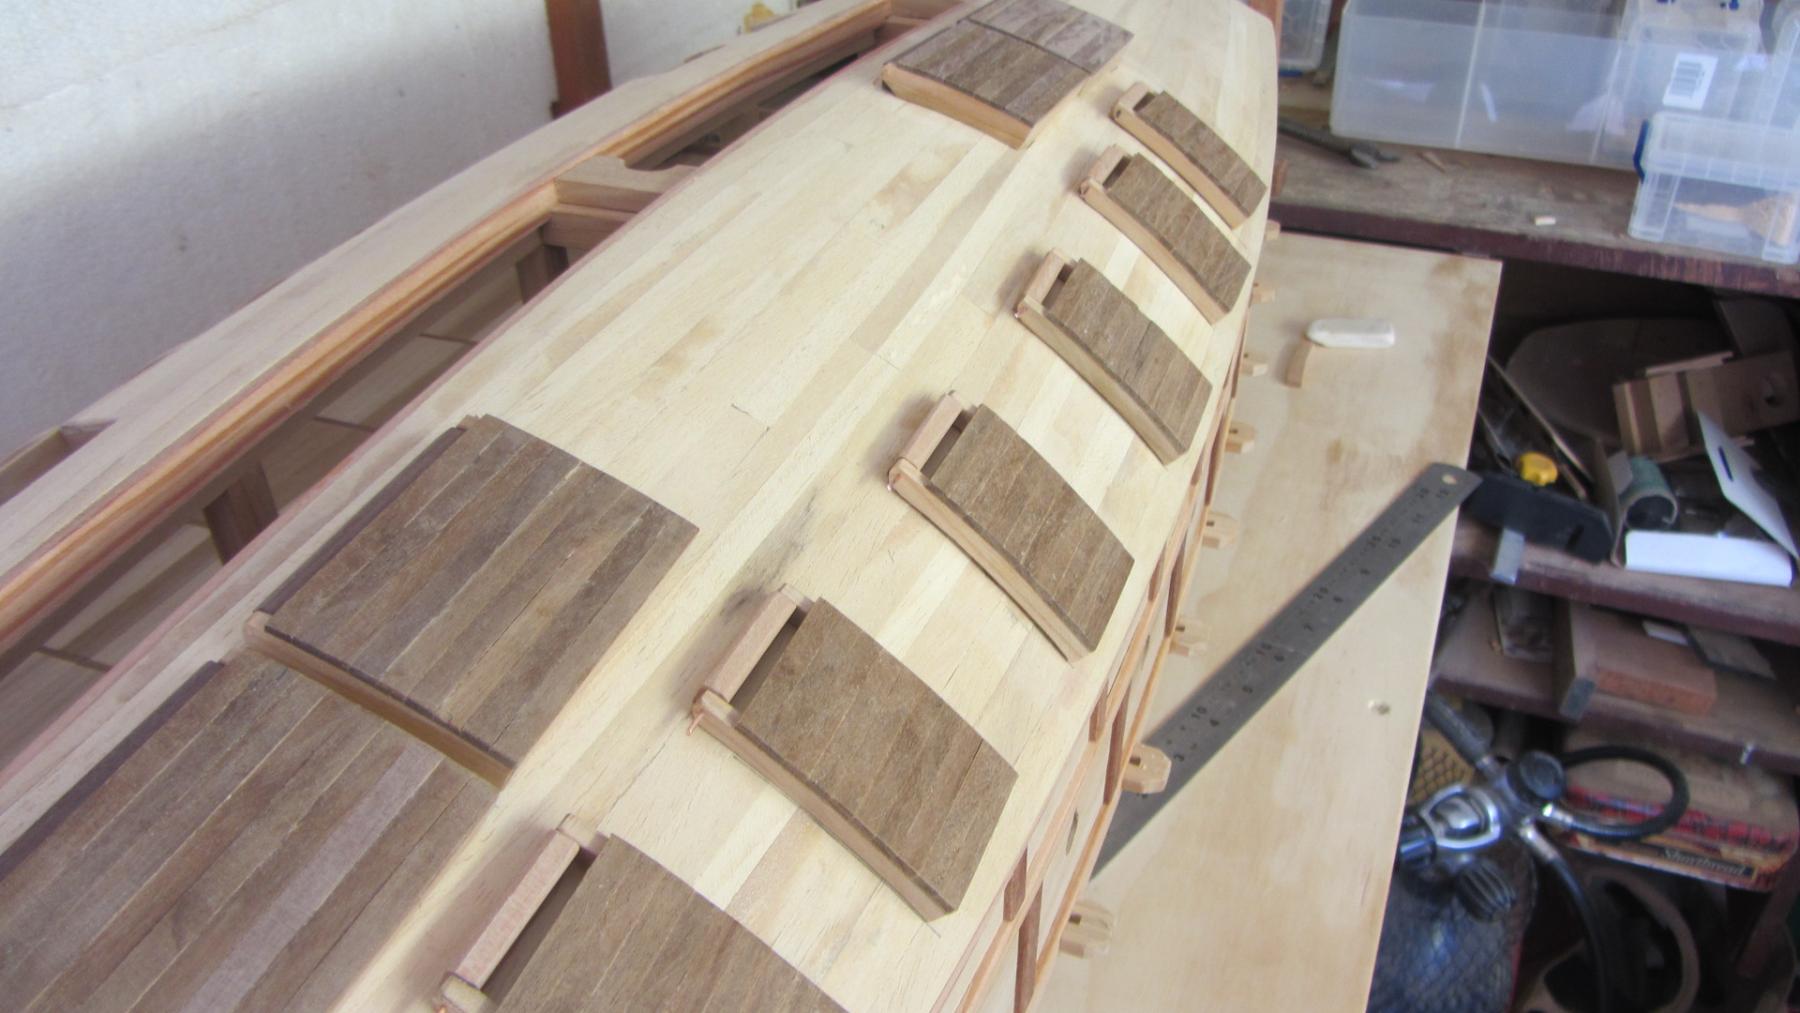
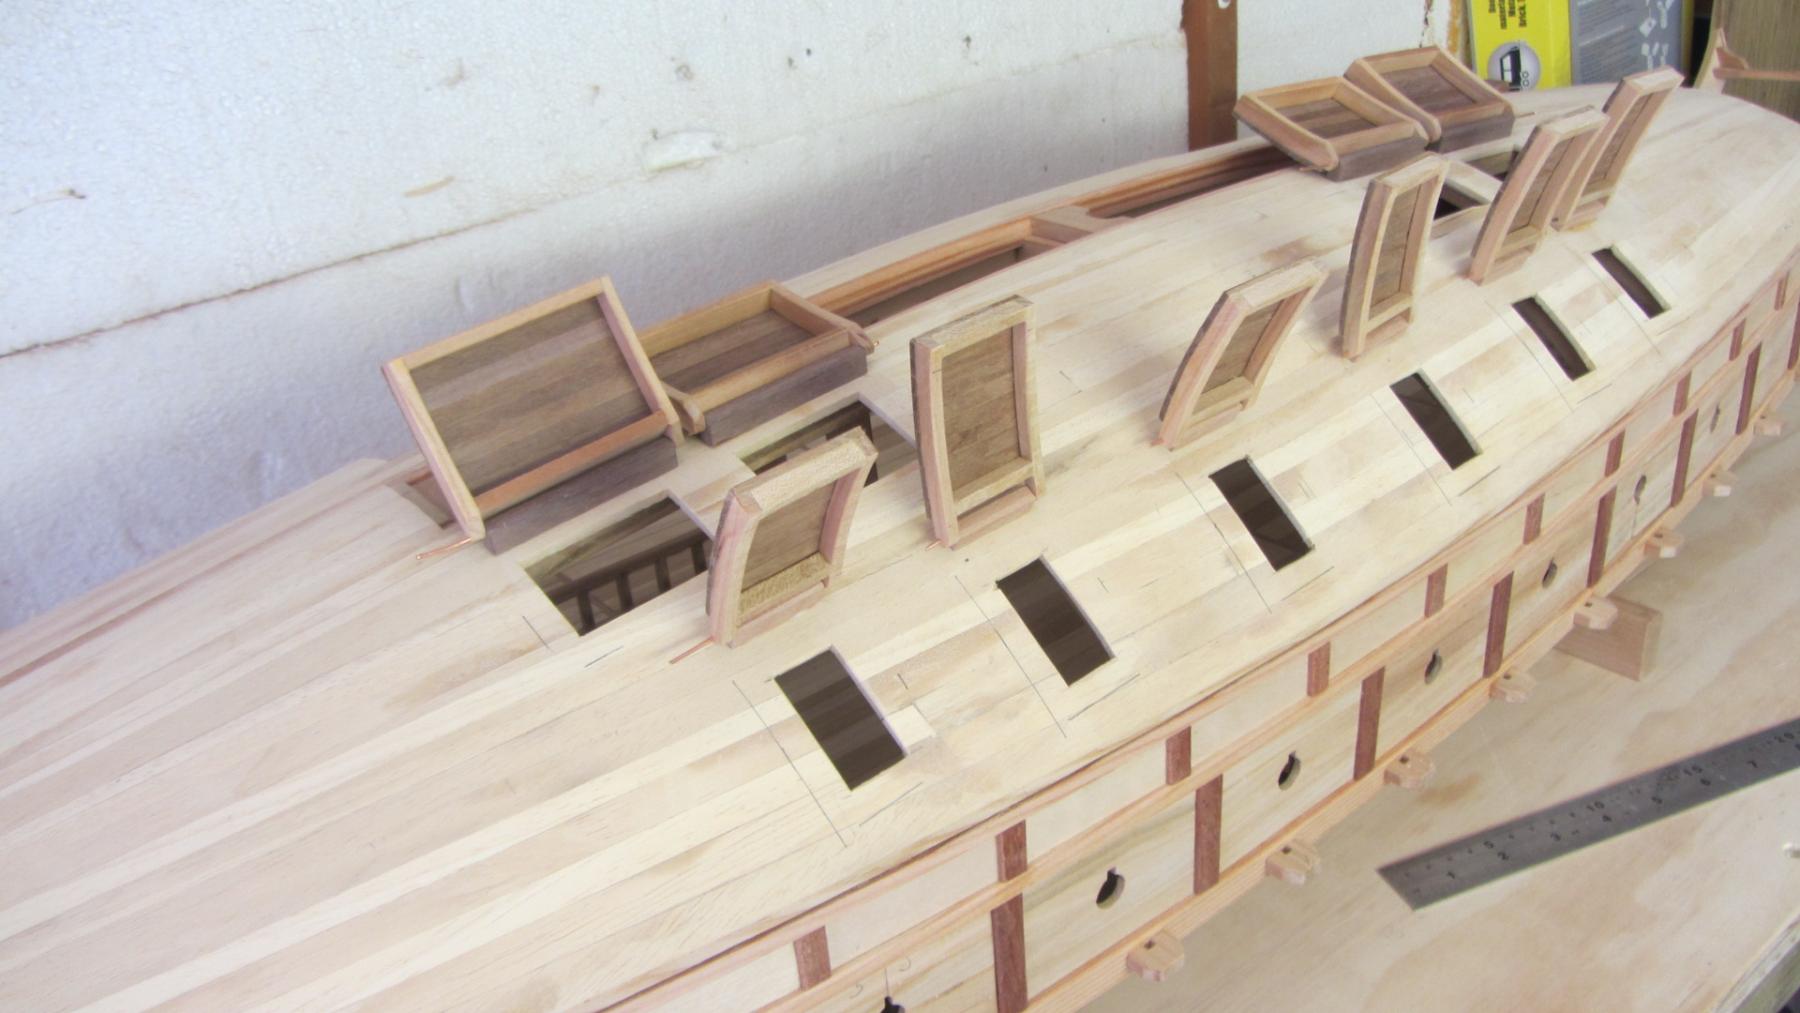
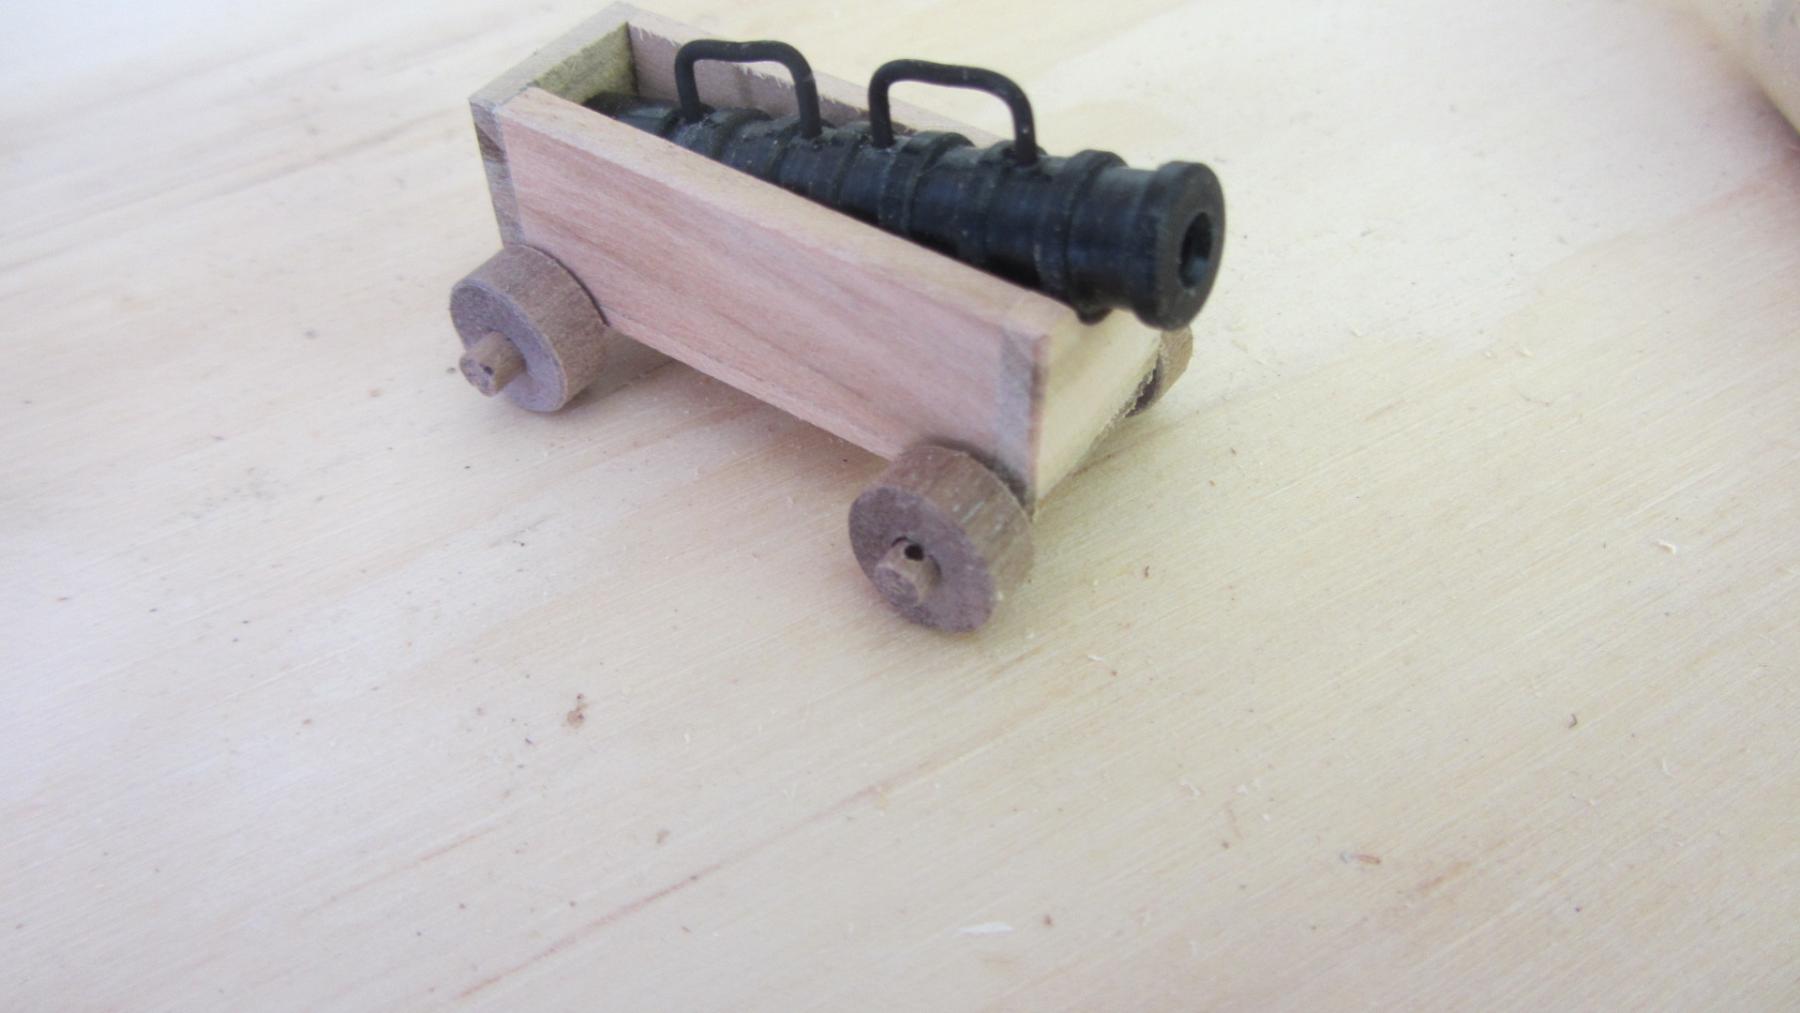
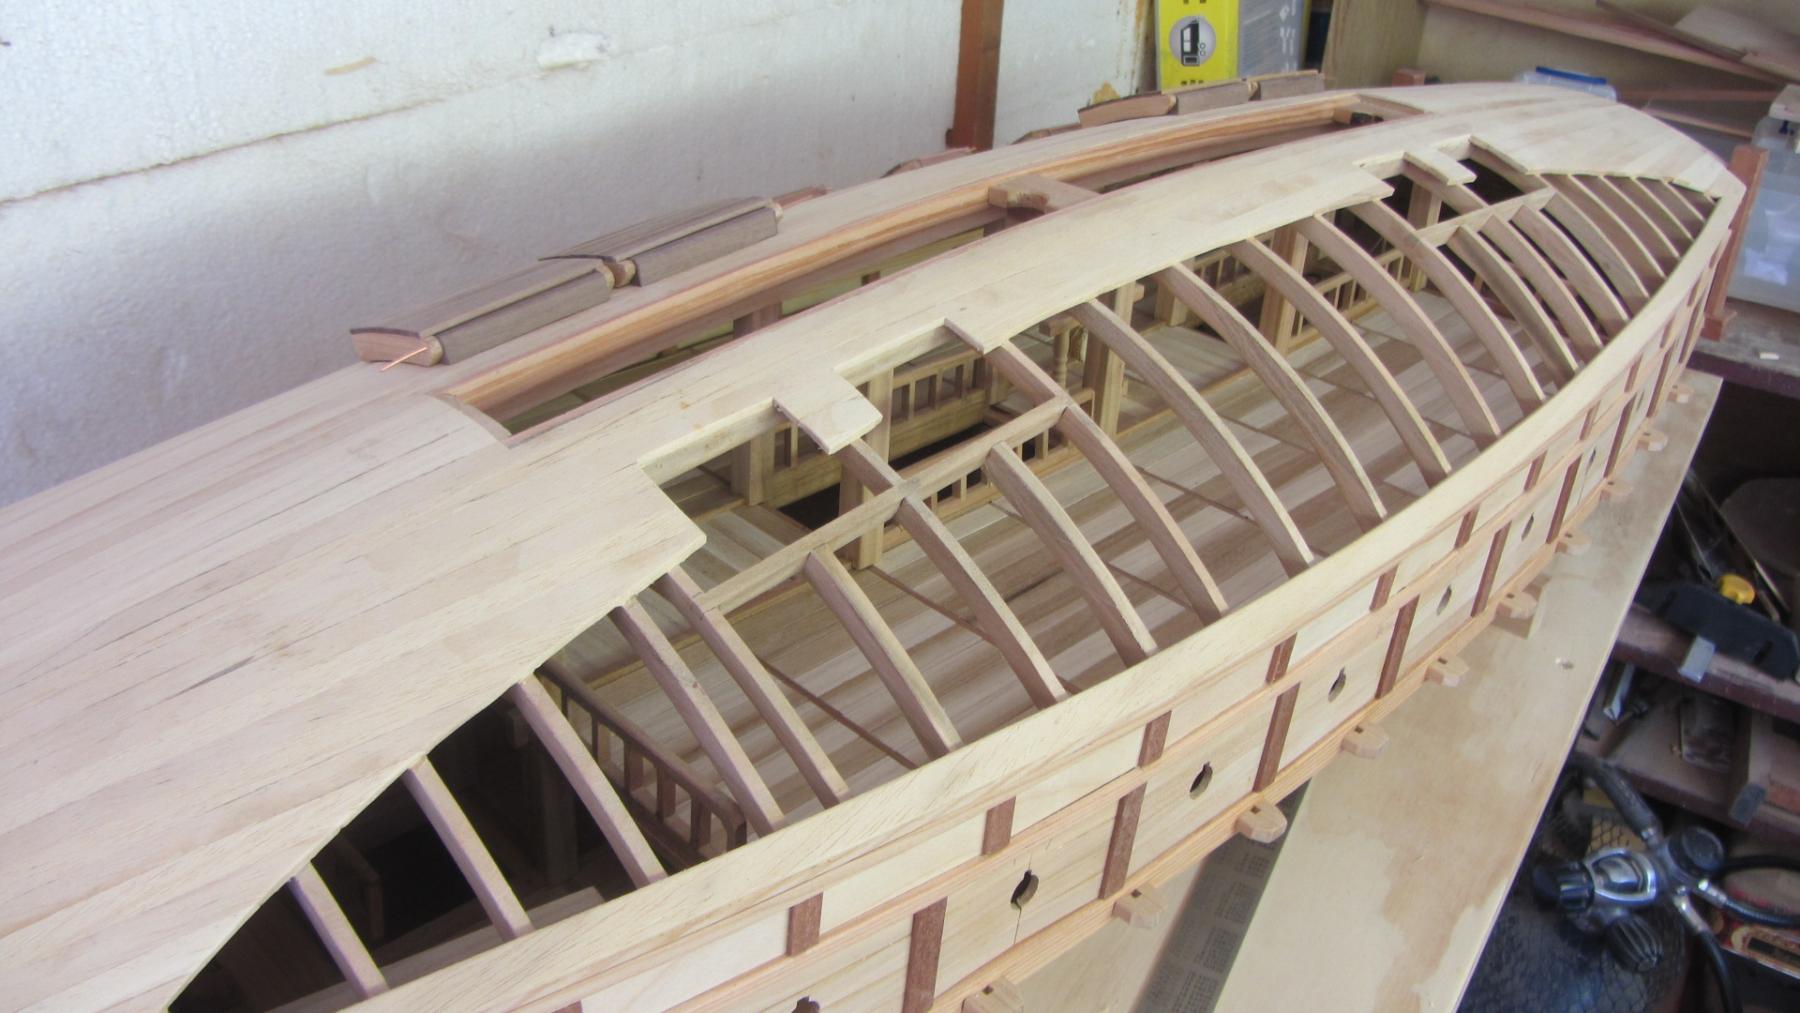
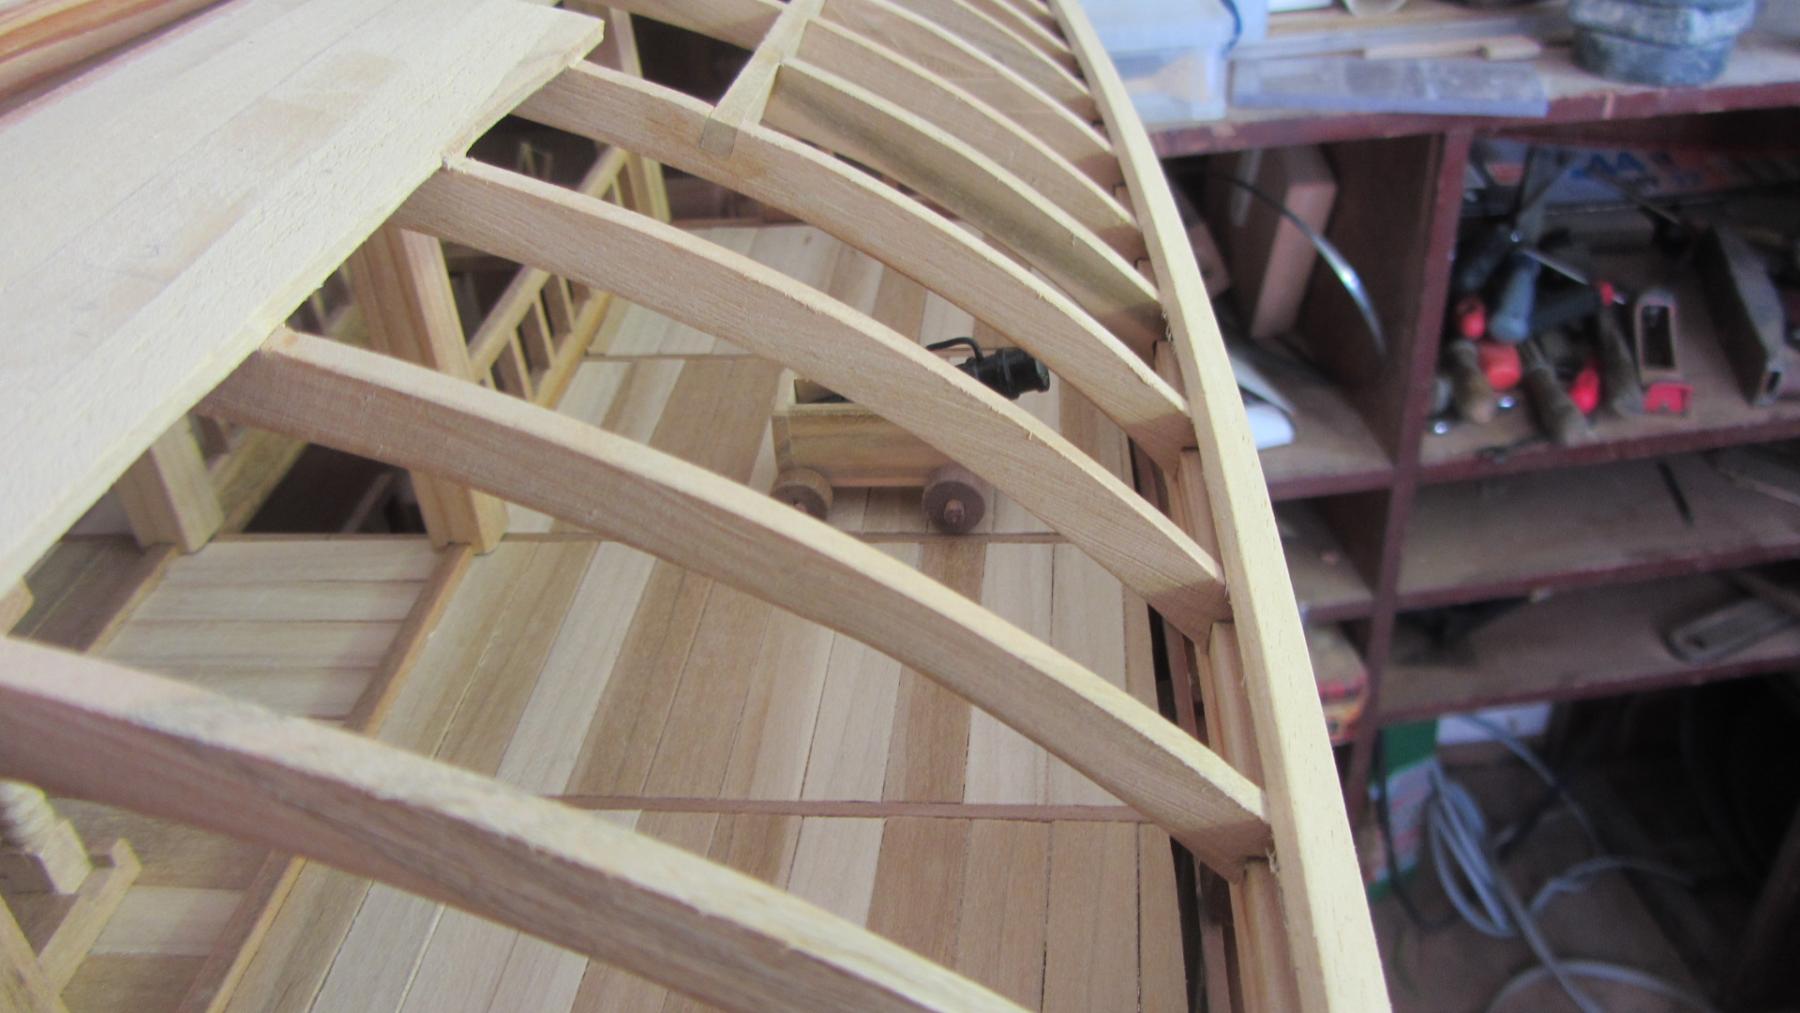
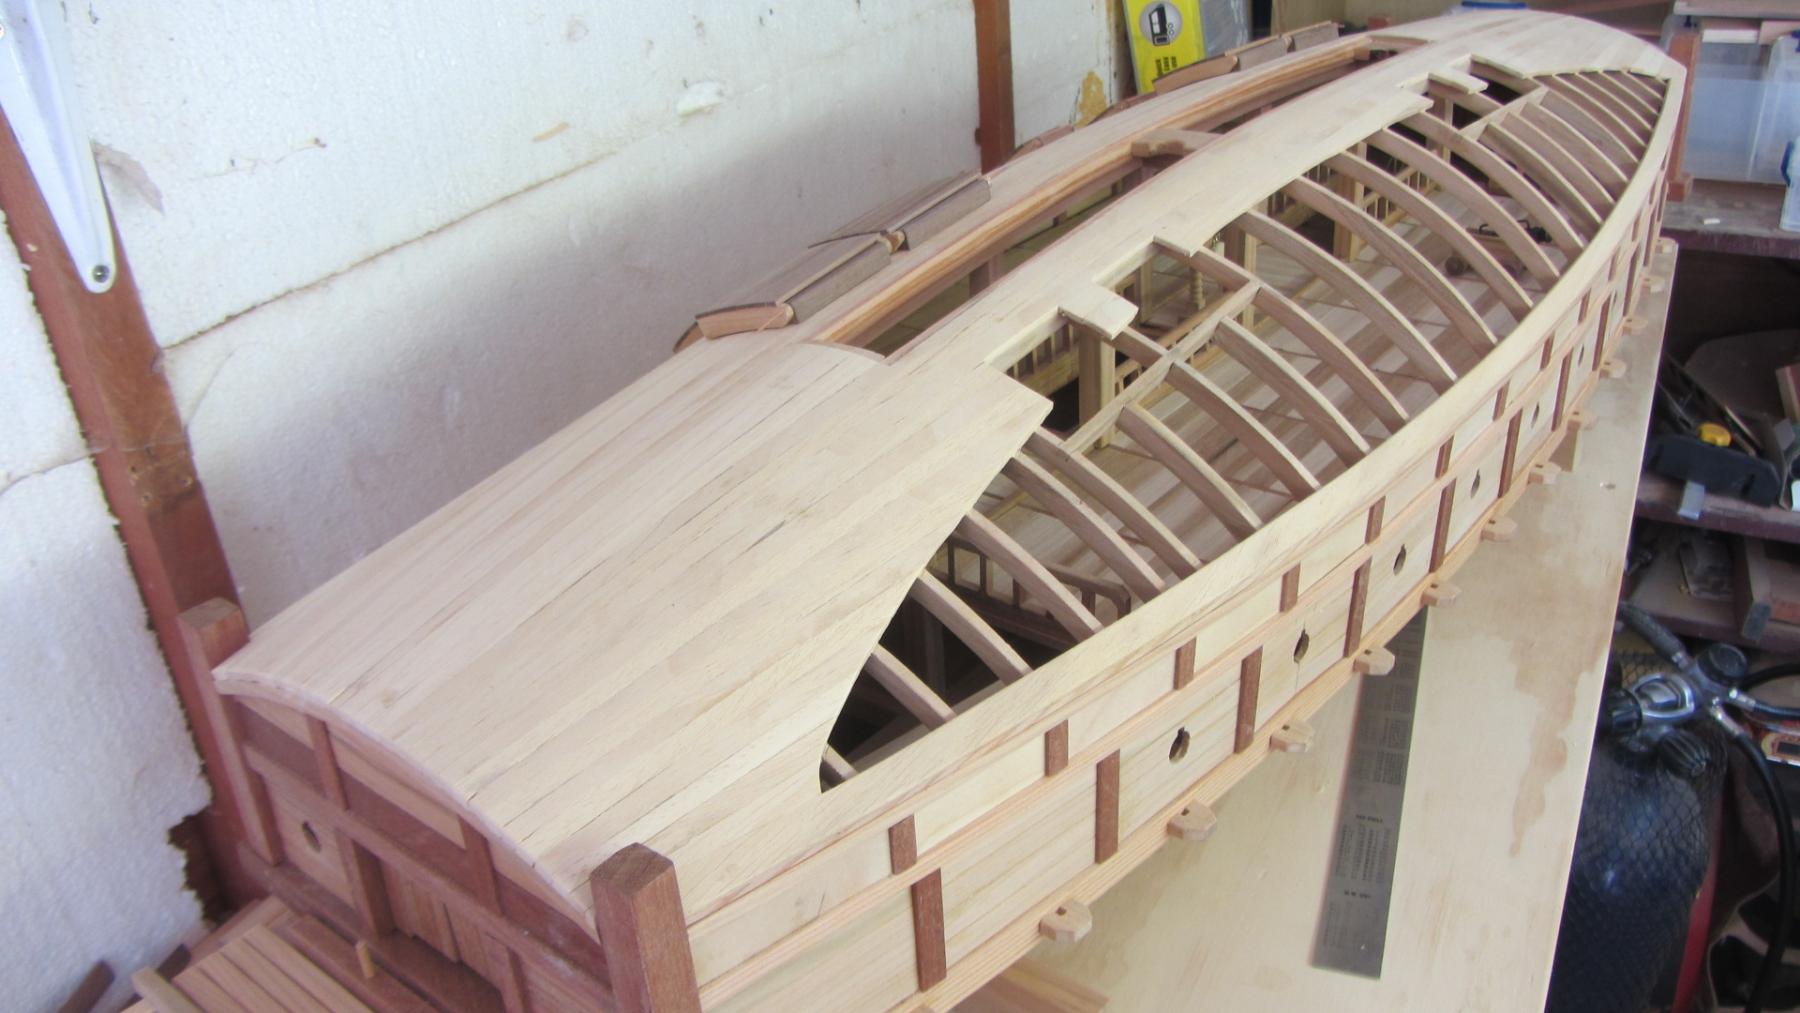
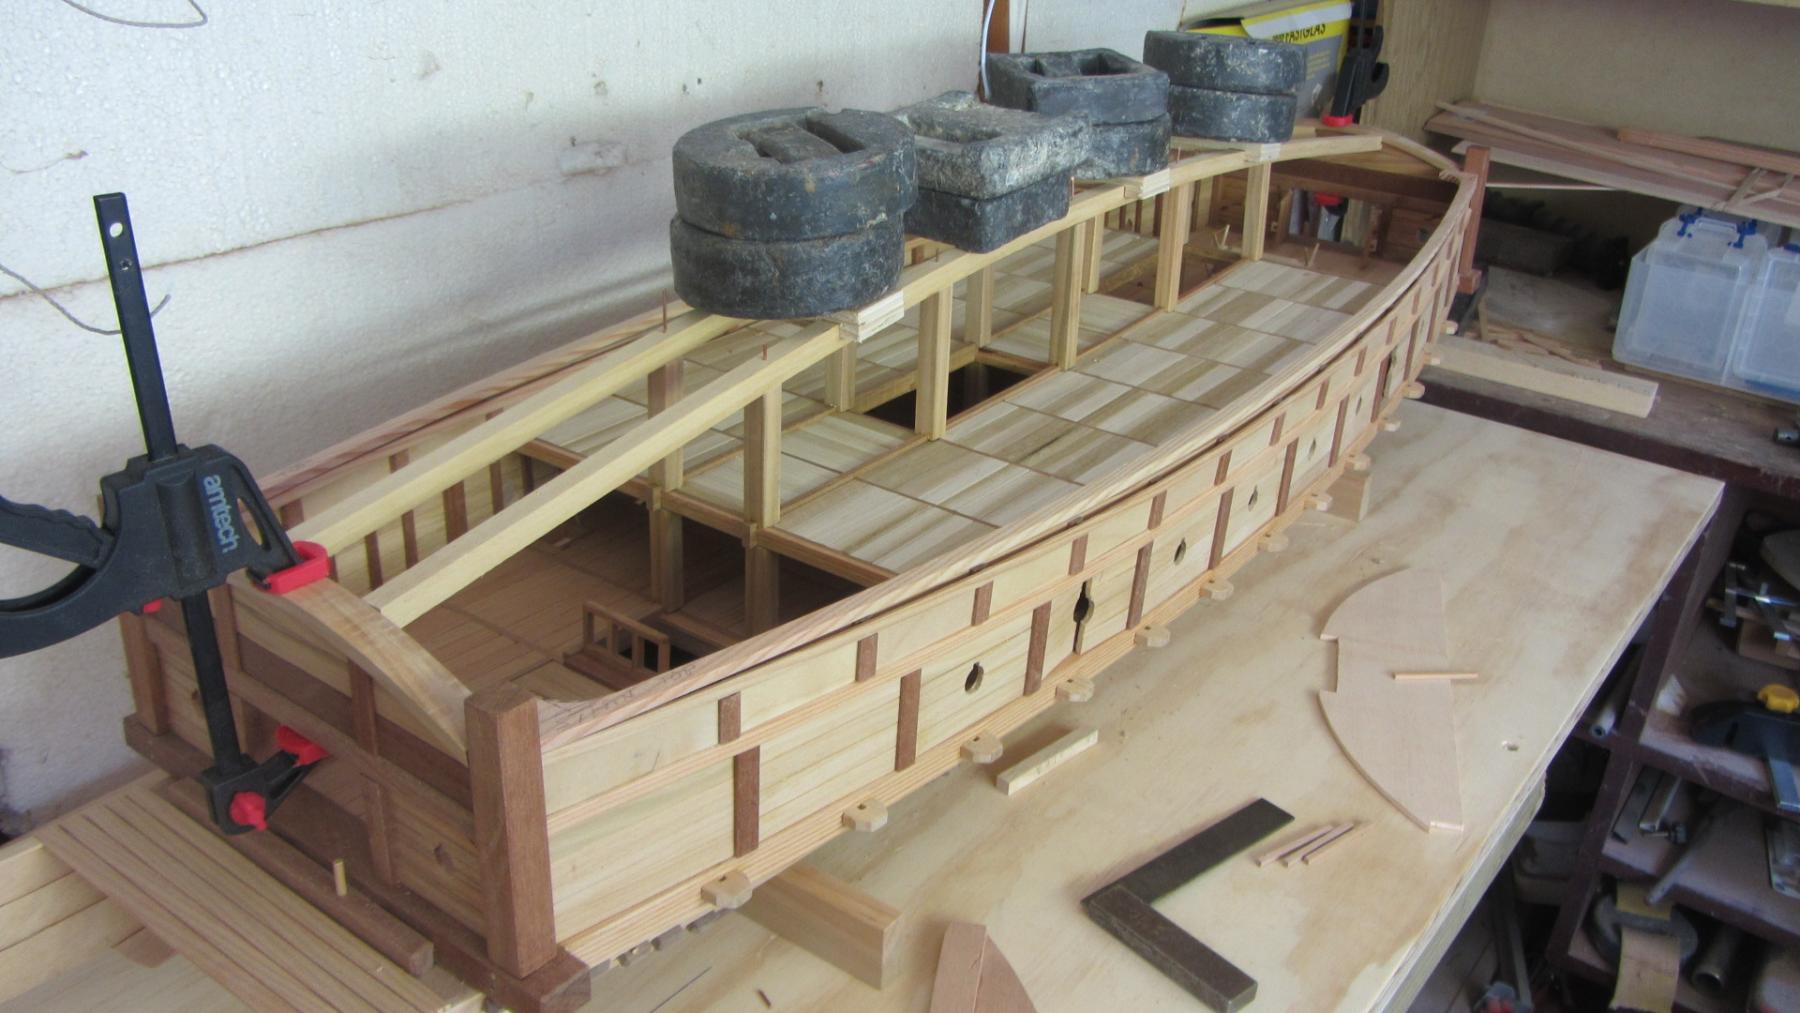
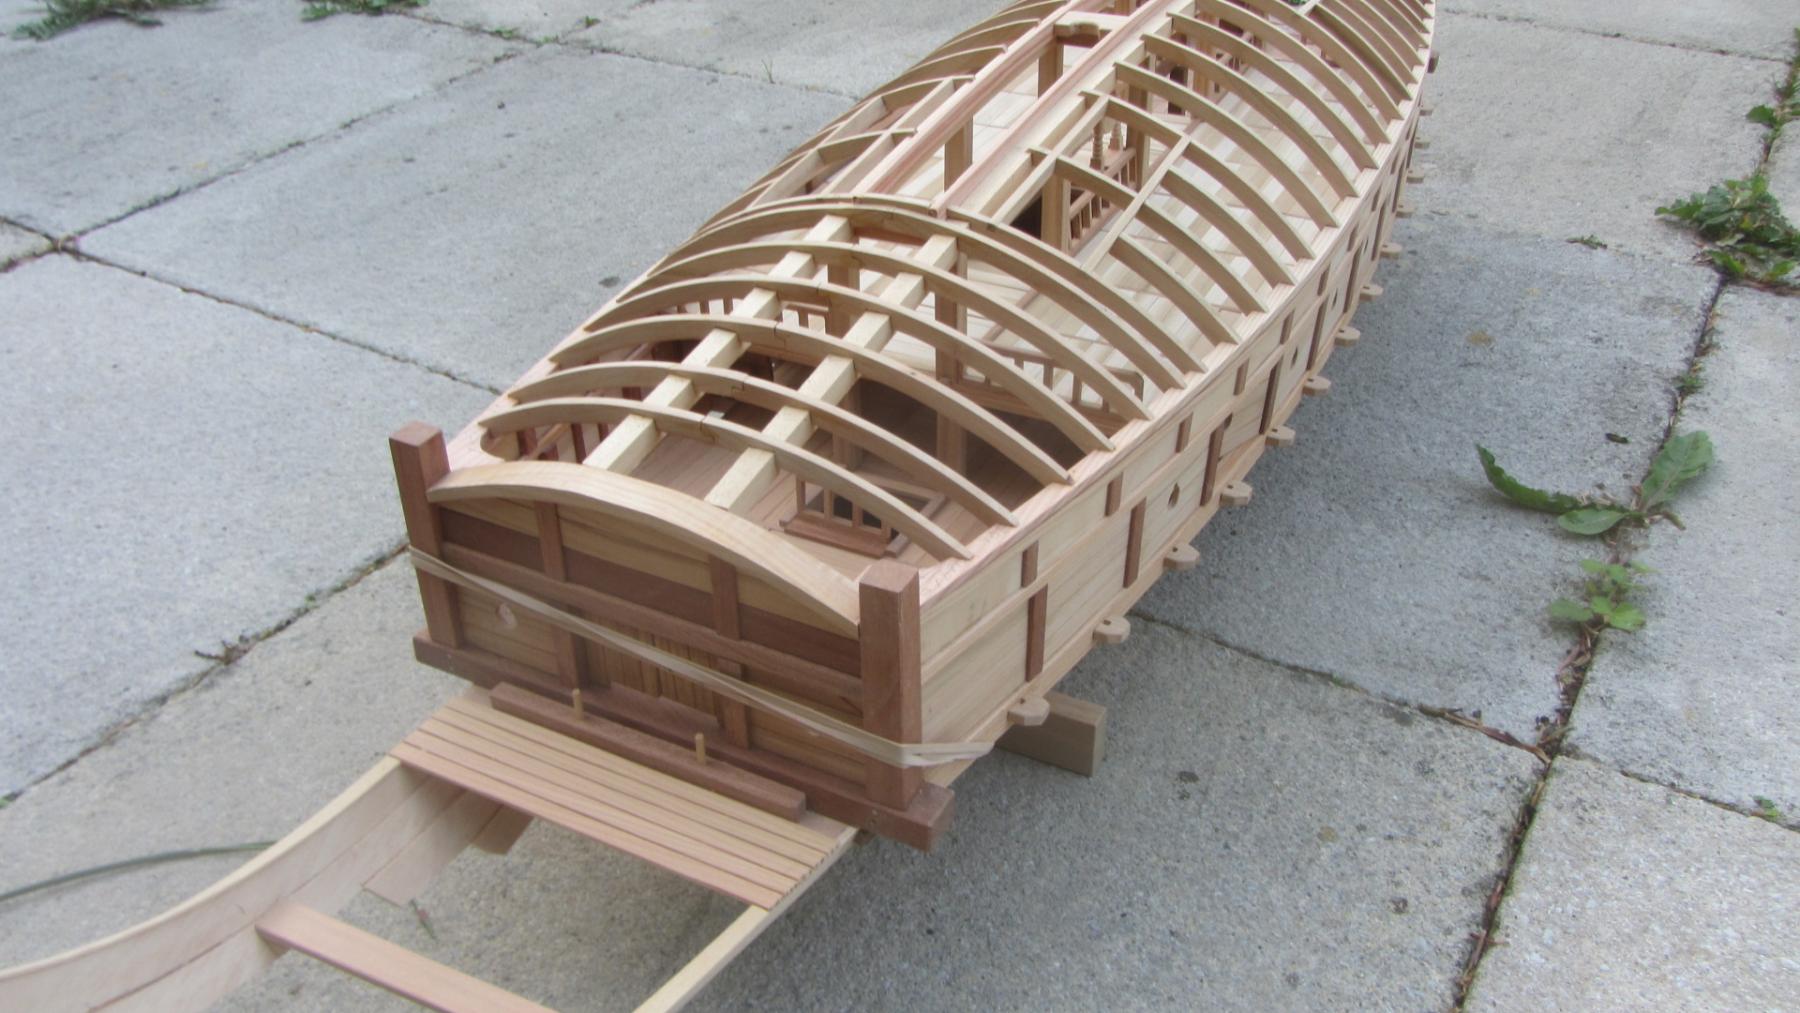
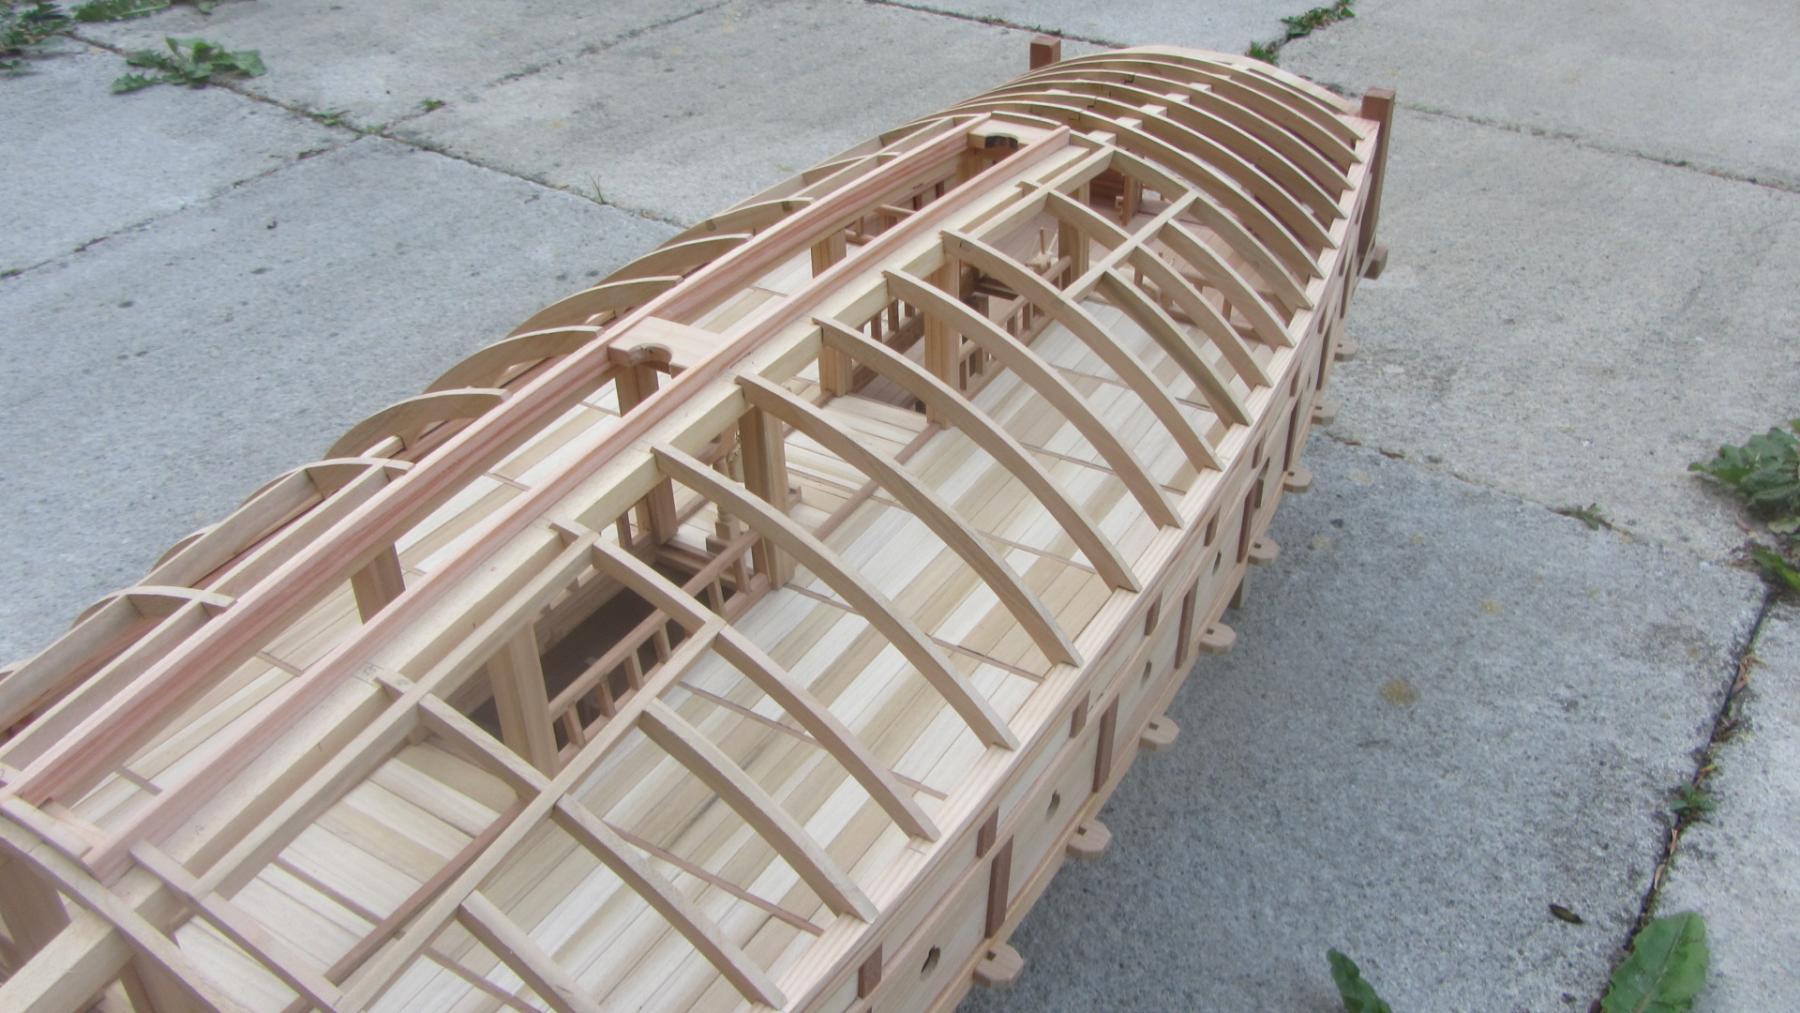
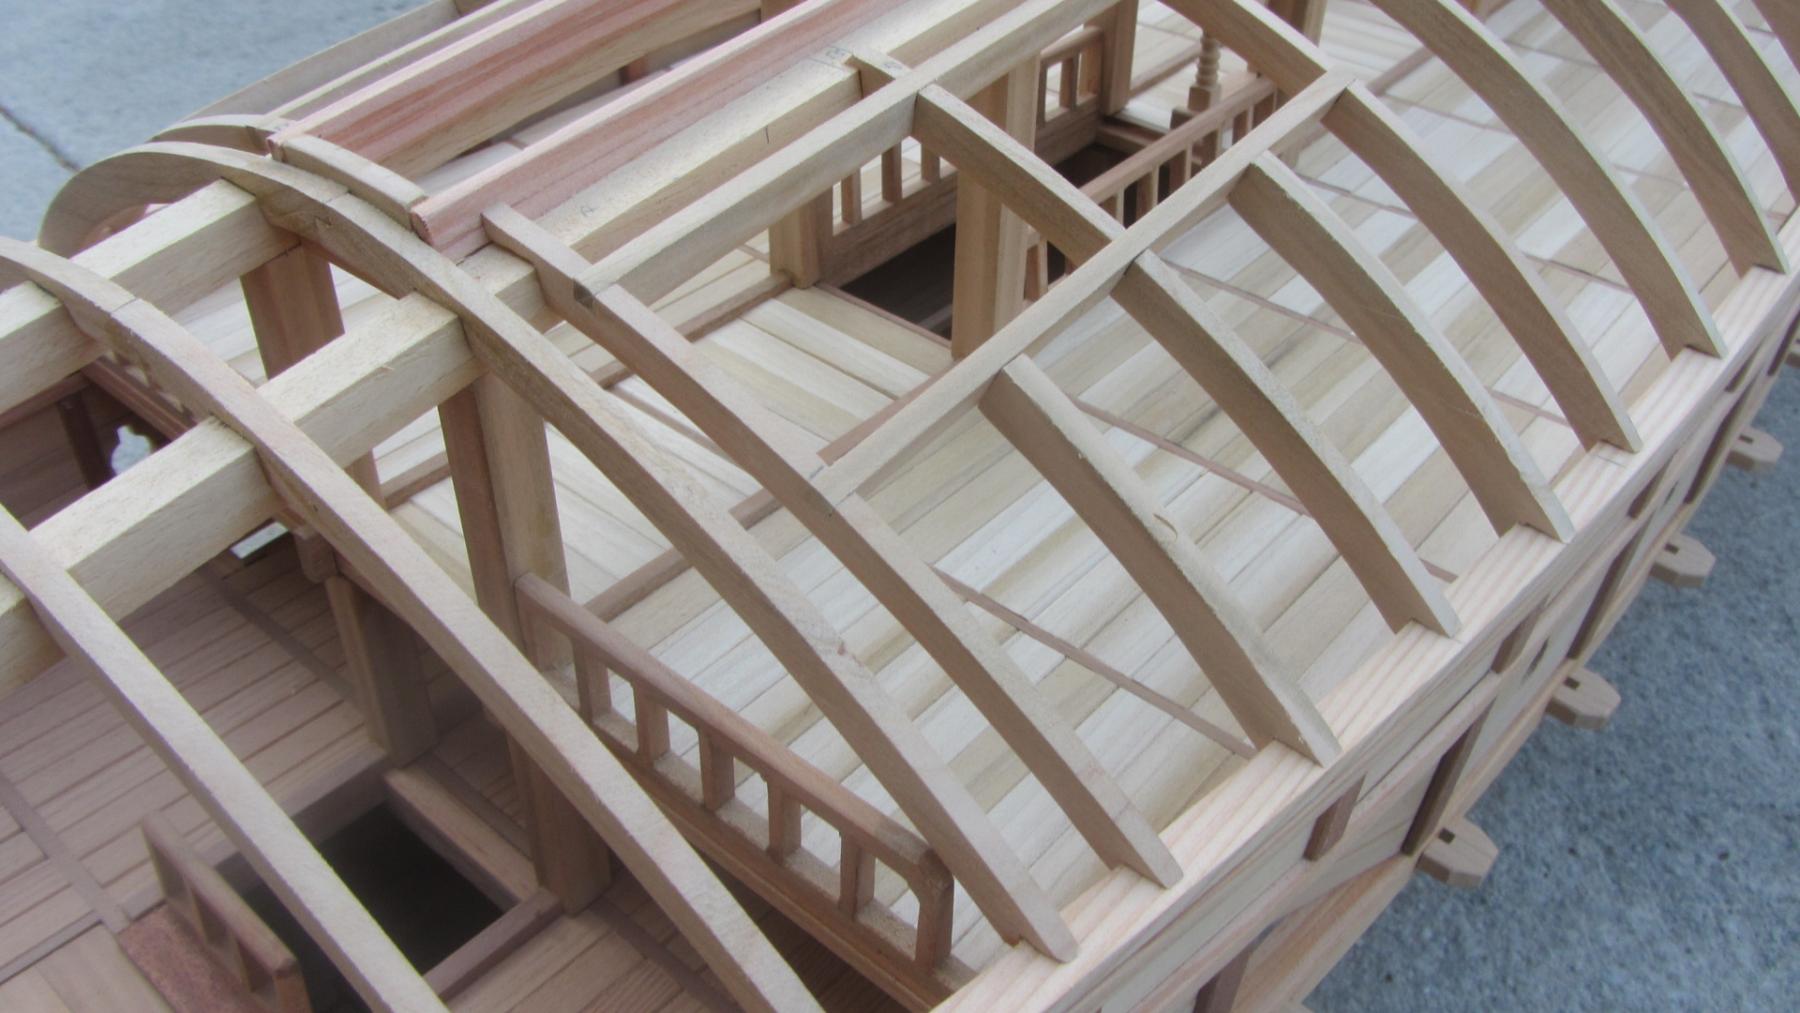
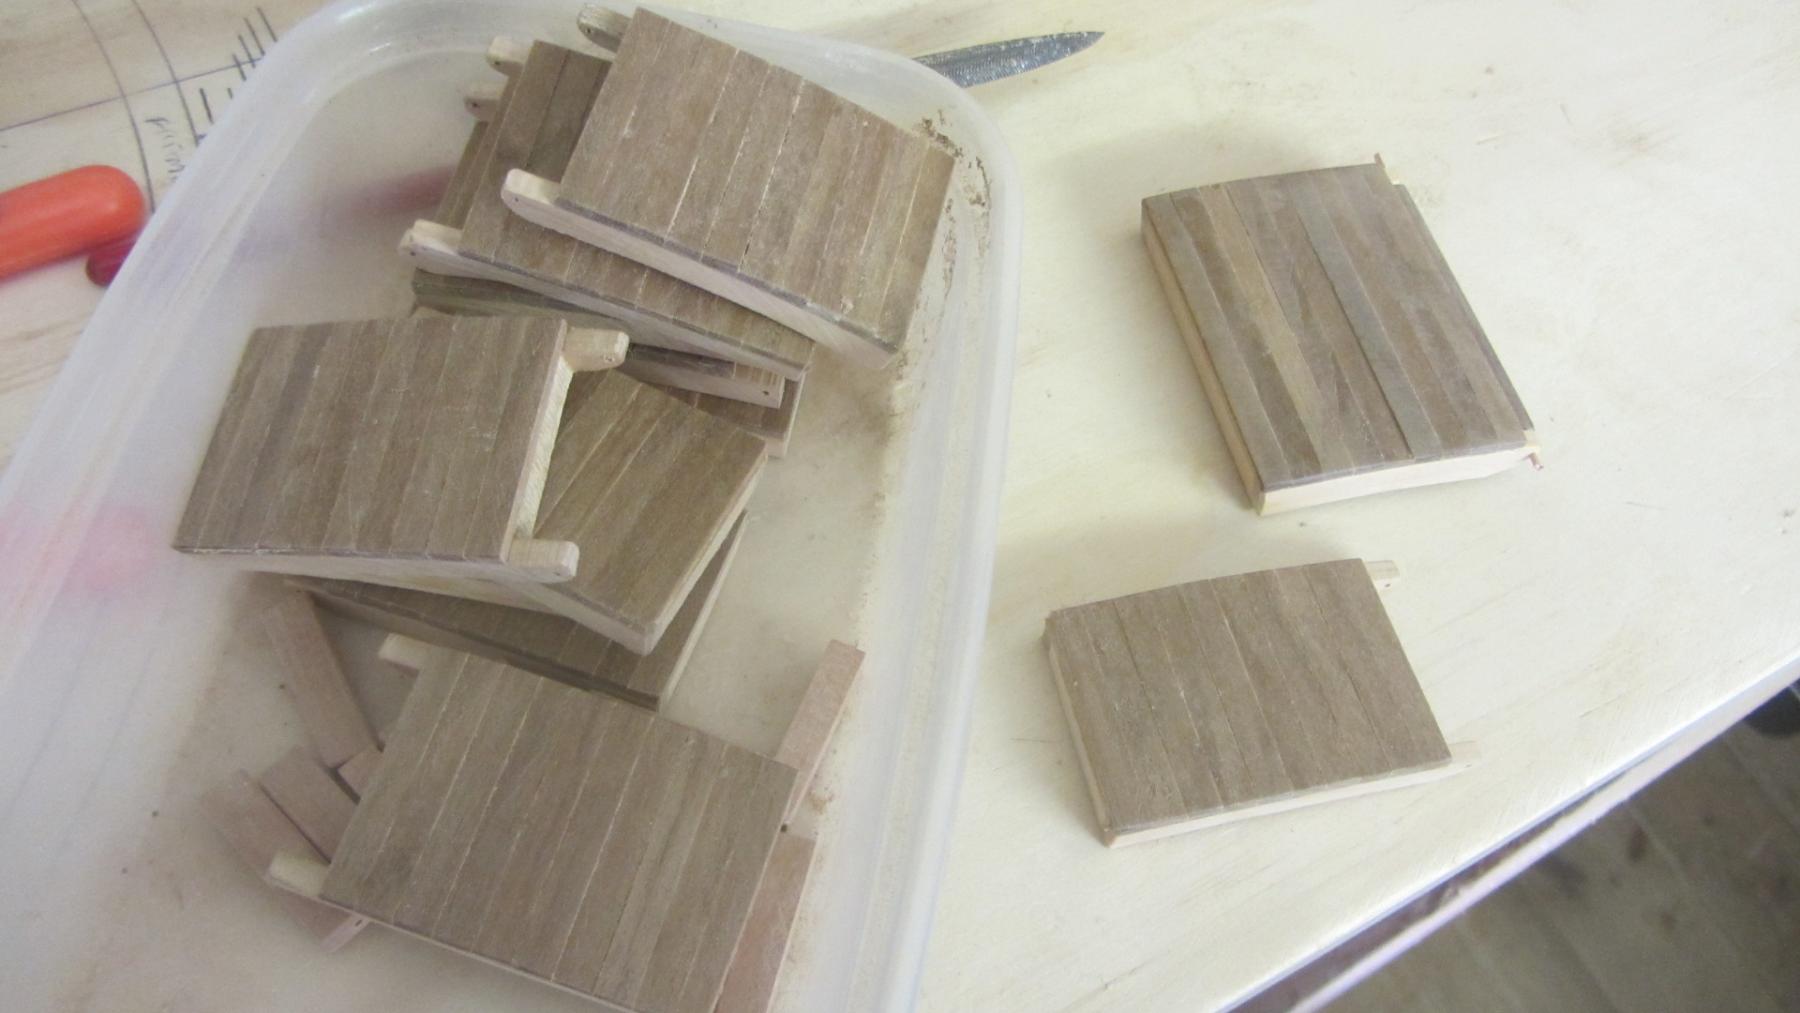
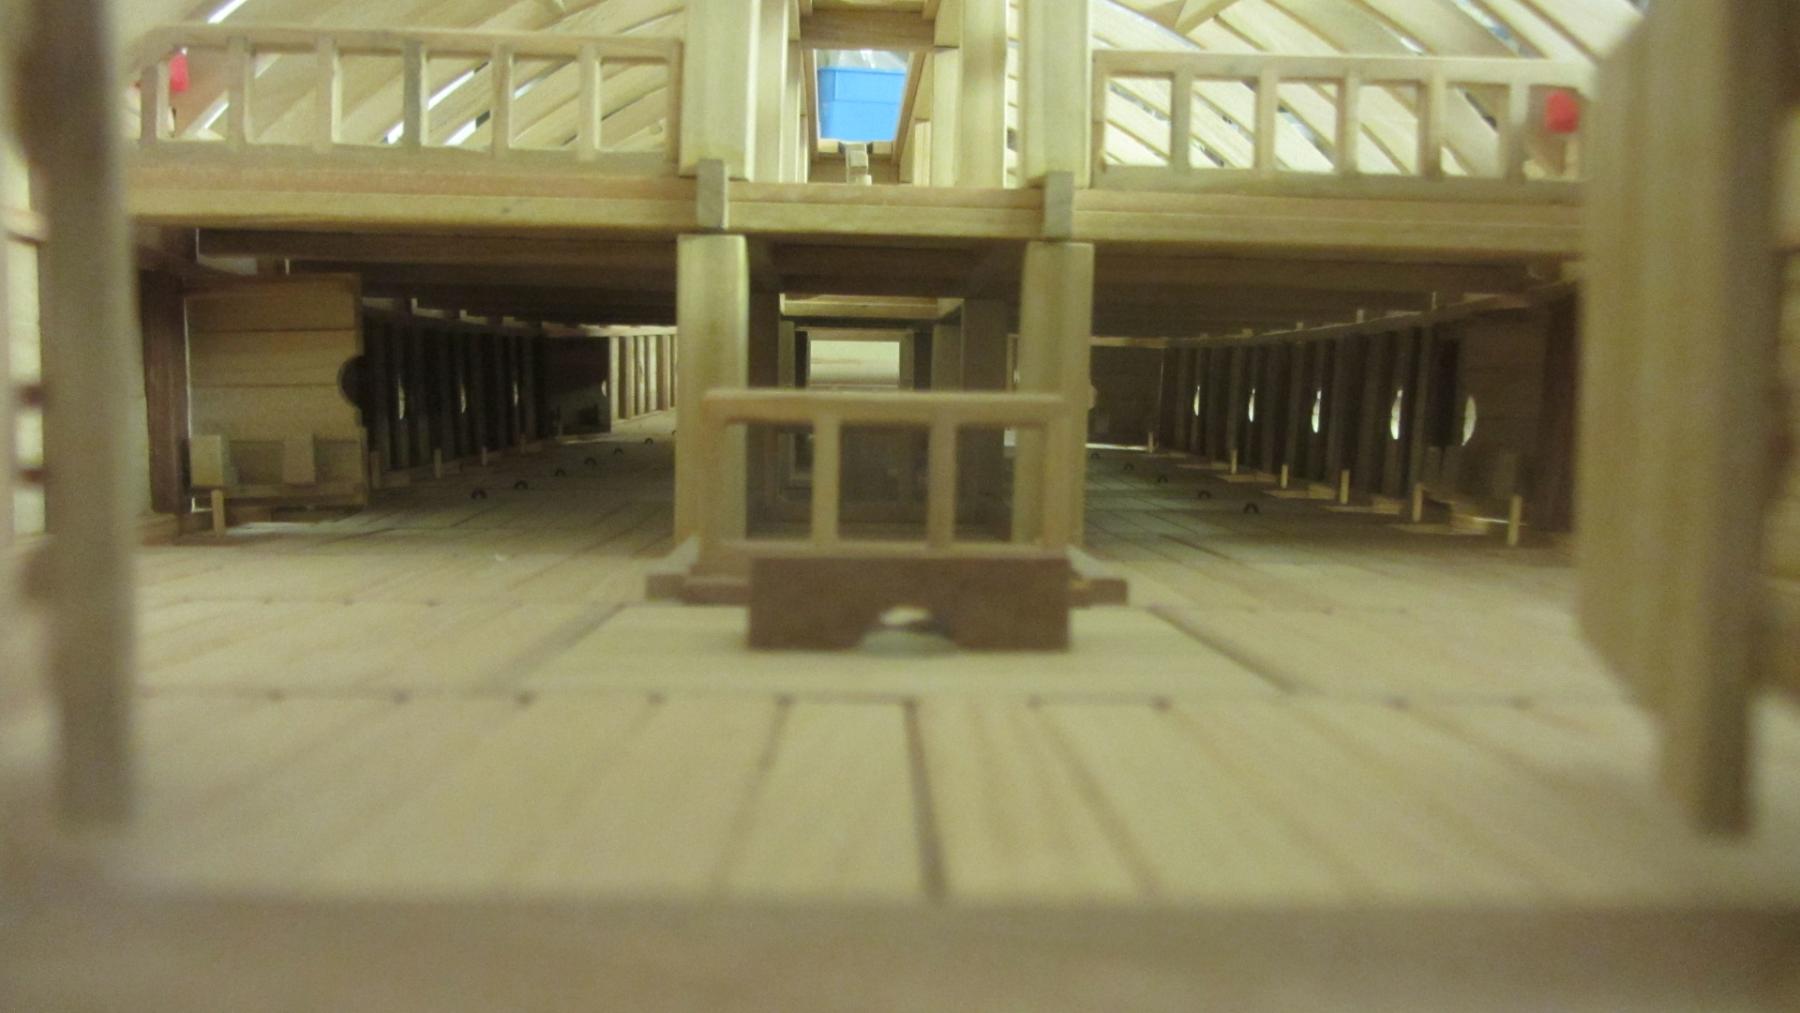
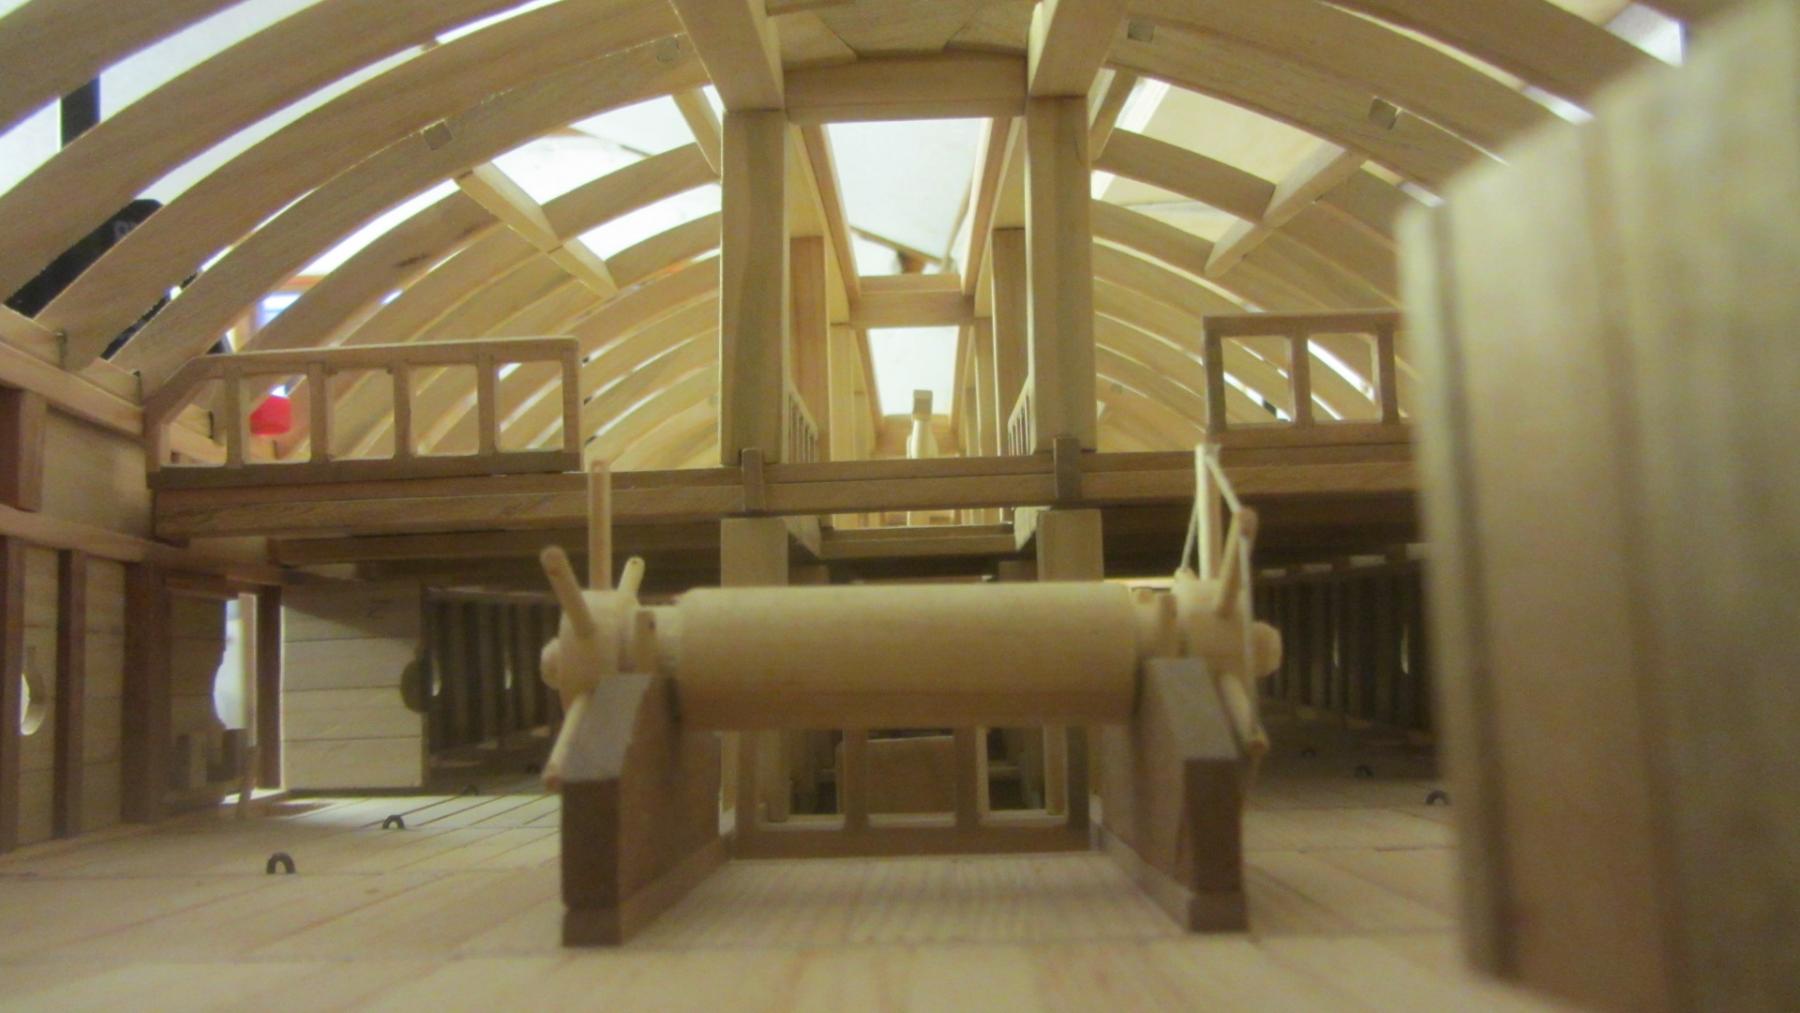
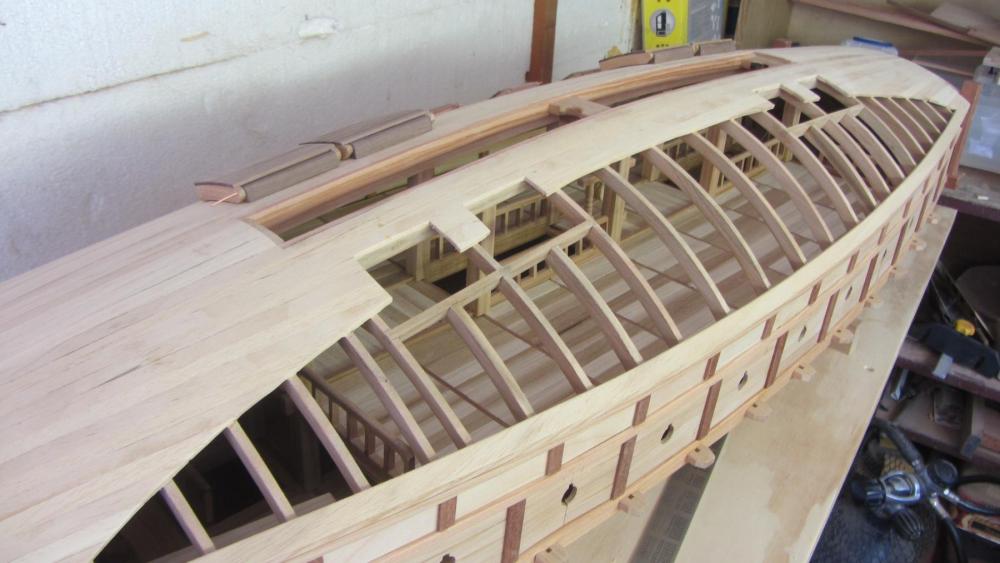
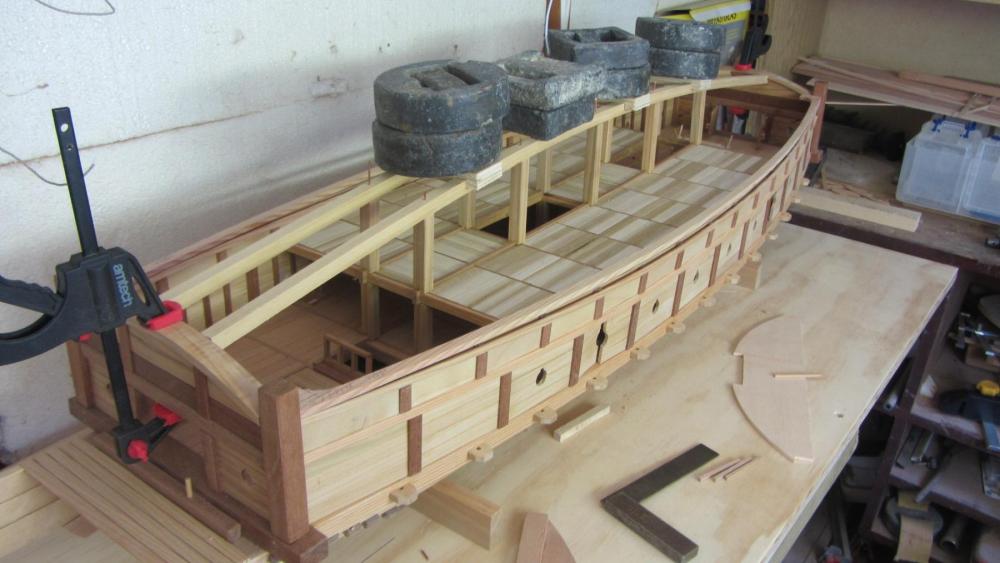
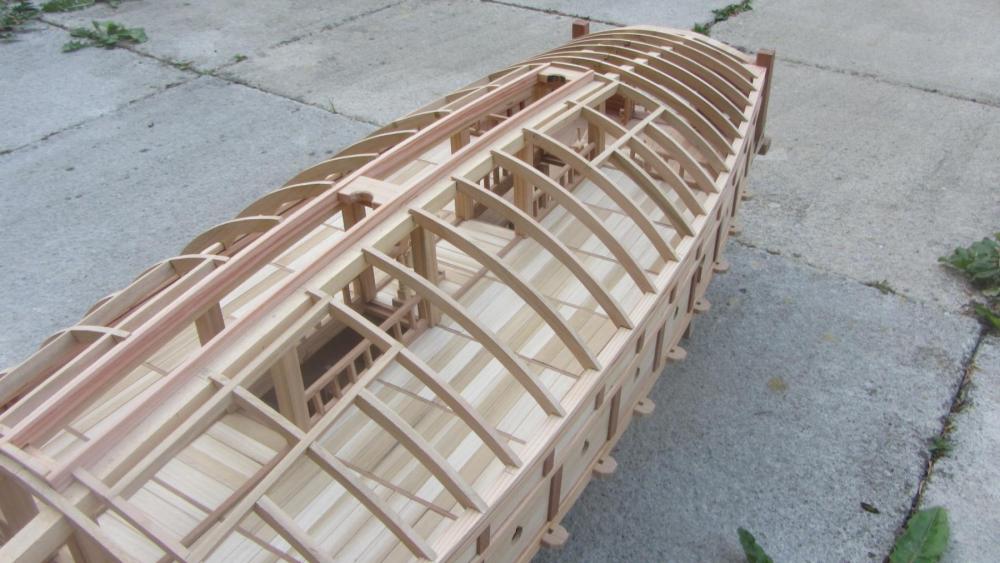
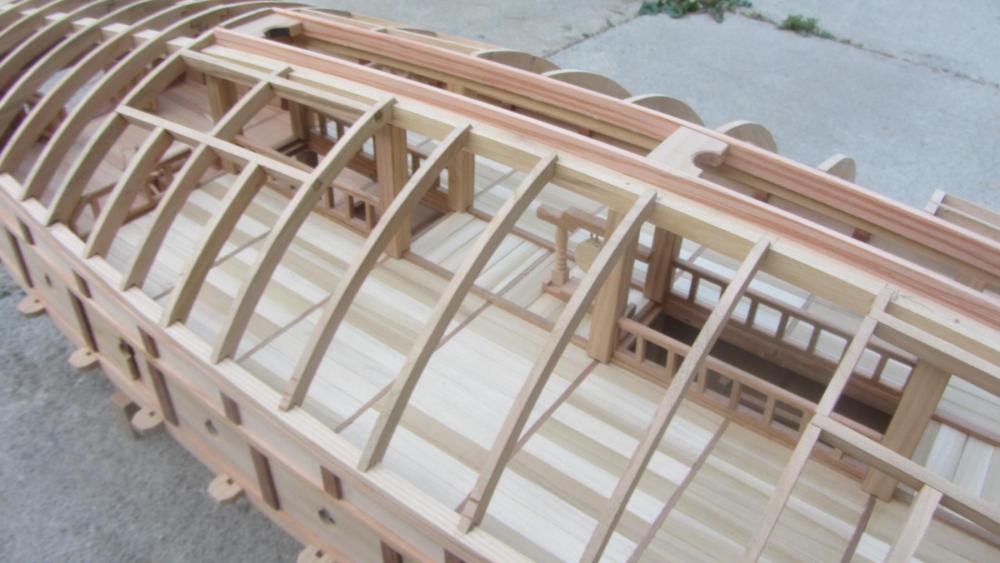
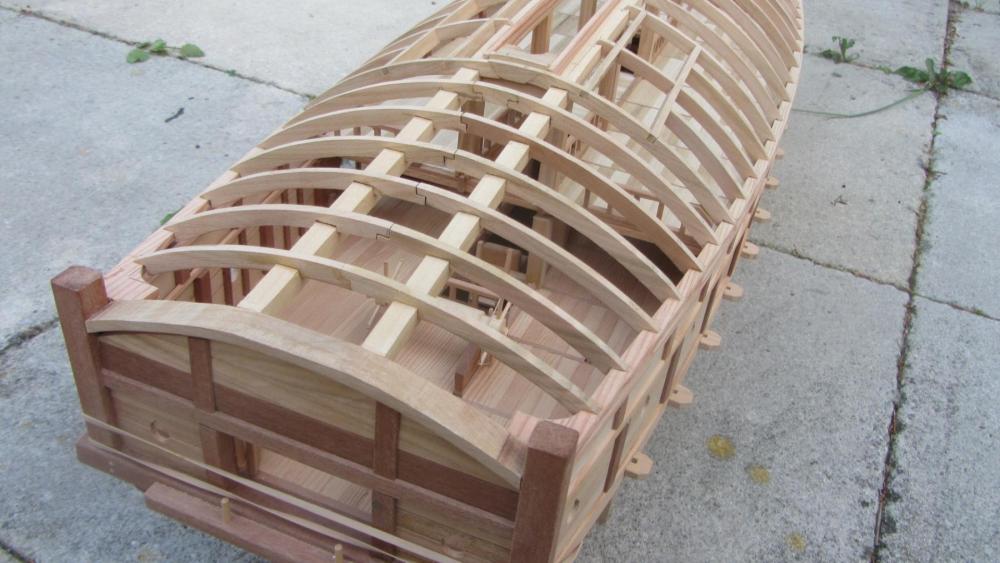
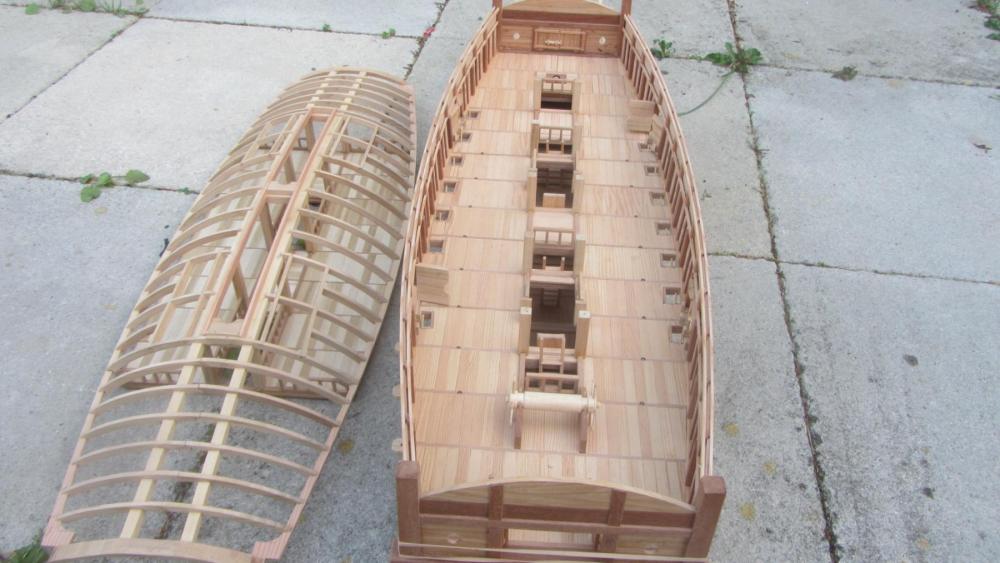
Hi. Sorry for the lack of updates.. Lots of progress . The jig for making the oars. 16 in total . the angle is quite important. My method of getting the angles spot on all the time. Helps with finishing the small bits. Making the roof. The plywood is only there for positioning the 2 main beams Roof beams now glued to second floor and bow and stern bulkheads. Roof timbering in place. Ready to sand to profile. Plenty of weeds growing...no time for gardening... Ship building has priority. Another view from stern. Close up of roof timbers. Bow area. i have made the second deck and roof removal.. will make it easer to view the interior of the model. Took a little planning but the results are very good. Another angle. One of the 8 top hatches ready for fitting. These are the gun ports for the second deck. there was guns on the second deck so where should the ports go ?? In the rood at the lower edge. Hand rails fitted. View into the stern doors. View into the Bow doors. View into the bow doors looking up a little. Next task will be to plank the roof leaving a large area not planked. this will enable people to look inside the model. I will be Turning the cannons from Acetel(Black) with blackened copper wire for the handles. Thanks for looking in. Regards Antony.


- 99 replies
-
- 18
-
-
- turtle ship
- korean
- (and 1 more)
-
Hi Aydin. Very nice progress. The seats really do look the part in this boat. Turning out to be a very nice kit. And you are turning it into a very nice model. PS I like the days and hours you have worked on the kit at the start of the posts. Regards Antony
- 414 replies
-
- 5
-
-
- riva aquarama
- amati
- (and 2 more)
-
Hi Aydin. WOW you are moving on so fast... I missed a day somewhere. Turning out to be a very nice kit. Nice build log with lots of details and hints. Well done. Regards Antony.
- 414 replies
-
- 2
-
-
- riva aquarama
- amati
- (and 2 more)
-
Proxxon Micromot DB 250 MICRO Woodturning Lathe
AntonyUK replied to Holty's topic in Modeling tools and Workshop Equipment
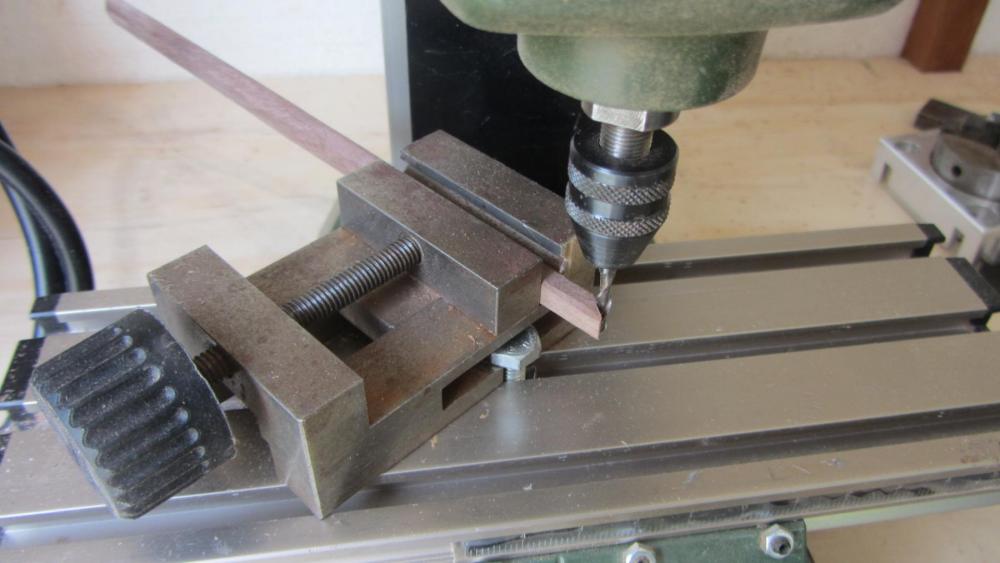
Hi Mark. Yes you are correct the any masts is way to long for the lathe. I own a lathe but prefer to shape it by hand. Planning first . Then sanding in a pillar drill. (Modified with hole in baseplate and through bench.) I find that a long thin mast flexes in a lathe even the stock centrepoint being used and with very sharp tooling. The wood plane is a 14 inch so has little or no level problems. First square the masts. To the right tapper Then octagon 8 sides. Then Hexadecagon 16 sides. This leaves very little sanding. That's my method. I know it's a lot of work but results are great. Regards Antony. -
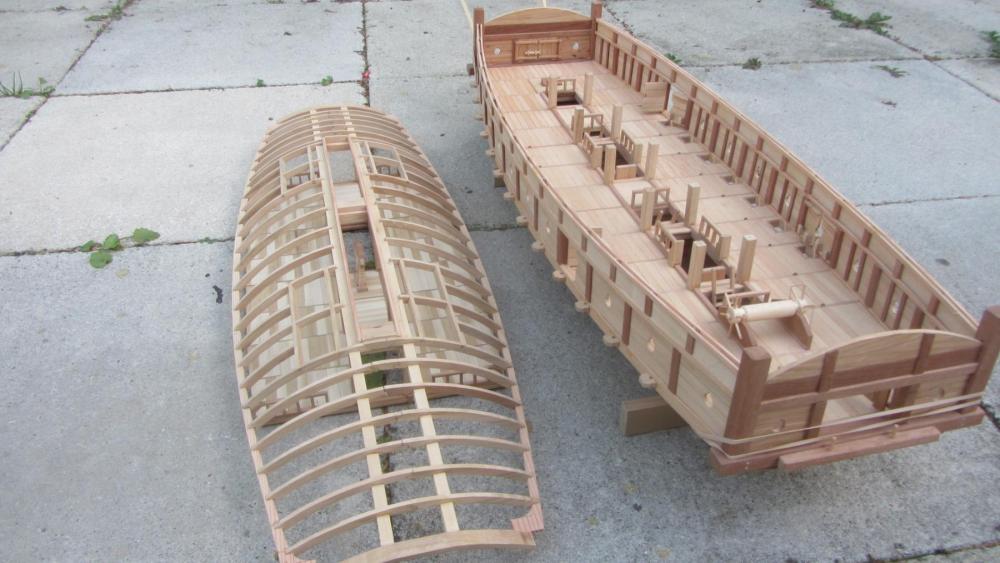
Hi. I agree Bob . But saying that most of the builds on MSW are unique as people add little bits to the ships that make them special. I have a change of plan... as so to speak. Instead of having a cutaway my sons has convinced me it would be better to have the roof and the second deck lift off. This will be easy because there are four pillars at each corner of the ship. Location of the roof and second deck will be easy. Not sure on how the masts will cope with this... make have them fixed to the roof and second deck. We will have to work that out as the build continues. Have put the base on temporary to allow the oars and other objects to be placed on the ship. Started working on the roof supports. Have cut then out but made them longer to allow bispoke fitting. No photos on this post as posting on my tablet. Will post them next time ime on the PC. Regards Antony.
- 99 replies
-
- 4
-
-
- turtle ship
- korean
- (and 1 more)
-
Hi Aydin. A excellent start to your build. I have to agree with Keith statement regarding the none flush reinforcing bits. Looks to be a super kit. And nice use of your new building jig/board. Keep the photos and comments coming. Regards Antony.
- 414 replies
-
- 4
-
-
- riva aquarama
- amati
- (and 2 more)