Trussben
-
Posts
2,008 -
Joined
-
Last visited
Content Type
Profiles
Forums
Gallery
Events
Everything posted by Trussben
-
 Hey Rusty, I cannot tell from those last pictures, have you added the flag mast step below the Thwart with its hole in it? ben
- 120 replies
-
- 2
-

-
- queen anne barge
- Syren Ship Model Company
- (and 1 more)
-
Nice Rusty, You are ahead of me now - I just am about to start with the Thwarts, but having soooo much fun painting - NOT! ben
- 120 replies
-
- 5
-
-
- queen anne barge
- Syren Ship Model Company
- (and 1 more)
-
Nice Rusty, I found using a #75 drill worked really well for the line that Chuck supplies once it has glue on it, perfect fit. ben
- 120 replies
-
- 4
-
-
- queen anne barge
- Syren Ship Model Company
- (and 1 more)
-
Opinions on Sherline DRO for Lathe
Trussben replied to rtropp's topic in Modeling tools and Workshop Equipment
Biltut i think sherline stopped selling the red handwheels a couple of years ago for some reason, don’t know why. I got my lathe and mill with factory installed DRO and the red handwheels and the DRO in my opinion is definitely worth the price for the ease of repeatability. ben -
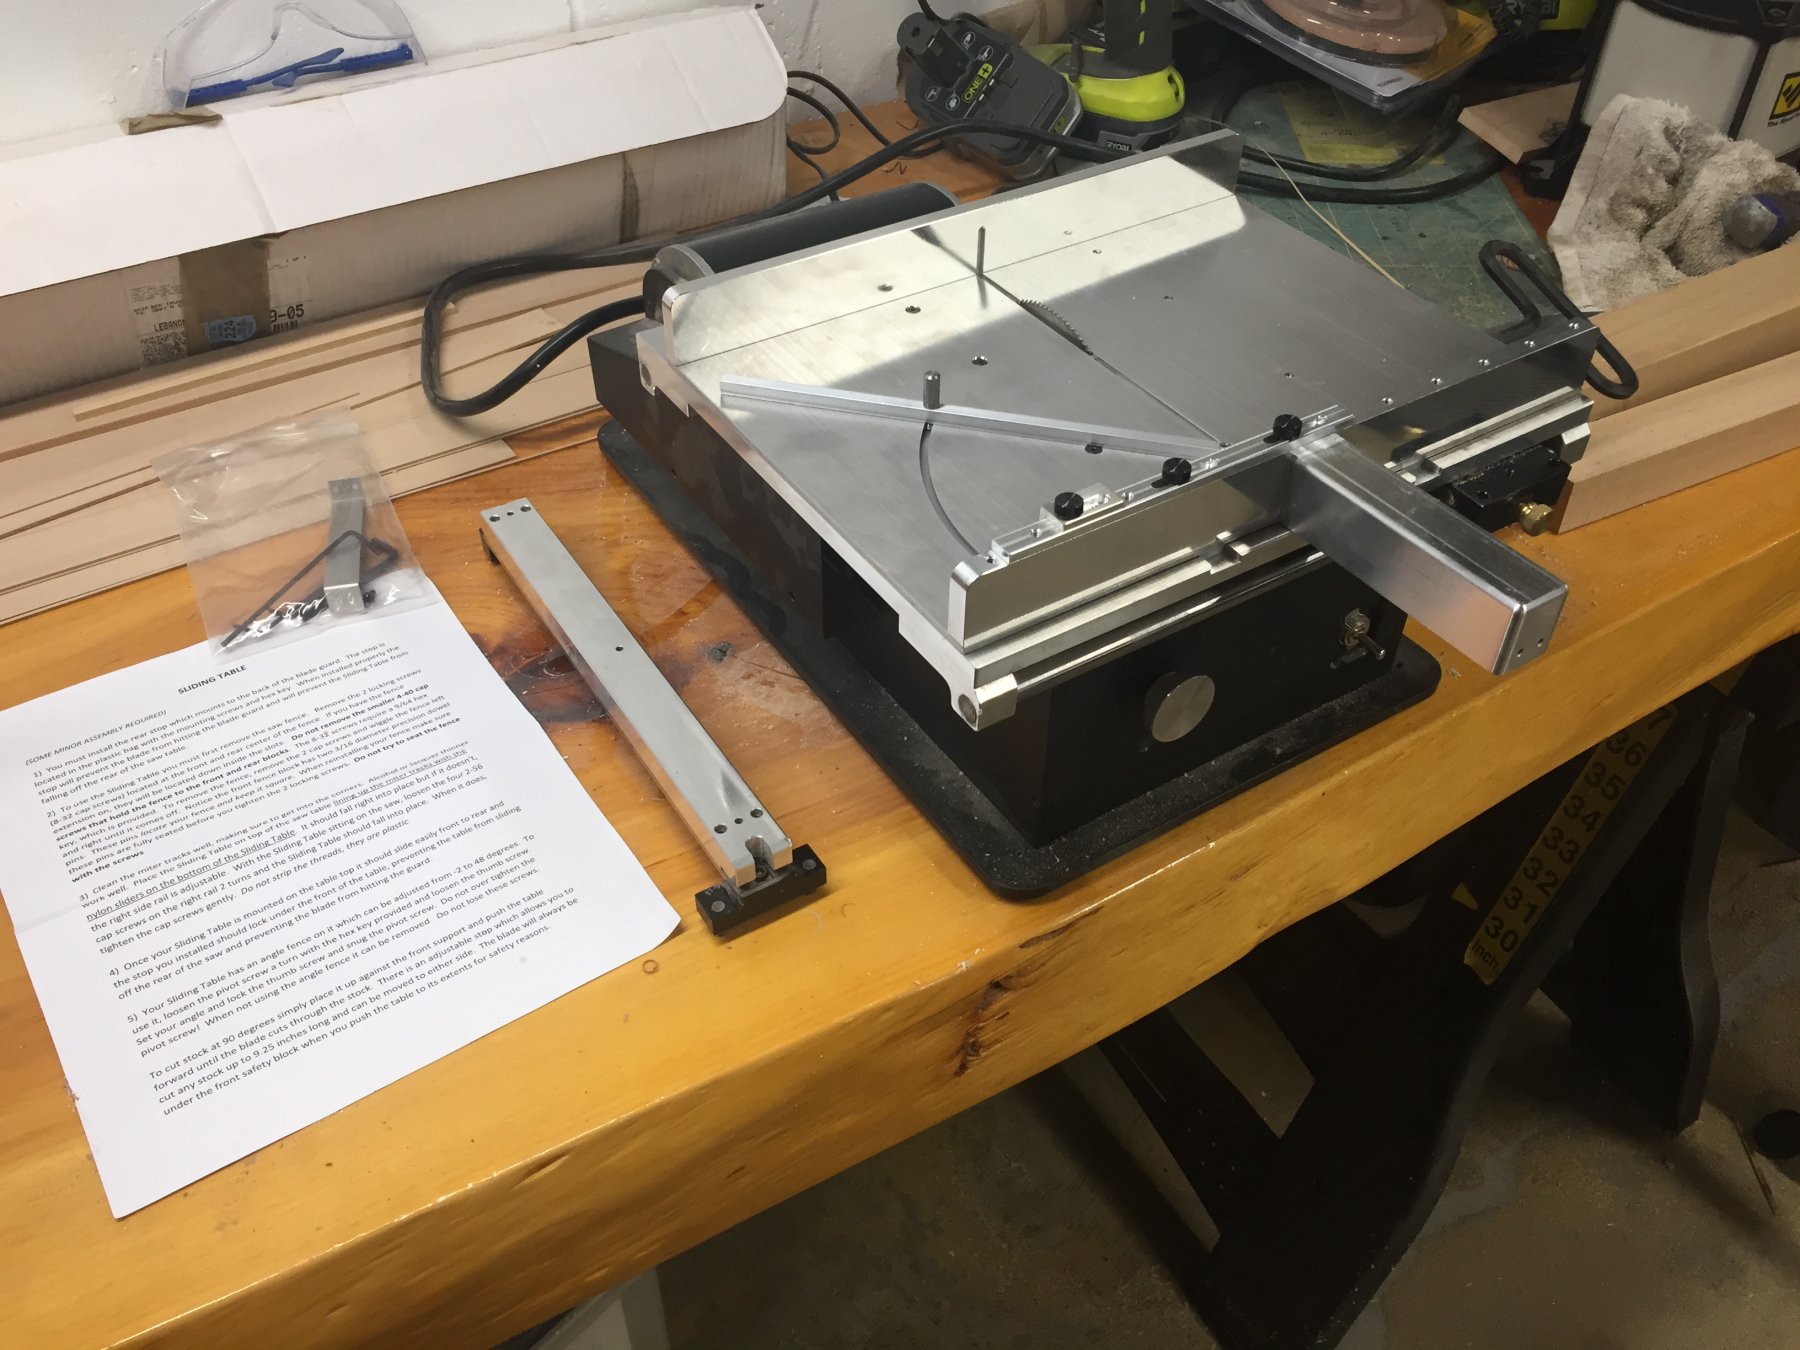
Walt, A sliding table, or sled has several uses on a table saw, you can find many videos and pictures on woodworking sites to see some of these uses, but for me the big ones are repeatable and square cuts, repeatable length cuts using the fence stop and it adds another layer of safety if you use it correctly. Ben
-
Thought that I would post a picture of the Byrnes saw sled that I purchased from Jim and Donna as I haven’t seen it shown elsewhere on the site. As with any of the Byrnes equipment, it is beautifully made of aluminum and the slot riders are made from plastic and a very nice fit into my saw. You do have to remove your fence to use the sled, but that’s only a few seconds work and two screws to remove. ben

- 20 replies
-
- 12
-
-
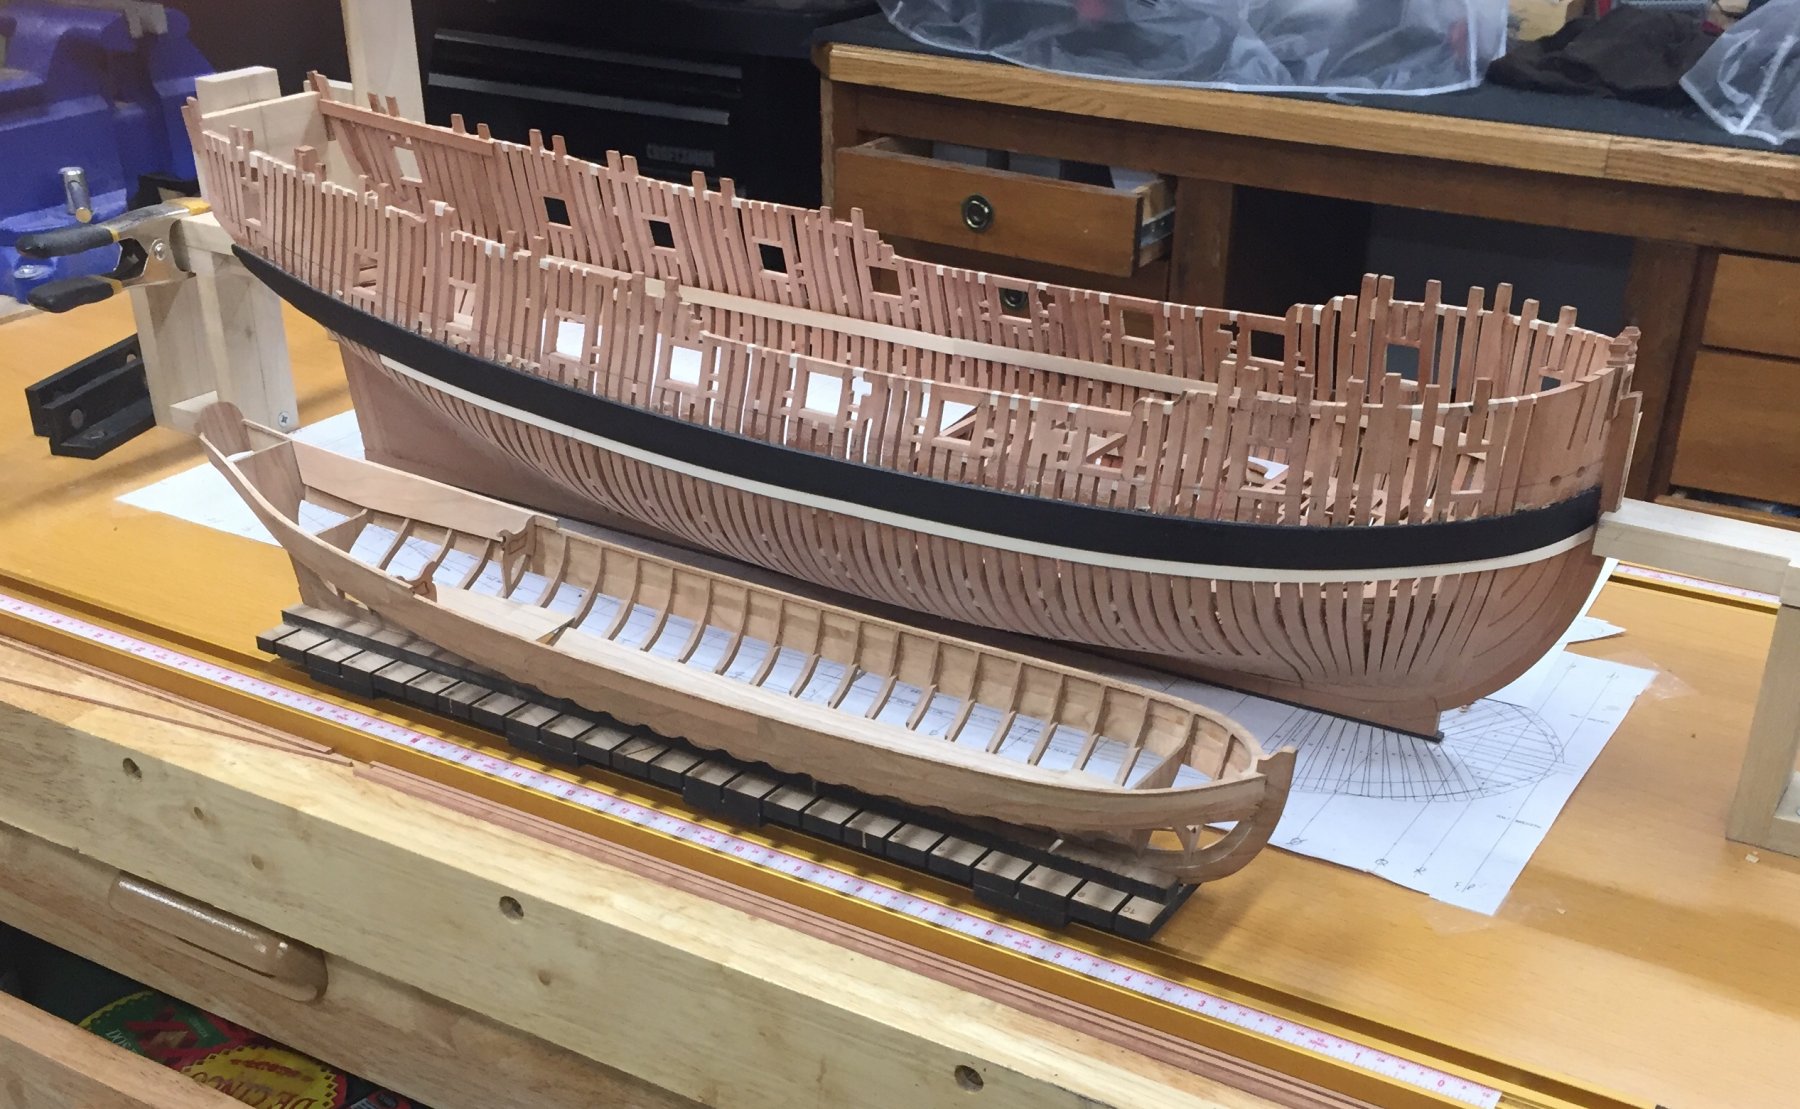
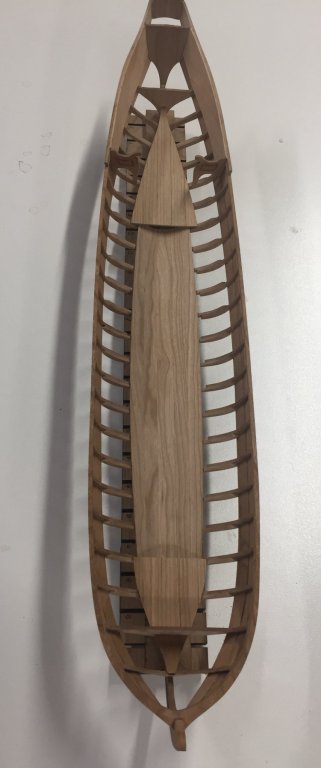
A little more work completed on the Barge, the flooring and platforms were marked for height and installed, also work on the rear seats has begun. Thought i I would show a pic next to Pegasus just for fun even though the barge is double the scale. ben

- 74 replies
-
- 17
-
-
- queen anne barge
- Syren Ship Model Company
- (and 1 more)
-
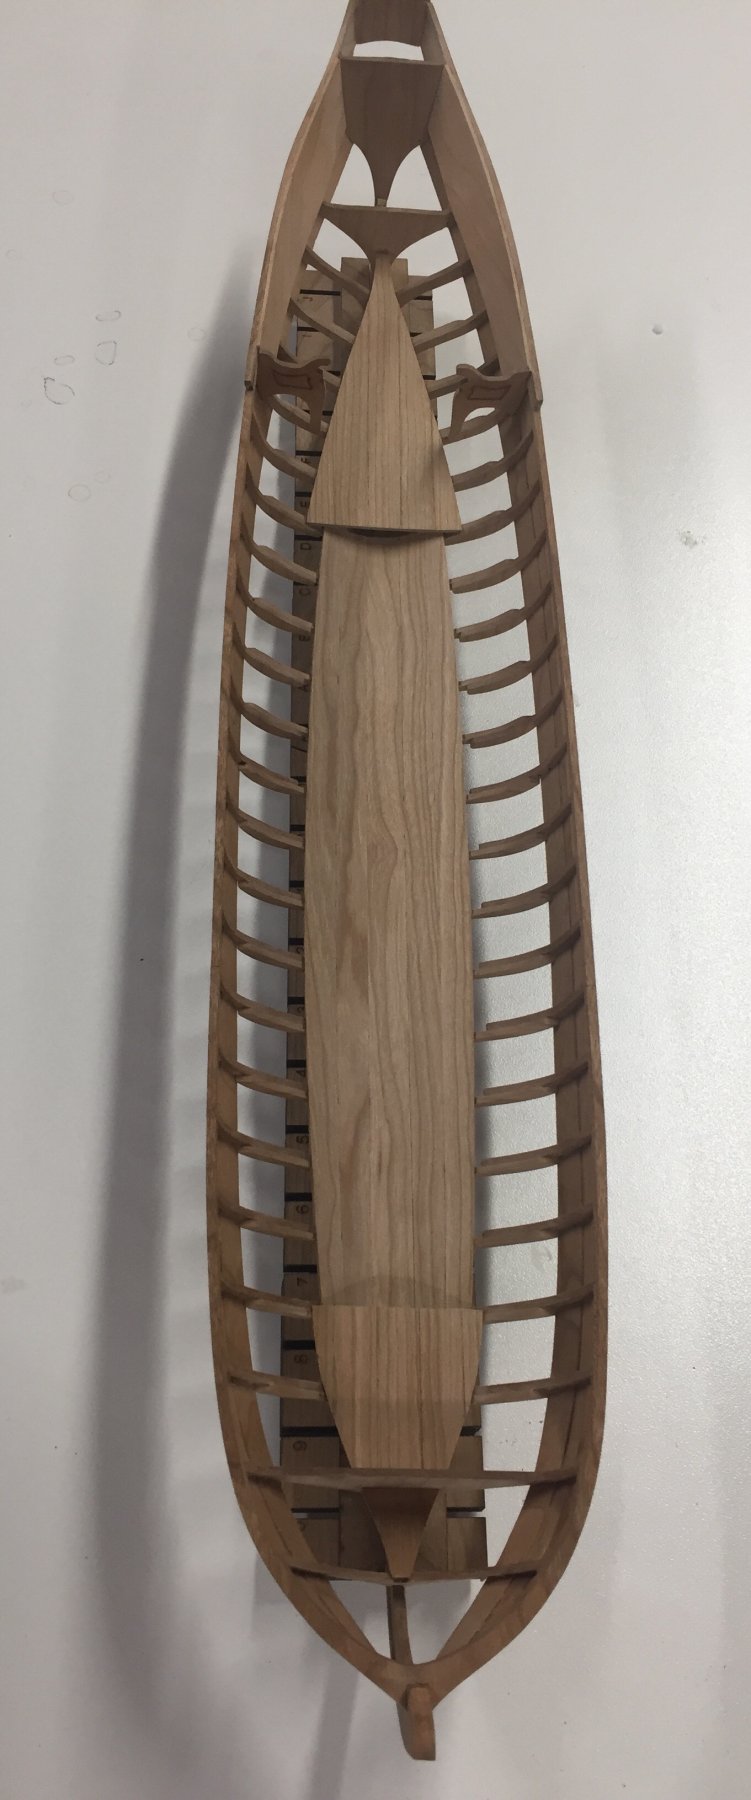
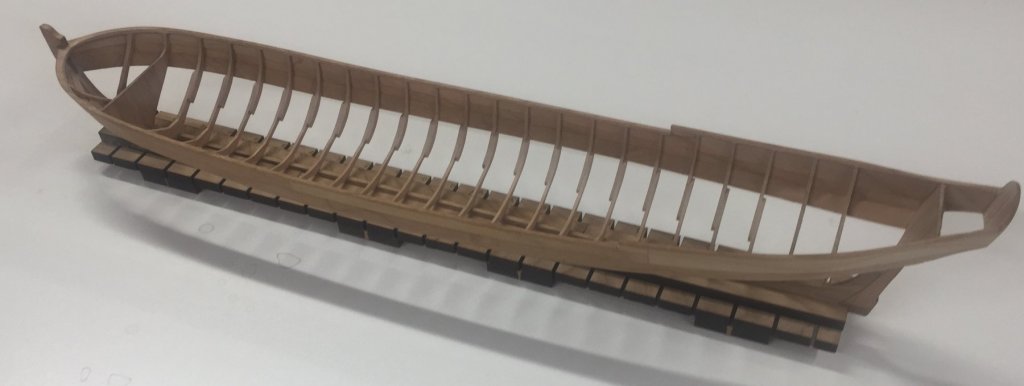
Here is the inboard side sanded down to 5/64 thick and ready for floorboards. ben
- 74 replies
-
- 19
-
-
- queen anne barge
- Syren Ship Model Company
- (and 1 more)
-
Motoring right along there Rusty, nice work as always. ben
- 120 replies
-
- 4
-
-
- queen anne barge
- Syren Ship Model Company
- (and 1 more)
-
That appears to be an acceptable joint there Chris. Whatever way way works best for you is the main thing. ben
-
Chris, I know a few guys who have used the mill to do some joints, however all mine on Pegasus have been done with the disk sander, chisels and files, just took a while to get experience doing it to a good level, and taking my time as well.
-
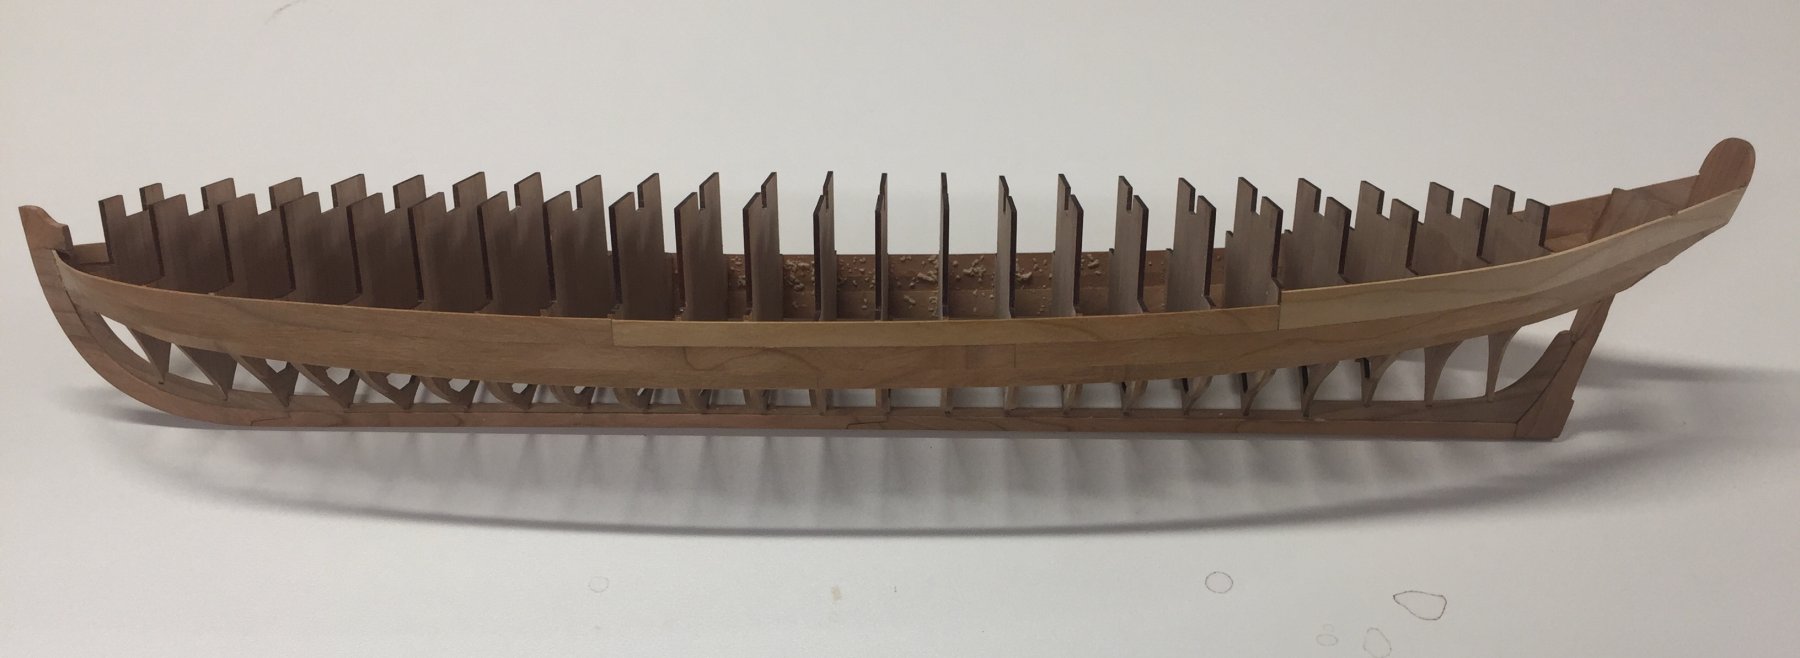
Small update, The frame tabs were removed with no issues, I use a scalpel saw instead of the file that Chuck used. Then the frame tops were sanded down level with the top of the planking and a nice smooth sheer was developed. After that it was an easy job to adjust and install the cap rail and sand it’s outboard edge flush with the planking. Now I will begin sanding the inboard framing and the cap rail until it’s 5/64 thick at the top as Chuck suggests. ben

- 74 replies
-
- 22
-
-
- queen anne barge
- Syren Ship Model Company
- (and 1 more)
-
Chris, “it’s the journey” I keep telling myself when things go wrong on my Pegasus build, which seems to happen far too often. When I talk to some of the greatest modelers and builders on this site I find the answer is always the same, you are trying to recreate the most complex machine that man had ever built at that time, in miniature scale! Learning the tools takes time and repetition but it will come, I couldn’t cut within an inch of a line on my 788 when I started, now I’m running a 64th away as long as I remember to put a new blade in and tighten it right, LOL. Keep your head up brother and keep going. ben
-
Some beautiful carvings on that model. ben
- 74 replies
-
- 2
-
-
- queen anne barge
- Syren Ship Model Company
- (and 1 more)
-
Thanks all, Rusty - I’m sure you will surpass my efforts. ben
- 74 replies
-
- 2
-
-
- queen anne barge
- Syren Ship Model Company
- (and 1 more)
-
So work has been crazy but I finally managed to get some modeling time in on the Barge. The planking part of the build has been completed, and a lot of care had to be taken to get it right. Soaking of the prespiled planks and clamping to the hull and then drying with a hairdryer seemed to work the best for me. i have lightly sanded the planking and will now begin to remove the frame tabs. ben

- 74 replies
-
- 17
-
-
- queen anne barge
- Syren Ship Model Company
- (and 1 more)
-
Nice to see your building a barge too Rusty. ben
- 120 replies
-
- 3
-
-
- queen anne barge
- Syren Ship Model Company
- (and 1 more)
-
No problem Chris, you were the one who taught me a lot about oil finish on your Confed build. Greg - yeh, the pounding away on the Pegasus for the last several years took some toll, I needed a nice quick diversion that shows some faster gratification.
- 74 replies
-
- 1
-
-
- queen anne barge
- Syren Ship Model Company
- (and 1 more)
-
Sam, Couple of things that I have noticed in the past using oil finishes. 1. If you have any glue residue on the wood, when you apply the oil it sits on top of the glue and doesn't soak in leaving a blemish, so make sure to wash off excess glue before it dries, or you will have to sand/scrape it off afterwards. 2. Like you said, first coat gets diluted so it penetrates, leave for 20 mins then wipe off the excess oil. Second coat goes on full strength - leave for 20 mins and then rub off with lint free rag to get a nice deep luster. If you don't rub it off well you will get a more shiny and reflective surface finish that I don't care for. Ben
- 74 replies
-
- 4
-
-
- queen anne barge
- Syren Ship Model Company
- (and 1 more)
-
Sam - The yellow glue I am using is Titebond3 ben
- 74 replies
-
- 1
-
-
- queen anne barge
- Syren Ship Model Company
- (and 1 more)
-
Mike, I was using a very flexible battern made out of holly to check the lay between frames while I progressively sanded to what I thought was a good result ( same as what I did on my Pegasus POF ) which turned out to be just enough to remove the laser char completely from the frames. ben
- 74 replies
-
- 3
-
-
- queen anne barge
- Syren Ship Model Company
- (and 1 more)
-
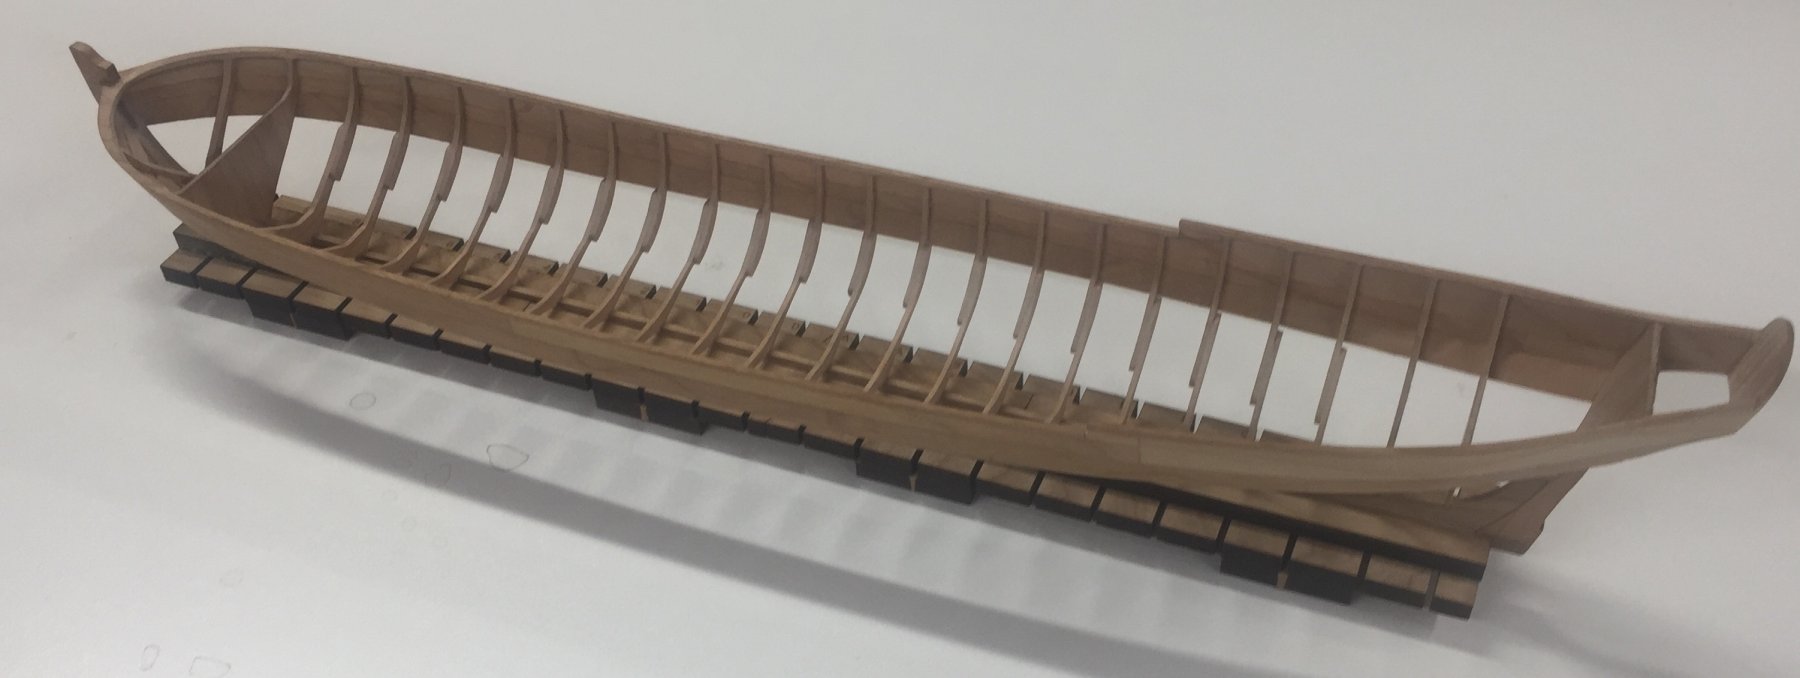
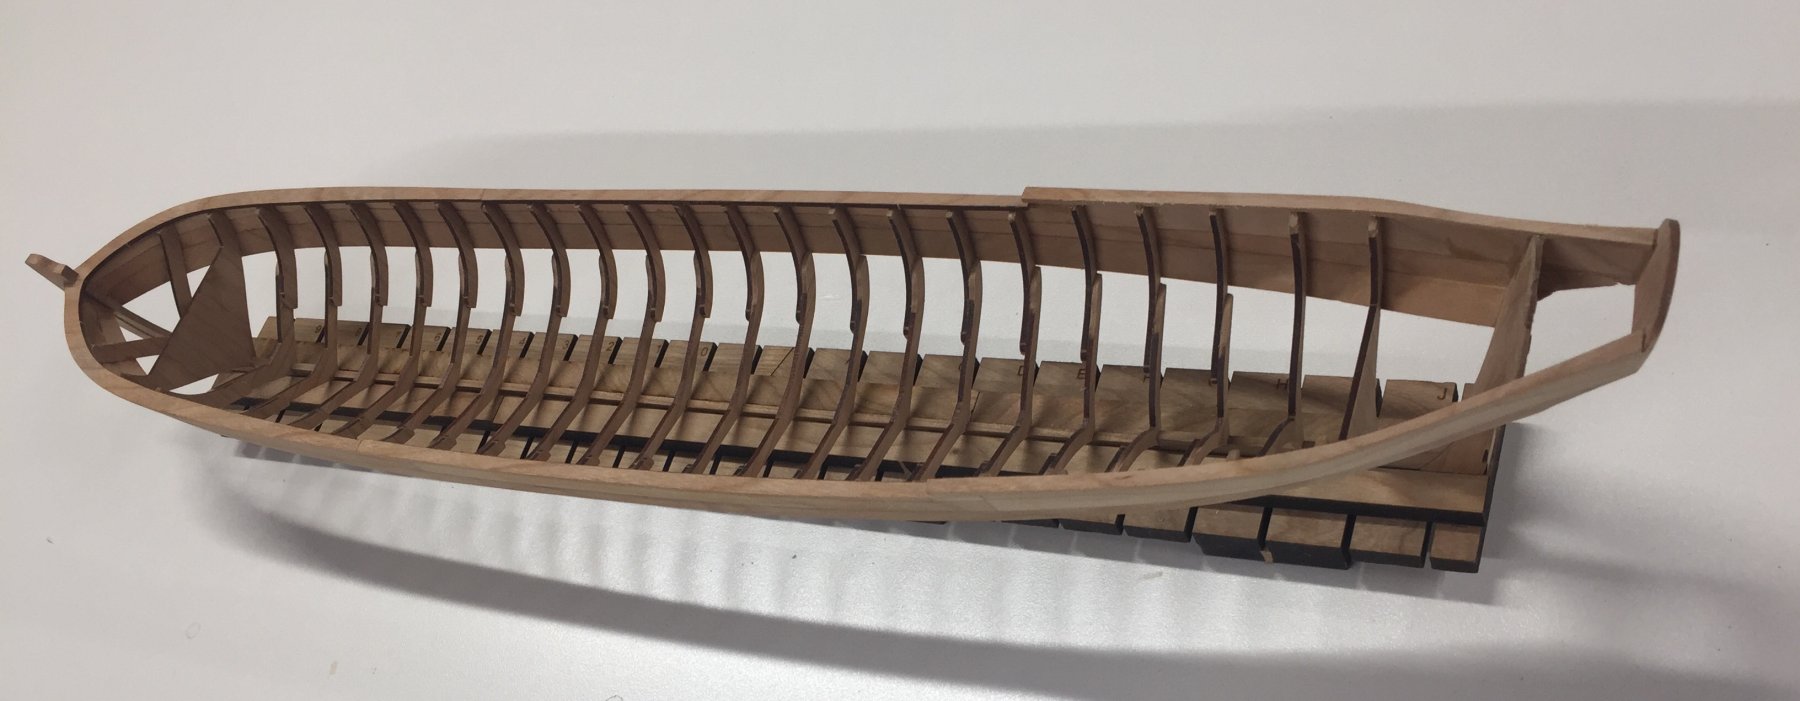
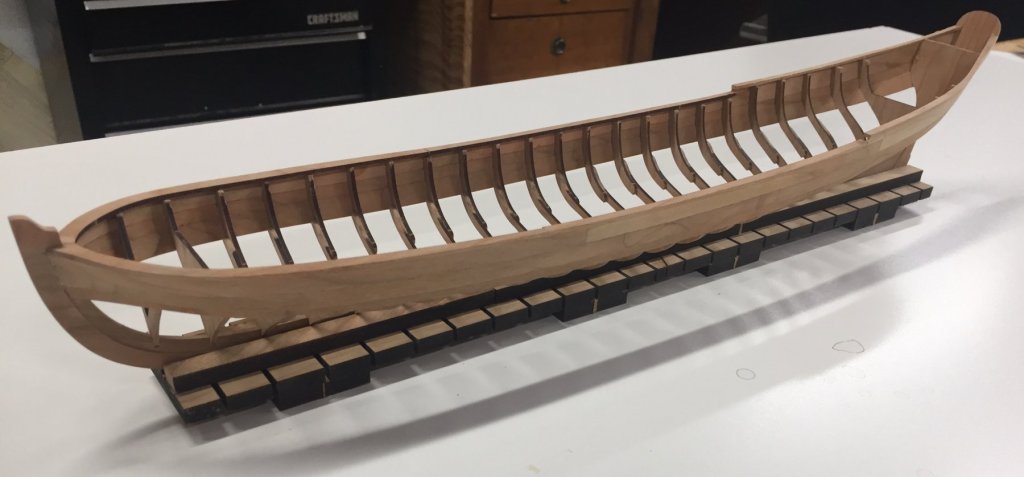
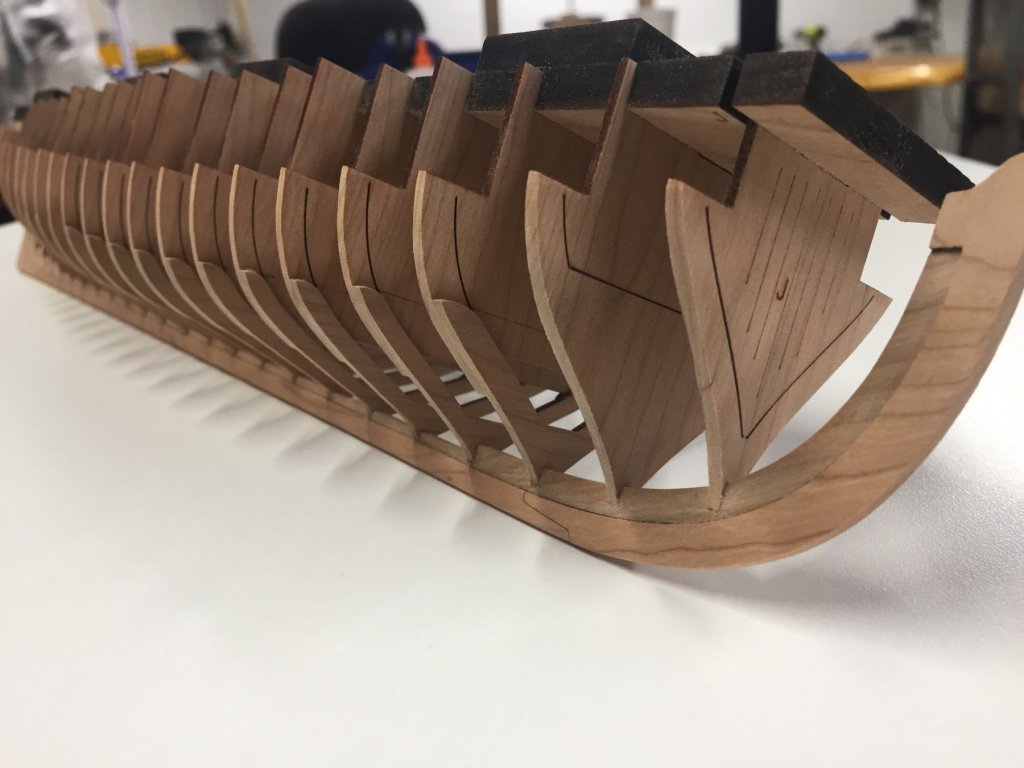
Here are some pictures of the framing that has now been faired using medium grit paper and emery boards. A lot of care needs to be taken to not break any of the frames and the tiny tabs that hold them together, and even then I had a few whoops moments. Ben

- 74 replies
-
- 20
-
-
- queen anne barge
- Syren Ship Model Company
- (and 1 more)
-
Chuck - yep she’s a fun build but only just getting going you know. Sam - most of the slots needed some small adjustment to get just perfect. I have not used any sealer so far as I haven’t decided between WOP or an oil finish like Tung/Watcos. ben
- 74 replies
-
- 5
-
-
- queen anne barge
- Syren Ship Model Company
- (and 1 more)