Trussben
-
Posts
1,995 -
Joined
-
Last visited
Content Type
Profiles
Forums
Gallery
Events
Everything posted by Trussben
-
 Chris, I use a Worksharp 3000 model electric sharpener designed for chisels and plane blades. Costs about $175. Comes with two glass plates and four grades of abrasive to stick to both sides of the plates, 100,400,1000,4000 grit. When I’m normally sharpening I’m just using the 4000 side and it takes the burr off the back with a separate piece of 4000 that it rests on. Has a rack that the back of your chisel rests on that has preset and repeatable angles set into it. You can also purchase a leather hone plate if you want to go to a pure mirror finish, however I find the 4000 is plenty sharp enough for almost anything I do and only takes a few seconds to maintain silly sharp edges. ben
 -
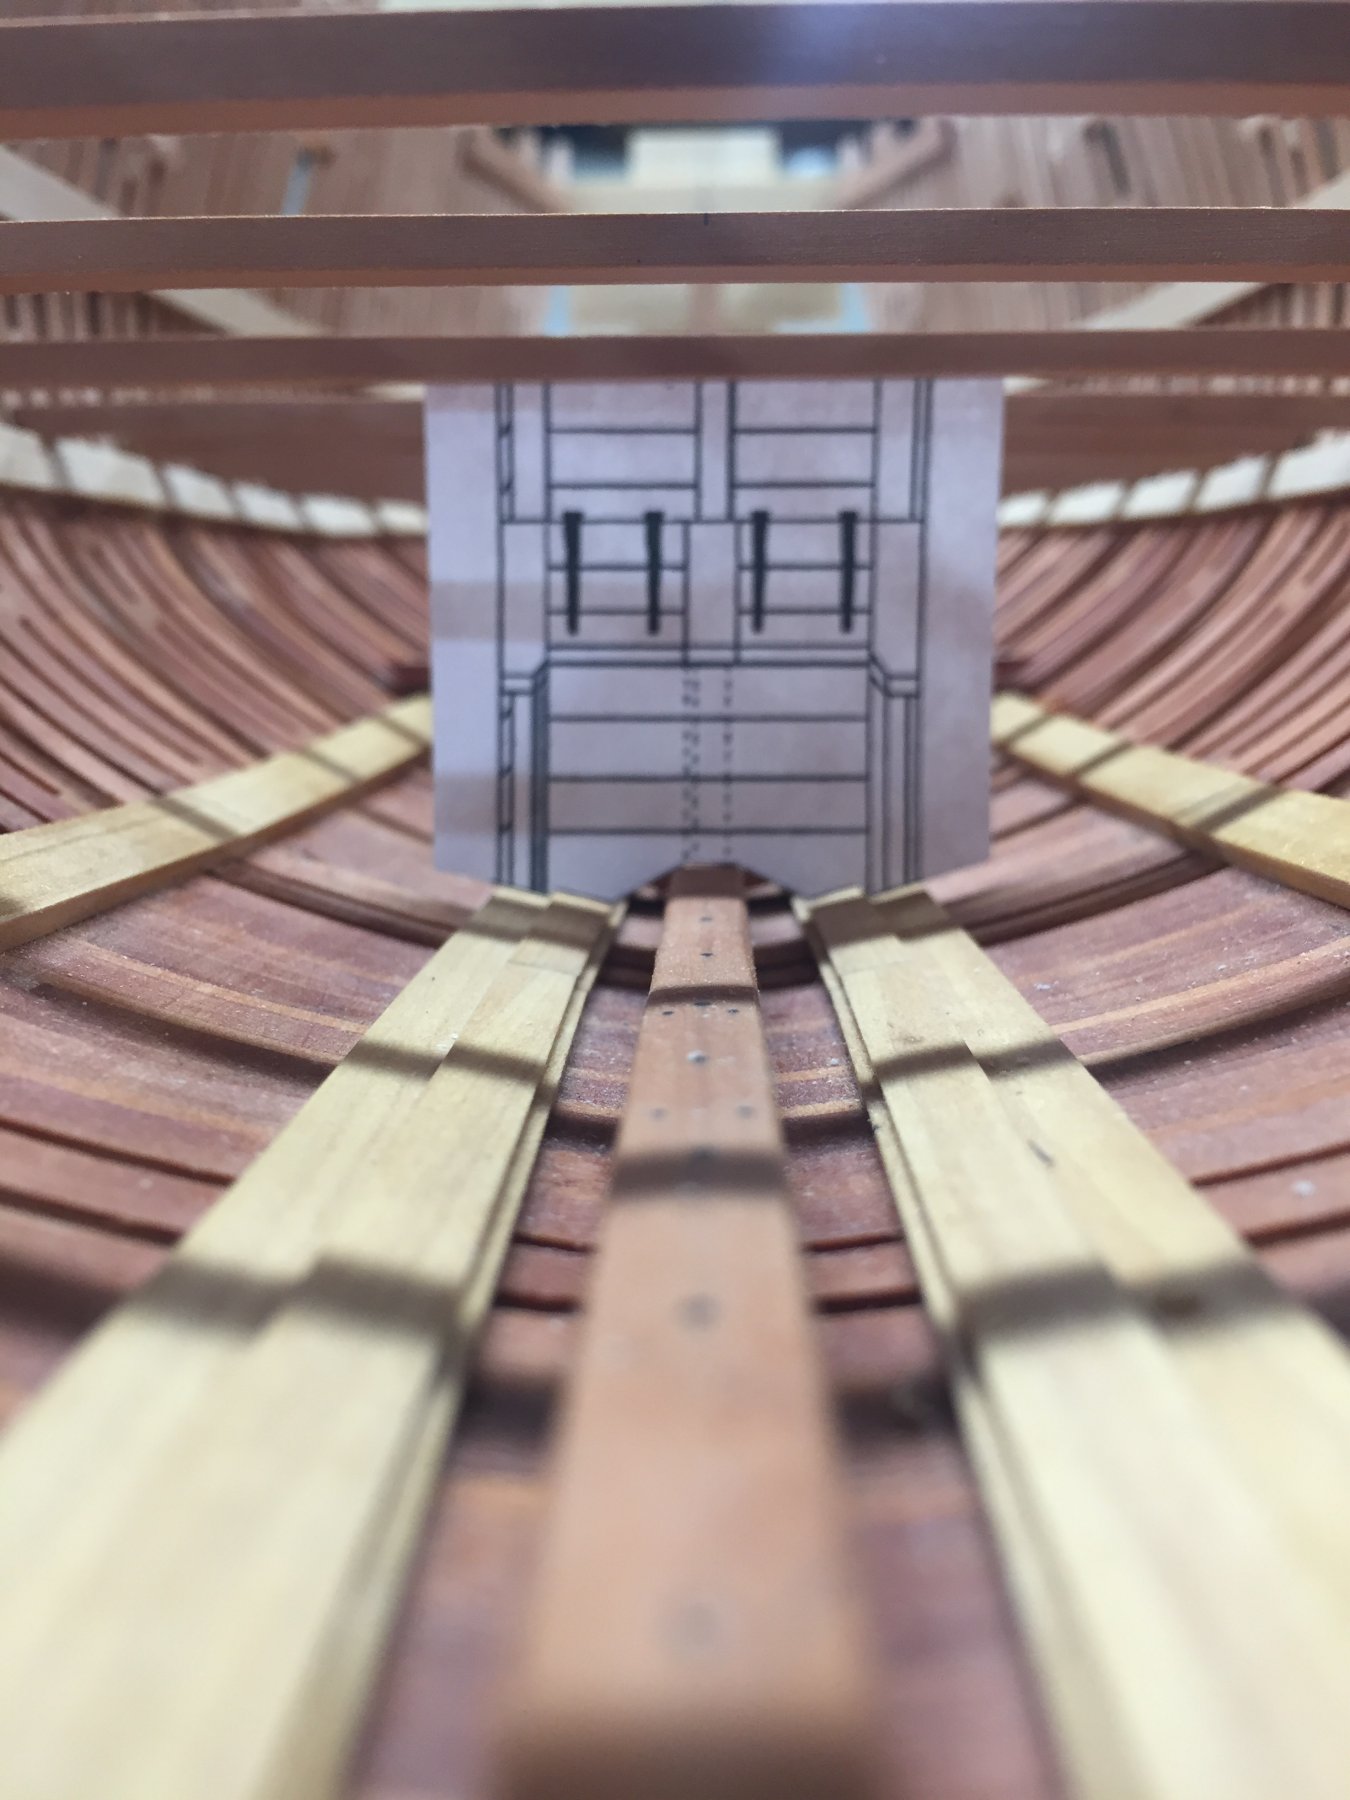
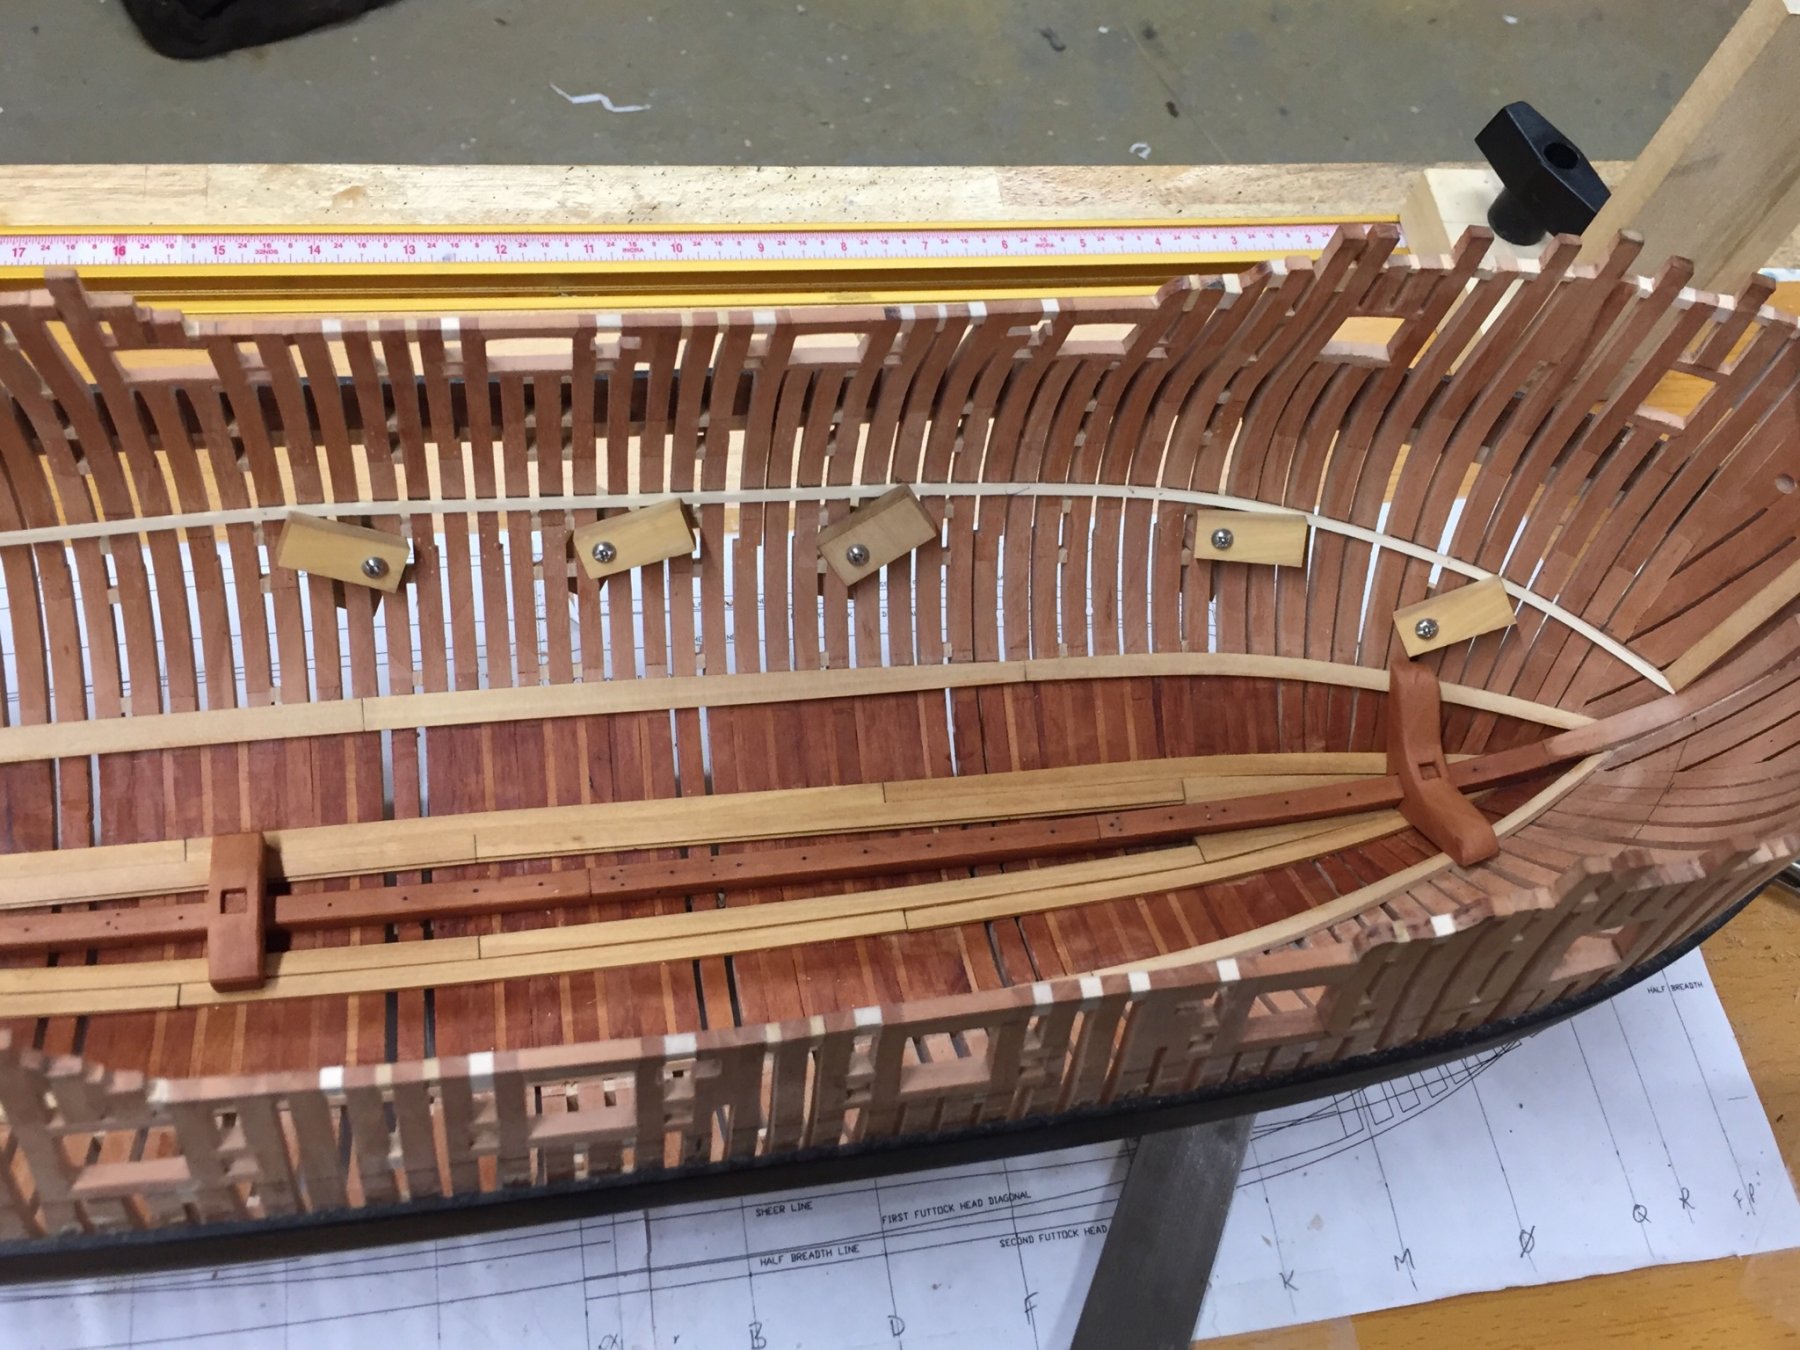
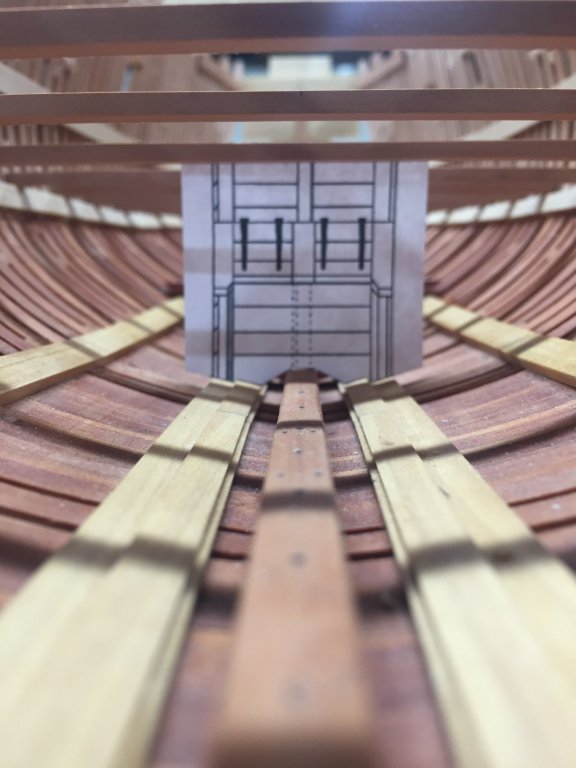
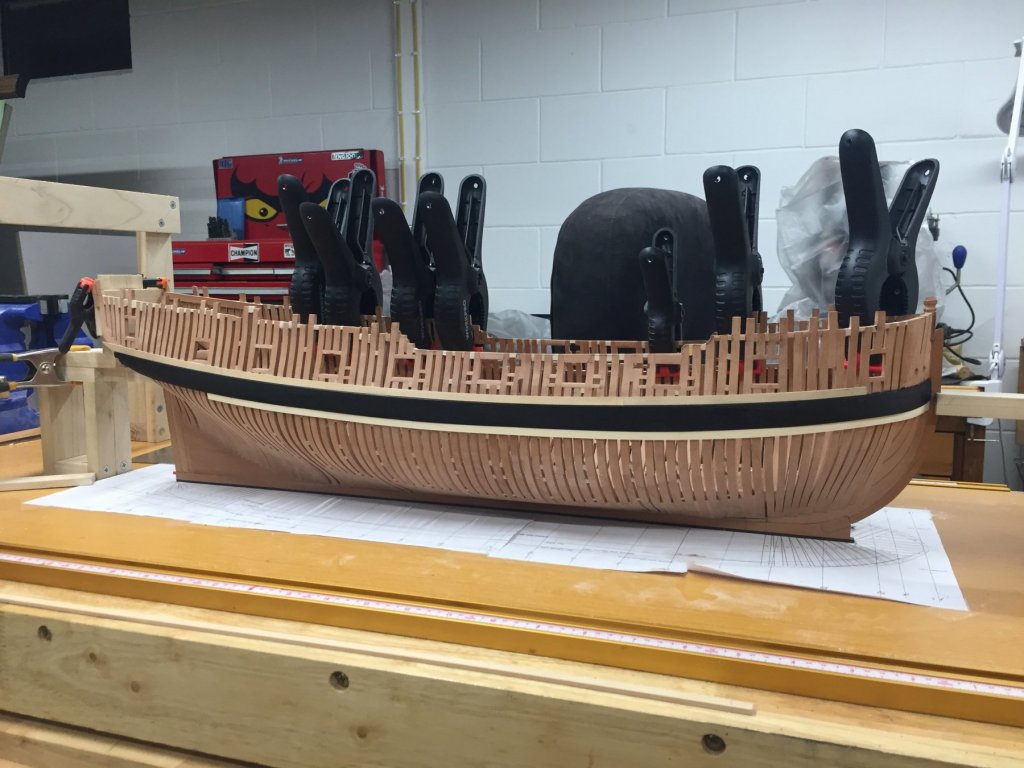
Thanks for all the likes. Im thinking of maybe including the well so I decided to do a size and position check using the TFFM example shown in the book, seems to be a good fit in my hull. ben
- 889 replies
-
- 19
-

-
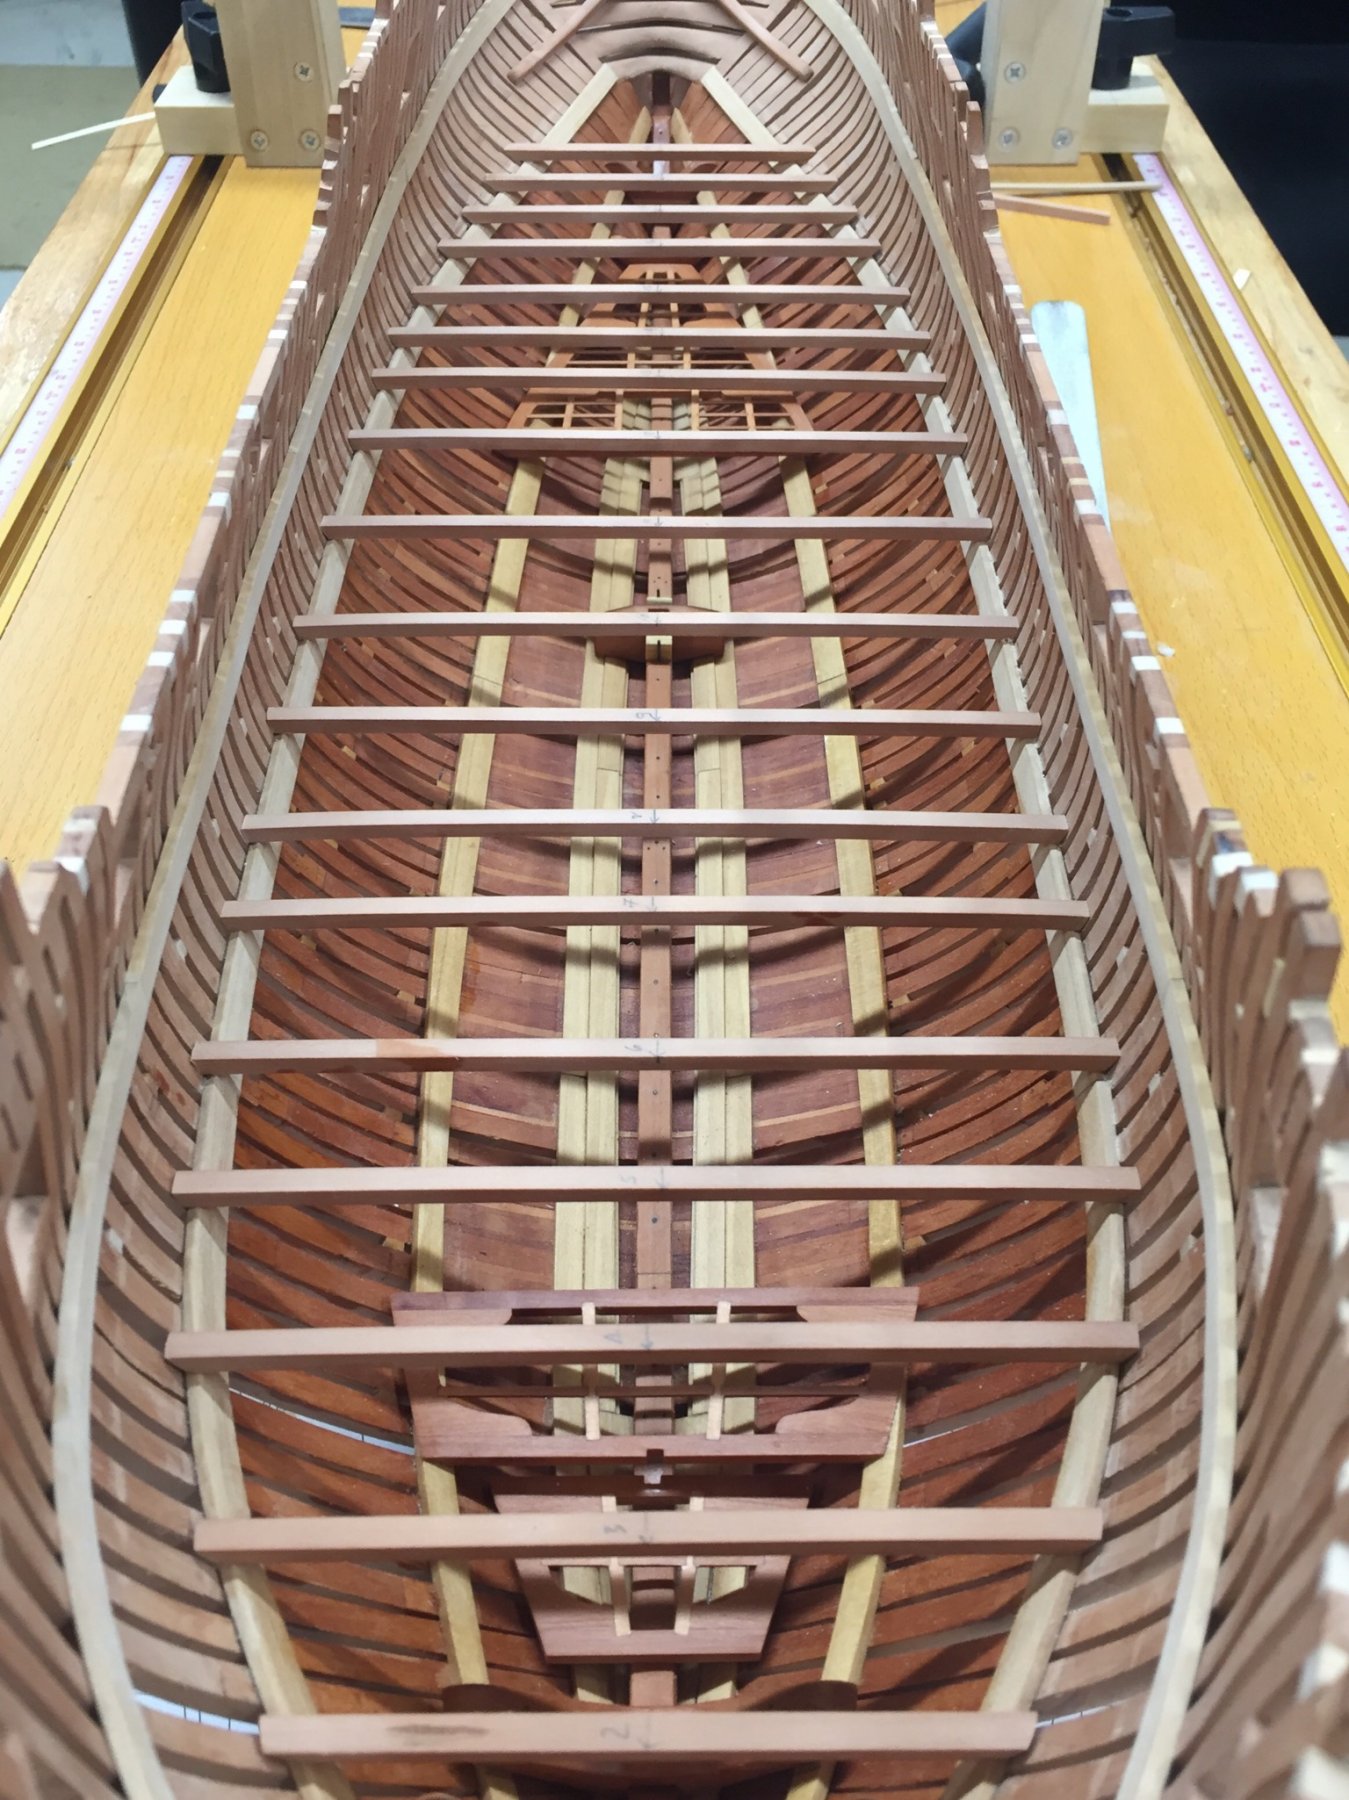
Here are the lower deck beams cut and shaped to length and temporarily installed so as to check positioning. I may remake a couple of them to get a better fit against the hull. You may also be able to spot the transom sleepers at the far end of the picture which still need their bolts to be complete. Happy Holidays to MSW. ben
- 889 replies
-
- 24
-
-
HMS Naiad 1797 by albert - FINISHED - 1/48
Trussben replied to albert's topic in - Build logs for subjects built 1751 - 1800
Beautiful joinery Albert. ben -
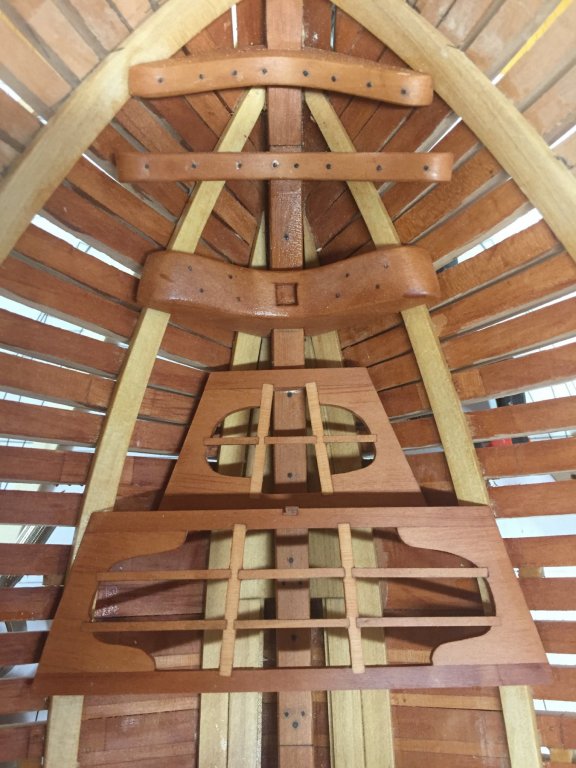
Thanks for all the likes and comments. Here are the two forward platforms, foremast step and the upper and lower breasthooks installed. ben
- 889 replies
-
- 27
-
-
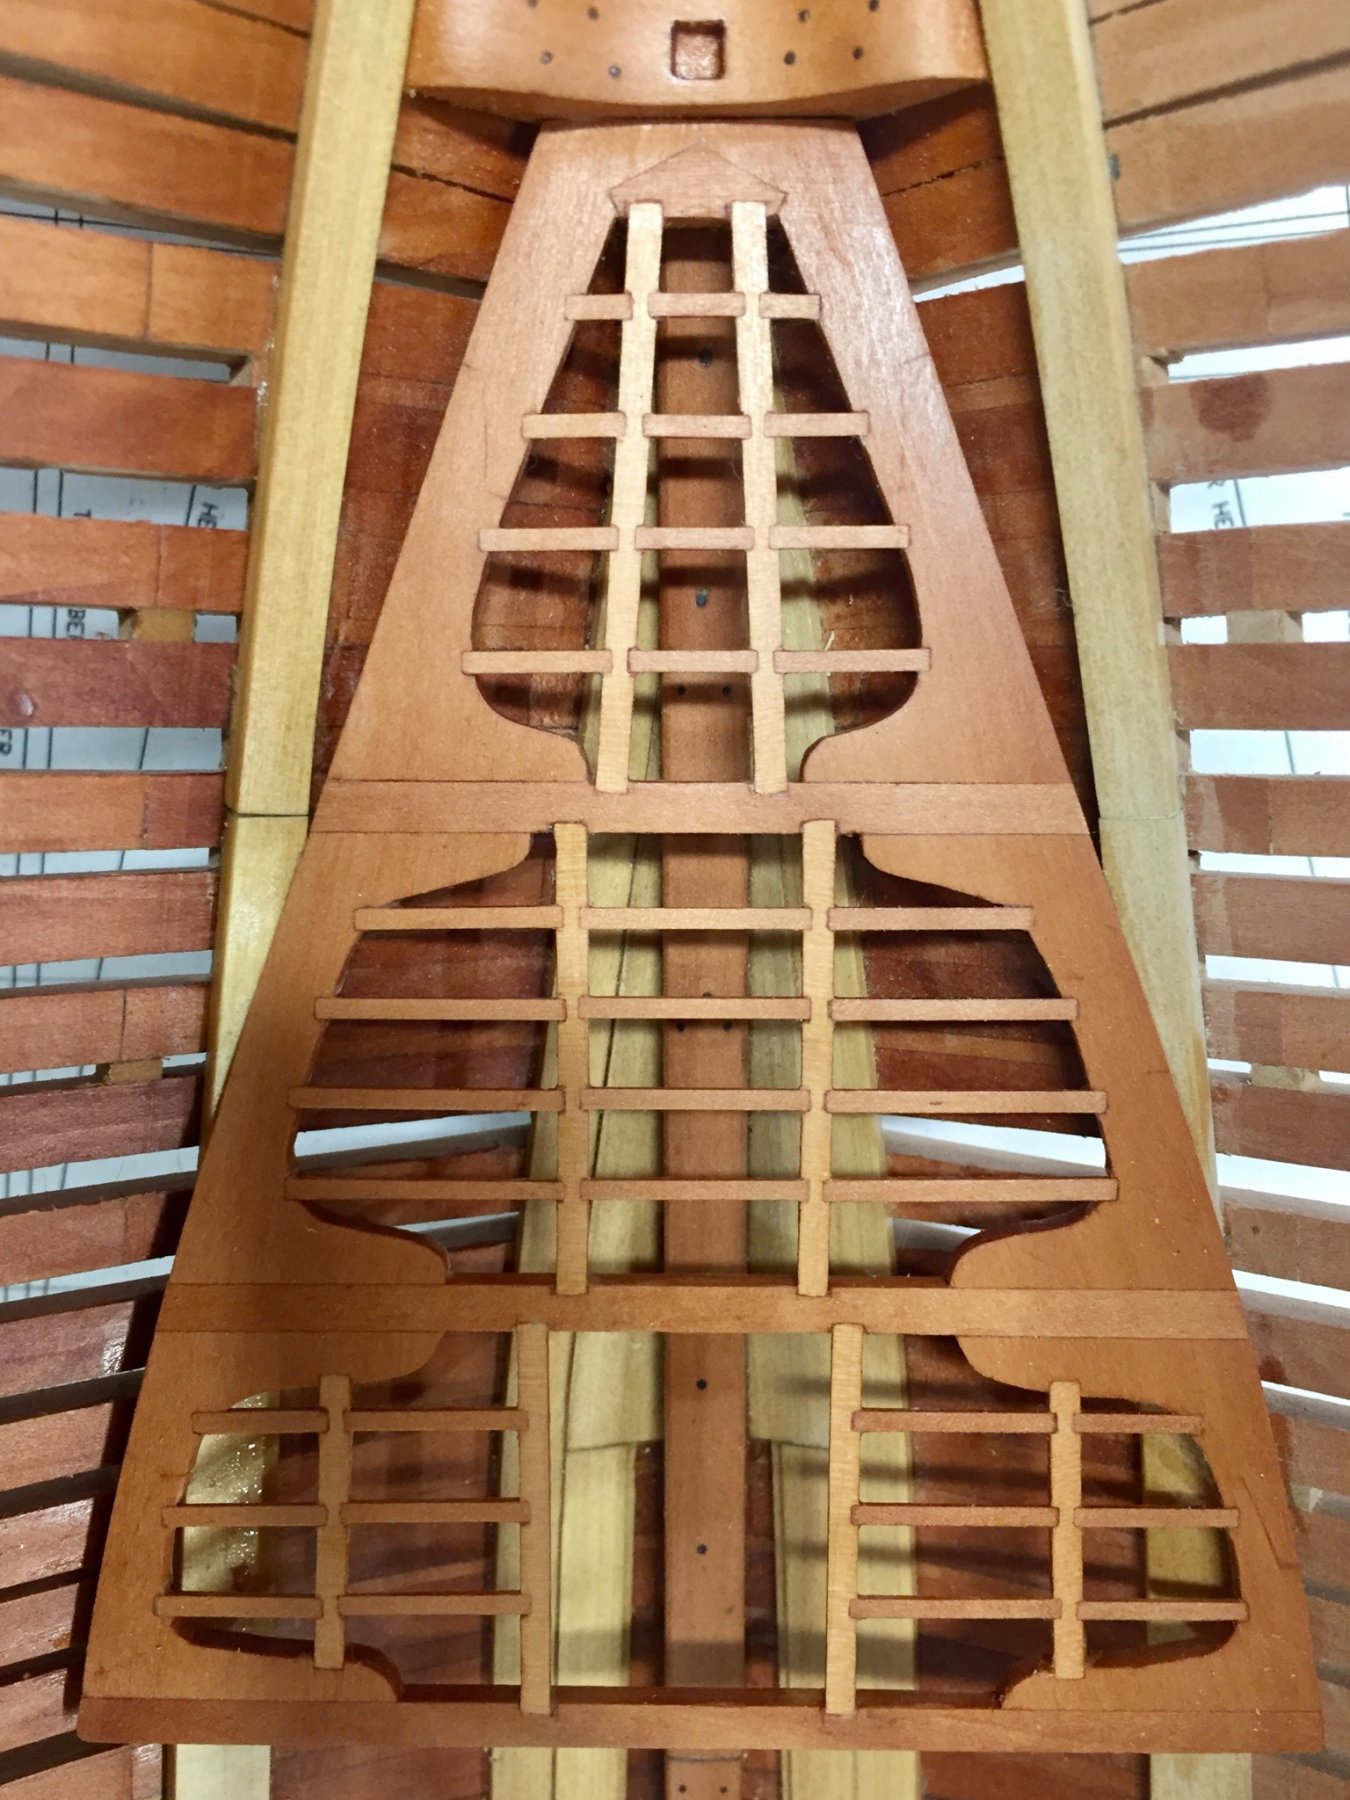
Aft platform and mizzenmast step completed and installed. The tenons for the carlings and ledges were fun to make at their size with a good fit. ben

- 889 replies
-
- 30
-
-
Stabilizing wood is basically under vacuum forcing CA glue or another medium into the wood sample. Used a lot in pen making with oddball wood species that do not turn well, makes it harder and better/easier to turn. ben
-
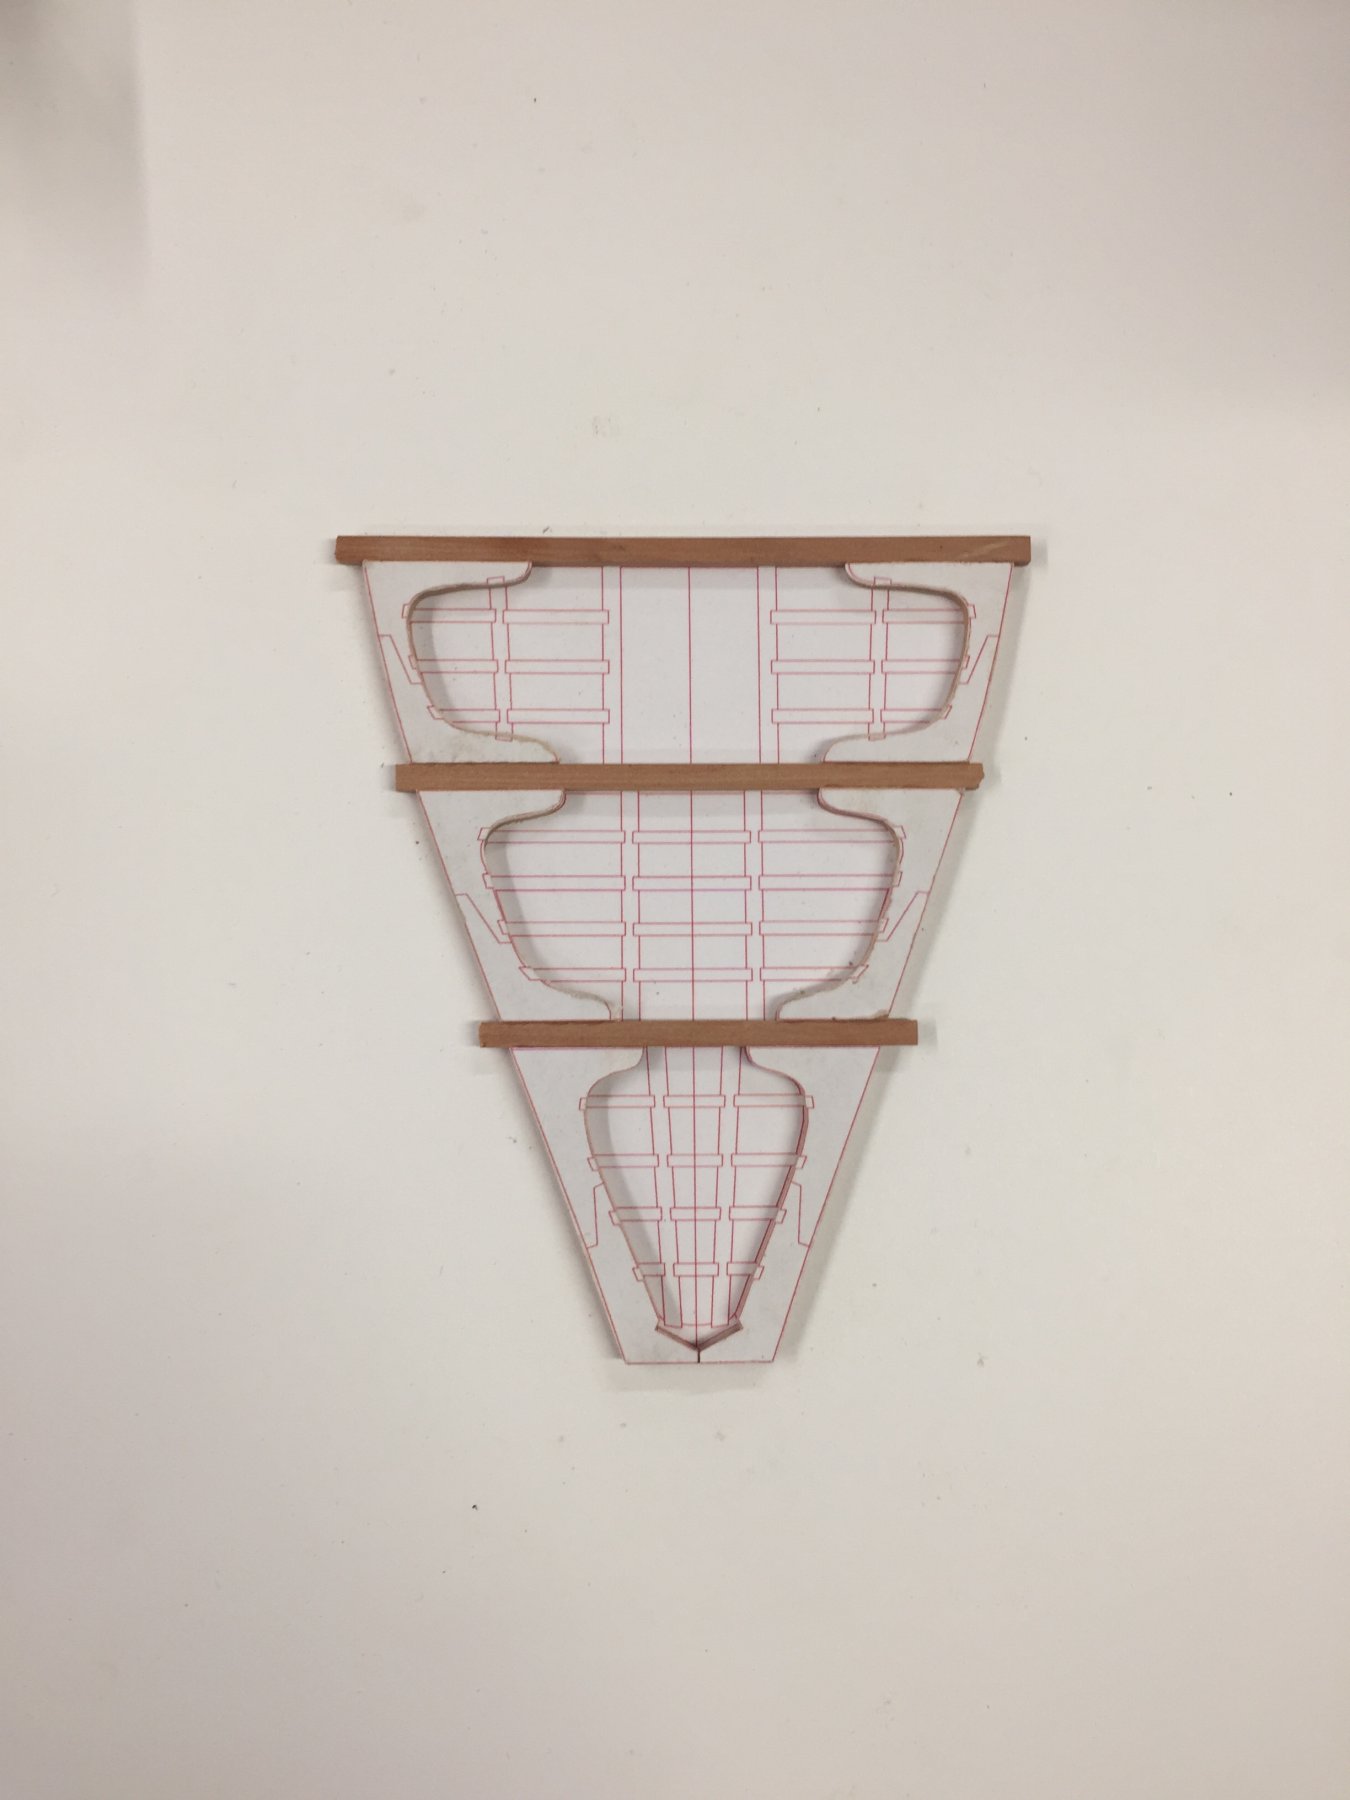
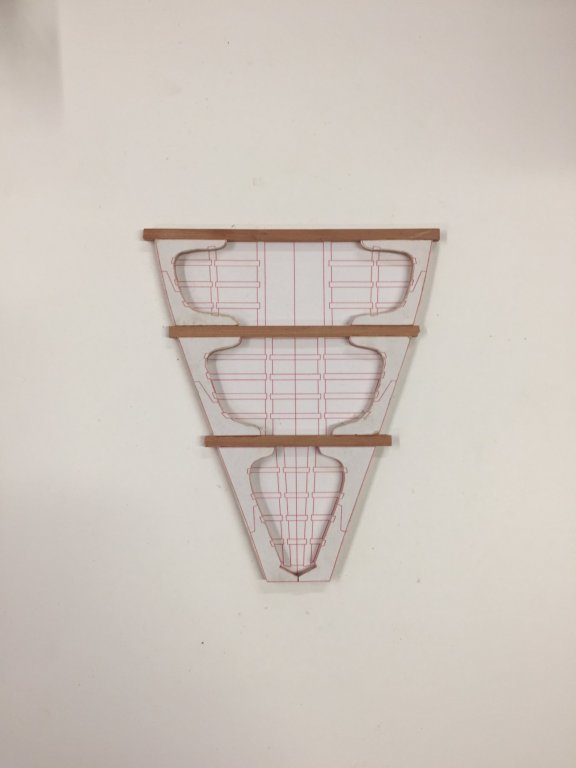
I’ve started playing around with the Aft platform, layout came from TFFM, Knee joints will be simulated on this version. ben
- 889 replies
-
- 16
-
-
Hi Graham, I’m enjoying your build, good luck with the Hawse timbers - they slowed me down on my Pegasus build. ben
-
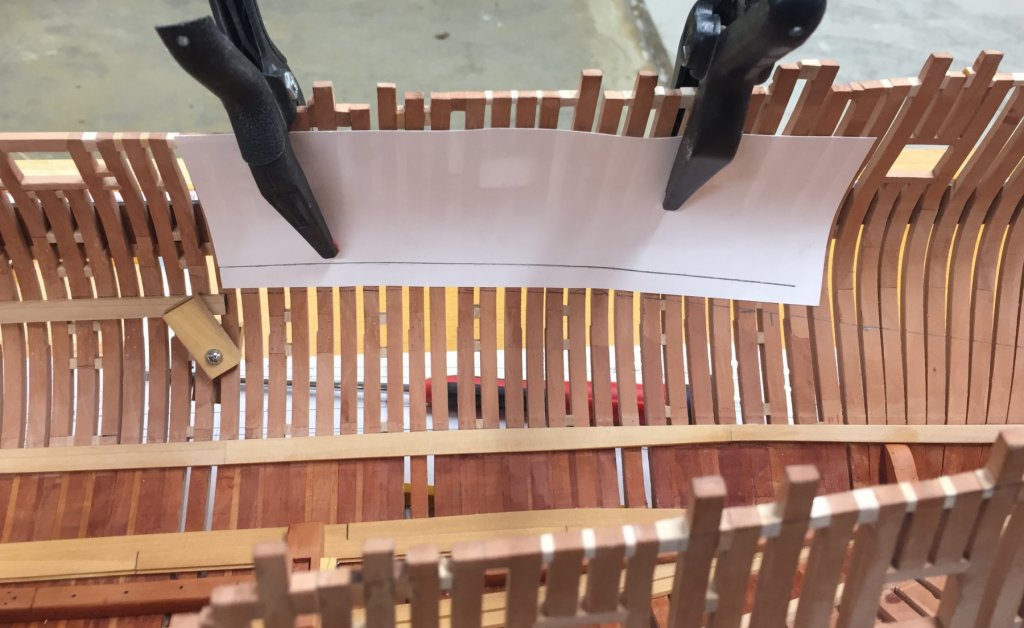
Here is how I do the spiling of the internal planking using card stock and a compass.
- 889 replies
-
- 19
-
-
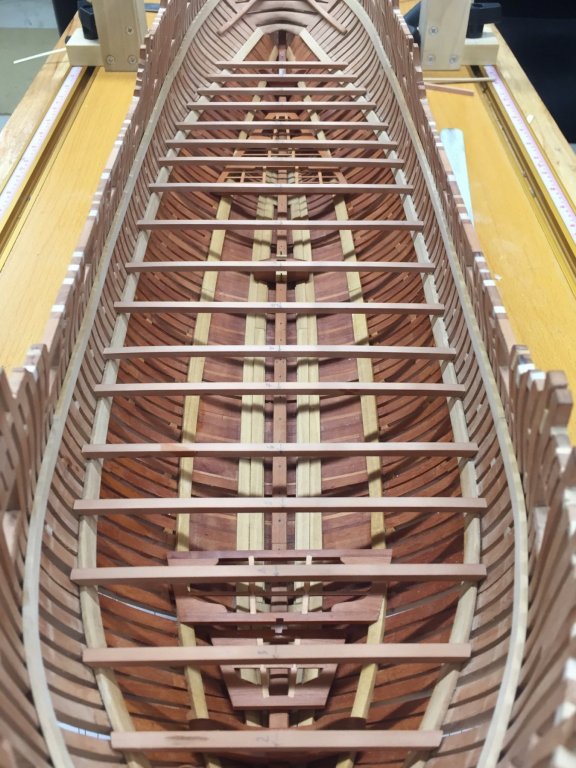
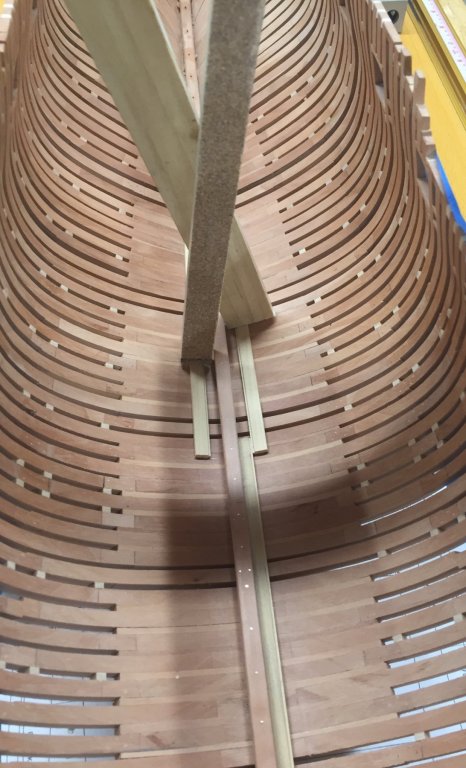
Work continues on the internal framing and mast steps. Im using a flexible Holly battern for marking out the height of the lower deck beam clamp in the picture. Im not going to follow the exact planking expansion for all the internal stuff that will disappear when the lower deck framing is installed - captains choice for a simpler and cleaner look to show more framing. ben

- 889 replies
-
- 24
-
-
She is very pretty Rusty. Up to your usual excellent standards. ben
- 310 replies
-
- 2
-
-
- cheerful
- Syren Ship Model Company
- (and 1 more)
-
Chris For Caulking, make sure you do some tests before committing to the model, some things will bleed ( sharpie, India ink ) especially on end grain, or when you put your final finish on. I tried black paper in keel scarphs originally but it makes the joints weaker. I’ve used pencil with great results as I don’t like my caulking to look too obvious and you can increase decrease the affect by putting pencil only on one edge or both. One thing I haven’t tried is the aforementioned colored glue. Looking good. ben
-
Chris - scroll saw speed is a function of blade type/size and of course material hardness/thickness. I find on my DW788 that using a #3-5 blade on pear below 1/4” thick I’m running between 3-4 speed setting for best results . What do you see? ben
-
Cant frames sure are fun to make, I think only beaten by the hawse/bollard timber’s. ben
-
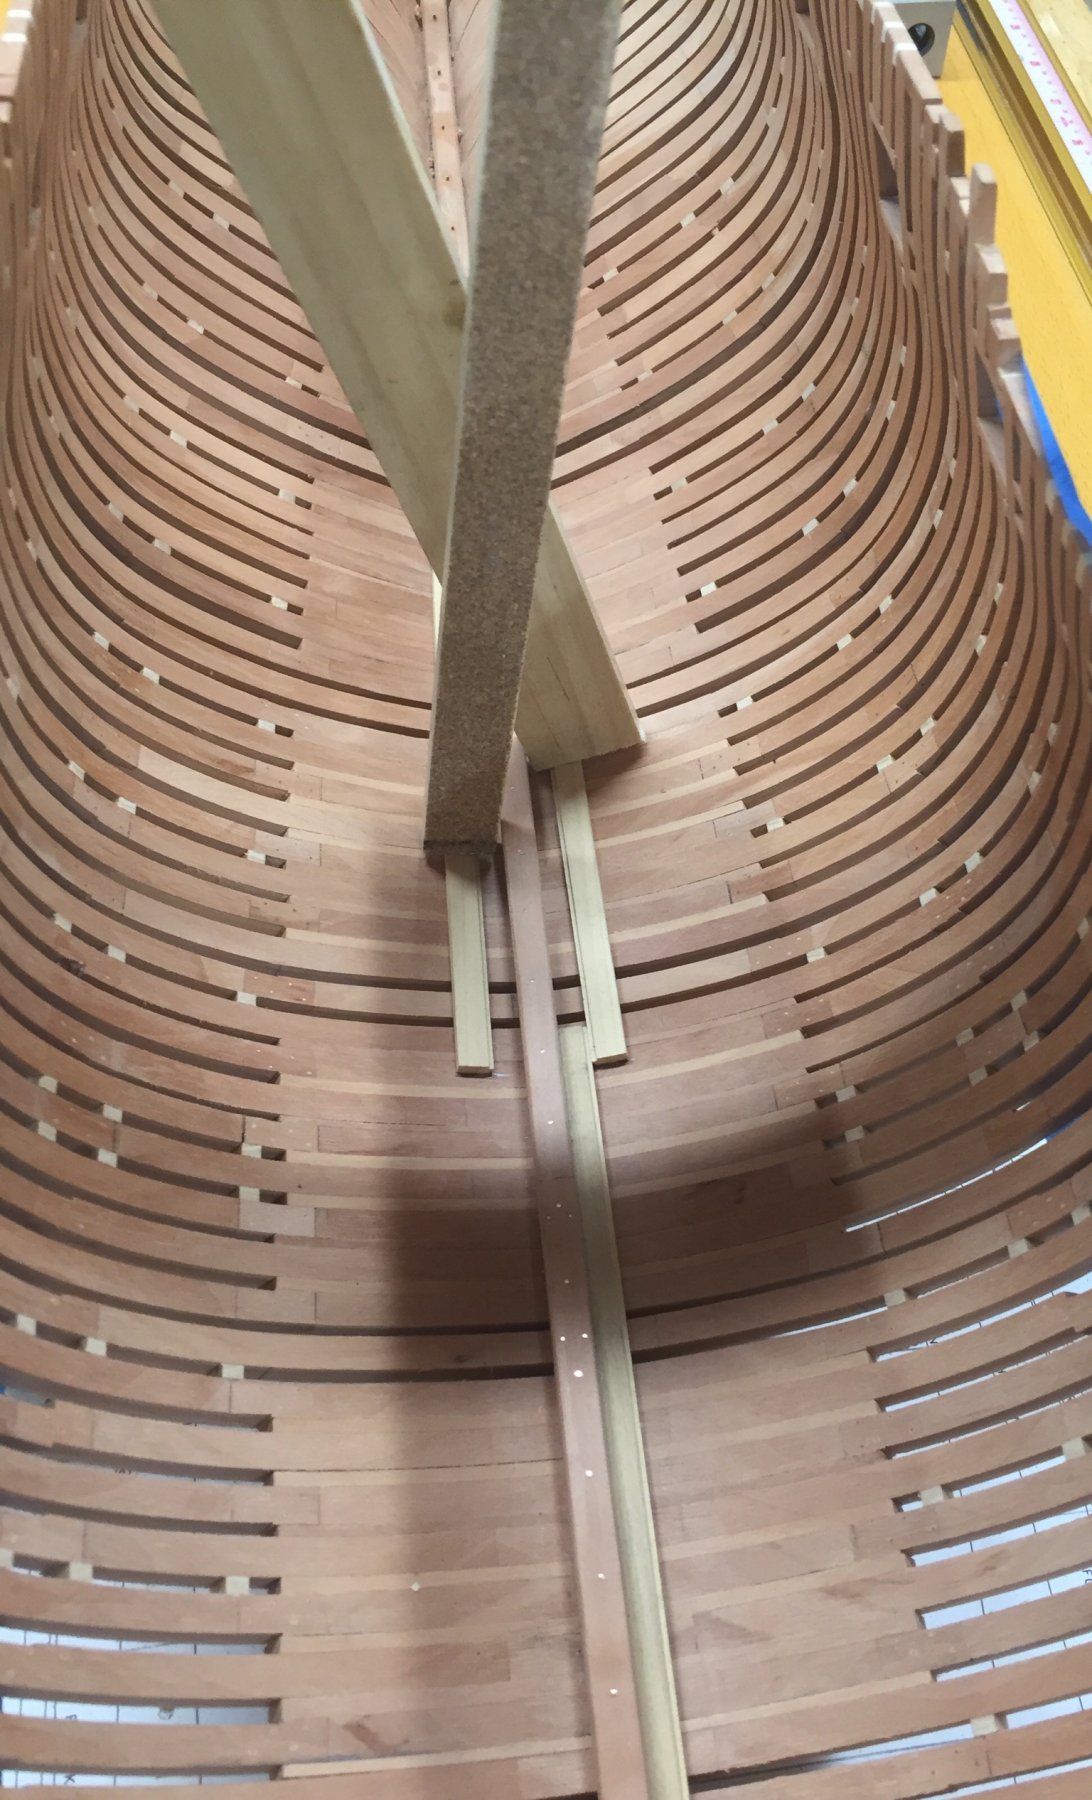
Hi, The pictures show installation of the limber strakes next to the Keelson has begun. These strakes have a rebate set into them that was cut using the Byrnes saw, they are 12 inches wide and 4.5 thick and are made out of boxwood. The Kelson has also had its copper bolts installed as per TFFM and they are awaiting blackening with LOS. ben

- 889 replies
-
- 20
-
-
John, i used a few different ways to avoid the bleeding of the dye into unwanted areas. First I use a sharp blade to score the surface of the limit of where the dye can get to which creates stop line. Also I use some good quality masking tape ( tamiya ) at the edge and then again some normal blue painters tape in the surrounding areas. ben
-
Hi, and thanks for all the likes and comments. John, the Wales are in Top and Butt style and made out of Swiss pear just like the hull framing and then dyed black using Fiebigs black leather dye with several coats. Between coats I used a scraper to smooth them and a fine sandpaper to create a fine black dust which gets forced into any tiny gaps between the planking - this was finally buffed with a soft cloth, then 4 coats of Watcos oil was applied and then also buffed to give a deep luster. This makes the planking seams almost disappear until you get up real close. The problem using dye is that it can bleed into other areas ( framing ) and you have to be careful with its application. I didn’t use ebony as it’s very hard and brittle and doesn’t bend well at all, I have a load of ebony on my wood rack but will just use it for small or straight pieces for highlights or small pieces. Hope that helps ben
-
Work on the main Wales is underway, I’ve decided to put one strake of Holly below the Wales, and Boxwood planking above. I’m hoping it ‘pops’ the way I want. ben
- 889 replies
-
- 28
-
-
Hi Mark, I made myself such a tool a few years ago, from my dremel box misc box I found a round felt polishing disc to which I glued some 180 grit paper. Works good for fast removal but I have caught myself a few times taking to much off. ben
-
Hi Chris, Glad you have finally fixed your mind on the next build. The Renommee is a beautiful ship in my opinion, but a difficult one to model - I’m sure she will give you lots of challenges and excitement. Ebony has its own charms, it also has its own issues, your choice if you want to battle with it. I will look forward to watching your build as you progress, love what you are doing and don’t try to rush man - that’s the mantra I’m trying to follow ( hell - I’ve built two models so far of the same ship and I’m still trying to get to the halfway point LOL ) ben
-
Agamemnon and Vanguard twin ships?
Trussben replied to semorebutts's topic in Nautical/Naval History
Sister ship of the HMS Agamemnon 64 was the 64 HMS Indefatigable, both built at Bucklers Hard. ben