


mbp521
-
Posts
989 -
Joined
-
Last visited
Content Type
Profiles
Forums
Gallery
Events
Posts posted by mbp521
-
-
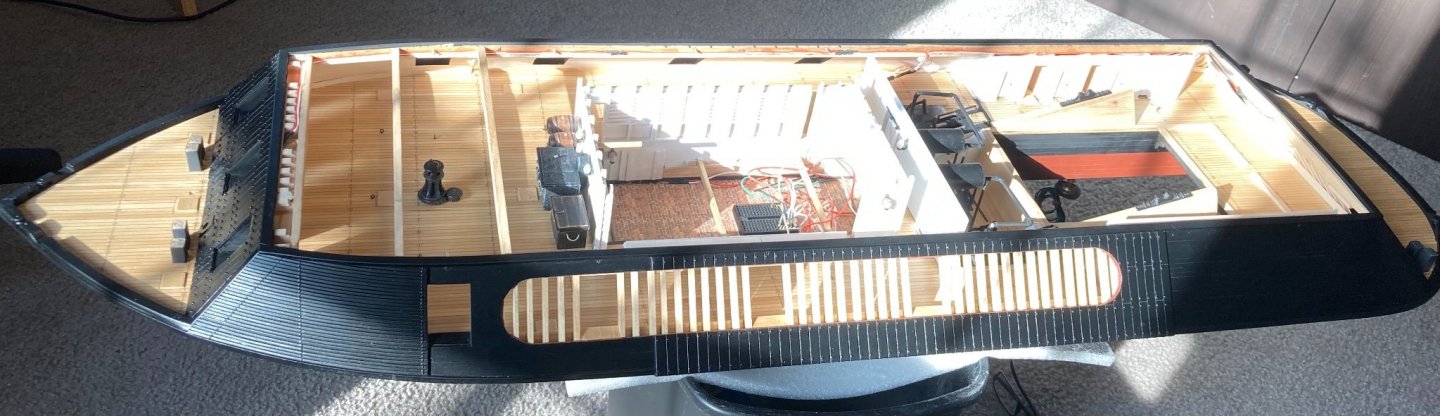
Mark,
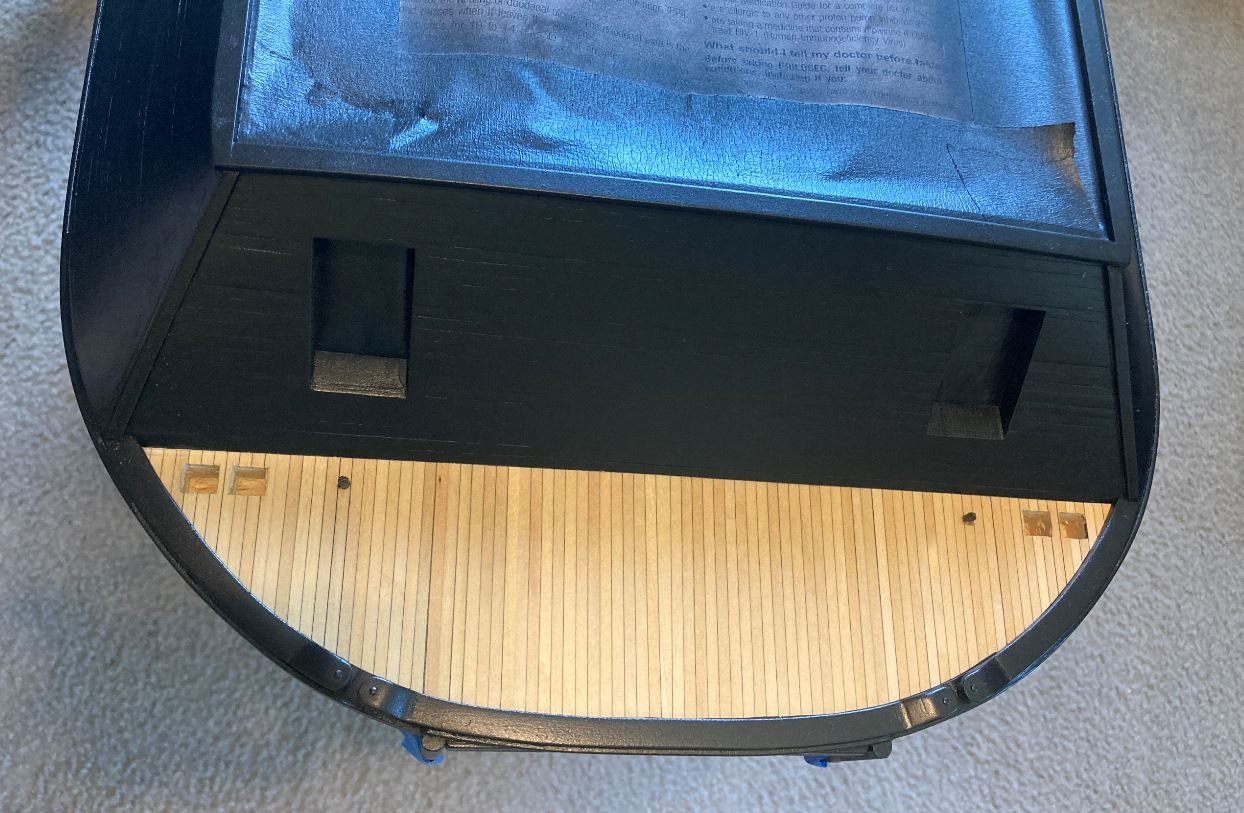
After I posted the shots above and it dawned on me that quite possibly you were wanting a side view with the hull color and cutaway in the same view. If not, well here’s an extra picture. 😁
-Brian
- Canute, Nunnehi (Don), FriedClams and 6 others
-
 9
9
-
Pat/MCB/wefalck/Eric,
Thank you all for the valued input. I am definitely happy with the way the colors turned out.
-Brian
- mtaylor, Keith Black, Cathead and 1 other
-
4
-
15 hours ago, Keith Black said:
Brian, I was originally unsure but seeing it done I like it a lot. As Mark requested, more photos if possible, please.
You need this for your Cairo collection.
https://www.ebay.com/itm/154046974912?hash=item23ddea4bc0:g:kwsAAOSwuhZeY~OY
Keith,
Now there is a tempting purchase. I could incorporate Selfridge’s signature into the display somehow when I’m done. What a conversation piece that would make. Thanks for the link.
-Brian
-
15 hours ago, mtaylor said:
I like it also. Usually, cut outs I've seen are rather irregular but with yours I think the paint sets it off so a viewer won't think it's part of the hull. Can you post a photo from side?
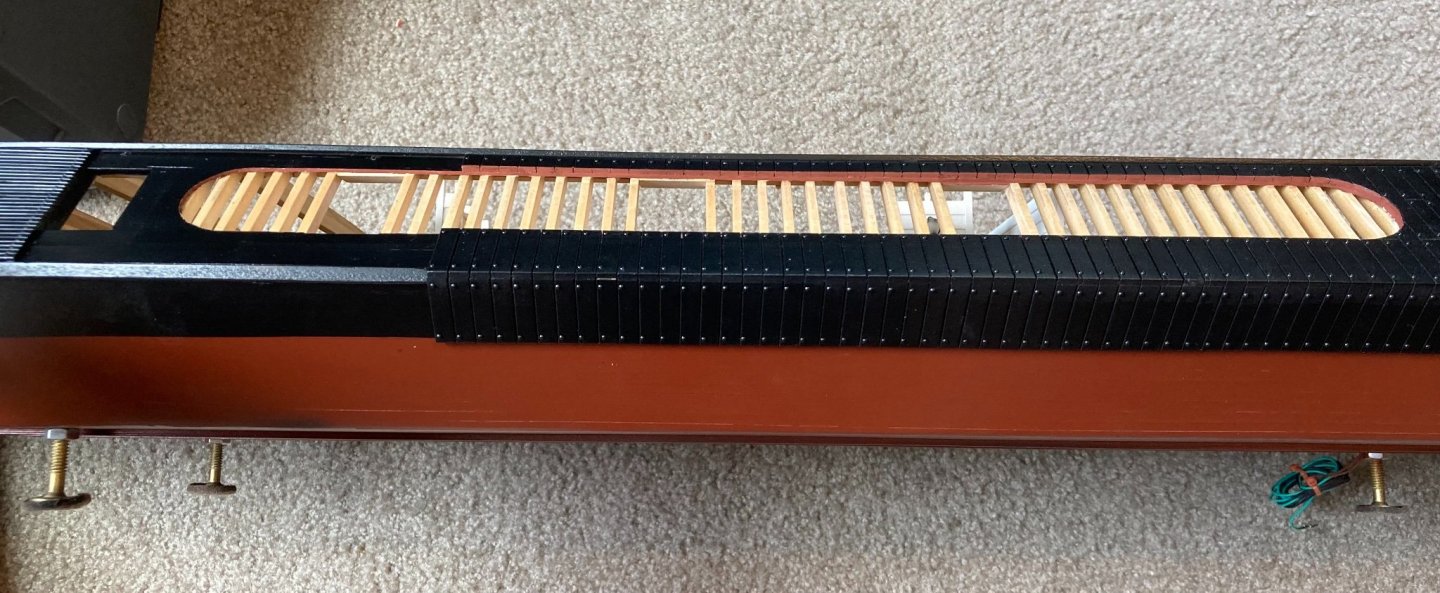
Mark,
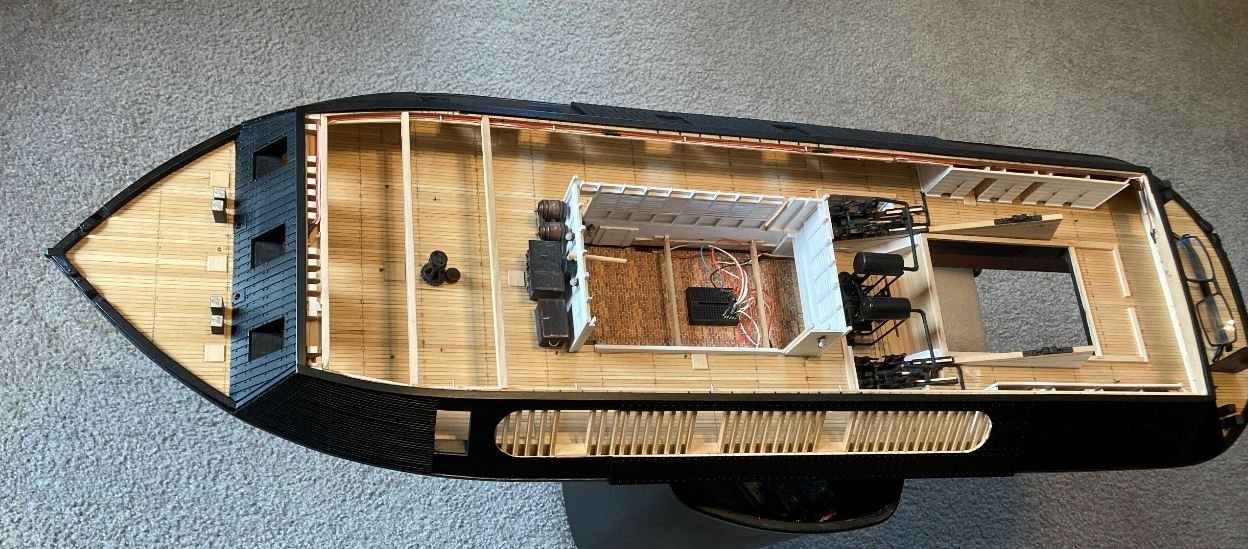
As requested, here are a few from Port and Starboard sides. I assumed you were wanting a clearer or overall picture of the cutaway, but I took pictures of both sides just in case.


I very much appreciate the input.
-Brian
-
Vlad,
Just catching up on the progress, and I must say you are moving along at a Clippers pace. Beautiful job on the bowsprit and the planking is coming along great!
Nice to see the fine lines of these beautiful ships come together.
-Brian
- mtaylor and Keith Black
-
2
-
Hello everyone,
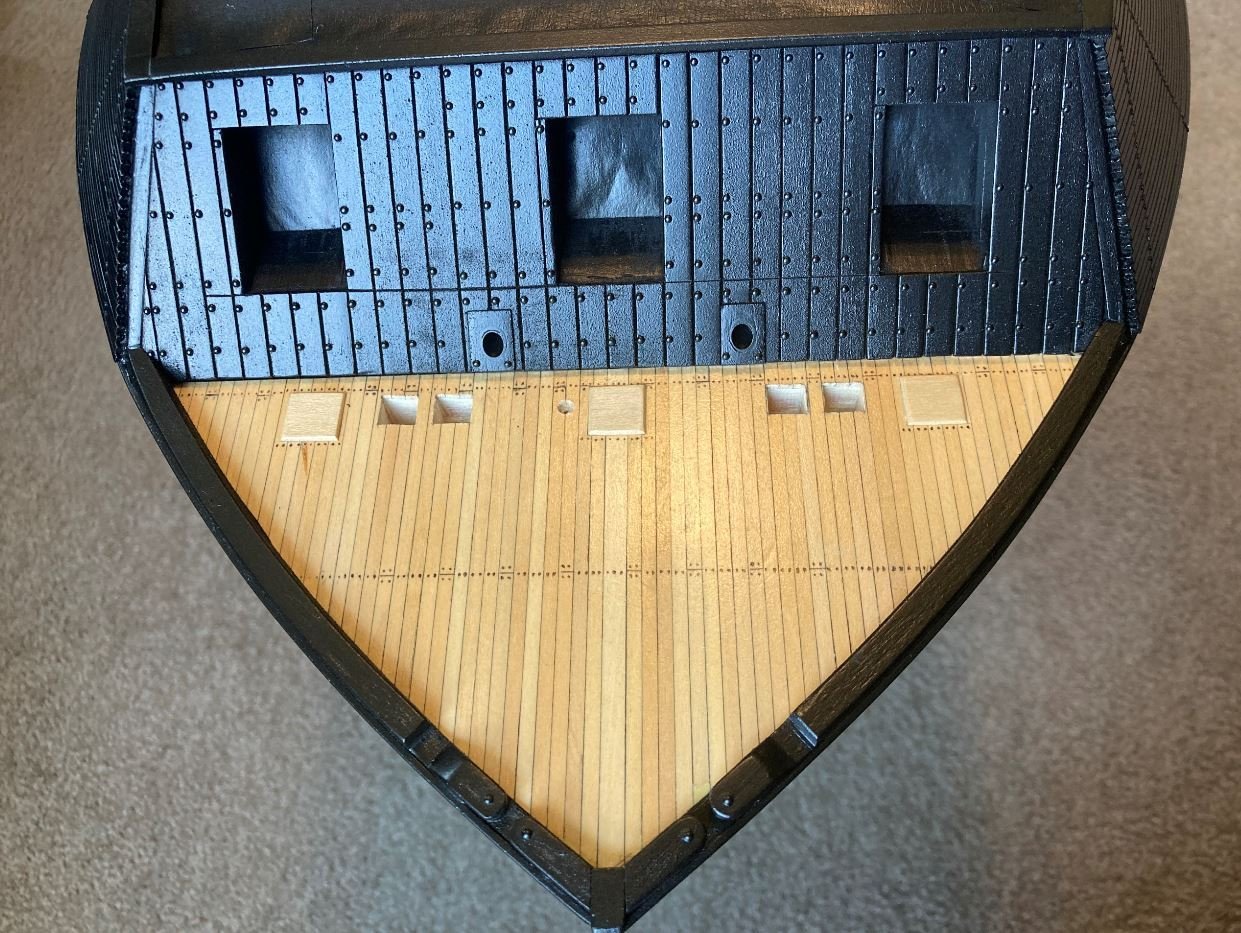
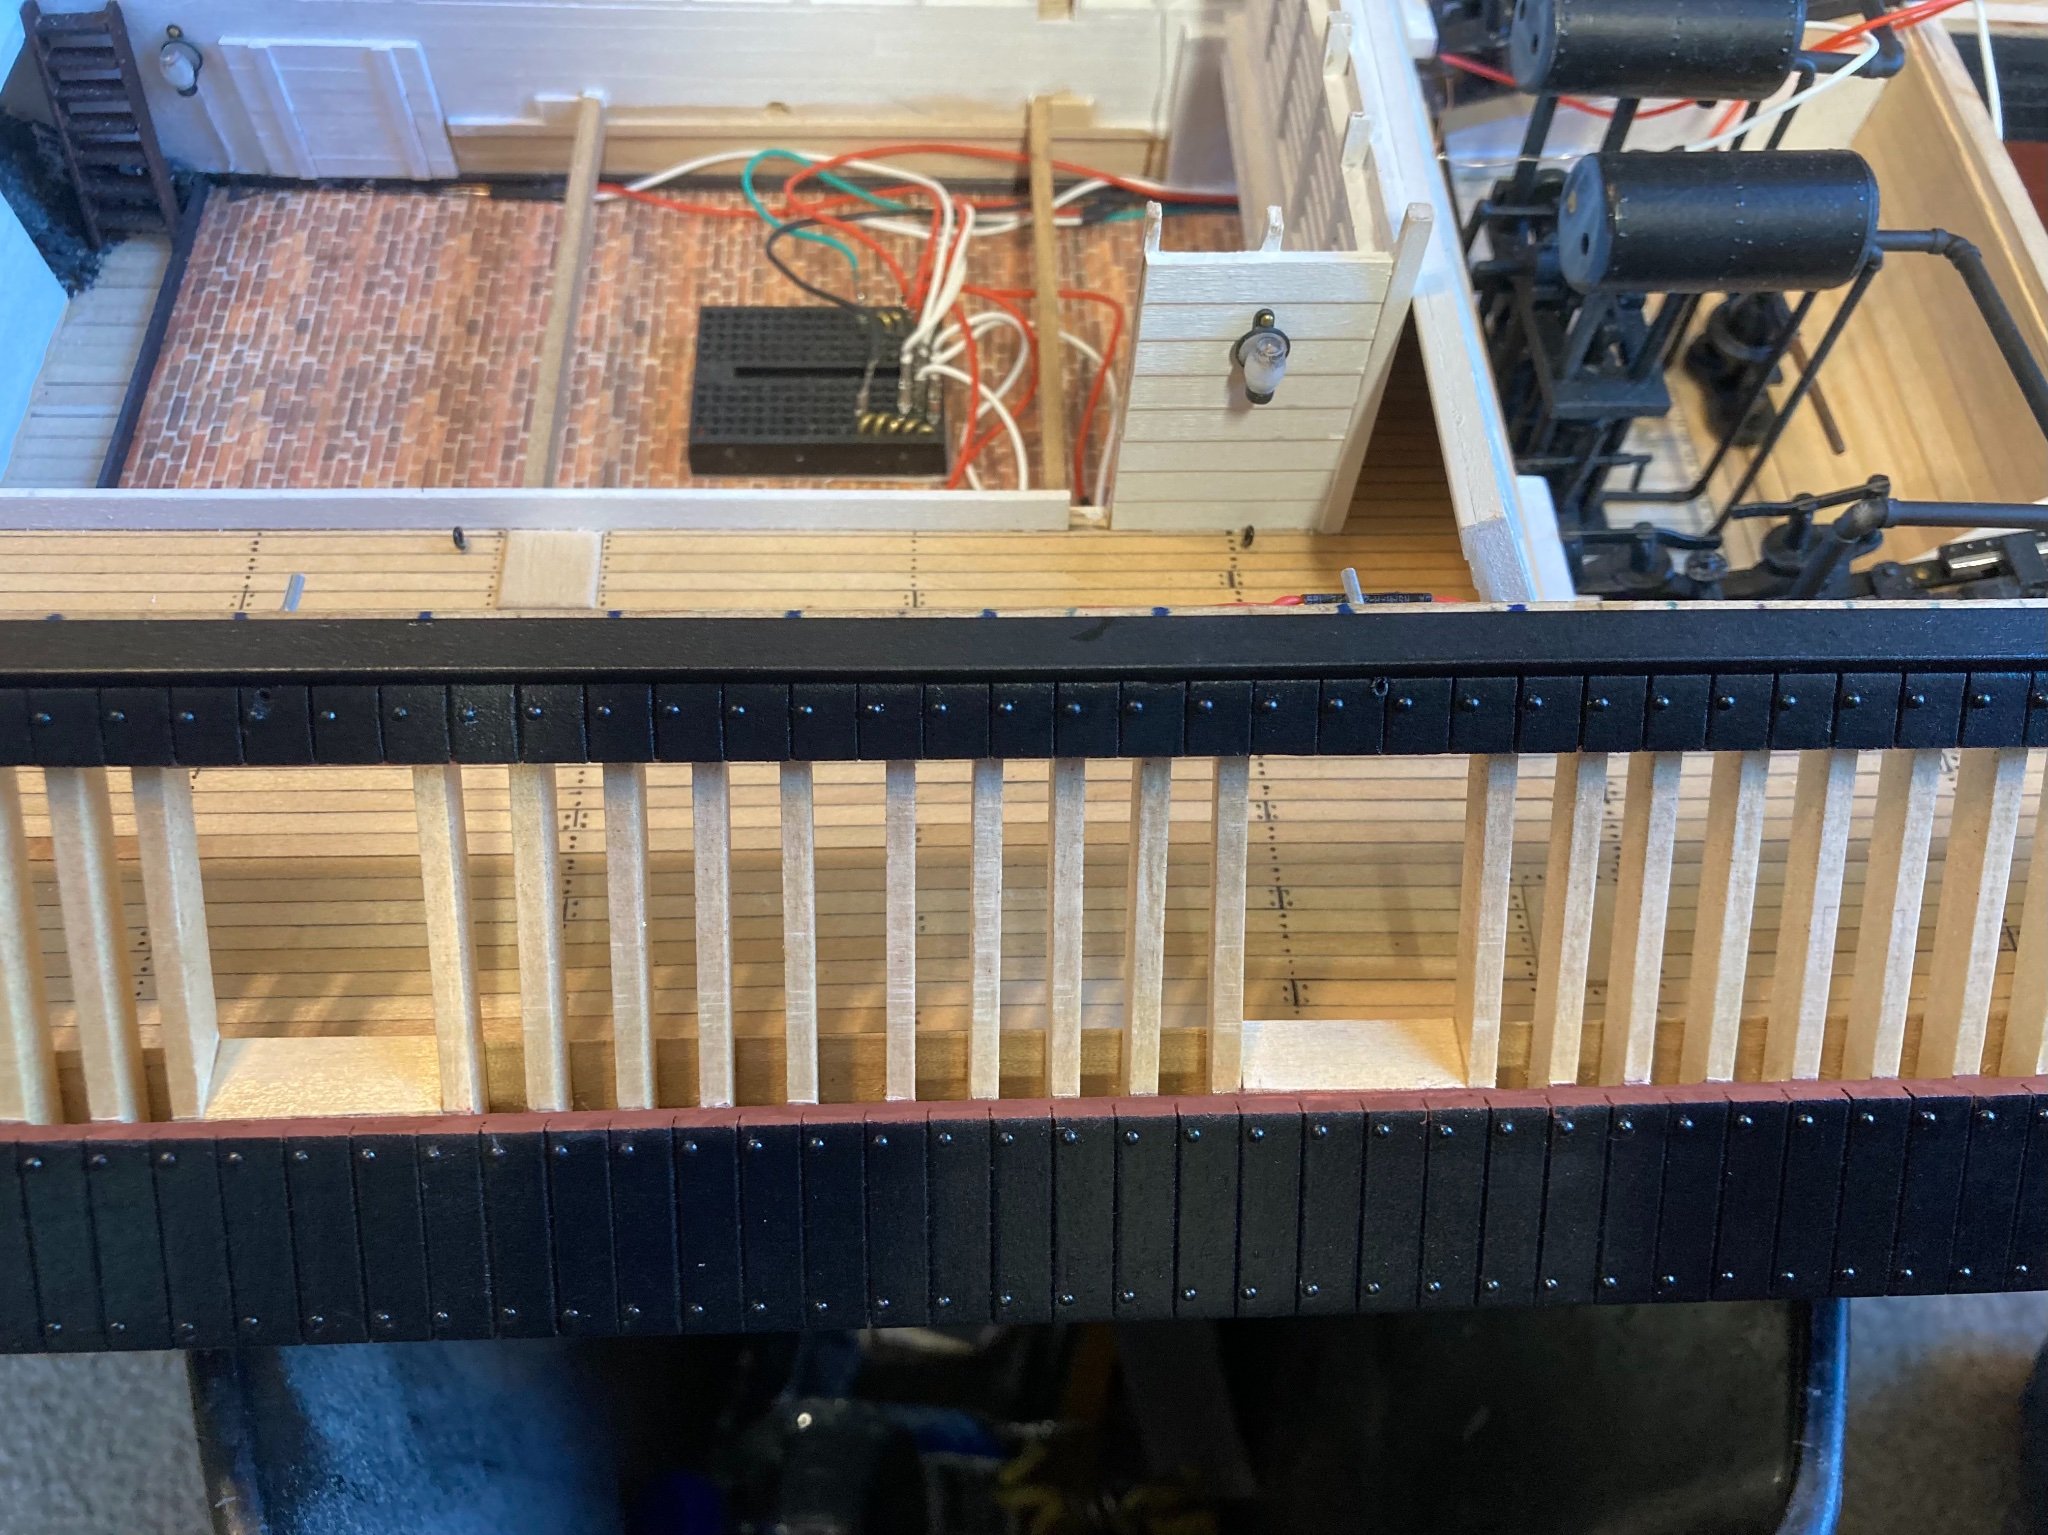
Looking for an opinion here. I painted up the cutaway edge with the reddish-brown I used for the hull. I’m liking the color and think it provides a nice separation from the black paint and the natural wood color of the frames. I just thought I’d throw this out there to see what everyone else’s thought.
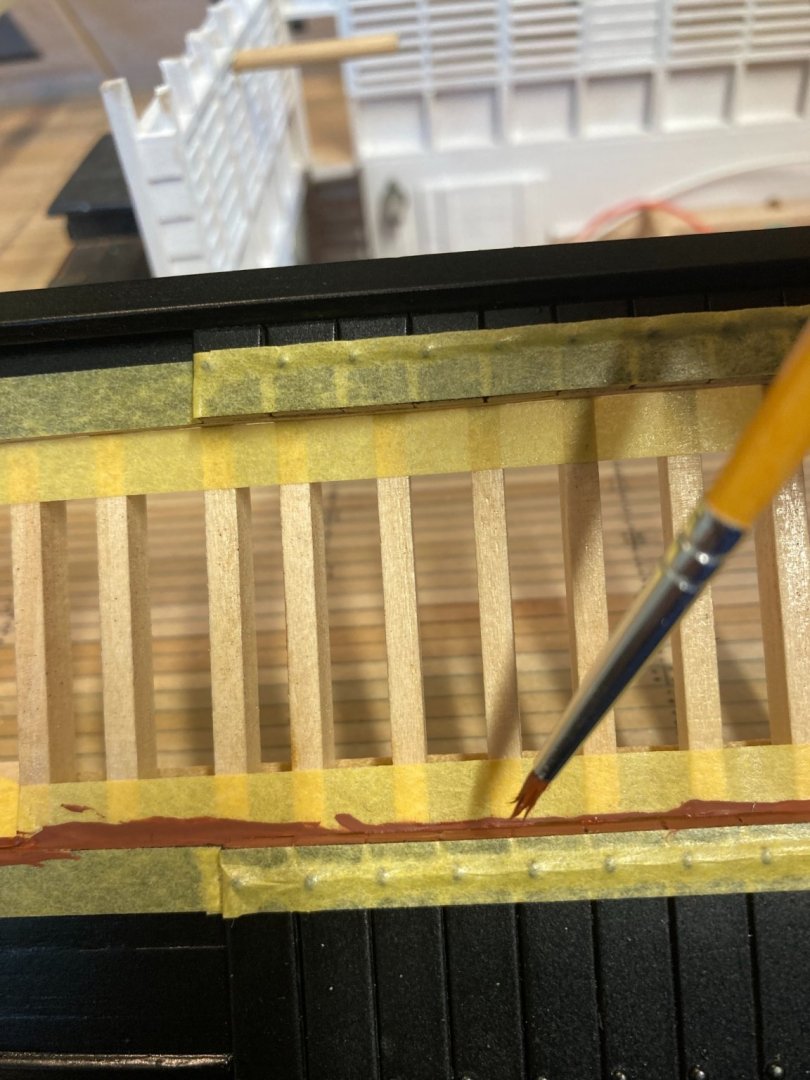

Please feel free to chime in, I always welcome constructive criticism.
-Brian
-
Beautiful build Eric. As always it’s sad to see them end, but what a great journey it has been. Thank you so much for sharing your work and research with us.
-Brian
- Cathead, mtaylor, FriedClams and 2 others
-
5
-
Eric,
Excellent job on the anchor. One of the things I enjoy most about your builds are that you make use of materials you have on your property. I try to incorporate something in each of my builds as well, albeit most of them are are small obscure pieces, like the woodpile on my Chaperon (which by the way I took your advice and entered in the contest as well).
While I was in Kentucky last month I picked up a few barrel staves from one of the distilleries we visited and I plan on using some of that material on my Cairo. Haven’t quite decided yet on where, but it will be a nice French White Oak addition to the build (with the wonderful aroma of bourbon).
Glad to see that you are on your way to completing this build soon. Can’t wait to see what you have in store for us next. I truly have enjoyed this one.
-Brian
- Cathead, Jack12477, FriedClams and 1 other
-
4
-
On 7/20/2021 at 8:25 PM, Cathead said:
Wow, that looks great. You're definitely right about the paint bringing out the realistic look. Nice job on the texturing. I like the idea of a dark/rusty maroon, something that sets off the edge a little but doesn't highlight it.
I found a detailed painting of the Cairo's interior on another modeling forum in a log for the BlueJacket kit. Not going to directly post it here as I'm not sure about copyright issues (not even sure if it's from the kit or some other source), but here's a link. It's a bit grainy, but appears to show gun rigging that looks fairly standard for naval cannons. If it is from the kit, I wonder if you could source a good copy directly from BlueJacket? If nothing else, I bet they'd be willing to discuss their own research used to develop that kit and maybe help you find new information?
Eric,
Thank you for the kind comments. I have actually been using that drawing in your link for a while now. If I remember correctly they have the same drawing at the Cairo Museum and this is where I got the template for building my crew quarters from. There is no documentation or photos of the actual crew bunks available but the HSR drawings show the toe-board outlines on them and this picture has the full structure, so with those two references, that Is what I based my build on. Now as to it's historical accuracy, that is an unknown, so once again I took my builders liberties and built it the way I wanted.
As for the cannon rig in the drawing, it does look to be a standard Naval rig so in keeping with that theme, I am most likely going to rig them that way and as Keith suggested, let the viewer make the connection on how they were maneuvered out of the way during resupply.
-Brian
- mtaylor, Canute, Keith Black and 3 others
-
6
-
On 7/20/2021 at 4:49 PM, Keith Black said:
Brian, why not just go with the standard rigging and let the viewers imagination make the necessary connections as to what the cannon would have looked like when bringing aboard stores and munitions?
Keith,
I think you hit the nail on the head with this one. Hadn't really thought about letting the viewers imagination do the work.
One option that I had considered was taking one of the cannons in the cutaway section and turning it sideways to show the access, but all I could think of was people asking why it was mounted that way then having to explain. I still may do this, but you are right, I may just go with a standard rig and leave it at that.
-Brian
- Canute, mtaylor and Keith Black
-
3
-
On 7/20/2021 at 4:47 PM, leclaire said:
Brian - I admire your idea of "slow progress" and "not getting much done". It sure looks to me like you made a whole bunch of progress.
Regarding your decision to paint the inside edges of the viewing ports red, you might want to consider painting them more of a maroon color rather than bright red. I agree the red would tend to detract from the overall look and using a maroon would make it more of a weathered presentation. Just a thought.
Bob
Bob,
Thank you for stopping by. It's mostly when I look back on previous posts of mine that I see a lot more pictures in them than my last that makes it look like not a whole lot of work was done. In reality, the most time consuming work of my last post was masking everything off. The painting, as everyone knows, was a lot of hurry up and wait between coats. Without the wait time included, I had about 10 hours worth of work done. By my normal standards, that is not much over a weeks time. Plus given the fact that it has been a month since my last post, I really feel that progress has slowed down tremendously.
But enough of my rambling, I am seriously thinking of using the reddish-brown color that I used for the hull to trim the cutaway in. It's a nice muted color and brings the color up from the bottom to a more focused on spot without being too distracting. I'll give it a shot and see how it looks. Nice thing about paint, if you don't like the color you can always change it.
On 7/20/2021 at 4:53 PM, Keith Black said:I'd be more inclined to go with white or natural wood instead of red. She looks great the way she sits.
Keith,
Thank you Keith. I had pondered that as well, but since I was leaving the framing in its natural color, I wanted to show some separation between the two. Like I told Bob above, I'm going to give the reddish-brown color a try and see how it comes out.
On 7/20/2021 at 8:24 PM, BANYAN said:Hi Brian; wow! looks great. If it is only the edges of the planking in the cutaway area, I say go for it. As you say, it will highlight the area and differentiate between the planking and framing (which look in natural timber).
Pat,
Thank you for the input. These great comments are always welcome. I think this is going to be one of my next steps to see how the reddish-brown looks trimming the cutaway out. I'll be sure to post photos of the look, even if I do change my mind and go with a different color.
-Brian
- FriedClams, Canute, Keith Black and 2 others
-
5
-
Hello again Everyone,
I know it has been a while since my last update. Progress has slowed to a crawl lately with other projects taking priority while I can get to them. Lots of physical labor involved, and by the time I am done for the day I am just wore out and just want to kick back in the recliner and relax with a cold beverage. Temps are starting to get a LOT warmer here so I may spend some of the hotter parts of the day at the workbench instead of baking in the Texas sun.
So with my lame excuses out of the way, I did get a little work done this past week, and I do mean a little.
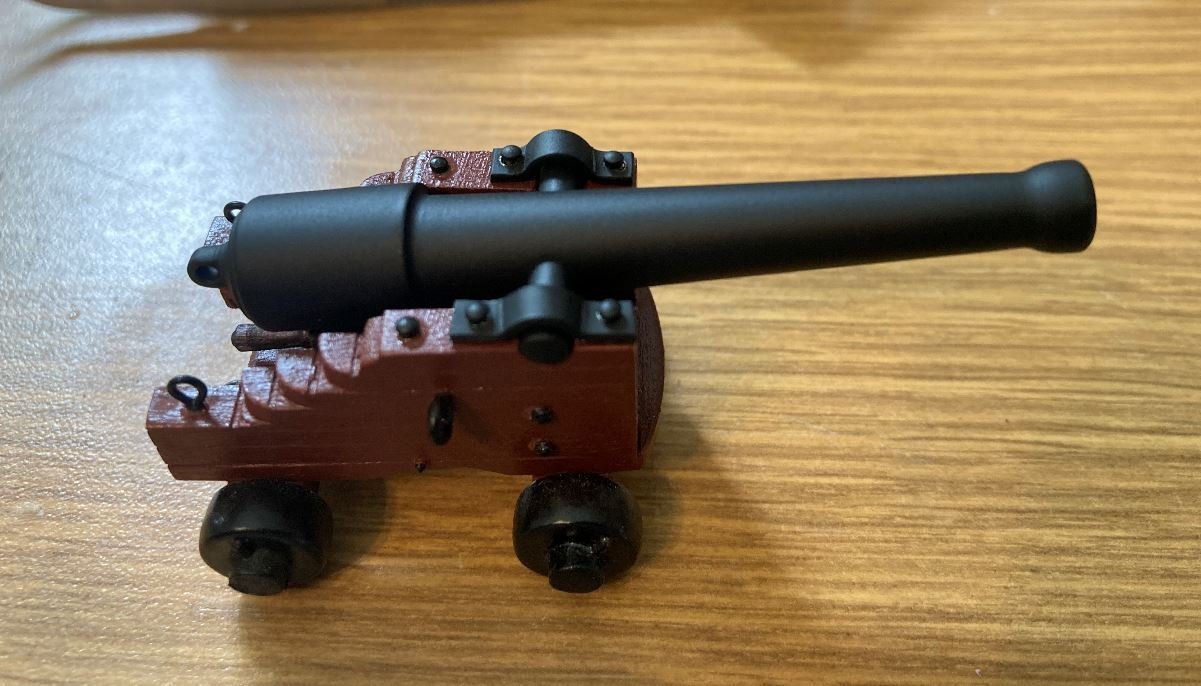
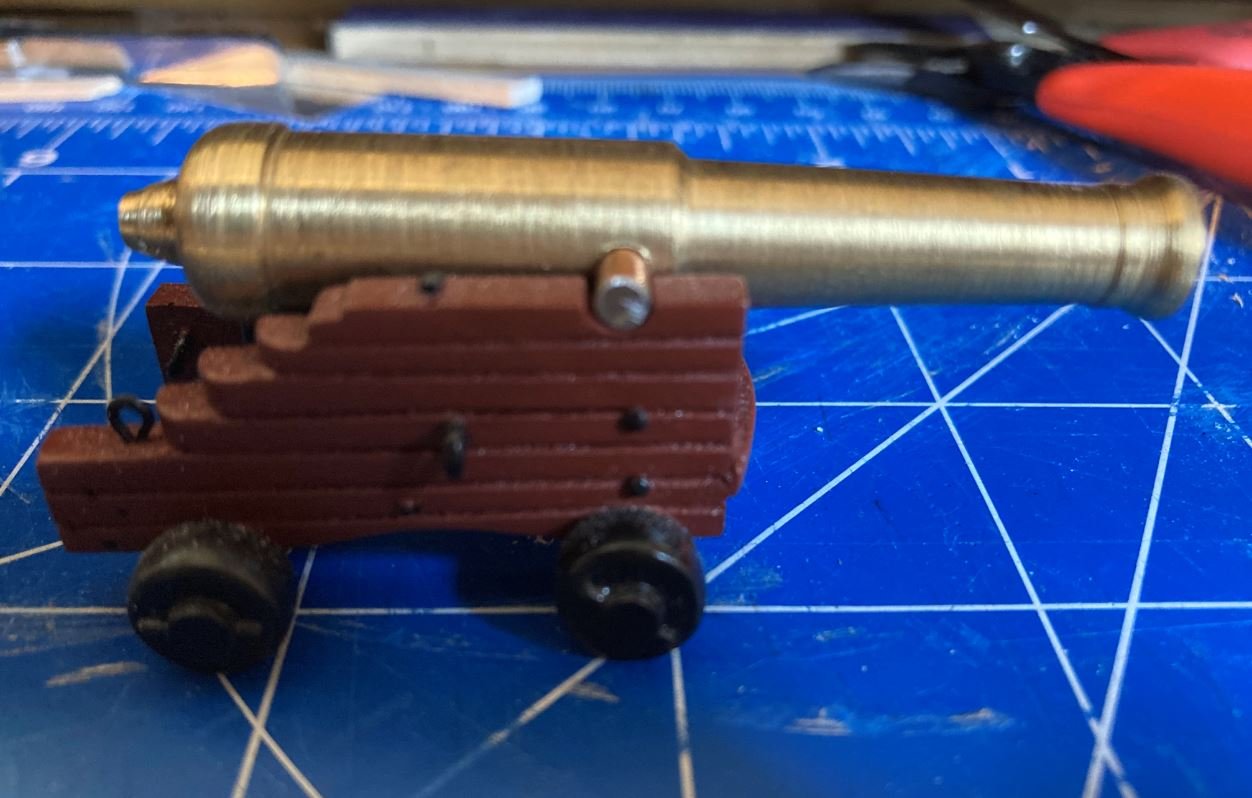
I painted up one of my cannons and assembled it to the carriage. Haven't got the rigging done on it yet, I'm still sorting out how to do that. It's hard to find a good layout of how these were setup. I thought of just using the standard cannon ring for all 19th century American war ships, but the thought occurred to me that the cannon ports were also used as access to load stores and munitions, so the cannons would have most likely been pulled out and turned sideways to make room for the supplies being loaded. So the more I pondered it, the more frustrated I got on trying to figure it out and finally just set them aside for now.
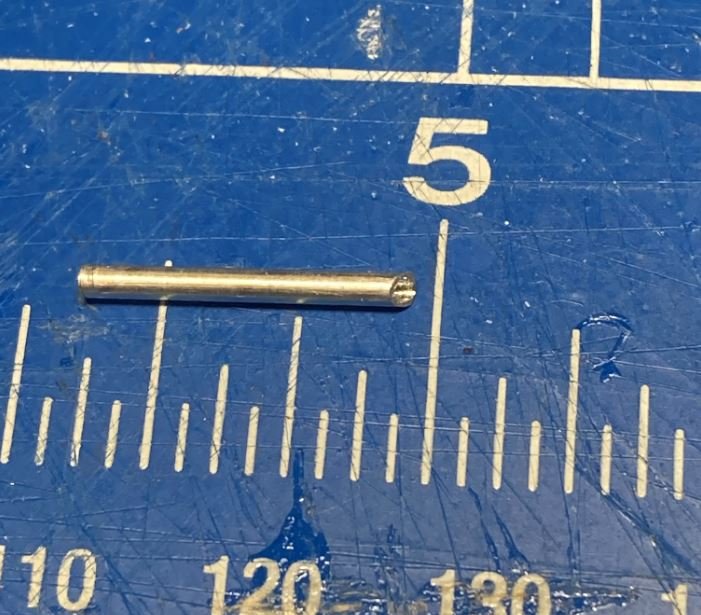
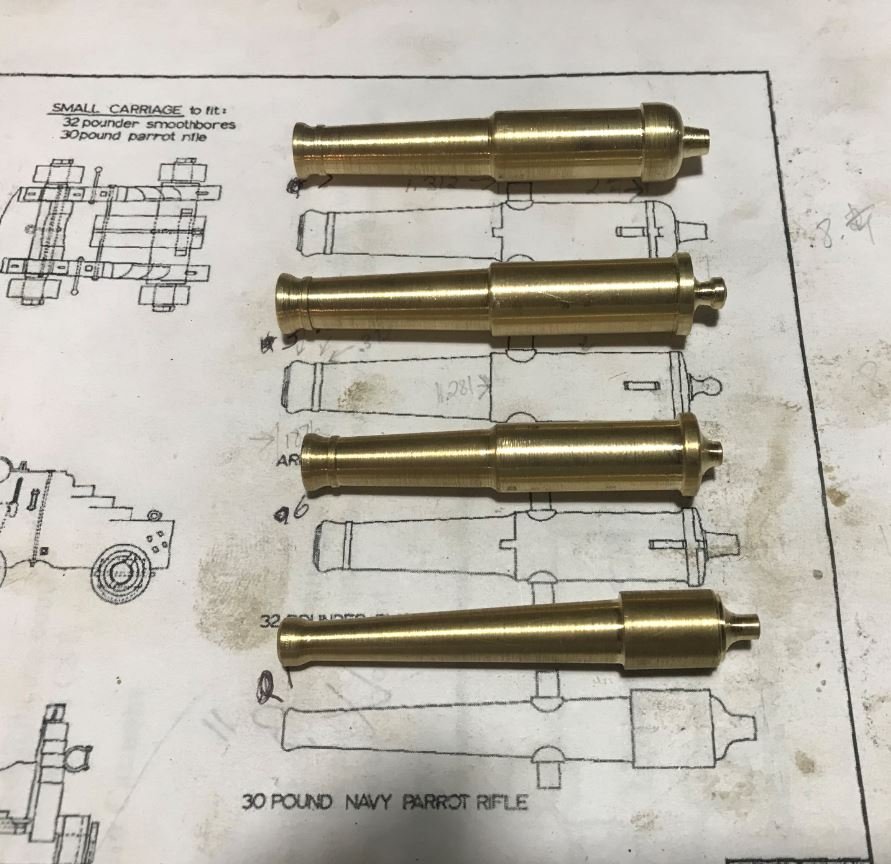
Anyway, here is the 30lb Parrot Rifle in its carriage.
Next up I decided that she finally needed a coat of paint. I'm almost to the point that I'm ready to start installing the cannon port doors, and rather than go through the trouble of painting twice I decided to go ahead and get the casemates painted up so I can then place the painted doors and make minor touch ups as needed. I think that I am going to go with all port doors in the open position. This will allow for somewhat easier viewing of the inside details, not to mention it will save me from having to get the cannons all perfectly centered on the pierced hole with them closed.
First coat of black going on the bow casemates.
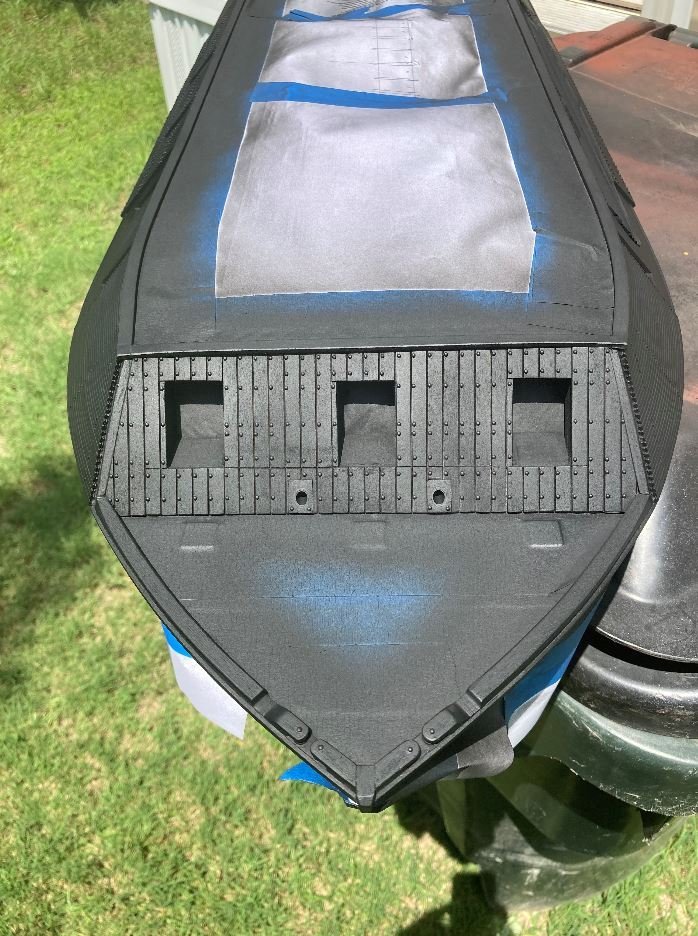
Port first coat.
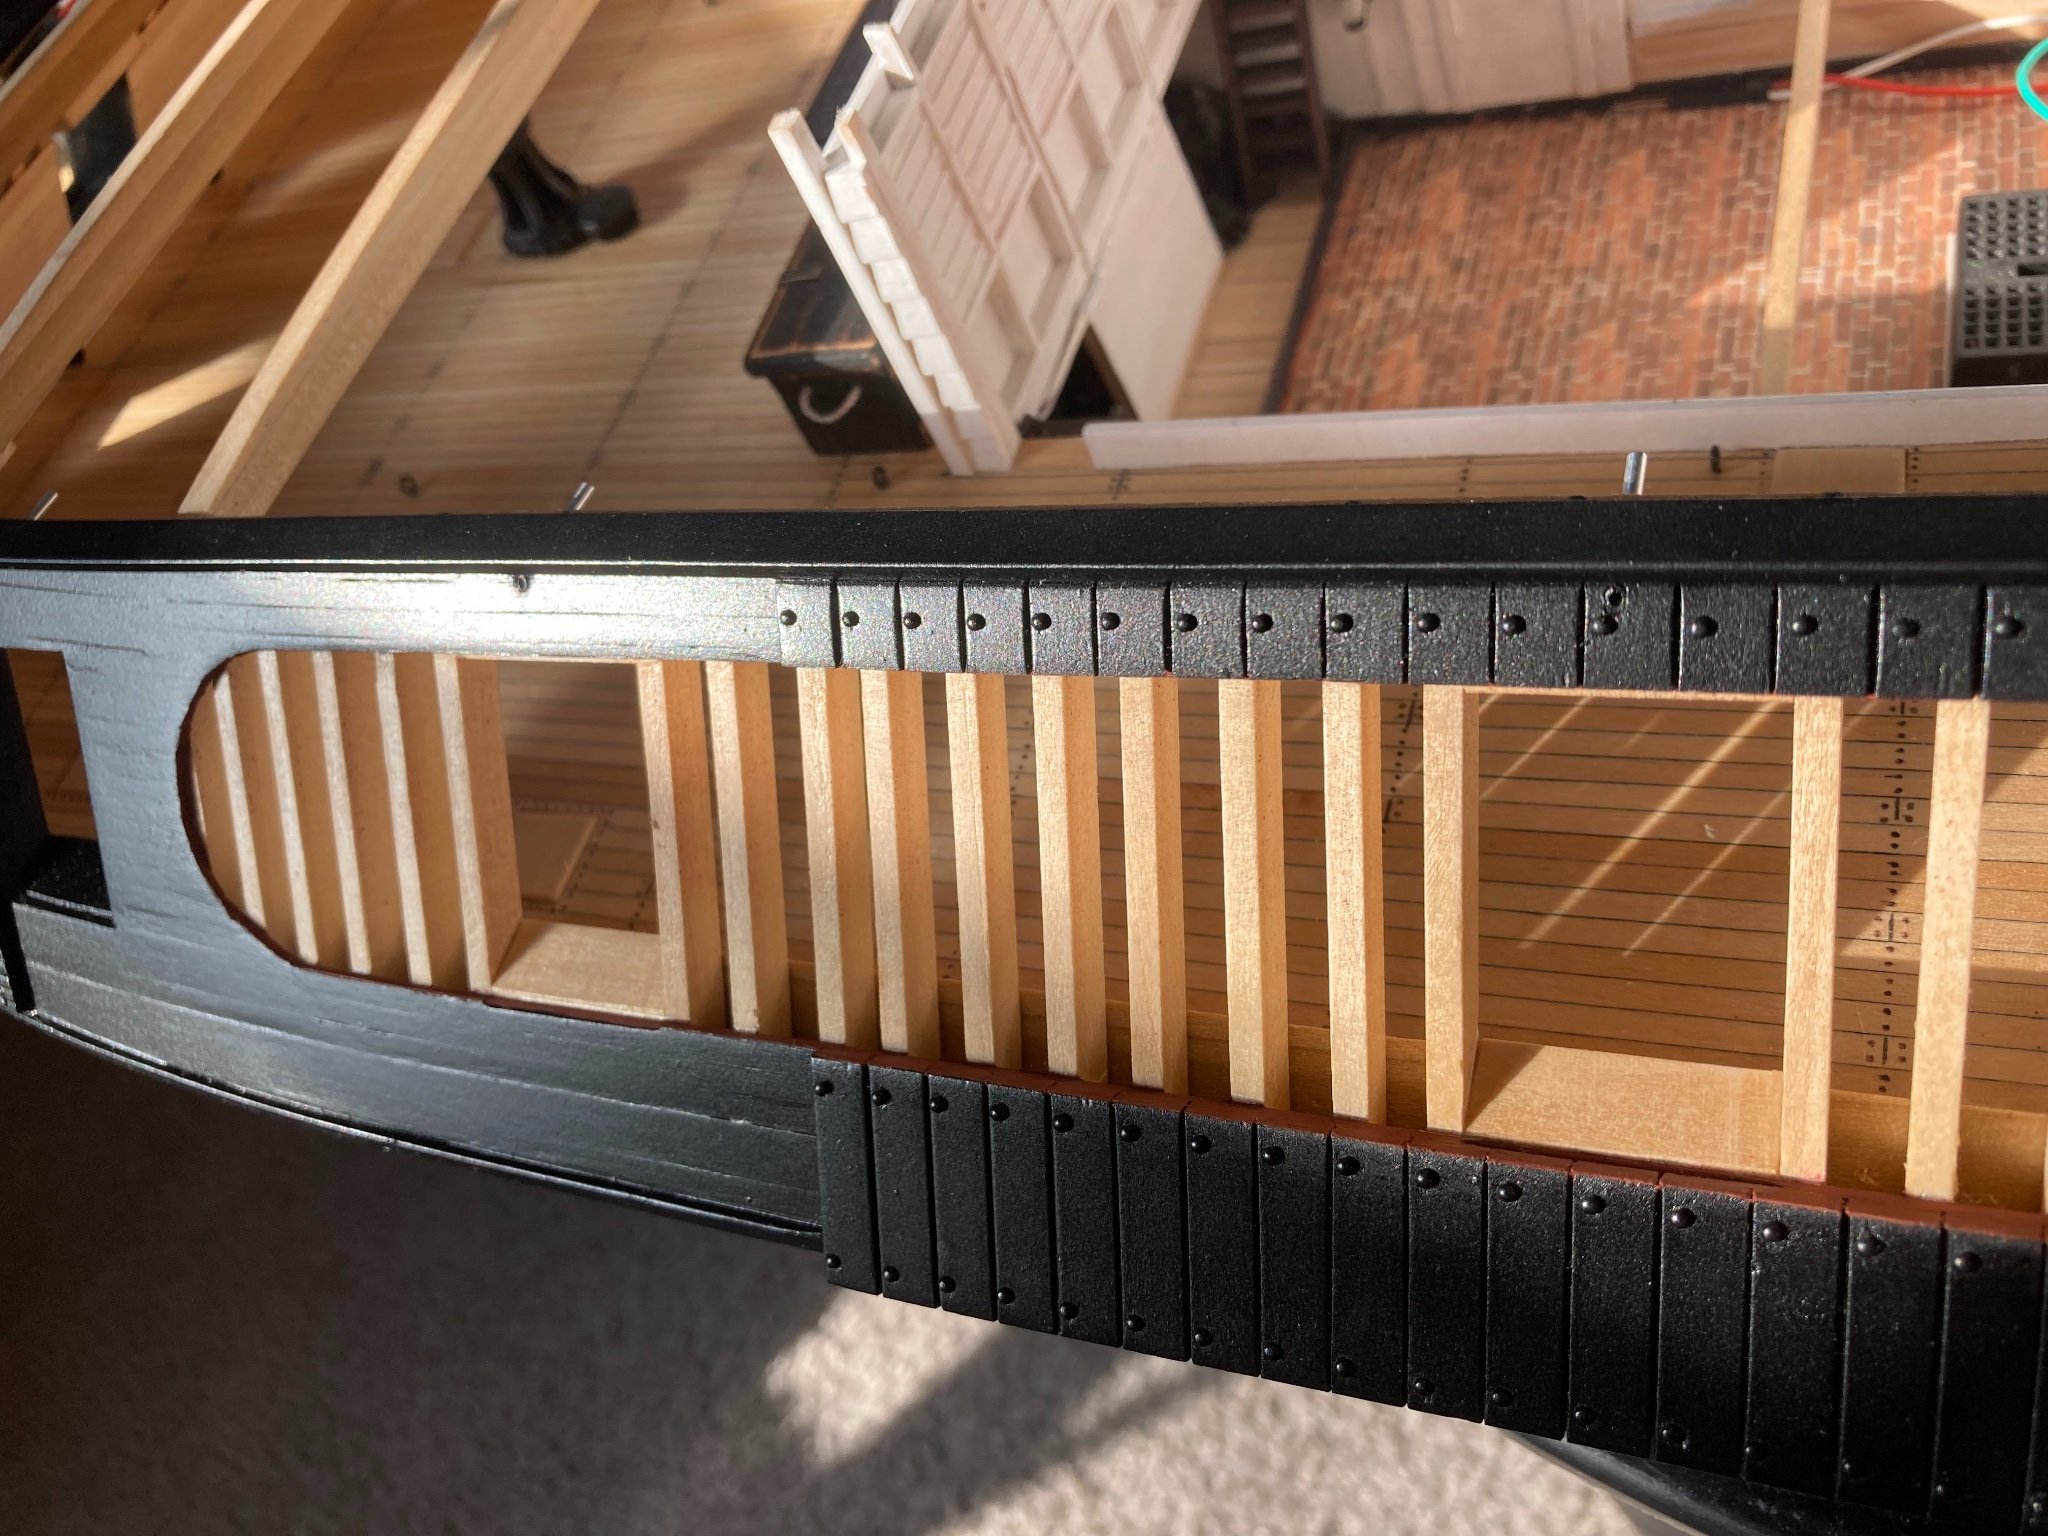
Bow after three coats of black and three coats of satin clear. I did a little texturing with the back paint on the armor plating to give it a more "wrought iron" look and feel. I thought it came out looking pretty good.
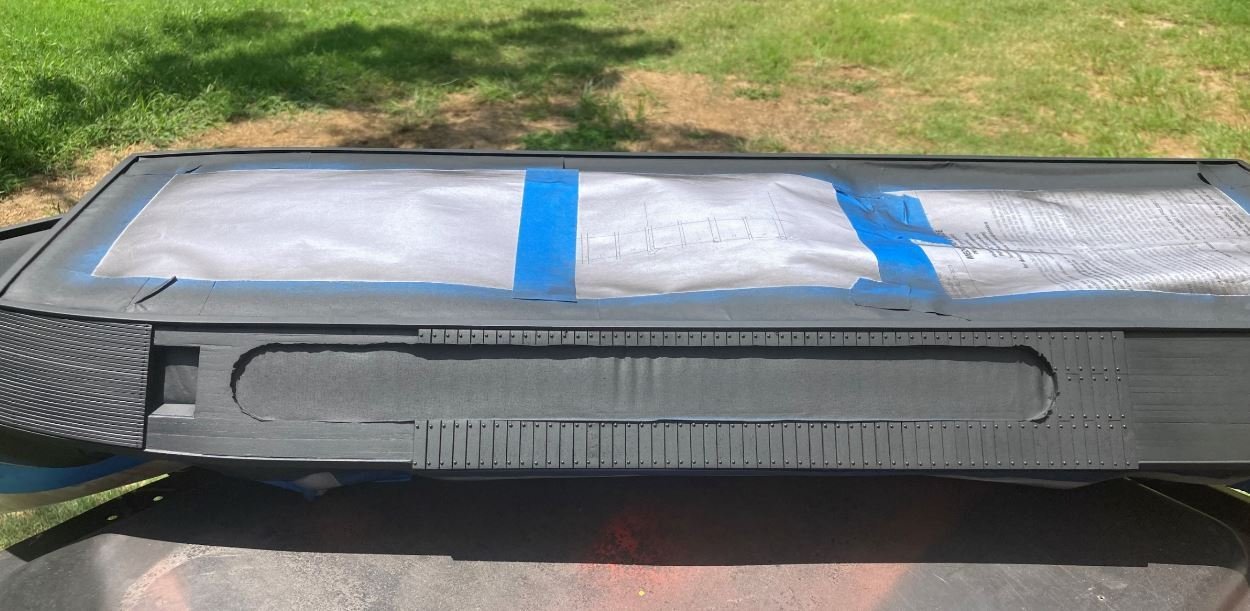
Painted port side. I am still debating with myself as to whether or not I want to paint the inside edges of the viewing port red to symbolize the cutaway. I see this on a lot of cutaway sections and I like it, even the guys working on the St. Louis are doing it, I just don't know if the red will stick out too much and detract from the rest of the model. I still haven't made the decision yet, but there's still plenty of time.

Painted stern
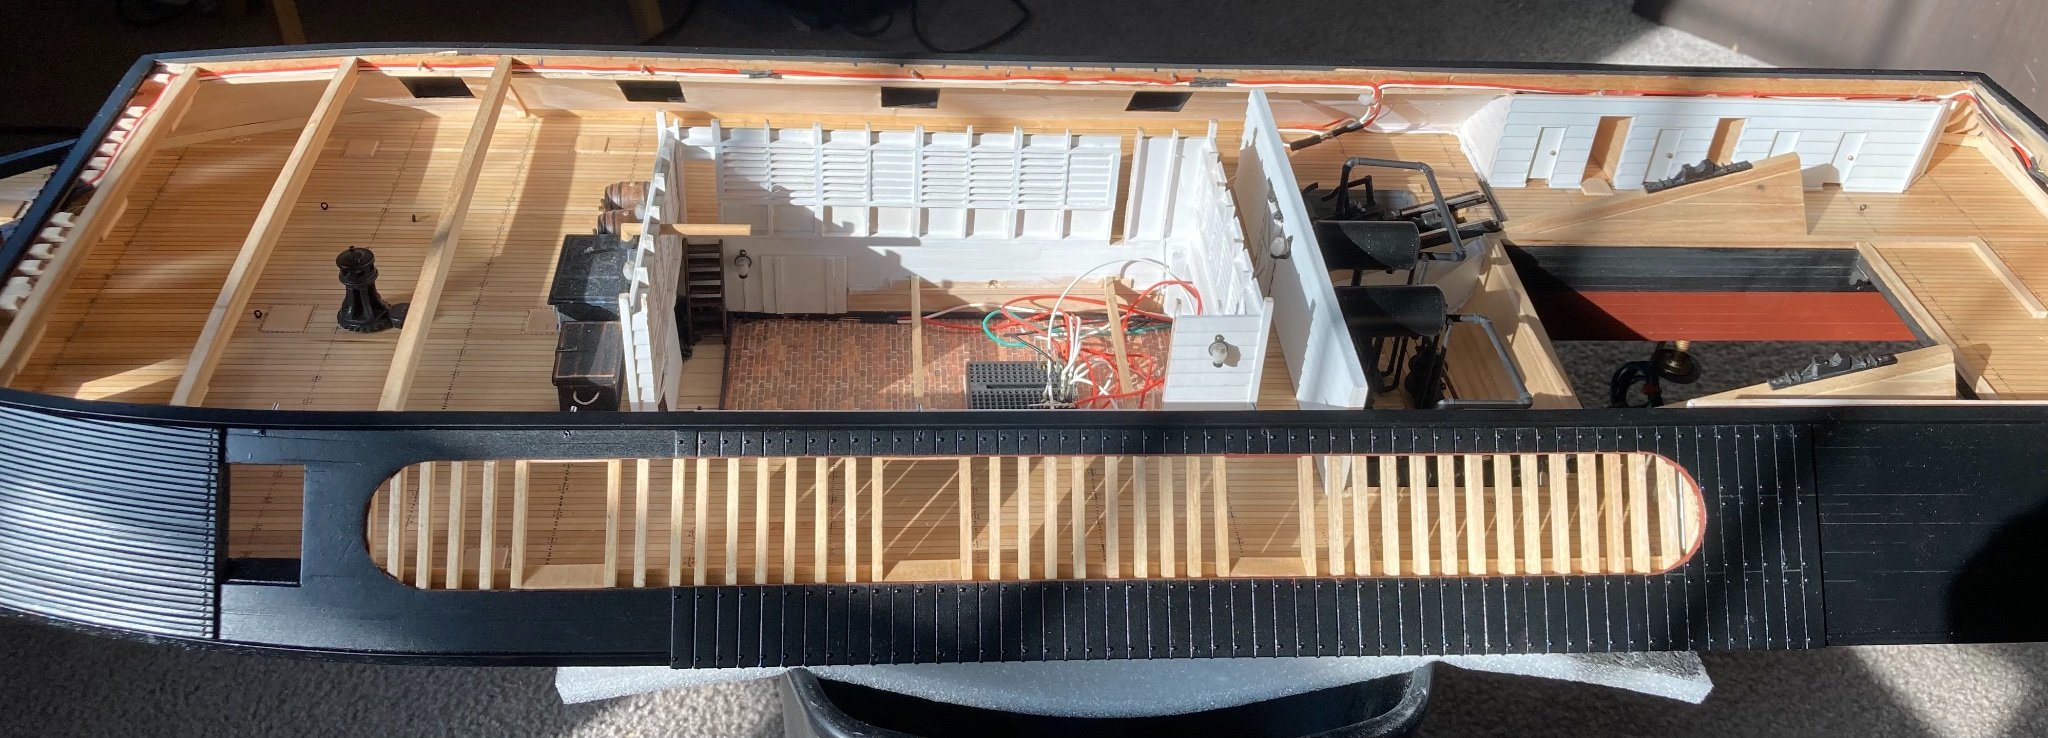
And finally the overall boat painted and all masking removed. It's amazing what a few coats of paint can do to the look. It's really starting to look like an Ironclad.
That all for now. Thanks for sticking with me on the slow progress. Hopefully I can get more done in the coming weeks.
Until next time, I appreciate all the great comments and likes.
-Brian
-
Eric,
In my opinion she looks great. I think the figureheads add a nice touch (authentic or not). Your build pretty my represents what I have always envisioned Viking ships looking like.
I am with you on the the deck crowding. This was a subject that I wrestled with on my last build. Where to draw the line at too much. I think you have just the right amount to get the point across of what these people traveled with without the deck looking too cluttered.
I have been toying with the idea of entering my Chaperon in the NRG photo contest, just not sure if my photography skills are there yet. Not to mention our farm projects have really eaten up my time as of lately.
Really looking forward to seeing the final rigging and it’s in place. I know you’ve had your struggles with this build, but you have definitely overcome them and produced a great looking build.
-Brian
- Cathead, FriedClams, Balclutha75 and 2 others
-
5
-
-
Vlad,
Even with all the trials you are facing so far, she is still looking good. Besides, has there ever been a scratch build that has ever gone smoothly? With your skills though I’m sure they will not be much of a problem for you.
-Brian
-
11 hours ago, mtaylor said:
Good work on the port doors. So they were actually pierced then? For some reason, I thought they would be solid with no gun port. And that's great finding Parrot guns. They will look perfect.
Mark,
Thank you for the kind words. The pierced port doors were almost a necessity. These boats carried some big guns on them and would have taken up a lot of limited real-estate on the gun deck if they were stowed inside. The 42 & 32 pounders alone were over 10.5 feet long and weighed over four tons each. Without them being stowed through the doors the way they were, they would have been an imposing item to have to maneuver around during daily life onboard.
I am extremely happy with the guns (I think I may have mentioned that before). I'm glad I went the route that I did instead of the wooden ones. Thankfully my uncle was able to direct me to his friend who is a machinist. It took a while for him to get them done, but they were worth the wait. I'm anxious to get them cleaned up and dressed to see how they are going to look rigged and in place.
-Brian
- Canute, Keith Black, Cathead and 3 others
-
6
-
14 hours ago, Keith Black said:
Brian, very nice work. Nice to see a update, good to have you back.
Keith, thank you. Good to be back at it. Funny how being away for a couple of weeks tends to draw you back in.
-Brian
- Canute, Keith Black, FriedClams and 2 others
-
5
-
14 hours ago, BANYAN said:
Nice photos and good progress Brian; looks like the adult beverages provided some incentive
")
cheers
Pat
Thanks Pat. The beverages definitely helped. They also may be the reason I got careless with my drill press on one of the doors.
-Brian
- Canute, mtaylor, FriedClams and 1 other
-
4
-
14 hours ago, leclaire said:
Brian - thanks for showing the screw up with your drill. I was beginning to believe you never made a mistake like us mere mortals who follow your magnificent work.
Bob
Bob,
Thank you for the kind words, but I am definitely mortal. I could probably make a whole build log out of just the mistakes I’ve made on this build alone. 😁 I usually don’t post too many of them unless I think they can be beneficial to other builders.
-Brian
- mtaylor, FriedClams, Keith Black and 2 others
-
5
-
Hello everyone,
Finally back at it after a well needed summer vacation. Took a nice little stroll along the Bourbon Trail in Kentucky viewing some beautiful country and giving my liver a good workout. Picked up several bottles of tasty adult beverages and I am now ready to get back at it.
This past week I wasn't able to get too much done, but I did take a lot of pictures. So this go-round I started working on the cannon ports and doors. This was a fairly simple task, and I wanted to get them done so that I could start work on painting the casemates. I wanted to paint the casemates and the doors all at once so the color stayed uniform.
First task up was to install the sleeves for the upper door ropes (not sure of the proper terminology of these).
For the sleeves I used some small aluminum tubing inserted into a small hole that I drilled above the cannon ports.
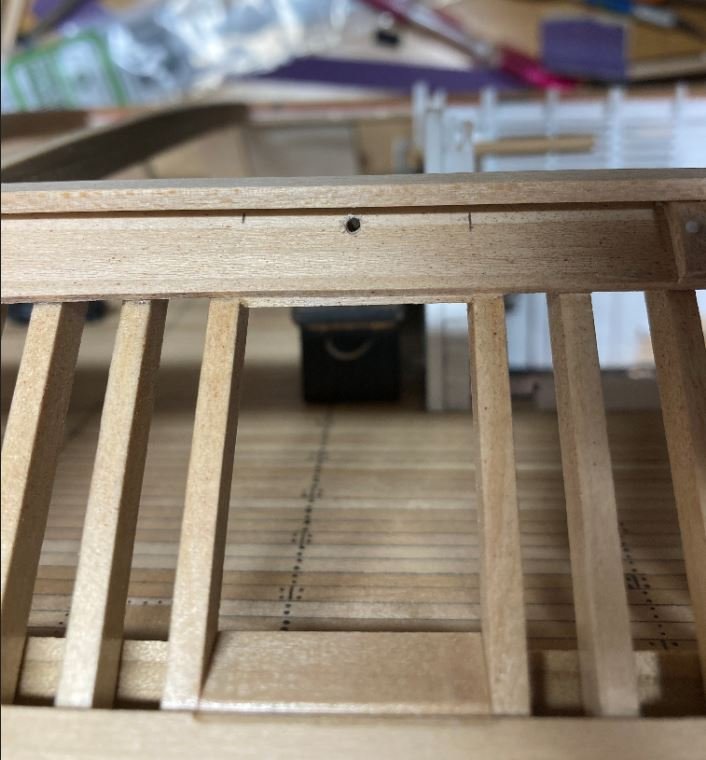
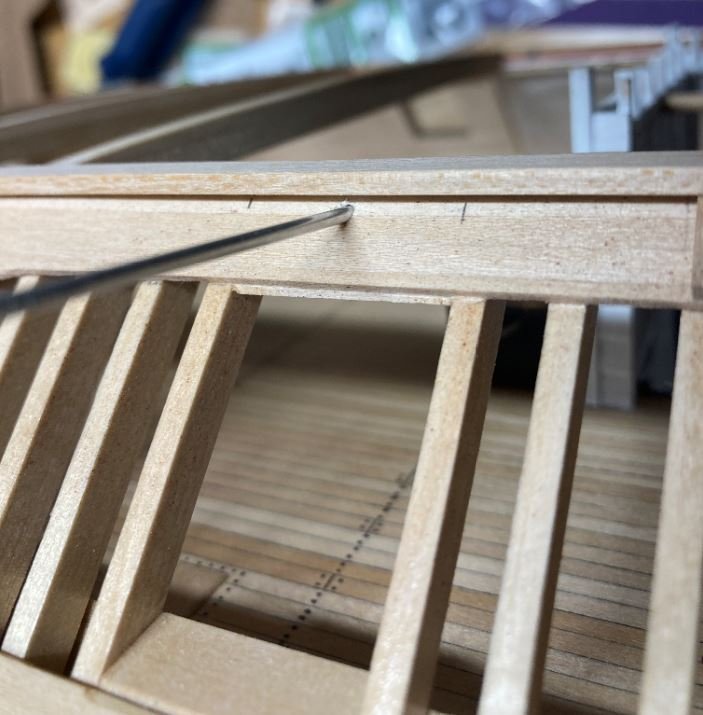
I traced the angle on the tubing then cut and filed it to shape.
Then inserted the tube and glued it into place.

...One down, twelve more to go.
Then it was on to the port doors.
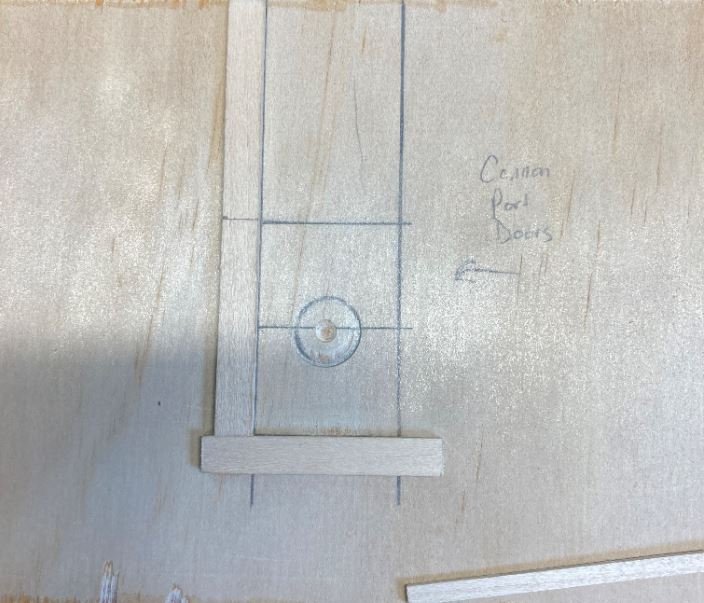
First thing I did was to make up a simple jig to make sure the doors stayed square and uniform.
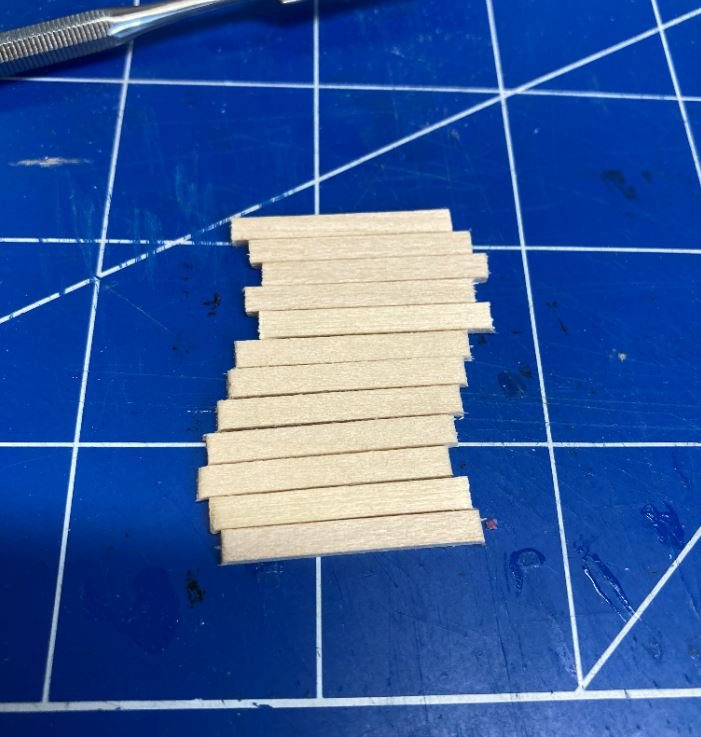
Next I cut the strips for for the individual door planks.
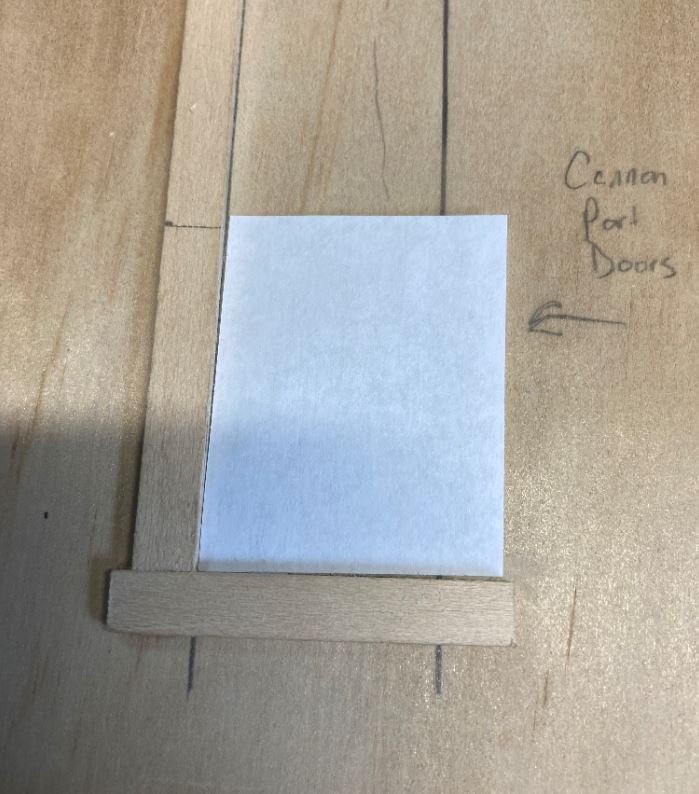
After the strips were cut I used a piece of paper for the backing to help hold things together.
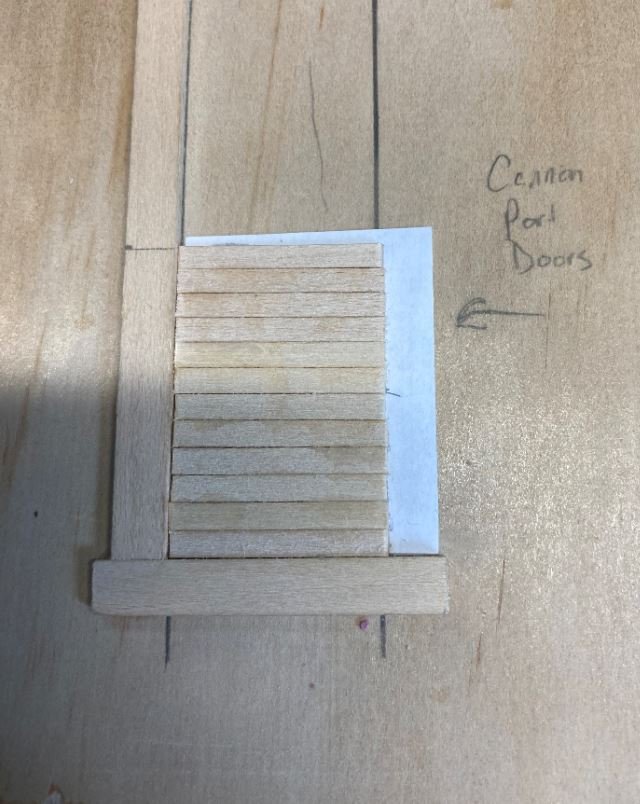
Once the planks were glued into place, I then drilled the cannon port out.

Oooops. Got a little careless with drill.

Front port doors in place.
Port doors in place. For the hinge straps I used thin styrene strips that I will cover with aluminum tape with the rivet pattern punched into it.

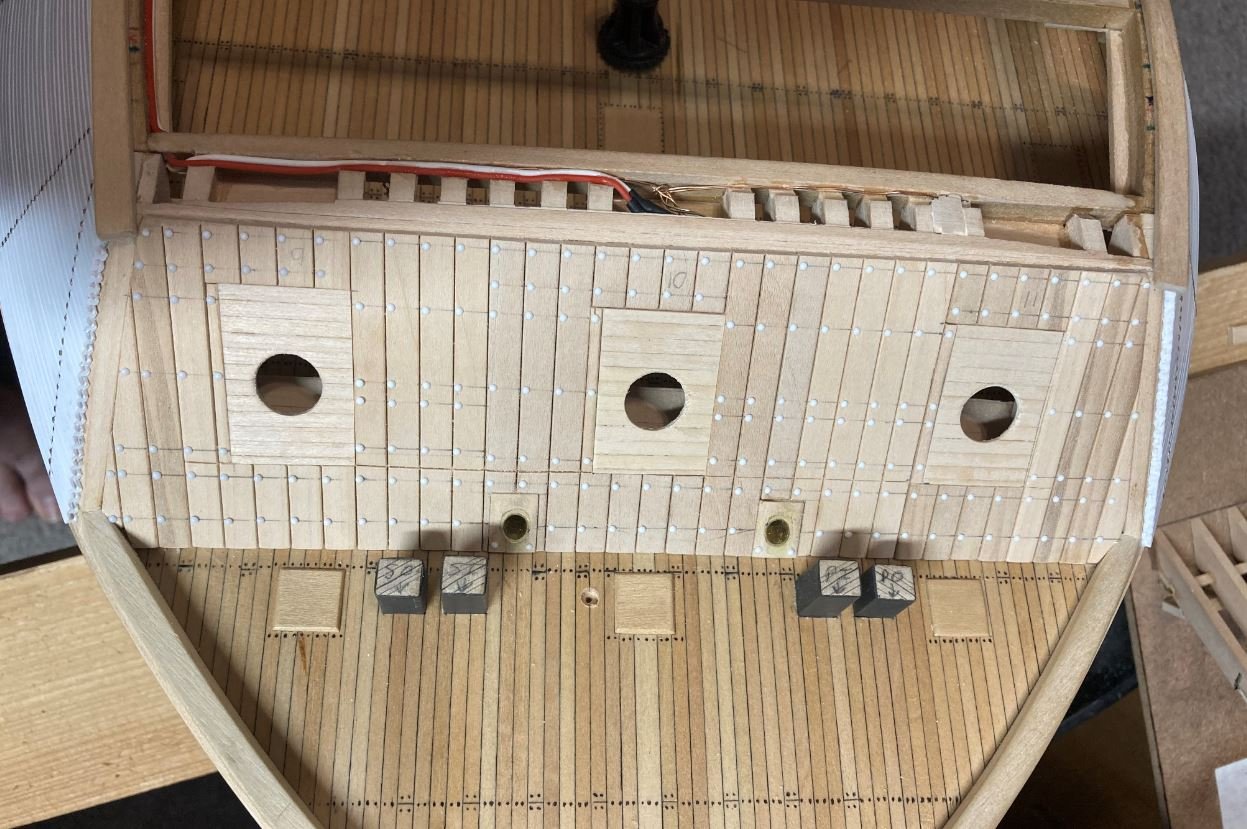
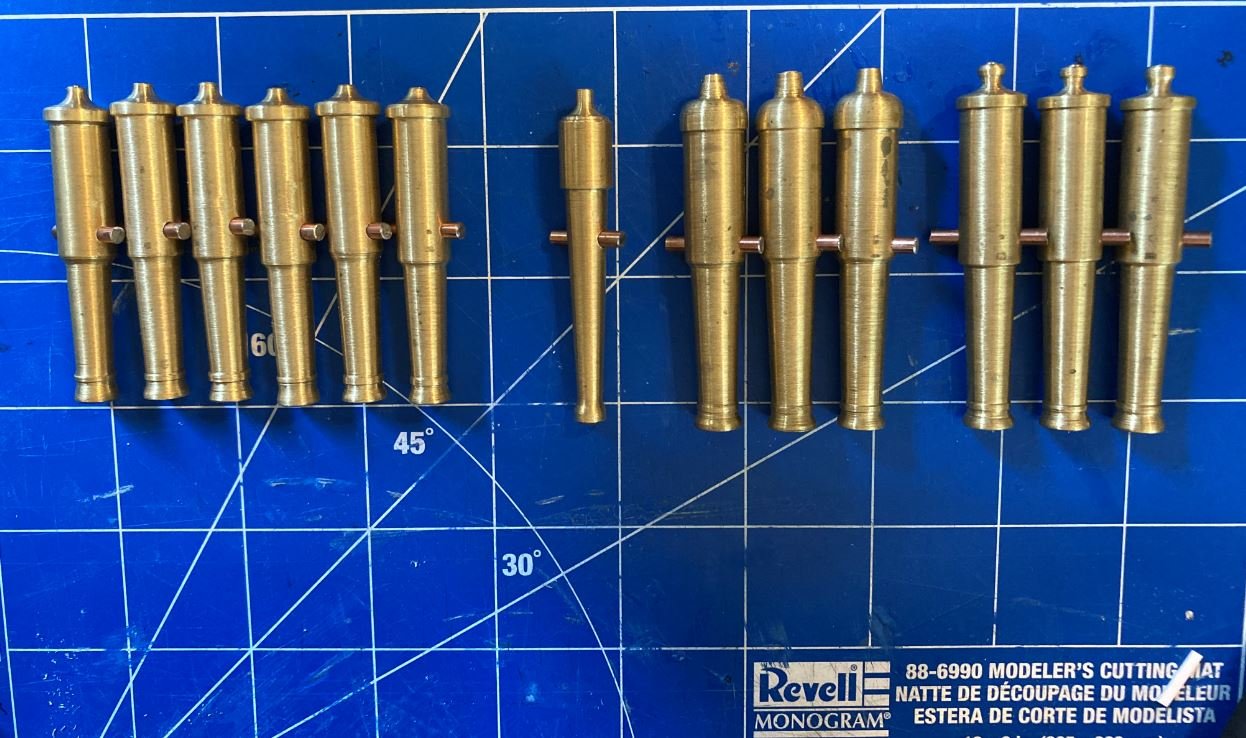
Finally, upon my return from our trip I was extremely happy to see that my cannons had finally come in. There is still some work to be done on them, they need to be polished up to remove the milling marks, the bores drilled to the correct diameter and the necks and knobs will need to be filed to shape, but I am definitely please with the way they came out. They are a definite improvement over the wooden ones I attempted to make a few months ago.
One cannon mocked up in its carriage.
...and finally one set in the gun port. Looks like there will need to be some adjustments made to get the height right, but I'll get there.

Well that is it for now, thanks again for all the likes and kind comments and also for stopping by.
-Brian
- mcb, Nunnehi (Don), FriedClams and 12 others
-
15
-
Great start Vlad. Nice job on getting that backbone straight. Looking forward to more updates.
-Brian
- mtaylor and Vladimir_Wairoa
-
1
-
 1
1
-
George,
Amazing job on the deck. Even without the nibbing strake it came out looking great. I would have to go with the case of the planks not being a consistent width as to having to place filler planks in, I have yet to build a deck that had all of the planks the same size. A task that I always say that I am going to watch for next time, but next time never seems to come.
I may sound like a broken record, but I have never been a fan of the Britannia fittings that MS puts in their kits. Most of the time they are misshapen, or there are voids in the casting, and almost every time there is an over abundance of flashing.
It has been several years since I built this part of the ship, and really don’t recall how I assembled this part and unfortunately most of it is covered by the forecastle deck. However, in looking at my build I have the hawse pipes directly in line with the windlass. Now going back and looking at the plans, I’m not sure I did this correctly. I tried to get a snapshot of mine taken through the bowsprit hole but it wasn’t too clear. You may be able to see the deck level in relation to the hawse pipes.
Hopefully this will help. Keep up the great work.
-Brian
- Cathead, gak1965 and Vladimir_Wairoa
-
3
-
Eric,
Finally catching up on your build. The oars look great!
Just my opinion to your posed question on how to display the oars, personally a display having them all spaced evenly apart looks great with a build that has no weathering, but in the case with yours, semi-chaotic, but slightly swept back would go along with the weathered theme you have going on.
I also agree with Gary, great job on getting so many pieces to look uniform. One of the details I still struggle with without a jig.
-Brian
- Cathead, mtaylor and FriedClams
-
3
-
Keith,
Catching up on your build. Love the display case, man what a great find.
I have yet to do a build that didn’t come with a rigging plan (never done a scratch build of a full rigged ship), and at this point I hope that I don’t have to. But on the bright side, at least you only have to figure out half of it, since for the most part everything will be mirrored between the port and starboard sides. 😜
Seriously, keep plugging away at it though, you’ll get there.
-Brian
- Keith Black and FriedClams
-
1
-
1


USS Cairo 1862 by MPB521 – FINISHED - Scale 1:48 - American Civil War Ironclad - First Scratch Build
in - Build logs for subjects built 1851 - 1900
Posted
Thank you Gary. I’m liking the way it’s coming along and the paint definitely makes look more complete, even though I have a long ways to go.
-Brian