


mbp521
-
Posts
946 -
Joined
-
Last visited
Content Type
Profiles
Forums
Gallery
Events
Posts posted by mbp521
-
-
-
Eric,
Great job on the mast step. Very interesting on its placement. I would have never guessed that the builders would have chose the bench tops as a strategic place to mount it, but those guys were a master of their craft and knew what they were doing and from an engineering perspective it makes sense.
As for the rigging, I am way out of my element on this one. My guess is that it would have been somewhat simplistic yet functional and sturdy given that there was only one sail (a rather large one) to deal with. I would think that it would be rigged where it could be set up and stowed with the minimal amount of effort so they could focus more time and effort on their conquests.
I am just slightly disappointed that you aren’t going with the rivets, but totally understand the reason. Accuracy is one thing but there comes a time where you have to draw the line, do I build it the way I want to and get it finished, or do start something that will put me off of the model and shelve it. This unfortunately is what happened with my USS Constellation build. I wanted to portray it as accurate as possible, but the more I researched it the more faults I found with the kit until I finally gave up and now use it as a dust collector. I may dust it off one day and finish it, but right now I am having too much fun in the steam boat era.
Overall she’s looking great. This has been a very interesting build and good info on an era I know nothing about. Keep those updates coming, I always look forward to them.
-Brian
- Louie da fly, mtaylor, J11 and 1 other
-
 4
4
-
40 minutes ago, Cathead said:
She's a beast. I'm actually wondering whether to put up the mast and sail or portray them stowed and furled to save some space.
That she definitely is a beast. For some reason I was thinking it was smaller than that. I can see where she would take up a lot of space, especially if the oars were in set and ready to row. But you really want to at least put the mast in place, otherwise you’re going to miss out on all the fun rigging. 😜
-Brian
-
Excellent work as always.
Out of curiosity, what is the overall length of the hull. Just trying to get an idea of how big this boat is. I briefly scanned through and couldn’t find anything on it. I was trying to figure it out in relation to the bench supports on your patio deck but figured it would be a lot easier just to ask.
-Brian
-
2 hours ago, wefalck said:
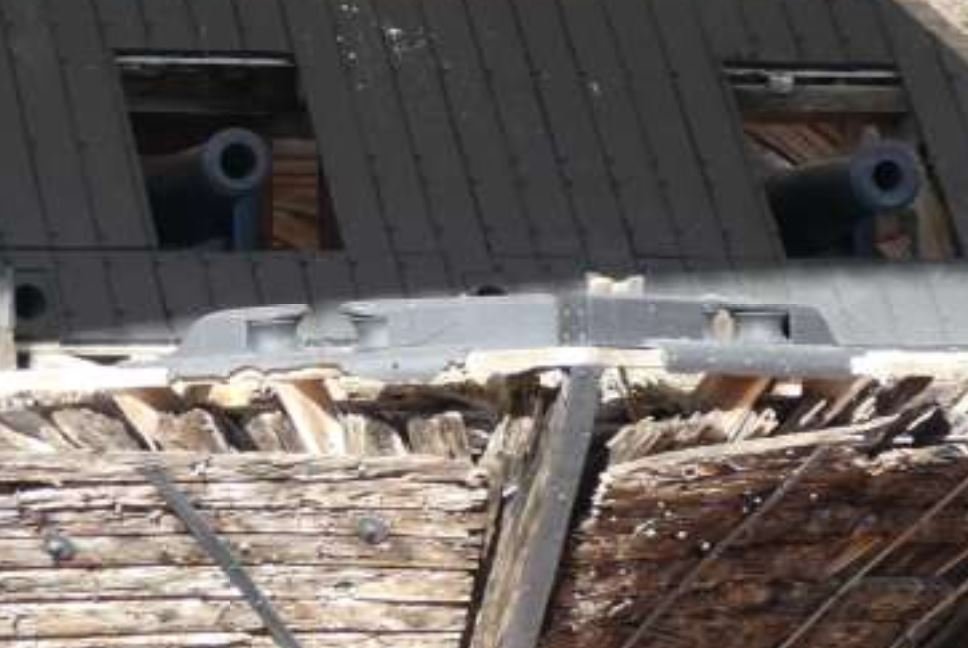
Did they have roller-fairleads at that time and on such rather improvised vessels ?
Wefalck,
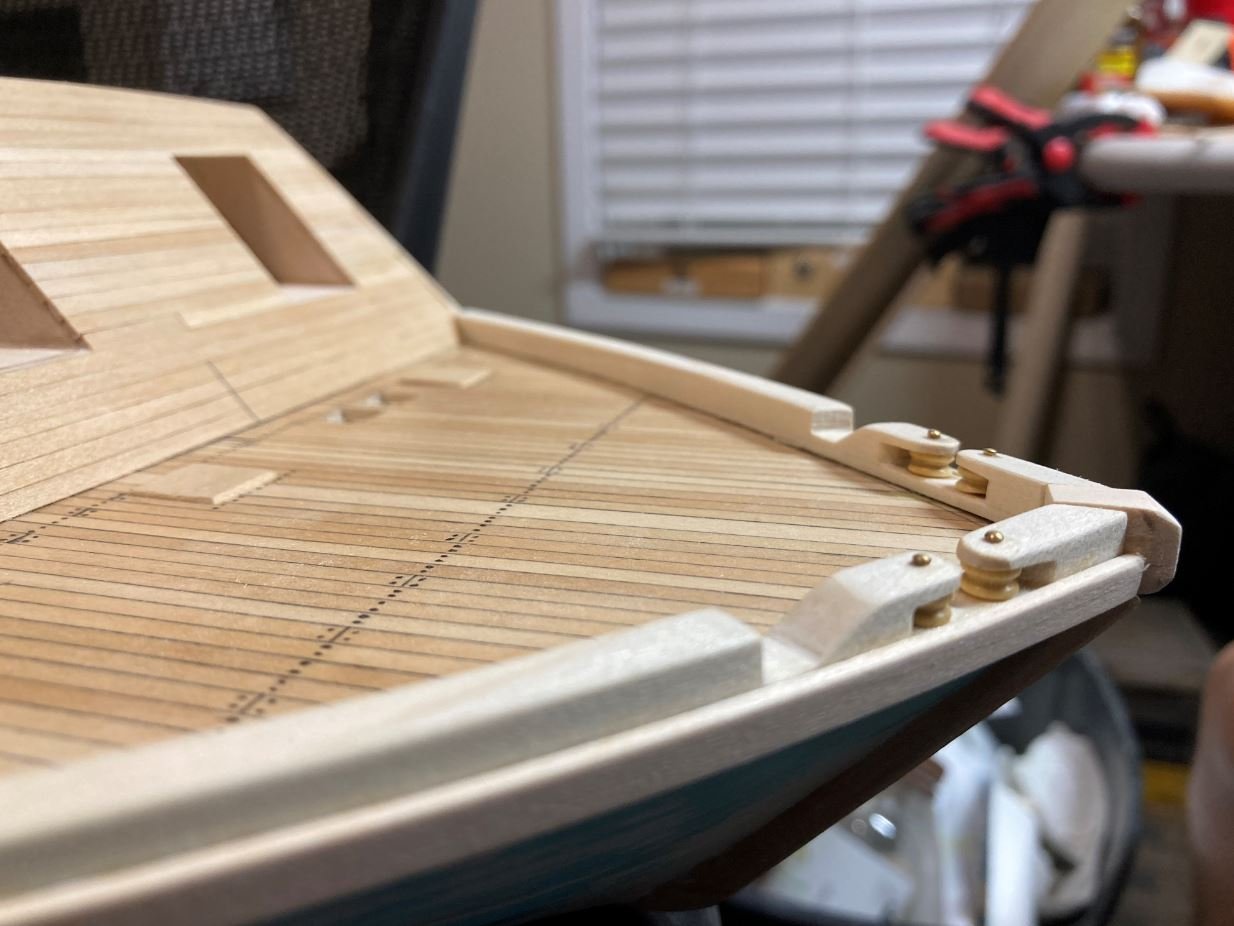
Most definitely. Here is a picture of her forward ones as she sits today. The aft ones were either lost in the recovery or just not installed on the display. I am not able to find any reference to fate of the aft ones for the Cairo in the HSR or otherwise. However, they are visible in some of the old pictures of other City Class boats and they are also called out on the HSR plans.
Cairo:
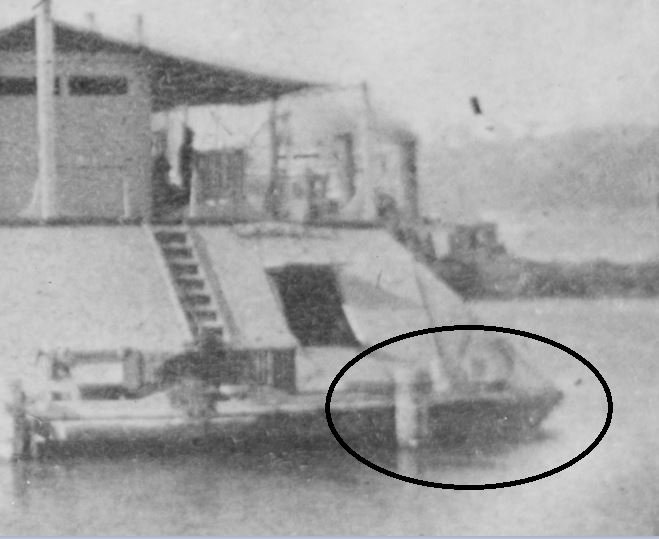
Carondelet:
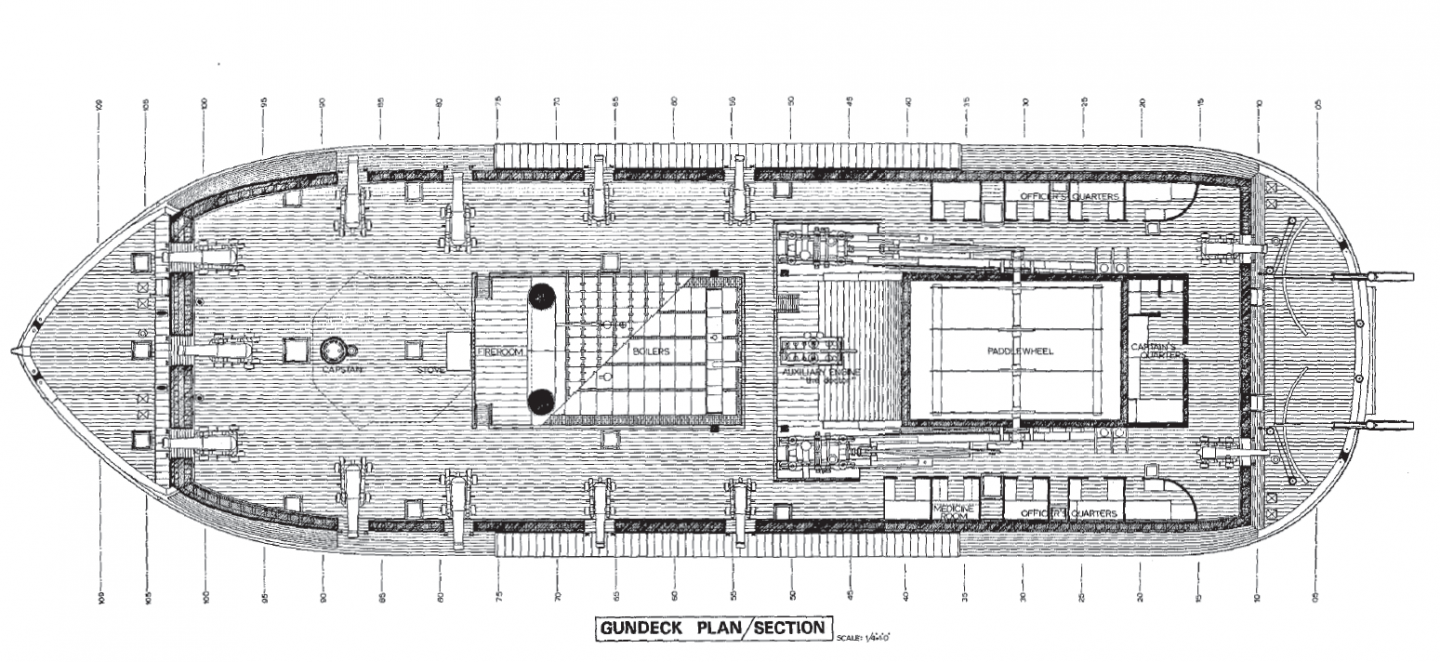
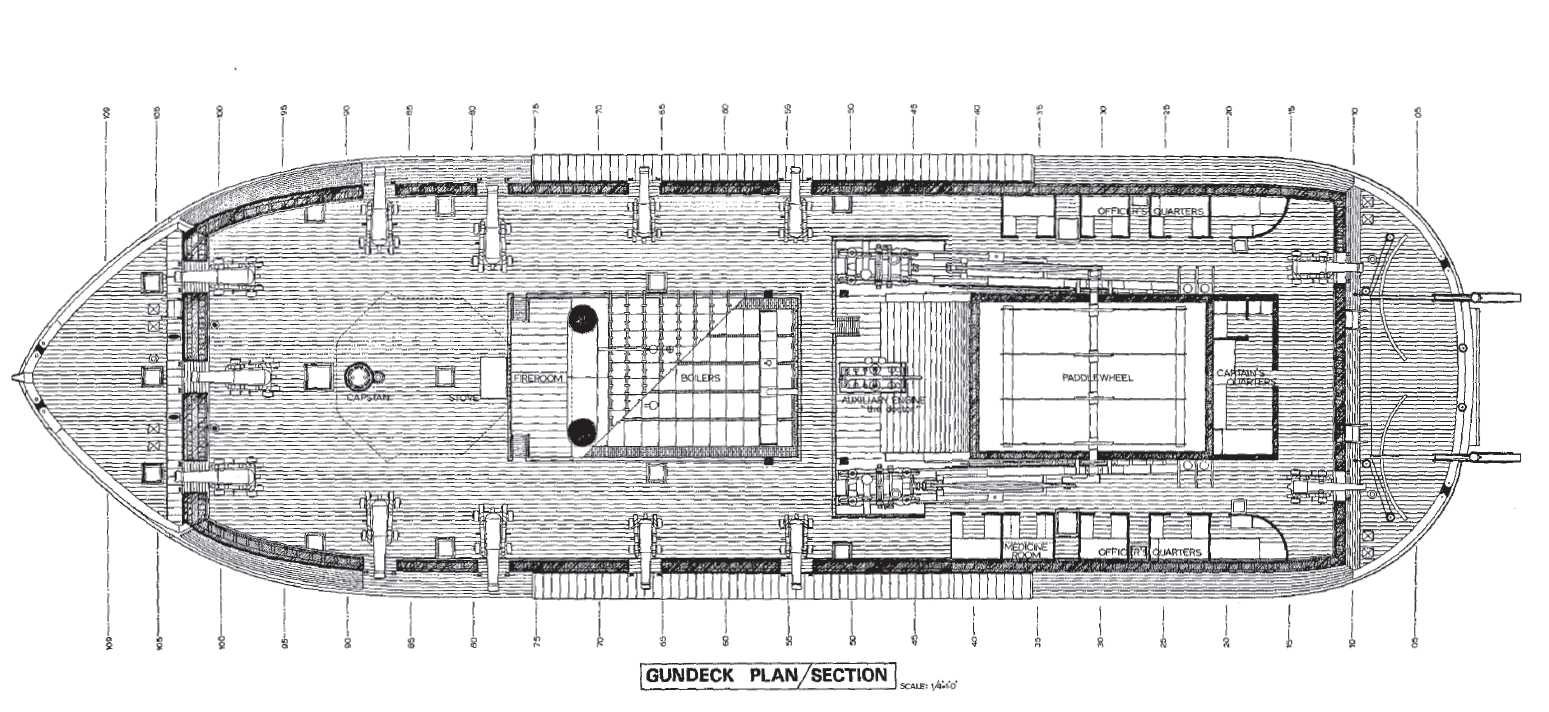
HSR Plans:
-Brian
- FriedClams, Cathead, Keith Black and 5 others
-
8
-
Greetings again all, hope everyone had a great New Years.
It's been a bit since my last update. Since Christmas things have been a little slow on the build and I have not had a whole lot of post worthy work to show.
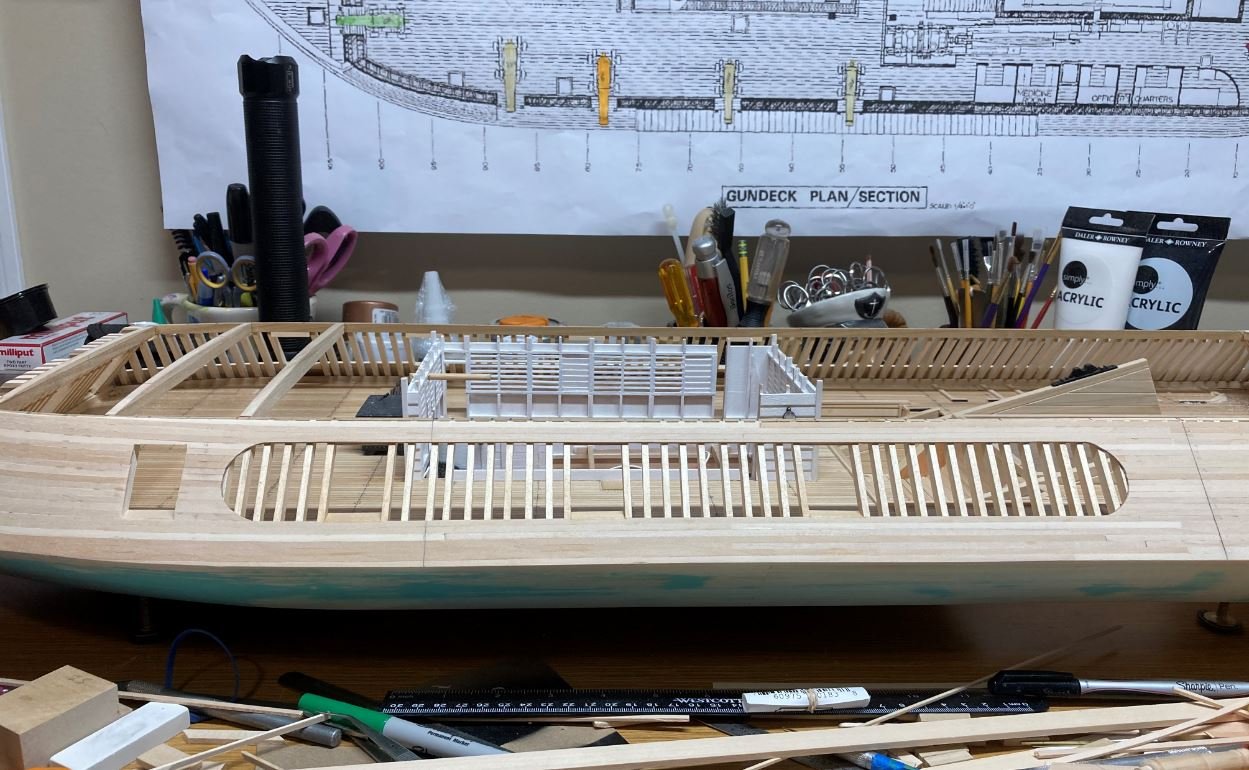
I did however get a few things accomplished recently. One of them being completion of the forward casemates.
Also complete were the starboard side interior walls.
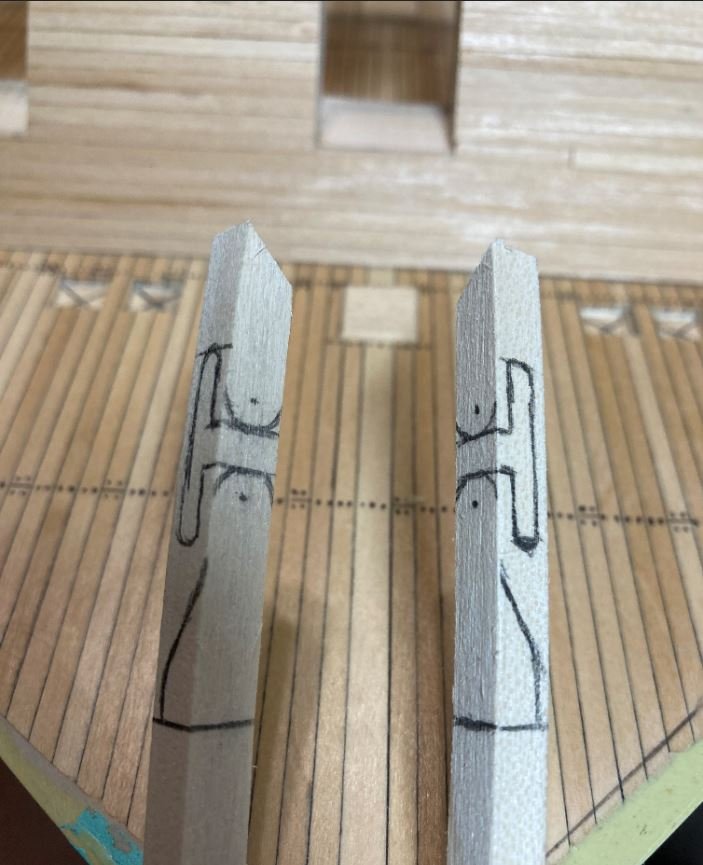
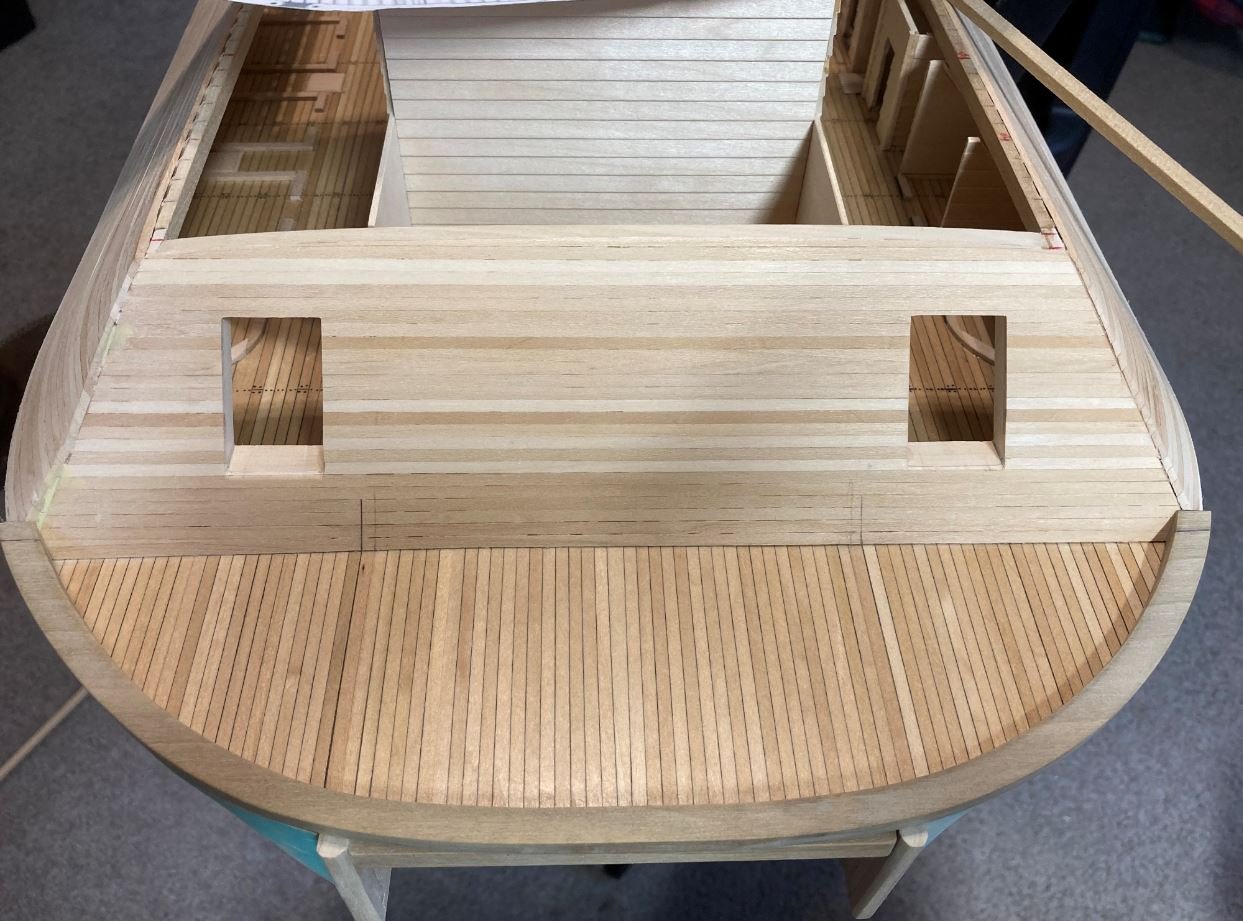
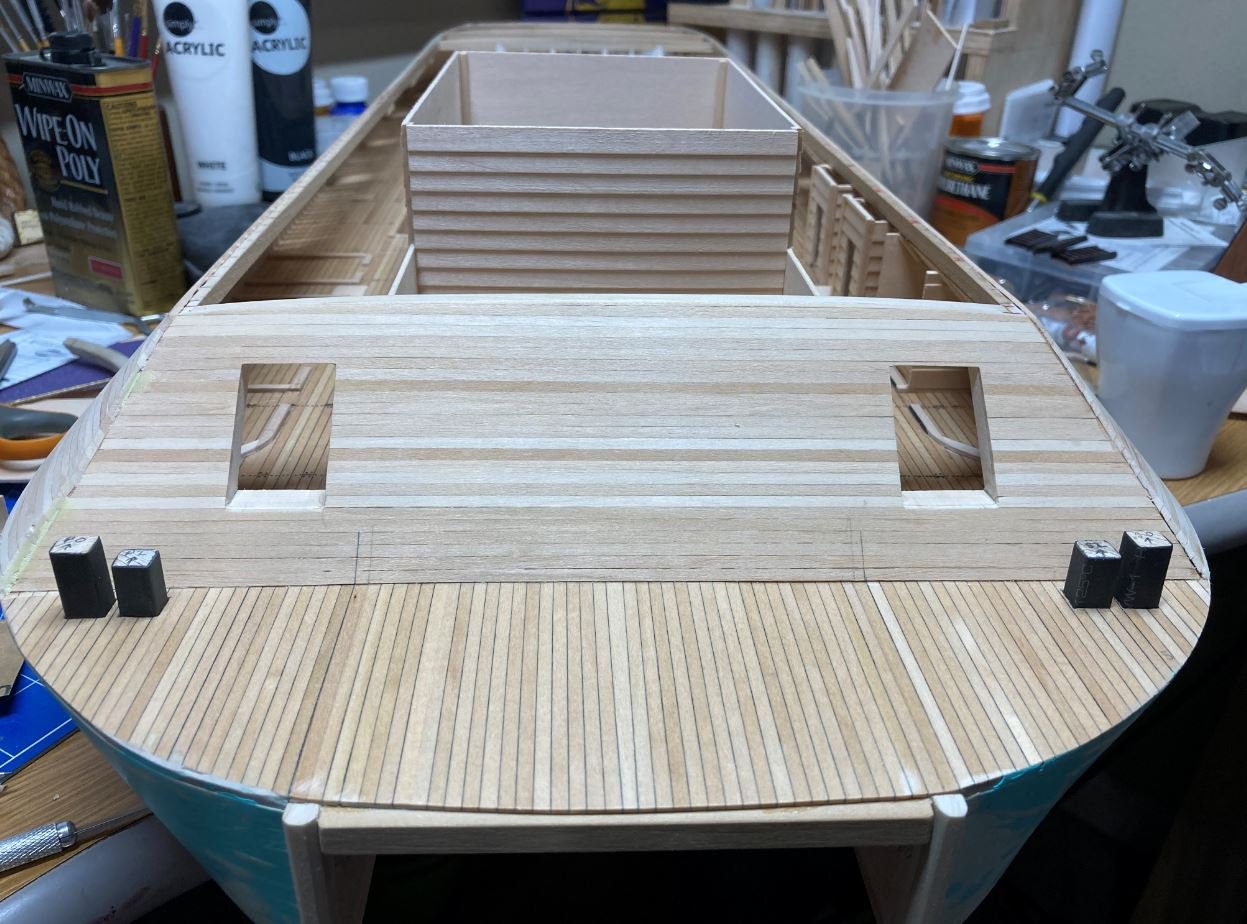
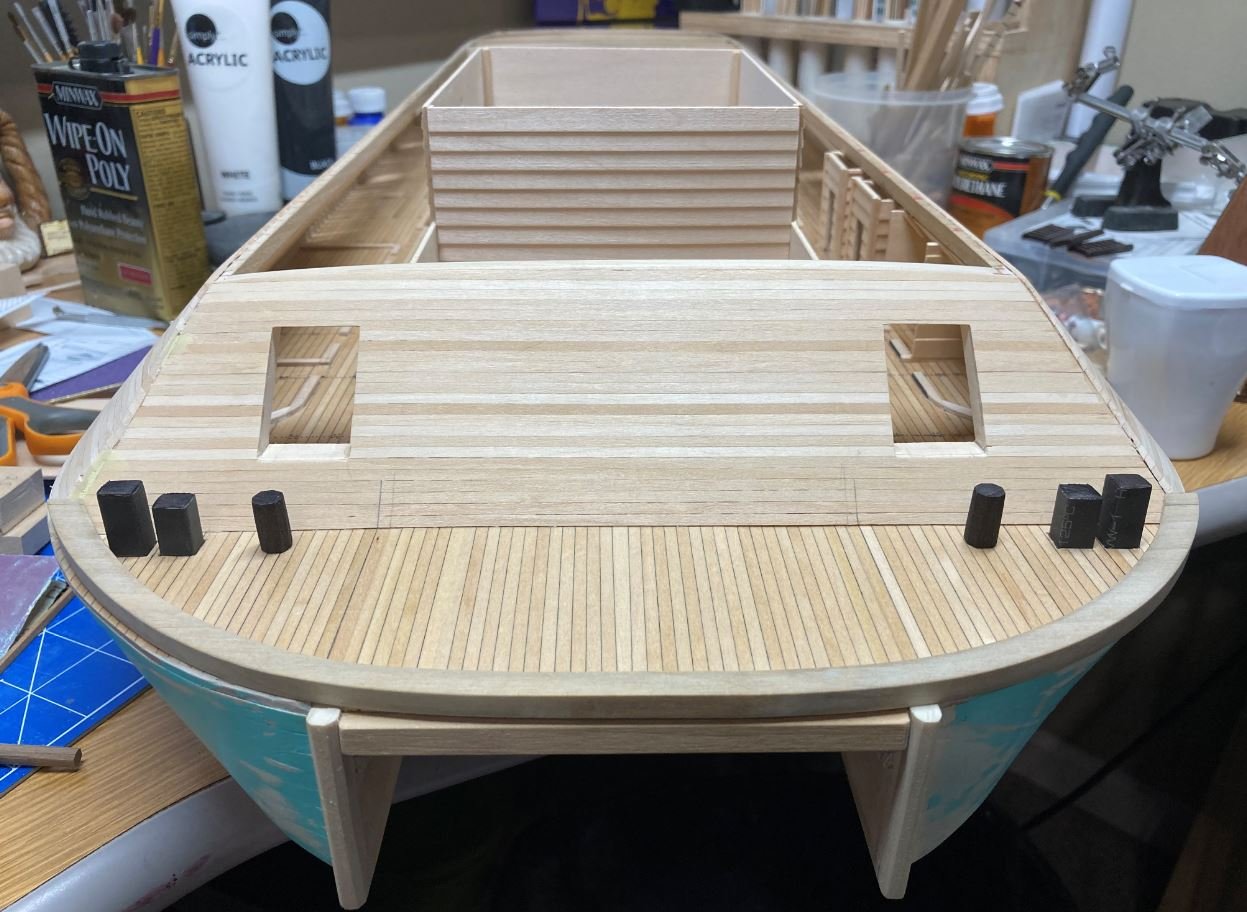
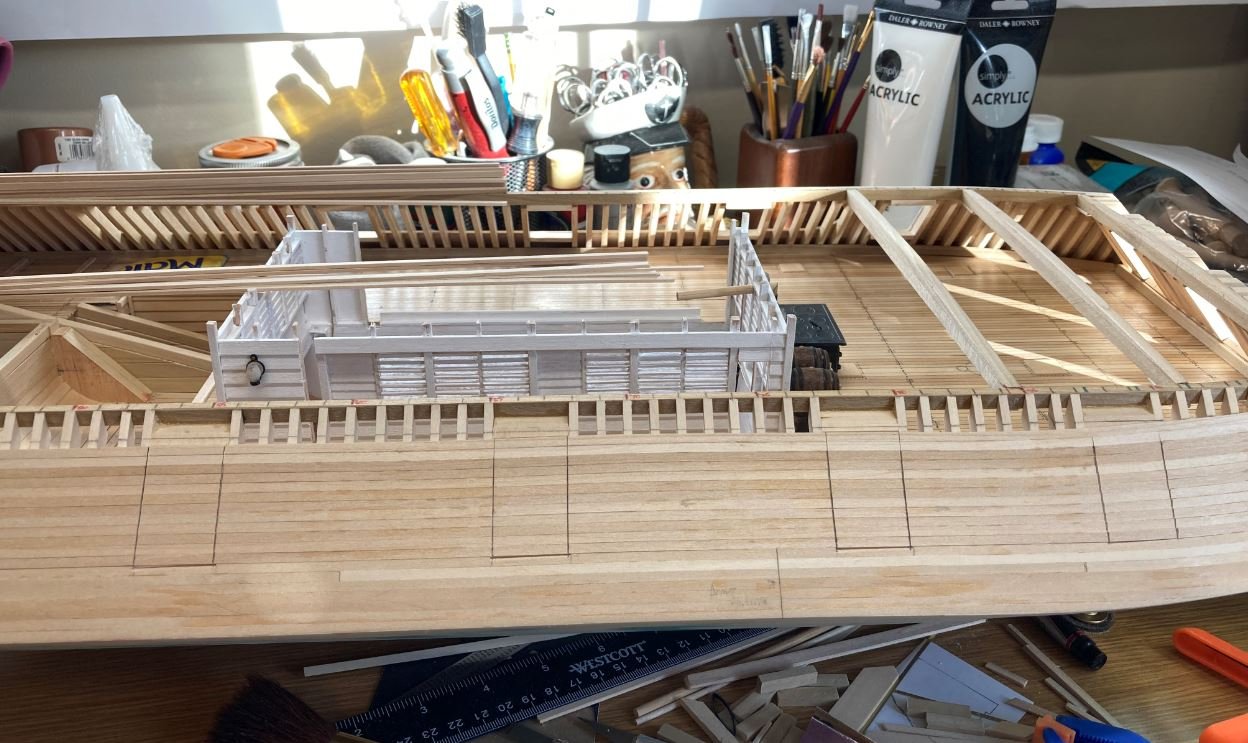
Next I started work on some of the forward deck features. First were the bollards.
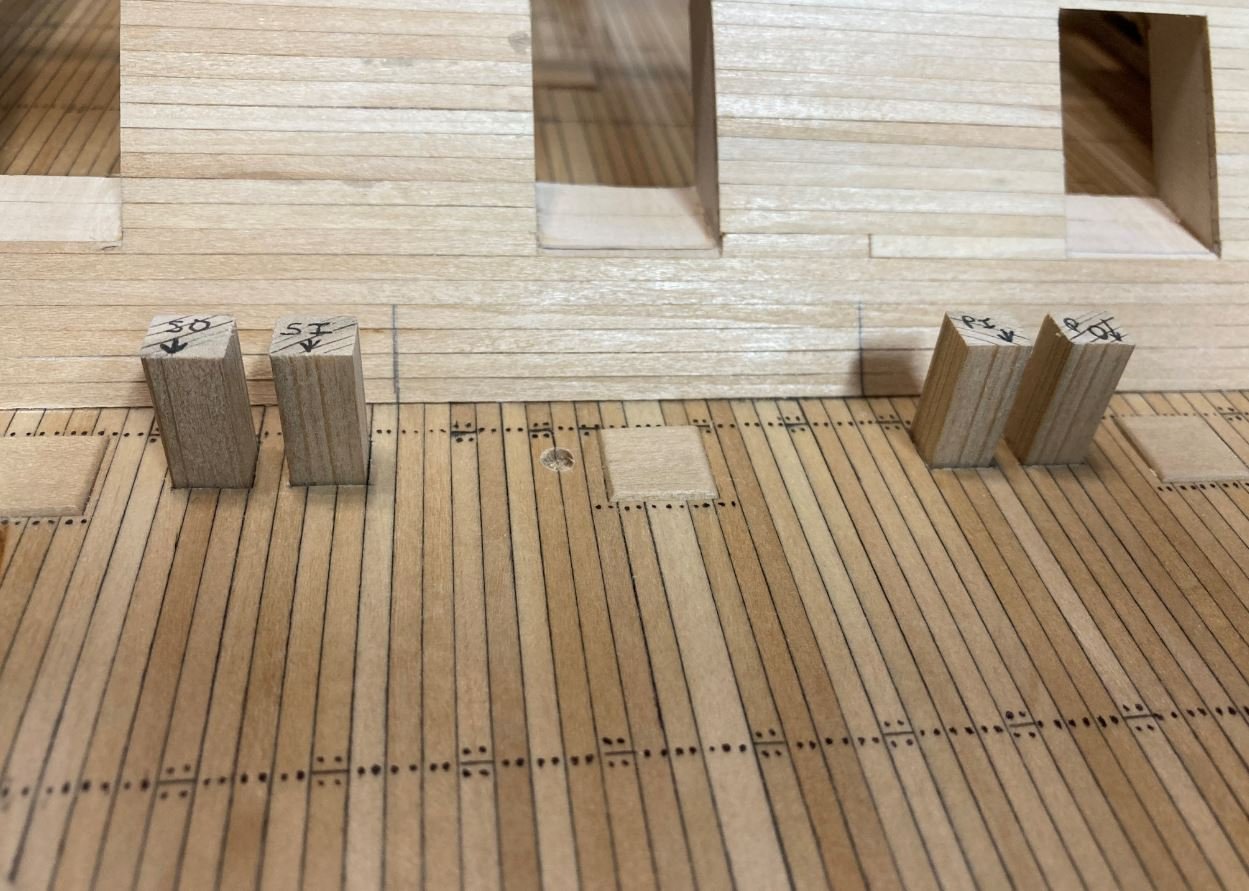
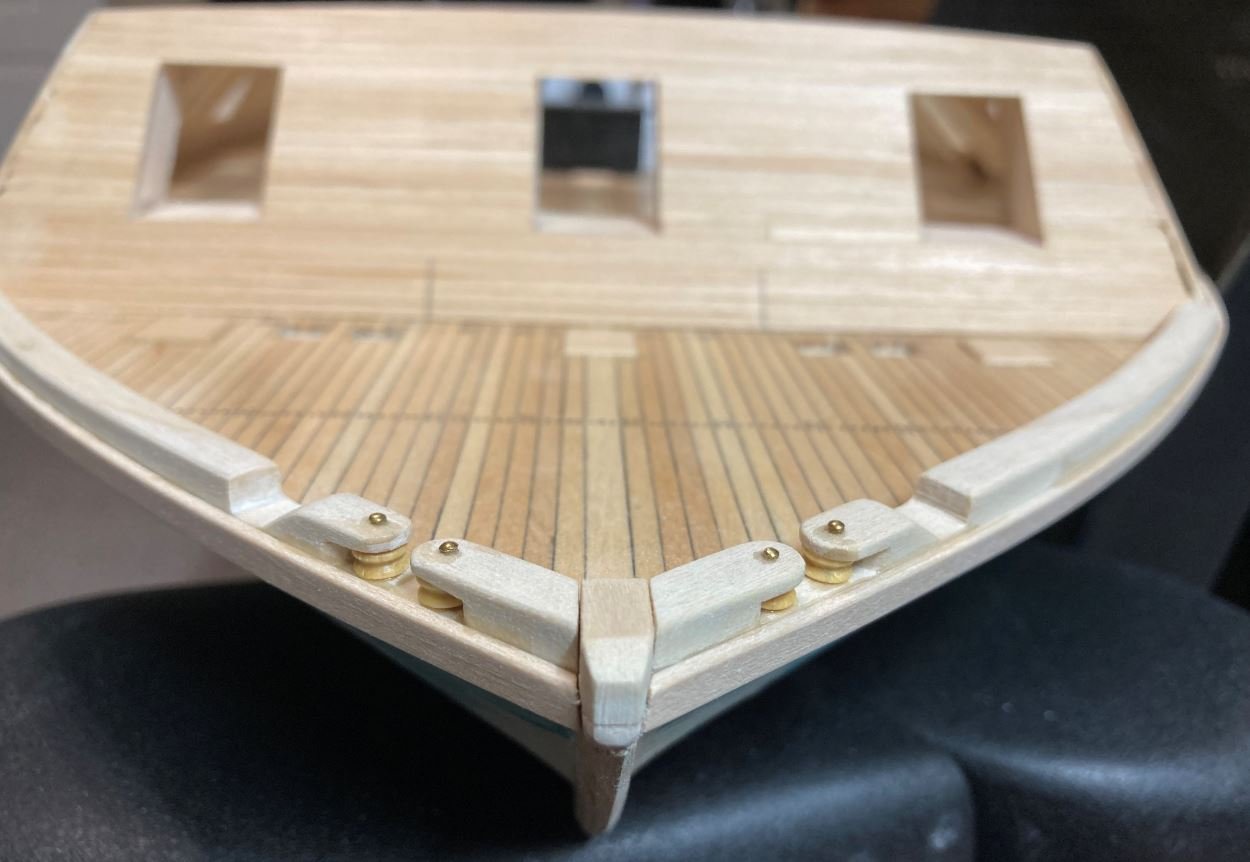
Next were the forward bulwarks and fairleads.
I have found that spare deadeyes make perfect rollers on the fairleads.
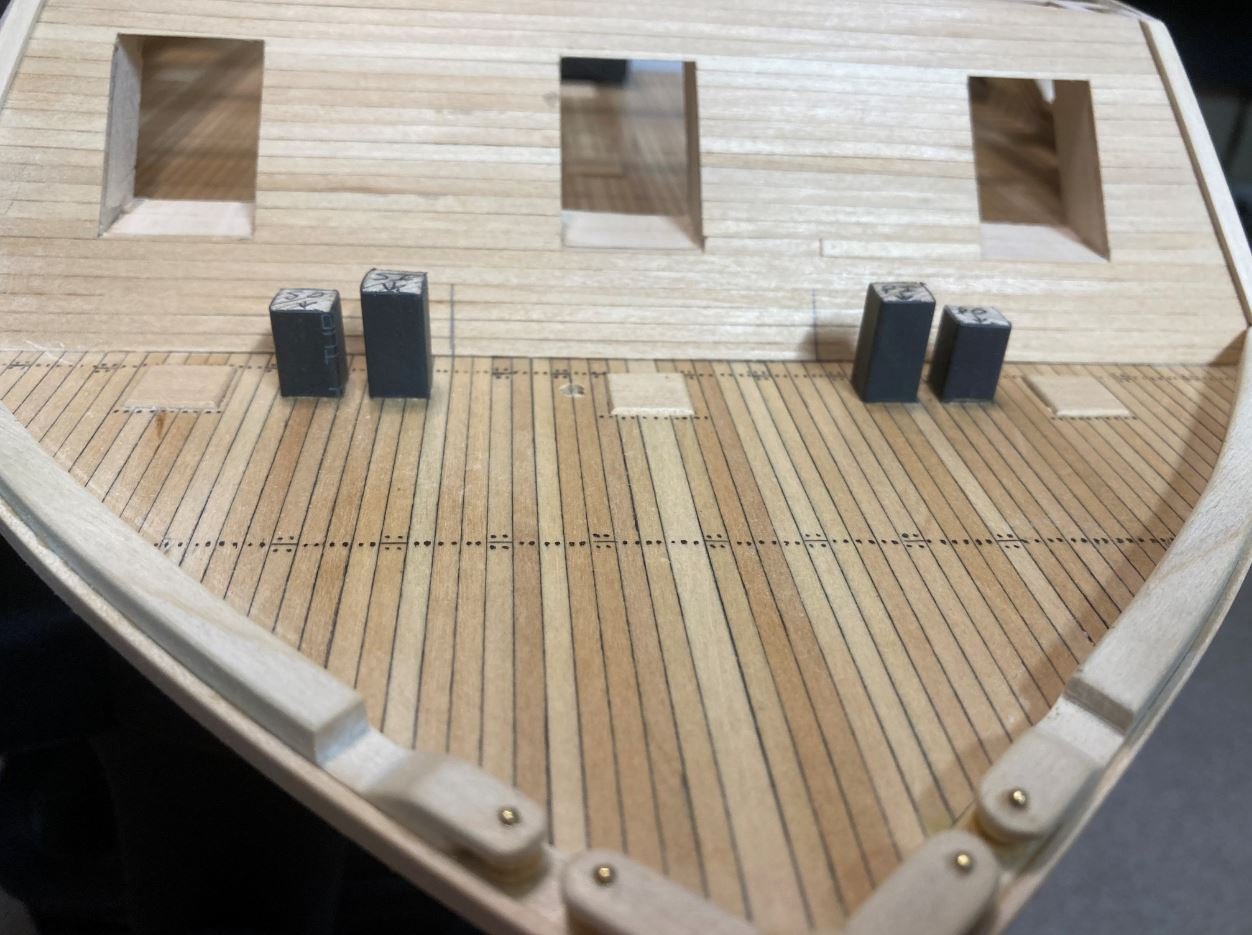
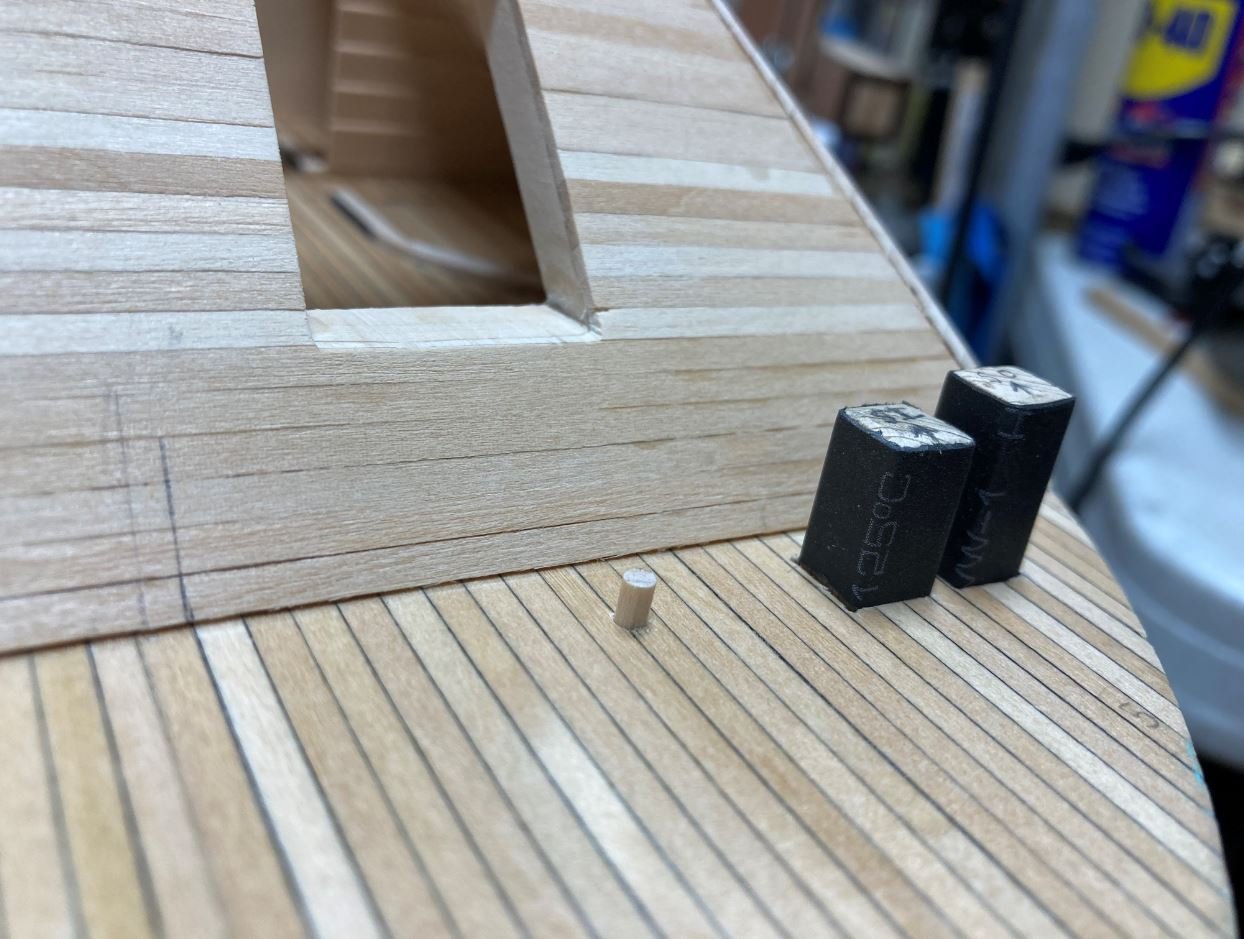
Next up were the aft bollards.
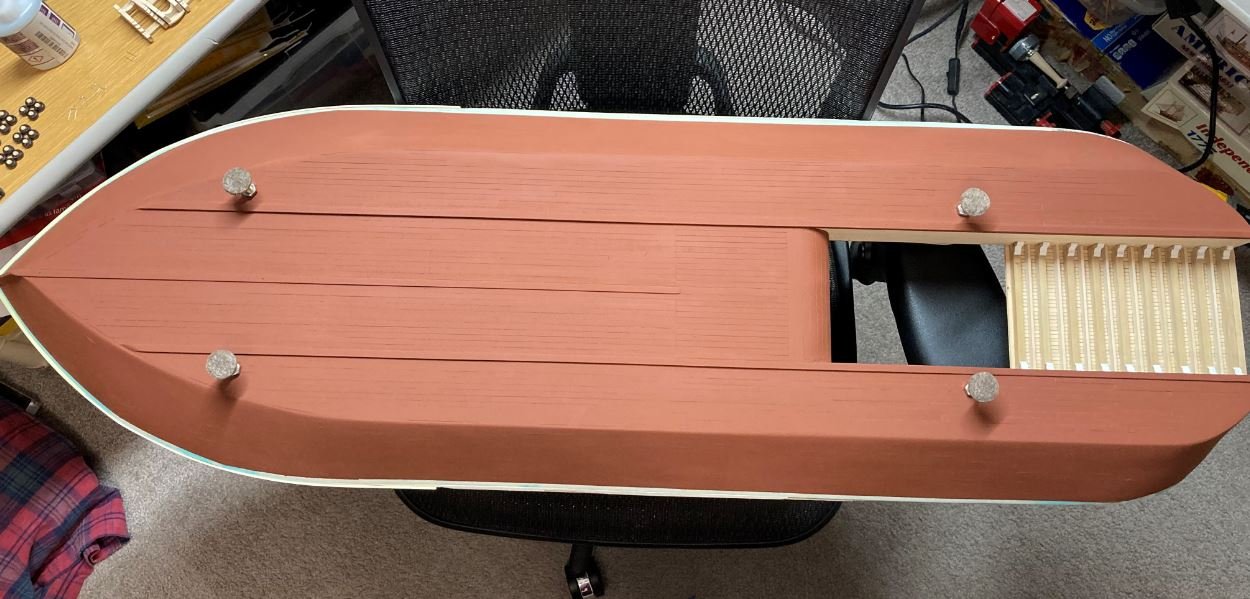
After extensive research and several info requests, I came up empty on my search for hull color. I finally made the decision that I am going to take my builders liberties with this and paint the hull something other than black. During my research I came across build after build and model after model of Ironclads that had some type of red color on the hull below the waterline. Unfortunately no info exists on whether or not the Cairo had a painted hull, so my choice is to paint it. I tried several different colors before deciding on a reddish-brown red oxide color. I wanted something that would break up the mostly black paint scheme of the casemates and armor plating, but something that would not stick out like a sore thumb. Many of the examples that I ran across the builders used a bright red paint, much like many of the modern day anti fouling reds that are used today. I just felt this would not have been the case and went with a more subdued color that will separate the black, but still maintain some of the boats stealthy-ness.
Here is the color I came up with. As always, comments are definitely welcome. It may not look like much now, but as soon as I get the black paint on it, I think it will blend in nicely.
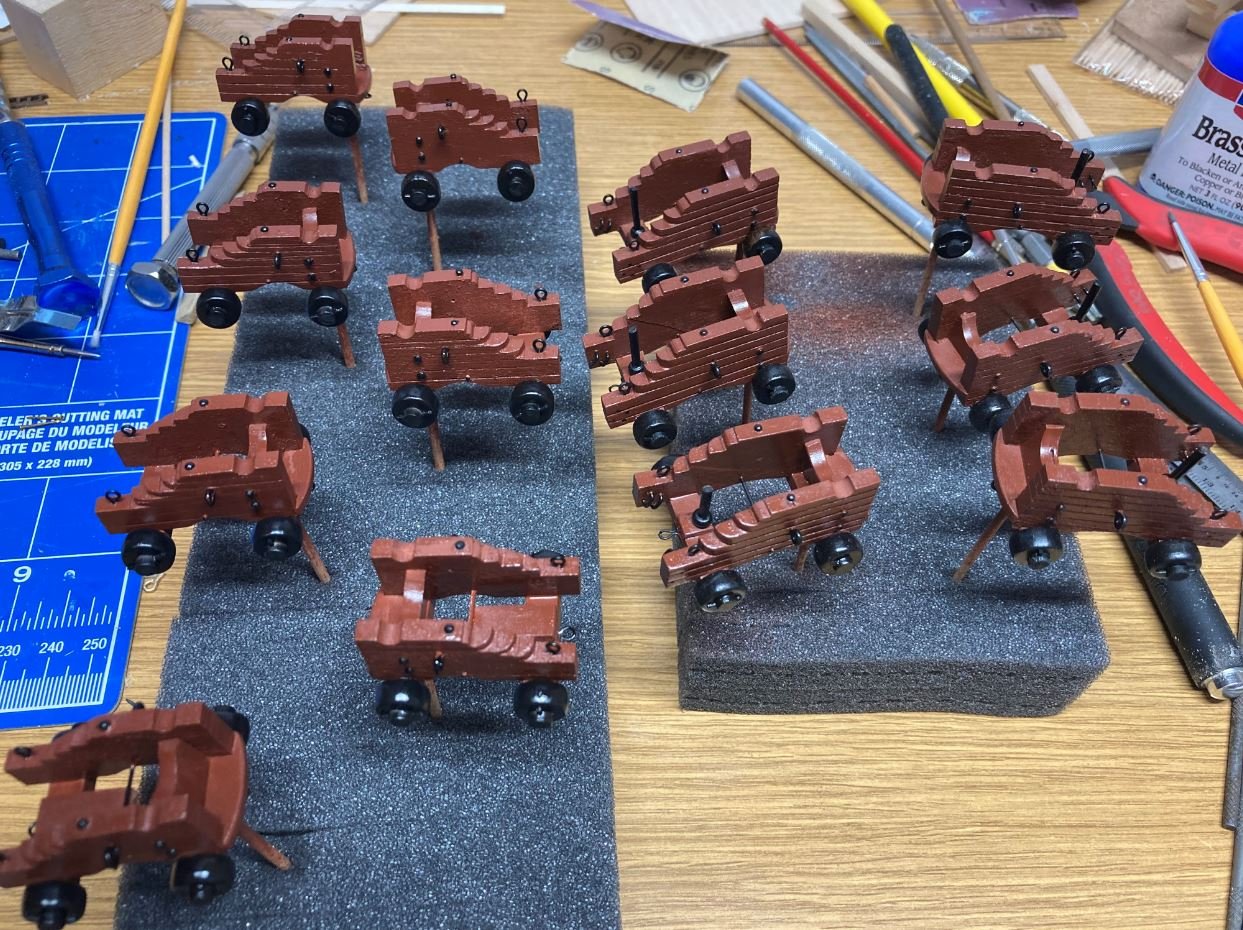
Next was the completion of the cannon carriages.
Here are the six large carriages. I had some leftover red from the hull, so I decided to use it on the carriages to. This way it transfers some of the color to the inside of the boat as well.
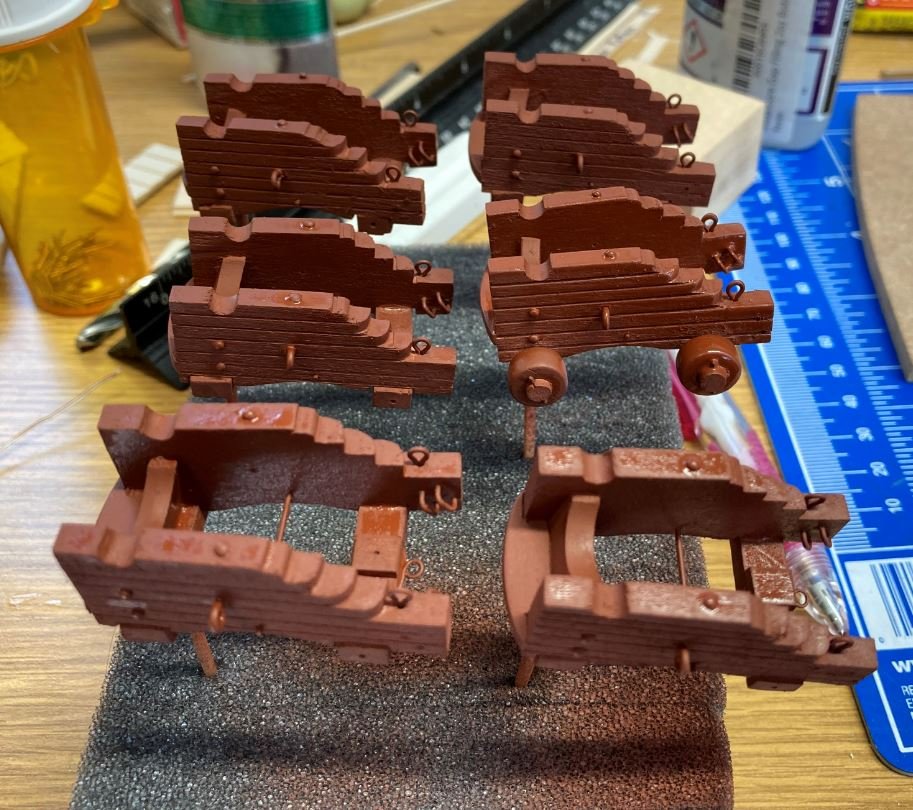
Large carriages completed
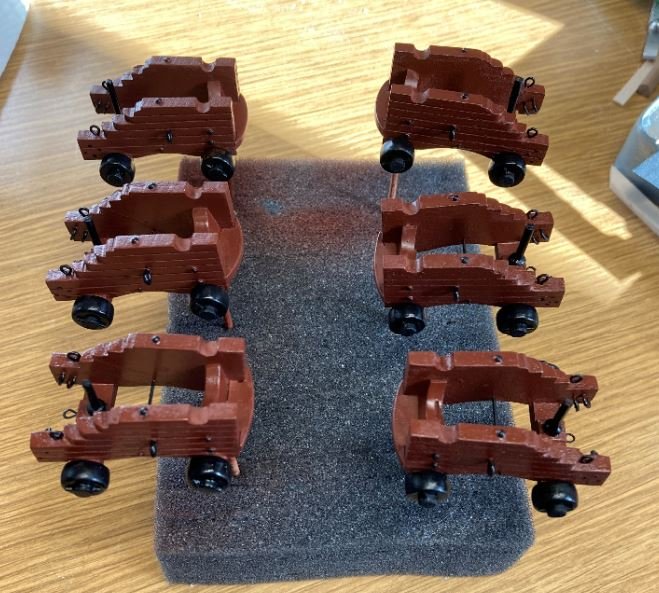
And all thirteen carriages completed.
I had started turning down the cannons, but I was having trouble getting them to come out looking the same. After several attempts I finally conceded defeat and decided to take a different approach. I was speaking with one of my uncles who used to be a machinist and still has some connections at his old shop that could 'hook me up" with some turned brass ones. All I need to do was to send him the dimensions and plans for them and he would take care of them for me. So this is the route that I am taking. Hopefully the truest out there won't look down on me for cheating a bit, but I just don't think that my skills on the lathe are there yet.
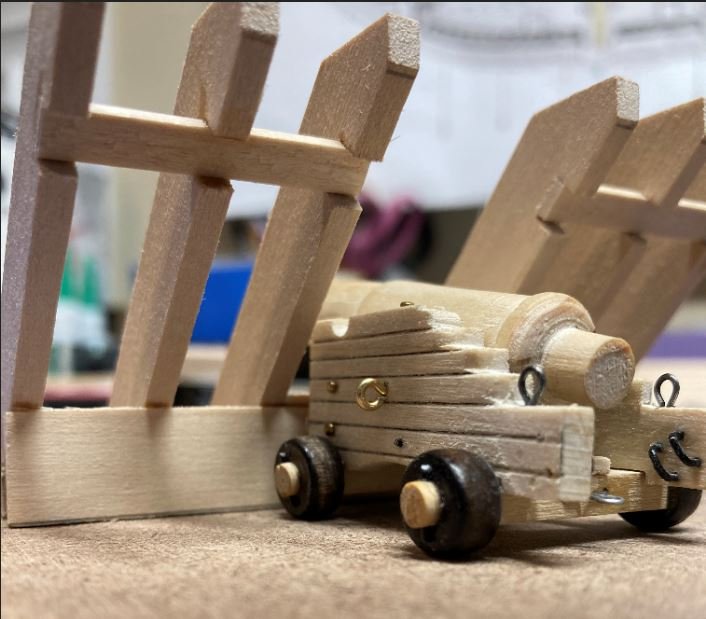
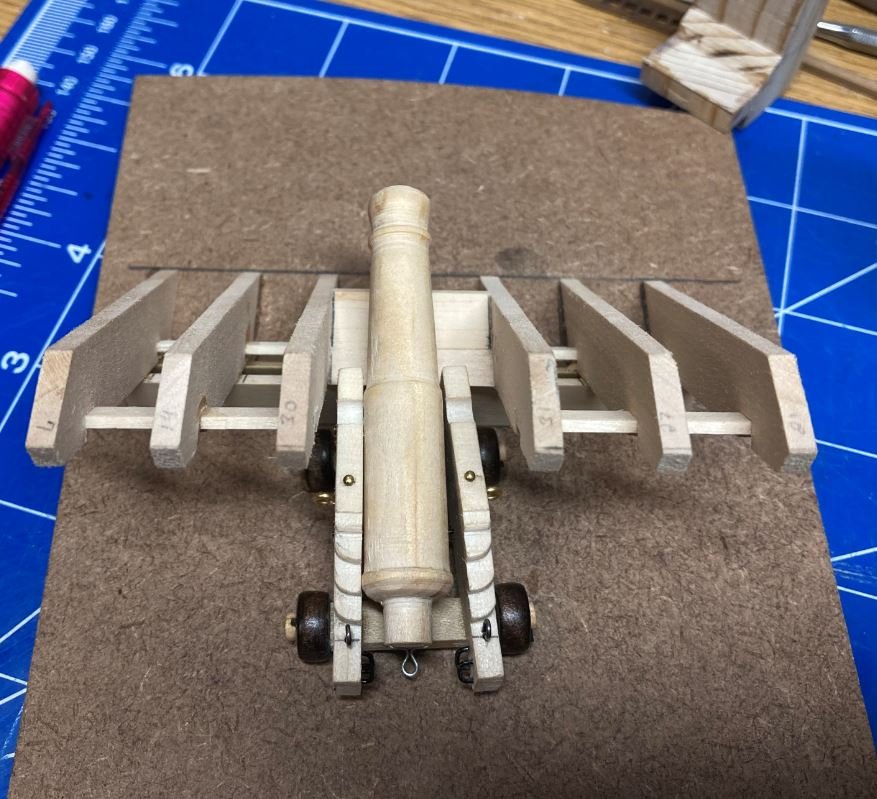
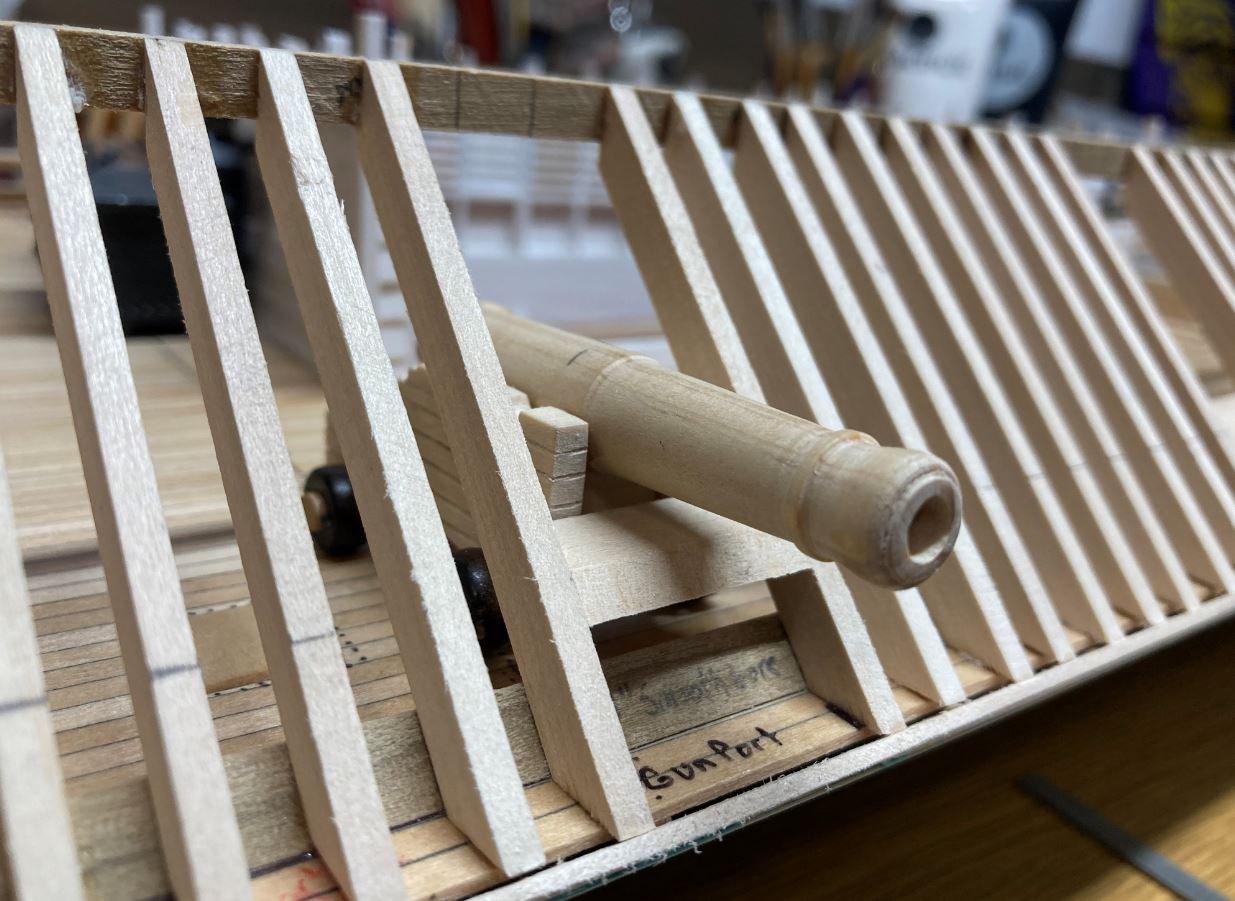
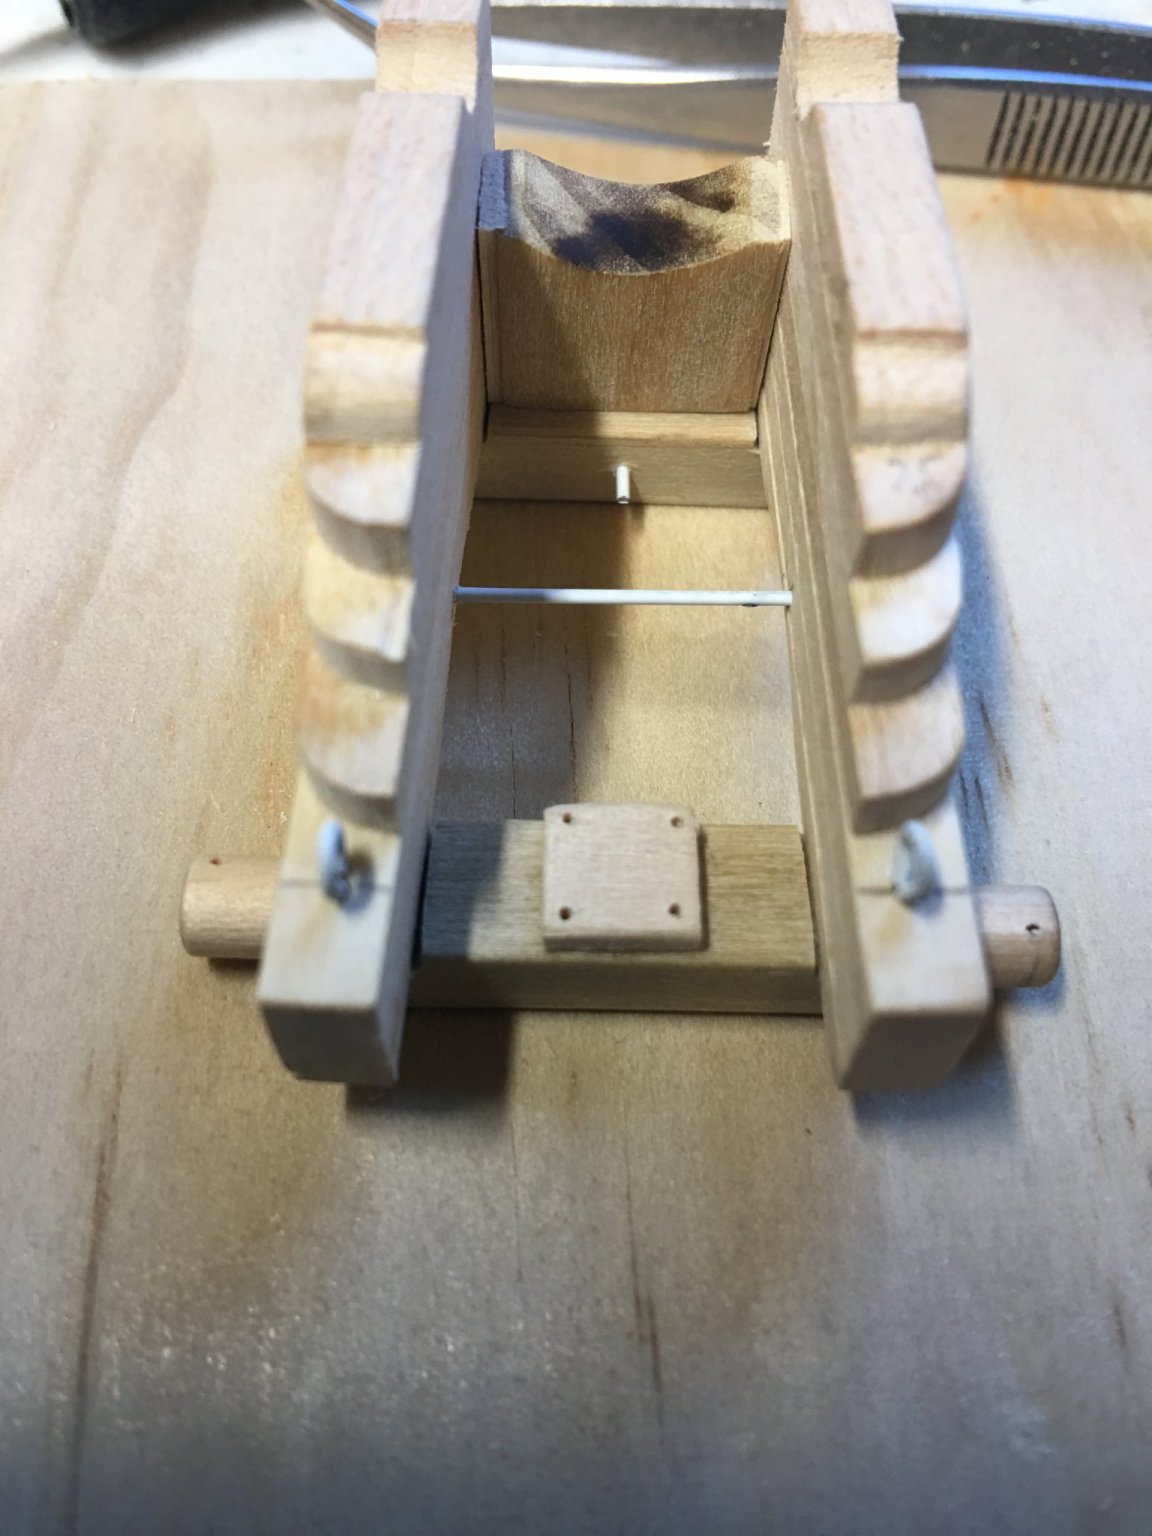
In the meantime, I built me a mockup of one of the gun ports for rigging the cannons and I set up my first attempted carriage and one of my failed turned wooden barrels in it. This will allow me to rig everything up with easy access and then all I have to do is transfer it to the model. Should provide me with a lot more room to work instead the close confines of the gun deck.
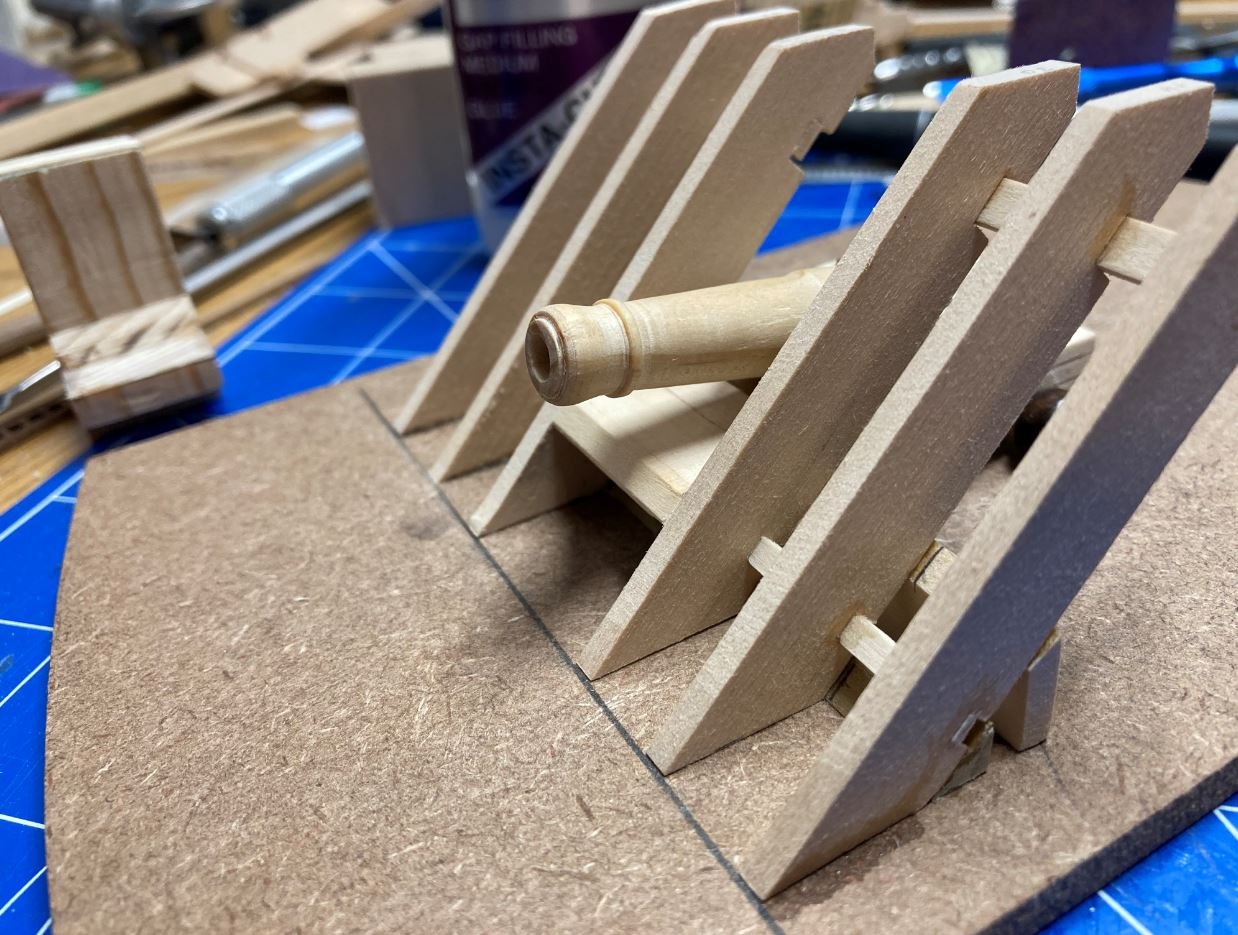
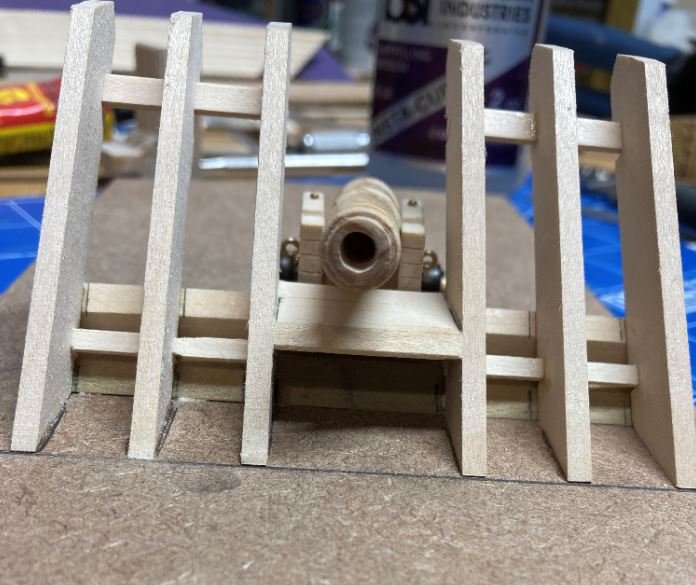
Everything is ready to go for the rigging, I'm just waiting on my order of blocks and rope from Chuck over at Syren Ship Company to come in and I'll make my first attempt at getting the cannons rigged up.
Well that is it for this update, hopefully it won't be so long before the next one.
Thanks again for the likes and for stopping by. Everyone please stay safe.
-Brian
- ccoyle, Nunnehi (Don), Canute and 15 others
-
18
-
Johnhoward,
I appreciate the input on this very much and kinda figured that would be the answer. Coloring determination on many older ships, especially those that didn’t have much of a history before going down to the depths make it difficult on us builders that are doing our best to faithfully replicate the original ships. I see a lot of this issue on other builds where builder liberties have to be used when the information is just not there. One such example would be Vasa. She didn’t make it past her maiden voyage before being lost for 400 years.
During my research on the coloring, I have run across model after model of ironclads, not just the City Class ones, where the builders have used the red color scheme for the hulls. There is even a life size replica of the Monitor that has the hull painted red. I agree that the bright red was most likely not used, but that a more muted red iron oxide could have been a possibility. However, since there is no documentation or information that can prove otherwise, and like you said, I will go with my own personal preference and color the hull to my liking. I have been playing with a few color schemes that I like and I believe I have settled on a reddish-brown rust color that is close to an iron oxide that I think will break up the otherwise all black paint on the casemates. I guess that if somewhere down the line a discovery is made the confirms the true hull color, I can pull my model out of its case and fix the error. Until then I think I’ll be happy with what I have now.
Again, thank you so much for your input. Really looking forward to more updates on the St. Louis build.
-Brian -
Lots of tedious work, but it all pays off in the end. I love the minor variances and inconsistencies, they add that touch of realism to a build.
To echo Steven’s comment, I’m glad all went well with your father in law’s memorial service. Coordinating that any people online is no easy task.
-Brian
-
Happy New Year to you as well. What a beautiful winter scene, definitely postcard worthy. We barely escaped the white stuff here this time around. good weather to spend in the shipyard.
Can’t wait to see how the latest additions to the crew come out.
-Brian
- mtaylor, FriedClams and Cathead
-
3
-
-
15 hours ago, Cathead said:
Thanks for sharing that video, it was a nice overview of various steps taken in construction.
That’s what I was thinking as I was watching. It’s amazing the skill and labor involved with shipbuilding. My ulterior motive was hoping, somewhat, that by watching it would entice you to add the rivets to your build 😈.
Beautiful job on the figures. They look right at home on the deck. My skills at detailed painting have never been that good. One of the reasons why I try to steer clear of painting my models unless it it’s one solid color, or lacks the fine details.
-Brian
- Louie da fly, mtaylor and joep4567
-
3
-
Johann,
This is quite simply a masterpiece in the making. The details and intricate work you put into this build are mind blowing. I look forward to each and every update with great anticipation. Coupled with the videos, it is one of “The” builds to follow. Thank you so much for sharing your amazing work with us, it is a true pleasure.
-Brian
- md1400cs, mtaylor, FriedClams and 3 others
-
6
-
Keith,
What a beautiful build! My apologies for being so late to the game. I’ll gladly take a seat in the back row, punishment for being so late. Your deck details are fantastic, as is your rework of other details.
After reading through this build, not sure if I missed it or what, but what is the back story on the model. Was this a continuation of a build that you started in the past or an unfinished build that you inherited? Also, what is the coloring of the decking? From the photos it has a deep, rich color that goes beautifully with the black and white of the hull.
-Brian
- Keith Black, FriedClams, vaddoc and 1 other
-
3
-
 1
1
-
-
Wefalck,
Just ran across your build and spent the last hour catching up. I have to say this is an interesting boat and a magnificent display of model building mastery. Looking forward to following along on future updates.
-Brian
- Tony Hunt, mtaylor and Keith Black
-
3
-
Merry Christmas Everyone,
I figured I'd get one more quick update in before the end of the year.
While I still sort out my hull color, I started working on the cannon carriages.
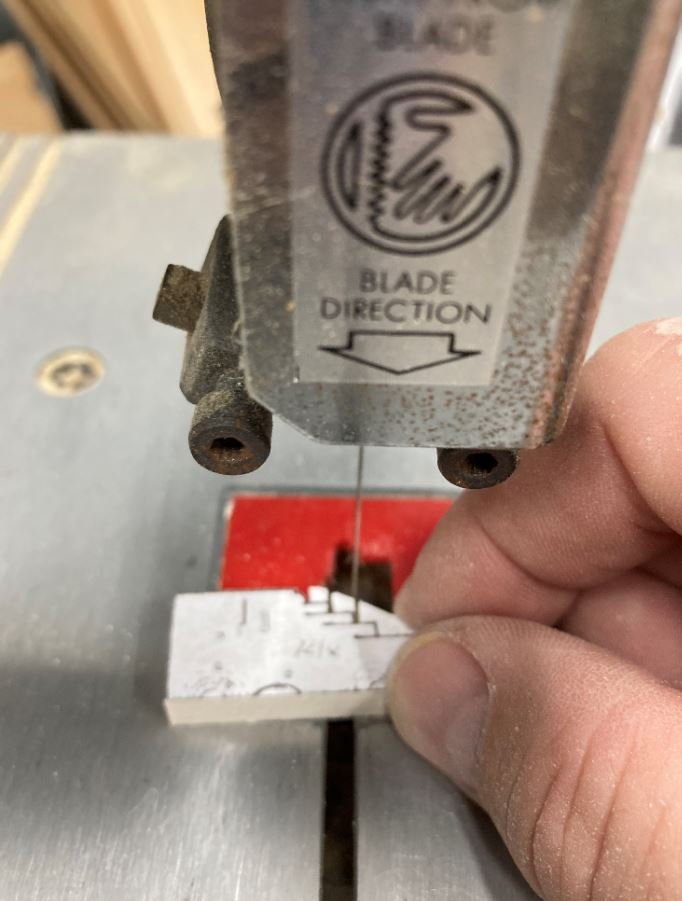
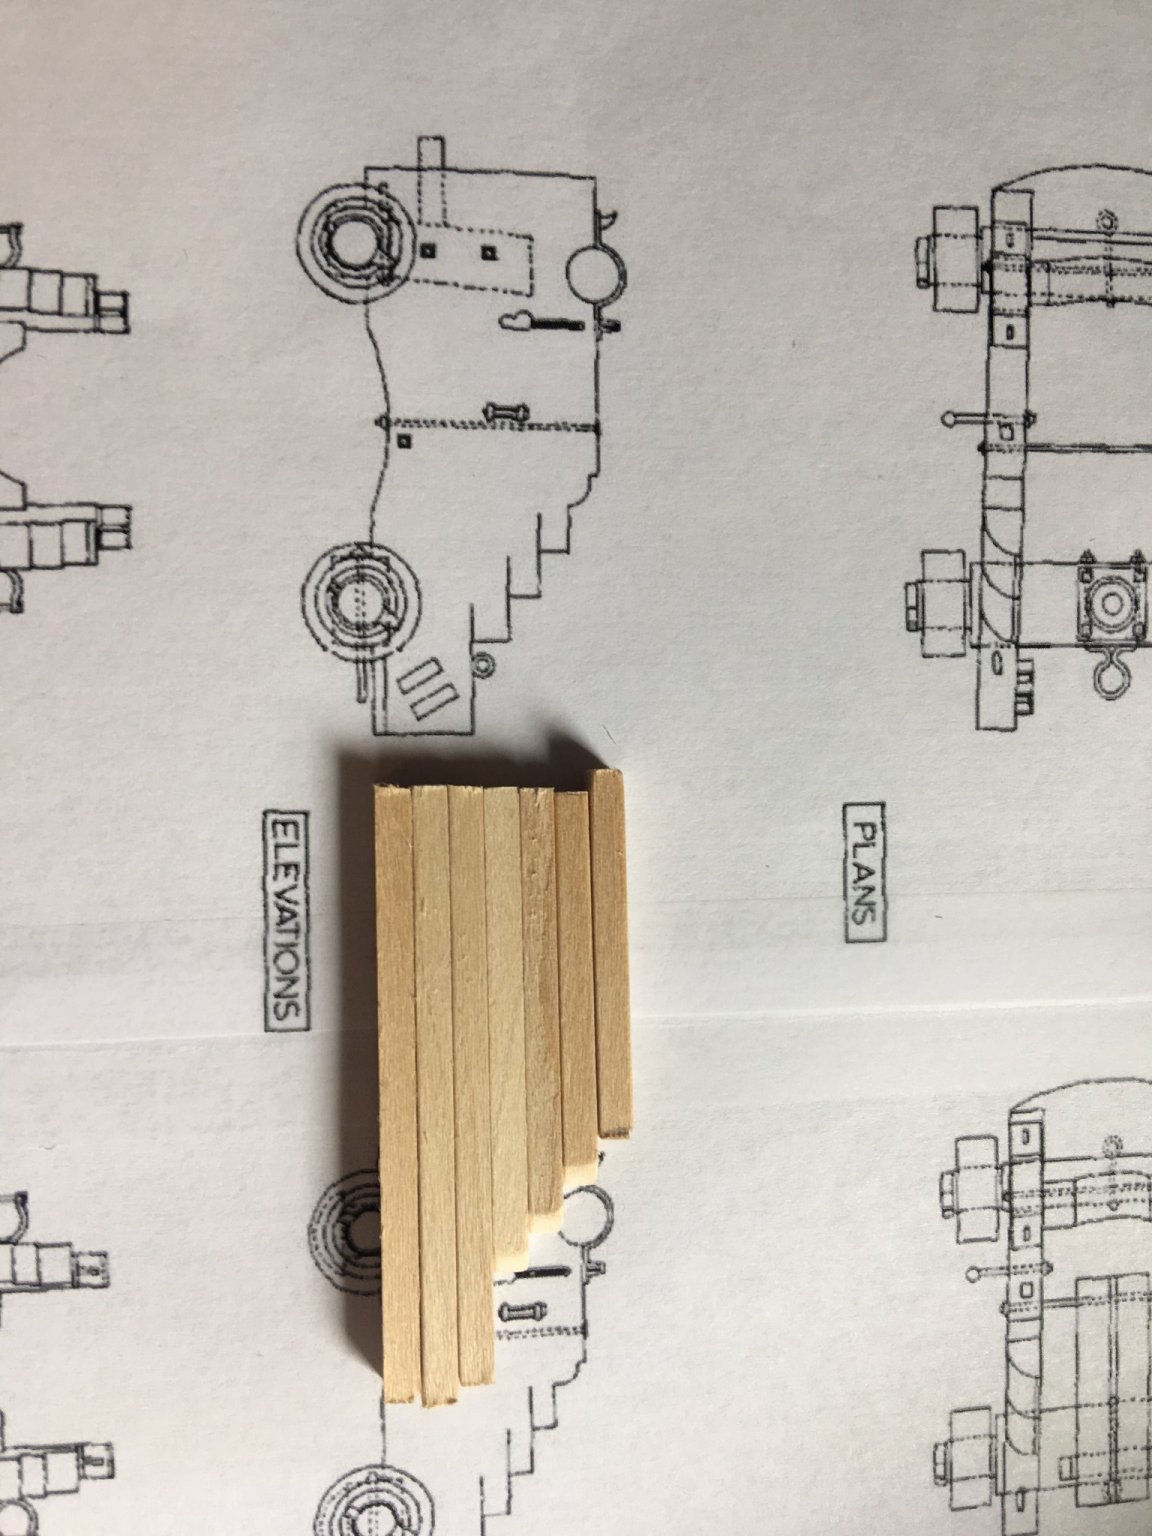
I started out with pasting the template as a pattern and cutting out the rough form on my bandsaw.
With a little sanding and carving I pieced them together. Please forgive my lack of pictures on these, I totally forgot to take them while building them.
Temp installed in one of the gun ports.
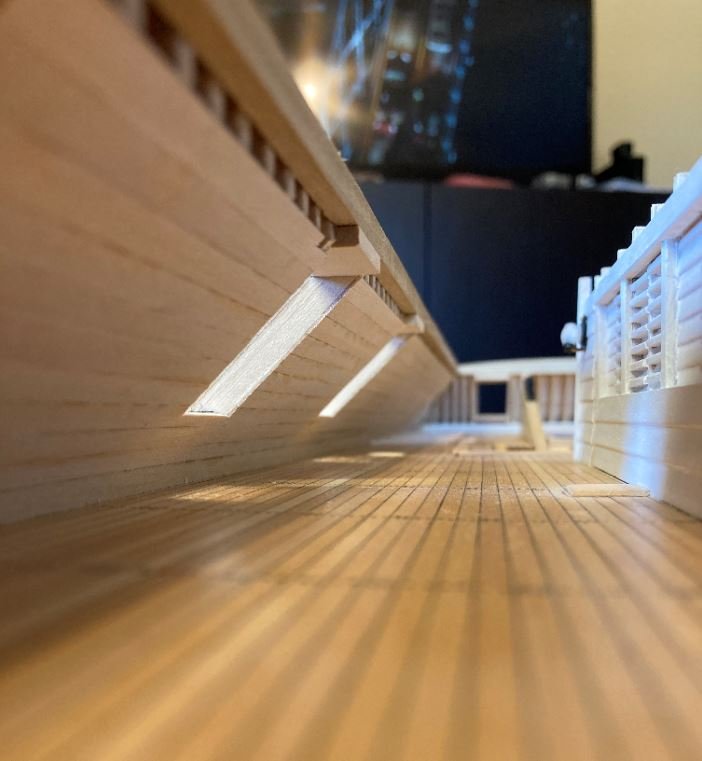
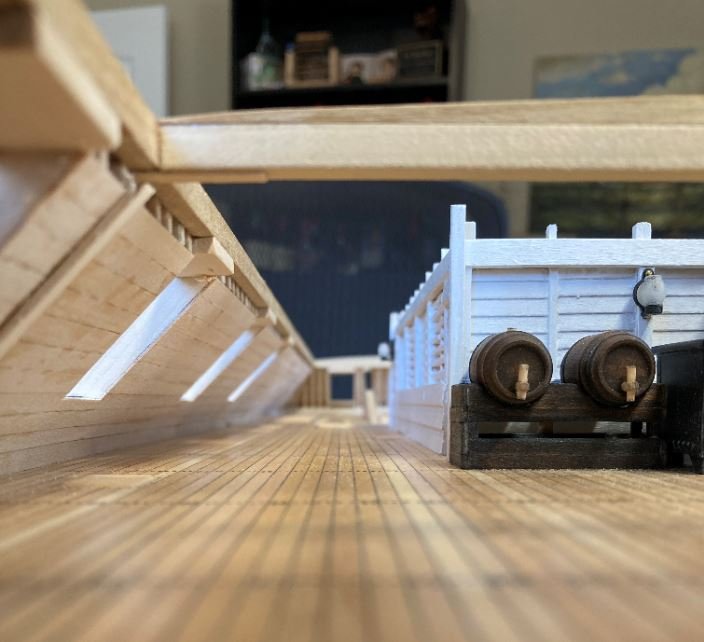
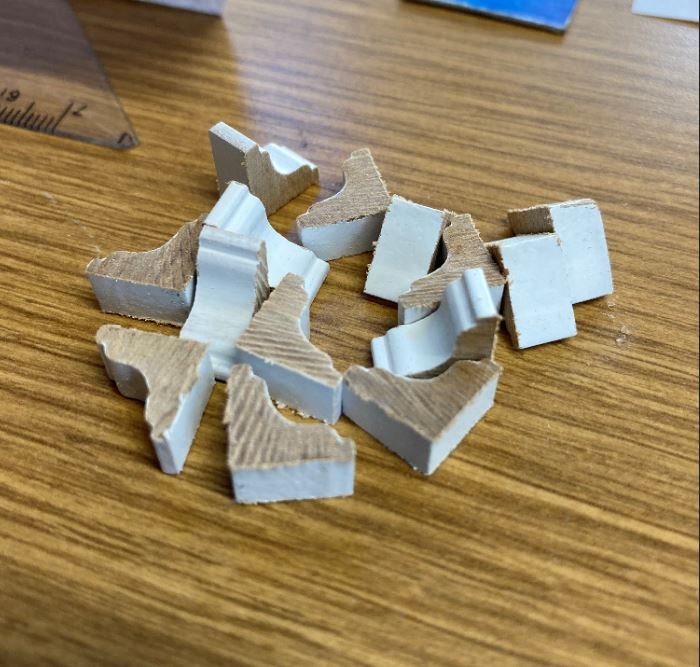
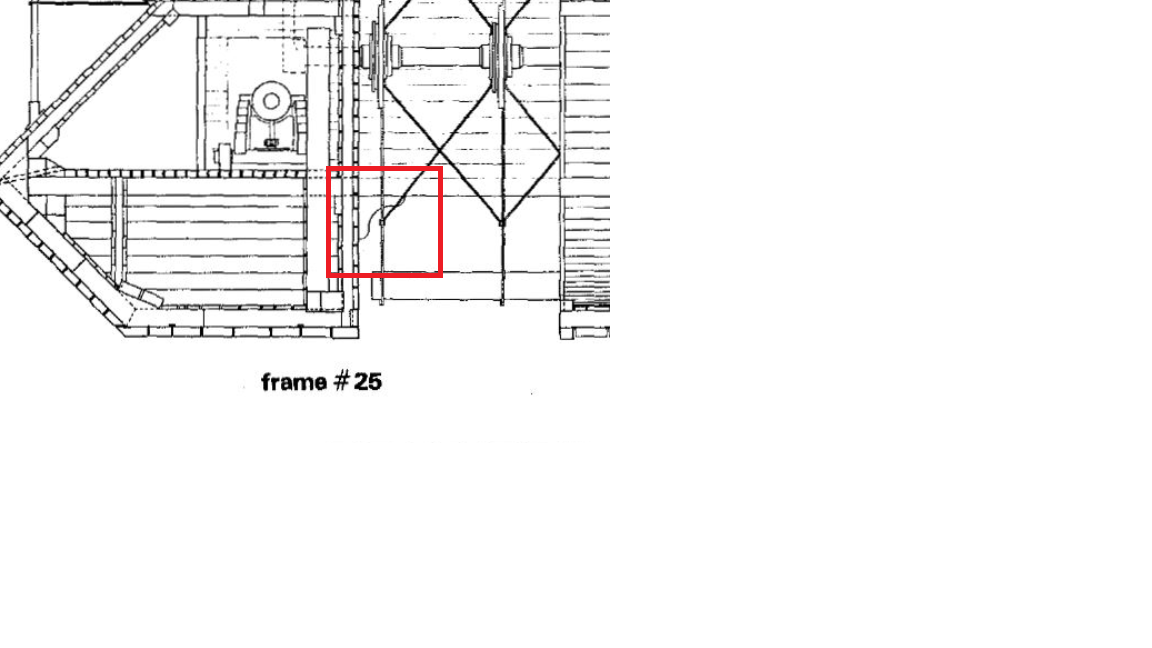
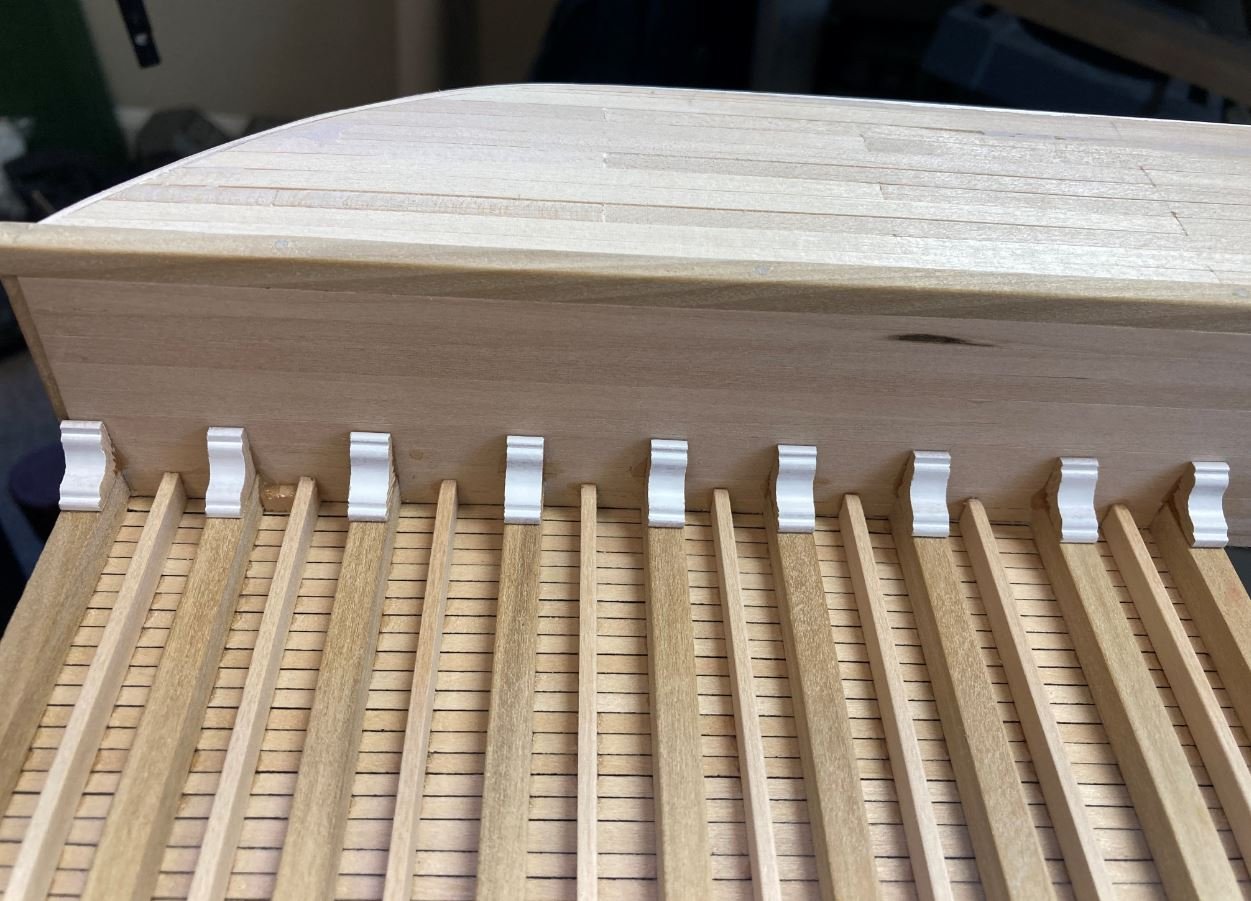
The more I looked at the carriages, the more I became dissatisfied with them. So while I pondered yet another quandary, I decided to work on putting in the waterway knee braces. I managed to find some dollhouse molding that I thought would work perfect for these braces. They may be a little bit more fancier than what was actually used, but since none of them survived the salvage, I went with what I thought would work. Besides, compared to the HSR, they look pretty close.
First one in place.
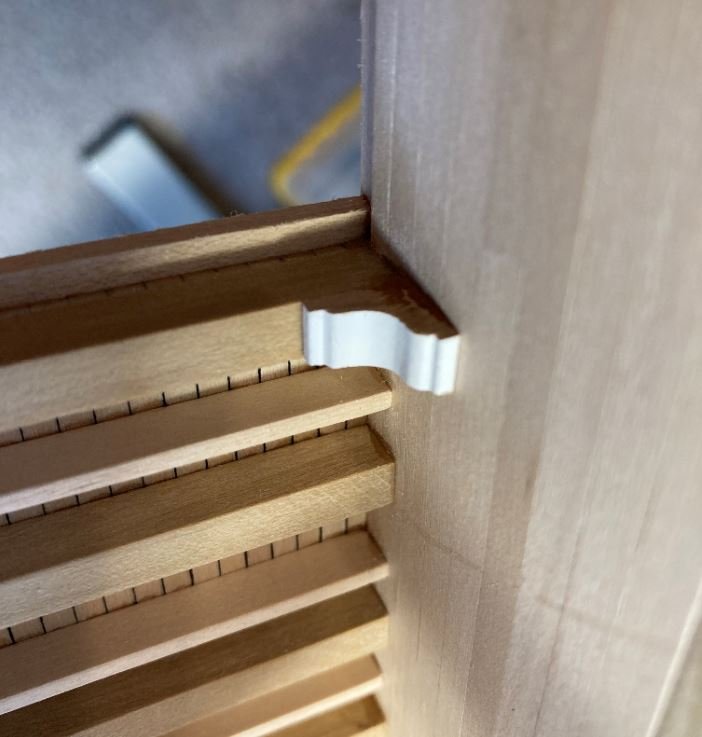
All done. I'll clean them up a bit before the paint goes on.
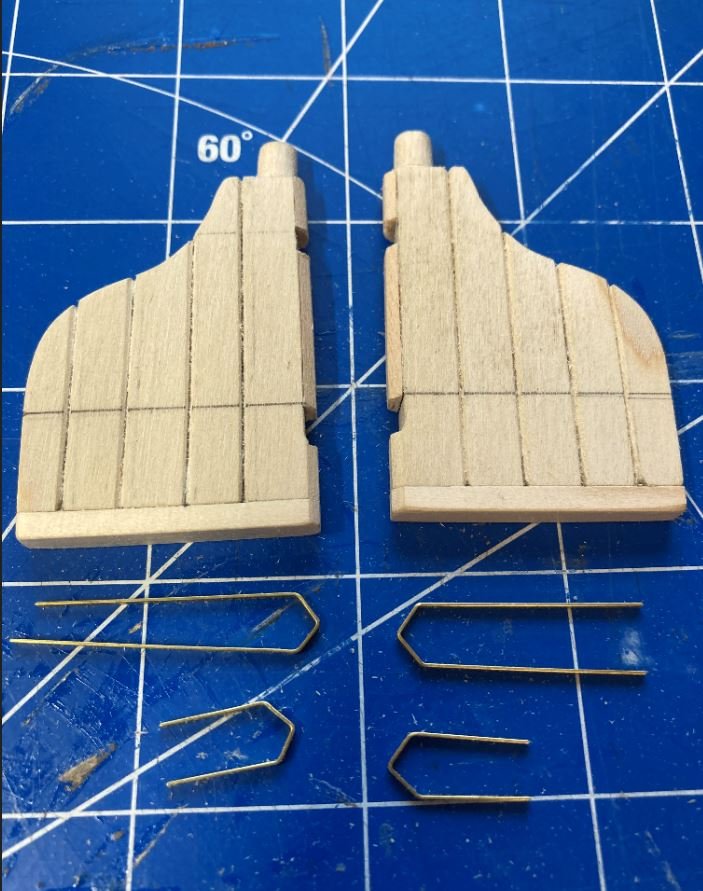
Once the knee braces were installed, I worked on building the rudders. Again I apologize for the lack of pictures, I guess I was just too engrossed in my work to focus on anything else but the build.
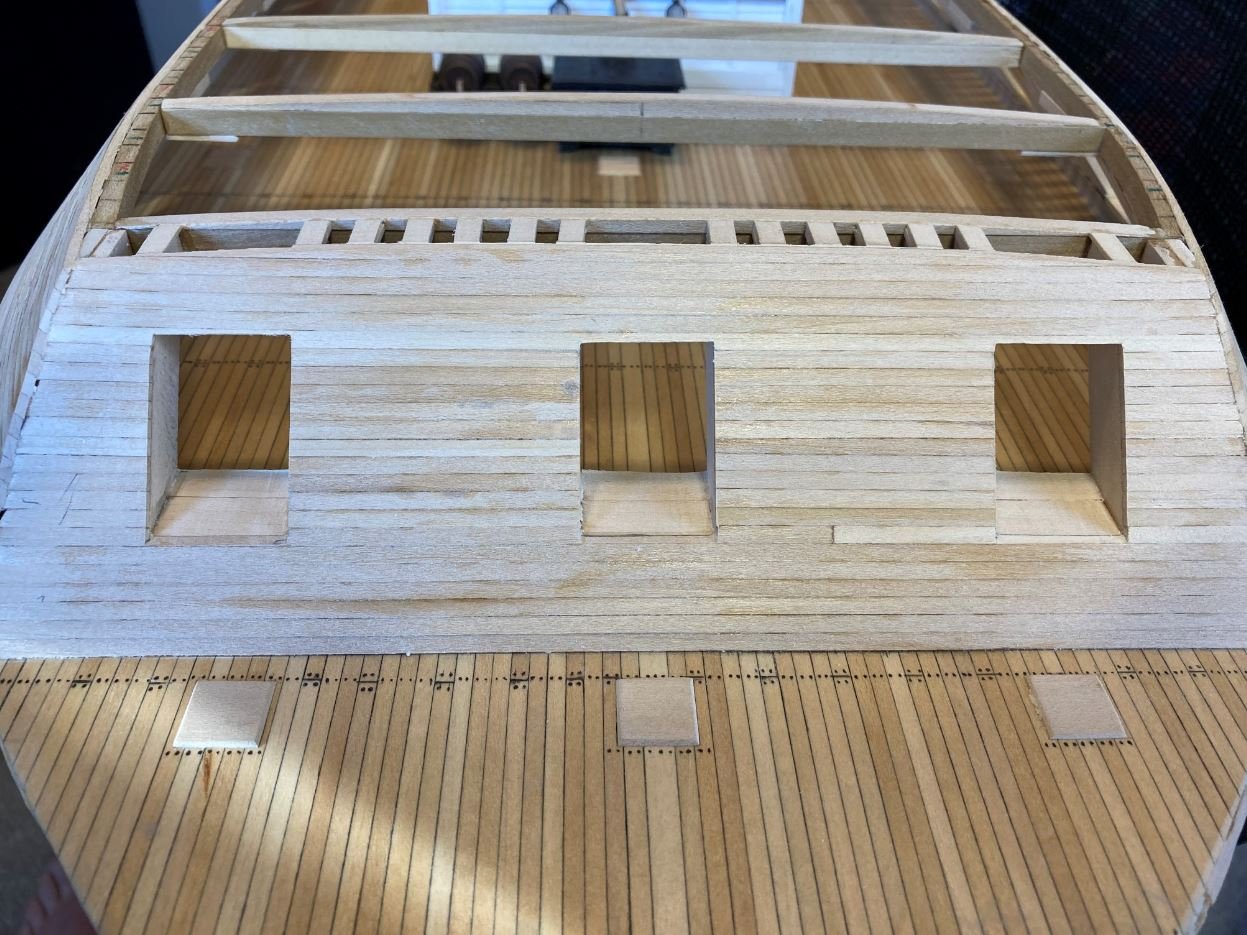
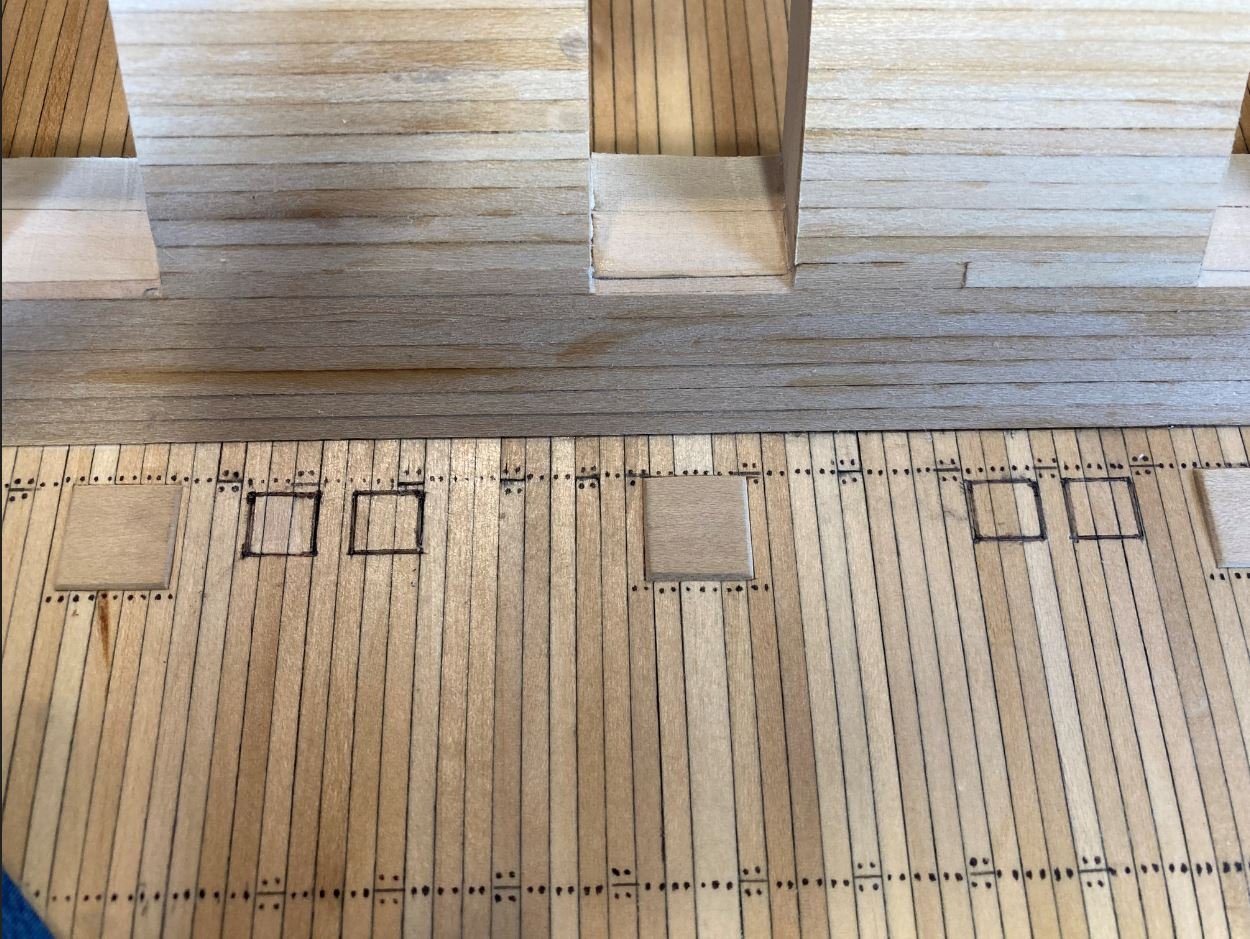
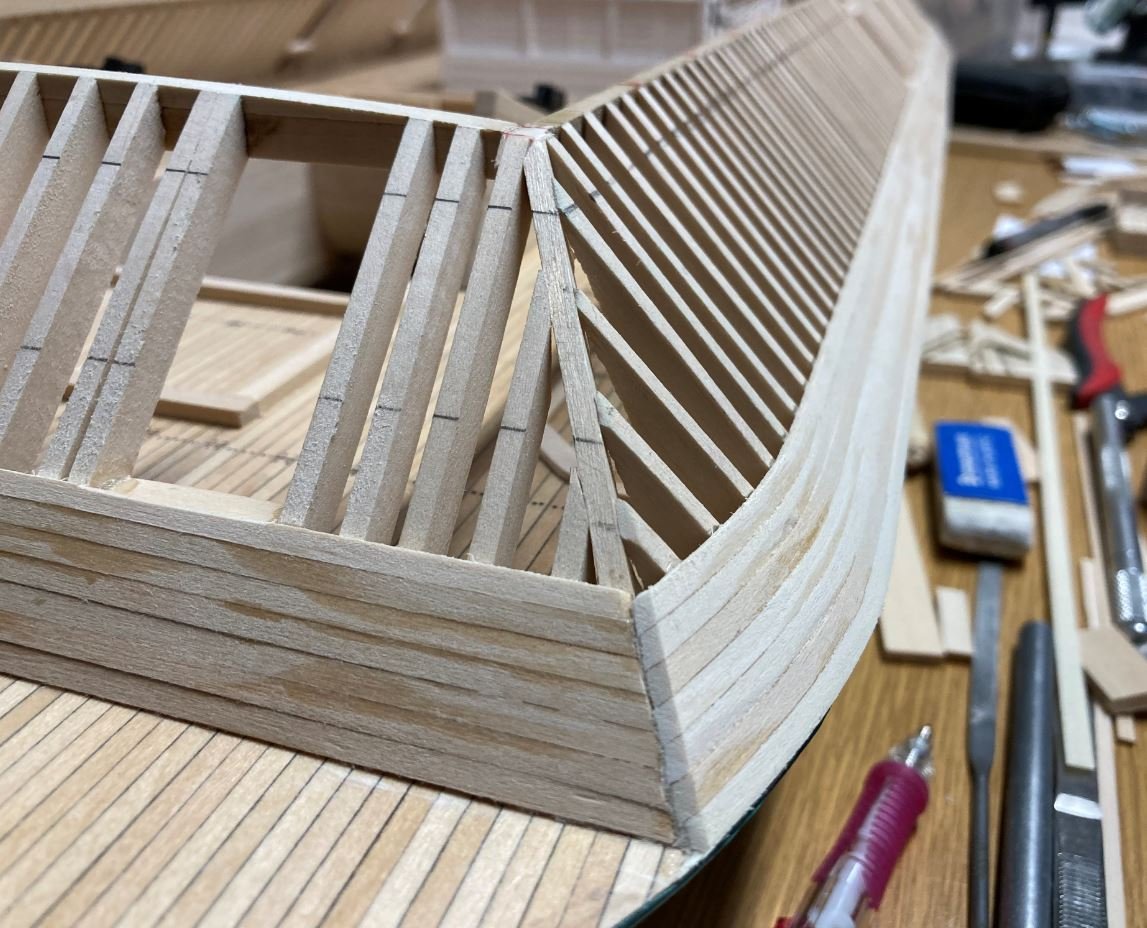
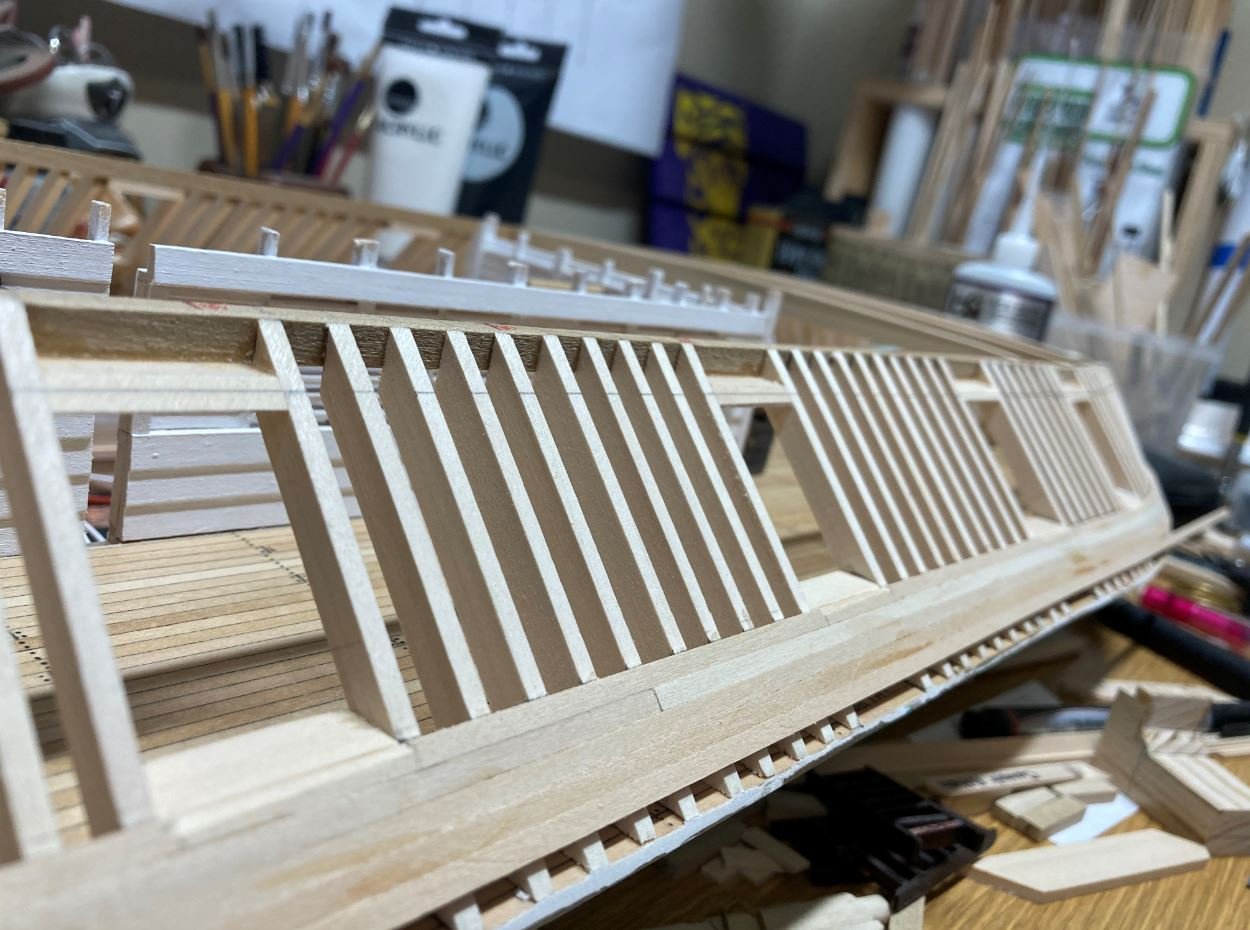
Next I started working on the casemate planking. This time I remembered to take pictures.
Lining things up for the casemate planks.
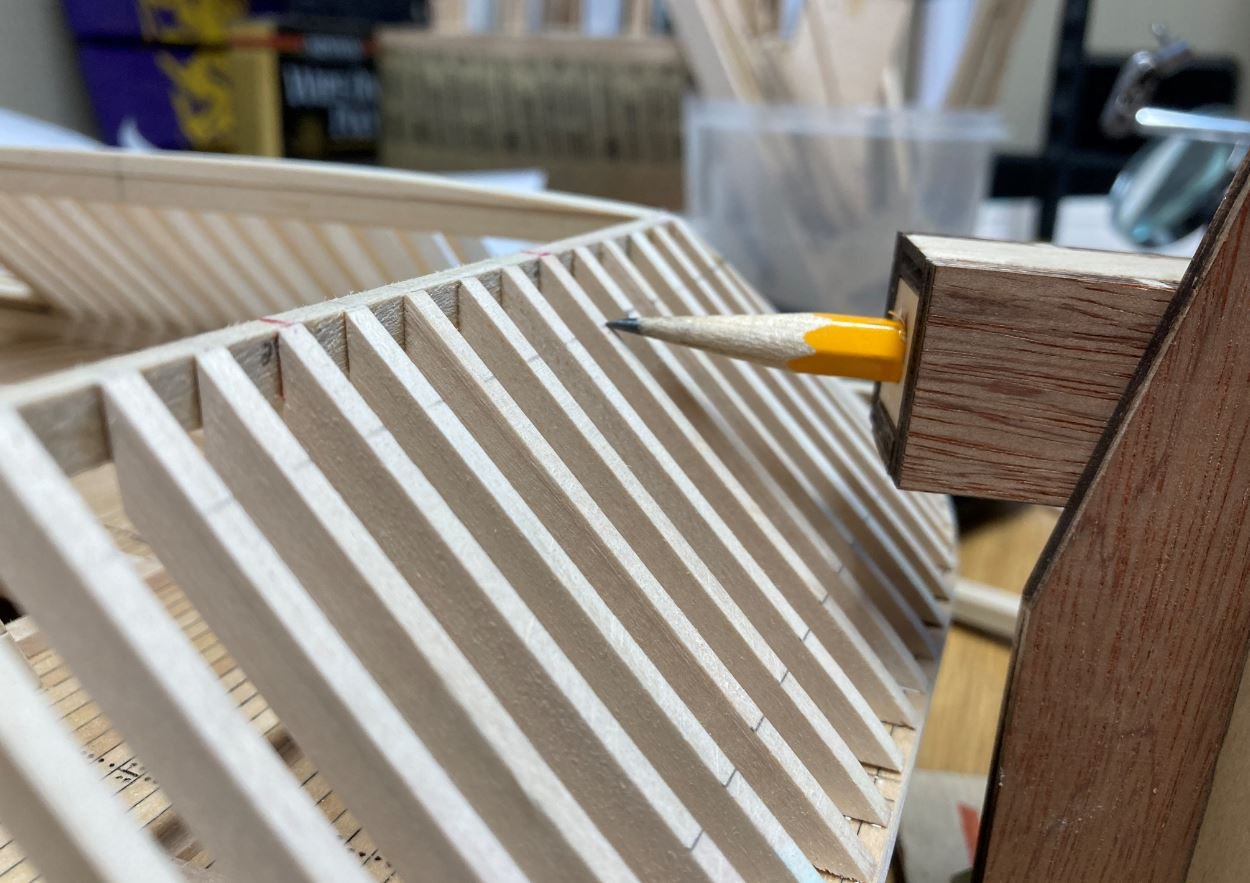
I made little jig to ensure that all sills were the same height. It seemed to work pretty good.
Aft lower sills in place.

Planking begins.

Aft and starboard planking.
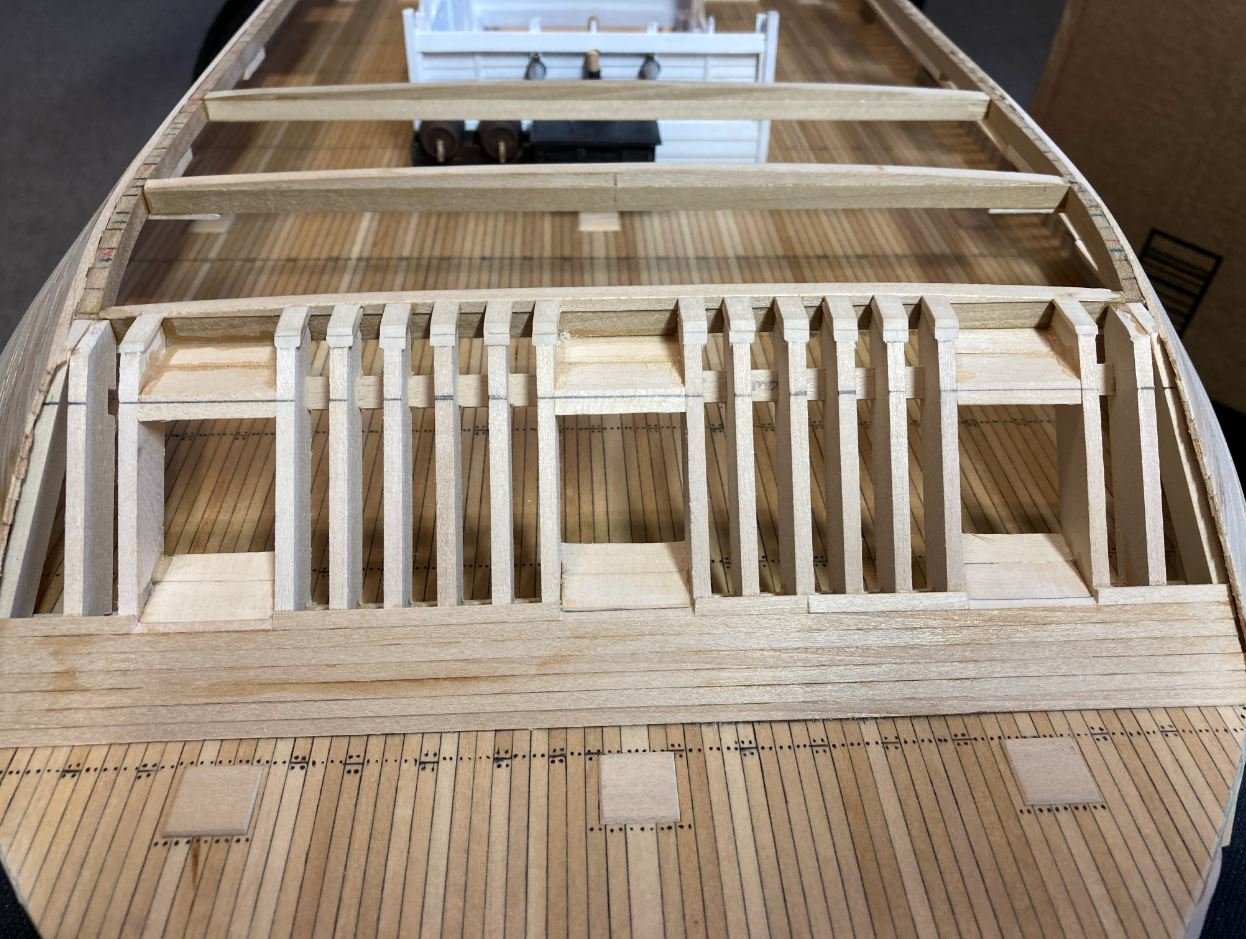
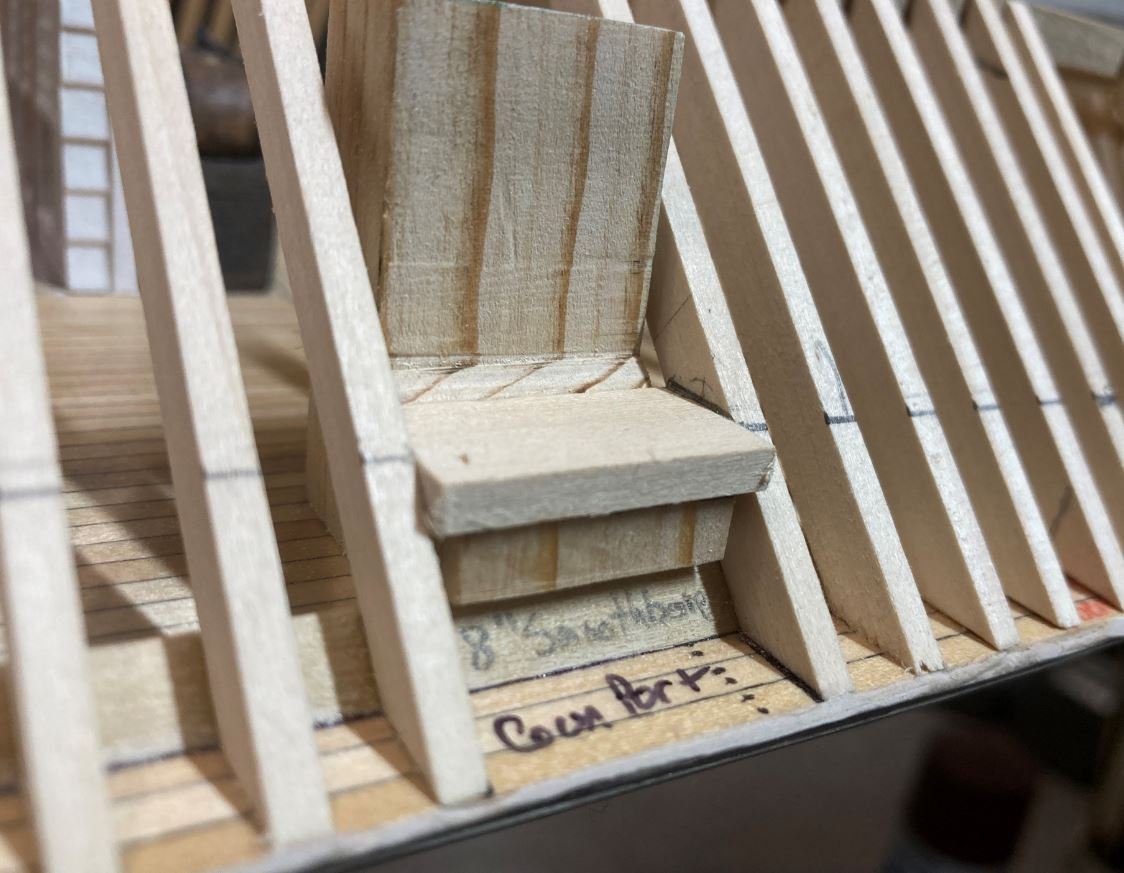
Port side planking. It is here where I finally figured out how I wanted to show the insides. I was struggling with how to show off some of the details inside. I wasn't sure if I wanted to leave the whole thing opened like the model in the Cairo Museum, or make a removable panel, or what. I wasn't too keen on leaving the whole side open, due to the fact that it seems that the integrity of the side would not be there without any support. Not that I'll be handling the model much after it is completed, it was just a concern.
Then I thought that maybe I could install a few removeable panels to allow access to the inside views, but I ruled that out because I didn't want to have to take it out of the case every time I wanted to show someone the insides. It wasn't until I was looking for some parts on Model Expo when I saw a picture of the USS Confederacy that the Idea to leave the planking off the side and expose the framing. The frames are spaced far enough apart that you will be able to see inside and there is no issue with compromising the structure.
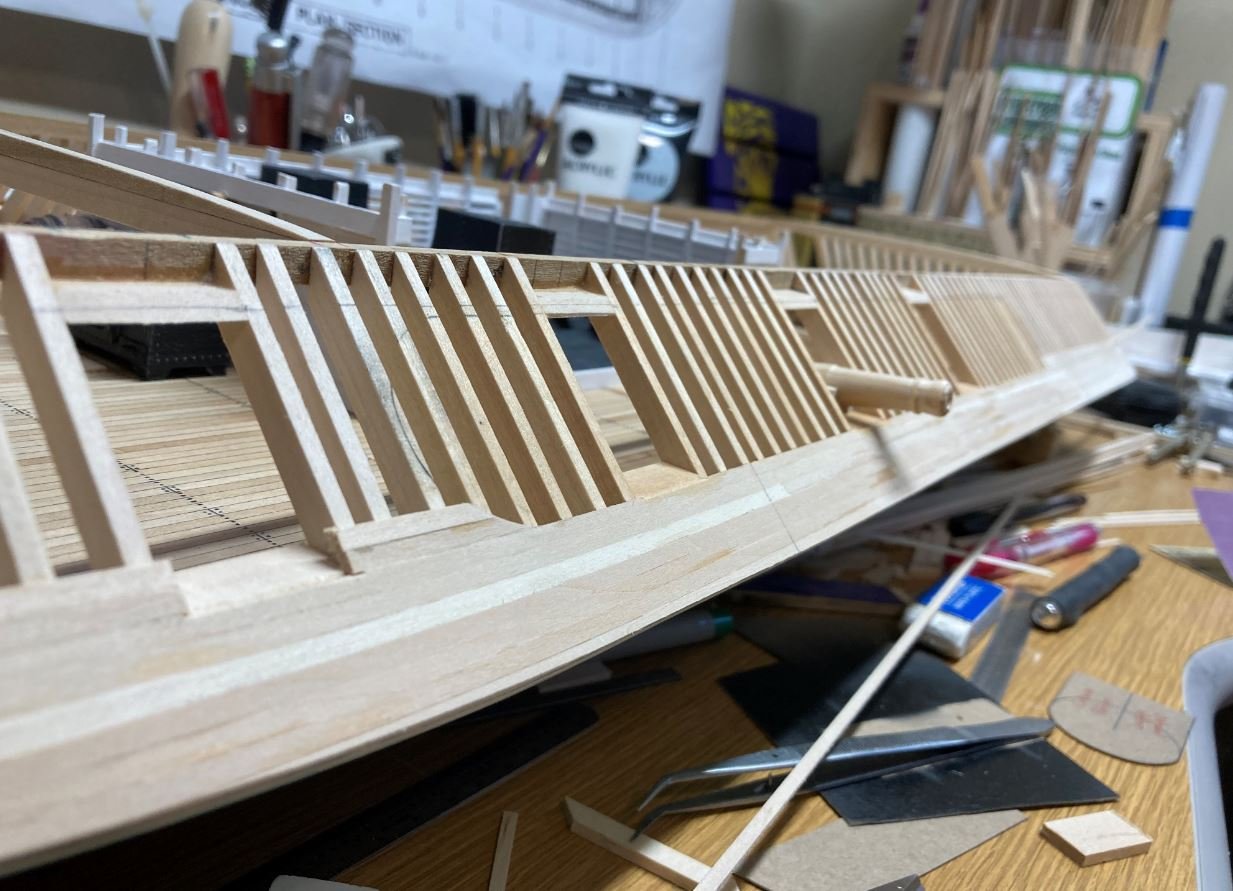
Completed port side with cutaway.
Finished planking the starboard side and starting the gun port cutouts.
Aft planking done and working on the gun port cutouts.

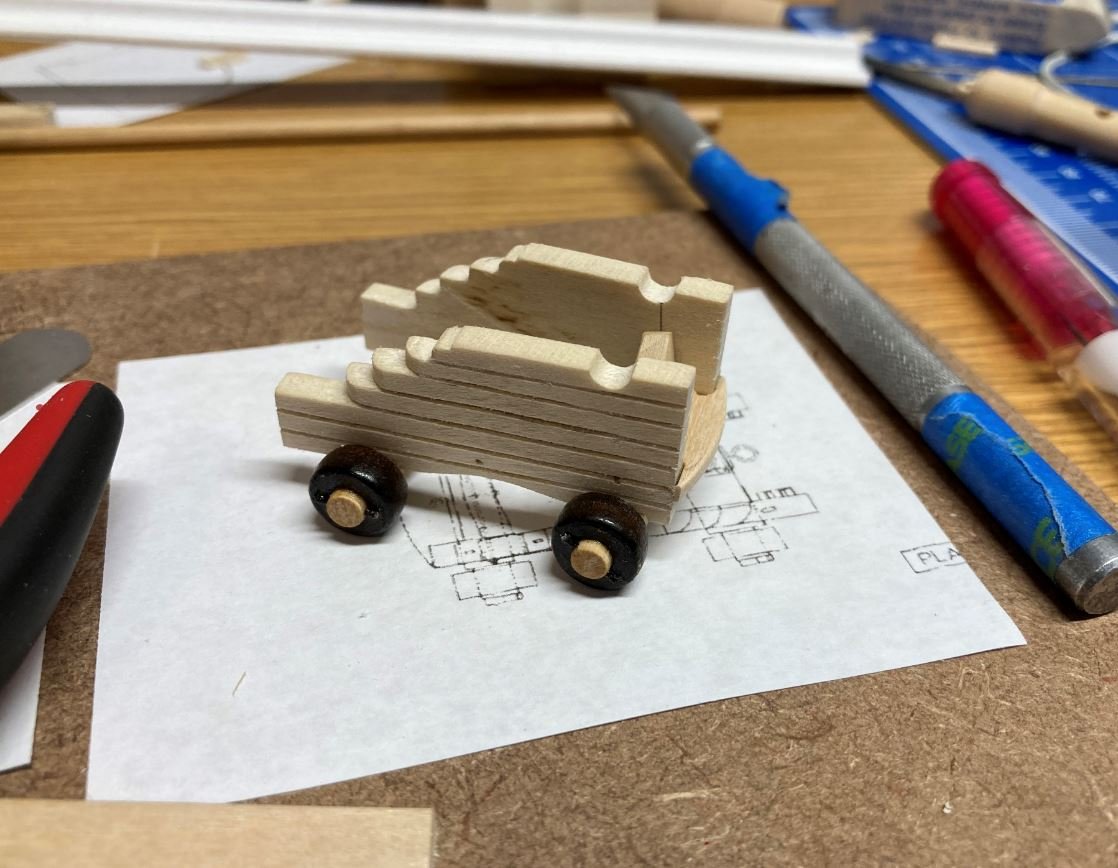
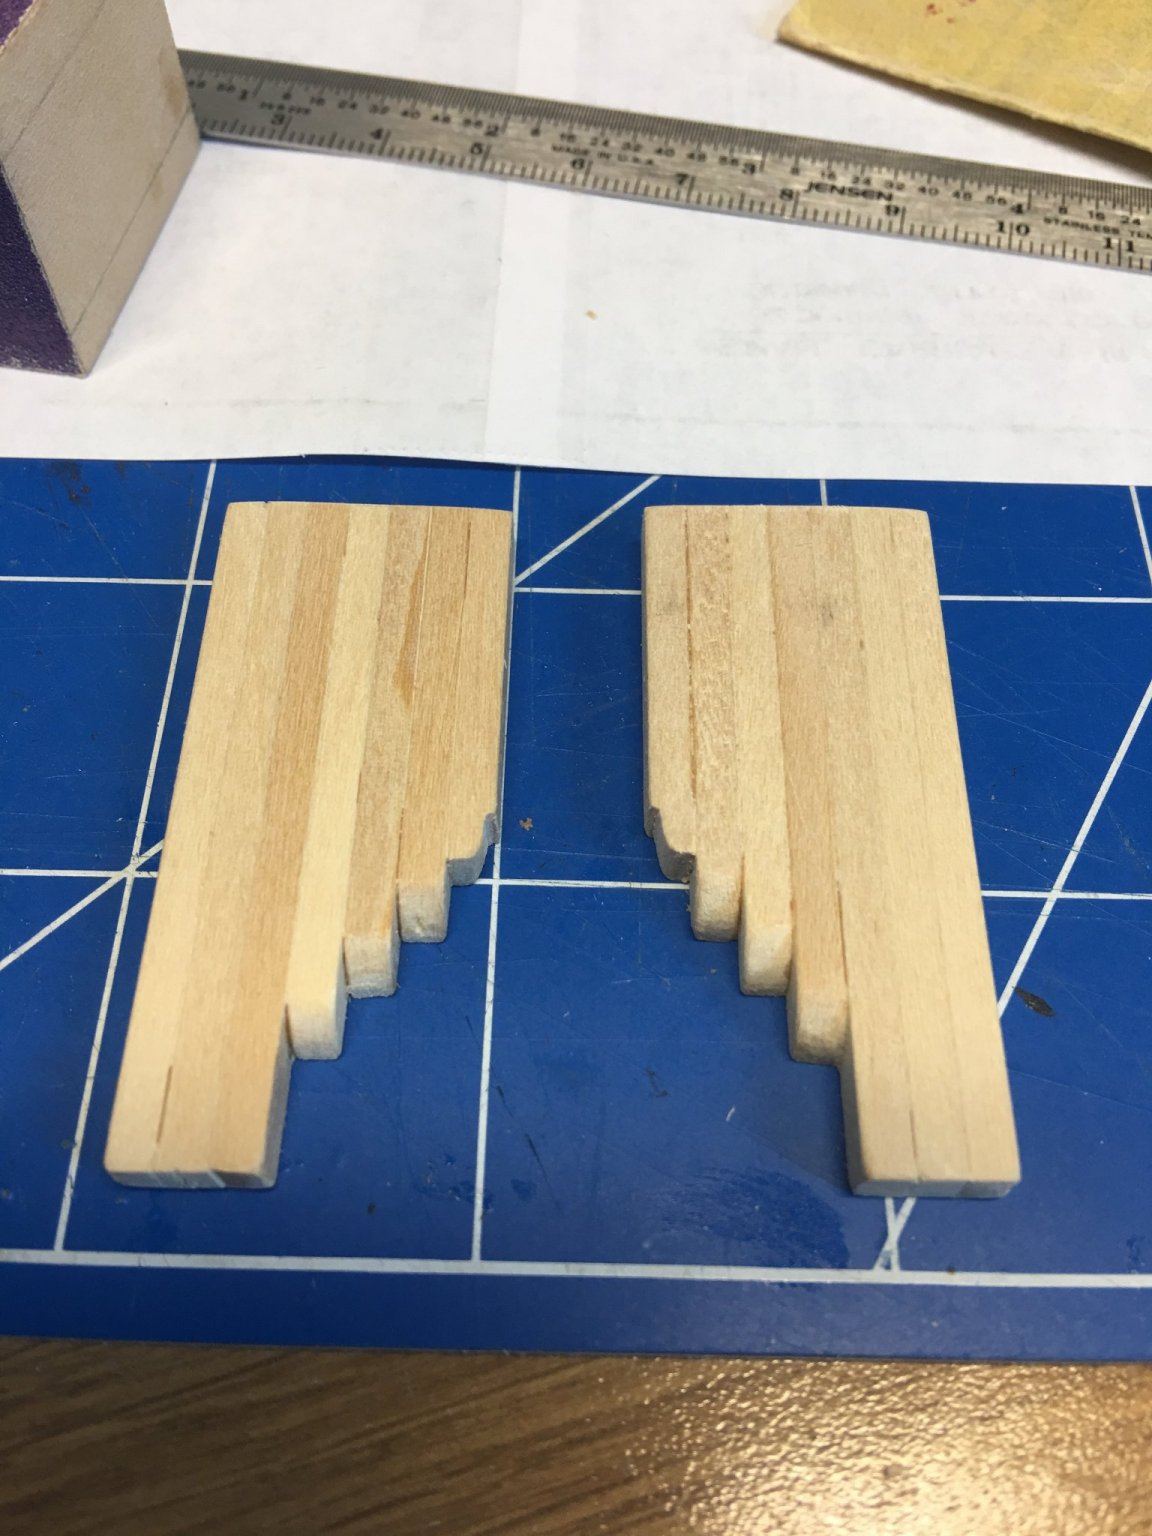
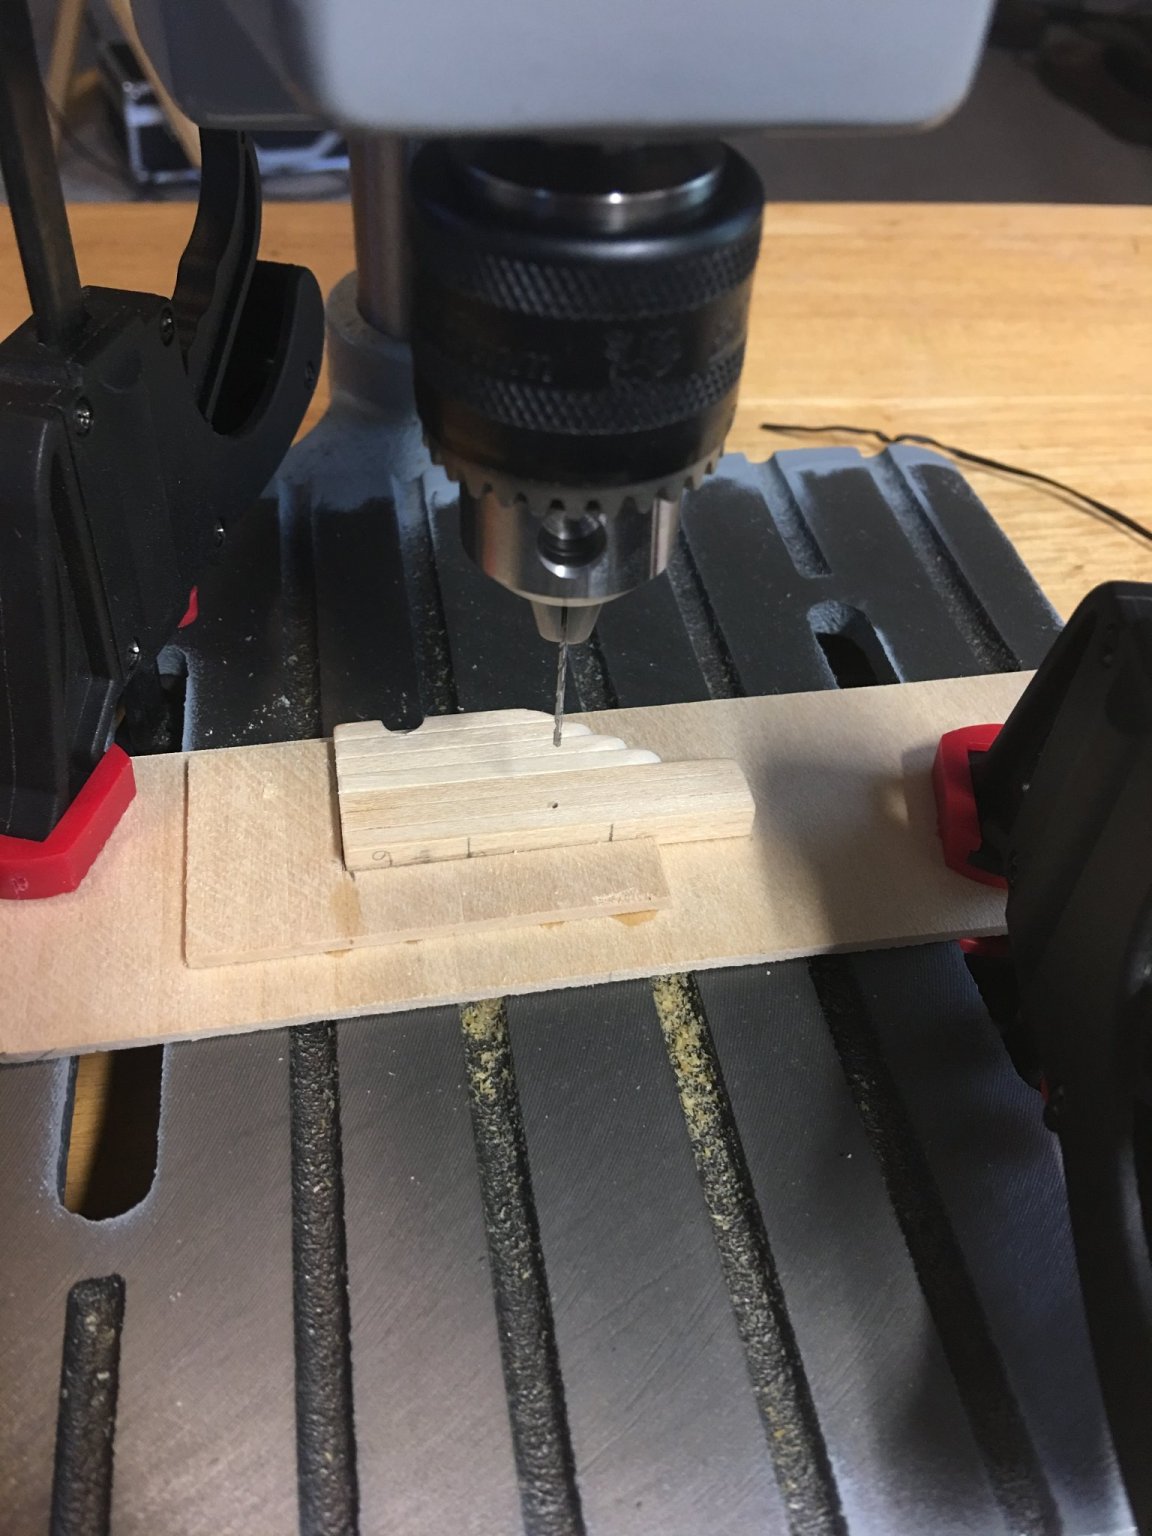
Finally, I couldn't stand it anymore. I just couldn't get over the look of my first attempt at the gun carriages. They just didn't look right. So I went ahead and rebuilt them. This time I took pictures of the process.
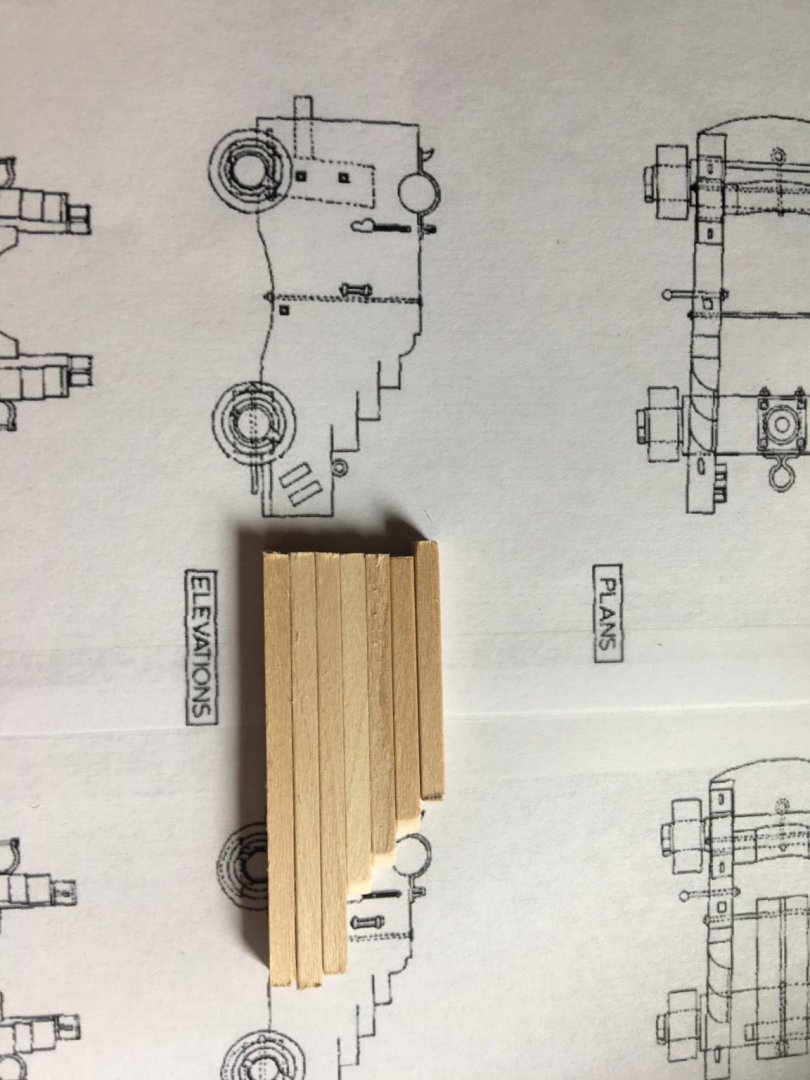
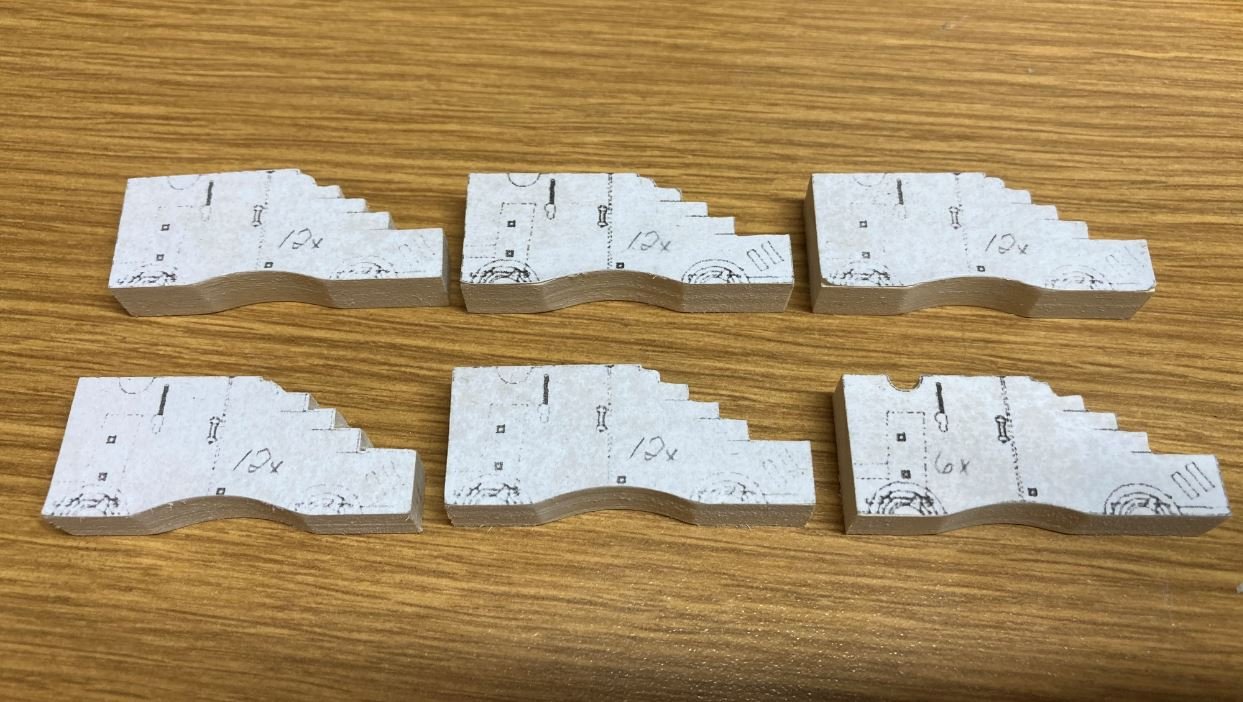
Shaping the boards.
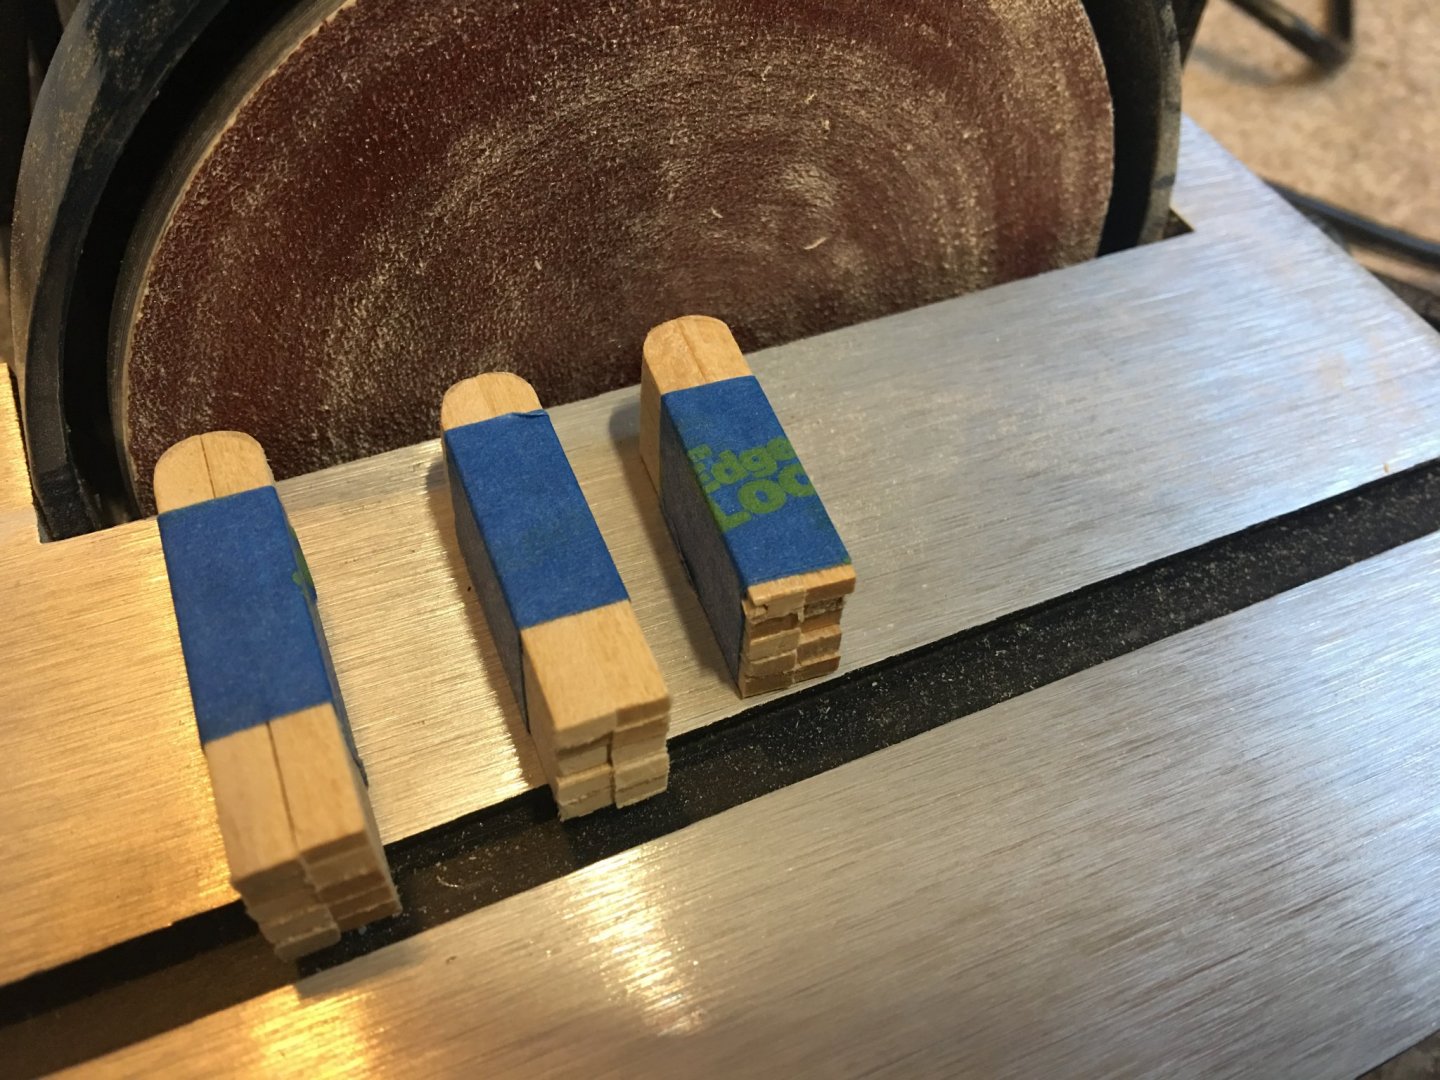
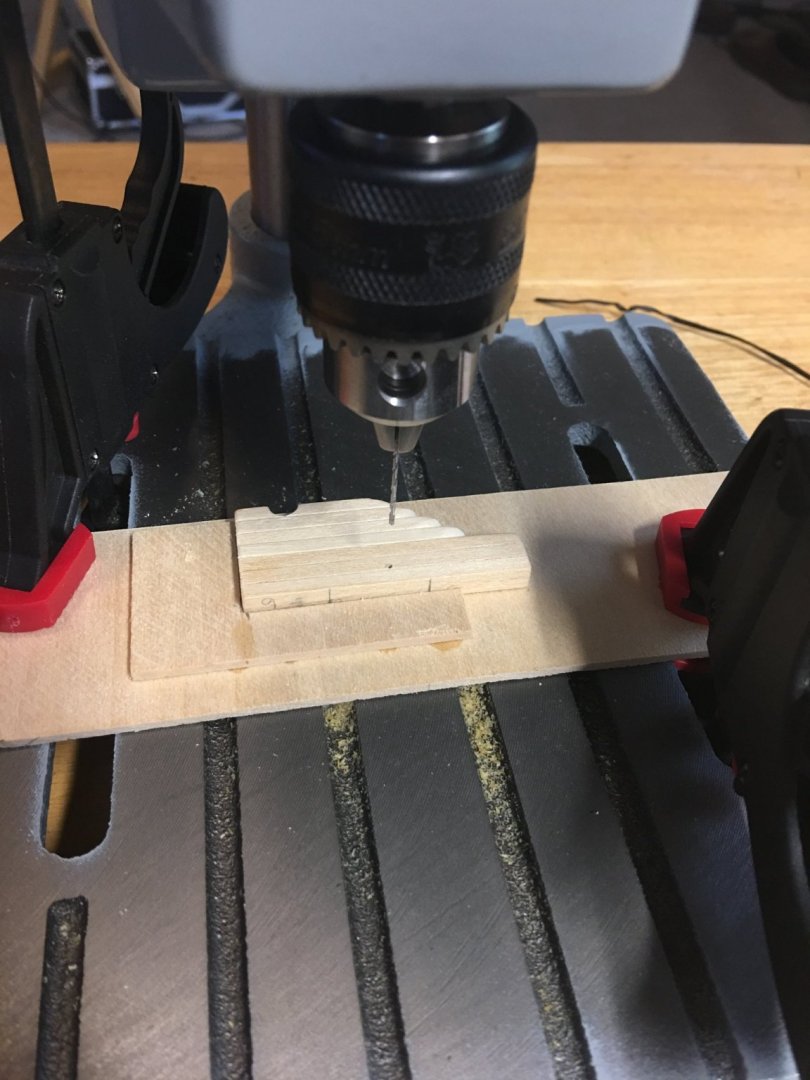
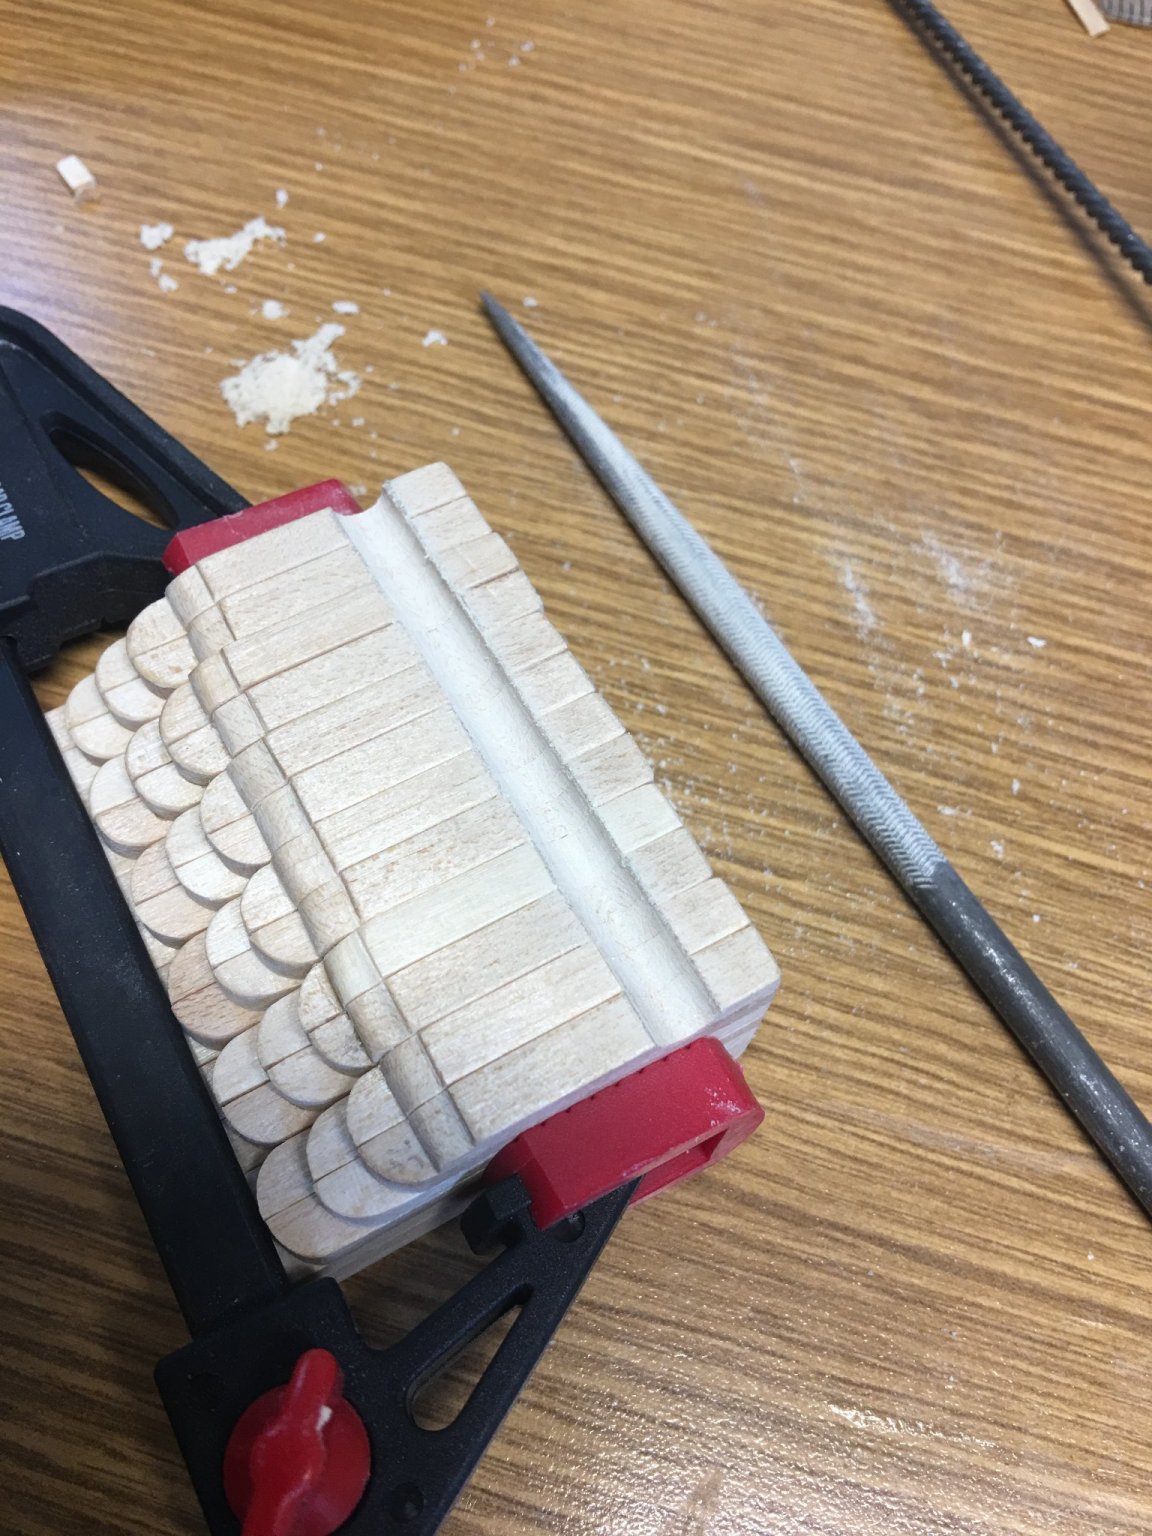
Sides stacked and glued together.

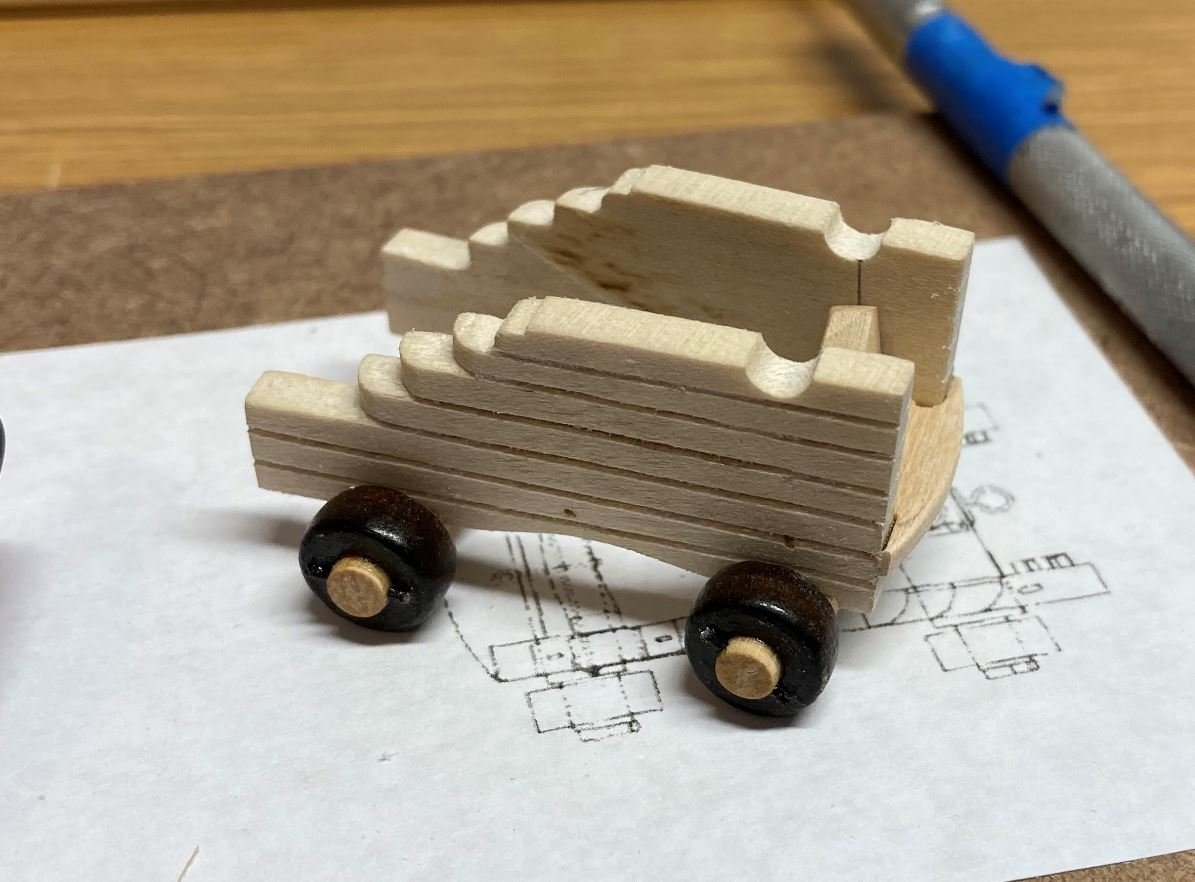
Trunnion notches filed out.

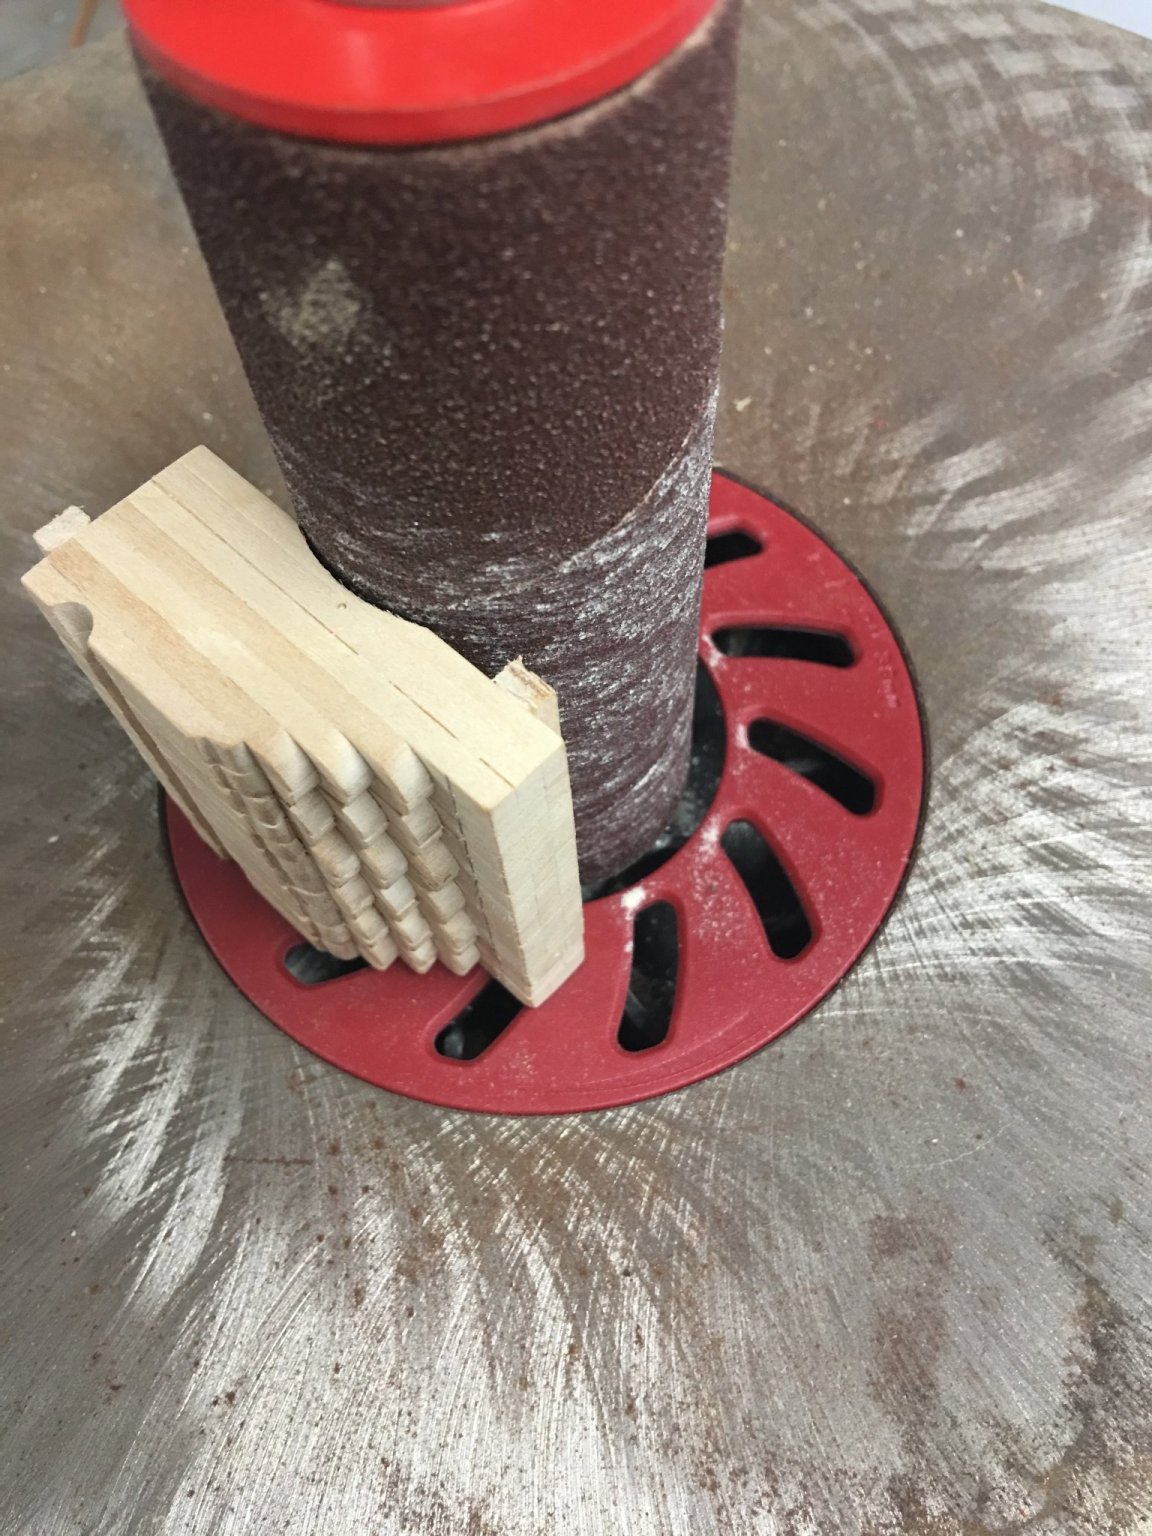
More shaping.

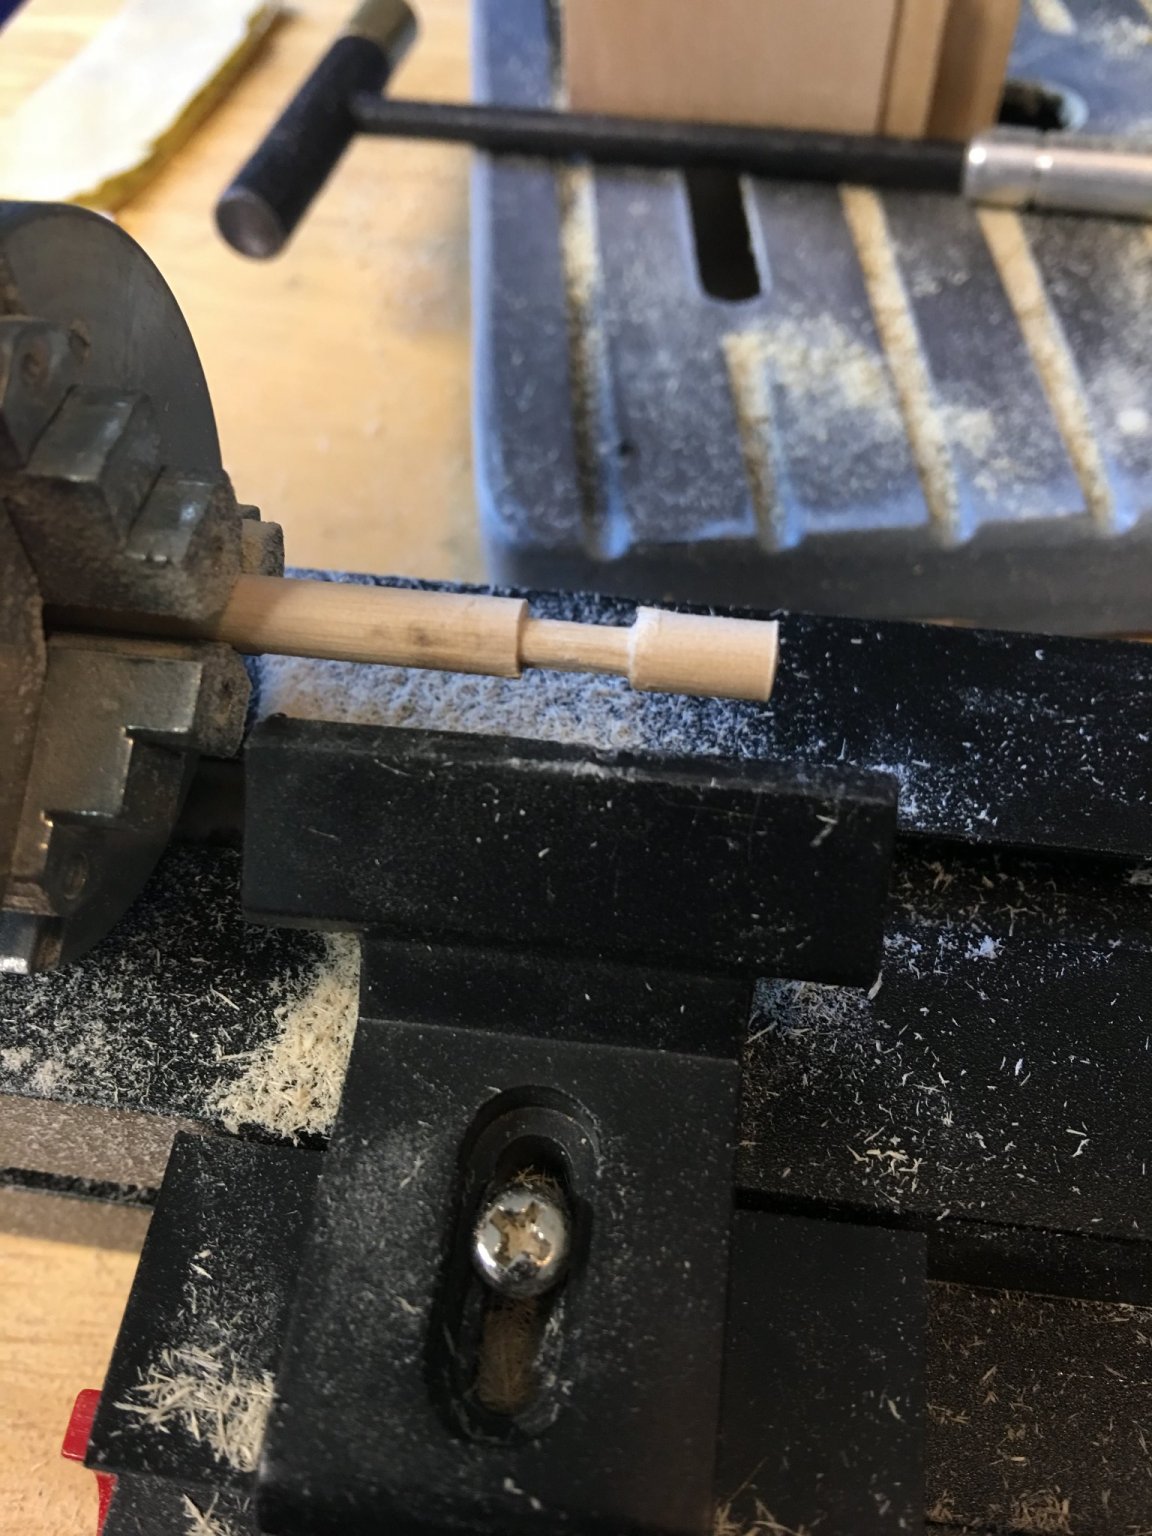
Turning the axles.

Pieced together.

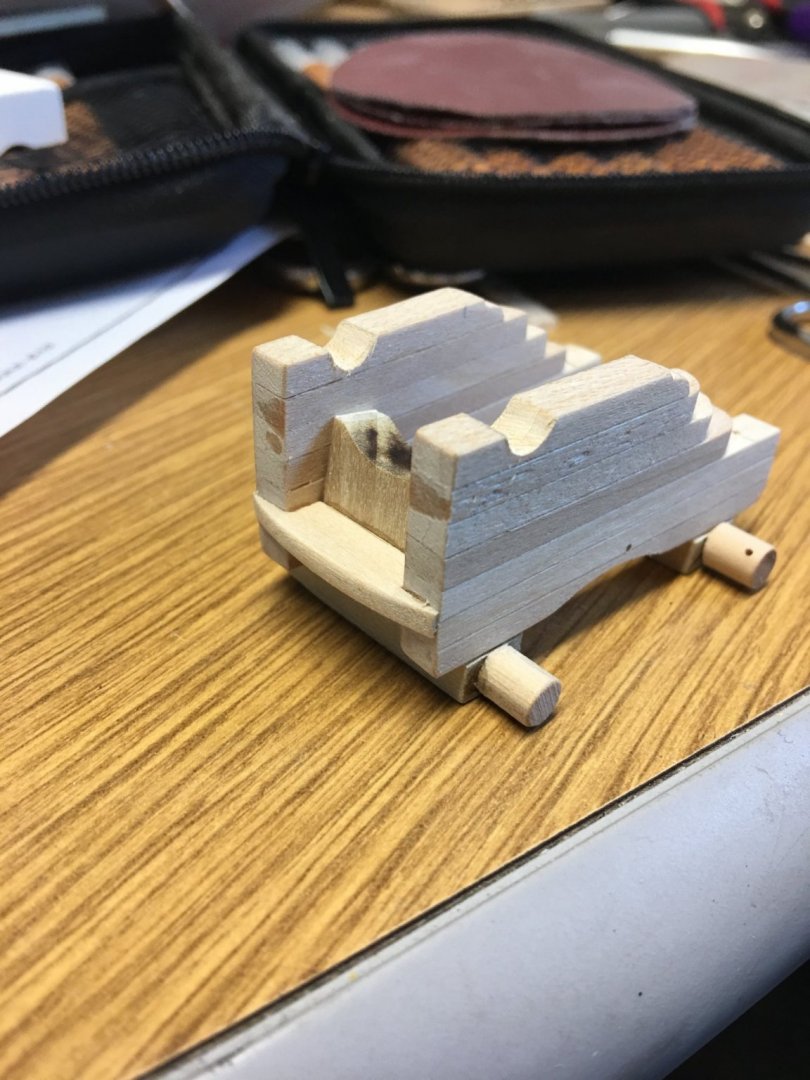
Mostly completed, just need to add the trucks to it. Then assemble 12 more.

I am much more pleased with the outcome of these than my first attempt.
Well that is all for now. Hopefully on the next update I will have some progress on the hull painting and a few other things.
I hope everyone has a wonderful Holiday Season. Please be safe and take care of yourselves.
Thanks for looking in.
-Brian
- Roger Pellett, mtaylor, wefalck and 16 others
-
19
-
-
Eric,
Love the look of the deck. It’s coming along nicely. As for the rivets, why not try several techniques on some scrap wood to see how they turn out. At least that way you can see if if you like any of them without risking the looks of your build.
-Brian
- mtaylor, Cathead and FriedClams
-
3
-
Roger, Wefalck,
Thank you both for the information. It’s very much appreciated. I had no idea that farmers used the same red on their barns. That would explain why you can still see remnants of red paint on some of the old dilapidated barns, as well as some still standing. The paints actually last longer than the wood.
I am seriously considering going with a reddish-brown hull, it seems the general consensus points that direction anyway. I have a few inquiries out to others, a couple of which are outside of this forum, with the same question, and so far the answer has been the same, “not a lot of info on it” and “go with your preference”. I think I’ll play around with some colors and see what comes out. I still have some time.
-Brian
- Keith Black, Canute, leclaire and 2 others
-
5
-
John,
I very much appreciate the info on the officers cabins. It will come in handy when I reach that point of my build.
If I may, I’d like to pose another question. I am at the point in my build where I am ready to paint my hull. I’ve done some research on this but keep coming up empty. The Cairo museum has a model on display that has the more modern looking red hull below the waterline and black on the rest of the vertical surfaces. I am wonder as to how accurate this paint scheme is. I like the look of the red hull, but I’d also like to keep my build as historically accurate as possible. Have you guy run across any information that would justify the use of red on the hull or is this one of those mysteries that may never be solved?
Any advice or direction would be greatly appreciated.
-Brian
-
Eric, great idea! Hadn’t thought about that. I’d have to email them though, unfortunately the museum has been closed since summer due to the ‘Rona’.
I guess I could also pose the question on the log for the St. Louis. I know those guys have done extensive research on that build.
-Brian
- FriedClams, Keith Black, Canute and 1 other
-
4
-
Keith, thank you for the kind words. I have a feeling you are correct, given the stringent time frame these boats were built on. I would probably say that they just slathered them down top to bottom with a coat of black paint and sent them on their way. Cairo’s service life was so short she probably never made it to a dry dock to have my hull work done, so it most likely remained its original color.
Unfortunately there are no records to prove or disprove this. It may all boil down to a coin toss, which will be heads on both sides, meaning red it is. That is, unless I happen across some hidden document that calls out her original paint scheme, or someone out there has done extensive research on how the hulls were treated.
Pat, what I wouldn’t give for a “way back” machine, not just to get a picture of what she looked like, but to also see these beautiful machines in action (from a distance of course).
On a different note, I have done some studying up on the model in the museum and there are several discrepancies with it, in comparison with the HSR. And not to discredit the builder(s), they did a beautiful job on it, and for the most part it’s fairly accurate. But I do think they took a few “builders liberties” with it as well. I’ll be more than happy if mine comes out looking as good as this one.
-Brian
- FriedClams, BANYAN, Keith Black and 2 others
-
5
-
Hello again Everyone,
It's time again for another episode of "Ask the Audience".
I have been working on getting my hull faired and completed so that I can get it painted to where I don't have to flip the model over anymore. I getting to the point where the deck structures will prevent the boat from being turned over without the risk of breaking something off. So in the process of researching the hull painting, I ran into another quandary that I cannot seem to find any information on.
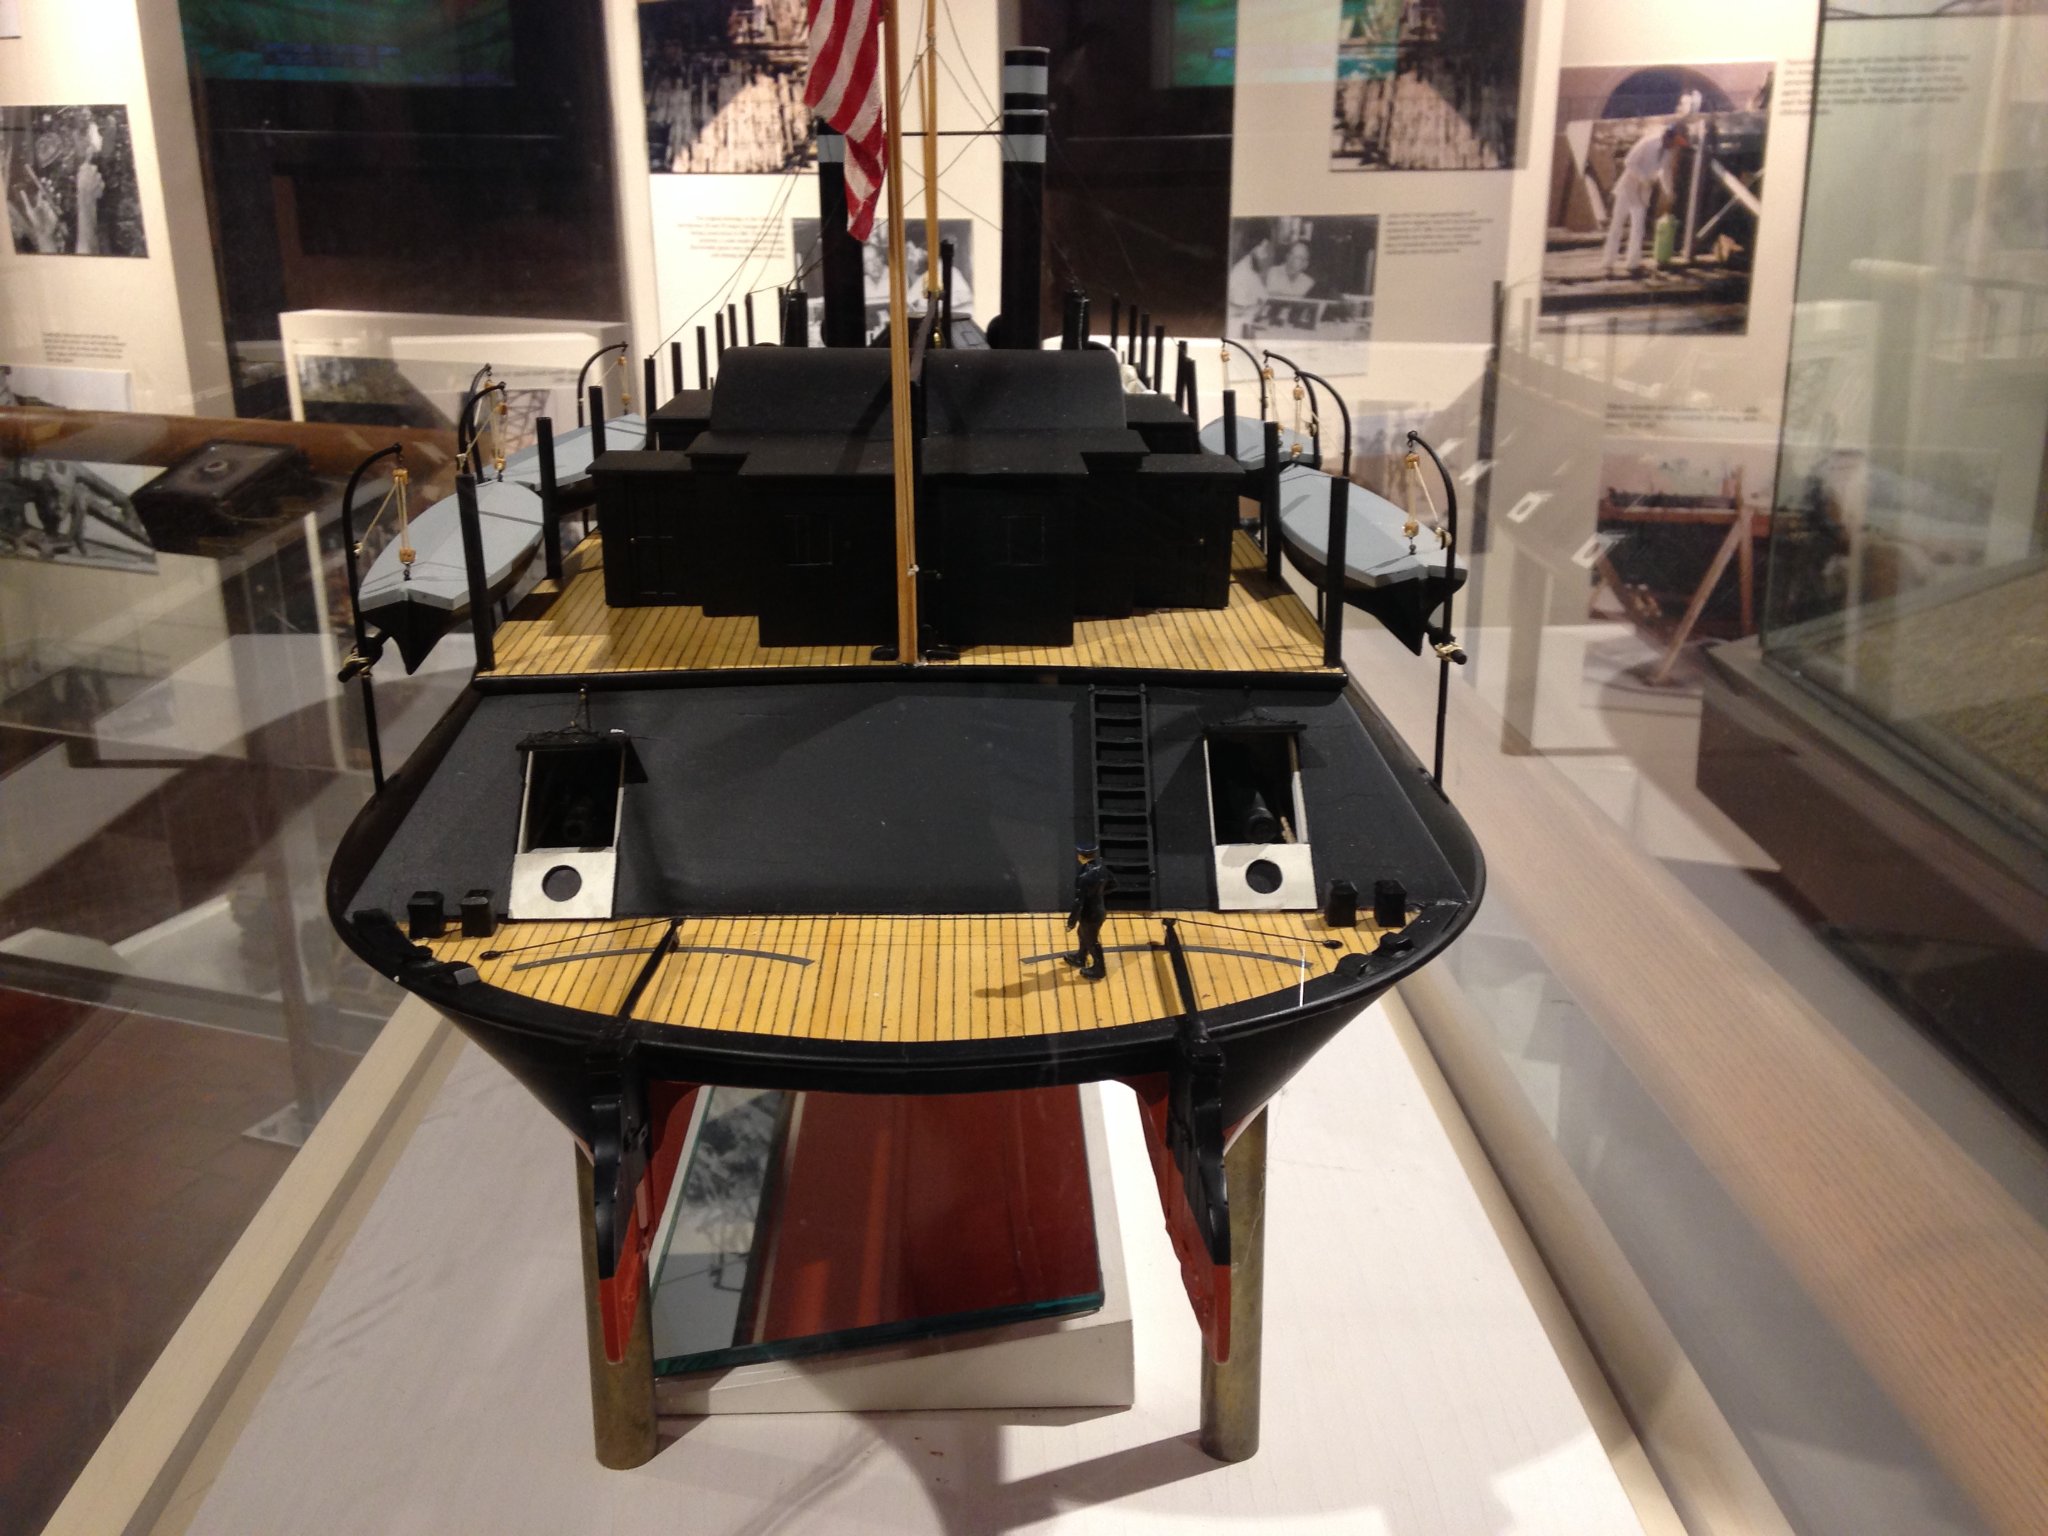
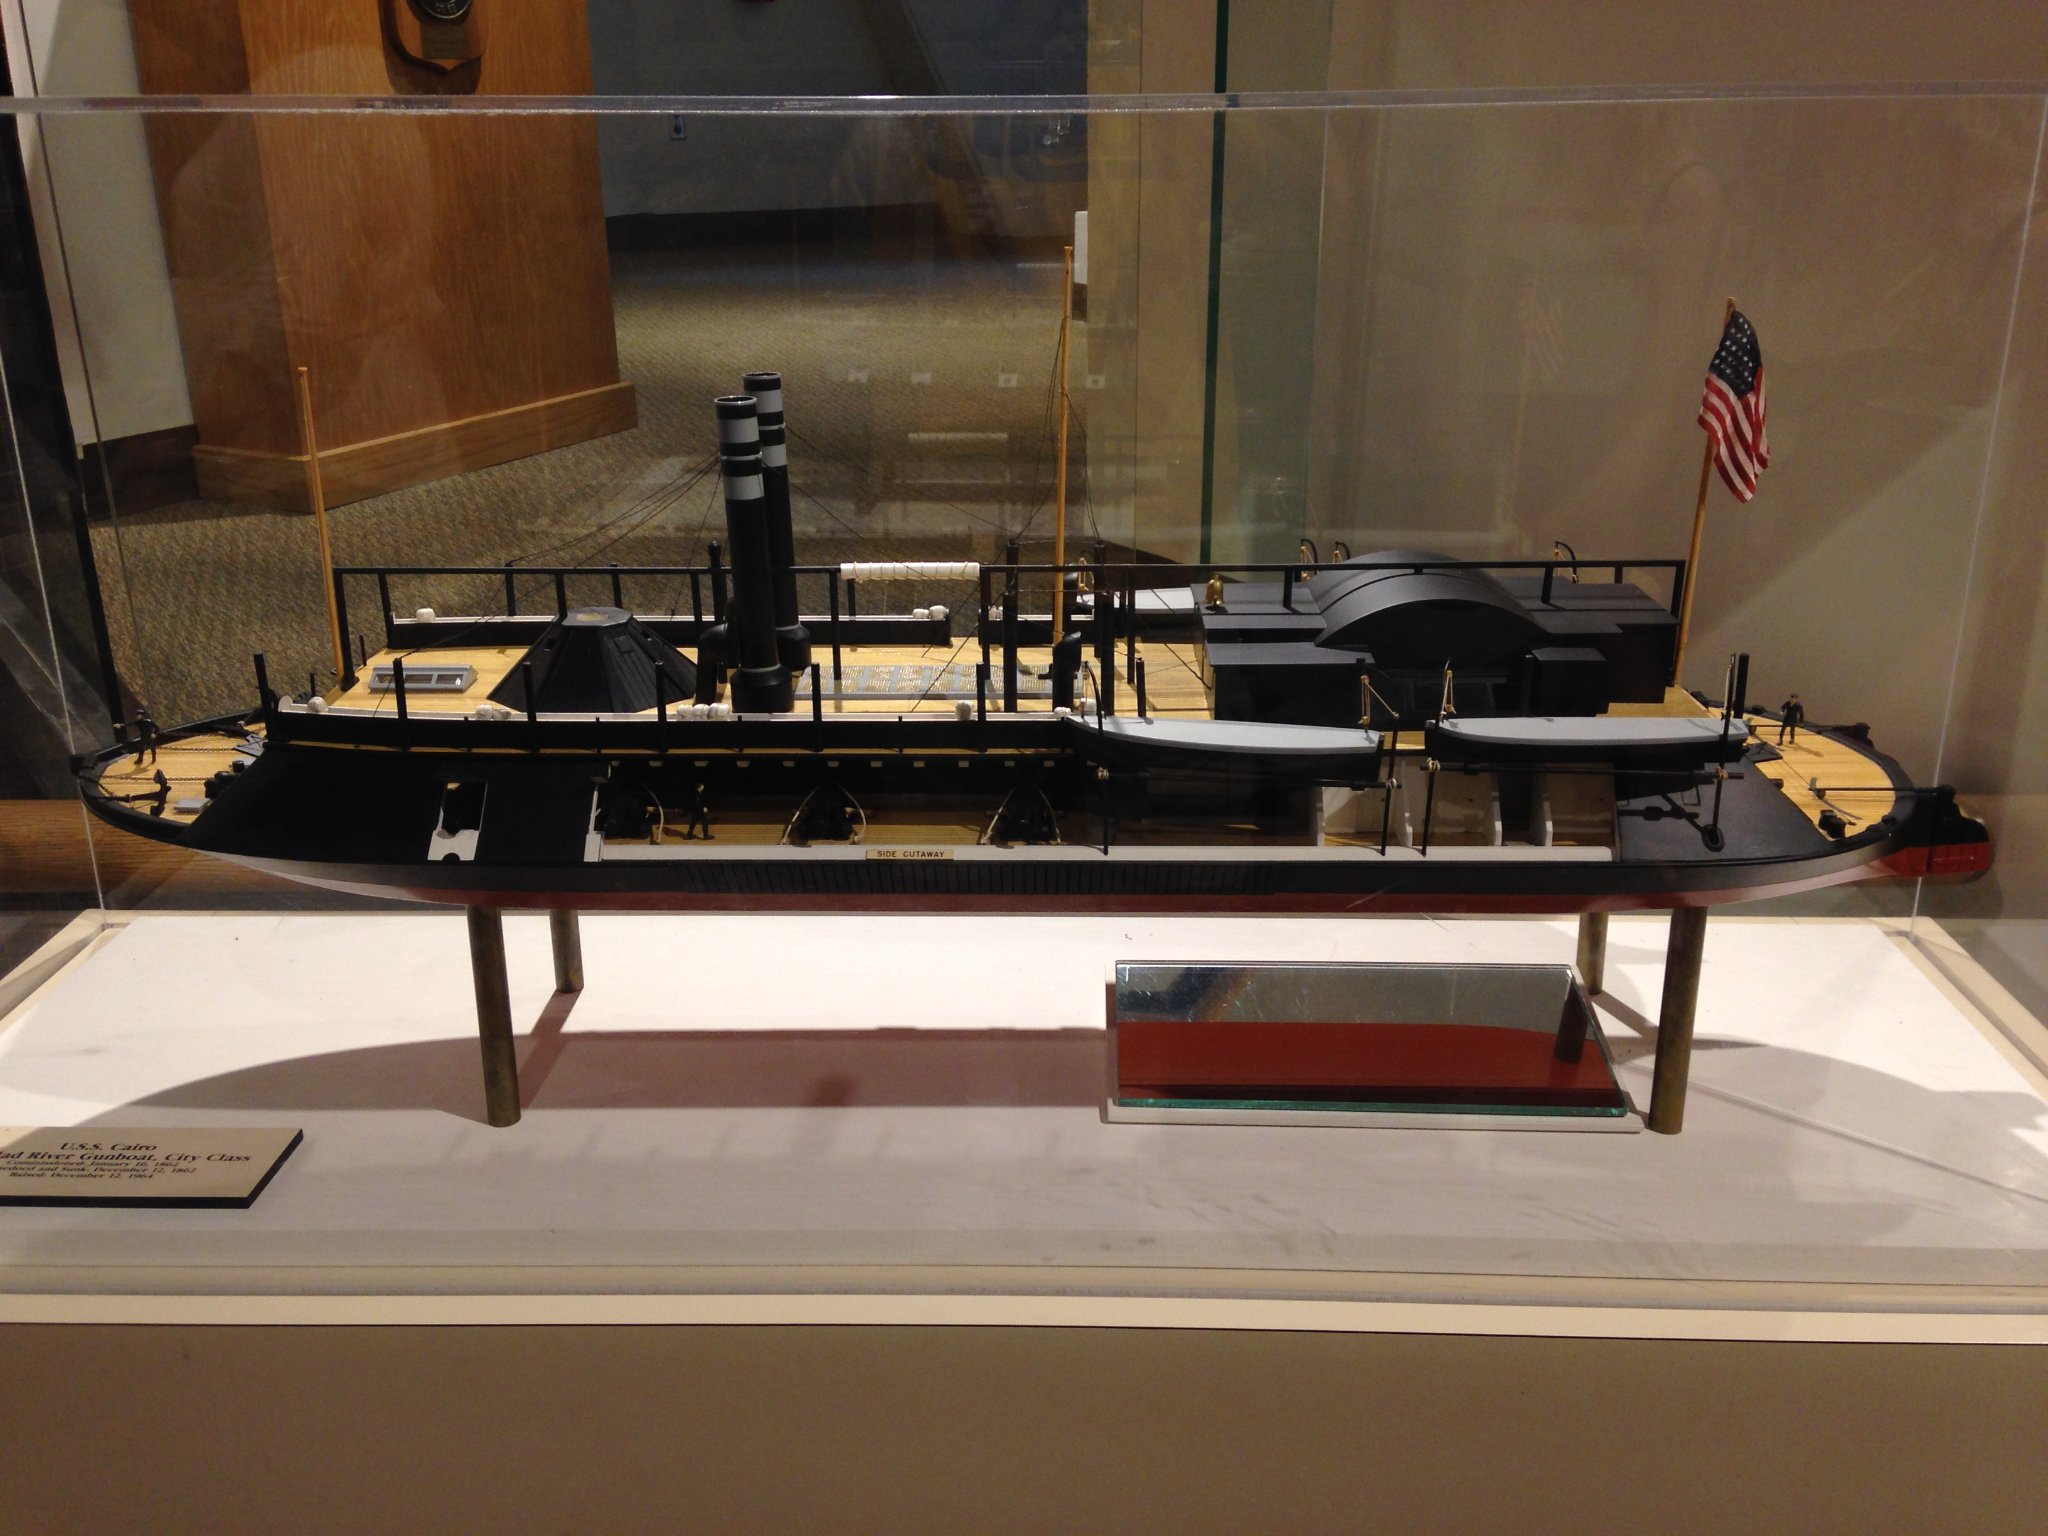
I know that the regular packet steamer hulls were generally painted, along with everything else above the waterline. And I know from research that the Iron Clads were also painted above the waterline as well, given the numerous pictures available on the internet and in books. This stands to reason that their hulls would have been painted too, to give the hull some form of protection from water absorption, even if their expected life span wasn't that long. The problem that I am having is what color was the hull painted? I have found several instances where the model builder painted everything below the waterline something of a Red Oxide color, similar to that of more modern steel warships (and other ships). In my limited knowledge of modern ships, I have come to understand that the Red Oxide hulls were a rust preventative and to help with keeping marine parasites like barnacles from fouling the hulls. This is all fine and dandy, but the USS Cairo was a wooden hull boat that travelled in fresh water. So what would be the reason for the red hull? Since the Cairo spent over a 100 years at the bottom of the Yazoo river, none of the paint survived, which makes it really hard to determine what colors were used.
My ultimate goal is to get my build as close to accurate as possible. I like the red hull color scheme, but was it authentic? This may be one of those time where "Builder Liberties" come into play, but if anyone out there has any input that would help it would be greatly appreciated.
These were some pictures of the model in the USS Cairo Museum that I took on my last trip there. It shows the red painted hull. There are a several other pictures that I found of models on the internet that have red hulls as well as black ones. I didn't post them here because I wasn't sure of their copyrights.


Thanks for looking.
-Brian
- Canute, Keith Black, dvm27 and 8 others
-
11
-
Beautiful job Kevin. Excellent build.
-Brian
- mort stoll and Kevin
-
2


USS Cairo 1862 by MPB521 – FINISHED - Scale 1:48 - American Civil War Ironclad - First Scratch Build
in - Build logs for subjects built 1851 - 1900
Posted
Keith,
I’m sure this is a common occurrence for you northern folks, but a 12 degree day with -5 windchill is unheard of here in Texas. But I have to agree with you, the Bahamas would be nice right about now.
-Brian