


mbp521
-
Posts
949 -
Joined
-
Last visited
Content Type
Profiles
Forums
Gallery
Events
Posts posted by mbp521
-
-
Russ,
Glad to see another Chaperon builder on here. I'm smack in the middle of my Chaperon build and what fun it has been. Kurt's CD has been a blessing and has helped tremendously, along with Catheads (Eric) excellent advice and help from several others. Looking forward to watching your build progress. I'm sure you'll enjoy it.
-Brian
-
Eric,
Thanks for the link. I can definitely see an extremely big hole in the budget with this site. May have to hide the bank statements from the Admiral on this one. 😁
-Brian
- mtaylor, Canute and popeye the sailor
-
 3
3
-
10 hours ago, cog said:
Congratulations on your daughters wedding. Enjoy your new house.
Despite the "limited" number of photographs, nice progress
Cog,
Thank you for the kind words. I will definitely enjoy the new house. Just need for the weather to cool down a bit so I can get my new shipyard in the barn up and running. The Admiral was kind enough to "loan" me the guest bedroom for the time being, but I'm sure it wont be long before she pulls rank on me and I have to pack it all up again.
5 hours ago, Cathead said:Nice! Great to see you back at work. Is your new home still in "far north Texas"? I worked in the Panhandle for a summer after college, at Alibates Flint Quarries National Monument and Lake Meredith National Recreation Area, doing geological surveys for both parks as well as public interpretive work.
Eric,
Most definitely glad to be back at it.
We didn't move far (about 600'). We built a new house and barn on our property, a project which we started early last September, but with all the rain Mother Nature has been gracing us with, put us behind by several months. So I am still in far north Texas, but on the eastern side about two miles from the Texas/Oklahoma border on Lake Texoma. Roughly 80 miles north of Dallas or about as far north as you can go without hitting red dirt.
-Brian
-
Very nice work Eric, she is really starting to take shape!
When you say that you use prescribed wood, is this something that you purchase or is it just plain panels that you scribe yourself instead of planking? Just curious. If it is purchased prescribed I'd like to get a hold of some. It would save a lot of time, not to mention come in handy for those "mishaps" that tend to show up from time to time.
I'm also with you on the scrap pieces of wood, I throw nothing away. You never know when you are going to need it. I have a tub full of small scrap pieces as well as a box full of the larger ones. Not to mention, I like the idea of using other parts of previous builds on current ones. Kinda like a friendship cake. A little bit of this model goes into the next one and so on.
-Brian
- mtaylor, popeye the sailor, Canute and 1 other
-
4
-
Greetings everyone,
It has been a while since my last post here, but I am finally back with an update on my Chaperon build. Finally having successfully married my daughter off and moving into our new house, life has settled down a bit where I can get a little build time in.
Not much work has been accomplished, and unfortunately since I was so excited to get back to building again I failed to take a lot of pictures of the work being done. But here is what I have so far.
The boiler deck has been installed. And as with the main deck, I was not happy with the finger joint on the deck panels. So I did the same as with the main deck and planked over the prescribed lines and detailed the nails.


Once the planking was completed, I applied several coats of semi-gloss poly and added the runner boards for the cabin walls.

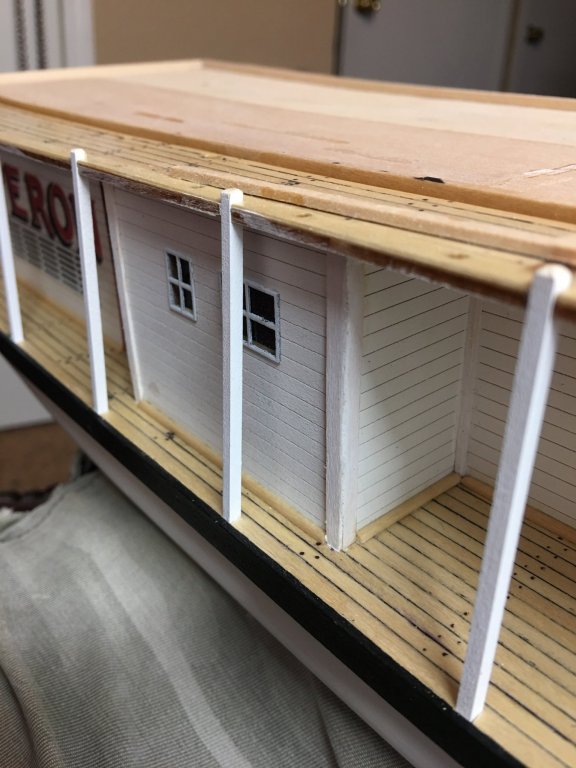
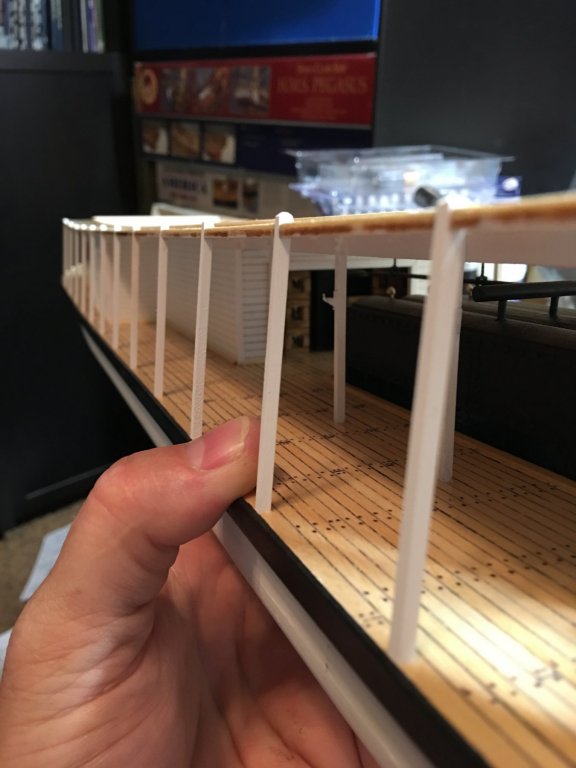
After that I started installing the stationaries. I created me a couple of jigs (as suggested by Kurt in his Chaperon build article), one to help get an even height between decks and the other to get the correct extension height of the stations above the boiler deck.
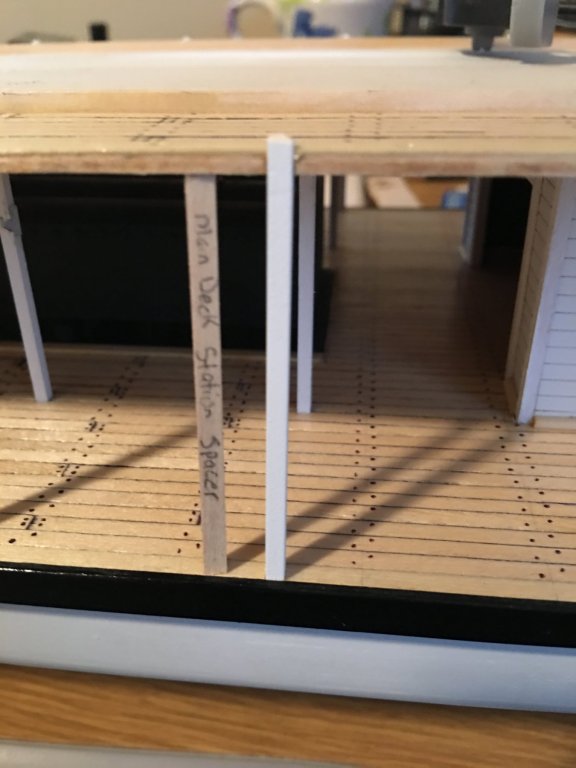

With all of the stations in place I'll work on getting the bull rail brackets in place then start the arduous task of building the cabin walls with all the little battens.
Thanks for looking. I hope to be back soon with more updates. This time I will be sure to take more pictures along the way.
-Brian
- GrandpaPhil, Captain Poison, Canute and 6 others
-
9
-
I will follow this build with great interest. I was there on the banks of the Mississippi River in 1982 when they towed the Kidd in to become the floating/dry docked museum. I still have the newspaper article about it stored away somewhere. I have toured her several time since then and the history of her always seems to fascinate me.
-Brian
-
Eric,
I definitely like the look of the deck. I’m a sucker for natural wood. Hence the reason I went with the unstained/unpainted finish on my Chaperon build.
As for the glue seeping through when planking, how are you fastening your planks down? I use CA with a fine point applicator on the bottle. I just run a thin line down the center of the board and place the plank over it. Very rarely do I have any “seepage” this way. Of course you pre-stained your planks before applying them whereas I glued them down then sanded and varnished them which pretty much erases all glue traces.
Either way, the outcome looks fantastic and from what I can see the seepage is not even noticeable.
-Brian
- popeye the sailor, Canute, mtaylor and 1 other
-
4
-
Eric,
Nice work on the chains, crates and support rods. Your Arabia is progressing very nicely.
Just out of curiosity, why would the stern-wheelers not have as many transverse chains (if any) as compared to side-wheelers. Is the weight that much more significant having the paddle wheels mounted to the side? In reference to hull size, it doesn't look like the hulls are that much different in size between the two styles of boats. To me it seems that it would be much more cost effective and more structurally sound to go with a stern mounted paddle wheel than on the sides. Although, the maneuverability of the side wheel placement seems to make more sense. Just some random thoughts that pass through my head.
All in all, I love the detail you have in work with the crates. I went by the "quicker" way when I made mine on my Chaperon build by just making the fronts. Since they are barely visible, the effect is there minus all of the work. I also cheated a little by finding a jpeg of a steam engine online, sizing to scale the picture and then sticking it to a piece of foam board just inside of the mechanical room. Only small parts of it are visible through the upper windows and the wall vents. Again, it gave me the effect I was looking for without the work.
-Brian
- mtaylor, Cathead, popeye the sailor and 1 other
-
4
-
3 hours ago, Cathead said:
I do agree that a great deal of the appeal of modelling (to me) is learning about and understanding the subject, not just the actual building or viewing.
Eric,
I must agree. In the short time I’ve been working on my build and log I’ve learned a tremendous amount. I have, by no means, the caliber of knowledge of steamboats you, Kurt and others have stored away but in time (20-30 years) I may get there.
Half the fun of the build is the learning. I always look forward to reading the updates on these builds and the tips and information that come along with them.
Your Arabia is coming along nicely. I do like the “roughness” of the planked walls. It truly shows the reality of how these boats were constructed. Nice touch on the “gutters”. I myself did cheat on my build and scribed the additional wall, only because the other walls in the kit were done in the same manner and I didn’t want have that different look either.
On a side note, are you guys drying out up there. I know a lot of people in northern Oklahoma and Arkansas are dealing with some serious flooding.
-Brian
- popeye the sailor, Cathead, mtaylor and 2 others
-
5
-
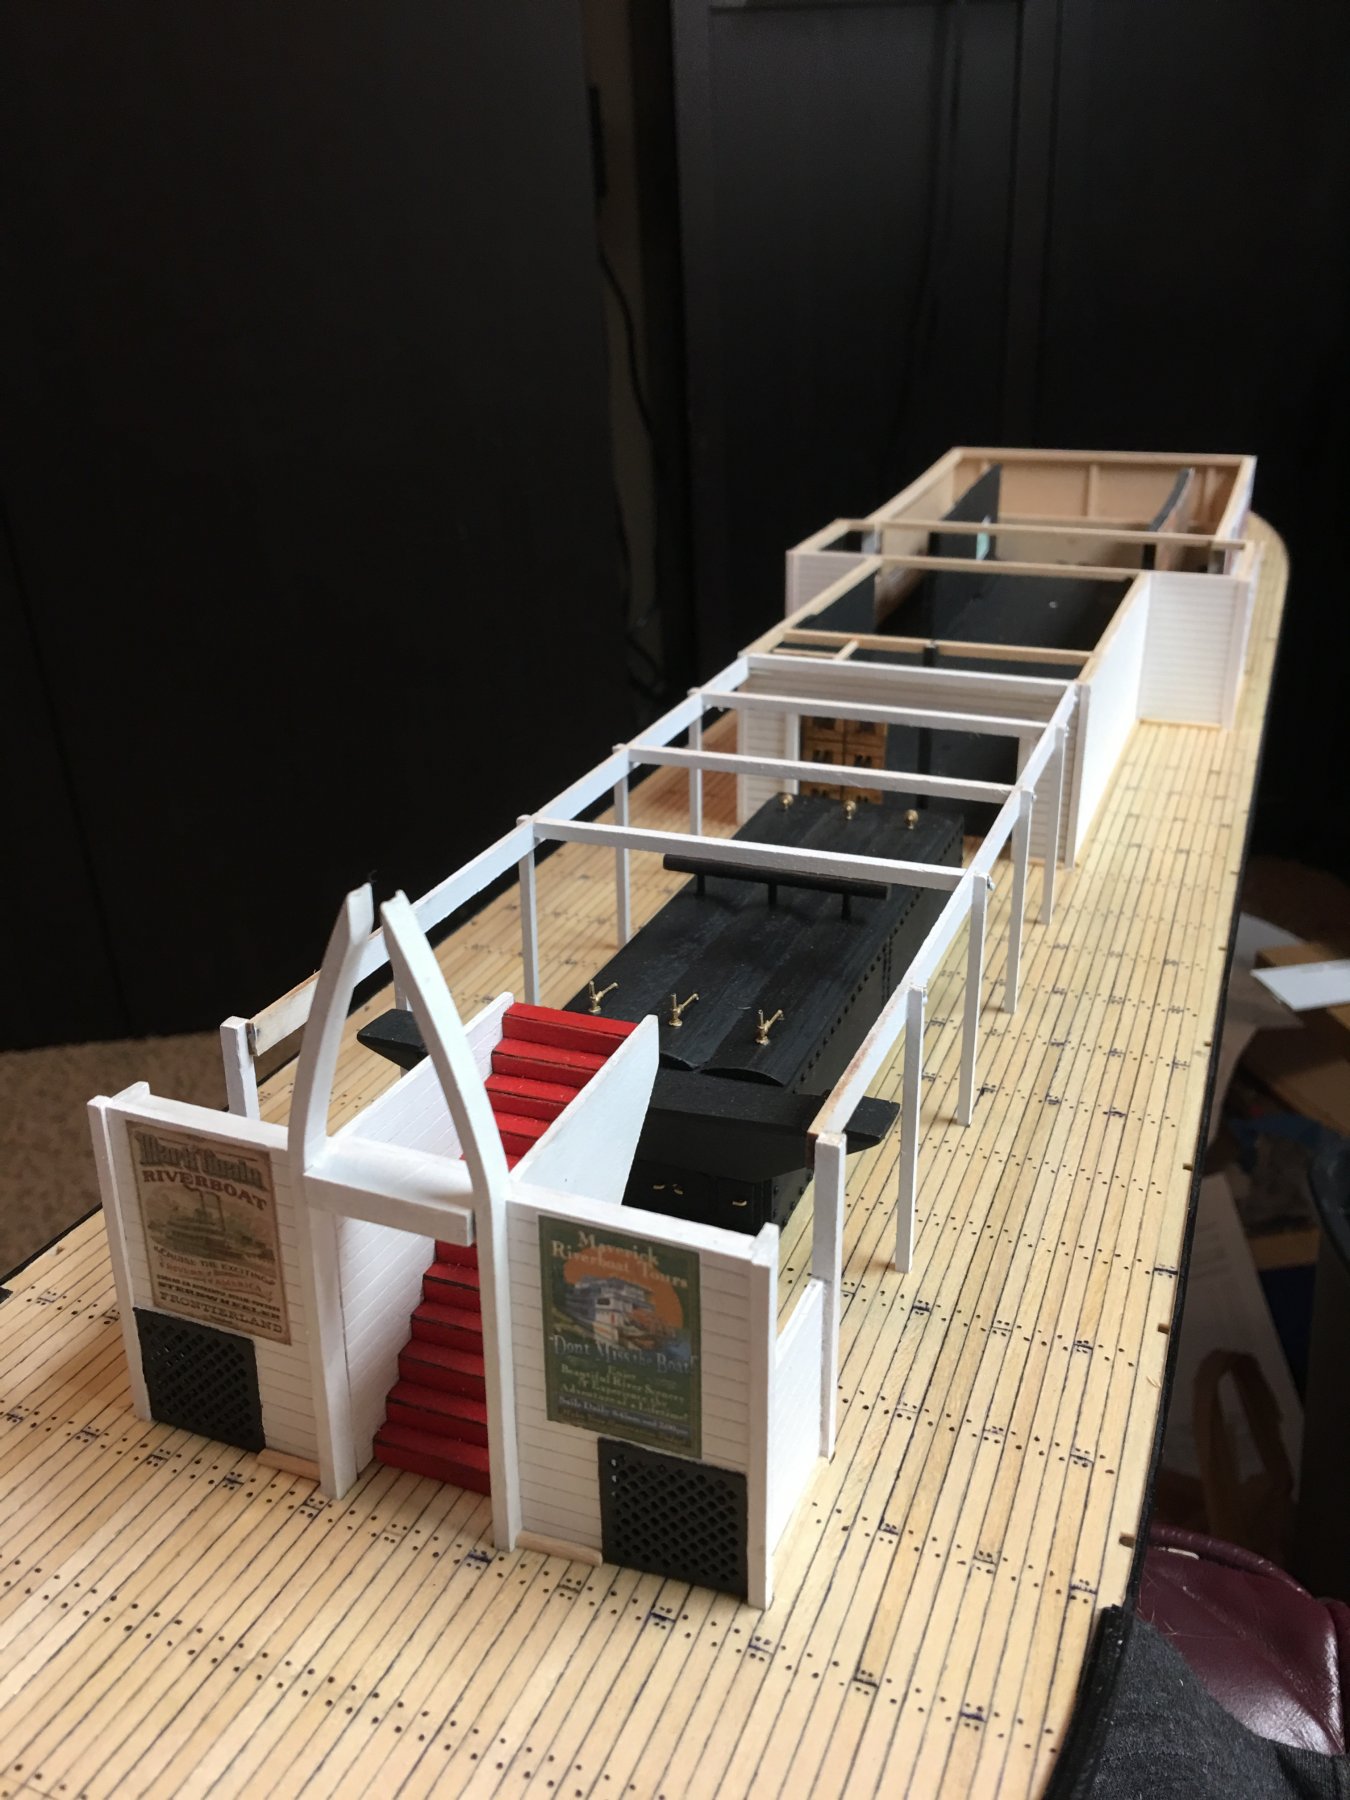
Greetings everyone,
I am finally back with an update. Again, life and other projects have taken up some of my building time but have managed to squeeze in a little work in my spare time.
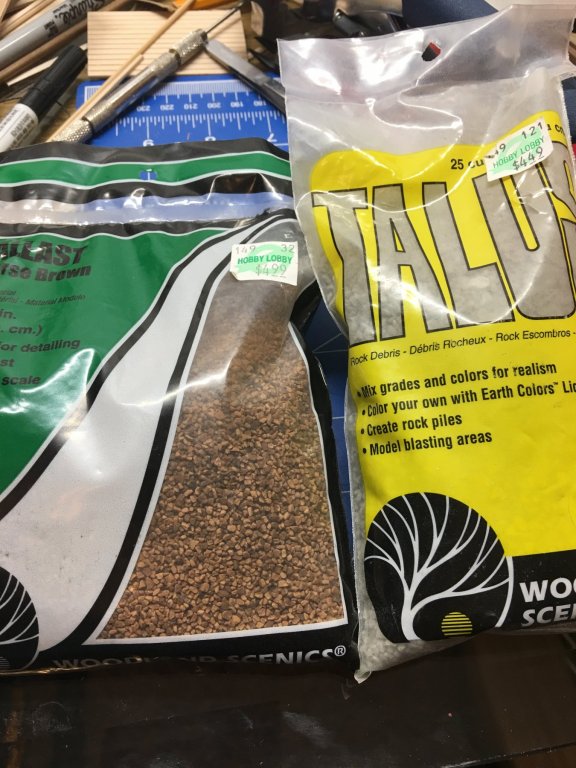
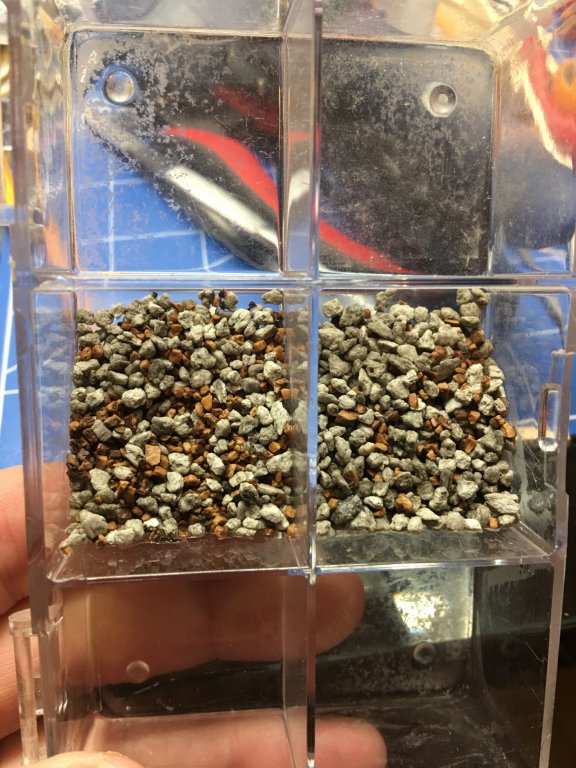
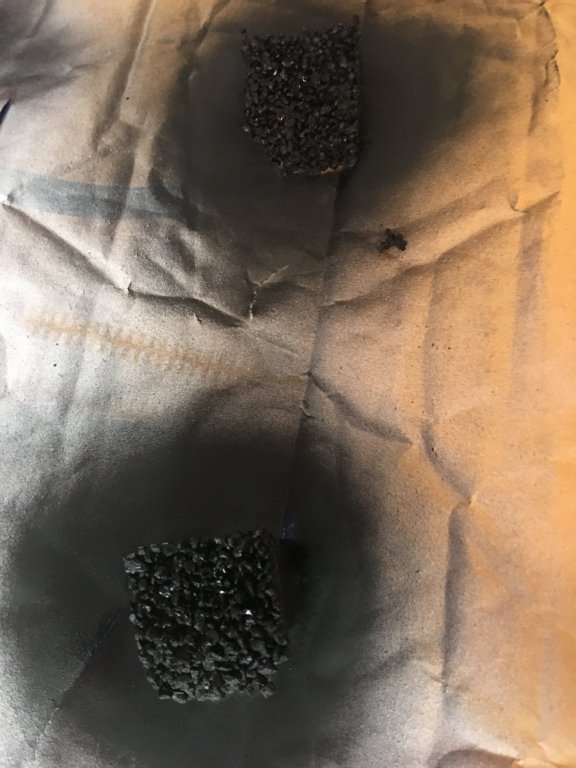
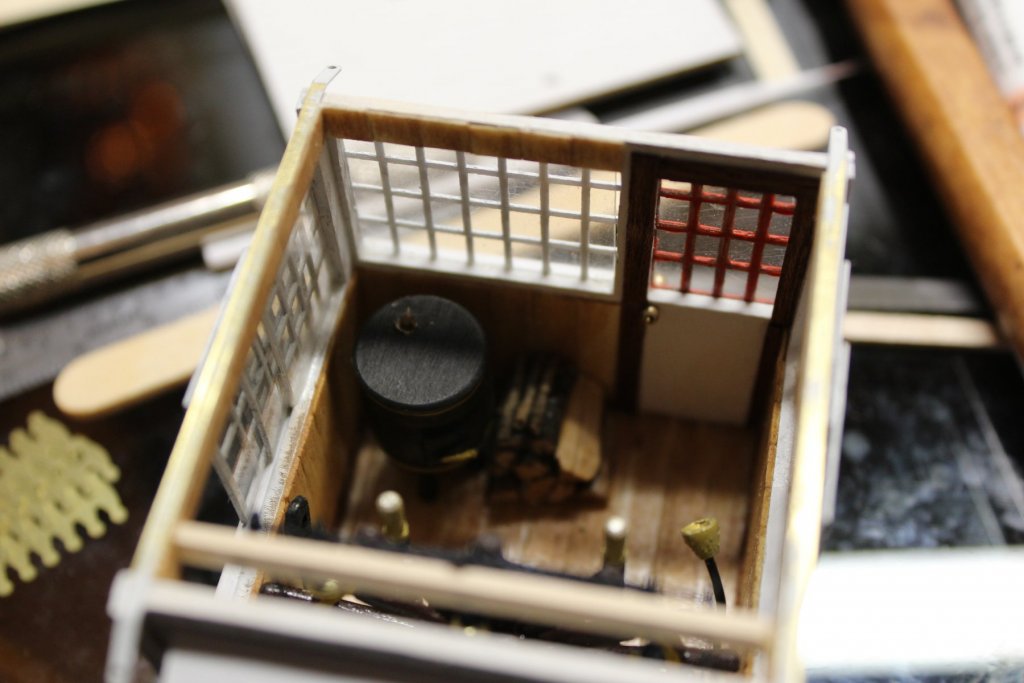
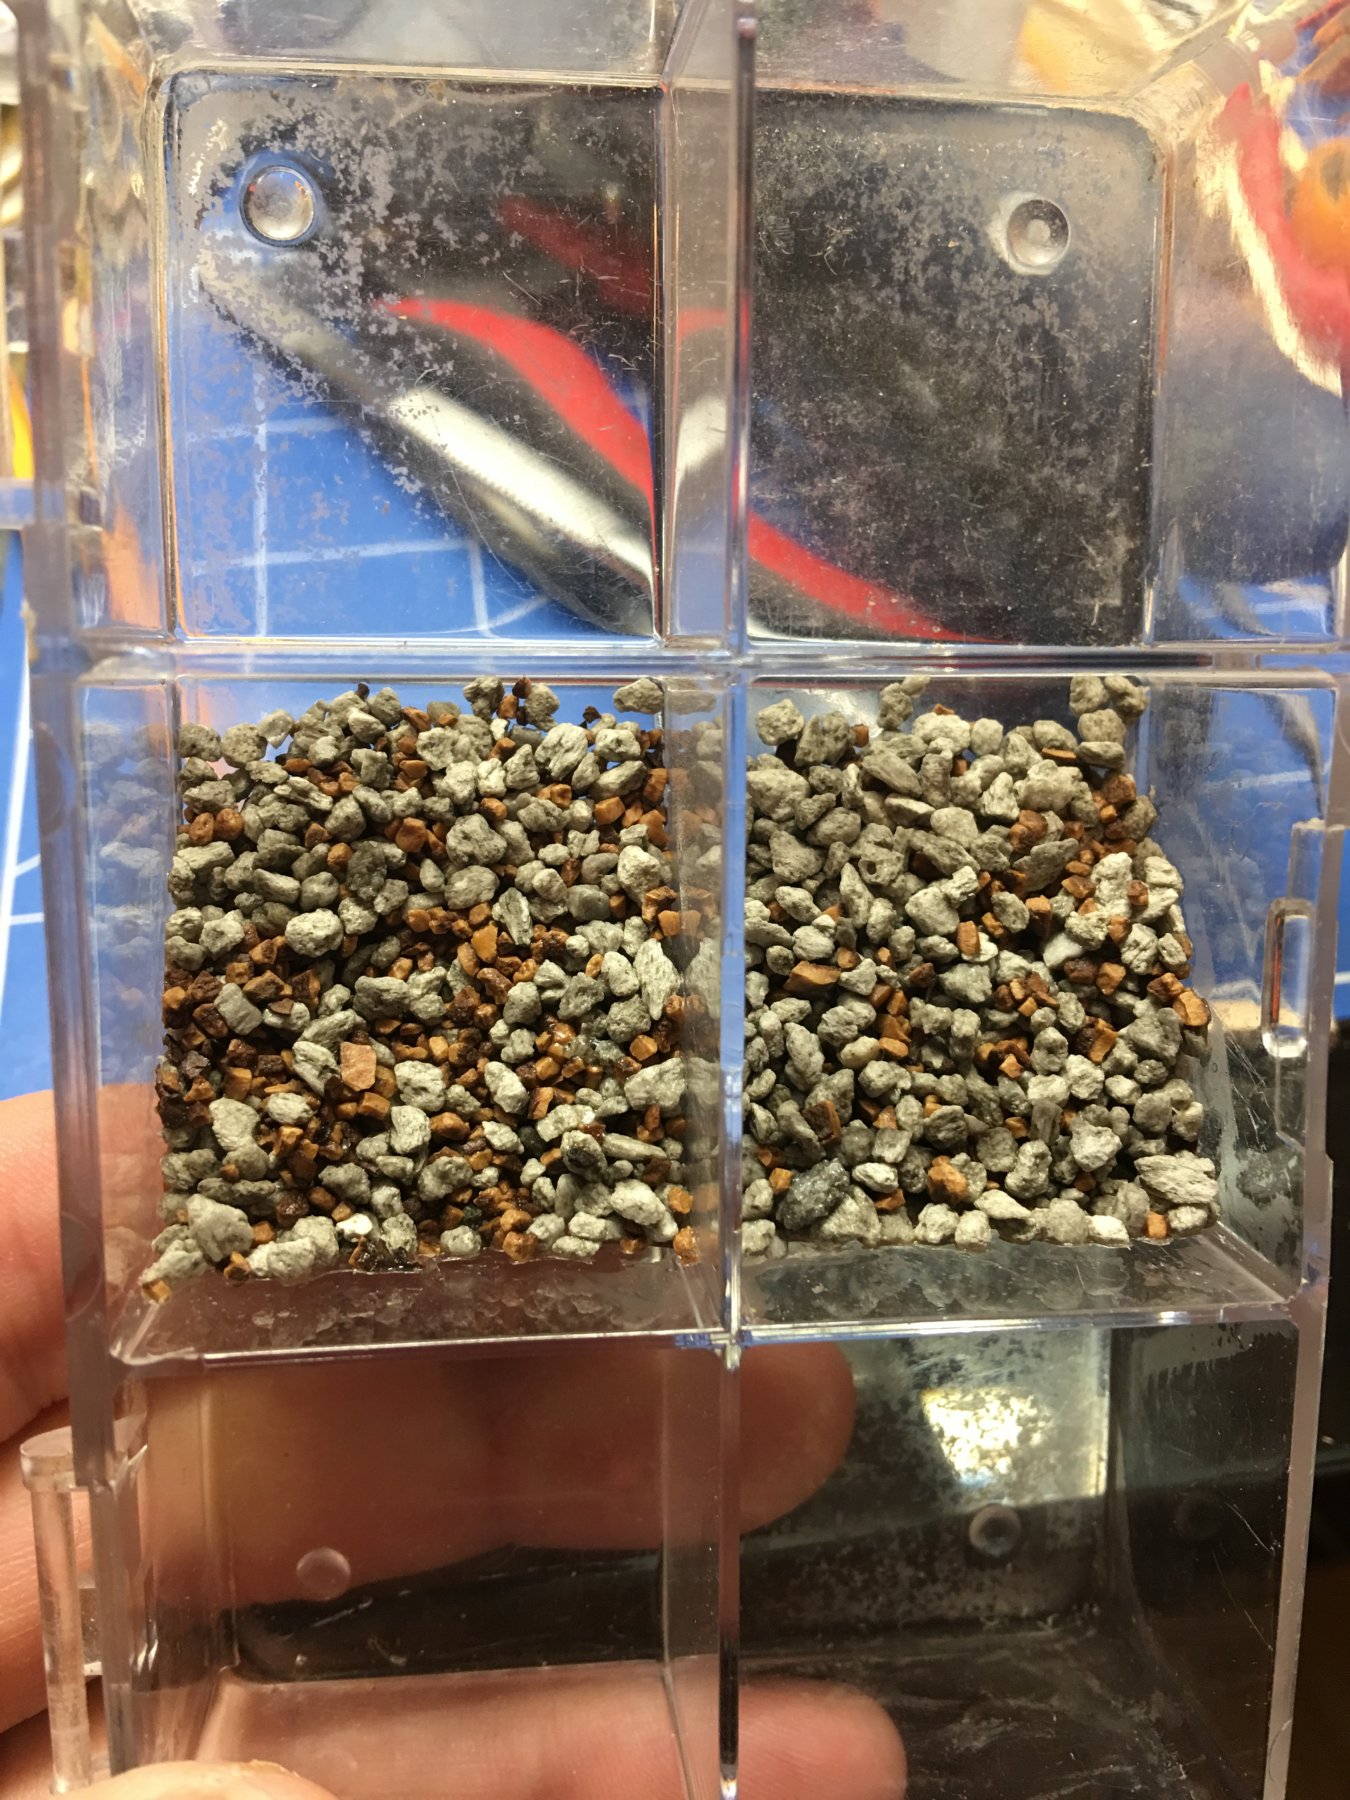
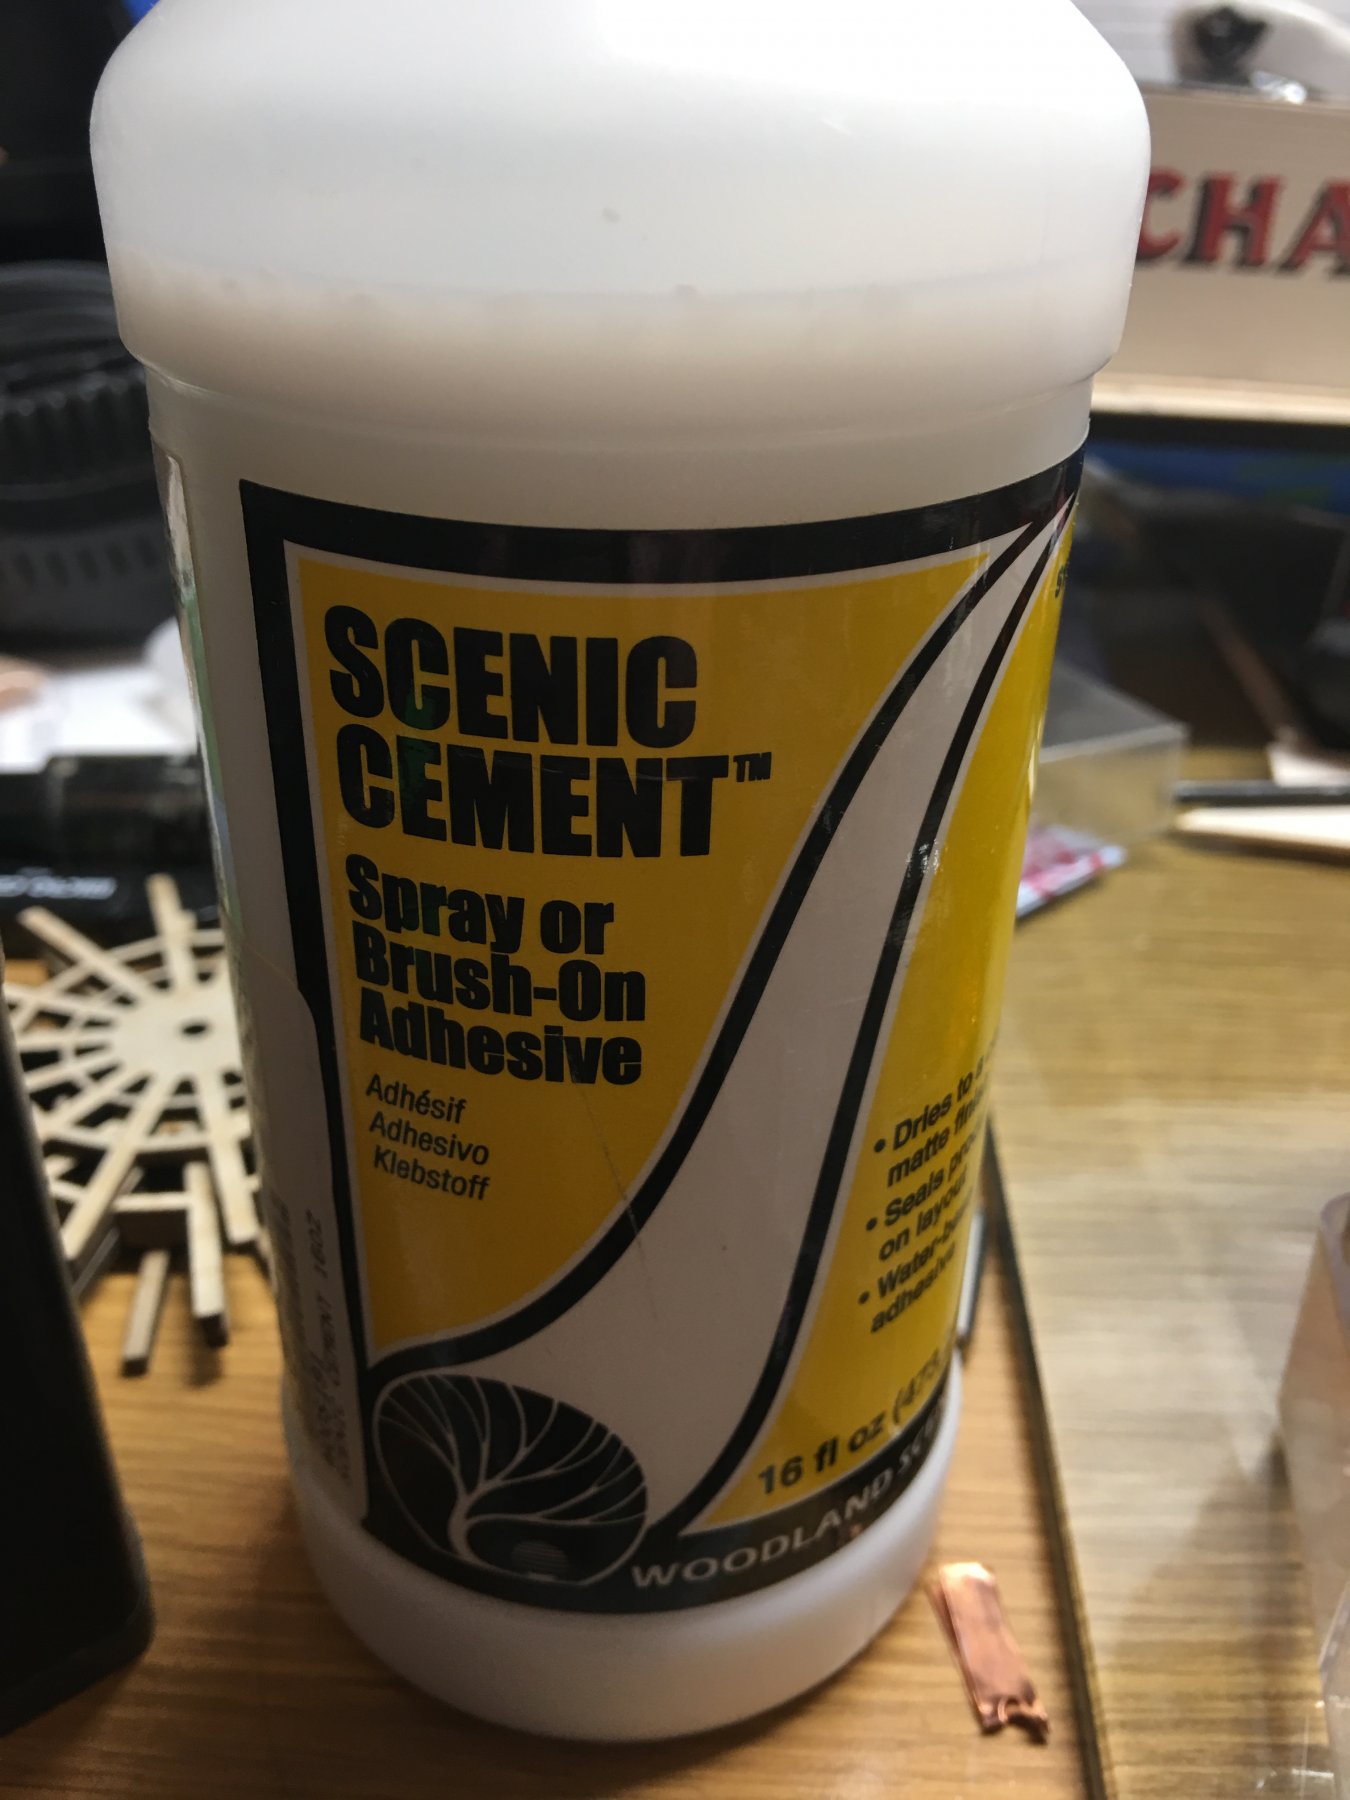
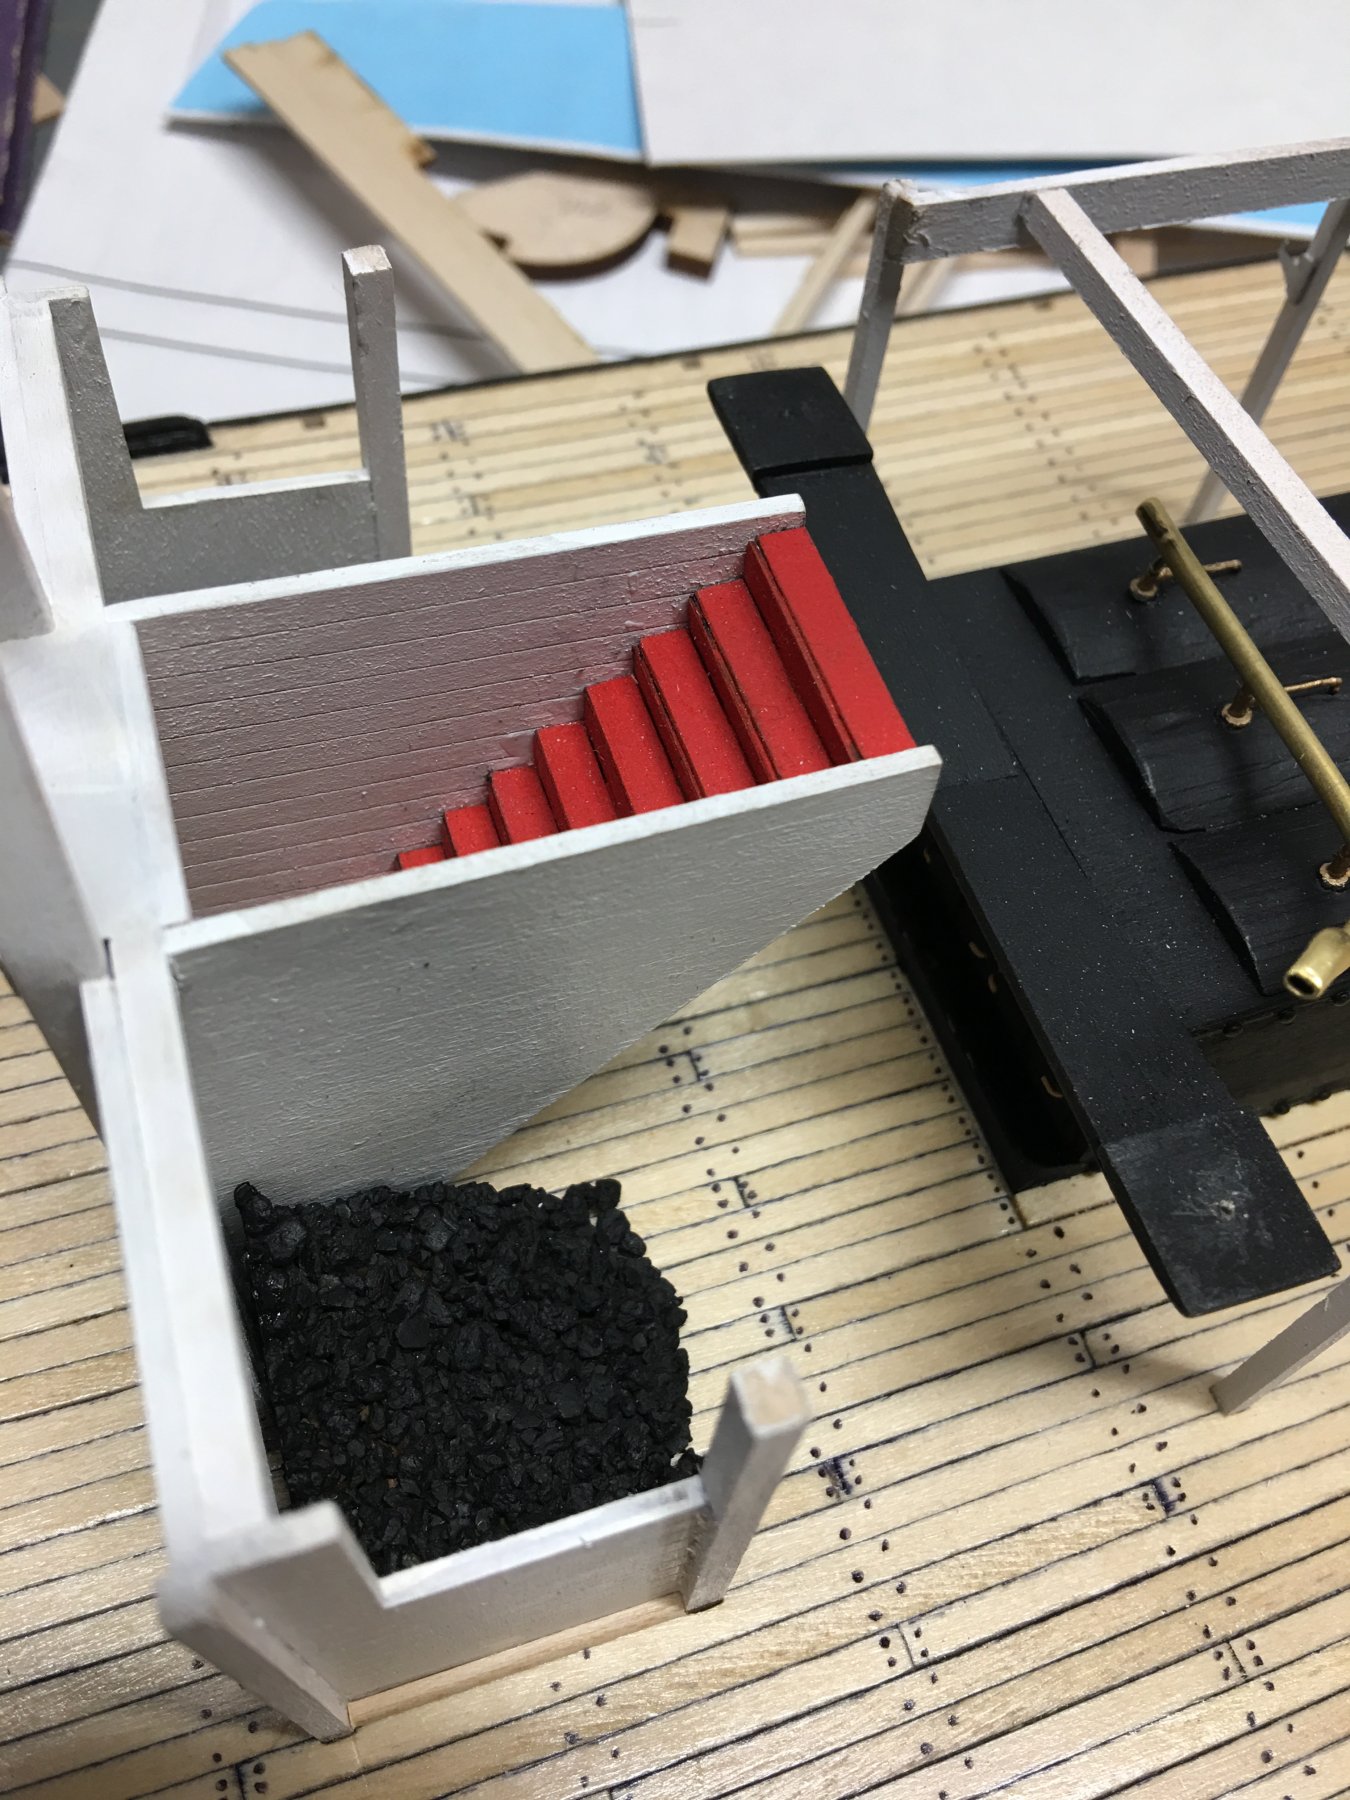
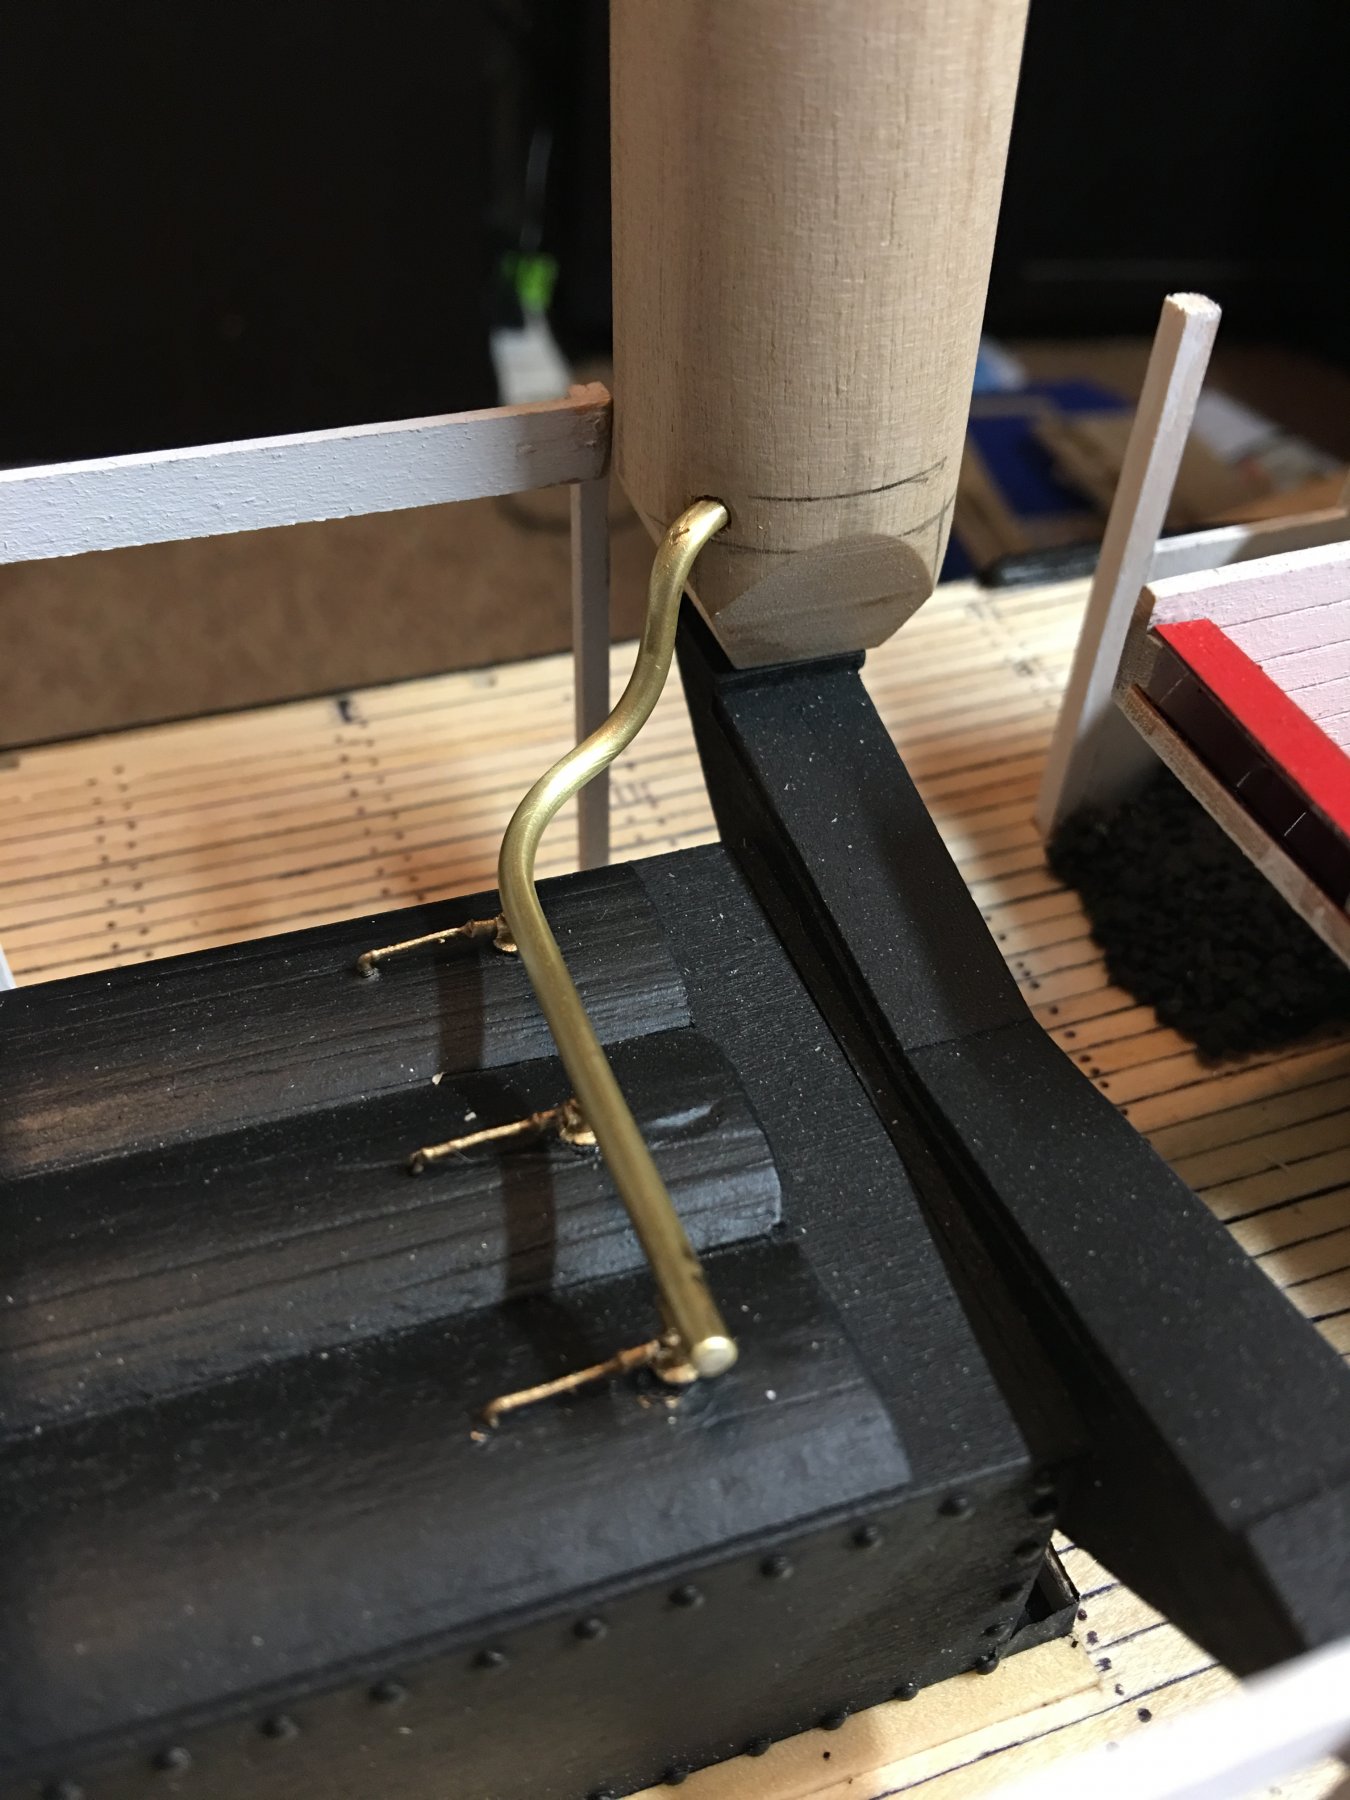
Work has progressed on the main deck. The walls and staircase have been installed, along with coal piles and steam tubes. For the coal piles I just used a little Talus aggregate held together with scenery adhesive. I found a parts tray that was the perfect size to fit neatly in the cubbyholes alongside the staircase. I simply filed the parts tray, poured in the adhesive, let it dry then removed it and shot it with light a coat of flat black spray paint.


Another feature that I wasn't completely satisfied with on the model was the way the walls ended just behind the boiler. To me it didn't seem structurally sound and needed a "little more" detail. I decided to finish off the opening and add that little more touch by installing cargo crates to help dress it up with more detail.


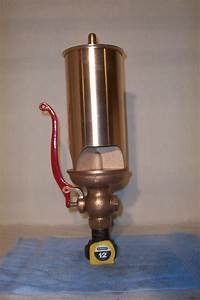
Next I installed the pressure relief valve manifold on the boiler and the steam tube back to the mechanical room. I added a couple of hangers to support the steam tube as well.


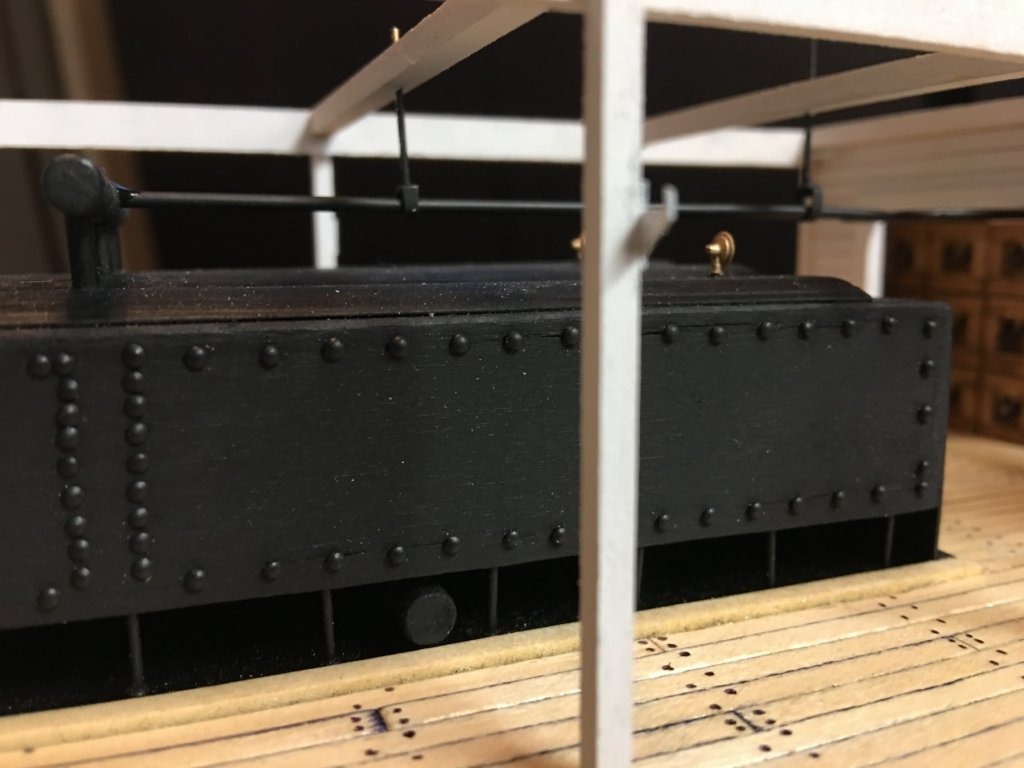
I'm currently still working out how I want to build my capstan. So far I have made a couple of attempts that I am not completely satisfied with. Hopefully soon I'll have a version that I will be happy with and get those pictures posted soon. In the meantime I'll start work on the boiler deck structure and features and see where that takes me.
Anyway, that's all for now. Thanks for looking.
-Brian
- Ryland Craze, yvesvidal, ferarr and 10 others
-
13
-
Eric,
She’s definitely coming along nicely.
I am approaching this stage on my Chaperon in assembling the structure around the boiler. One of the things that has been pointed out on several Chaperon builds was the lack of the foreword hog chain supports not extending through the boiler deck to the main deck. They just simply disappear. This is an error I do intended on correcting with my build.
Even given the time difference between Arabia and Chaperon the construction of this area seems somewhat similar. Although it’s simplistic in looks, I’m sure each and every post and beam serves a purpose, whether to support the deck above or holding hull in line.
On a side note, I grew up on the lower Mississippi River (Baton Rouge area) and have seen a lot of what Mother Nature can do do a river and it amazes me what lengths are taken to ensure the water stays within its man made boundaries. I’ve seen the Mississippi as high as a foot from spilling over the tops of levees on a few occasions and living only a half mile from it warrants a serious pucker factor when it happens.
It’s an eerie site to see huge ships go by looking like they are riding the top of the levee. But what’s even more eerie is when there are no ships at all going down the river because it’s been shut down due to high water.
-Brian
- druxey, Canute, popeye the sailor and 3 others
-
6
-
18 hours ago, cog said:
GReat result on the deck, Brian
Carl,
Thank you. I am quite pleased with it as well.
9 hours ago, Cathead said:Real planking always looks better. Are you leaving it the natural wood color or planning to paint/stain the typical red color?
Eric,
I'm going to leave it as is (natural with a couple of coats of poly). All of the builds on MSW have the typical Red or Brown decks so I thought I'd change things up a bit.
Besides, if I paint it now it will hide all of my nail heads that I worked so hard to put in.
")
-Brian
-
Greetings everyone,
It's been a little bit since my last post. Life and work have been in the way this week. We've been in the process of building a barn and the prep work is taking up some of my shipbuilding time. It'll all be worth it in the end as the barn will eventually house my new shipyard.
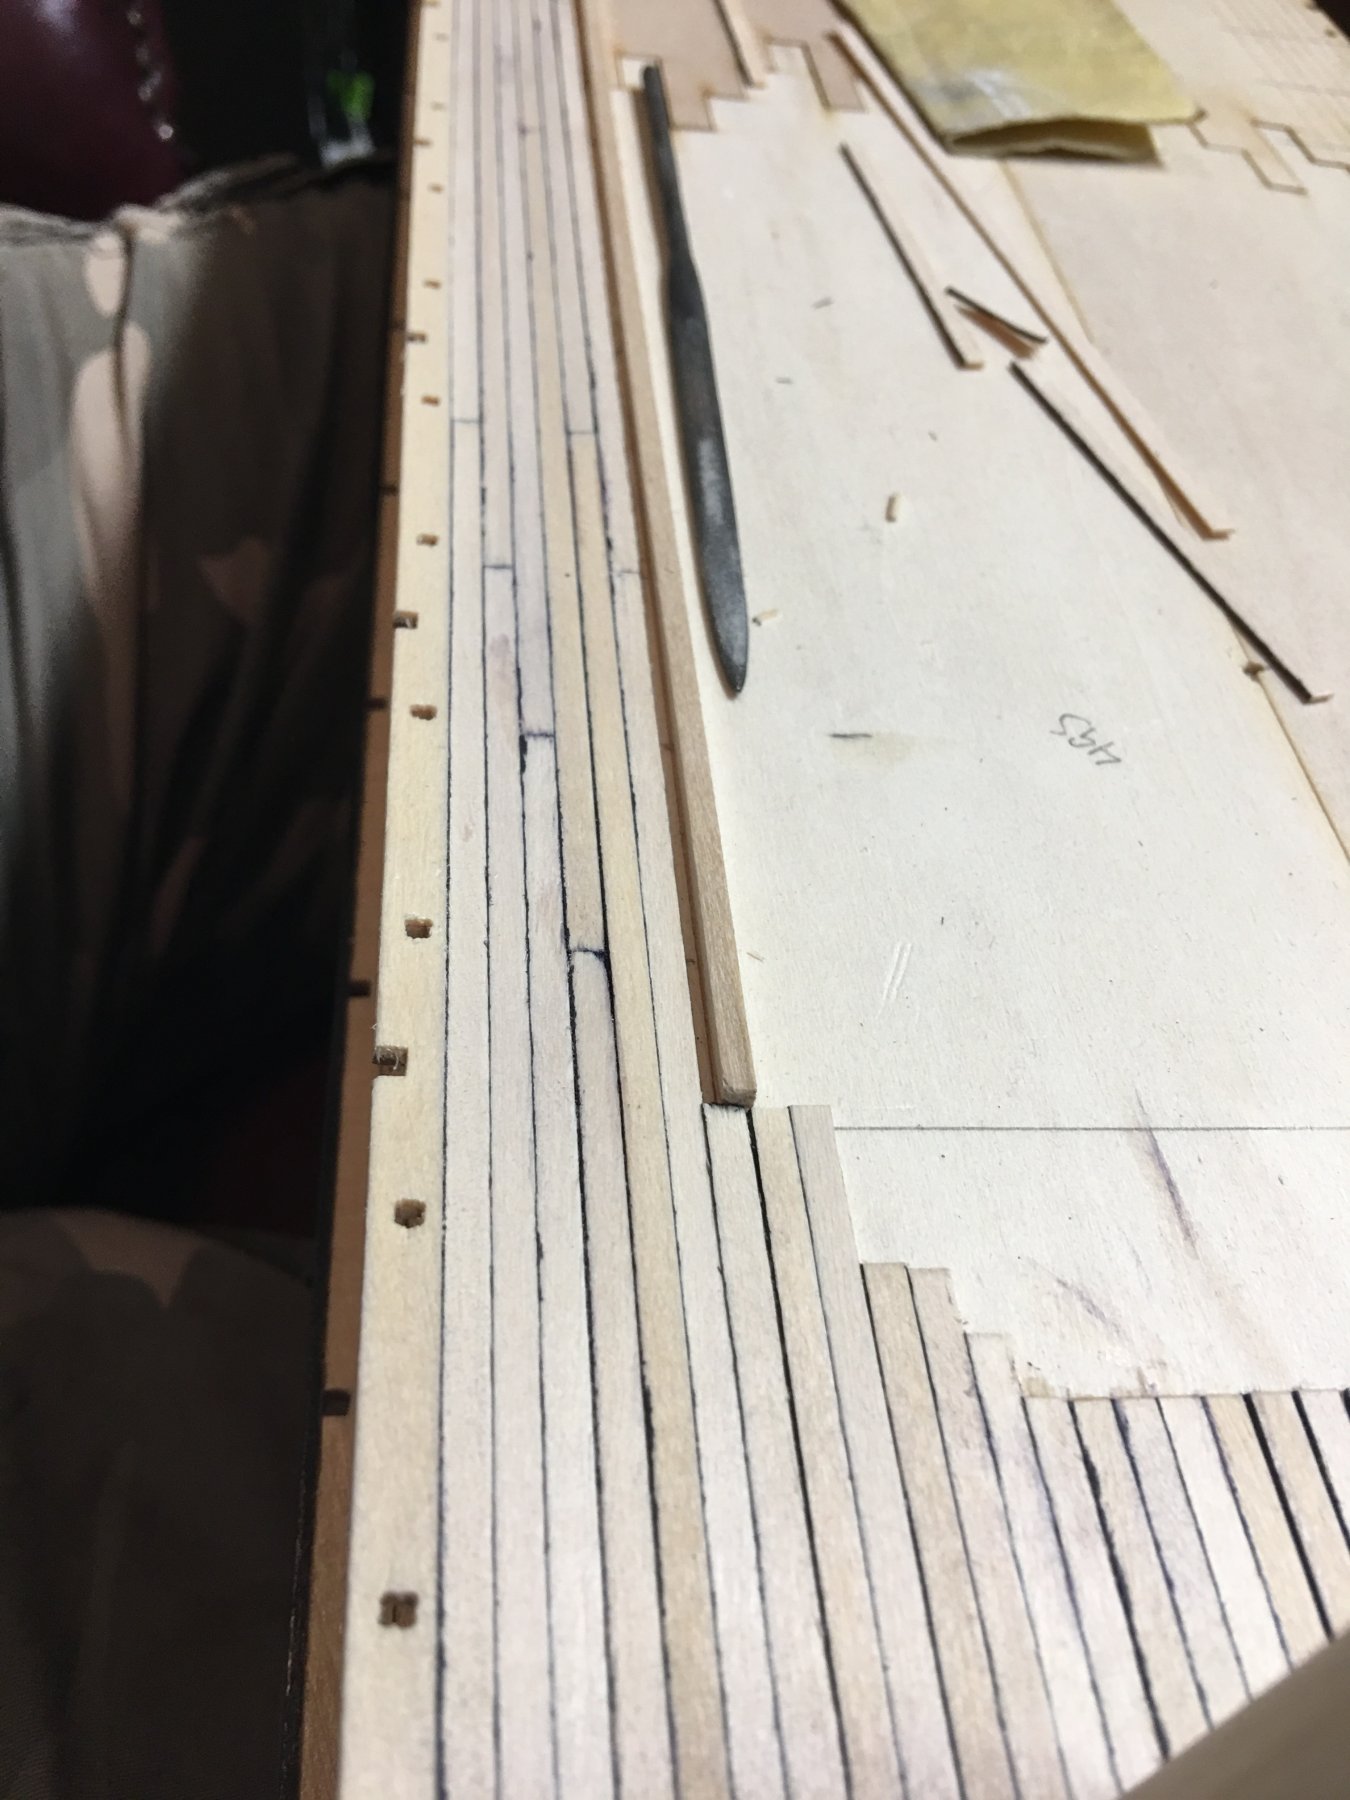
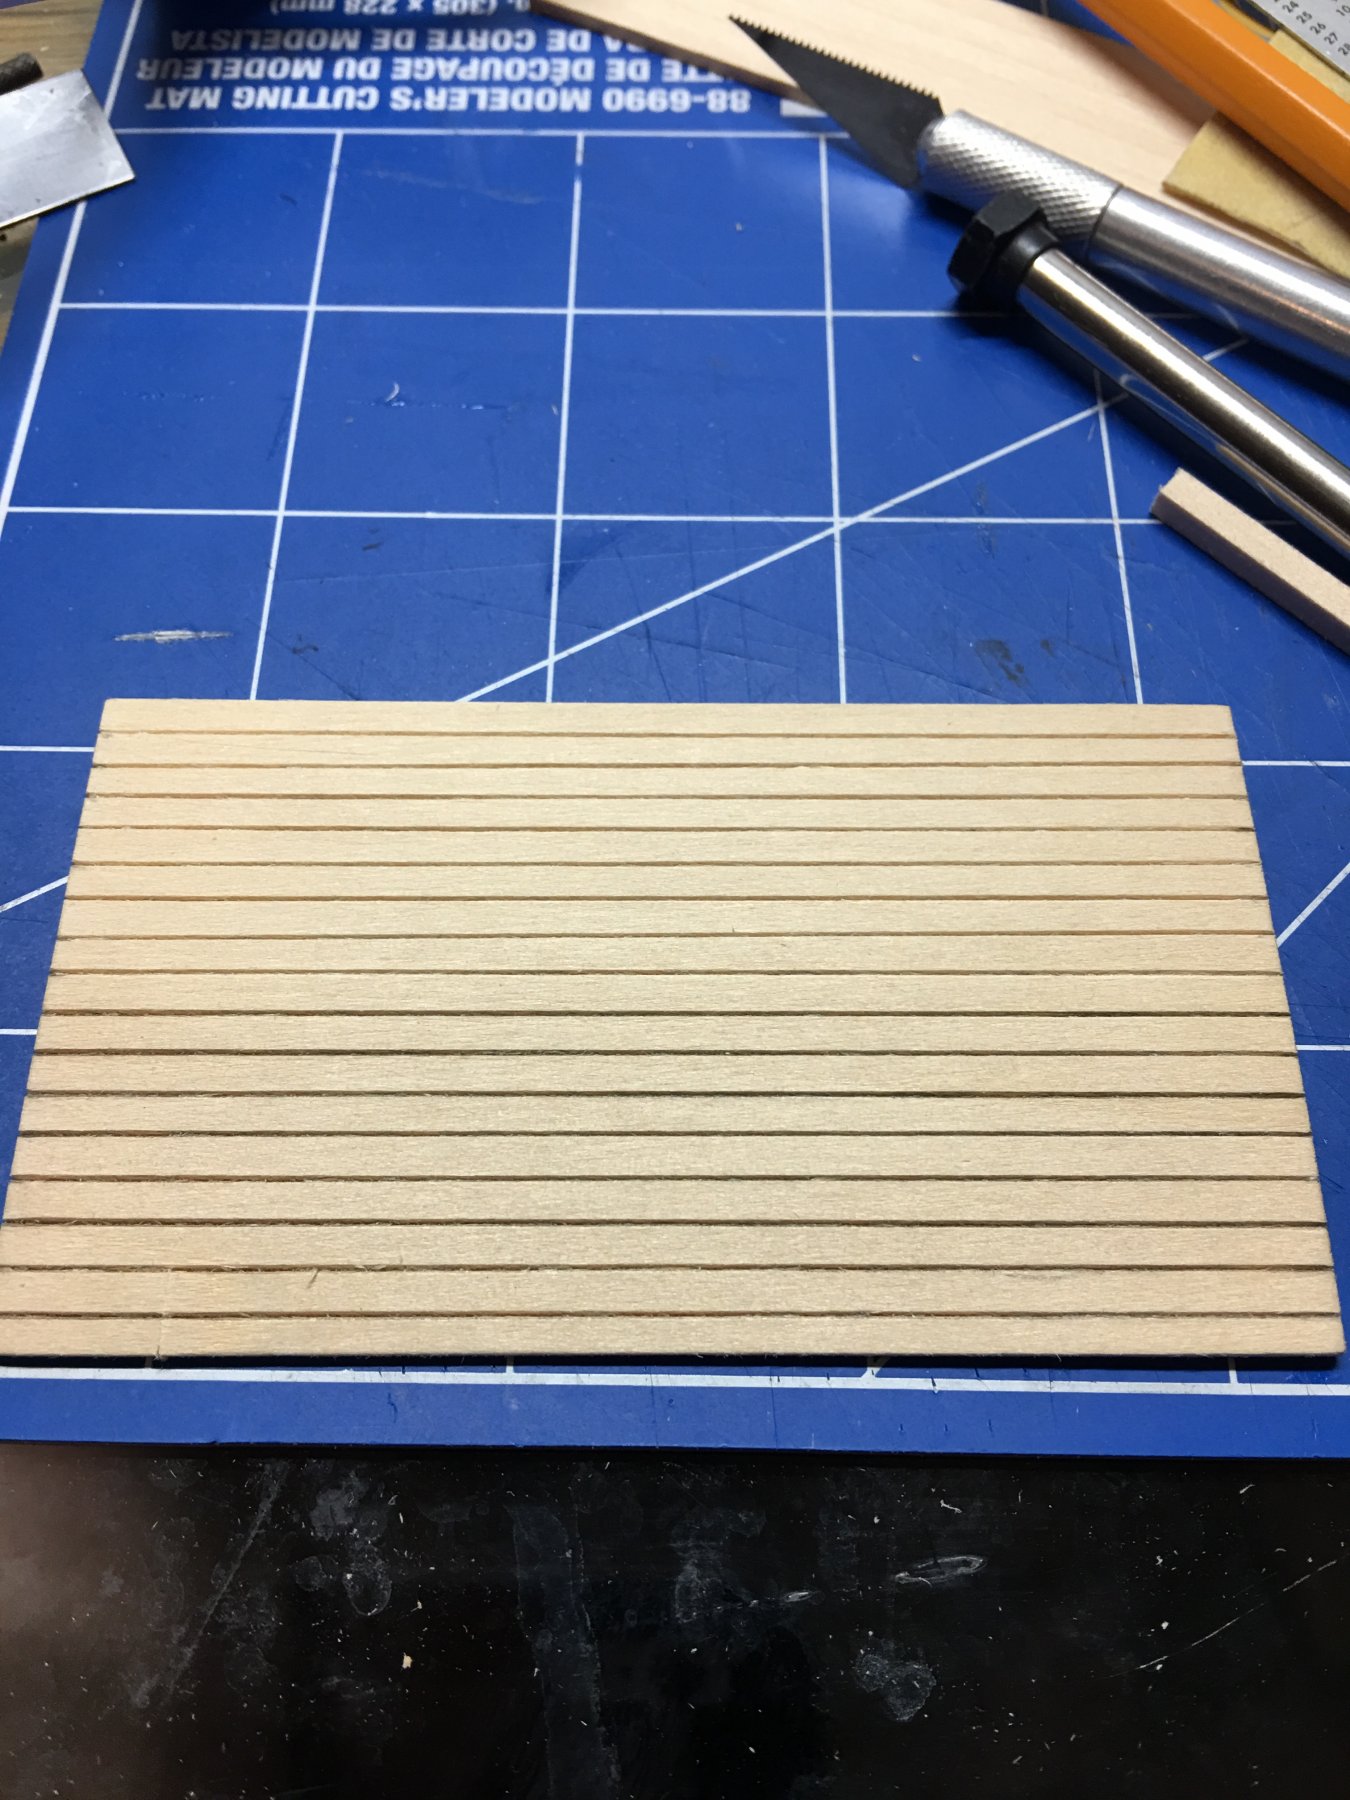
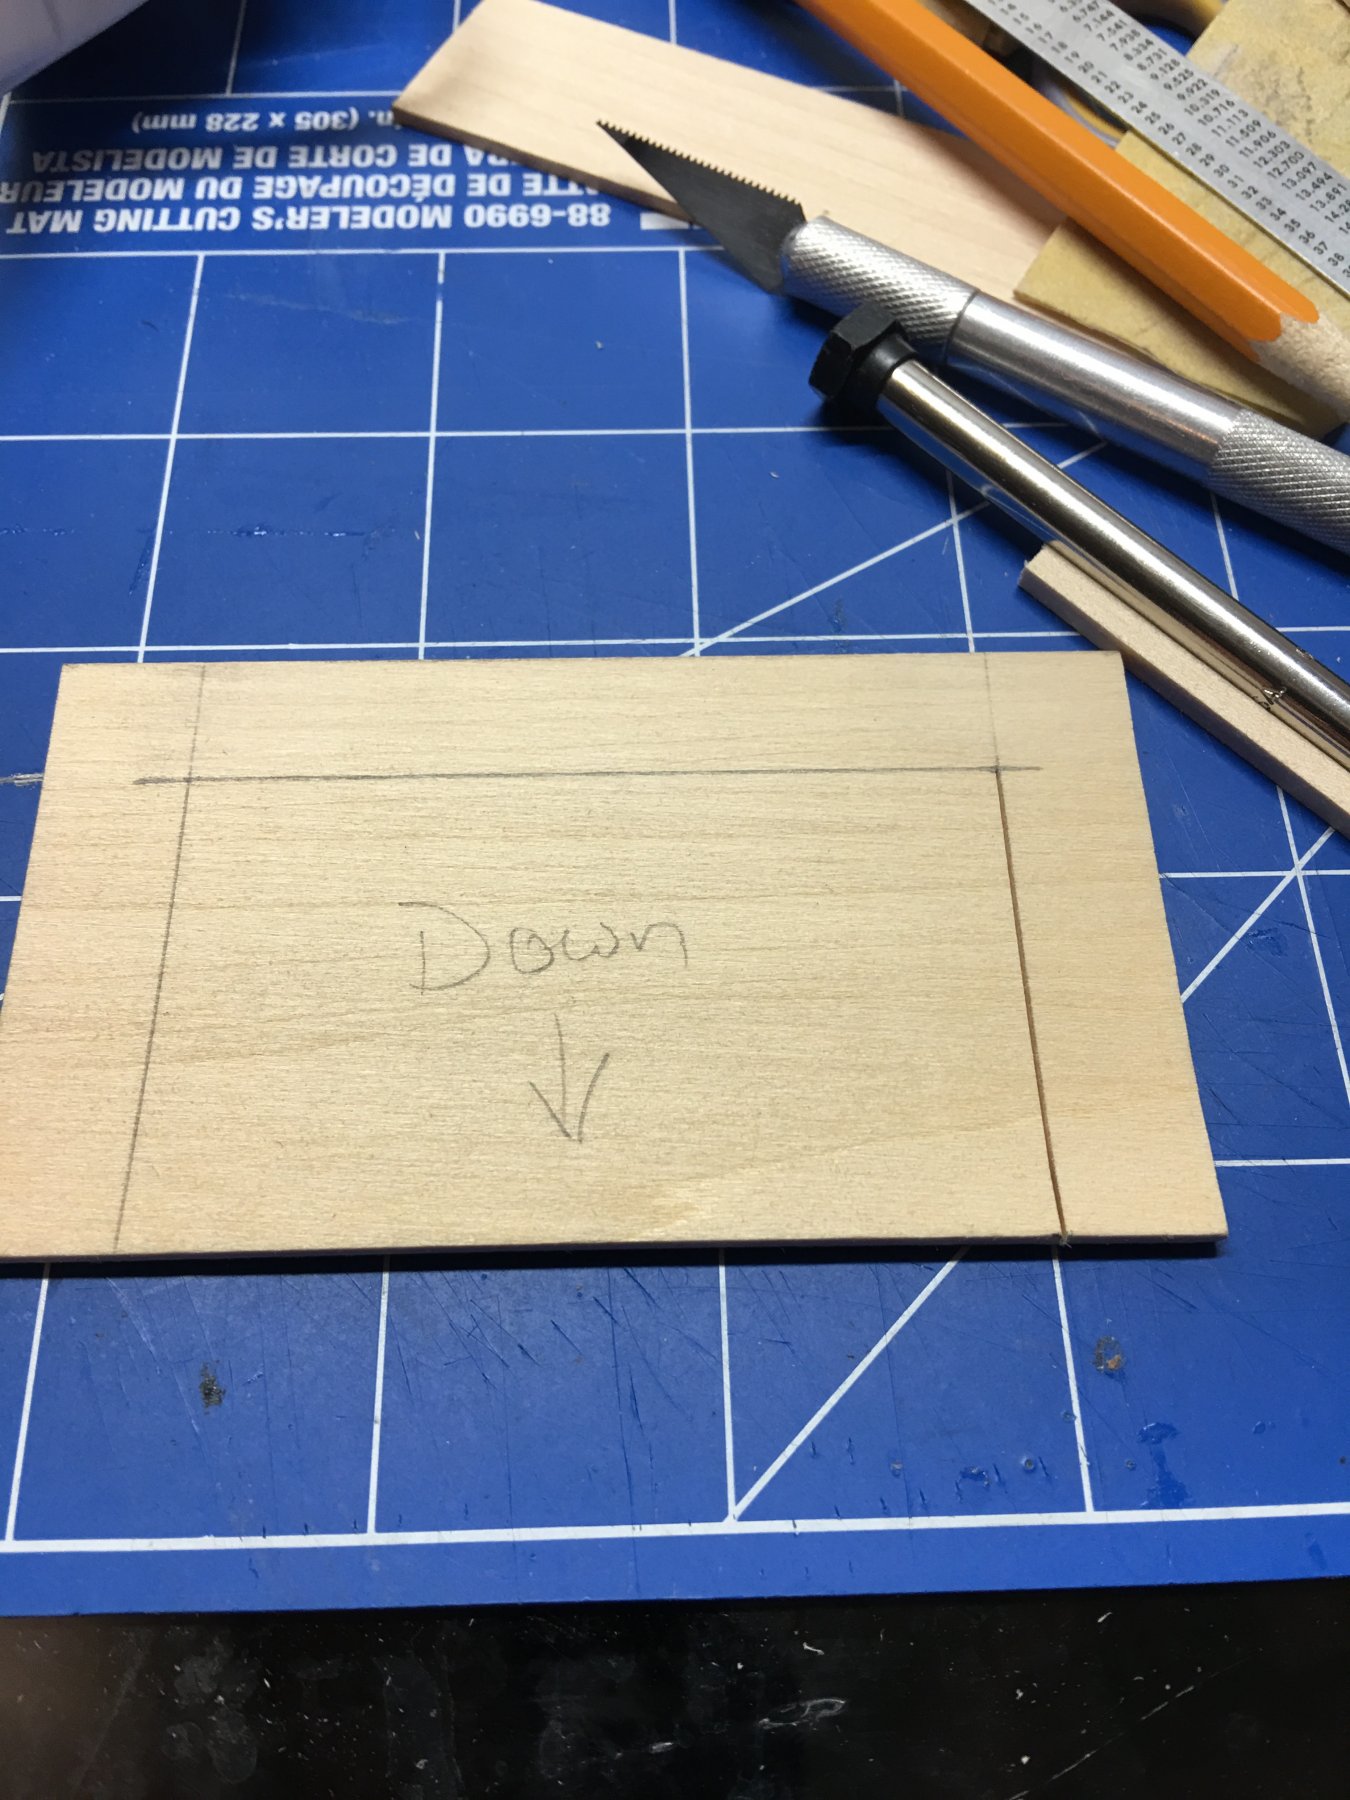
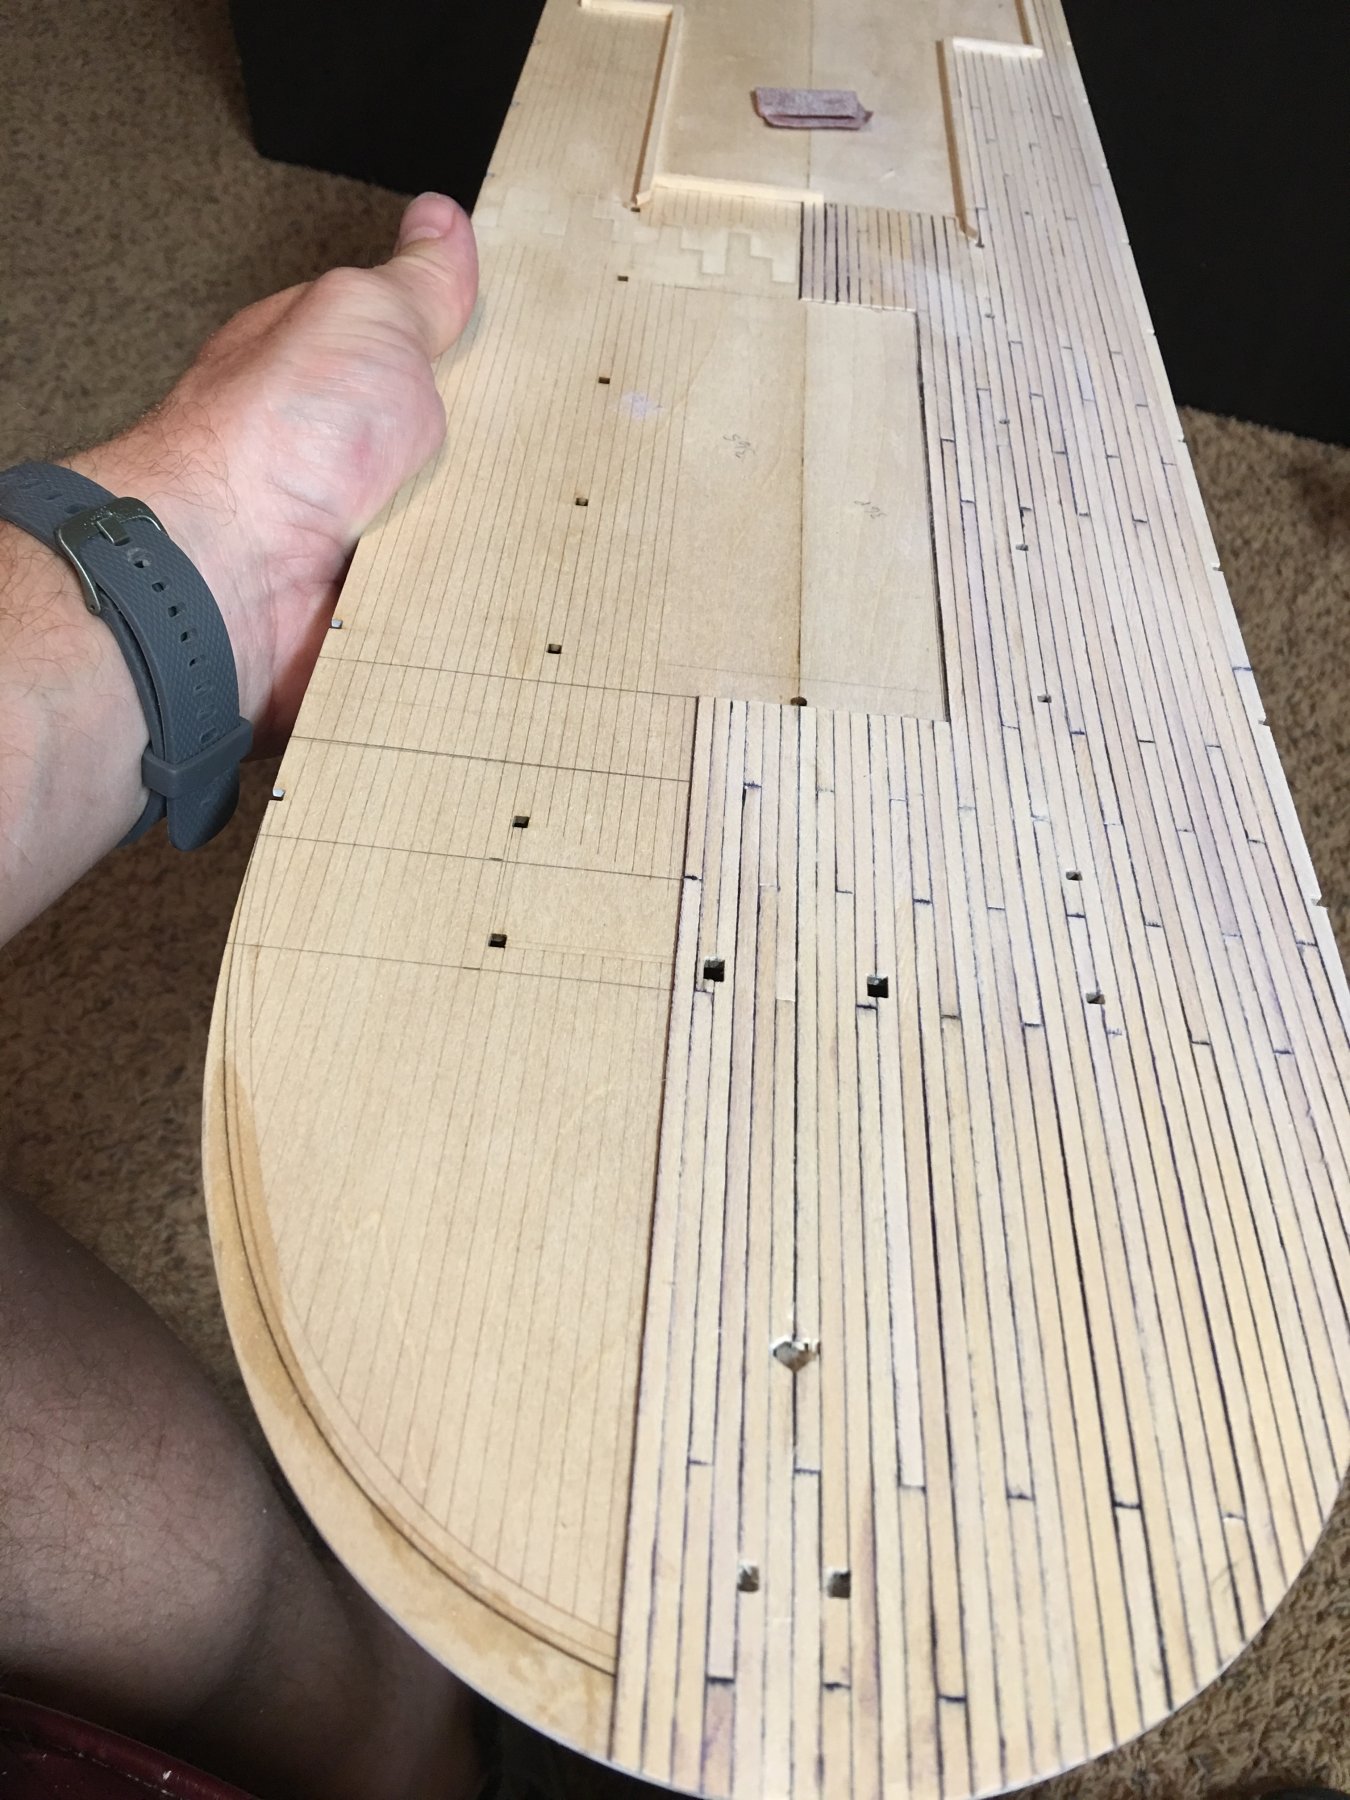
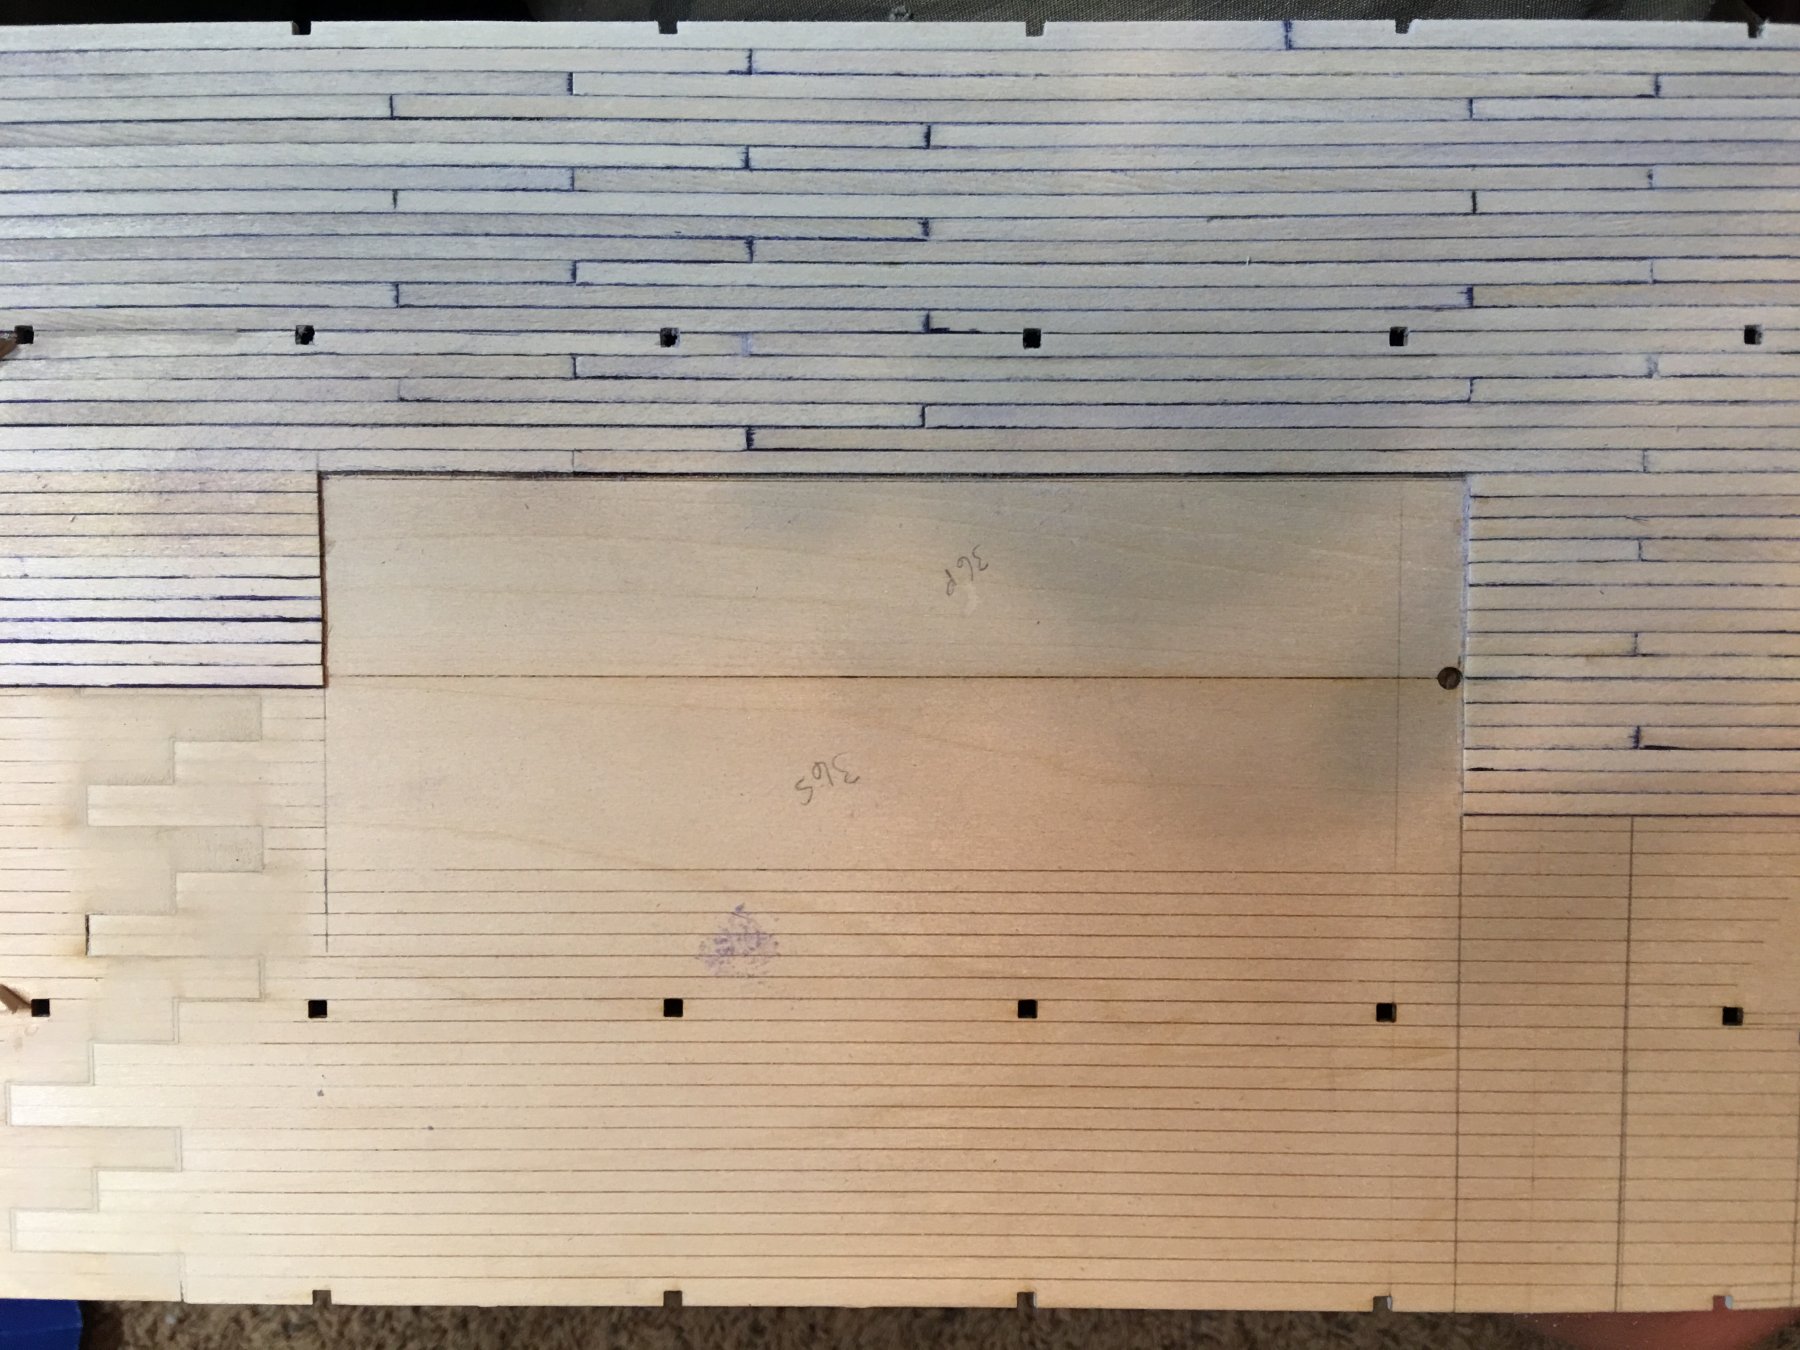
Anyway, I finally received my planking material after a month of waiting and was finally able to get the main deck planked. Thanks to Kurt's assistance in letting me know that steamboat decks were nailed in place and not trenailed. I did a little digging on the Arabia website and found that they have a deck section setup with the boats capstan and anchor displayed. I noticed that on this display that you can actually see the nails that hold the deck planks in place.
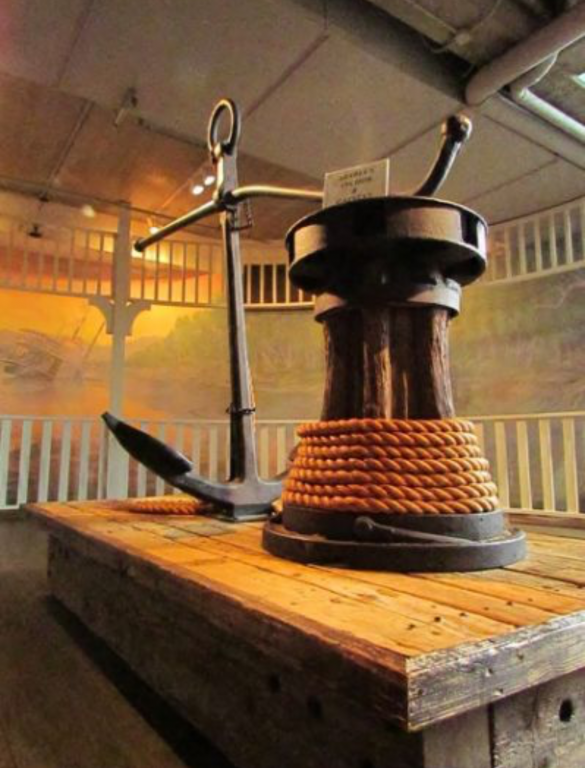
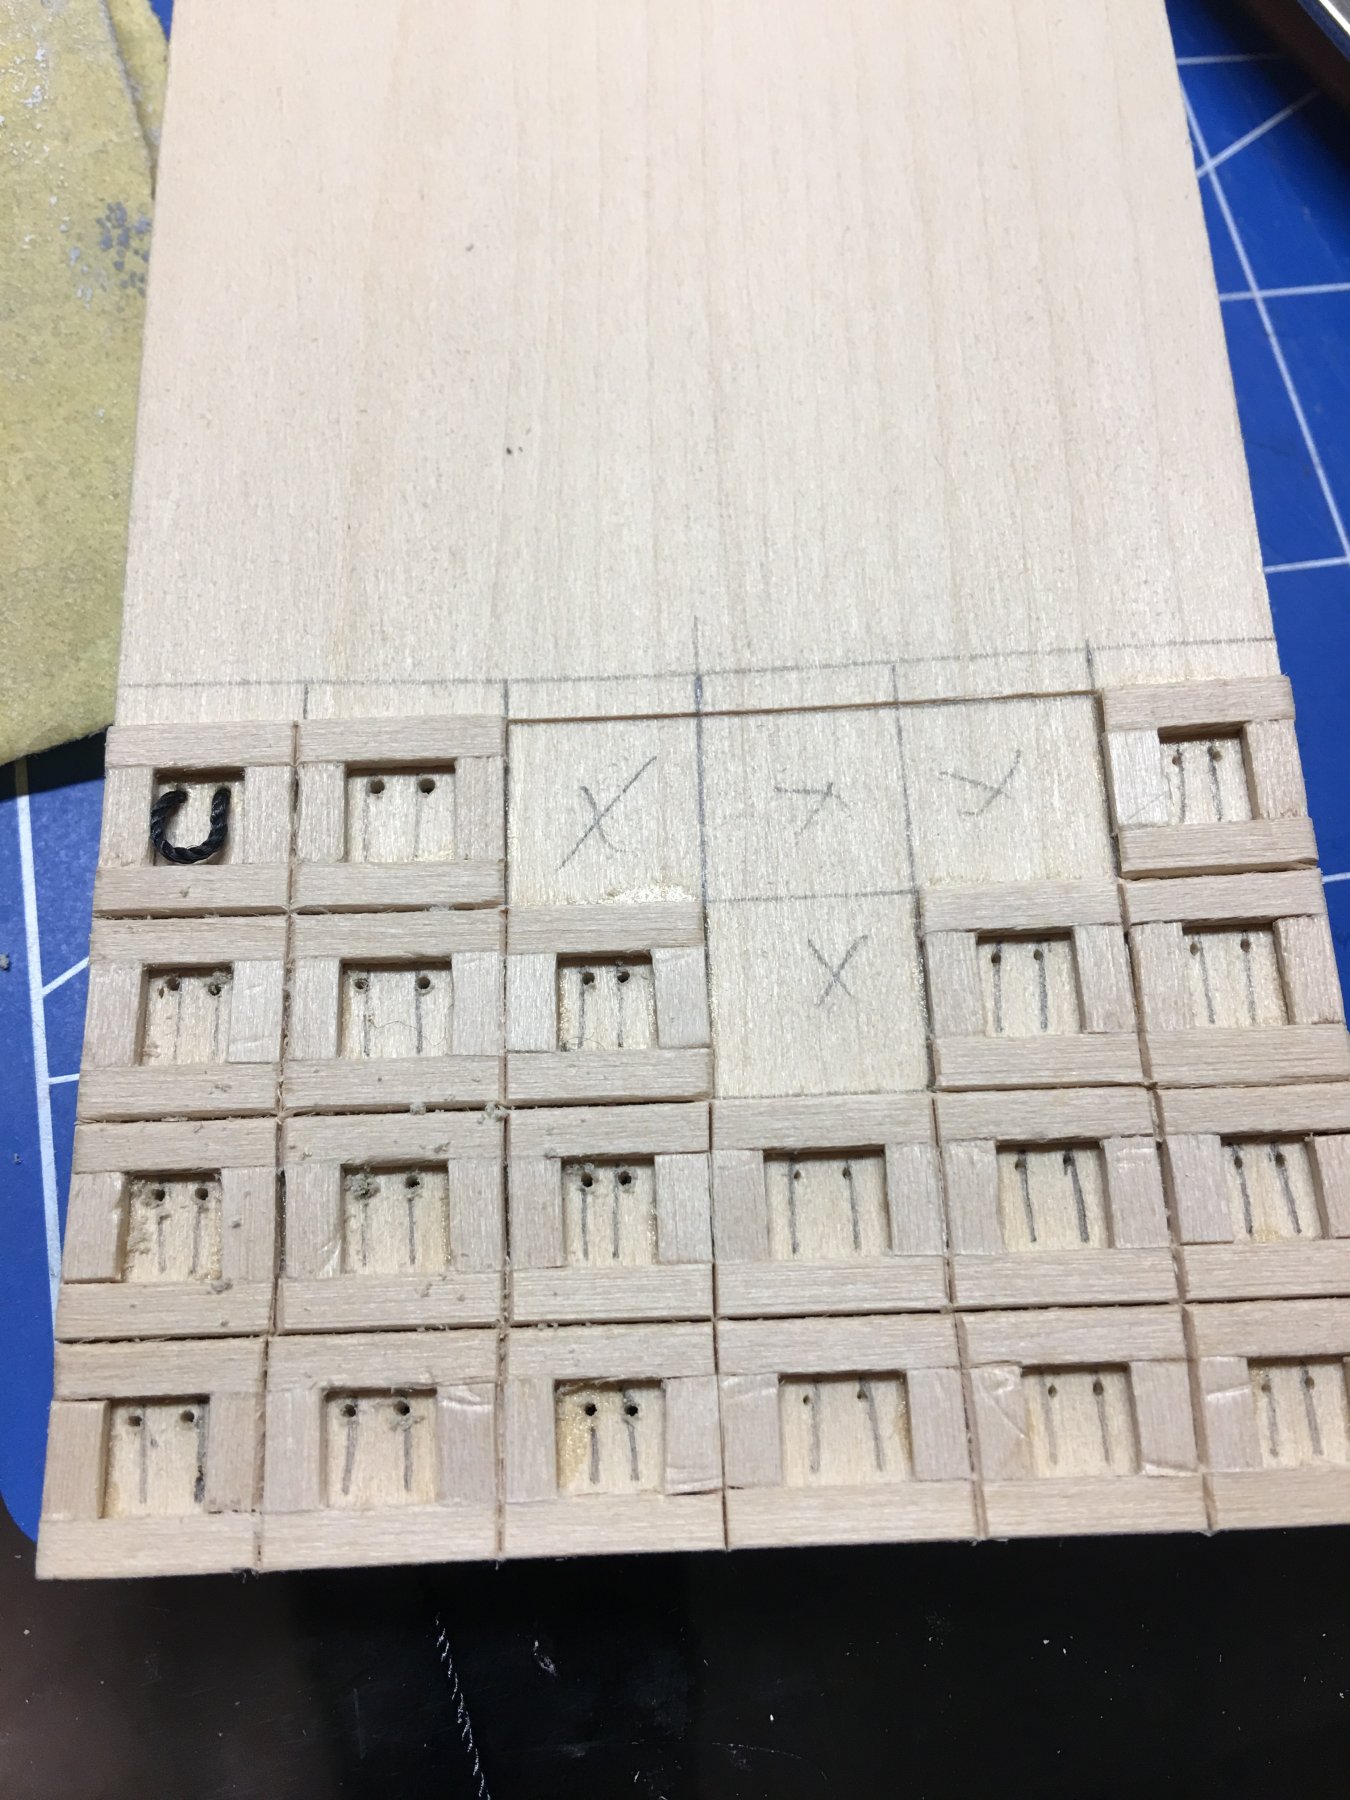
Since I love the look of a nice trenailed deck, I figured I could do something similar to trenailing with the deck nails. In the picture of the Arabia display you can clearly see the nails lined up in a neat row, so I figured I could simulate the same with a fine point Sharpie pen and a ruler.
After I had started planking the deck as I do all of my builds, I run a Sharpie pen down the edge of each plank to simulate caulking. It wasn't until I had several rows laid down before I realized that I hadn't done my research or asked the question of, were steamboat decks caulked? Well, a little too late to ask the question now so pressed on with the way I was going. My thoughts after the fact were that steamboat usually carried cargo in their holds below deck so they were probably caulked to prevent damage to the goods stored there. Whether they were or were not caulked, mine will be.
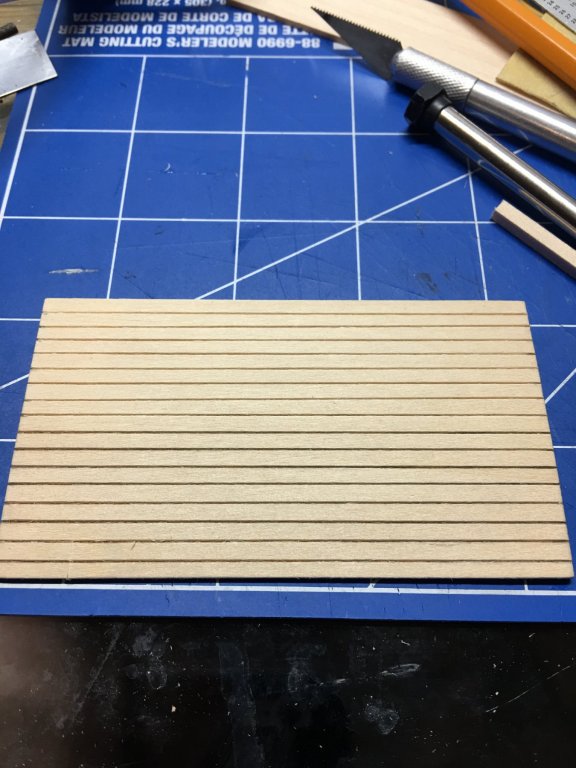
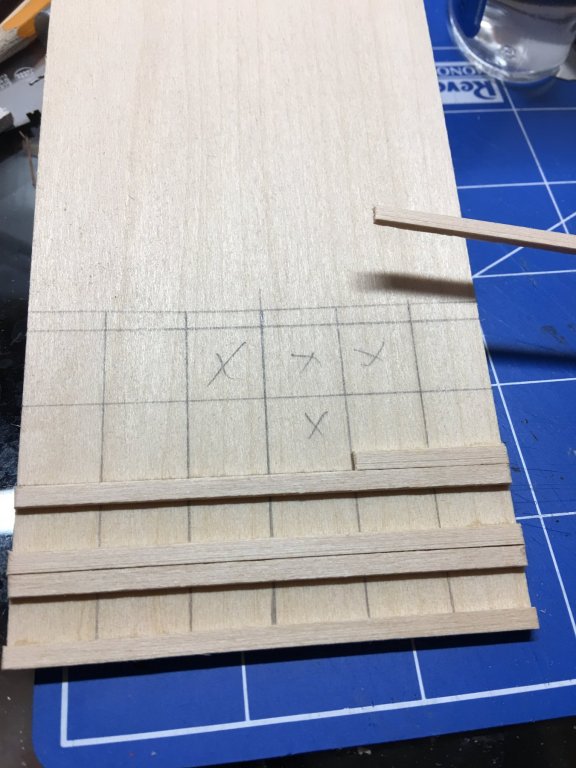
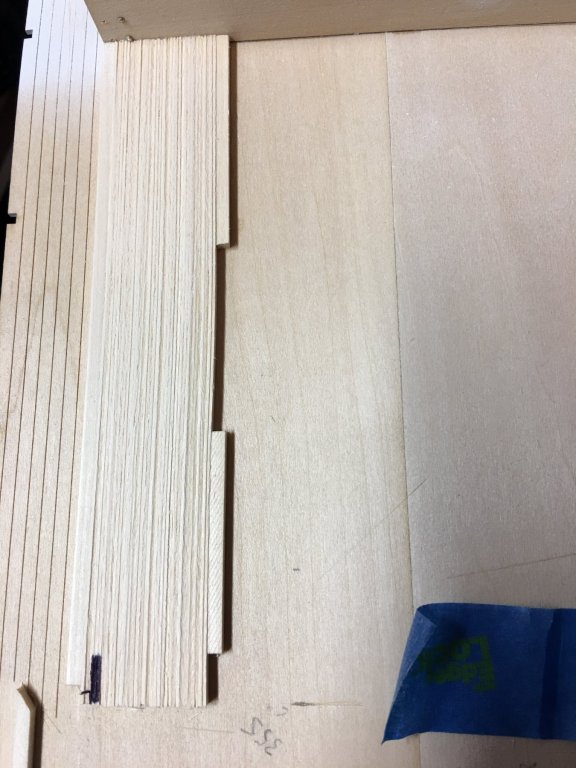
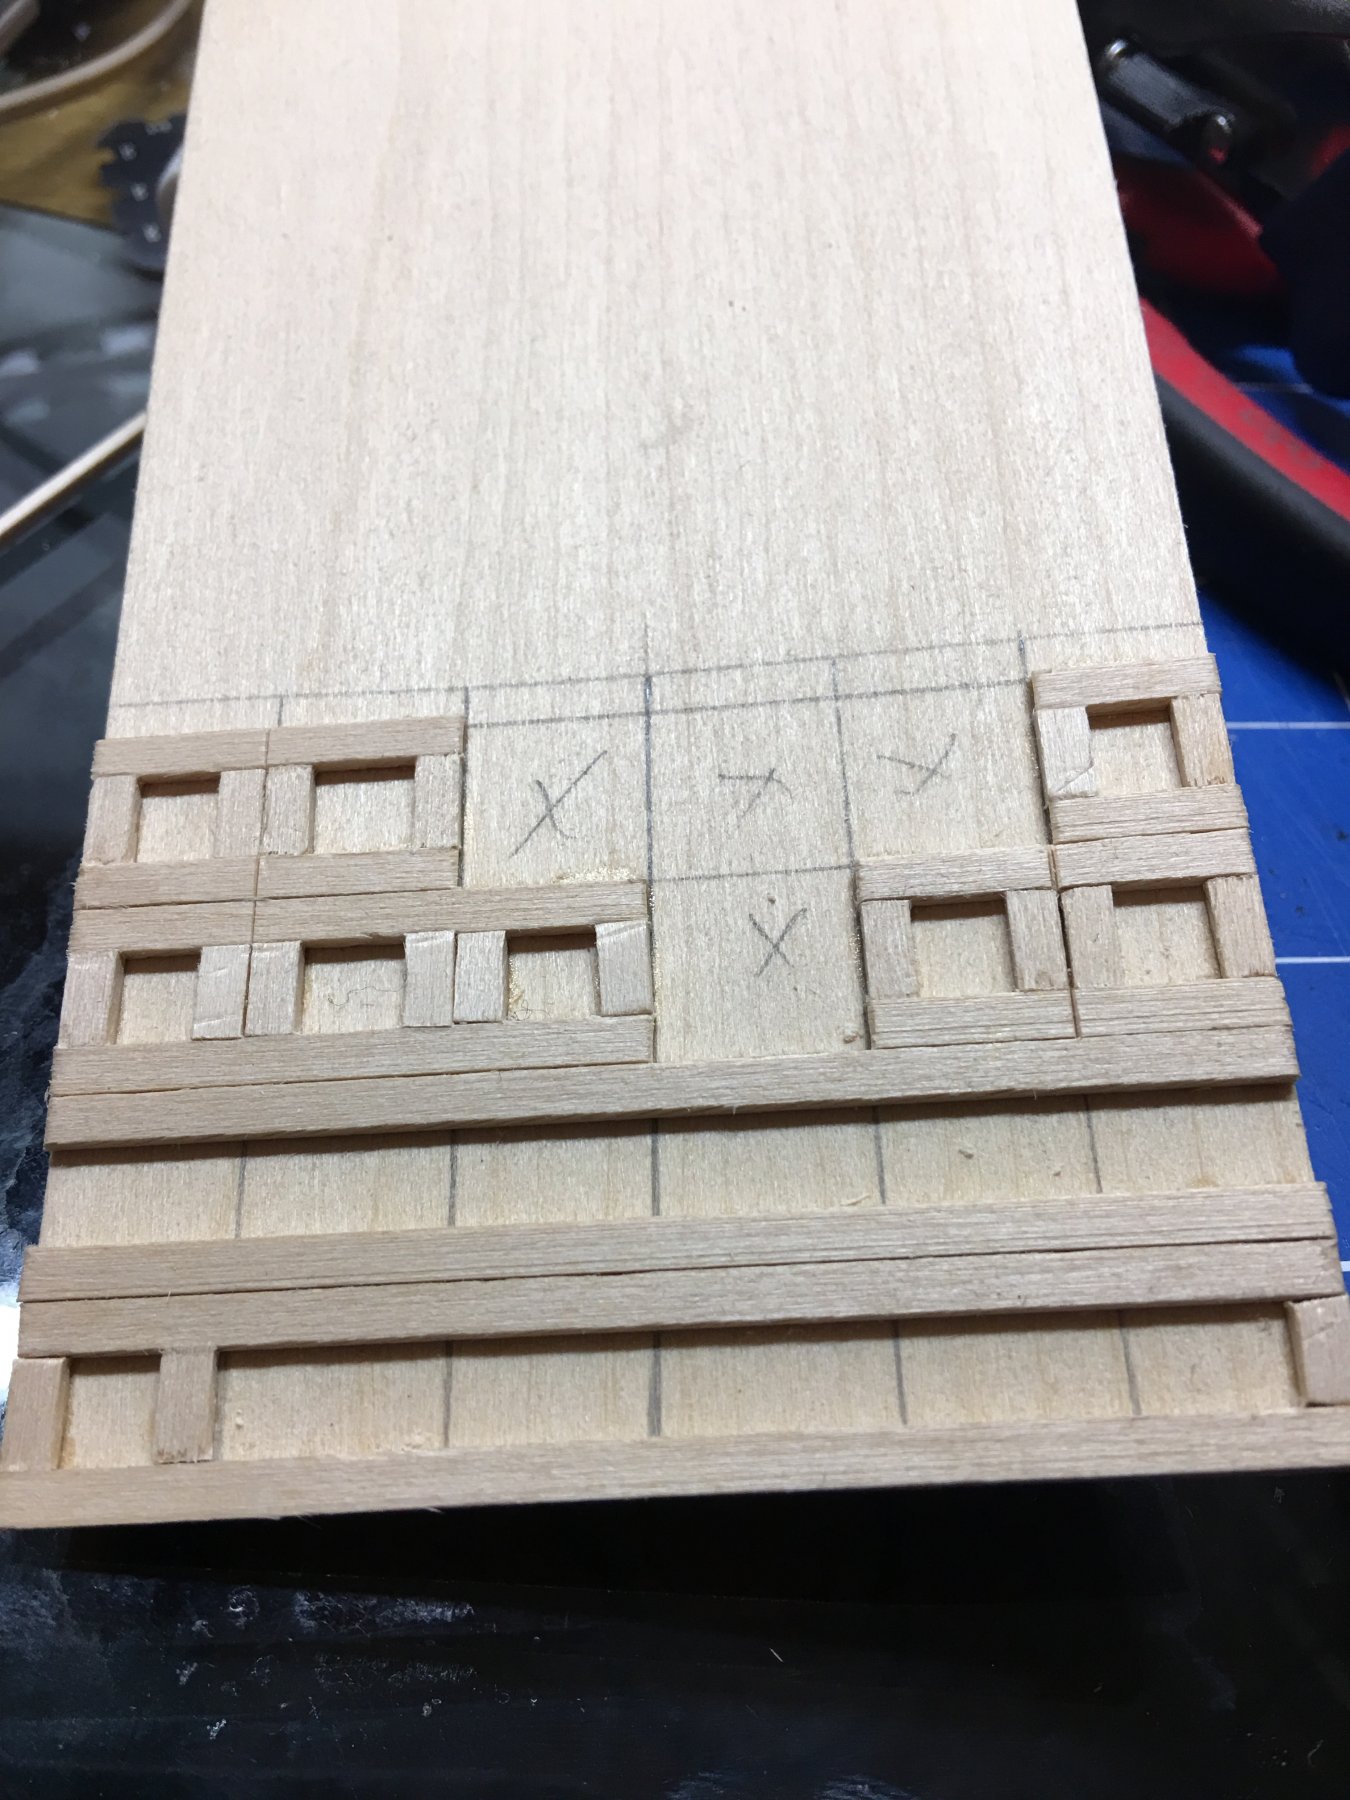
Any way, enough of my ramblings. For my deck planks, I cut each strip into 6" lengths to get the effect of the scaled 25' to 30' boards used on the real boats. The strips I purchased were 1/8" x 1/32" basswood which matched up to the laser cut plank widths on the deck panels, so keeping them lined up was pretty easy. I also used the empty space behind the machine room walls to create a little jig where I could line up the deck planks on edge to sand them smooth and blacken them with a Sharpie. Worked out pretty well.
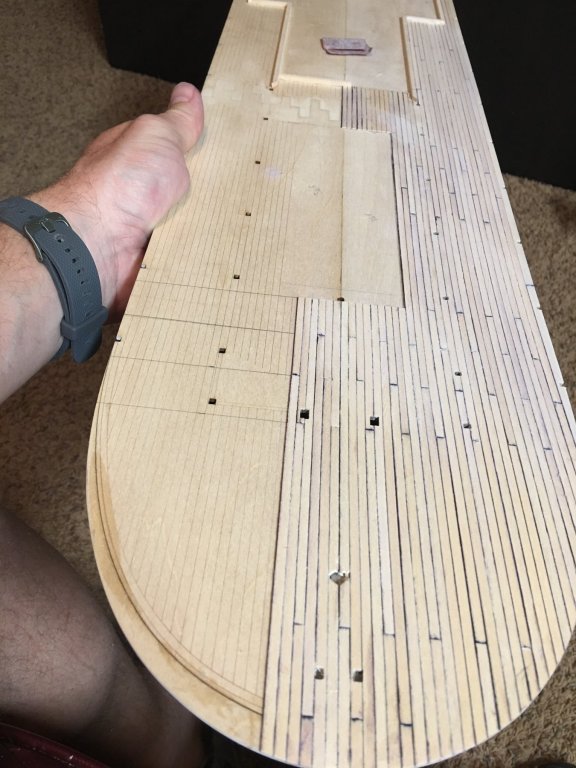
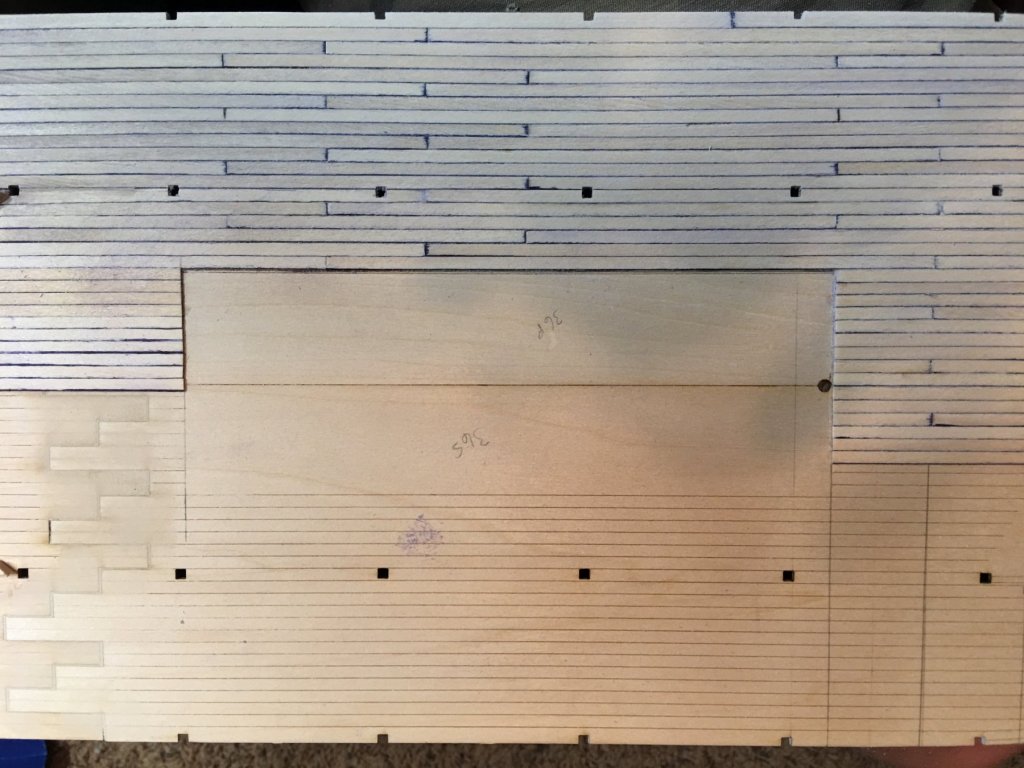
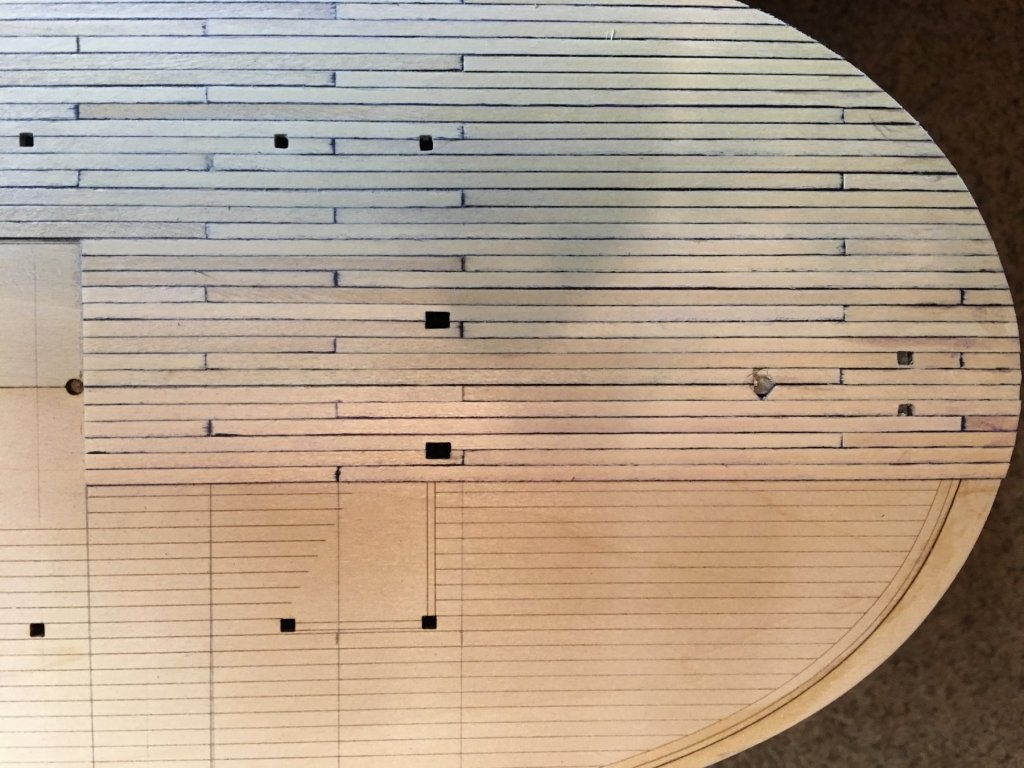
The planking definitely looks better than the simulated laser cut planks on the deck panels. Especially at the finger joint. I'm truly glad I decided to go this route.

When it came to the area around the boiler I took a couple of 1/8" 1/16" strips of basswood to line each side as waterways to keep rainwater from flowing under the boiler. Maybe not truly authentic but it added another nice little touch.
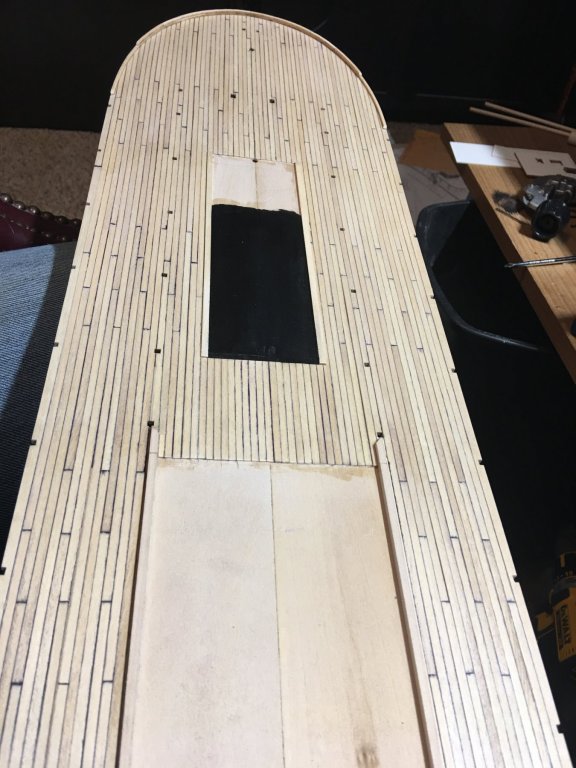
After a little sanding and a couple of coats of semi-gloss poly the finished product looks pretty nice.
The stair case, boiler and machine room walls were temp installed to give me an idea how everything was going to look with natural wood deck. I'm liking it.
My next task is to scratch build a capstan. I really don't care for the one included with the kit. We'll see how this one goes.
So that's all for now. Thanks again for looking.
-Brian
-
17 hours ago, kurtvd19 said:
Nailed in place. The builders were not shipwrights. In the period of the Chaperon the nails would have been cut nails.
Kurt
Kurt,
Thanks so so much for the info. Kind of what I figured. I guess I just like having confirmation from the experts.
-Brian
-
Thank you everyone for the compliments and likes. I am rather pleased with the way they turned out.
So as I was working on the main deck planking, another thought occurred to me. How were the deck planks fastened to the substructure? Given that many of the packet steamers were built on a shoestring budget and time was not a virtue, was the time taken to trenail each board in or were they simply just nailed down? I did some looking at some of the other build logs but couldn’t come up with a definitive answer.
The ships of sail side of me wants to trenail them in (mostly because I love the look), but the steamboat side of me wants to keep my build as close as possible to the original (even though I have strayed a little from authenticity). I know that it’s my build and I should do as I please, but I am always open to others opinions.
Please feel free to chime in on what direction I should take.
-Brian
-
Ken/Griphos,
Thank you very much for the links and input. They very much helped me along the way and here is what I finally came up with.
As I have said before, I am no metal-smith and after several failed attempts at trying to solder the brass pieces, here is what I finally came up with for my whistle. Below are some of the ideas I used for my design.

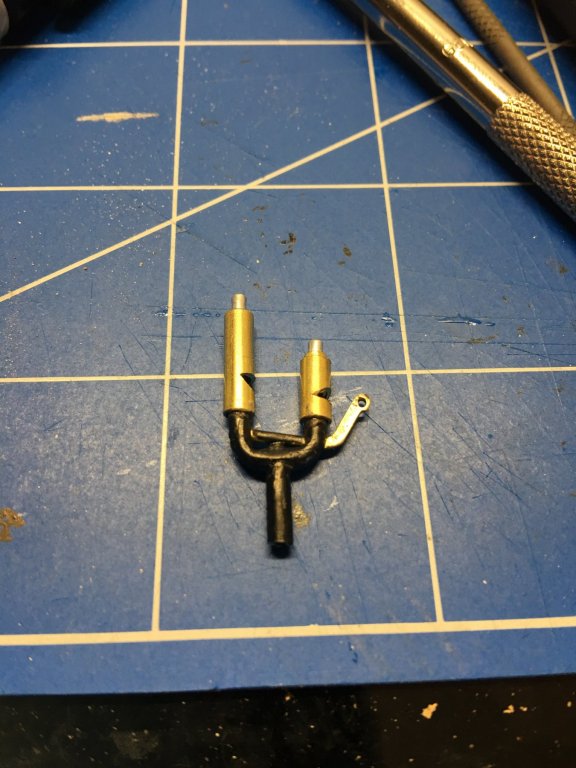
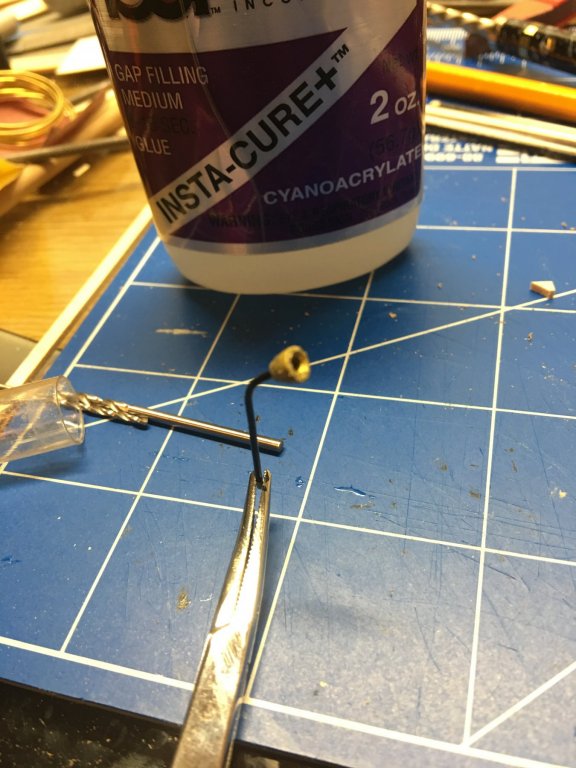
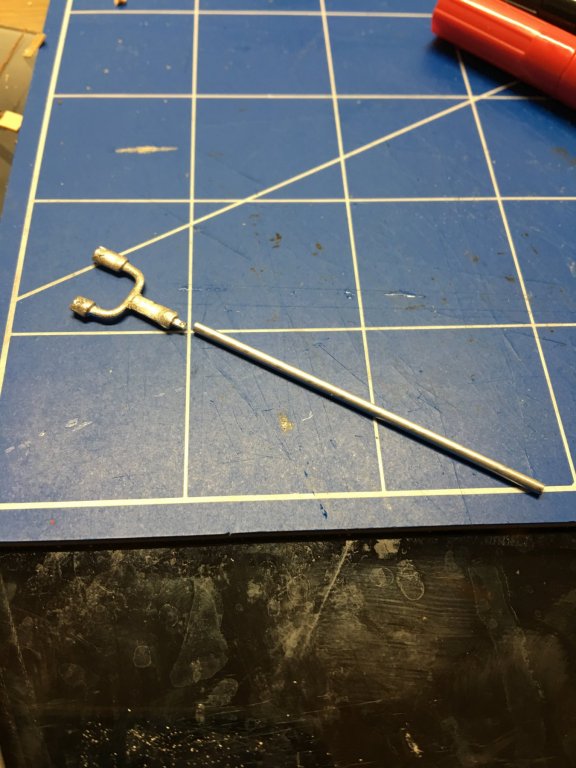
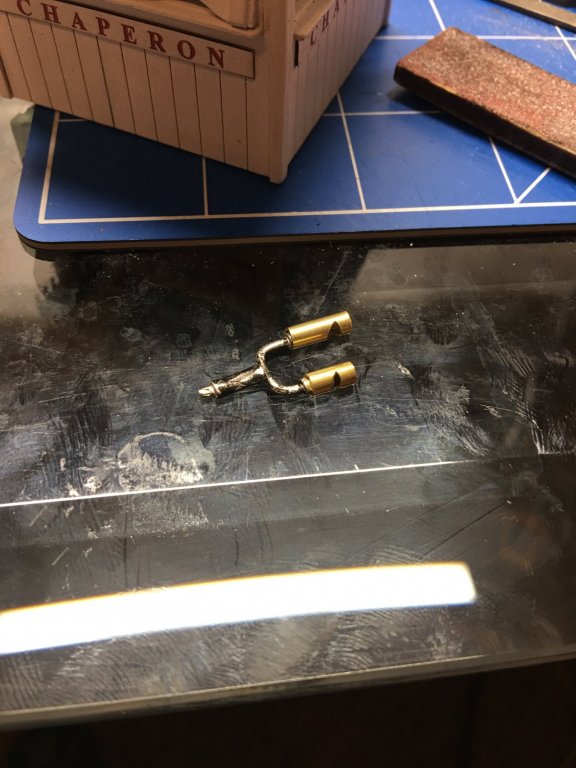
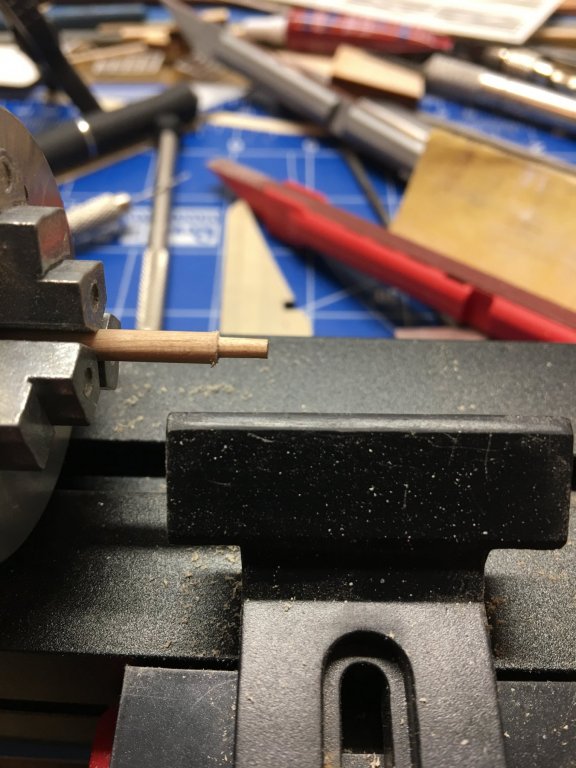
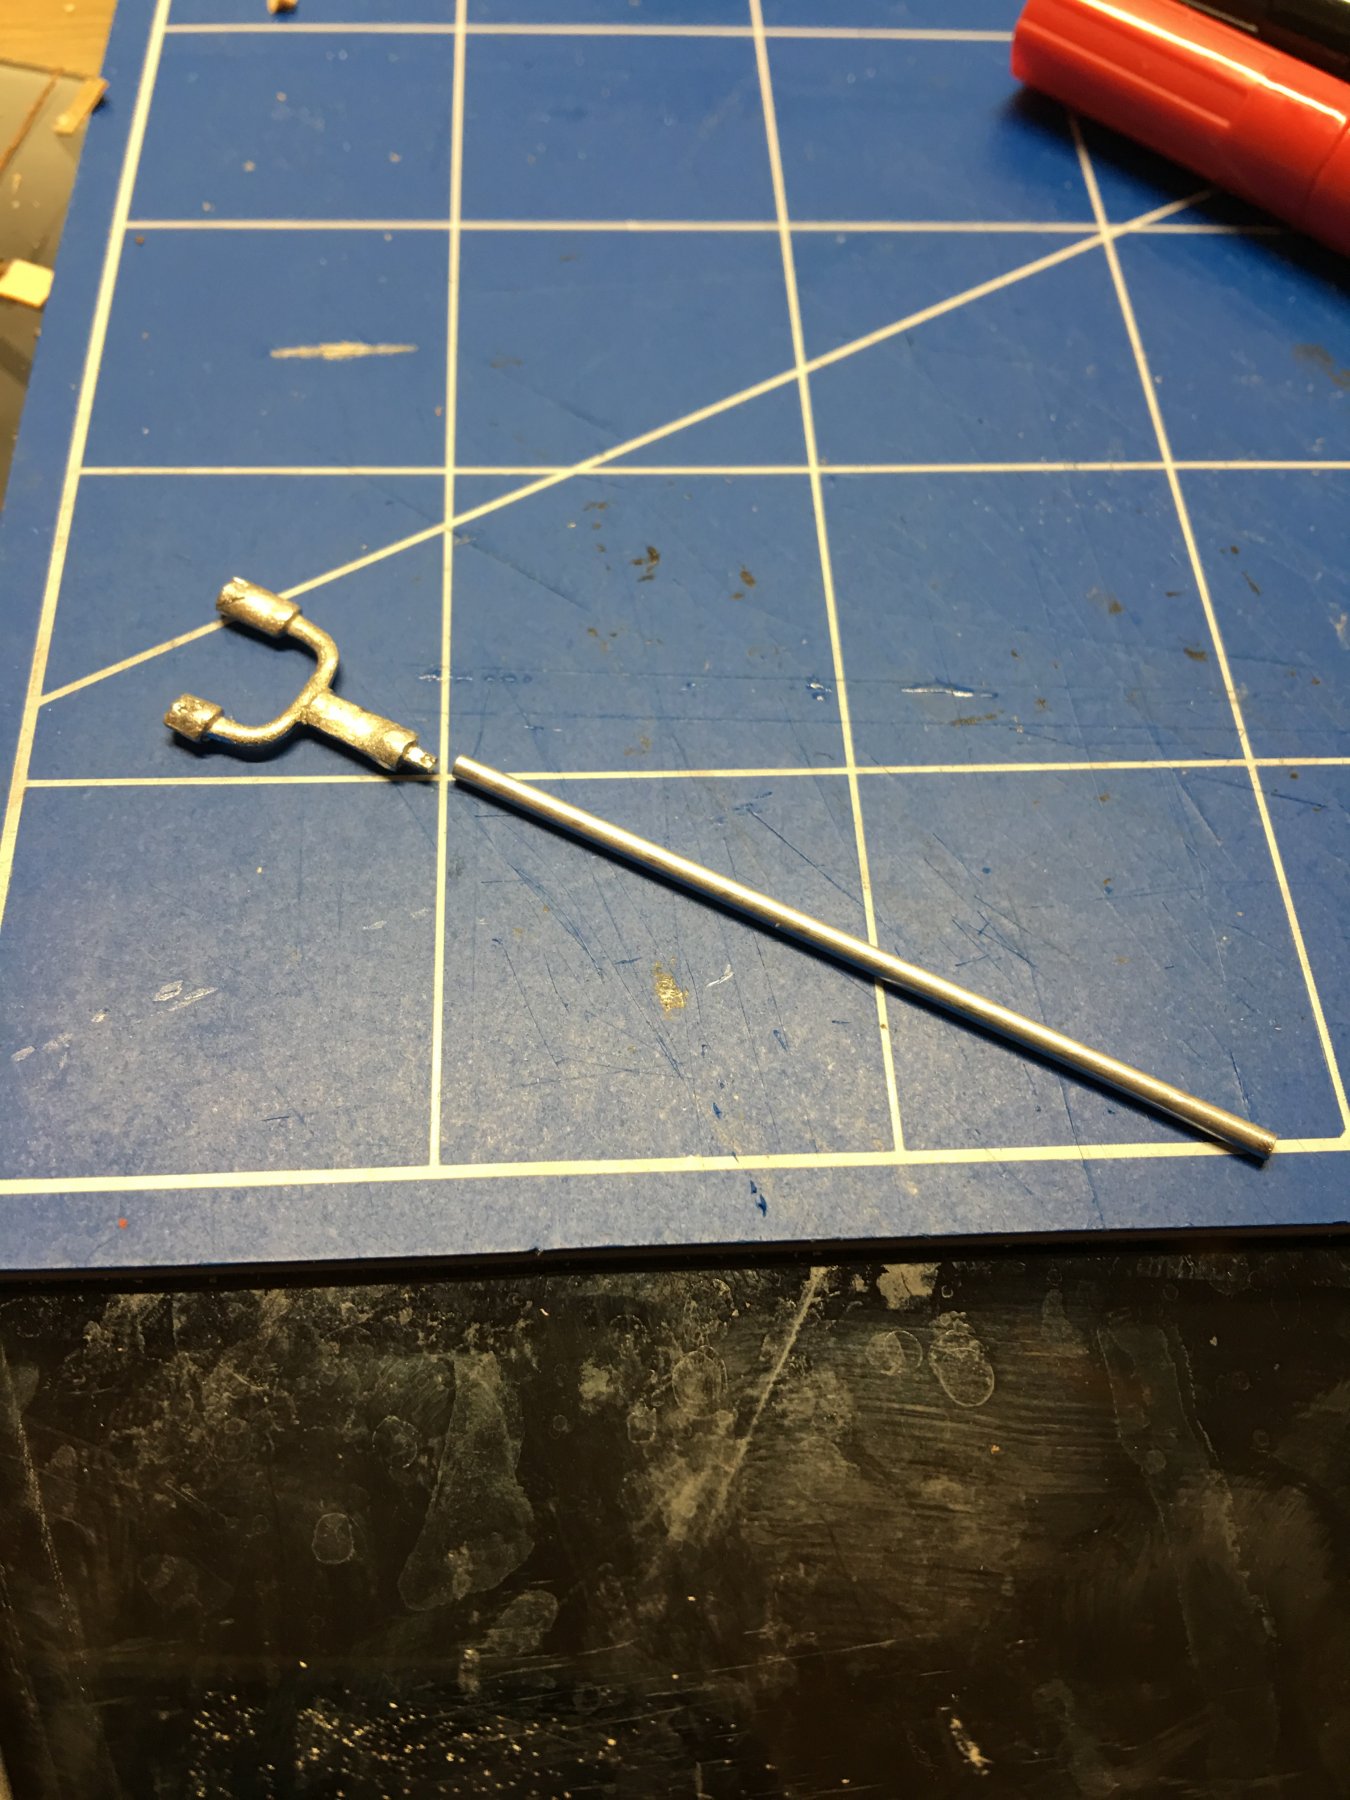
At first I was just going to use the kit supplied whistle base and mount my scratch built brass ones to it, but after looking at it, I thought it looked a little cheesy. So, using two different sizes of brass tubing, some small aluminum tubing and small brass rod, I set out on my whistle adventure.
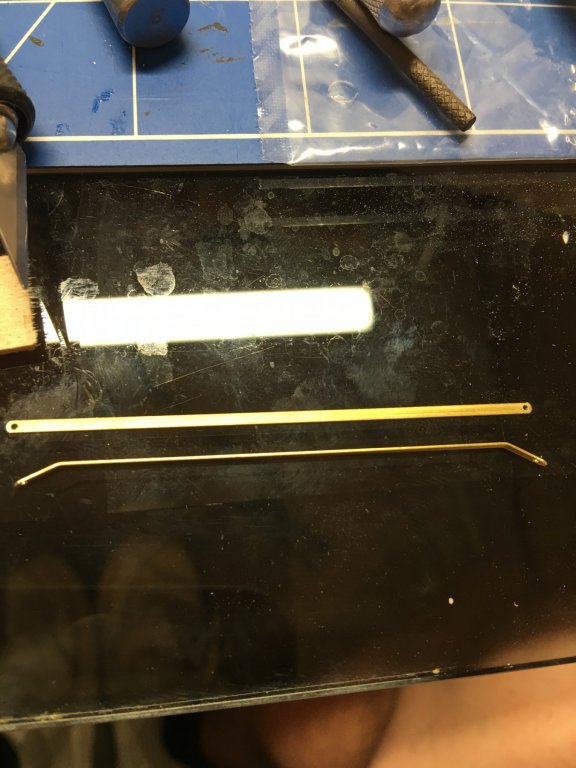
The two whistles are made with 1/8" brass tubing, the mounts and steam pipe are made from 3/32" brass tubing. Since I was not able to successfully solder the pieces together, I took a small piece of 1/16" aluminum tubing and drilled through the whistle mounts and CA'd them all together. Conveniently, all three pieces of tubing stacked nicely into each other.
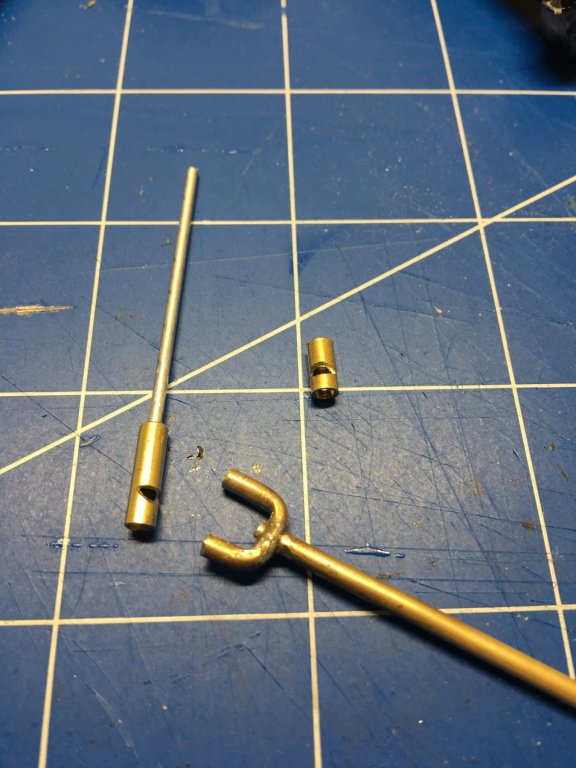
Since the tubing sizes fit so neatly together it was a lot easier to get the style I was looking for. I used a small 1/32" brass rod for the steam lever and hammered out the end to make the loop for the pull rope.
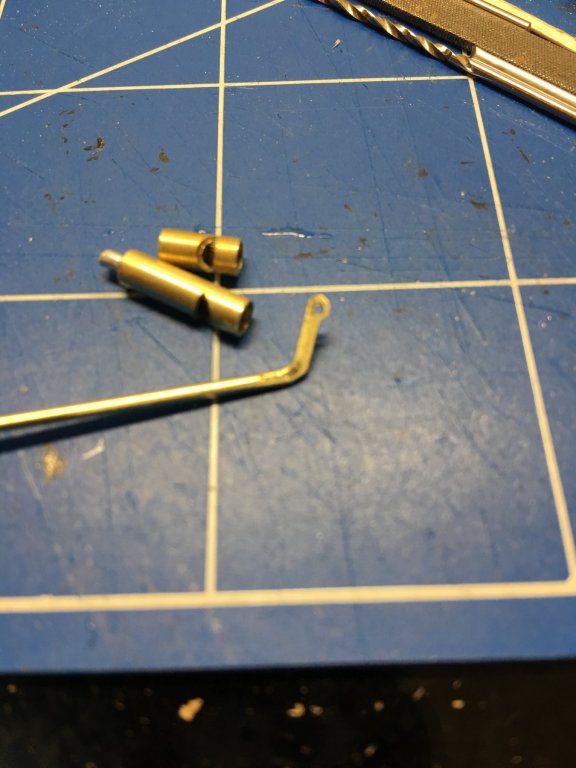
Next I pieced it all together.
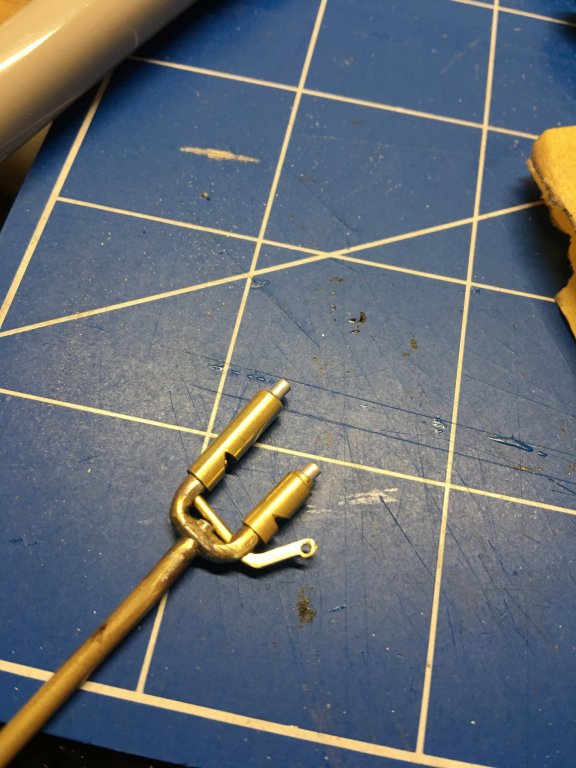
Then finally I had what I was looking for. I was going to use a blacken-it for the lower portion of the whistle, but with the residual solder and CA still on the tubing, it just wouldn't do right. So I just painted it all black.
Here is the end result installed on the pilot house with the pull rope attached.
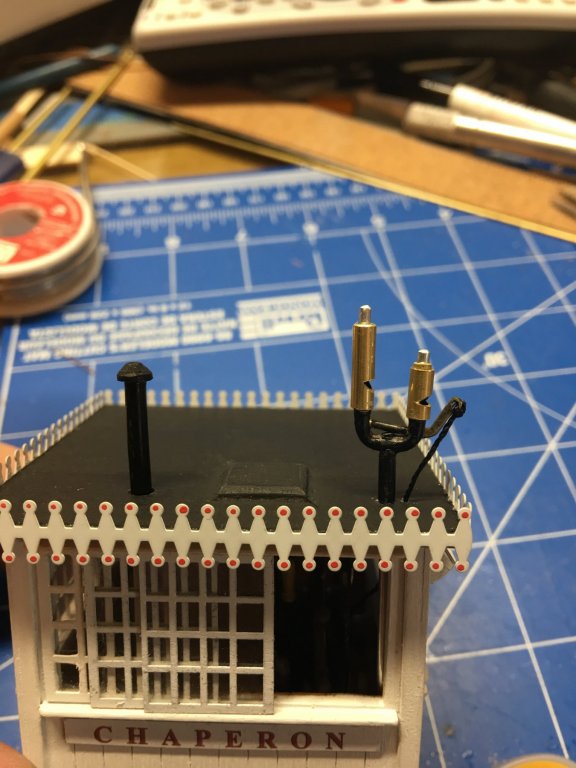
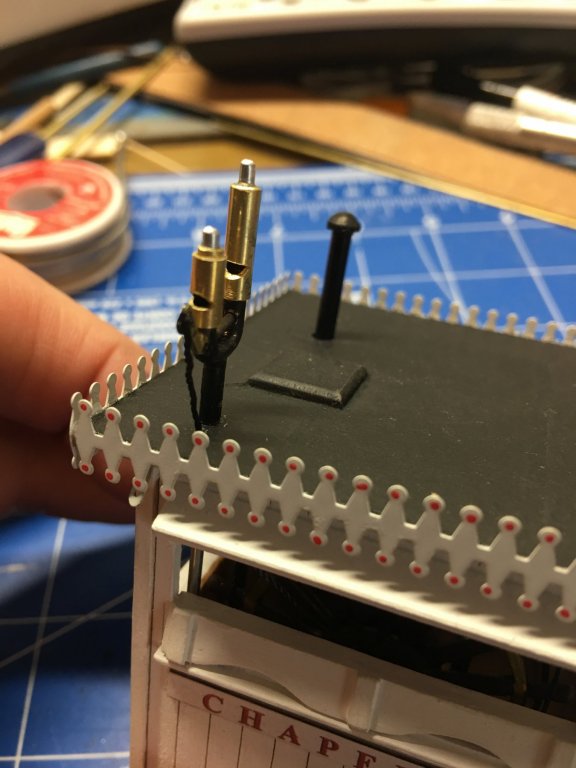
I think I am happy with the results. Now on to planking the main deck.
Thank you for looking.
-Brian
-
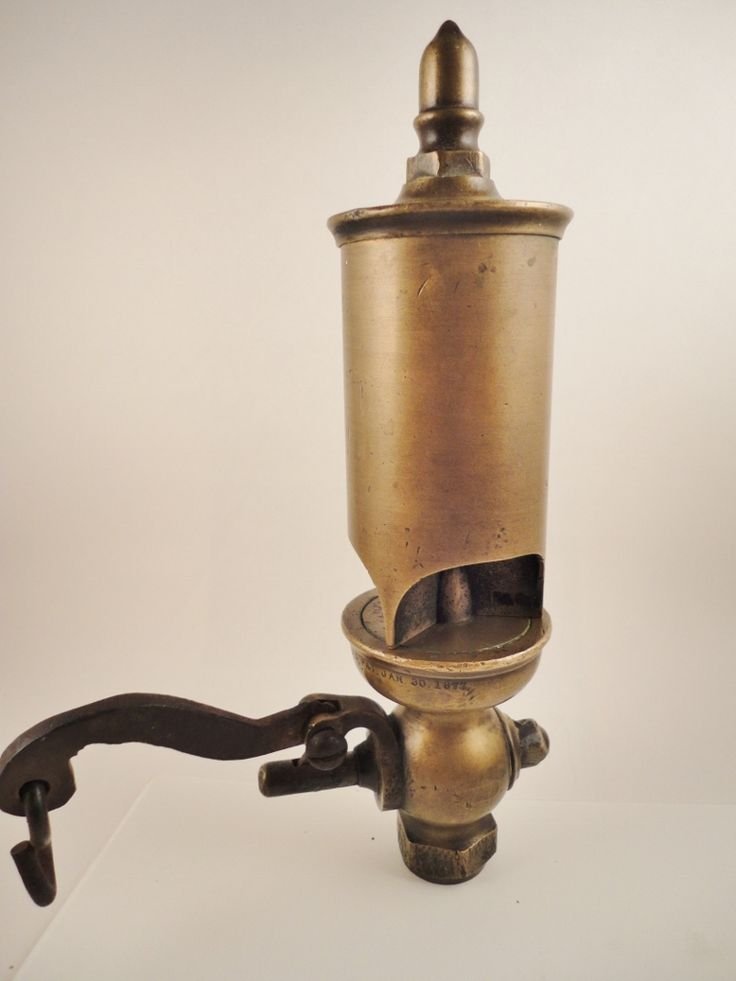
23 hours ago, Canute said:
Brian, after Cathead(Eric's) endorsement in his Arabia log, I'm jumping on this bandwagon. Very nice work. 👍
If you haven't already done so, I'd paint the steam whistle brass/gold color. The whistles on steam engines were usually brass, at least on the railroads.
Ken,
Welcome aboard and thanks for the praise. (And thanks to Cathead for the endorsement. His detailed work on the Bertrand and Arabia inspires me).
The scratch whistles I made were from brass tubing and I turned a couple of caps for them from a 1/4" walnut dowel, but I was not happy with the result. I have been rethinking how I want to cap them off. I would love to make the caps out of brass as well, but my metalworking skills are pretty limited. I'm sure I'll come up with something. However, I definitely plan to have them brass/gold in color with whatever idea I come up with.
3 hours ago, cog said:I really enjoyed following your build from a quiet corner upto the start of your pilot house ... you really make that shine, such marvelous details you added ... very well done!
Carl,
Glad to have you on board as well. Thank you for the kind words on my build. I felt that I would not do this kit any justice just leaving the pilot house the way it was. On a model of this quality it deserved something better, and with all of the input on this forum there is an abundance of great ideas to help add to the detail. As I go along, I'll try not to disappoint.
Thanks again for looking.
-Brian
-
On 5/4/2019 at 6:38 PM, Cathead said:
Also, assuming that anyone reading this is interested in American riverboats, please go check out this new build log of the Chaperon, the only accurate kit available in this genre. Brian's doing a great job with her (some poor advice from me notwithstanding) and it's well worth a look.
Cathead. Thanks for the kudos, it is very much appreciated. While my talents aren’t quite up to your level, I think she’s coming along nicely.
While can see Mrs. Cathead’s point, unfinished models do have a certain intrigue to them, (like your Bertrand) the beauty of the finished product is also worth the work.
Besides, you always have the build log to go back and look at to see all of the internal details.
- Brian
- Cathead, mtaylor, popeye the sailor and 4 others
-
7
-
-
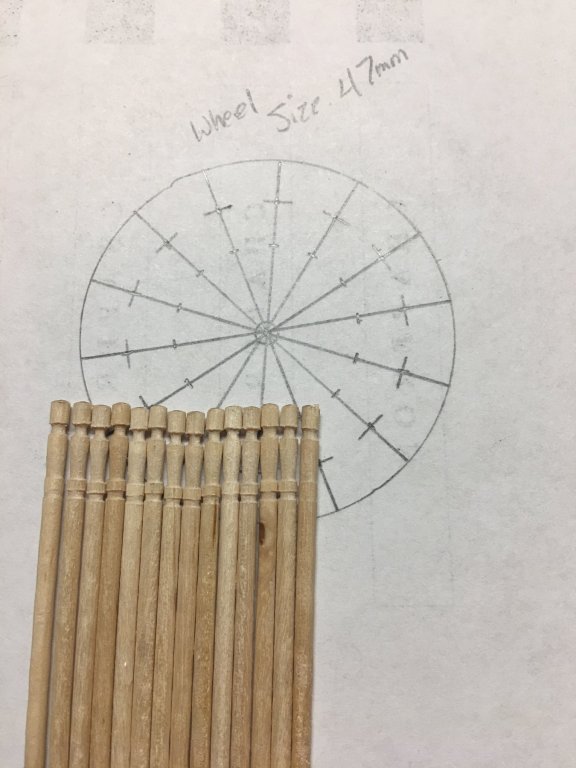
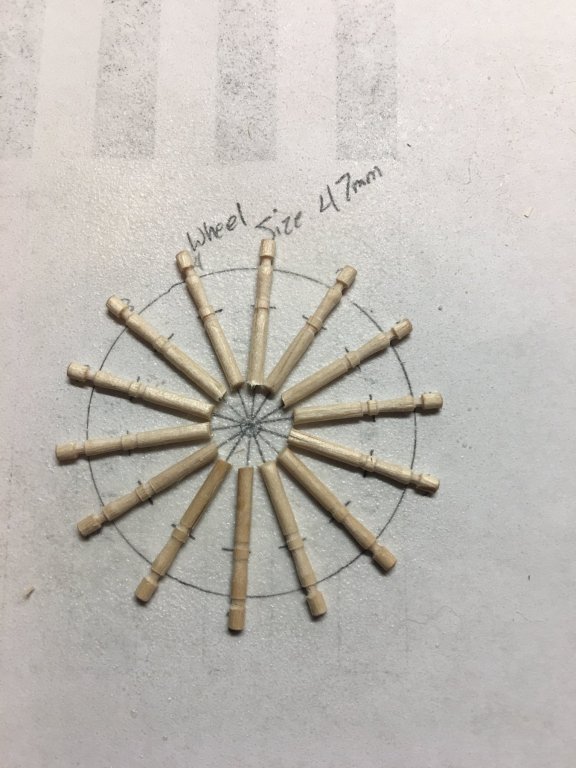
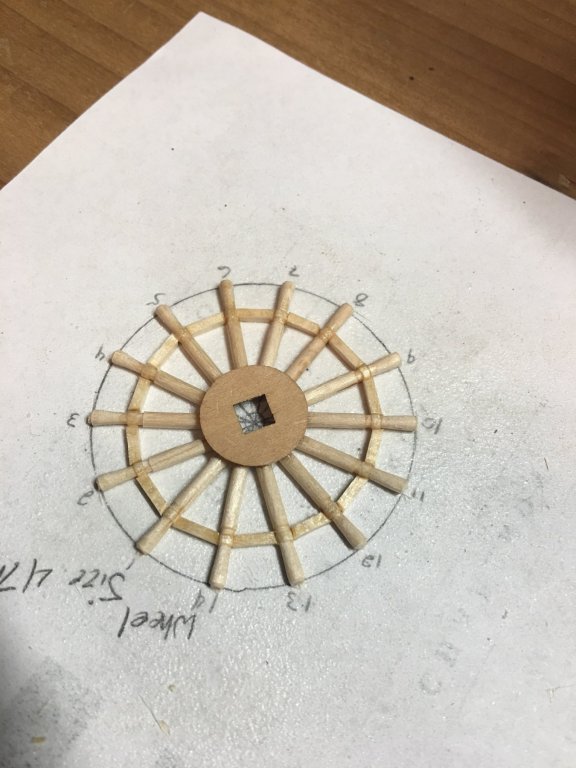
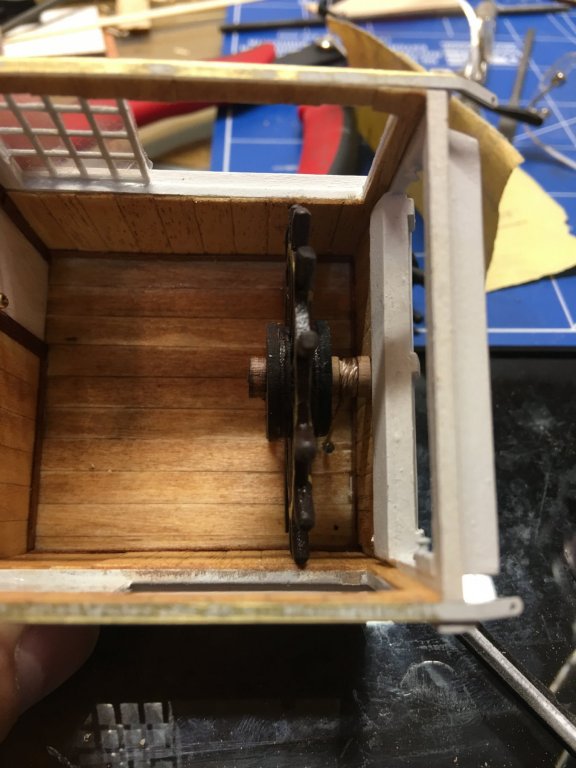
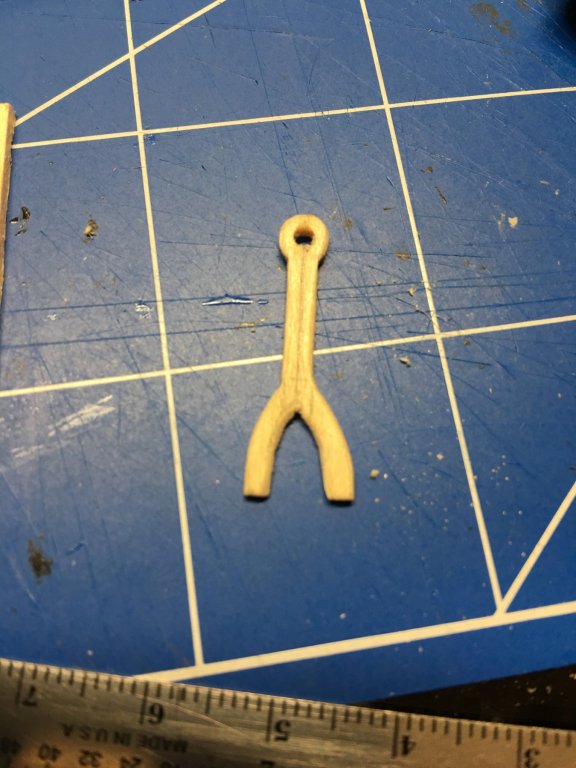
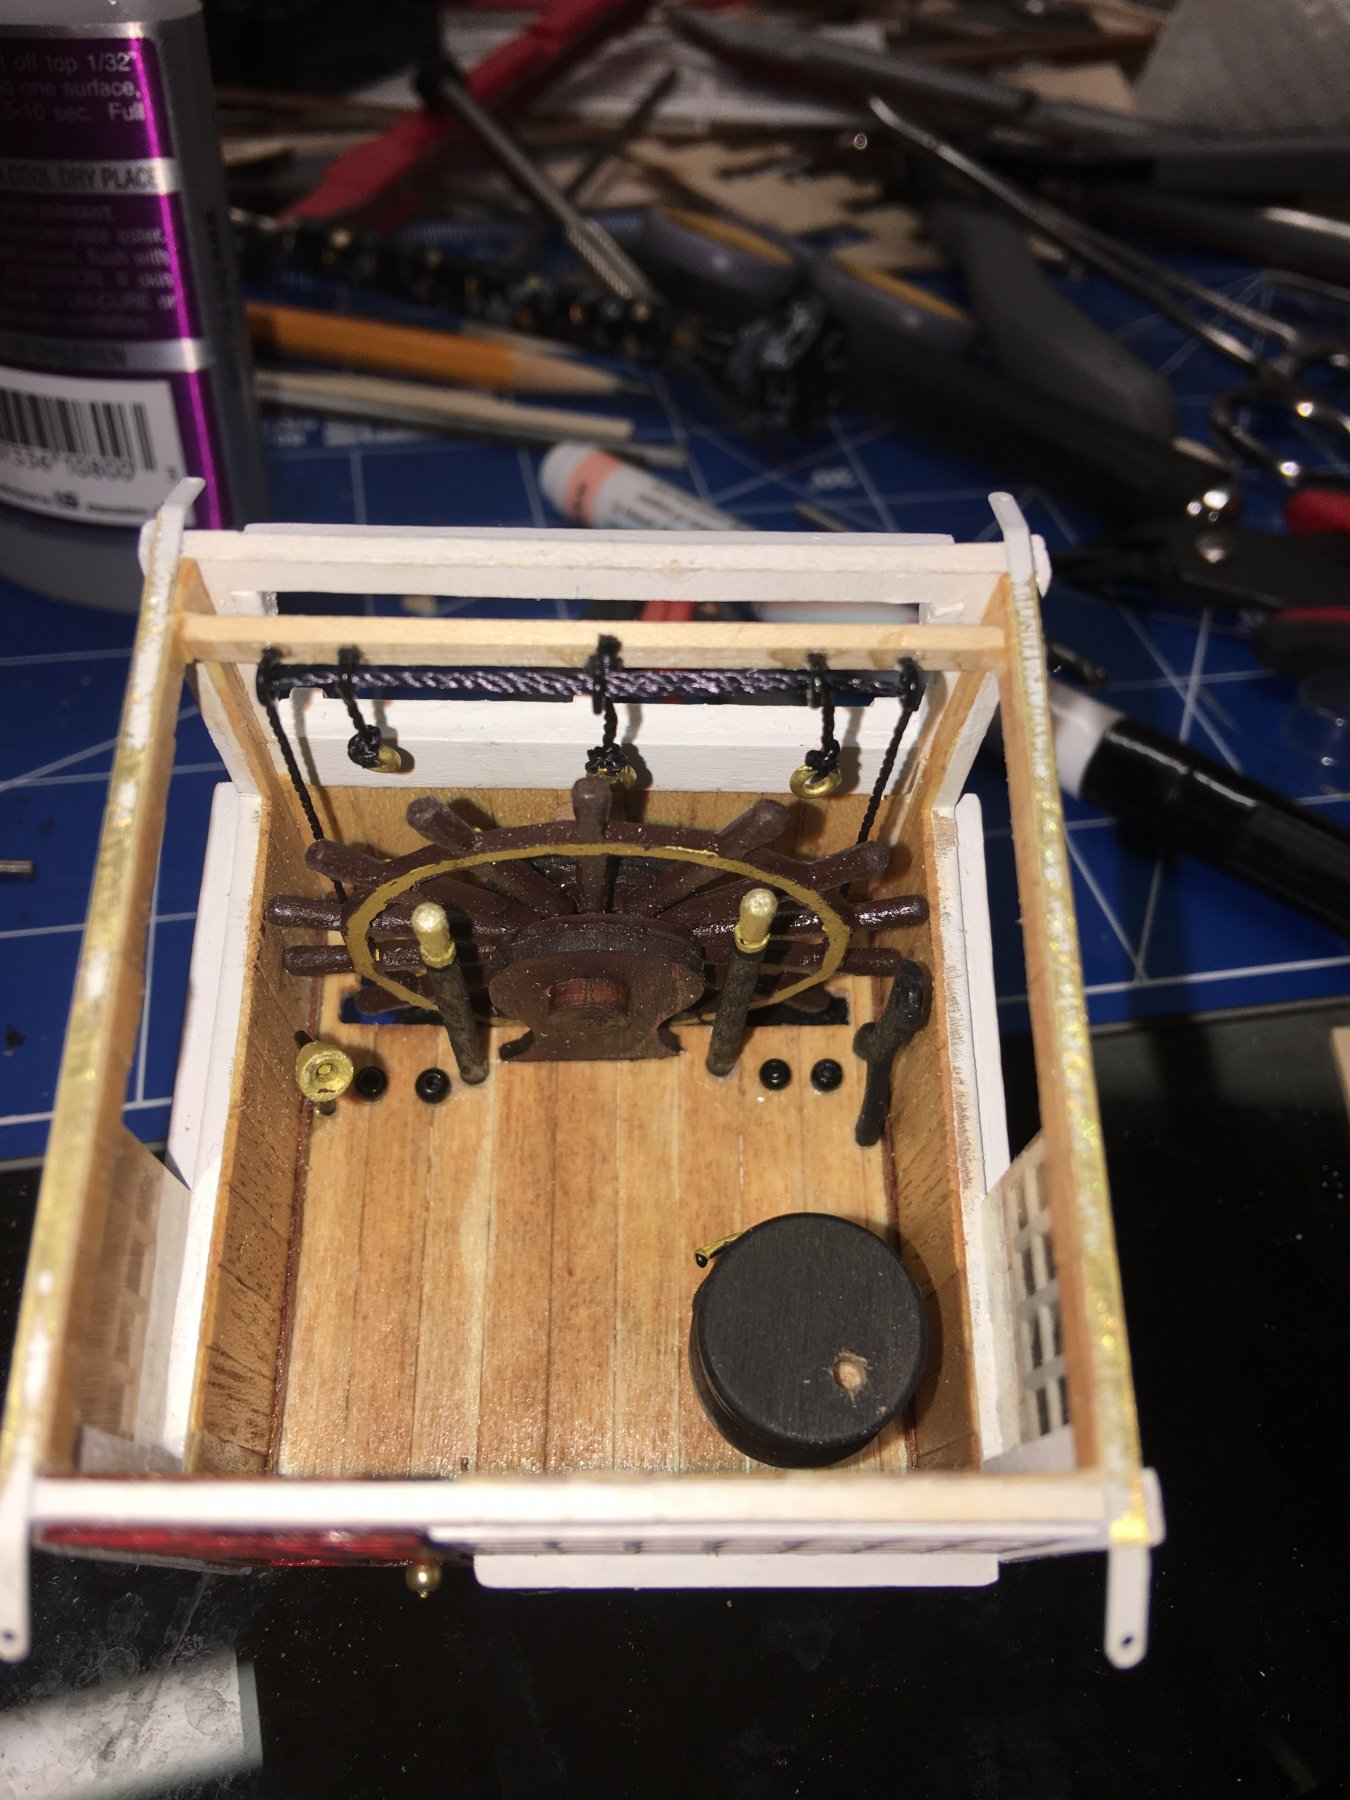
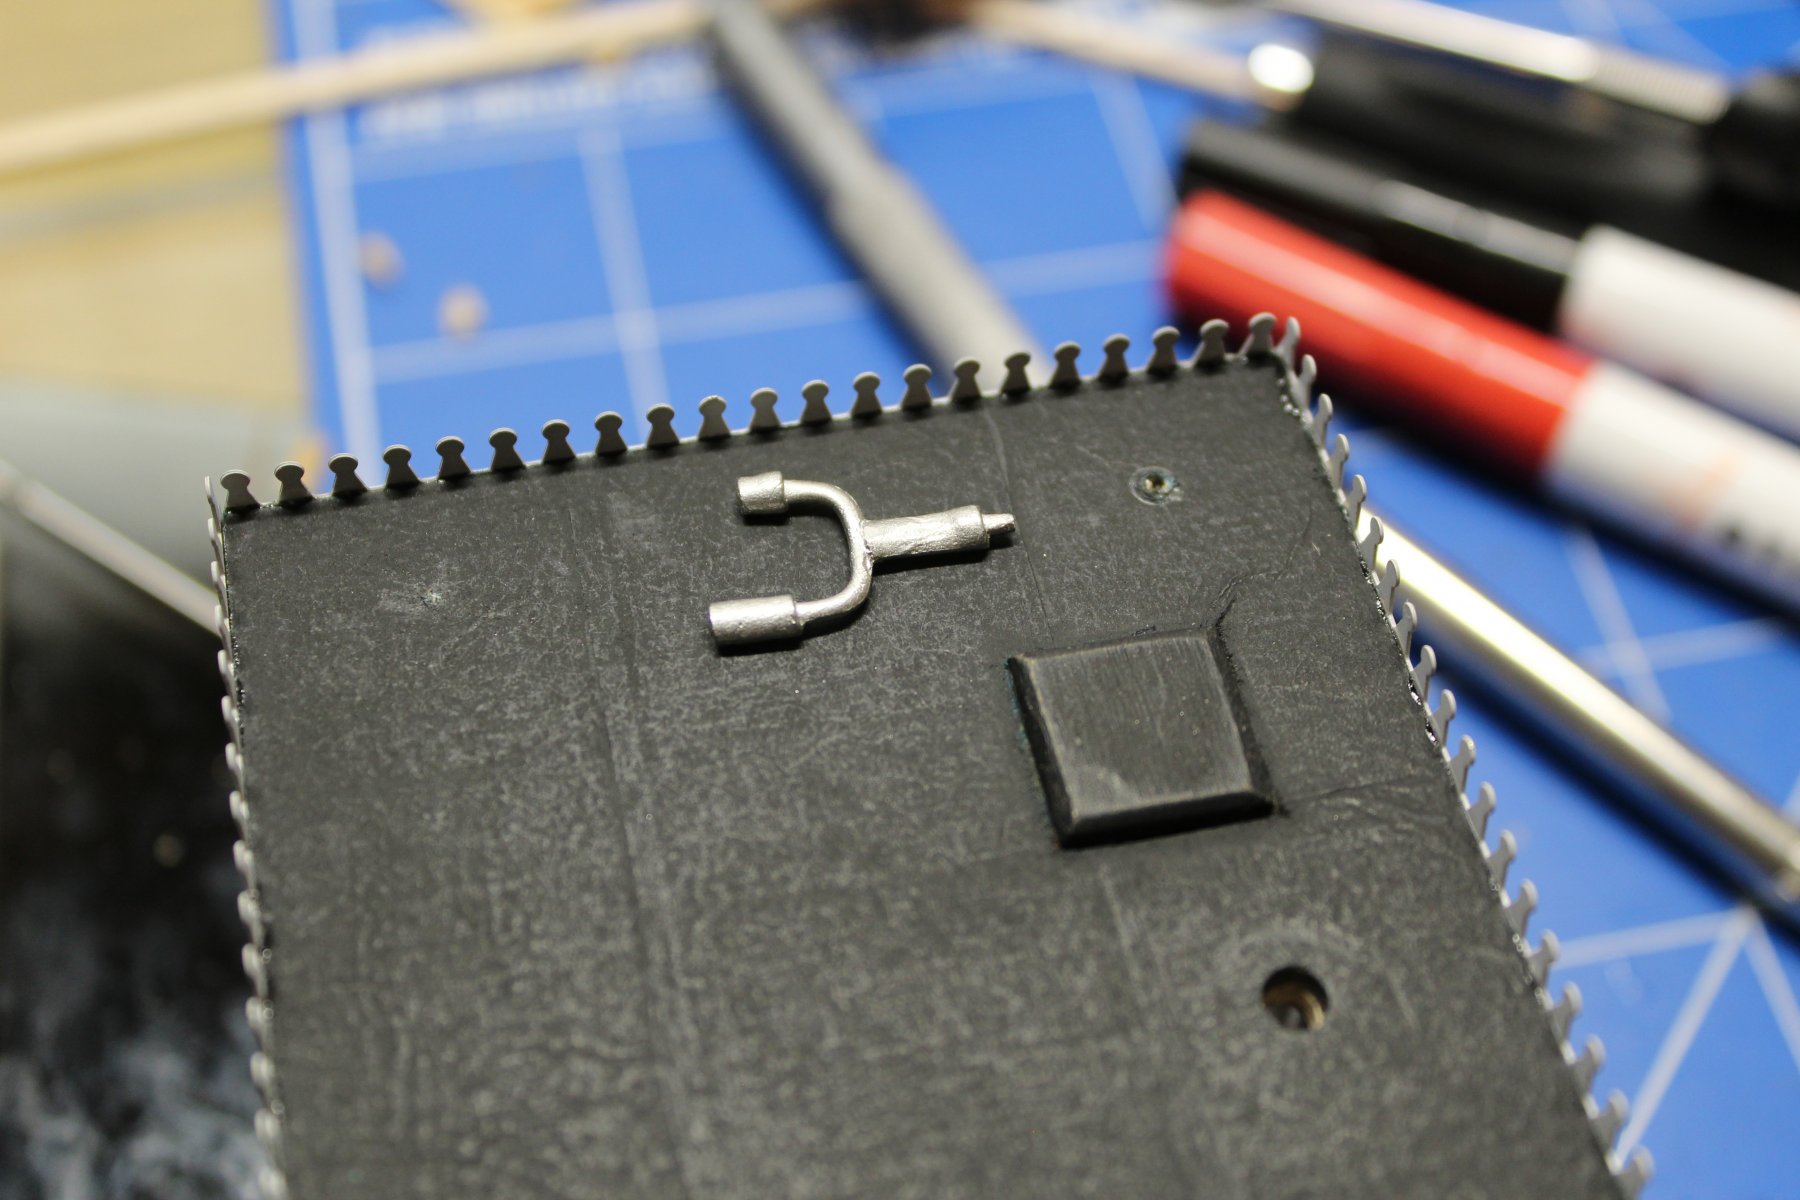
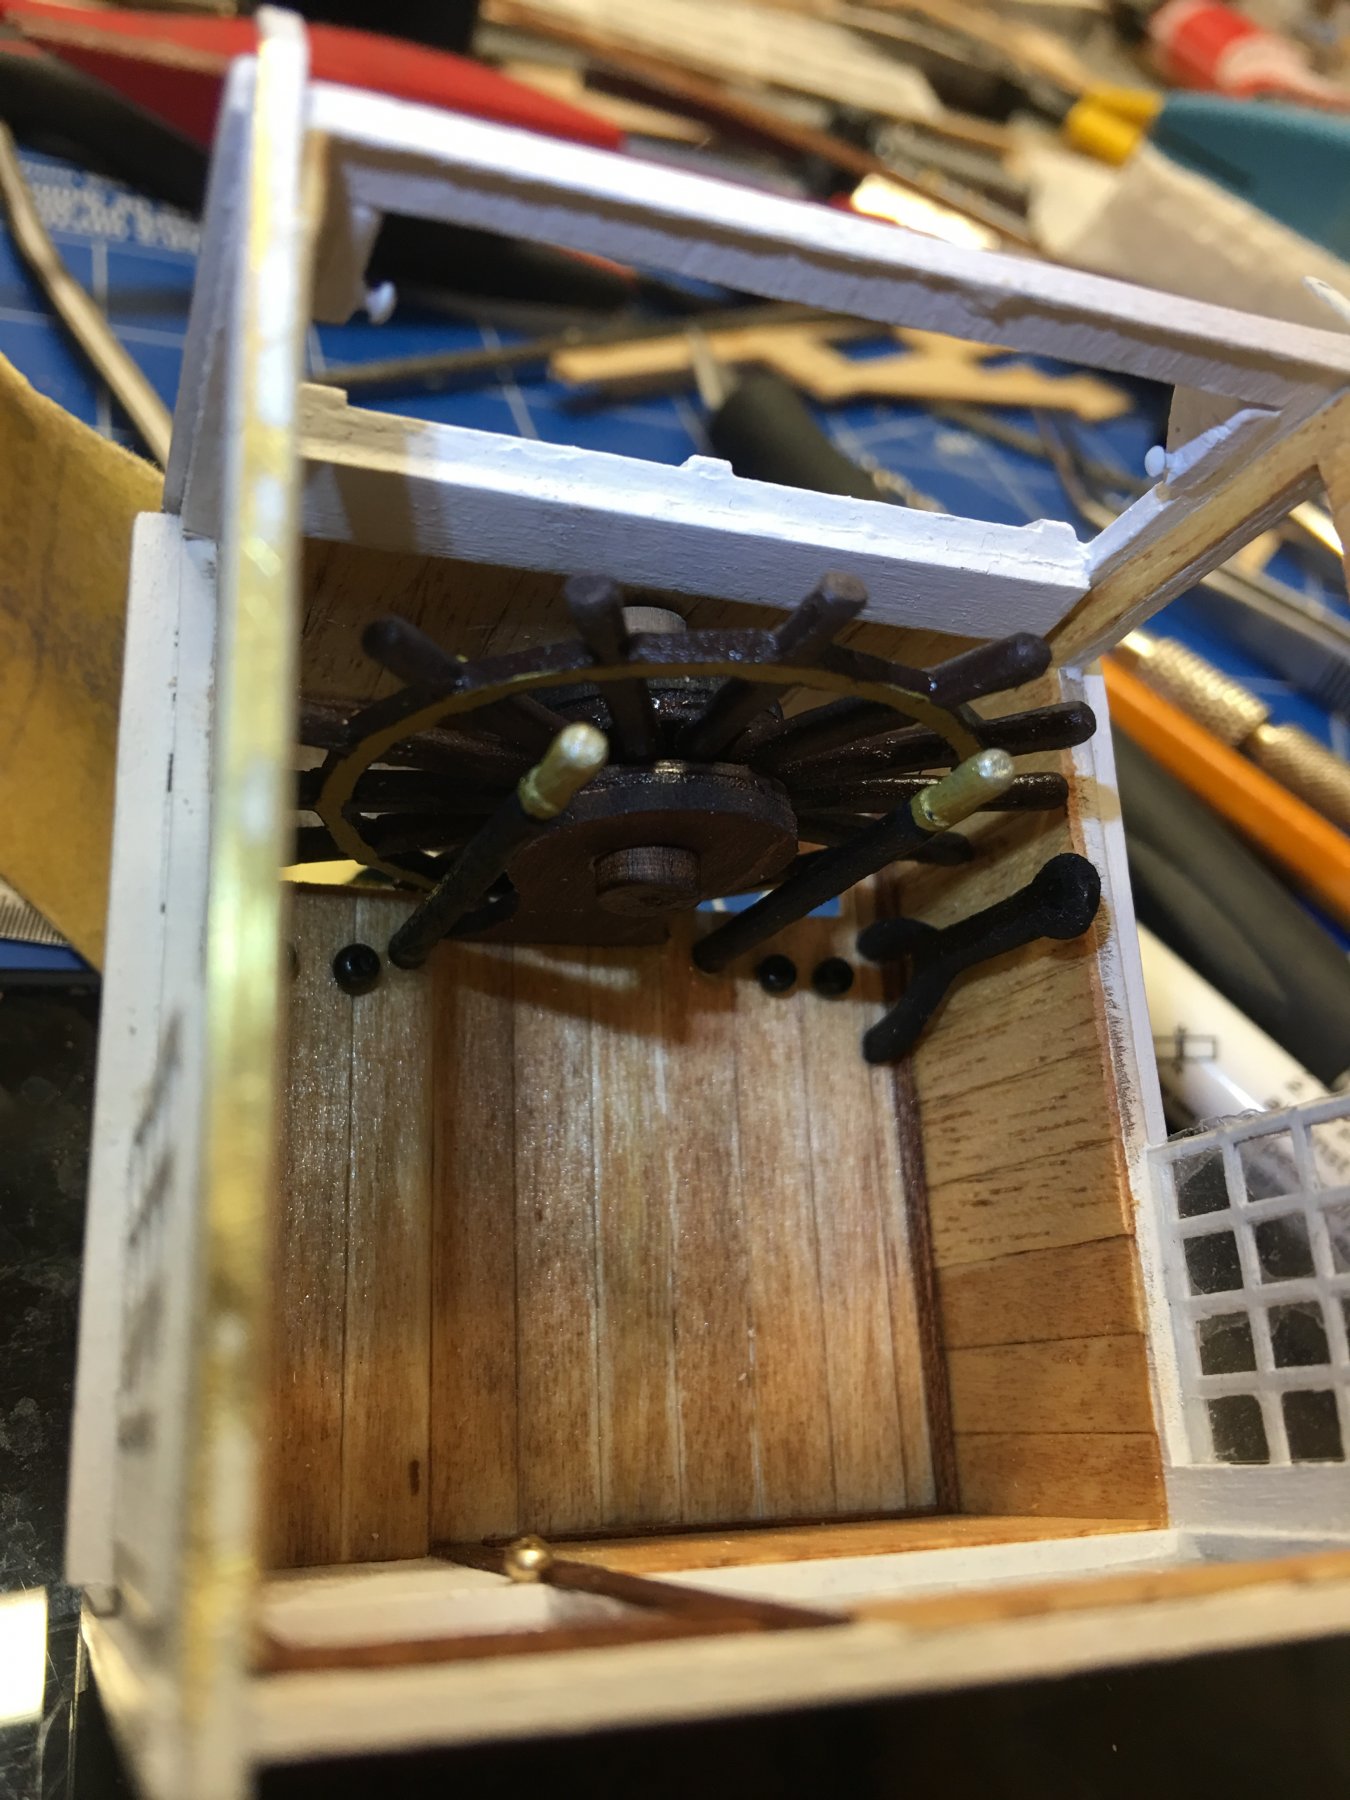
Another detail missing from the model was the ships wheel. Rather than try and find a scale wheel that look proper for the Chaperon, I decided to scratch build my own. For this I took 14 toothpicks and arranged them in a circular pattern and cut them to fit inside the pilot house. Using leftover wood from the kit I pieced together the bell stand and turned down the rope spool for the tiller rope. Next, I slotted out the floor for the wheel to drop down through then installed the tiller rope.

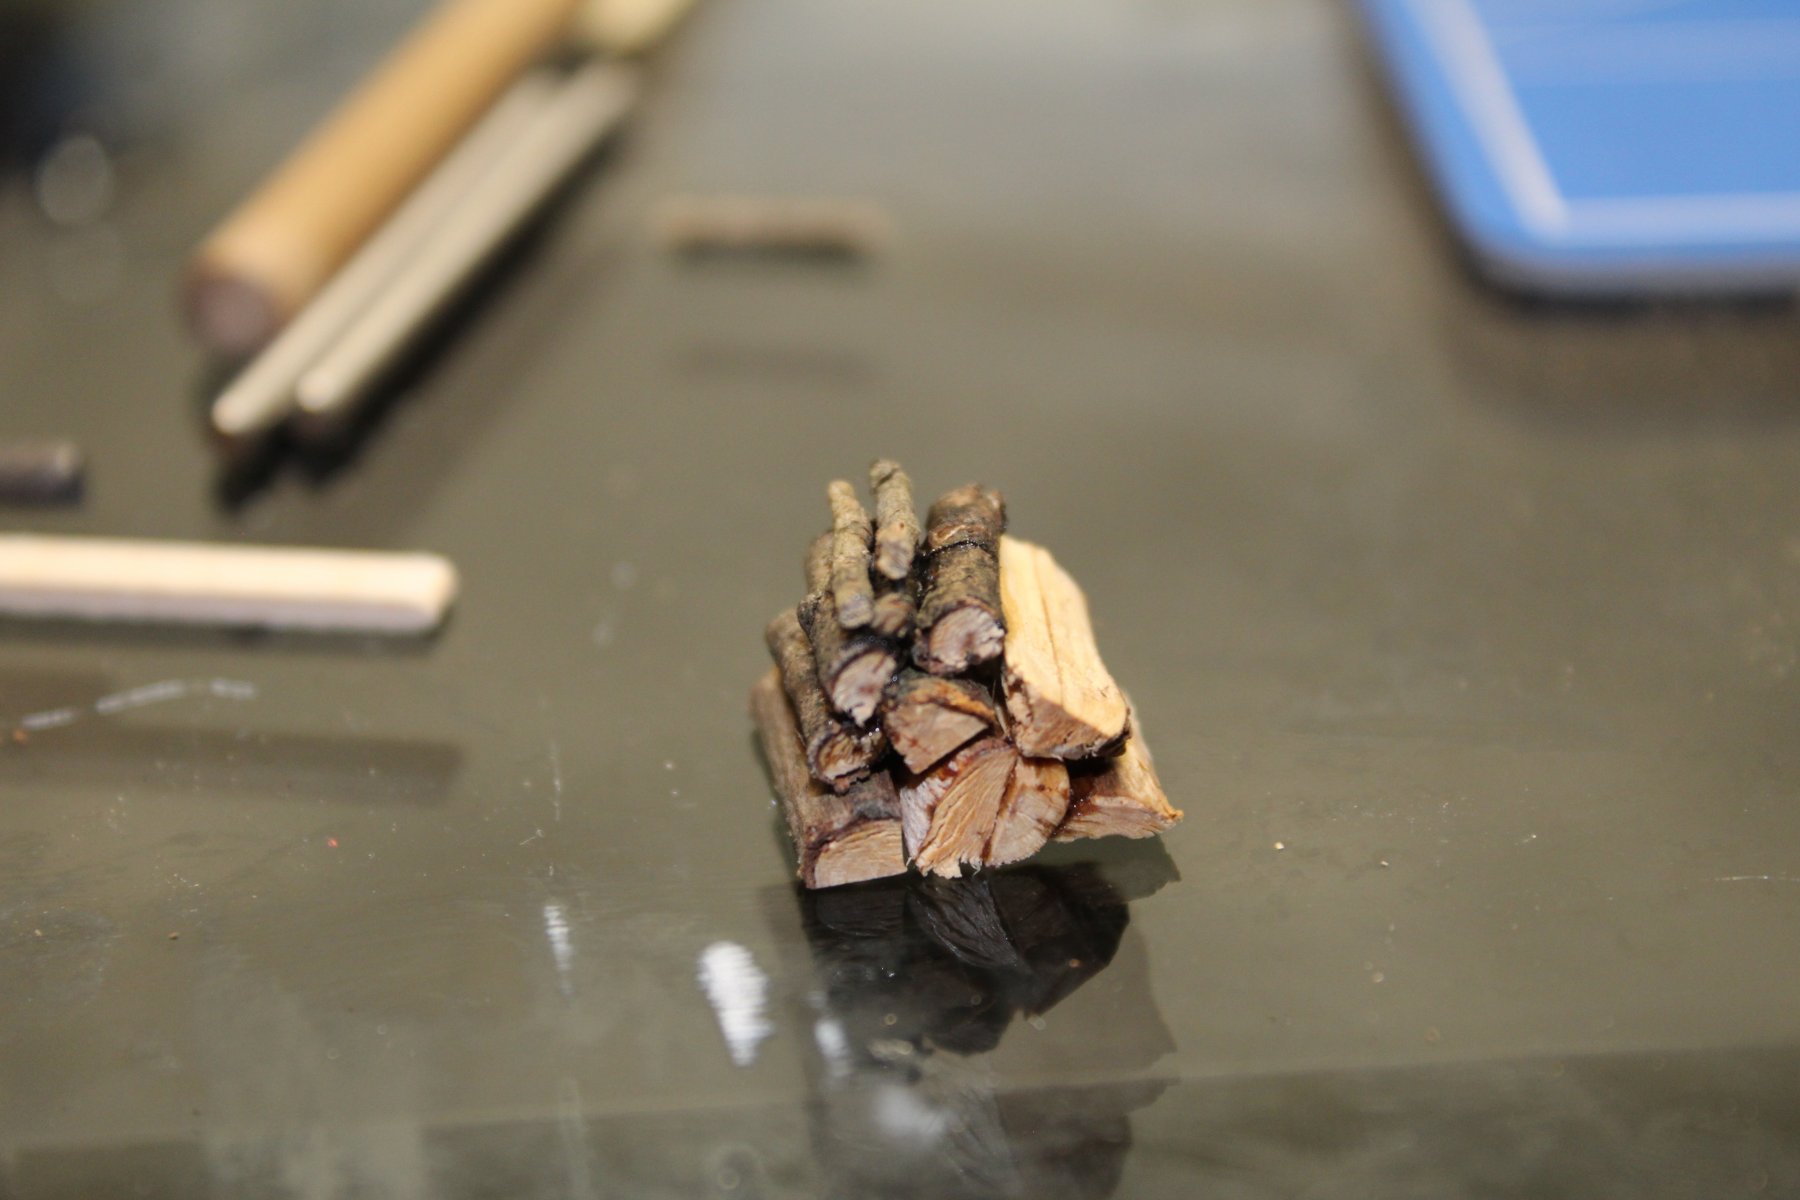
Other details that I decided to add were the bridle, foot brakes, steering levers, whistle pedals, speaking tube wood pile and a few other handles and levers.
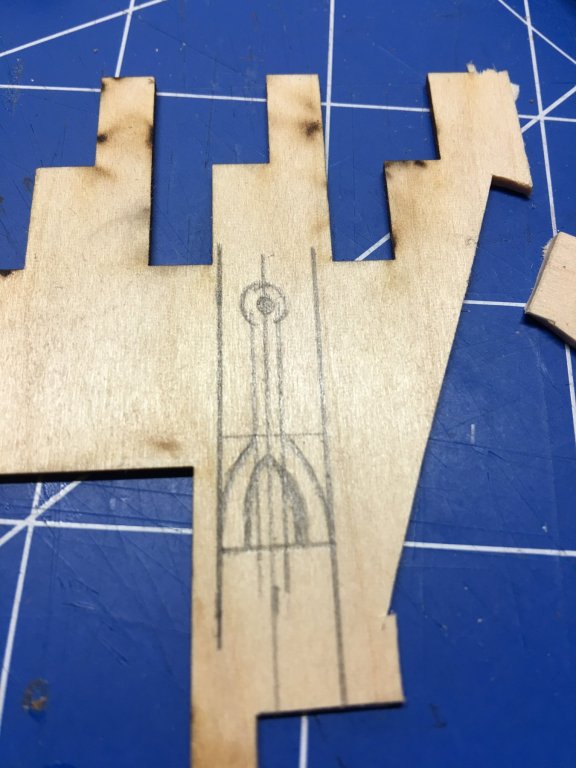
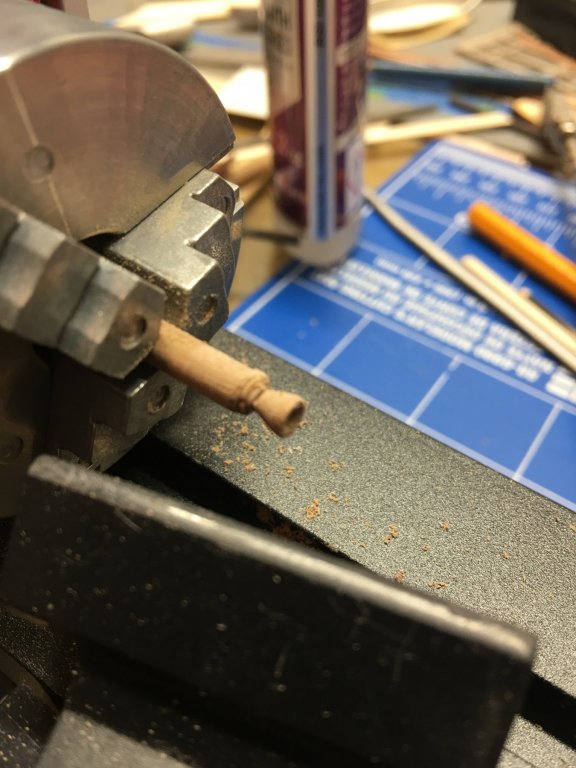
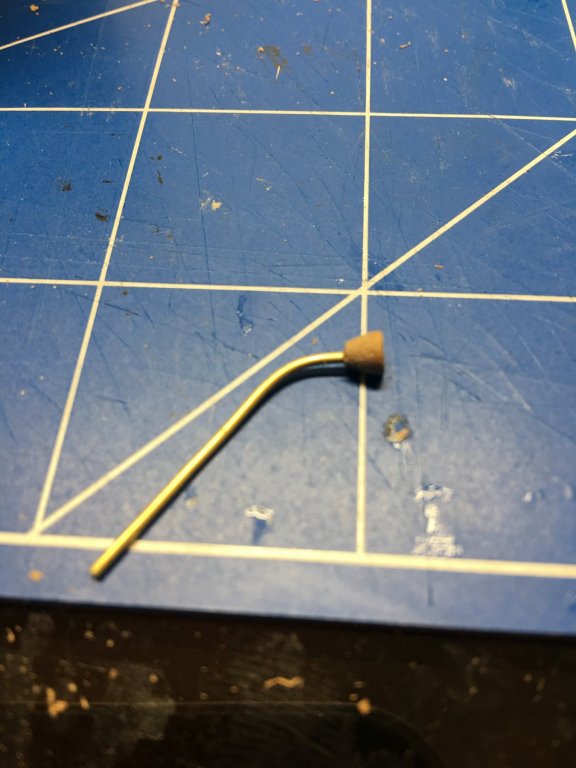


I wasn’t really keen on the way the boat whistle was cast. To me it seemed a little flat and not real detailed. Actually, I not a big fan of many of the Britannia pieces in the MS kits, and any chance I get I try to replace them with brass or wood whenever possible. For the whistle I took a couple of pieces of brass tubing, filed a sound slot in them then turned a conical cap for both of them. I also installed the steam tube from the floor up to the whistles just for that added touch of realism. How else does the steam get to the whistles?
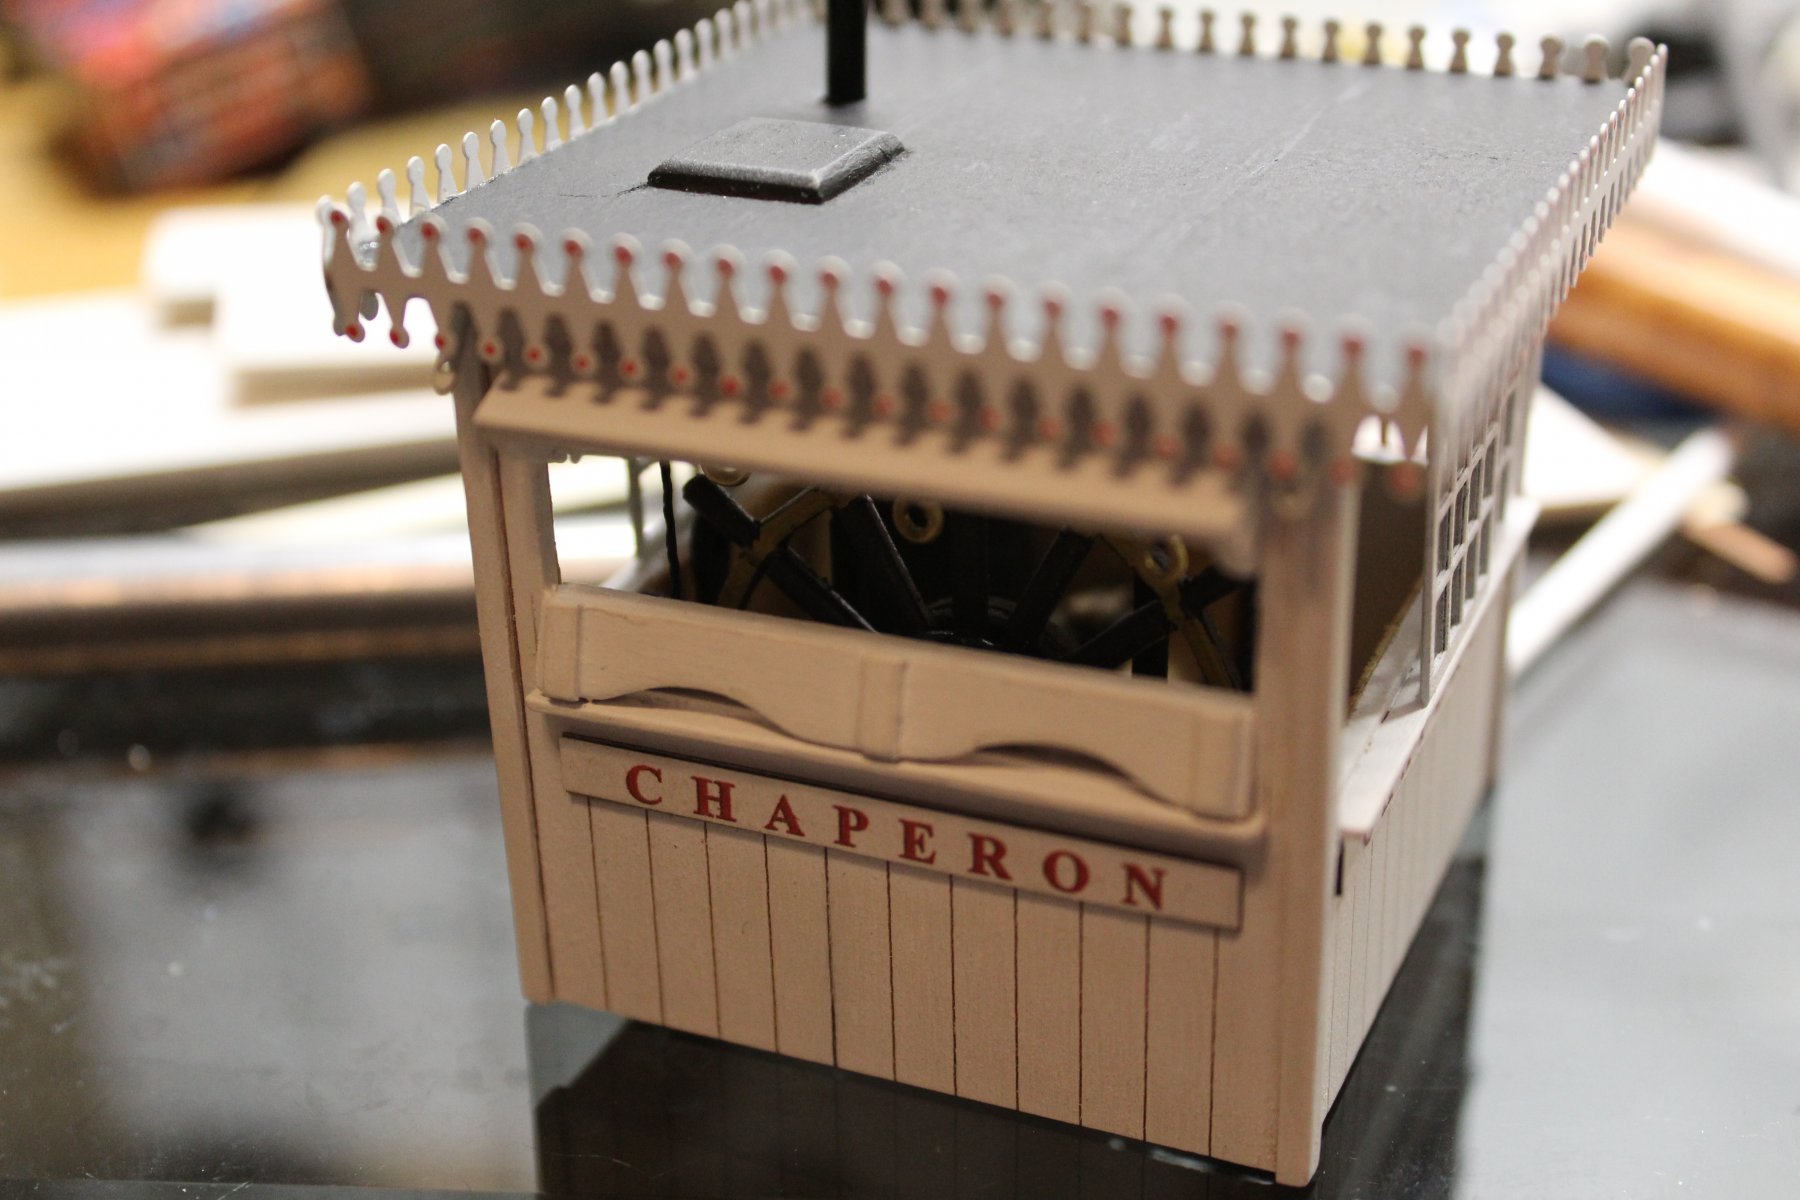
Using another touch from Kurt’s build guide I used silk-span and flat black paint to simulate the tar-paper roof of the pilot house. I used a small piece of plumbing solder for the stove pipe and turned down the smokestack cap on my mini lathe from a ¼” dowel. Painted the whole smokestack assembly black then installed the brass roof decorations.
One minor adjustment that I’ve seen on many of the Chaperon build logs is that the roof hatch and smokestack holes were not properly aligned. Easily fixed by giving the roof a 90 degree turn and everything lines up perfectly.


Now that I finally received my planking, I should be able to make some progress on the main deck and get it planked and finally get this project going vertical. That’s all for now. Thanks for looking.
-Brian

- Duanelaker, Canute, JayCub and 13 others
-
16
-
Greetings everyone,
So I managed to get a little work done this week on the Chaperon pilot house.
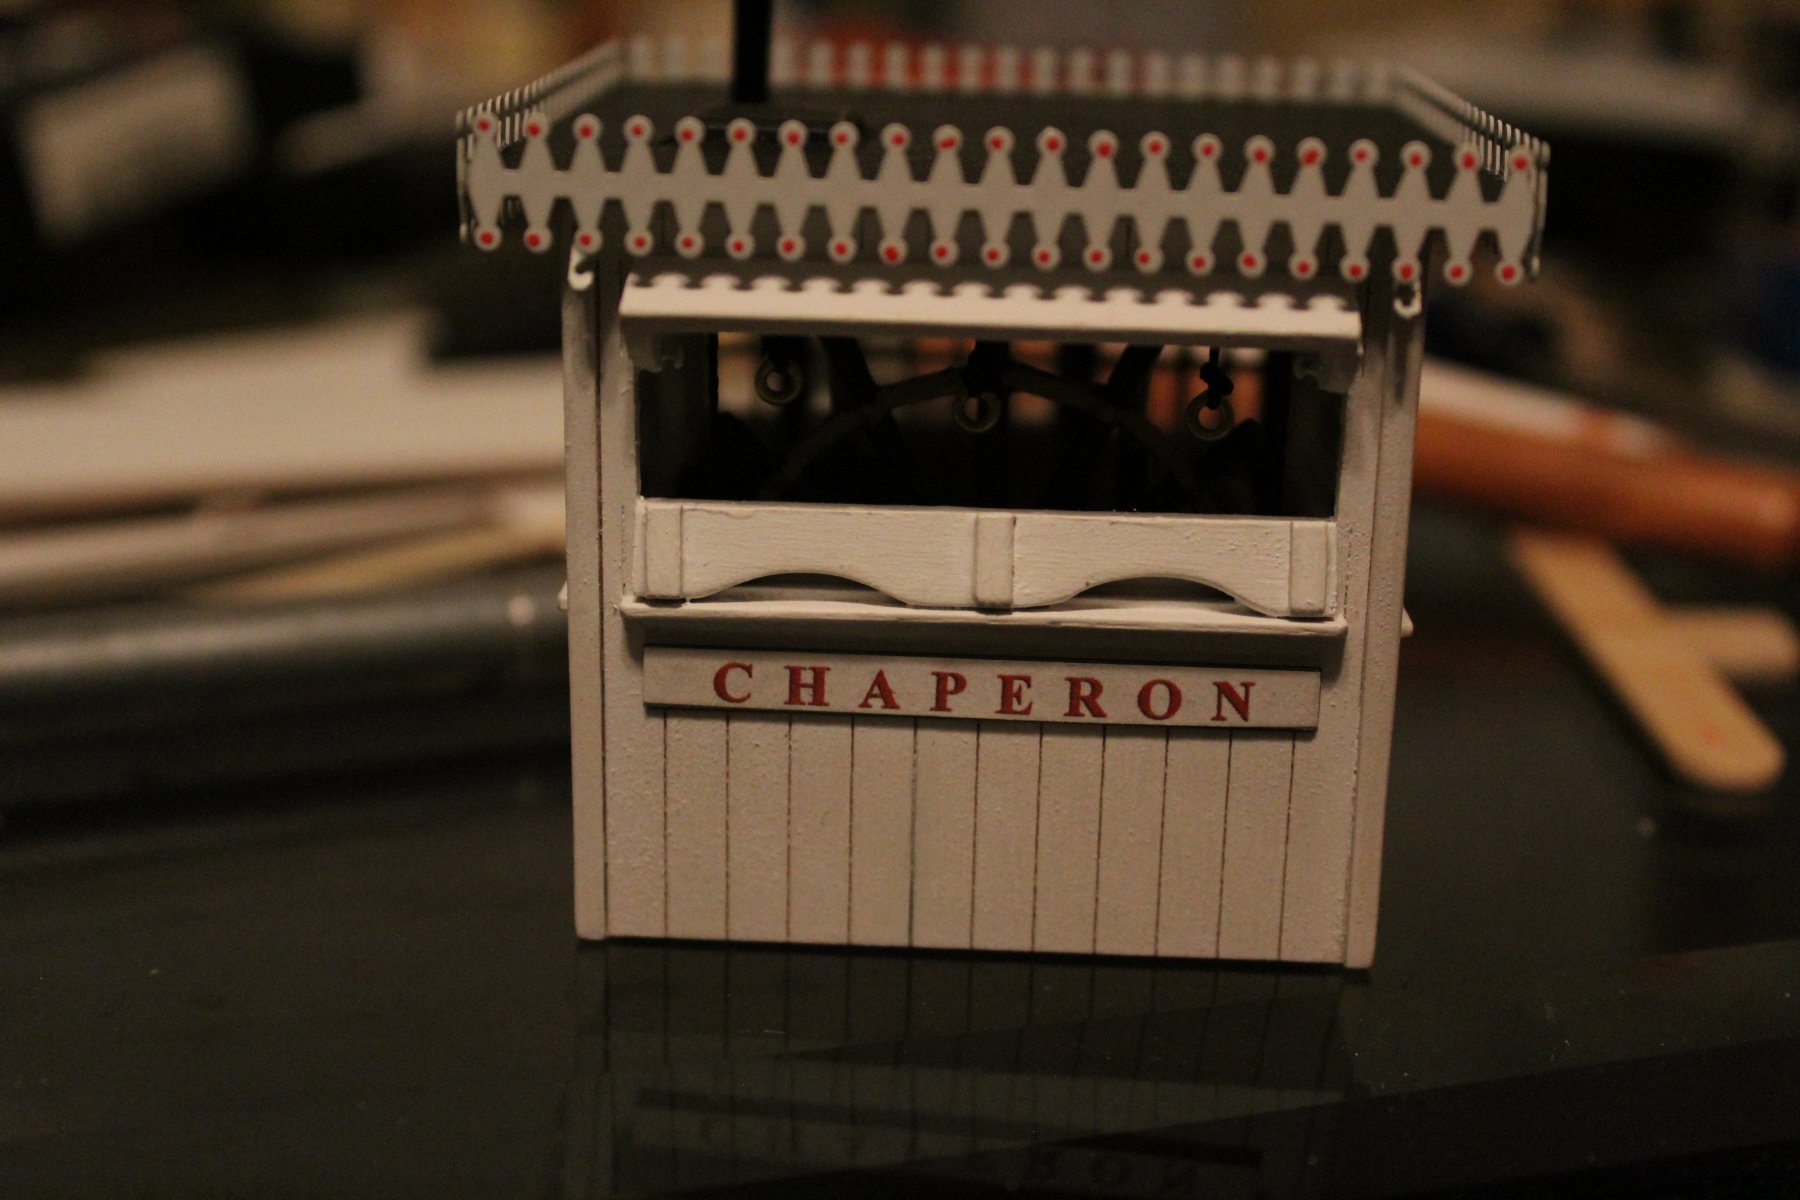
Using Kurt’s build guide I went with the more traditional construction of the pilot house with the open front window and breast boards. I also decided to go with three sliding windows on the ports and starboard sides as well.

Next, I incorporated the adjustable rain visor for the forward window.


Construction and installation of the tie-down straps.
A little detailing of the floor and walls of the pilot house to break up some of the white.

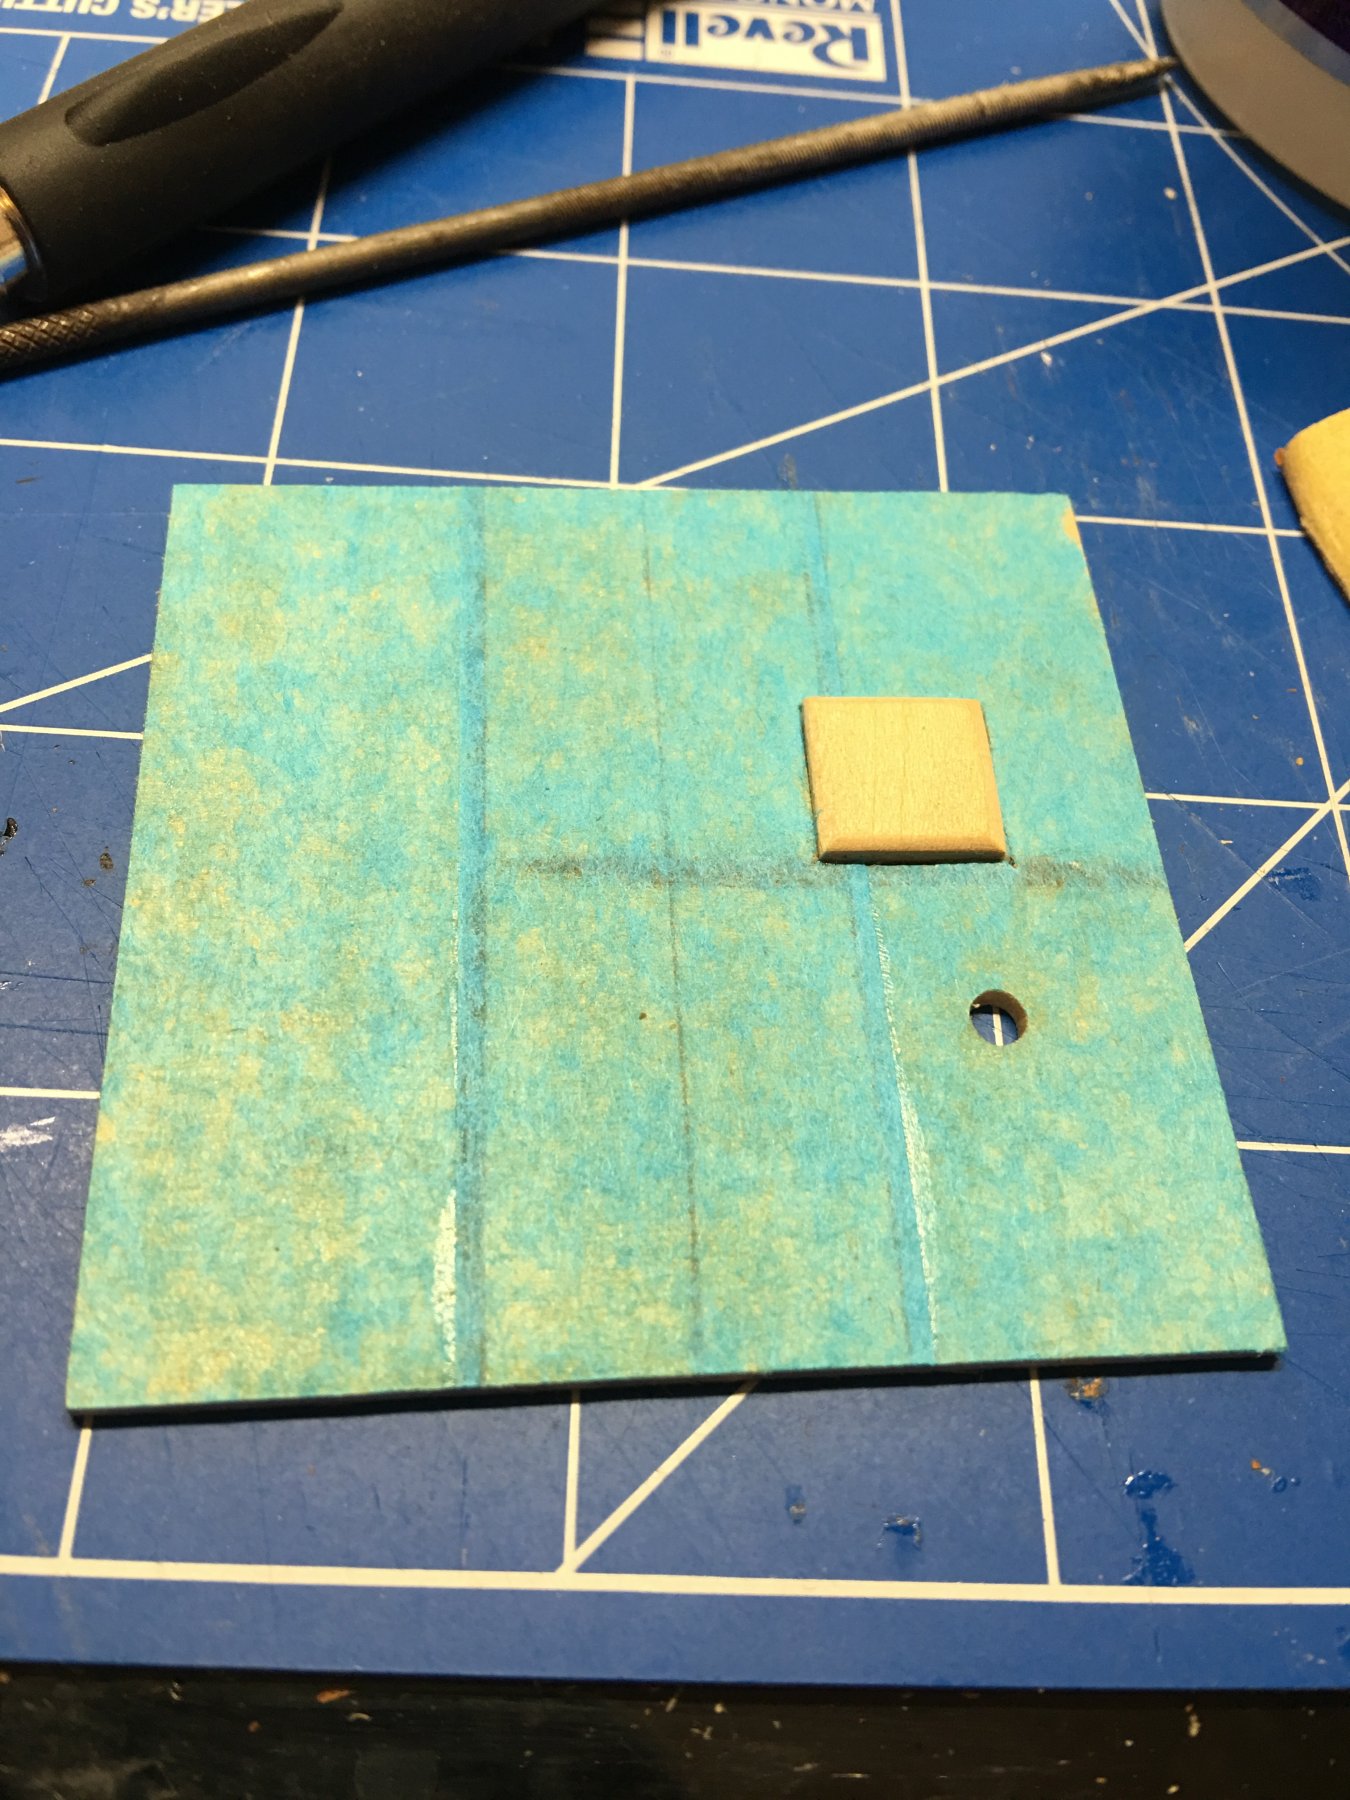
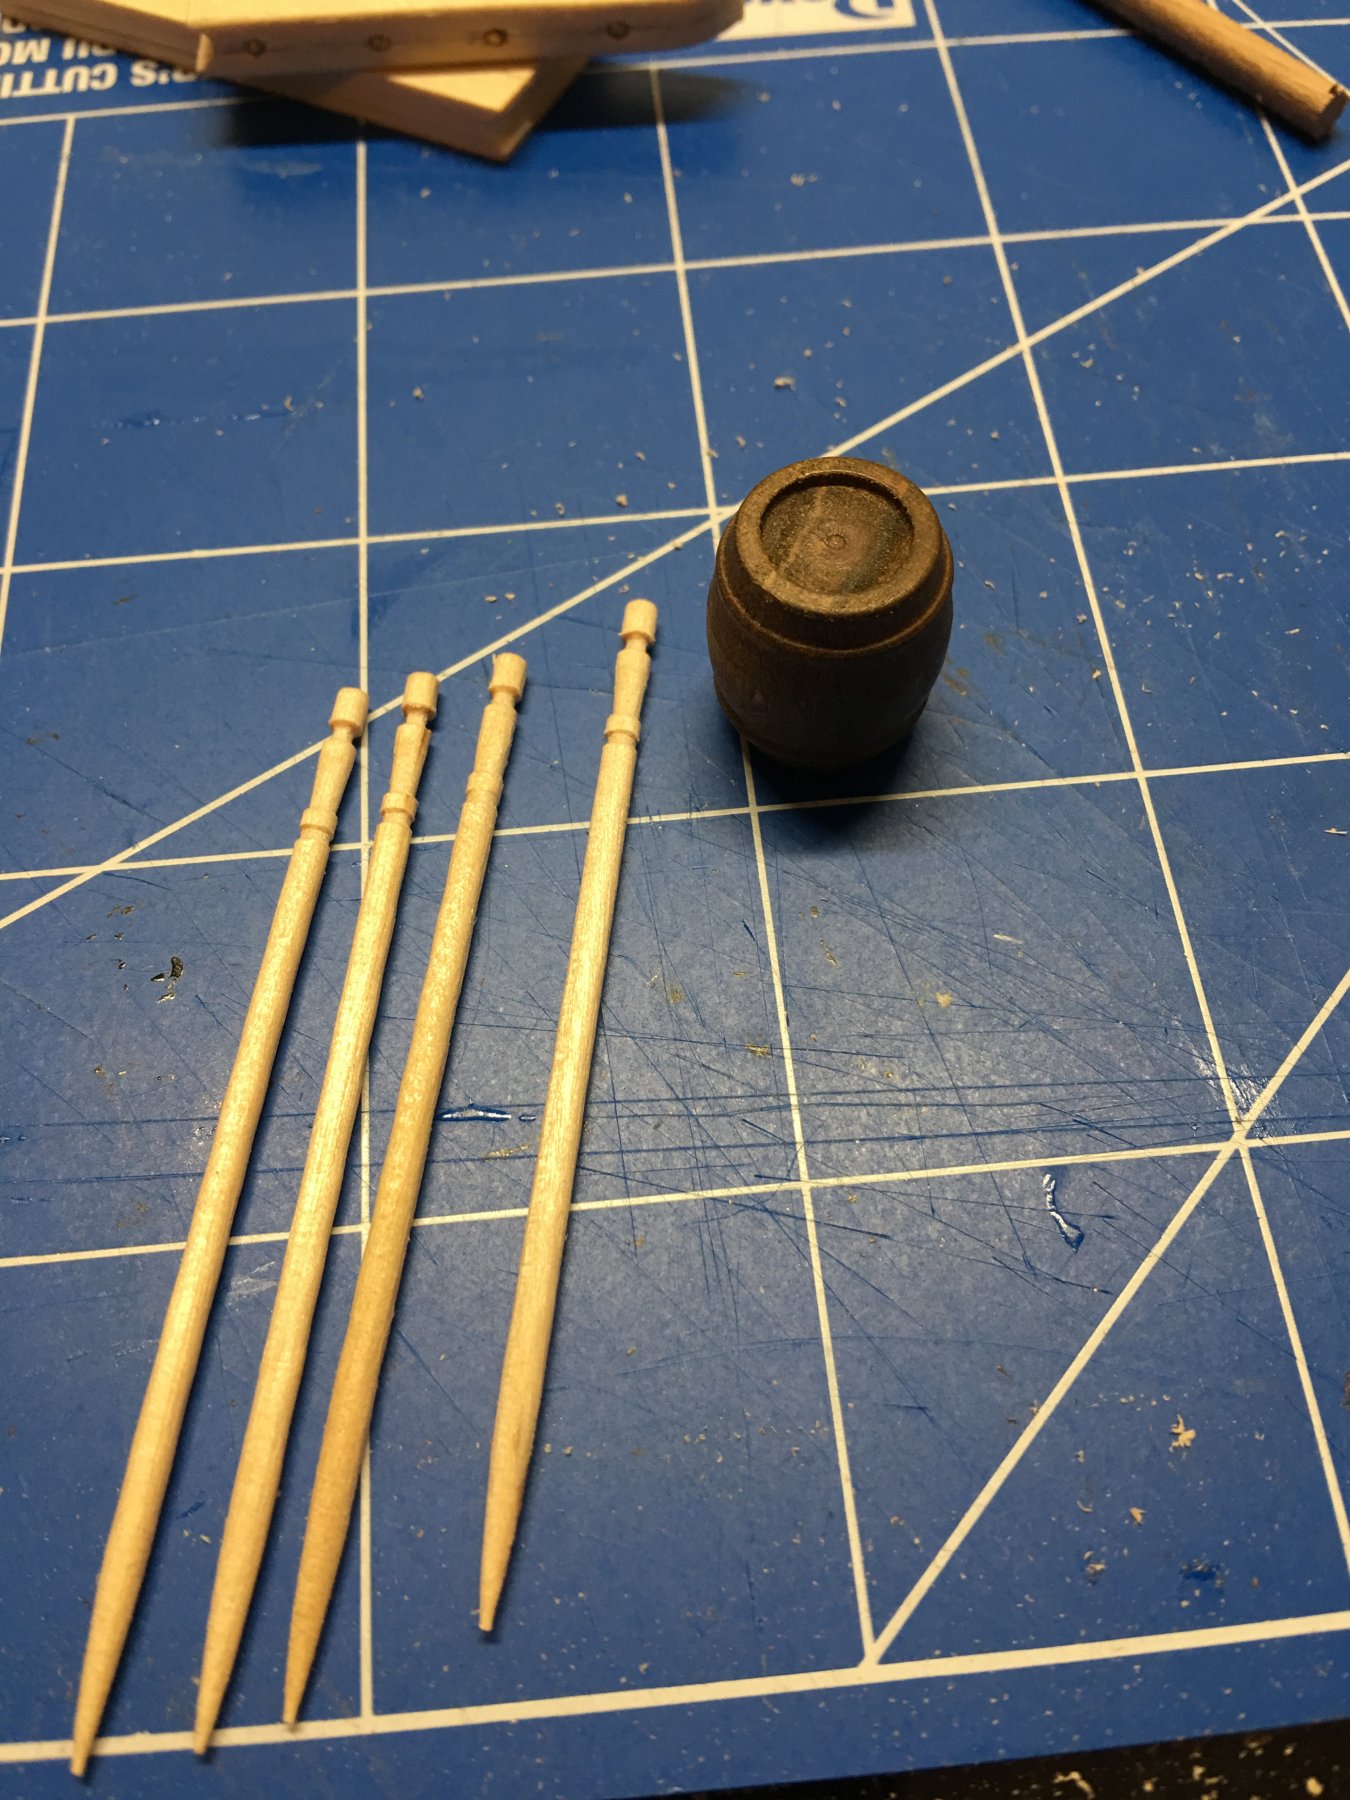
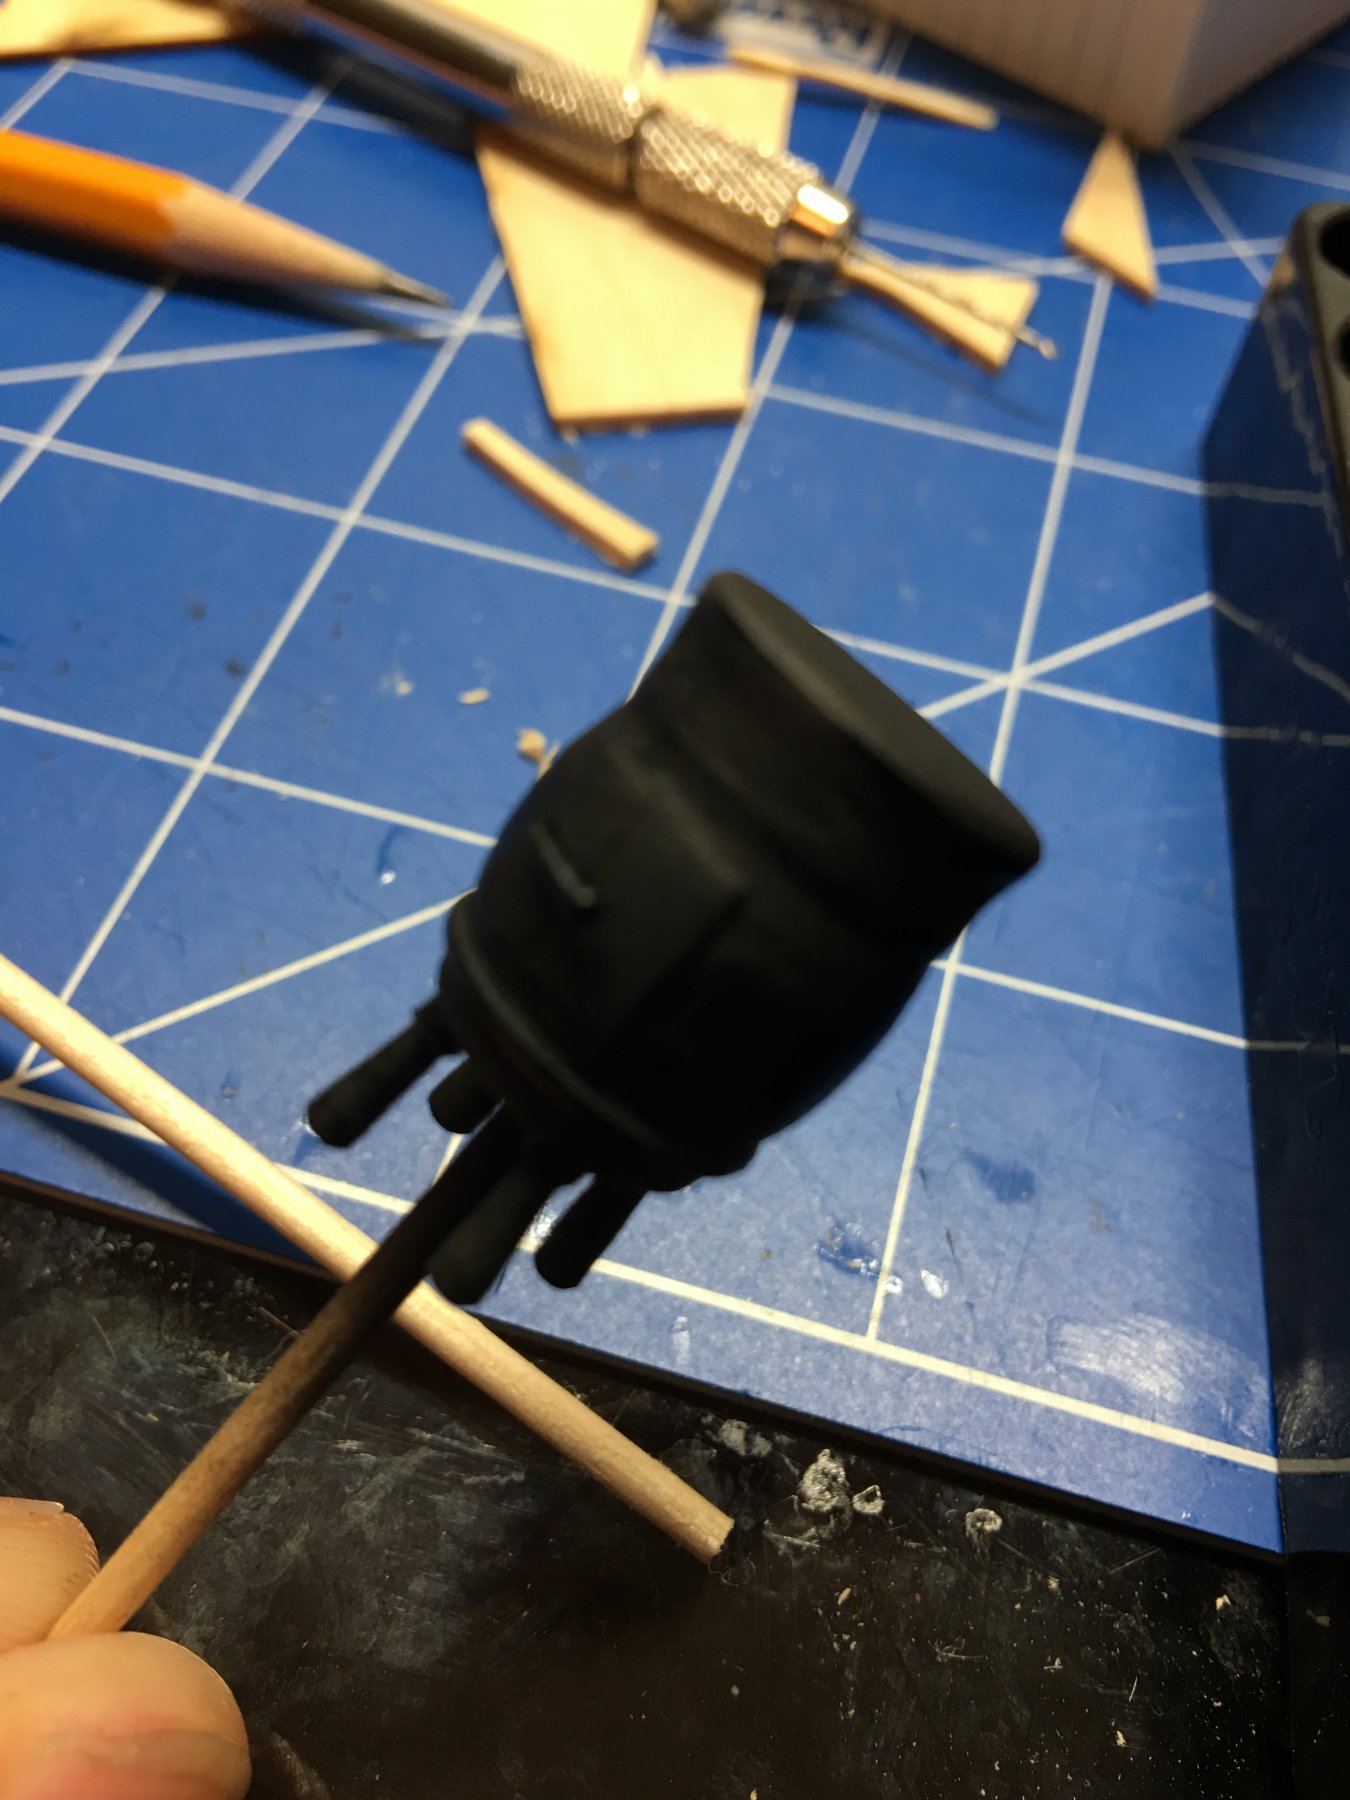
Since the model didn’t provide much in the way of details for the pilot house, added my own personal touches. First, to keep the riverboat pilot warm on those cold nights up north, a nice potbelly stove. This I constructed from a leftover barrel from a previous build, a few fancy toothpicks for the legs and capped it off with a round piece of basswood and some wood putty to give the top a contour, then finally added a door and handle.


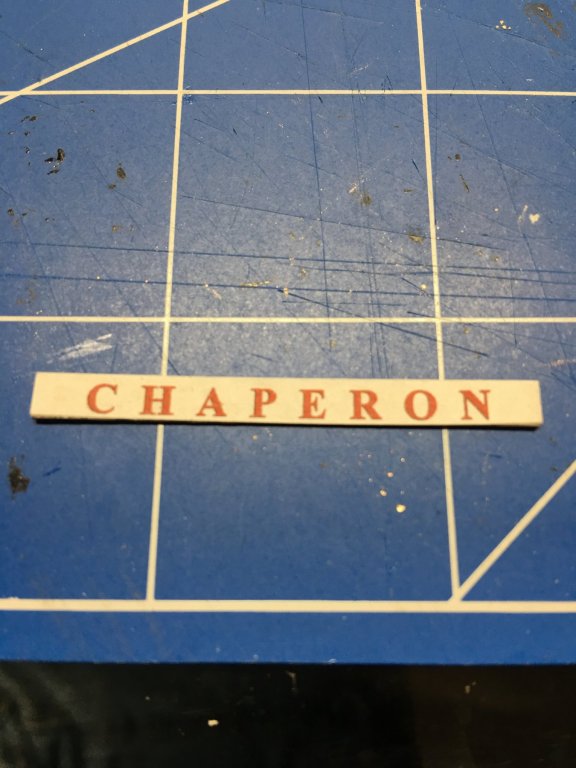
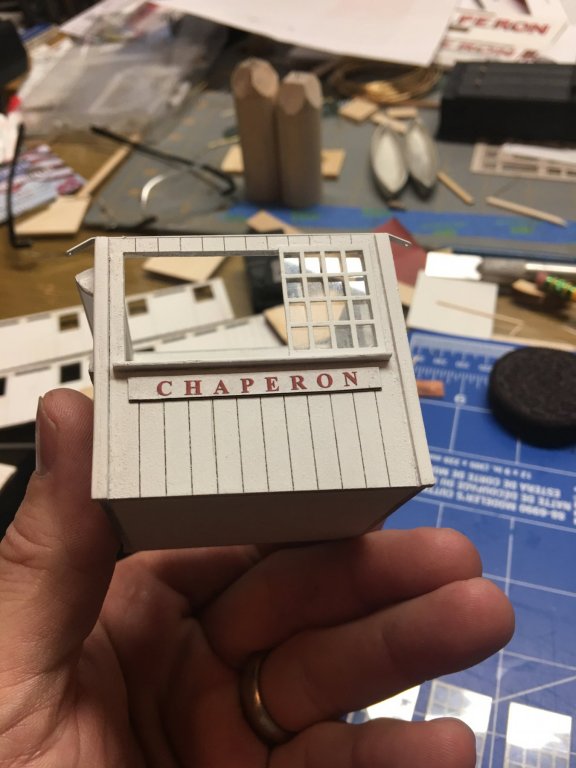
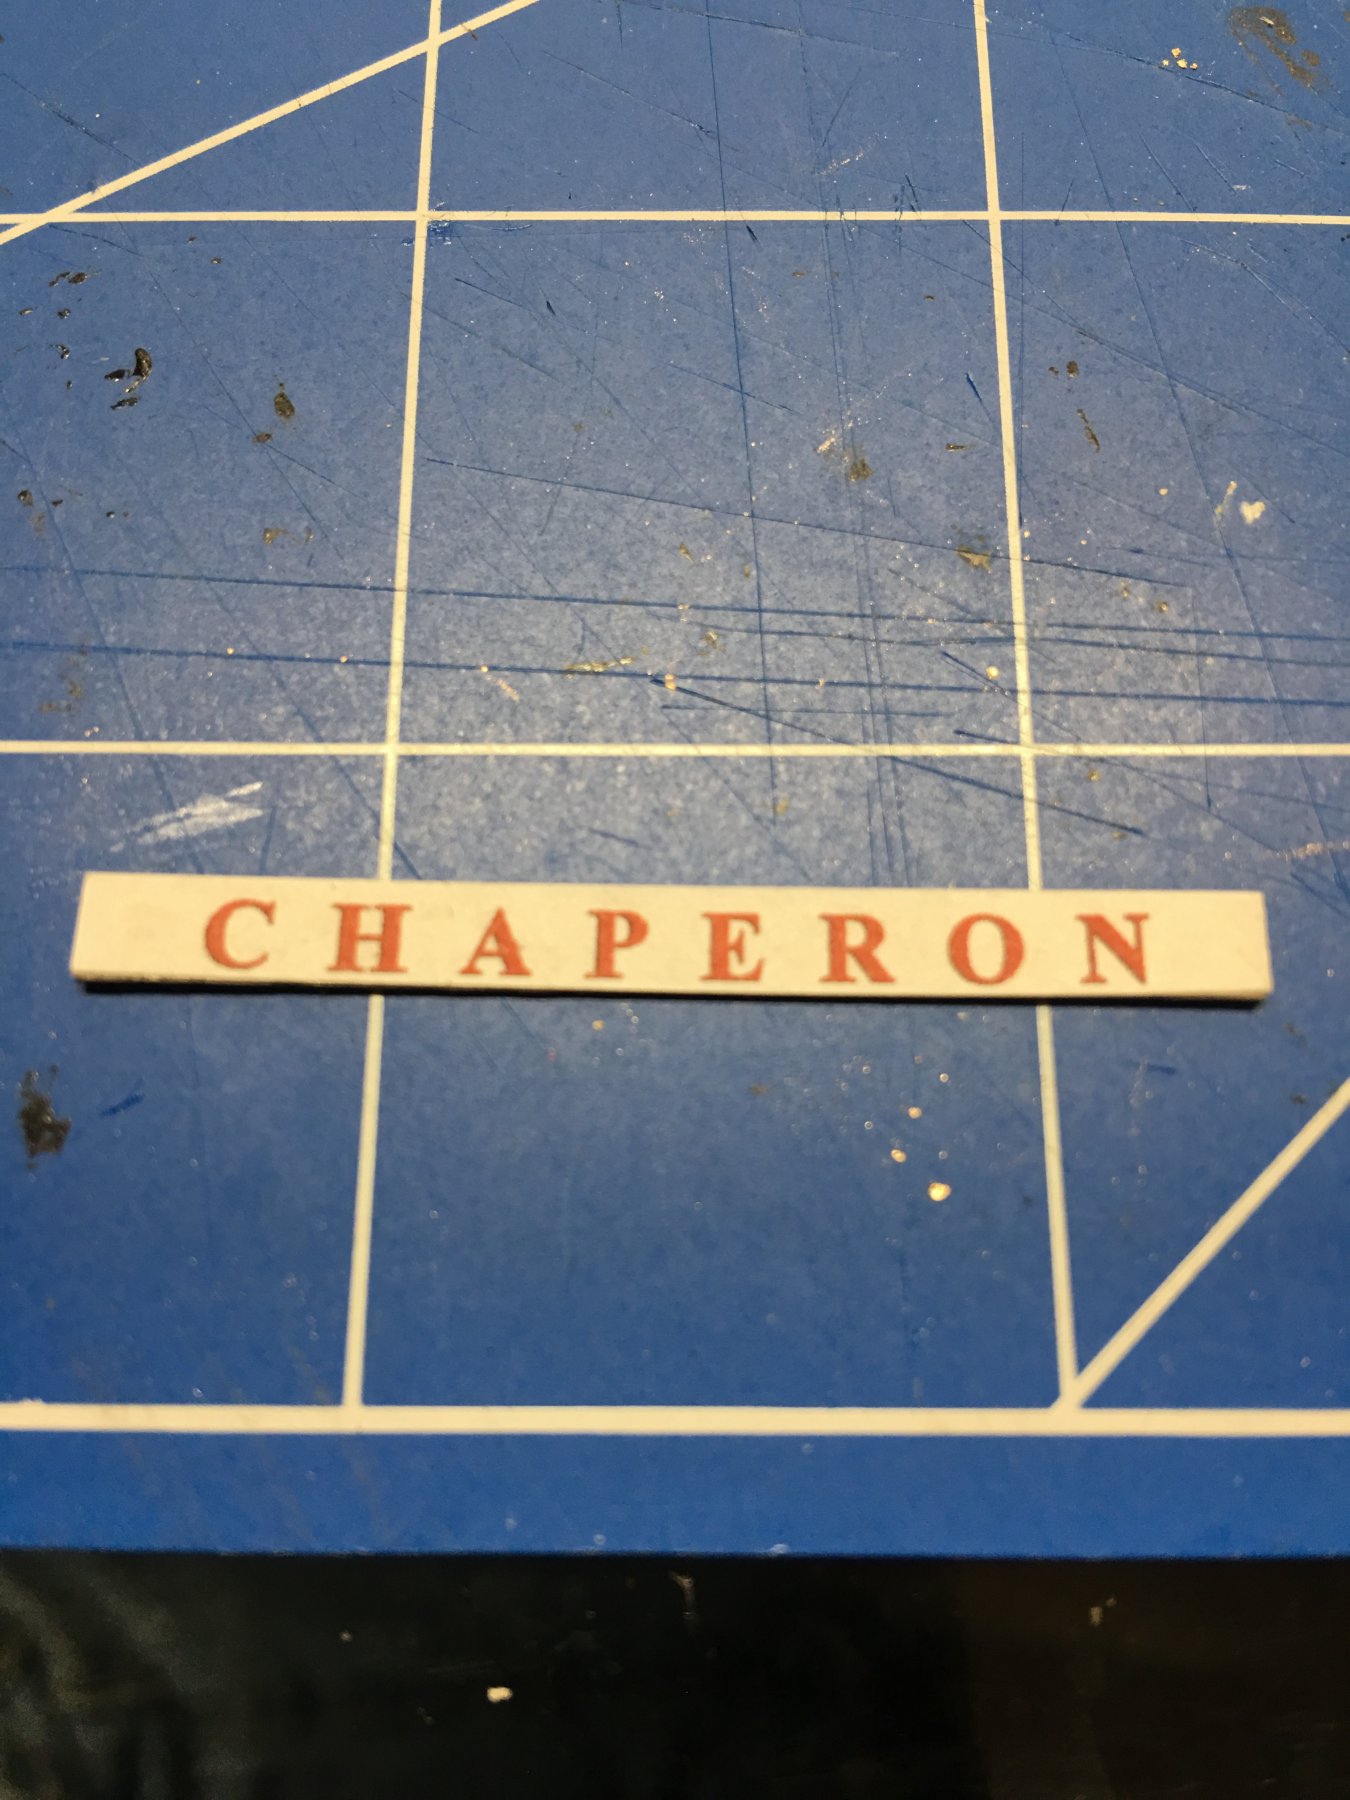
For the name plates I used the same method I did for the Chaperon lettering on the mechanical room sides. I scanned and printed the name then cut out and glued the paper name to the wood name plaques.
- coxswain, Duanelaker, yvesvidal and 6 others
-
9
-
32 minutes ago, Cathead said:
You're kind to imply that I did anything but lead you astray. Rudders look nice. I also left off Arabia's rudder while the build is ongoing; it'll be about the last thing I put on because I'm sure I'll smash it otherwise.
Cathead,
I learned from my past builds that any little piece that can be snagged and easily torn off will. Just on my Endeavor build alone I bet I replaced the jack-staff three times while rigging her before I finally waited until I was almost done to install it a fourth time. I guess I'm a slow learner.
-
Hello all,
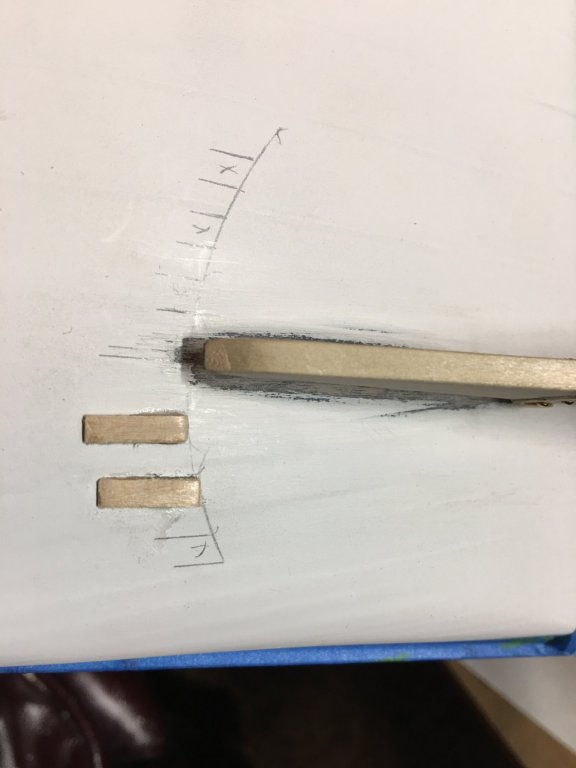
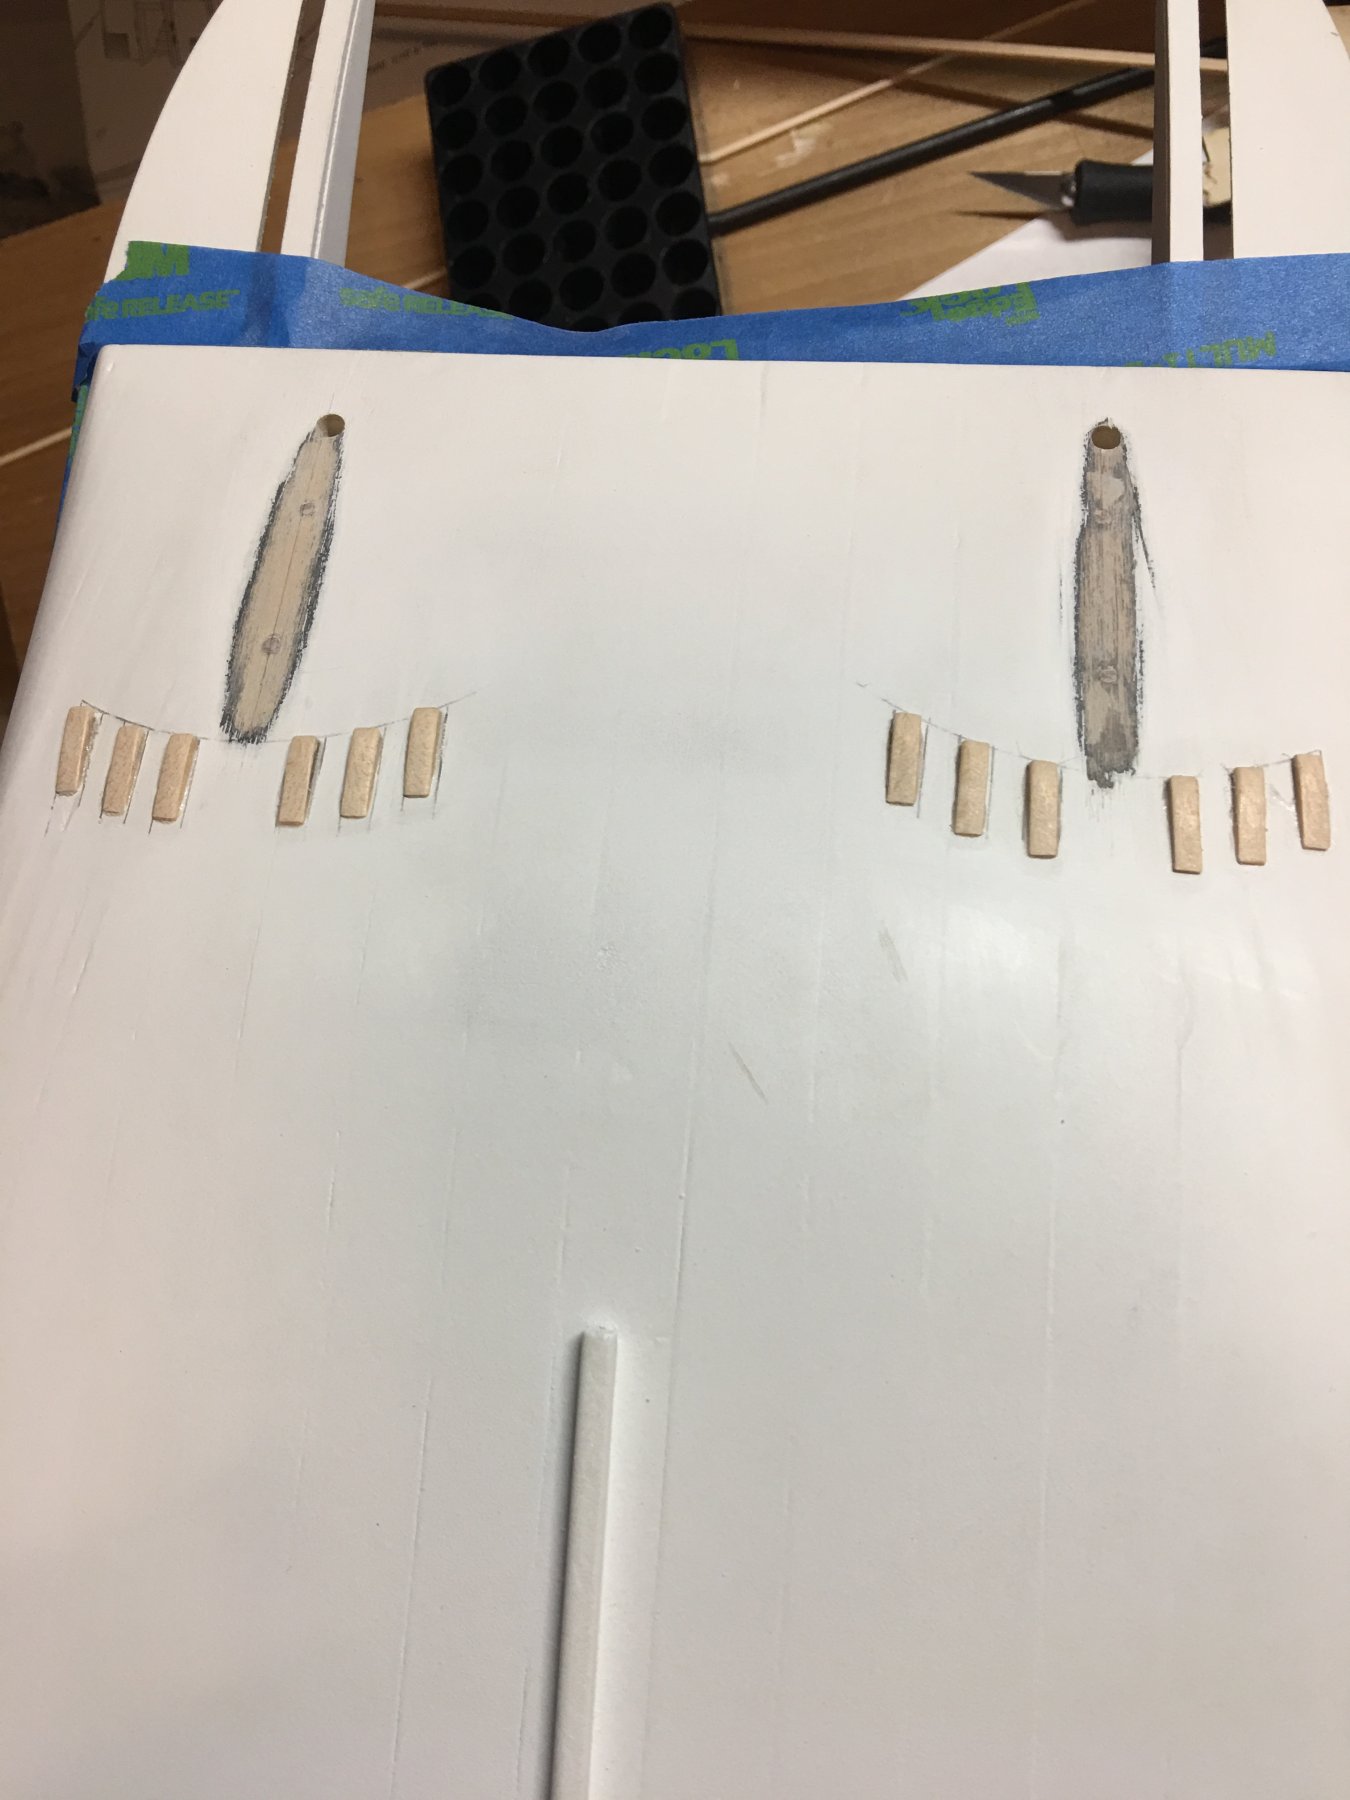
Got to spend a little time working on the Chaperon this weekend and finally finished up on the rudders. I also decided to go with the protective wedges that sit on the hull just forward of the rudders. I thought it added a nice little bit of detail. Please forgive the sanded areas just above where the rudders sit. This was where I was toying with the idea of installing a split rudder, much like the Bertrand. This idea was scrapped once Kurt & Cathead set me down the correct path with the balanced rudder. A little sanding and paint and it's almost as if it was never there.
Placement of the first two wedges on the starboard rudder.
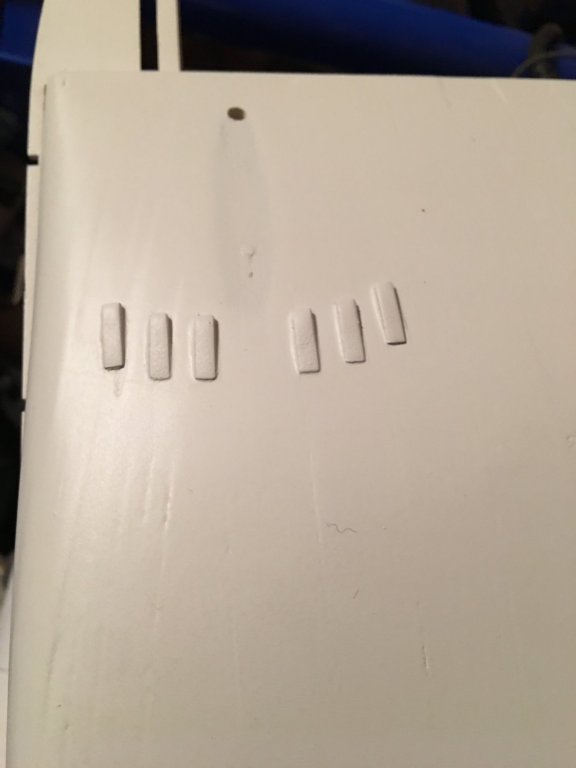
All 12 wedges in place.

First coat of paint. I noticed that I didn't get the mount post of the split rudder sanded down good enough. Amazing what a coat of white paint will reveal.
Final coat of paint and the rudders temp installed. I think I'll wait until I'm almost done to install them permanently, just in case i get clumsy and knock one off. I really don't want to have to rebuild them.

...and just for learning purposes, some pics of my attempt at making the split rudder.

That's all for now. While I still wait for Amazon to get my order straight on my deck planks, I'll start work on the pilot house. Looks like a nice little project to bide my time.
Thanks for looking,
-Brian
-
Good evening everyone.
Not a whole lot going on this week in the shipyard. Did a little travelling over the Easter weekend so I wasn't able to get much accomplished.
However, thanks to Kurt and his library of useful steamboat information I was finally able to solve my rudder dilemma.
For my build, I incorporated some of the older build techniques with some of the more modern ones to complete my rudders for the Chaperon.
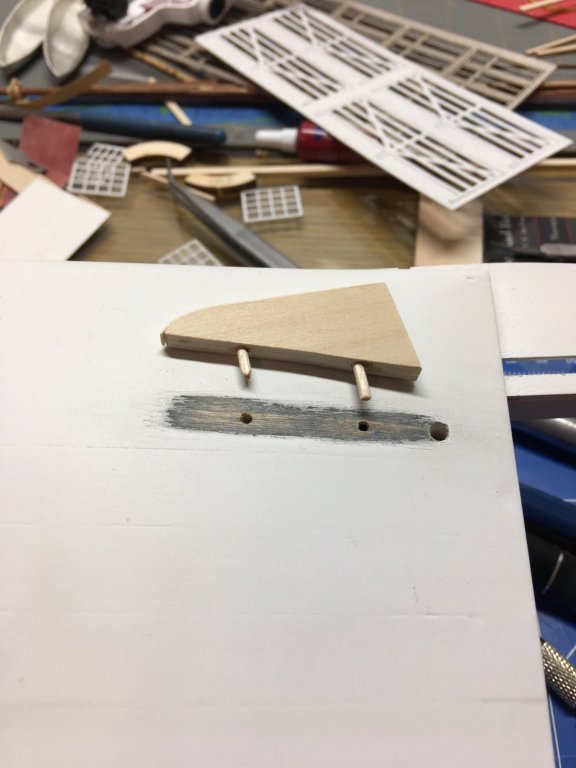
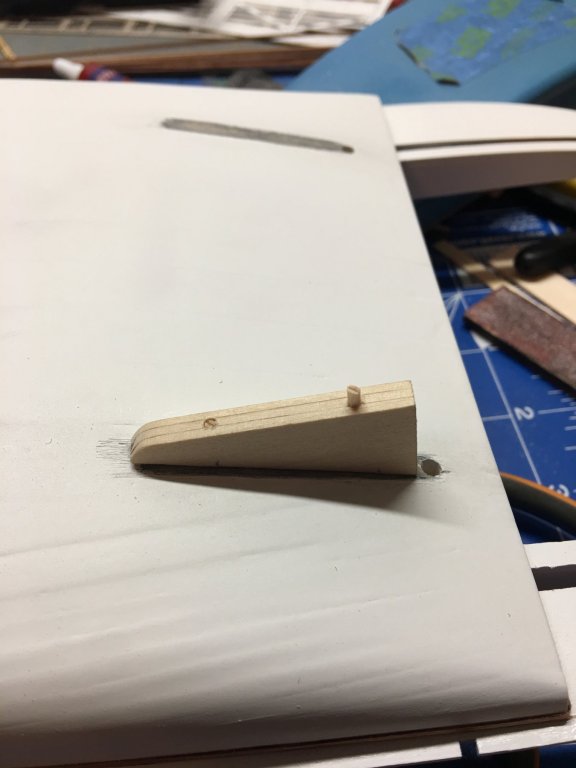
I went with the balanced rudder that used stacked timbers, held in place with through bolts from top to bottom. I also simulated the wood sheathing that wrapped the entire rudder for added strength and protection.
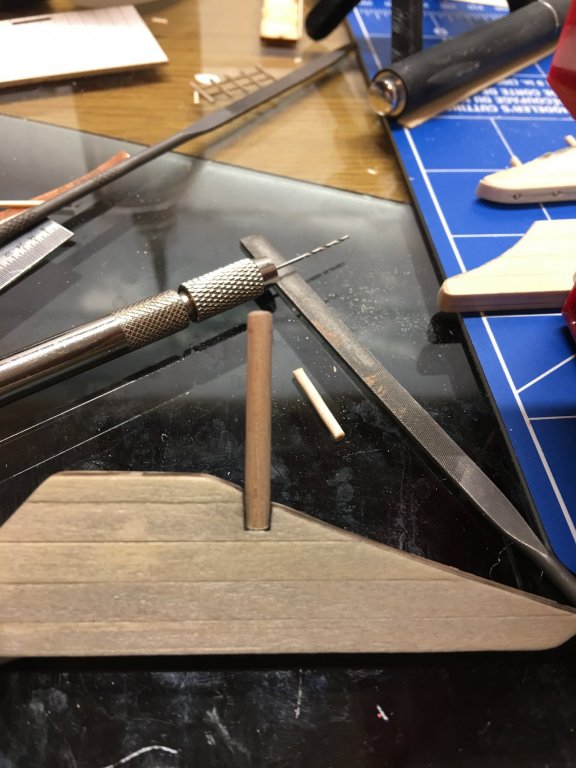
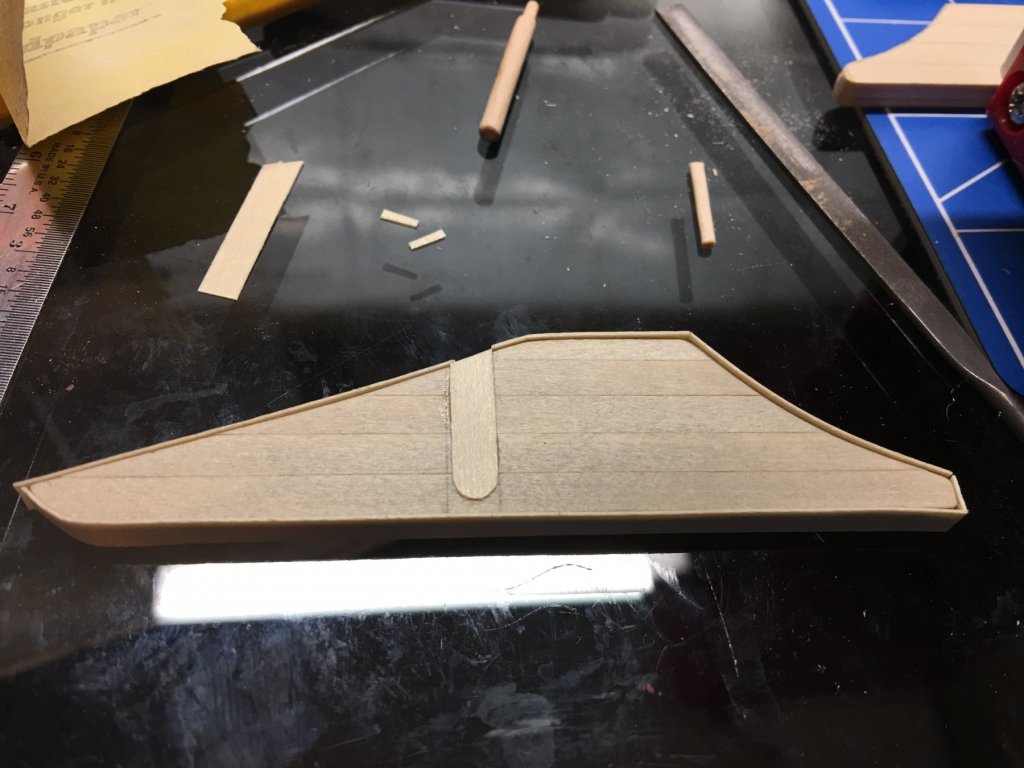
I wasn't able to find any other information on how the tiller was attached to the rudder itself so I did the best I could with what information I was able to find.
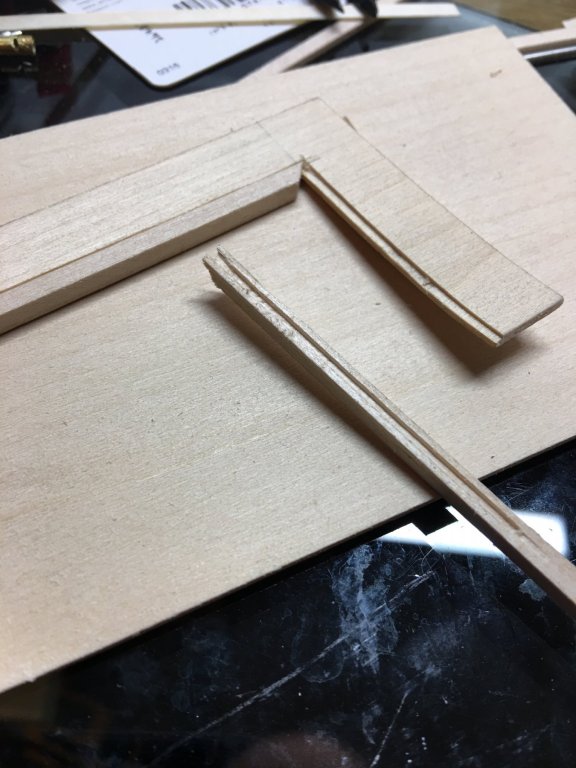
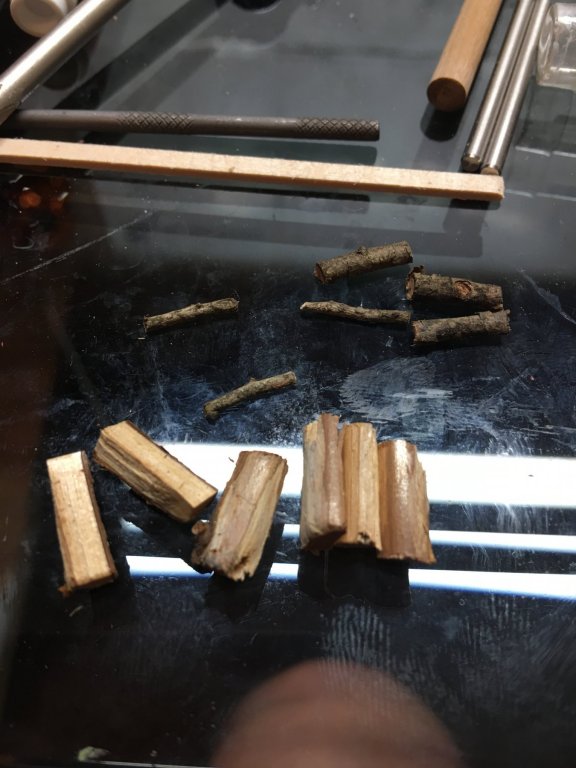
My thoughts were that the rudder was drilled out where the tiller was attached. The joint was a mortise and tenon with an iron yoke attached at the top and running down the sides of the rudder. Holes were then drilled though the yoke and tiller and then bolted together. All of this I simulated with some scrap pieces of wood I had laying around. I figure with a few coats of paint everything should look right.
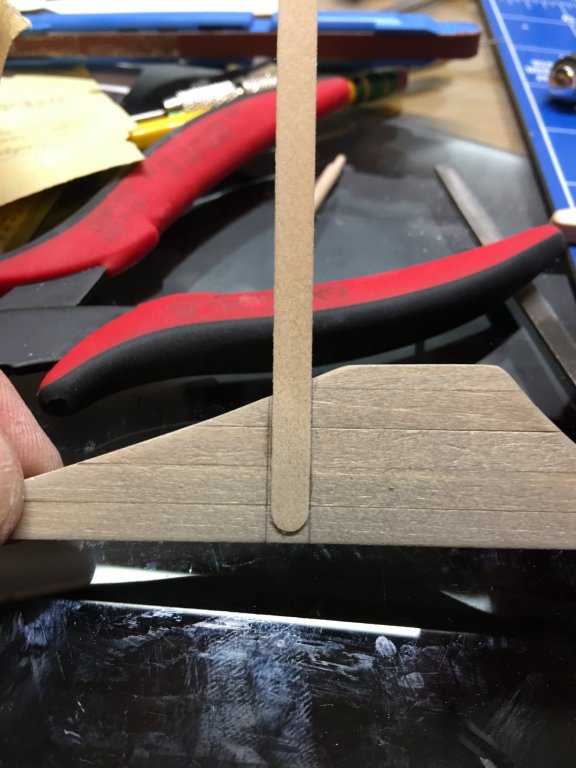
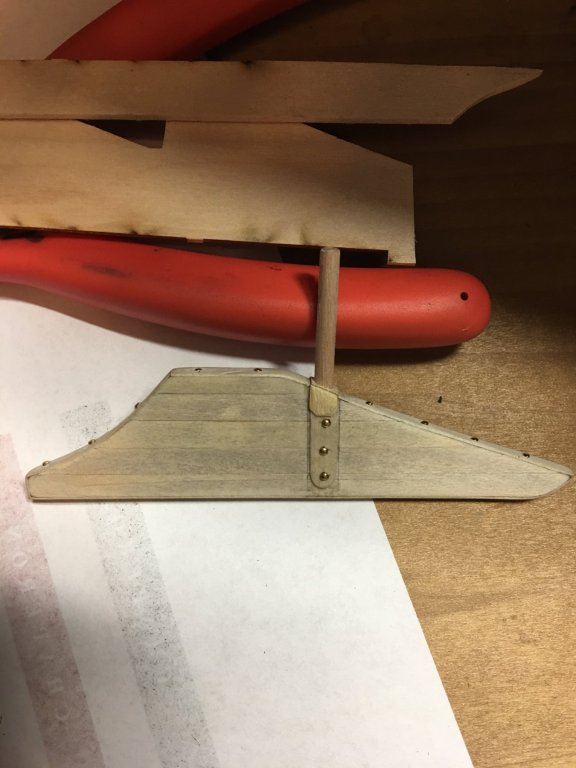
It may not be entirely accurate, but it adds a little extra detail to an otherwise plain looking rudder.
Now to make the second one, paint them up, then get them mounted. While I am doing that I will contemplate whether or not to add the protective wedges to the hull.
Thanks again for looking.
-Brian
- Cathead, Canute, Duanelaker and 2 others
-
5


Chaperon 1884 by mbp521 - FINISHED - Model Shipways - Scale 1:48 - First Build Log
in - Kit build logs for subjects built from 1851 - 1900
Posted · Edited by mbp521
Hello again Everyone,
It's nice to be back at it again, albeit at a slow pace, but at least I'm getting something accomplished.
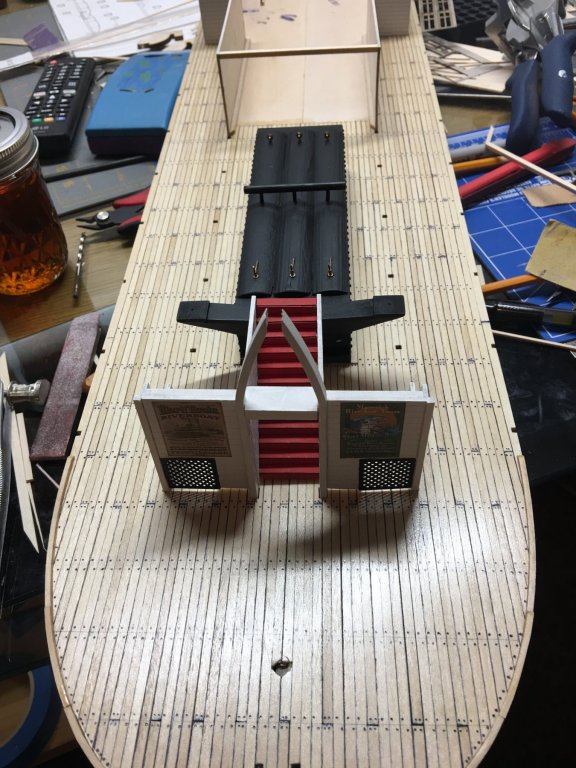
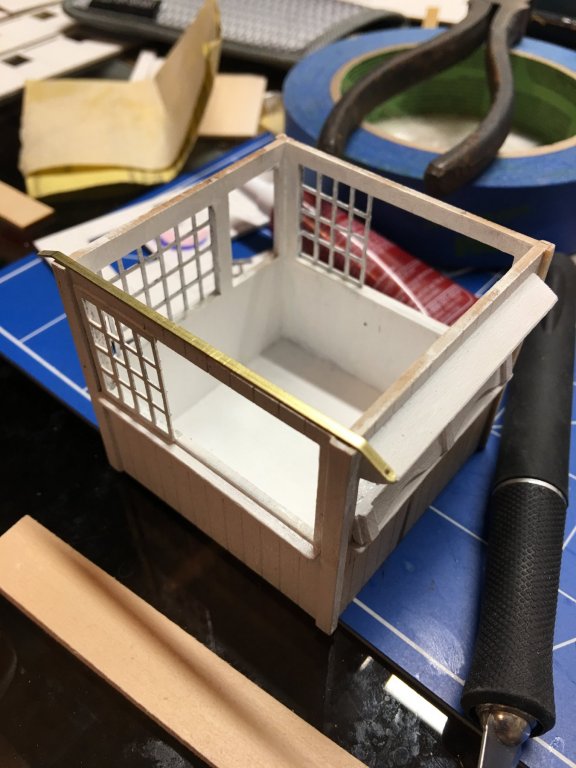
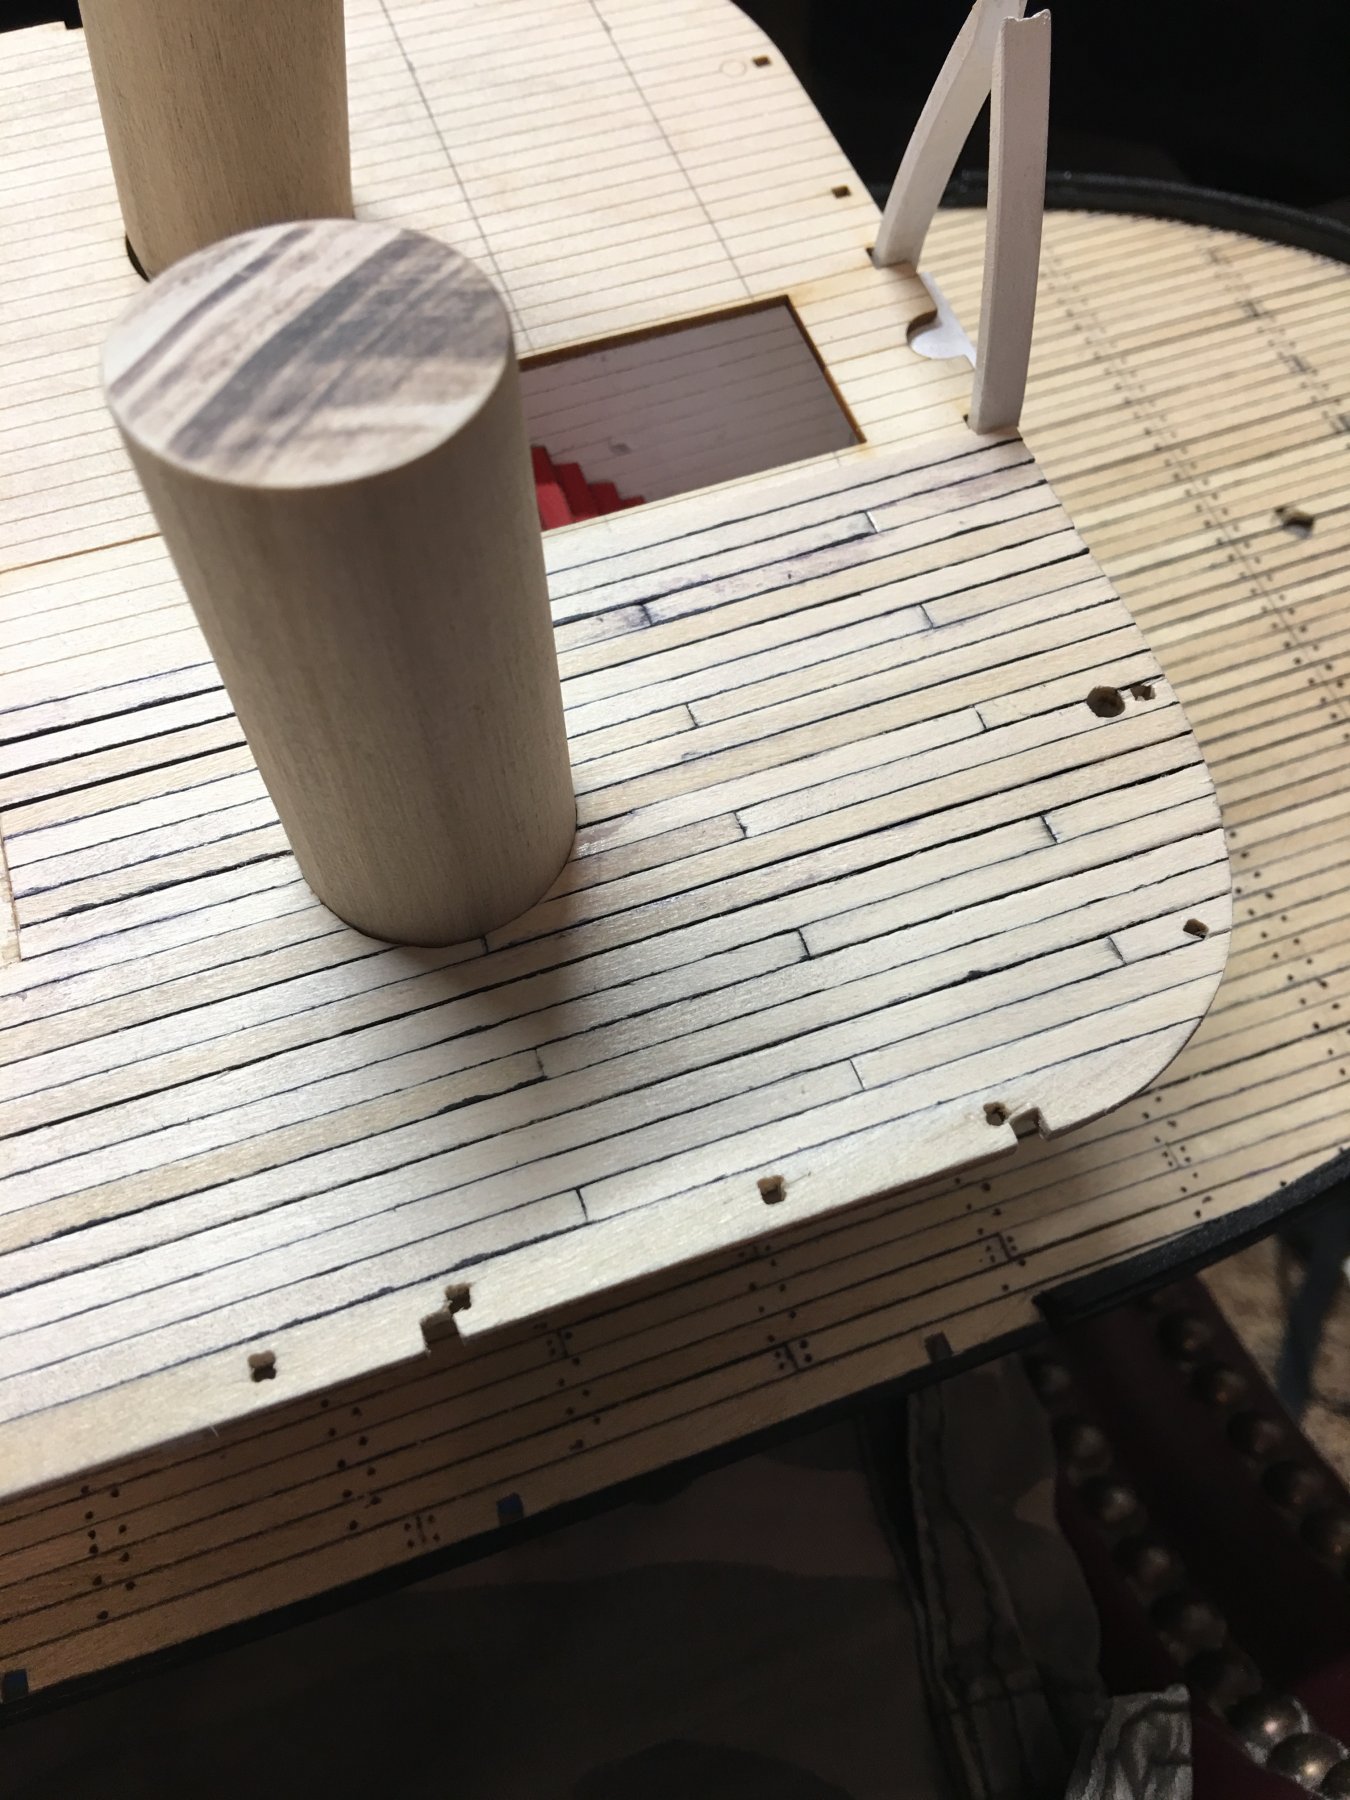
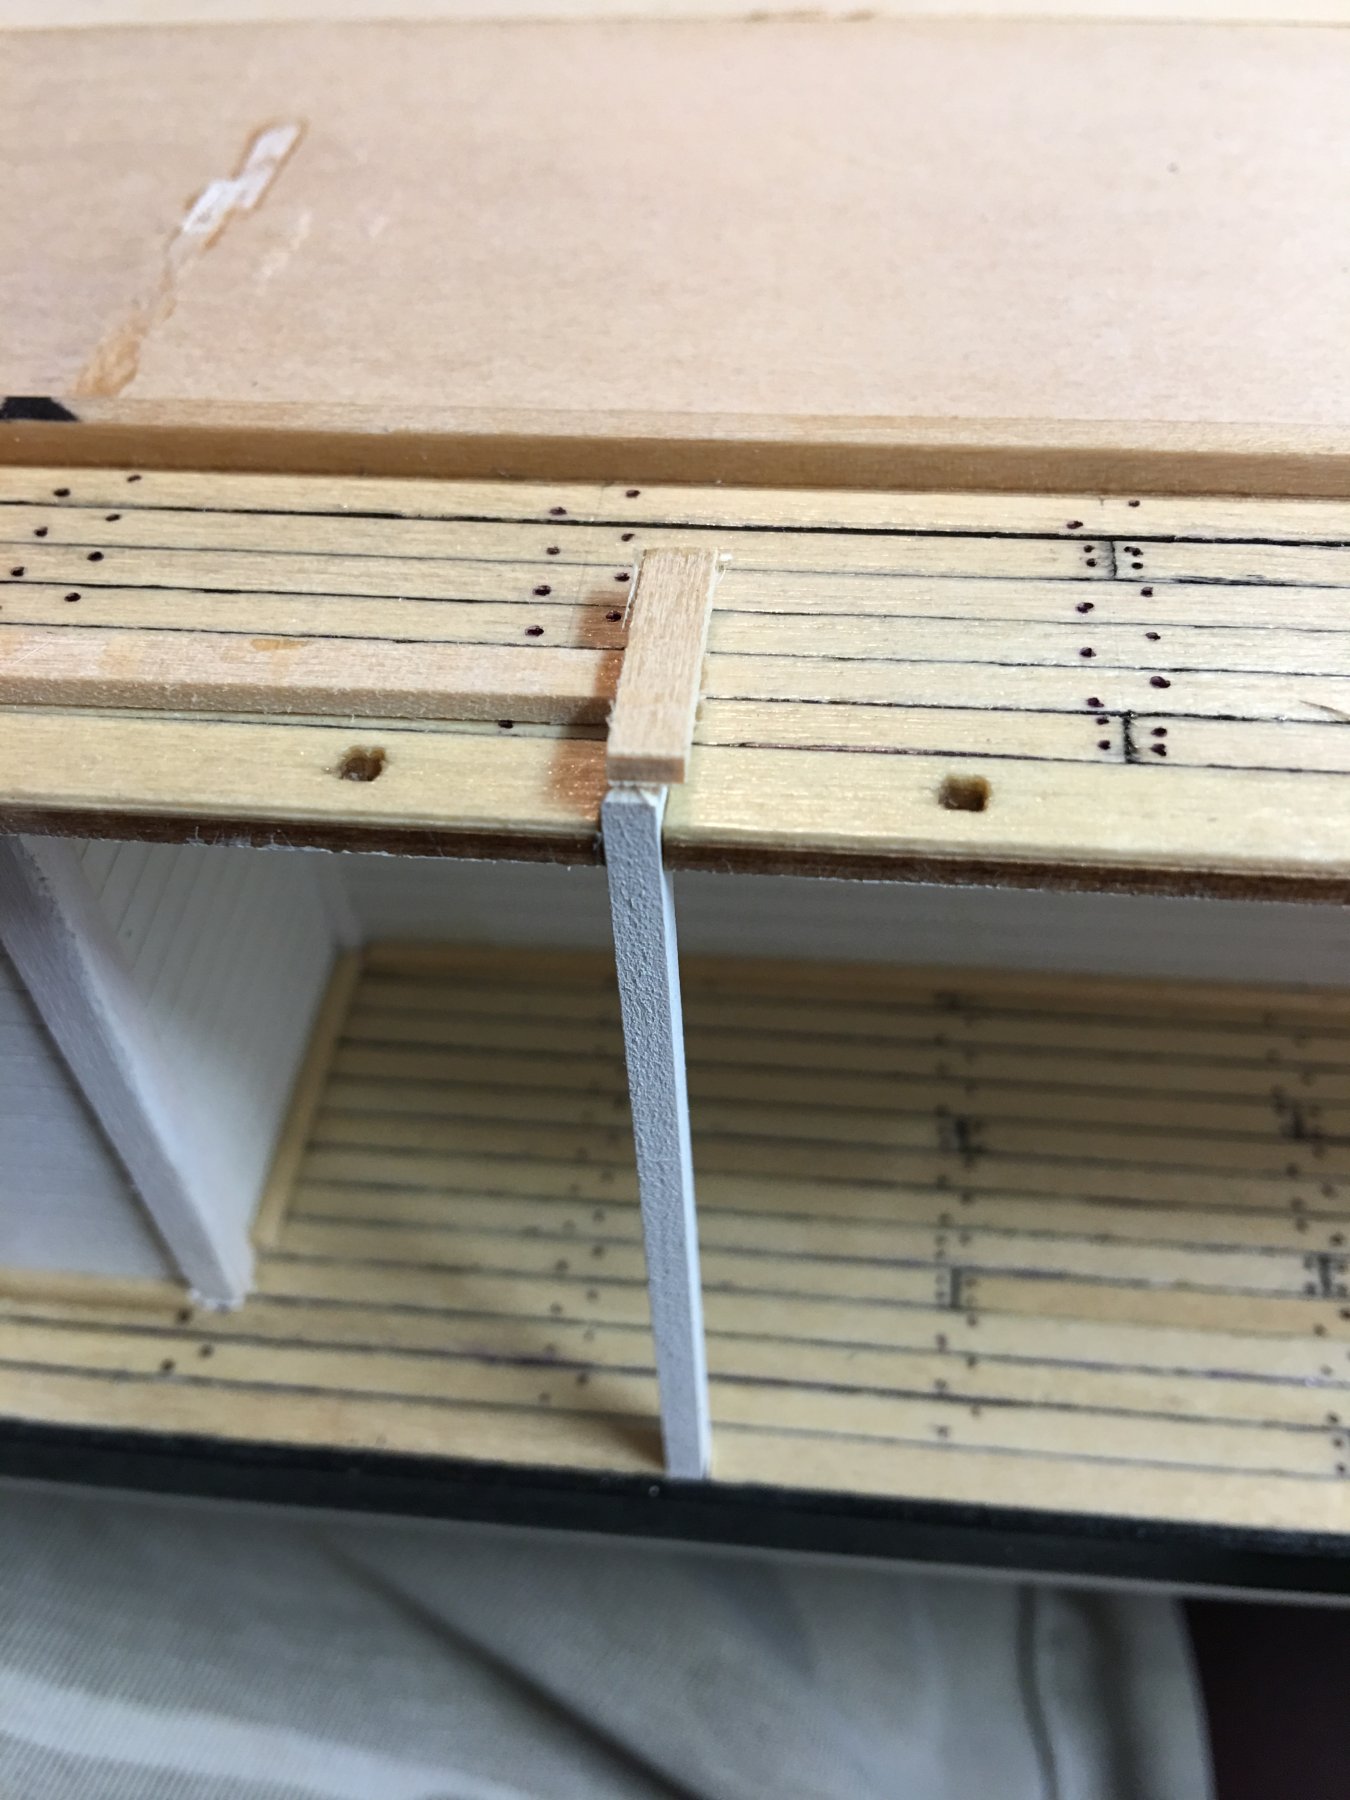
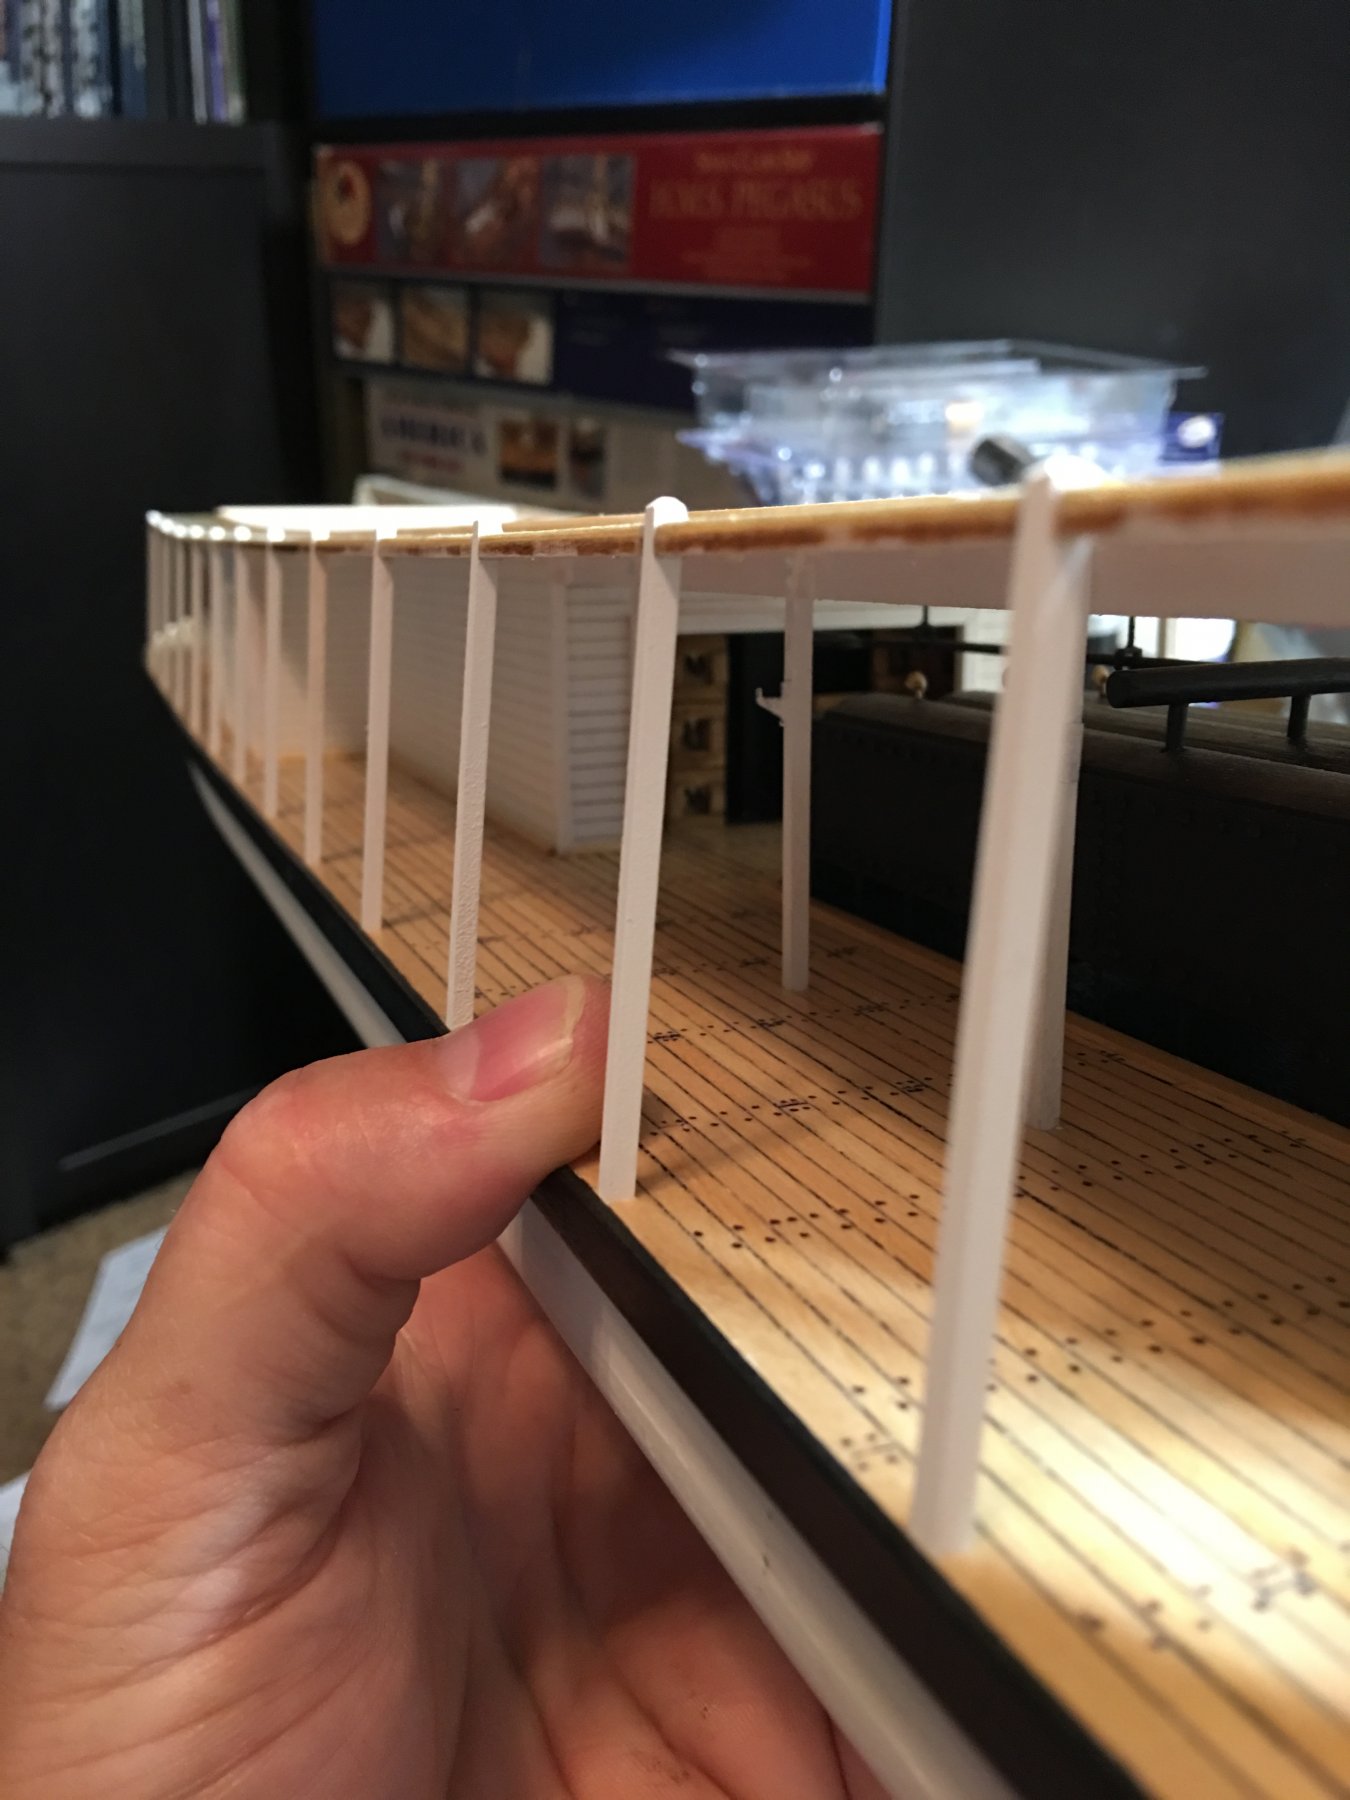
The bull rail brackets have been installed on the stationing, I think I am going to leave the bull rails off until I'm just about done. There are still several things that I need to do before installing them and they'll just be in the way.
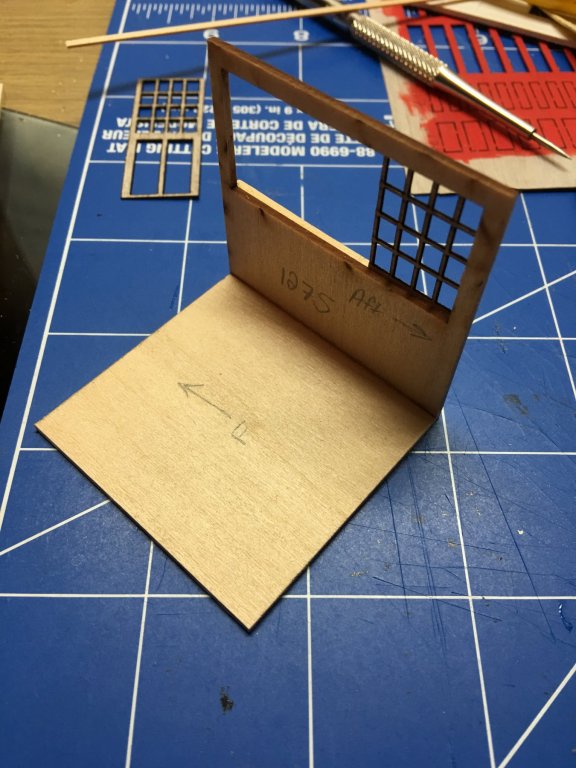
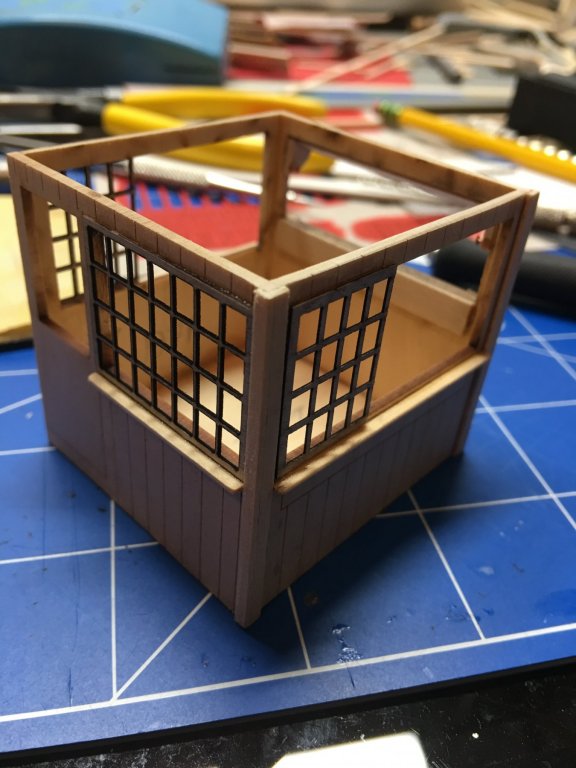
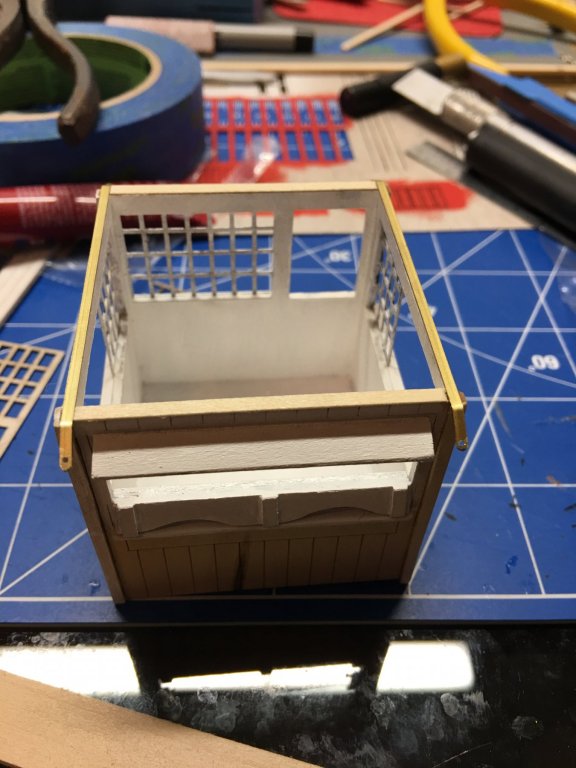
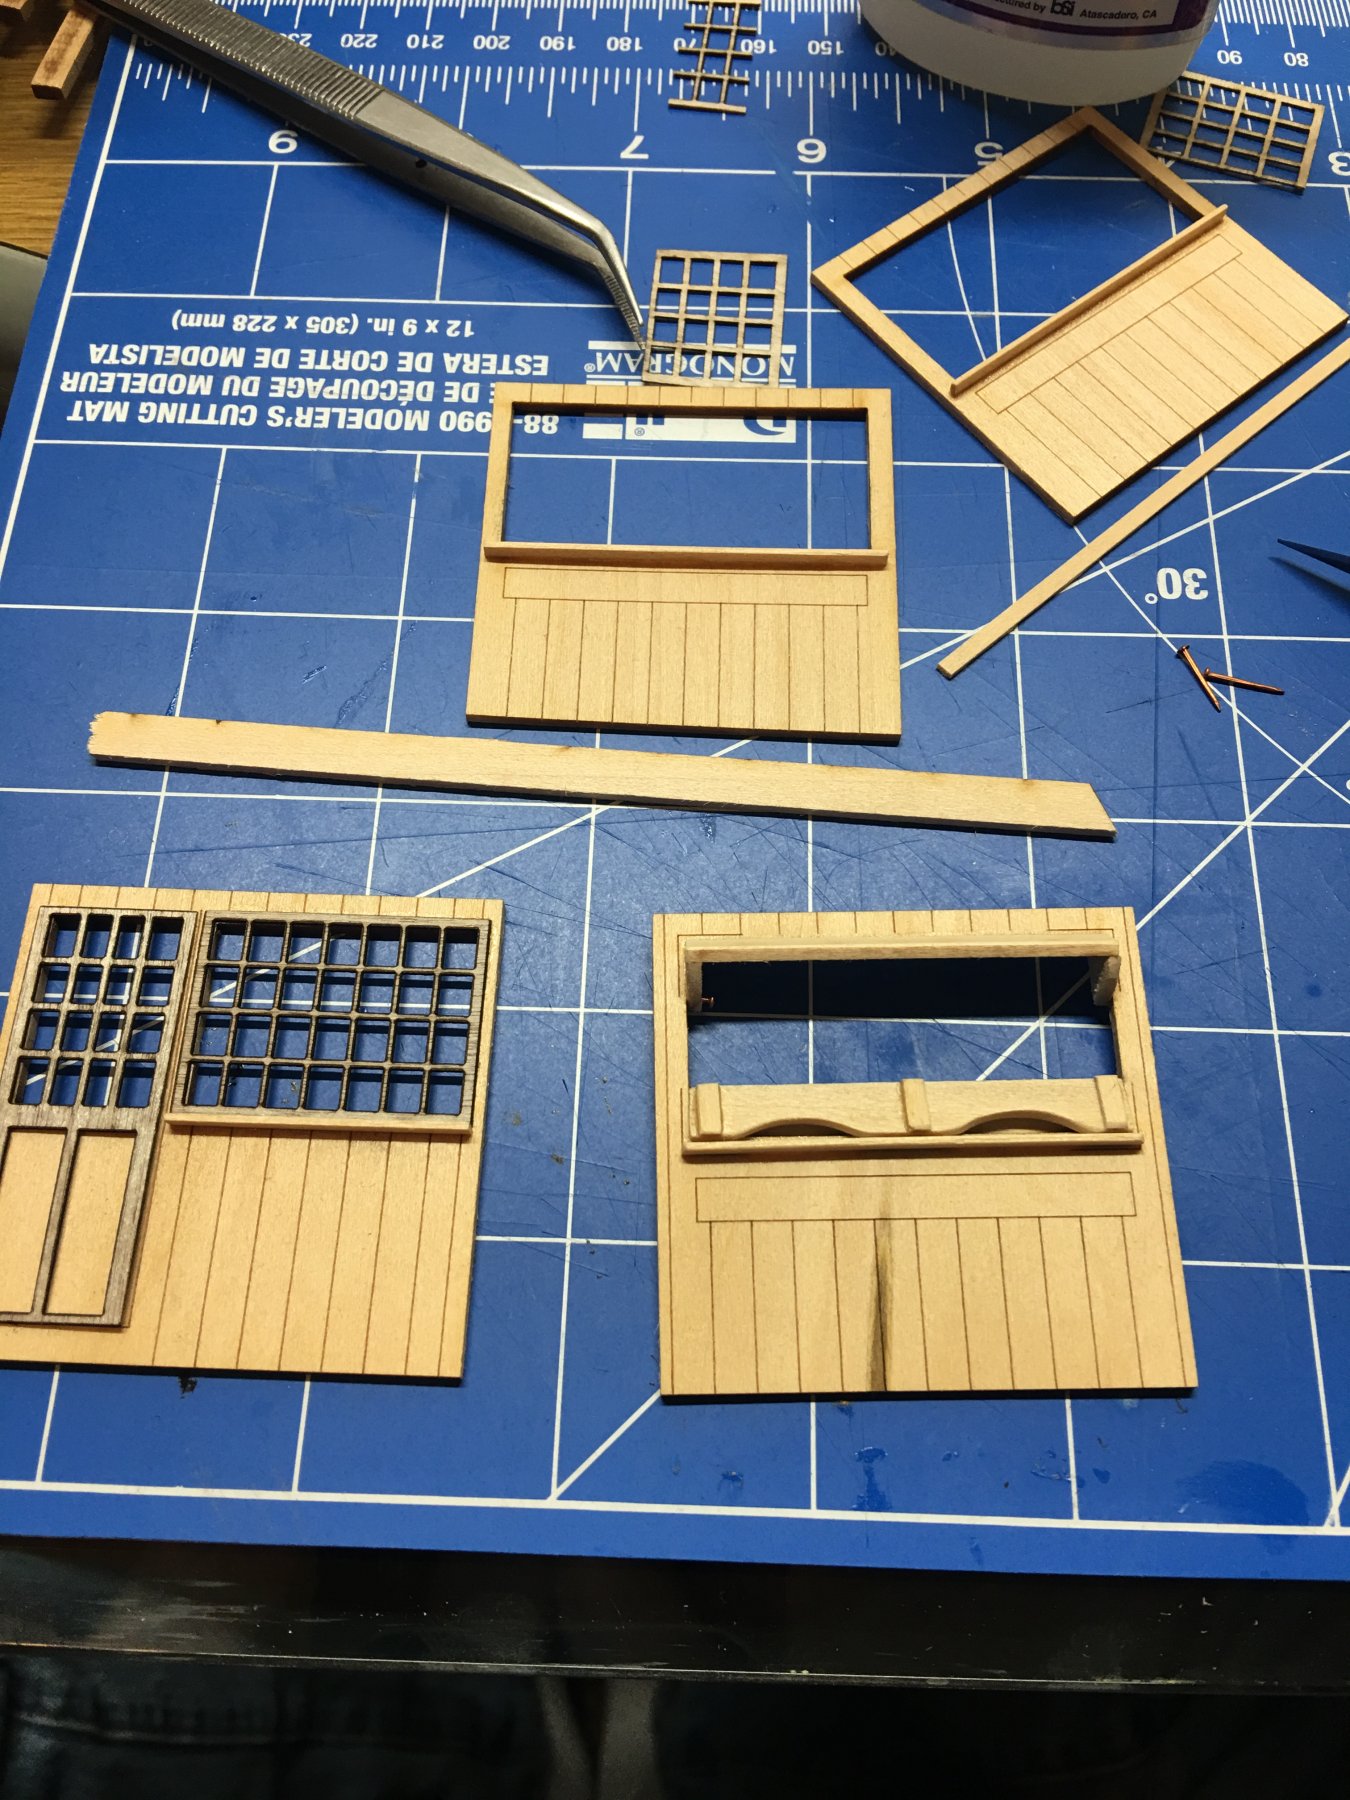
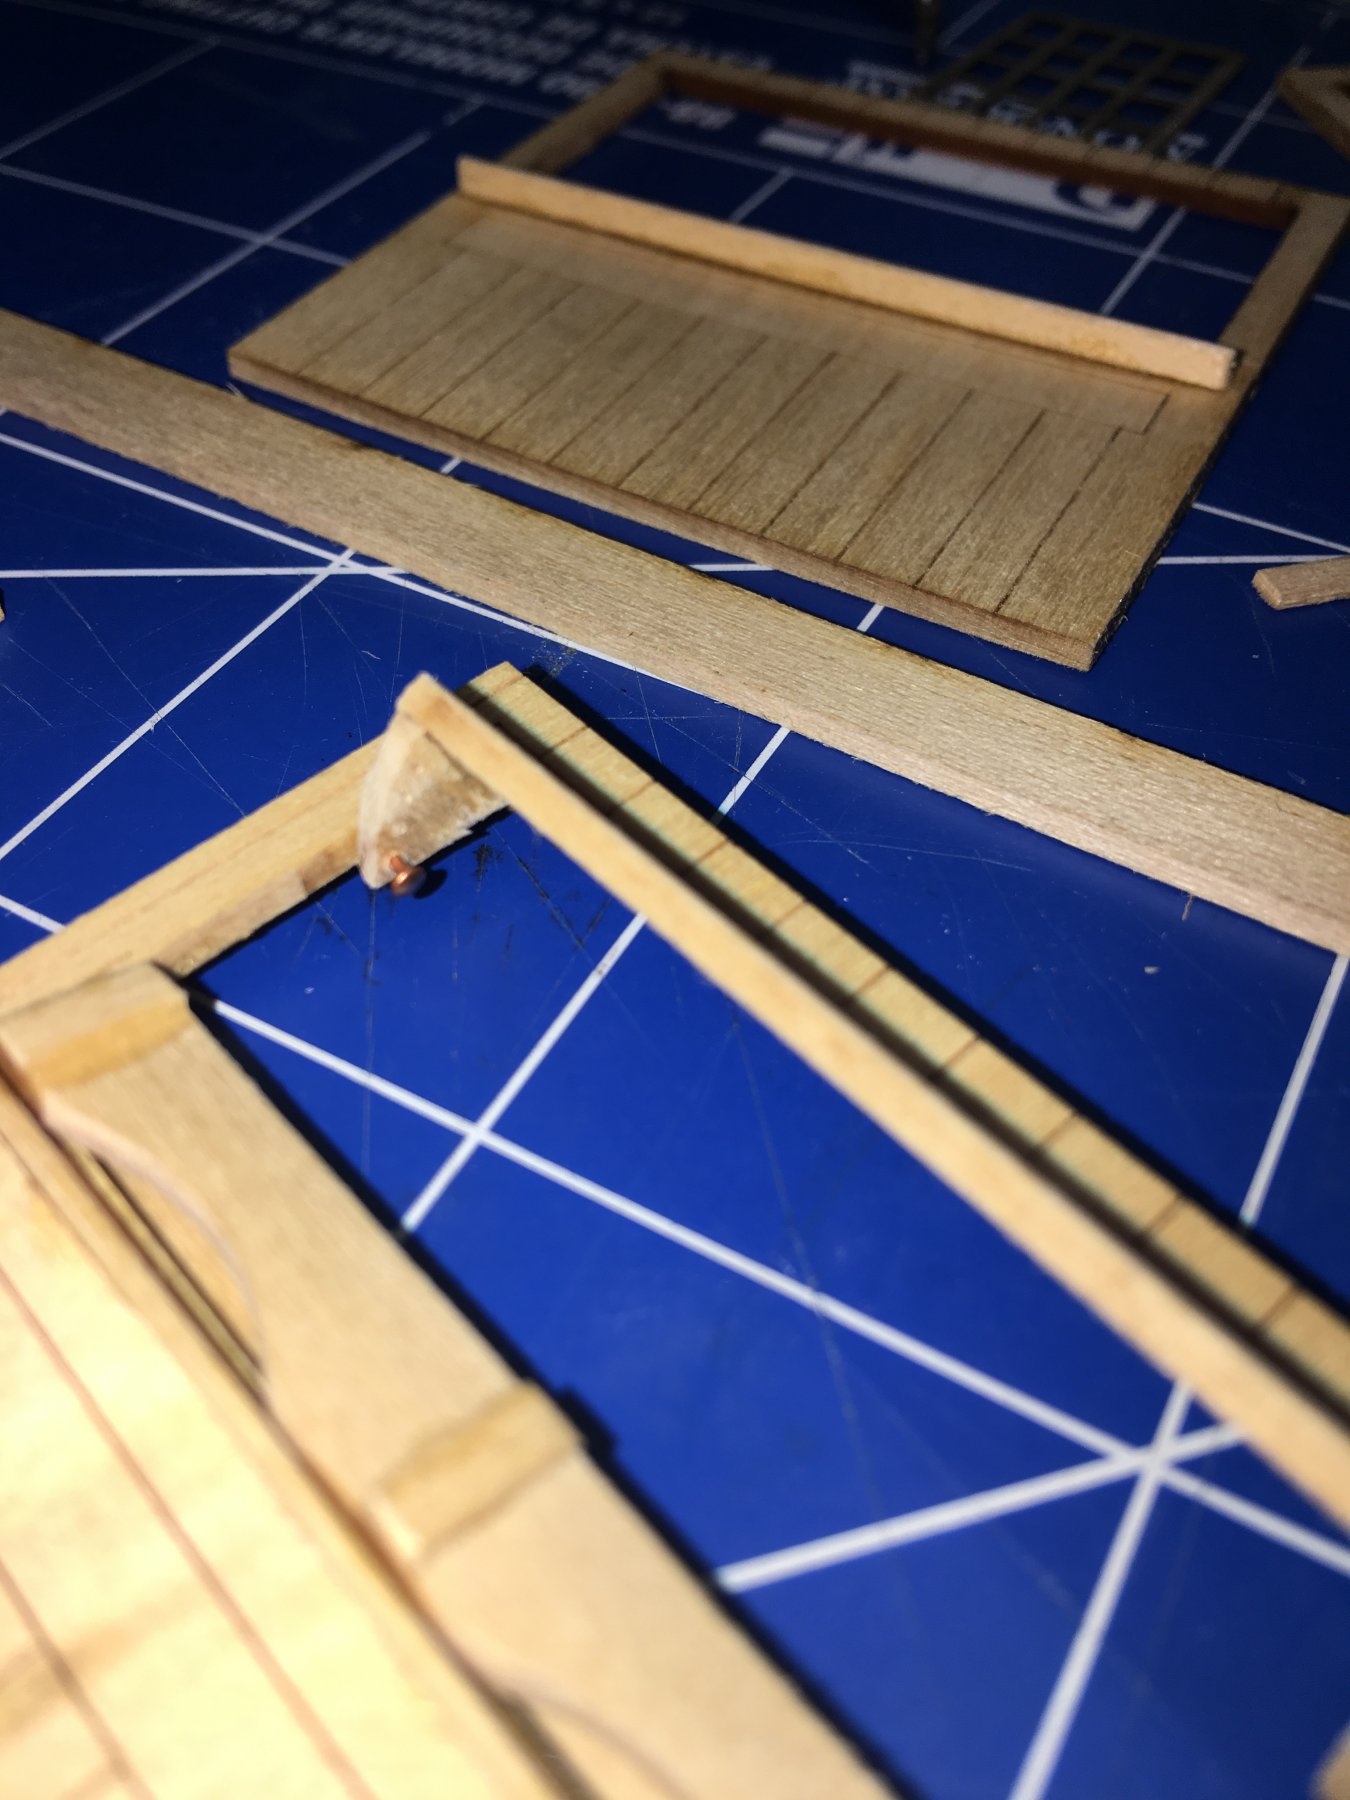
Work then began on the boiler deck walls. Getting the radius formed just right was pretty simple with the braces provided with the kit. Cutting the walls just right to where they would form around the braces without cutting all the way through was the biggest challenge.
Then came the tedious part of the build, adding all of the battens. Monotony at its best. I may have dozed off a time or two because I found a few that were not quite on the prescribed lines. Nothing a little paint can't hide though.
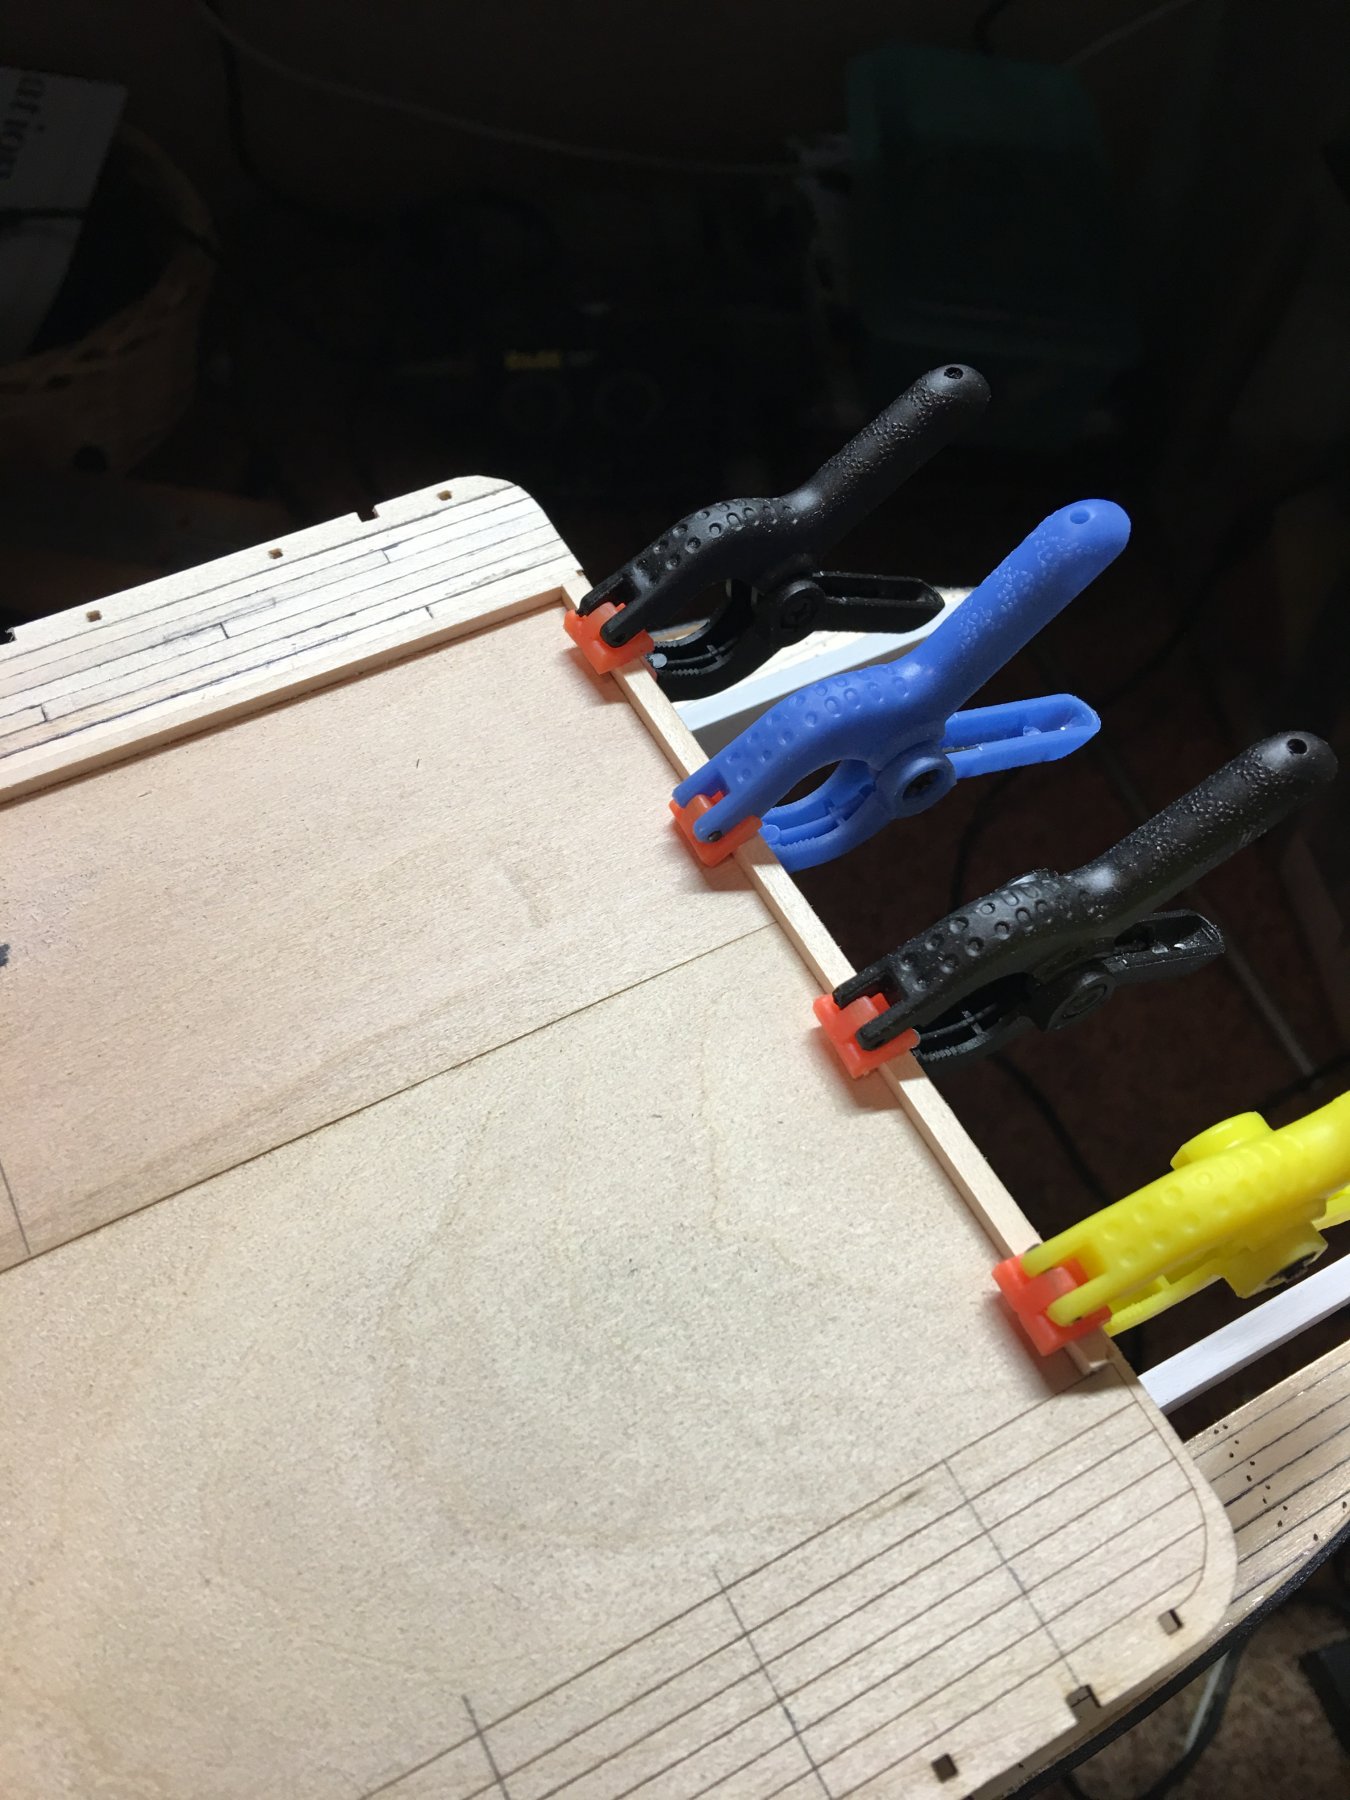
Besides adding all the battens, I think the toughest part of this build was getting the front wall lined up even and straight. The side walls had a slight bow to them which caused the curved part of the wall to want to lean out. Not a huge problem that a few clamps and rubber bands couldn't solve.
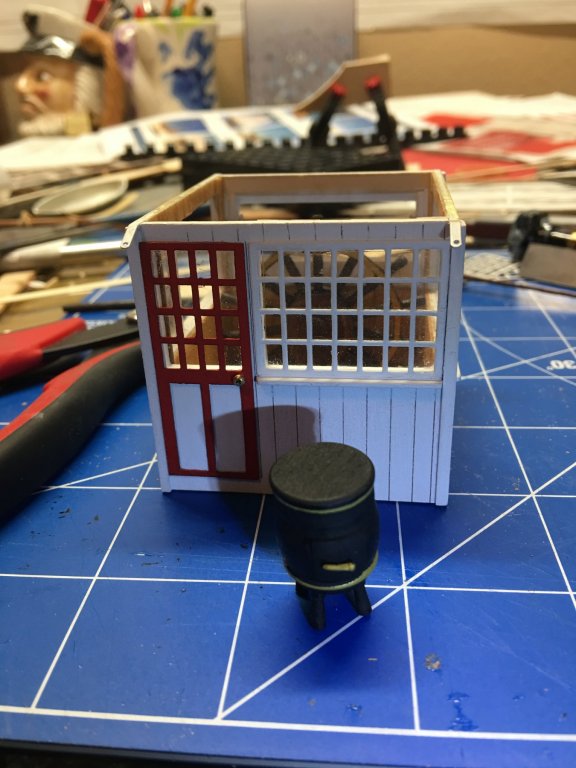
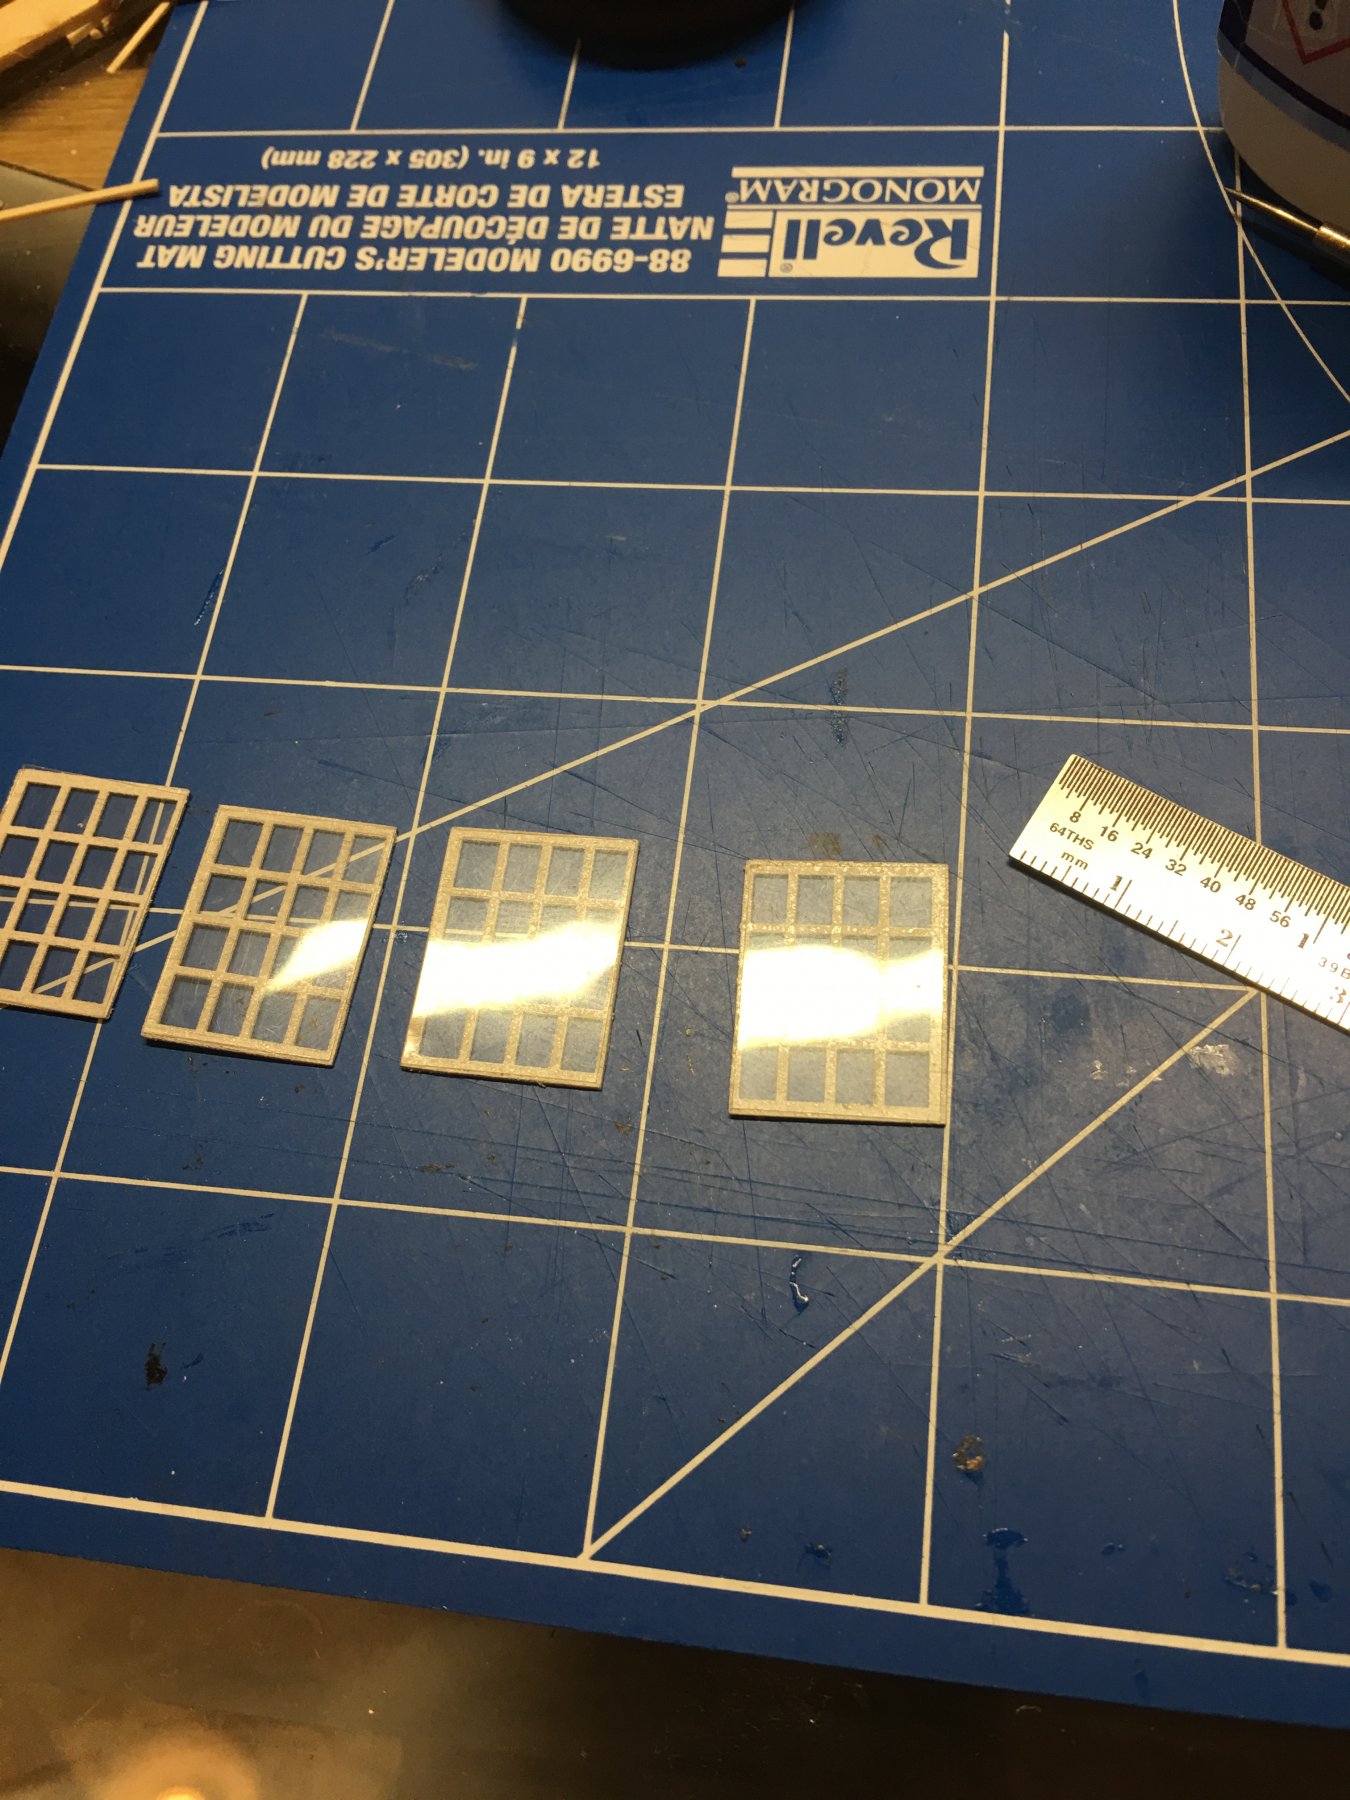
All the doors were added as well. I decided to go with red door frames. I was thinking that they just blended into the walls too much and pretty much disappeared with them painted white. I just need to go in and add the door knobs as soon as I can find my small beads that I use for knobs. I hate moving, I can never find anything when I need it.
I also started working on the forward stairs. I am contemplating adding hand rails to them as well as railings around the sides on the main deck stairs. Seems to me that it's sort of a hazard to leave them just open on the sides for some unsuspecting passenger (or crew) to inadvertently stumble over the side and down the steps. I know that OSHA wasn't around back then, but it seems that with a boat that carried passengers, some sort of safety features would be in place. Still not sure of how I am going to do them, I see a little more research in the making.
Finally, I decided that I was going to go with lighting things up. I did this on my King of the Mississippi build and liked the results, so I figured why not. I have some leftover LED's so I'm going to put them to good use. Only this time I am going to make it battery powered instead of AC. So I placed a few LED's along the main deck in places that would highlight some of the features on the deck.
I'm going to start working on the side staircase and making some bulkheads for the cabin walls. The supports that I have on there right now are not taking all of the bow out of the walls like I want them to. I figure about four should get them straight enough. We'll see. Now to go hunting for my door knob beads. Only four boxes to go through.
As always, thanks for looking.
-Brian