


mbp521
-
Posts
989 -
Joined
-
Last visited
Content Type
Profiles
Forums
Gallery
Events
Posts posted by mbp521
-
-
2 hours ago, vaddoc said:
If it wasn't for the rudders, I d say that the stern is only vertical at the midline, and gets a gradually steeper slope as it extends sideways. Maybe I am completely wrong though, difficult to orient on the photo of the plans
Vaddoc,
Those are my intentions to try and get the compound curve right.
The radius of the curve is tight going from a vertical 90° angle to an angle of about 43° angle in a short distance. I have a plan that just may work to get it corrected. I will move the hull planks to the same line as the upper deck planks (the green line on my previous post), change the angle of the last two bulkheads to compensate for the lengthened hull planks and fill the void with body filler. If I can get a nice smooth edge with a putty knife, running it along the top edge of the filler blocks and the edge of the extended hull bottom planks, the body filler should form the correct angle transitions from the stern-post to the hull sides.
This is the plan, anyway. We'll see how it works out. I'll be sure to post pictures of my progress.
- Brian
-
Hello again everyone,
Time again for another update.
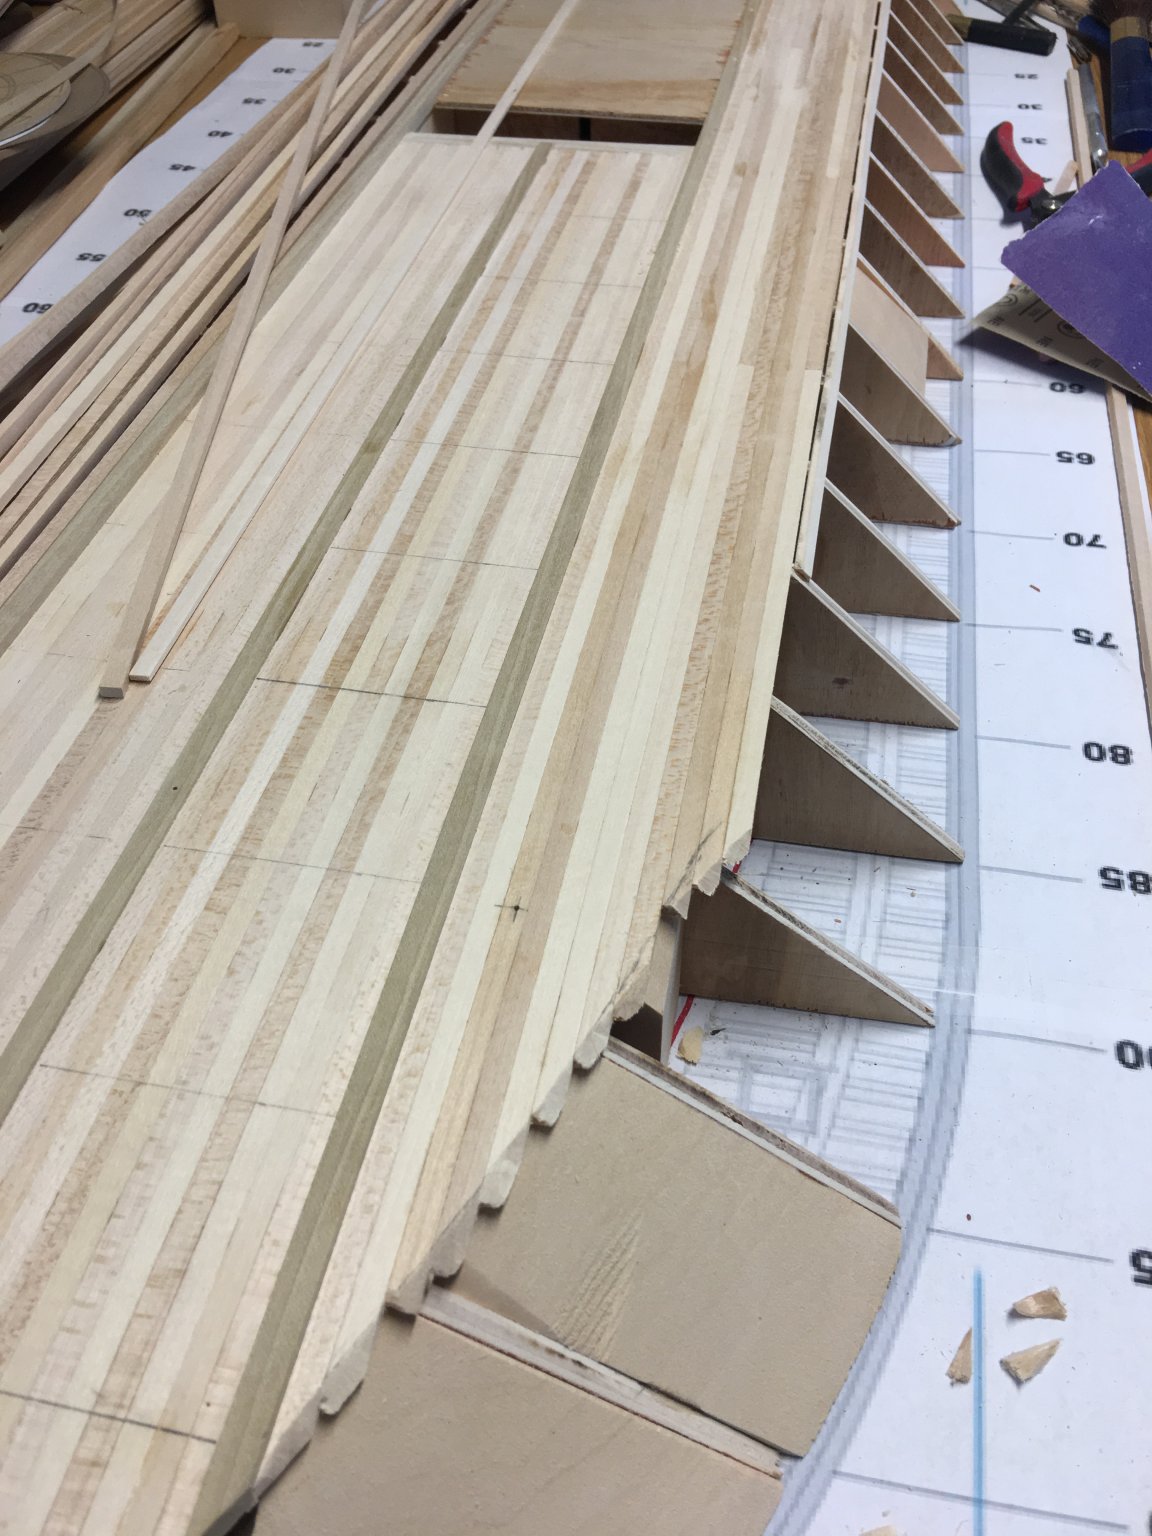
So things were moving along pretty smoothly. I finished planking the Starboard side of the hull bottom.

And then completed the planking of the port side bottom.
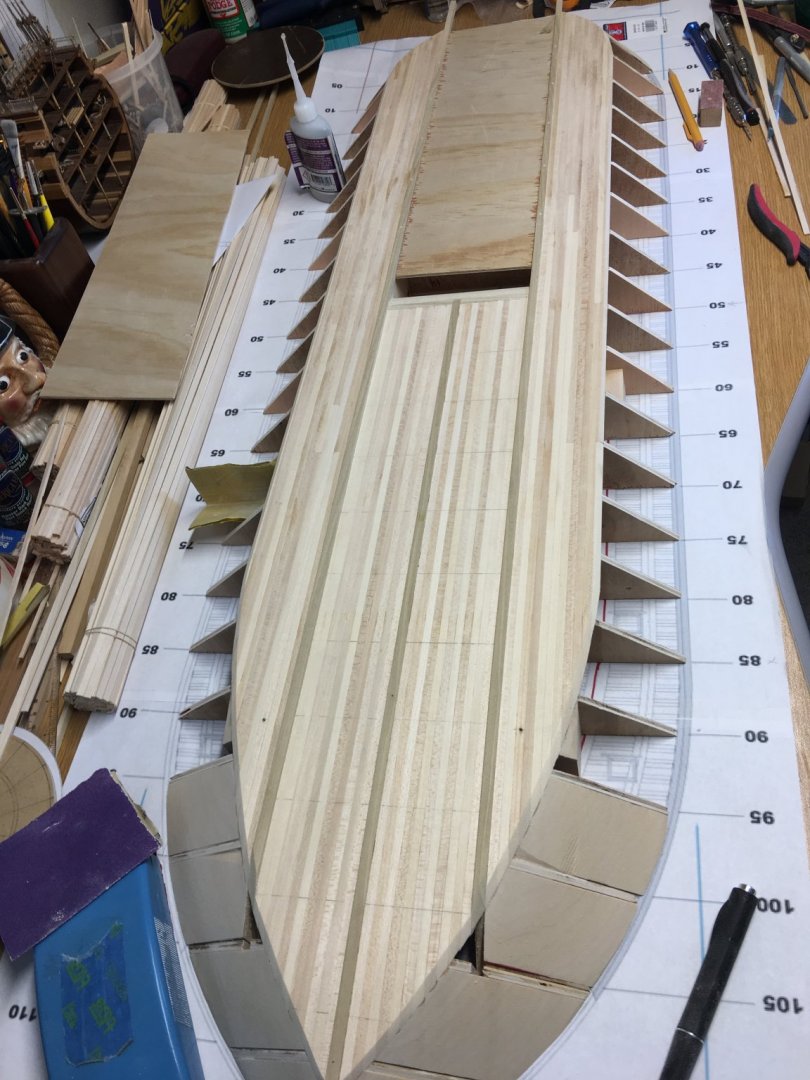
Once this was completed the ends of the planks were trimmed and sanded smooth to blend with the filler blocks.
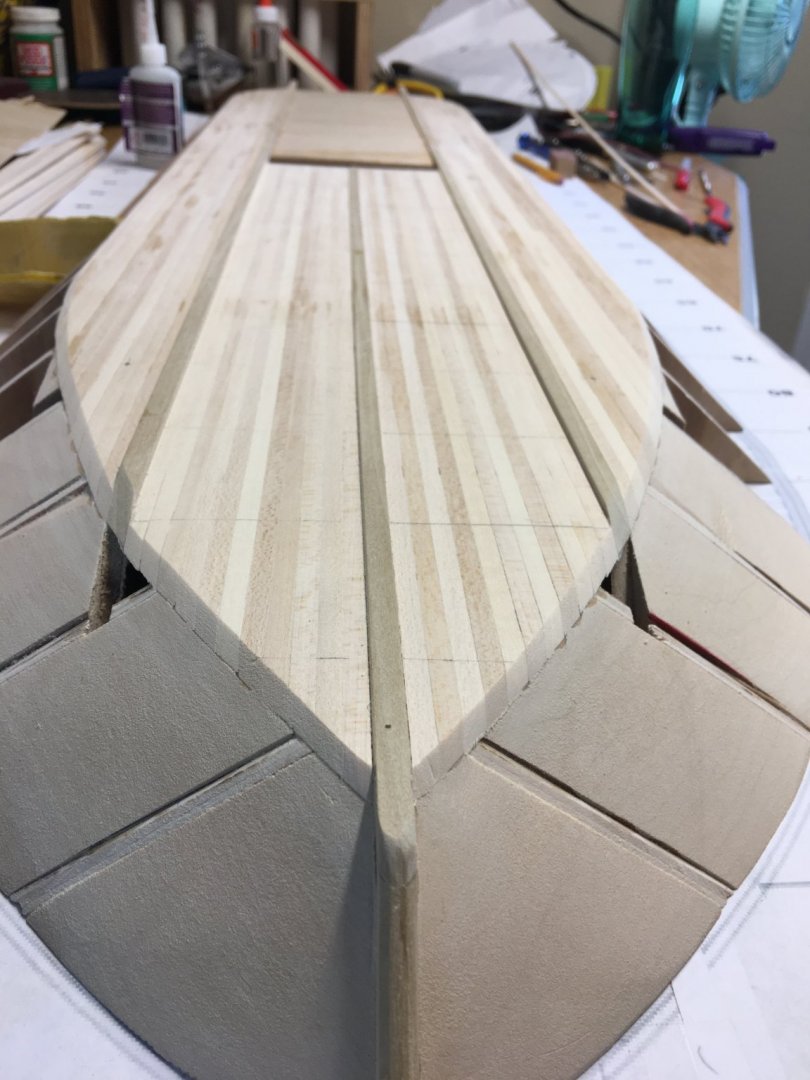
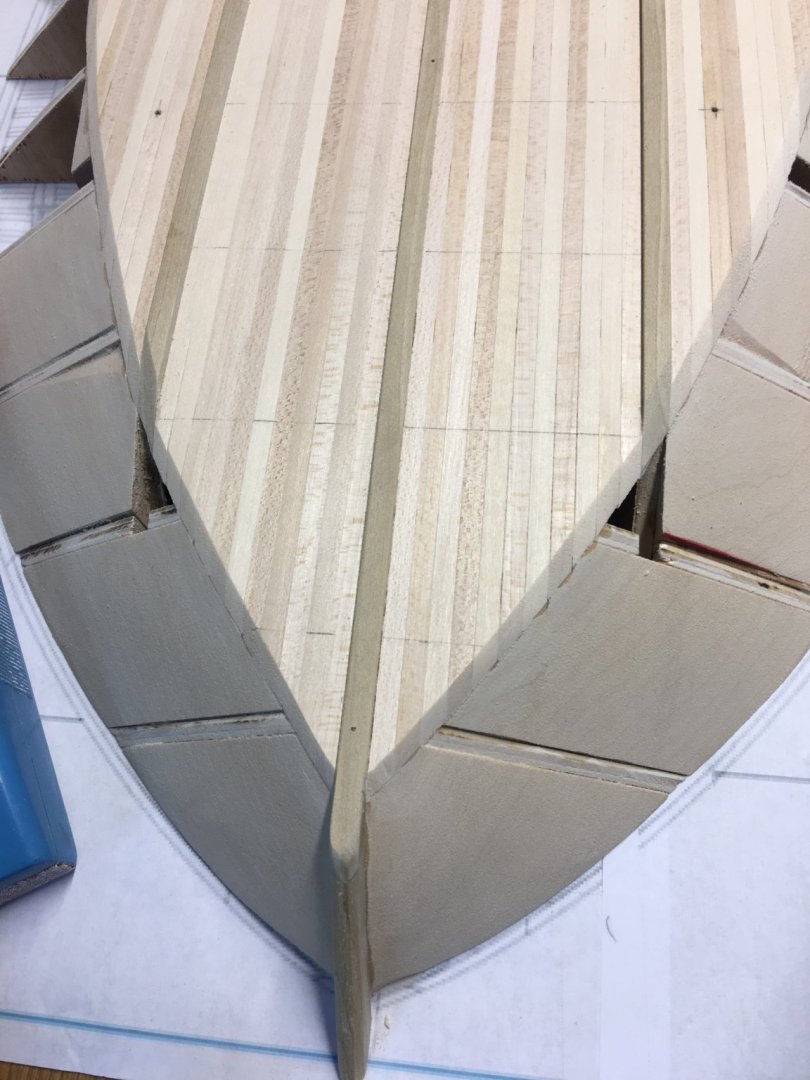
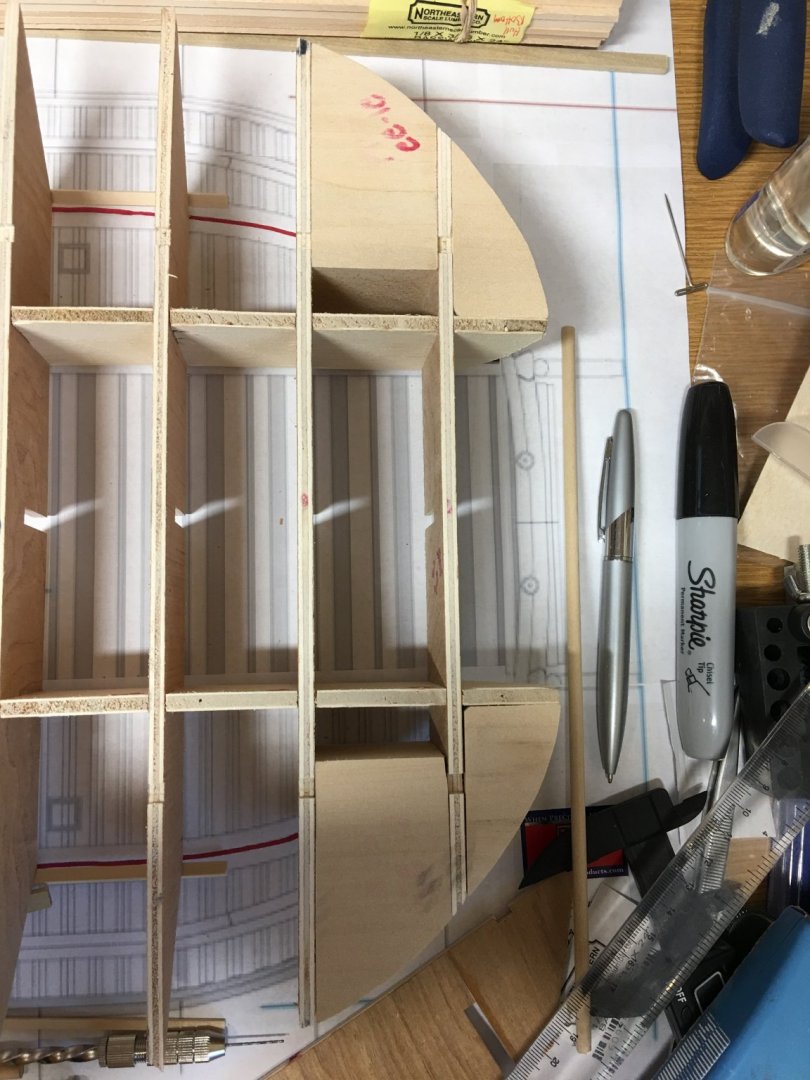
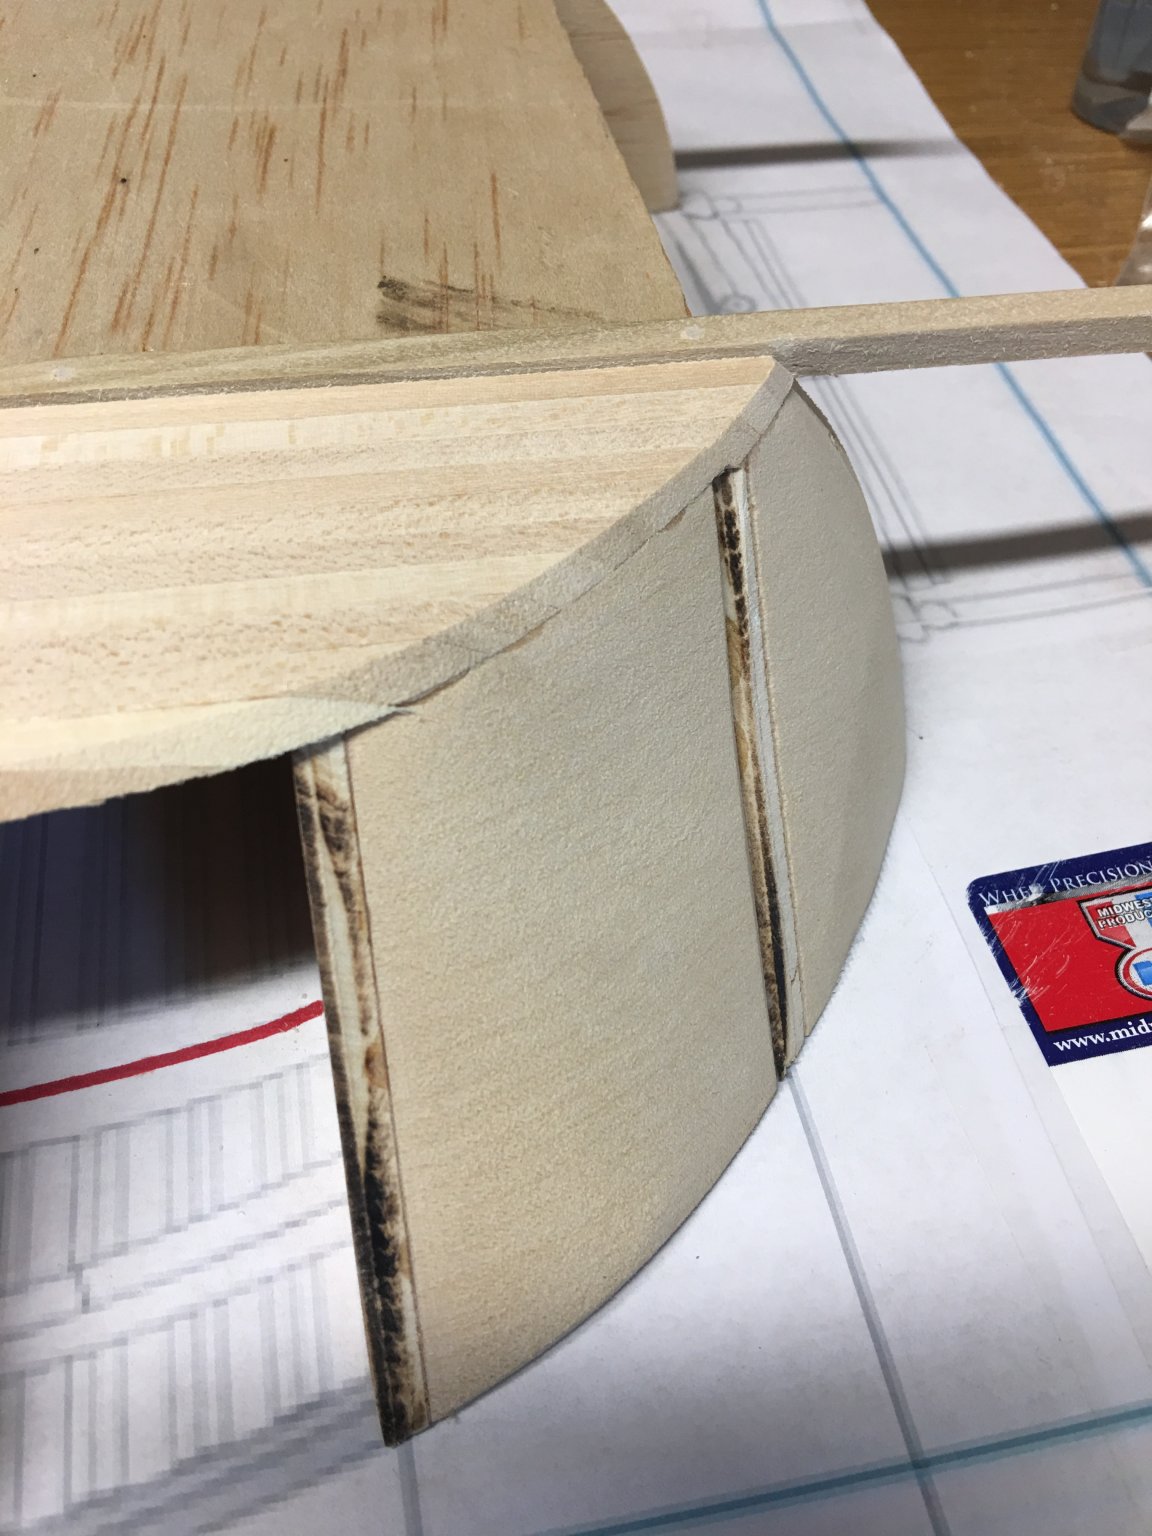
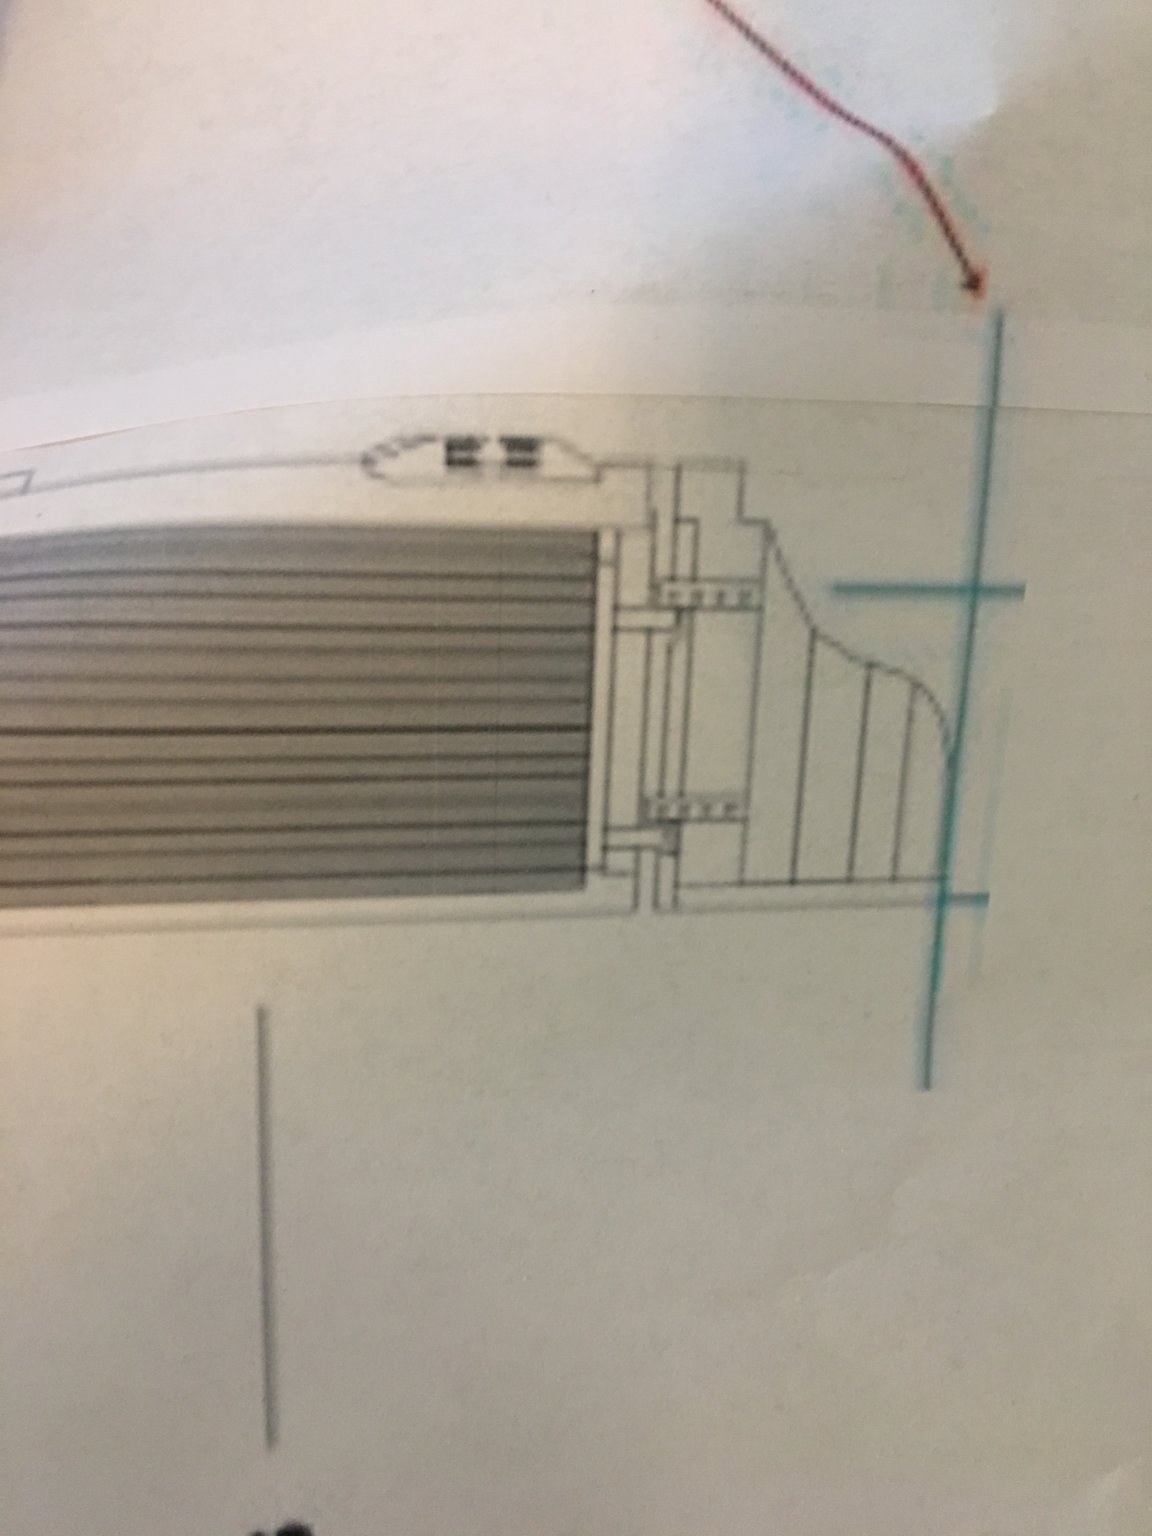
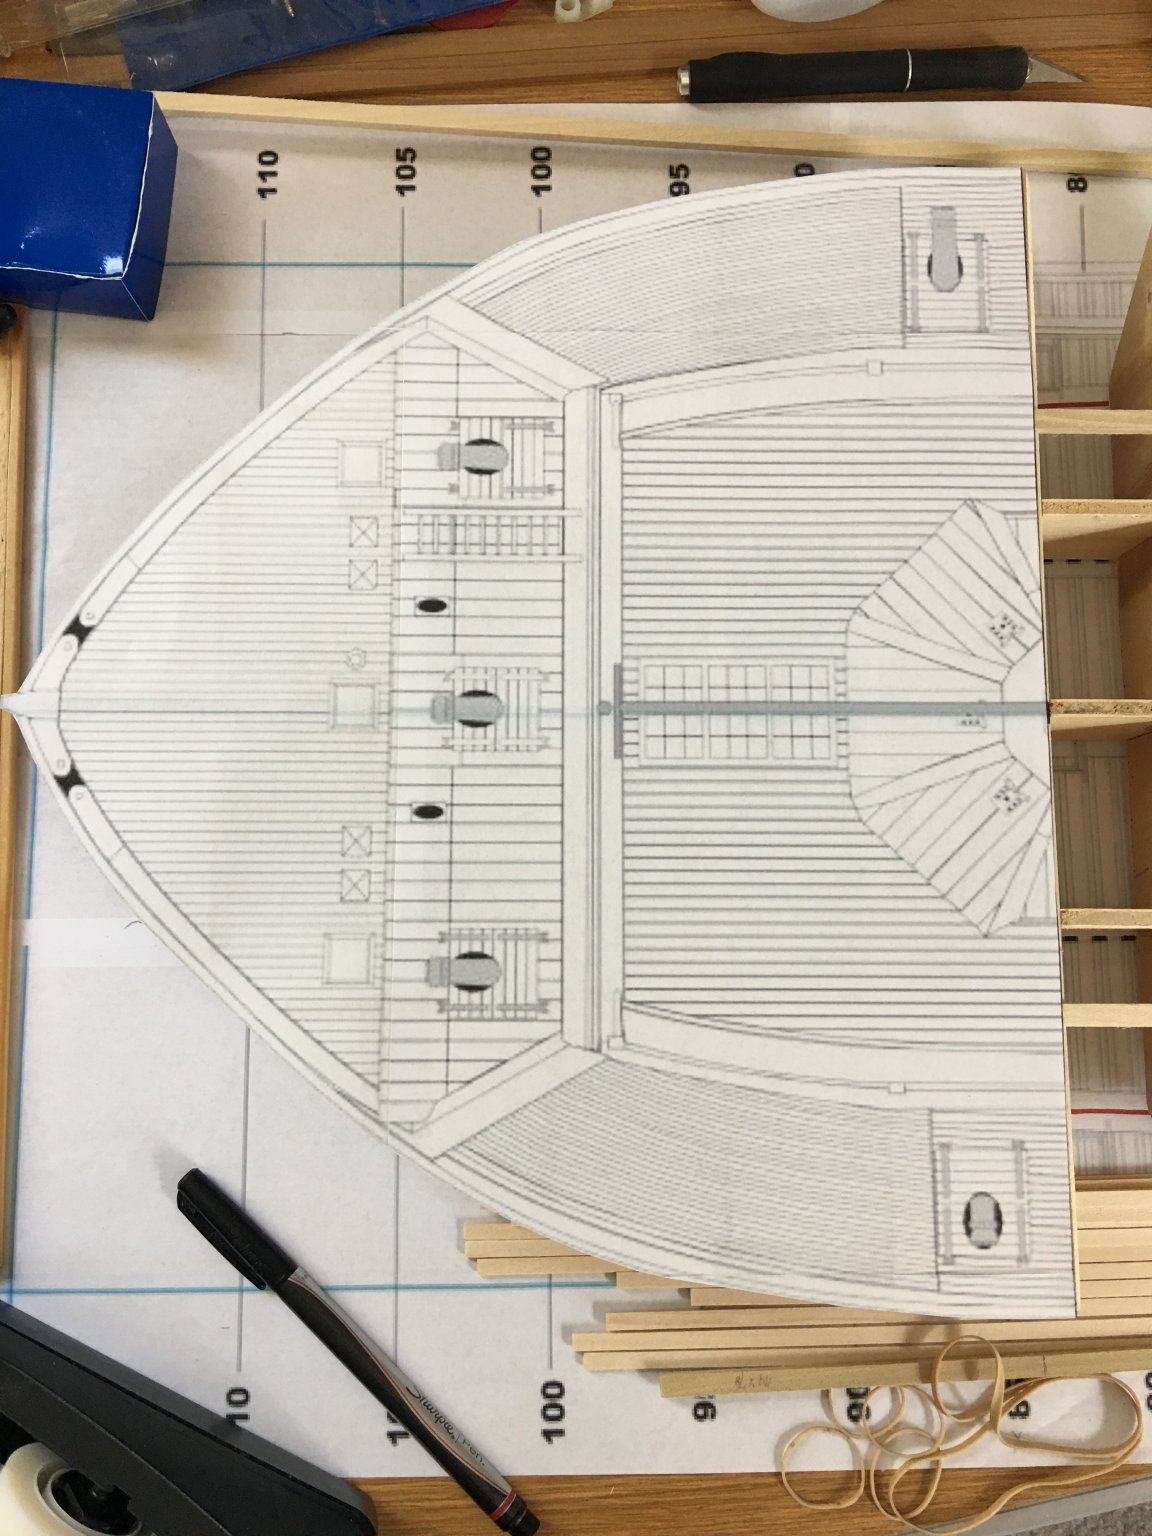
It is at this point where I ran into my first real snag. It was while I was sanding the aft filler blocks and hull planks when I noticed that the contour of the hull didn't seem right. According to the hull plans, the flattest part of the hull bottom should follow the red line (as drawn on the plans), and this is how I built it. In looking at this view the flat bottom of the hull would stop about a half inch shorter than the bulwarks at the top of the deck. This would create a slightly curved stern-post at the back end of the false keel.


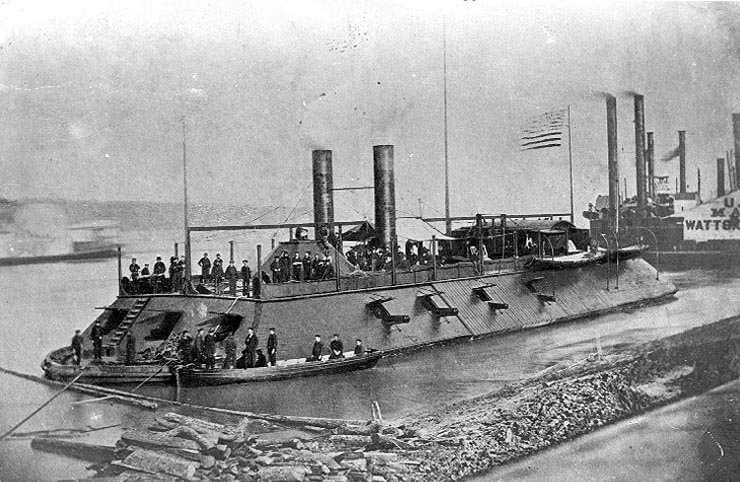
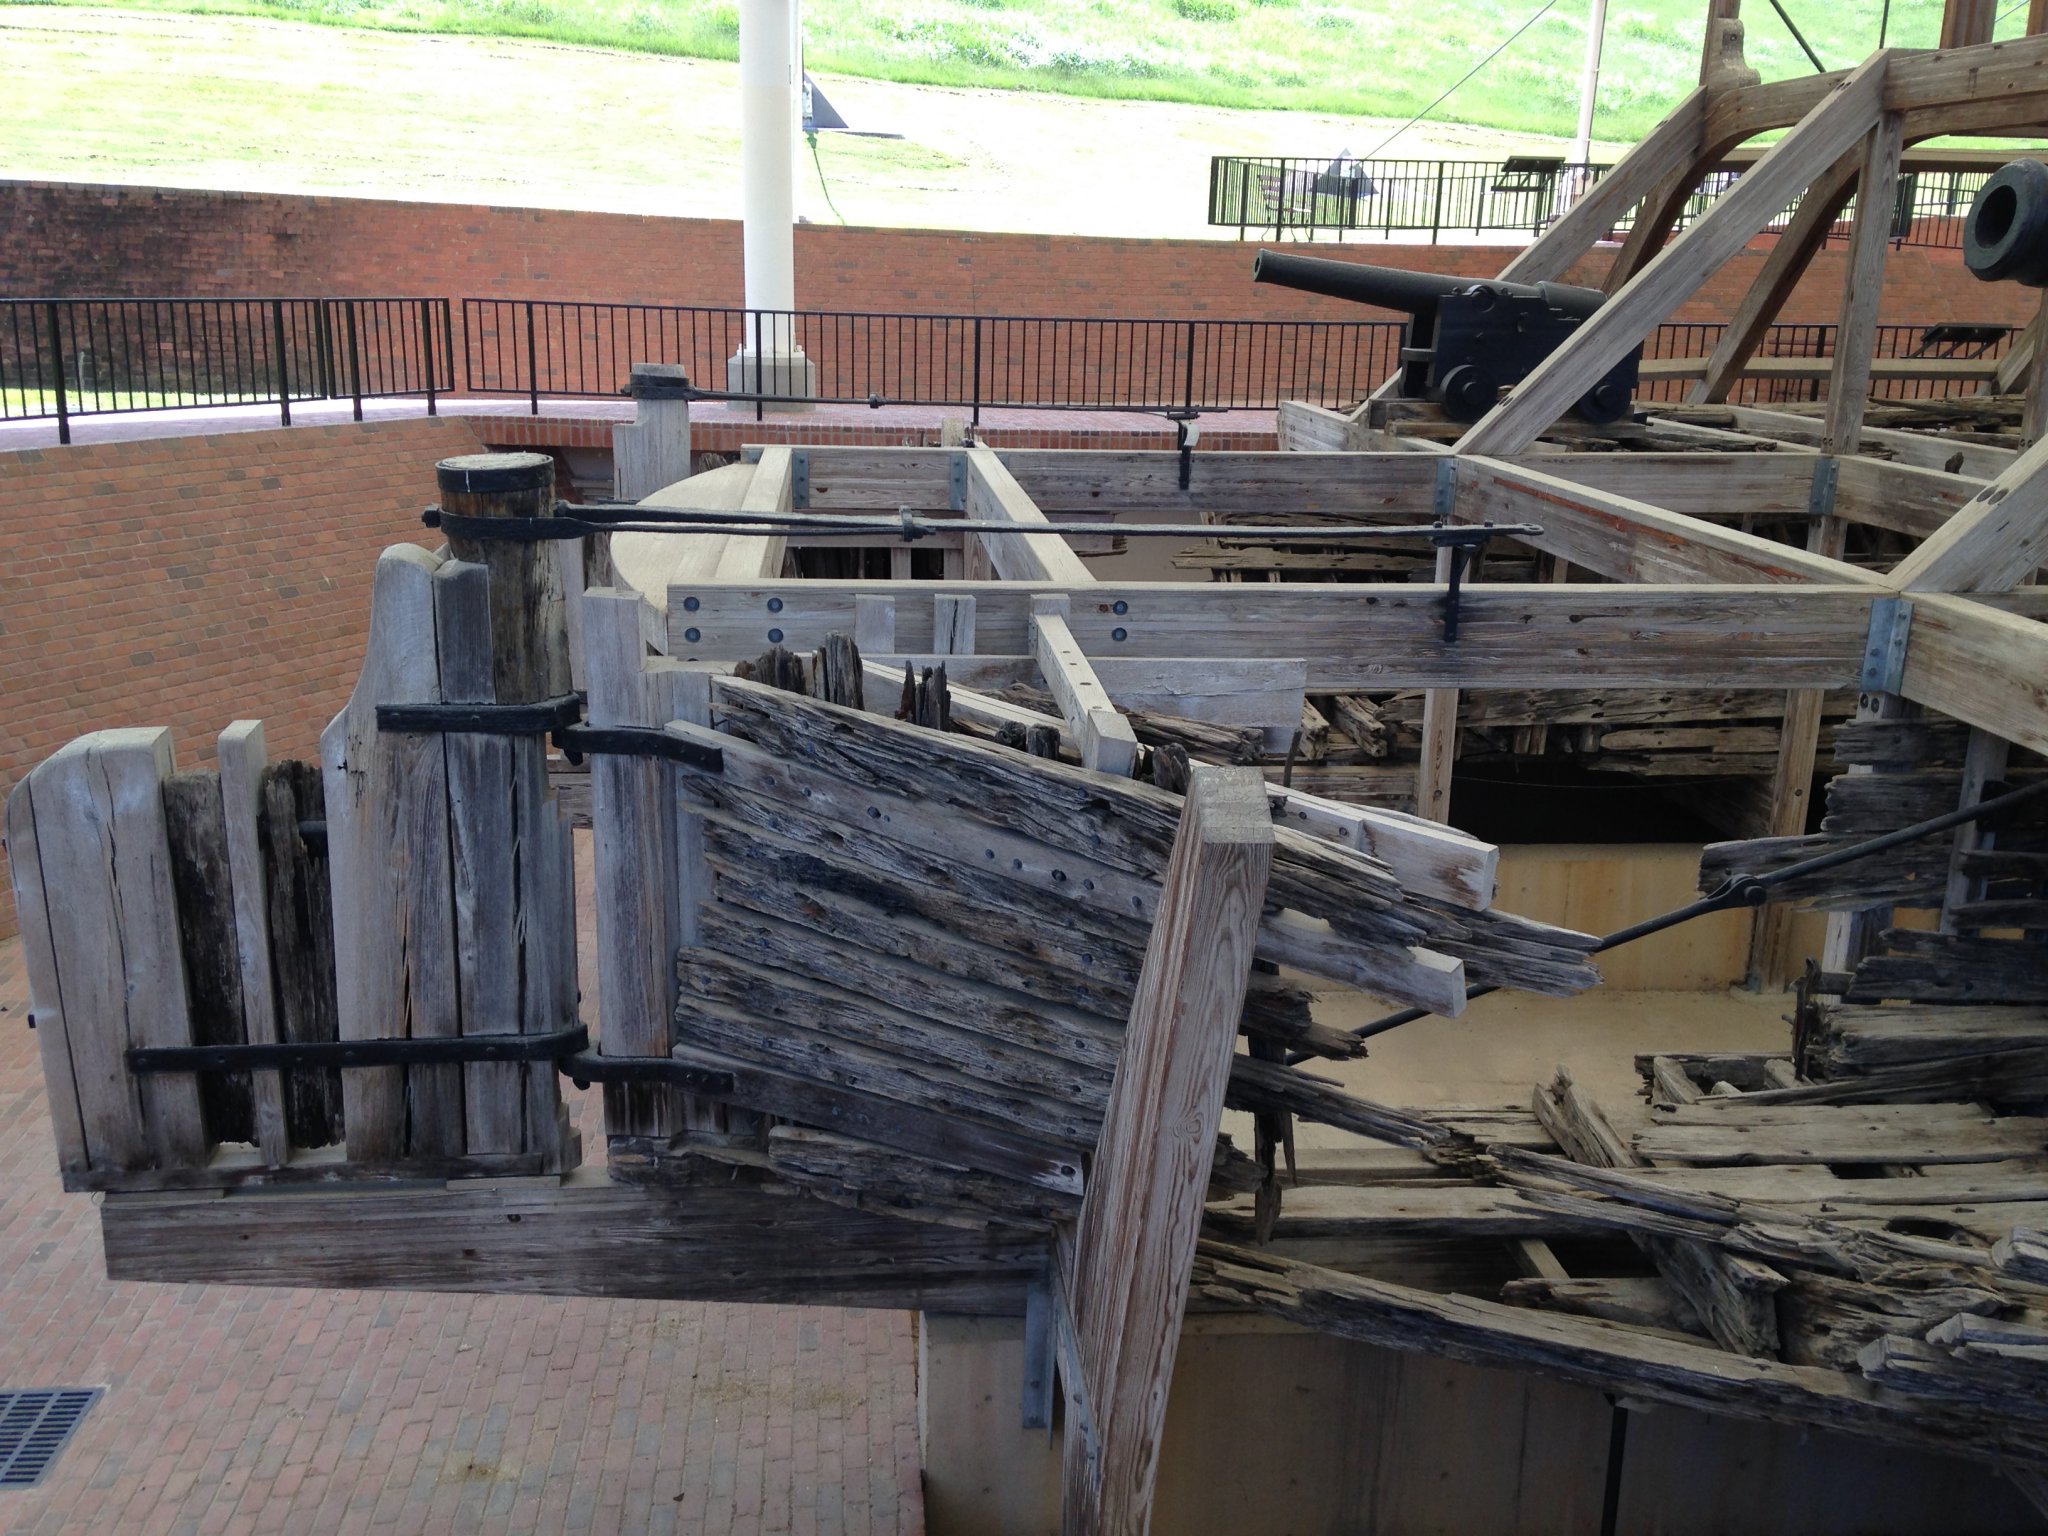
However, if you look at the elevation plans the hull side planking runs straight up and down at the stern-post and rudder.

This is also visible on the actual ship.

So I determined that the hull bottom should curve more like the green line drawn on the plans, creating a more 90 degree angle on the false keel and stern-post.
I'm not sure if I am just misreading the plans, or if there is truly an error on them. This is my first scratch build, so I could have just totally misinterpreted the plans, but following the red line all the way around seems to line up perfectly with the hull bottom with the exception of the aft end.
So, in order to make it look right, I'm thinking I will need to extend the hull bottom out to the green line and add some more filler to get the proper contour of the hull. Please feel free to chime in if I am way off base.
...anyway, time to make some more sawdust.
Thank you for looking.
- Brian
-
-
Eric,
She looks great sitting there in her place front and center in the room. Great place for her. I’d love to see a picture of her sitting next to the Bertrand. Even though they are different scales, it’d be a neat photograph.
Here’s hoping your stress levels go down in the next few weeks. Best of luck on your in-laws move. Really looking forward to your Longship build.
-Brian
-
30 minutes ago, vaddoc said:
This is an unusual boat Brian. Very beamy and little draught as you mentioned but also very little overall height and those slopping sides would guide waves over the ship. Was it intended for open water or just for coastal/river cruising?
You are doing a good job and indeed, this is a big boy!
Vaddoc,
She is indeed big and unusual. Her the characteristics and her history are what draw me to build her. That, and the fact that there aren't many American Civil War Iron Clad builds out there.
These boats were pretty much built for patrolling inland rivers and bombardment of forts. They weren't designed for open water. The waves of the sea would probably swamp them in a second, given the fact that their decks were just inches above the waterline.
The sloped sides were set up to deflect enemy fire from cannon and bullets. This is one of the reasons their opponents changed tactics against them and started lobbing cannon balls at them since the sides were the only parts that were armored. They would attack from the top and the cannon balls would penetrated the more vulnerable decks. This particular ship was actually sank by torpedo, or in modern terminology, a mine that was triggered remotely which penetrated her unarmored hull and caused her to sink in 12 minutes. Fortunately, all of the crew made it out alive.
-Brian
-
17 hours ago, Cathead said:
Four mounting points make a lot of sense, I did the same thing with Arabia. These flat, wide bottoms are perfect for that and I feel a lot better with the foursquare support. Treenailing in the false keels is a good touch, too.
Four points definitely makes sense. This will be the first time I’ve done it this way. My KotM and Chaperon are two pointed but they sit flat on their hulls and the anchor points just hold it in place. For this one I want it to sit above the base to give a better view of the unique hull design.
16 hours ago, KeithAug said:Fascinating subject for a model - looking forward to the next instalment.
Thank you Keith. I feel these types of ships have somewhat been forgotten in the model building world and hopefully building her will spark an interest in them.
-Brian
-
Magnificent results Eric. She came out looking stunning!
I'm sorry to see you have finished her because that means an end to this wonderful build log. I've picked up so much knowledge of the steam era as a result. I am now chomping at the bit to see what your next project is.
Don't keep us waiting too long.
-Brian
-
Hello Everyone,
It's been a little hectic over here since my last update. With the warm weather we had several of our goats give birth within a few days of each other, so time has been split between nursing kids and my build.
I did manage to make some progress on my Cairo though (along with a lot of sawdust) and her hull is finally starting to take shape.
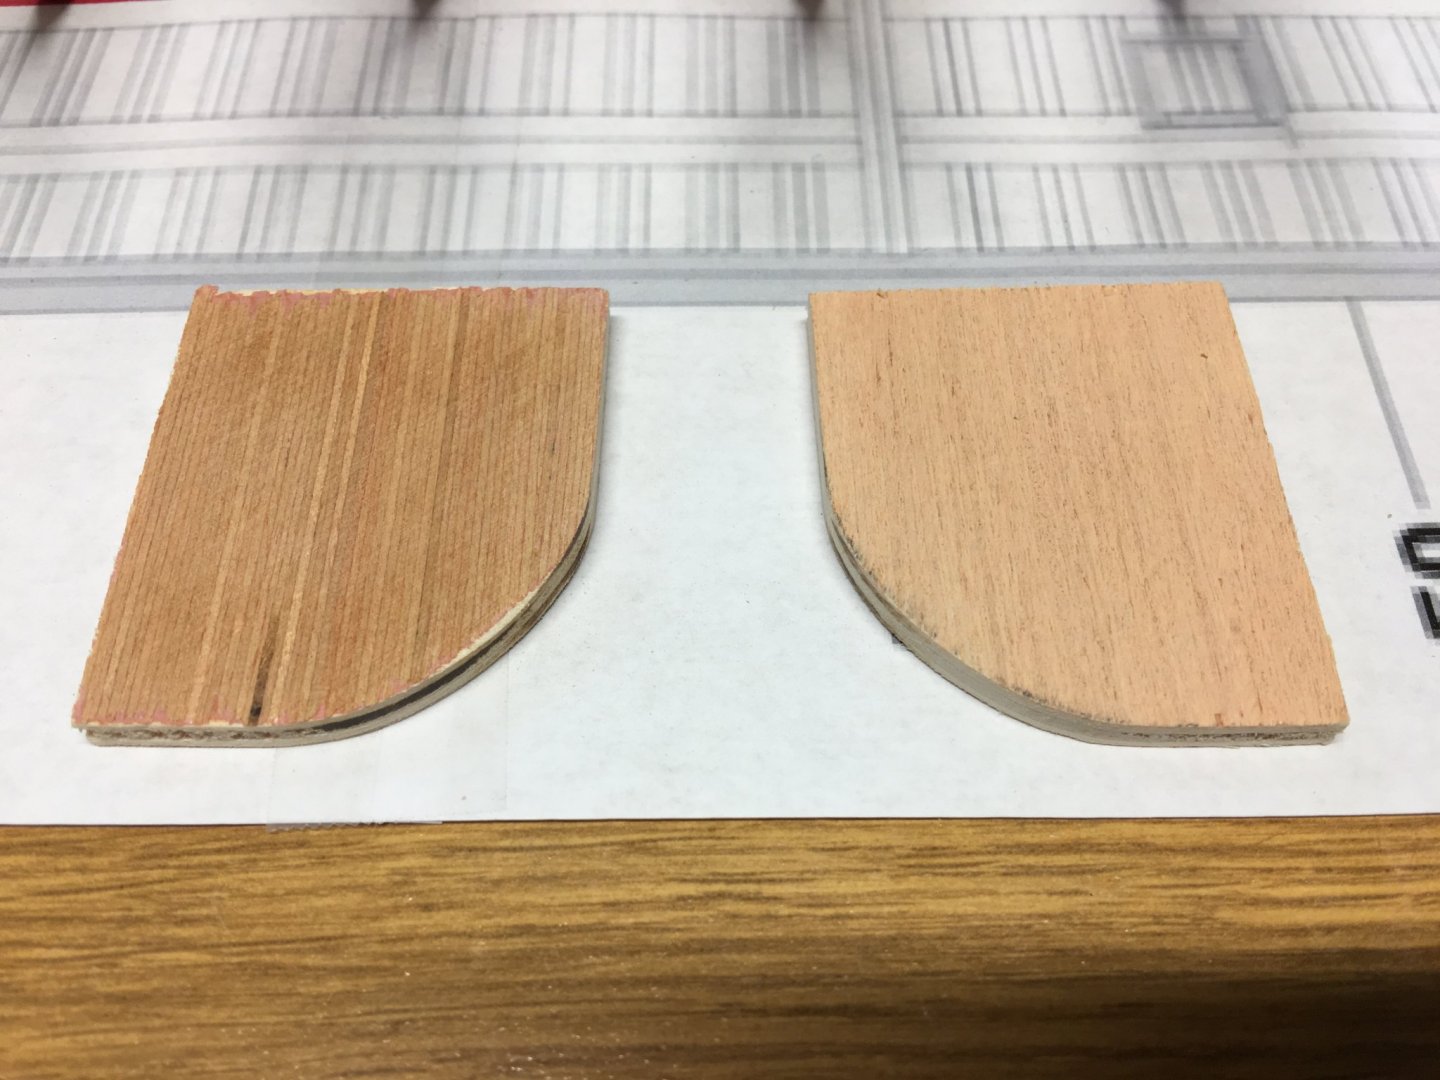
I cut out the filler blocks for the bow and stern sections and got them all temp installed into place.

I then used my template to mark the hull outlines on top and bottom.
This is where a lot of sawdust was generated. The filler blocks were cut down and glued into place. Then they were shaped to the contour of the hull with the sander.


Next, I installed the center keel and stempost.


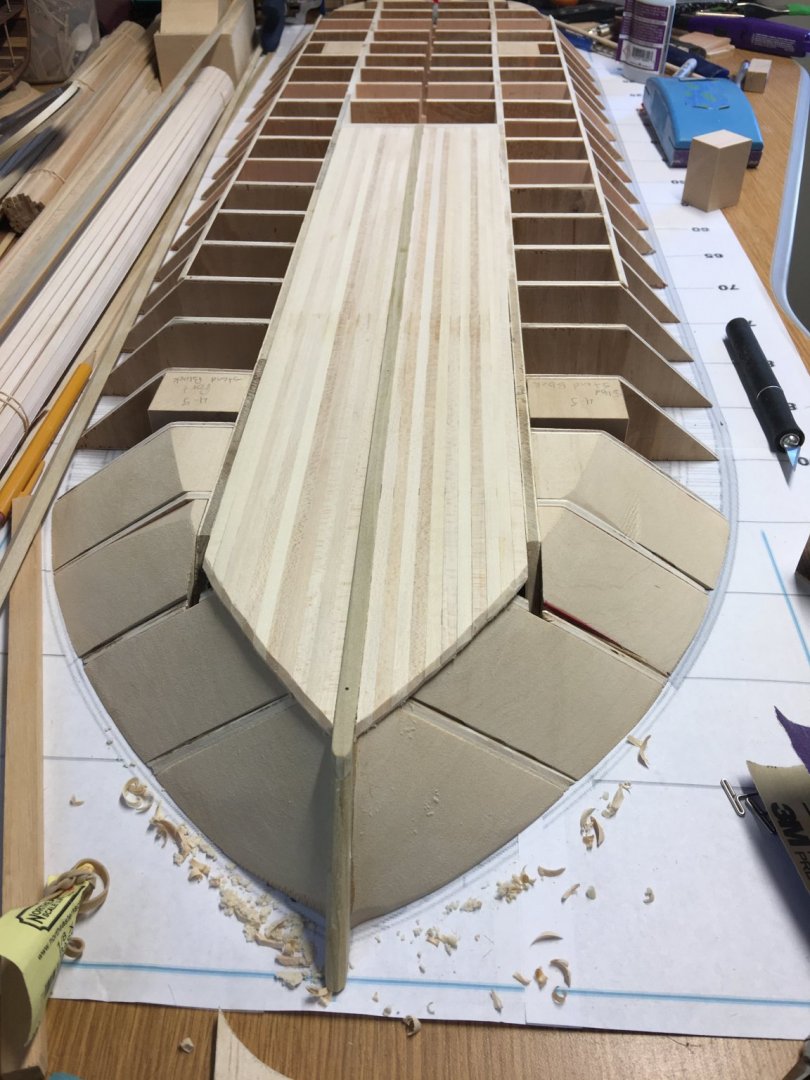
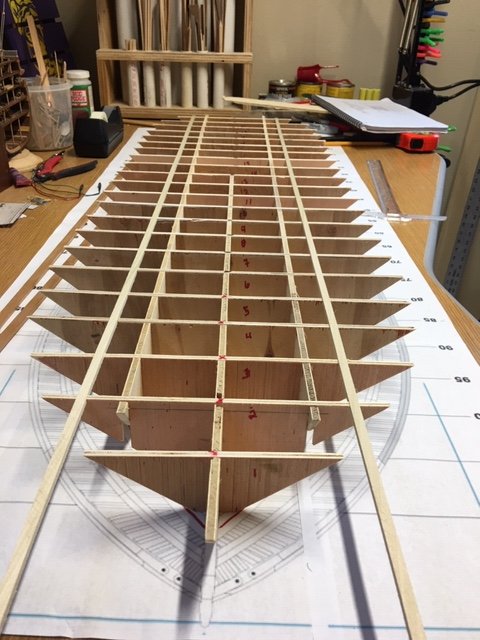
Next, I started planking the hull bottom on both sides of the center keel between the port and starboard keels.
I finished up with the center planking and then installed the port and starboard keels. I also installed the display mount blocks. Since this is a rather wide ship, I decided to go with four mount points to give it a better stance for stability. Not to mention that with all of this wood, this is going to be a fairly heavy model and I definitely don't want to risk any damage to it by scrimping on the display.
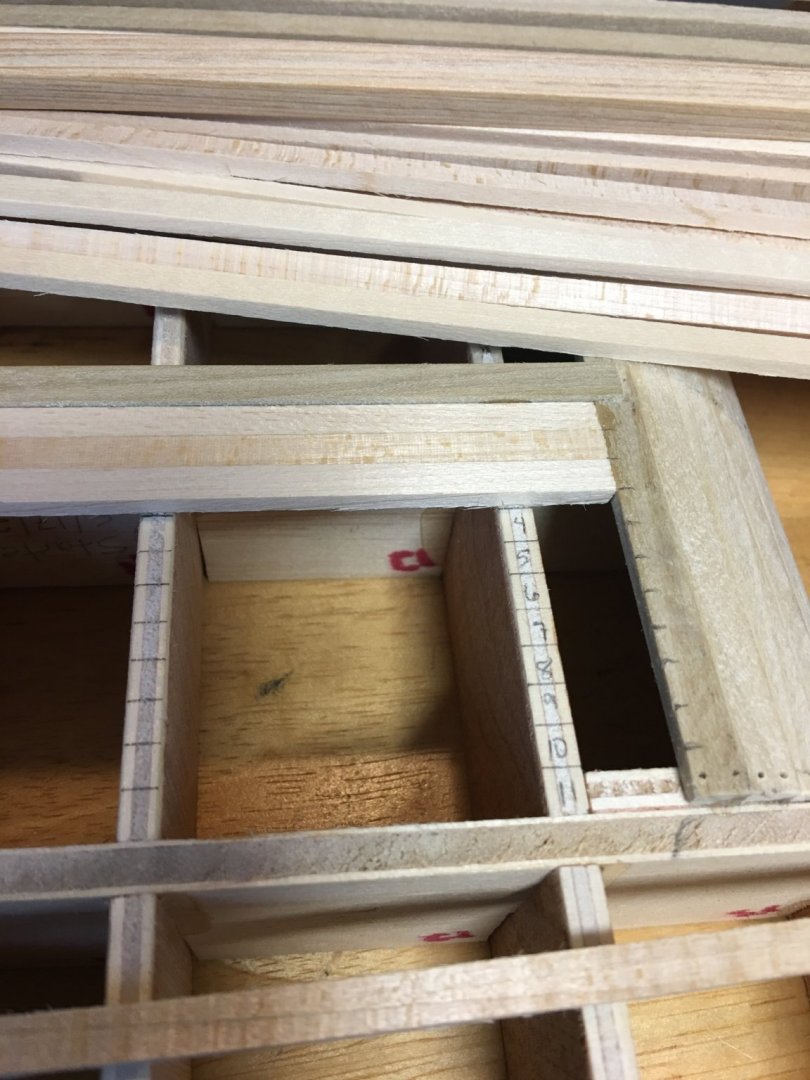
Once I had started the center keel hull planking, I noticed that the port and starboard false keels had developed a slight curve to them beginning just past the end of the center keel. Rather than just trust the CA to hold everything in place, I decided to drill and install trenails along the false keel to add extra support. I also temp installed a piece of 1/8" plywood between the keels to keep them straight until the bottom hull planking was done. Just to be sure that everything stays straight.

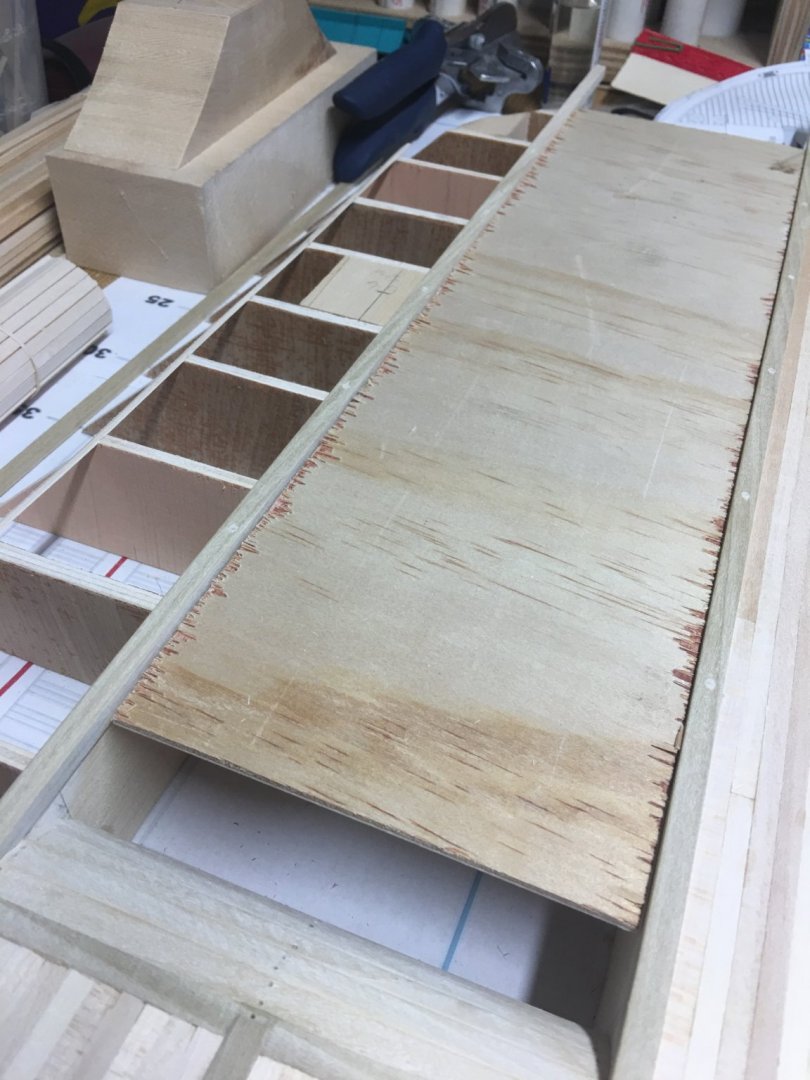
From here I will work on planking the rest of the hull bottom. As you can see from the above picture I have some of it in place on the starboard side. This week I will try to finish up on it and get it all sanded flush with the edge of the hull sides, then hopefully start planking the hull sides.
Until the next update, thank you all for looking and for all of the likes.
- Brian
-
Hello again everyone,
I managed to make a little progress over the week, but not a whole lot. My main hold up was waiting on my hull planking and other wood products to arrive. Fortunately, they arrived just before I sat down to type this up, so I am good to go.
So here is what I was able to get done since last time.
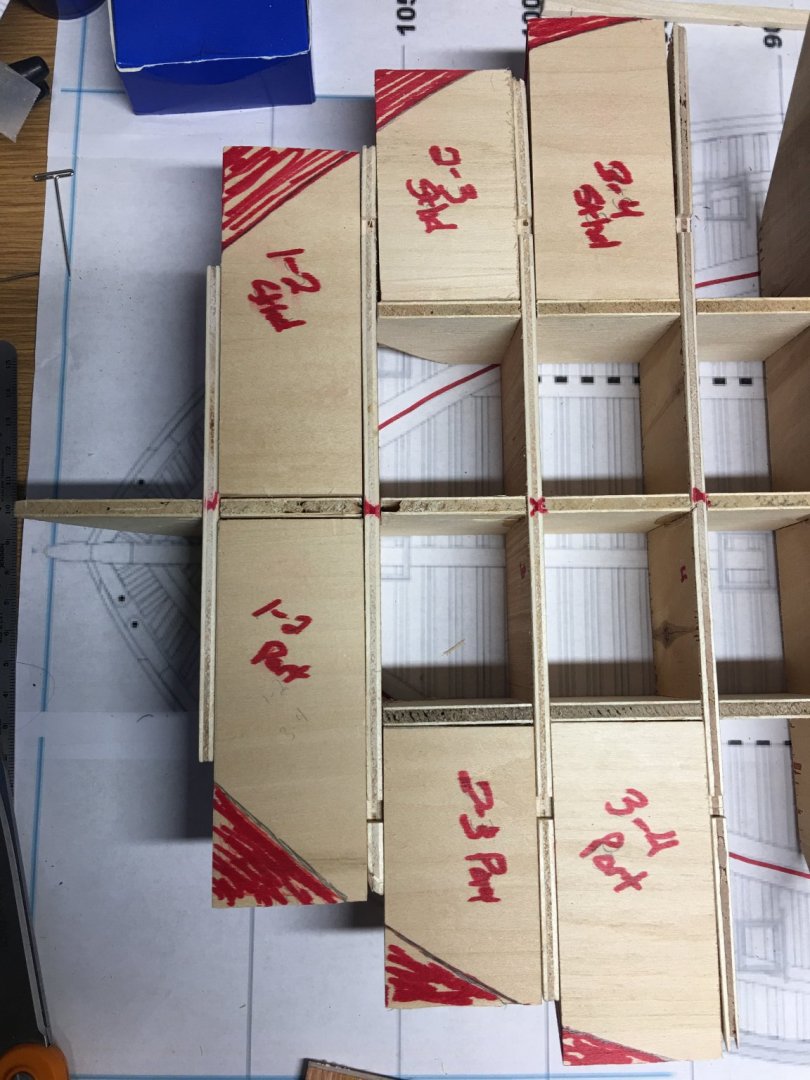
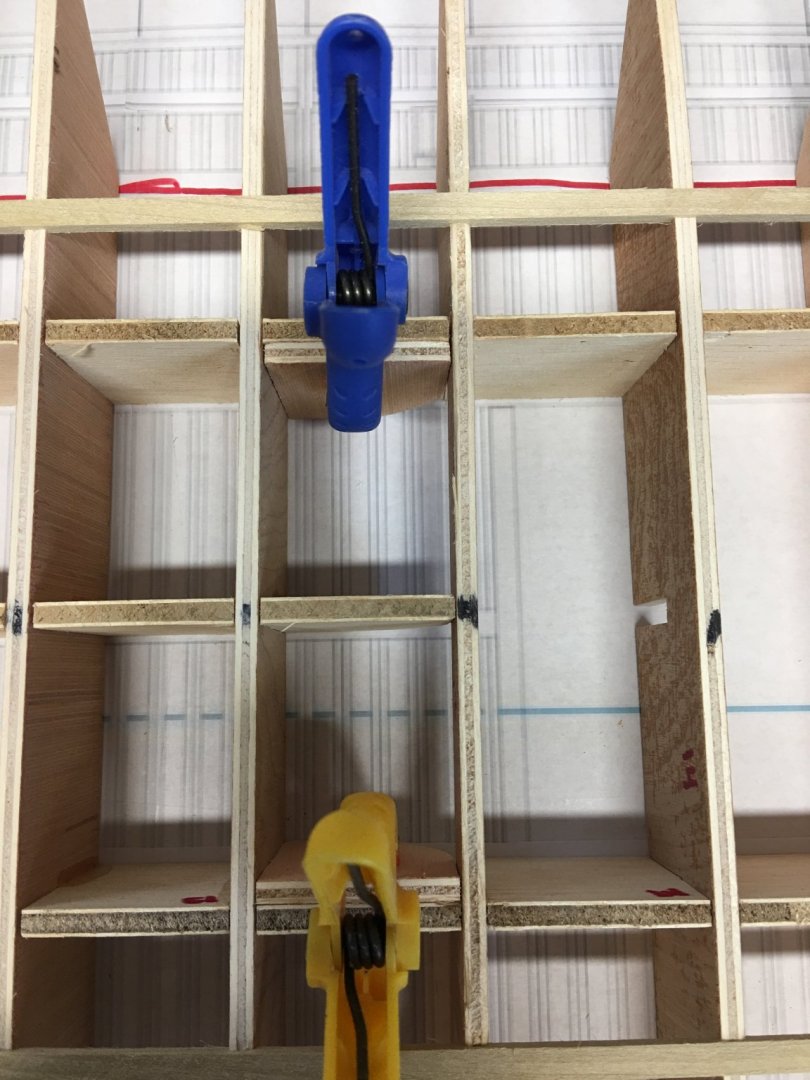
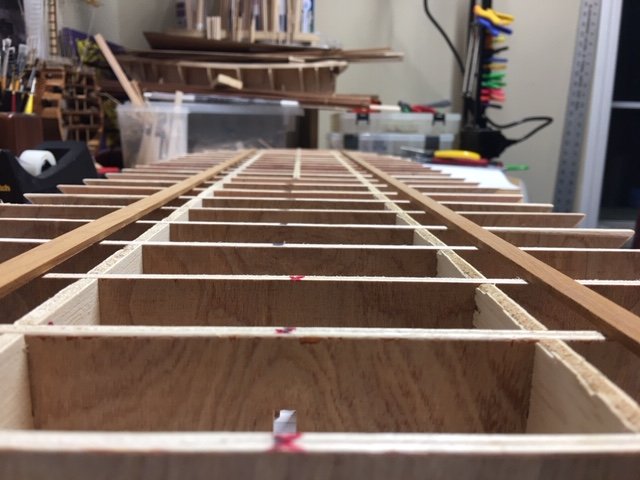
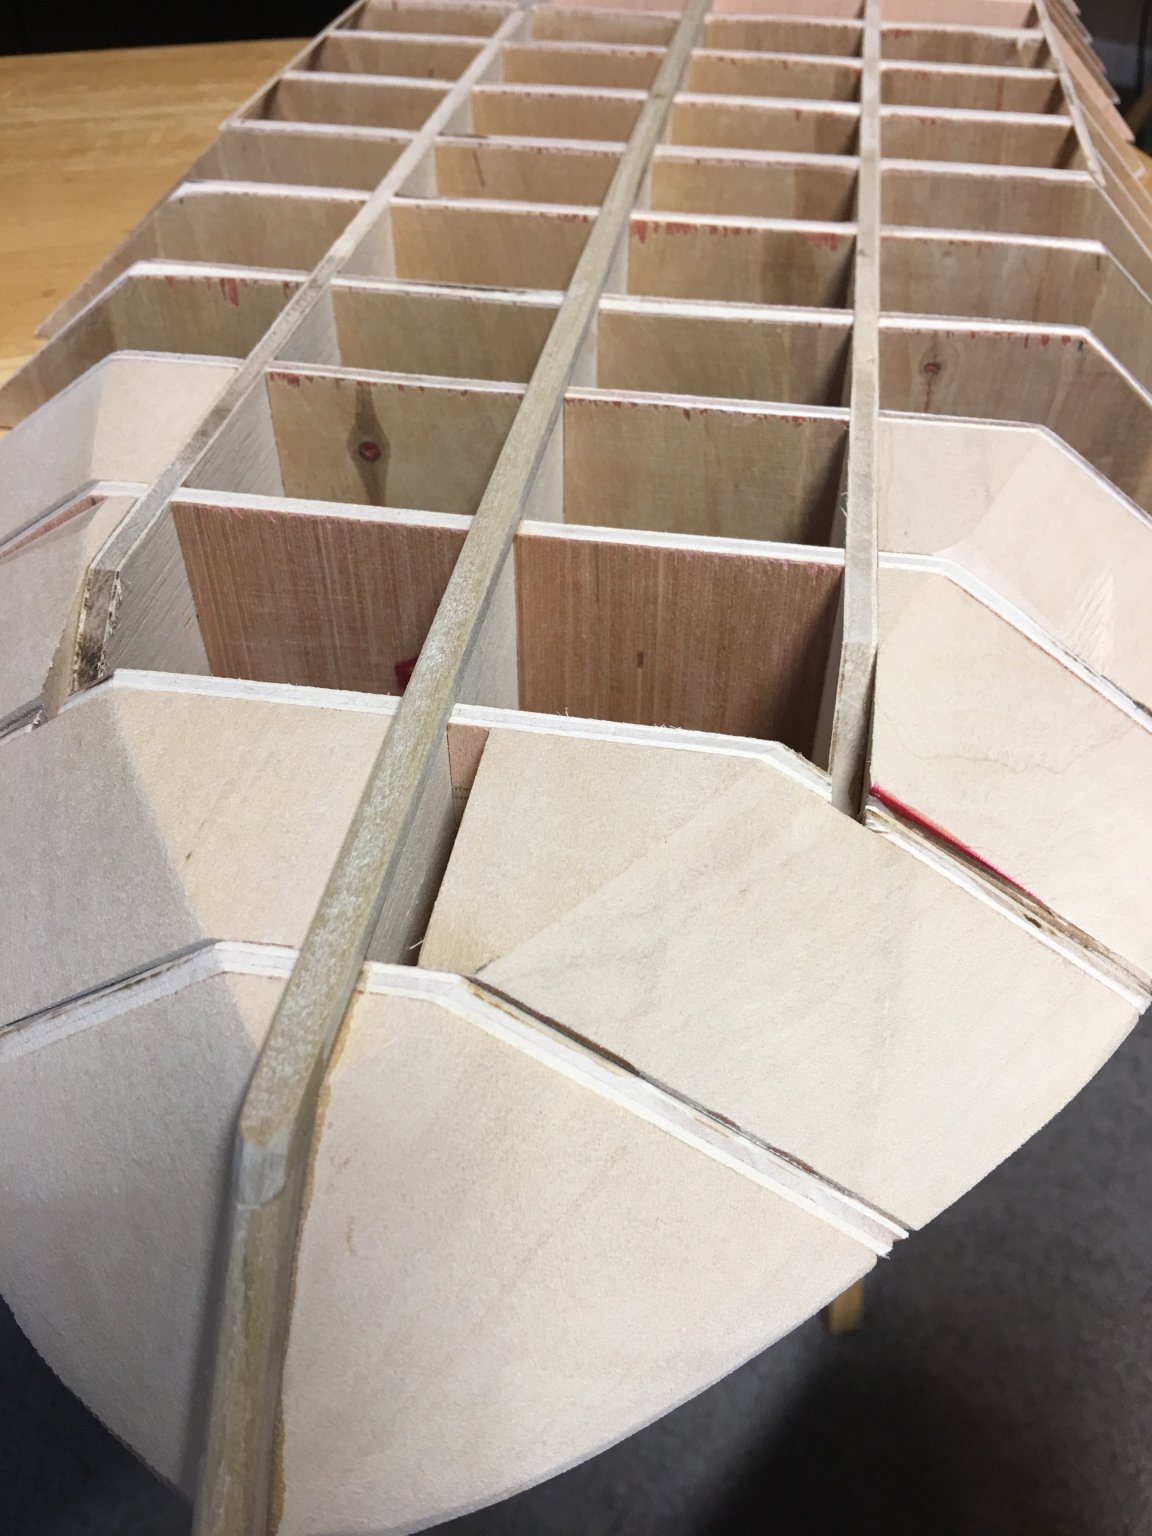
All bulkheads were squared up and glued in place.

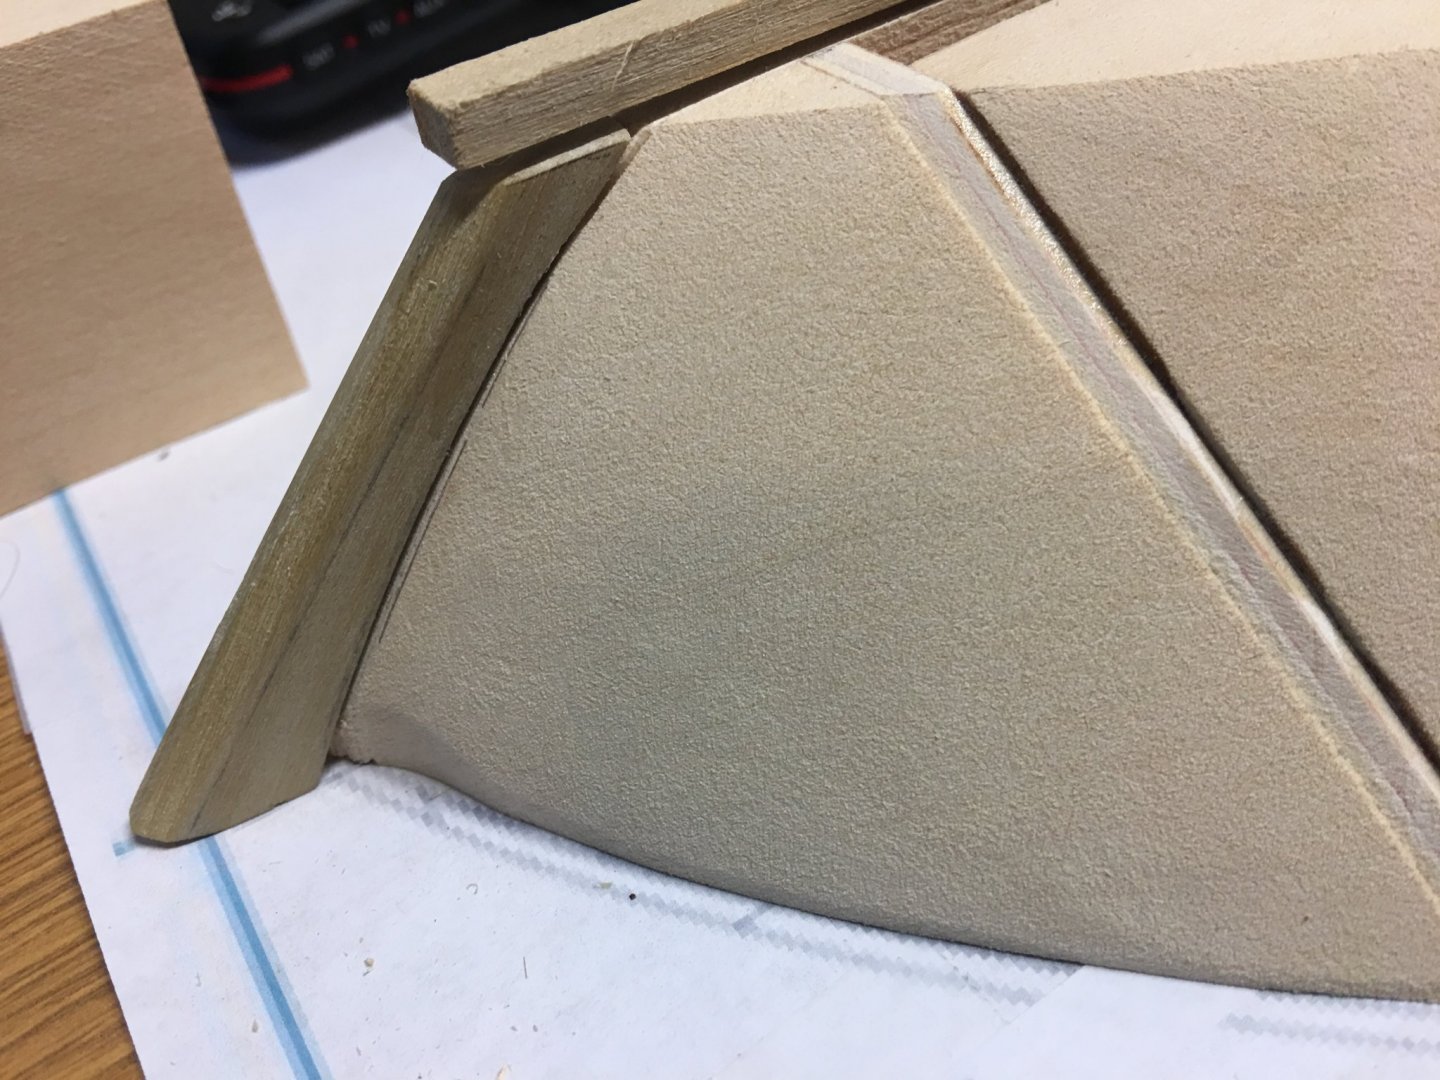
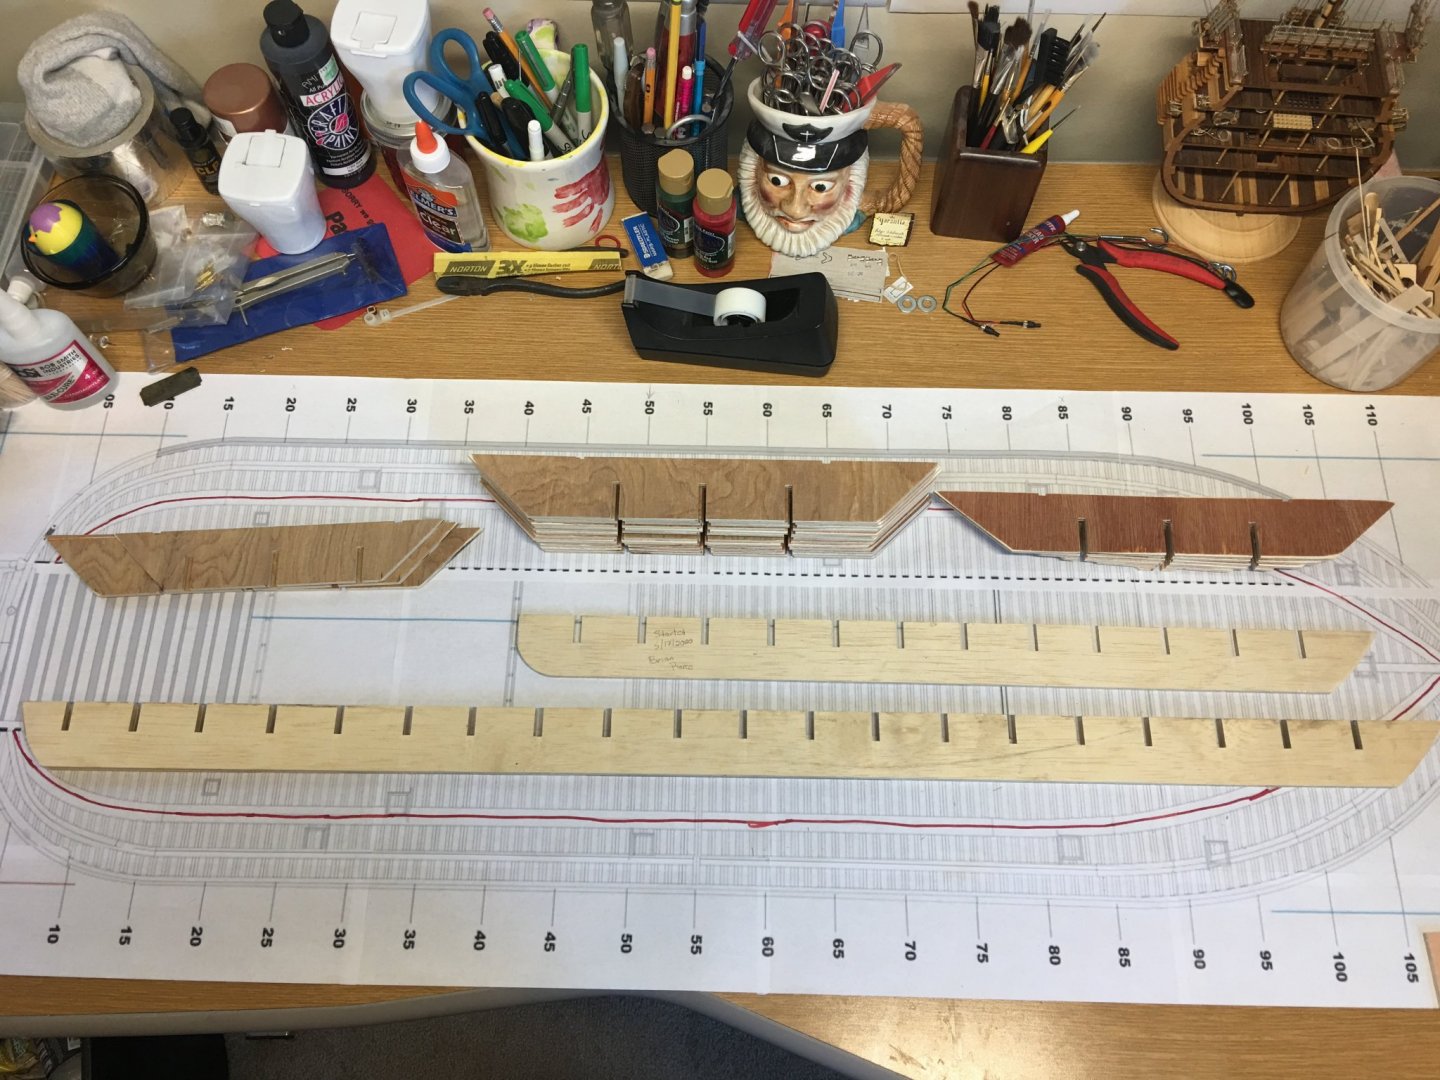
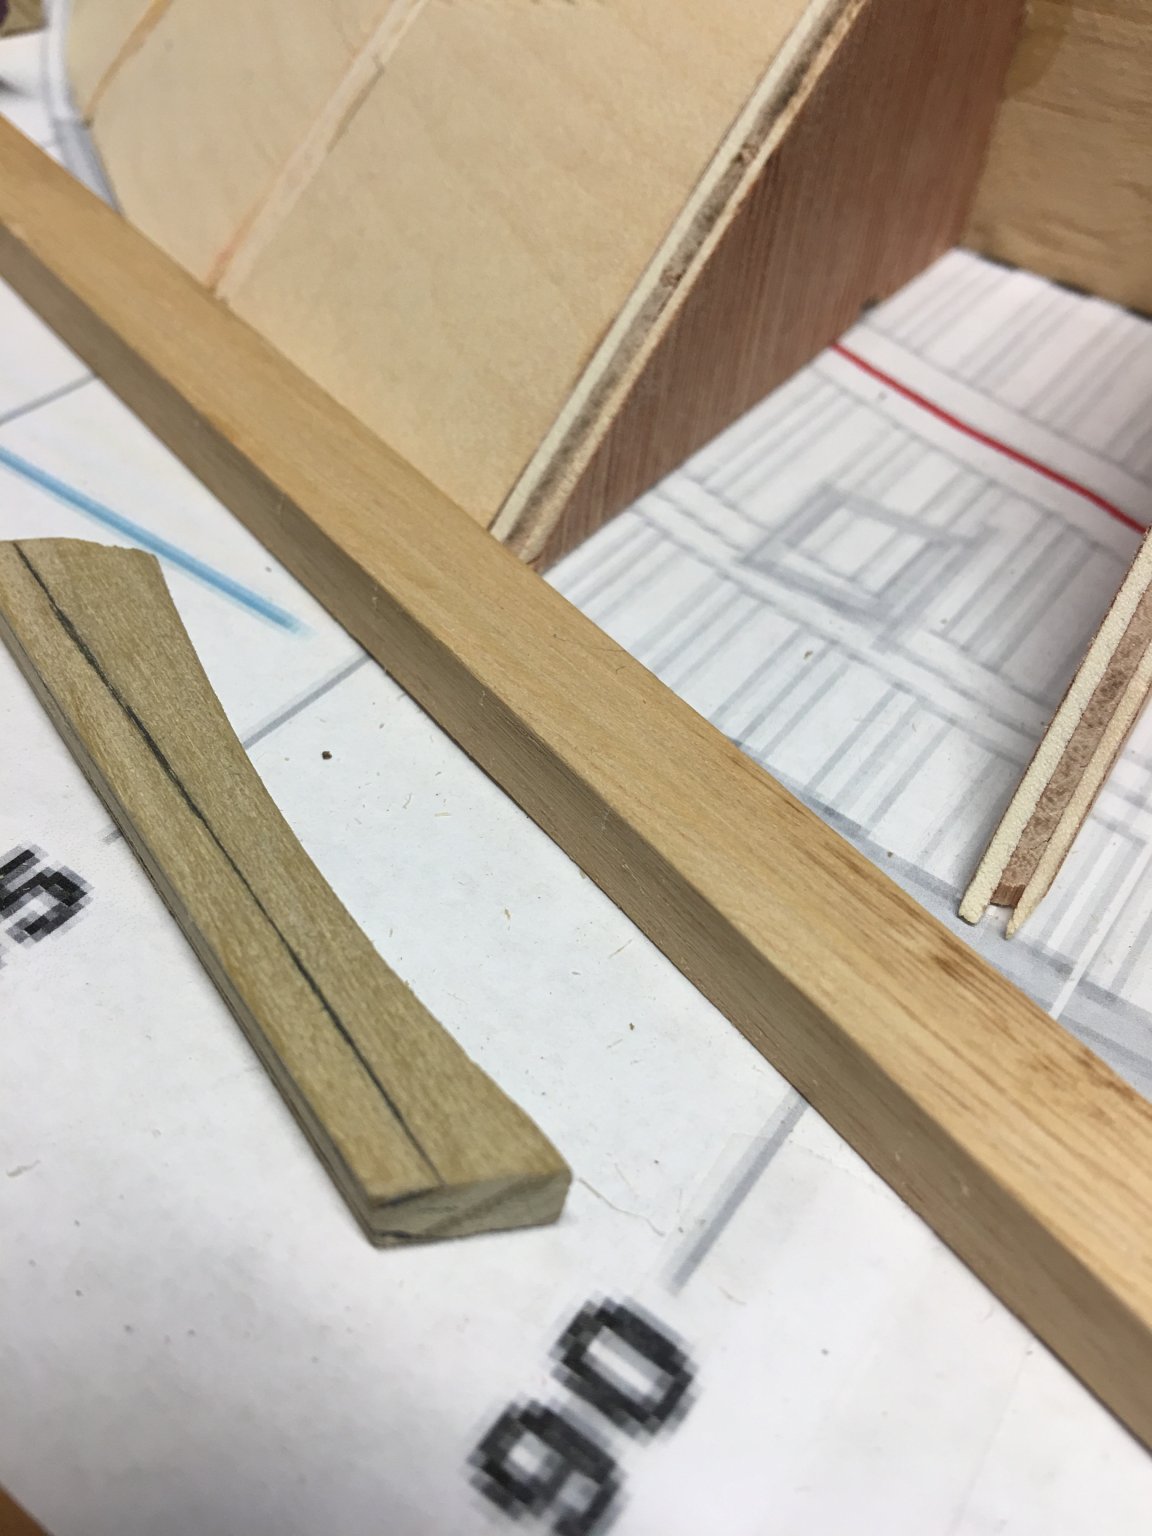
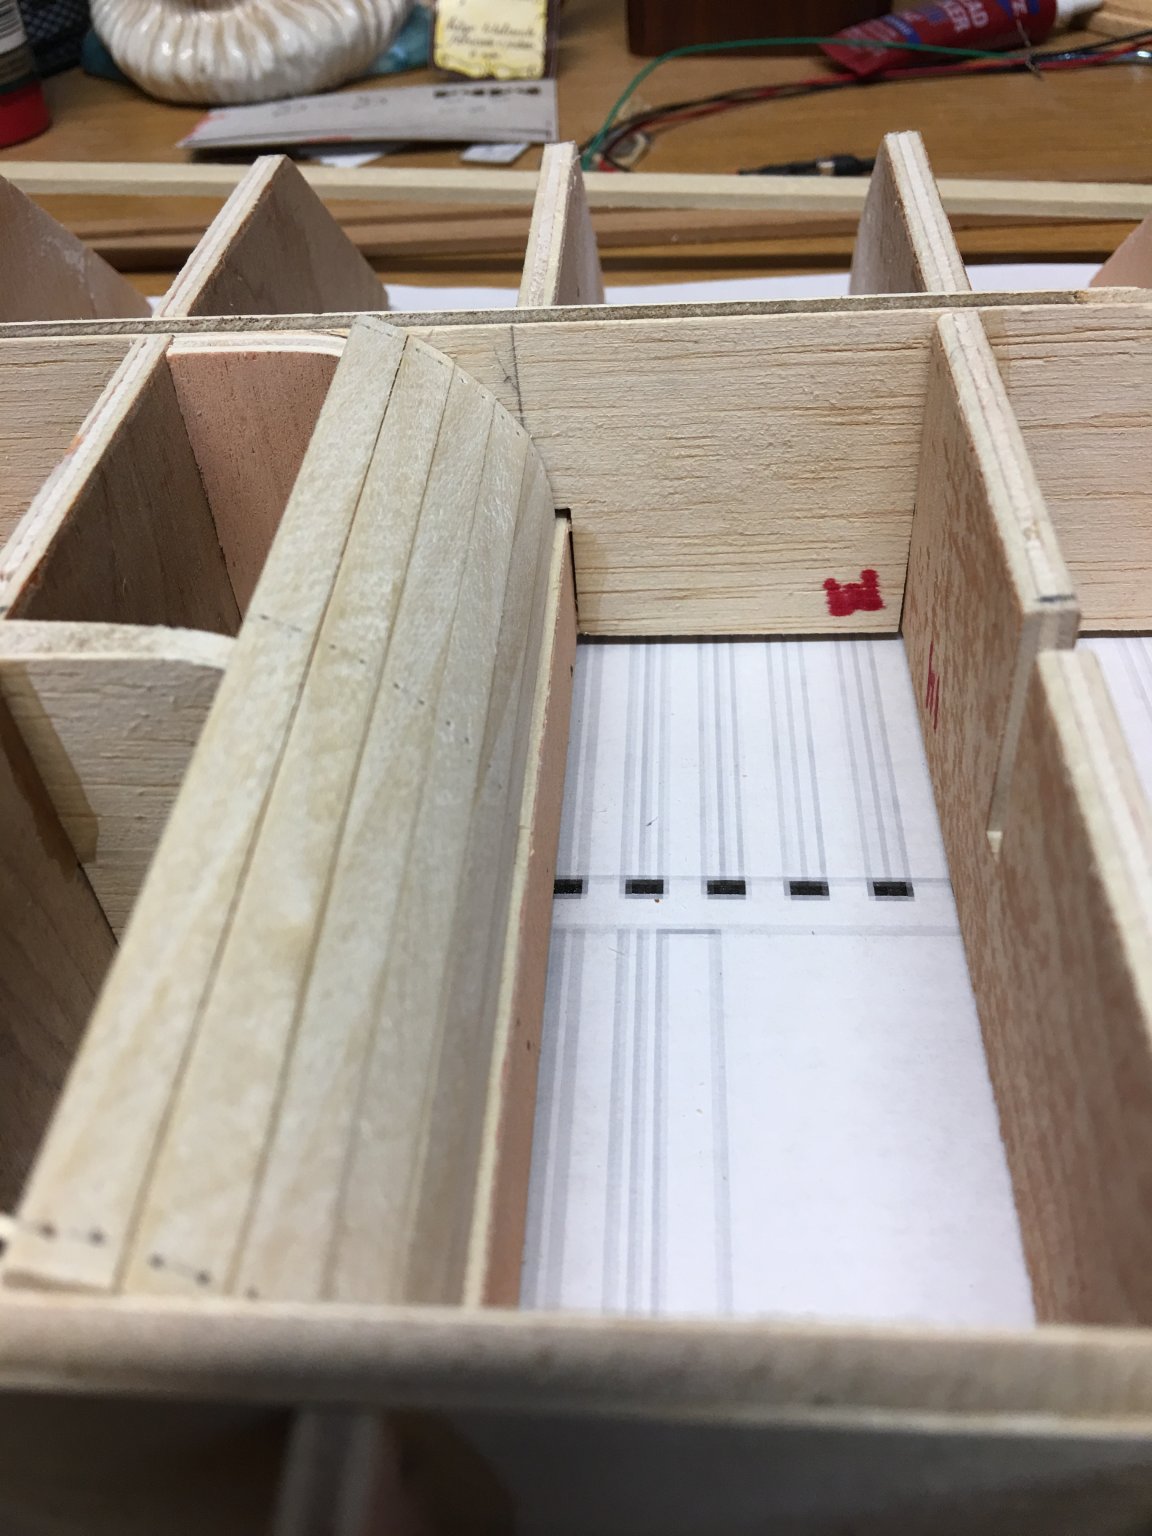
Then I cut out the pieces that will form the back side of the center hull, just in front of the paddle wheel. Not sure of what you would call this section, but it is where the rear pontoons begin. These will provide a mounting brace for the planking that curves up from the bottom of the hull.

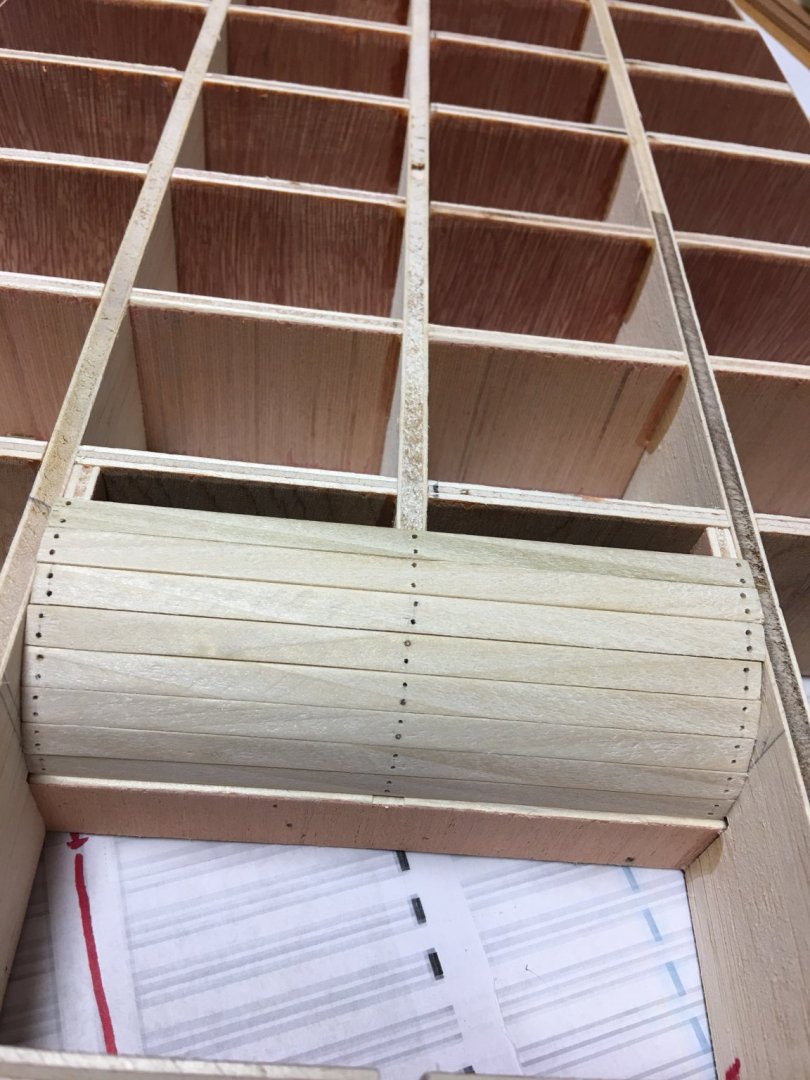
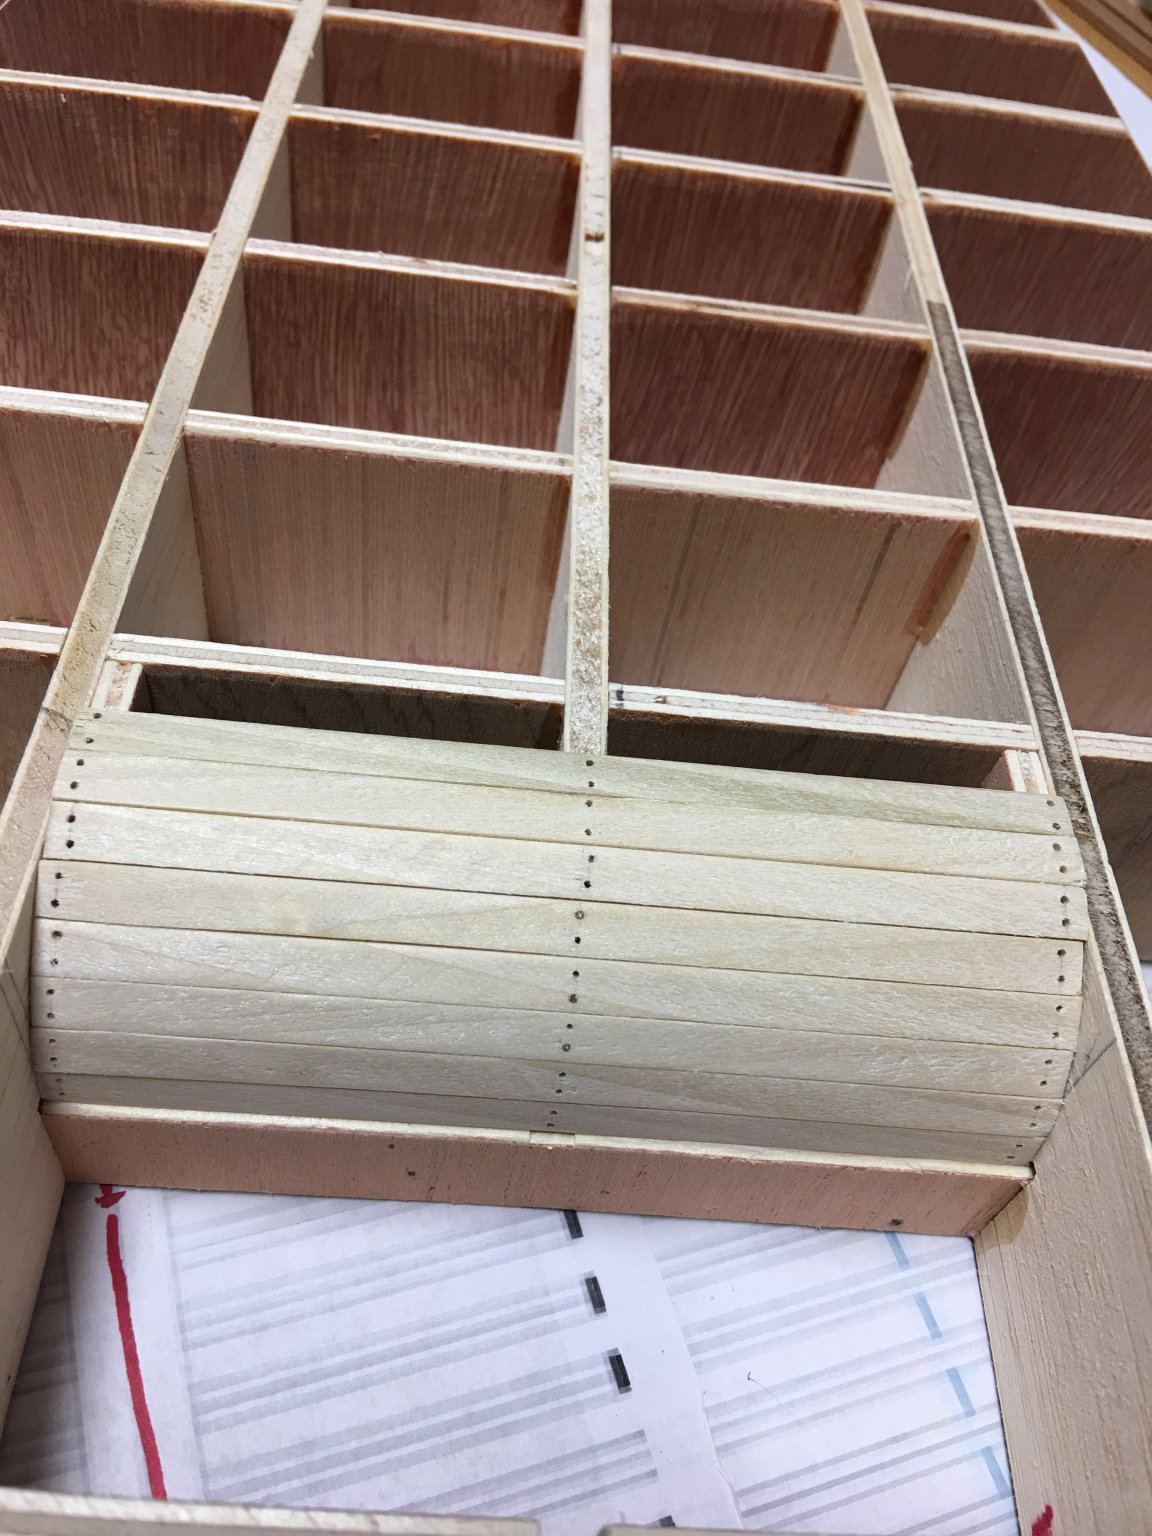
Planking this rounded section of the hull. I had to give each of these planks a slight taper on the insides so they would fit together nice and snug.
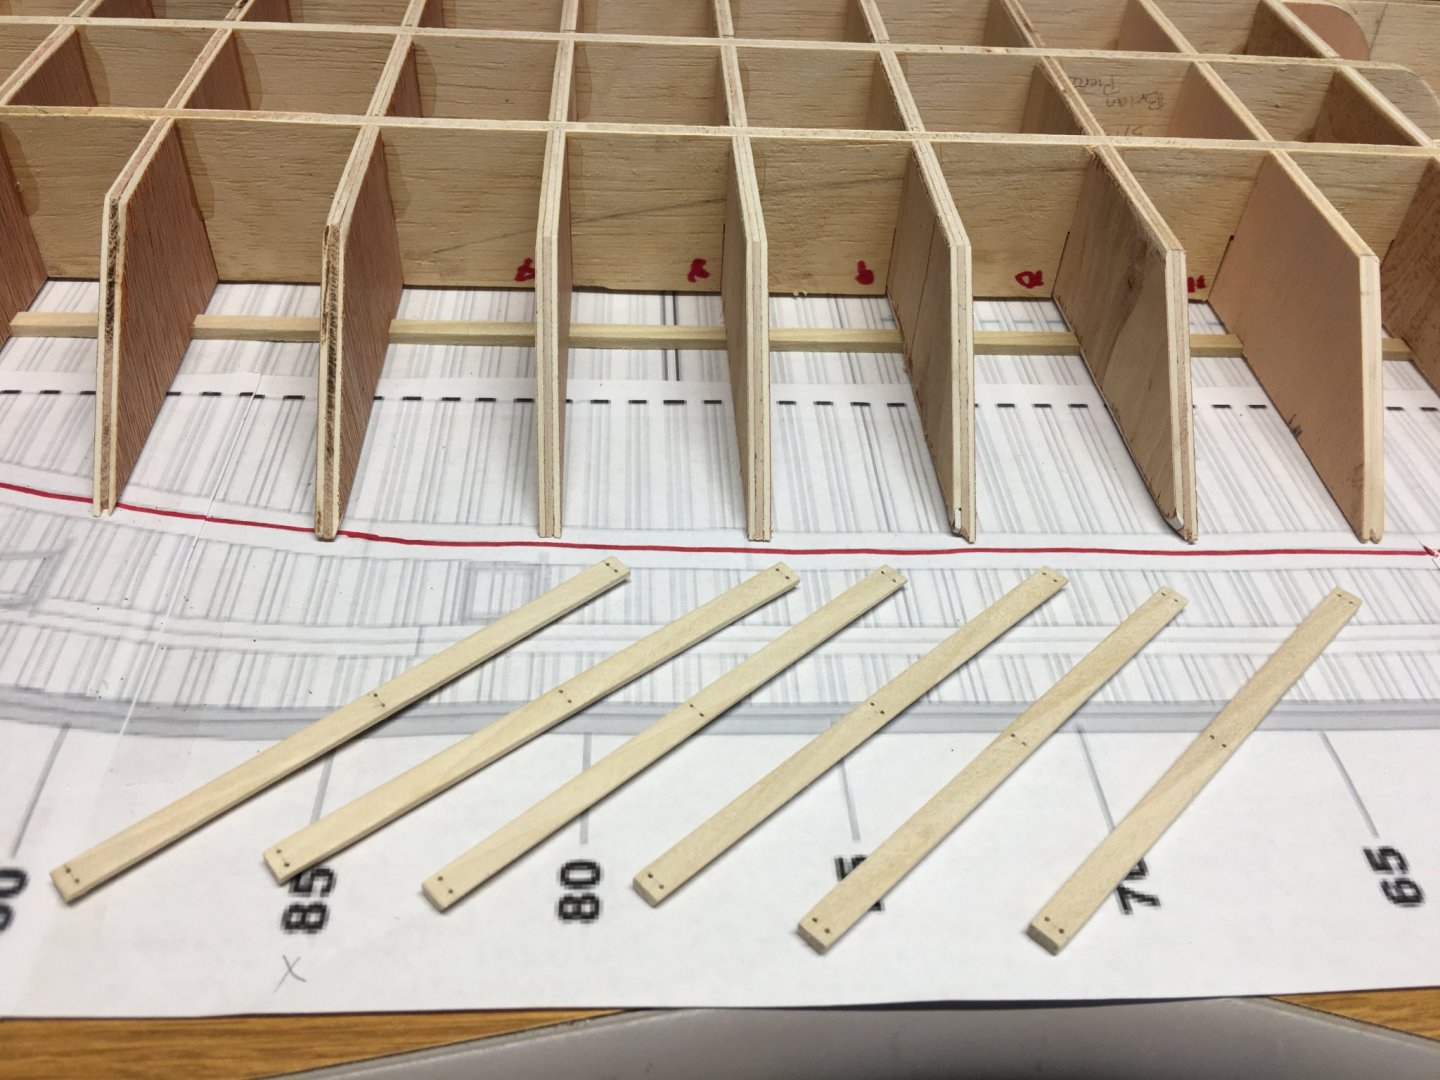
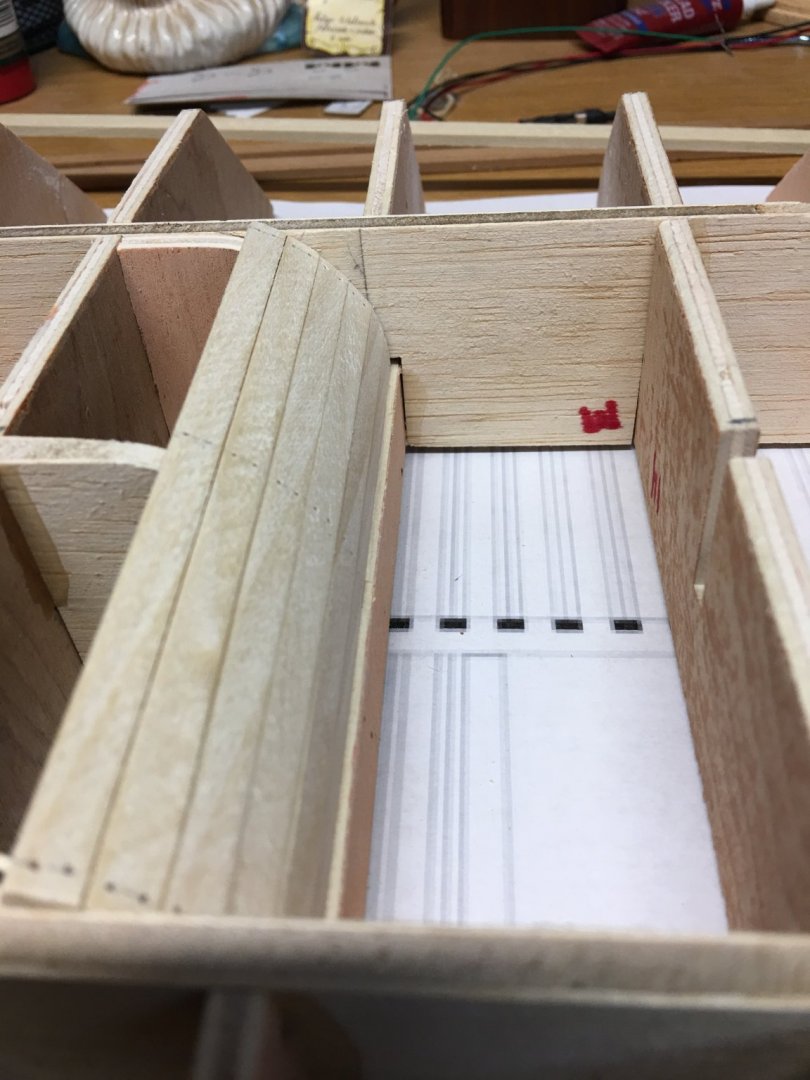
All the planks in place. I see now that I may need to up my magnification on my glasses. Some of my nail holes aren't all in line with each other. Thankfully this will be on the bottom and not seen.
Next I printed out the Hurricane Deck plans and pinned them in place to use as a guide to help true up all of the bulkheads and to make sure they are all the correct width.

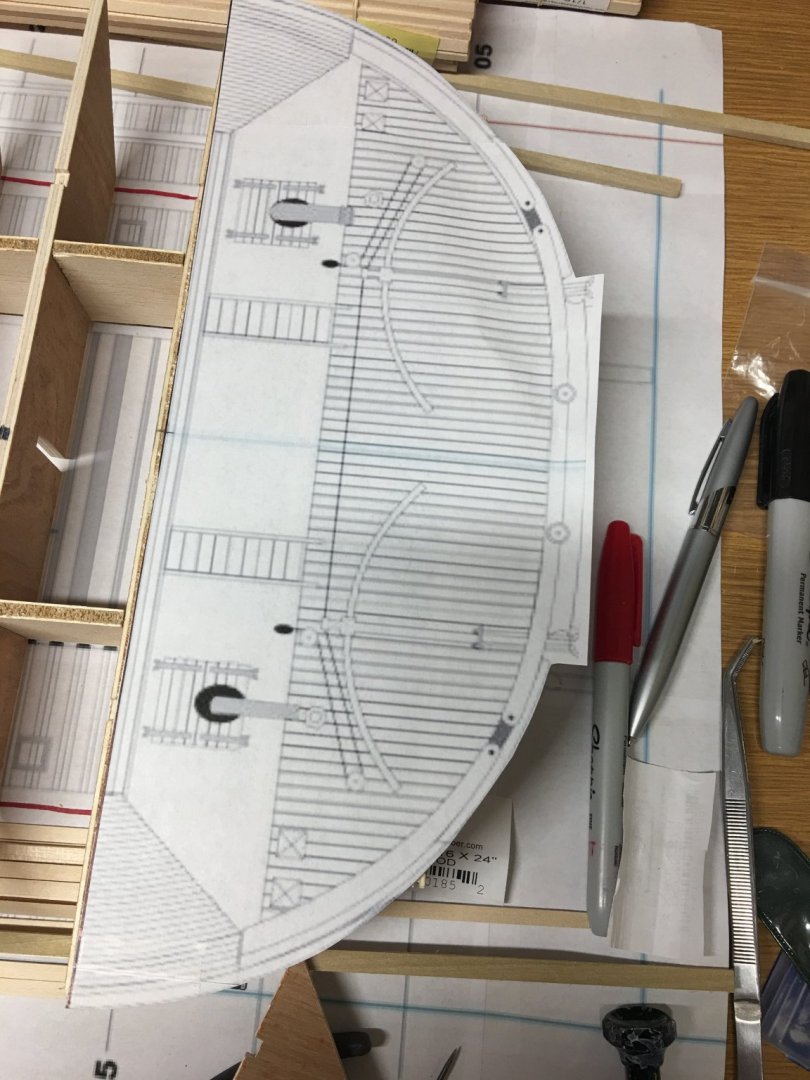
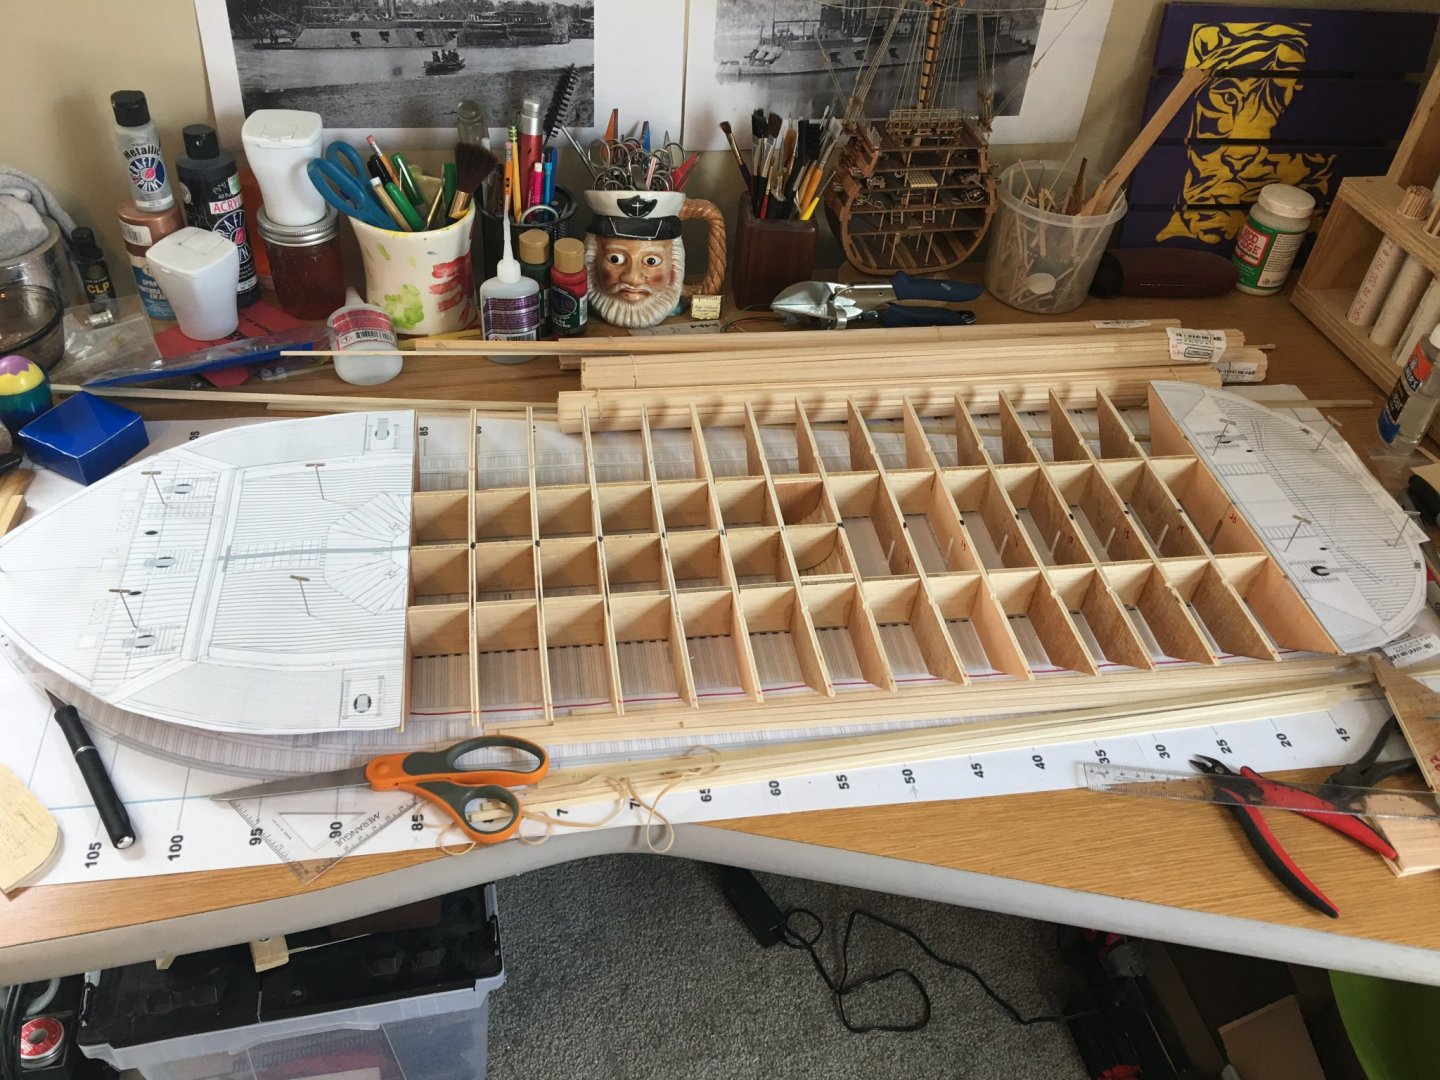
From here I will get the bulkheads sized to the template and start putting in my filler blocks and shaping the hull. Things should move along a little better now that I have some material to work with.
That's all for now. Thank you all for looking and for all the likes.
- Brian
-
Eric,
All I can say is absolutely beautiful. It's been a pleasure watching the progression of this build along the way. Really looking forward to seeing the final photos, especially the ones along the Missouri River. Those should really prove to be stunning. You've also got my curiosity piqued on the reveal of your next build.
Are you planning a display case to go along with it? I need to get my rear in gear on my Chaperon case, otherwise I may have to sacrifice some of my build time dusting it.
-Brian
-
-
23 hours ago, leclaire said:
Brian, a good start. If your craftsmanship on this project is anyway near as good as your Chaperon, it will turn out great.
Bob
Thank you Bob for the kind comments.
I am always up up for a good challenge, this build looks to be like it’s going to be just that. I think it’ll be fun though.
-Brian
-
Hello everyone,
…and so, it begins.
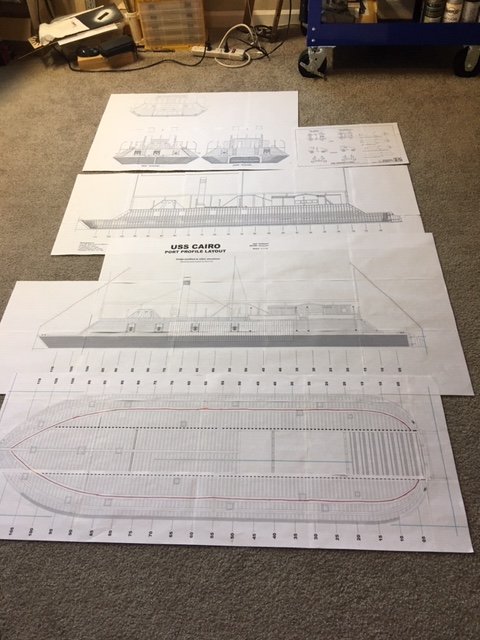
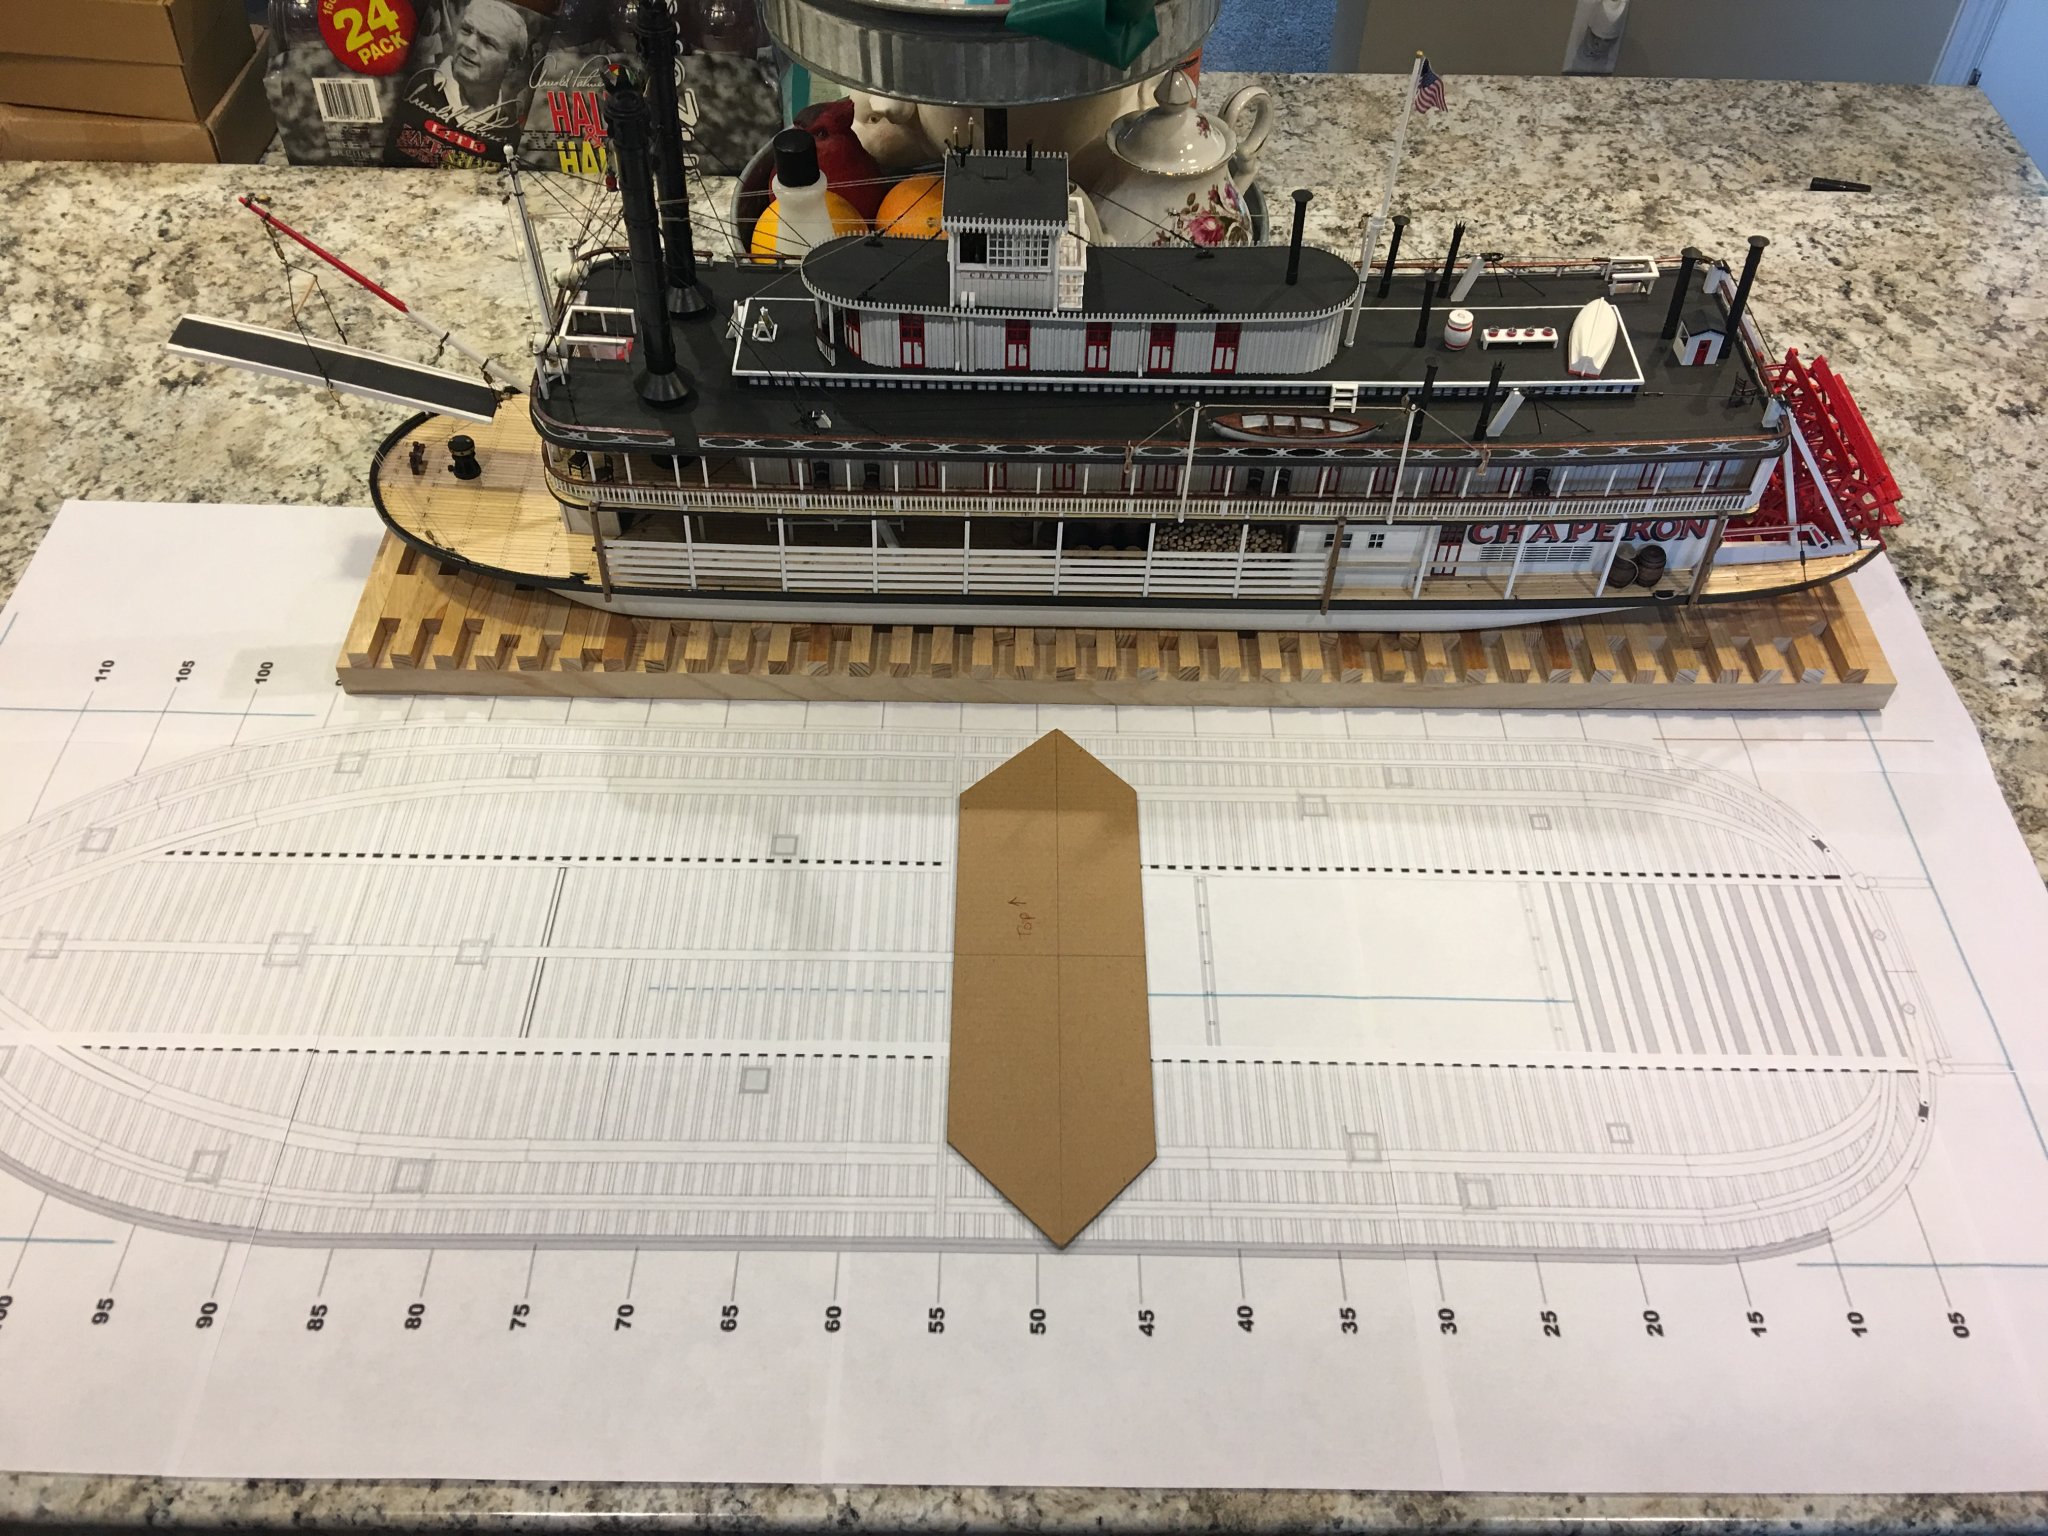
I am finally kicking things off on this build. First thing I did was scale up the Bob Hill plans to fit the 1:48 ratio and print them out. This put the overall length of the model at 43.75” with a beam of 13”. I managed to print out most of the plans to scale that I will be using. I wanted to take them to the local print shop and have them printed out, but unfortunately for me, the print shop wasn’t able to handle them on that large of a scale (drawbacks of living in a rural community). However, I did get them printed on my home printer. I think I came out cheaper, just a box of paper and a black ink cartridge. That, and a lot of tape to stick the pages together. Oh well, I now have scaled plans to work off of.
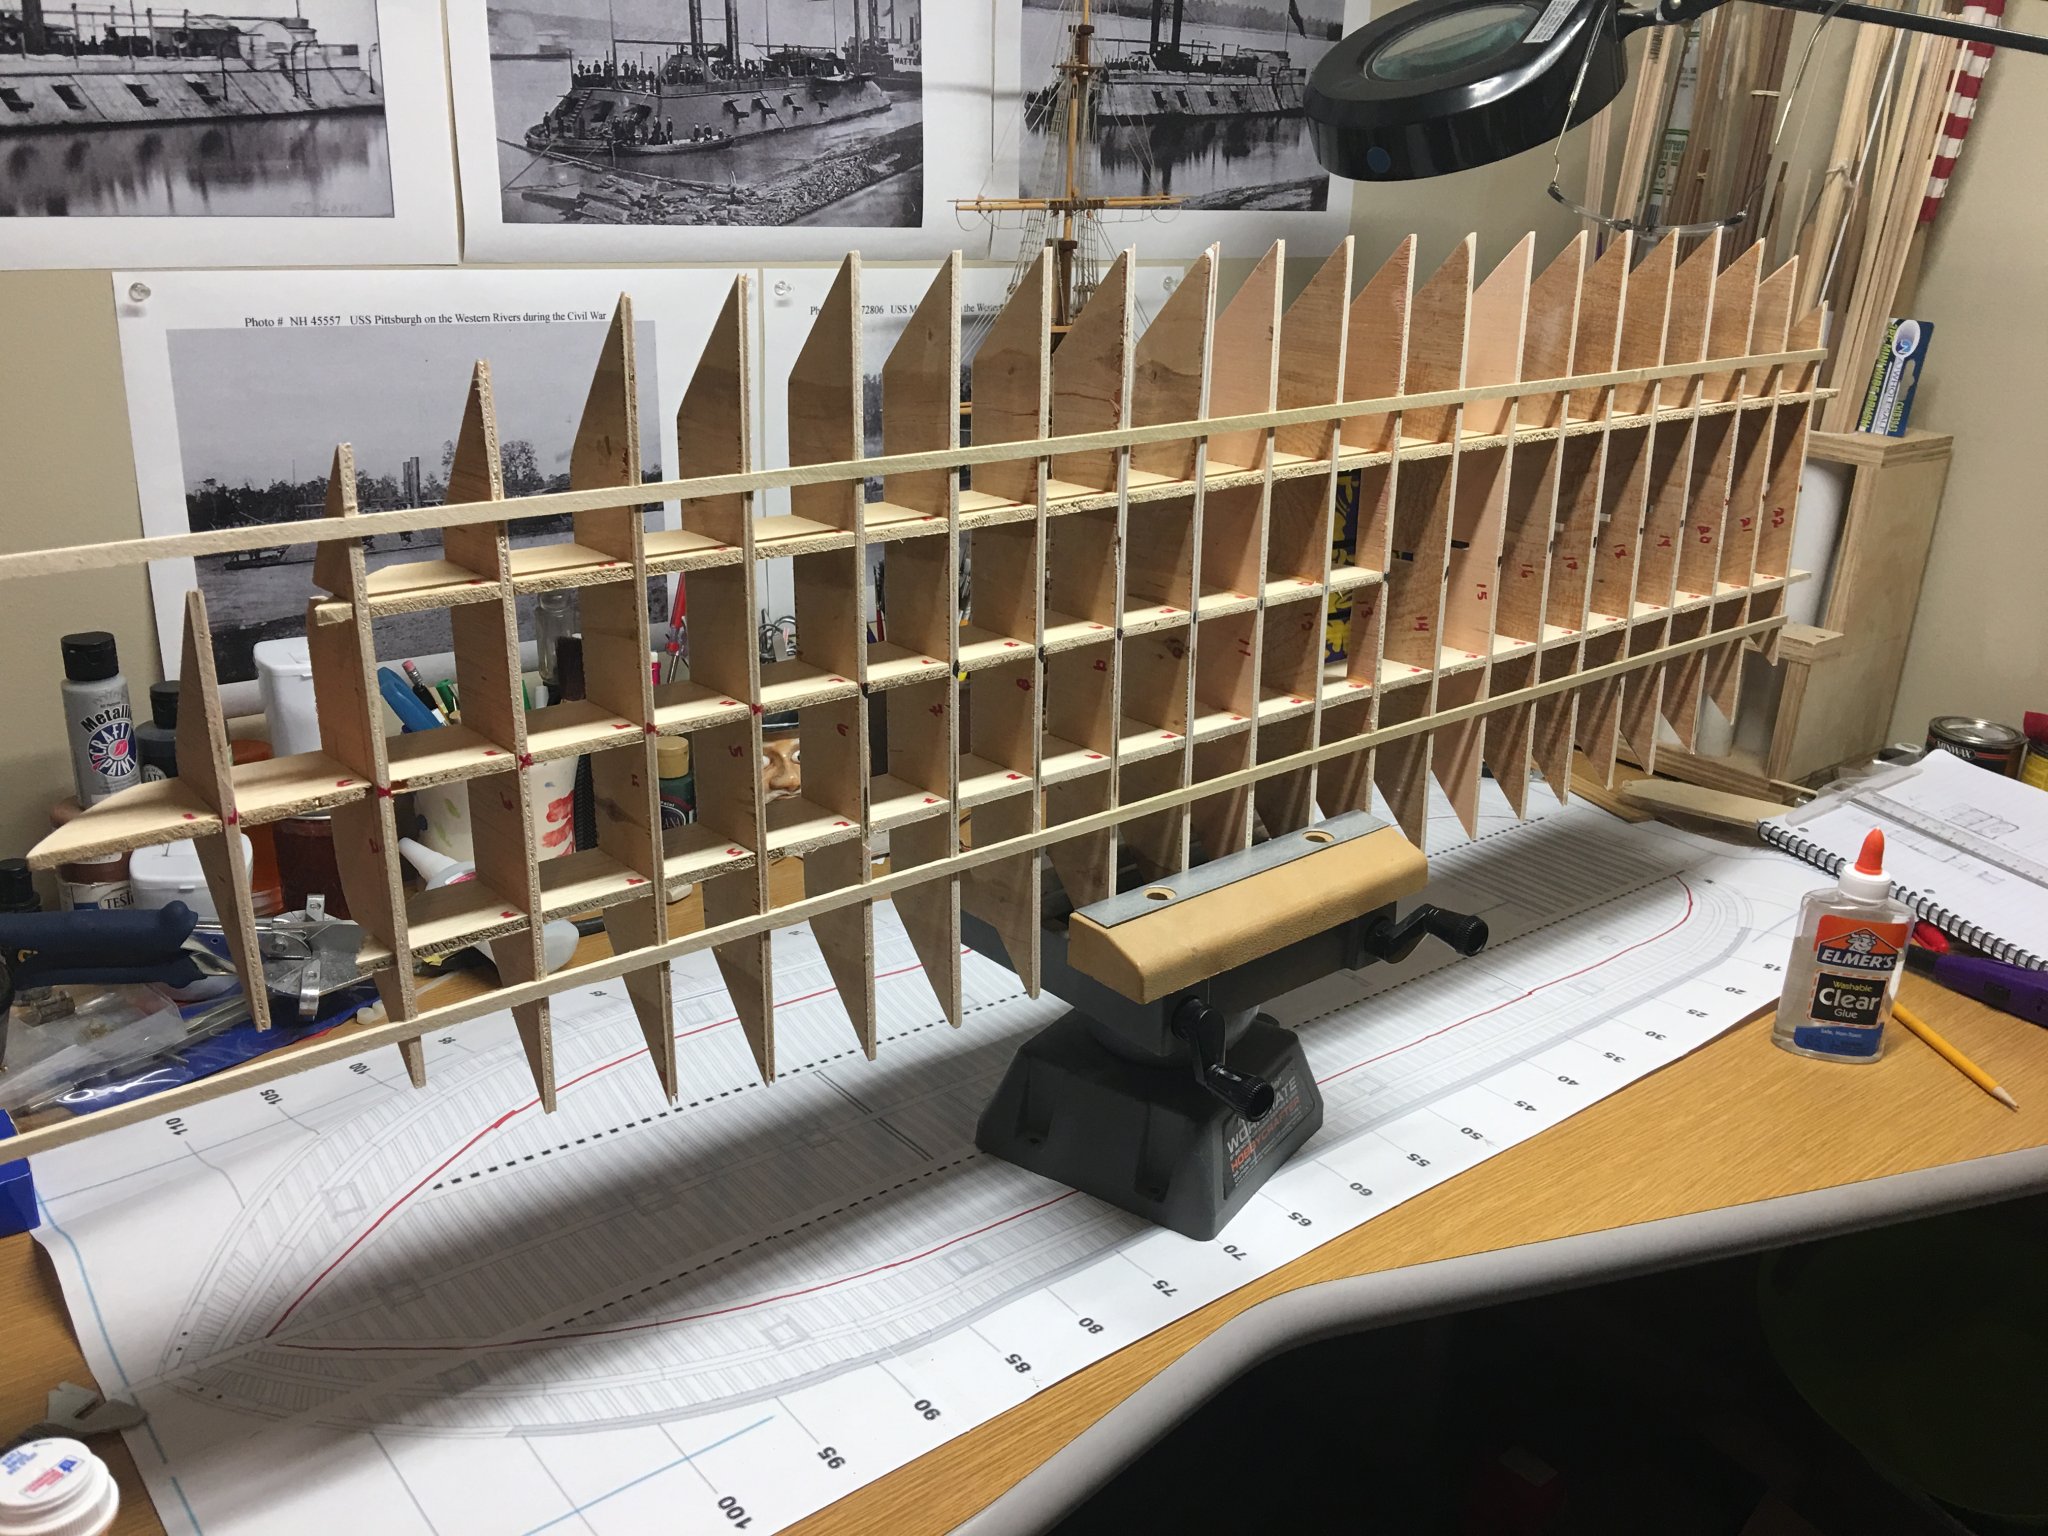
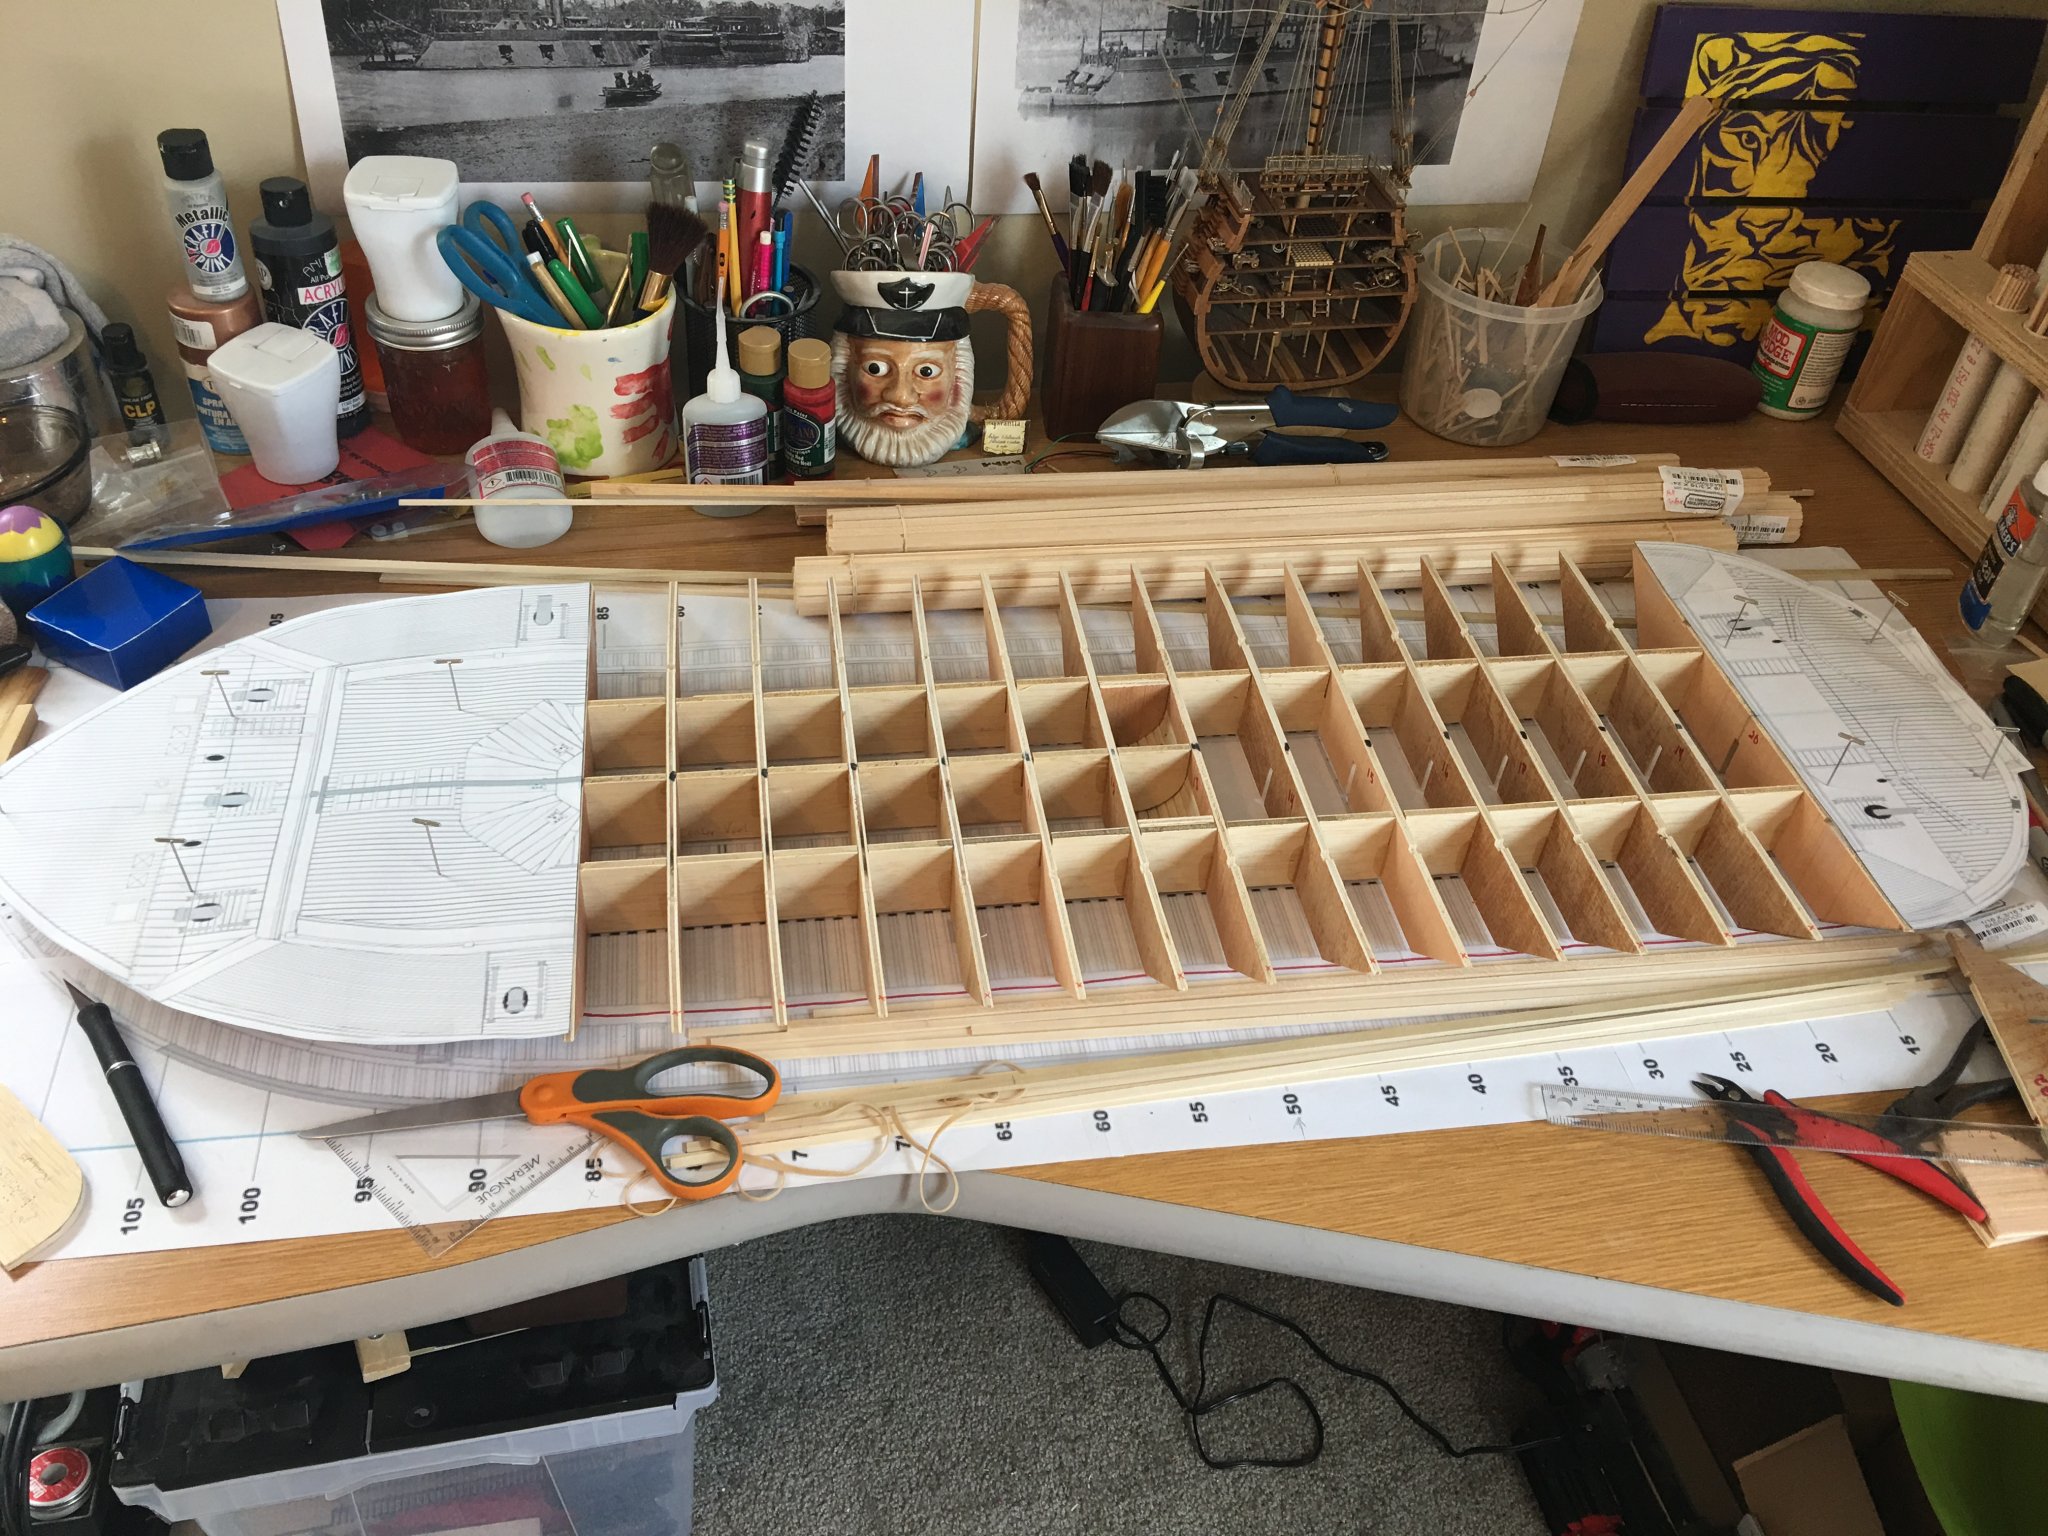
Here are the hull framing plans next to my Chaperon (same 1:48 scale) which is about 36” long.

Man this thing is going to be a big build. I am now beginning to wonder what I was thinking going with this scale. Eh, why not, it’ll all be worth it in the end.
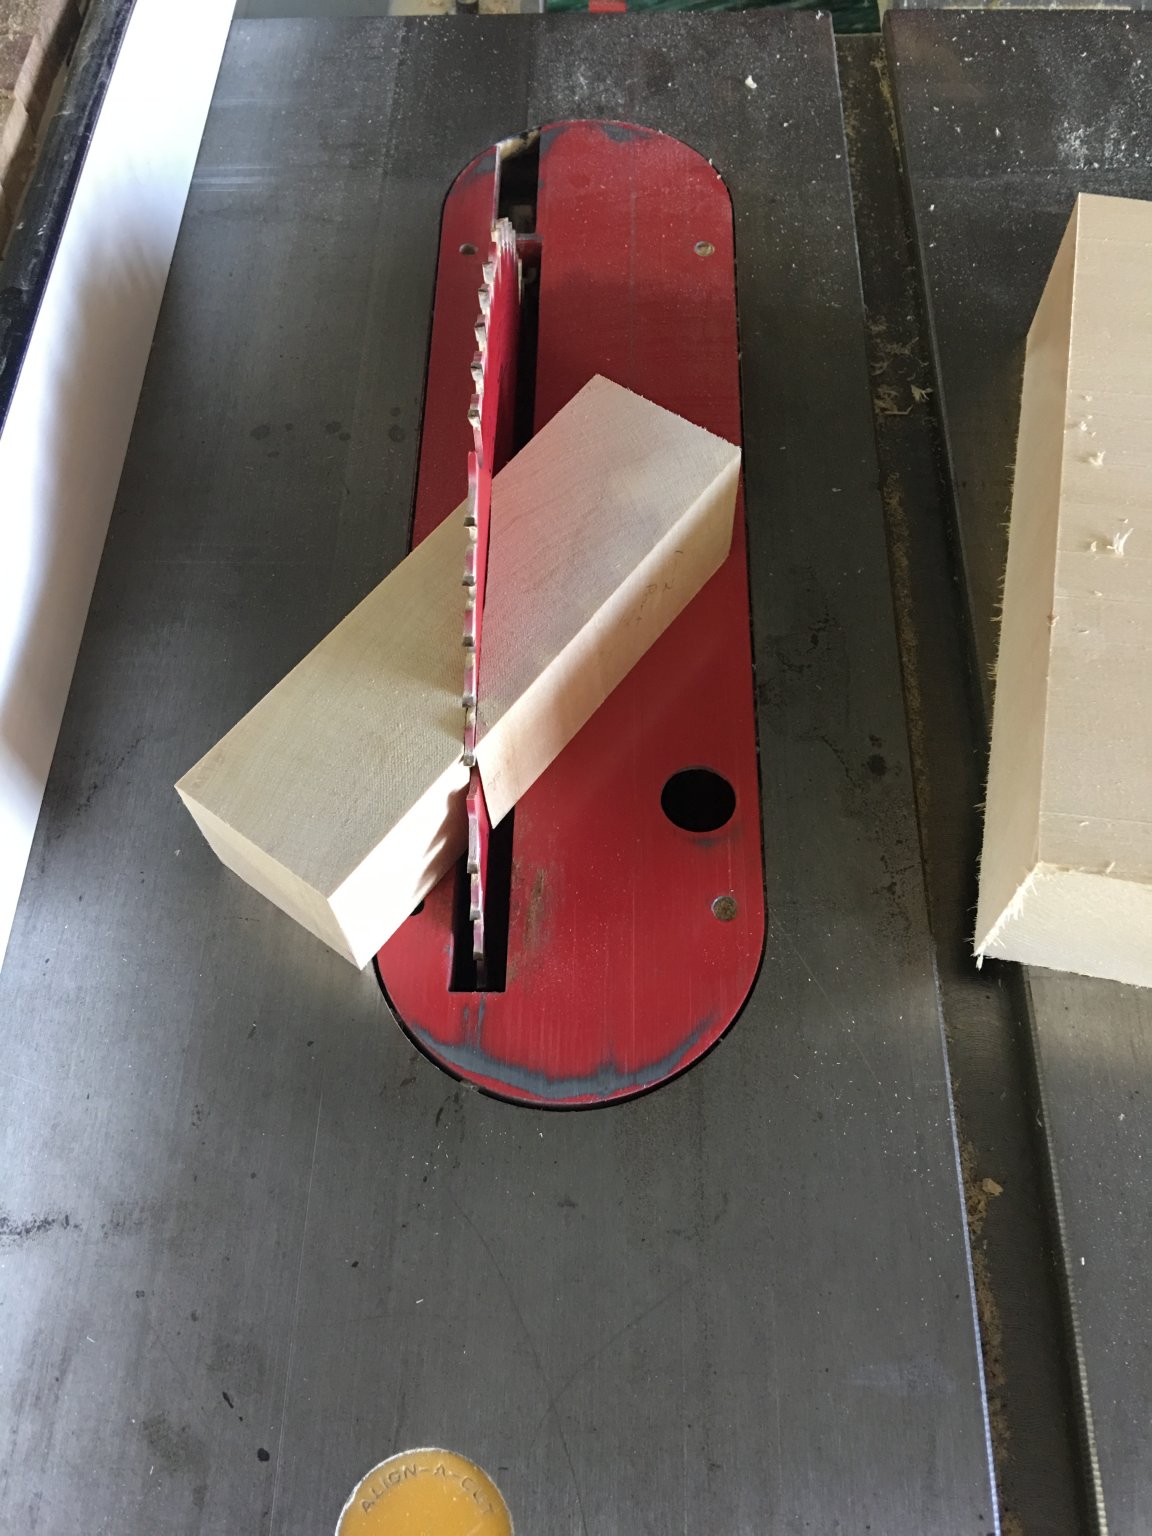
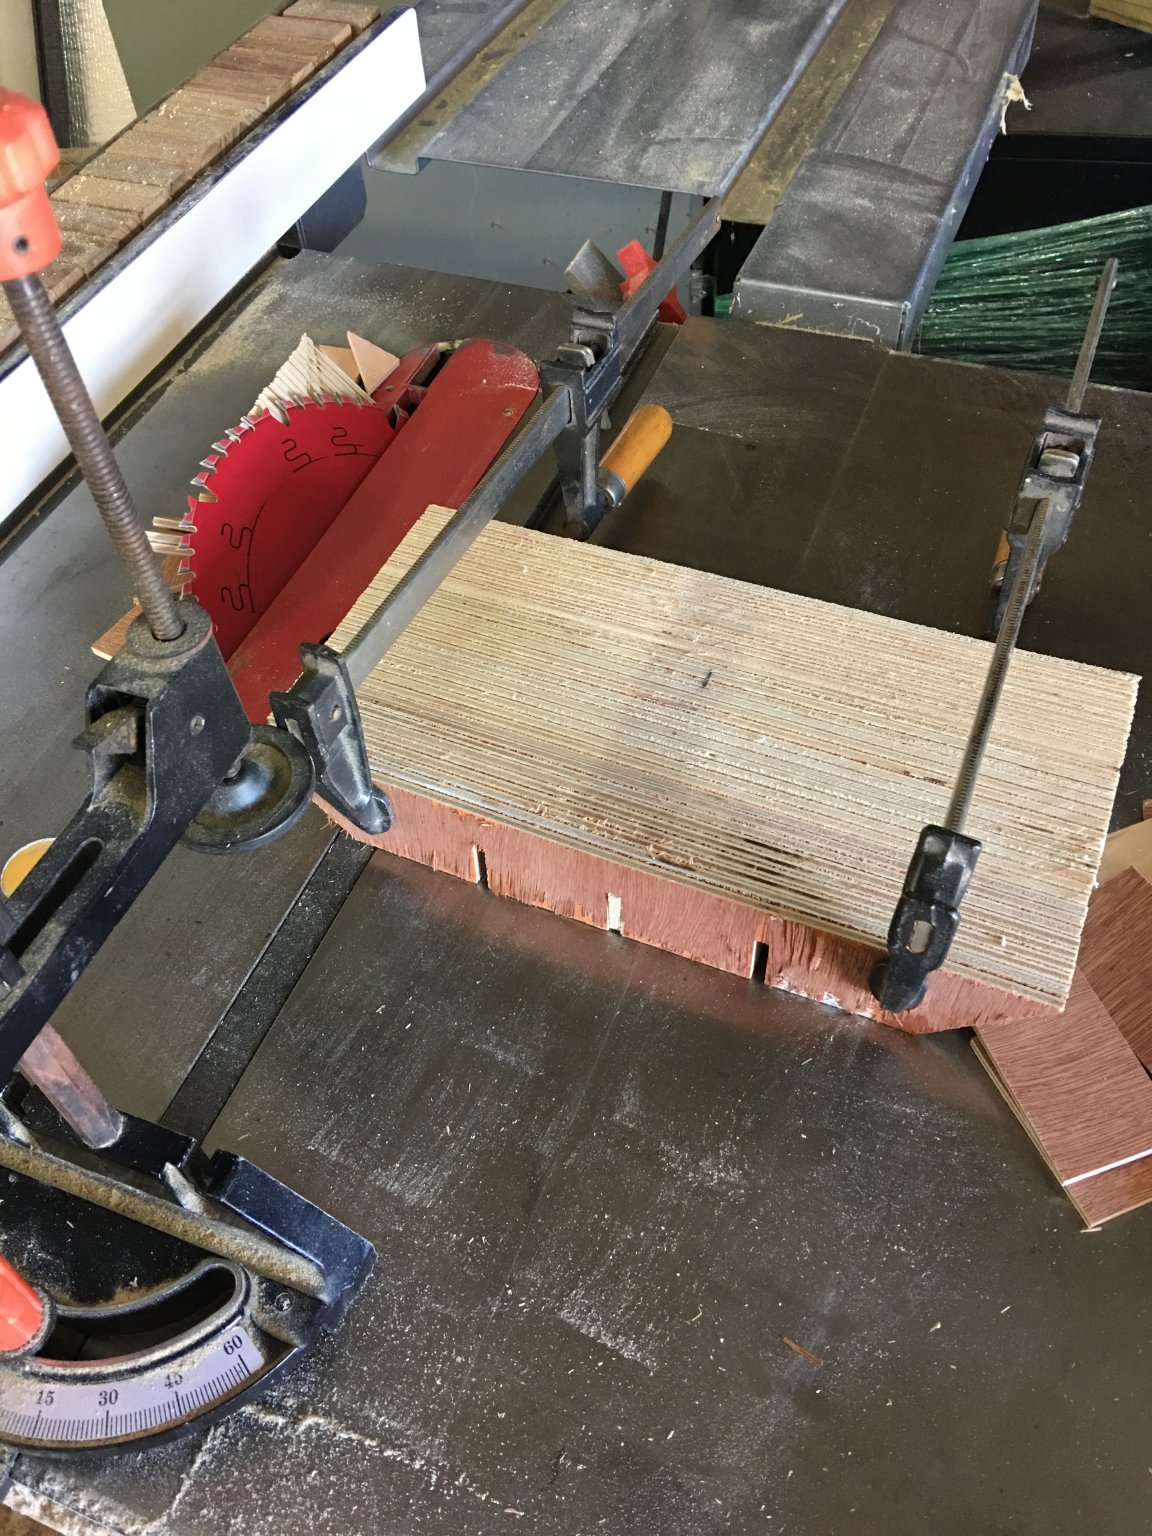
As stated earlier, I am not going to bother with too many details on the interior of hull and hold of this model, since it is going to be a static display and fully enclosed. For the hull construction I am using the plank on bulkhead design, single planked in basswood. I used ¼” plywood for the bulkheads, cut to shape on my table saw. I notched each one out in three places for the three false keels to interlock with. These bulkheads were spaced about 1.75” apart, or approximately every fifth frame outlined on the plans. Right now, all are the same width, but I will cut them down to follow the taper of the bow and stern, but it was easier to cut them all the same size at first to get all the notches lined up.

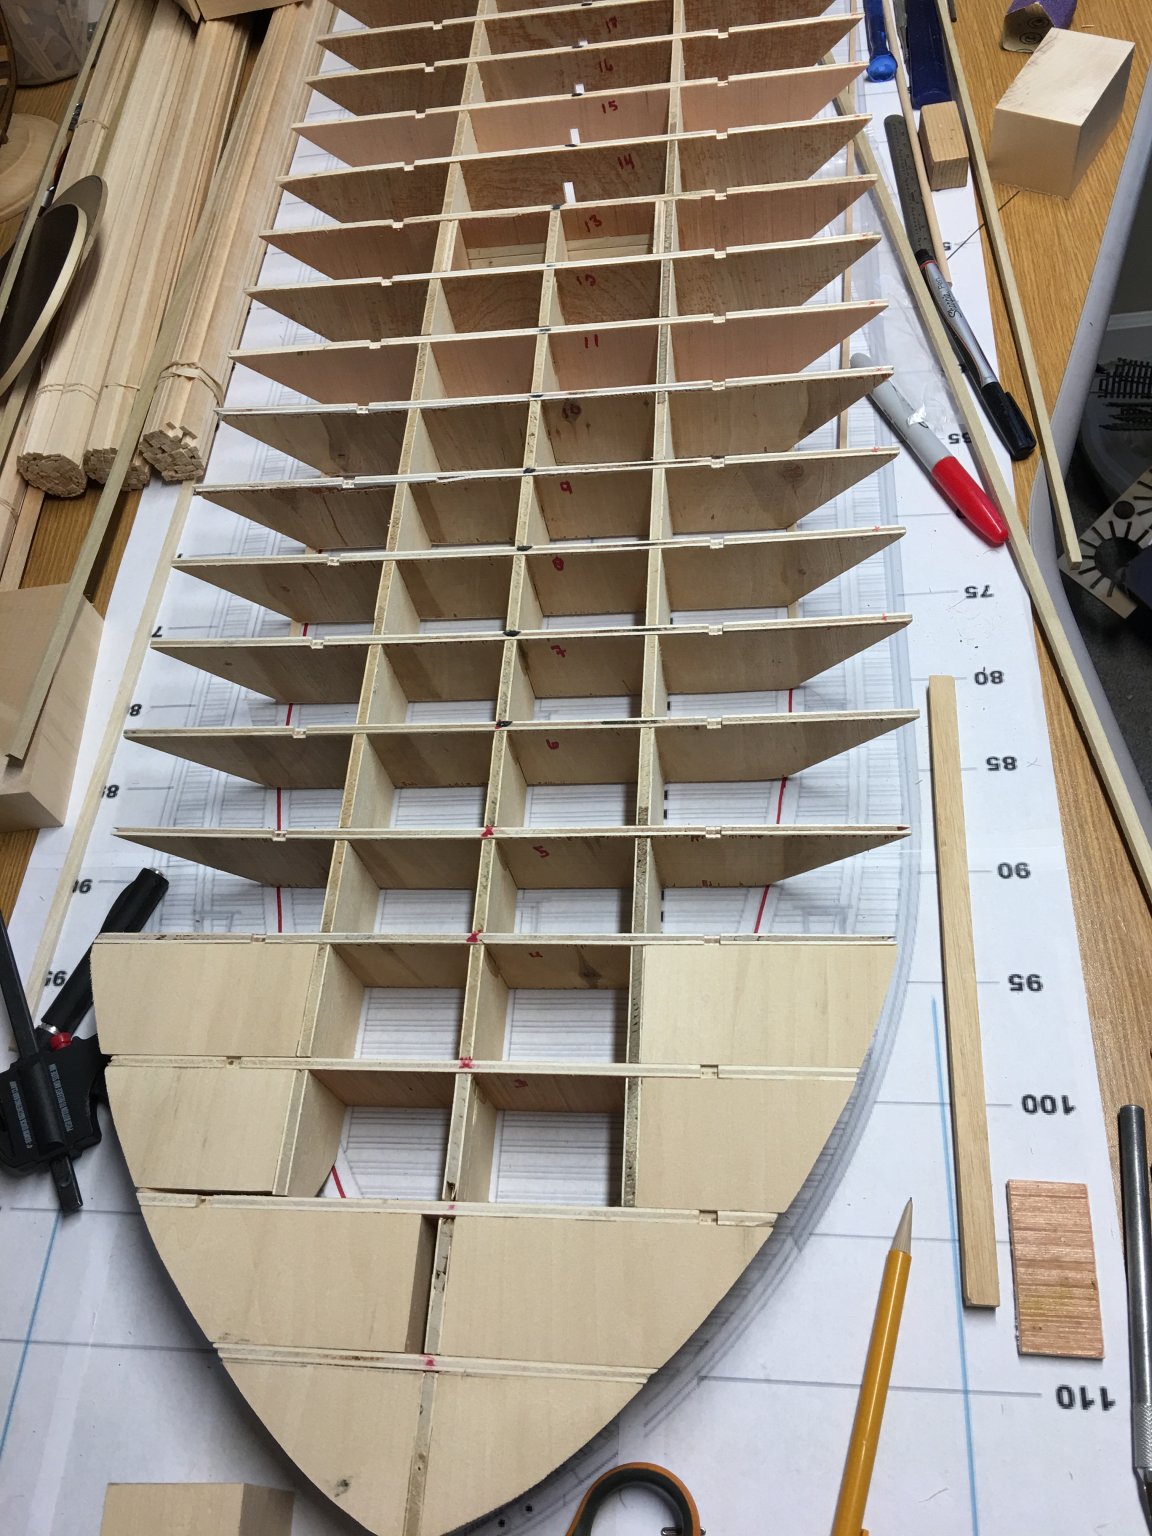
Of the 22 bulkheads, 14 are the same width. I cut down the three stern and five bow bulkheads to follow the contour and taper of the hull.
Here are all of the bulkheads and false keels dry fit. I will go ahead and leave the bulkheads that extend across the paddle-wheel area between the aft pontoons until the hull planking is done. This way I won’t have to worry about keeping the aft end in line and even. Once the hull planking is on it should hold everything in place and I’ll remove the center of the bulkheads and install the cross-braces.
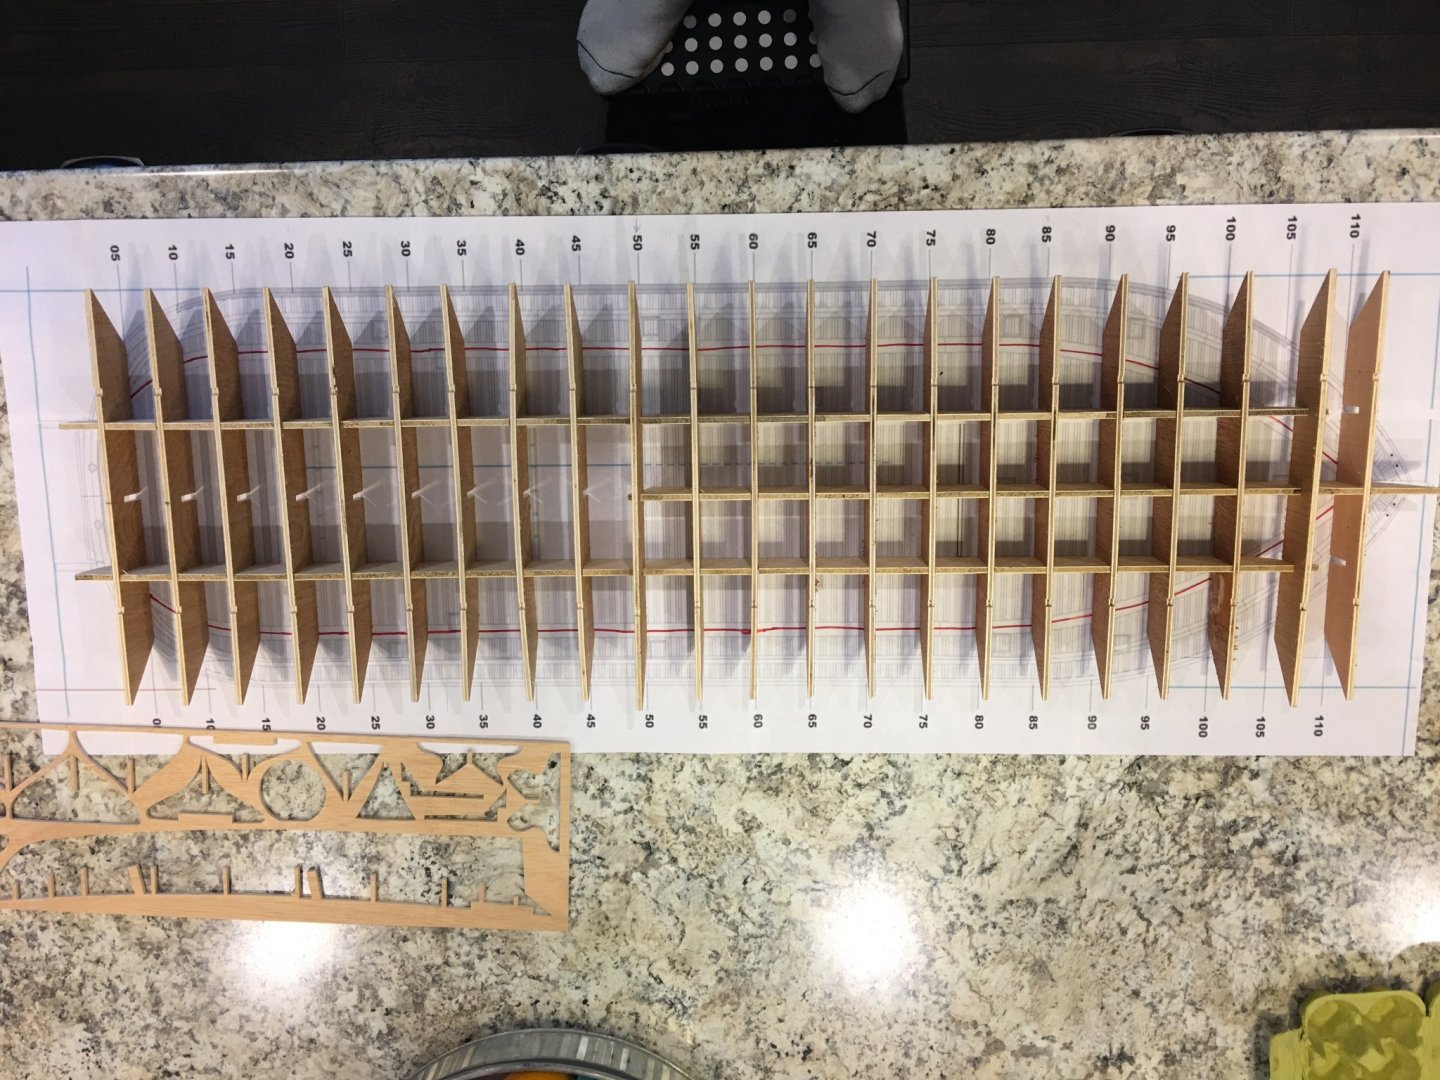
Everything seems to be pretty straight. Doesn’t look like I have any warping to contend with on the false keels. There are a few bulkheads that will need some adjusting, but all in all things look good so far.
So this is where I am at for now. I did place my order for the basswood planking and hopefully it should be here within the next few days. Right now, I am going to work on squaring up the bulkheads to the false keels and get them glued into place, then set the stringers to hold everything in line.
Oh, one last thing. As I do on all my builds, my signature. For no other reason other than I did it on my first build so I keep on doing it.
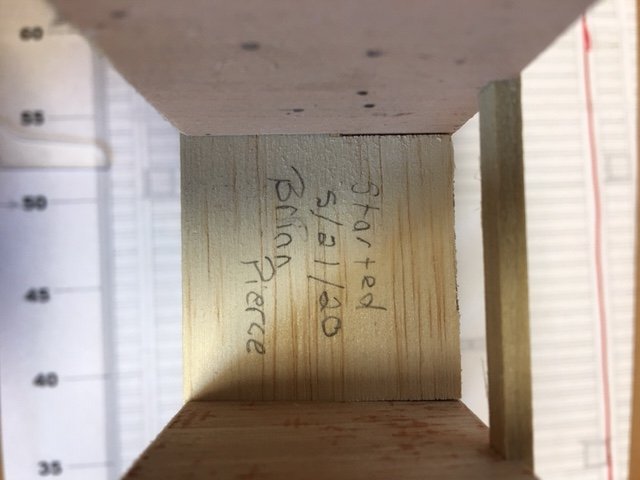
Thank you for looking.
-Brian
-
Welcome aboard everyone. What a great audience. Hopefully I all goes well with the build and I don't disappoint.
I am currently working on scaling the rest of the plans and printing them out. Hopefully I will have something picture worthy accomplished here shortly.
-Brian
-
Hello Everyone,
Welcome to the beginning of my build log for my first scratch build model. I recently completed work on the 1884 Packet Steamer Chaperon, which was my first attempt at a build log, and I enjoyed it so much that I wanted have another go at it. The comments and suggestions and overall conversation on the build was way more than I had expected. There are so many people out there with so many great ideas that helped along the way. Not to mention the knowledge I gained from the research.
For this build I will be taking on the City Class USS Cairo American Civil War Ironclad as she was shortly before her sinking in 1862. I have been in love with this particular ship since my first visit to Vicksburg NMP back in 1984. Something about the mystique of the recovery of a sunken ship and the history of those who lived aboard is just fascinating. And, since there are no large-scale wooden model kits out there for this particular ship, I figured this was the perfect opportunity to scratch build one.
My plan is to build this model in 1:48 scale using the Bob Hill plans, the USS Cairo HSR documentation from the Vicksburg NMP, and several other builds, especially the build log for the Civil War Ironclad USS ST. LOUIS by the Gateway Model Shipcrafter's Guild. This is an exceptional build and their extensive research has found many discrepancies with the USS Cairo HSR and I hope to “borrow” some of their research findings to accurately build my representation of the USS Cairo.
I won’t be building out a whole lot of interior details, with the exception of what can be see through the gun ports, skylights and deck vents. I will probably build out the tops of the boilers, flue, capstan, and possibly simulate the engines. I haven’t quite determined what material I will use for the iron plate cladding, but for the railroad irons on the forward and aft casements, I plan on using HO scale model railroad track to try and make it look as authentic as possible.
Without boring you with too much of a detailed history of this ship, here is a little background info on it:
The USS Cairo, along with her six sister ships (Carondelet, Cincinnati, Louisville, Mound City, Pittsburg, and St. Louis) were commissioned by the U.S. Army (later transferred to the U.S. Navy), designed by Samuel M. Pook and built by James B. Eads at the Carondelet and Mound City Shipyards in 1861.
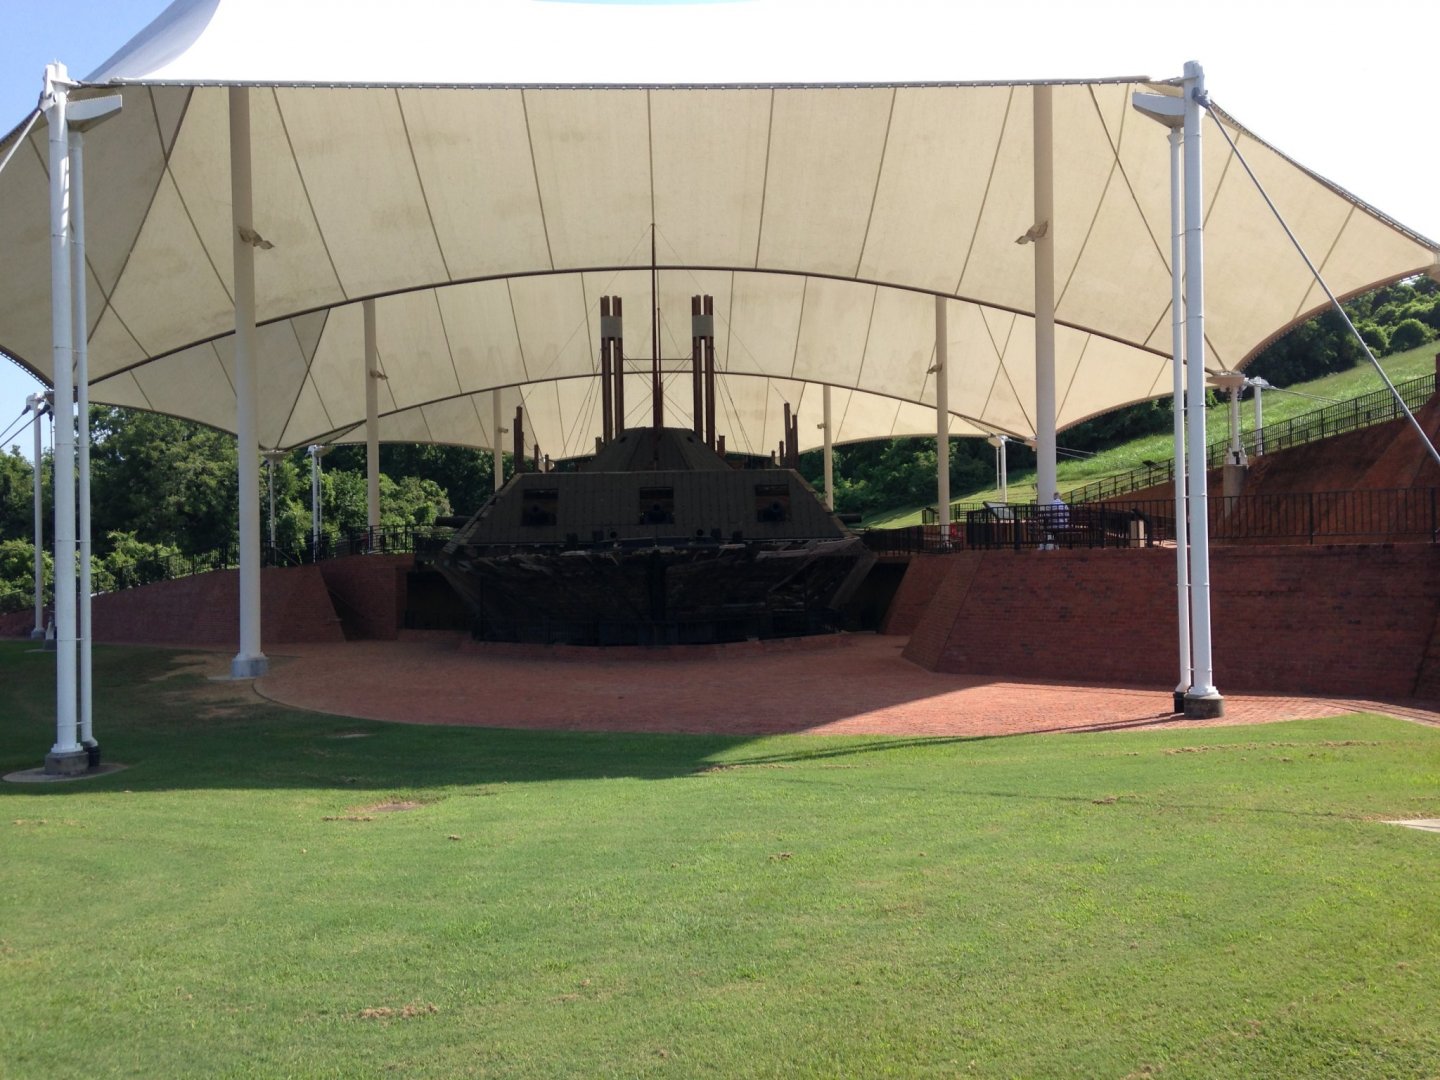
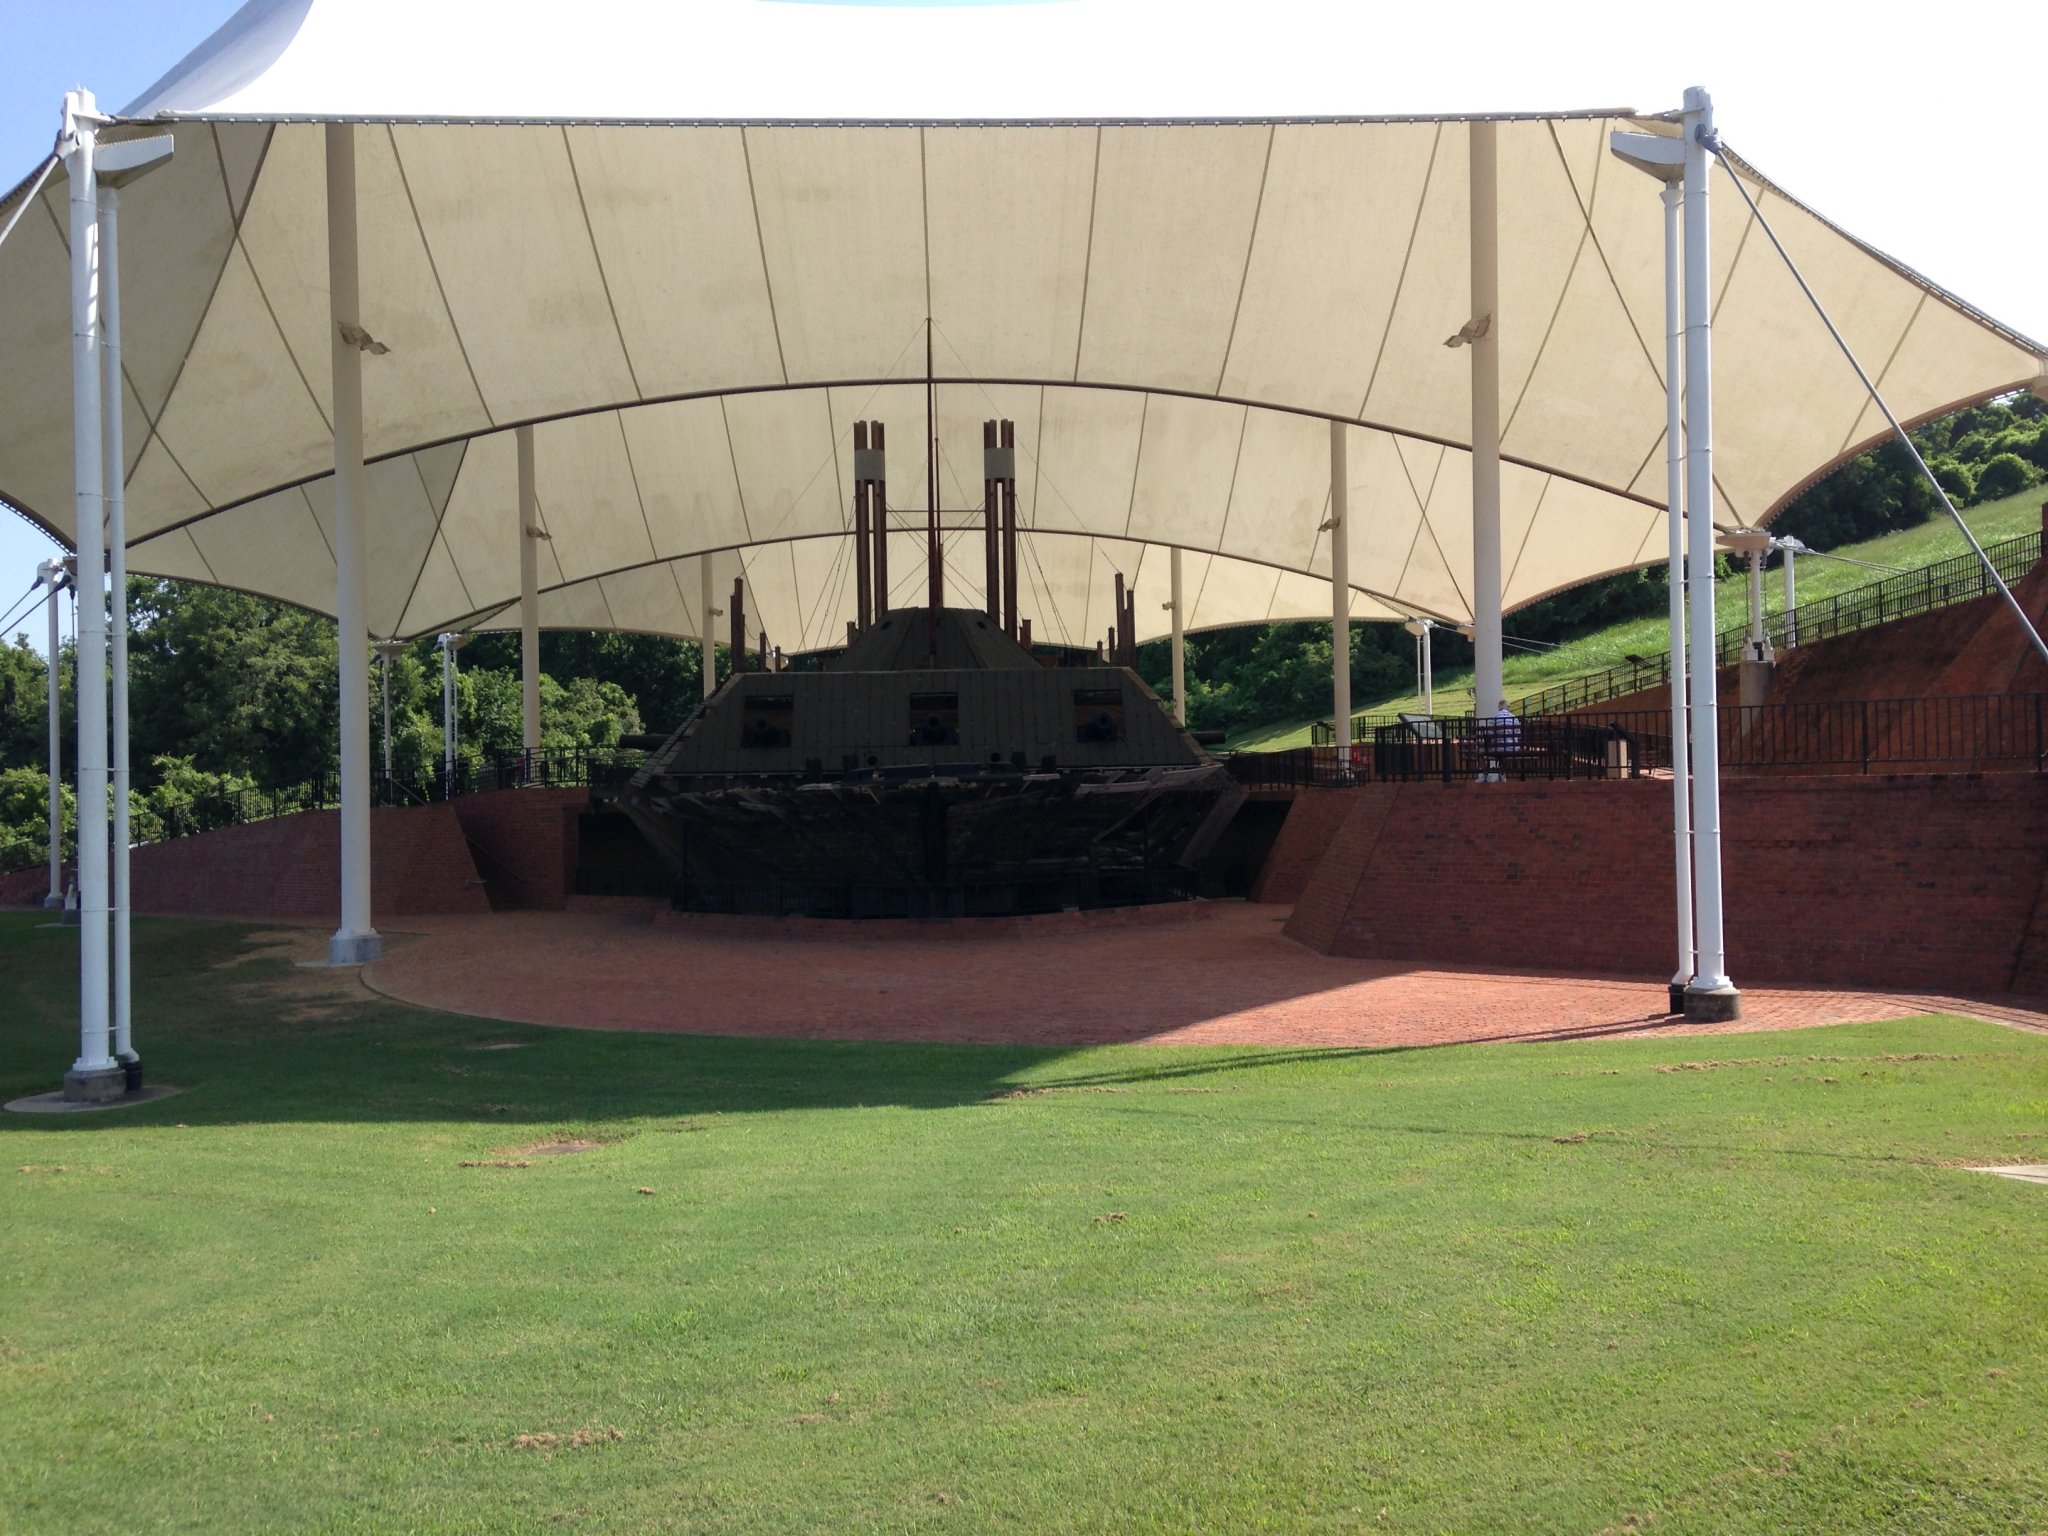
USS Cairo was 175’ in length with a 52’ 2” beam and drew only 6’ of water. Not very deep for a 512-ton heavily armored ship. Ironically, she was sunk by a Confederate “torpedo” on December 12, 1862 in the Yazoo river while on a mine clearing mission. The USS Cairo wreckage was located in 1956 and finally raised from the mud in 1964. She sat in neglect at the Ingalls Shipyard in Pascagoula, MS for several years, until 1977 where she was transported, restored and placed on permanent display at the Vicksburg National Military Park in Vicksburg, MS.
This will definitely be a learning experience for me, so if you would like to follow along, please pull up a chair and feel free to offer up any suggestions. I am always open to new ideas and constructive criticism. If you see something that I am doing wrong or see a better way to do something, by all means, please let me know. I welcome the input.
As she sits today (well, six years ago when I took this picture):
-Brian
- archjofo, GrandpaPhil, Cathead and 12 others
-
 15
15
-
1 hour ago, Cathead said:
Ooooh, is that an ACW ironclad? Tantalizing.
Yes sir. About time I get my feet wet in the scratch build world.
City Class - USS Cairo. Coming soon. Just need to study up a little more on the plans and I'll start the build (and the build log).
-Brian
-
Eric,
Thank you for steering me in the right direction. I don't know where my mind was when I said western red cedar. I guess I was thinking Western Rivers and got turned in the wrong direction. My compass may need a calibration.
You are also correct about the the Cedar/Juniper trees out here. I would say that about one third of my property is covered with them (I'd say at least a couple thousand of them). One of these days I would like to get a small sawmill and start harvesting some for projects around the the house. Too may other projects right now though.
As for the davits, the sockets seemed like a viable design. I figured that when lifting the boats, the deck hands would pull the ropes at an angle away from the bow and stern of the boats. The weight of the boats would be used to counter the angle of the ropes thus keeping the davits pretty well balanced in their sockets. Sounds good on paper anyway. But like you said, "modelers license" was applied in this case..
-Brian
-
Thank you all for the kind complements. This was definitely one of the more fun builds that I have done. I know that the build is complete, but I wanted to put out a small update on the progress of my display. I haven't gotten around to making the case for it yet, but I have made some headway on the base. I wanted to go with an epoxy resin water base, but I just don't think that my talents are quite there yet. So I went with a base that would somewhat represent her in dry-dock on the ways.
Right now the base is in the construction phase, but I'm getting there. Slow progress on it because I've been anxious to get started on my next build.
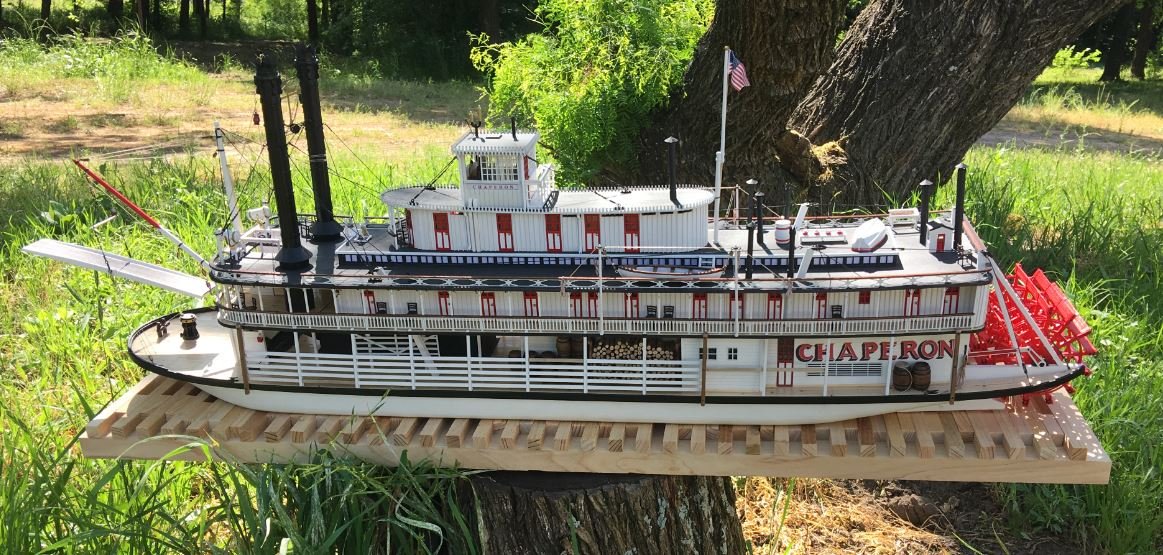
And here she is by the plans for my next build for size comparison (build log coming soon).

-Brian
-
4 hours ago, Cathead said:
Starboard boat rigging:

Eric,
Beautiful job on the work boats, the rigging is progressing at breakneck speed.
Quick question. I ran into the dilemma on my Chaperon build with how the davits were attached at the bottom. I studies numerous photographs of how they were set up, but none were close enough to get a good idea on them. Finally I ended up just rounding the end of the davit and making a block with a concave socket for the rounded davit end to pivot in. In looking at your photograph above, is this what you did? I tried zooming in a bit but still couldn't make out how it was done.
By the way, love the base. The western red cedar looks great with the colors of the boat and the darker border adds a nice contrast to it all.
-Brian
-
Great work on the navigation lighting Yves!
Good to see you are going to tone them down a bit. Otherwise it makes an easy target for the sub hunters.
-Brian
-
-
Eric,
I feel your pain on these. Several years ago I built these particular “lifeboats” for my Flying Fish. More than once I was ready to launch them into the never while trying to get the ribs formed around the formers. What I ended up doing was taking three strips of thin stock, soaking them in warm water for an hour or so and applying three layers around the former to “laminate” them. This worked perfectly to get the right shape. After making four of these for this build, I swore I wouldn’t make another one. For my Chaperon I built the MS kits that have the stackable layers that you sand to shape. These worked better and with less frustration. The only drawback to these is the seats are thin and susceptible to breaking. That’s why I mounted mine keel up. The overall look is good, the layers give the look of planking.
-Brian
-
-
Yves,
I agree with everyone on this. Truly an amazing piece of artwork, craftsmanship, and model building. You are a treasure to the hobby and an inspiration to us all.
-Brian


USS Cairo 1862 by MPB521 – FINISHED - Scale 1:48 - American Civil War Ironclad - First Scratch Build
in - Build logs for subjects built 1851 - 1900
Posted
Thank you Yves. I like the scale and thought it would be neat to show a size comparison between a work boat and a war boat.
-Brian