
HOLIDAY DONATION DRIVE - SUPPORT MSW - DO YOUR PART TO KEEP THIS GREAT FORUM GOING! (Only 75 donations so far out of 49,000 members - C'mon guys!)
×


Overworked724
-
Posts
1,259 -
Joined
-
Last visited
Content Type
Profiles
Forums
Gallery
Events
Everything posted by Overworked724
-
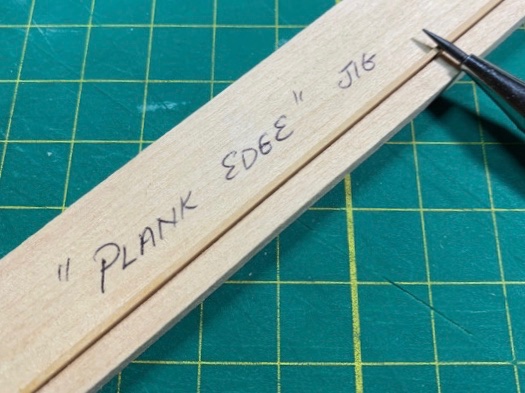
 Took a break from the build to make a few decisions. Decided that now that I have some nice Swiss pear wood to attempt my deck furniture, I decided to rethink the wood for the deck. I was going to use cedar, but really think The contrast would be a bit stark. A Swiss pear deck would look sweet, but really want to save it for other things. Since the deck gets brutalized a lot, I’ve decided to got with boxwood which is harder than cedar. I won’t even consider basswood...the crap I got in the kit made it to the firewood scrap bucket...it’s just waiting it’s turn to burn. I have a stash of boxwood I have never used before....so what the hell. I went ahead and calculated out the rough square area of the deck (overestimating by about 20% since I figured the area as if the deck were rectangular) and milled my 1/8” wide (0.4mm thick) boxwood deck planks. I think I should have enough. While I was doing that, I also made a little ‘plank edge jig’ to hold the planks when I need to clean up the edges or use pencil simulate deck caulking without smudging up other areas of the plank. I’m really just procrastinating. I needed a break from sanding...😣.
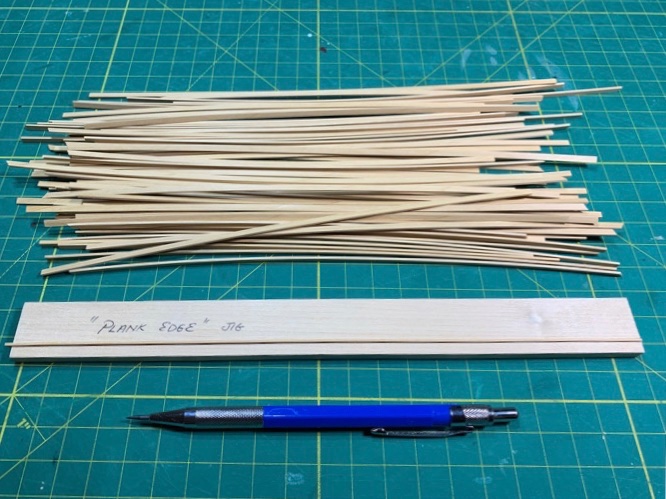
-
Looking good! I think you’ll find the micro-engraver I use is ideal. It’s not cordless, but that’s really not an issue. It’s light, thin, and very easy to adjust speed. I use it for everything. 👍🏽 The one I use also works with Dremel collets so you can adjust the engraver to fit even the tiniest drill bit. If you don’t have a collet assortment, you can order them on amazon for like 6$. Using the engraver with a mini drill bit will give you clean holes, but it will cut wood like butter...so you need to practice so you don’t pierce a bulkhead wall!!! 🤣
- 436 replies
-
- 1
-

-
- Syren
- Model Shipways
- (and 1 more)
-
Well...COVID shutdown #2 is now in progress in Illinois. I'll refrain from political commentary or opinions on the matter, as my ship building hobby and the modeling community are truly an escape from real life! I'll just say that I pray you all stay sane, healthy, and happy during the Holidays - and that we all find 2021 to be a year where we can stand outside in the sun and feel normal once again. I think it's amazing how many build logs are helping me make decisions as I (very slowly) progress. I believe me and @Justin P. are at about the same stage in our builds. Good on you, Mate - your build is looking brilliant! The build logs from other Syren modelers - @NovaStorm @WalrusGuy @niwotwill @abelson @Gahm are continual sources of information and inspiration! As for me, I'm enjoying and learning and relearning from new Syren builds like @Redshadowrider & @Bill Gormley. I'd like to personally thank you all for your continual posts...they really are the fuel that helps keep the motor of a new modeler going. Keep up the great work and remember, it's marathon....not a sprint. Text update only. Completed the interior bulkhead planking. The sanding part is now in front of me to clean up the interior prior to painting....and I'm trying to think happy thoughts...like never having to sand again! But as I start the clean up work on the interior bulkheads, I'm thinking about the margin plank, nibbing/joggling the deck planks, the cap rails, the stern davits, the waterways along with the scuppers and haws holes for the anchor cables. Funny...the Admiral says I forget myself when I'm in the shipyard...and I do. My mind just gets filled with too many little side projects at are a ship model. LOL - what a great hobby! Moving on - with one small note ==> The fixed blocks are now locked into the bulkheads and I am very very happy with the additional time spent to make them! One tiny success...I'll take it. Moving on...damn the torpedoes!
-
@niwotwill Thanks, Will! Your recent difficulty made me reassess my decking plan to ensure my measurement wasn’t off!!!
-
Many people use a pin vise for drilling - I use a handheld rotary (engraving) tool (my build log post #71). I don't think I've ever used a pin vise. The way I make trunnel holes is using Tamiya tape to make a solid edge (line) to mark where I want to holes to line up. Then I use a pin which is mounted in a dowel as an awl to premark the spot for the drill. Then I stick in my micro drill bit and drill away. Pretty relaxing drilling the holes... Either way - I think your build is looking great!
-
I do the same....run it along the edge. The line is still there...the tung oil will make it pop!
-
@Justin P. sure thing. No promises! I’m spitballing here! 🤣 I think I got my stash of plywood at Hobby Lobby or some other kraft shop...but they do sell it on Amazon. 1/64” birch sheets, Midwest Products 5240. It‘s a bit pricey...but a 12” x 24” sheet would be way more than enough to cover the deck.
-
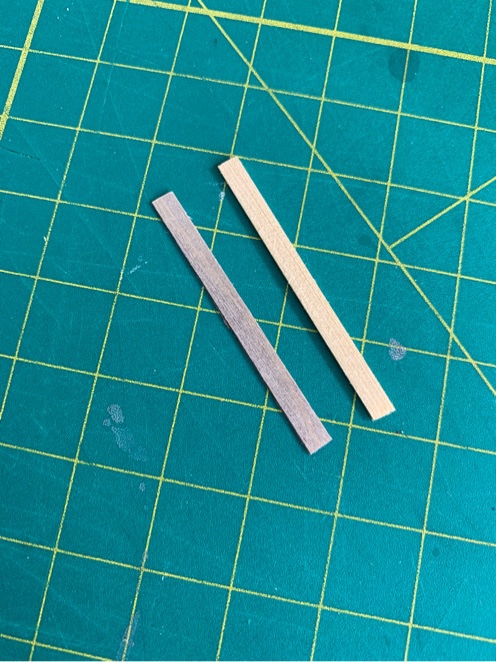
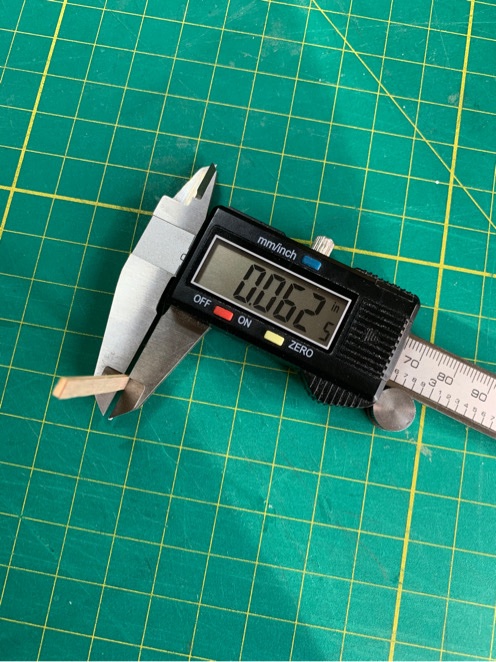
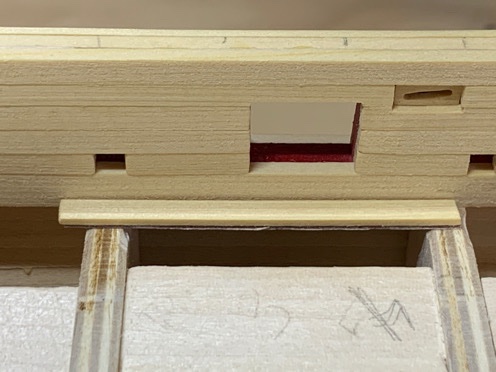
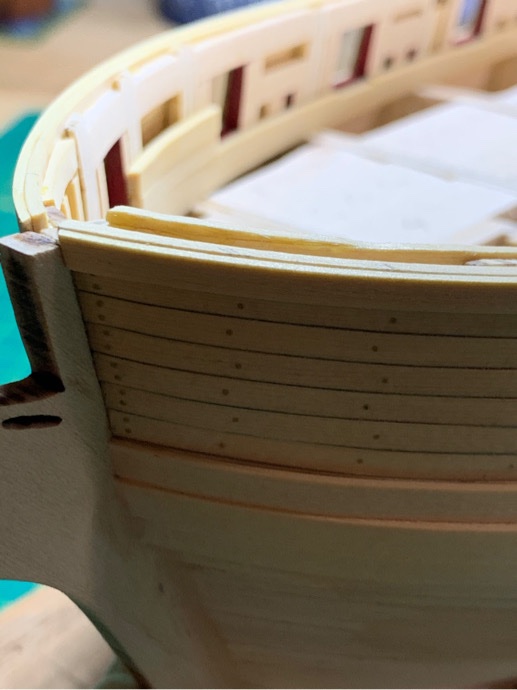
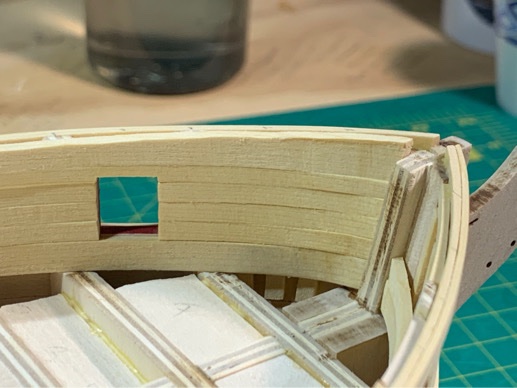
Sanity check as a minor diversion to the tedium of the interior bulkhead planking. My plan is to lay down a false deck and use thinner wood (1/32” or 3/64”) for my planking/margin. My hope is the false deck will give me greater stability and purchase while laying down the deck as well as nibbing and joggling at the bow. Took a sample of 0.5mm birch ply and a ~3/64” cedar plank. Went ahead and glued them and measured total thickness as almost perfectly 1/16” (0.0625”). Can’t get much closer. Quite Lucky that! 👍🏽 Laid it up against the bulkhead to check distance to the sills above the deck. Relieved to see the gap between deck and sill is a comfy 1/8”. Should be sufficient room for the waterway and carronade swivel bracket without making it proud above the sill. Moving on...

-
Many thanks @Gahm@WalrusGuy@CPDDET!!!! Much appreciated!!!
-
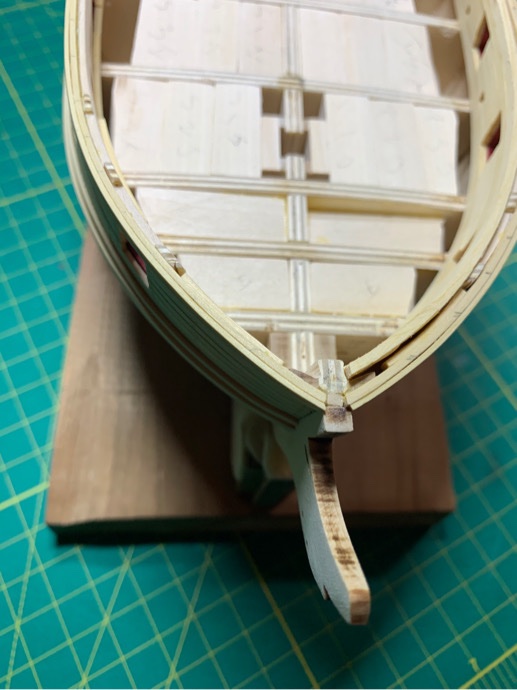
Well. The bottom of the ship didn’t fall off! 🤣 So that’s a win. 👍🏽
-
It’s not an issue really. I just glued it along to top edge to lock it in place (even though I didn’t really need to...). I plan to put in a thin support deck to make it easier to do the deck planking. So I had set the fillers slightly lower than the tops of the frames initially anyway. 👍🏽
-
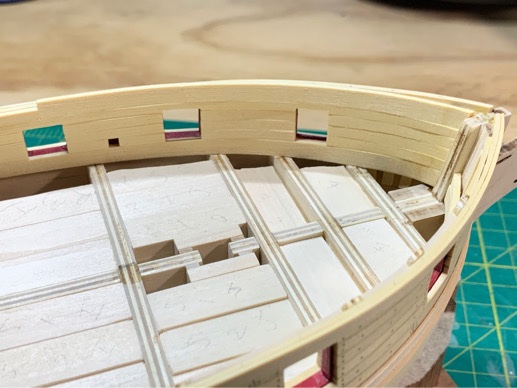
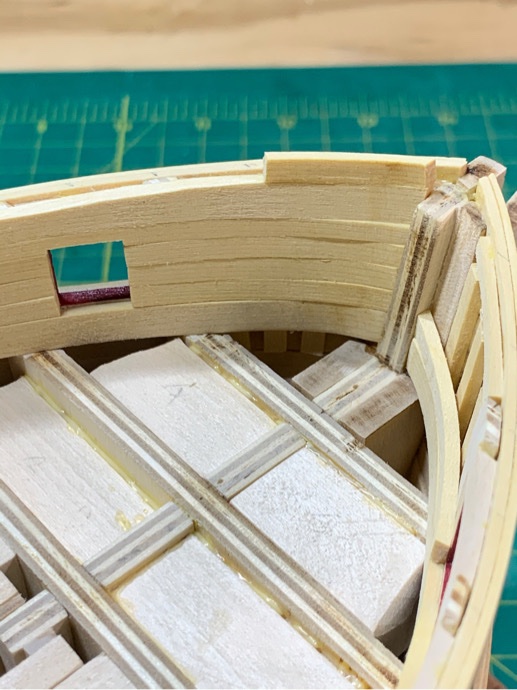
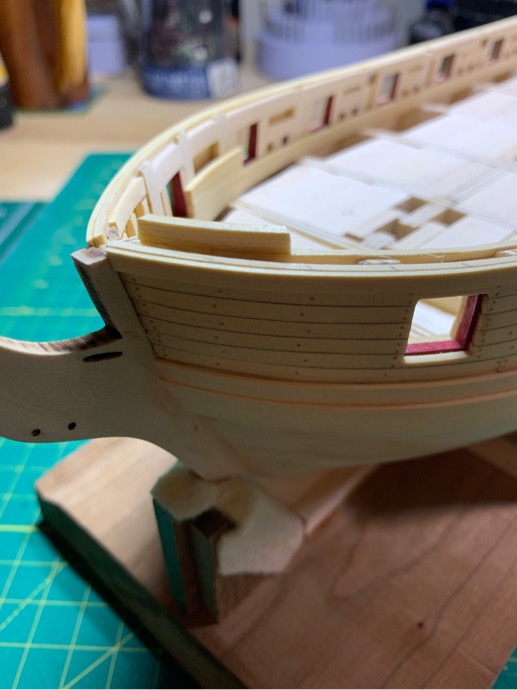
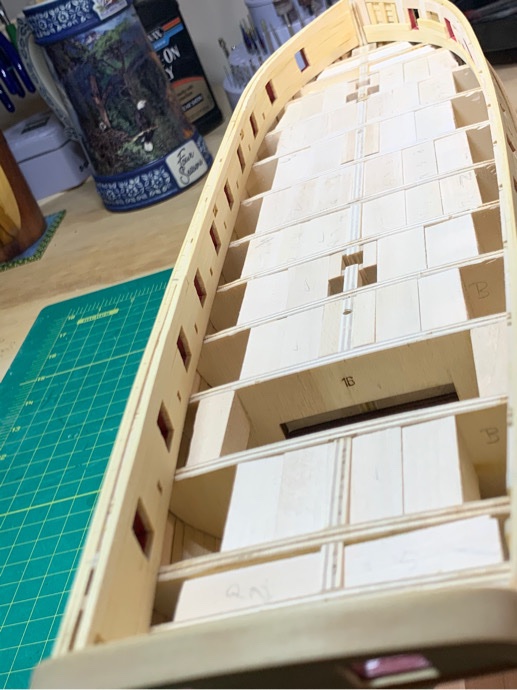
Glacial pace...good grief, I hate work but love my paychaeck. =-/ Got done with rough planking the interior port side. Realized I’d needed a slightly wider plank along top edge to cover the upward swish on stern and bow...used 7/32” plank along top edge. But still needed a shim on the bow portion. Basically I wanted to ensure that the interior wall was a bit higher that the outboard side so I can fair top of the bulkheads to level without eating into the wood of the shear strake. I am trying to ensure I get a nice level cap rail...so I'm trying to make it less difficult for when time comes to prep and lay down to cap rails. Bow... You can see the very slight dip on the interior edge nearest the stem after I put in the last plank along the interior top edge. (Can you see the 'surprise'? I didn't notice until later!) Added a shim along the front top edge.... Then I sanded down with a dremel barrel sander and ensured the inner bulkhead was slightly elevated than the outer. Stern...(hey...the double block looks pretty nice) Midships...fixed blocks are slightly depressed...sanding in my future! Port side done...Overall - the rough interior planking looks ok. With some final sanding and some touch up filler, she'll be ready to paint....Good Lord willing. Plus one surprise!!! A truly WTF moment.... Sometime recently, a port side filler block near the bow 'sunk'!!! Well....s**t. =-( Just threw on some glue and continued on...the filler blocks are not my concern and I won't need them for deck planking. 😃 Moving on to the starboard side!!
-
I say go for it. It’s your build! But I do agree that you should make some trial nails as well as trial swatches of planks to get the rythm and work out kinks. Another thing to consider is ensuring you can reproducibly drill the trunnel holes without issue. So that’s the other half...Tamiya tape and an awl is what I used to premark the holes. But everyone needs to refine their techniques. 👍🏽
-
Takes forever...binge watching Netflix helps. It’s practice for coppering the hull. 🤣
- 436 replies
-
- 2
-
-
- Syren
- Model Shipways
- (and 1 more)
-
Looks fantastic! PVA glue or CA to lock the rail in place?
- 950 replies
-
- 1
-
-
- syren
- model shipways
- (and 1 more)
-
Sure. The whole explanation is in my build log (see post #251).
-
Longboat looks fantastic, Will. Wouldn’t worry too much about the sills. Once you e got the carronade sleds, tackle and rigging, rope coils and whatnot....you will be lucky to see the trunnels in the deck planks! 😂 Enjoy your. Trip, shipmate!
-
I just measured using a caliper and straight edge with a drafting pencil (sharp as hell point). Once the line was drawn, I placed the plank against the edge of a wider plank of the same thickness as a backstop. I took a small metal ruler and glued 800 grit sandpaper to the back. Then I put the metal ruler along the top of both pieces lining up the edge of the rule with the cutting mark. The sandpaper keeps them from moving. Then I used a #11 blade and ran it gently down the line a few times...the lighter you press the more strokes is required but you don’t run into issues with the blade catching any cross grain and screwing up your cut. Then I just cleaned up the cut edge with 1000 grit sanding pad. Later on I managed to get an old plank clamp but I thought the above method gave me consistent results. Think there’s probably some great methods out there...but I had the same problem. Good luck!
- 436 replies
-
- 2
-
-
- Syren
- Model Shipways
- (and 1 more)
-
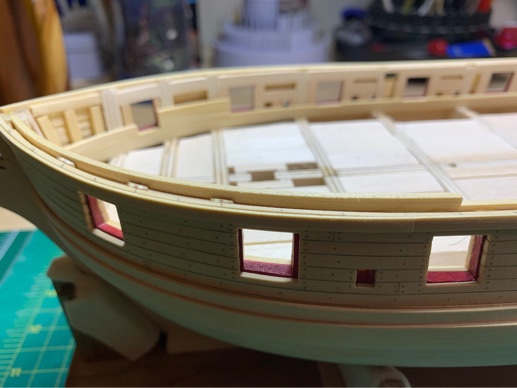
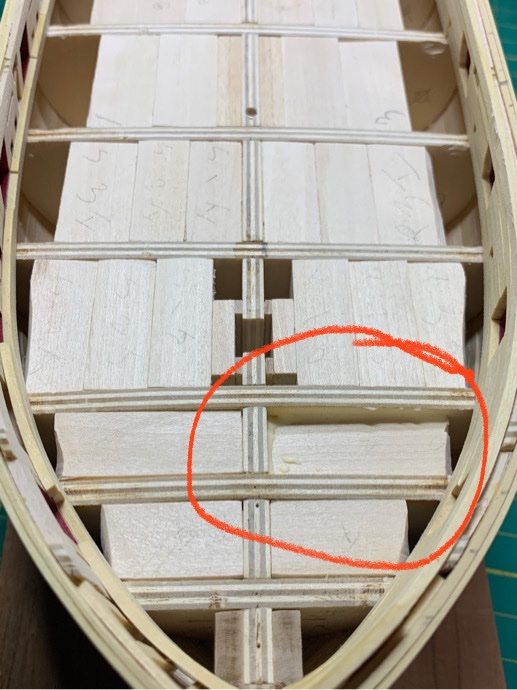
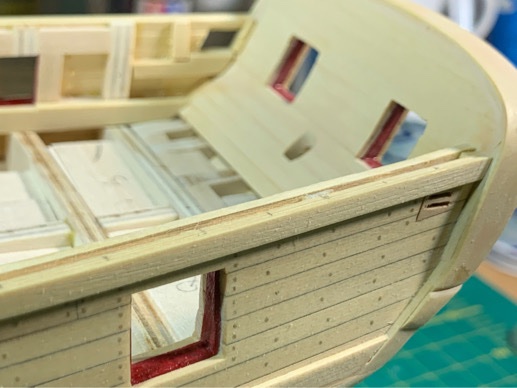
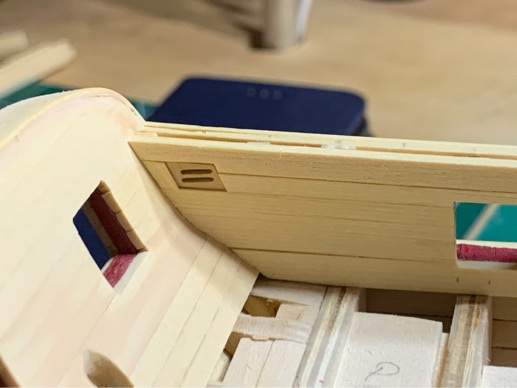
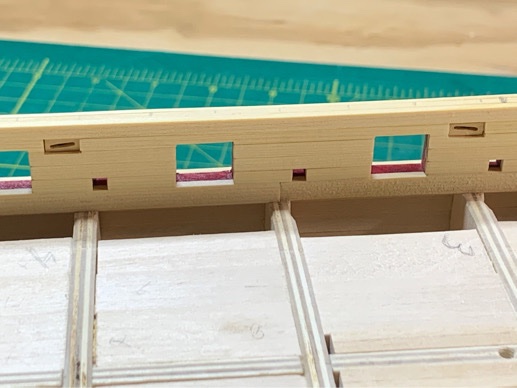
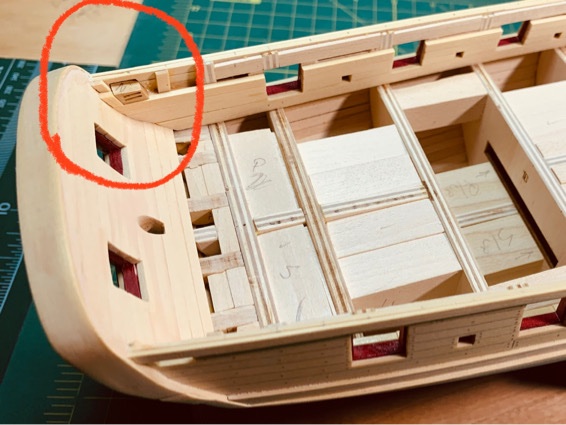
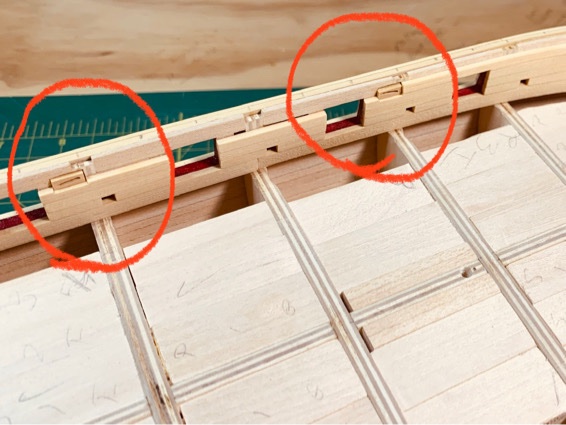
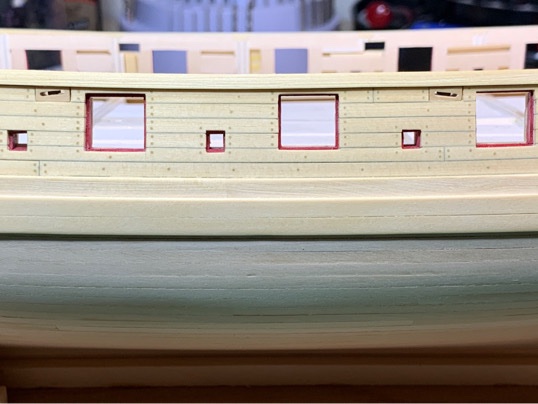
Still pecking away at the interior bulkhead planking. Work has been distracting these past few weeks but thought I would send a couple pics. The fixed sheave blocks actually look fairly decent when viewed from the exterior of the ship. The trick is getting good clean interior planking around them after they have been set in with glue. You can see (red circles) that I’ll still need to sand down the bulkheads about 0.5mm or so after I’ve completed the planking. This will also ensure the sheave blocks are flush on both sides. Sigh....more sanding in my future. Moving on!
-
Is that a mini lathe?
-
Interesting building board! Did you make it or was it manufactured?
-
Looks great, Jamie! Coming along very nicely. The sanding never seems to stop, does it? 😃
-
A shipmate from my ship model club was liquidating some of his stock. I jumped at it...but I was on a waitlist for good unfigured Swiss Pear from Gilmer Woods. It’s rare but they are pretty good. I get boxwood from them.
-
Yep. It almost cycles through a 90 degree angle from vertical at the stern to mid ships then back to vertical. I used those soft plastic clothes pins a lot as well as the modified binder clips. Made it easier.
- 436 replies
-
- 1
-
-
- Syren
- Model Shipways
- (and 1 more)