HOLIDAY DONATION DRIVE - SUPPORT MSW - DO YOUR PART TO KEEP THIS GREAT FORUM GOING! (Only 13 donations so far - C'mon guys!)
×


Ian_Grant
-
Posts
2,113 -
Joined
-
Last visited
Content Type
Profiles
Forums
Gallery
Events
Everything posted by Ian_Grant
-
 Good first build; you're a braver man than me. I've never tried planking a hull. Just a note about the blocks in your mast picture: it looks like the two upper blocks are the wrong way round. By this I mean the single holes should be at the other end. Imagine that the rope passing through has to go around the disc-shaped sheave (a pulley) within the block; whichever direction the rope comes from it must enter the block at the furthest end in order to use the pulley. Enjoy your rigging! Ian
 -
As I recall, flemish horses were present on any yard carrying a sail which had reef bands. A crew member had to be at the very very end of the yardarm to haul the end of the reef band taut and attach to a fixture at yardarm end. I believe this was called "passing the ear-ring". The regular footrope is too near the yard (in the sense of height to the yard from the rope) for this seaman to safely stand. The Flemish horse droops lower to provide this. I haven't looked to add to this response, but there are pictures of seamen even sitting astride the yardarm end to haul the band taught. That's what I recall anyway; I should consult Harland.
- 186 replies
-
- 2
-

-
- Flying Cloud
- Mamoli
- (and 1 more)
-
That's ok, we'll wait (sound of chair scraping). (sound of feet tapping). "Umm, are you back yet?" (sound of feet tapping).
-
Nice hull Bill! Also - I hereby induct you as an honorary electronics engineer! Your iron ring is on its way (well, not really since it's a Canadian thing!).
-
Hi Glen - another awesome build! Just got back from vacation and saw this thanks to your mention of me. 😏 Probably moot now, but when I read about your new idea of lit flames I thought of this build I had admired before:
- 156 replies
-
- 6
-
-

-
- Queen Annes Revenge
- bottle
- (and 1 more)
-
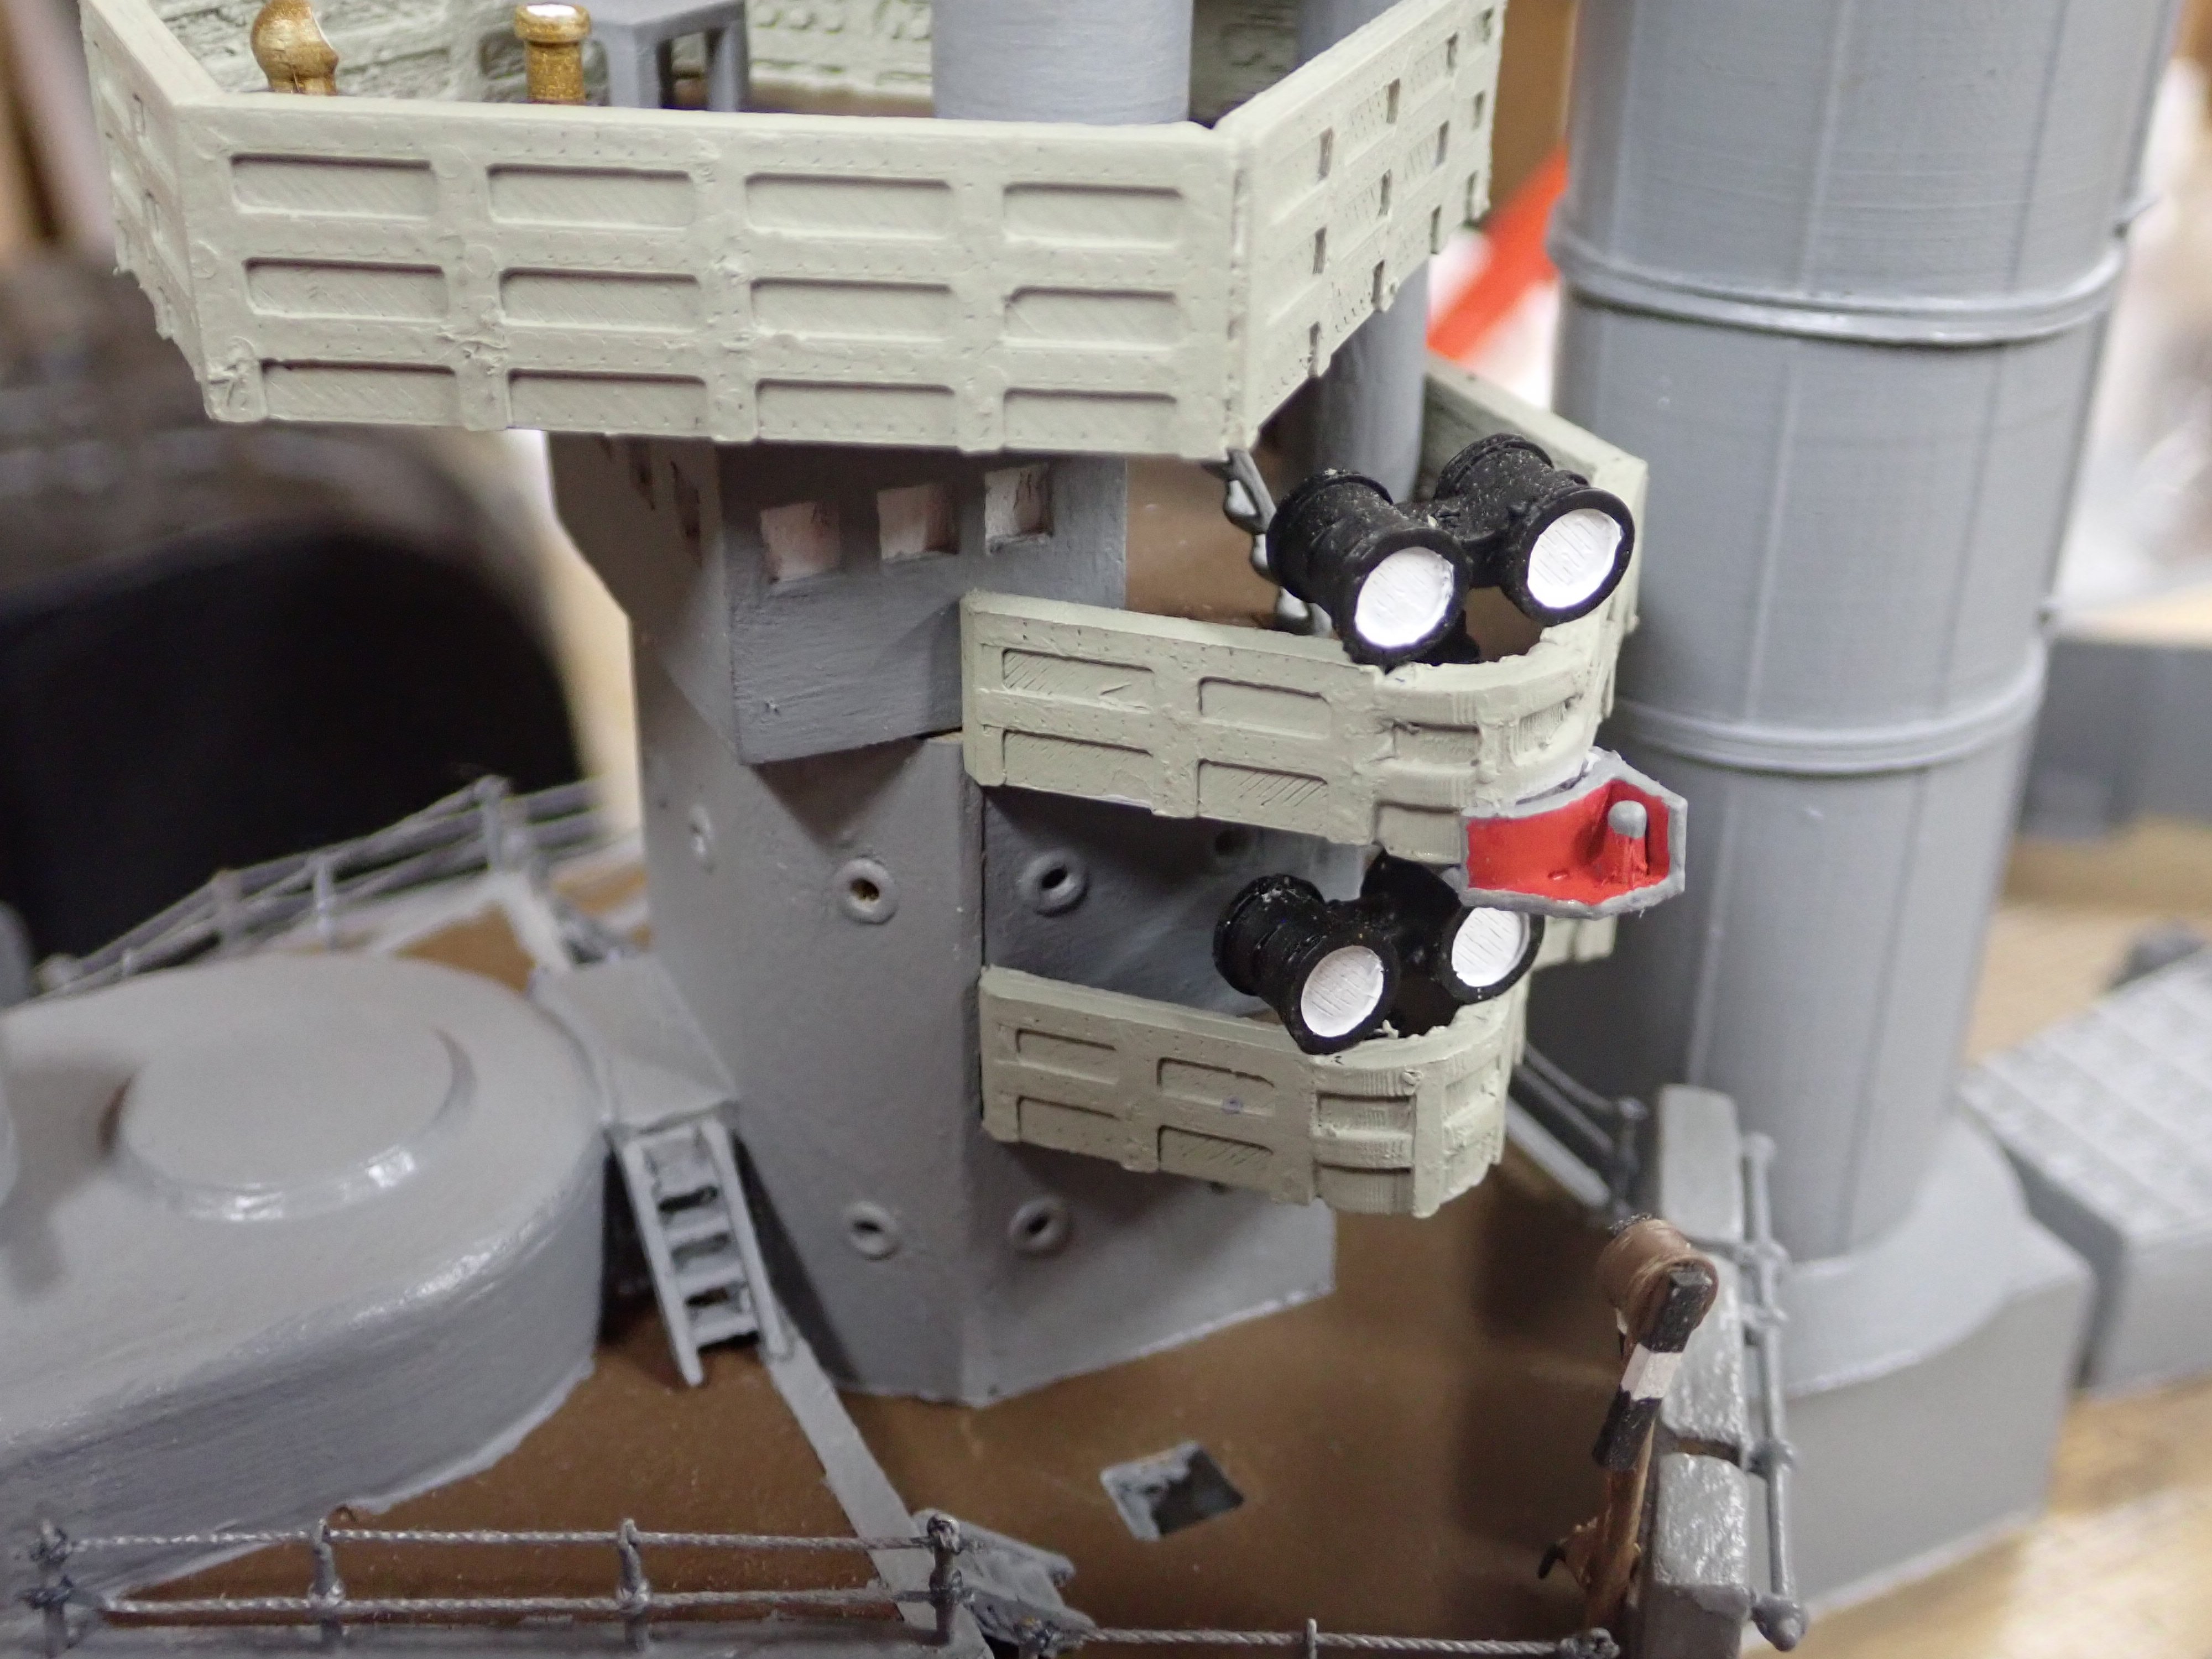
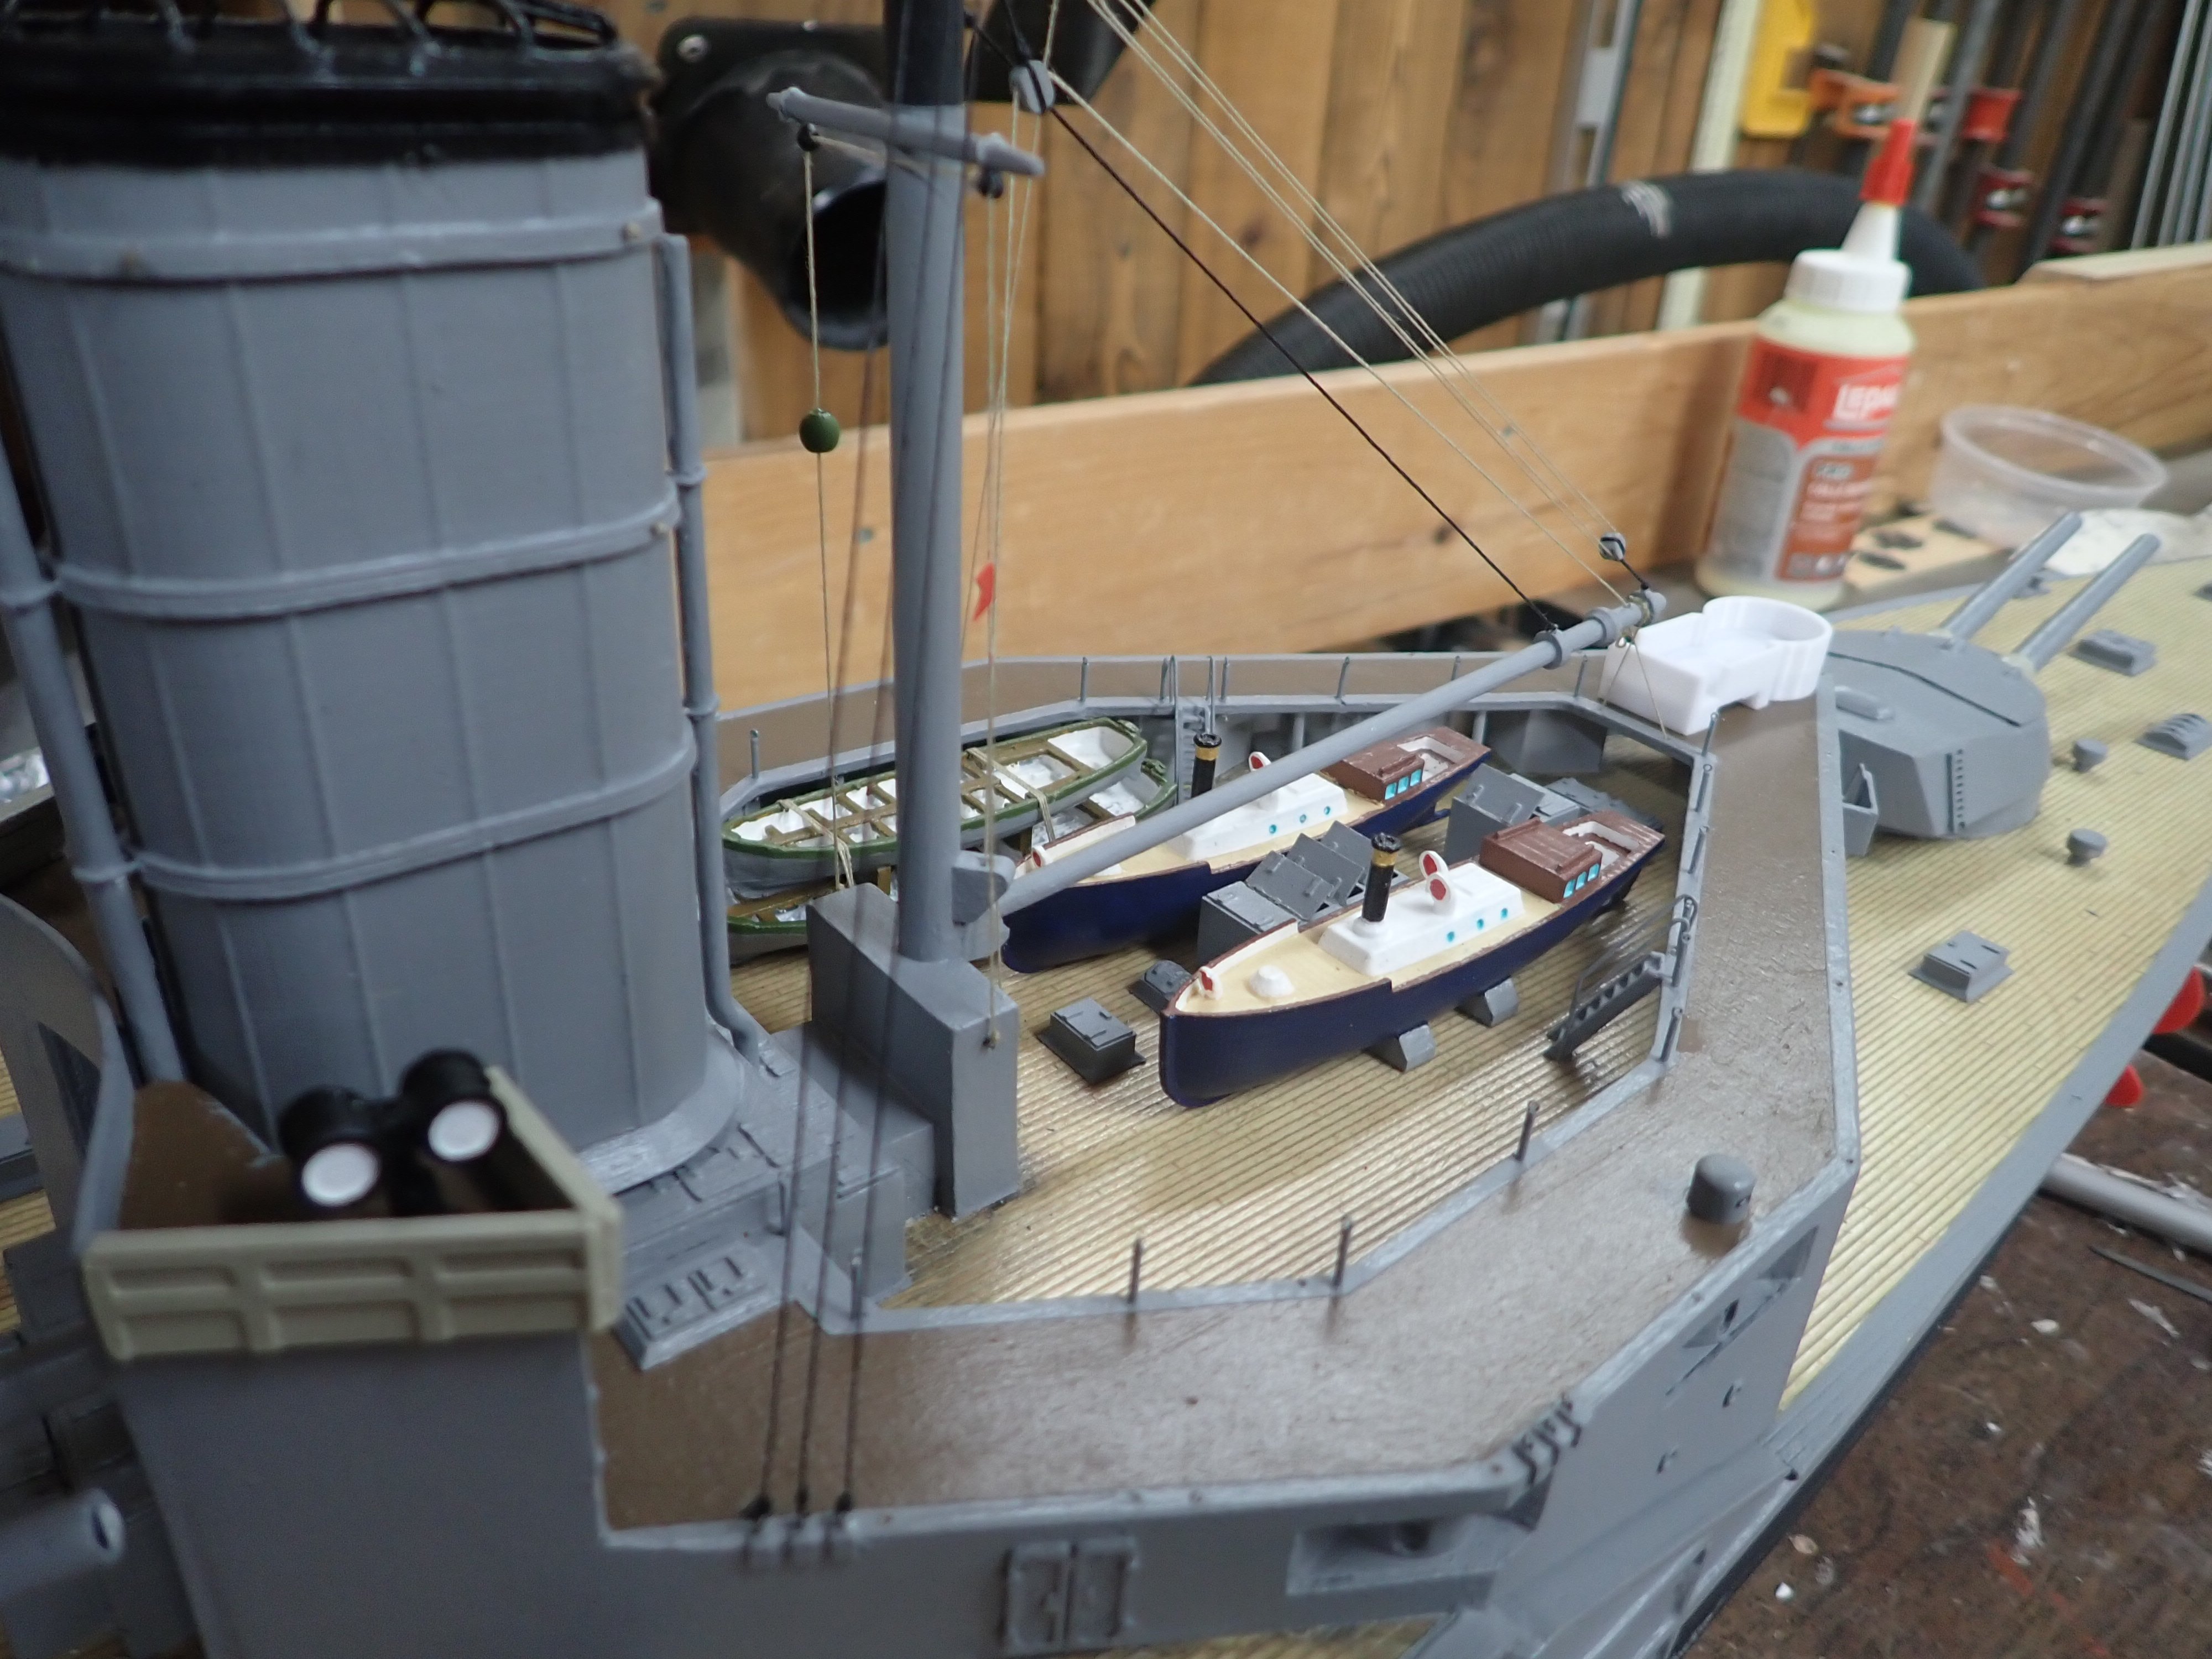
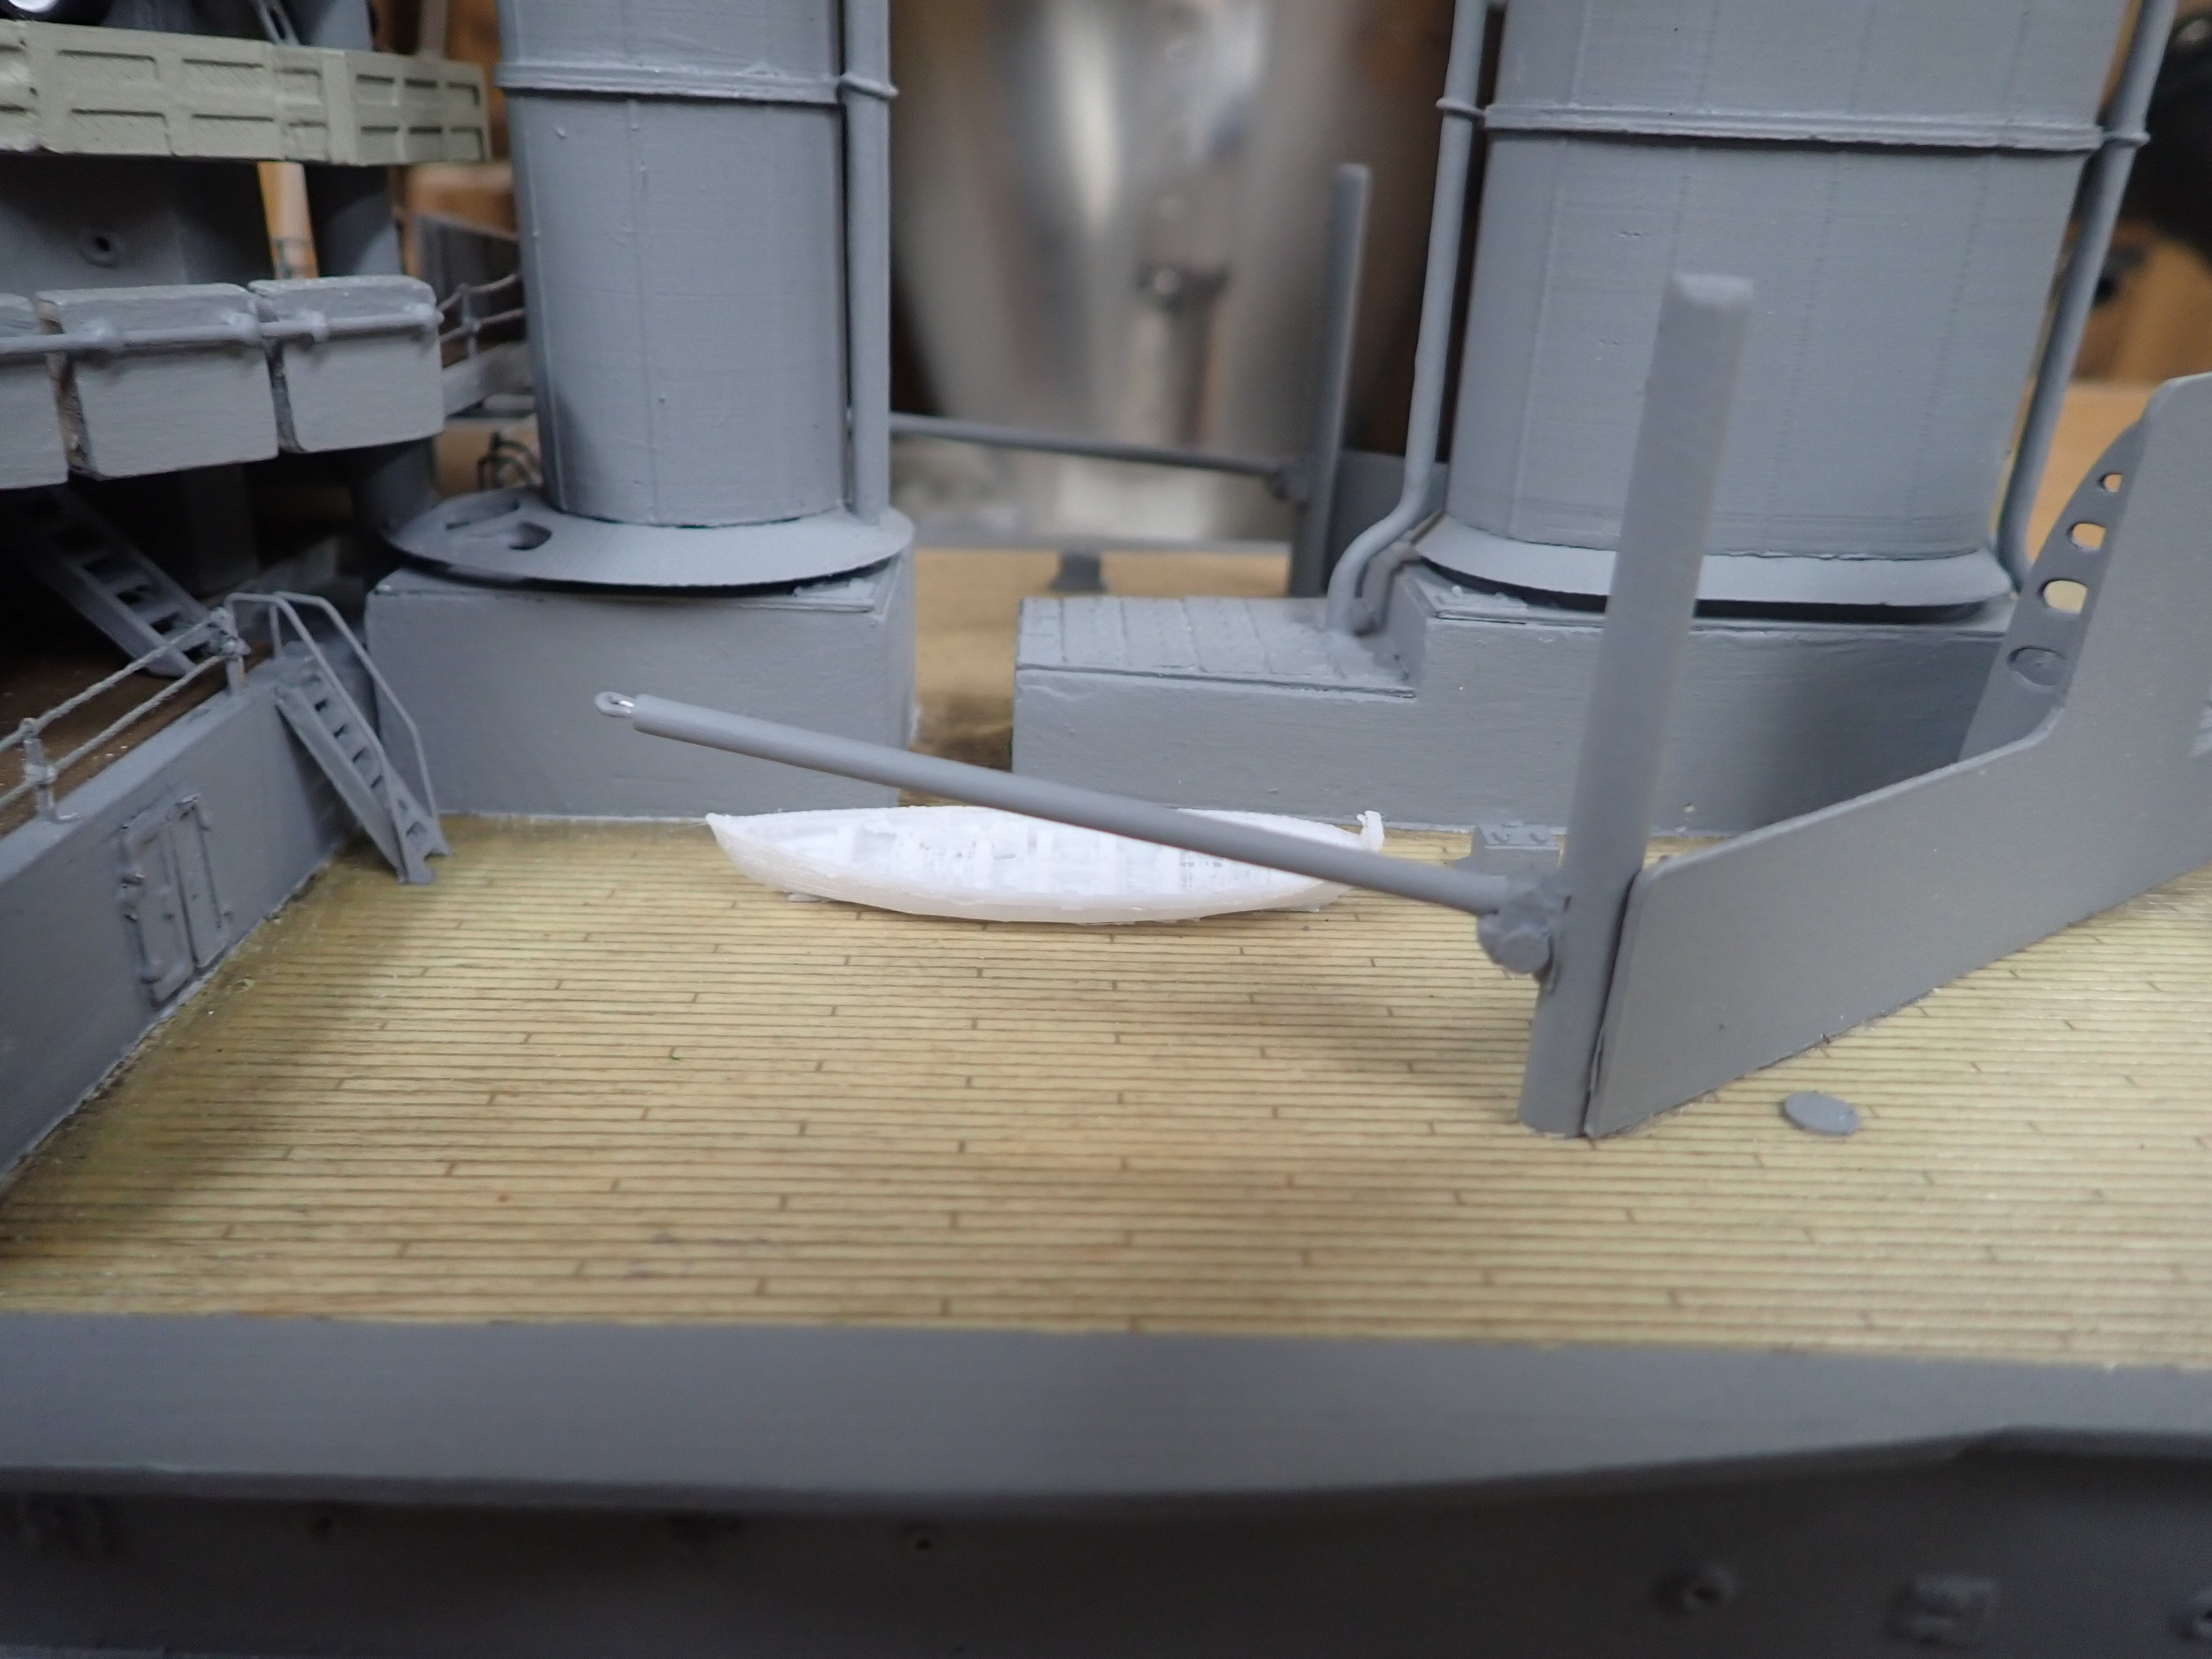
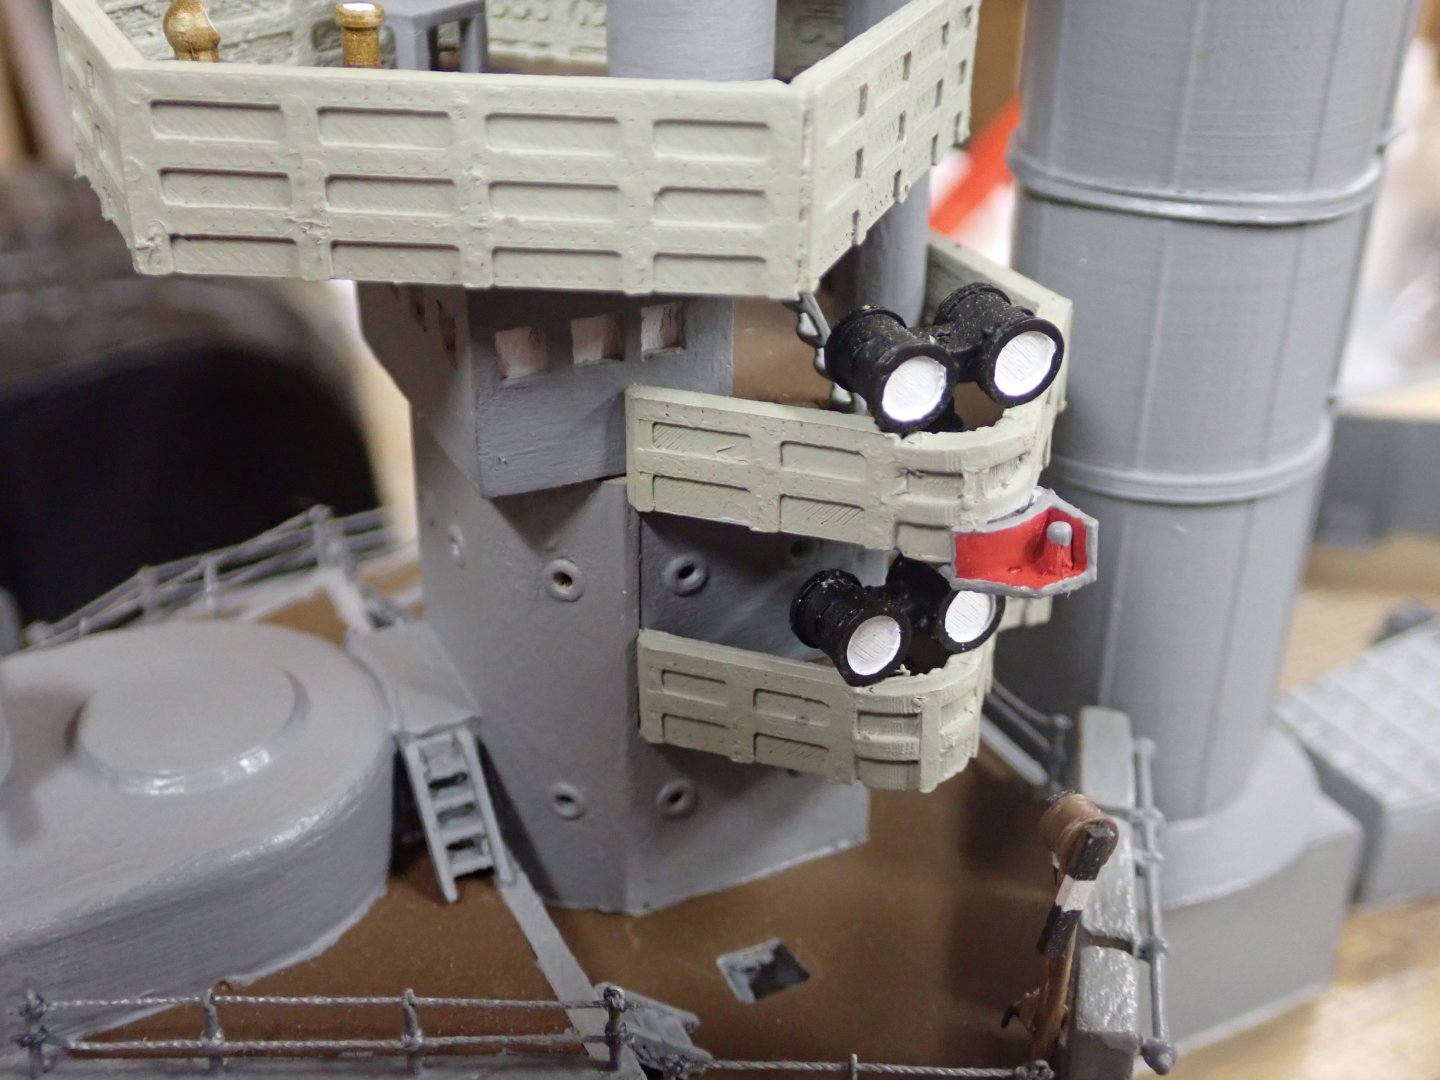
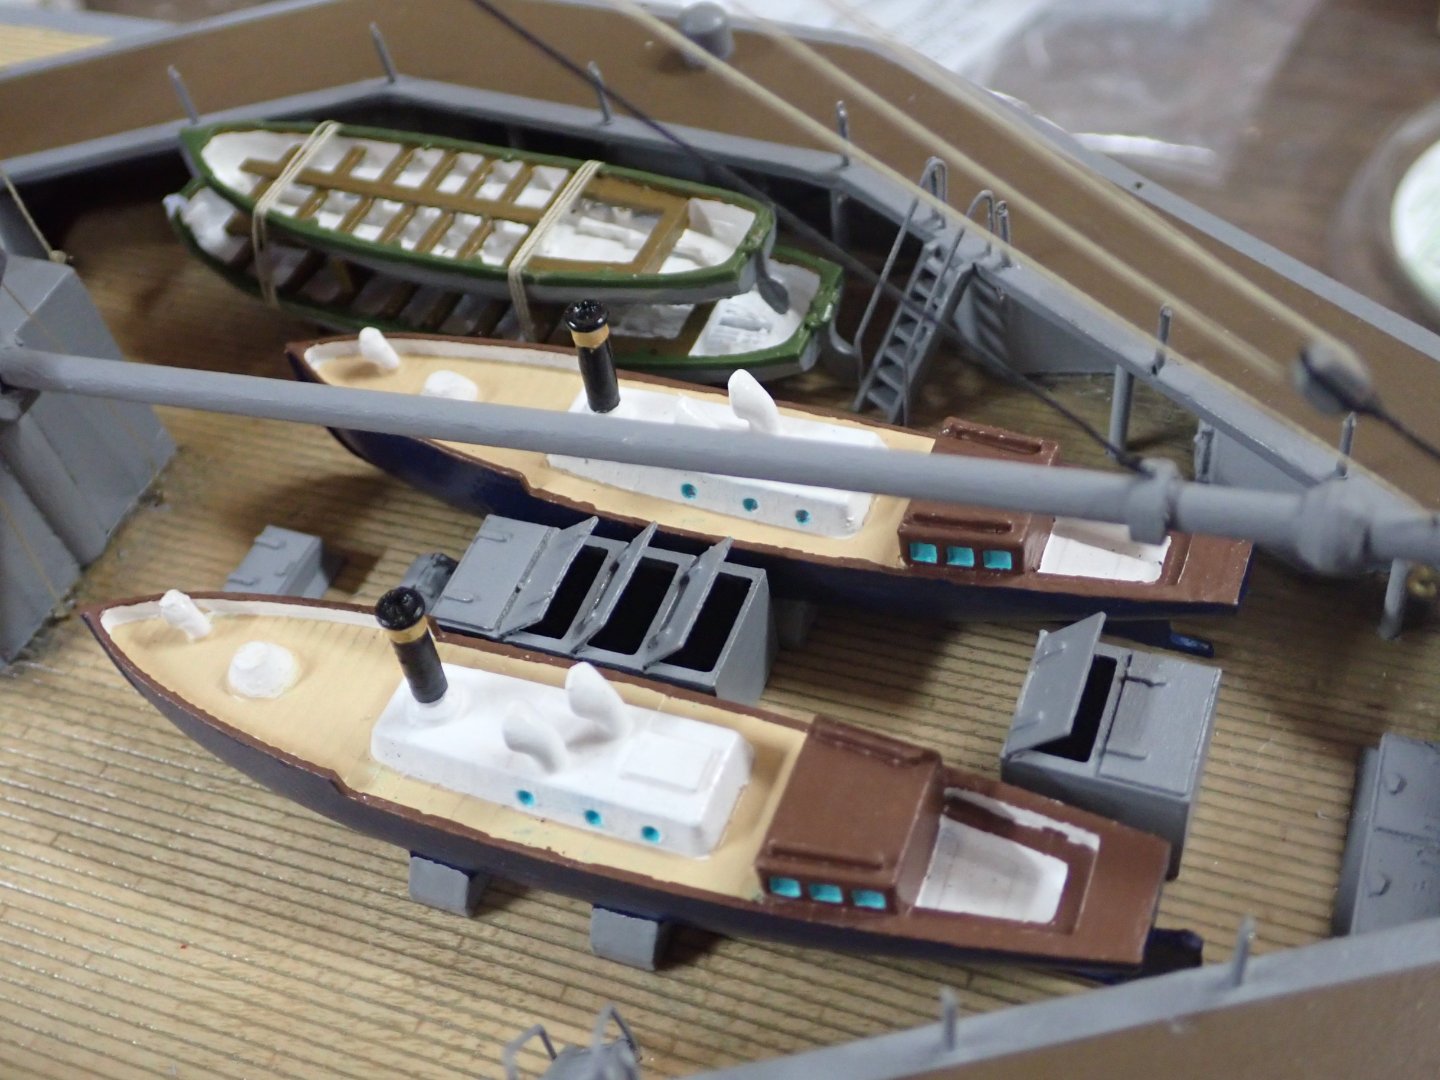
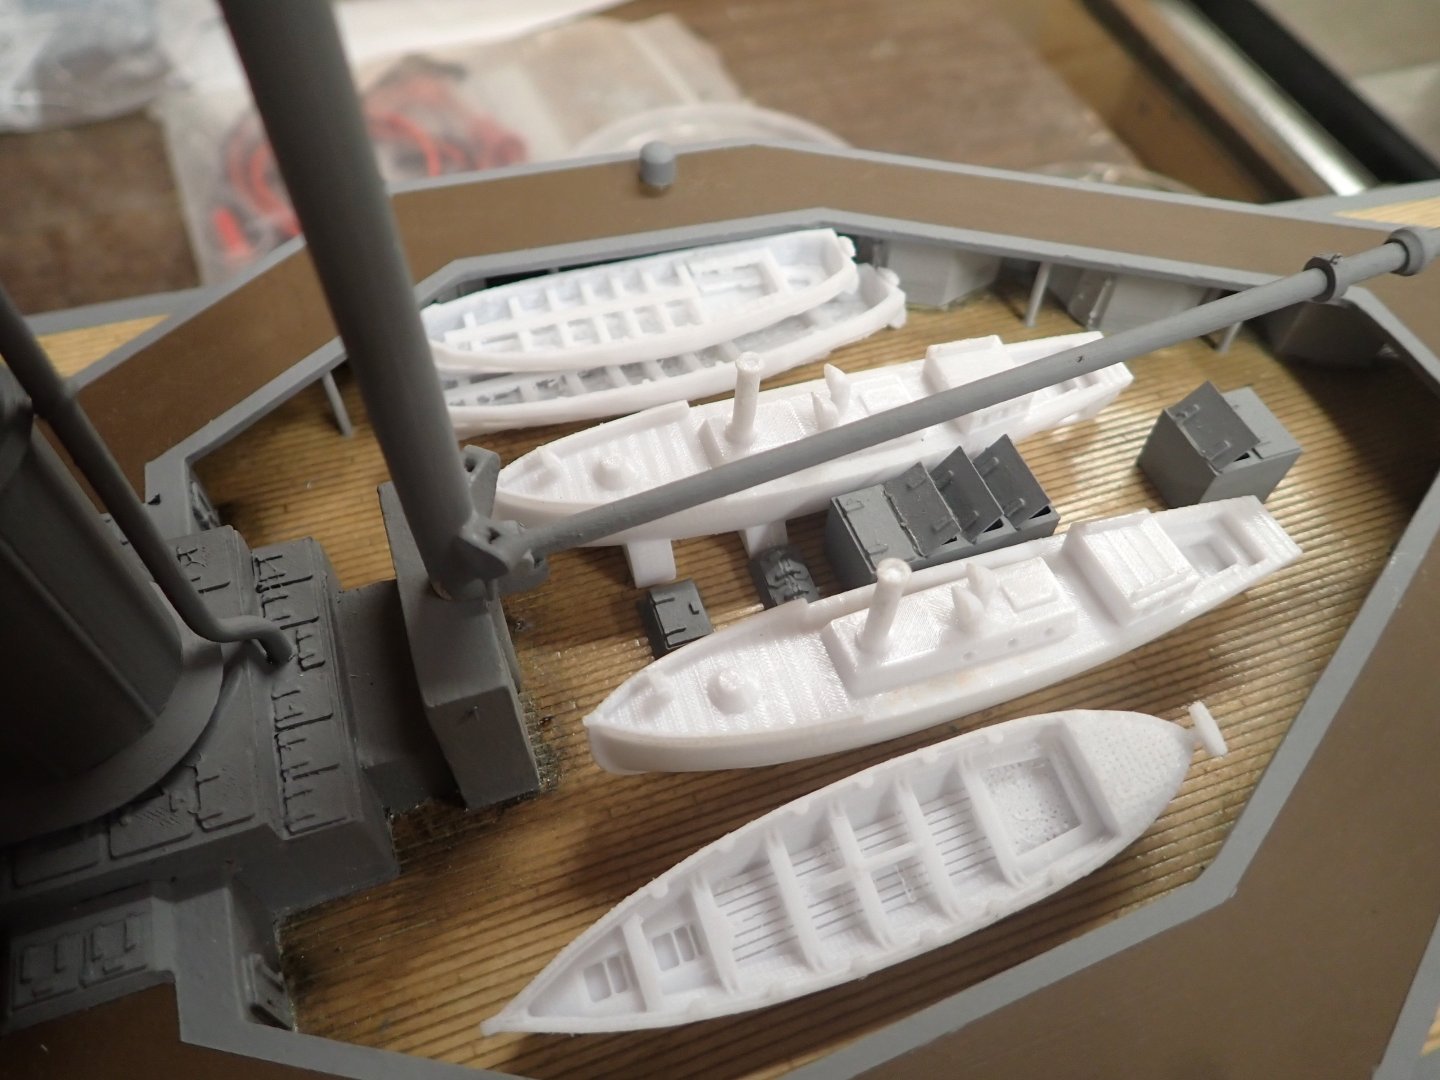
A little more progress. I've had Lion on the water at three club pond sails. Very relaxing and it's fun to chat to the same 5 or 6 other guys who show up at the park. This week there was a boy hovering around interested; gave him a shot at steering her around. Among other things in a constant flow of talk, he remarked, "You must be the youngest one here". HaHa. Says something about the hobby. I added the port and starboard navigation lights, at the level of the charthouse deck. Still need to make white ones for the foremast/mainmast. I started working on the mainmast stays, then realized they would get in the way of drilling holes and adding stanchions for the aft shelter deck railings (which I have been procastinating about for weeks!). I now have the stanchions for the inner railings made, glued in, and painted grey. I decided to add the boats in the aft well deck before the railing threads were in the way. I spent a l-o-n-g time painting these boats; even then in the end I decided to forego painting bootstripes and red u/w hull on the steam pinnaces since it seemed too much more taping etc for results not all that visible. Here we see the two steam pinnaces, and two stacked boats. The port side will contain the "admiral's launch" beside the pinnace. I can't find a suitable, cheap, 3D file so I'm going to use a whaler hull which printed nicely. I added trailboards at bow and stern and will paint up all fancy for the admiral's use. Don't know whether they slapped grey paint all over these boats in wartime or not. Also visible in the pic are the "green ball" and "red flag" of the helm indicator for ships following when in line ahead, and the inner rail stanchions. I added handrails to the two ladders, from 0.5mm brass rod. I printed a prototype for the Hotchkiss gun emplacements; she carried two on the aft end of the shelter deck according to Norman A. Ough's drawing. God knows how I will make tiny Hotchkiss guns.....TBD. Last, I finally glued on the forecastle breakwater which also has been sitting around painted and ready for weeks. I ordered and have received (just this week) a sound board with USB programming cable and speakers. It's a great little board which plugs directly into an RC Receiver channel (taking power from it too), specifically the channel which has a 3-position switch on the Transmitter (commonly used by pilots for full flaps/half flaps/flaps up). In this case you click it up say "n" times, then click it down once. "n" is the number of the sound track you want to play (board can store many), and clicking it down triggers the audio play. The board can store almost half an hour total of sound. I have WAV files for bosun's call, klaxon, and the old-time steam driven triple-note whistle. Club members suggest "God Save the King" (this is 1916!) and heavy gun fire to go with the rotating turrets. I'd also like to play a voice calling "battle stations" but I have not yet found it with a British accent, only American.🙄 Should be fun!! For example, other club members with model Corvettes have sonar pinging, sonar pinging with a return echo from a sub, gunfire, depth charges exploding, "action station" calls (no Brit accent but they're models of Canadian corvettes). We're starting our trip the day after tomorrow so it will be a while for the next update. Thanks for following!


- 235 replies
-
- 12
-
-
-
Good idea. I did the same thing for my Heller Victory.
-
Beautiful job so far! Is having two adjacent capstans historically accurate though?
-
Michael, obviously your idea of fun differs from mine. 😁 What was it Andersen said?......"The sprit topmast backstay was one of the places where the early 17th century rigger let himself go." Just kidding; I look forward to seeing it in the "flesh". Ian
-
I used a bead then wrapped thread around it. Still doesn't give the woven effect though.
- 341 replies
-
- 1
-
-
- Sophie
- Vanguard Models
- (and 1 more)
-
Simply gorgeous, Siggi !!!
-
You can contact designers via Yeggi/Thingiverse. I noticed that the steam pinnace design, which prints with a perfect hull, was by one designer whereas the other boats were by a second designer. I had not noticed in my excited downloading. The second designer's intro notes that he is a "beginner" and warns not to expect perfect designs. Indeed, the images on Thingiverse show the same hull scalloping as I see in Bambu Studio. Far be it from me to chide him about this; he has done a great job on the interior and has far more 3D skill than I. So it's back to sprucing them up by myself, somehow. Thank you for the suggestion, Kevin! And indeed for this trip down 3D-file-world!
-
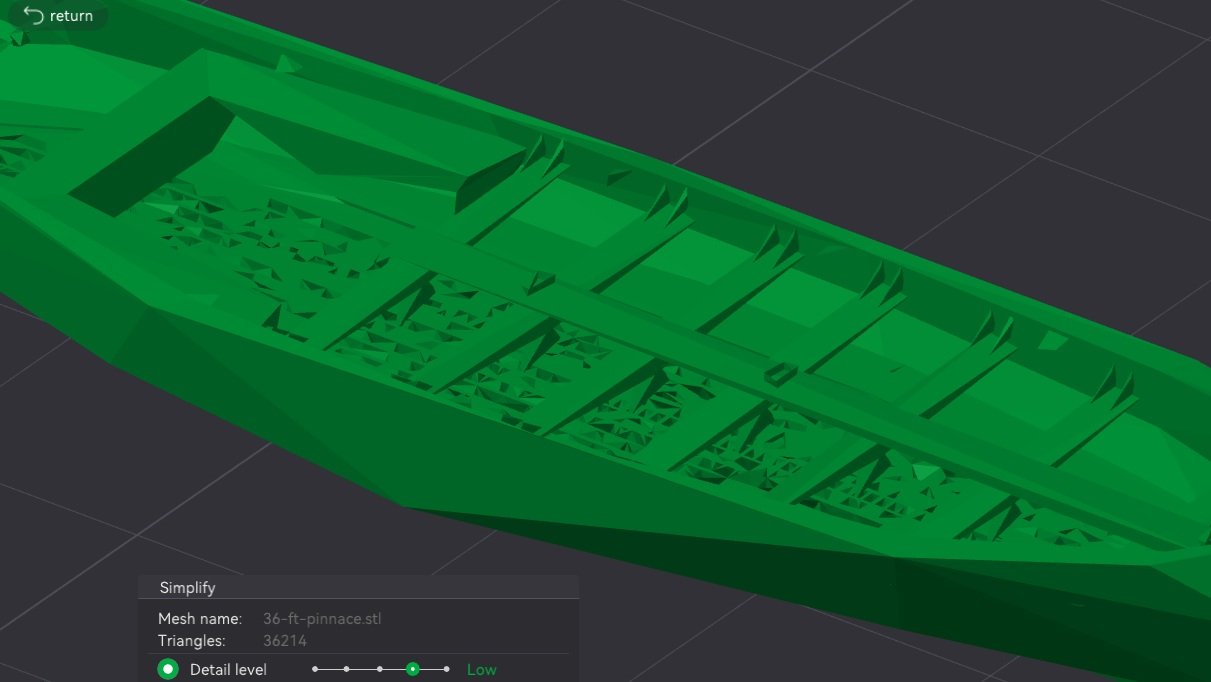
@Kevin-the-lubber, here is an update. Bambu Studio does indeed have a simplify function, but it appears to default to "Very High" detail level which is what the screen shot above depicts, believe it or not. When I lower the detail level not only does the hull exterior get even worse, but the interior details (floor gratings etc) start to disintegrate too. Here's a screen capture of "Low" detail level. Now that's an ugly hull!!
-
Yes, that's how it looks as downloaded then imported into Studio, before slicing. You raise an interesting point, though. I will look into it. Thanks Kevin!
-
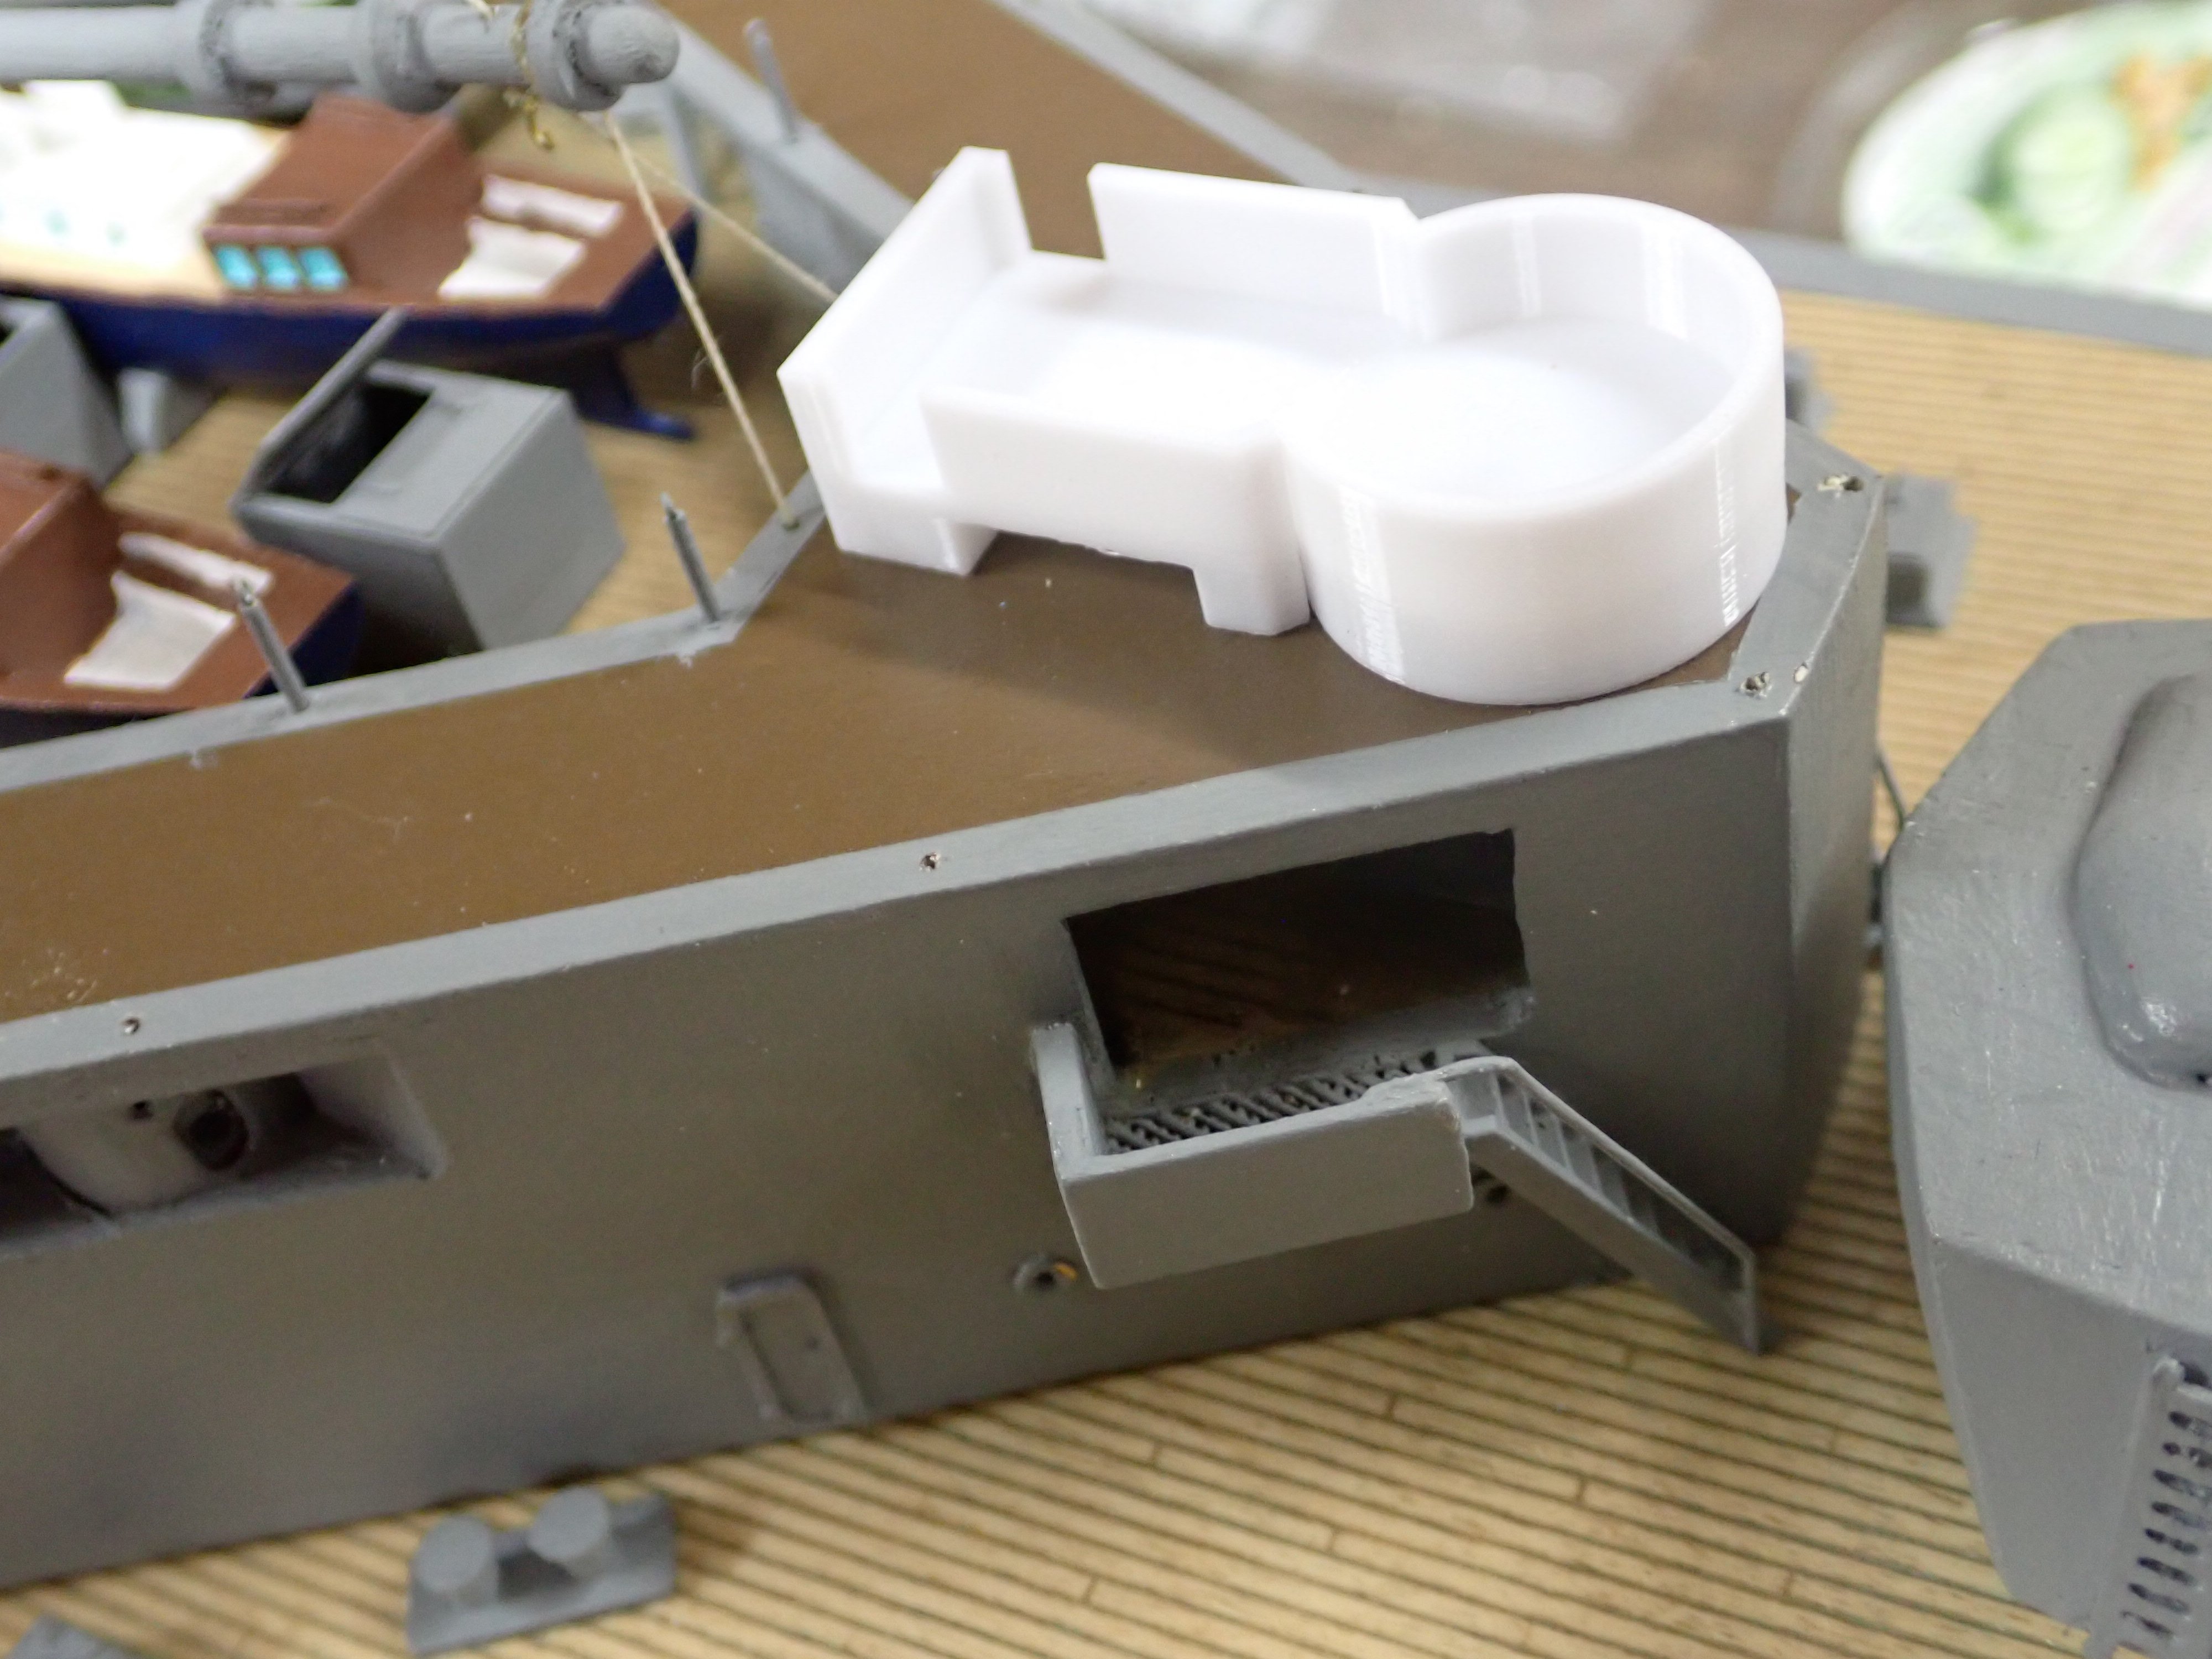
@Kevin-the-lubber, the boat interiors look great but the external hulls are not properly faired; it's not the printer it's the 3D design with too few polygons. Oh well, it's for free! These designs are intended for war gaming apparently. I used a fine 0.2mm nozzle and selected 0.08mm layers; knowing these values the Bambu Slicer selects the Bambu-Designer-Approved recipe for all the other factors and prints a nice result. The boats buried in the aft well deck work as is, but the more visible (in terms of hull exterior) boats stacked at the forward boat cranes will need to be sanded, or filled and sanded, or plain rejected if I can find something else.......I did find files for Titanic's lifeboats but they're not really apt for most of Lion's boats. For example, here's a slicer image from the 36ft pinnace hull. Hmmm, I wonder if unbeknownst to me the slicer has a function which could smooth those out? Will have to do some googling. 😏 Or learn some Blender.

-
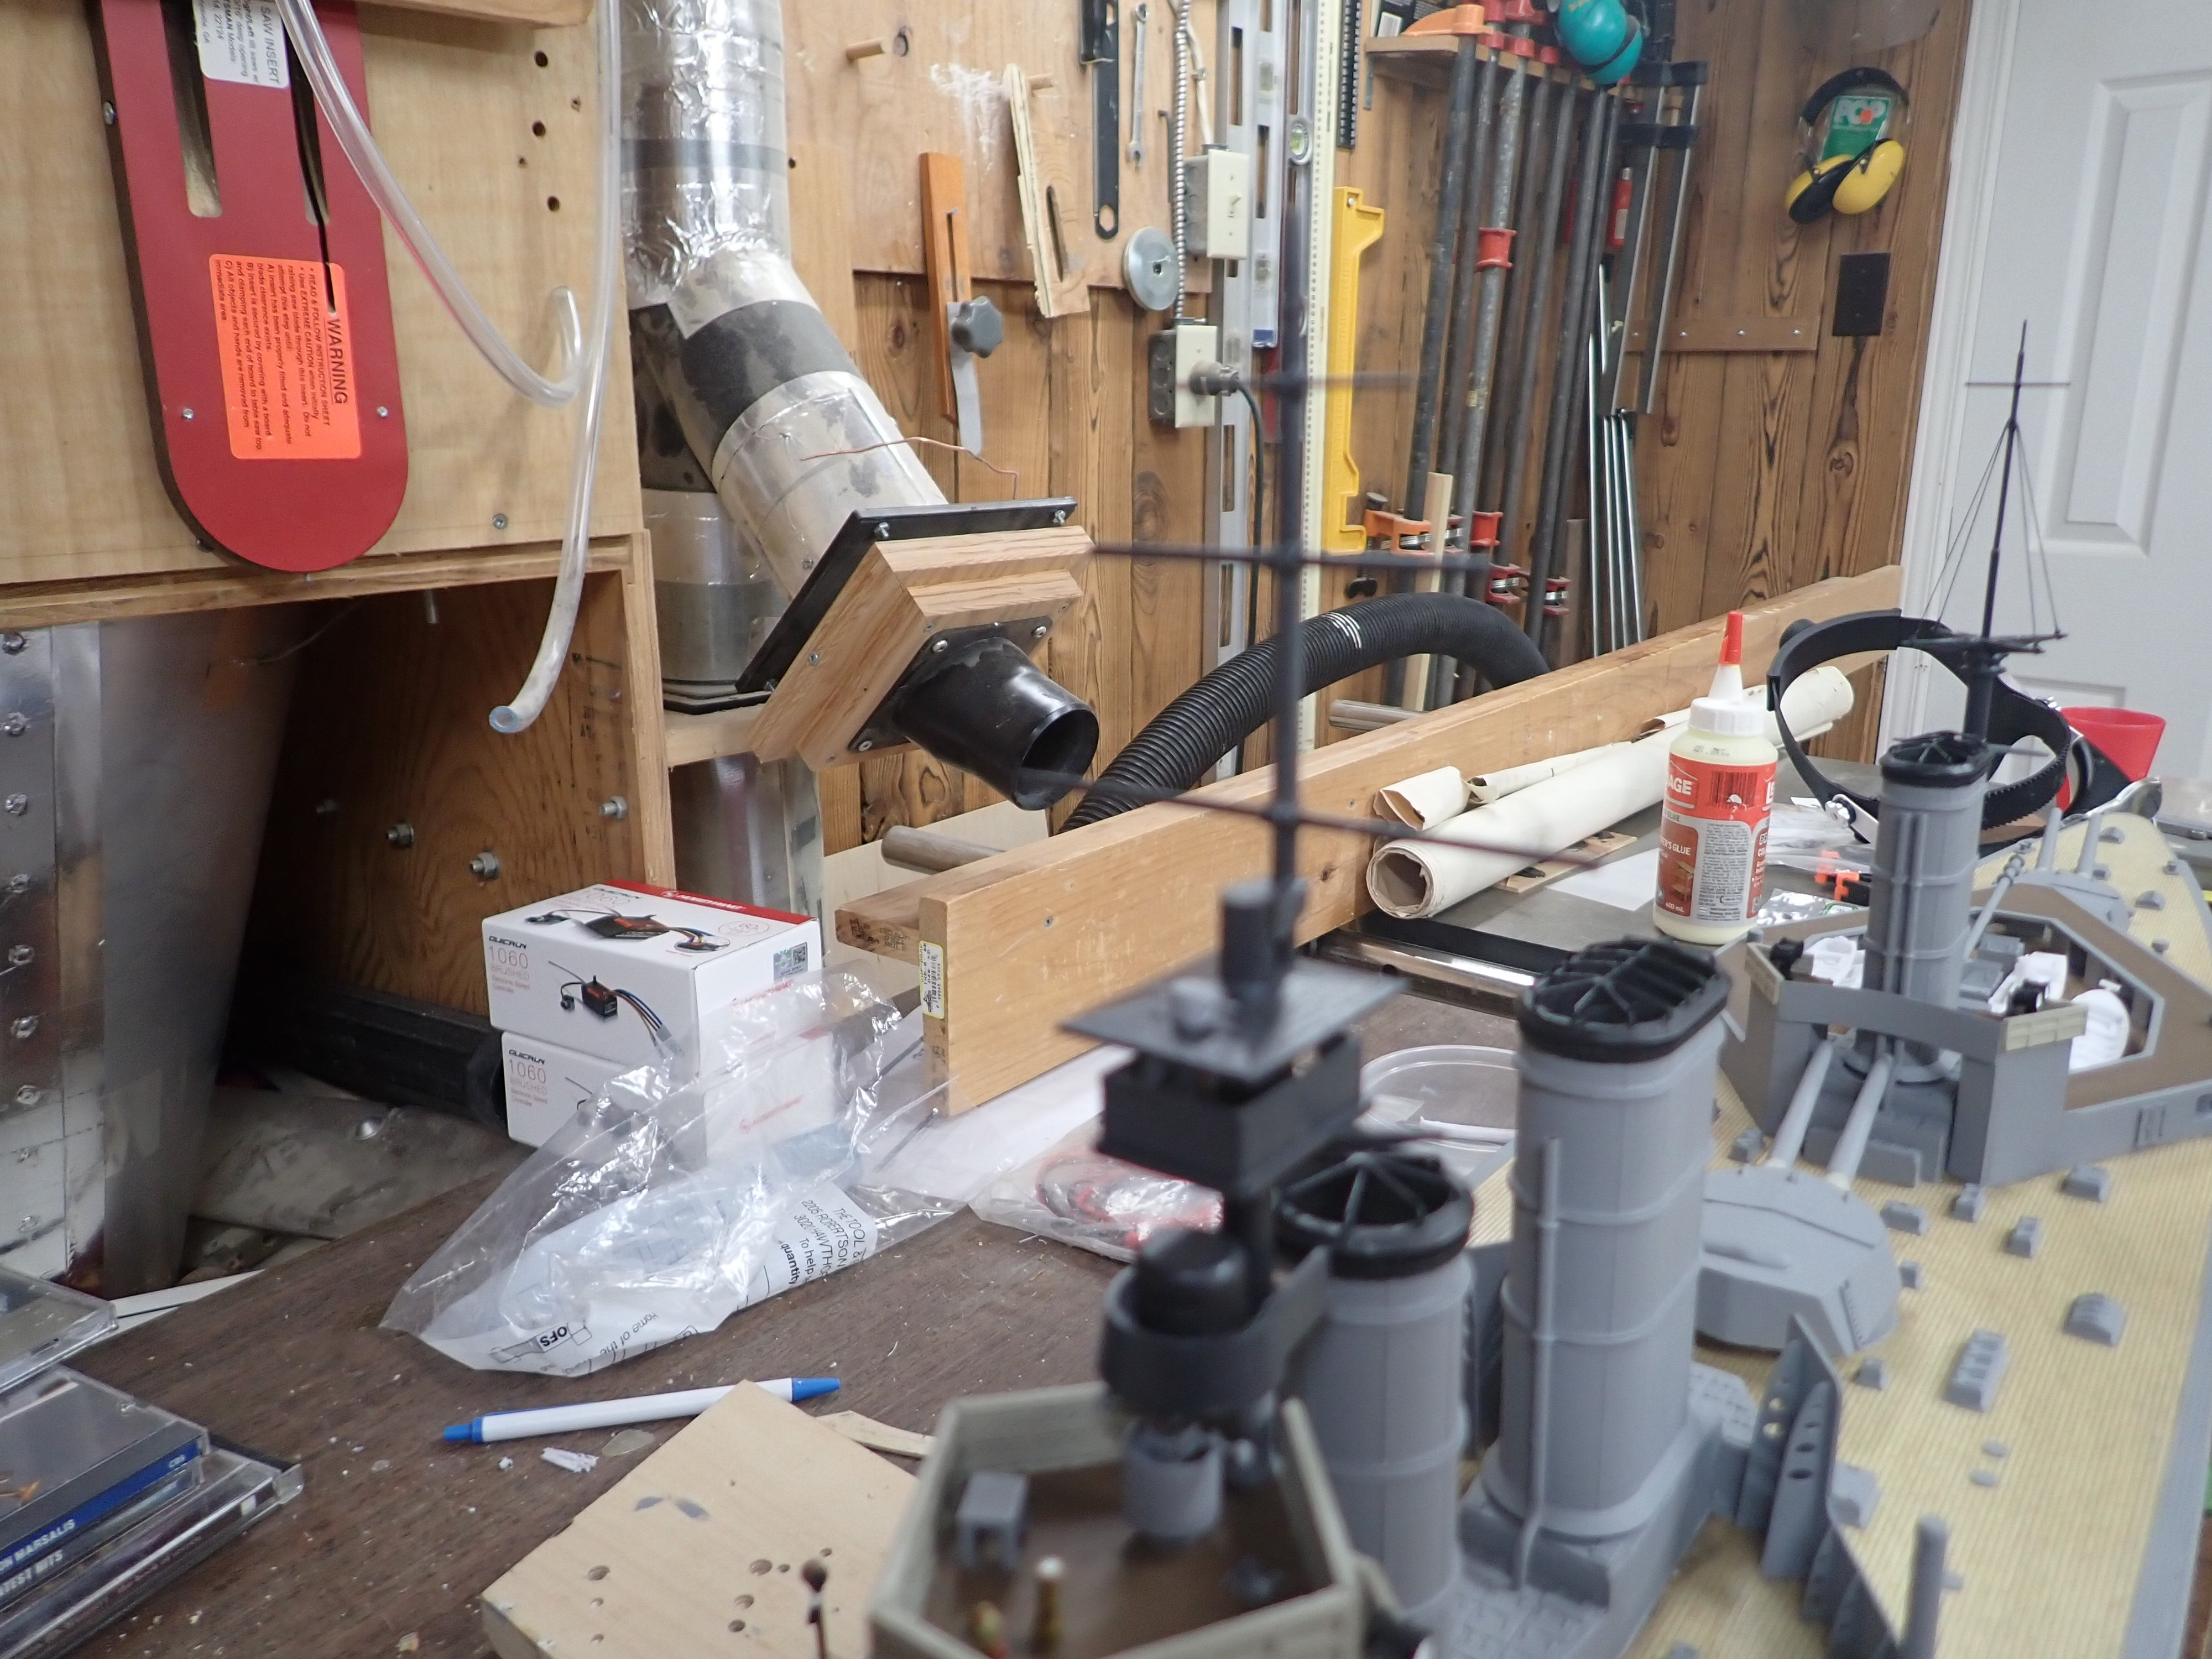
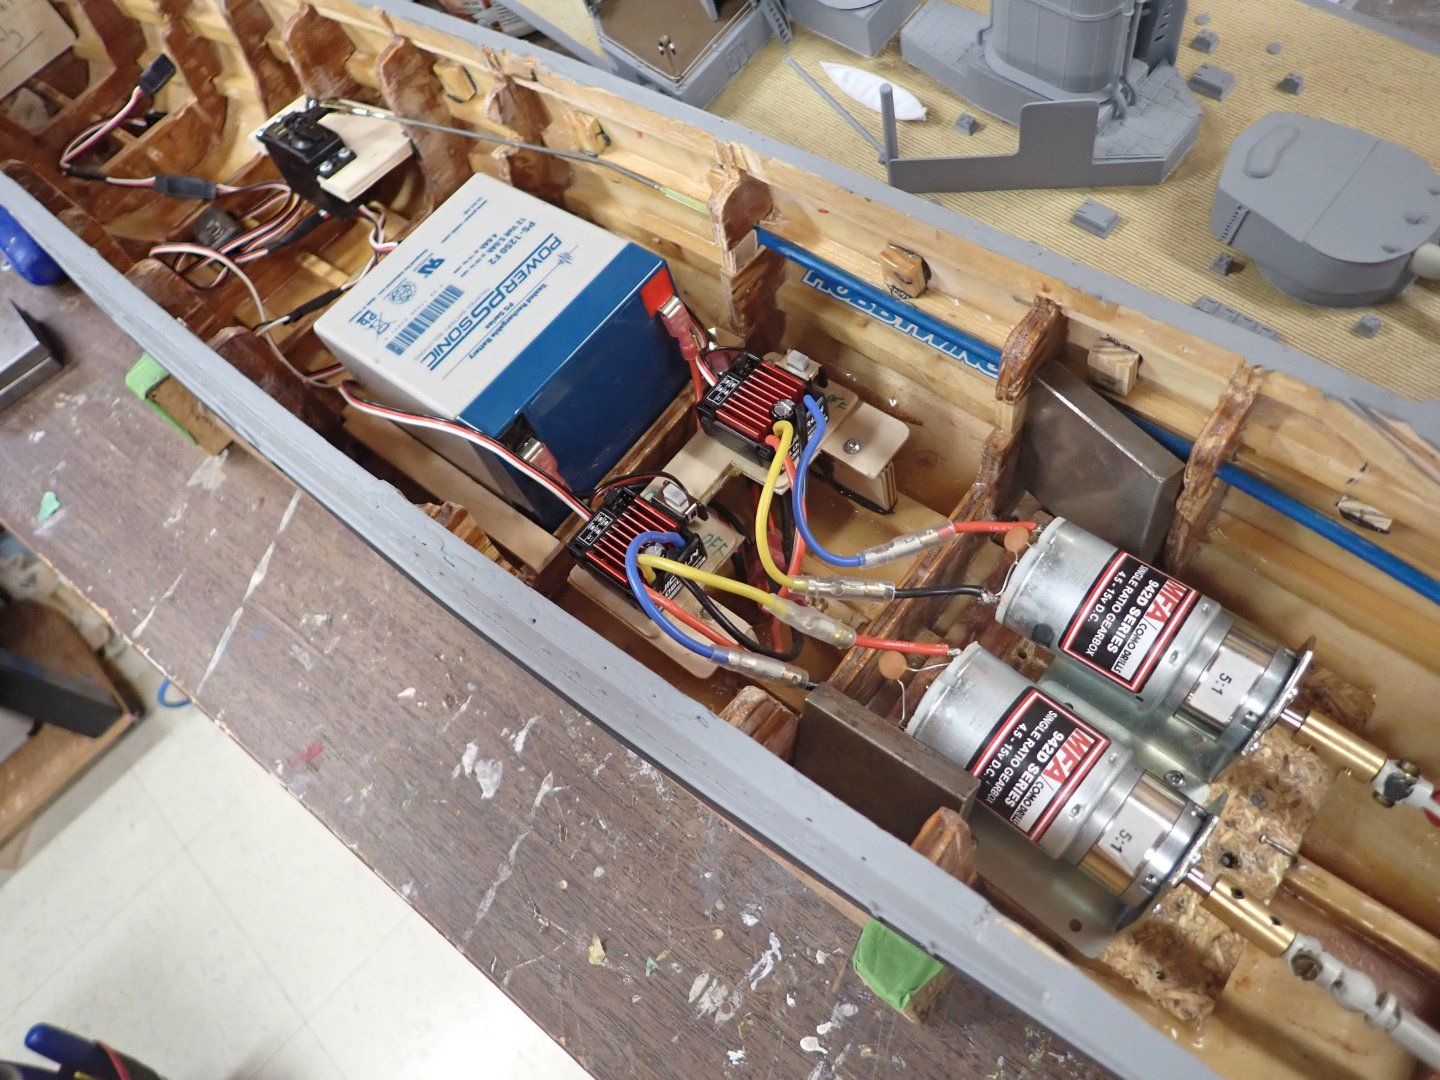
Went to the club pond sail last night. I had verified that the 1060 ESC's do in fact give me full power in reverse; I did what I should have done in the first place and put a voltmeter across a motor to find that it varied from +12V to -12V at the extremes. At the pond, I had much better response in reverse than on the maiden voyage. Either I did something wrong then (can't imagine what since the ESC units automatically calibrate on power-up), or removing 2kg of ballast to get to the proper waterline made all the difference. I've added the topmasts and the three boat cranes are started. Here are some pics. Interior gear. I have plenty of room to add stuff. Seems funny having only one servo, for the rudder, but kudos to modern tech. From right to left- motors with 5:1 planetary reduction and U-joint couplers; ESC speed controls one per motor (they're so tiny compared to the rheostats I used in the 70's!); lead gel battery; rudder servo and receiver. Wood fore topmast and brass signal yards. Sorry for focus.... Main topmast with first bit of rigging! Telescoped brass tubes for mast, brass tube yard, 3D-printed "star". Focus! I need to get a steady rest apparently. An idea of what ship's boats will be in the aft well deck. I found some free 3D files of various RN boats and can scale each print in the slicer program. The two stacked boats are the same design printed at different scales. The bottom-most boat is a whaler design, not really suitable for the "admiral's barge" now that I see it in person. I did find an admiral's barge but the file costs and really needs to be printed in resin. Note the crane boom. Crane for boats at fwd superstructure, in progress. That's it for now. Holidays coming up so it might be a while with no posts. Thanks for following.

-
That's odd; in my experience the "quality control men" much prefer to lie ON your papers rather than beside them.....
-
Siggi, do we know that the reef point was known to vikings? Maybe from tapestries or vases?
-
I addressed the problem alluded to earlier by removing some a lot of the fixed ballast at bow and stern. This ballast was in the form of lead shot onto which, fortunately, I did not pour epoxy resin but rather inserted a layer of wood over it to keep it stable. The bow was easy; there's a large bulkhead sitting right there. Just drilled a hole each side of centre part way down and presto the shot fell out as I tilted the hull back. The stern was another story. I had to remove the motors and ESC units in order to get the drill body into the hull interior, and drill through a bulkhead recessed behind the aft turret which I could not really see. All without having the bit emerge through the hull bottom or side. You would have needed a crowbar to pry apart my buttocks at the moment I pressed the drill trigger. Again it went well and the shot poured out fine. In float testing originally the waterline of the hull (incl battery, motors, ESCs, etc) was about at the middle of the black bootstripe (which is where I want it) without the removable upper works. Adding the upper works settled w/l to the top of the bootstripe, which I didn't like. I had assumed in original float tests in the shop last winter that the upper works would have negligible weight, however it currently weighs 1.16kg. This is what decided me to remove some previously fixed ballast. I have poured out 2.09kg of ballast. The hull with upper works now sits with w/l at the bottom of the bootstripe. Adding three of my original metal pieces (total 0.6kg) gives a nice waterline. These metal bits will be placed in the accessible areas, giving me leeway to adjust ballast when I add a sound system, possibly smoke generation, etc. So that's a big relief for me. Thanks for your comments and likes! Ian
-
You're right; cars use "Fwd/Brake/Rev" whereas ships want "Fwd/Rev". The 1060 ESC uses a jumper to program this while the 1080 has an internal programmable register.
-
Bill, you're really getting into electronic logic ....."diode OR'ing".....nice!
-
This is a pretty large kit. Billings seem to take pride in their short-on-detail instructions. Looking good so far, look forward to more!
-
John, might be worth a quick message to @Kusawa2000 to ask our man-on-the-spot in Parks Canada's Whitehorse office building! 😏 She's looking very good! Cheers, Ian