Ian_Grant
-
Posts
2,156 -
Joined
-
Last visited
Content Type
Profiles
Forums
Gallery
Events
Everything posted by Ian_Grant
-
 The book is "The Anatomy of Nelson's Ships" by C. Nepean Longridge. But it sounds like you have it since you mention the mainsheet block bracket ...??
 -
John, your log is fascinating thus far! I love your colour scheme. I see you moved the waterline up to above the bottom edge of the main wale which is what I plan to do. Would they really have had the gammoning going into the water though? I had it in my mind to move the gammoning slots up a bit. Also. I think you have changed the "angle of attack", as it were, of the waterline? I seem to recall that if I kept her slightly stern-deep as does the Heller w/l while raising it to the wale, the decorative bits at the bottom of the 1/4 galleries ended up touching the water which bothered me too. It seems to me that down-by-the-stern is probably accurate, to have some lateral resistance in the u/w hull profile to compensate for the huge windage on the towering stern or she would need constant windward helm. On the other hand the sail plan might be designed to help compensate. I haven't really studied my model too much; it's been just sitting in my stash for a few years. I have two other build to finish first.
- 106 replies
-
- 3
-

-
- Soleil Royal
- Ship-of-the-line
- (and 2 more)
-
Eager to see your finished pics Glen. That water looks fantastic! This build will be hard to top.....
- 290 replies
-
- 5
-
-

-
- Quinquereme
- Finished
- (and 1 more)
-
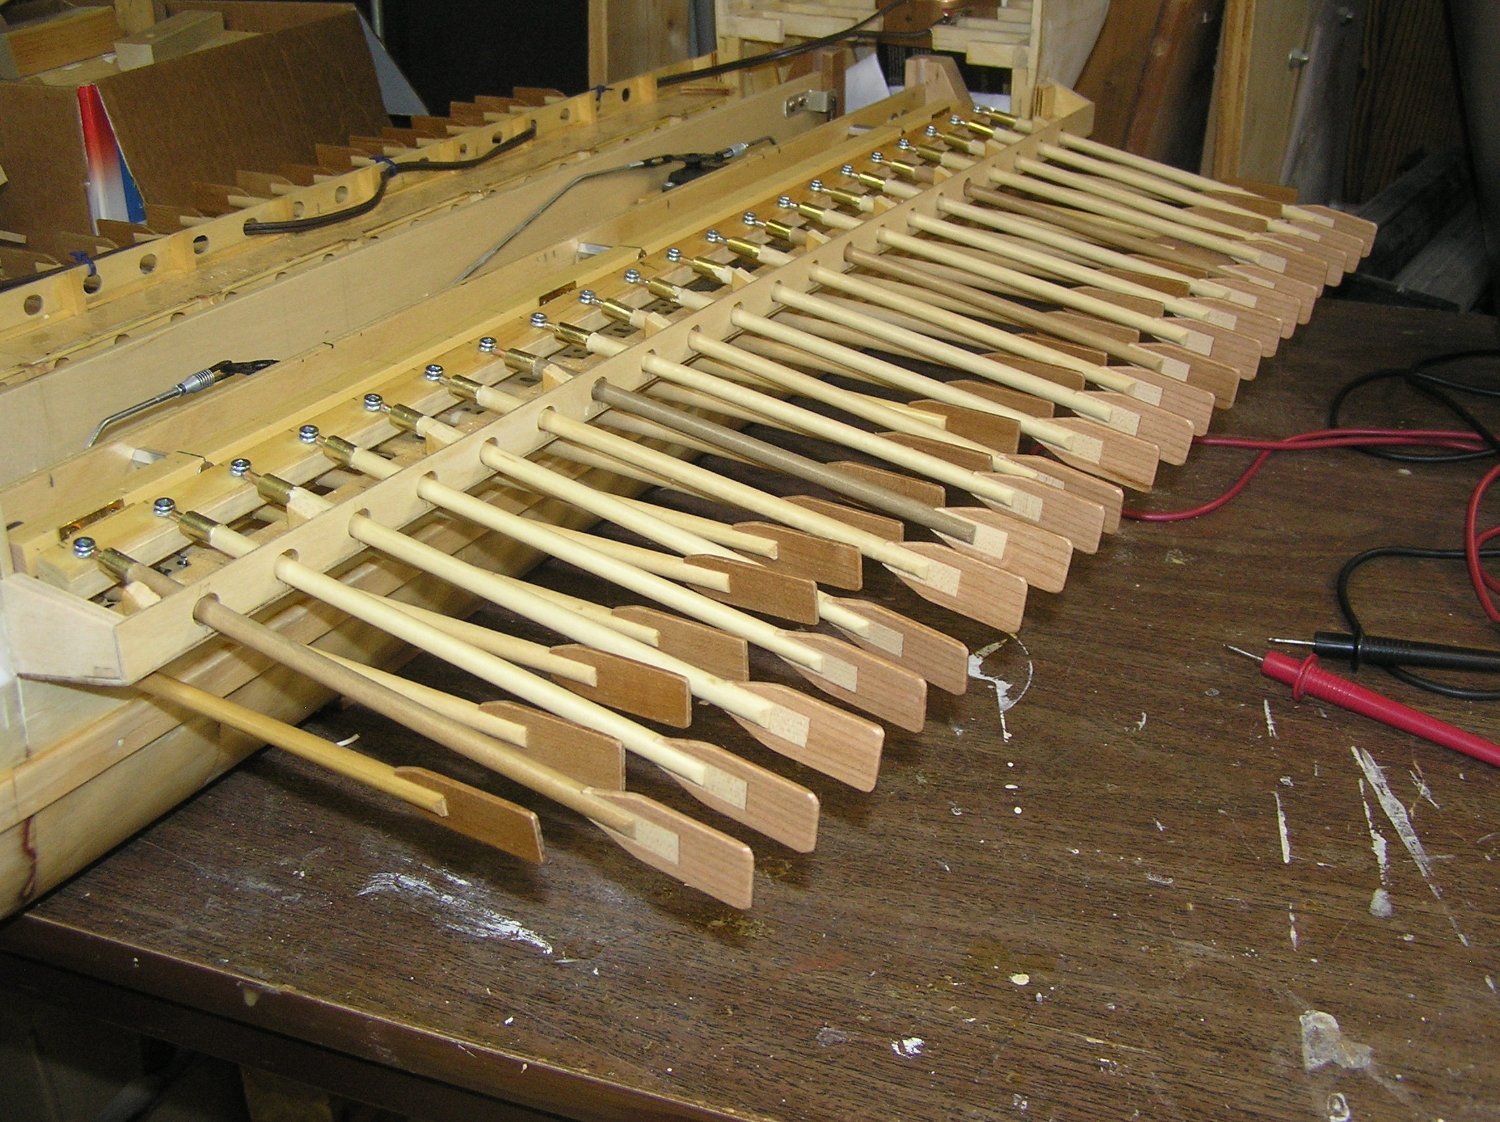
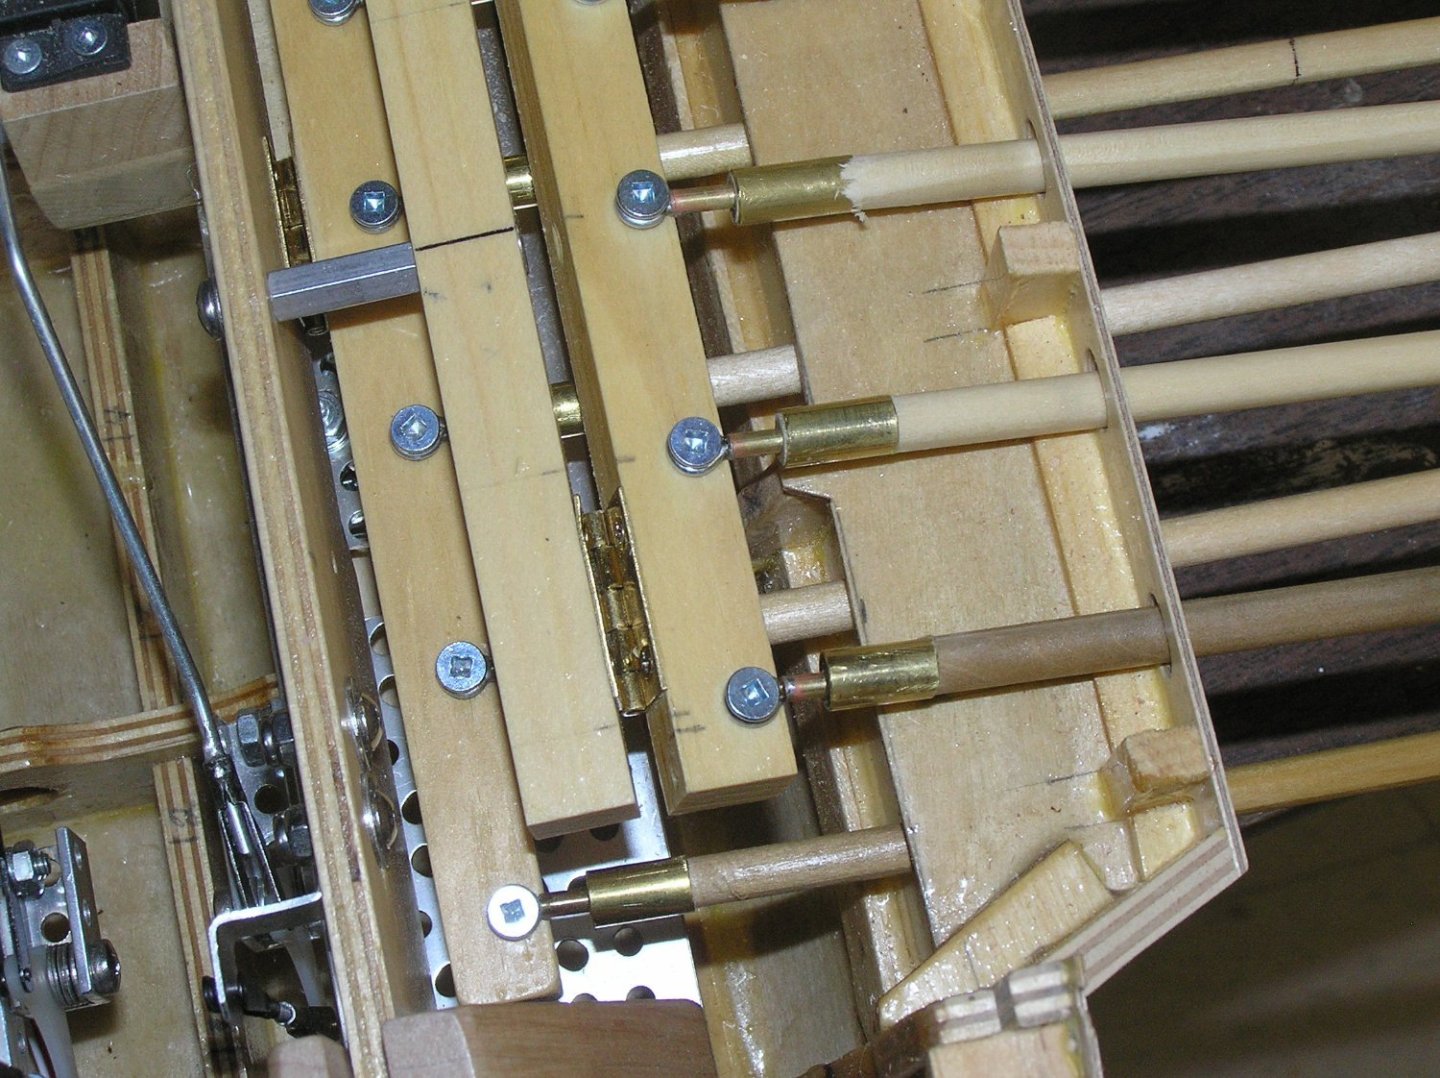
Well I have all 42 upper oars made and varnished, and 21 of them mounted on the port side. It's looking good ..... but .... when I added 1/2" to the upper oar shaft length in order for their blades to lie beyond those of the lower oars, I inadvertently created a problem. The oar ports have to be elongated to allow the shafts to sweep and I mentioned way back there is some play. When I row the oars just on the bench, sometimes a few of the lower blades cross under an adjacent upper shaft at some point in the cycle then there is a clicking noise as they clash and are corrected. The real solution is to redo the loom ends of the upper oars, removing the extra 1/2" so there is some blade overlap which should stop the lower blades from crossing under. Or perhaps it will be ok when they are all in actual water ..... will do the starboard side then have Sea Trial #3. Soon I hope. Here are a couple of pics. I changed the mechanism design to use just three hex metal standoffs to support the pivoting beam for the upper oars, as opposed to the solid wood with drilled holes I had before. The holes were intended to provide access to the mounting screws for the lower oars but it was too difficult to get to the screws in, without dropping a lot of them into the bilge, when adding the oars. As can be seen in the 2nd pic the access now is much better. See the increased size of the blades of the upper oars. They look lighter than the lower blades because they're freshly cut cherry; over time they will darken as the older blades have done.

- 536 replies
-
- 10
-
-
- Quadrireme
- radio
- (and 1 more)
-
Bill, in your second photo above it looks like the t'gallant mast maybe could be struck, or nearly so, if the topmast had normal trestle trees instead of that "cone" shape going all the way around the mast. The cross trees themselves look too far apart to me. Normally the middle one would be pressed against the front of the topmast and the aft one would be pressed against the back of the topmast (as Anderson says too, pg50) which would place them at little more than half the distance apart. And I agree they are too long. You can't do anything about the first issue, but I would cut them shorter as Marc has already discussed. Looking forward to working on my SR ......not really 🫤 But I'm taking notes for the future.........🤙
- 1,508 replies
-
- 1
-
-
- Le Soleil Royal
- Heller
- (and 1 more)
-
Regarding the cross trees, when I first looked through my SR instructions I wondered if it was yet another "Hellerism". The reason they were constructed as shown by Anderson was so the t'gallant mast could be "struck" ie lowered vertically through the square hole between the first and second crosstrees, just as topmasts are dropped through the lower mast tops. Heller's construction leaves no such cavity.
-
...... which is itself derived from the ship's beam (Anderson, Chapter 1 part III, pg 15). Sorry to "quote" you, Marc. 😉
- 1,508 replies
-
- 1
-
-
- Le Soleil Royal
- Heller
- (and 1 more)
-
Hi Bill; in short, yes. Anderson has some ratios for English and foreign ships at the start of Chapter III. Bear in mind that when he says a topmast is x/y as long as its lower mast, he means the entire lower mast to the step in the keel. It would be interesting to compare his values to the stock Heller parts. At any rate, he says fore and main t'gallant masts varied from 0.4 of the topmast, to 0.5, then back to 0.4 from 1620 to 1670 or so; any value in that range should be satisfactory.
- 1,508 replies
-
- 1
-
-
- Le Soleil Royal
- Heller
- (and 1 more)
-
Begging your pardon of course, but my thought would be to buy a wheel ... 😉
- 346 replies
-
- 2
-
-
- Sophie
- Vanguard Models
- (and 1 more)
-
It may be best to not try to hinge the rudder - instead, have the rudder shaft pass through a brass tube epoxied into the hull and have a way to support the bottom of the rudder: eg a small plate attached to the keel, extending back under the rudder with a hole for the bottom end of the rudder shaft; or make it with a pin which extends up into a hollow rudder shaft. Just two ideas to inspire thought.......
-
Looks good. My only comment is that the rudder linkage is much farther out from the centre of the servo arm than from the rudder shaft. The servo will hardly have to move to give rudder hard over, which means it would be very "twitchy" when moving the "stick" on the transmitter. Moving the link towards the servo shaft would give a better feel on the "stick", and give more torque from the servo though more is probably not needed. Also not sure why the rudder horn holes are oval....🤔 Finally, you would get a smoother action if you employ "quick links" rather than bending the wire. https://www.greathobbies.com/productinfo/?prod_id=DUB109
- 57 replies
-
- 4
-
-
- Nordkap
- Billing Boats
- (and 1 more)
-
Good luck; I'm interested to see how this works...............
-
Looking forward to her shakedown cruise!
-
John, I am really enjoying your historical analysis and will follow to the end, of course. I hope to start my SR in about two years from now, God willing, and am very interested in where you go from here. Thanks for posting!!
- 106 replies
-
- 3
-
-
- Soleil Royal
- Ship-of-the-line
- (and 2 more)
-
Just yesterday in another log someone replied to the same question. His solution is to pass a styrene rod (like Evergreen) through the tube, form the bend during which the styrene prevents kinking, then heat the tube with a propane torch to melt the styrene out. Apparently he does this fairly often. I would do the heating outside in the fresh air though.
-
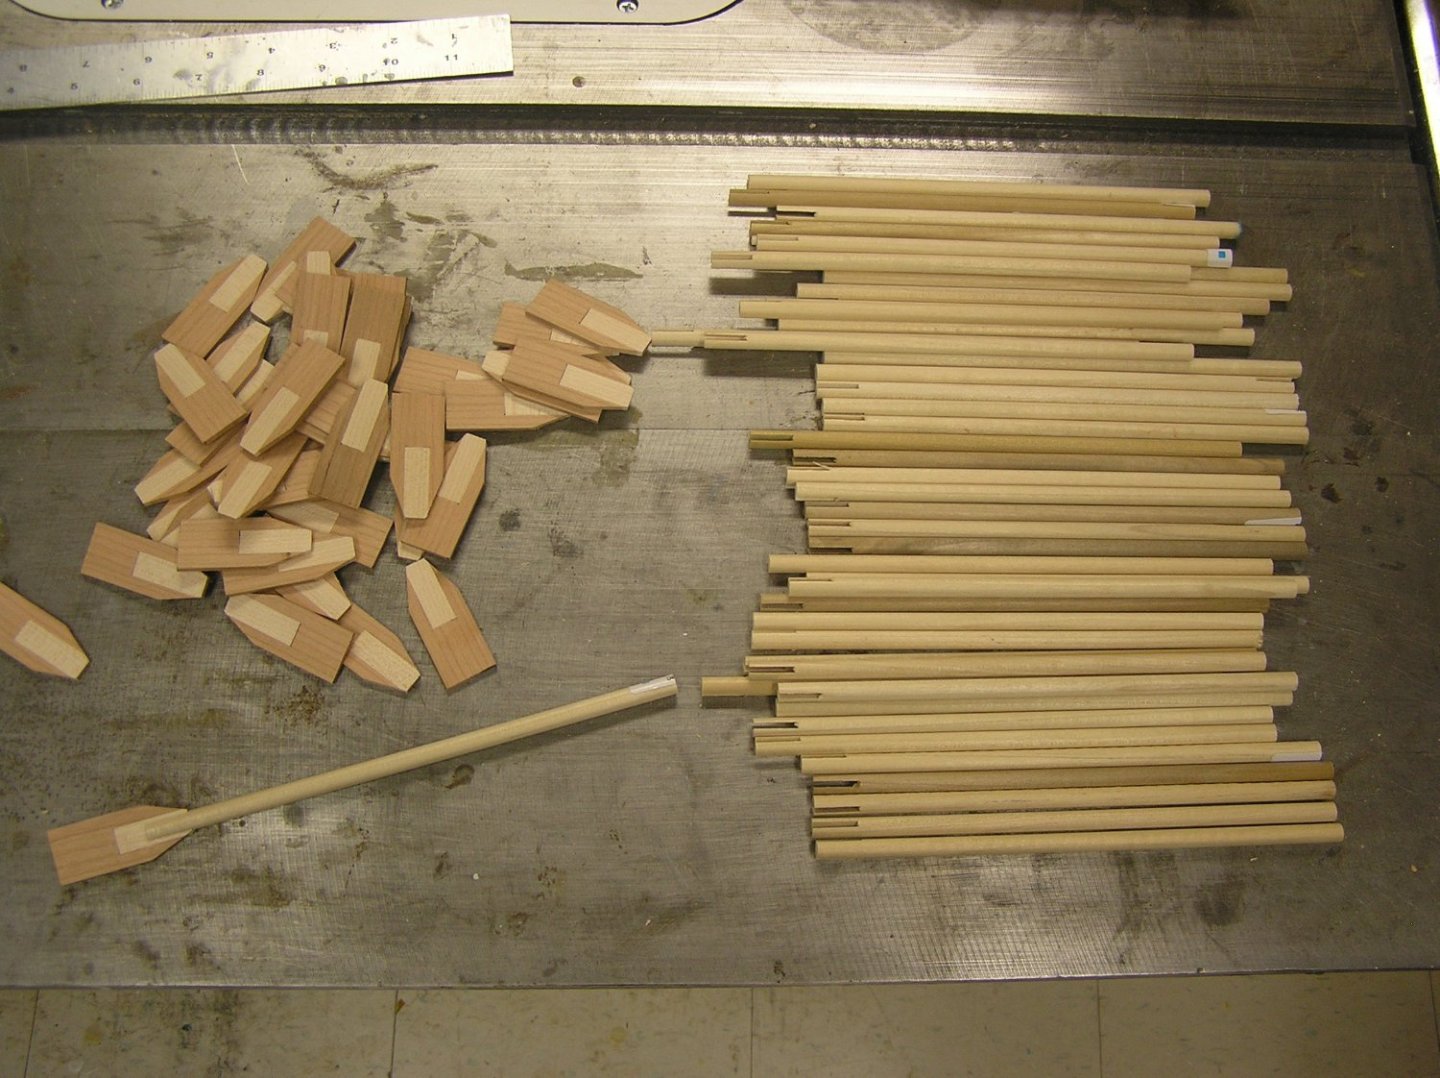
Started production on 42 upper tier oars plus spares. I decided I wanted the blades 1/8" wider and 1/8" longer for good measure. Thinking about modifying the existing oars, I decided it would be easiest to trim their edges back to flat then add u-shaped additional wood, rather than messing around with the glued shaft/blade joints or scarfing new ends on. Further it would add some pizzazz to make the additional wood a contrast to the cherry ie use maple. Given all this I decided to make the upper oars with the wood contrast too, only in reverse to add yet more pizzazz. The shafts are 1/2" longer to decrease overlap between the blades from the two tiers. Here we have the notched shafts and the formed blades. Making oars - deja vu all over again....
- 536 replies
-
- 8
-
-
- Quadrireme
- radio
- (and 1 more)
-
Steven, you work so quickly, puts my scratch effort to shame. And your true-to-the-ship framing is wonderful! There are soldering irons which allow you to set the tip temperature, but they're more expensive.
-
Glen, I thought the "claw" would be supporting the neck of the bottle anyway? 🤔 This is your best yet ... highly imaginative!!
- 290 replies
-
- 3
-
-
- Quinquereme
- Finished
- (and 1 more)
-
Great! I'll keep them in mind from now on, never used them before.
-
I loved Newby's book. What a life, I could never do it. Thanks; yes I thought the galley would be an engineering challenge but after completion the novelty would wear off, whereas a square-rigger would be easier to build but constantly challenging to sail. In mainland Europe model square-riggers 2m long are common. Here is web site which got me thinking about square-riggers. I'd like to build a 4-mast barque (like Moshulu; did you know she is now a restaurant in Philadelphia?) not a warship. Probably a full-rigged 3-master would be more realistic. http://www.cocatrez.net/Water/NevilleWadeShips/index.html It is to dream.....
-
Nice, sturdy-looking shaft and prop! Also, I don't see much "serious sanding" for your hull.....😉
- 57 replies
-
- 1
-
-
- Nordkap
- Billing Boats
- (and 1 more)