


Ian_Grant
-
Posts
1,641 -
Joined
-
Last visited
Content Type
Profiles
Forums
Gallery
Events
Posts posted by Ian_Grant
-
-
-
On 1/1/2024 at 9:52 PM, Snug Harbor Johnny said:
As usual, the ship yard is by no means my only interest. And lately I thought it would be nice to look for a used telescope to at least look at the moon as the phases change - lots of shadows and craters seen clearly wherever the 'terminator' (lunar day-night zone), plus whatever planets might be available. And I found one locally - an old Criterion RV6 - 6" f8 Newtonian on a motorized German Equitorial mount. The scope itself was only $375 (assembly and tweaking required - like modifying a spare pinion to fix the focuser). Another $125 bough some decent eyepieces and a Barlow. The optical tube is lying on my wheeled project table.
Nice! I have a 6" Newtonian as well, though not on a motorized mount which you need for photography. It delivers spectacular views of the moon, best viewed when it is partial and cratering is picked out by low-angle sunlight. But with a 6" you can also view Jupiter and four of its moons. I can make out that Jupiter is striped, but it's all "orangish-y" as the eye cannot integrate enough light to see different hues. Looking through an 8" Newtonian the striping is better defined and those four moons become very small orbs as opposed to points of light. Aperture envy is a thing. It's fun to view on successive evenings and see the moons move.
When I first bought the scope, I wondered why the 6" protective "lid" had a smaller capped opening; it was only after an eye-watering session of moon viewing that I realized that one leaves the lid in place and removes the small cap to look at the moon with smaller aperture thus reduced light intensity. 😬
-
If you rent a car in Whitehorse now and propose to take it on the Dempster Highway, there is an extra charge. Presumably the highway is much better now than in 1978 but they say you **will** have a stone hit your windshield. In fact, when we did the pre-rental walk-around I pointed out a crack in the windshield; the guy just shrugged and said every car here has a cracked windshield LOL.
Our neighbour drove across the country to the Yukon last summer, went along the Dempster, and sure enough a stone came from nowhere and cracked his Tacoma's windshield.
-
24 minutes ago, No Idea said:
I have used lead shot just as you have and it works great. The only difference that I did was to line to compartment with cling film first. I then put in the lead shot and poured in the resin. Once set I could lift the set shot out in one complete lump should I ever need to do any maintenance as it never was stuck to the hull.
Wish I'd thought of that!
-
Mike, .... -38C !!!!!!
It just occurred to me to check back here since I hadn't had any notifications....turns out I had forgotten to "follow" my own thread.
Wow those drawings are highly detailed!! Right down to hole locations in decks for cabin sink drains, and size/measured location for the china cabinet ... 🙃
There doesn't seem to be a drawing of the china cabinet itself, though. 😏
An incredible resource for potential Klondike modellers.
Thank you so much for obtaining all these drawing sheets! I will email Richard and Terry to thank them too.
Wonder who will be the first to start a build? My money is on John Ruy ....
- mtaylor, Canute and Knocklouder
-
 3
3
-
-
1 hour ago, yvesvidal said:
I would pour the shots, place them where you want them to be and then pour the resin on top.
Resin is worse than water (in a way) and will seep through every little holes and cracks you have.
Yves
Concur. I gradually poured the resin and stirred the shot around, my theory being that if a solid gelled mass was formed between the frames it would take some of the stress off the thin skin.
-
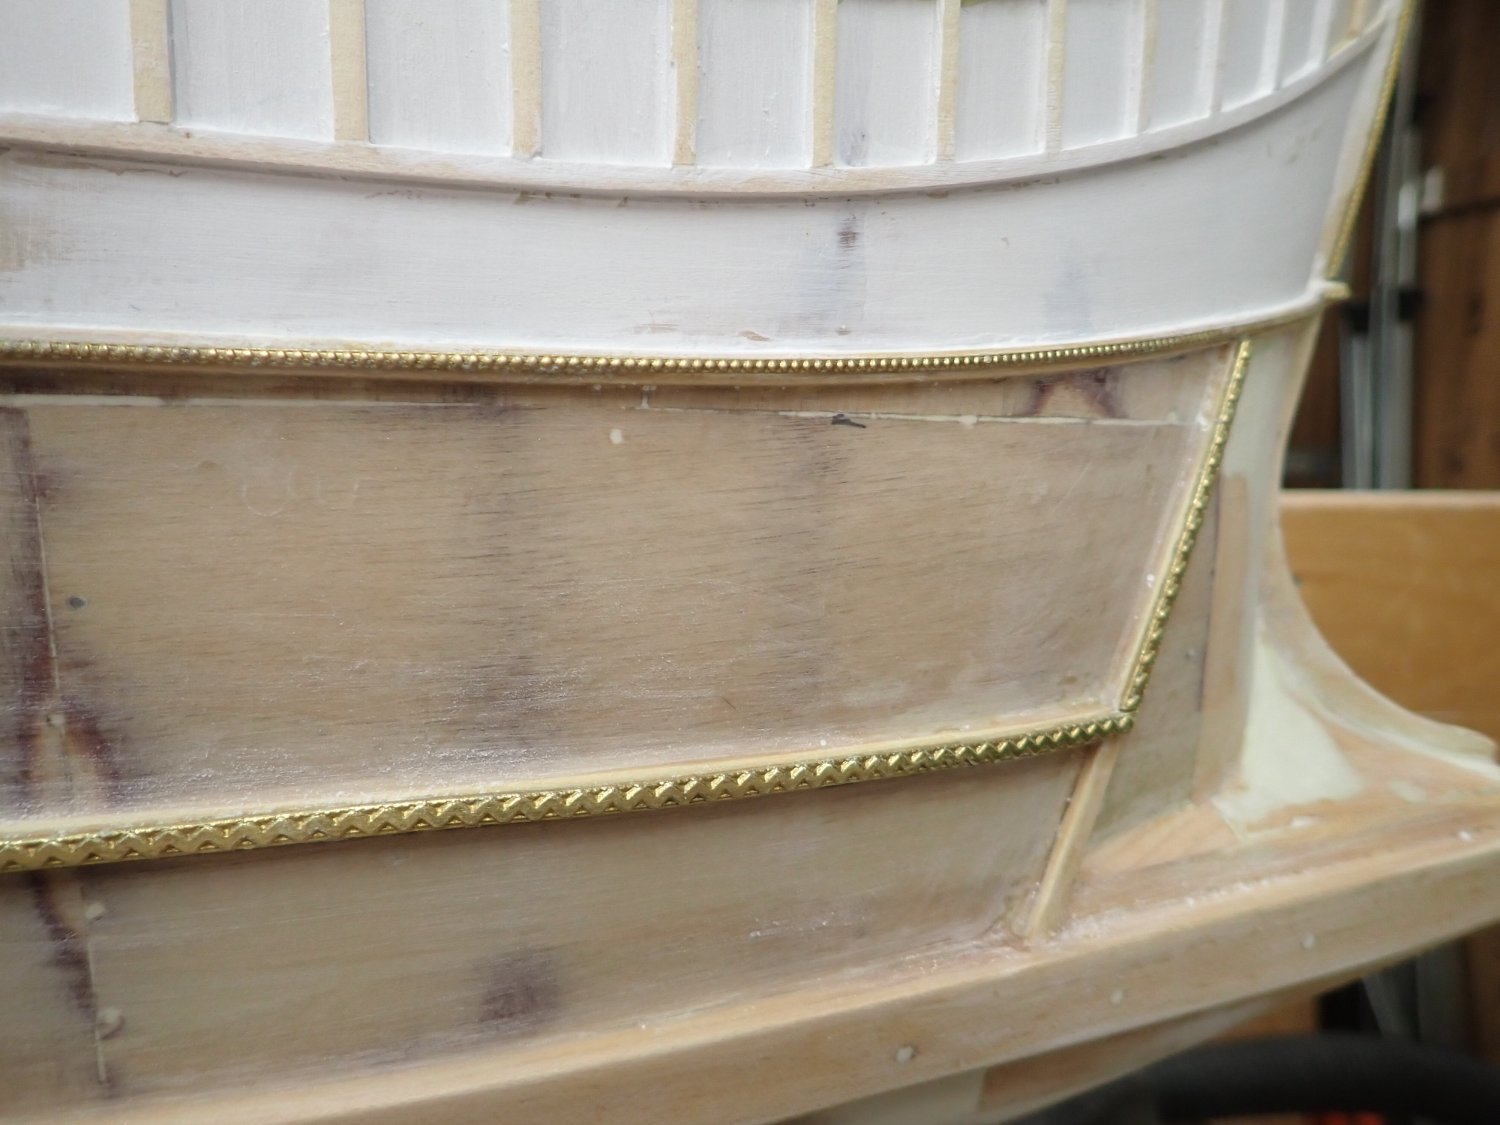
I decided to CA the decorative bits on before painting, so the glue can get a "bite" on the sanded epoxy resin hull instead of a paint surface. It will however be quite tedious to paint these details later. On the other hand if I had pre-painted them the paint probably would have cracked off as I bent the brass to follow the required contours.
At the bow:

At the stern:
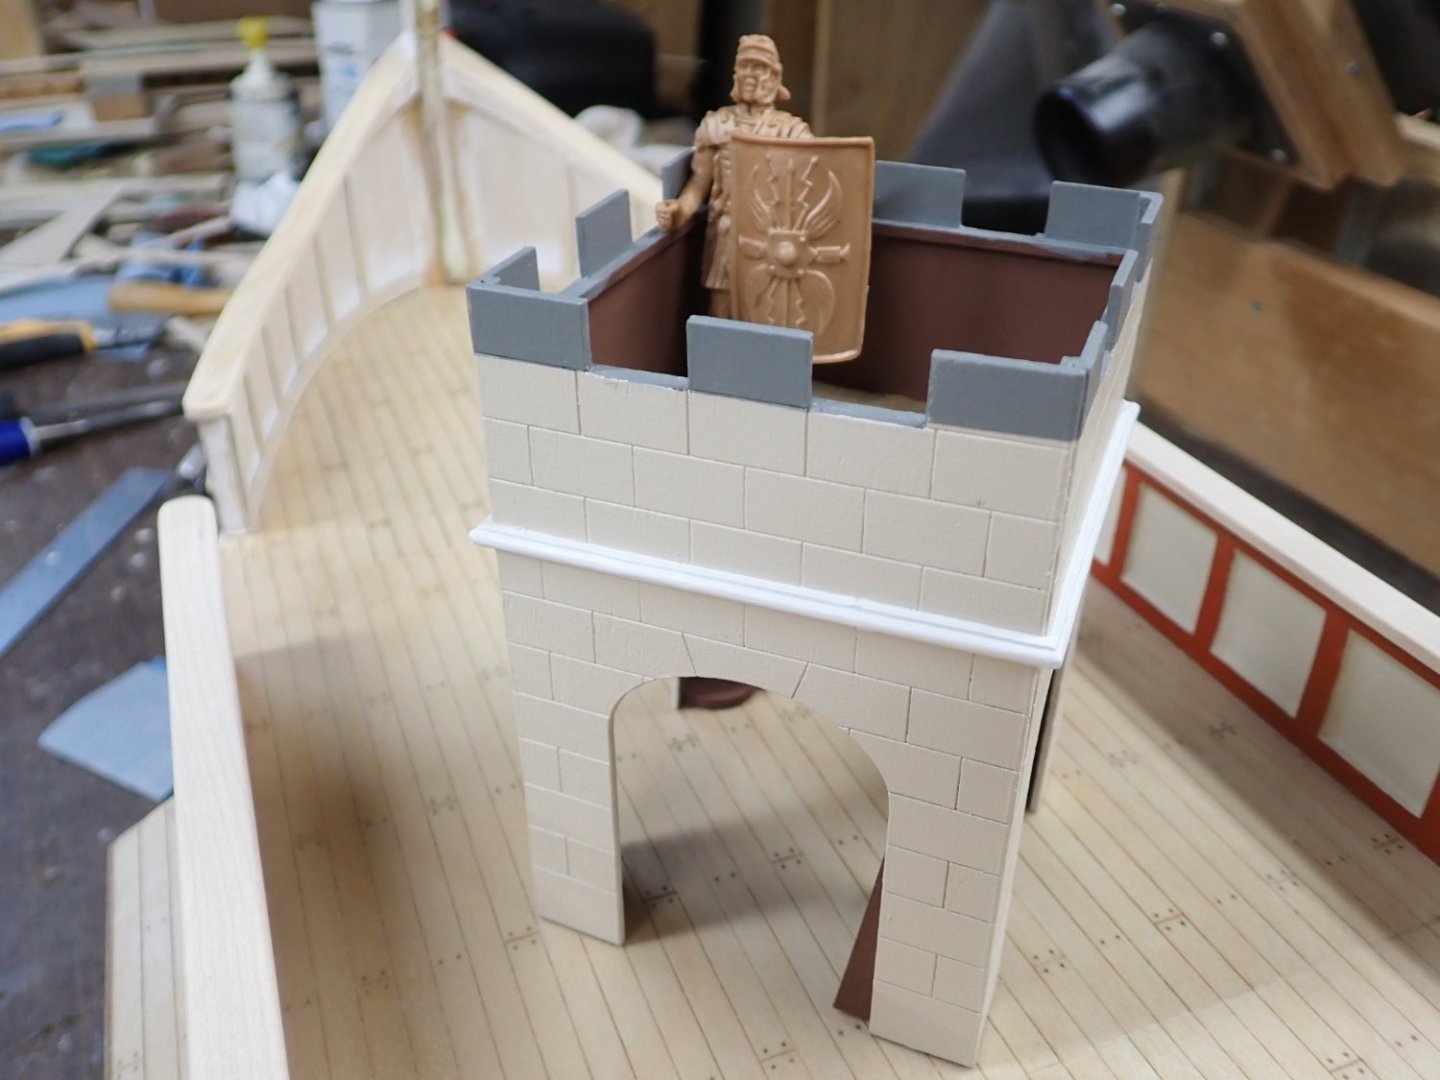
In other news, the Roman navy recruiters sent a new crew member over to help Marcus guard the ship while in the builder's yard.
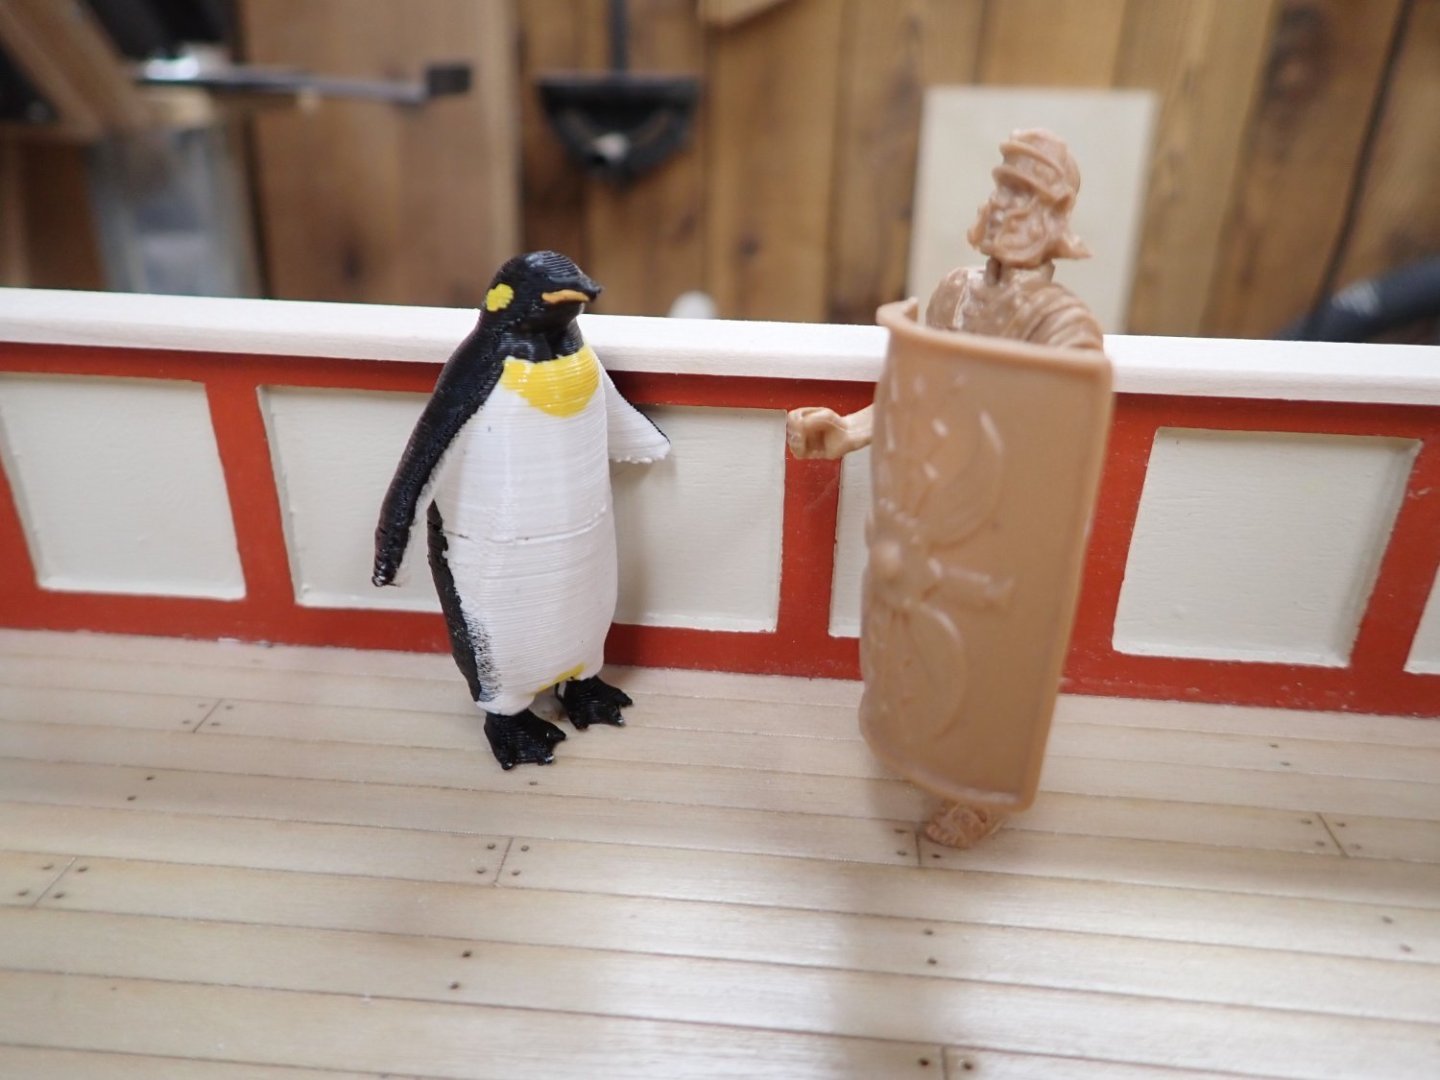
What a lookout team! I really must give Marcus back his javelin (pilum).

-
-
3 hours ago, Richard Braithwaite said:
I've got one of these to make...I was thinking of making from brass sheet and chemically coloring, but 3D printed and then painted looks much easier, and probably closer in appearance to a casting...
Yes, I thought of using brass too but I don't have much experience in soldering multi-part assemblies.
- Glen McGuire and mtaylor
-
2
-
Richard, this tabernacle is very interesting ... I've been wondering what to put on my galley's deck to hold the mast and allow it to be pivoted down. I have watched the "Nave Roman" video many times but other than something big and dark holding the mast no details can be made out. So they tilt the mast up, its square foot settles into the recess, then they lash it higher up on the tabernacle?
- Keith Black, Glen McGuire and mtaylor
-
3
-
Build commenced: Oct 2022
Build completed: Jan 2024
Duration: 15 months
Bill, you have to have set a record for this ship model build! She looks wonderful ... I love the sails partly brailed up ... excellent work. You are now a master.
Congrats! What's next? A Roman galley perhaps? 😏
-
Pardon my ignorance .... what is a hunting port? For a stern chase? Helping with fishing the anchor?
- EricWiberg and Bill Morrison
-
2
-
As we know, Glen never throws anything away either....how many of us also have short sections of railway track lying around "in case"?
- mtaylor, Canute, Keith Black and 1 other
-
 4
4
-
1 hour ago, Siggi52 said:
Thank you JJ and Druxey,
I build them after a picture out of the book Rogers Collection part 2, Model No 7, page 106. And there has the bowl alone the same diameter as the port nearby is broad. An other factor is, the walls are nor really vertical. So you would have a problem with the one I first build smaller.
The same problem as in an airplane bathroom? 😁
- FriedClams, Keith Black, Siggi52 and 3 others
-
1
-
5
-
Oh, HaHaHa! I don't have the box from the 70's; I just found that image......
")
No tilt, no height adjustment? That's very limiting in a saw, all right.
-
Hey man, I didn't know you had a Proxon! Congrats!
Looks like an interesting small model.
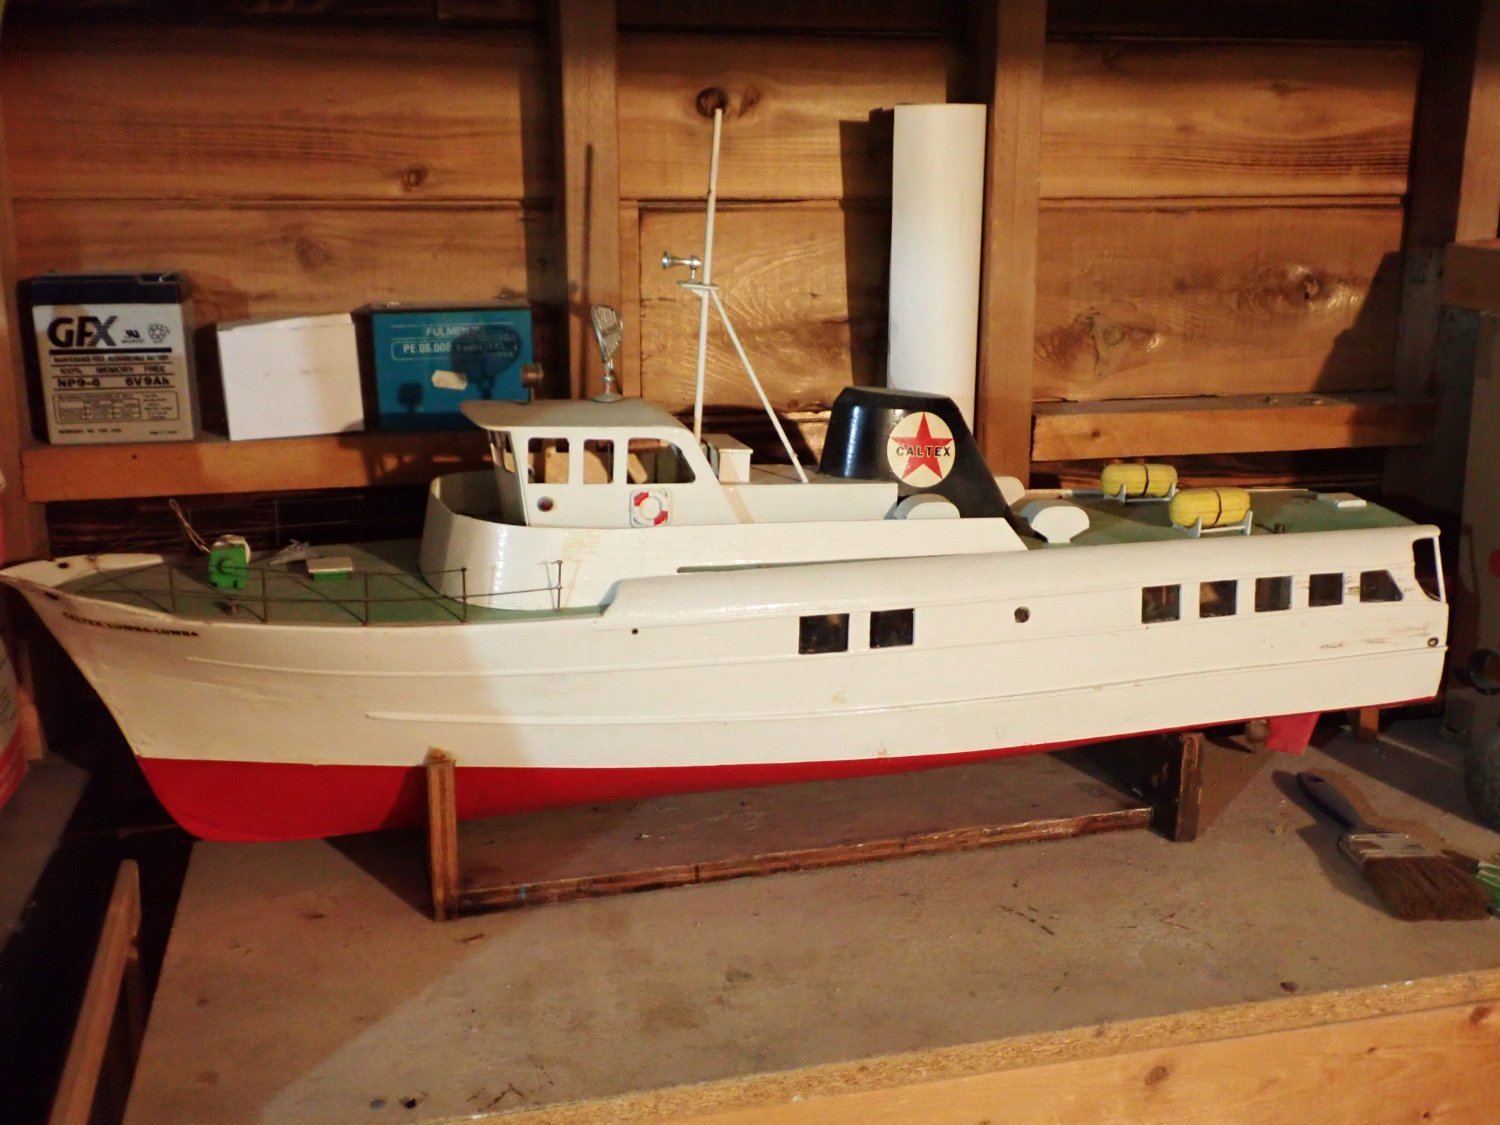
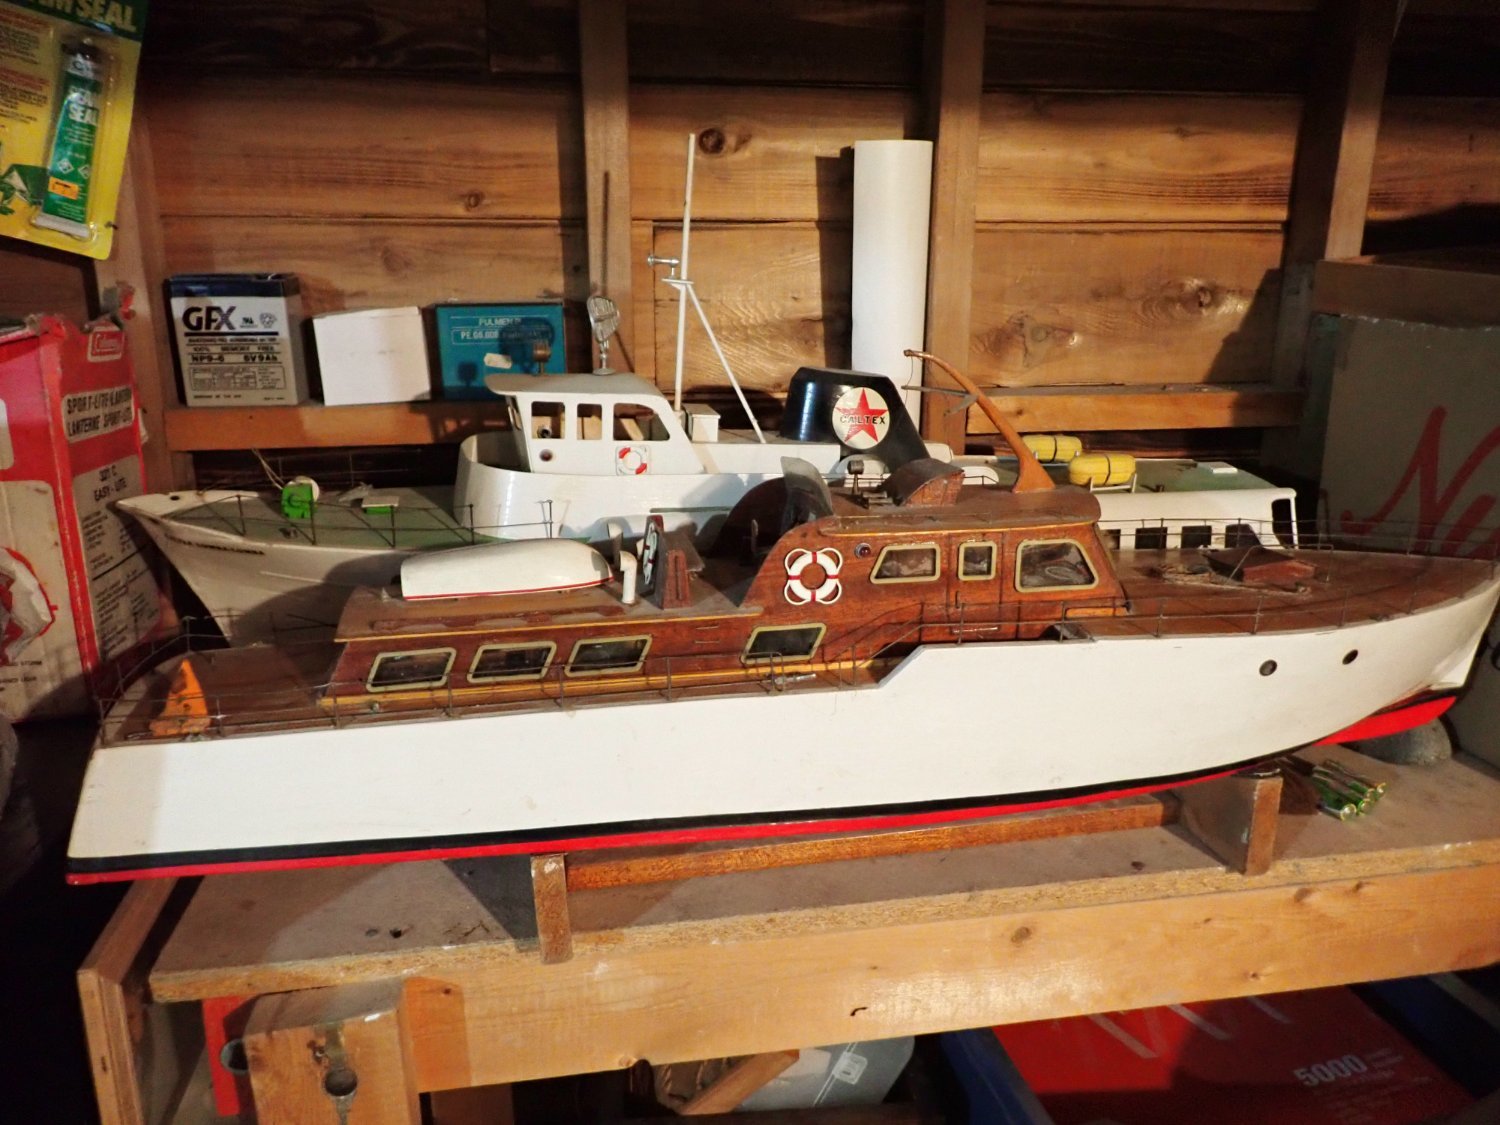
Remember my old Lumba-Lumba which was balsa? ... not ideal for an RC boat; too soft. Still has a ding where George's boat hit her. 🤨
She's still in the basement drydock. Here are two of the fleet which you may remember.


-
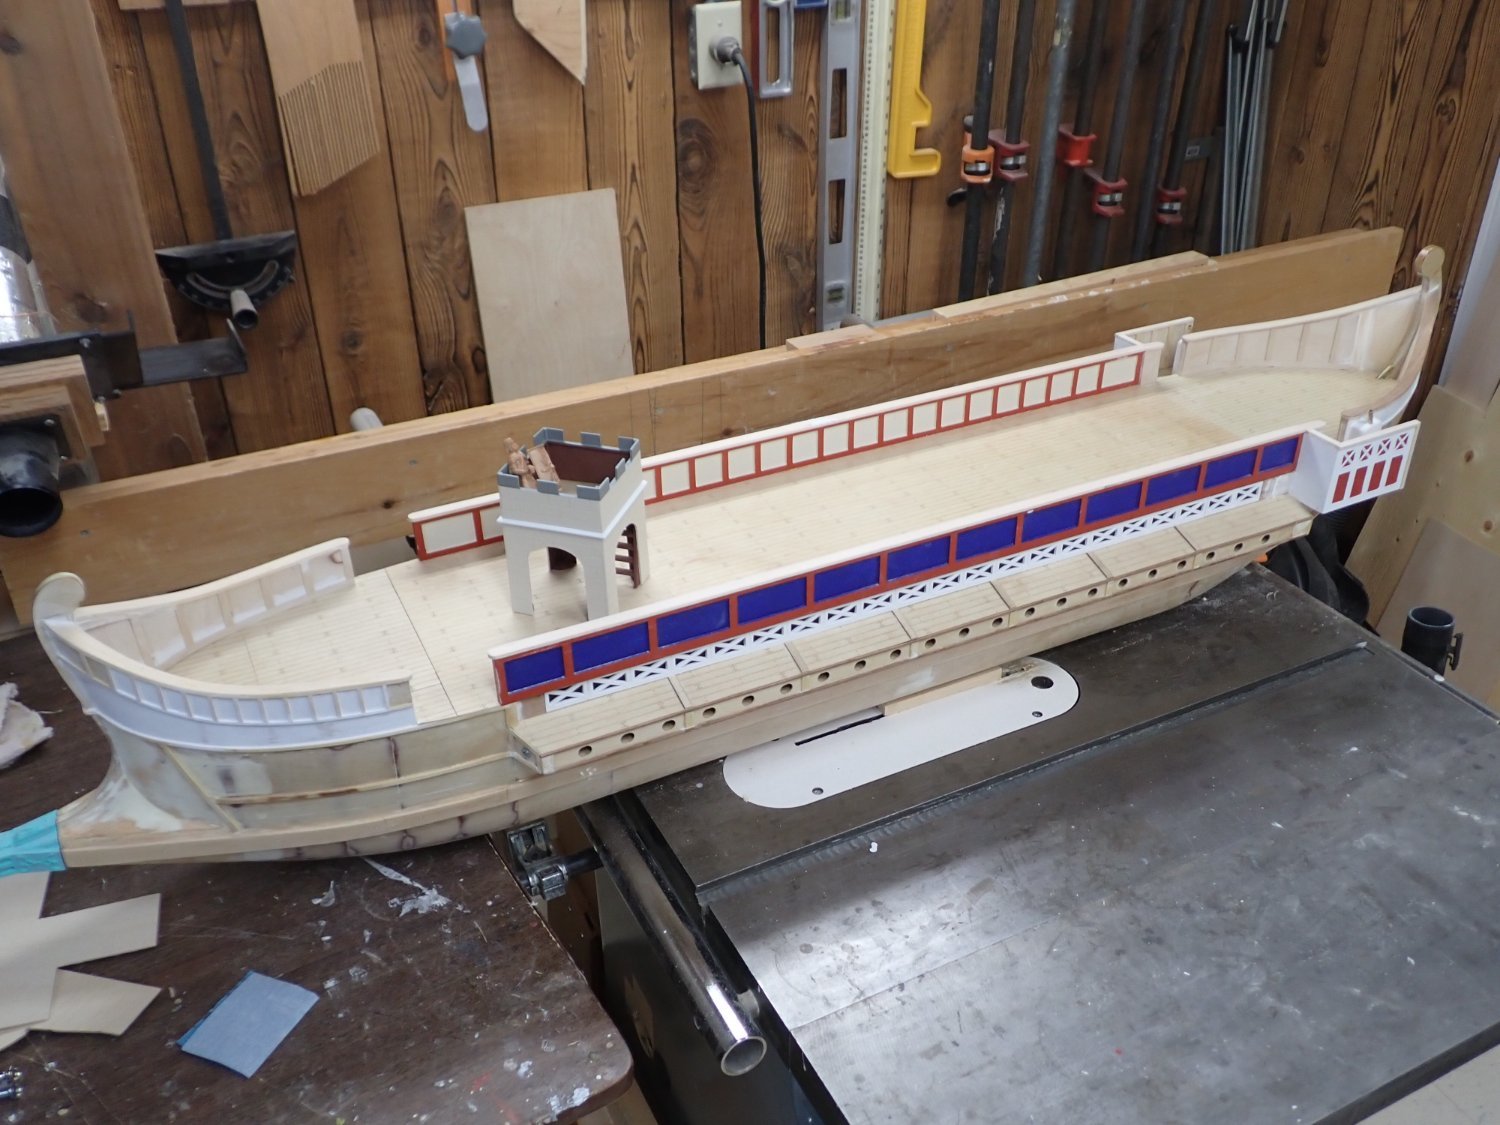
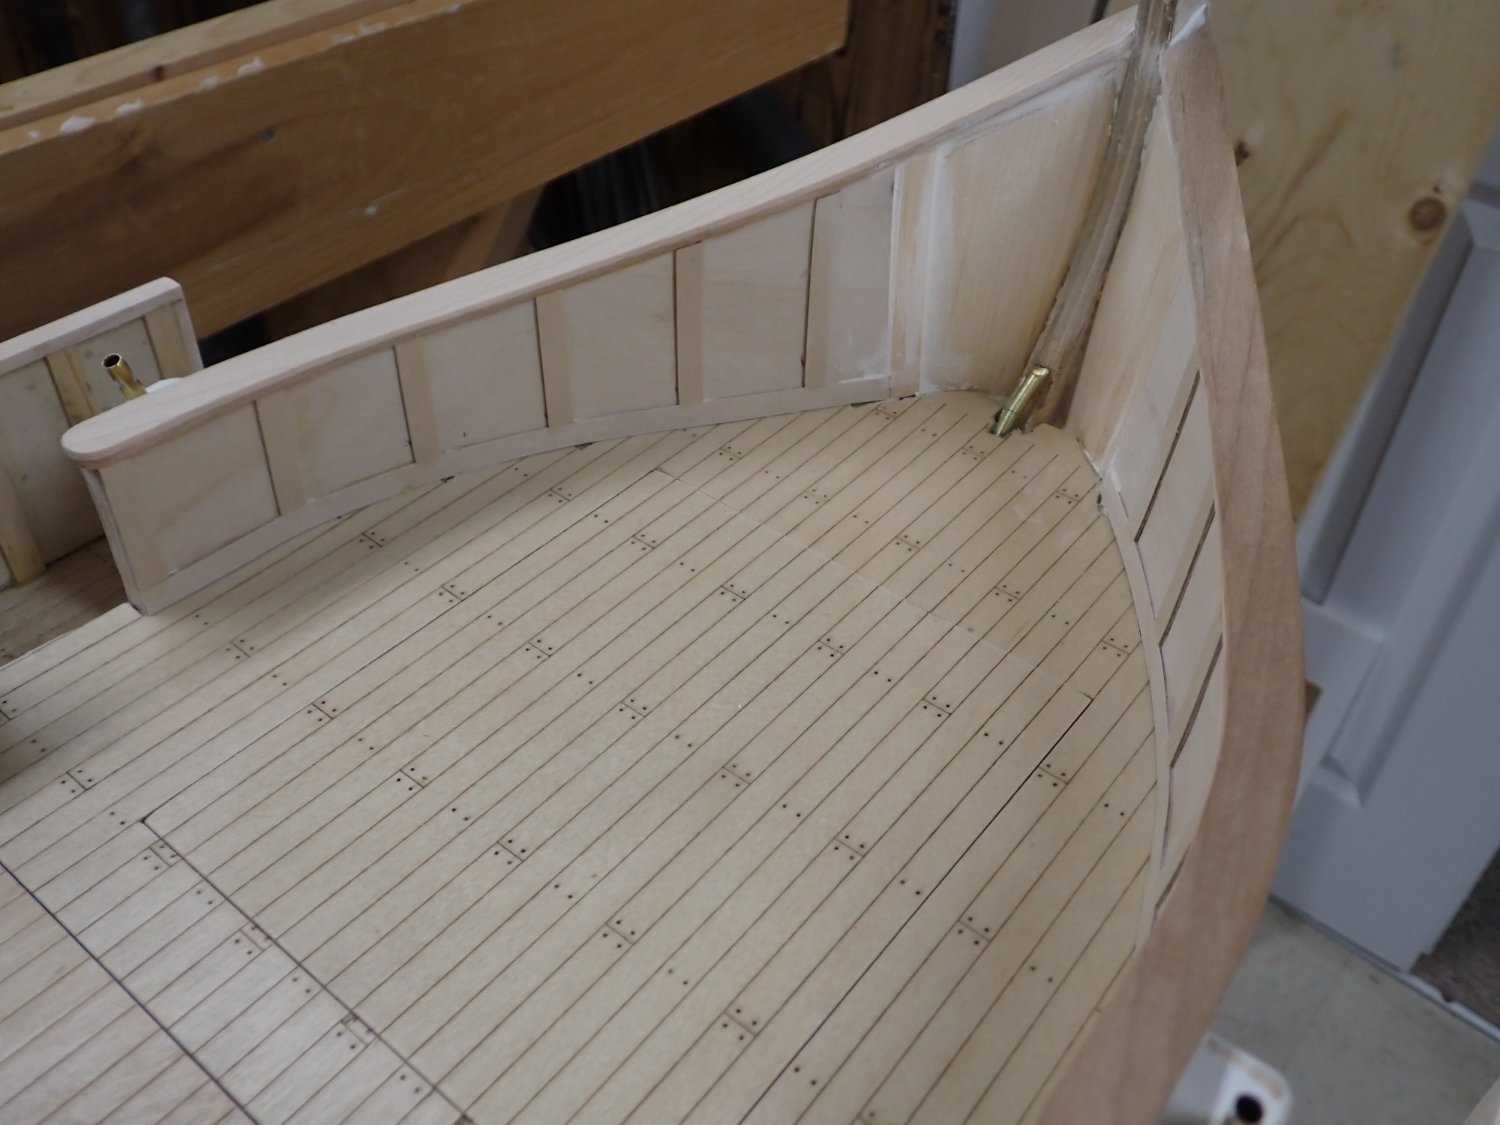
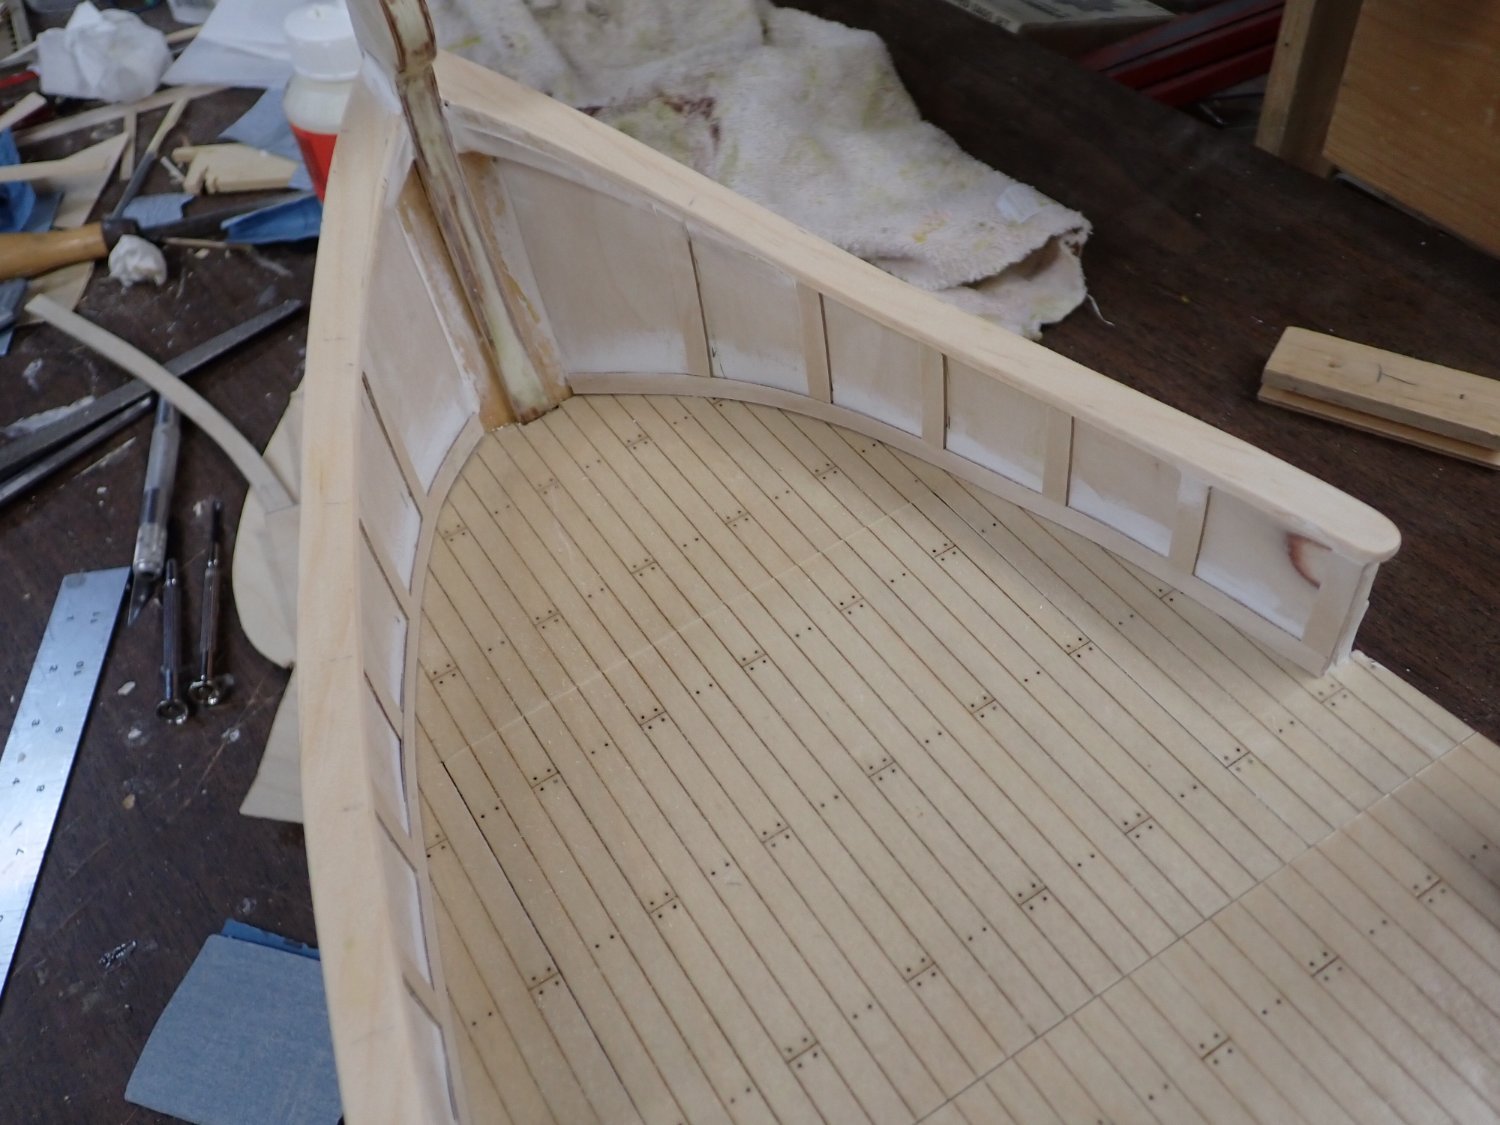
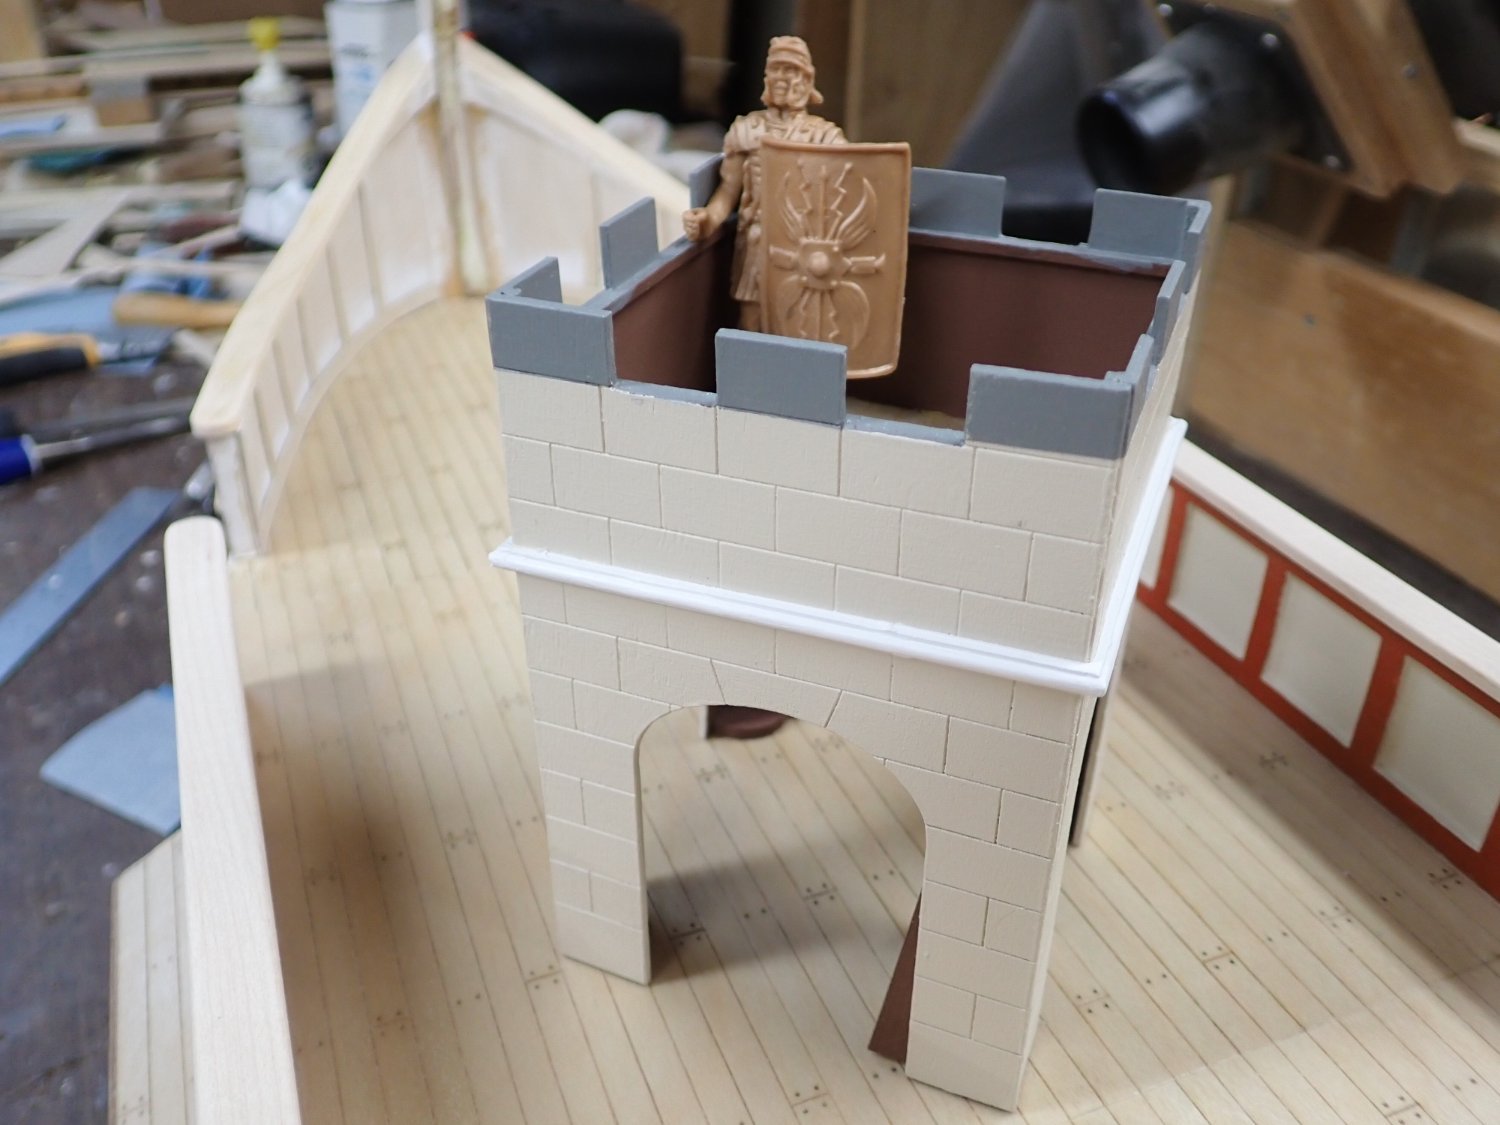
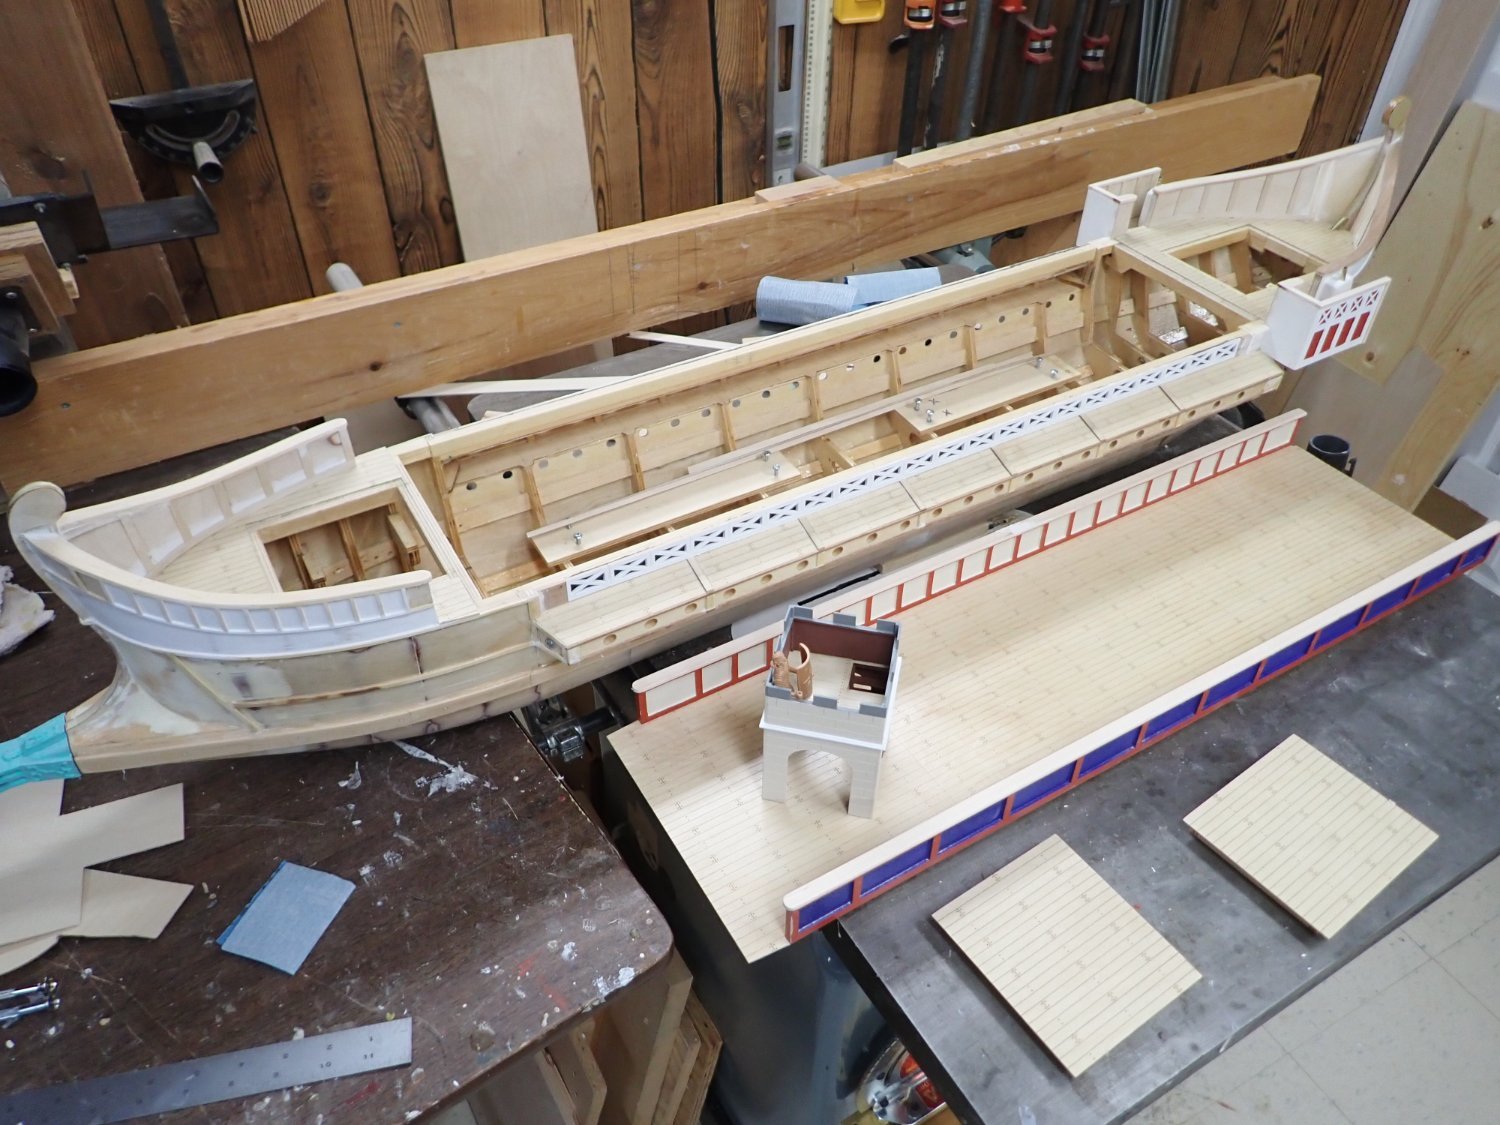
More progress. Finished the inner bulwarks at bow and stern and added all the cap rails. Archery tower painting is complete now too.
Next steps are a little light sanding of remaining areas of the external hull, then on to painting it in all its gaudy glory.
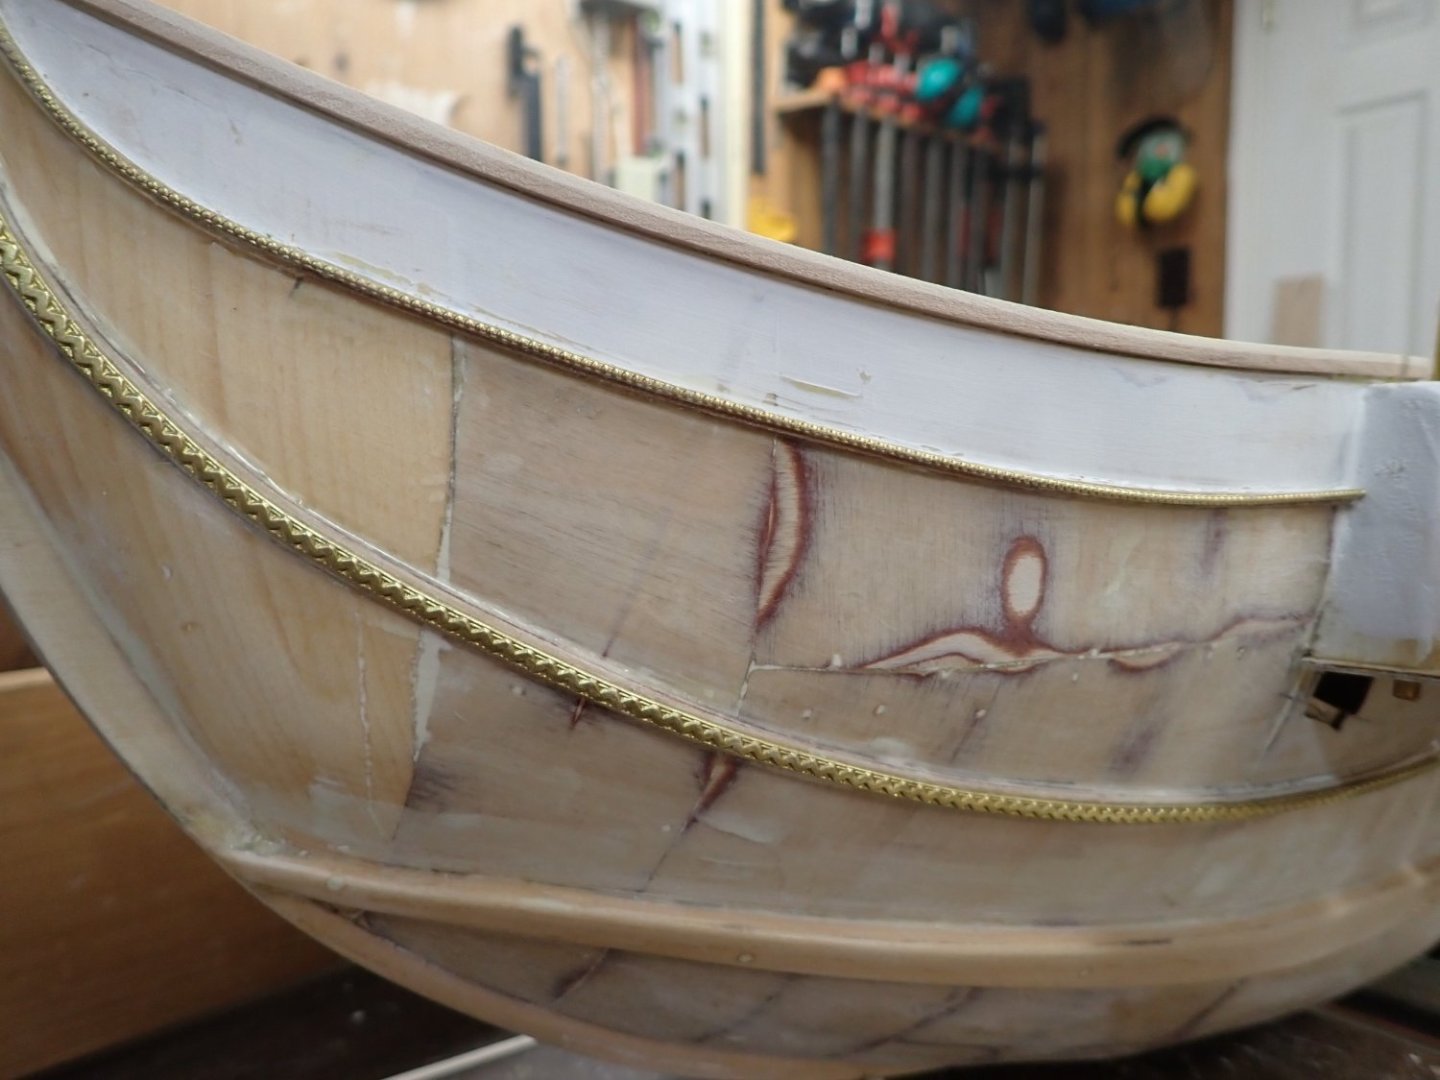
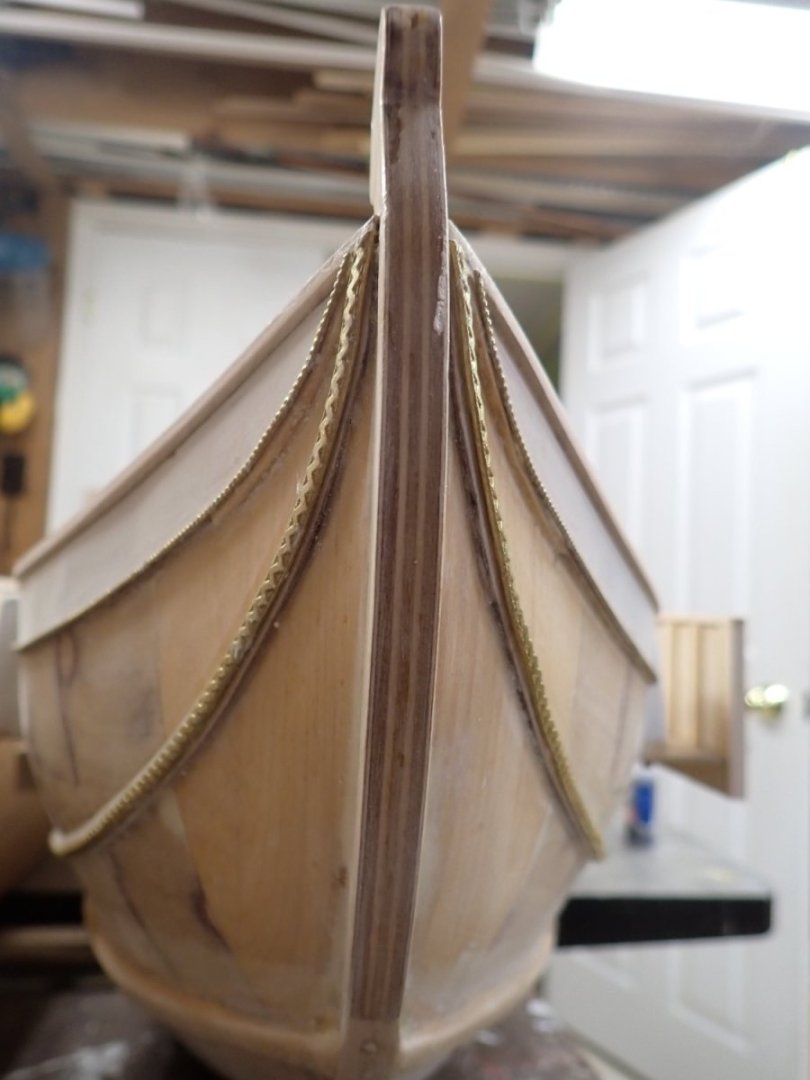
One thing I am wondering about is the brass and copper "bling" from etsy. Most of it will be painted yellow, except for gold colour at the stem itself. Will CA glue the backs of these strips to a painted surface, do you think, or should I CA the metal on to the sanded epoxy resin then paint the detailing in situ? Opinions please, bearing in mind that this will get wet on the water.
Pictures;
Overall shot. I wish I hadn't made the bilge so rounded and large, but my weight estimates were off as explained earlier. It will be unseen when on water. And now that I see the entirety, It could do with a 3/4" reduction in beam. Oh well, no one really knows about these ships for sure.

Stern. The brass tube in the middle is for wire leads to a possible "flickering LED" lantern hanging off the fantail; the other two are the rudder tubes. Speaking of which, I can't figure out how to draw the fantail decoration for either laser cutting or 3D printing. Limitations in TinkerCAD on the one hand, and my understanding of Inkscape on the other.

The bow.

Marcus likes his tower.
Boat with all removable deck portions off.

- yancovitch, Glen McGuire, gjdale and 7 others
-
4
-
 6
6
-
-
5 hours ago, Kevin-the-lubber said:
<snip...snip> ..... and when I re-opened the box three or four weeks back, I was once again struck by the quality.
Yes, I recall going to the hobby shop in 1982 and asking the guy if I could see inside the "Victory" box before buying. He was excited to comply and we both gazed reverently at the fantastic hull engraving and sprue after sprue of multi-colored parts. Fond memories. 😉
-
19 hours ago, nzreg said:
A question thats a bit off topic but when searching for this kit they seem to refer to it as a starter kit.
could someone explain why this is?
thanks
This kit is the opposite of a starter kit ..... along with the Soleil Royale it is one of the most complex plastic sailing ships on the market.
At least they claim to have improved the instructions; not sure if they're better or just separated out a bit onto glossy paper.
- Wacom, Mexspur and Hubac's Historian
-
3
-
Did you make those deadeyes Michael? To me, a daunting task.
-
Nice coils, Bill! I like your jig too; I painfully wrapped mine one at a time round the two ends of my tweezers .... how foolish .... 🙄 ... will do it your way next time.
Ship looks great!
Regards,
Ian
-
I'd like to suggest the "Great Eastern" with its interesting mix of prop, paddlewheel, and sail; and storied history. A rare model subject.
Or the "Great Britain", another ship rarely provided as a kit.
Both fine examples of innovative Victorian engineering.
- Canute, Keith Black, thibaultron and 3 others
-
6


Roman Quadrireme Galley by Ian_Grant - 1/32 Scale - RADIO
in - Subjects built Up to and including 1500 AD
Posted · Edited by Ian_Grant
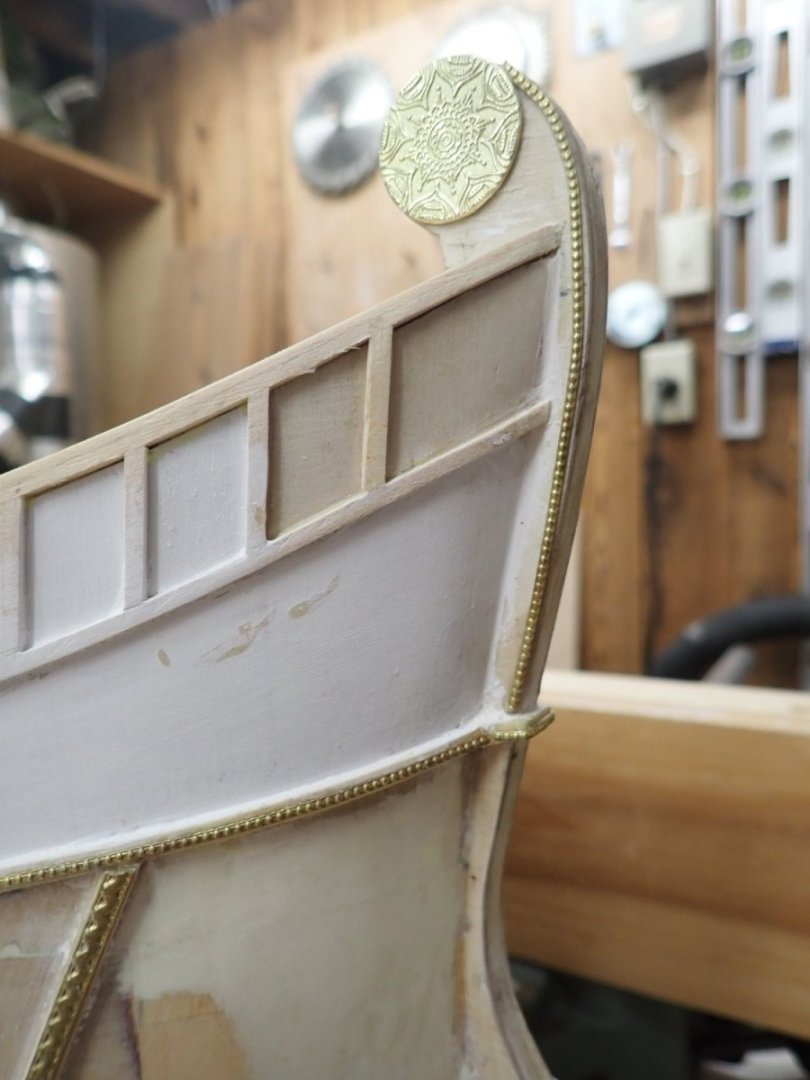
I went to the library to pick up a book on hold (one of Ian Ross's excellent "Twilight of Empire" series) and took a memory stick with the 3D file for stern medallions, in the event that the printers were available. They were so I whipped off the pair (33 minutes, 70 cents). One has a notch for the stern flagstaff to pass through, enabling the crew to lower the staff if required. Here they are with some primer on them. I had to use black PLA this time.
And here in place:
I've been applying primer to the ship too. Some parts are at two coats, some at one, all around the lower ports at zero. I can now see it's going to be quite a chore to mask and paint it all. Amazing how a little paint highlights the flaws. Some filling and sanding will be needed.
Tomorrow we're off (at 4am 😭) to fly to Bonaire for a week of snorkelling/scuba/hiking. The boat will await my return.