Baker
-
Posts
4,294 -
Joined
-
Last visited
Content Type
Profiles
Forums
Gallery
Events
Everything posted by Baker
-
Is my Google translation from English to Dutch correct?? And do i understand it correctly. I have the requested parts. 2 other people want them. These 2 people think of each other that one of them has the parts and wants to deliver them to him. Whoever sends the first PM to me, gets them.
-
Never heard from Lorne. Is still available for free, only the cost of shipping. If I read correctly you live in the USA. Shipping is by Belgian post (Bpost) I have yet to see the correct price. According to the Bpost site, this will be around 24 to 25 euros. If ok sent a PM to me.
-
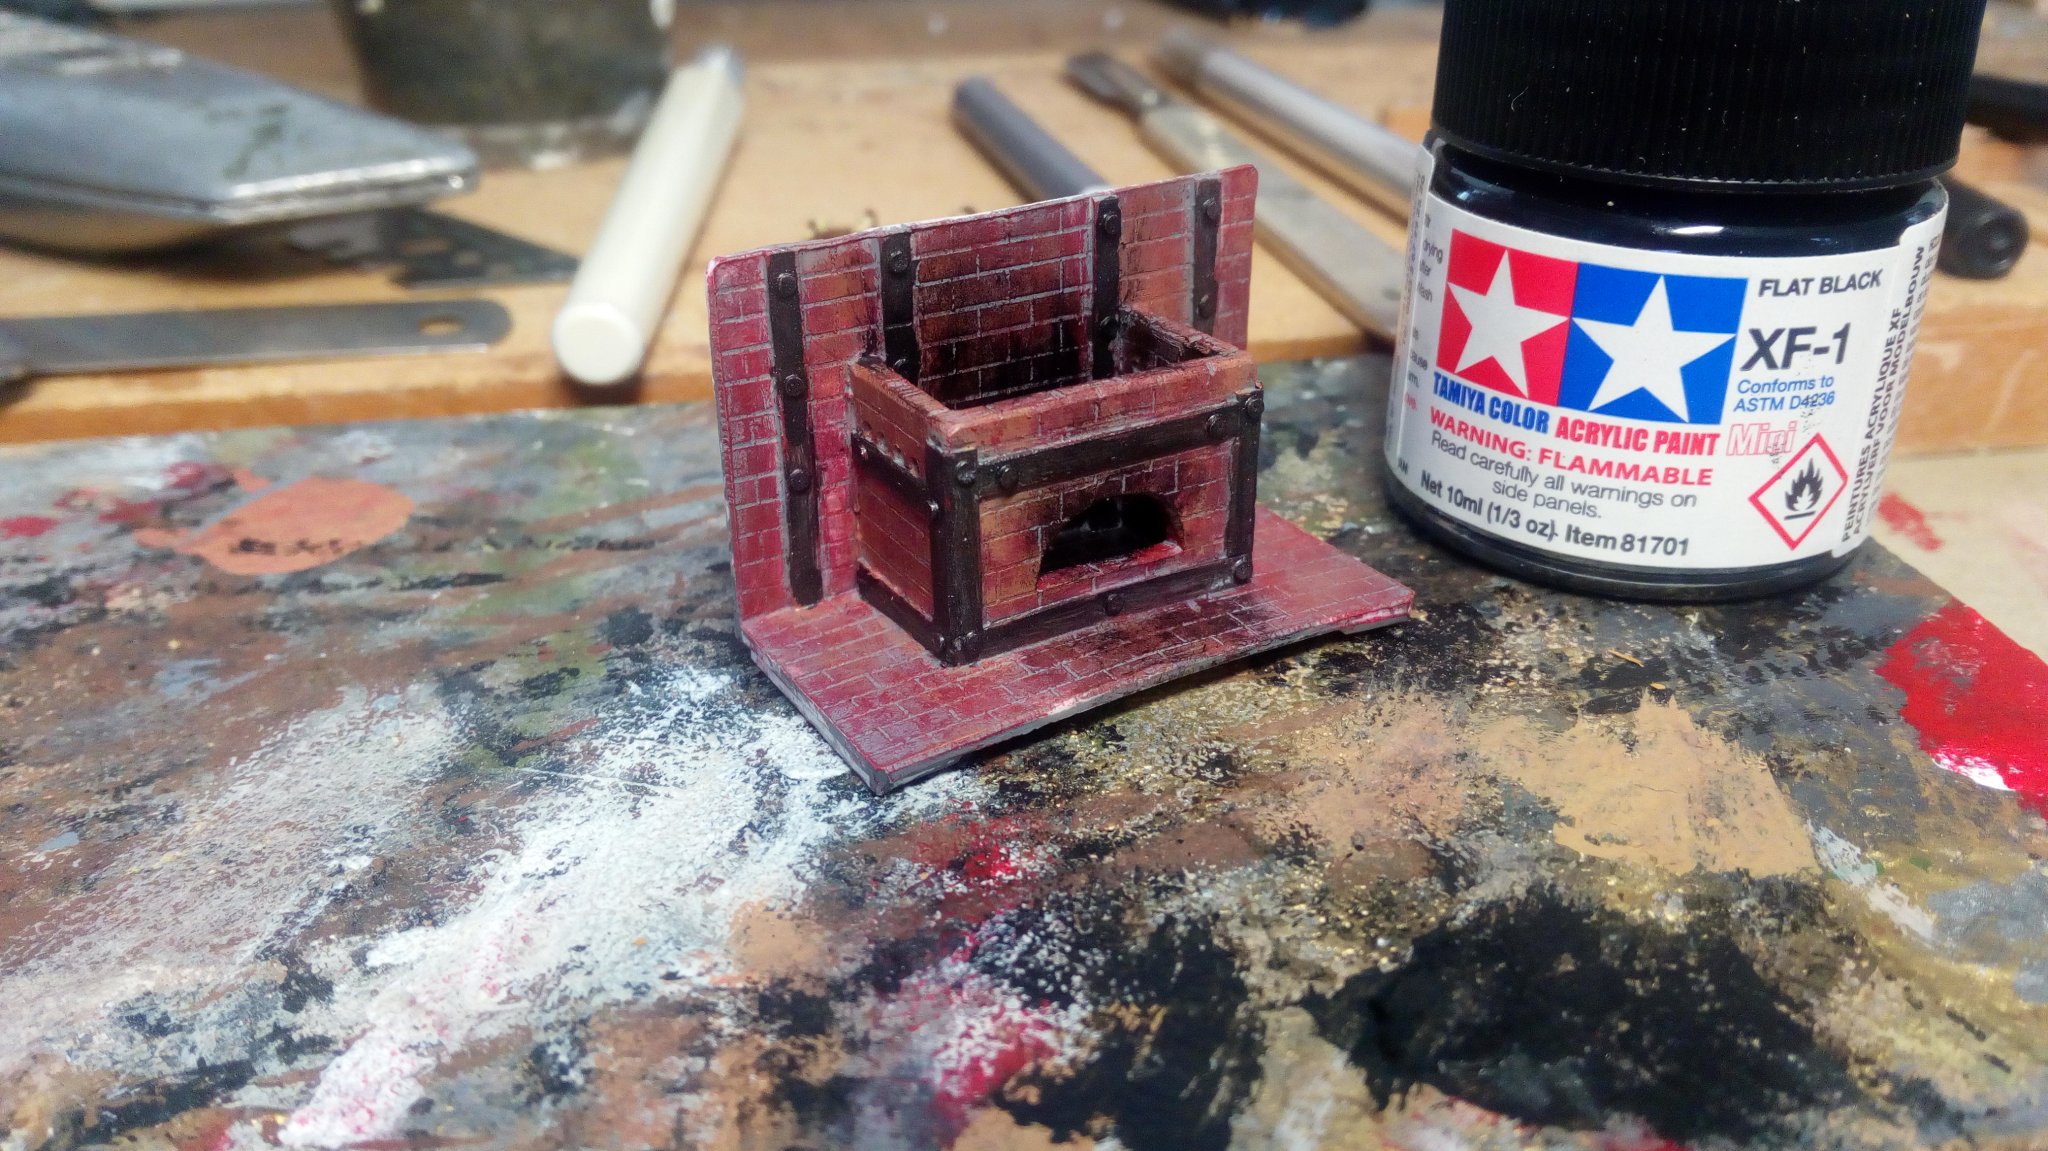
 You can polish the matte Tamiya Paint a bit after it has hardened. Then it becomes semi-gloss and has a weathered look.. I do this with soft scotch brite.
 -
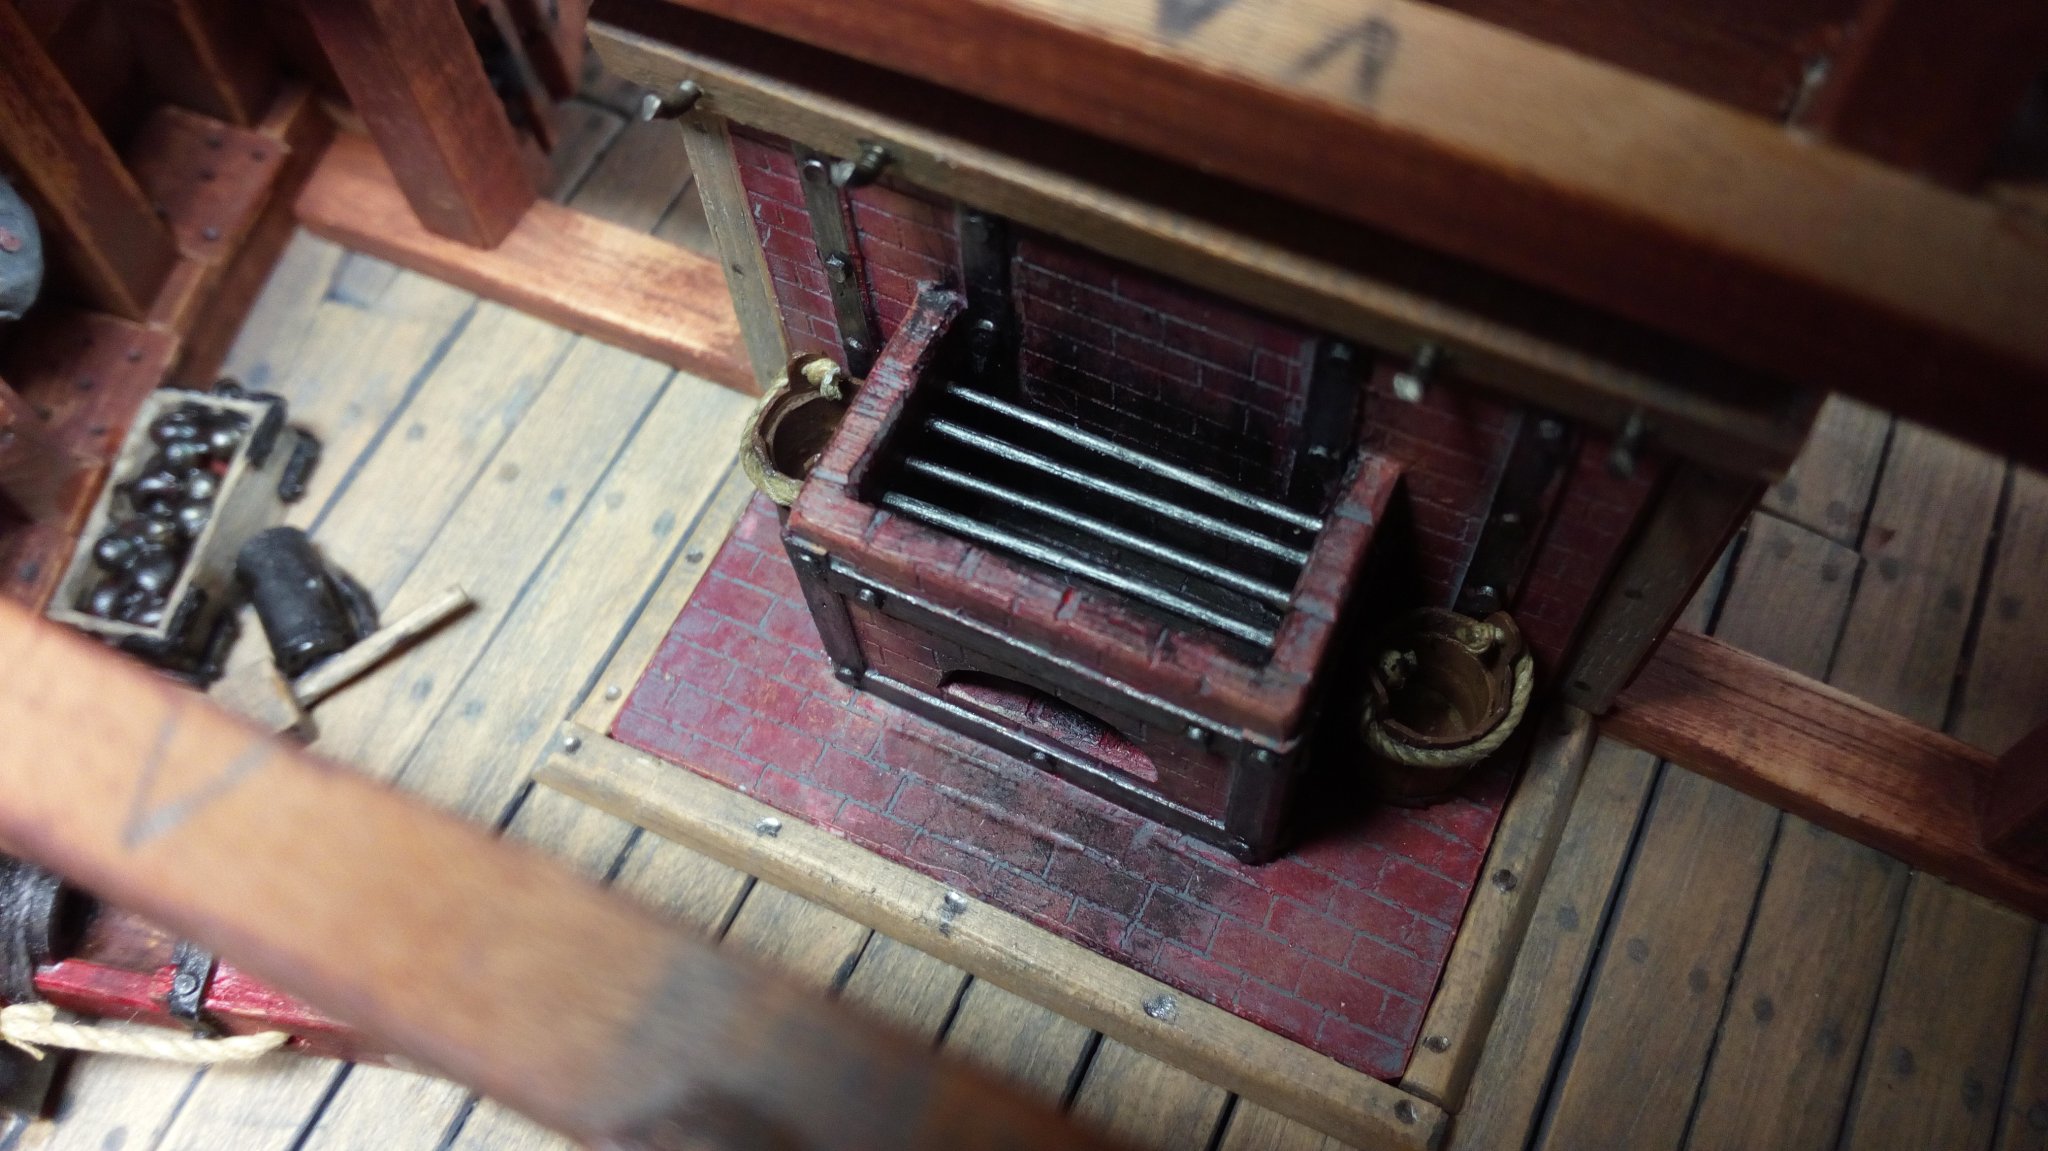
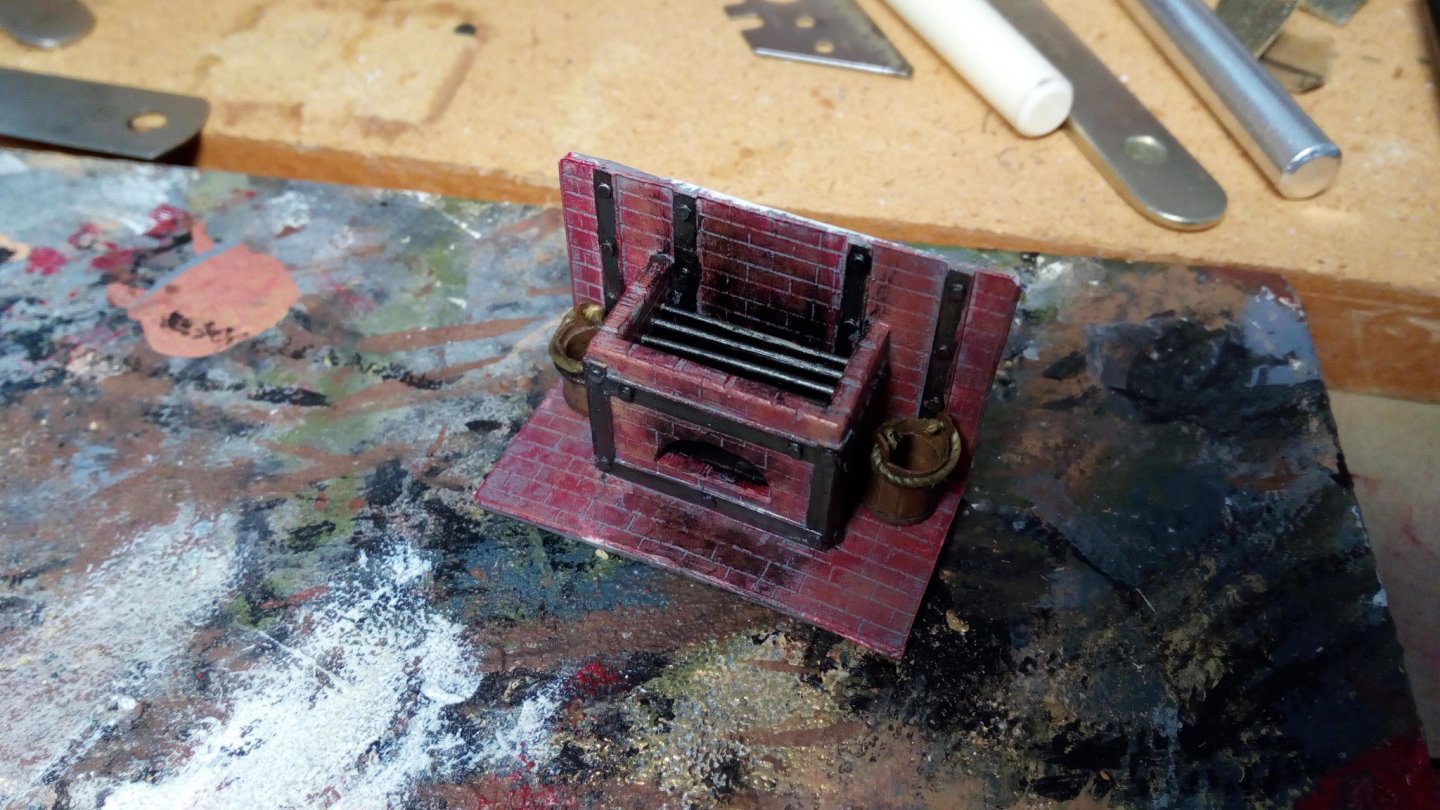
Thanks everyone for the nice comments. Brick walls can indeed just be bought. But my model shop in the city of Antwerp is closed because of Corona. And actually the build of the stove was not that much work. Building about 1 h and painting 30 minutes. Installing the stoove on the model took the longest time. Removable grating will be provided later. After the corona lock out, BBQ on the ship for all members. (Does anyone have a shrink machine to make us all 45 times smaller?)
- 756 replies
-
- 9
-

-
- galleon
- golden hind
- (and 2 more)
-
Welcome to MSW
-
Welcome to MSW
-
Hello, and welcome to MSW.
-
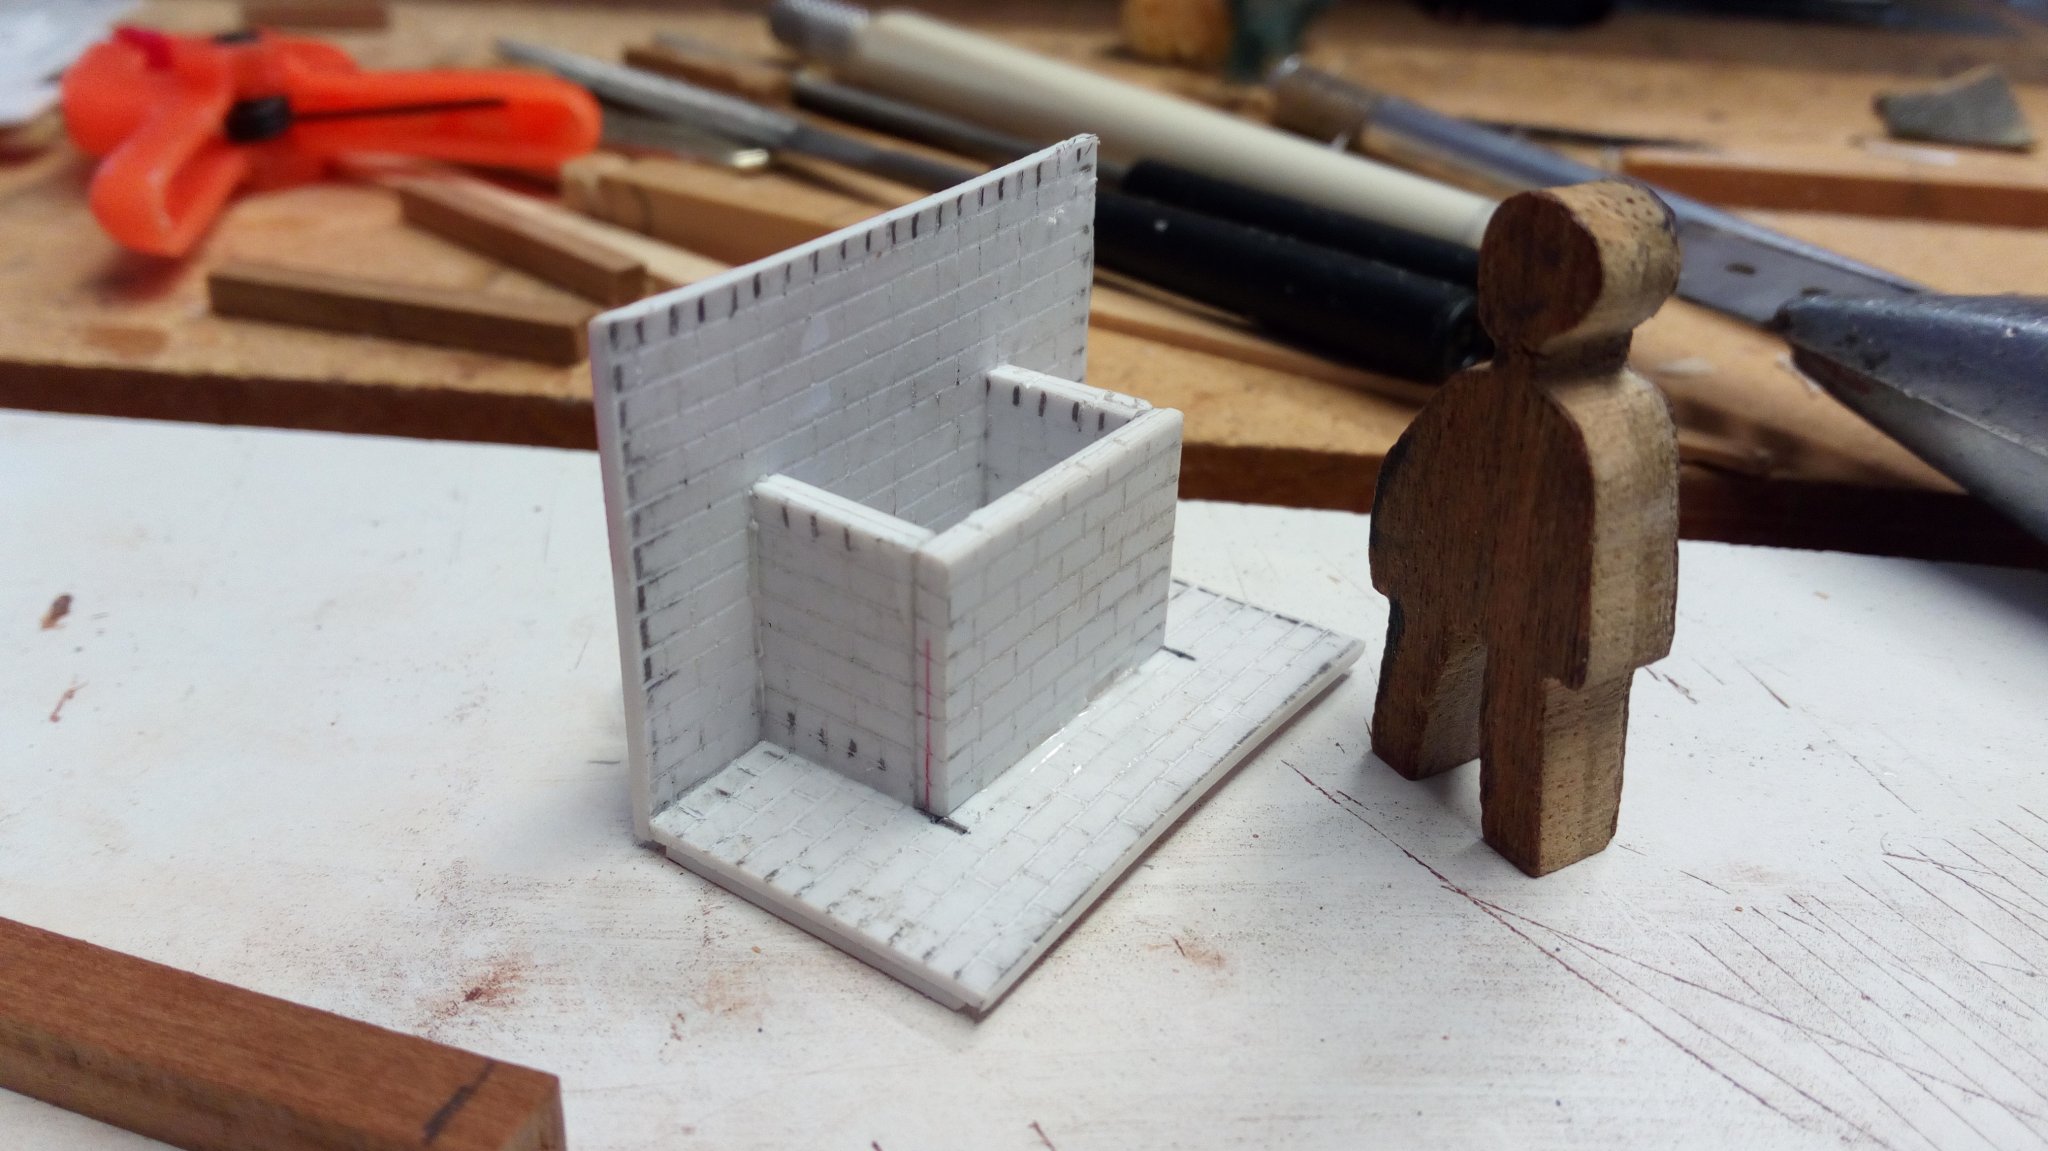
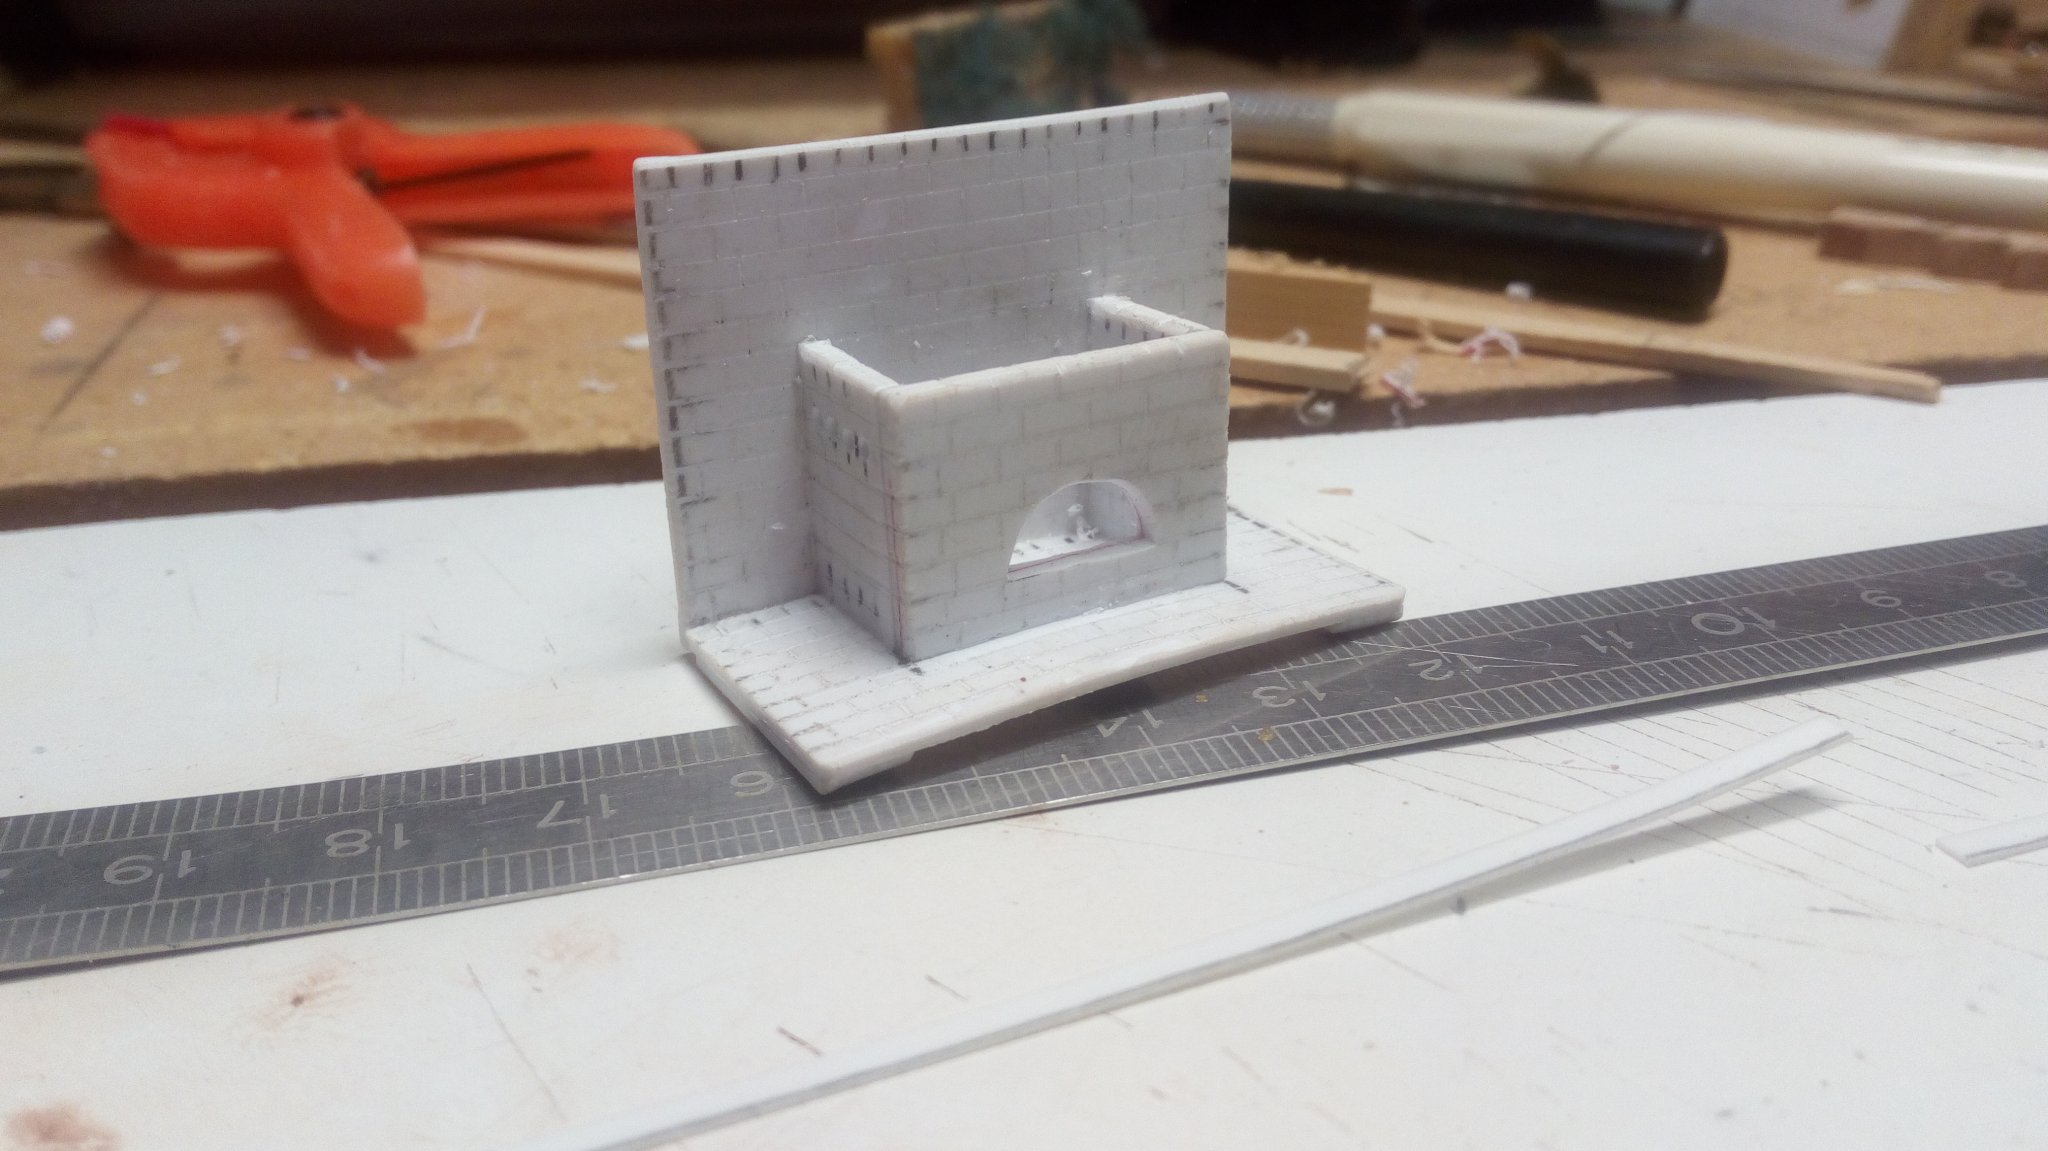
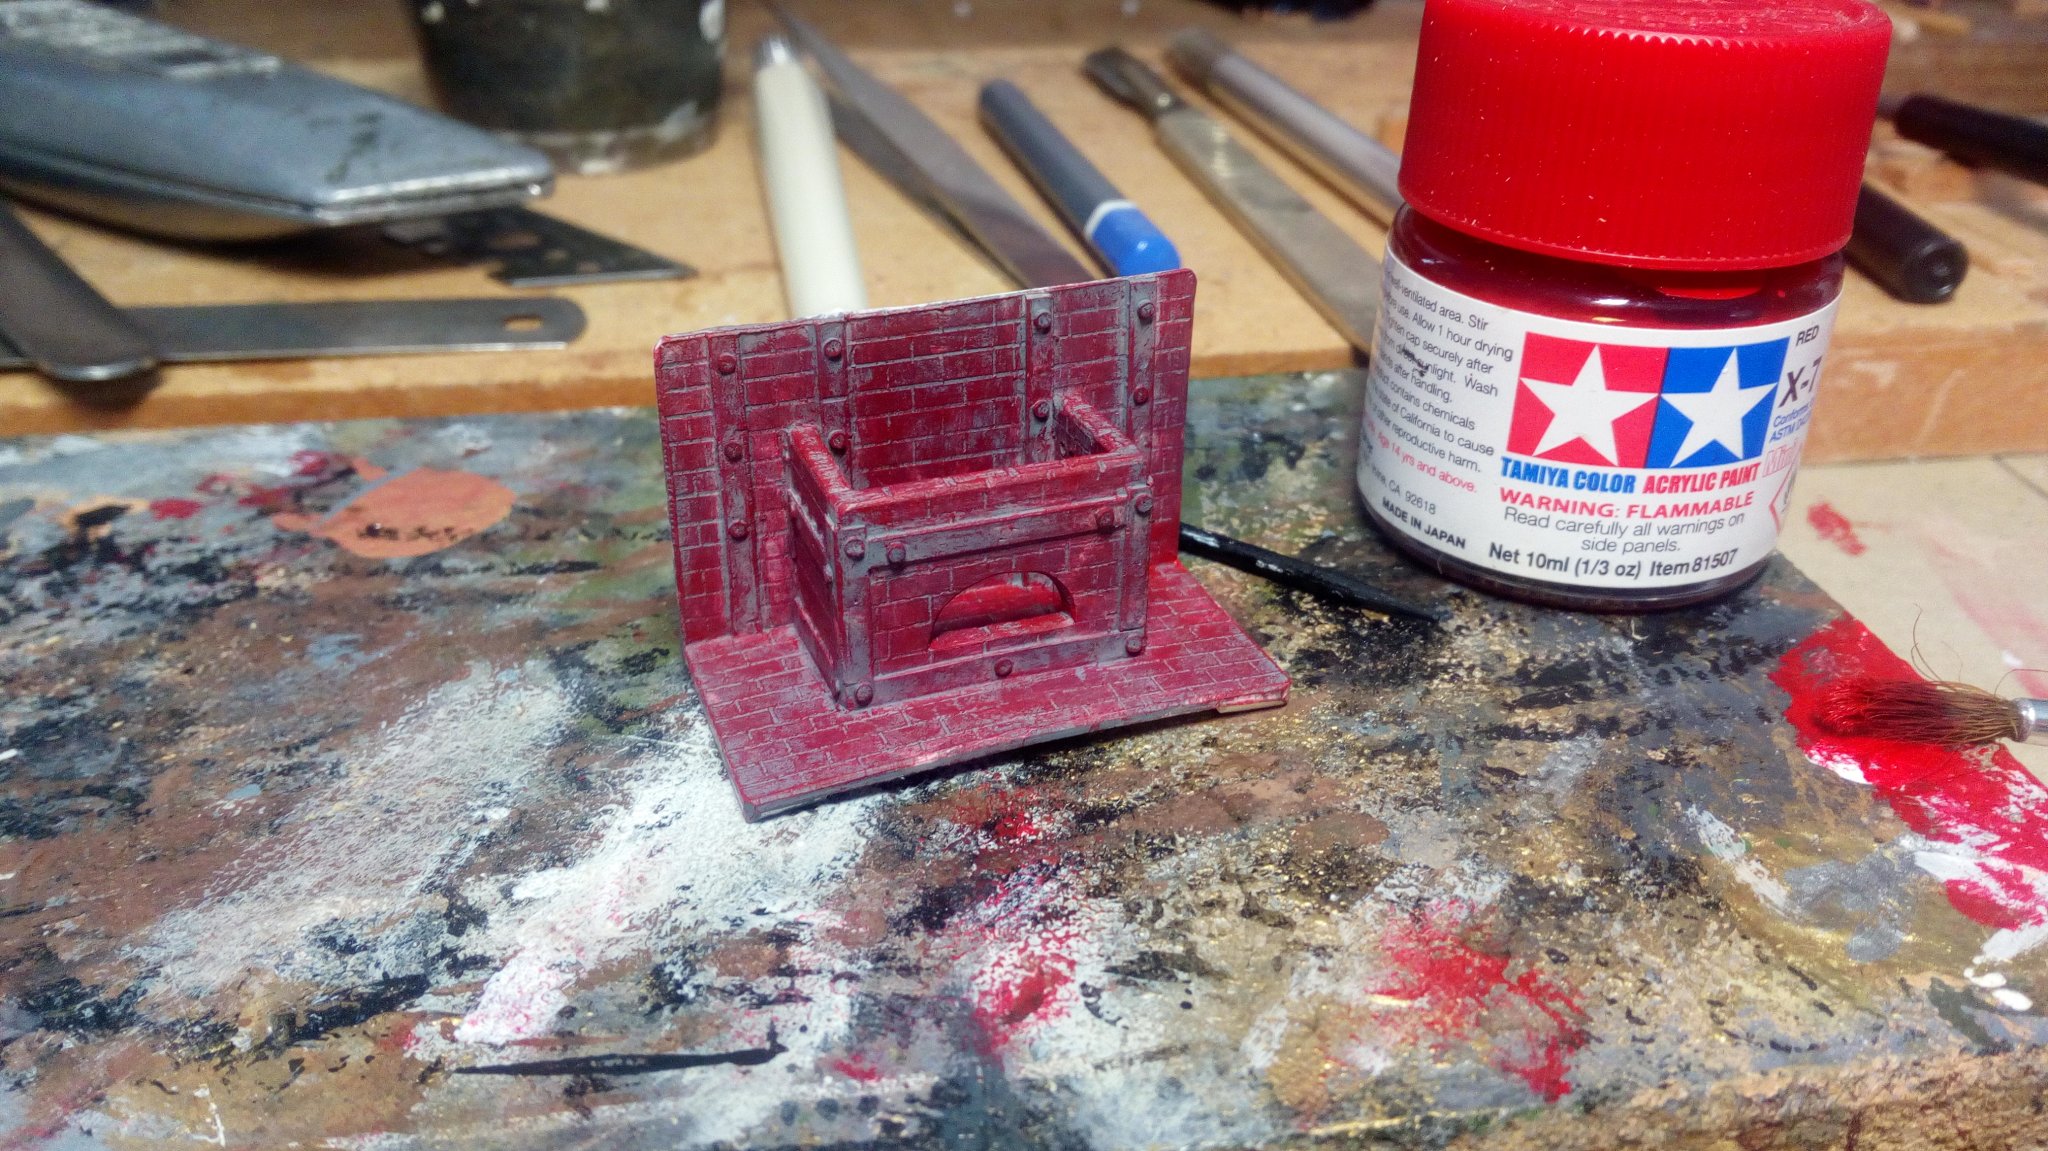
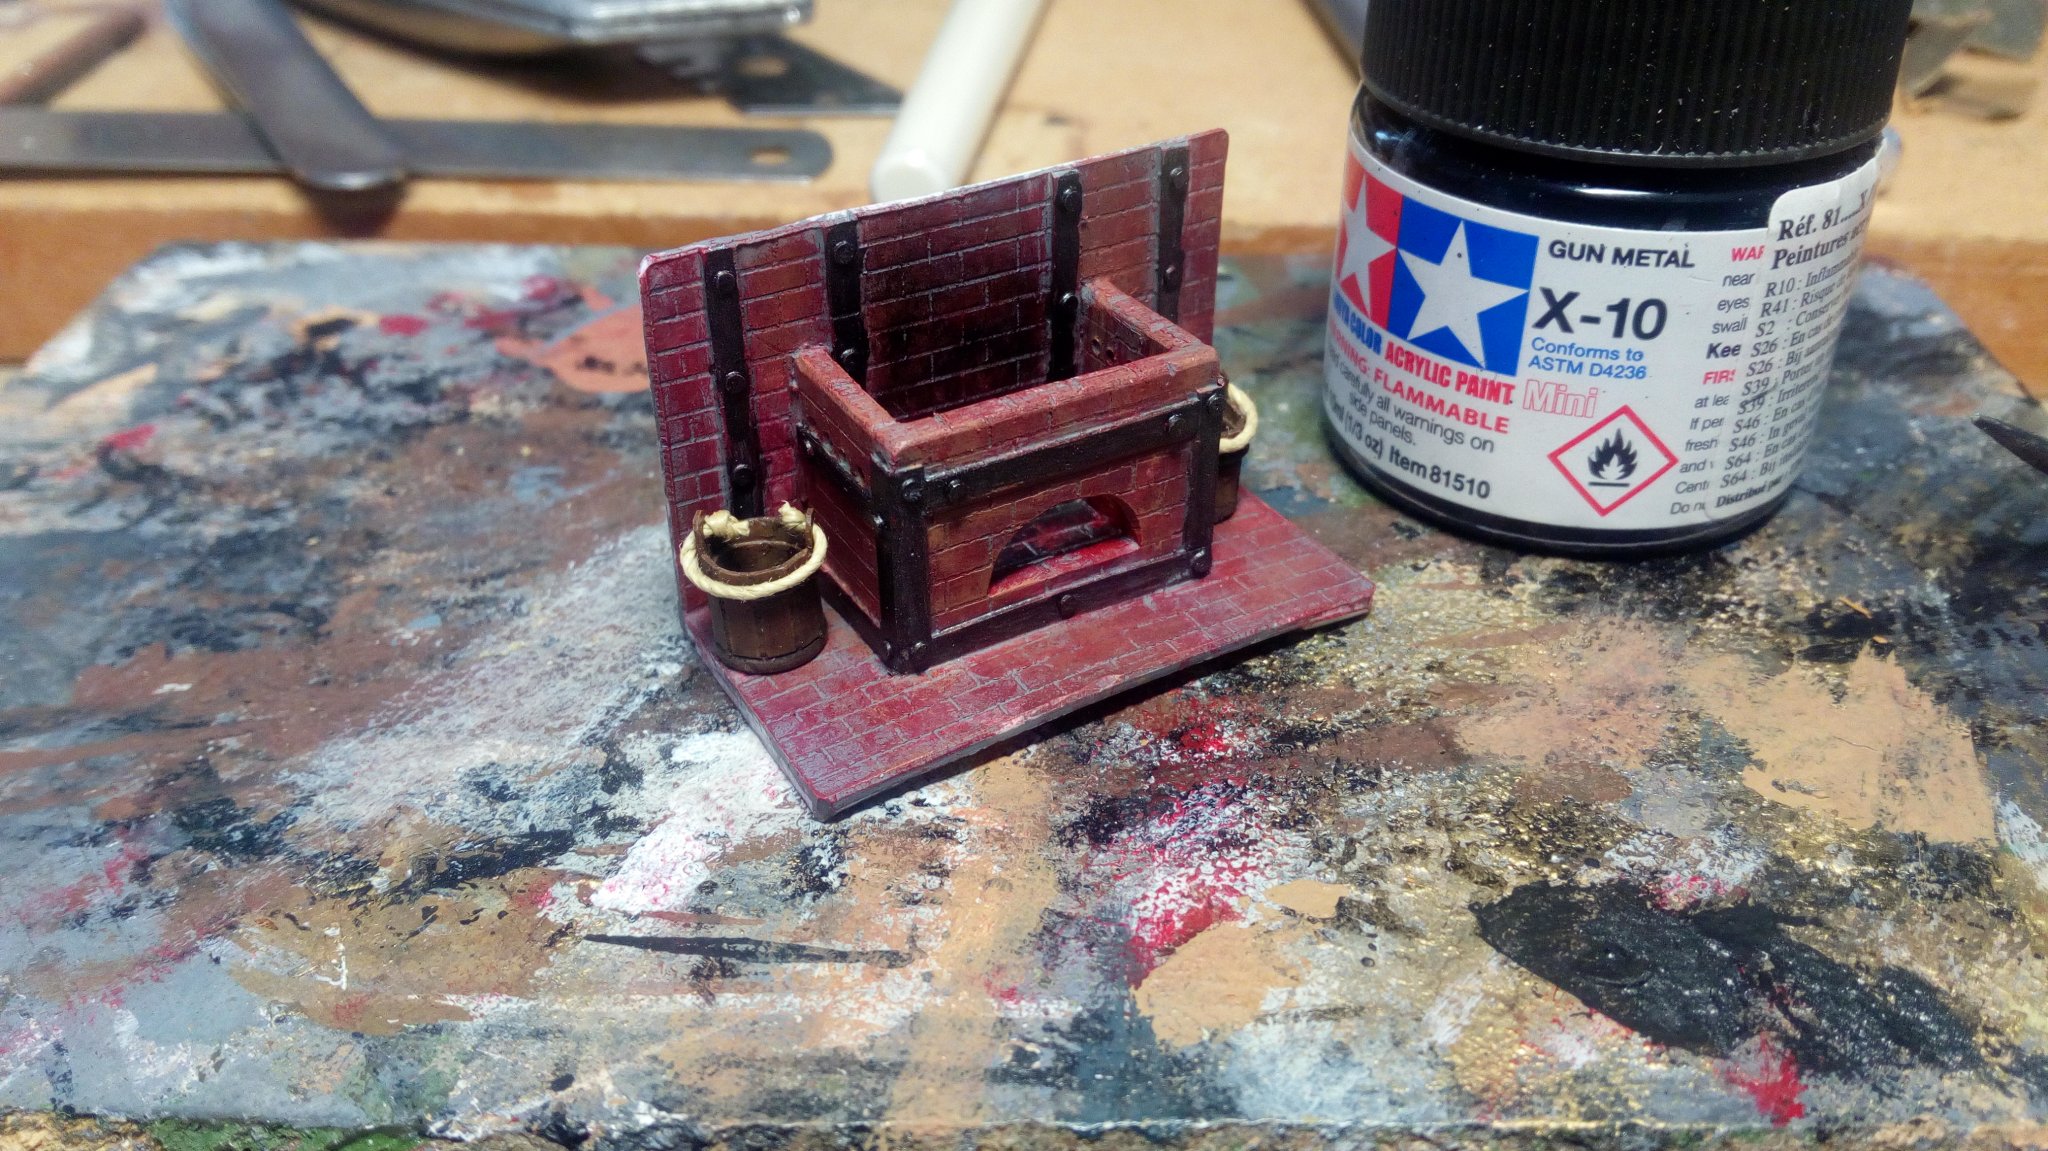
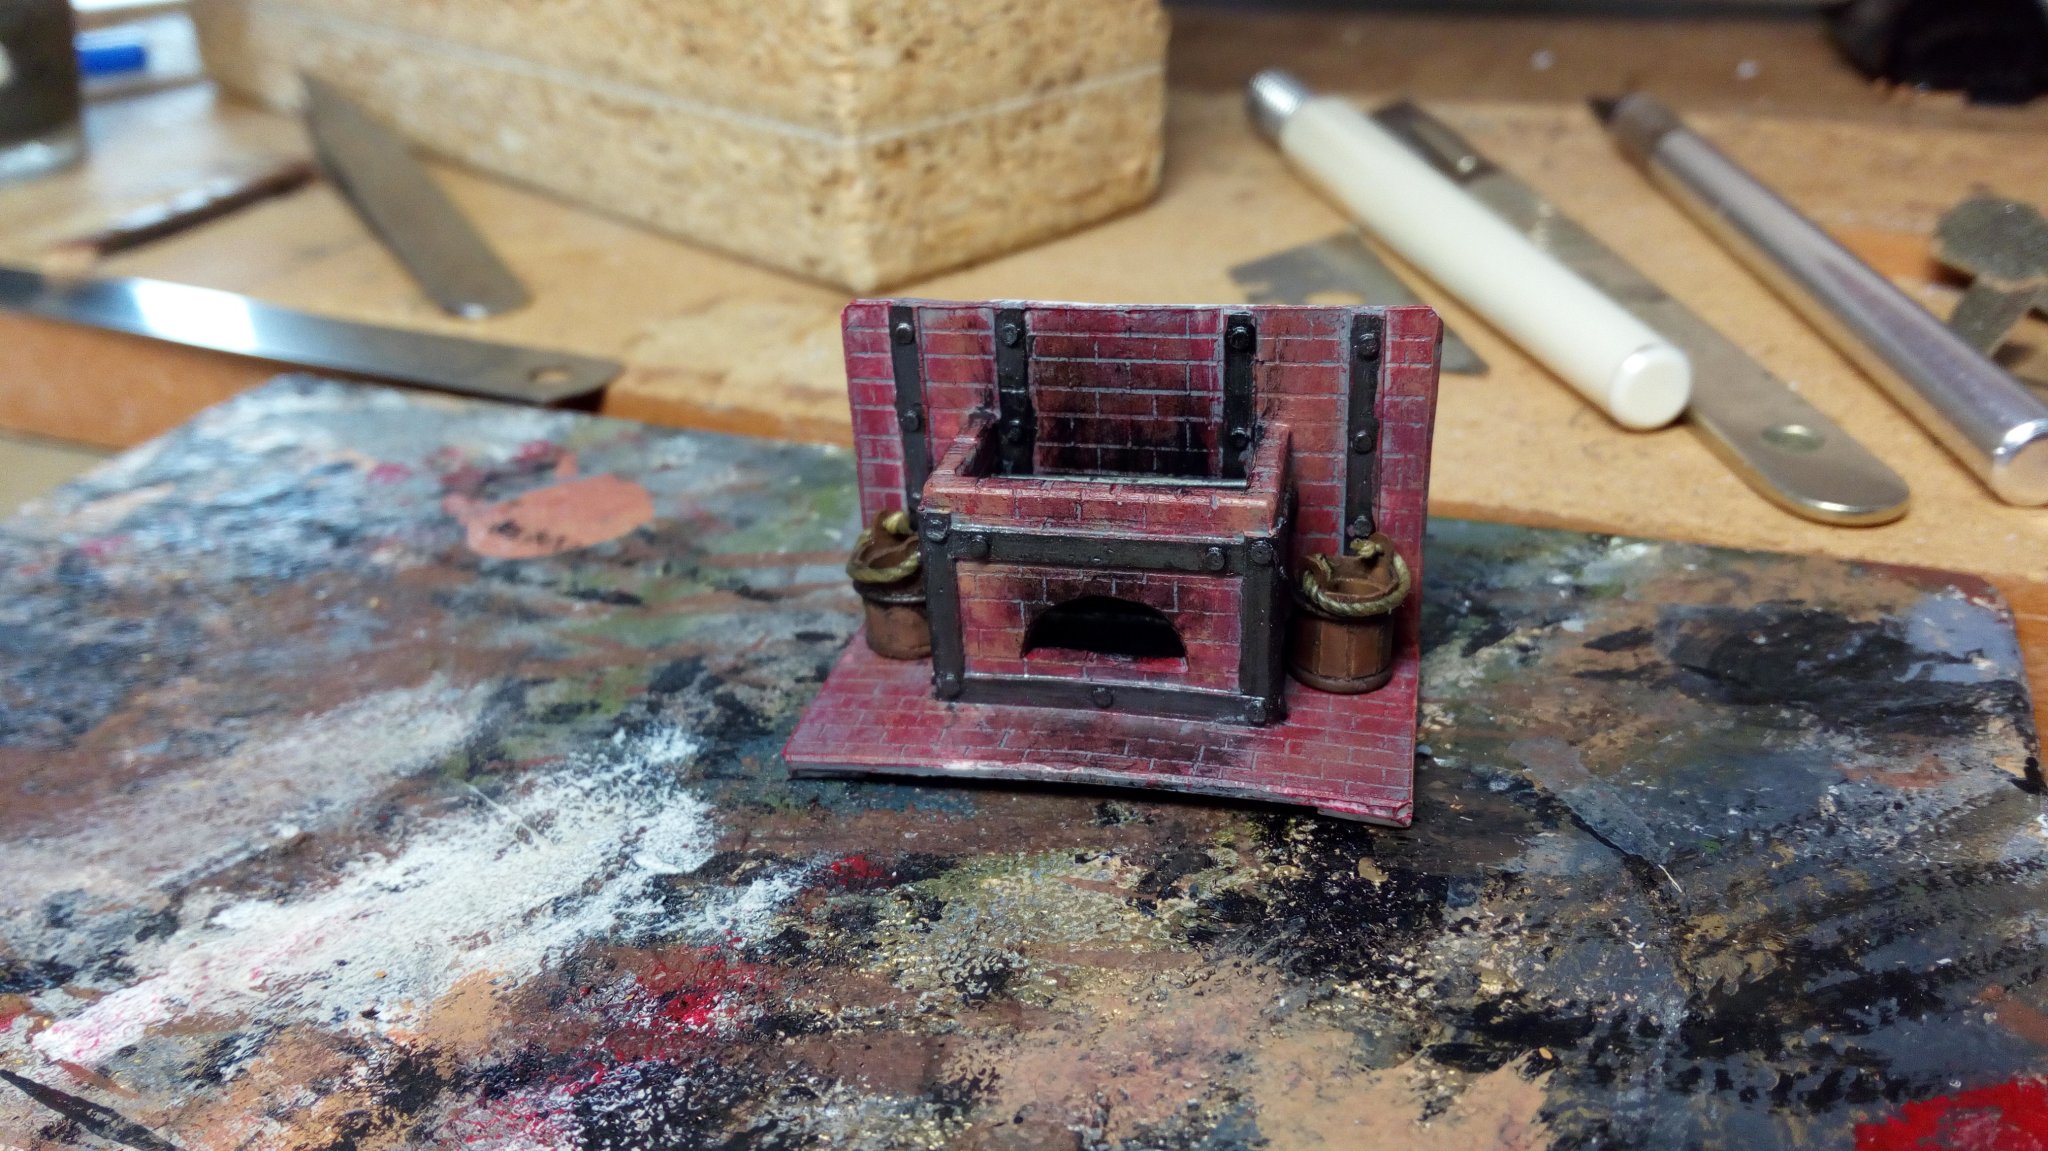
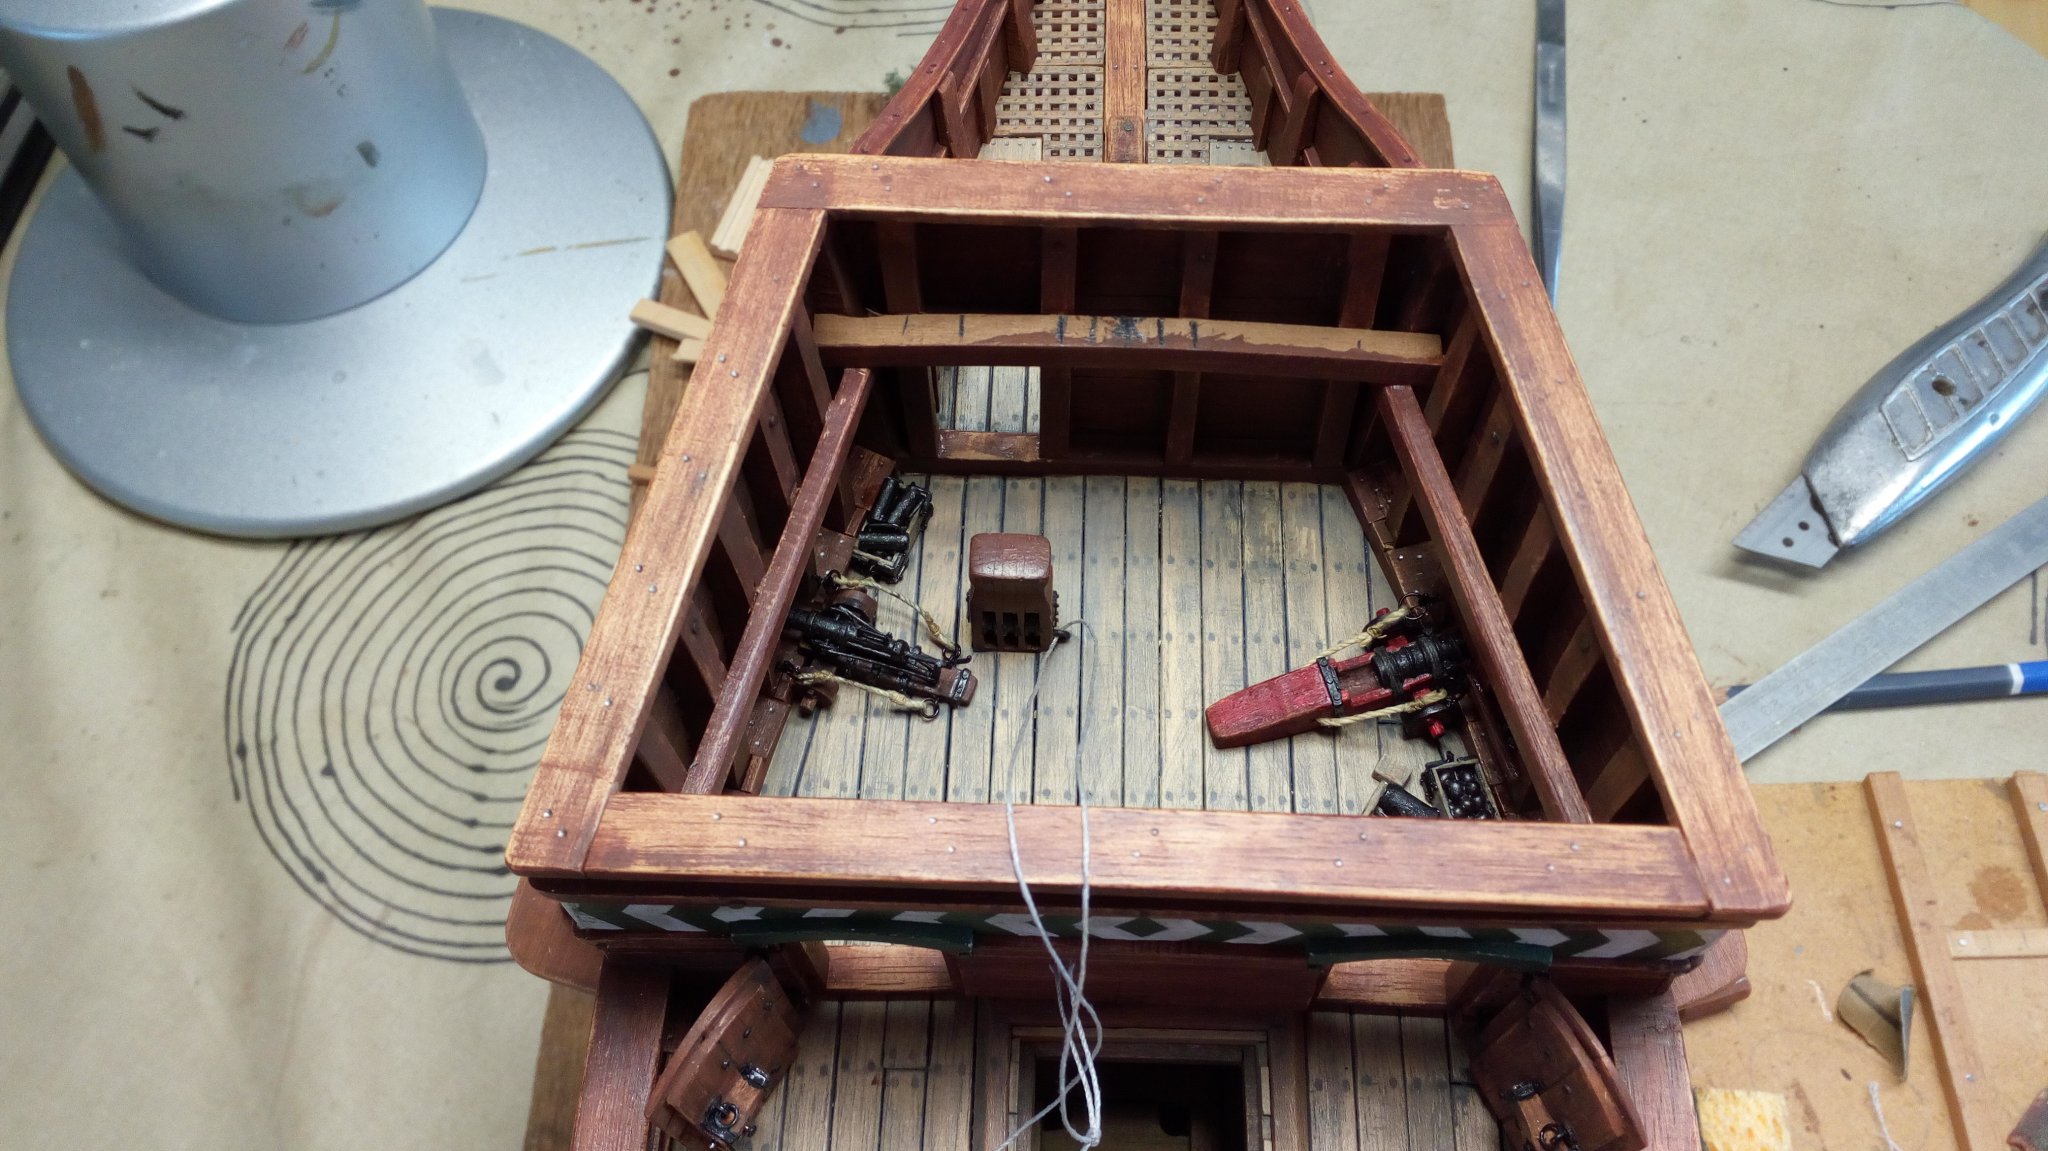
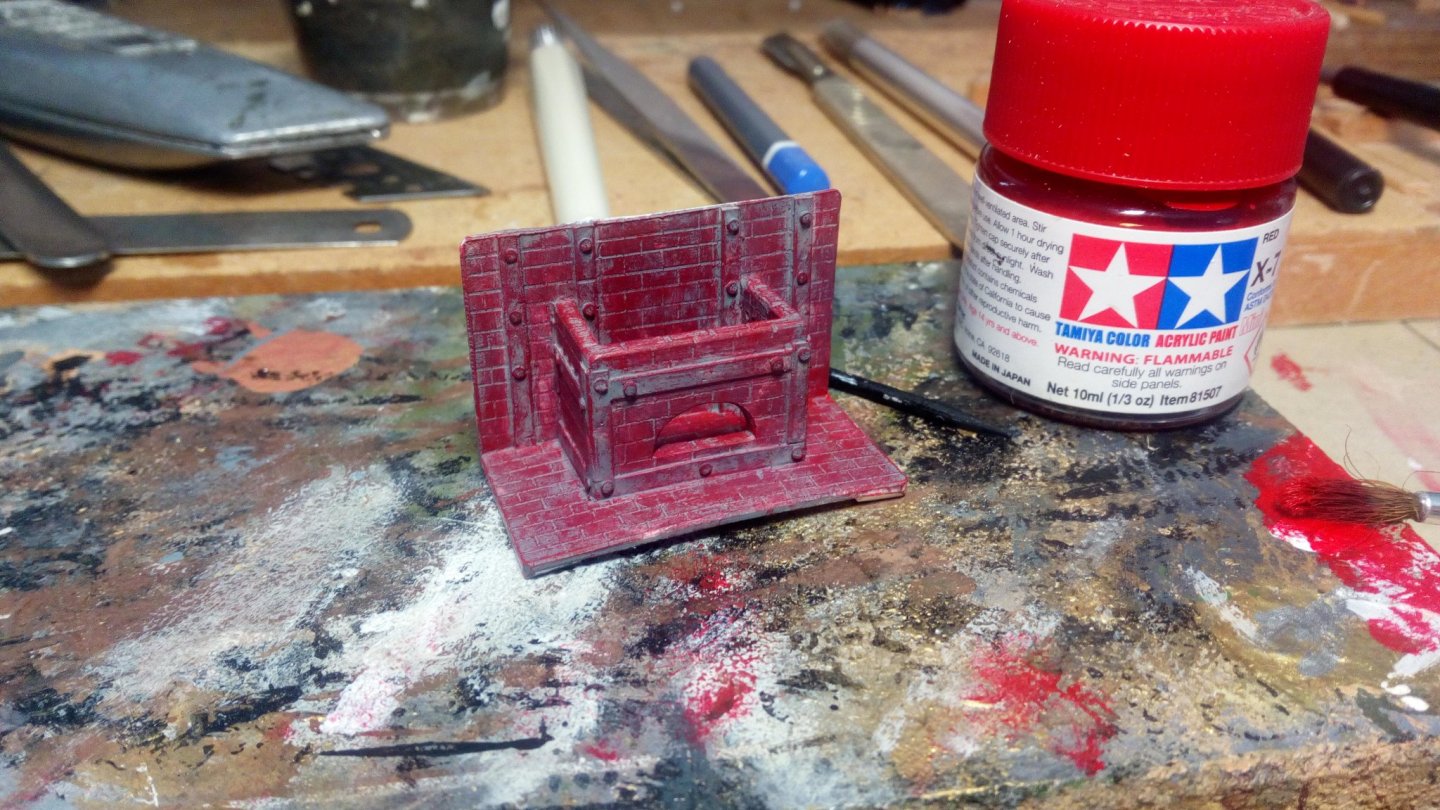
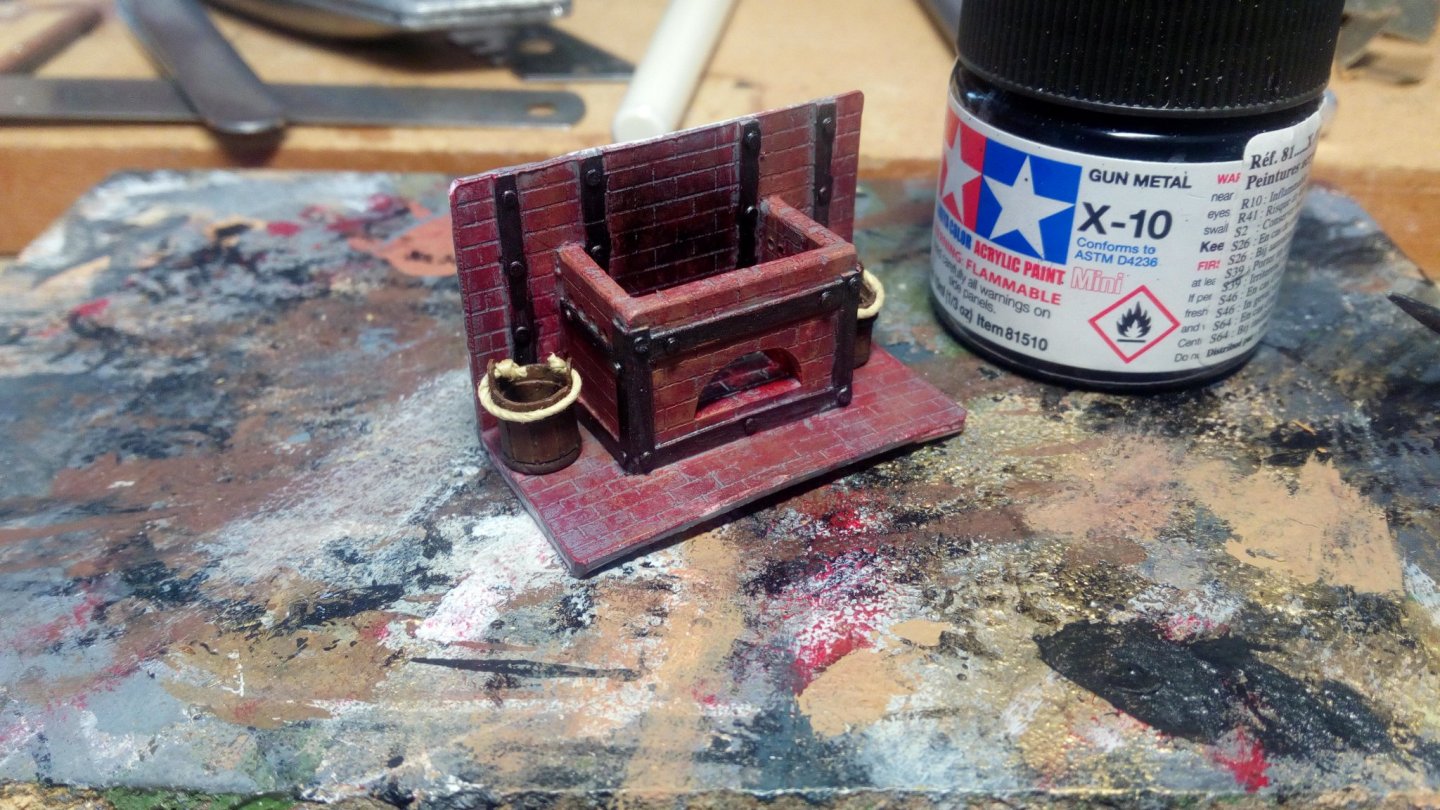
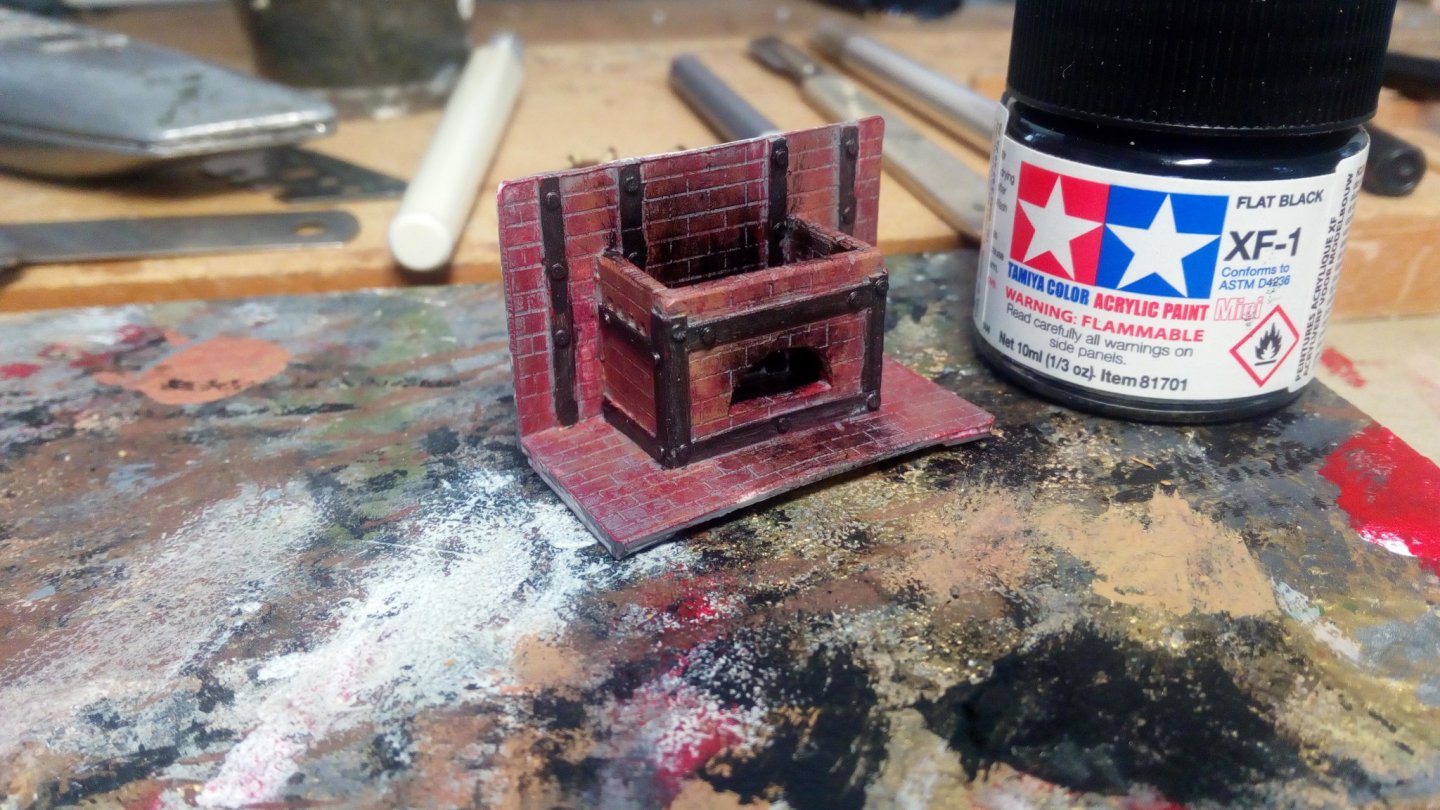
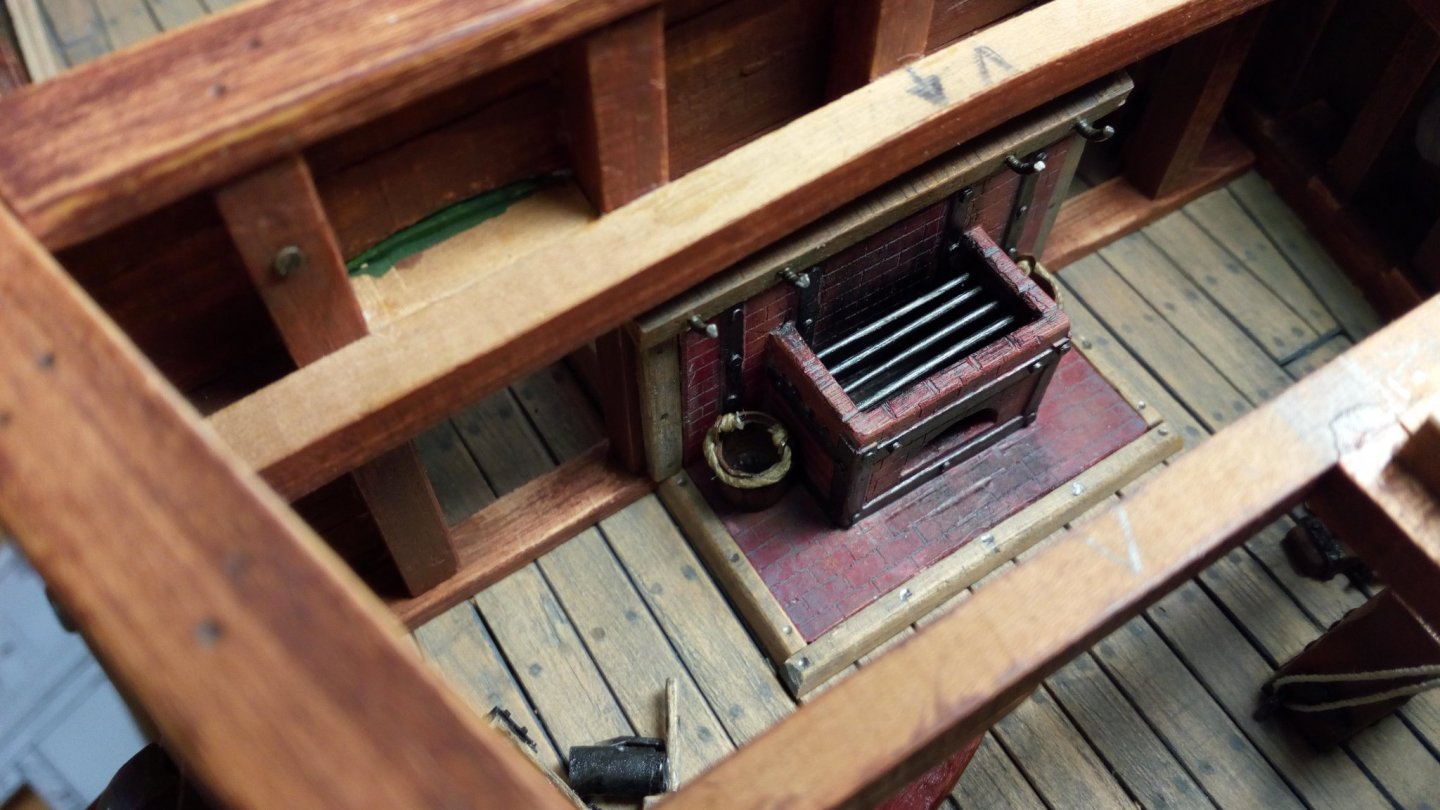
A 16th century "cooking stove". Only 2 things are maybe correct : Made of bricks and it can be placed in the fore castle. Everything else is my own guesswork. A brick construction on a moving wooden ship, I think, should be reinforced with wood and or iron. Otherwise, the construction will not last long. Plastic sheet is the material i use. Making a brik wall The base Make a hole "iron and bolts" Neutral grey is base color. While still wet, dry brushing with red While still wet, dry brushing with sand Metal parts painted (2 buckets as a test) traces of soot ready to install (2 buckets with extinguishing water) ready for coocking Removable grating will be installed above the kitchen. Thanks for following, likes and comments


- 756 replies
-
- 19
-
-
- galleon
- golden hind
- (and 2 more)
-
-
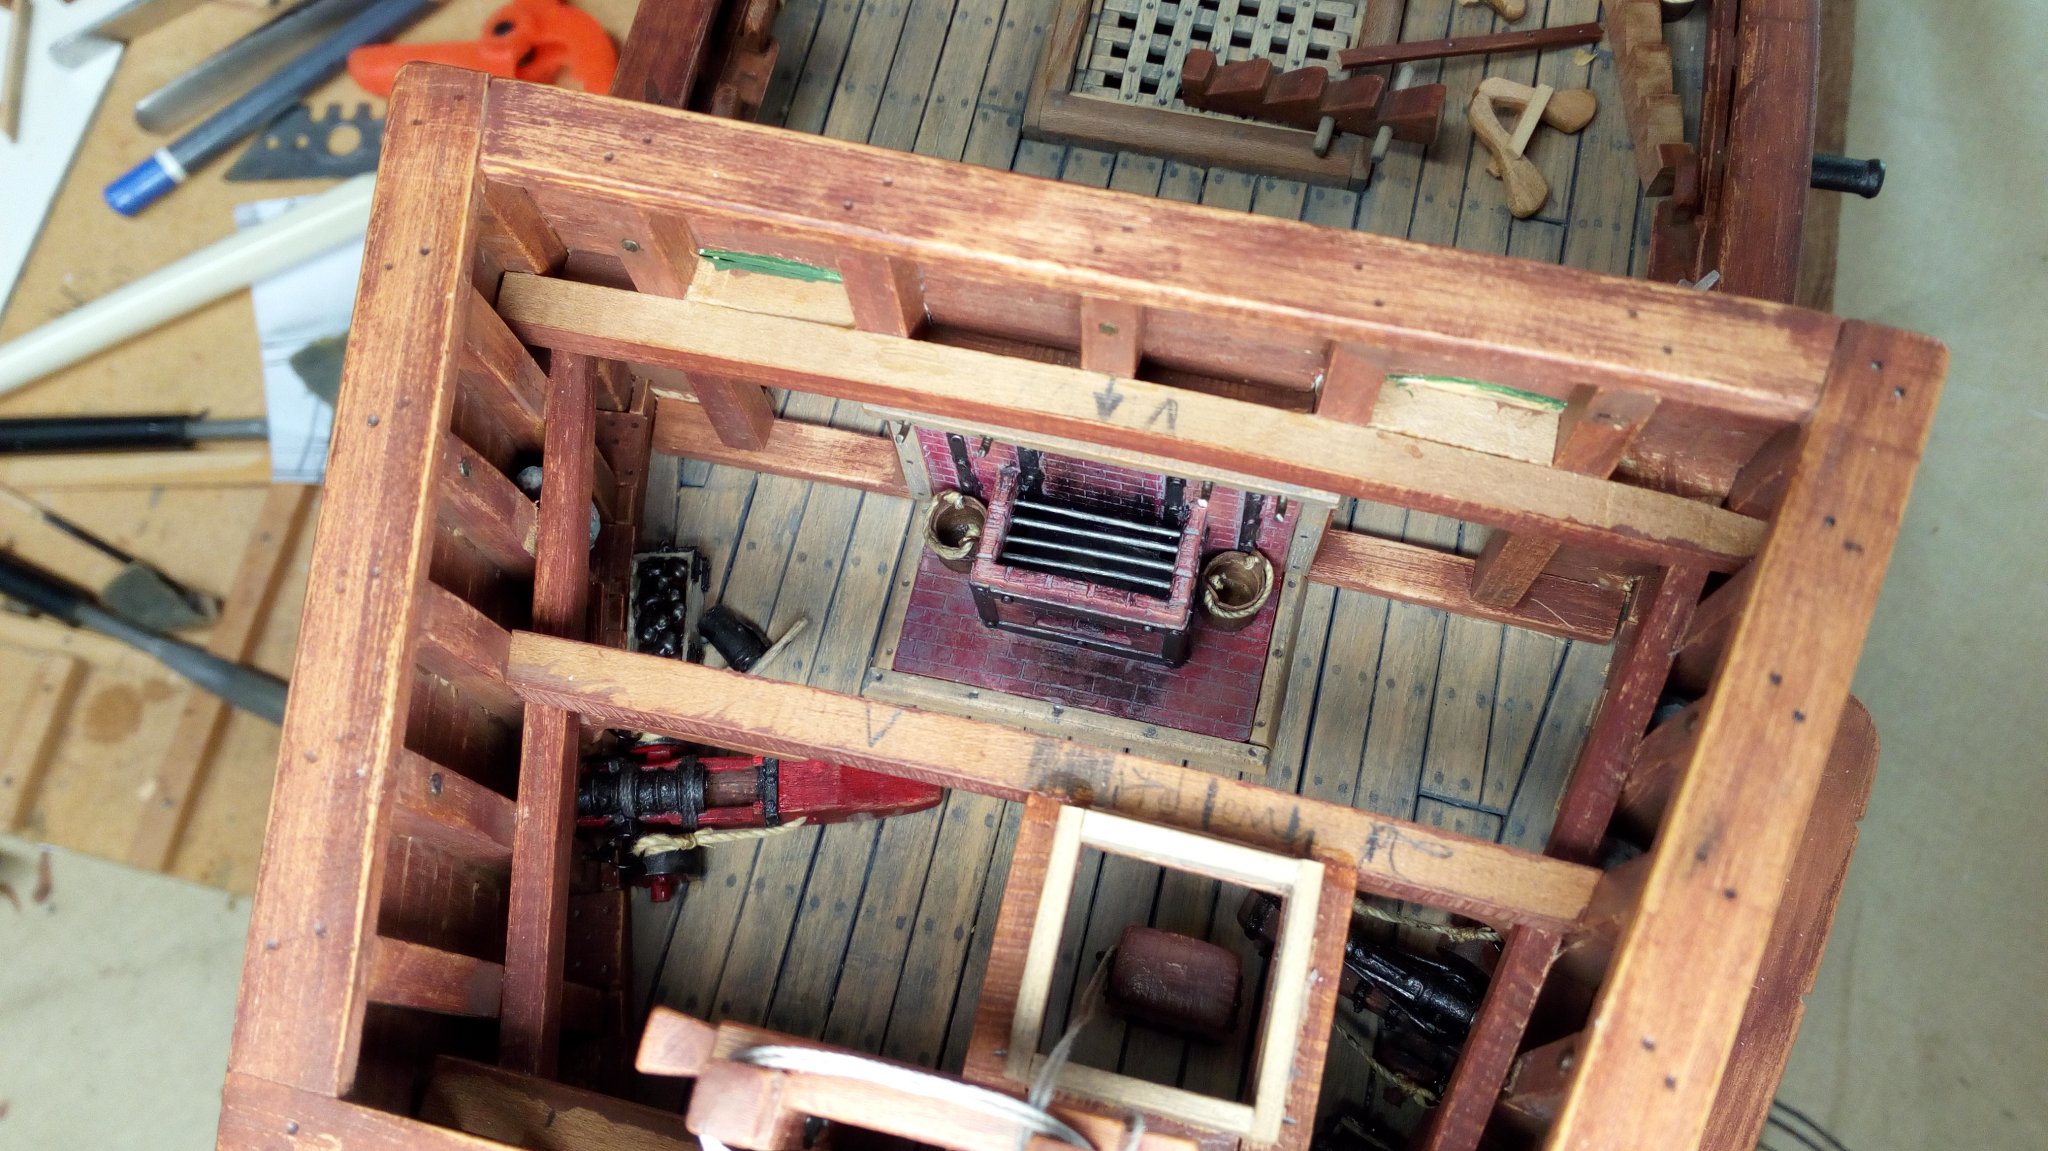
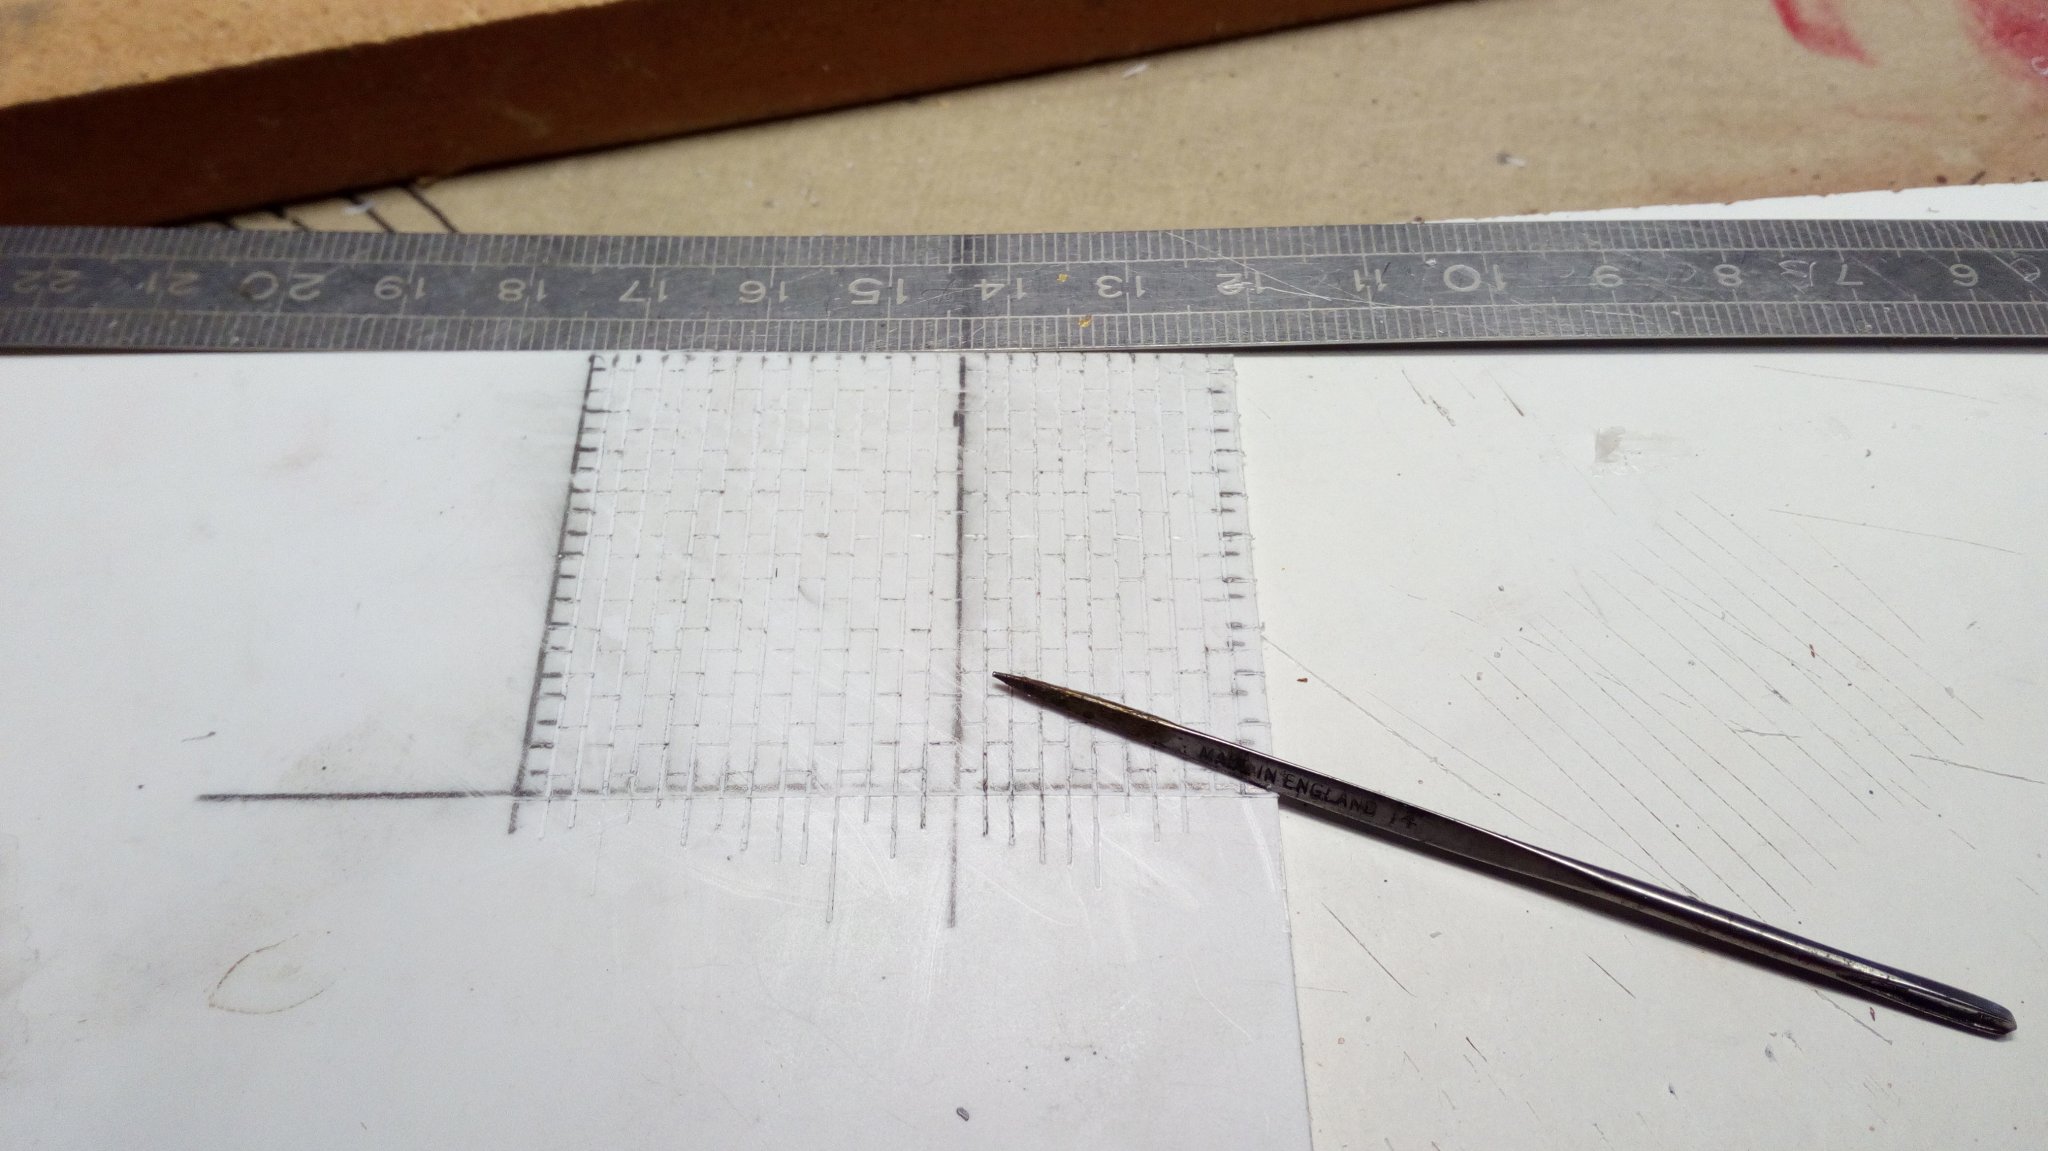
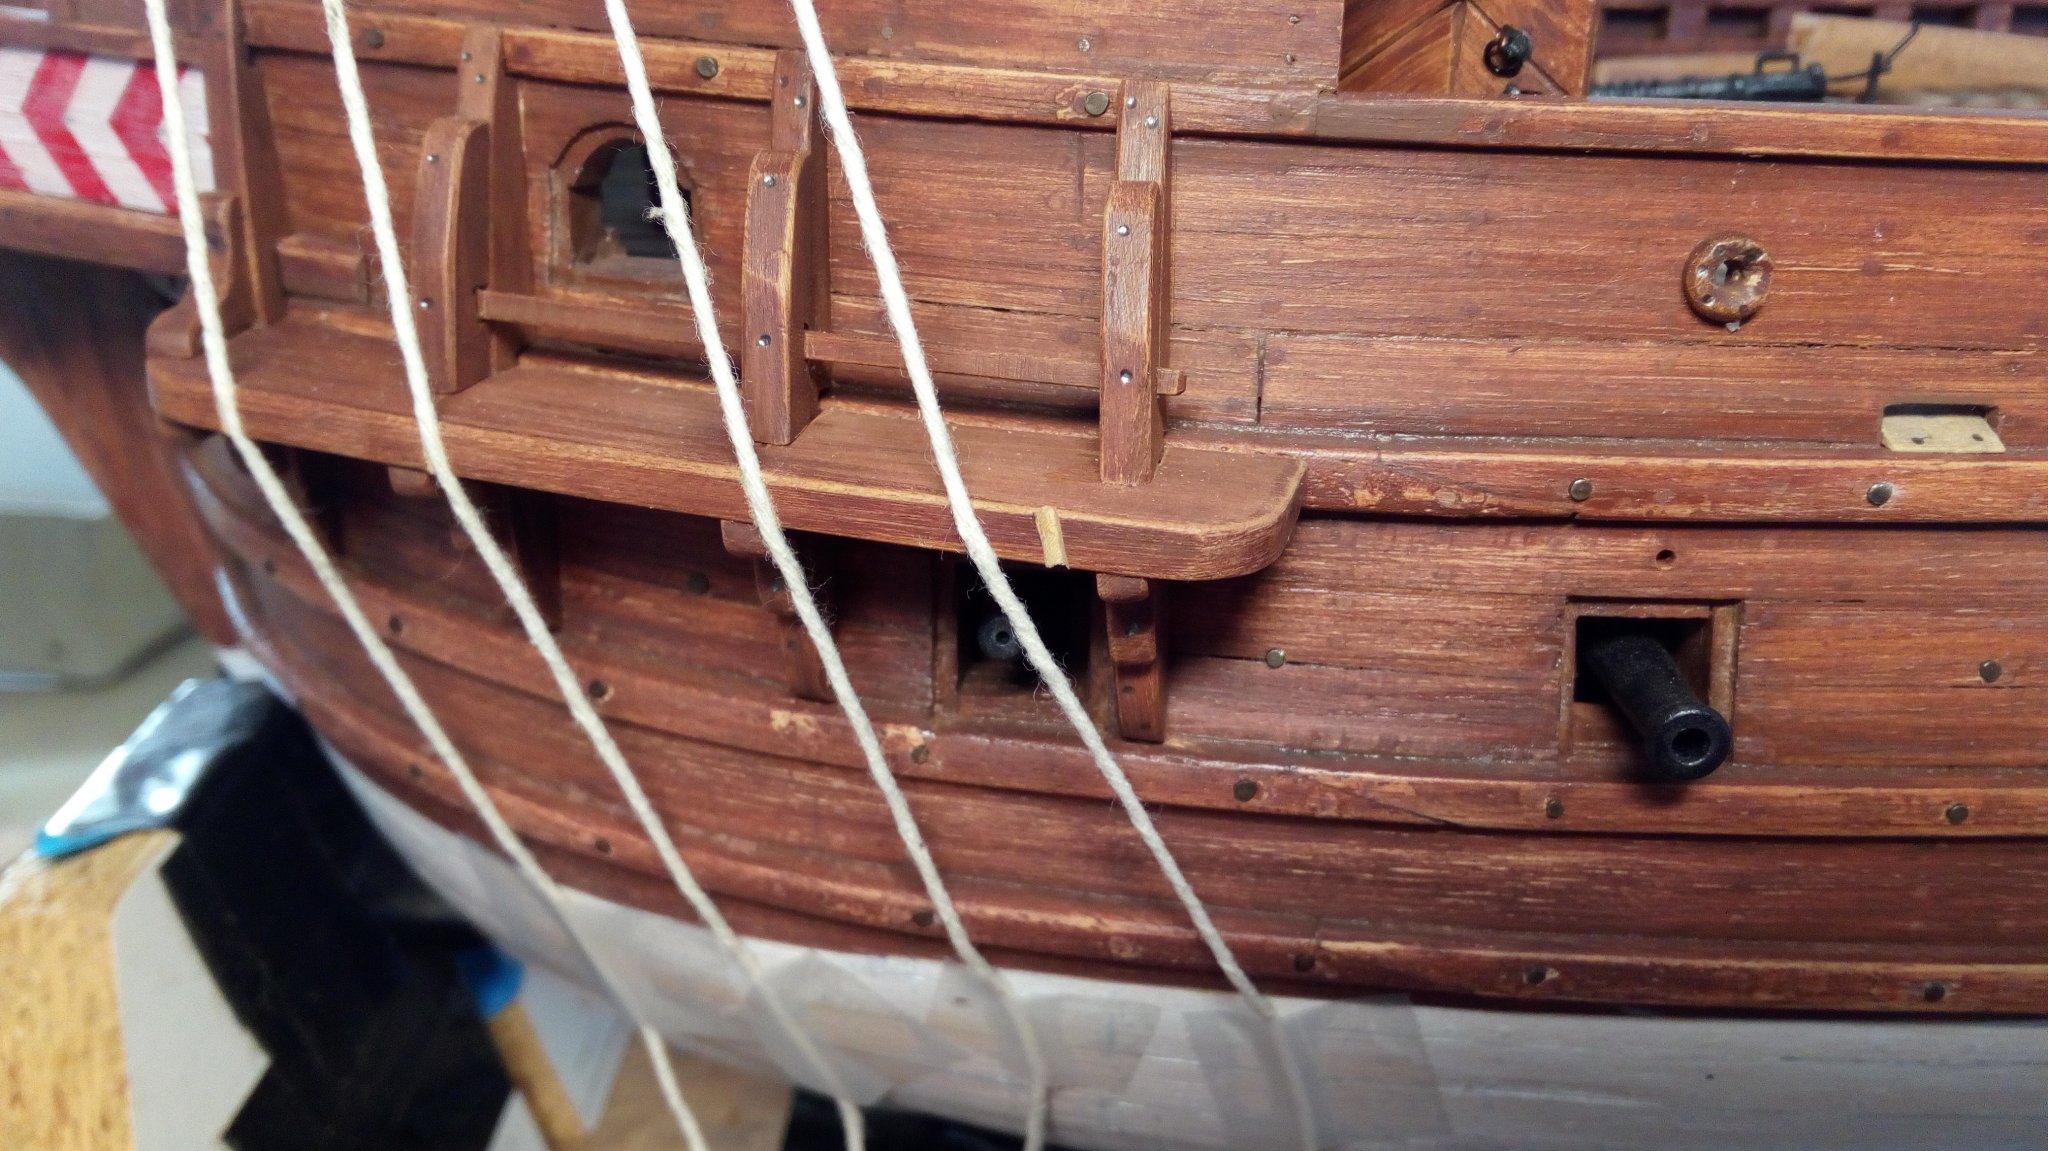
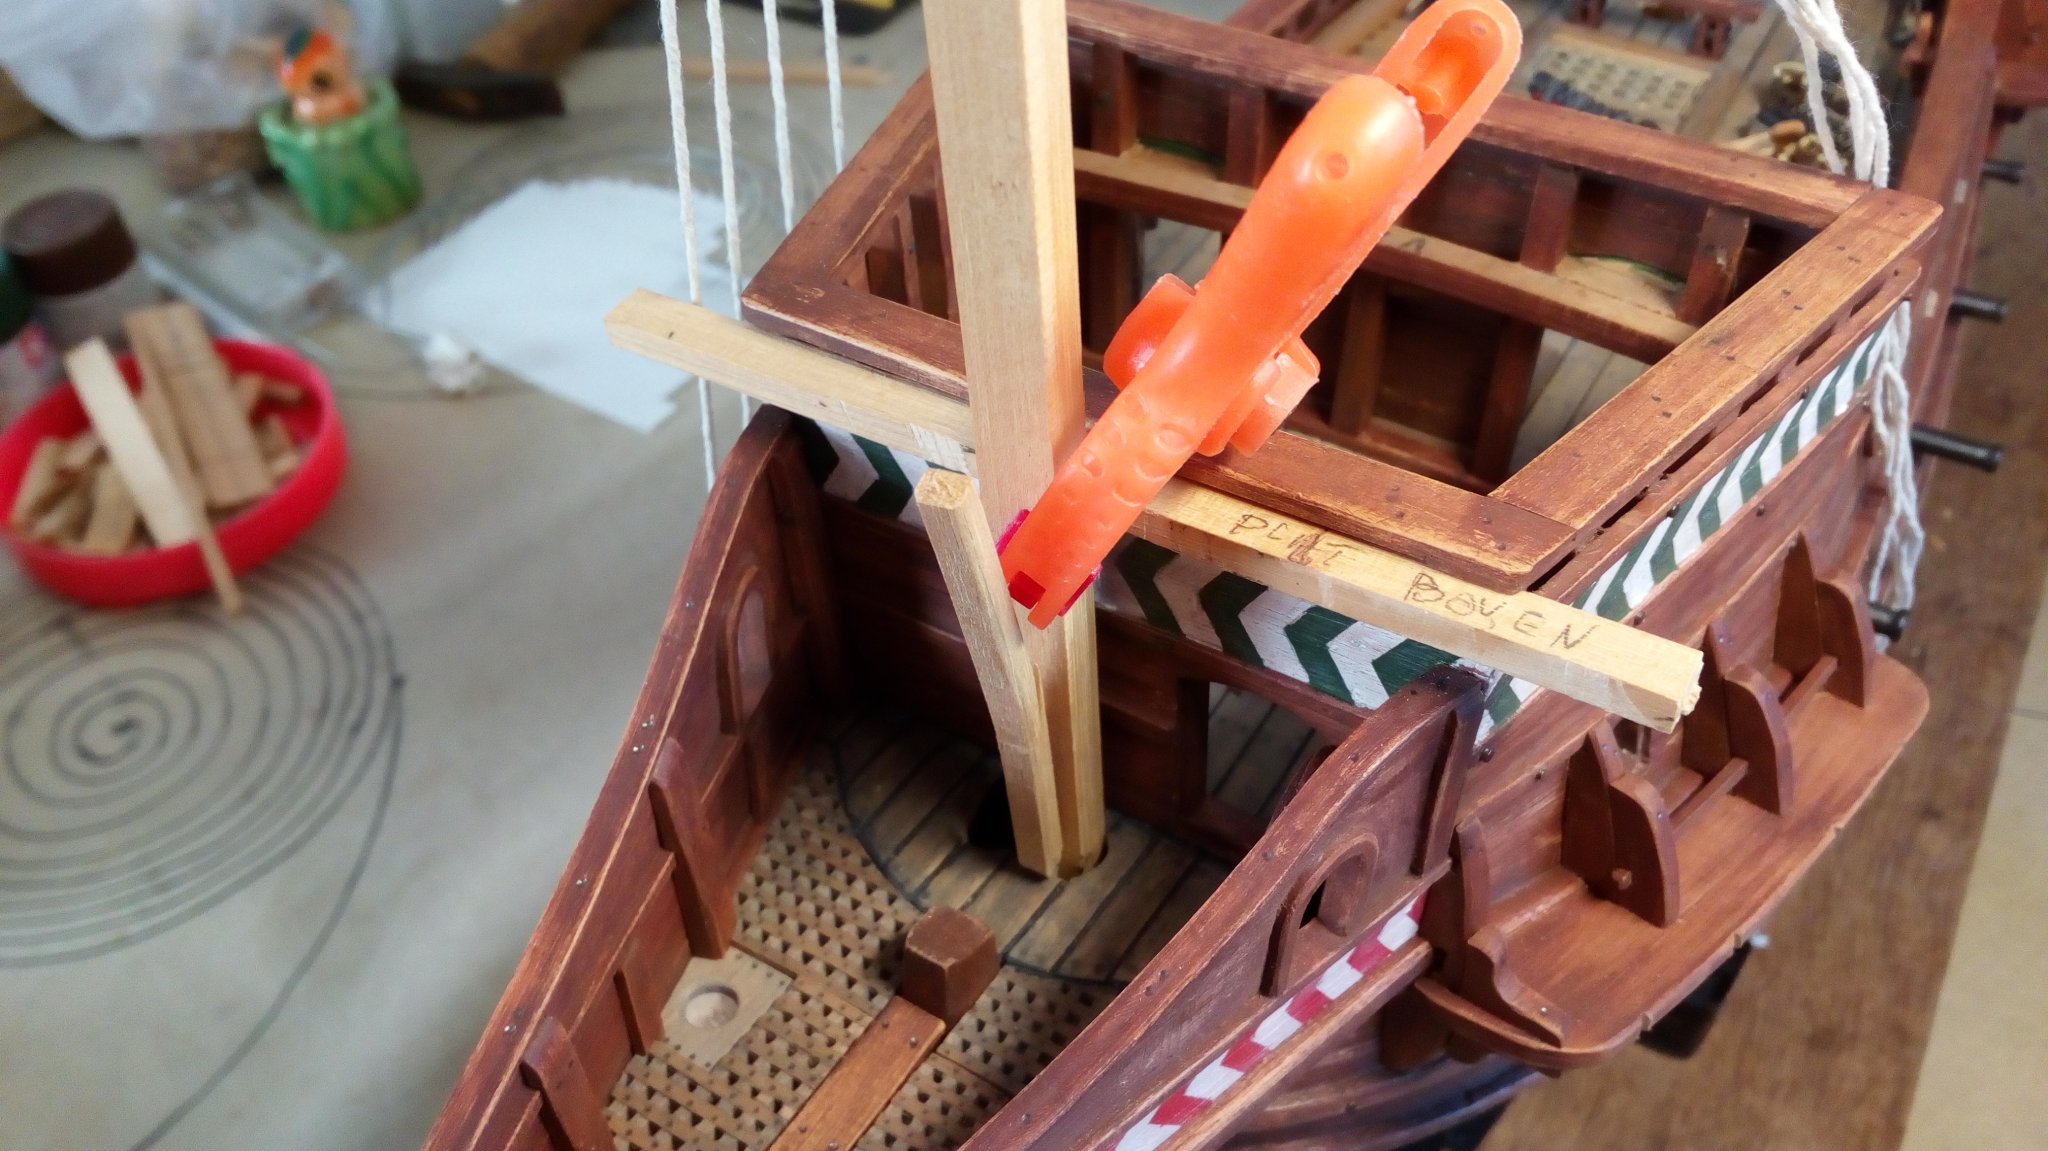
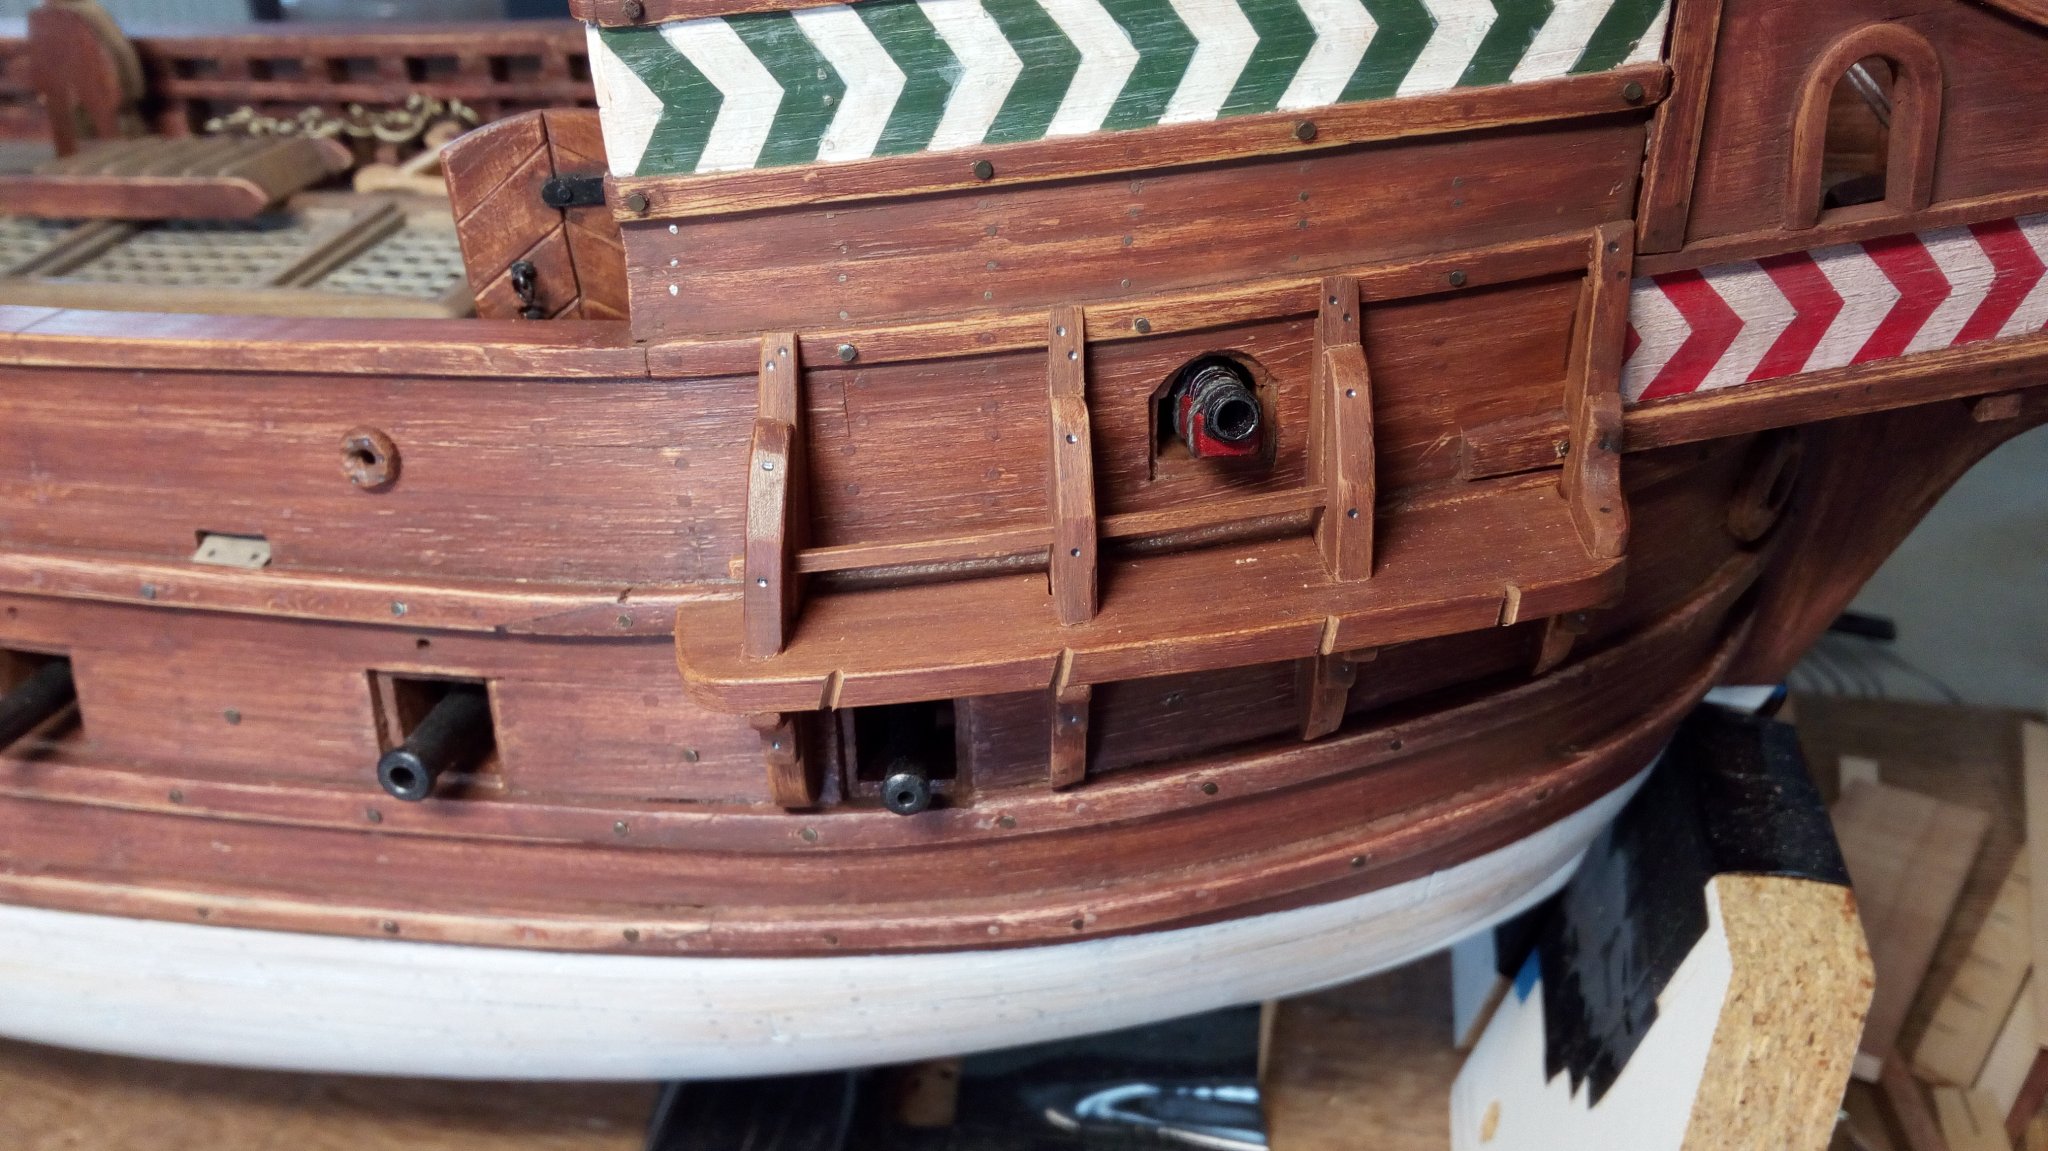
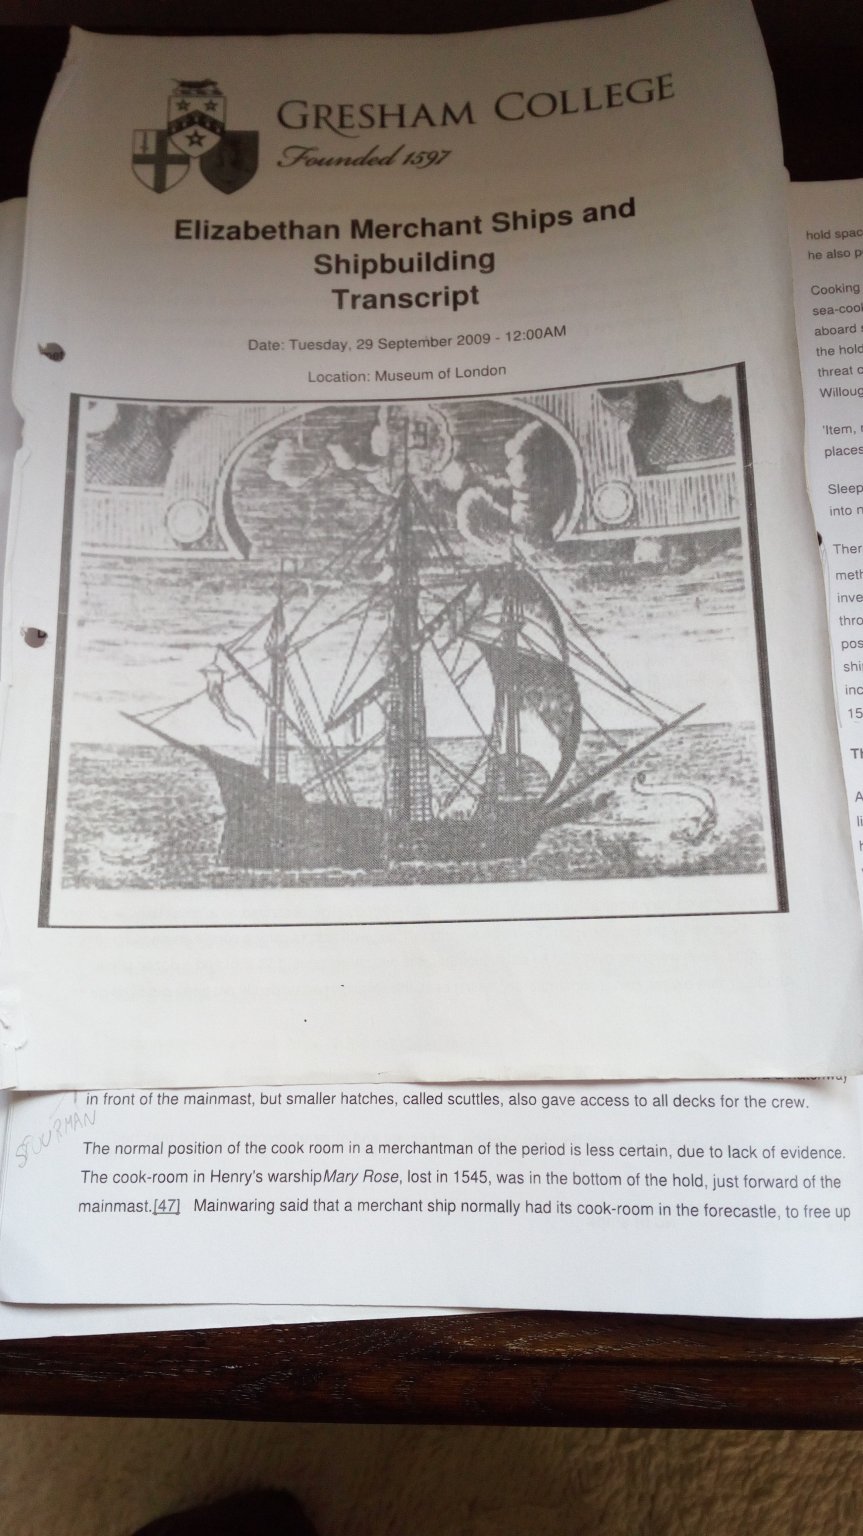
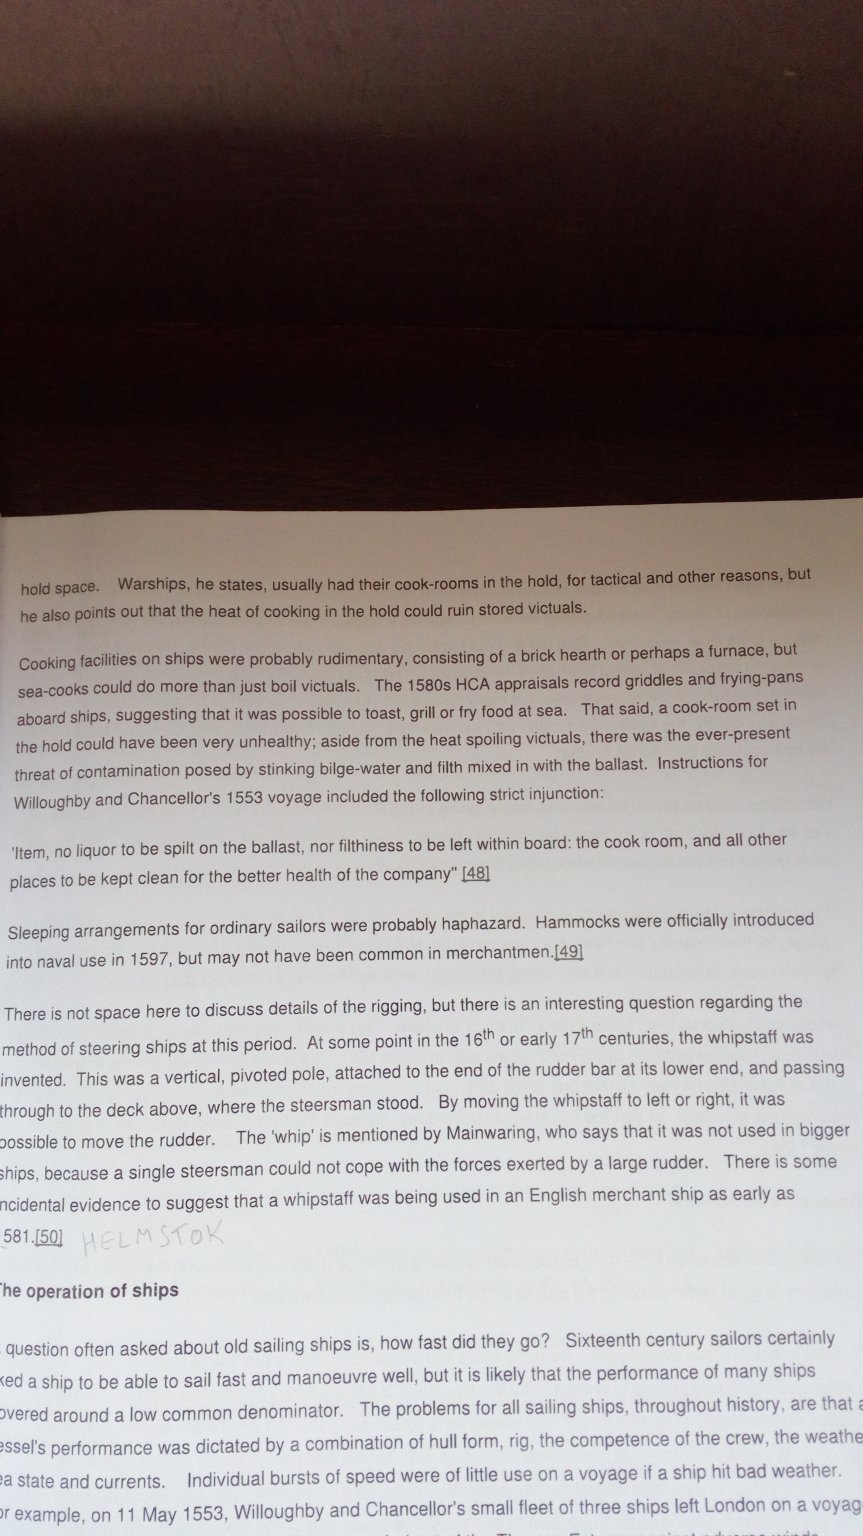
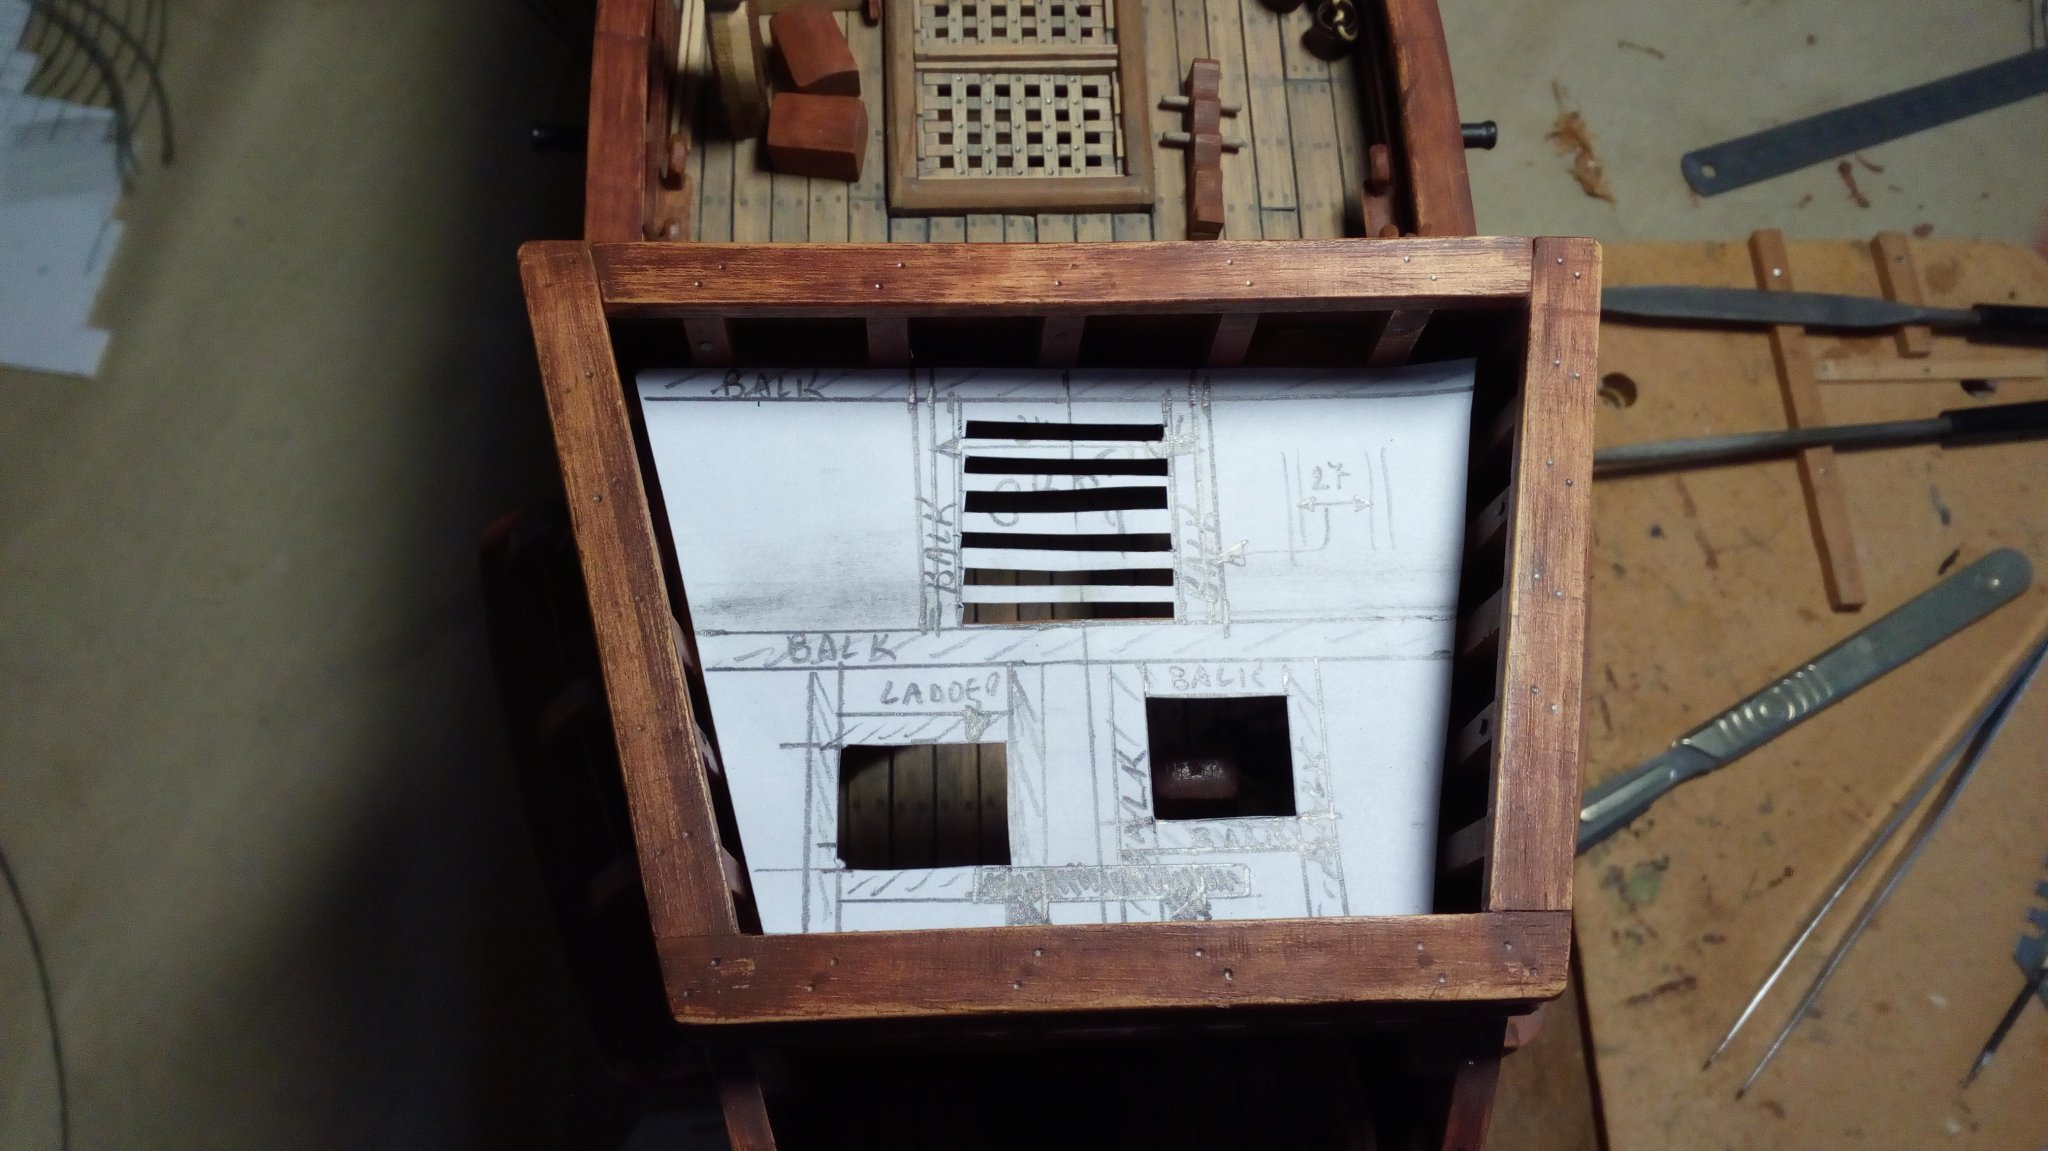
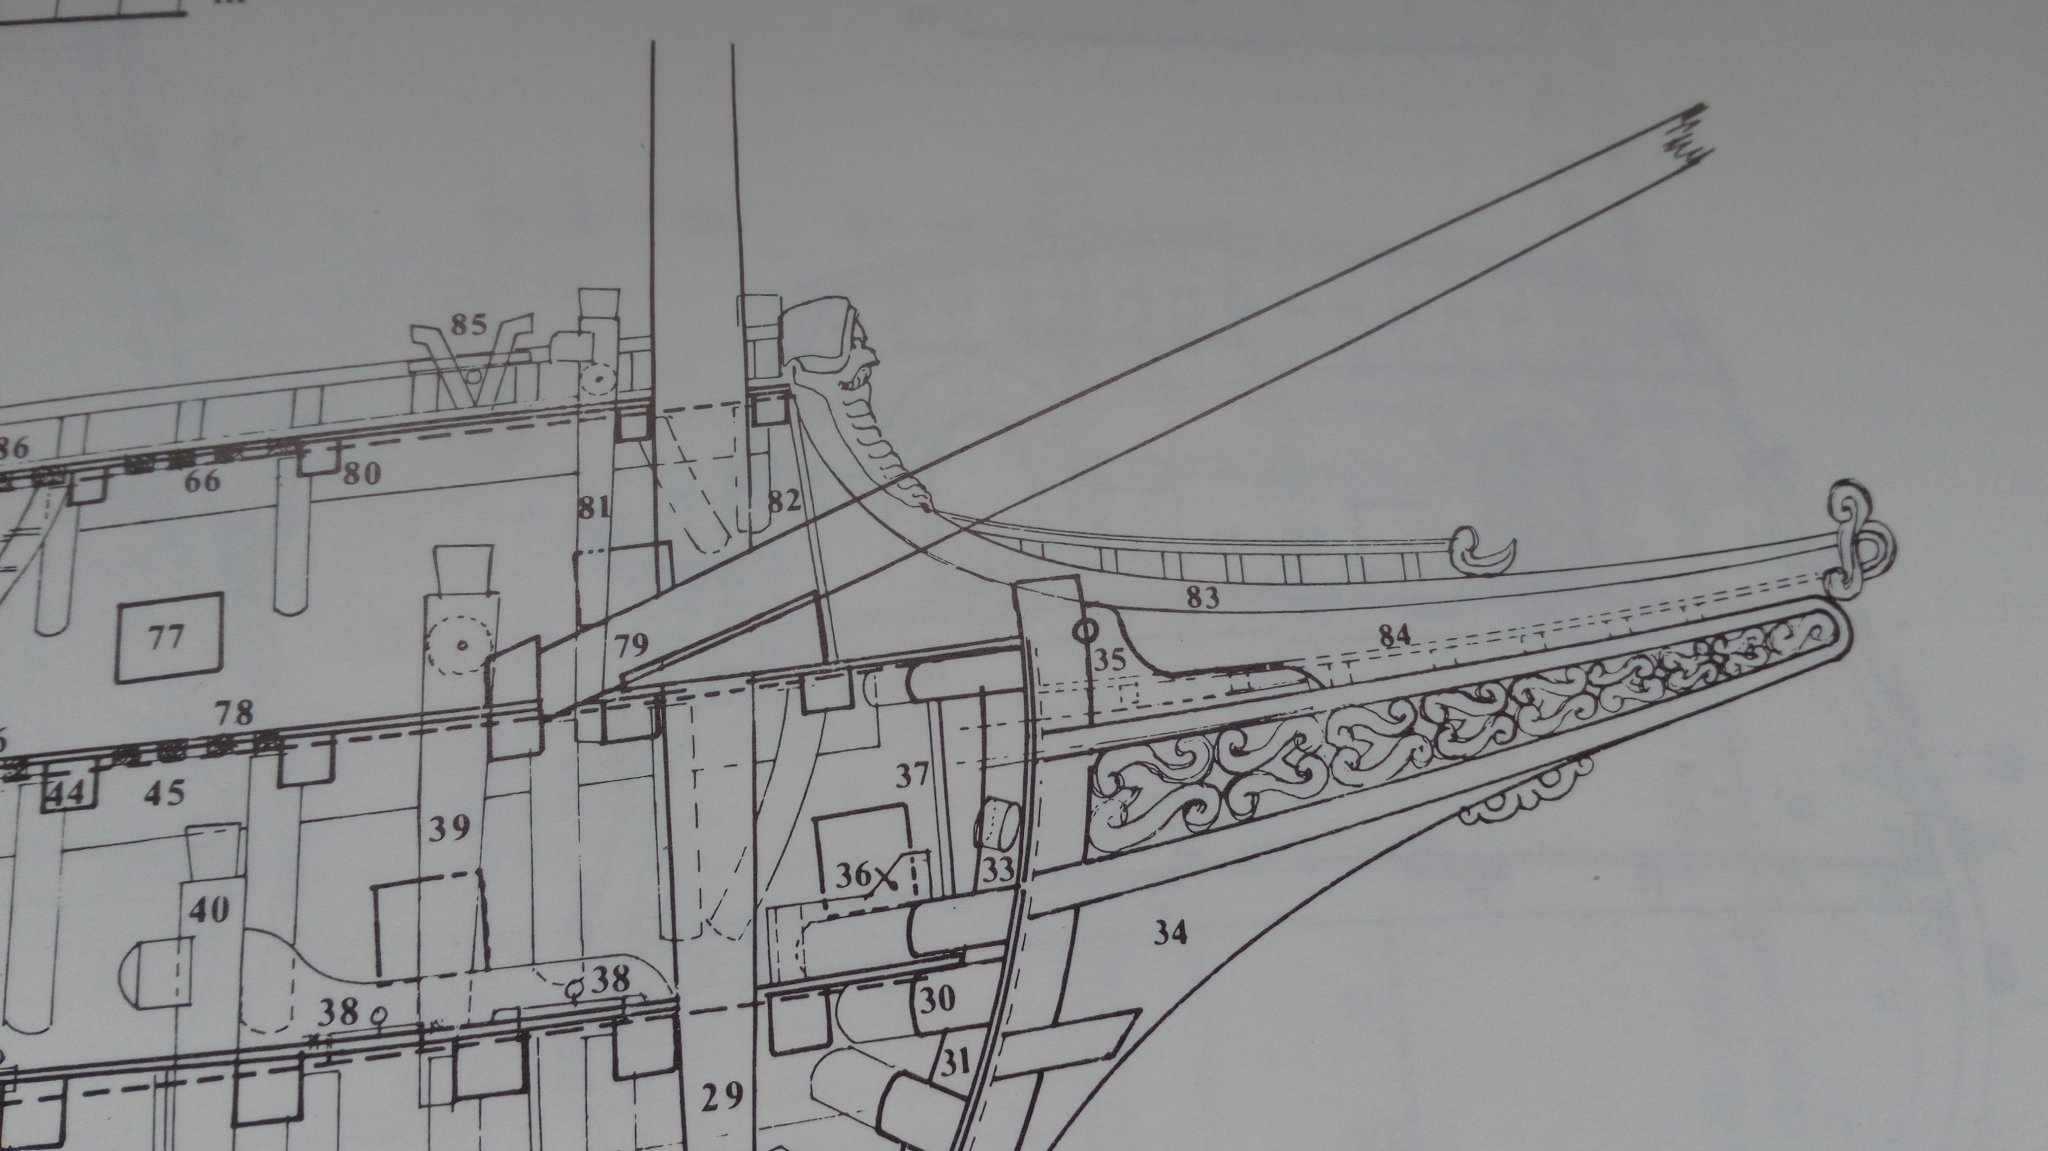
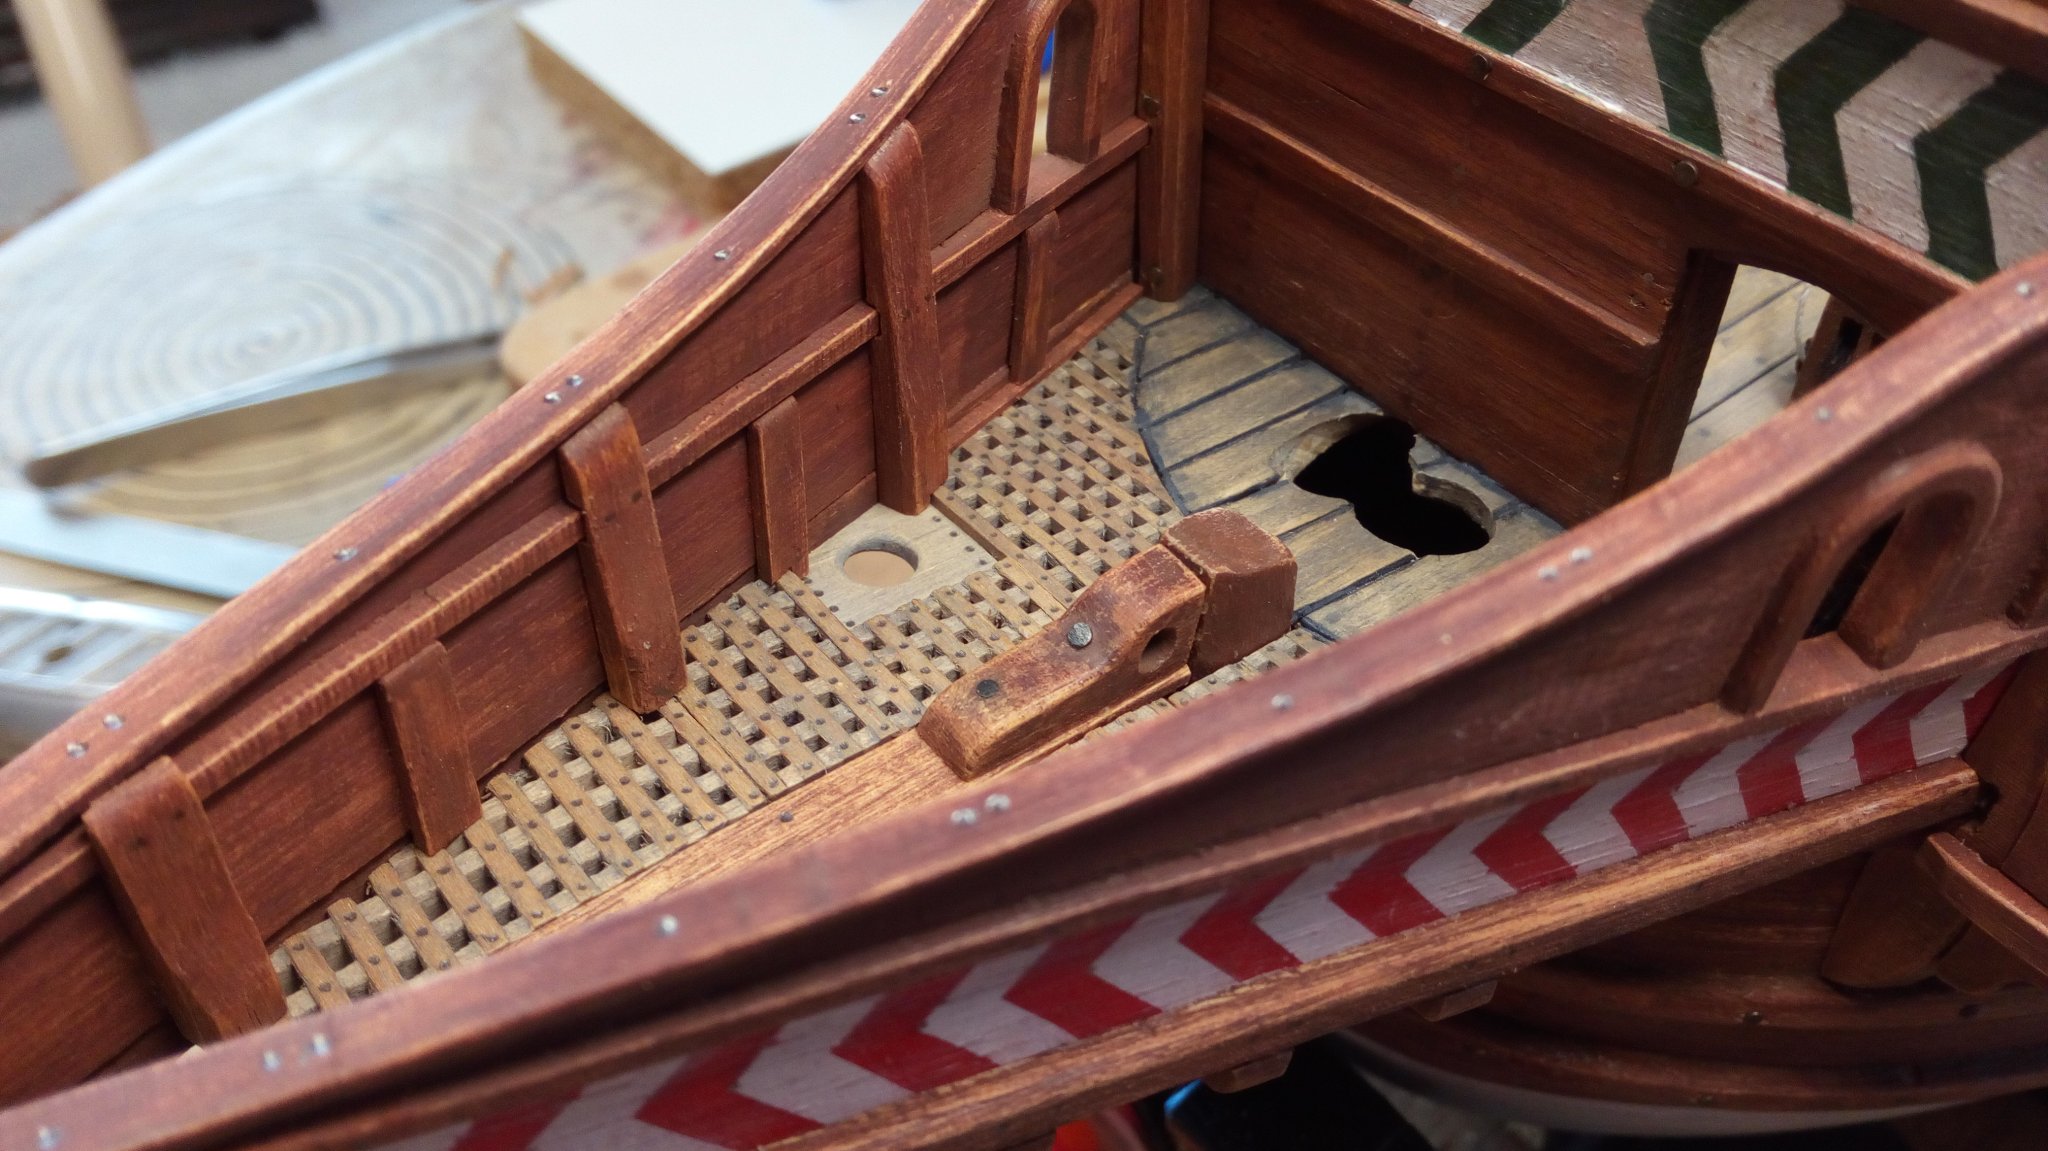
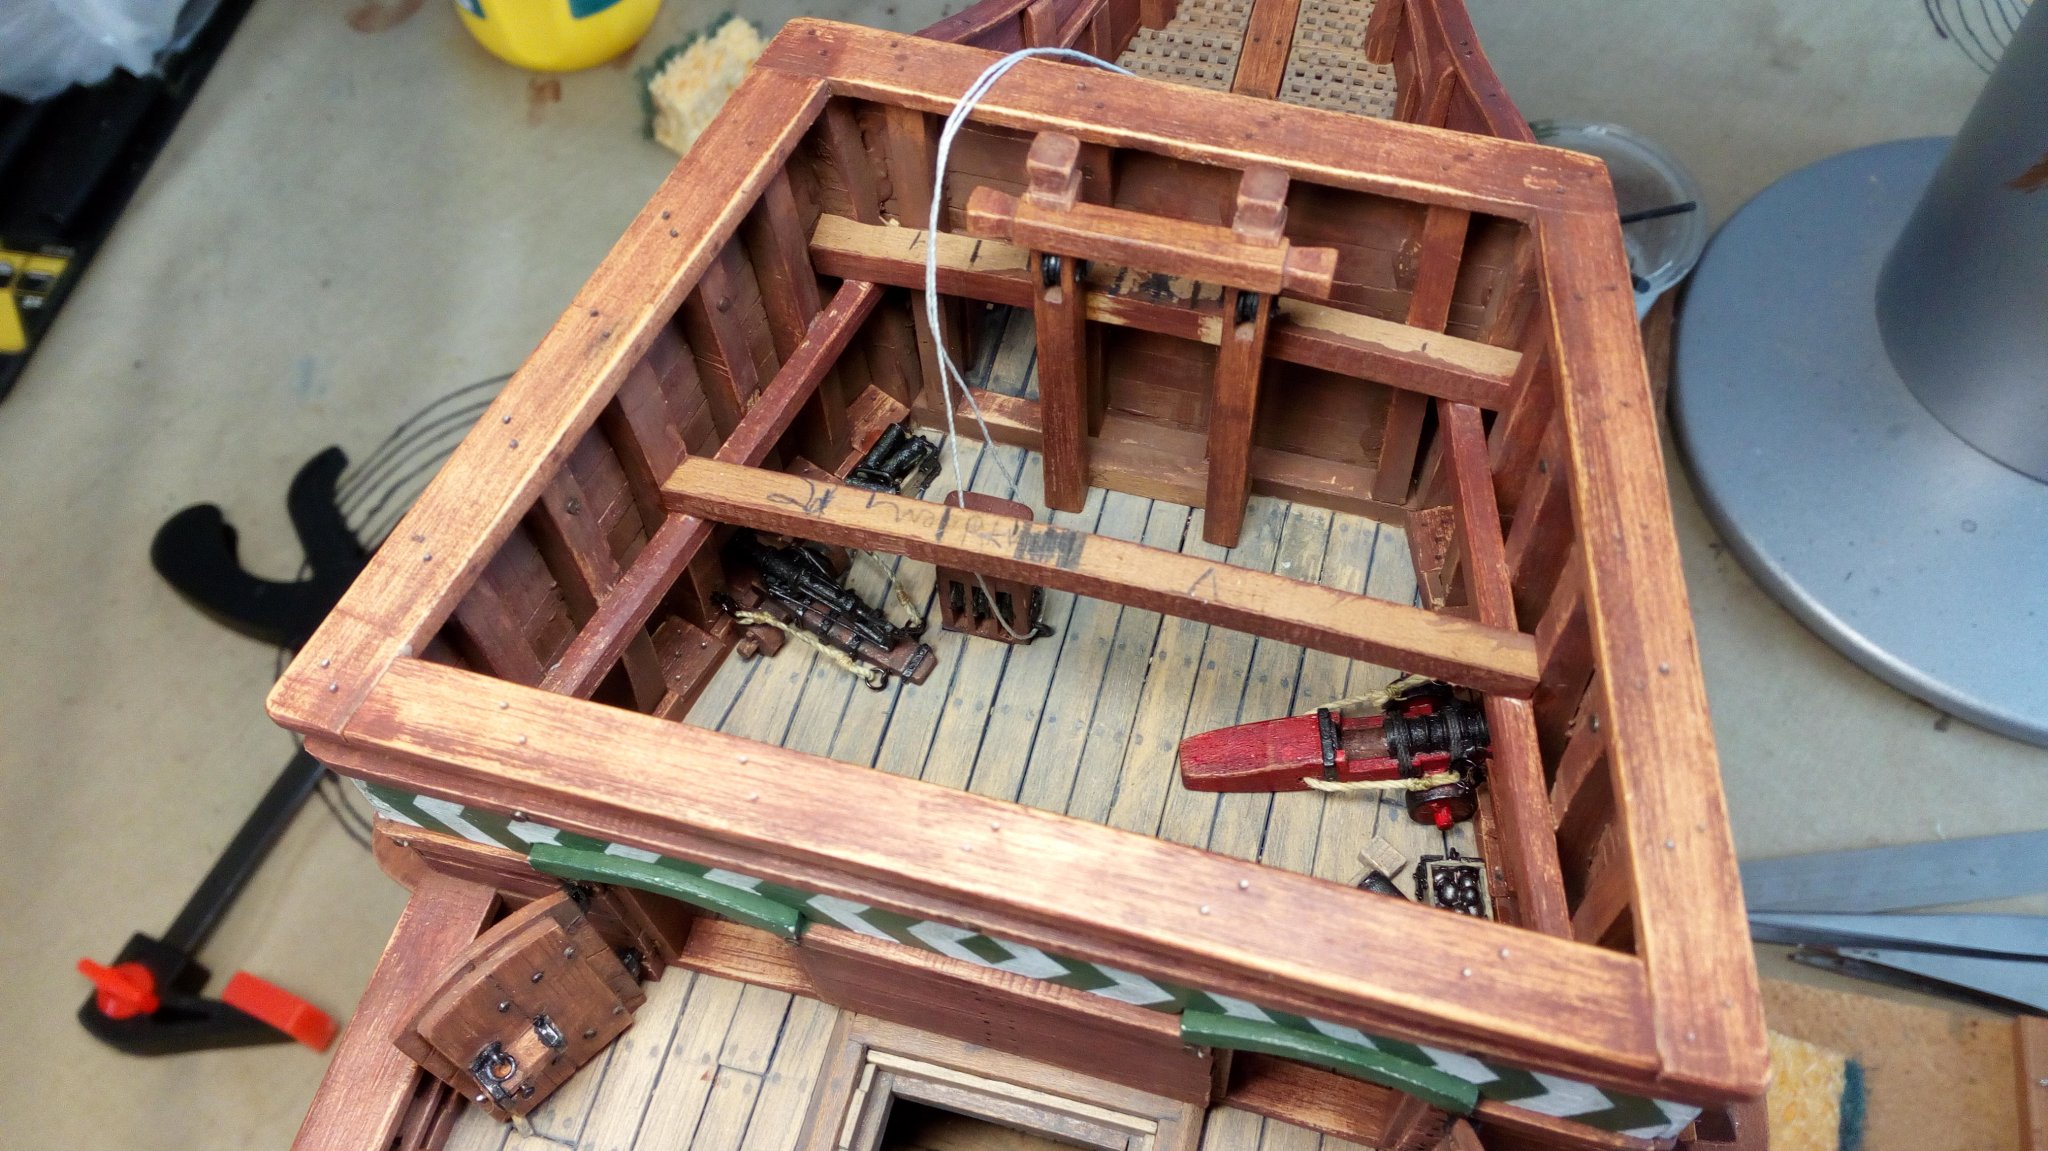
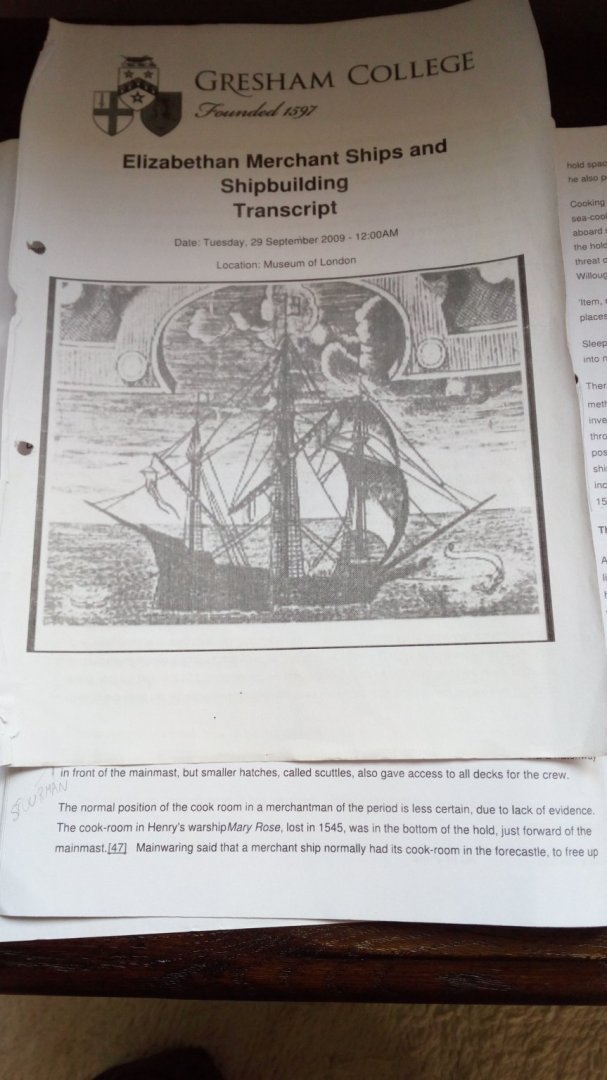
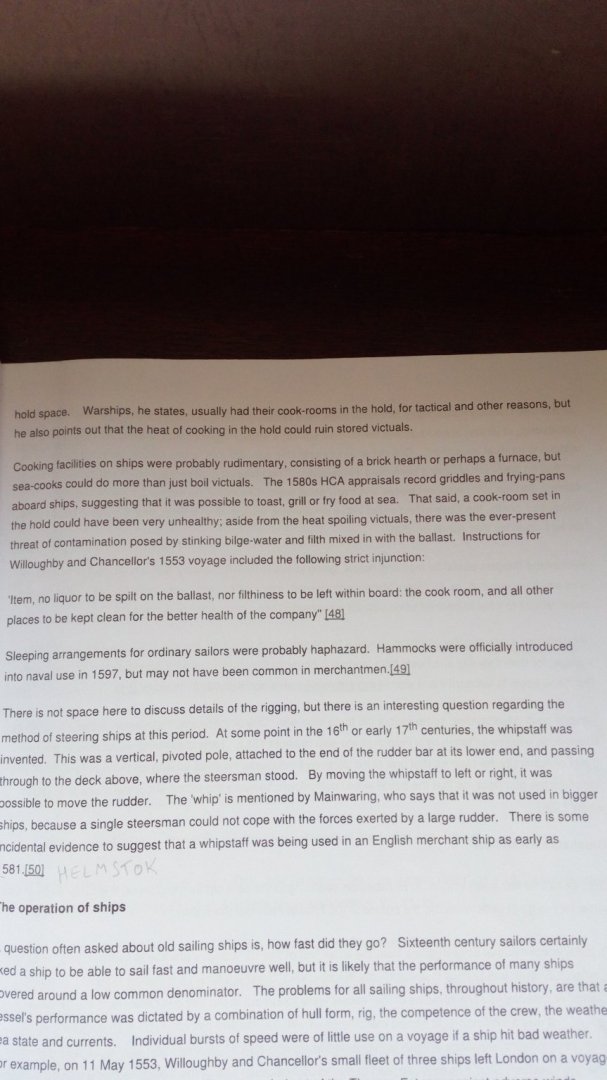
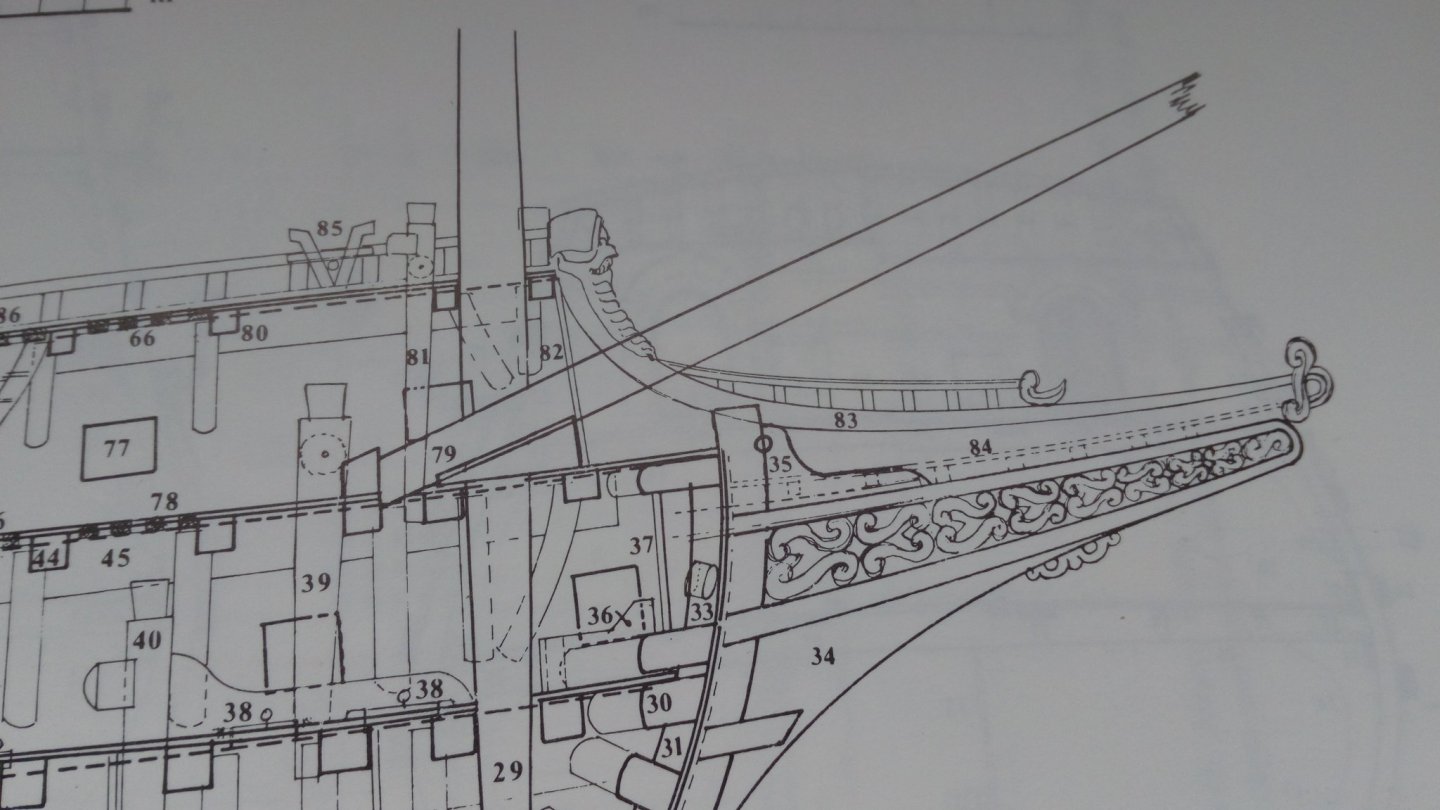
All grooves for the shrouds are made. A lot of work to determine the position of 8 grooves. Reminders with the necessary dimensions The fore castle Especially on Spanish galleons, this, together with the rearcastle, was one of the most important defenses of the ship. In function of boarding an enemy ship and defending one's own ship. Usually it was custom to give 1 salvo with the ship cannons and then board the enemy ship with the well equipped and trained Spanish foot soldiers. The English began to develop a different strategy over time. Better placed cannons that fired several salvo's. Different strategies. The interior of the fore castle. Since the cannons and most other items have already been made, this goes quite smoothly. And first I make a layout of the deck (approximately). On some merchants the galley was sometimes placed in the fore castle . For hygiene reasons (even as early as the 16th century). Because this is not a real warship, but more of a (heavily) armed merchant ship. There will be some kind of small cooking place in the forecastle. source Forgotten something on the beakhead (n°35) Solved Thanks for following and likes


- 756 replies
-
- 13
-
-
- galleon
- golden hind
- (and 2 more)
-
A useful new friend. I think : The hooks on the inside where the rigging of the cannons is attached go through the hull. Those are the (4)bolts / nuts that you see on the outside. And, Great work.
-
Welcome, and good luck with finishing this model.
-
Can't be THAT different from knitting... (New Member)
Baker replied to Grisha's topic in New member Introductions
-
Airfix Revenge & Revell Golden Hind Accuracy
Baker replied to Robert Taylor's topic in Nautical/Naval History
A very beautiful model. Indeed, i think mine is a little too big. And my balcony on the stern? I do not regret it, but without it, it was probably more correct. -
Welcome, and good luck with the model.
-
Beautiful model. Welcome to MSW
-
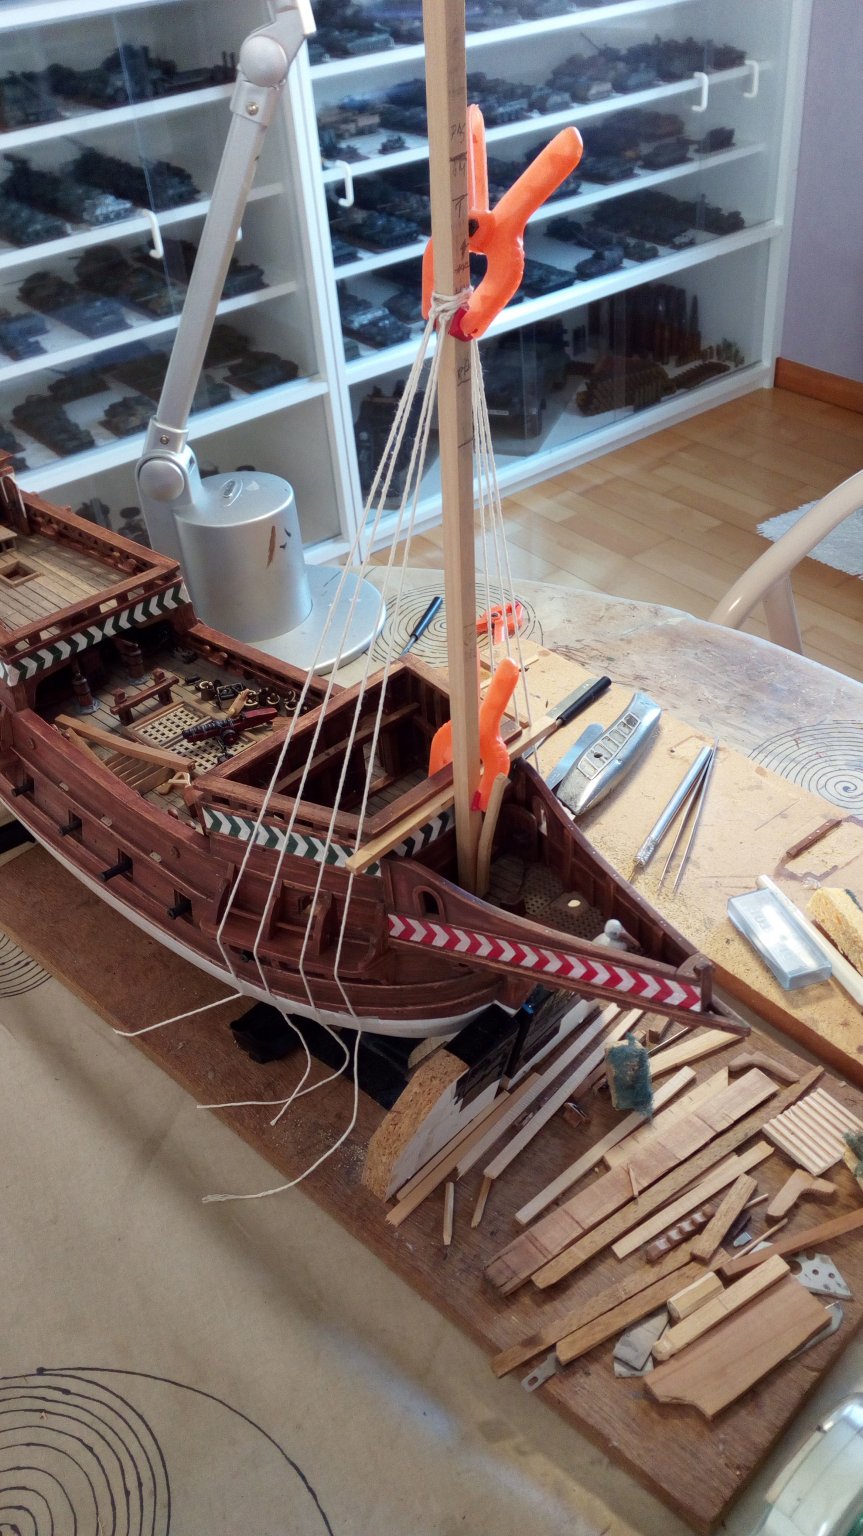
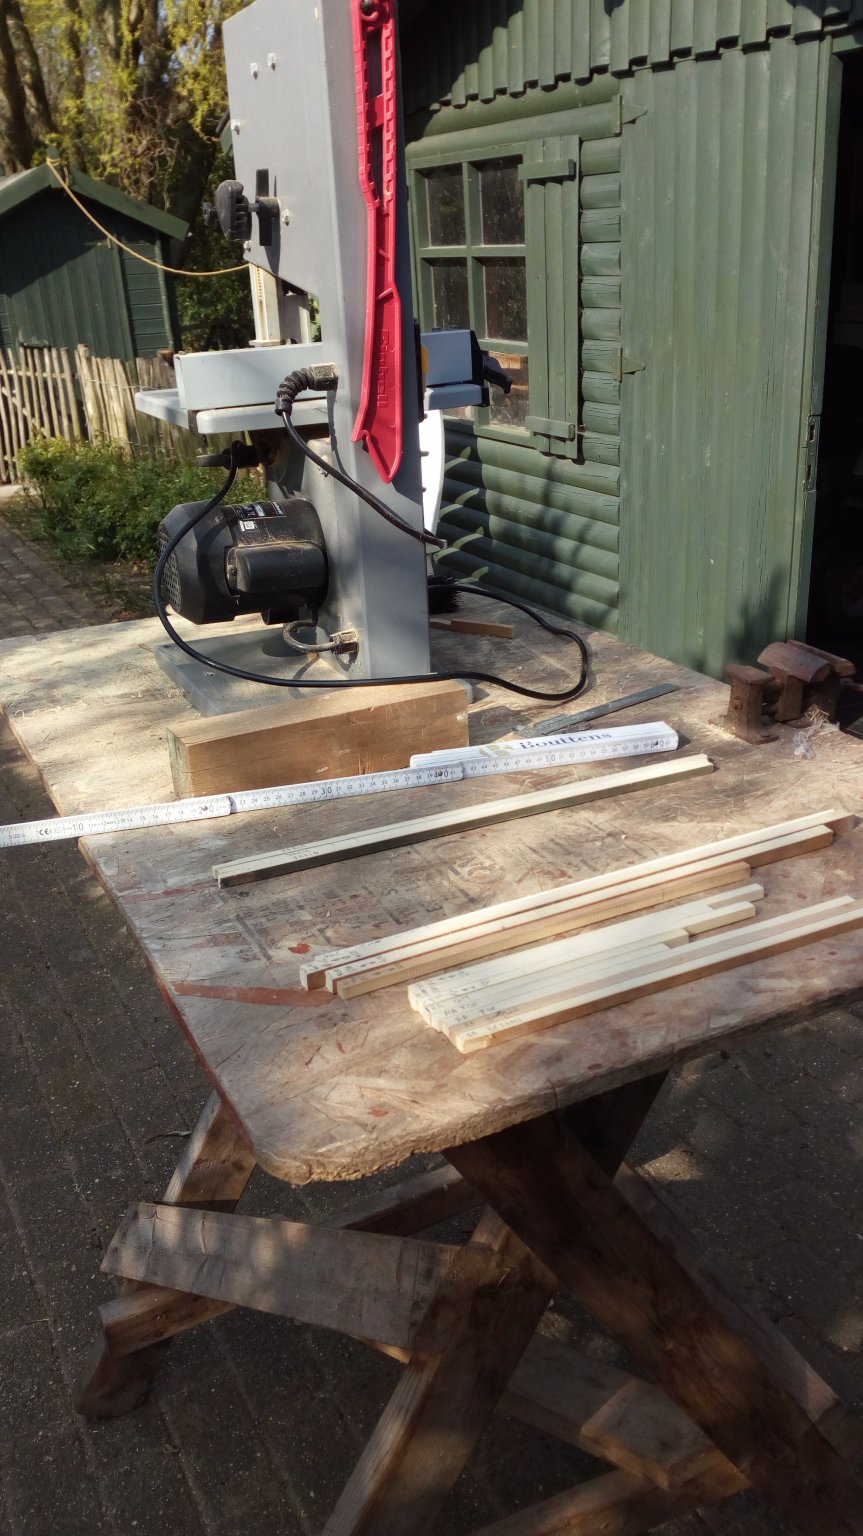
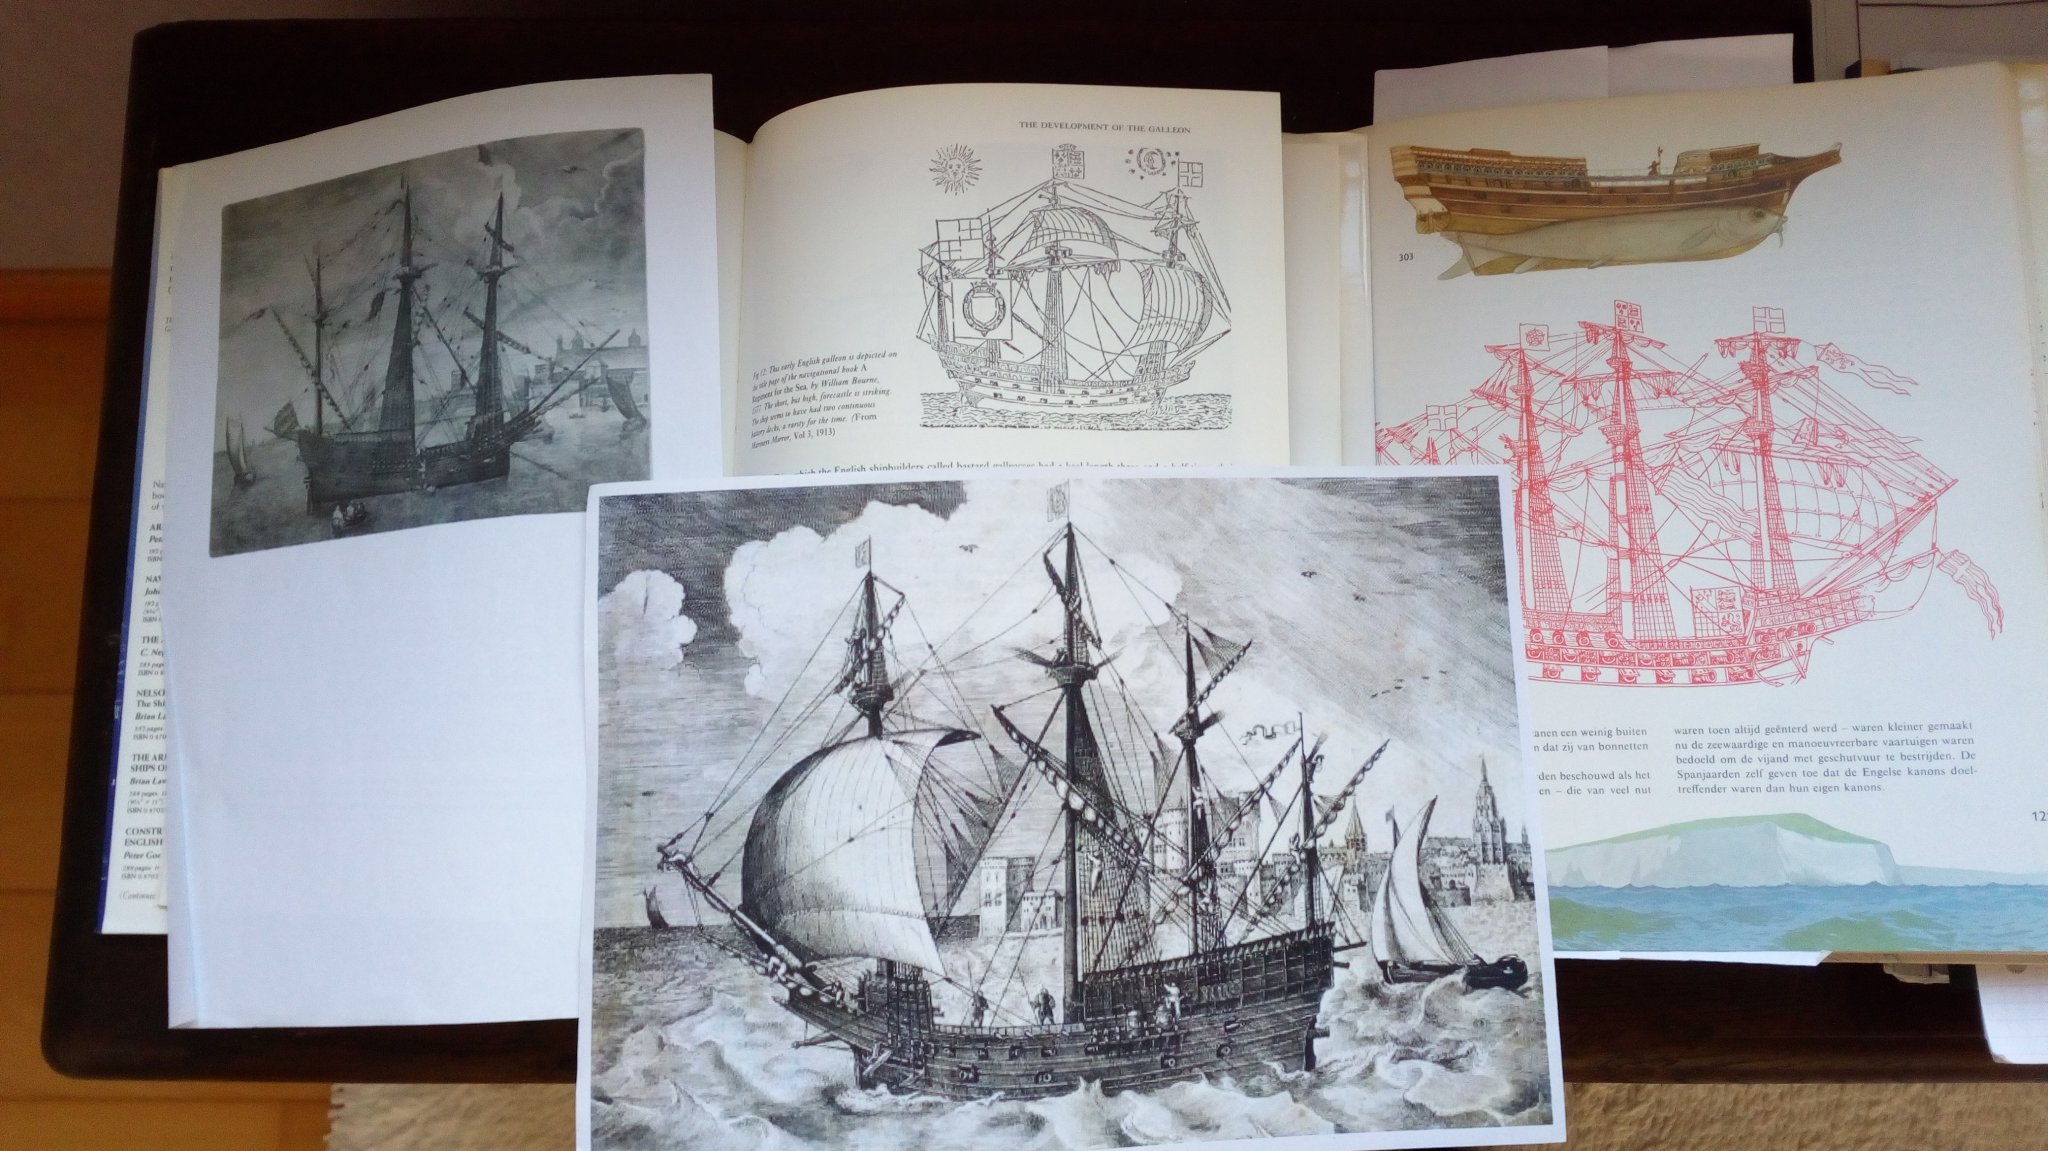
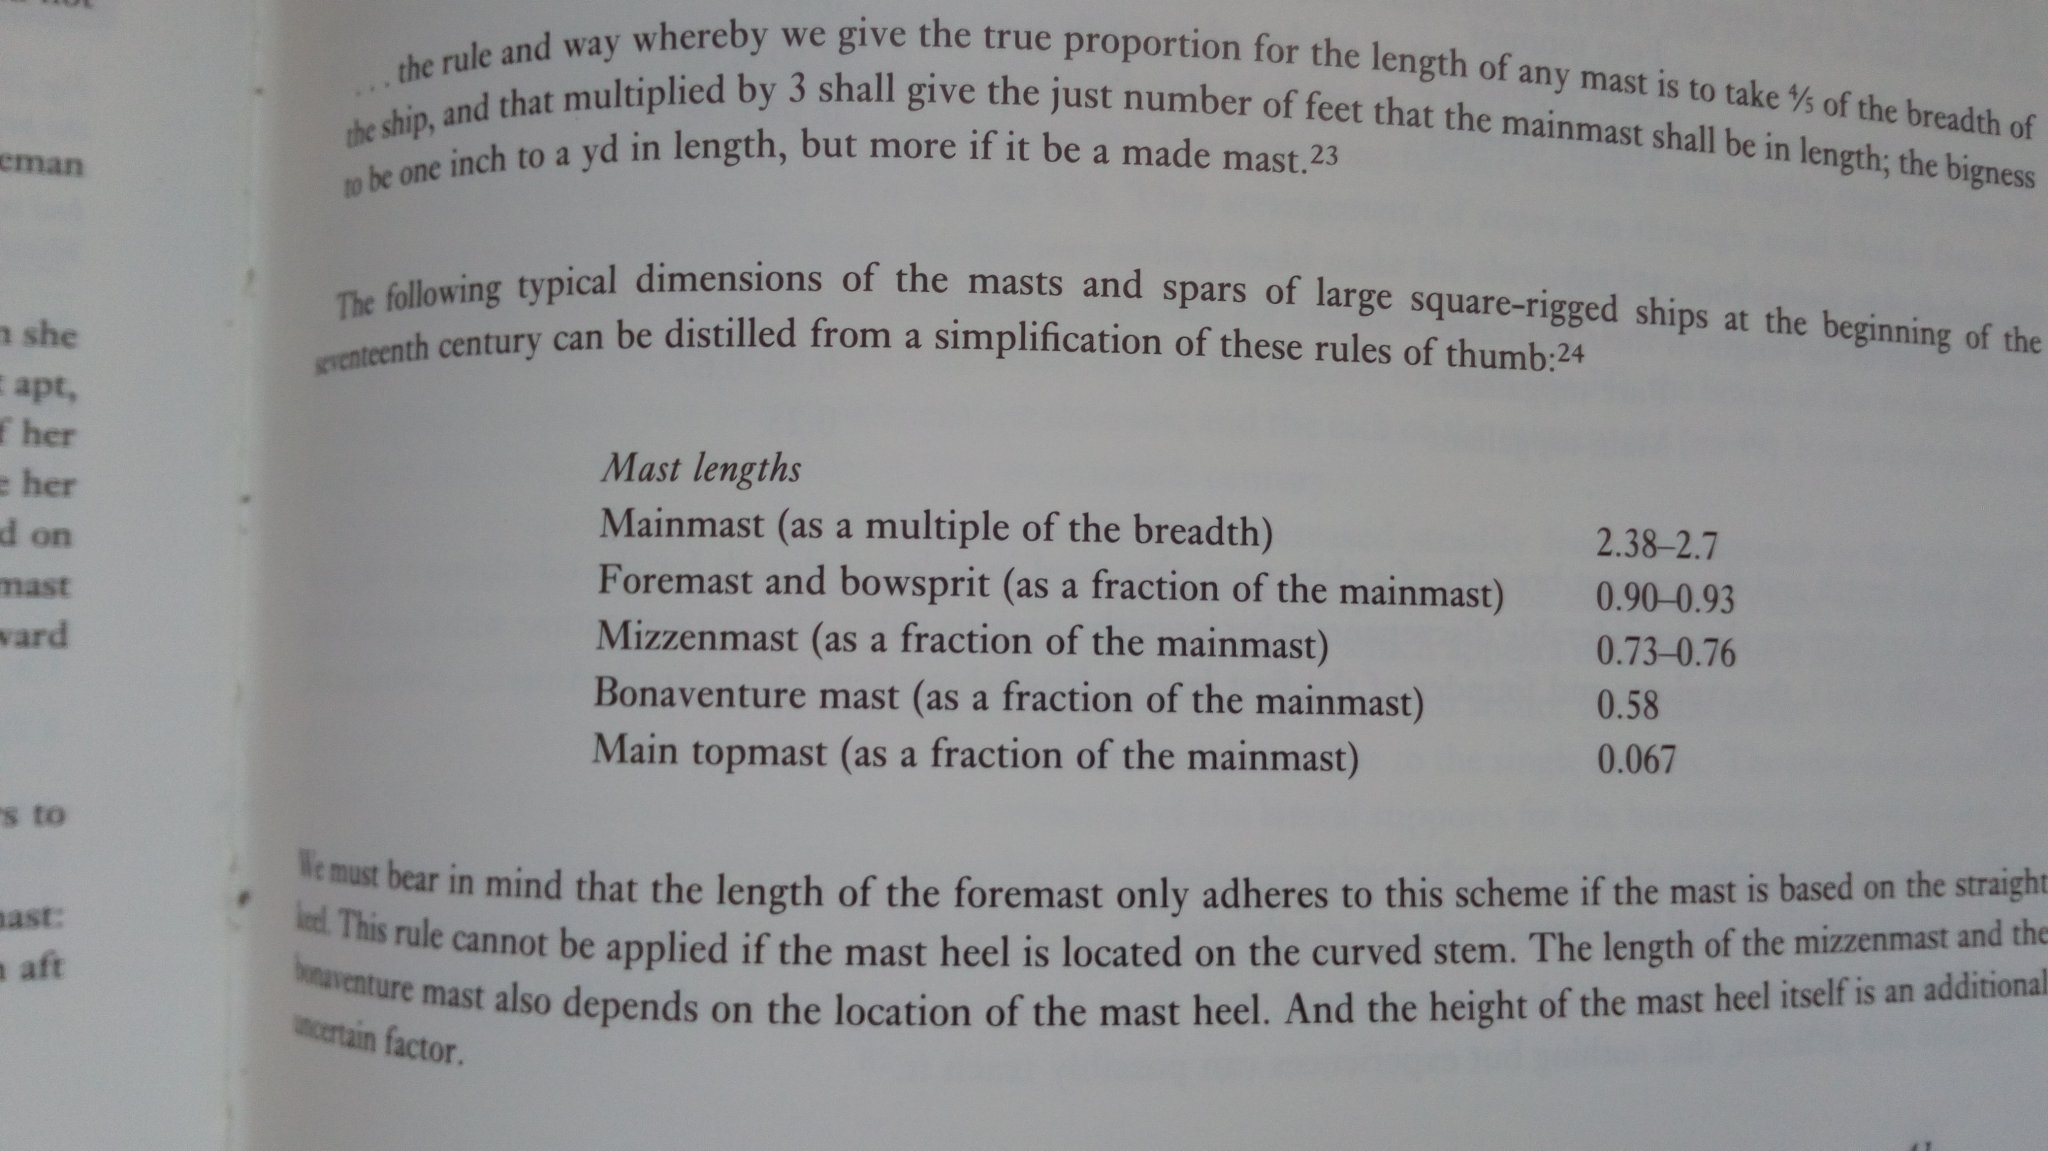
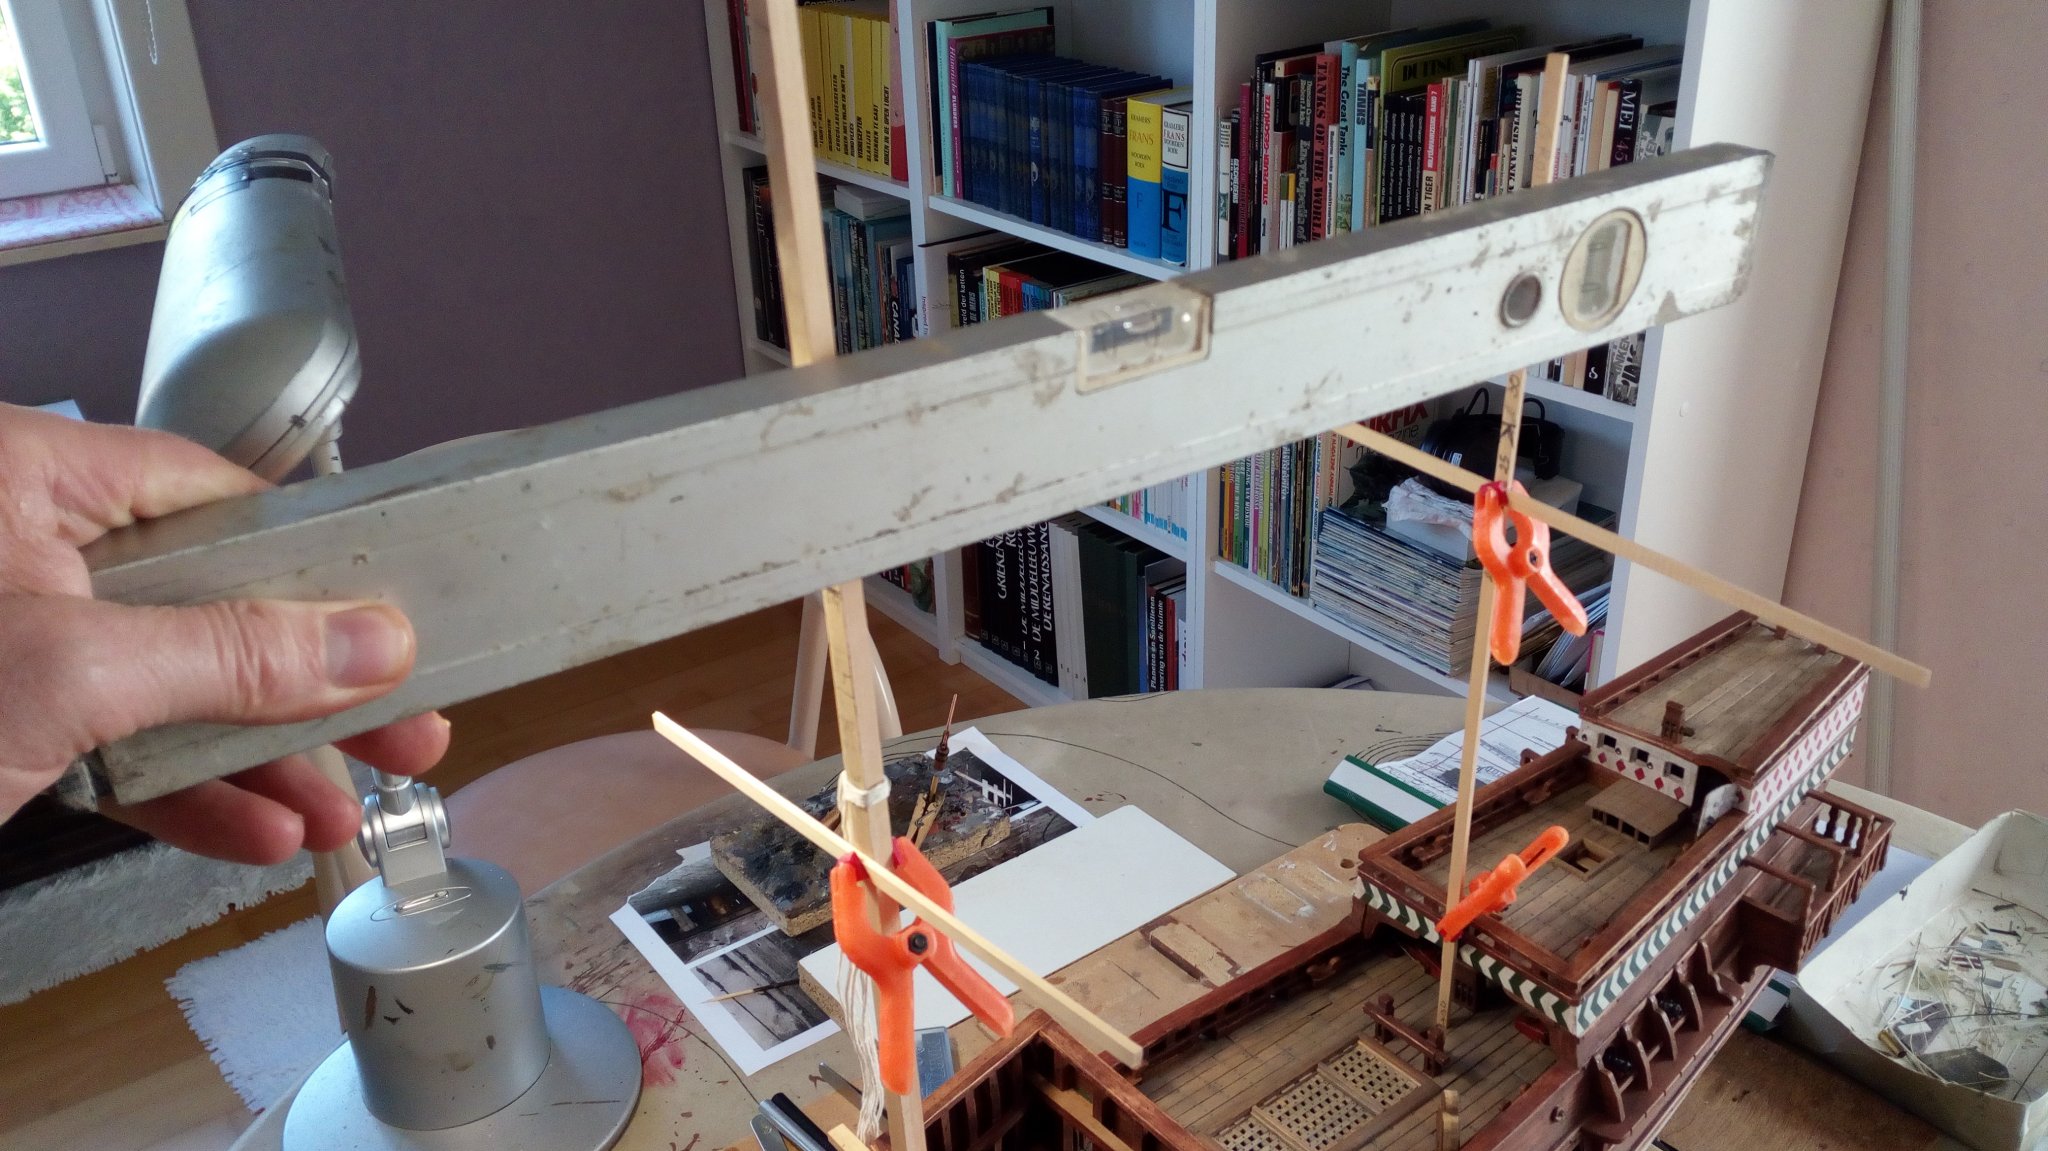
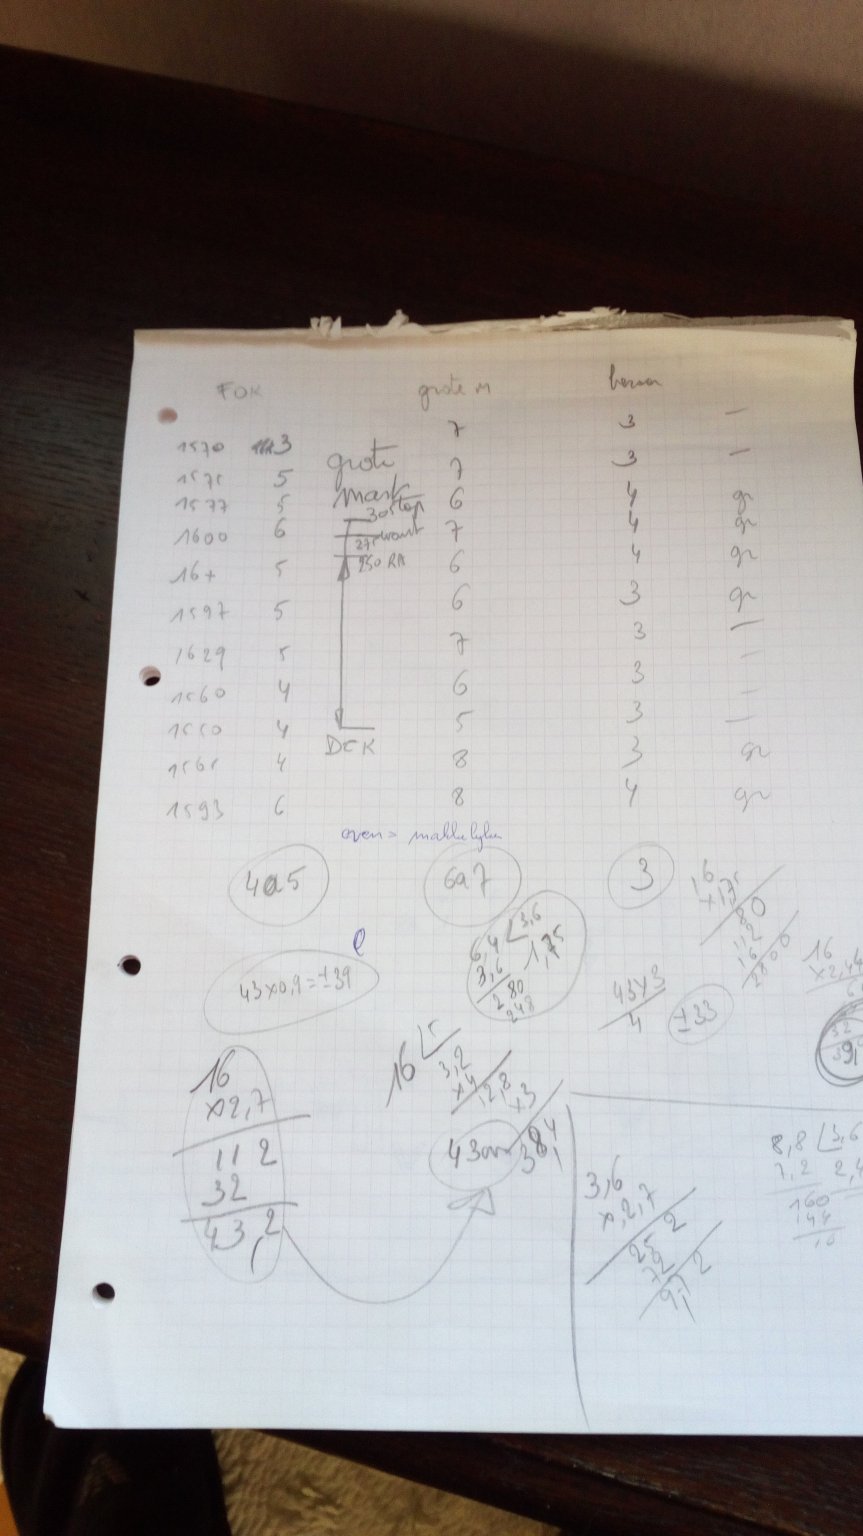
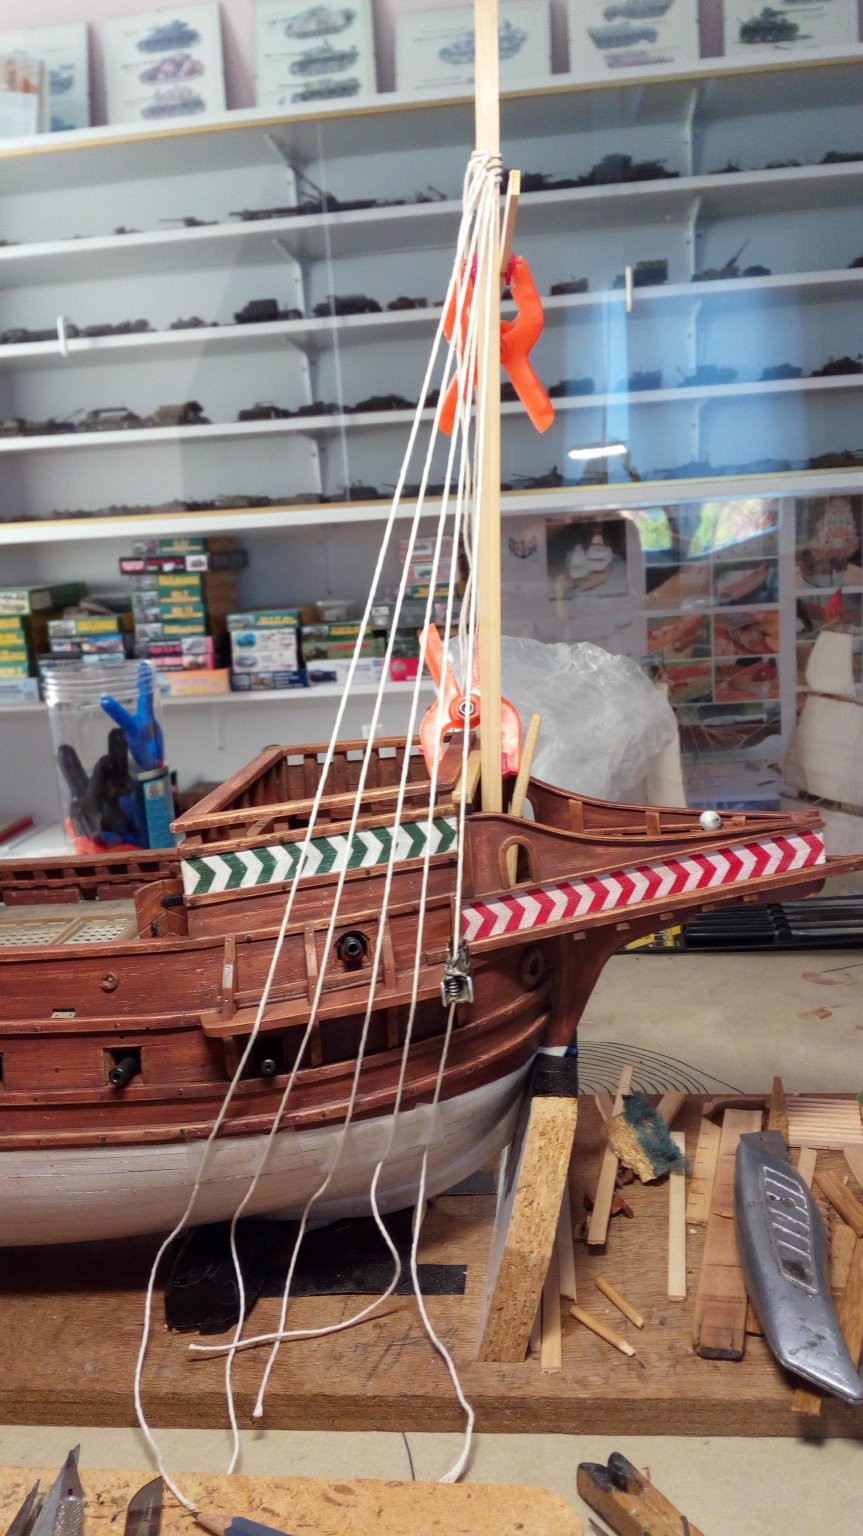
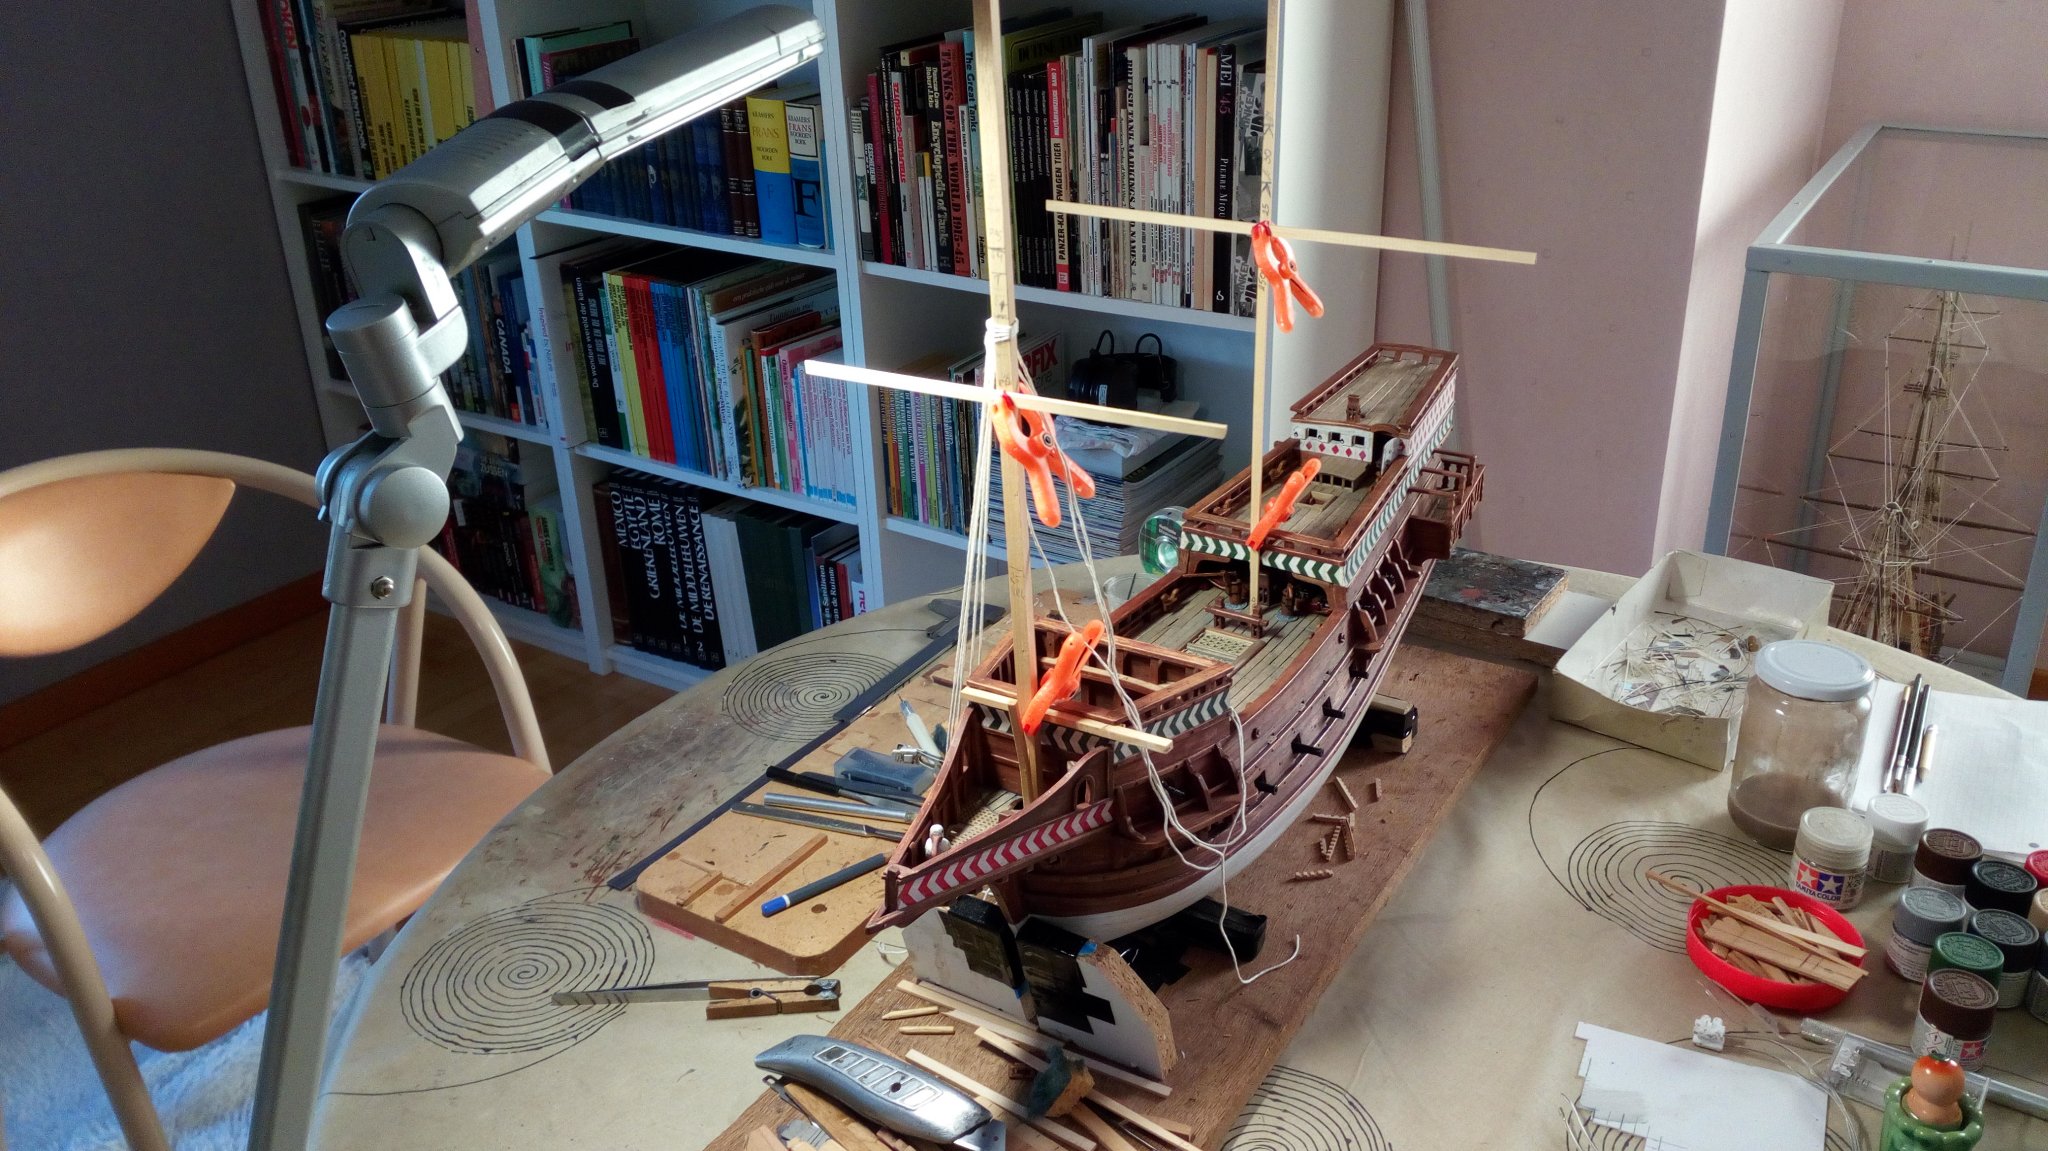
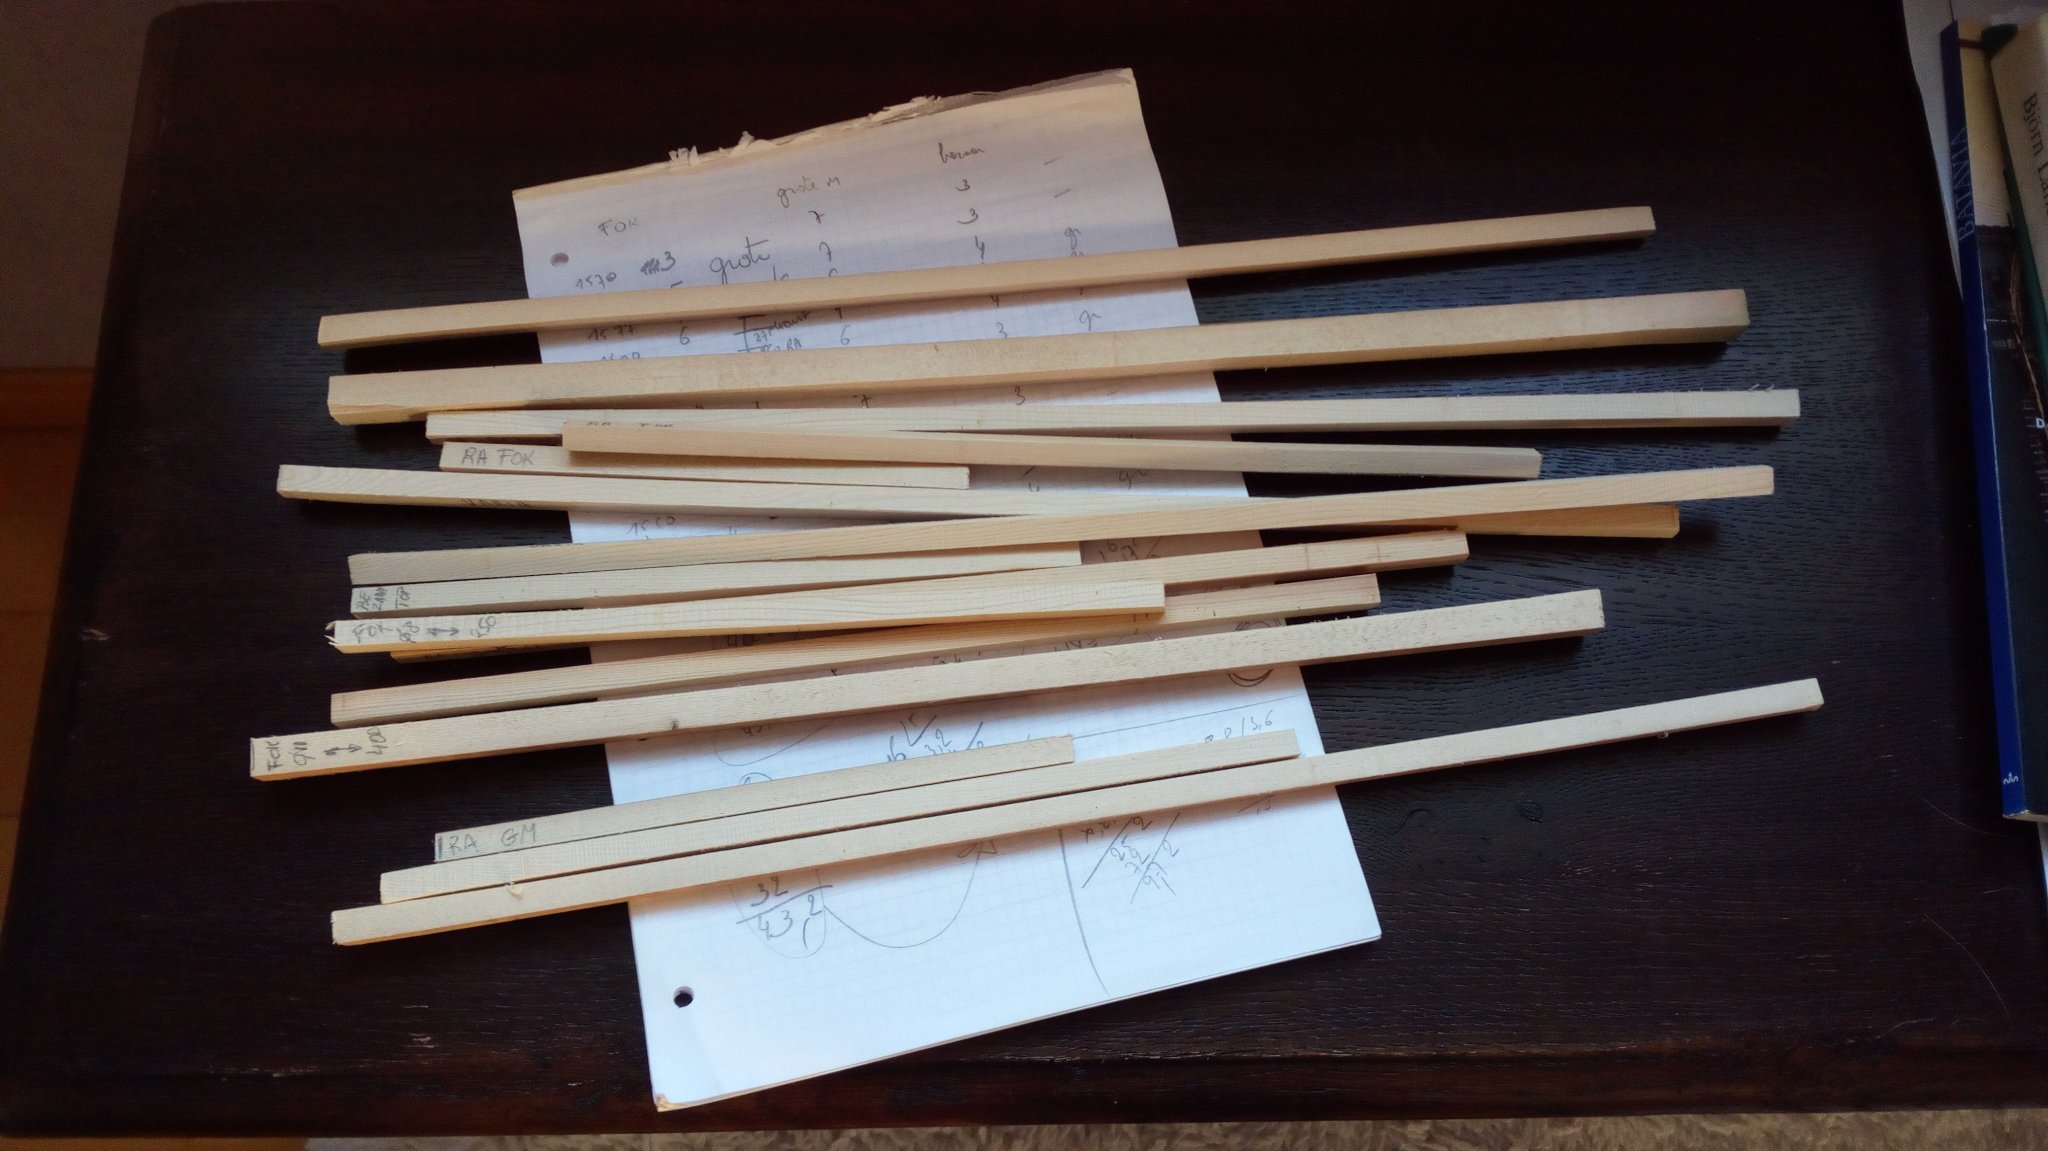
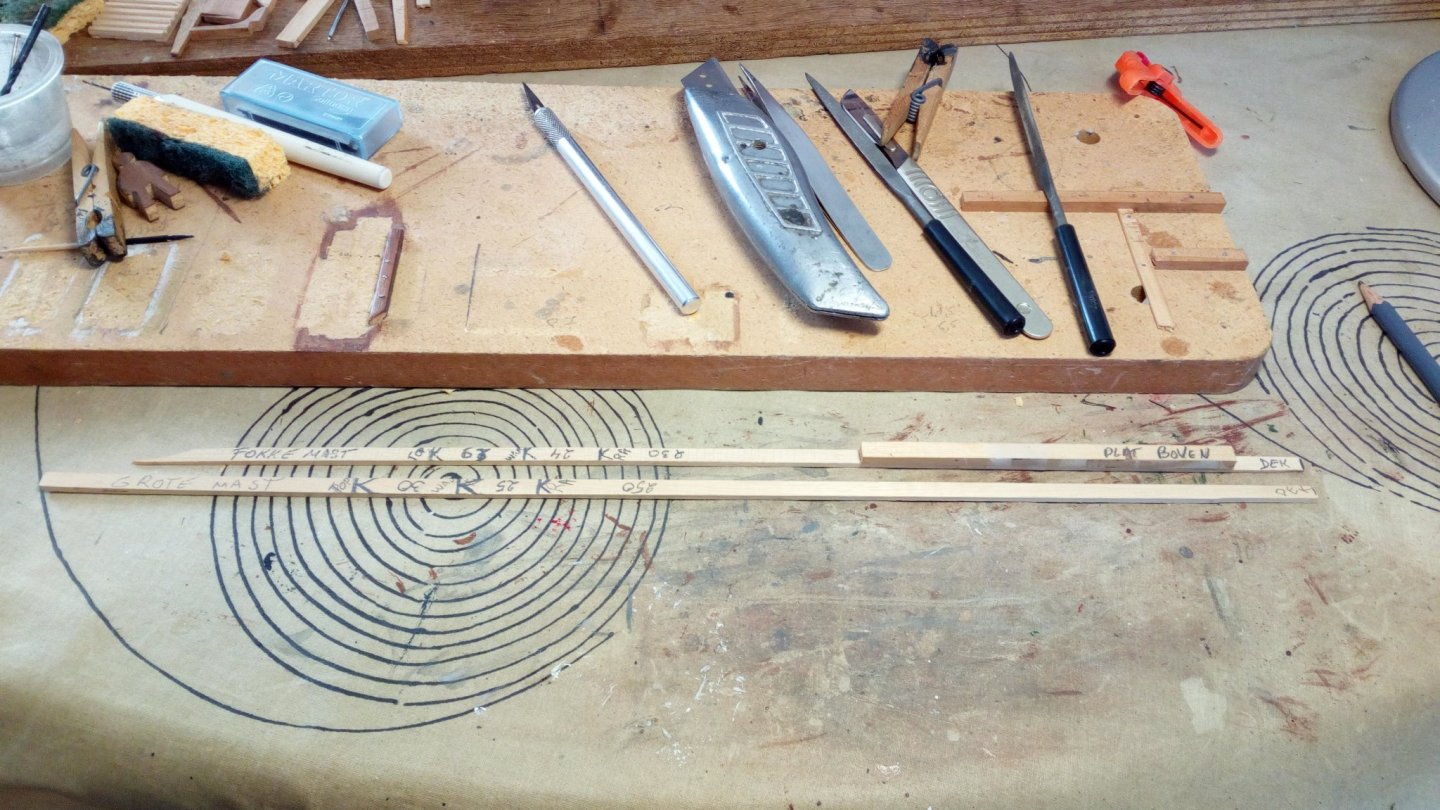
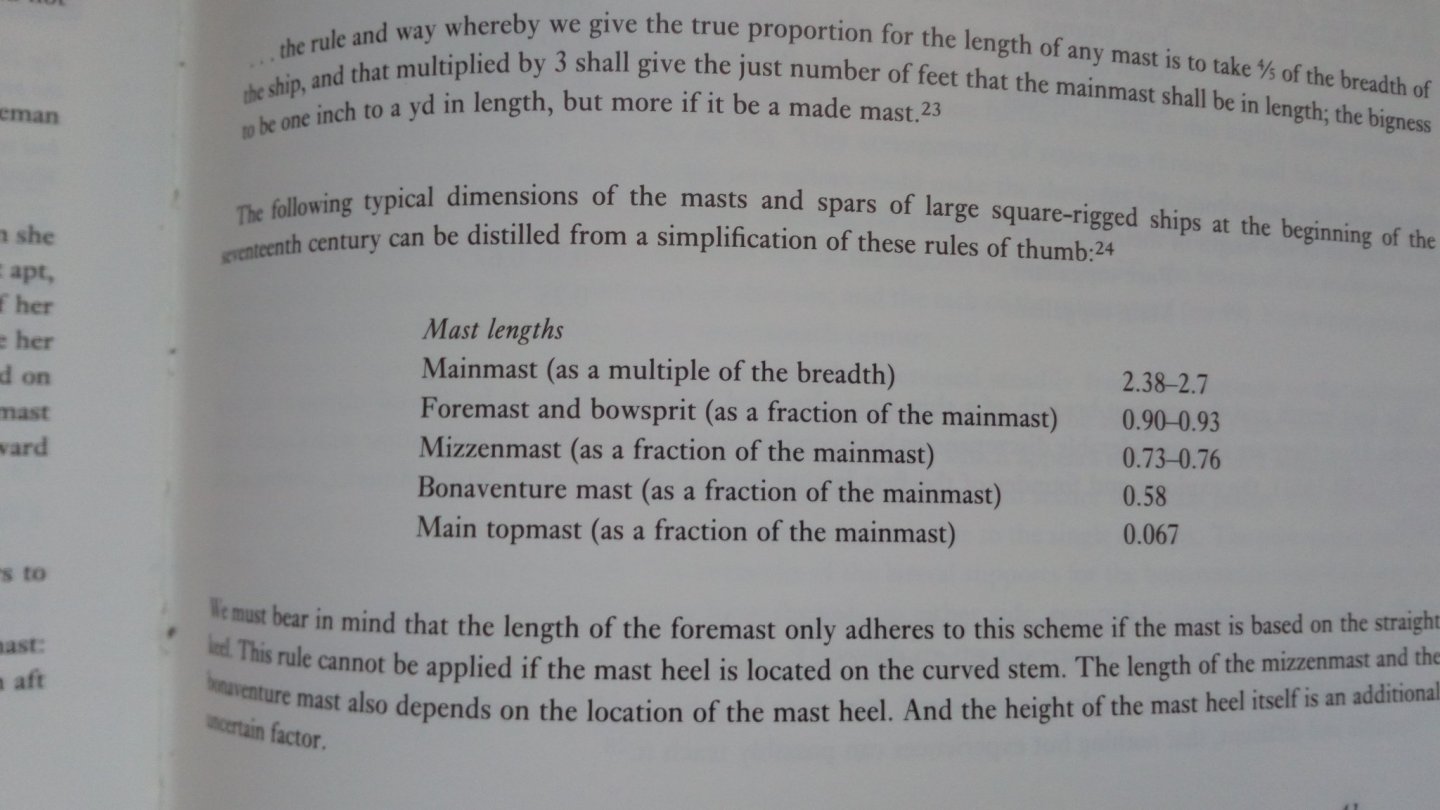
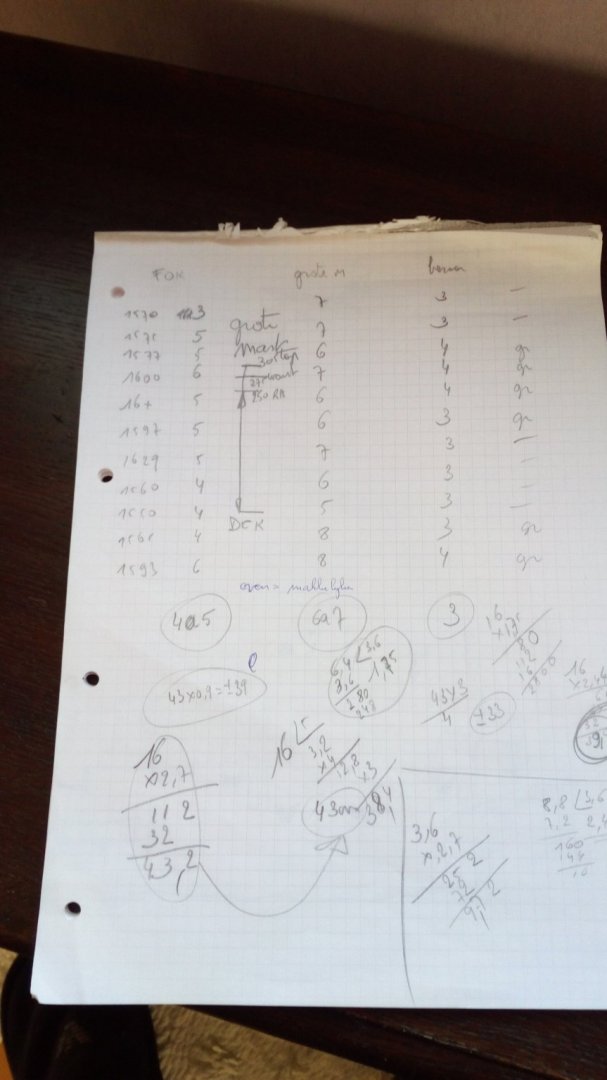
And a few weeks ago i sawed wood for masts and spars Before i install the fore castle i have to decide where the shrouds of the fore mast come, and how much. Some info about the lengts of mast early 17th century And it seems that the lower part of the main and fore masts are about the same height on level The number of shrouds on the fore mast also varies a lot (between 3 and 6) Determine mast length in relation to the deck. The fore mast is a little bit shorter than the main mast. The angle to the deck also varied greatly. From right-angled to strongly bending forward 5 is to much, when we fire the cannon, we will do more damage to our own rigging than to the opponent. 4 is better, where one enters the ratlines (on the forecastle) the distance between the shrouds is already much narrower. Thanks for following, likes and comments


- 756 replies
-
- 11
-
-
- galleon
- golden hind
- (and 2 more)
-
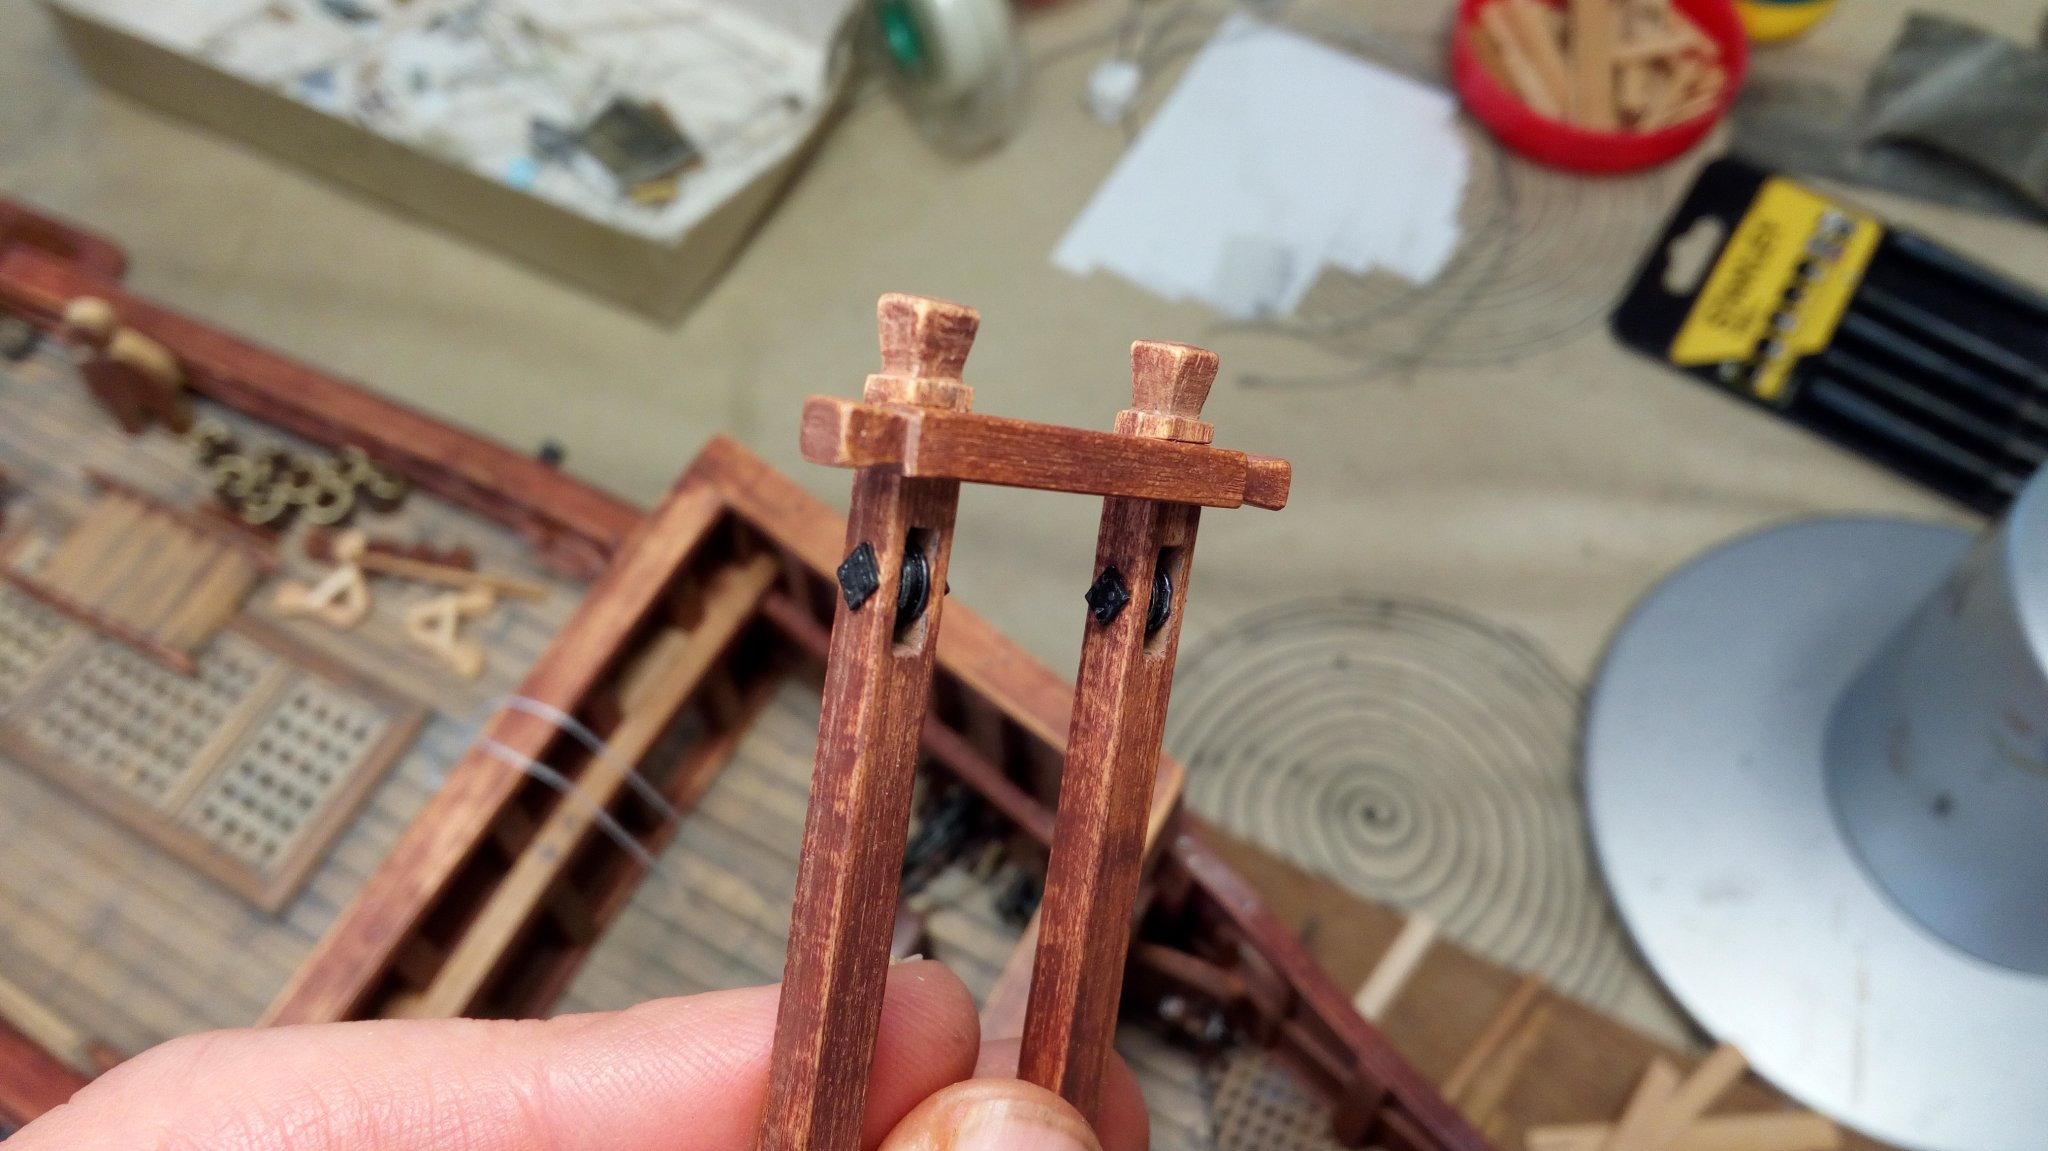
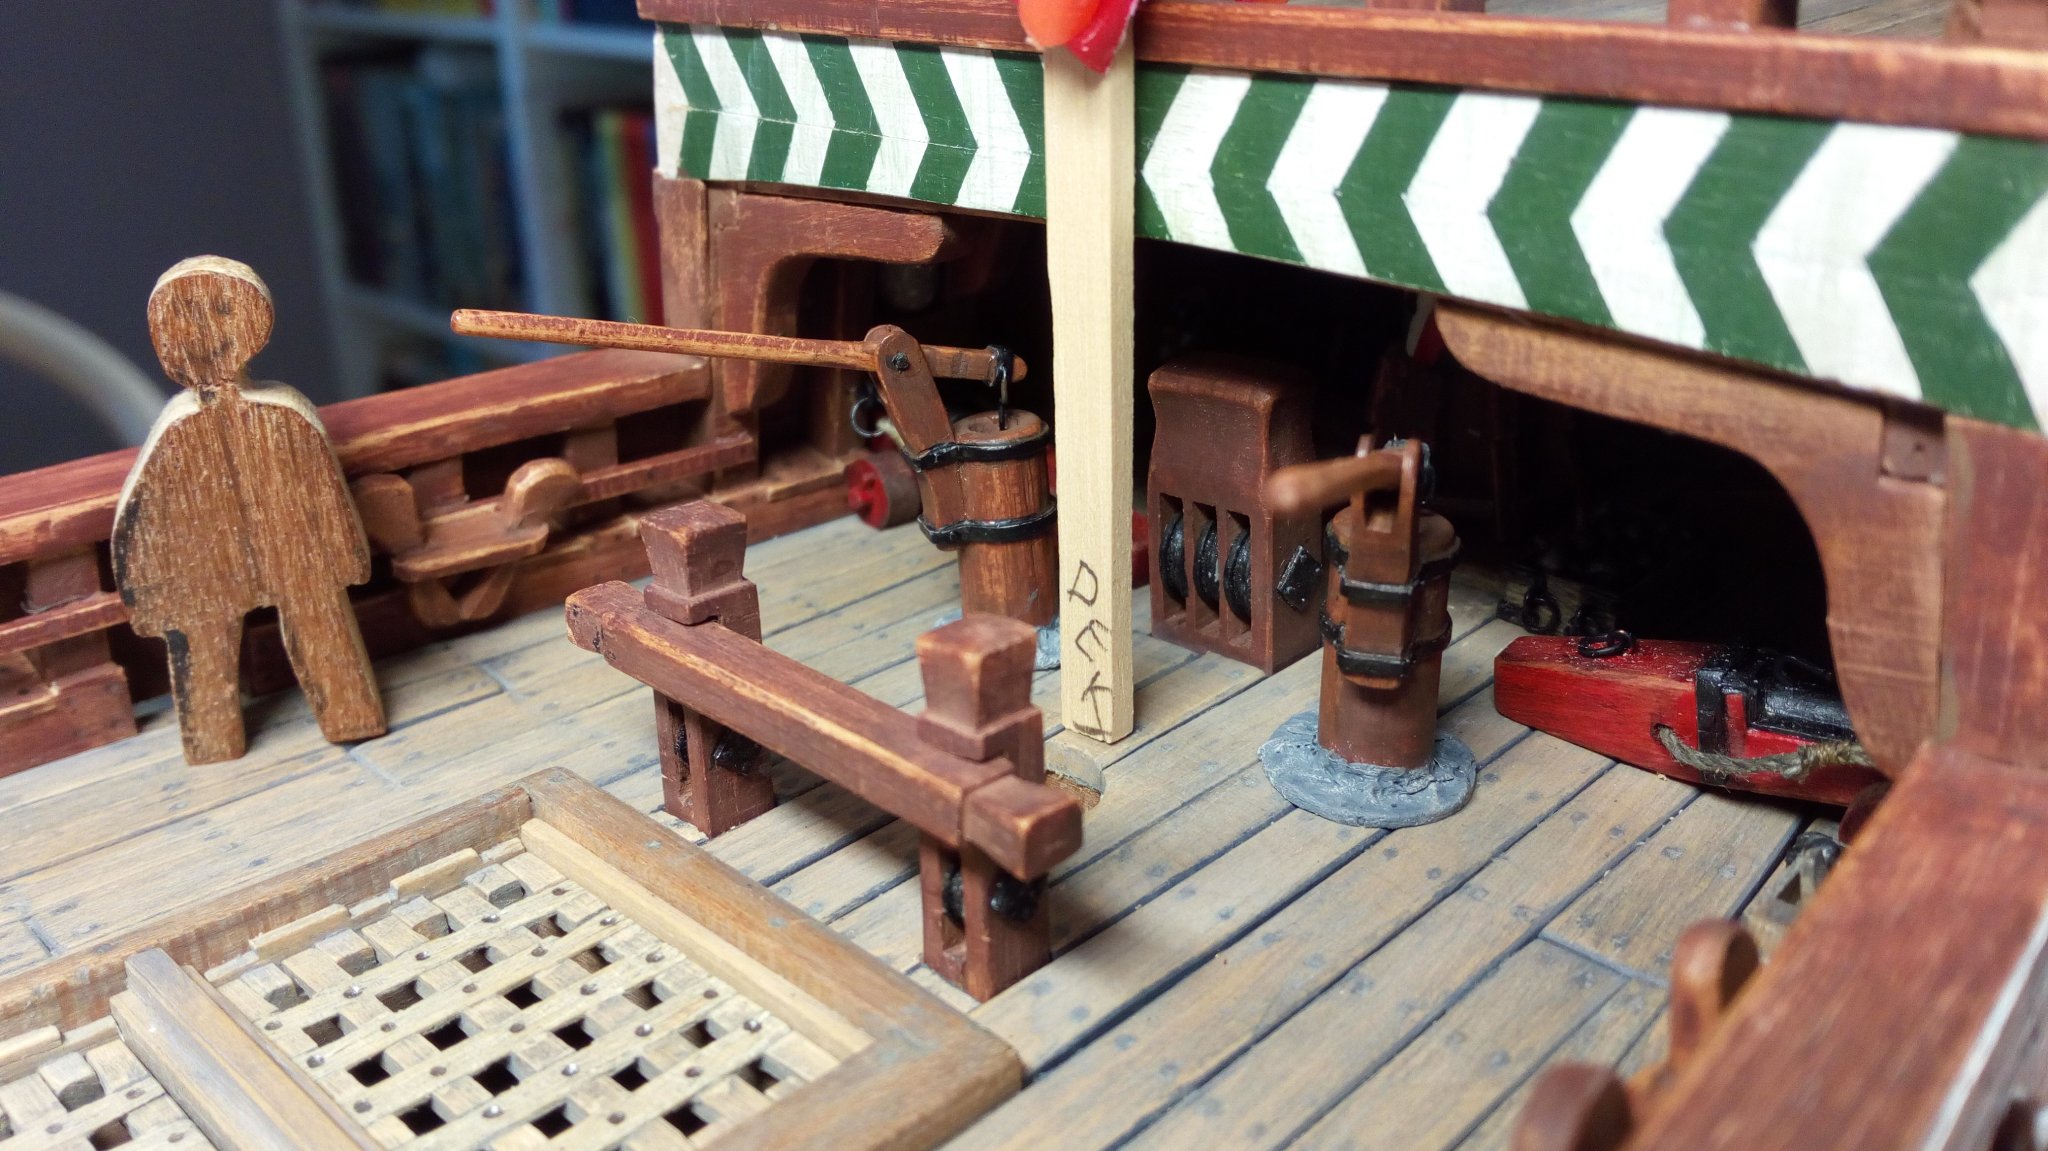
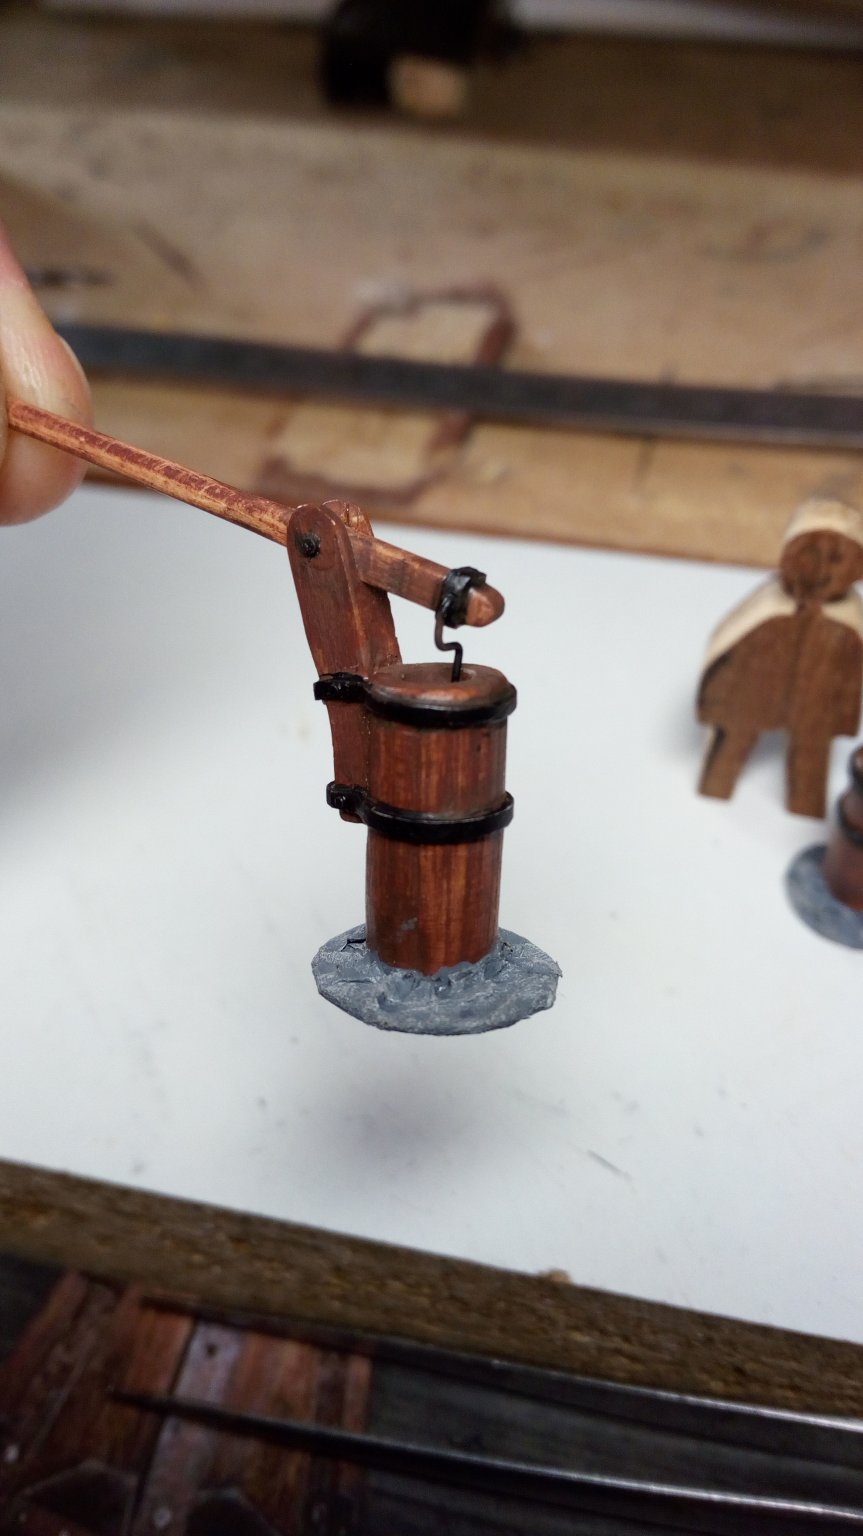
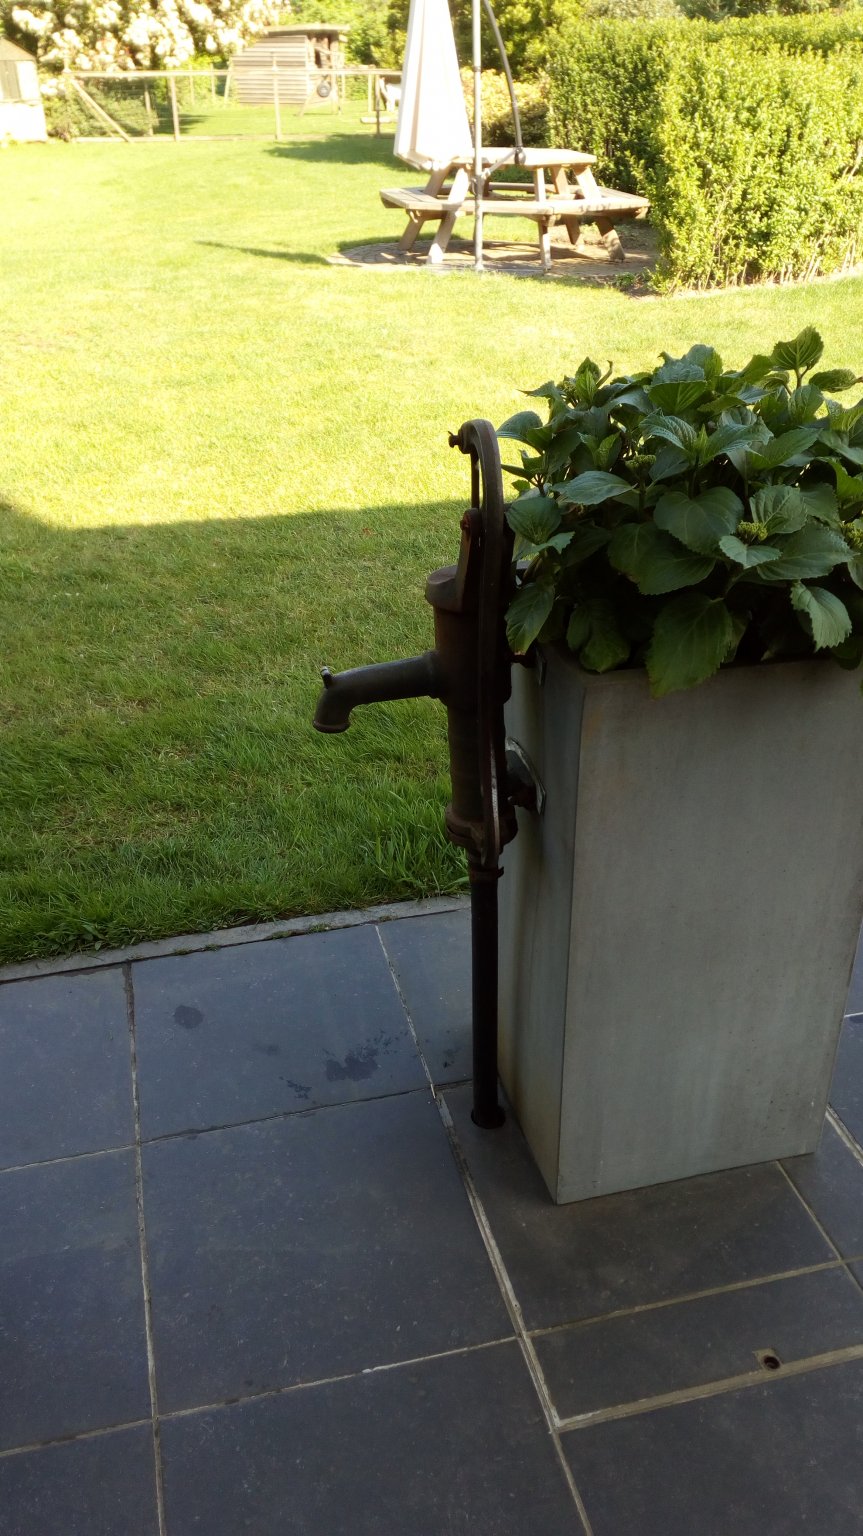
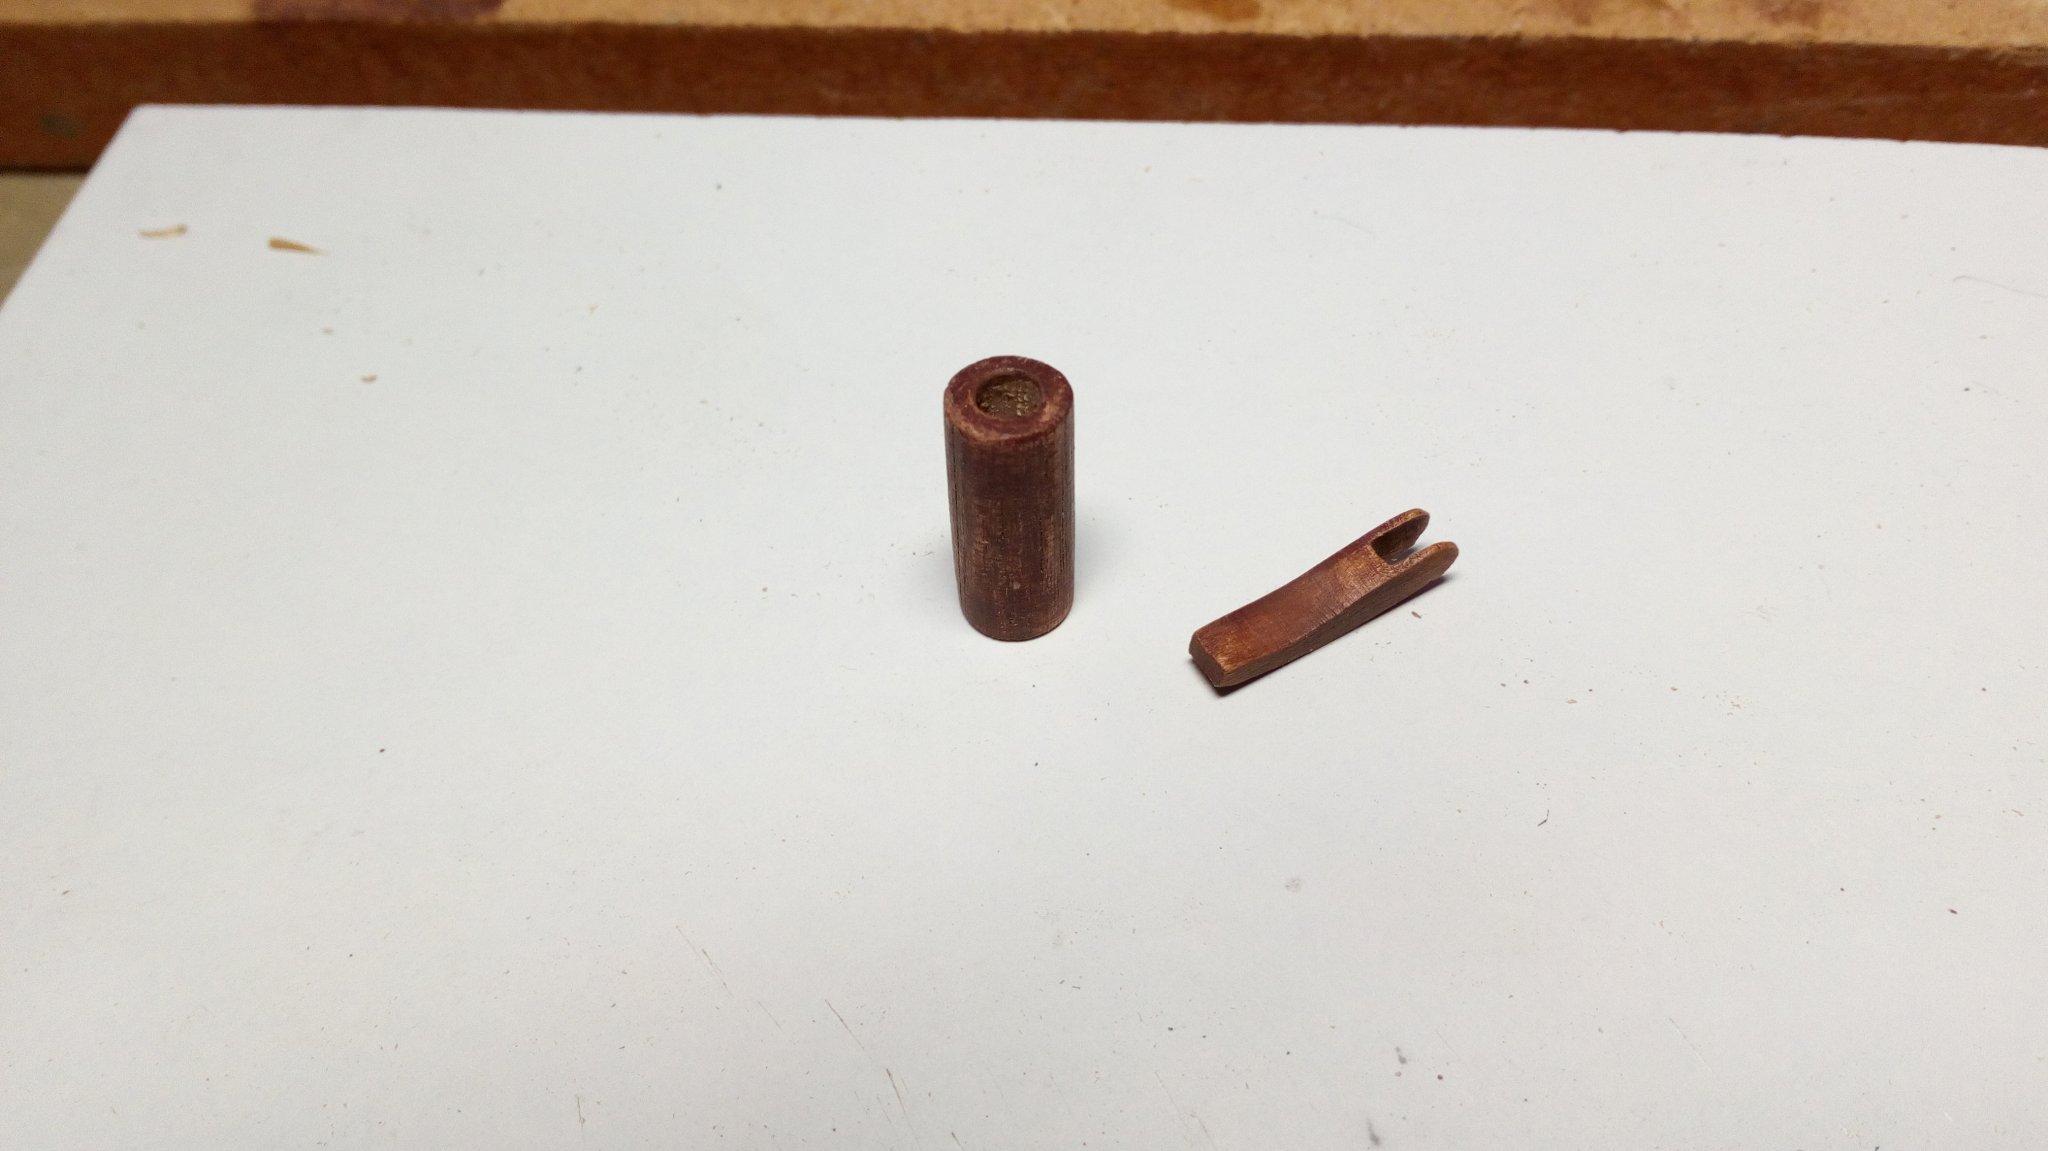
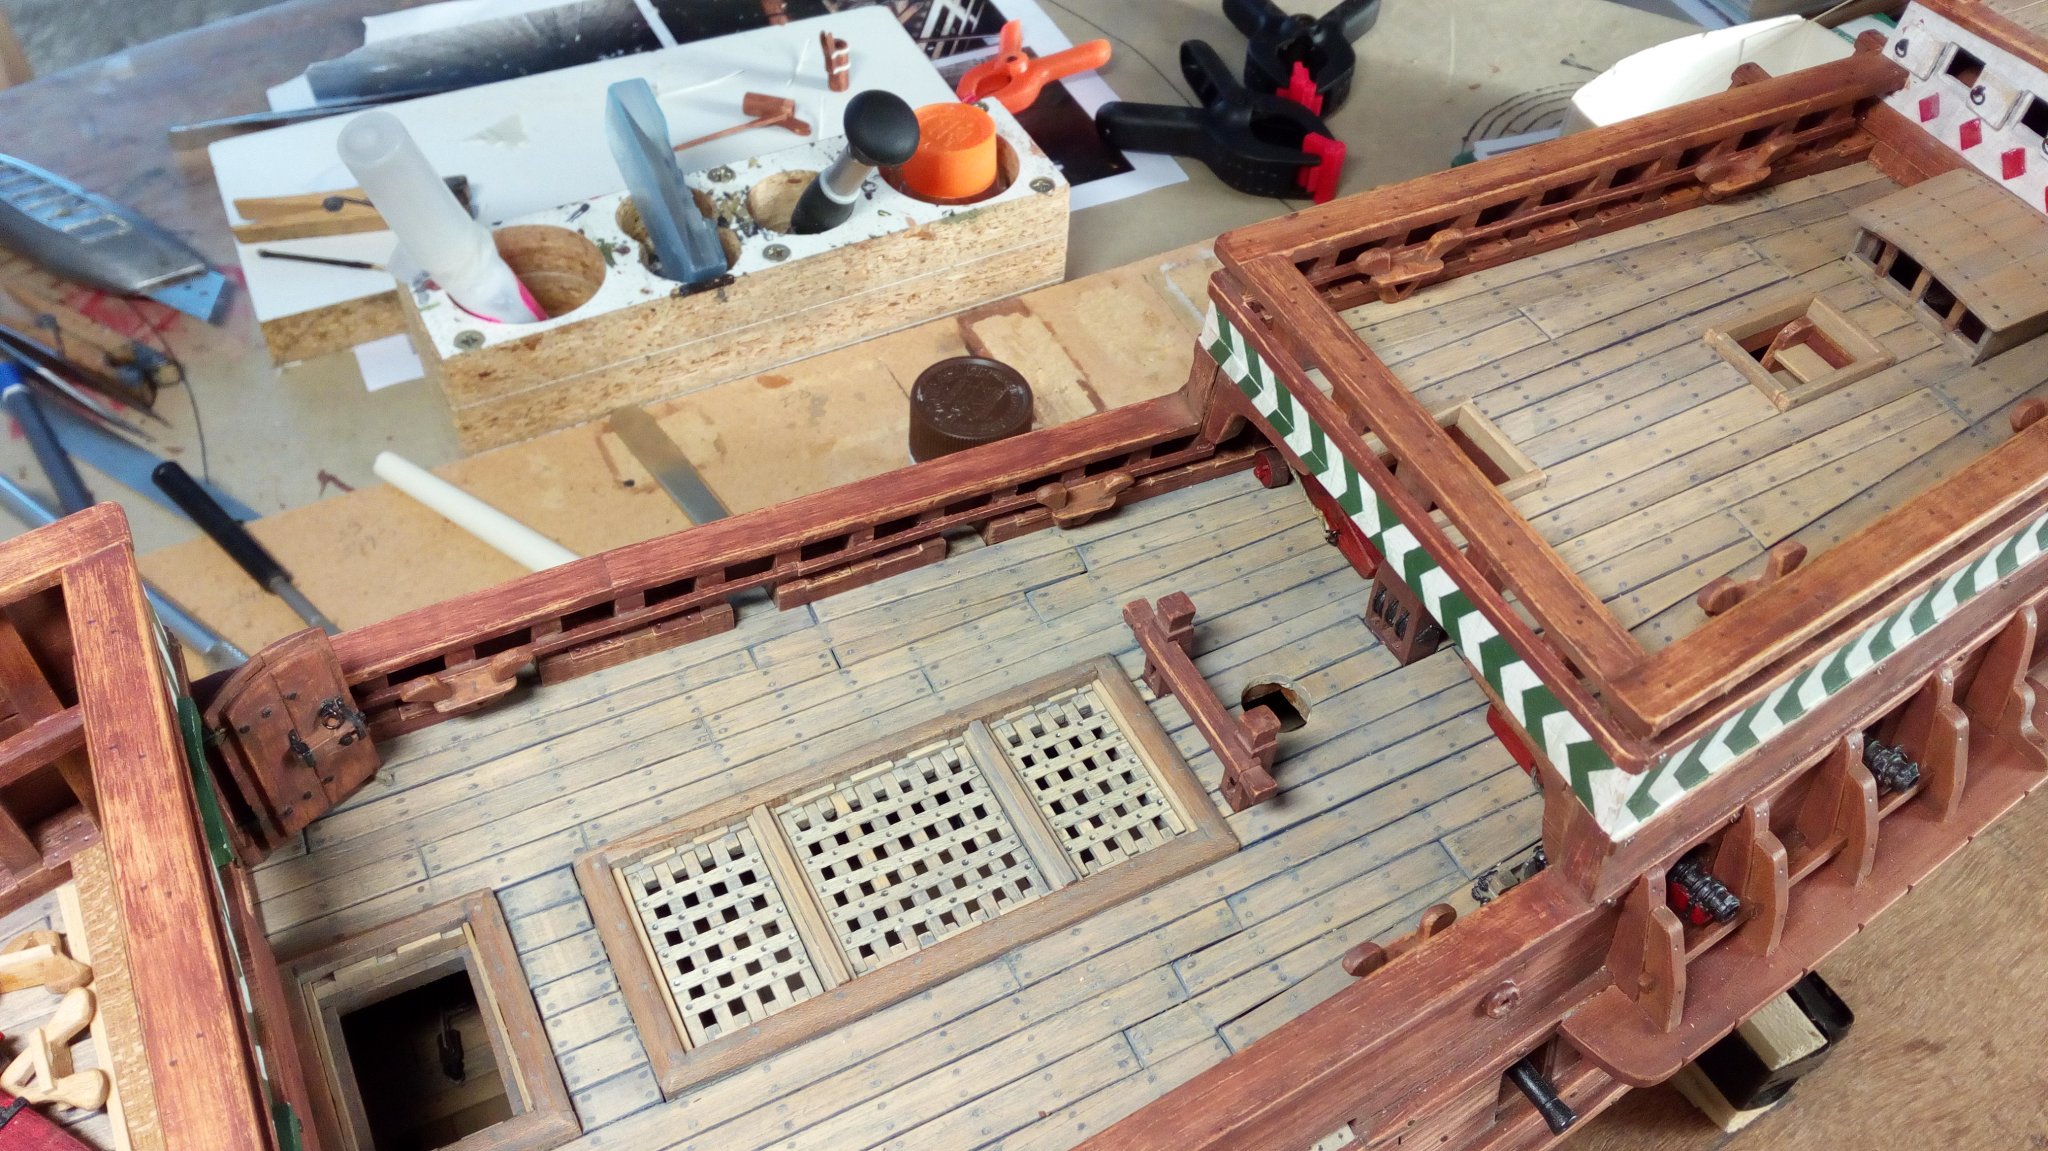
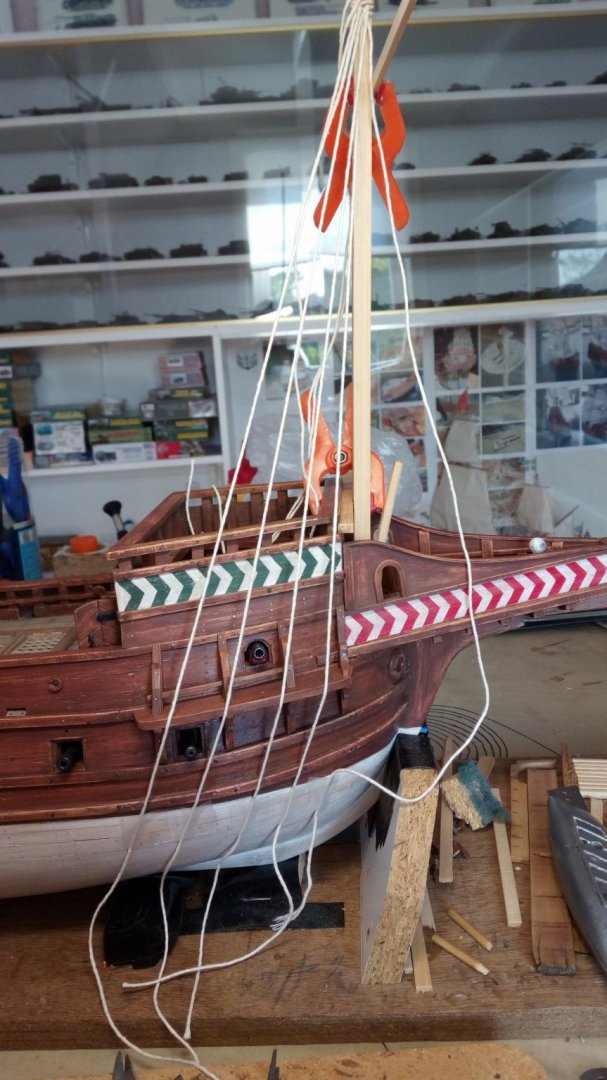
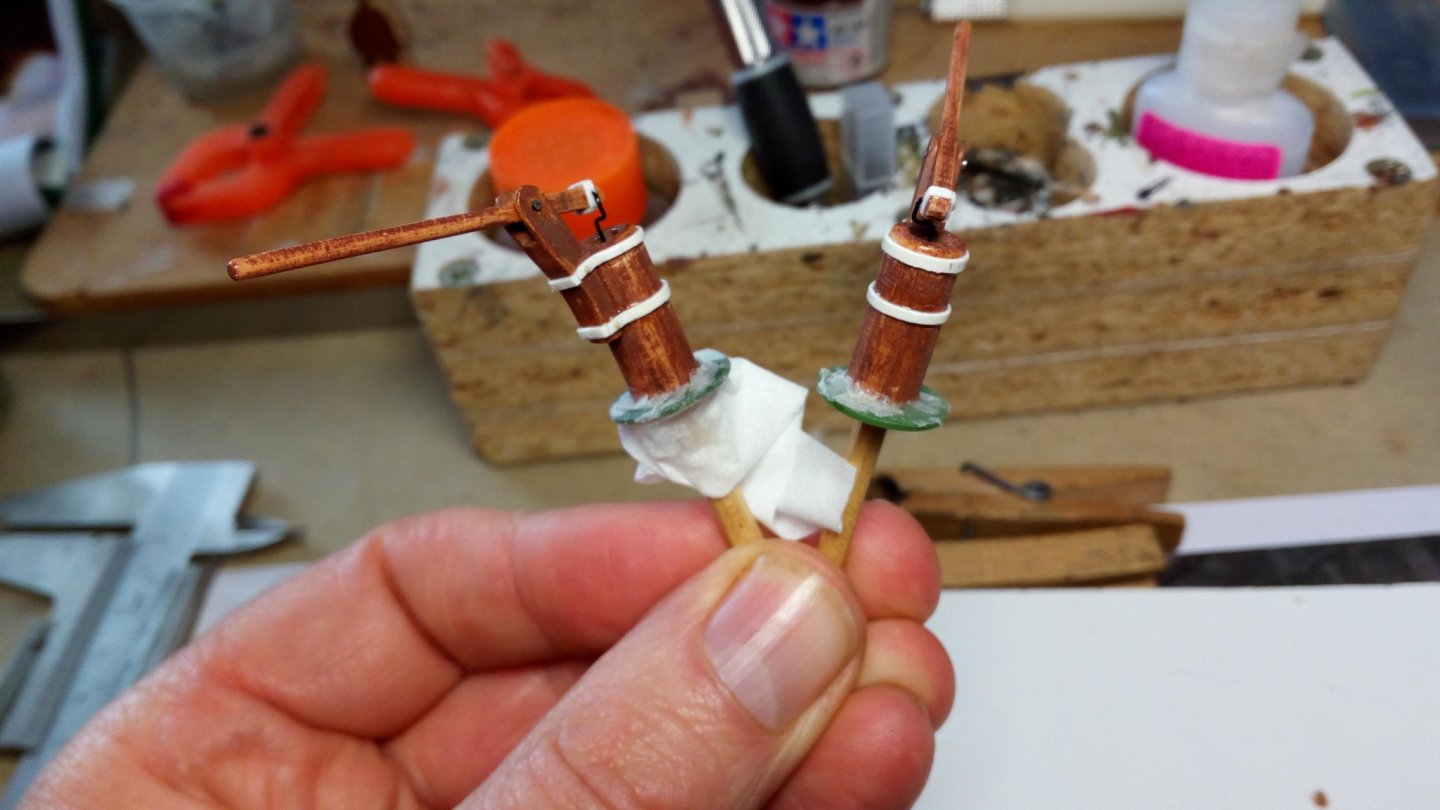
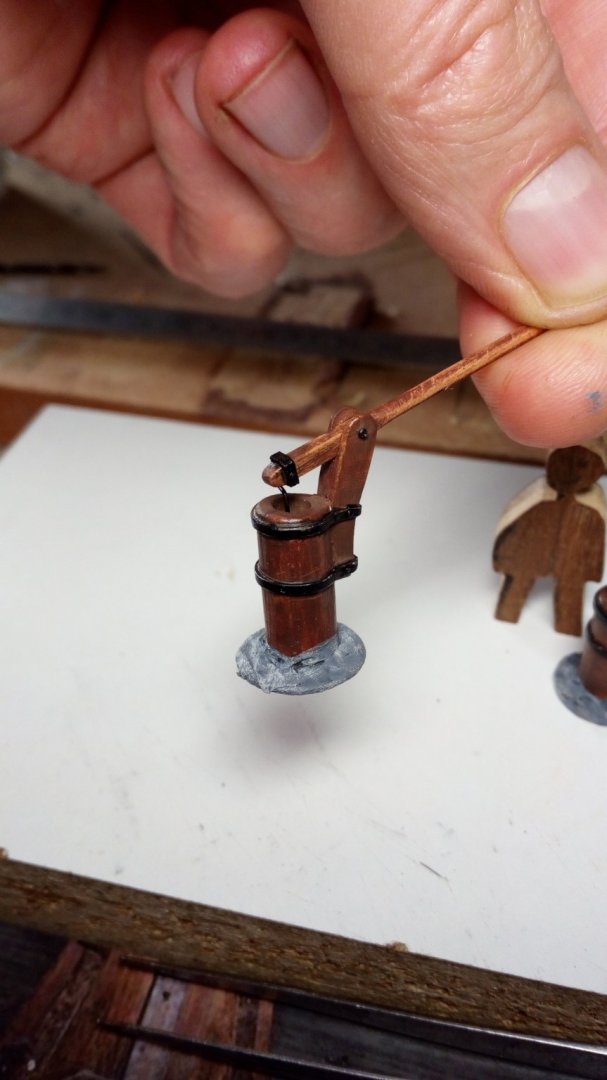
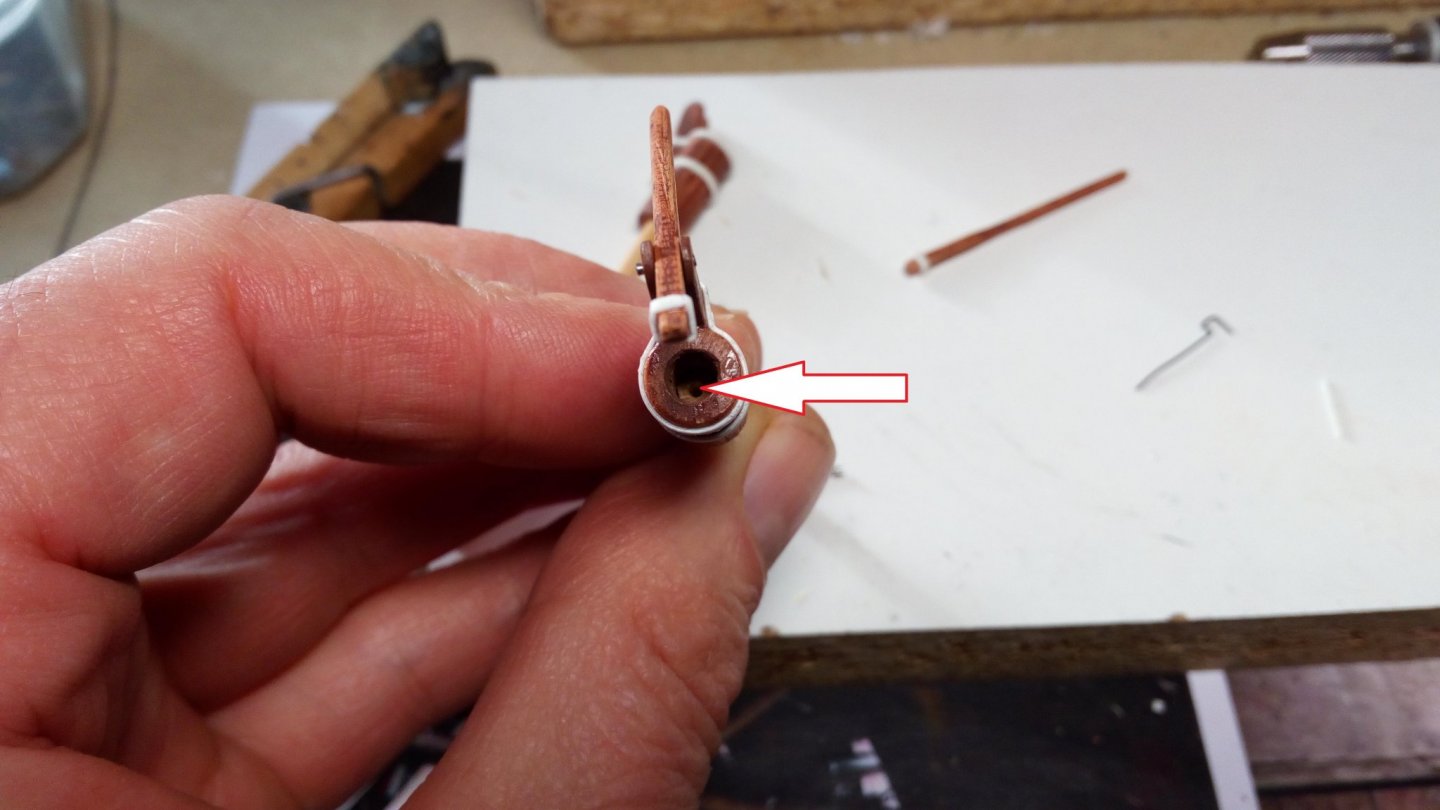
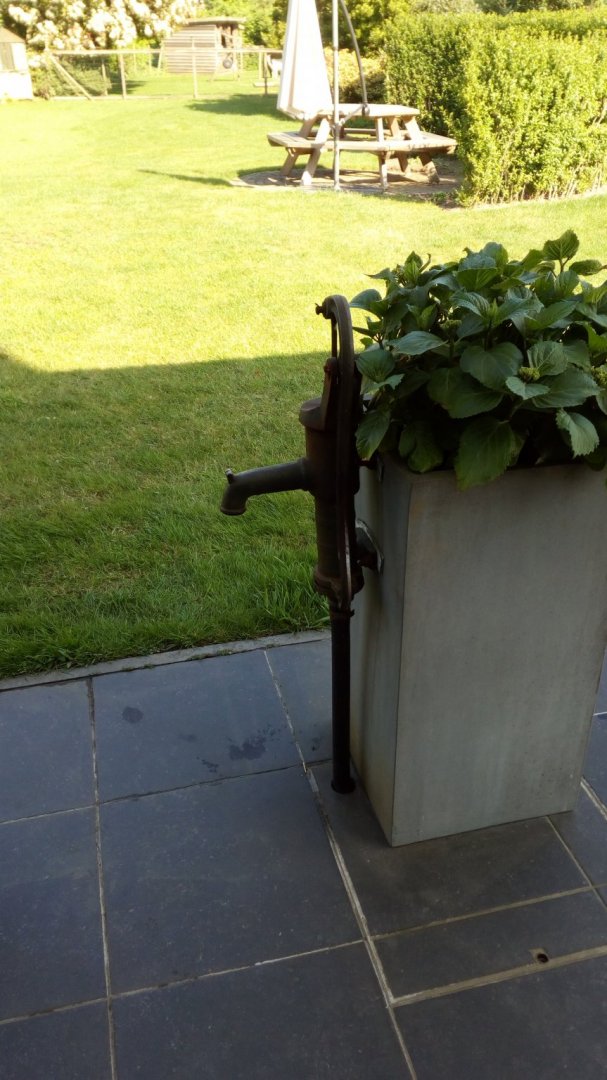
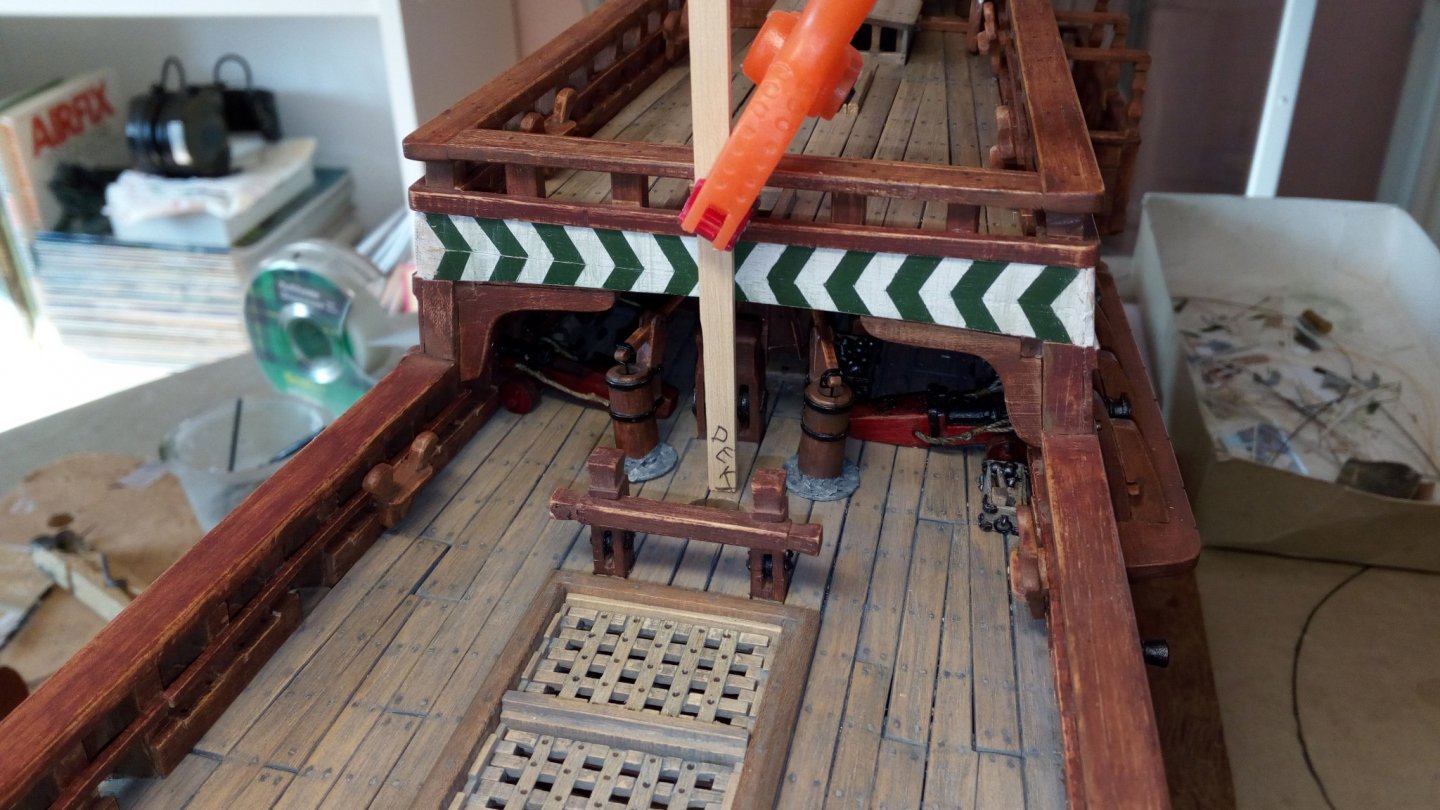
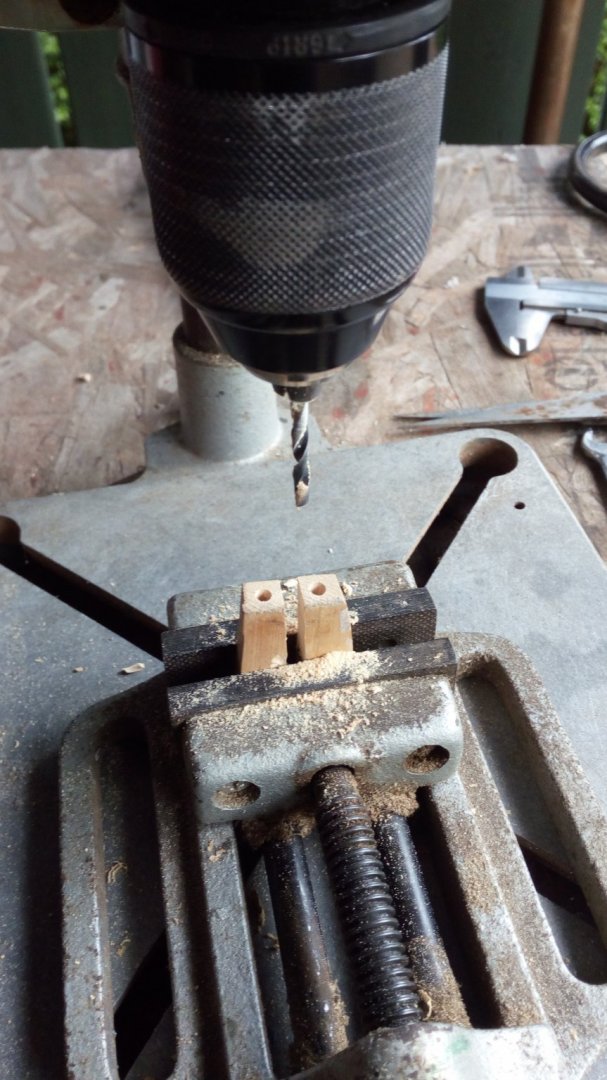
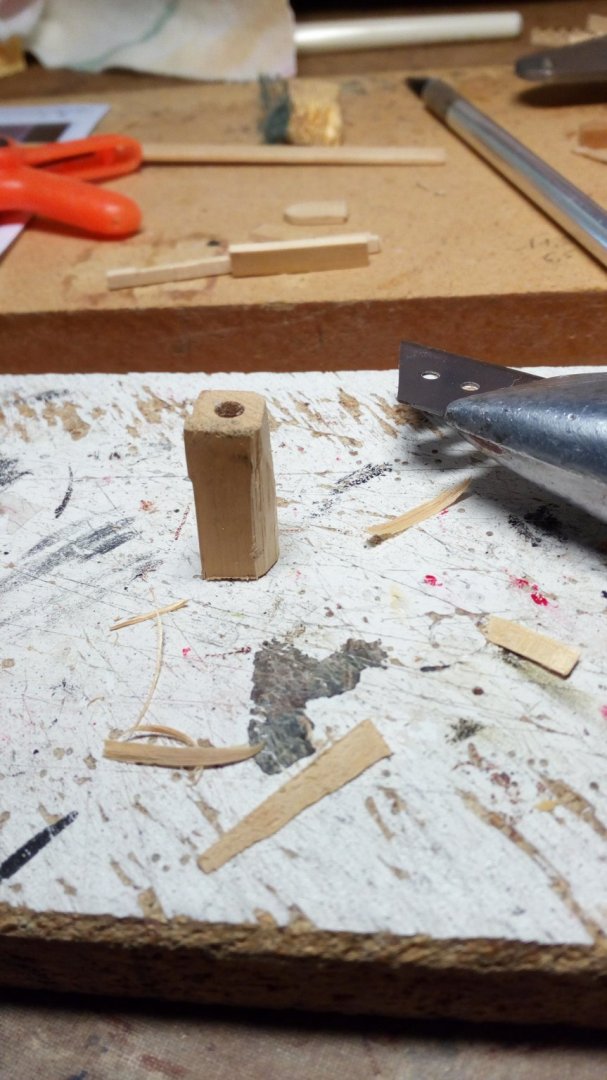
Finishing the pumps. As said, the pumps of the Batavia and Duyfken replicas served as an example. A hole is drilled in the centre of the pump. This is where the metal wire comes in that is attached to the pump arm A plastic disc is glued to the base of each pump. Around the base is tissue paper glued with CA glue Pumps painted. The basis is a kind of seal between the pump and the deck (source Duyfken Replica) Ther is no outlet on the side of the pumps like on my "modern" pump. Reason, they do not serve to pump clean water into a bucket. But to pump dirty water out of the hold. Pumps dry fitted in place. 2 options. option 1 option 2 For the moment, i go for option 2


- 756 replies
-
- 10
-
-
- galleon
- golden hind
- (and 2 more)
-
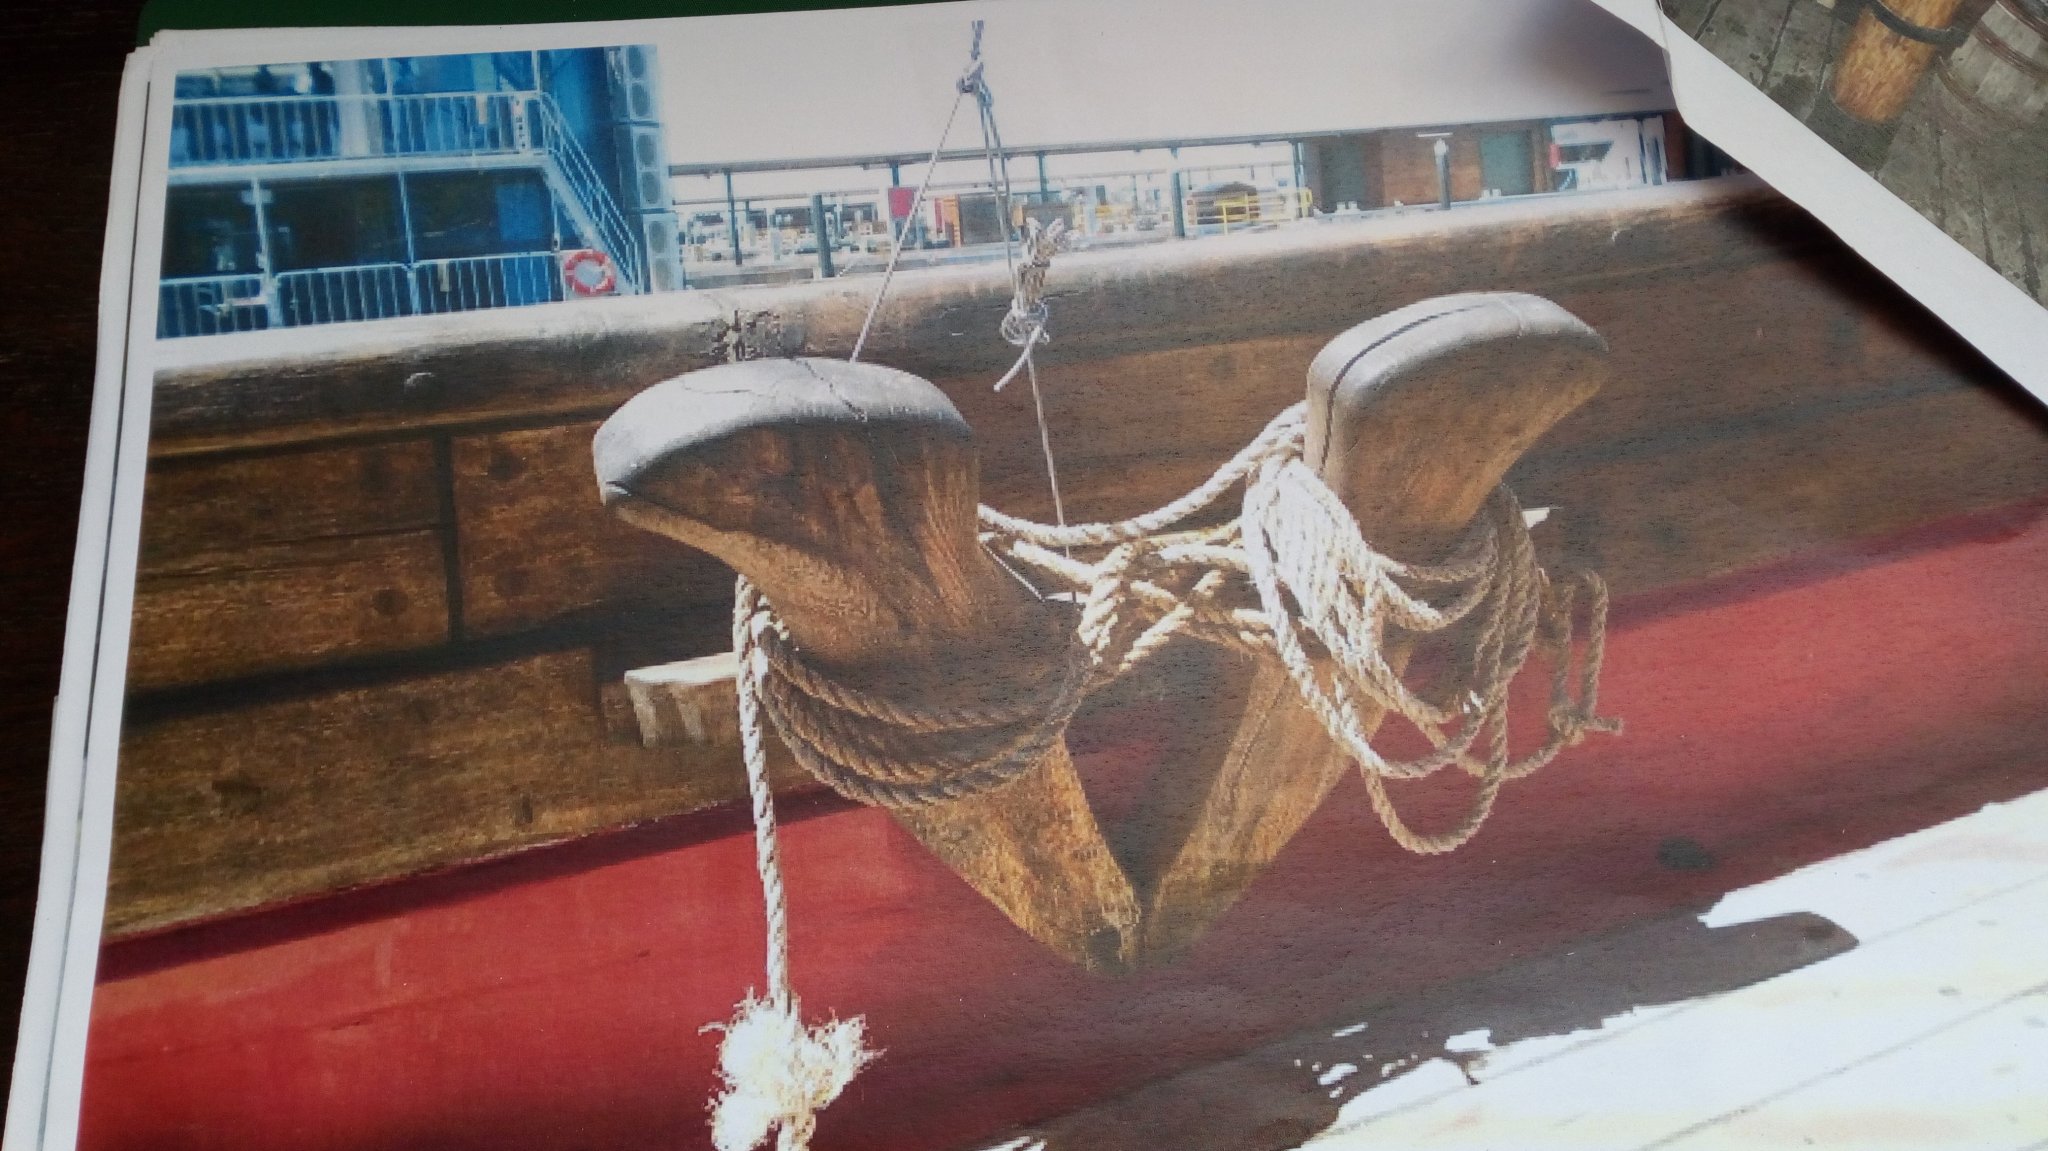
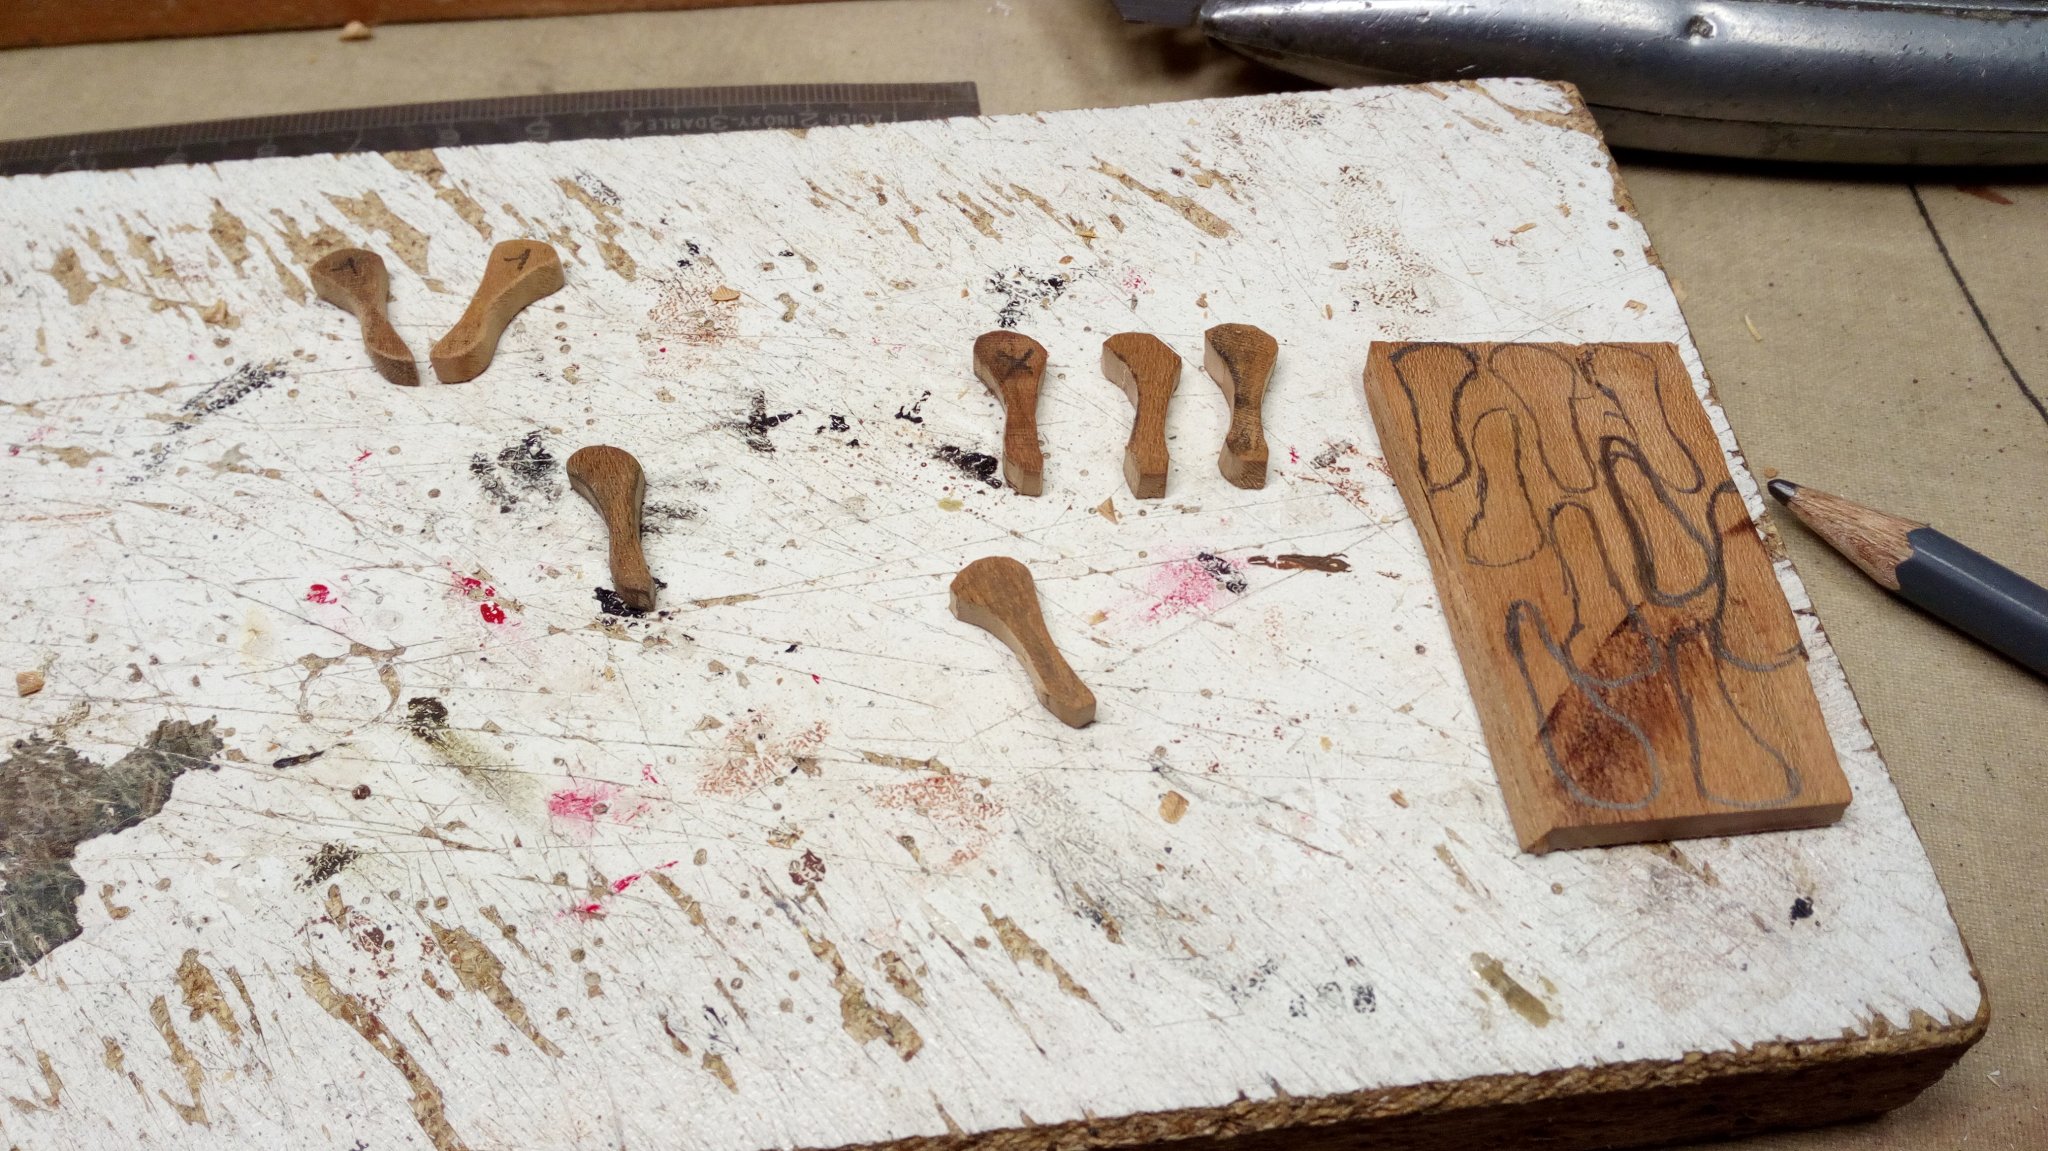
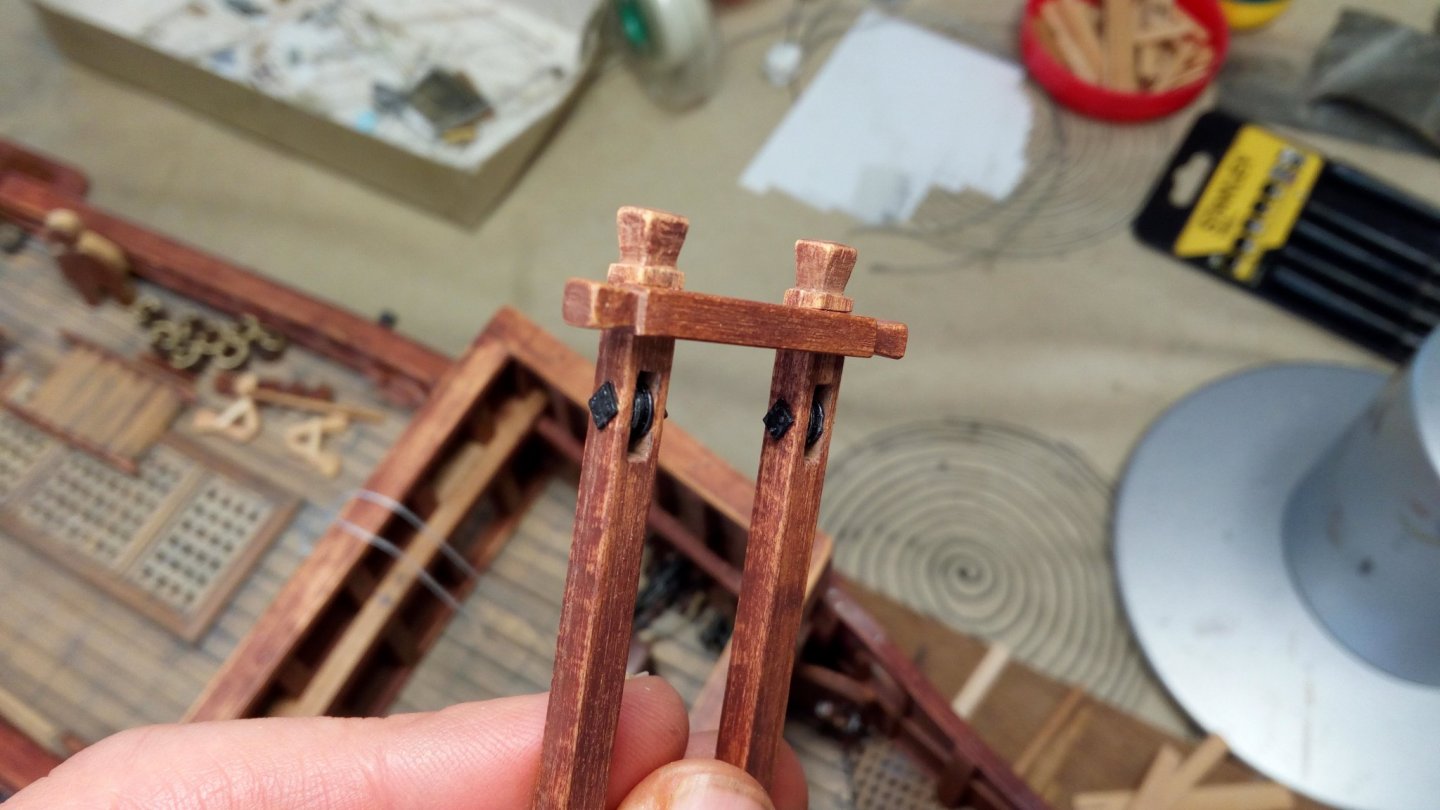
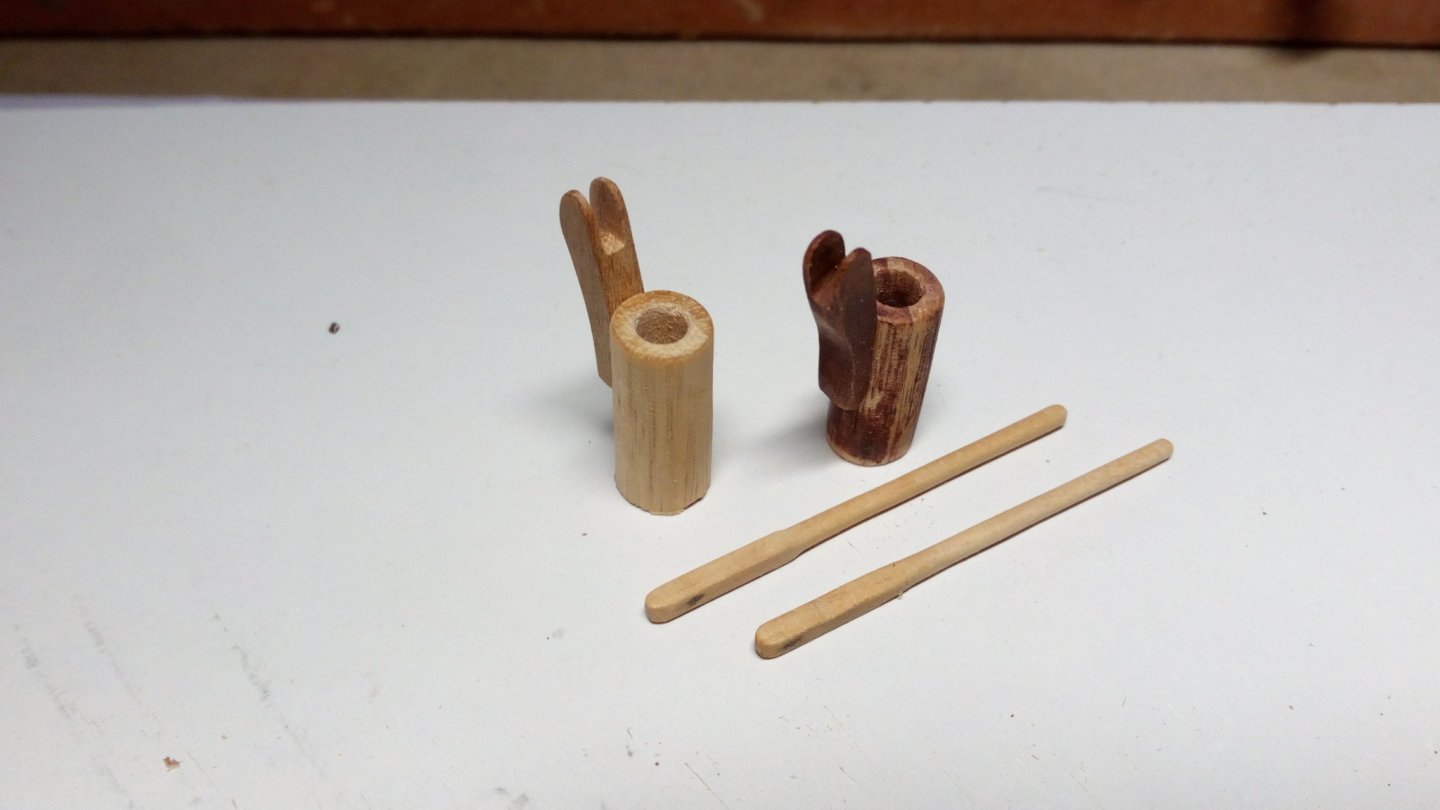
They were rounded with a very poor man lathe (a knive, a file and sandpaper) I should invest in some better material. But ... space, space. no space left to install it The staghors came from the Duyfken replica . The pumps are from the Batavia and Duyfken replica It looks that on Windows 10 everything should work through paid micro$oft programs. That's my problem... Ps, Most things on the lapotop already work back (for free).

- 756 replies
-
- 6
-
-
- galleon
- golden hind
- (and 2 more)
-
Looks great. Well done
-
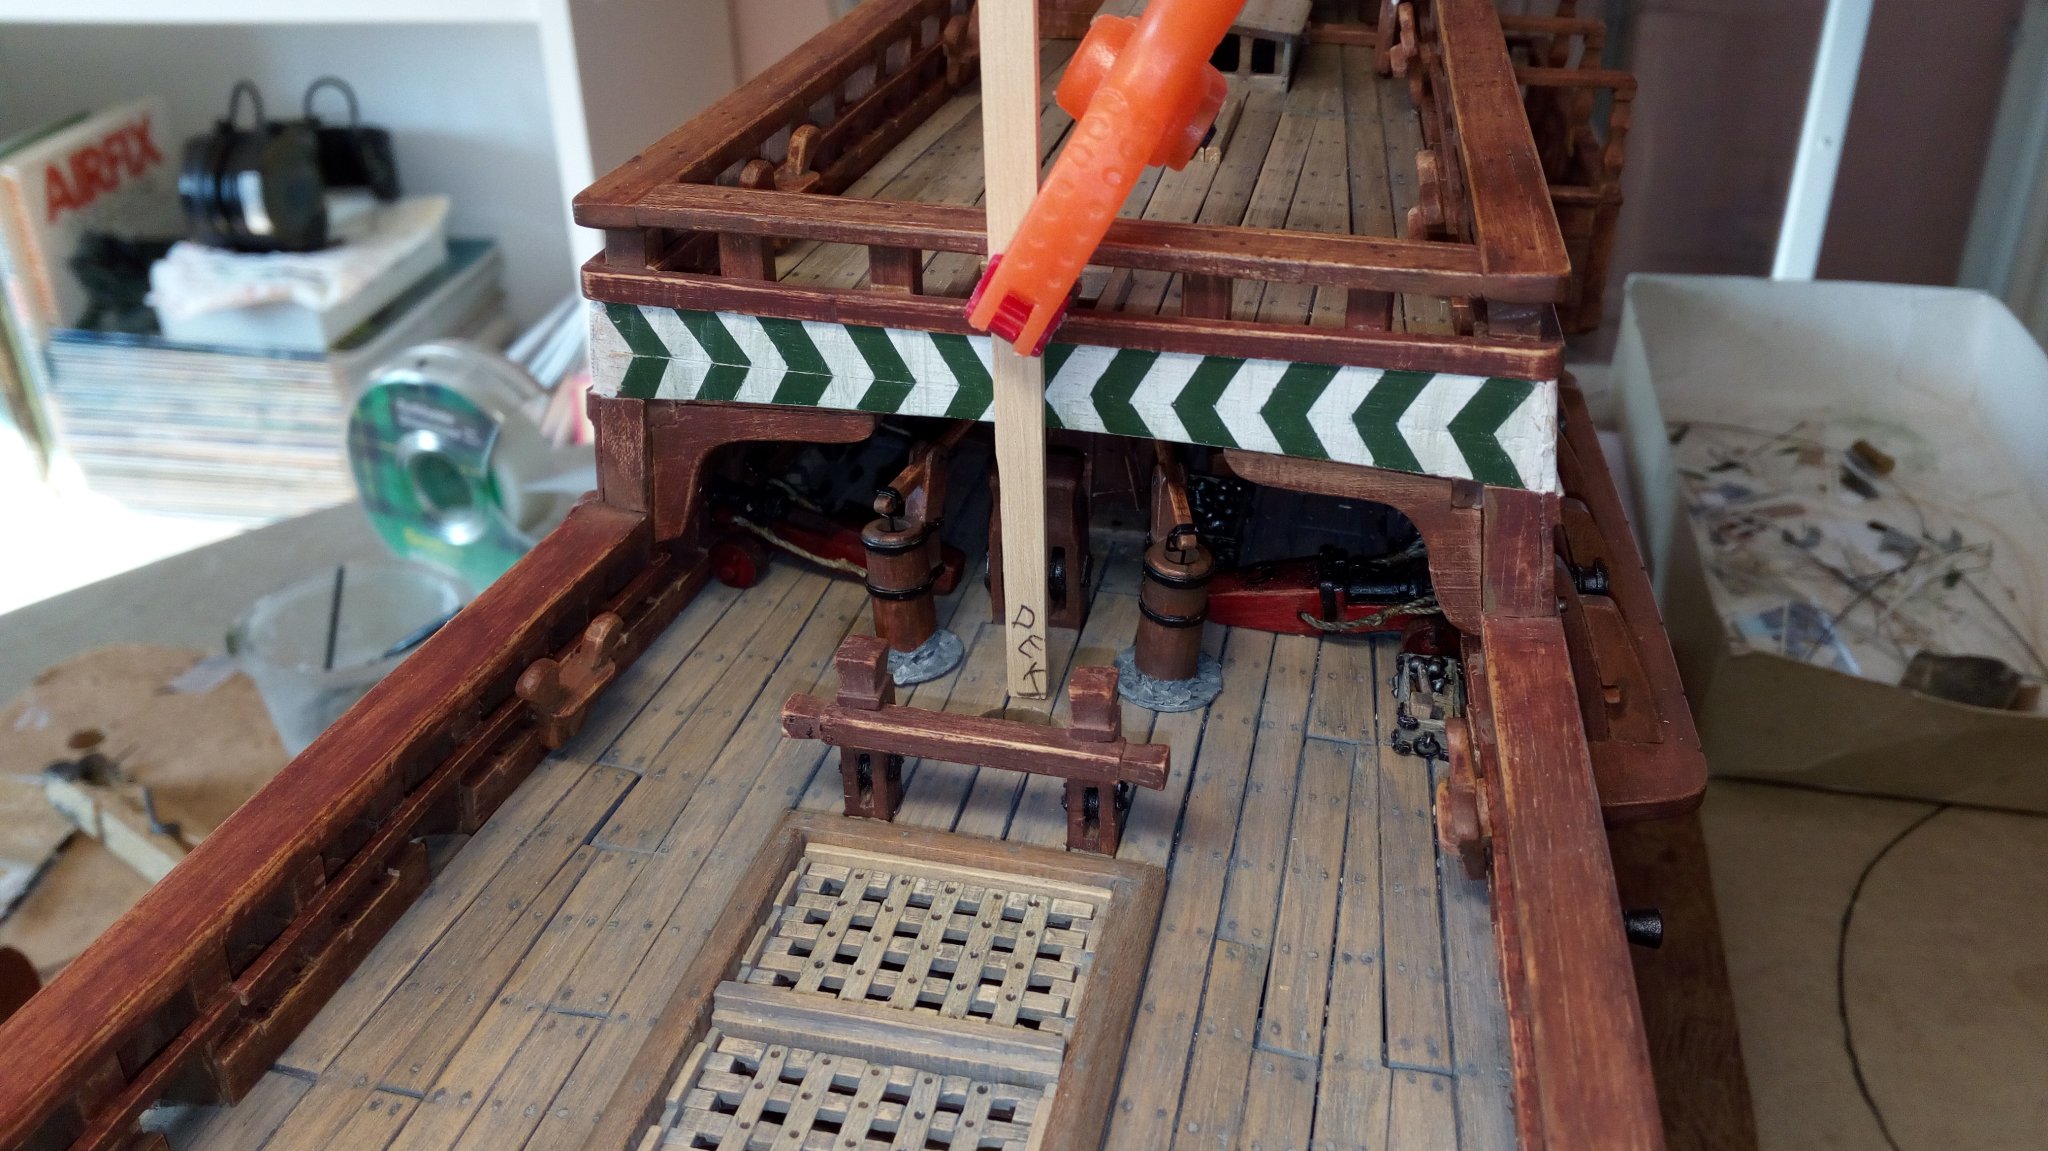
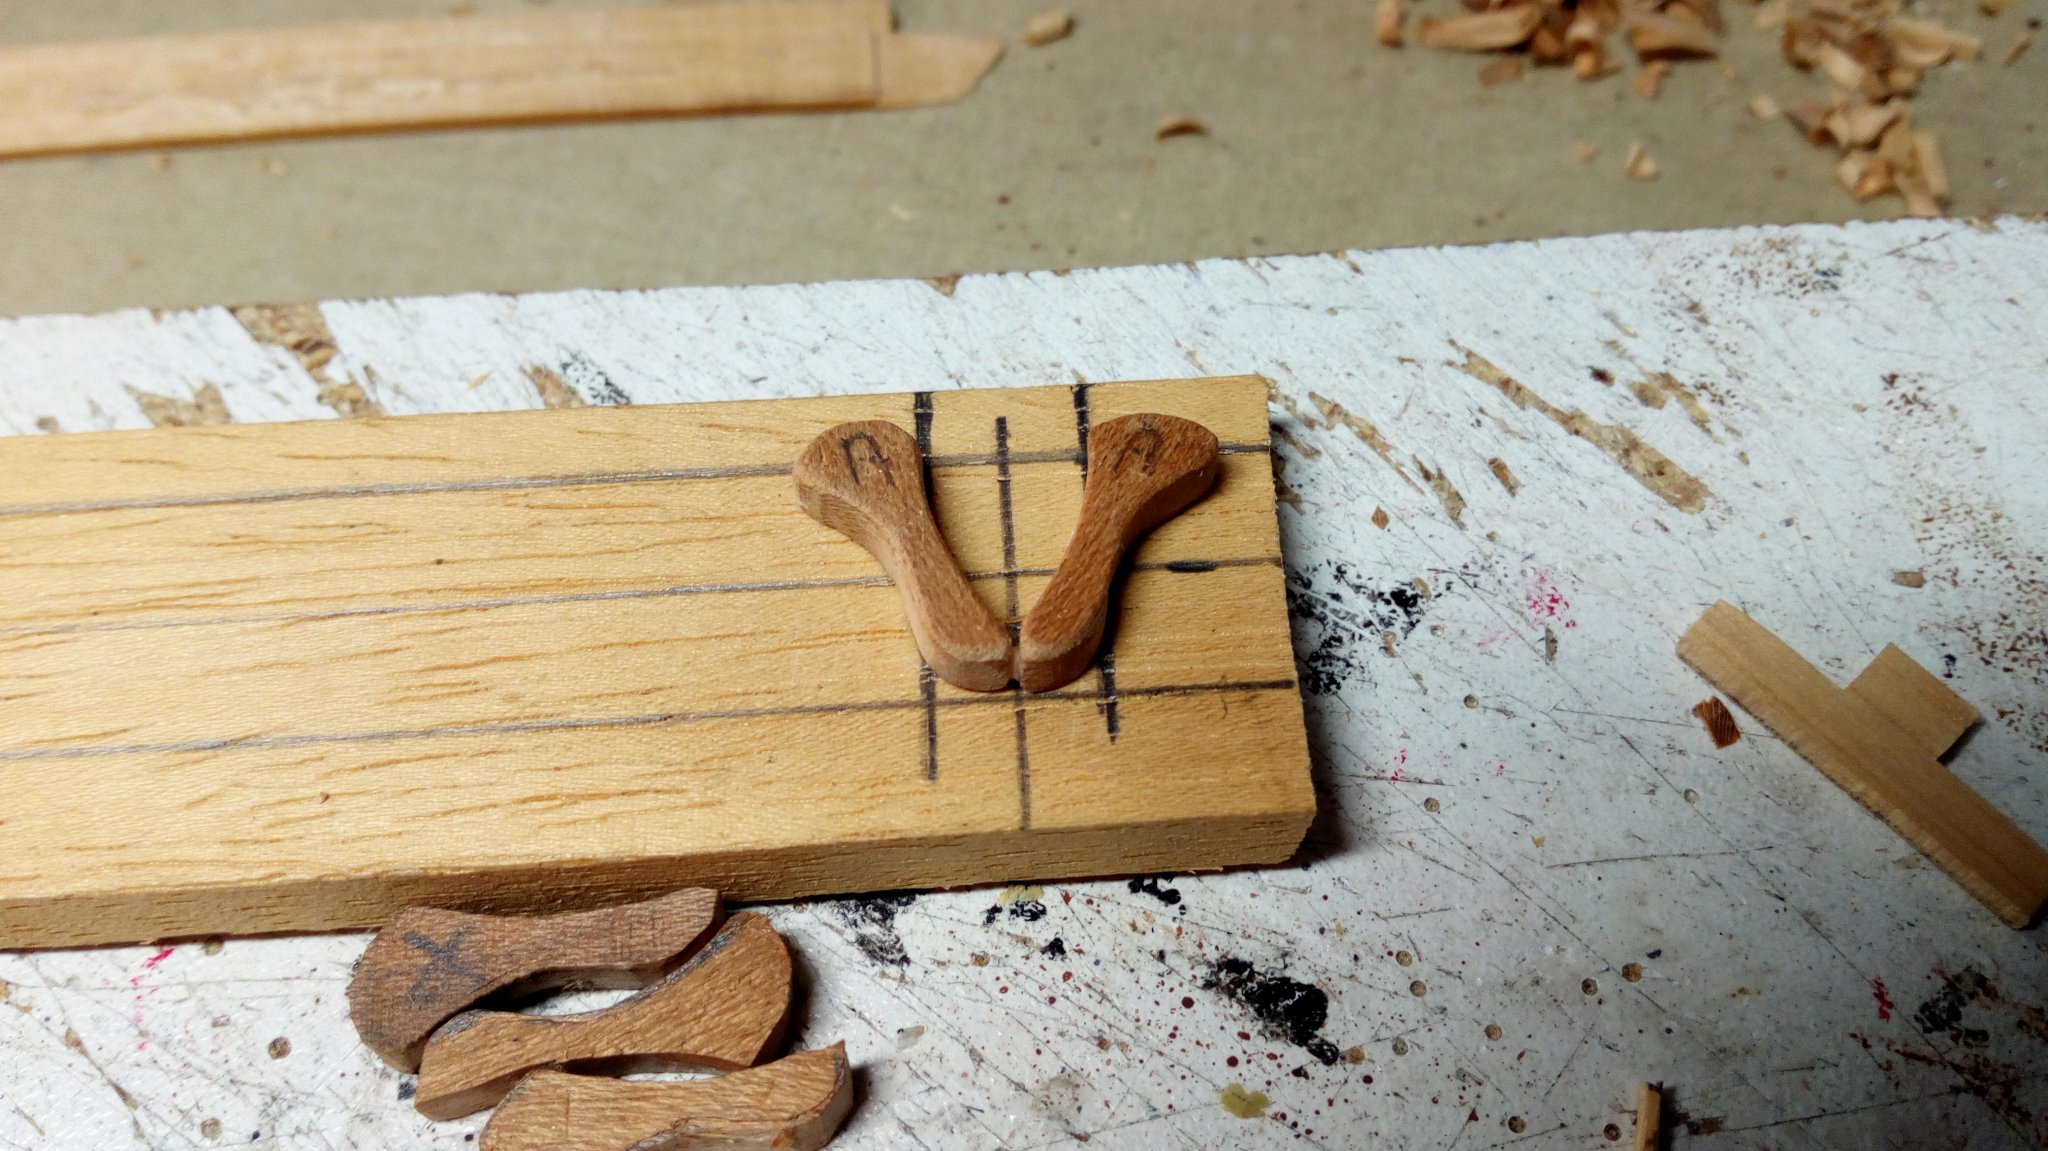
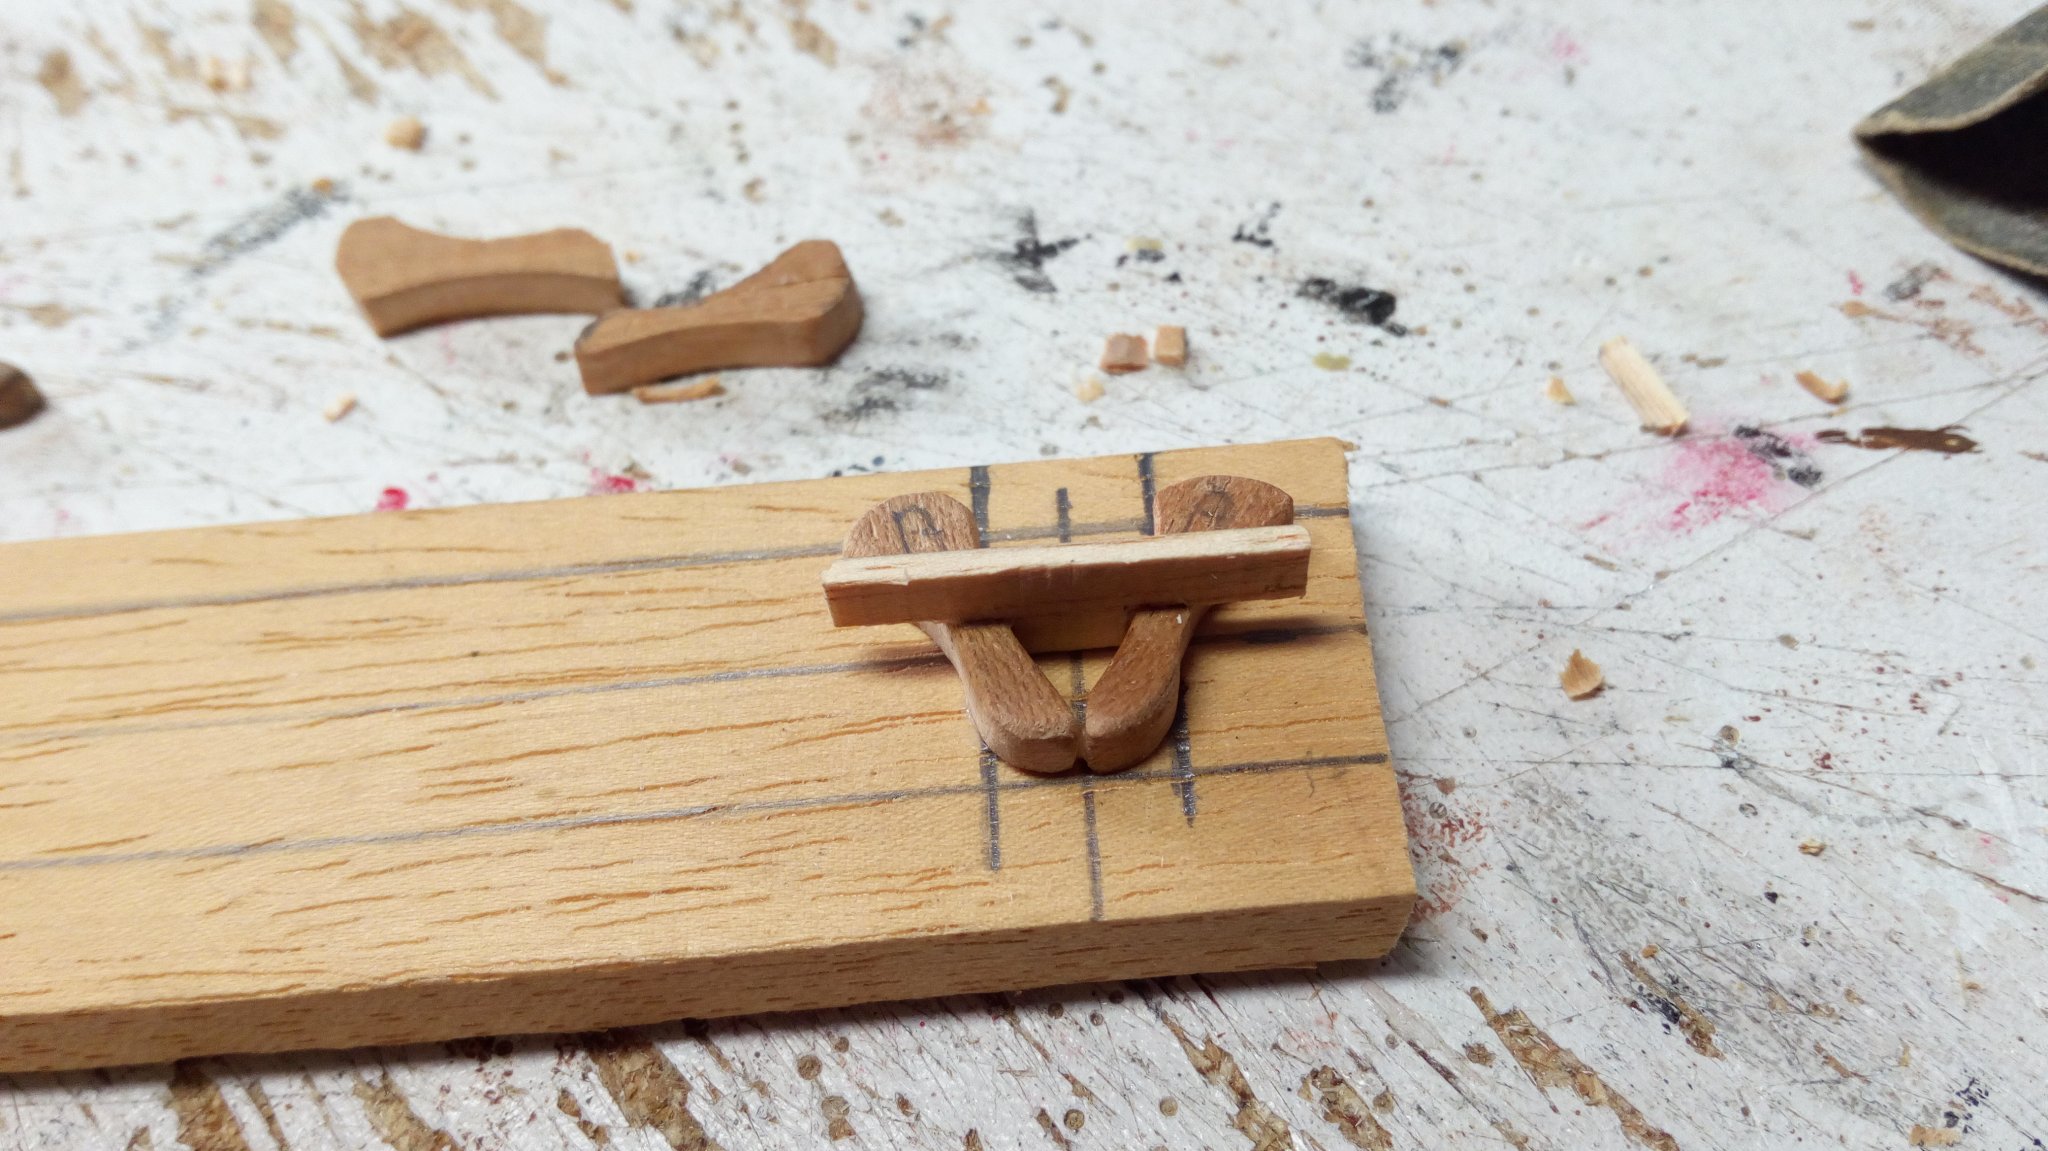
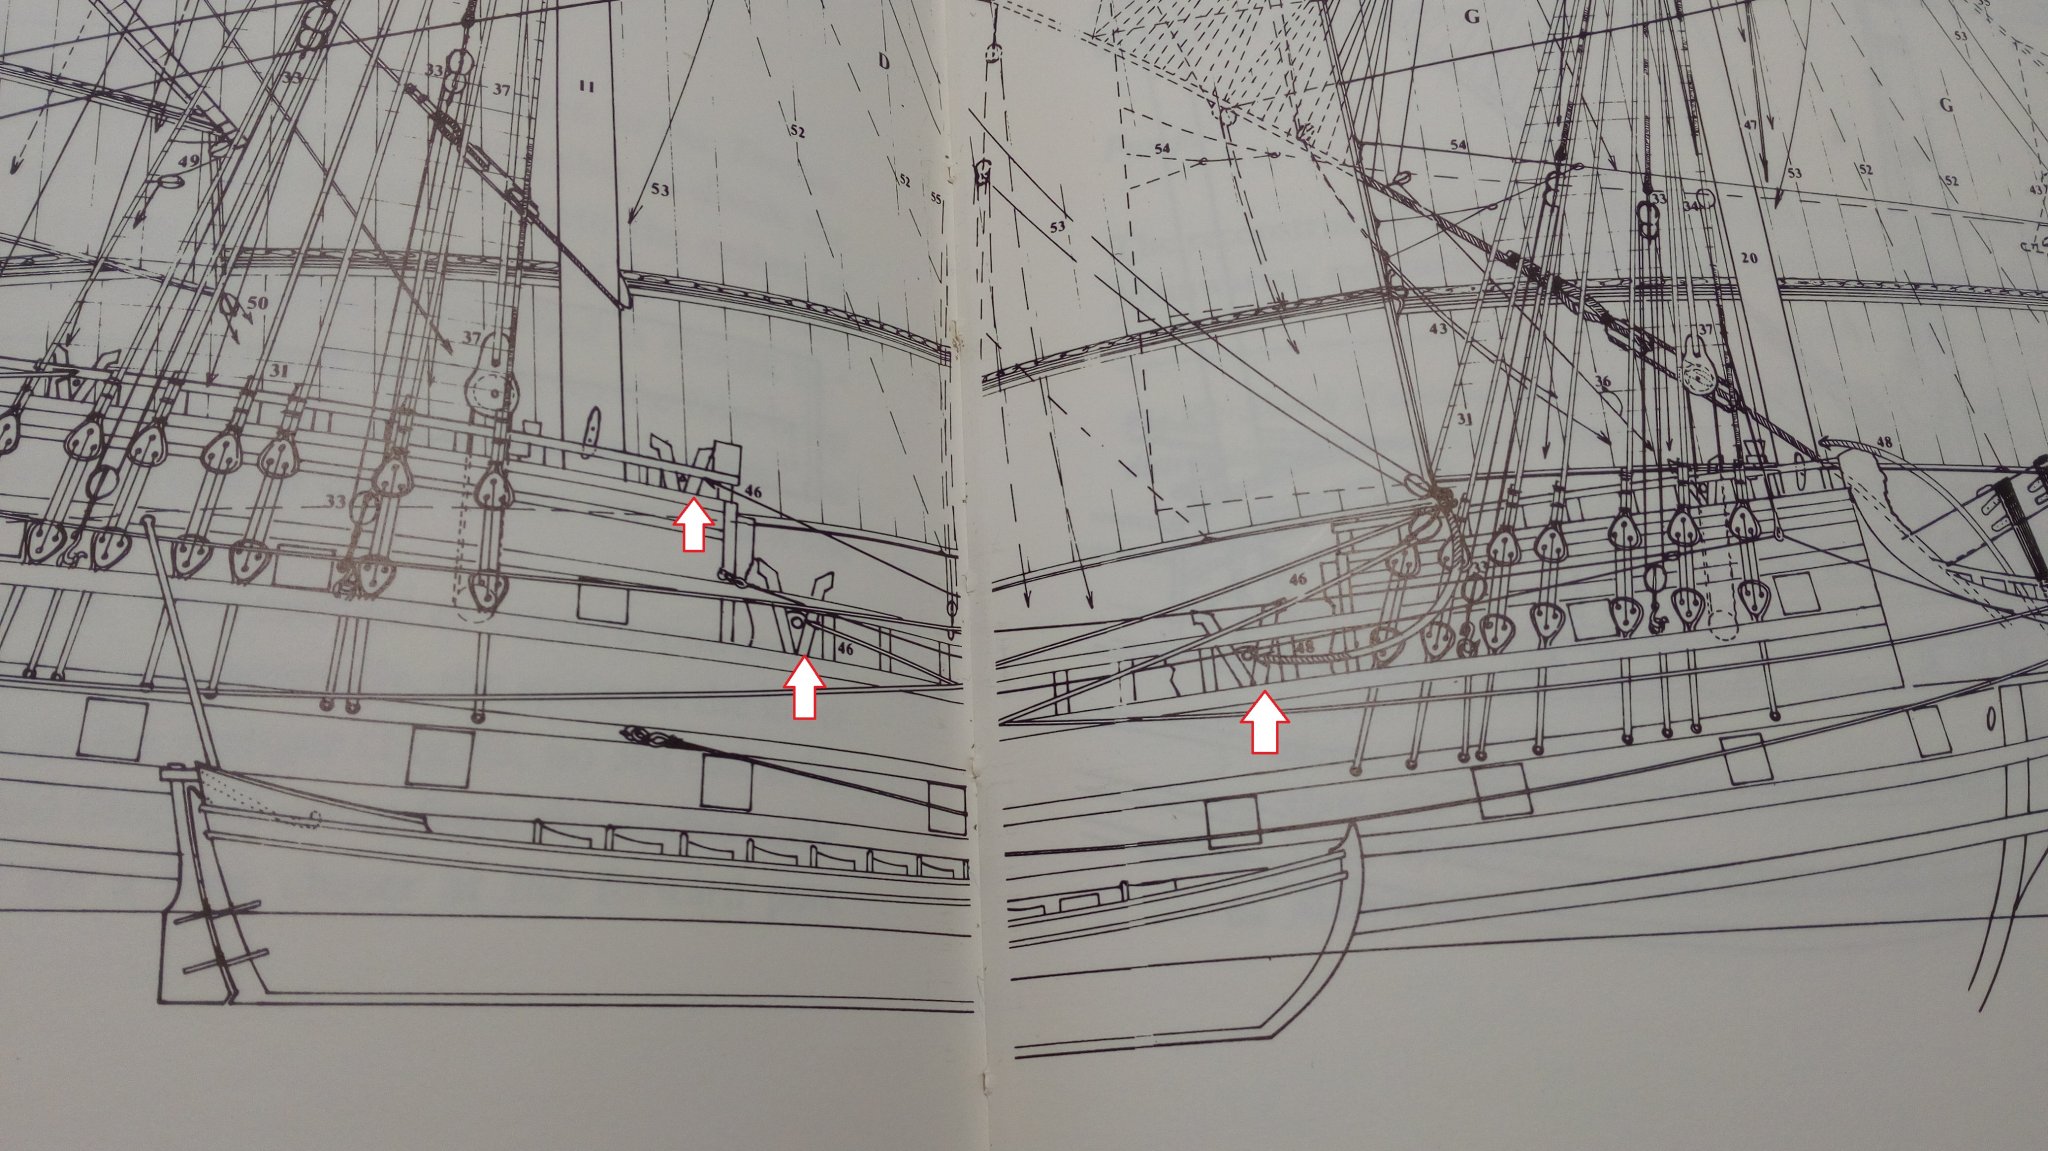
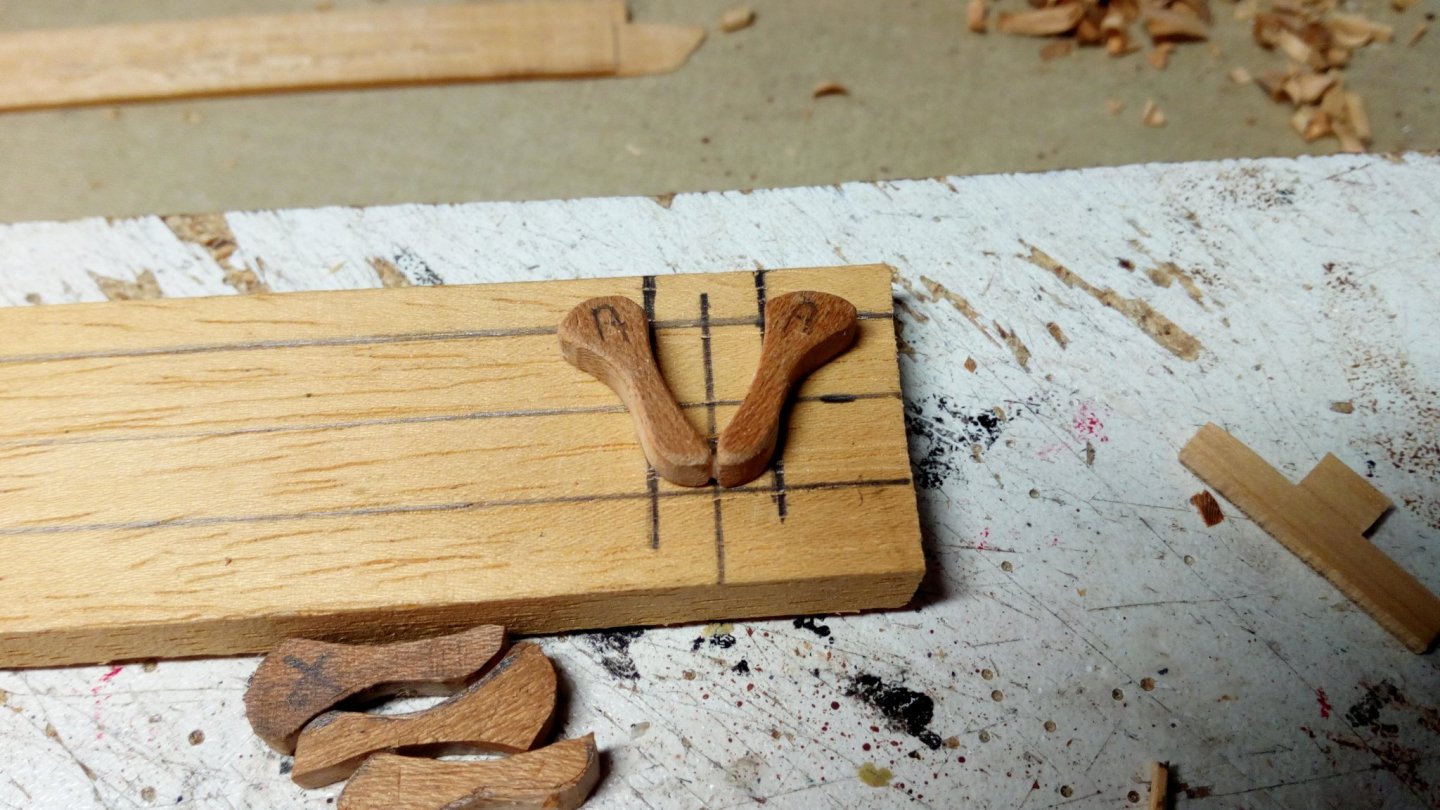
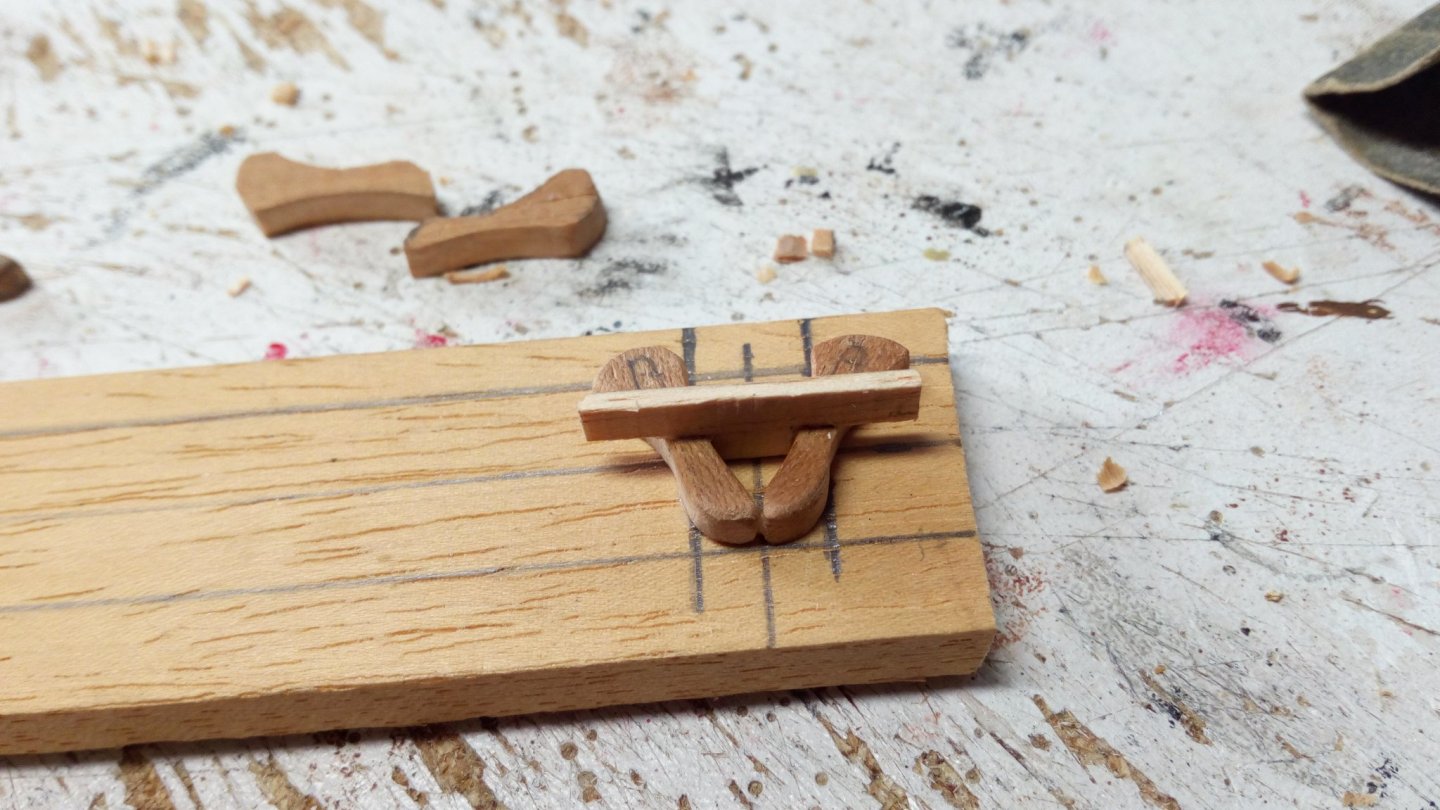
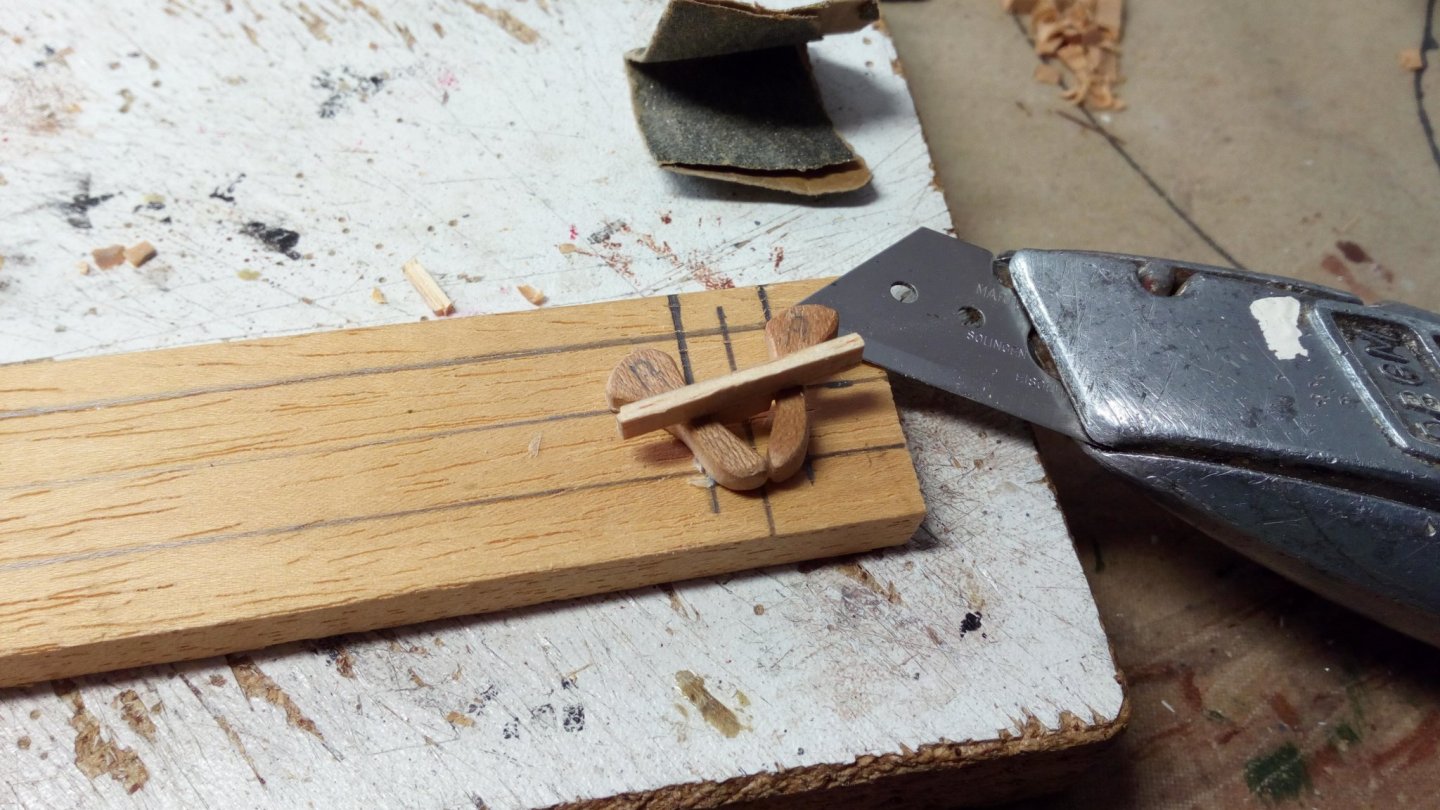
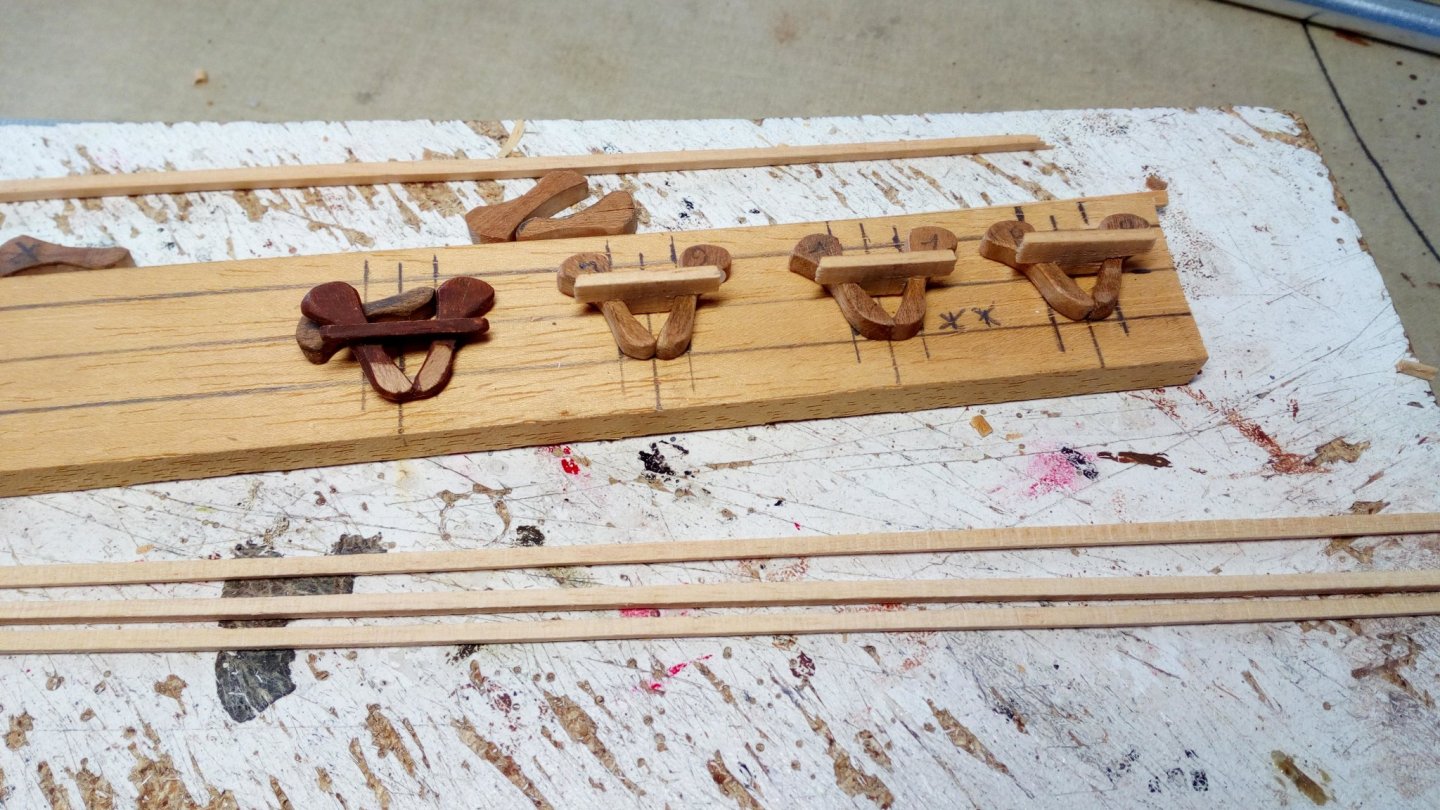
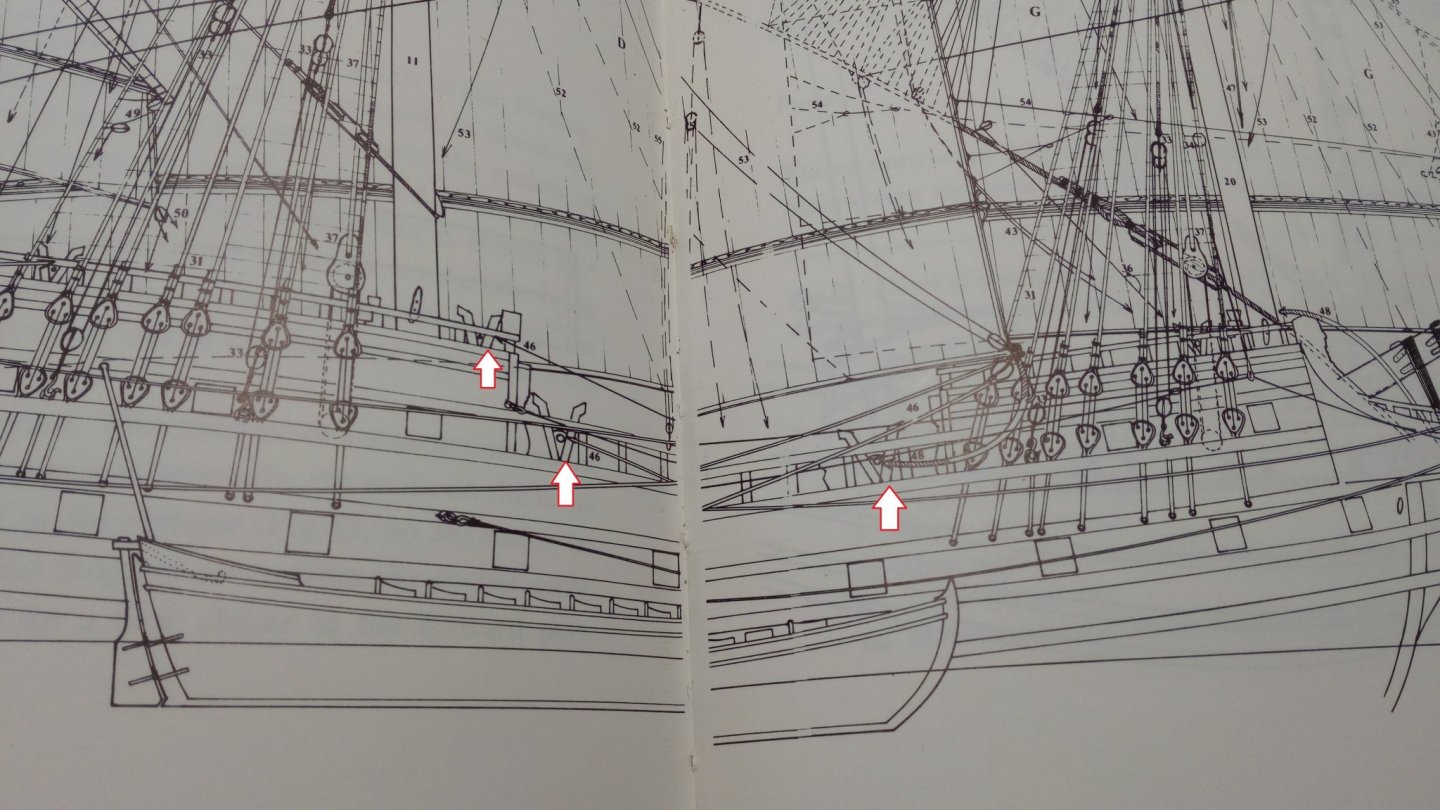
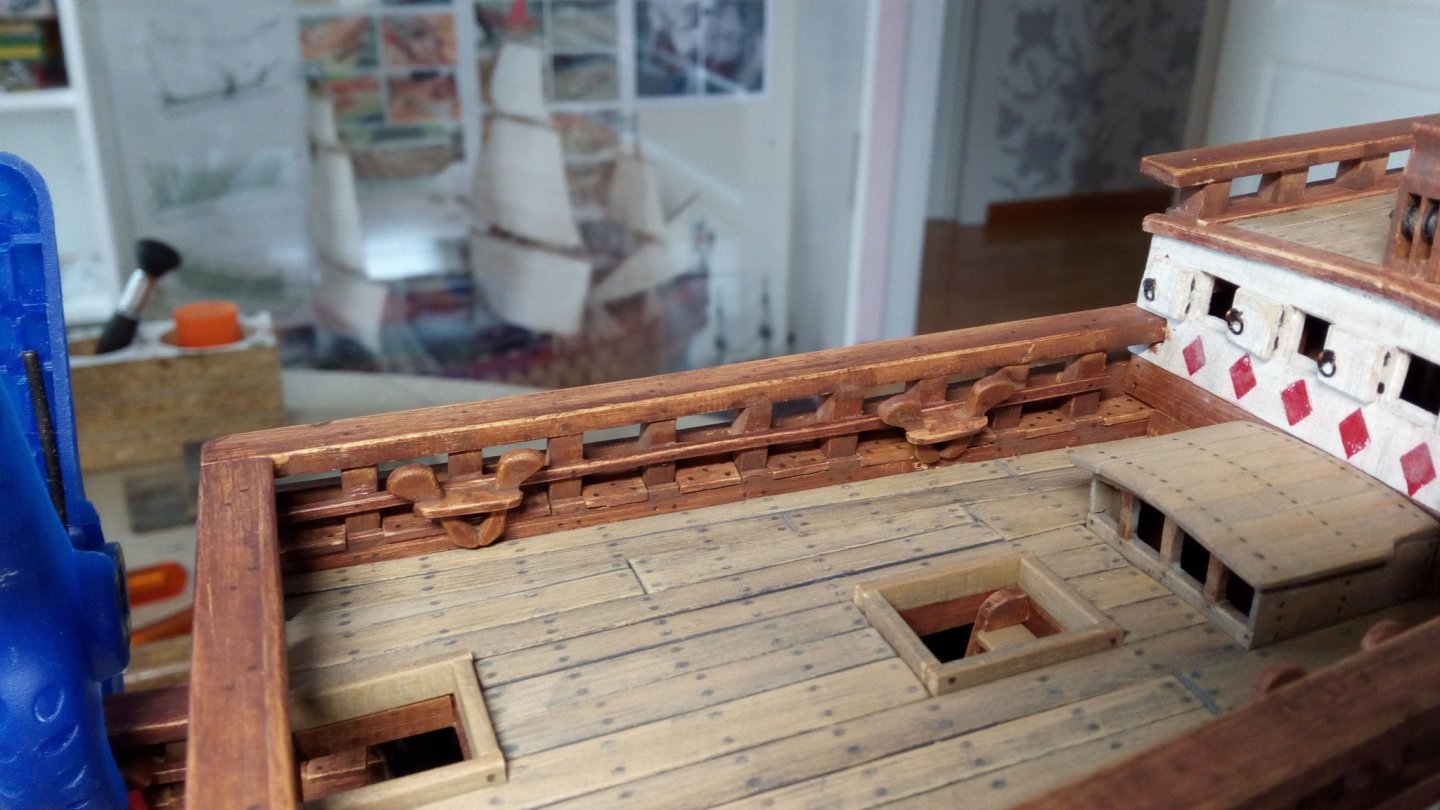
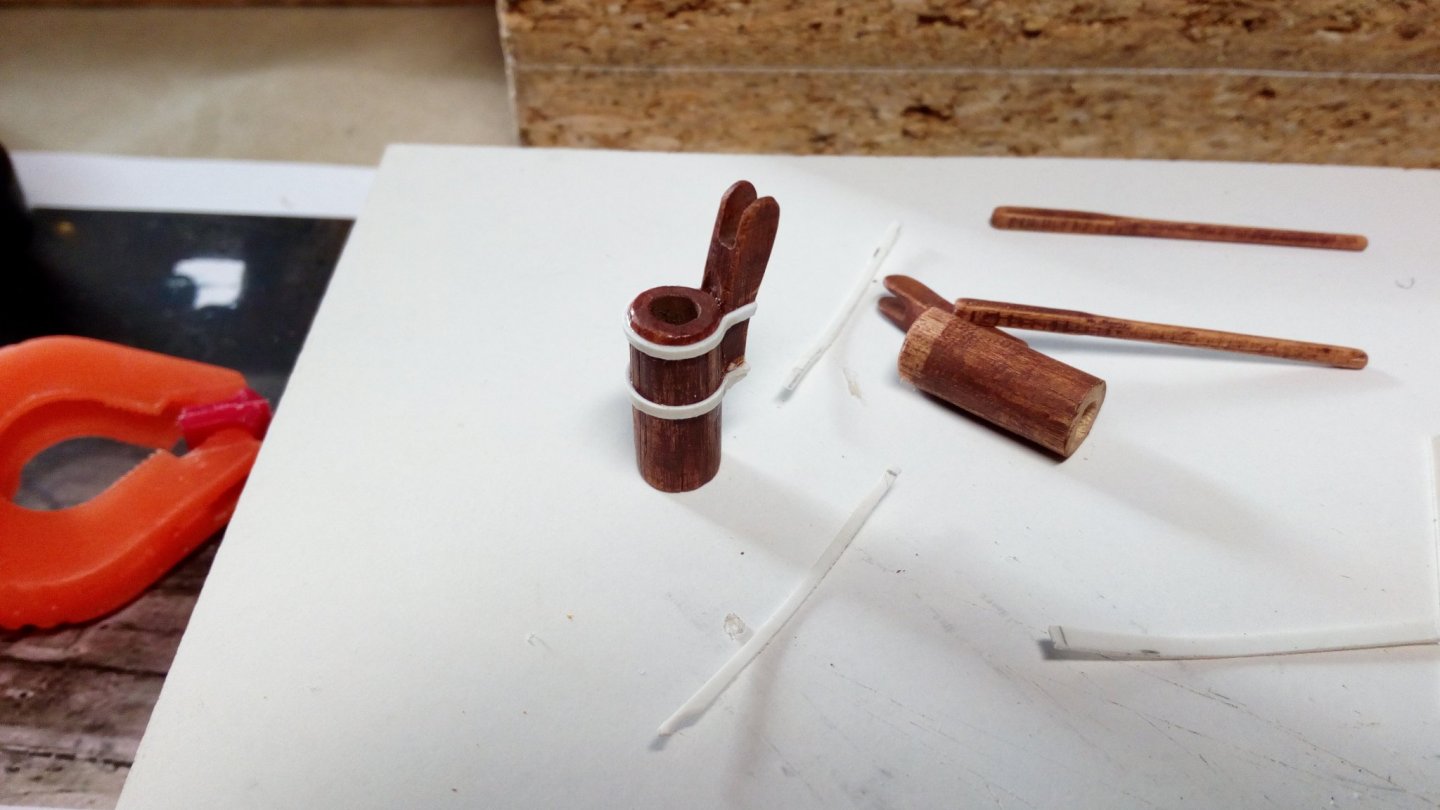
Most of my time the last few weeks has gone to installing a new laptop. The old laptop hadn't survived a fatal upgrade to windows 10. And considering I'm no IT specialist , complete installation of the new laptop takes a while ... Building the staghorns The staghors were first completed and then glued on the model. In total there are 10 4 at the waist 4 on the half deck 2 at the fore castle (to be placed later) The places where they are provided are based on these drawings. Building staghorns first glued on a plank after drying cut loose Meanwhile, the construction of 2 pumps has started. Again many questions. On which deck, how much and where do I place them. Which deck? The deck below this deck is expected to drain water to the hold. Therefore, the pumps are on this deck at the waist / rear castle. How much ? Probably 1 or 2. Because we anticipate a long unknown journey. This Pelican gets 2. Where? Normally behind the main mast close to the center of the deck. The pumpshafts should be (visible) on the lower deck. But to be able to drill holes , I will have to remove part of the deck from the rear castle (small construction error ). These pumps will be glued to the deck later. If I place them now, they'll get in the way of the knighthead and I'll get in trouble later. Thanks for following, comments and likes


- 756 replies
-
- 12
-
-
- galleon
- golden hind
- (and 2 more)