Baker
-
Posts
4,294 -
Joined
-
Last visited
Content Type
Profiles
Forums
Gallery
Events
Everything posted by Baker
-
 This model was mainly used for close infantry support. A steel helmet is then not an unnecessary luxury if you want to look outside.. And 2 sets of spruces : lucky you, extra spare parts for free 👍
 -
Roter Löwe 1597 by Ondras71
Baker replied to Ondras71's topic in - Build logs for subjects built 1501 - 1750
As always, Great work Ondras -
Sorry About 30 models on the Sherman chassis
-
Hurray, a tank. I follow I built some sherman's myself on scale 1/72 (I am using an excel file. Otherwise I don't know what I built )

-
Greetings and welcome to MSW
-
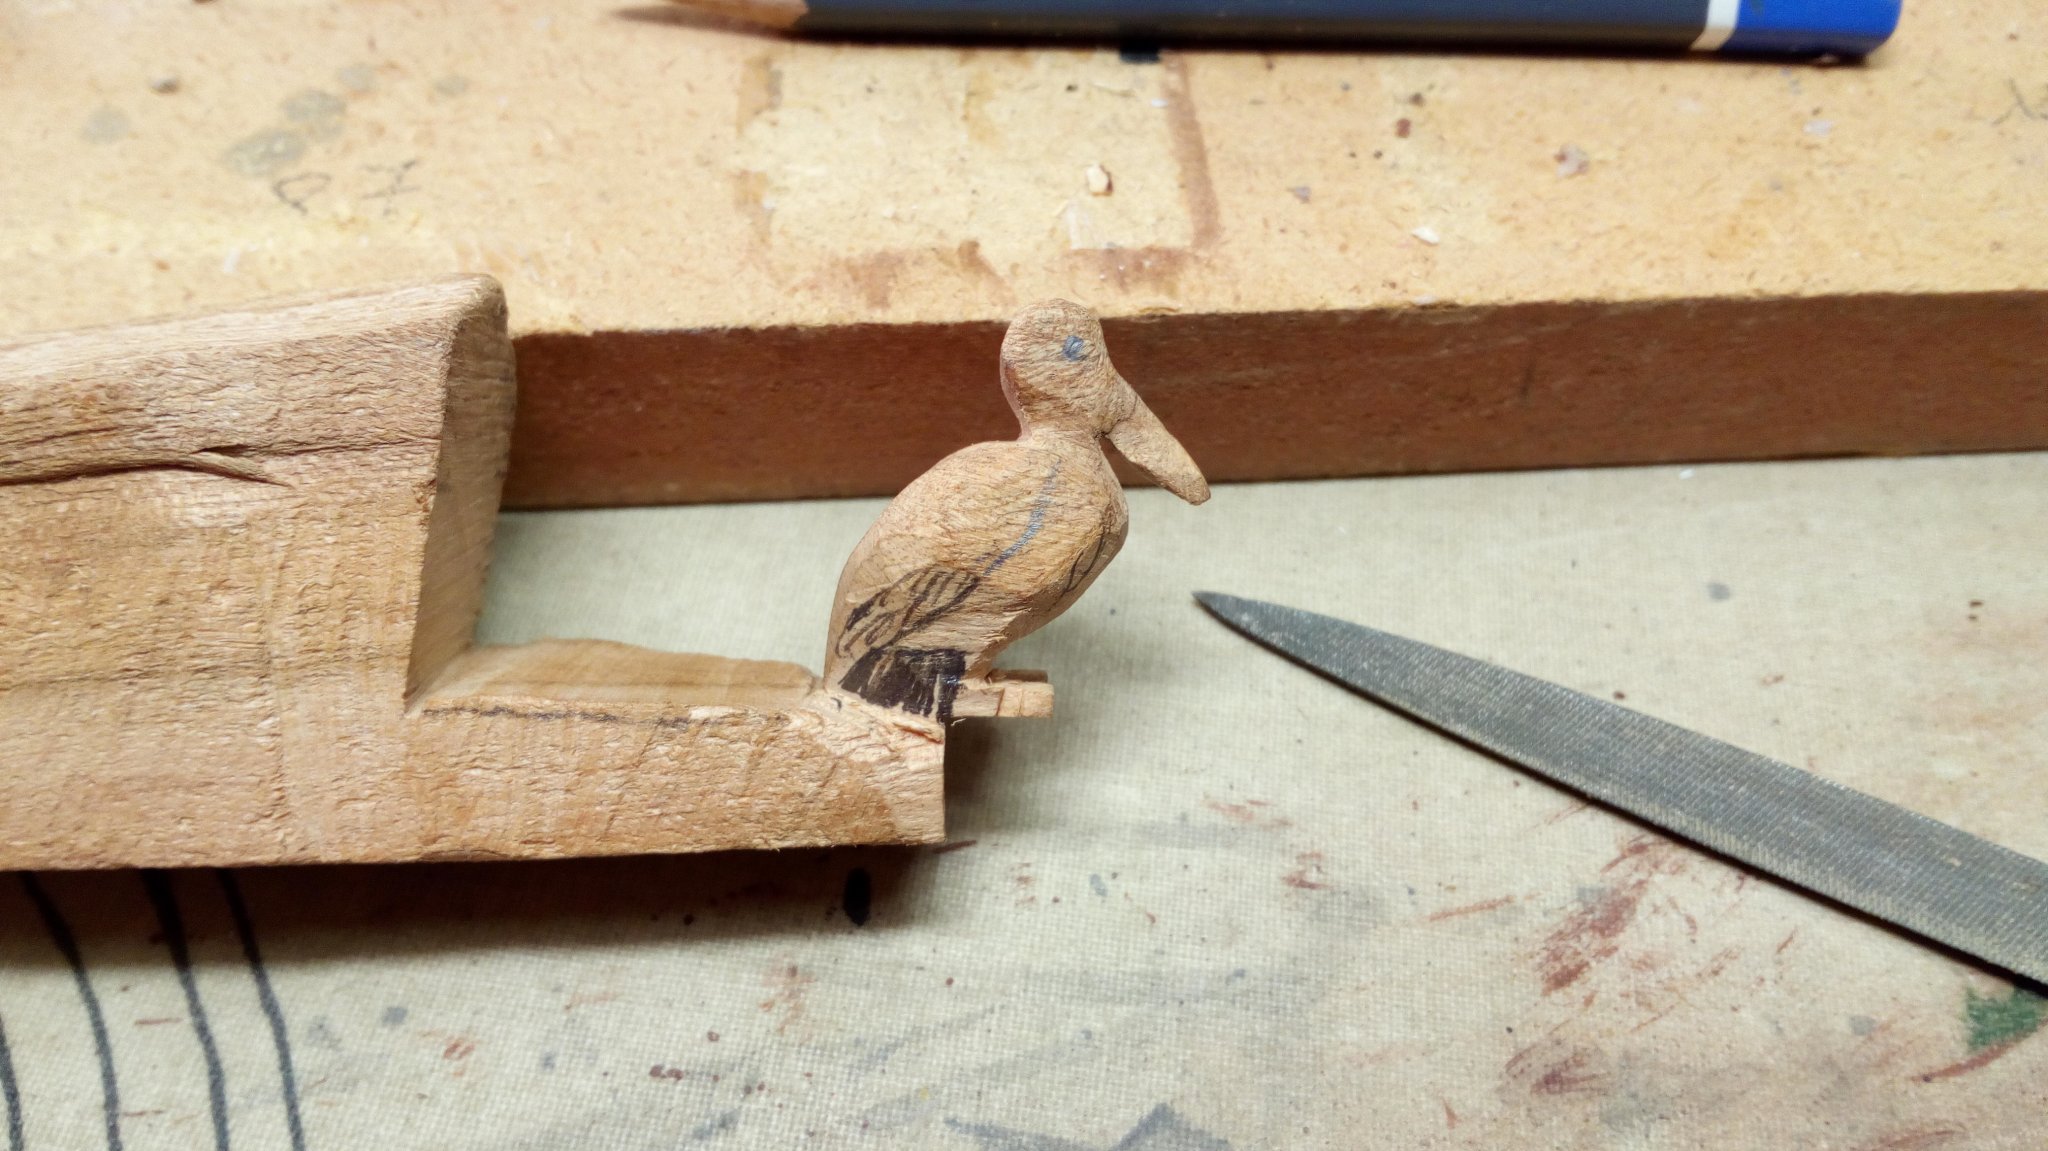
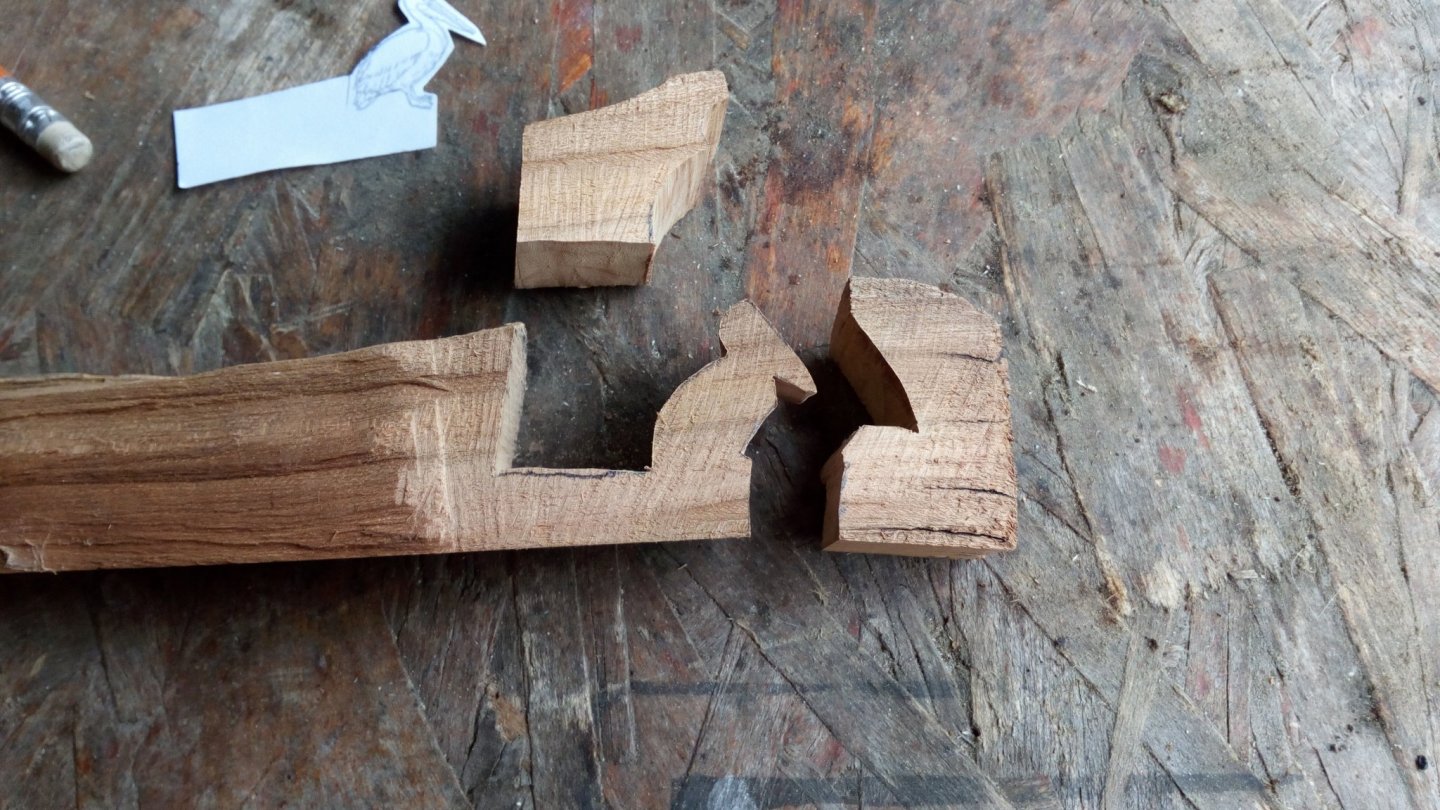
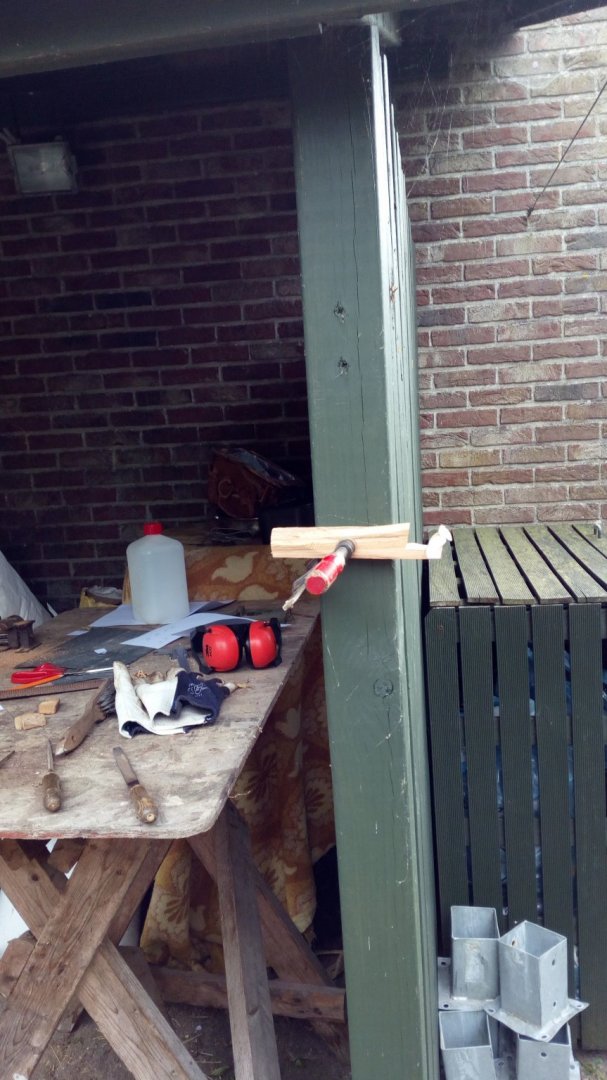
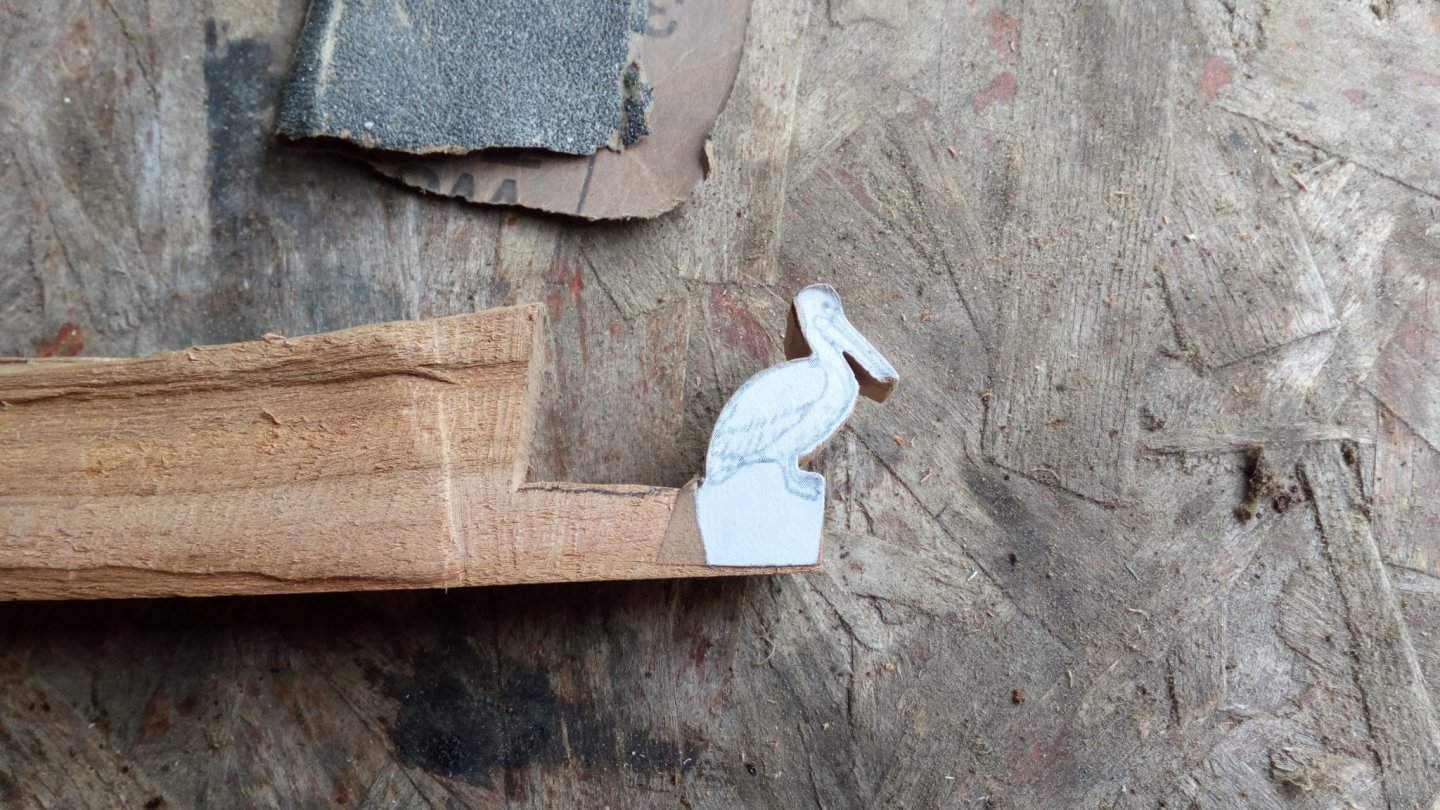
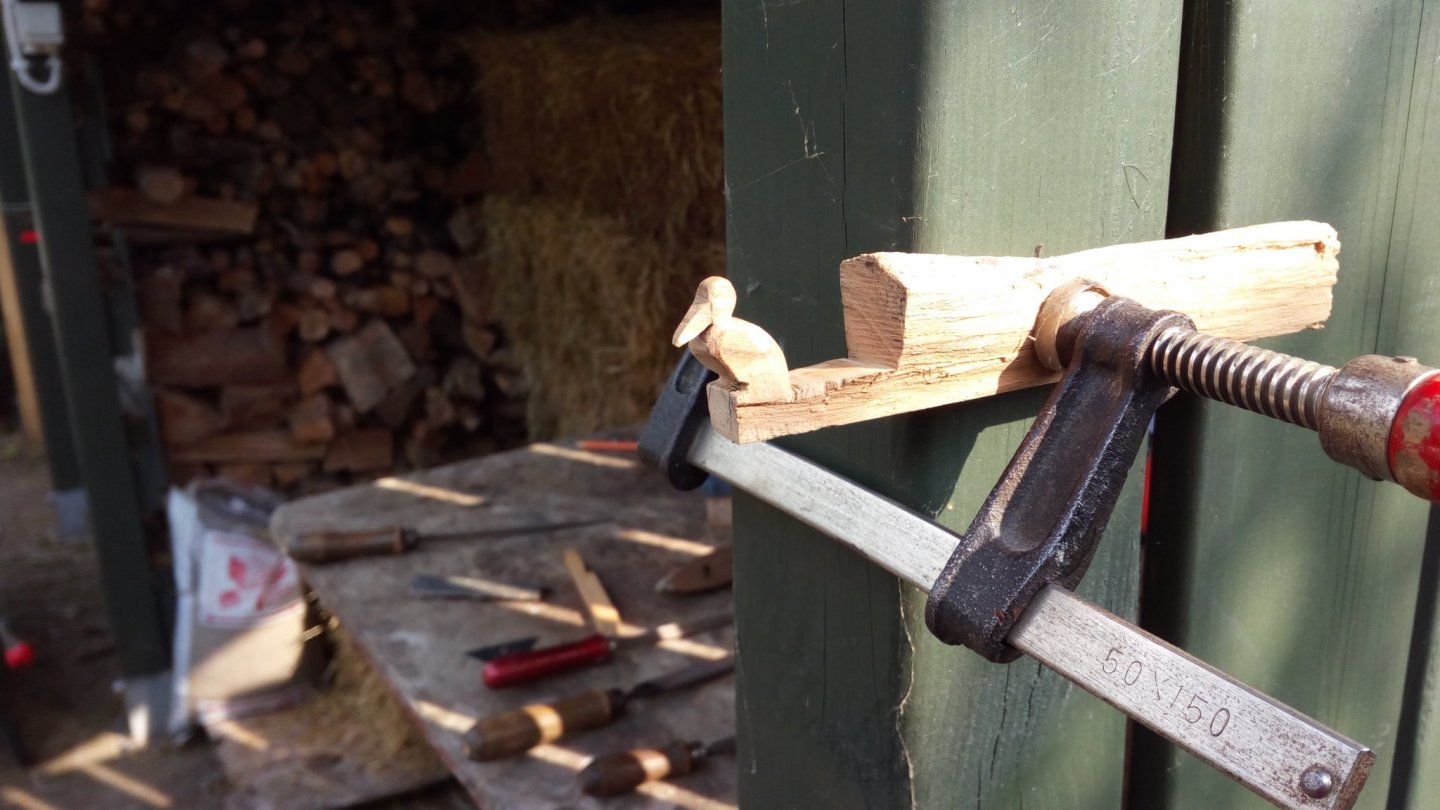
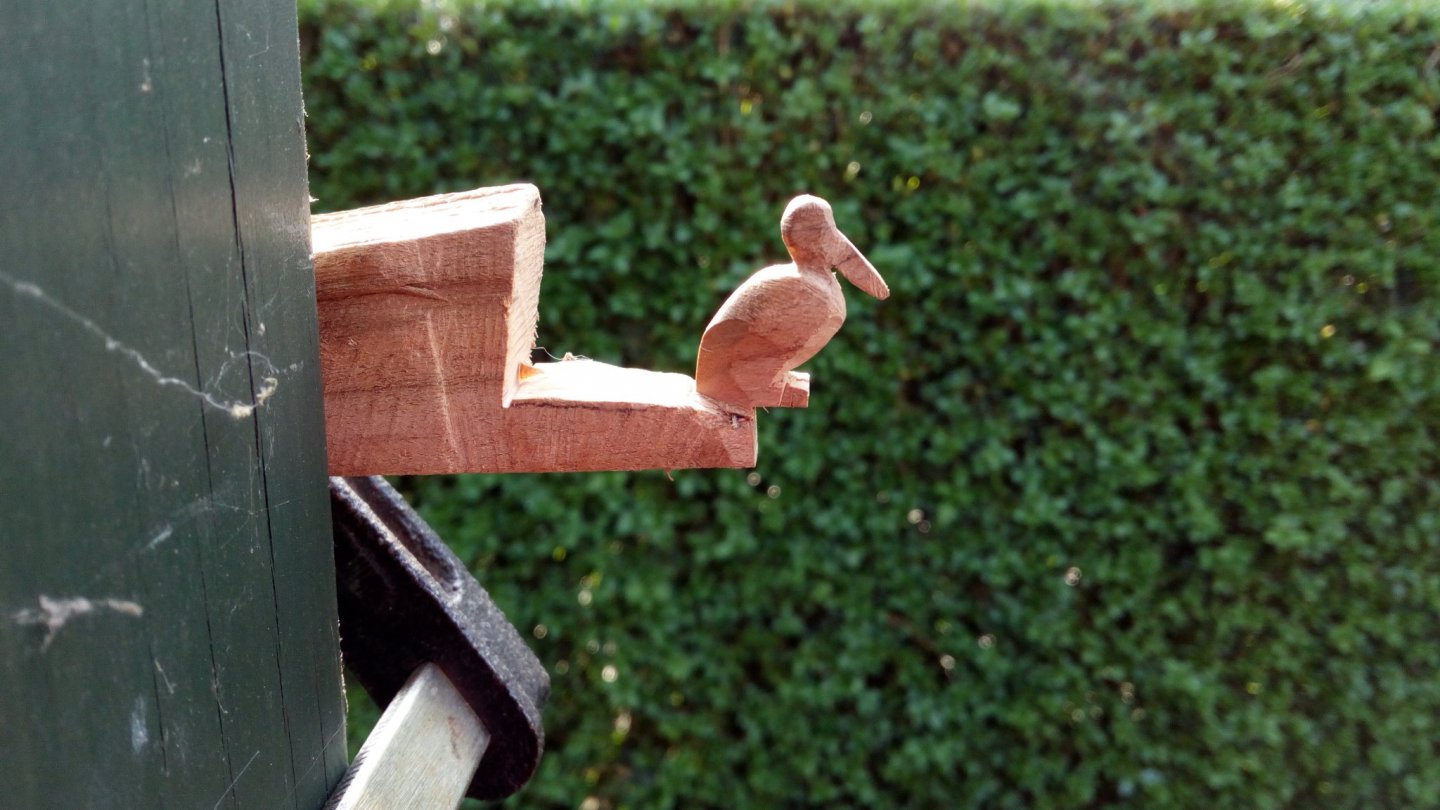
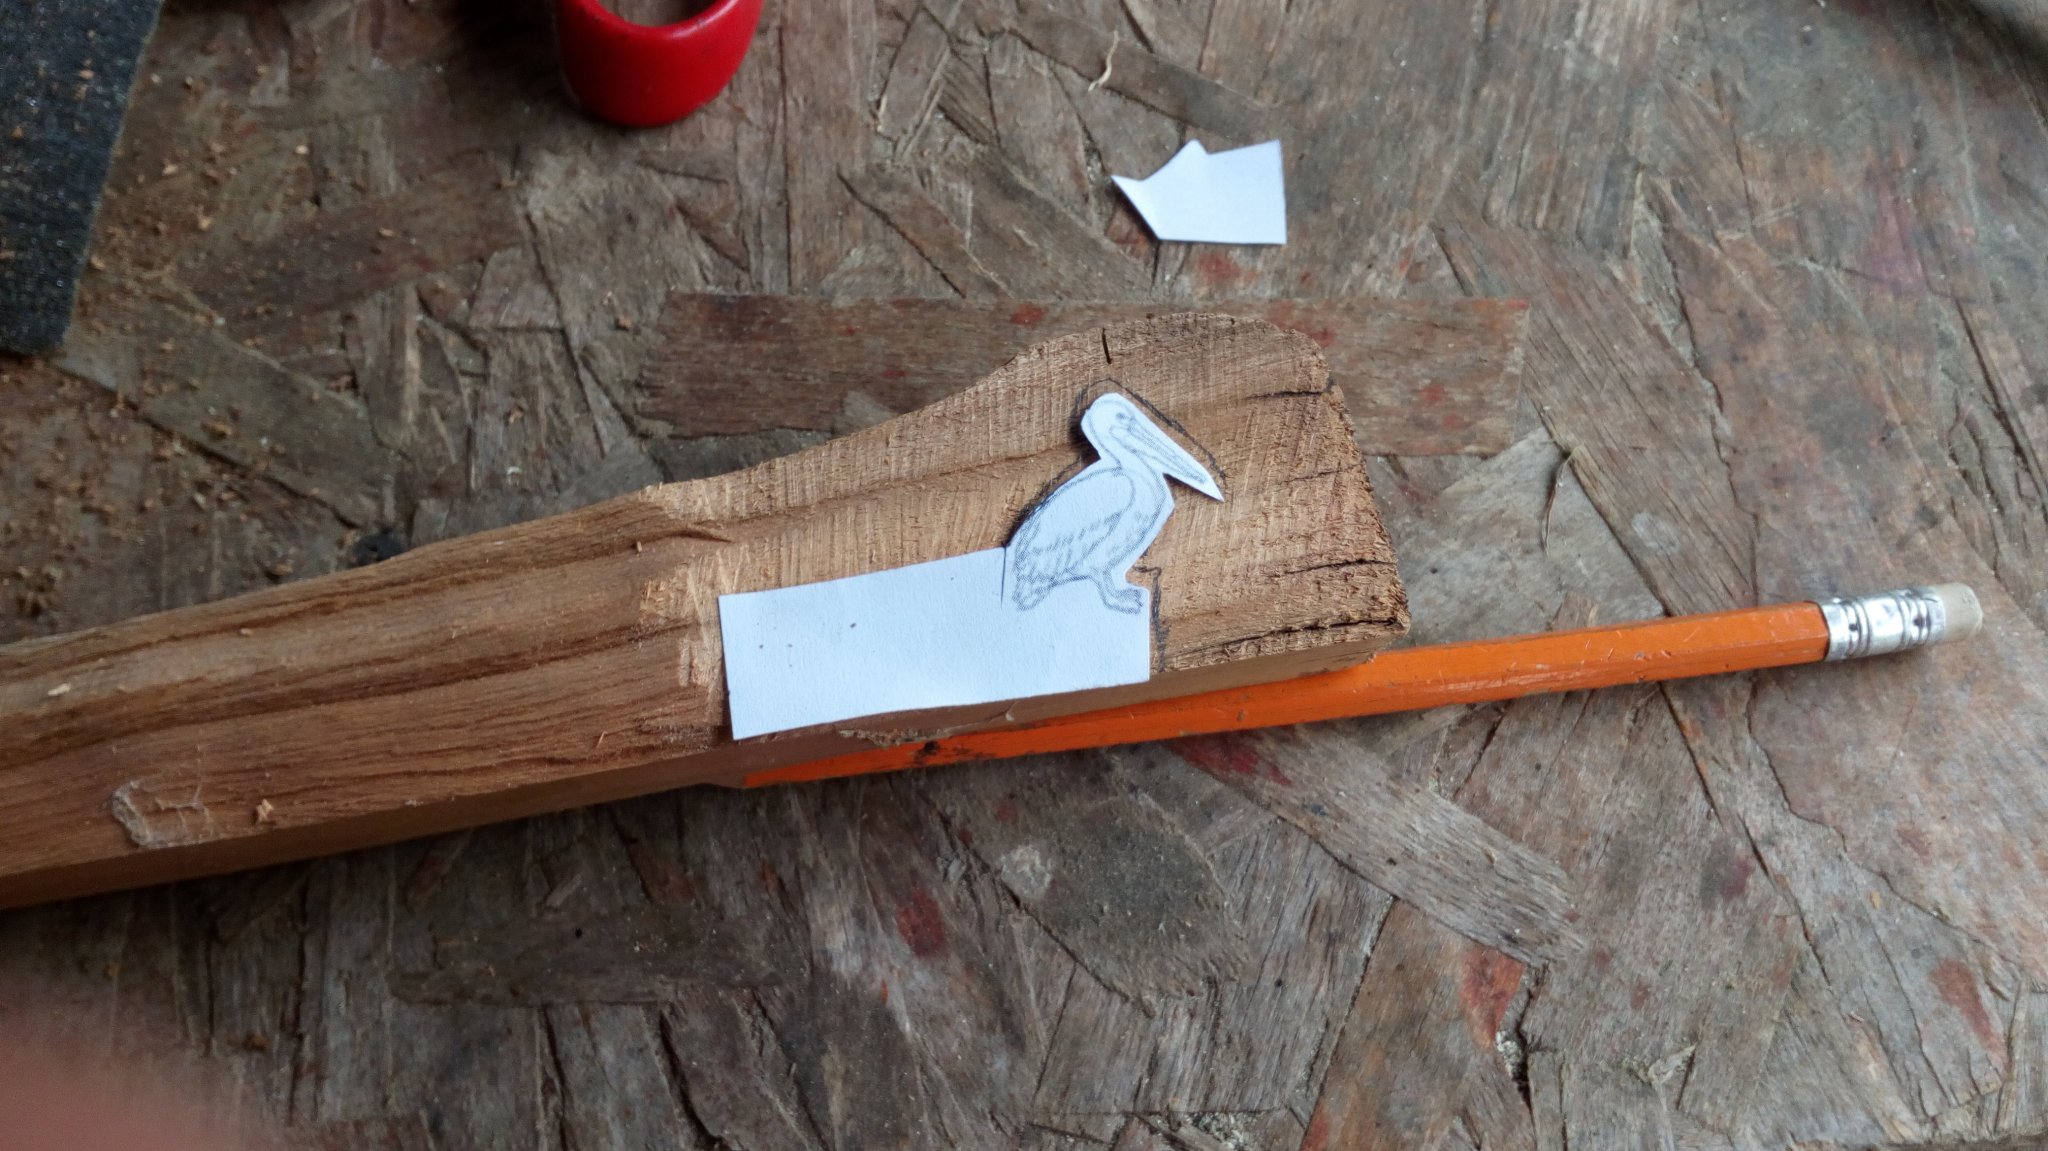
A figurehead. Backer's very first attempt at wood carving. In the 16th century, I don't think anyone in England knew what a pelican looked like. The sculptor took as an example a duck with a strange beak ... And probably this ship didn't even have a figurehead. The first part of this build happened outside (nice spring weather). And the weird way of clamping has a reason. Good at eye level and I don't have to bend over. Uses tools : A piece of cherrywood, jigsaw, Stanley knife, sandpaper and files. The "pelican duck" gets some shape. Hopefully it will look like a real Pelican someday Thanks for following and likes

.thumb.jpg.f21648ee08832214406292be9da8ee85.jpg)

- 756 replies
-
- 8
-

-

-
- galleon
- golden hind
- (and 2 more)
-
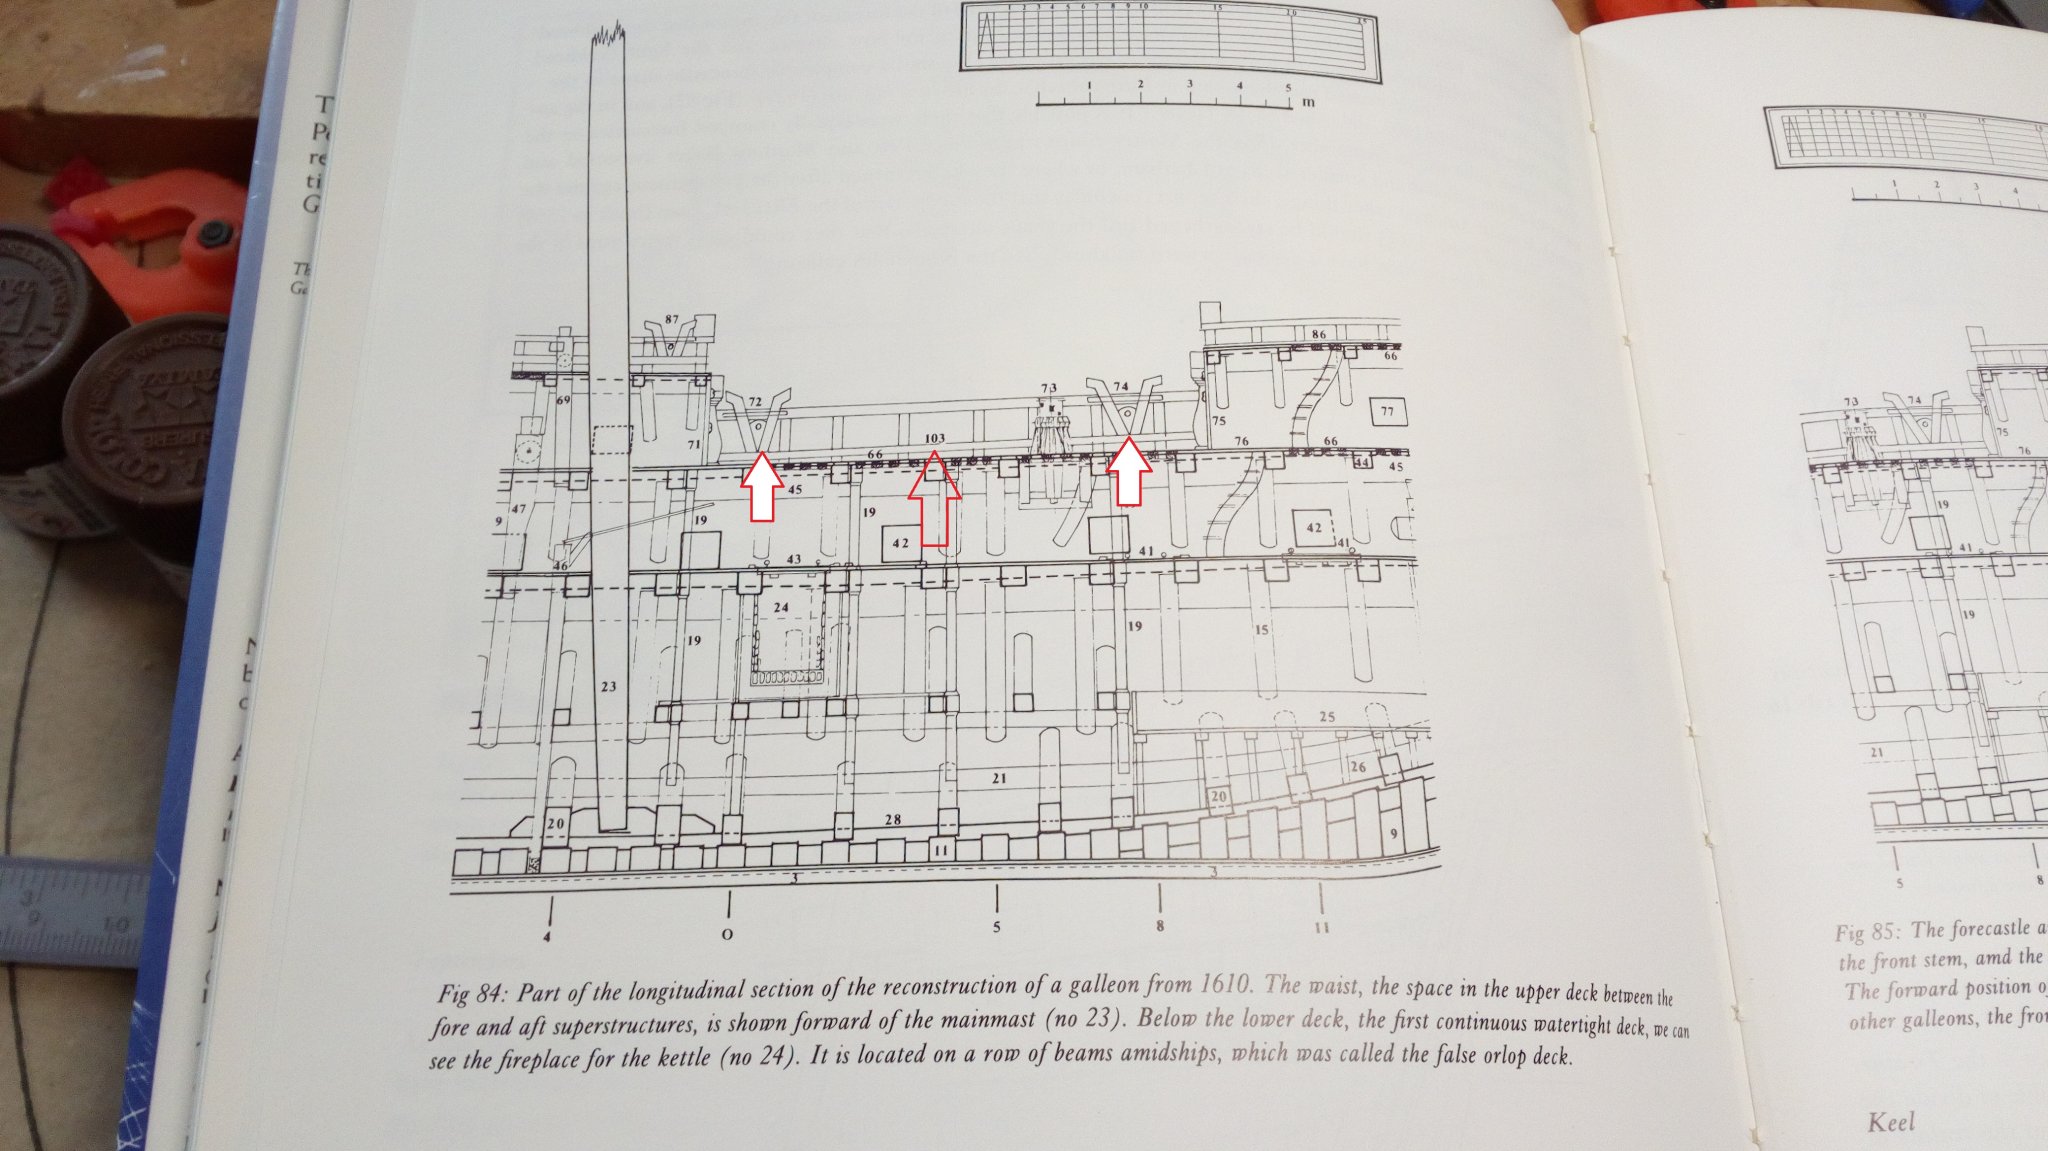
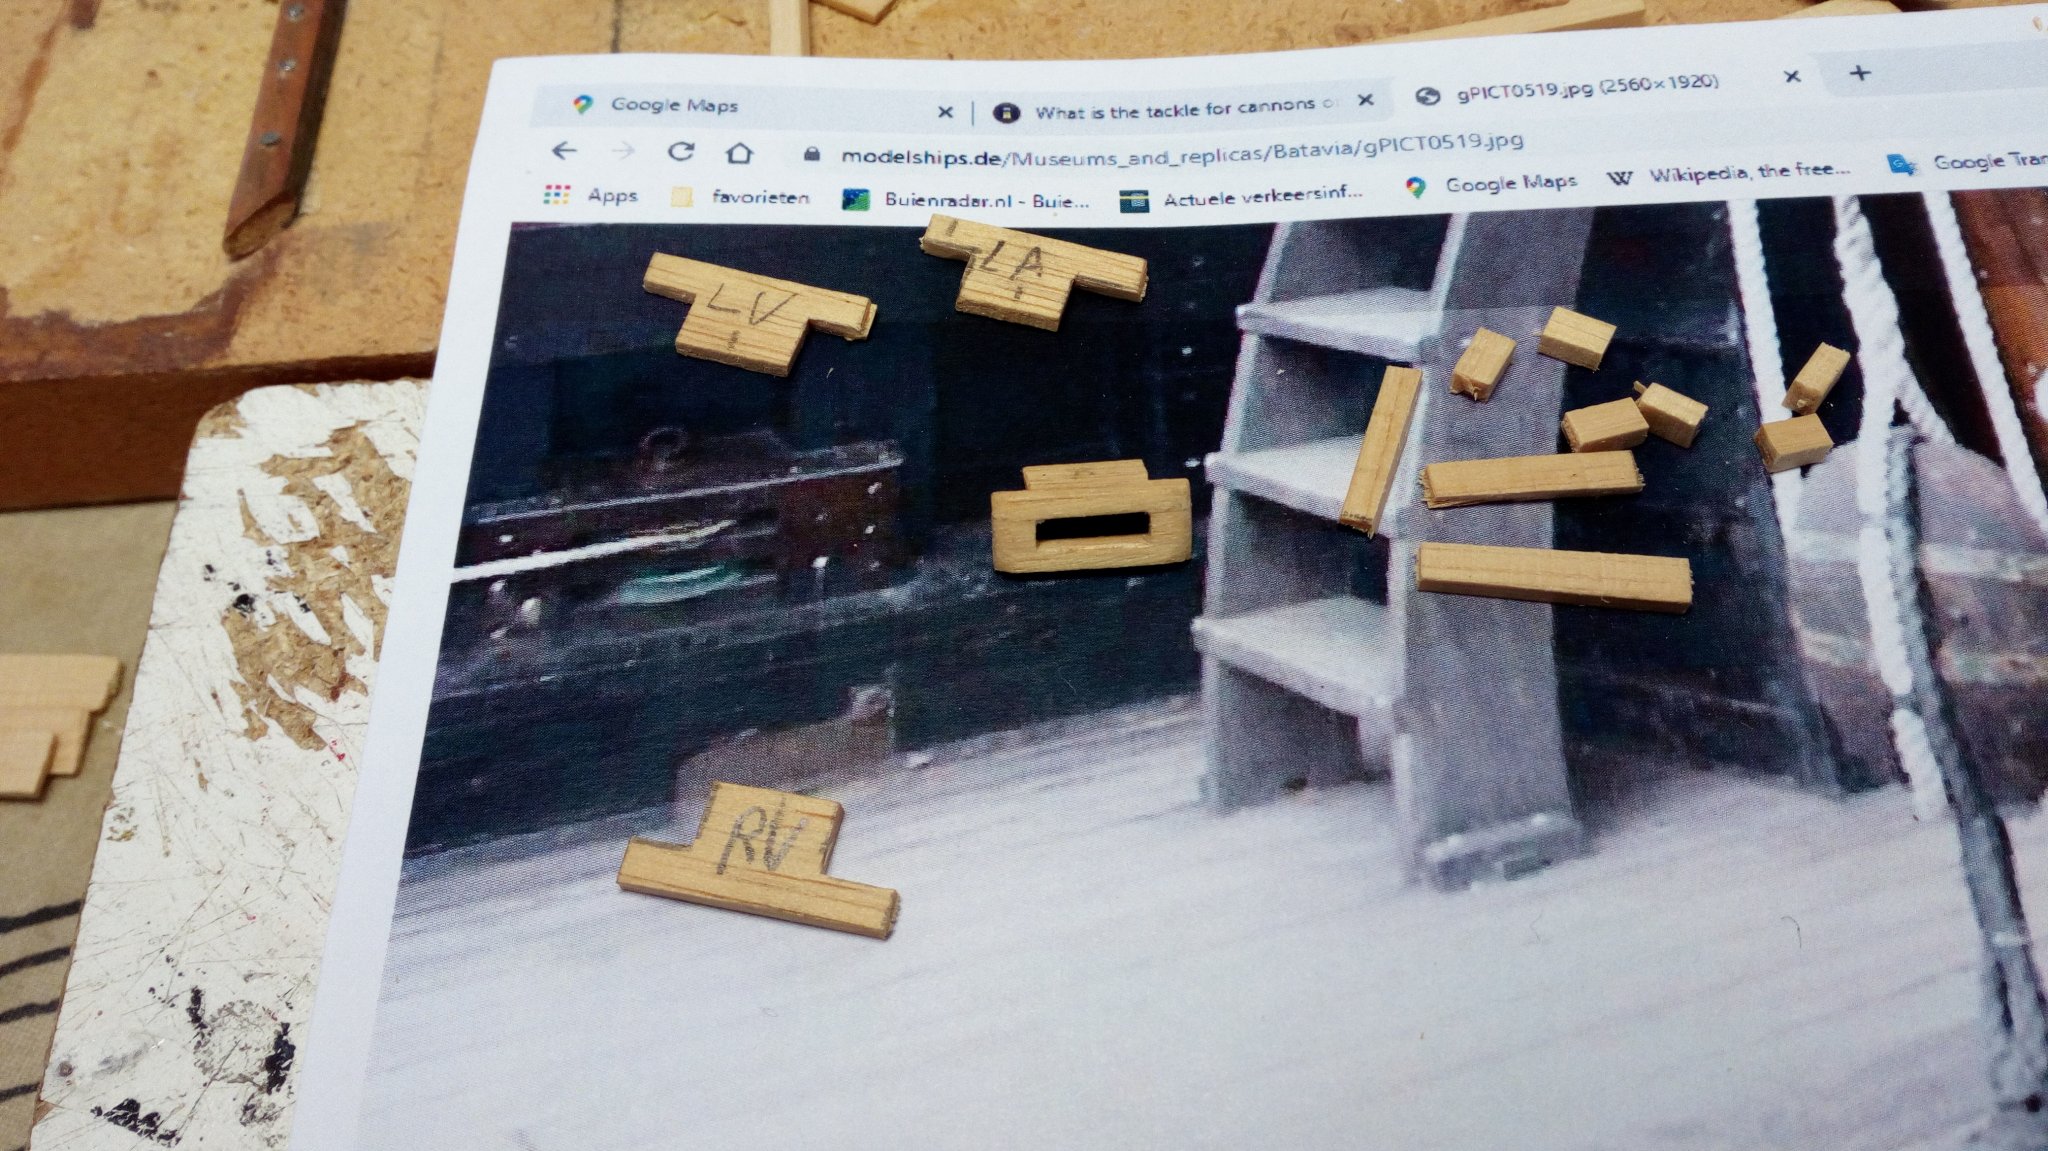
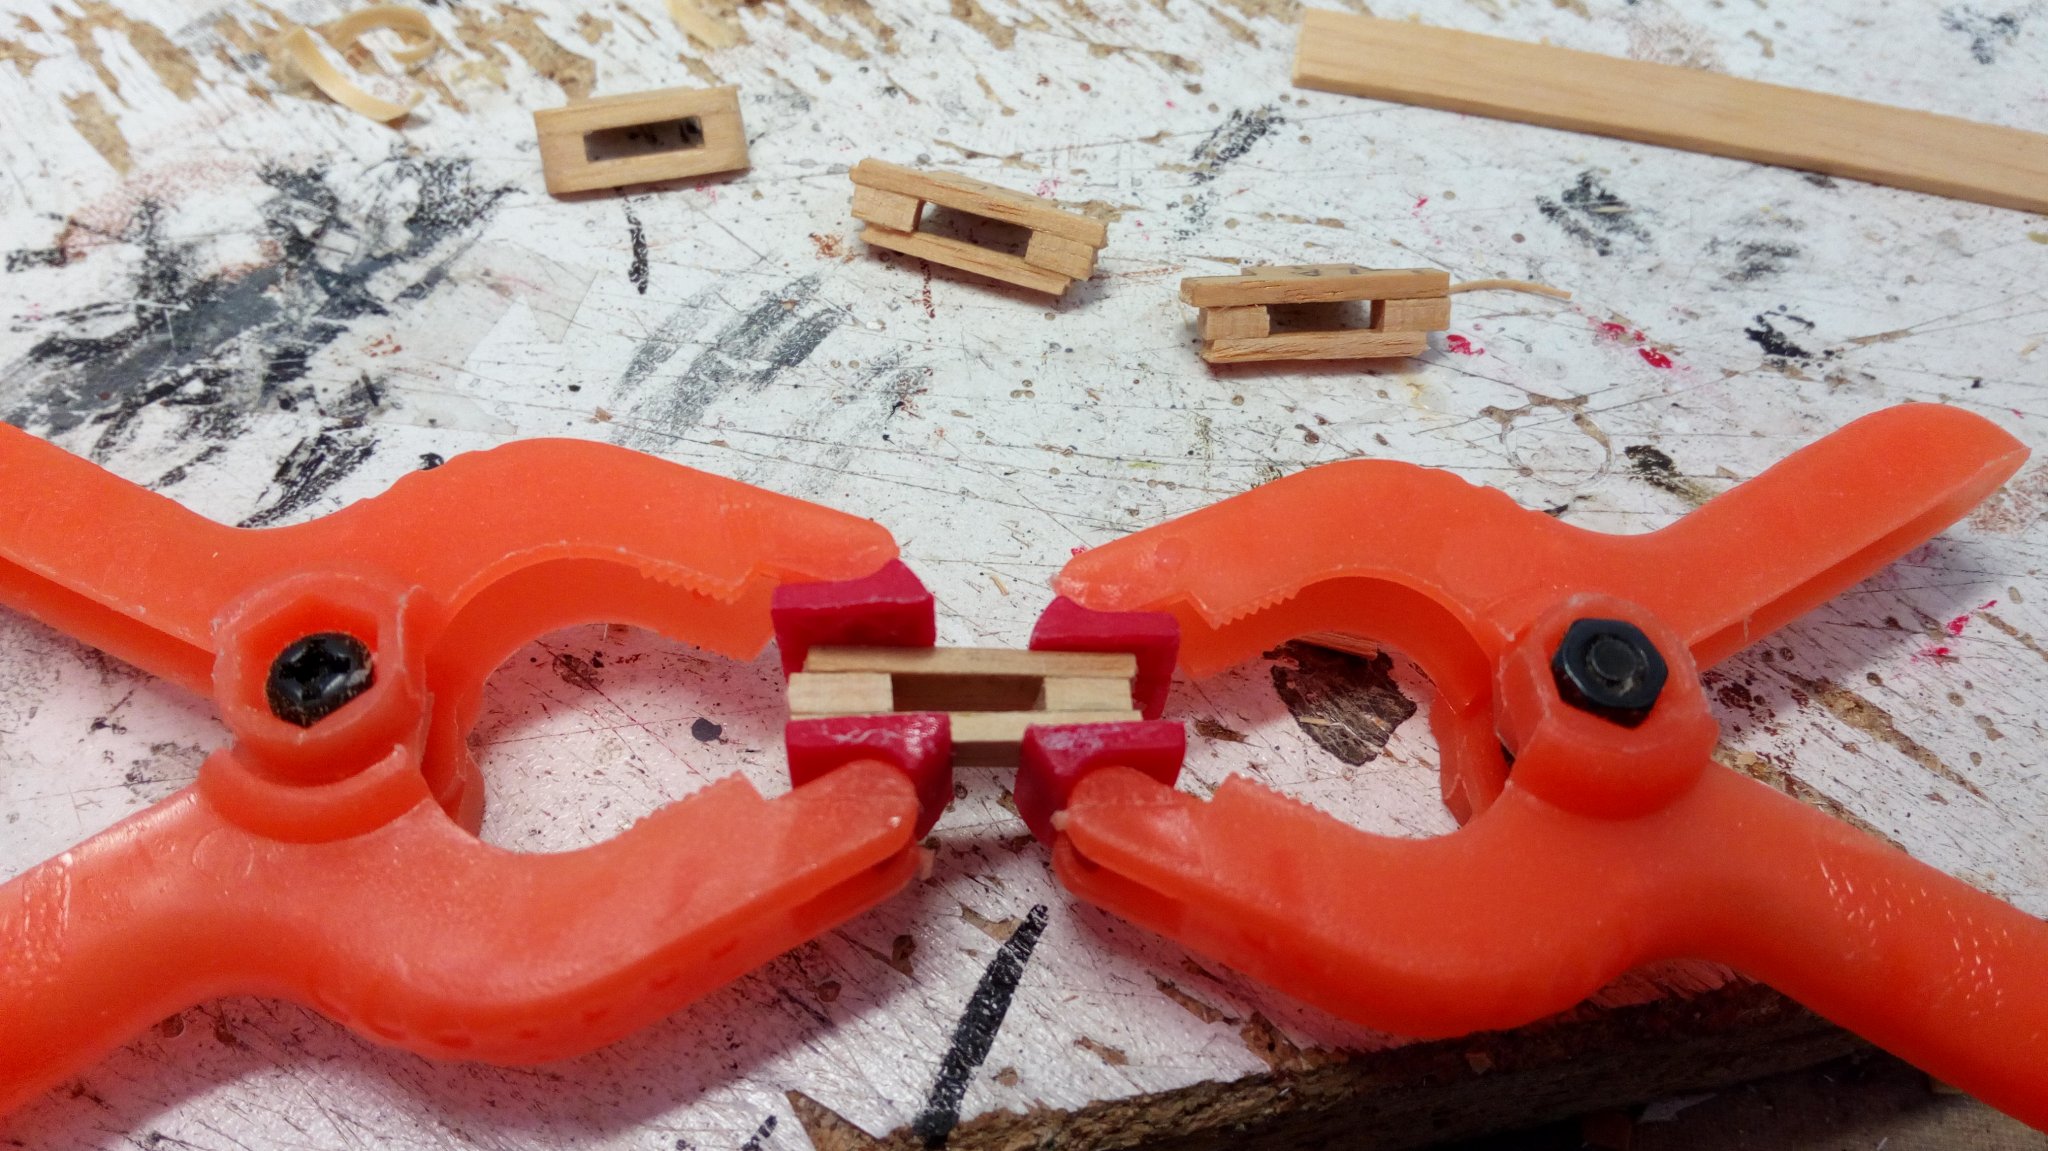
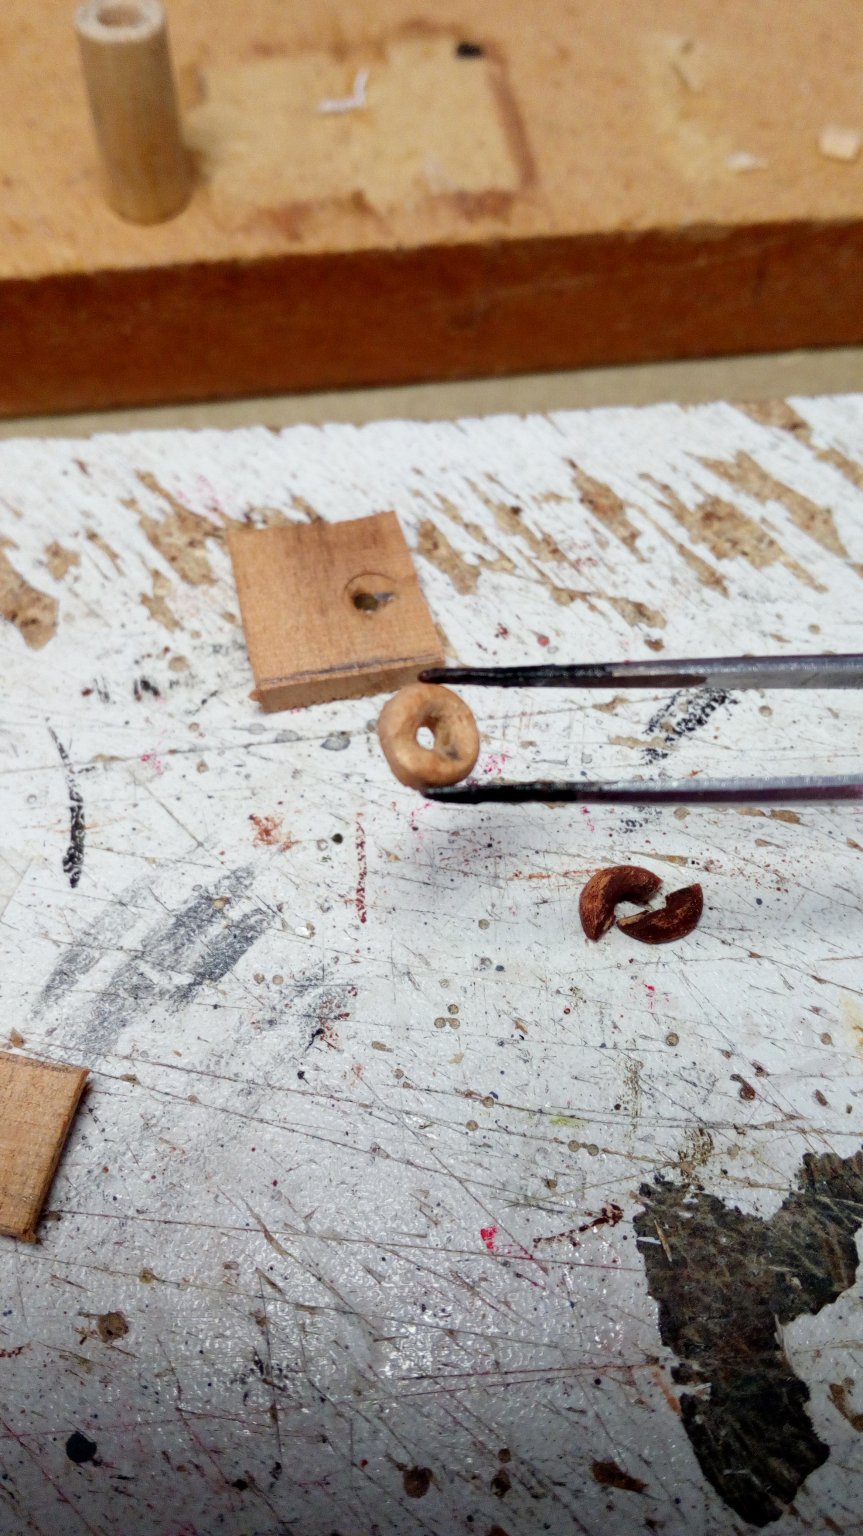
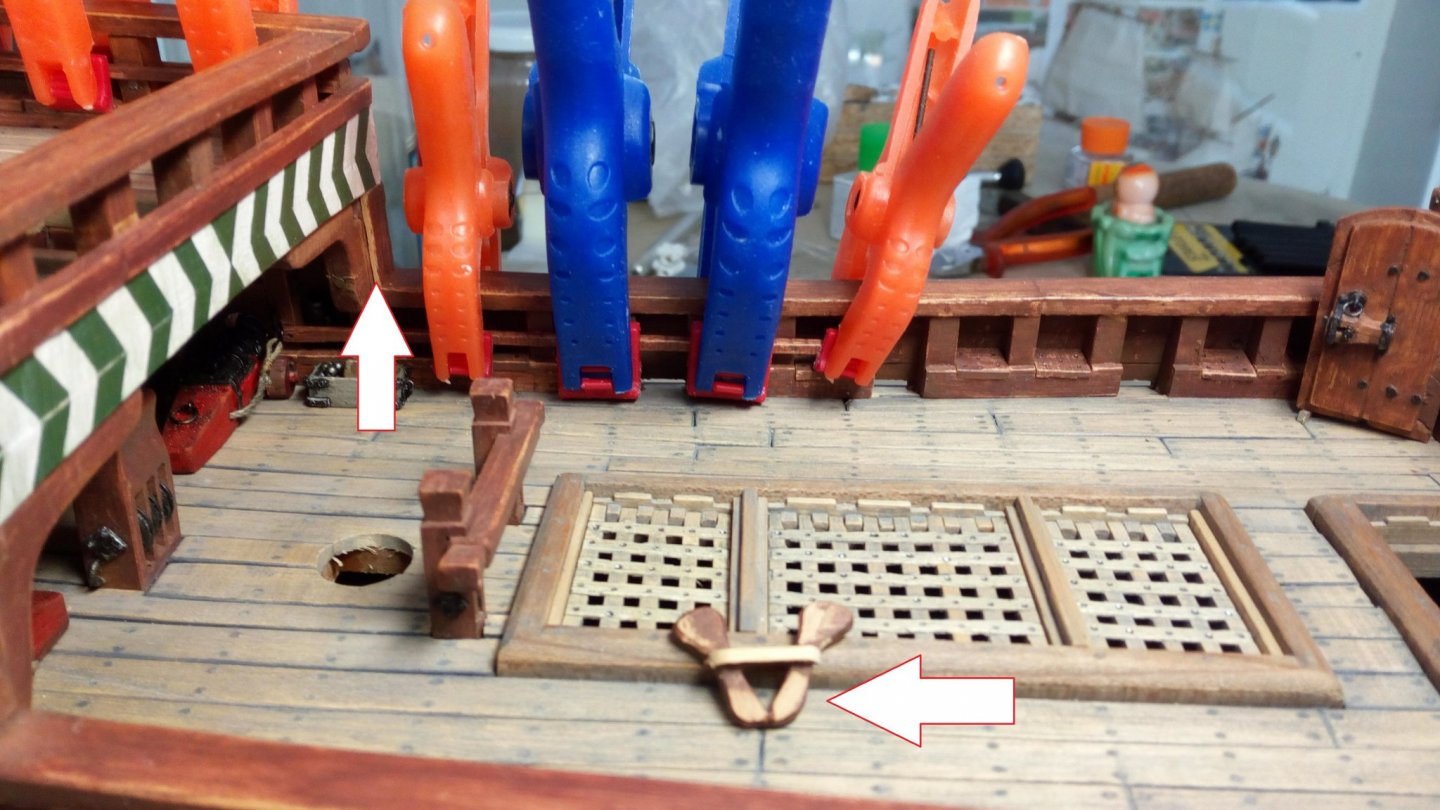
Belaying pins and staghorns. First, this post is more to say that I was probably doing wrong things. The parts mounted in the previous post have been partially removed. Belaying pins. Presumably these came into use slowly in the early 17th century. But, maybe a few will be placed into the beakhead. Staghorns Hopefully these came into use earlier because I'm going to apply them. If I can't use belaying pins. To what do I tie my ropes? All I can think is a methode like this. Wooden rails (n° 103) and staghorns (n°72 and 75) The sheets of the lower sails (n°46 and 48) will go to the staghorns Adding the rails in progress and a staghorn almost ready (And I forgot a little bit of paint on the left) Thanks for following


- 756 replies
-
- 7
-
-
- galleon
- golden hind
- (and 2 more)
-
Looks good 👍 Great work Cristian.
-
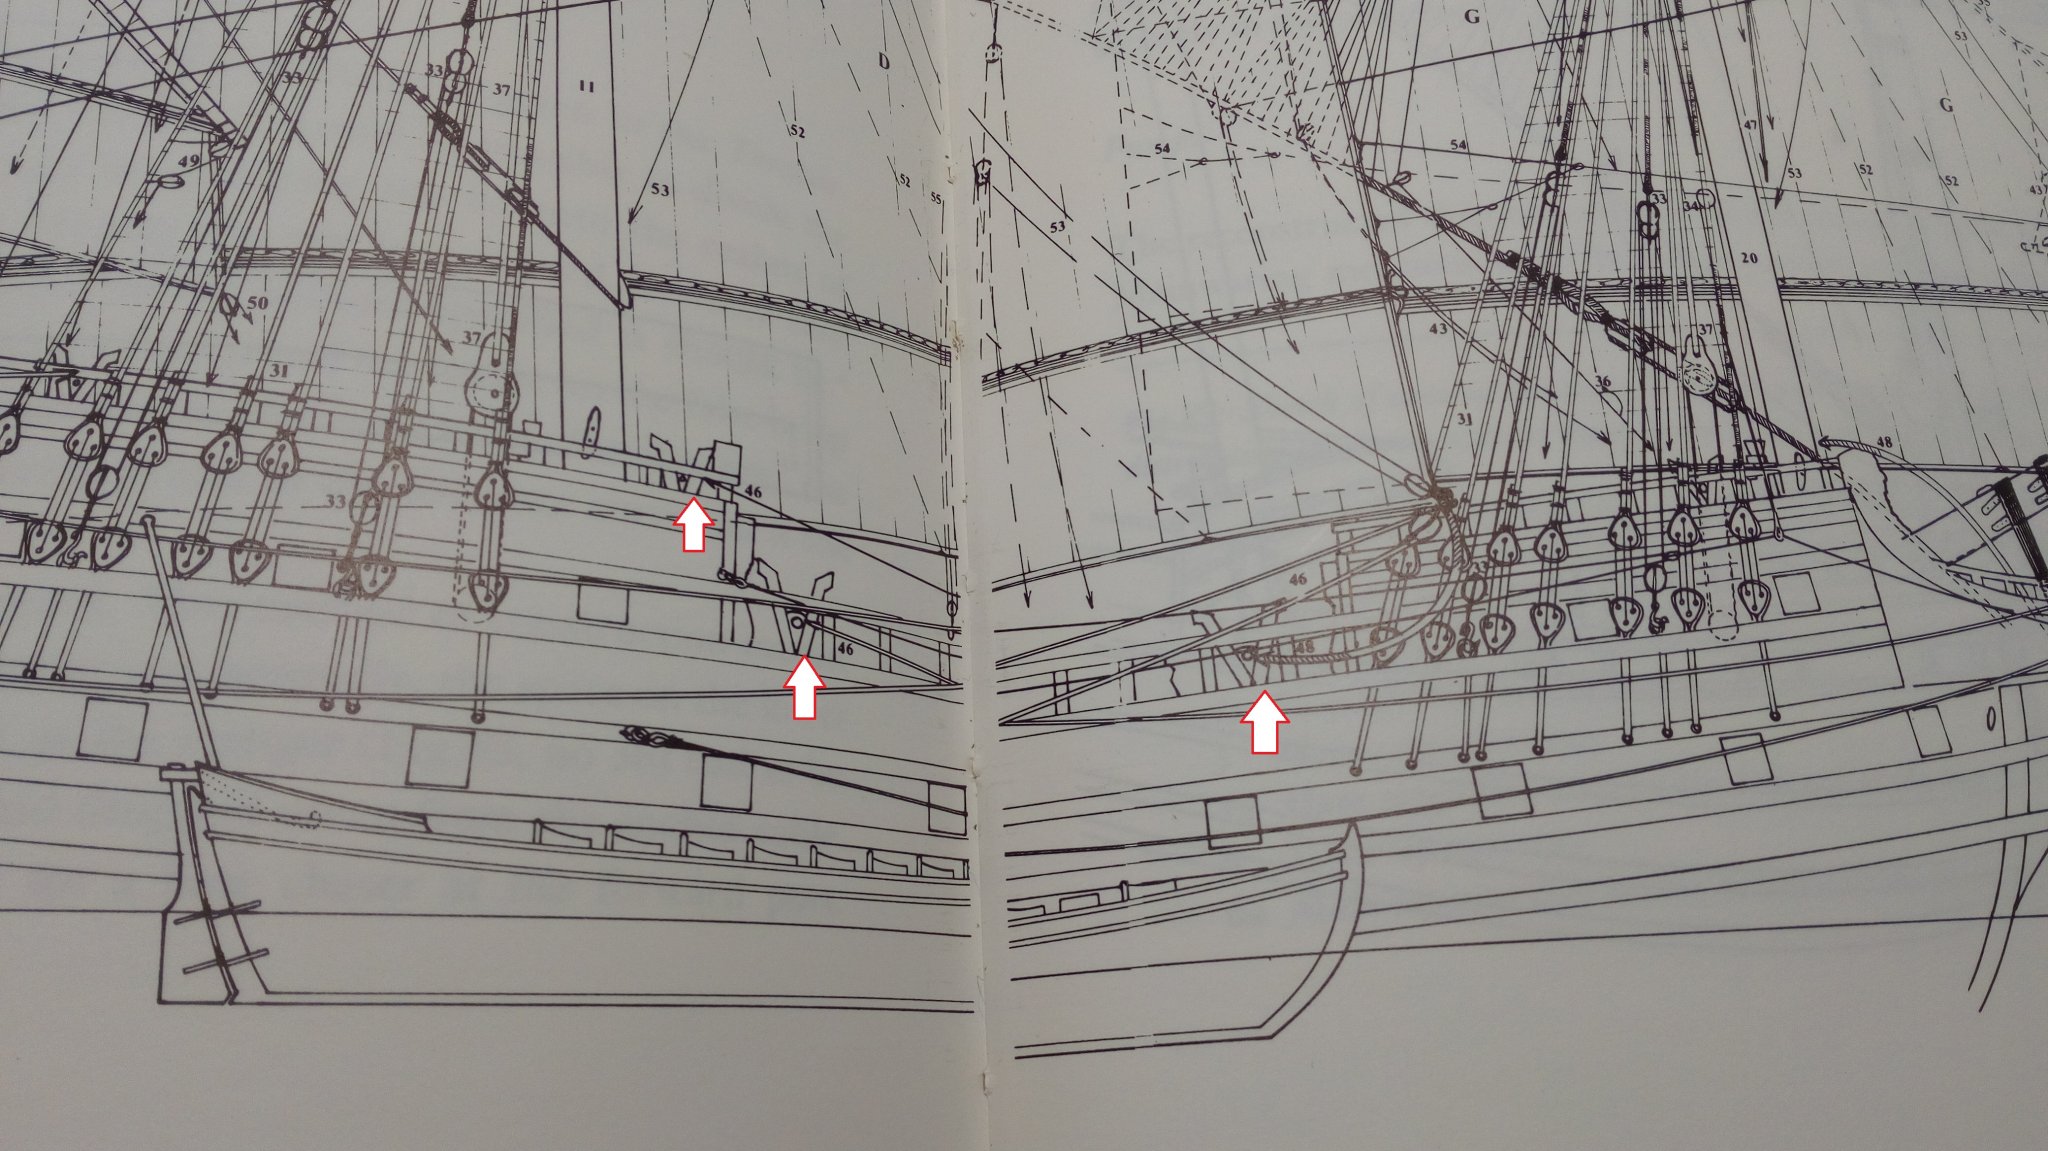
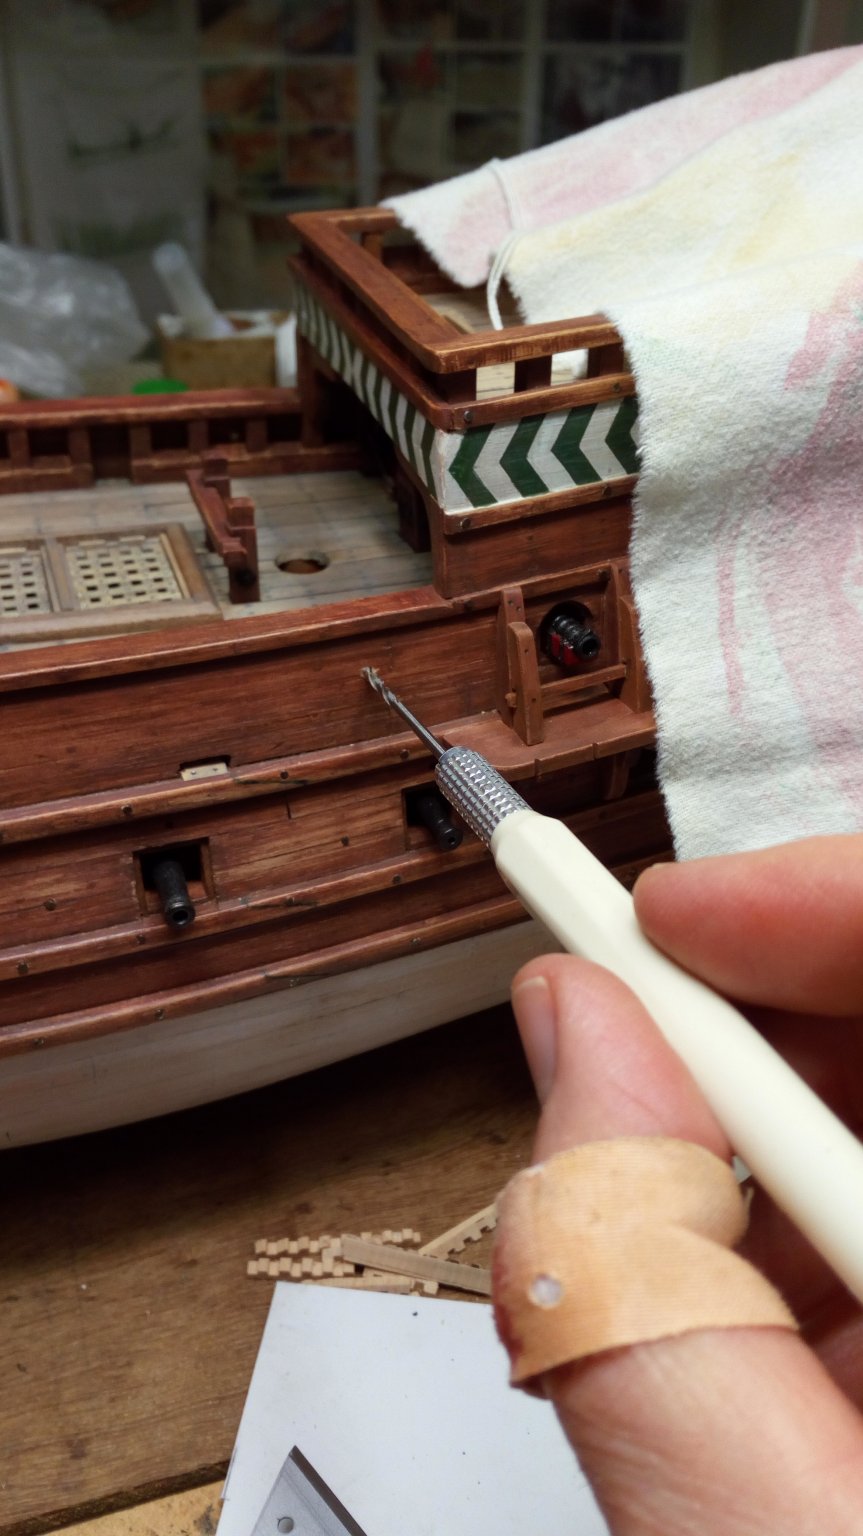
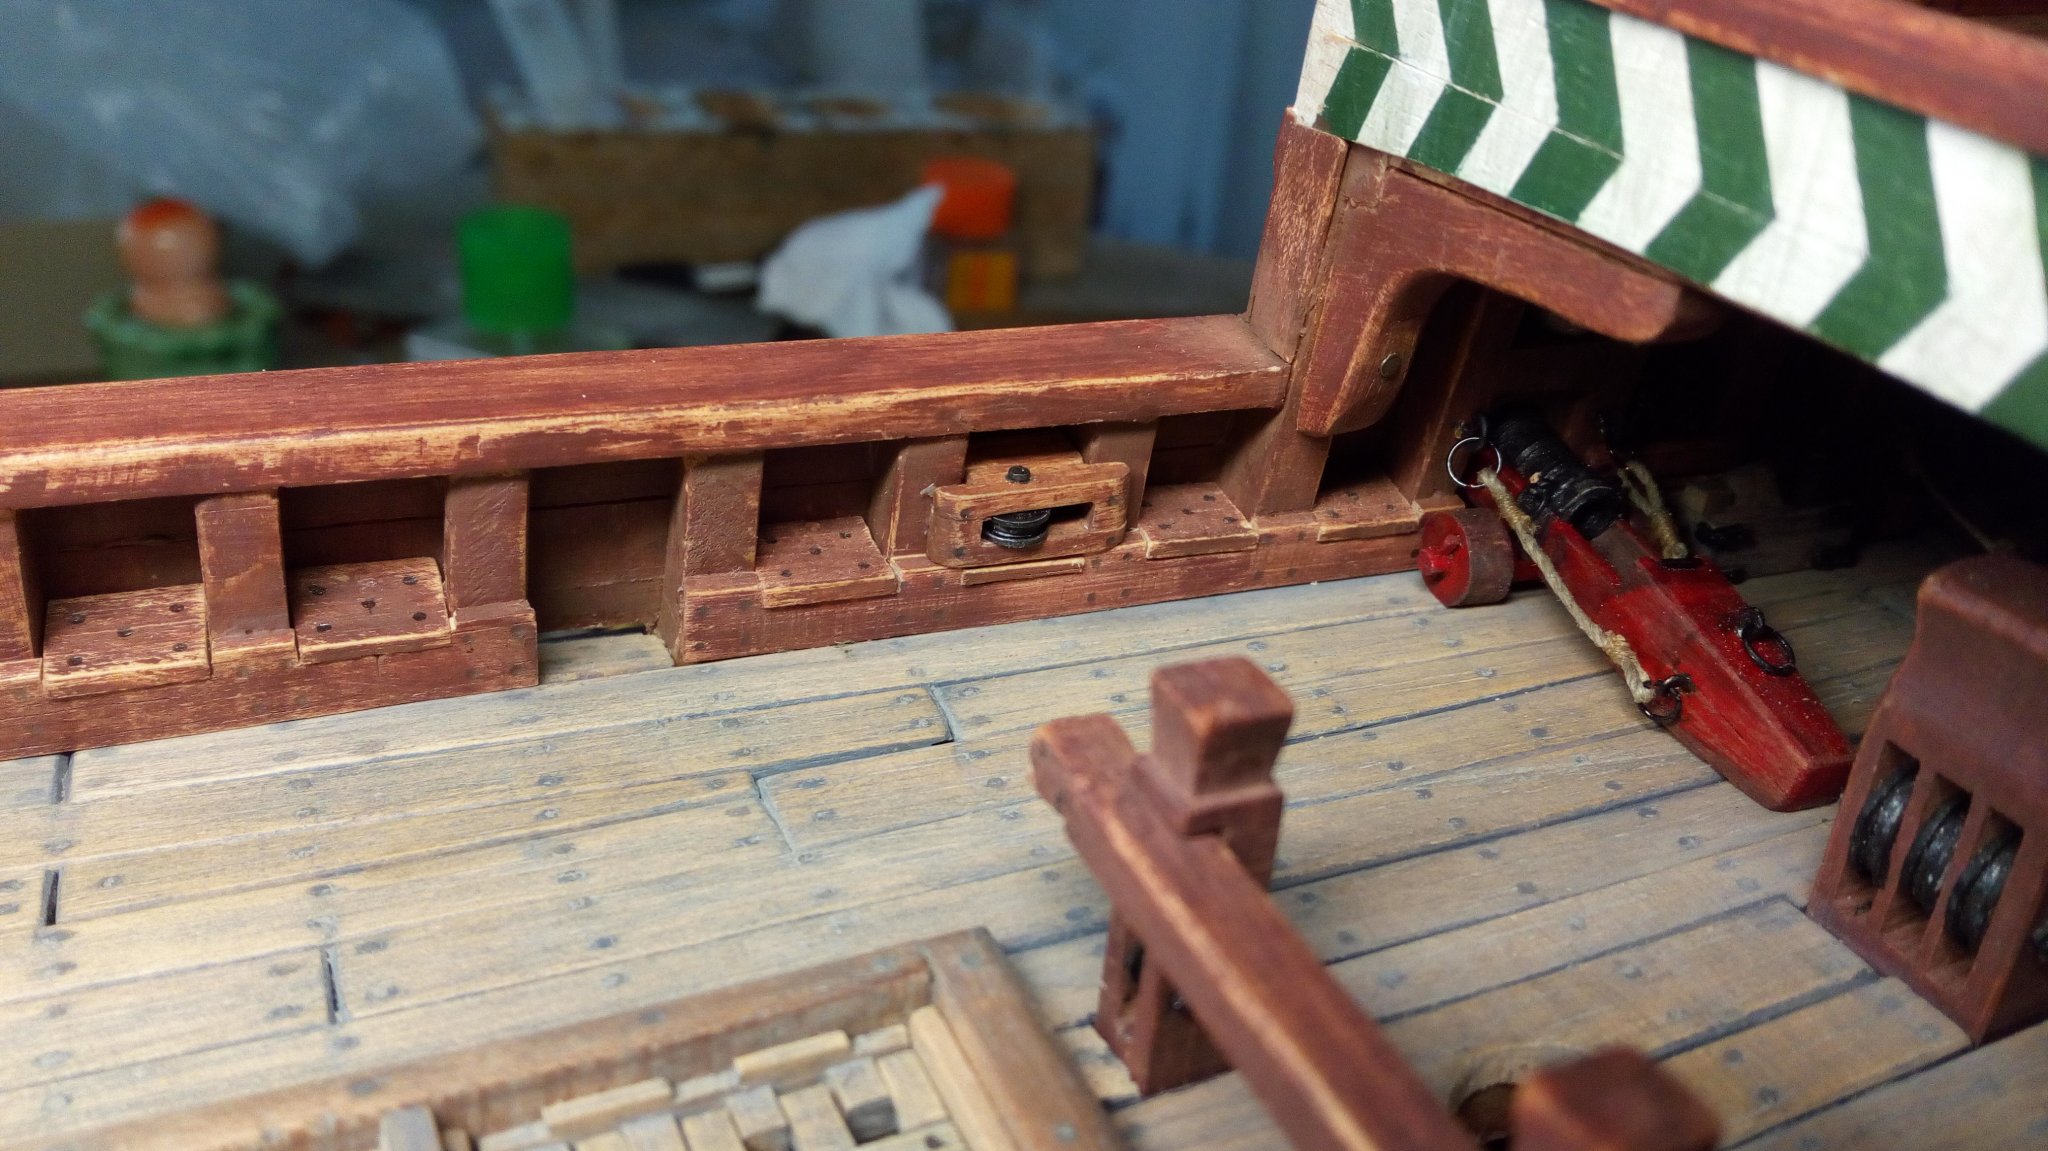
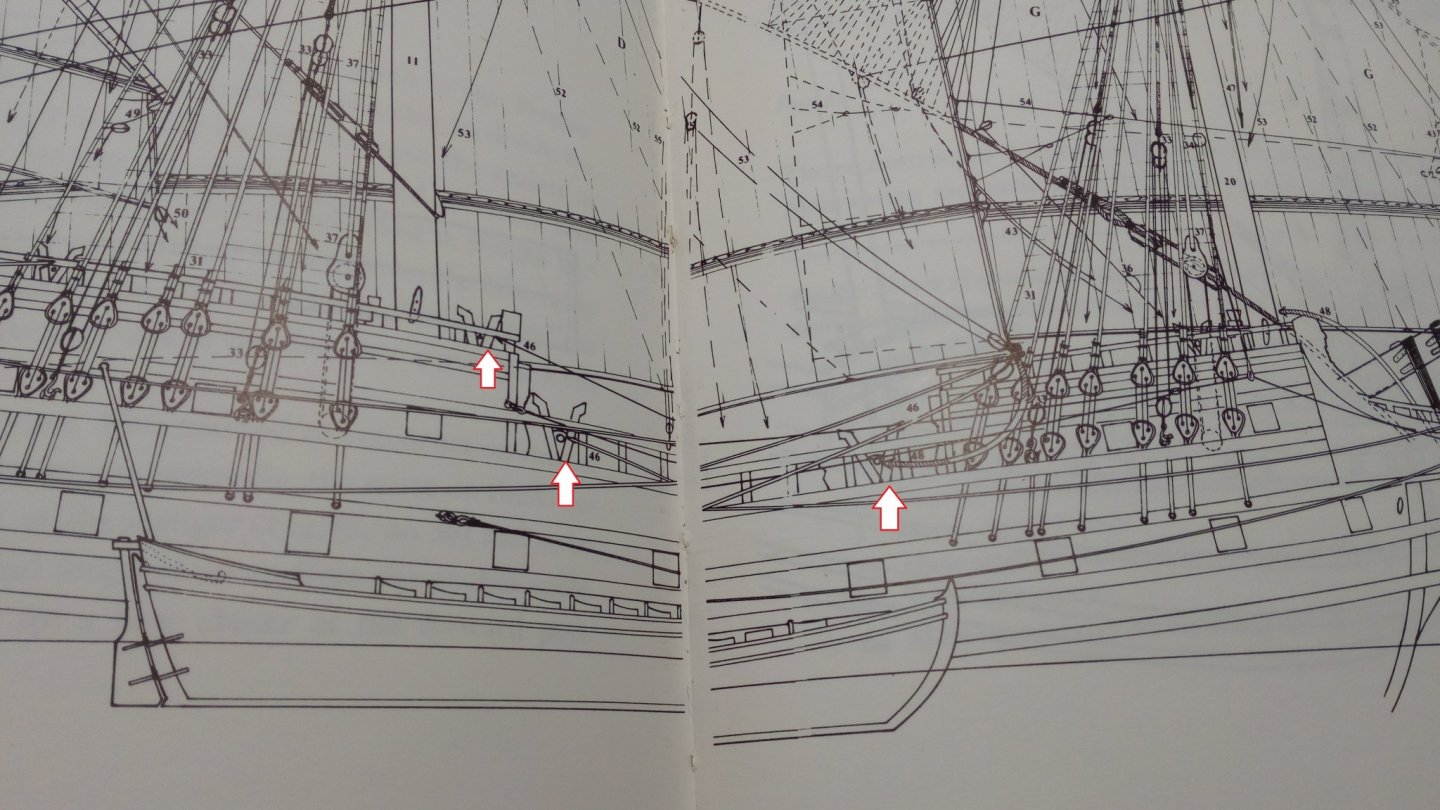
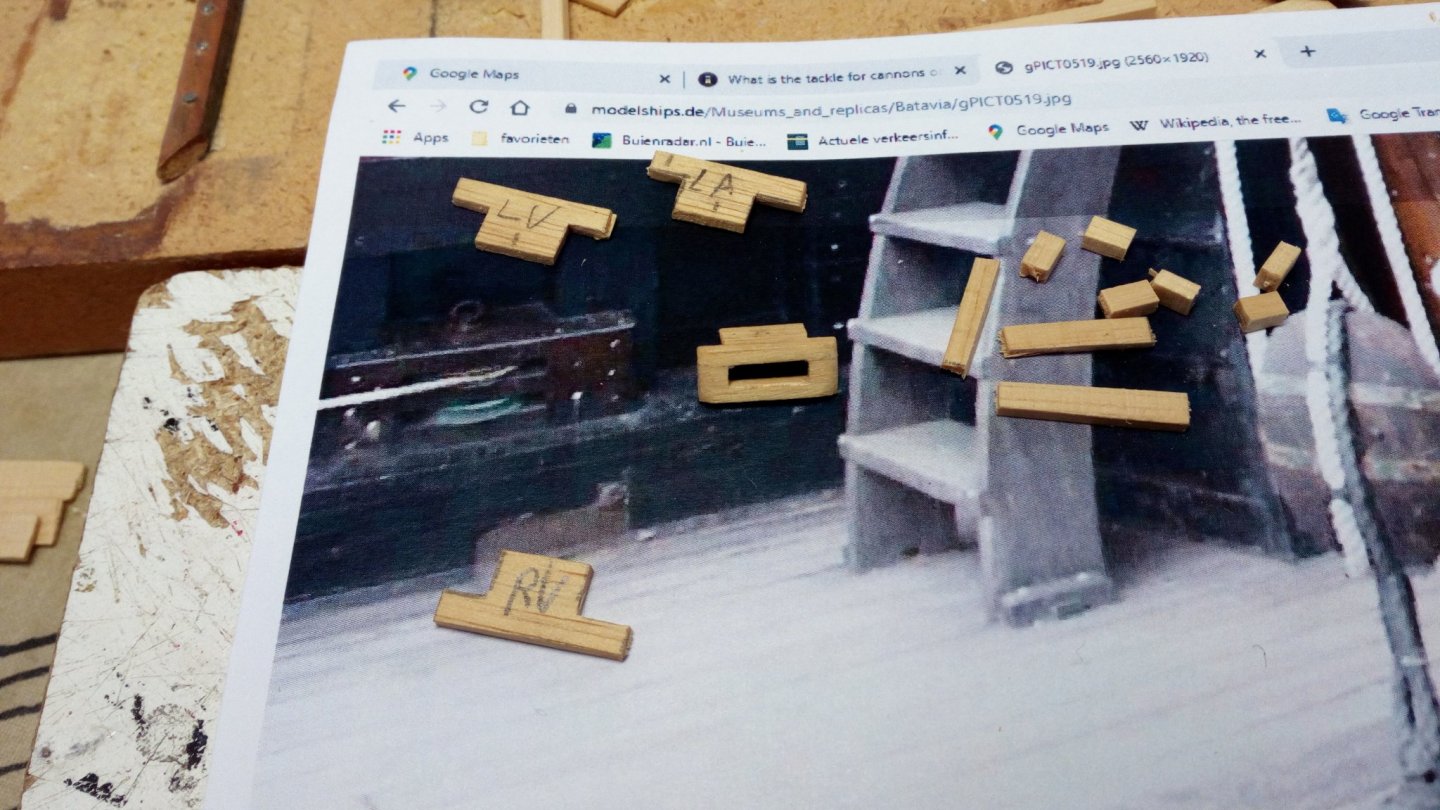
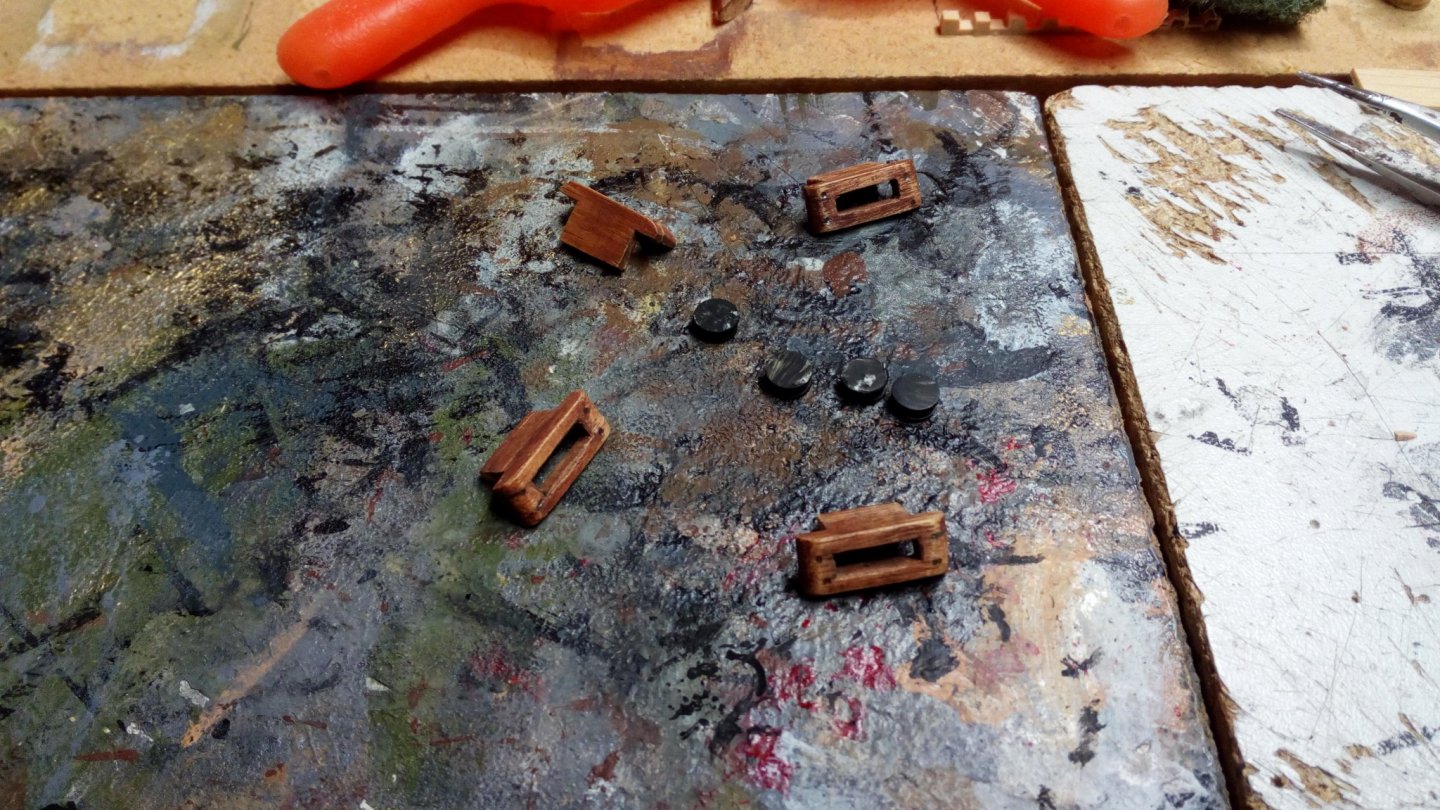
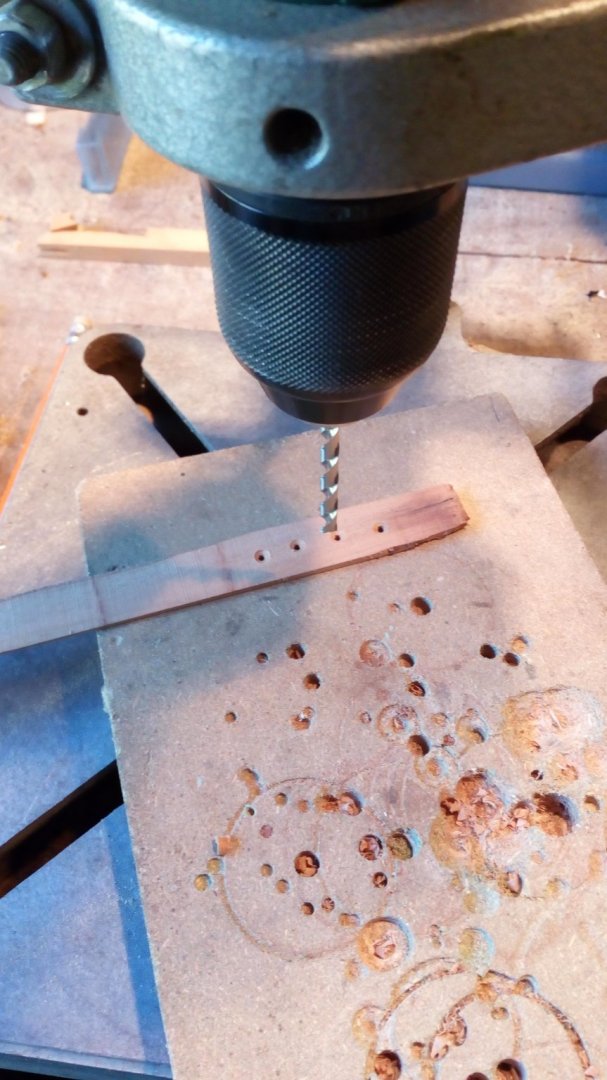
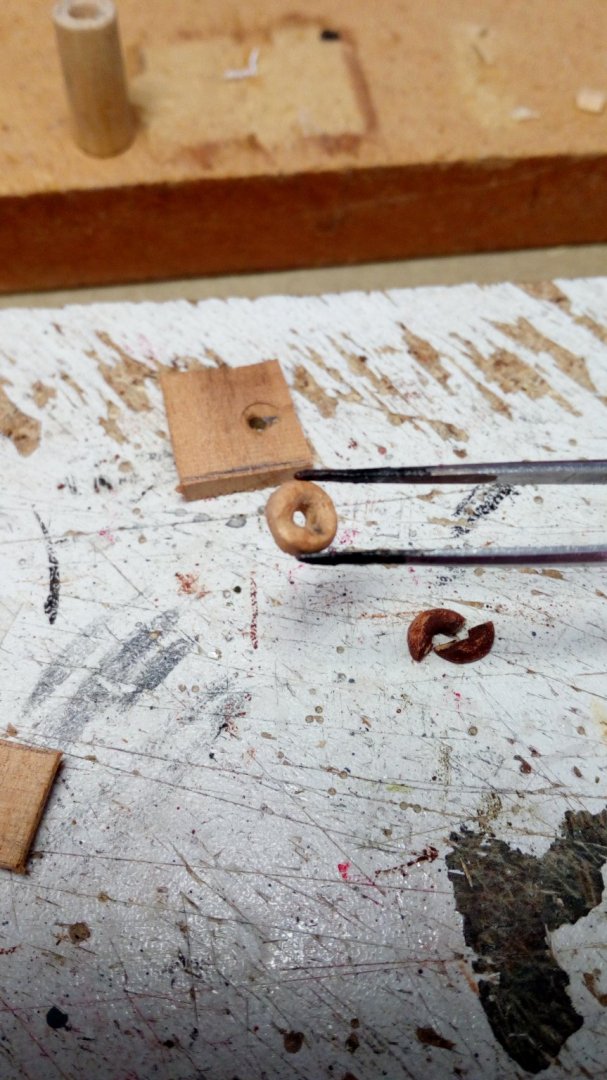
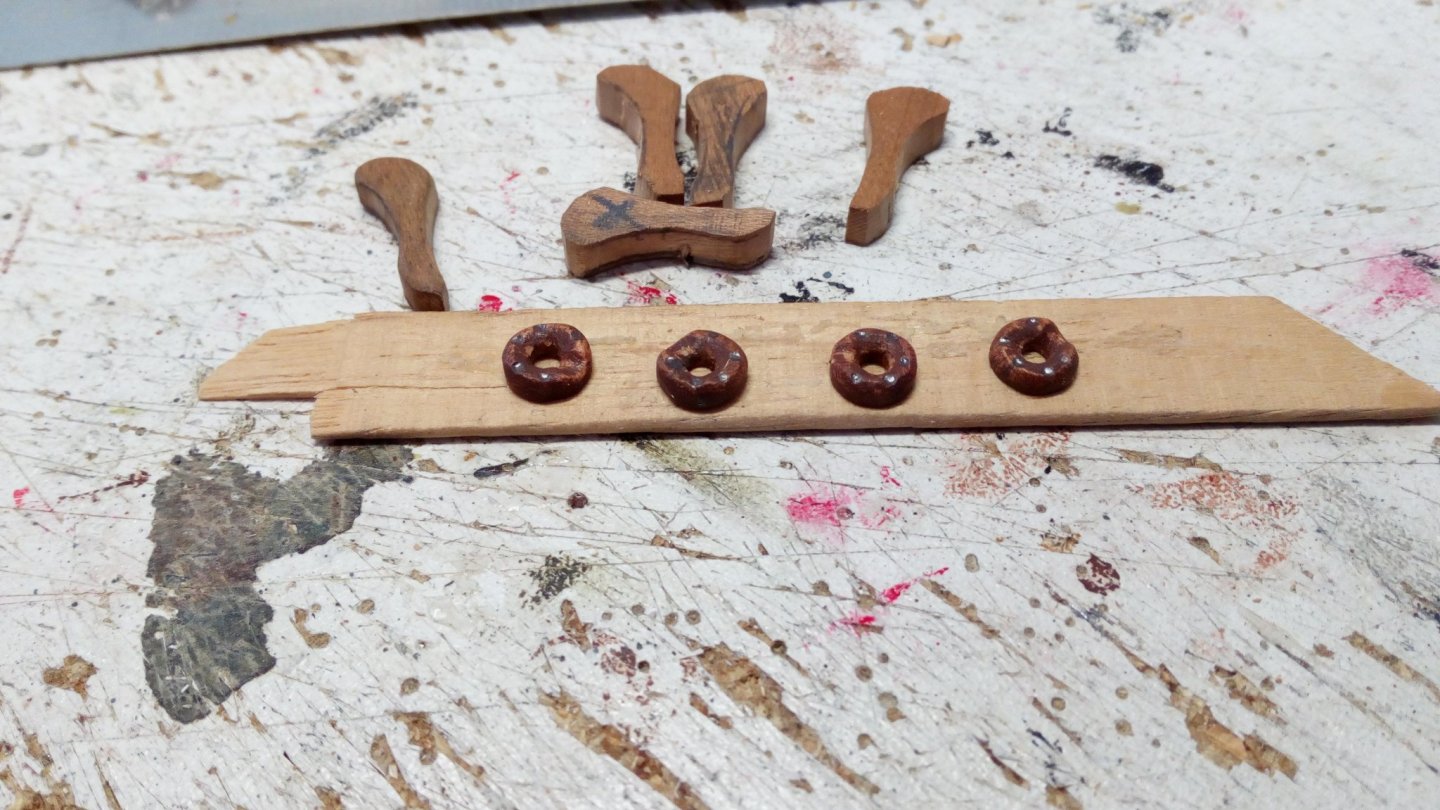
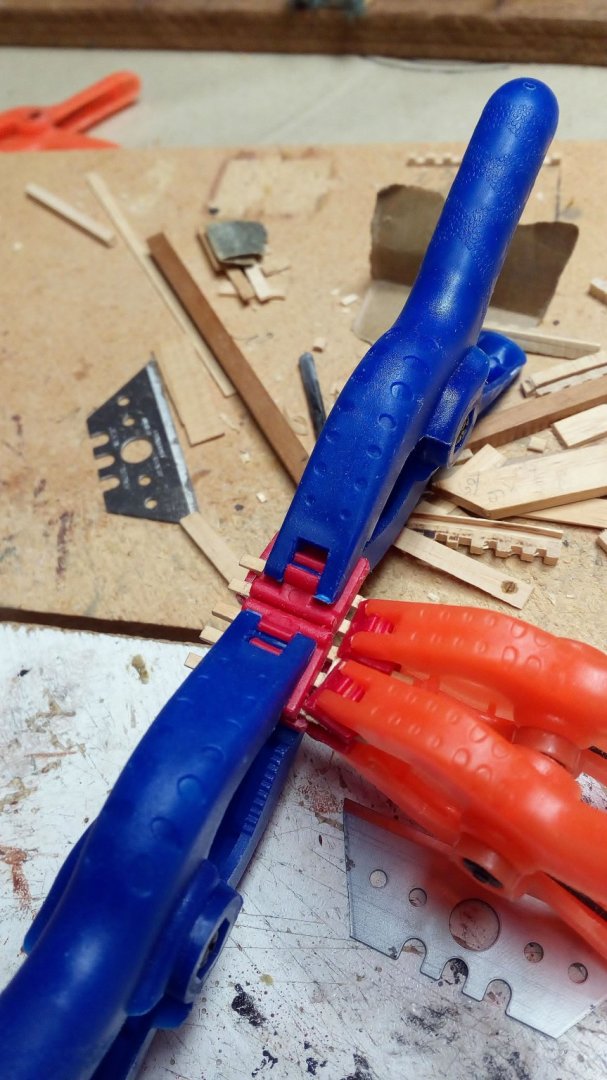
Thanks Thanks Thanks Thanks. By the time these guns are loaded and fired. You are already far, far away Building something I don't know the English name for ( i don't really know the Dutch name either ) Looking at drawings and paintings of this era, the ropes of the mainsail and foresail usually pass through the railing (hull) at these places. So, i make something like this glue pieces painting assemble Drill a 1 mm hole increase the diameter of the hole to 2mm. So it does not splinter on the outside. The pieces for the outside (The first test piece was unsuccessful) Painted and assembling quality control. If this can go through, then the rope will be able to pass through at a later stage Ready Thanks for comments, likes and following


- 756 replies
-
- 12
-
-
- galleon
- golden hind
- (and 2 more)
-
Welcome to Msw and good luck with the Santa Maria
-
You might find advice here Glue (filler)blocks between the frames is perhaps the best idea.
-
-
Hi from Azores and thank you all in advance
Baker replied to Marco Silva's topic in New member Introductions
Welcome, And good luck with the galleon -
Have you looked here before ?? I have ordered something here once and the delivery was correct. https://www.cornwallmodelboats.co.uk/acatalog/sovereign_of_the_seas.html#SID=55
-
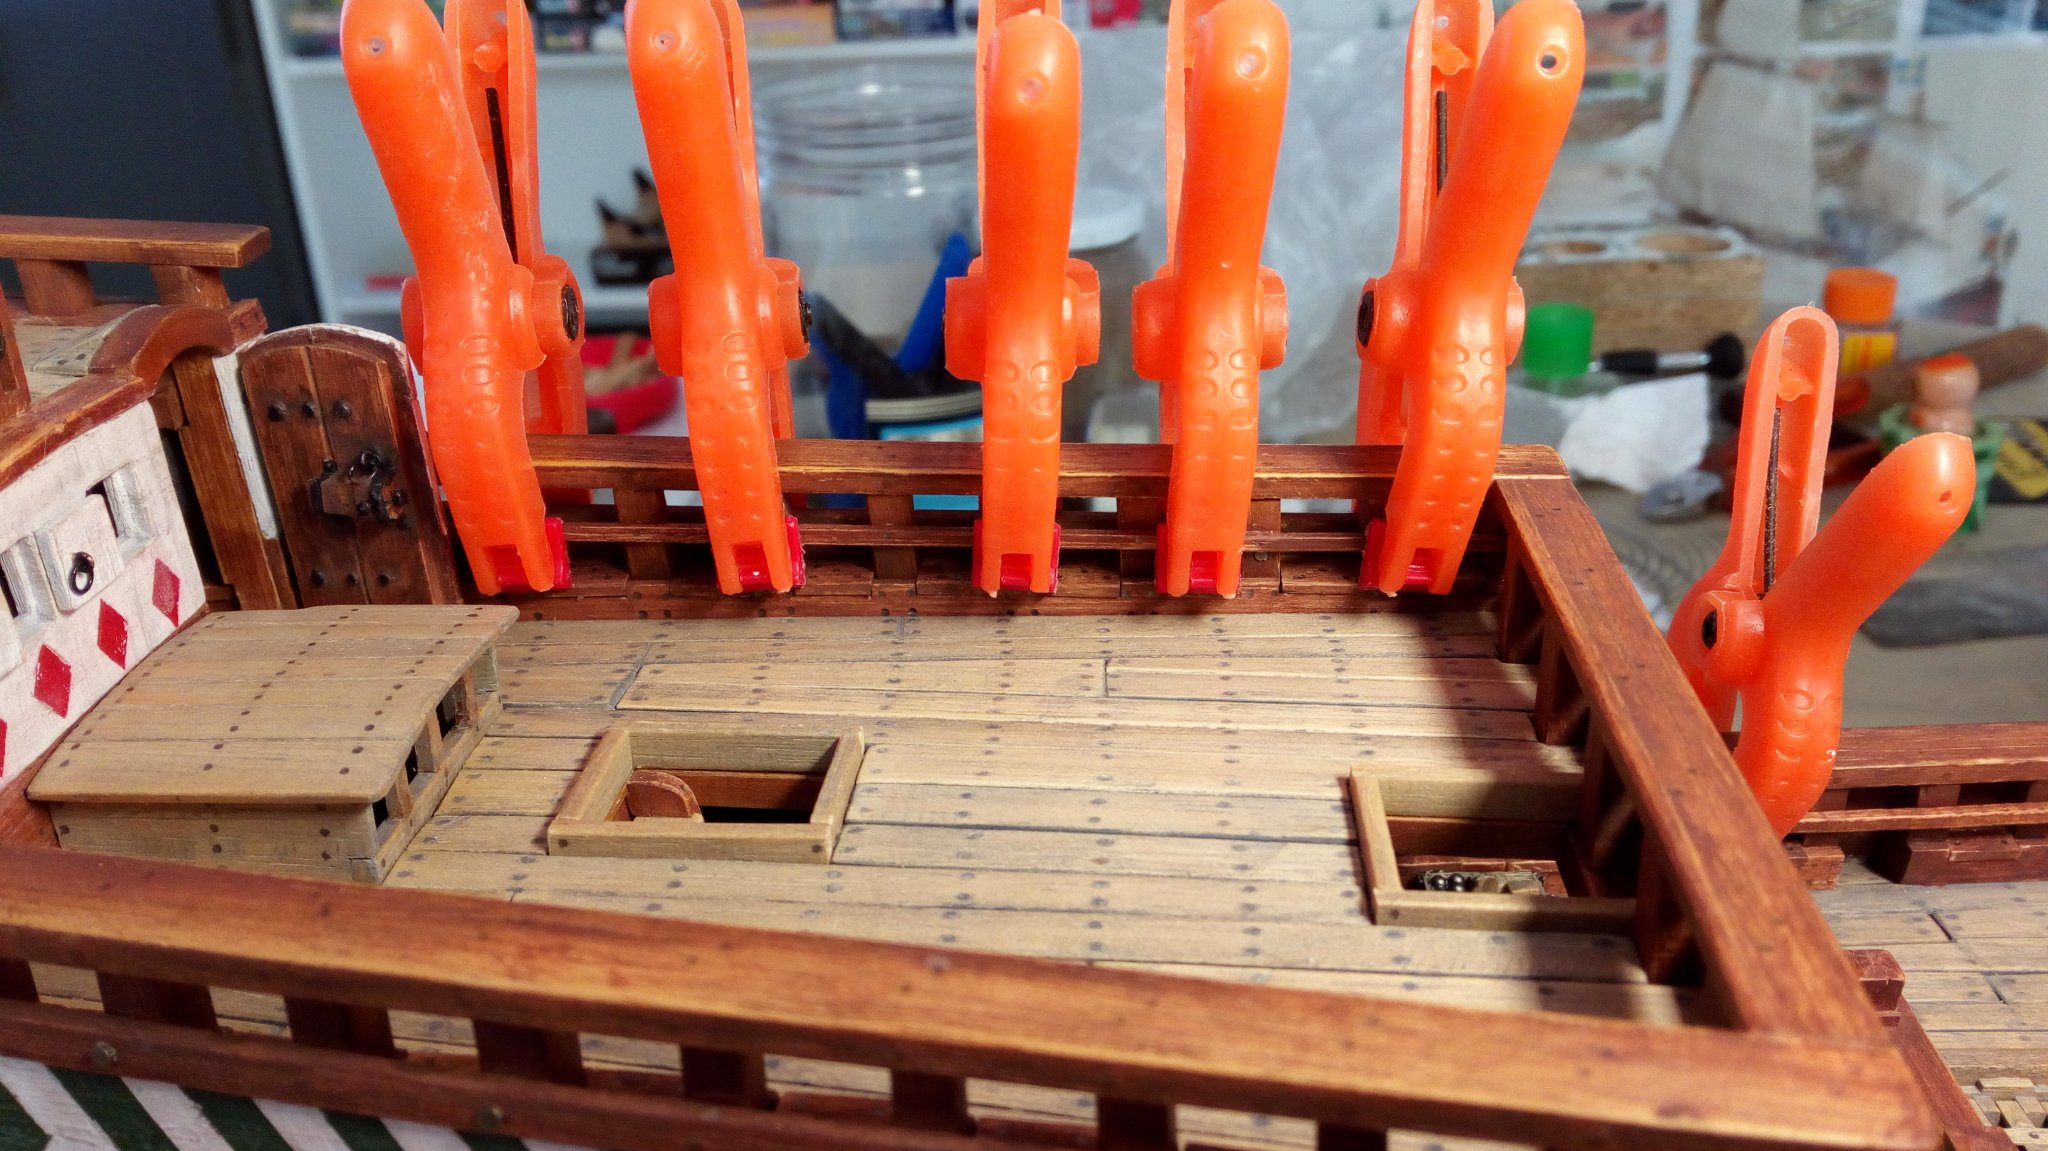
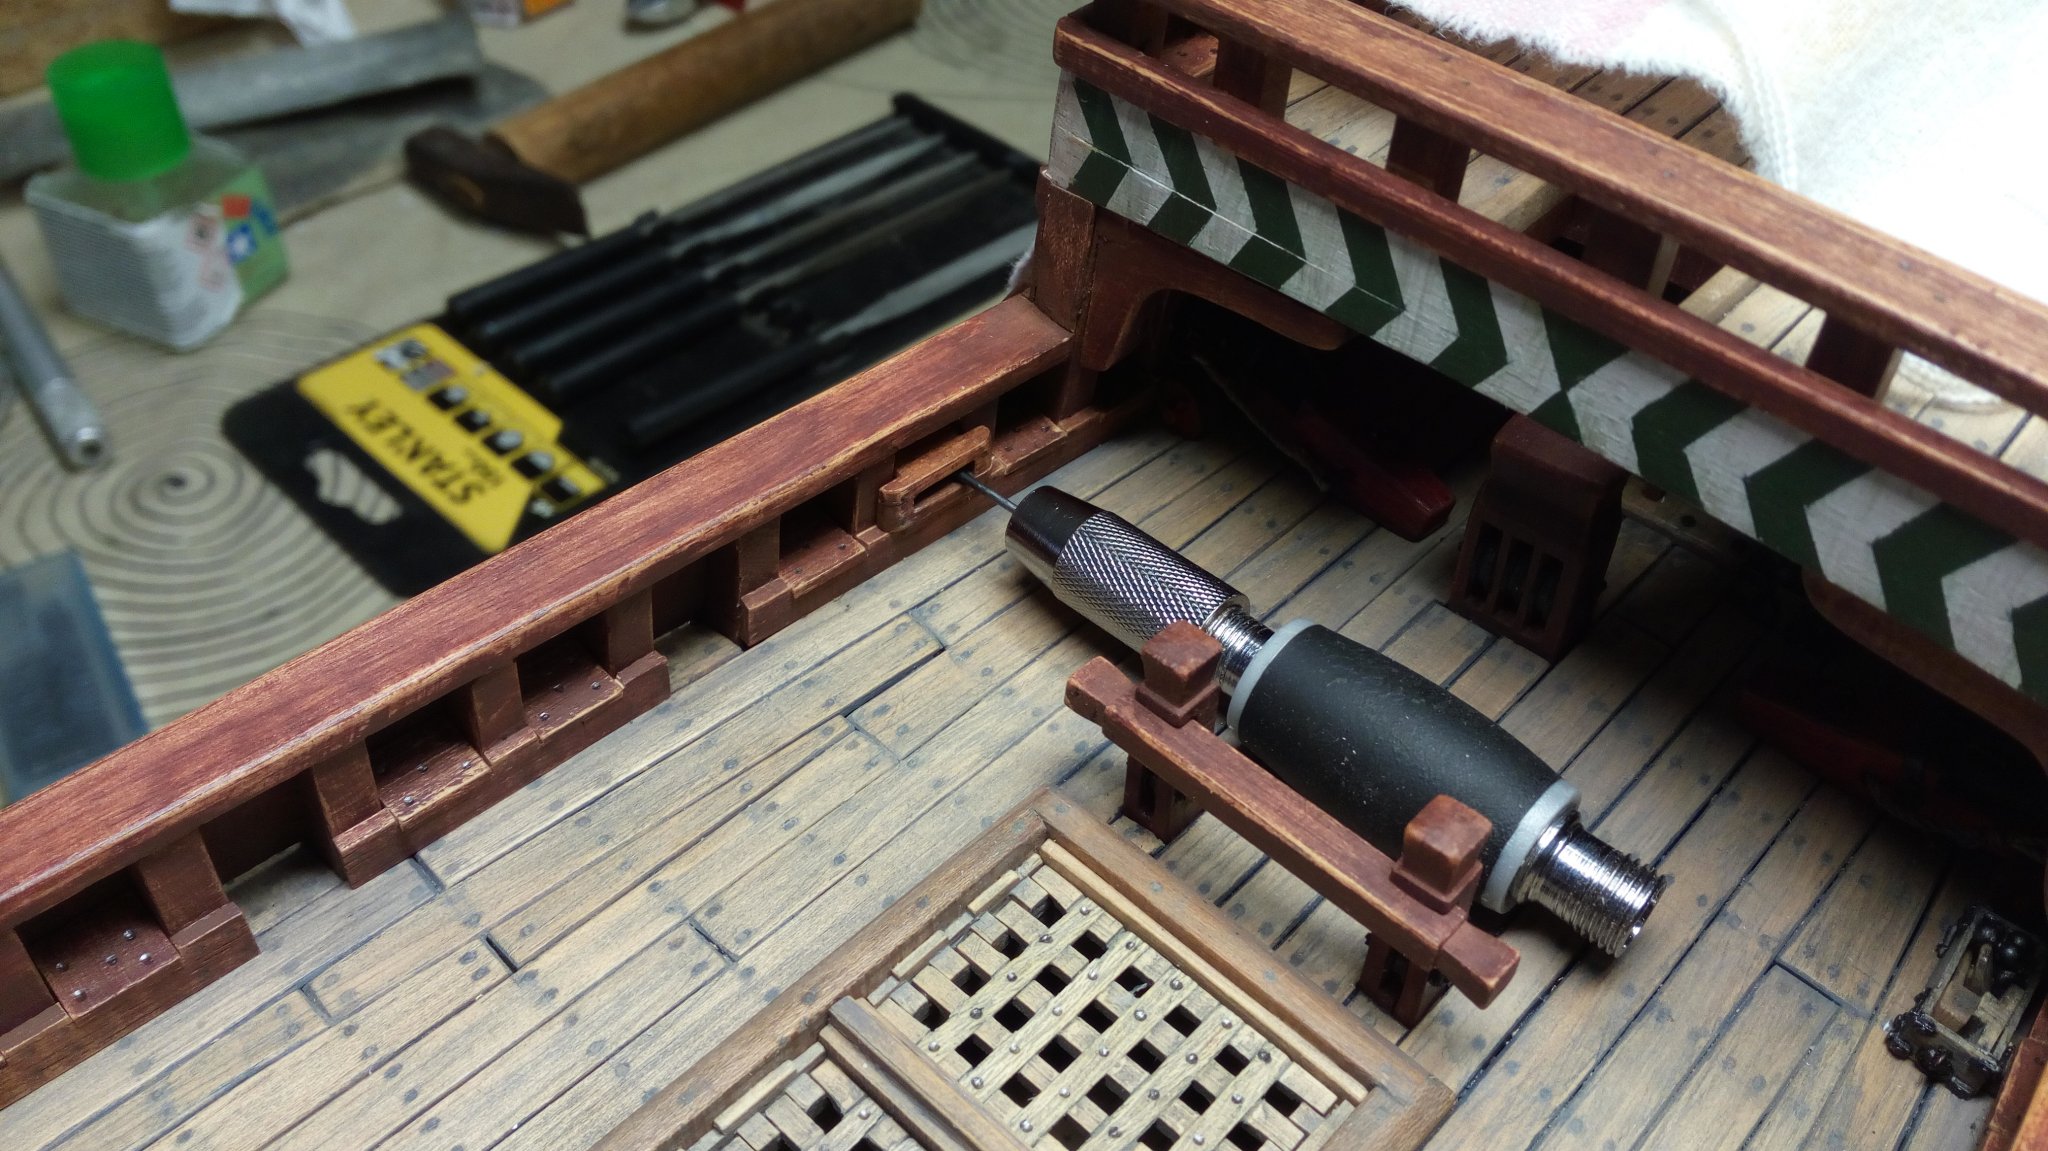
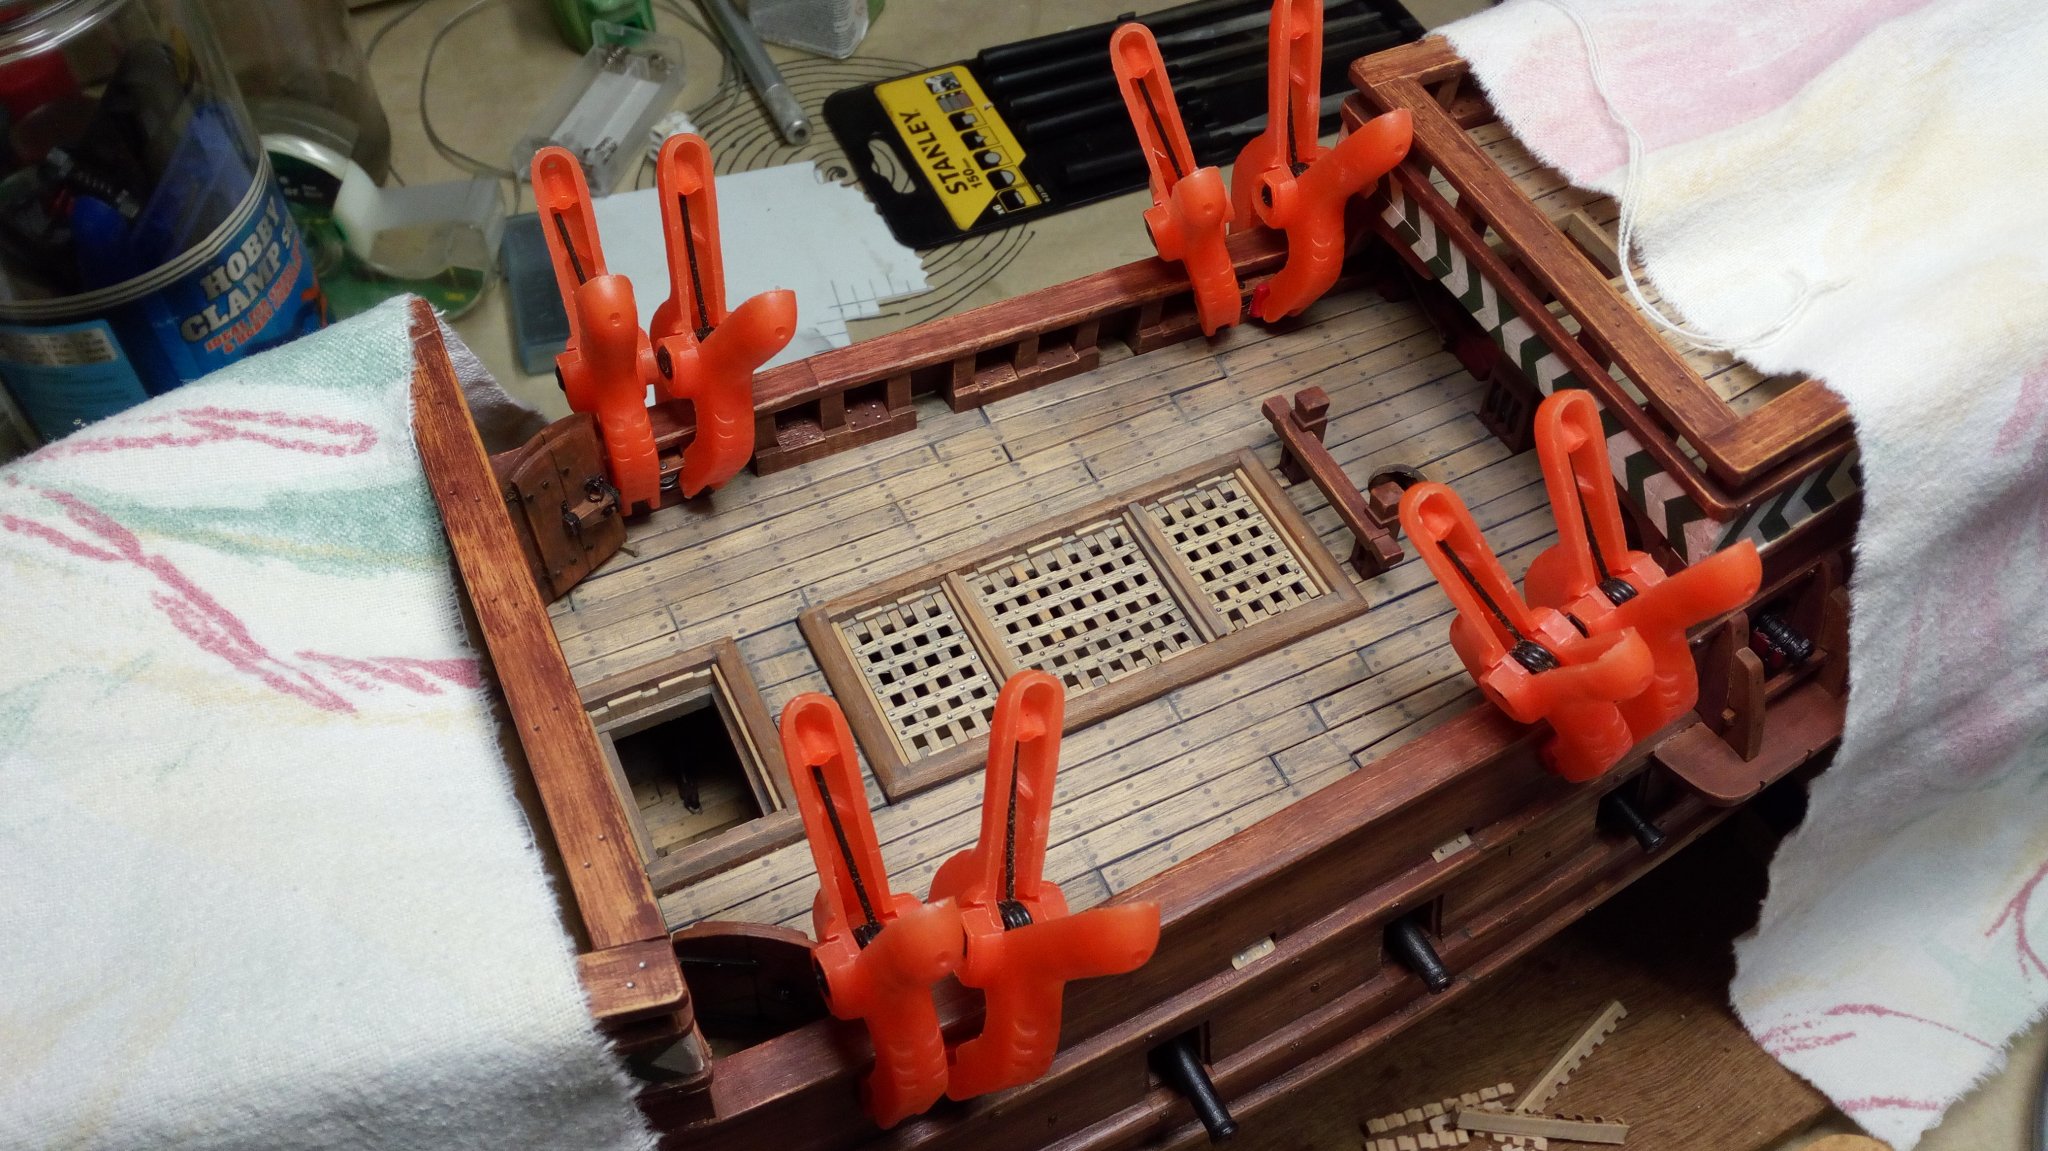
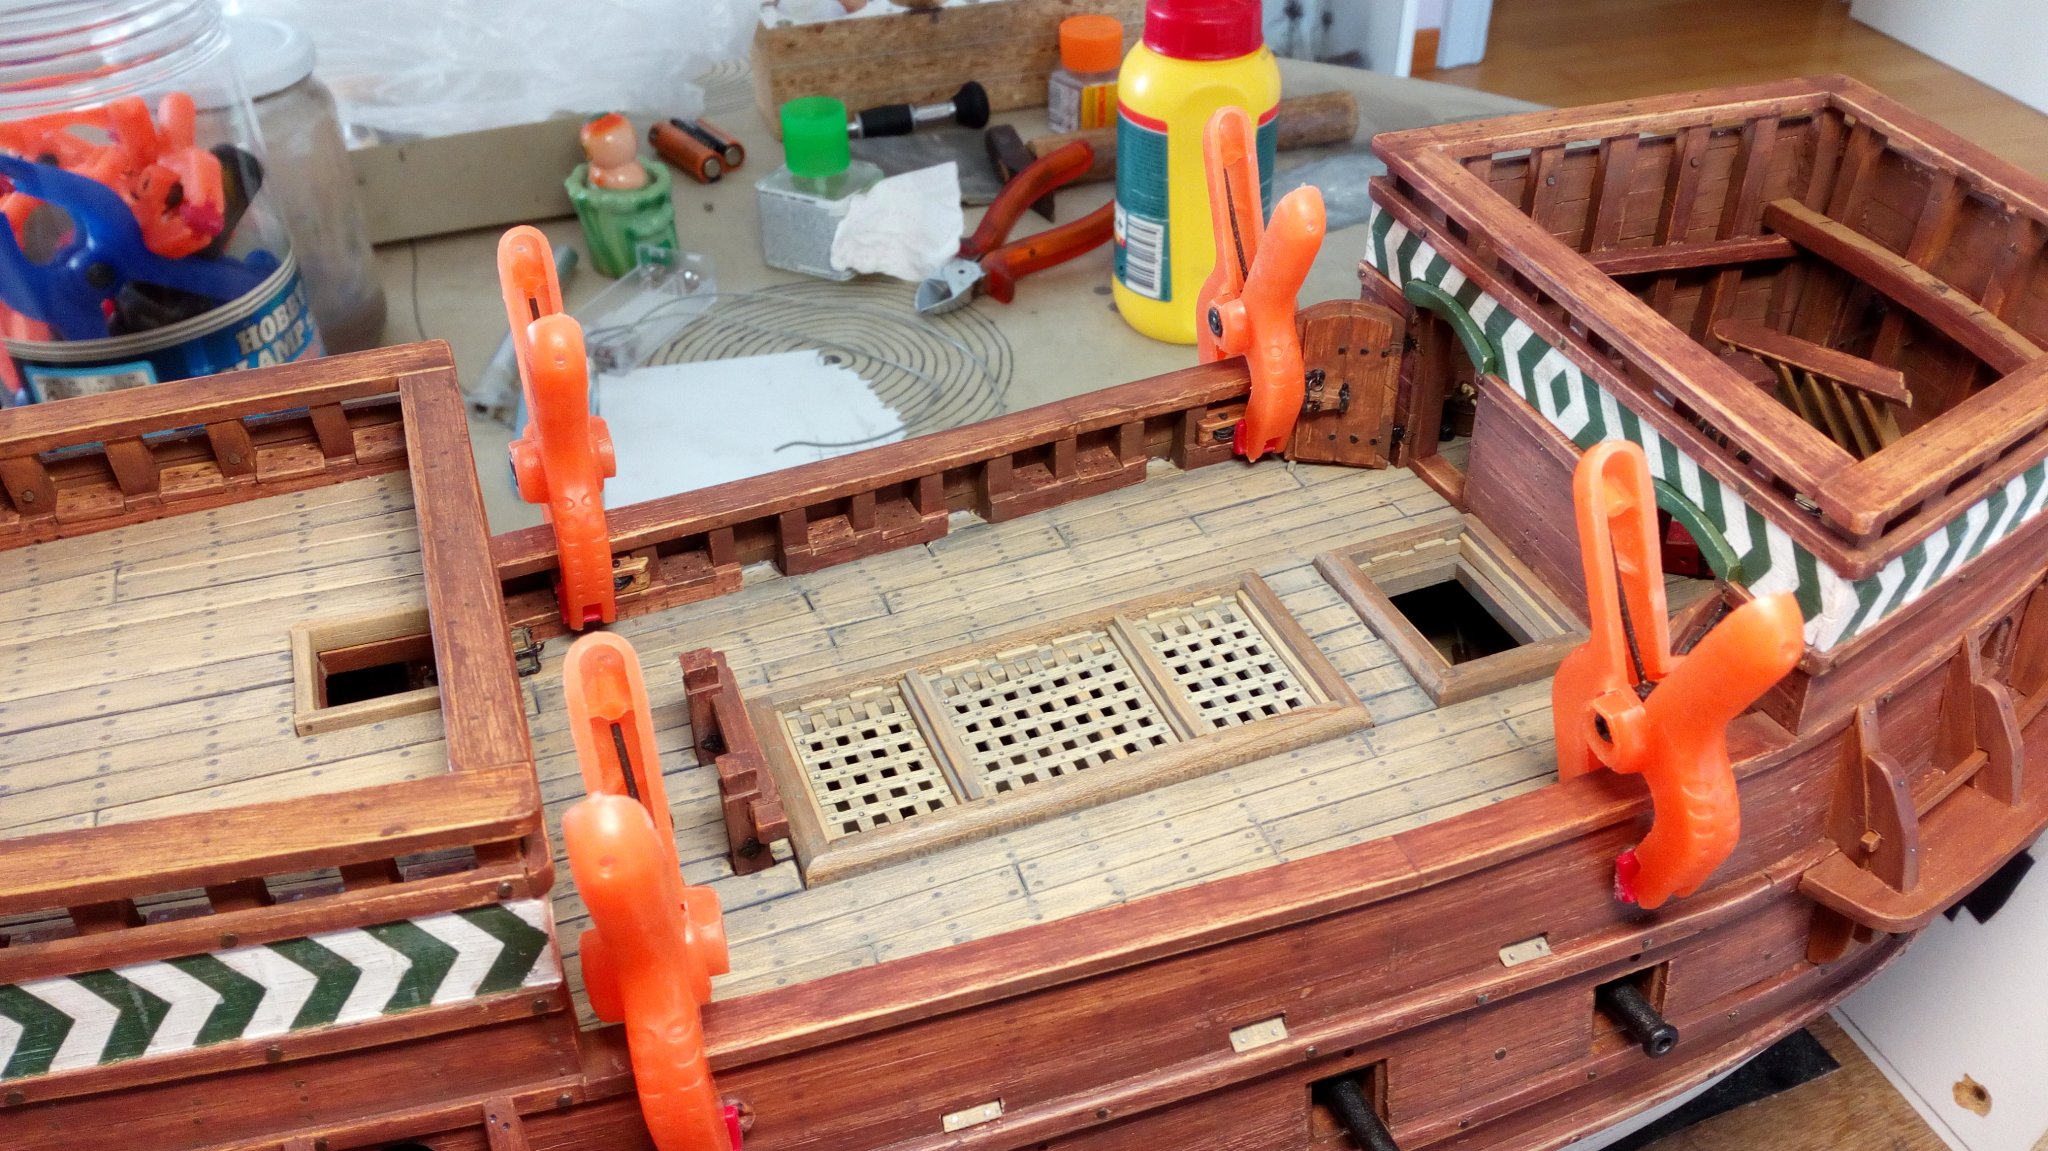
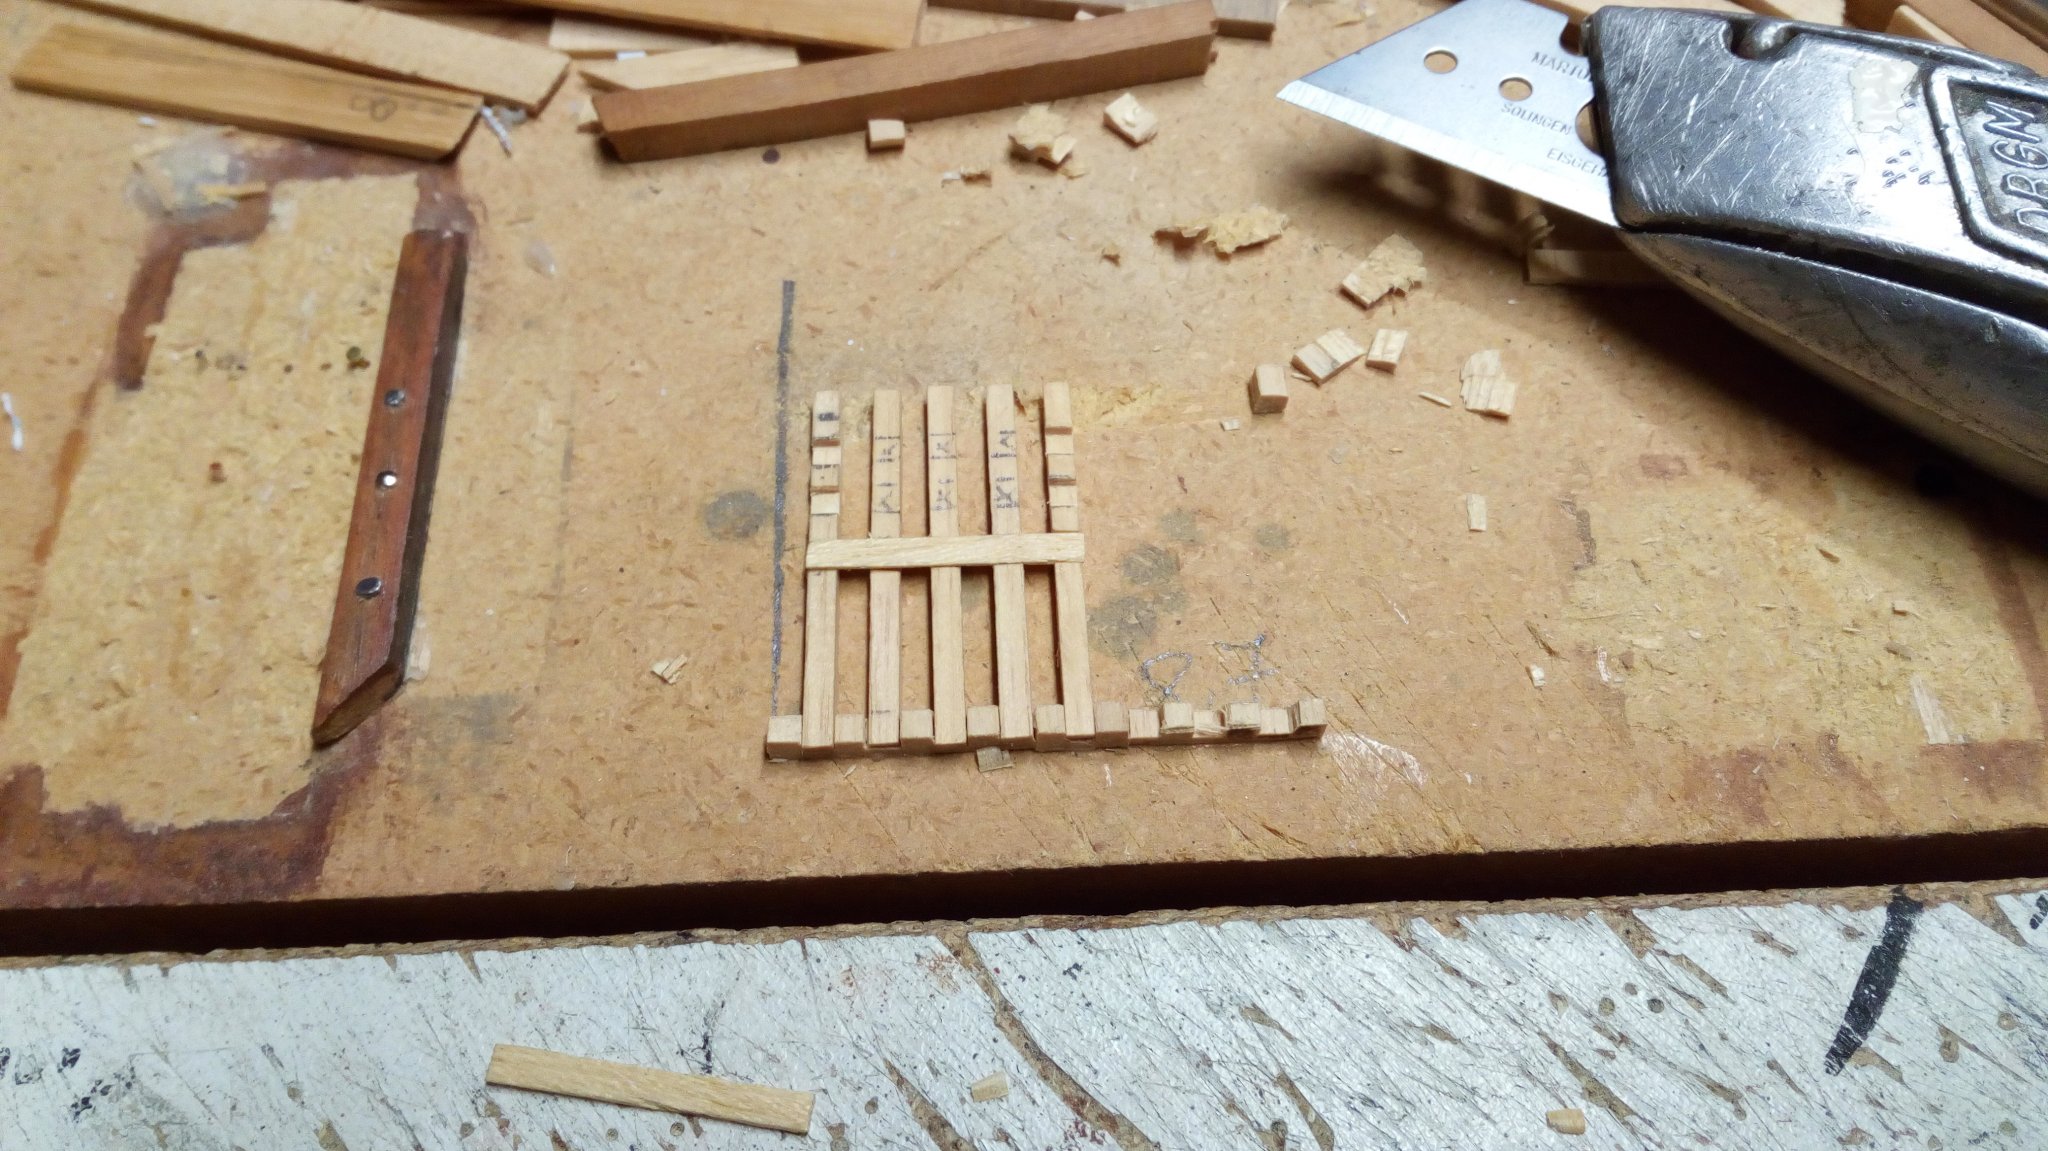
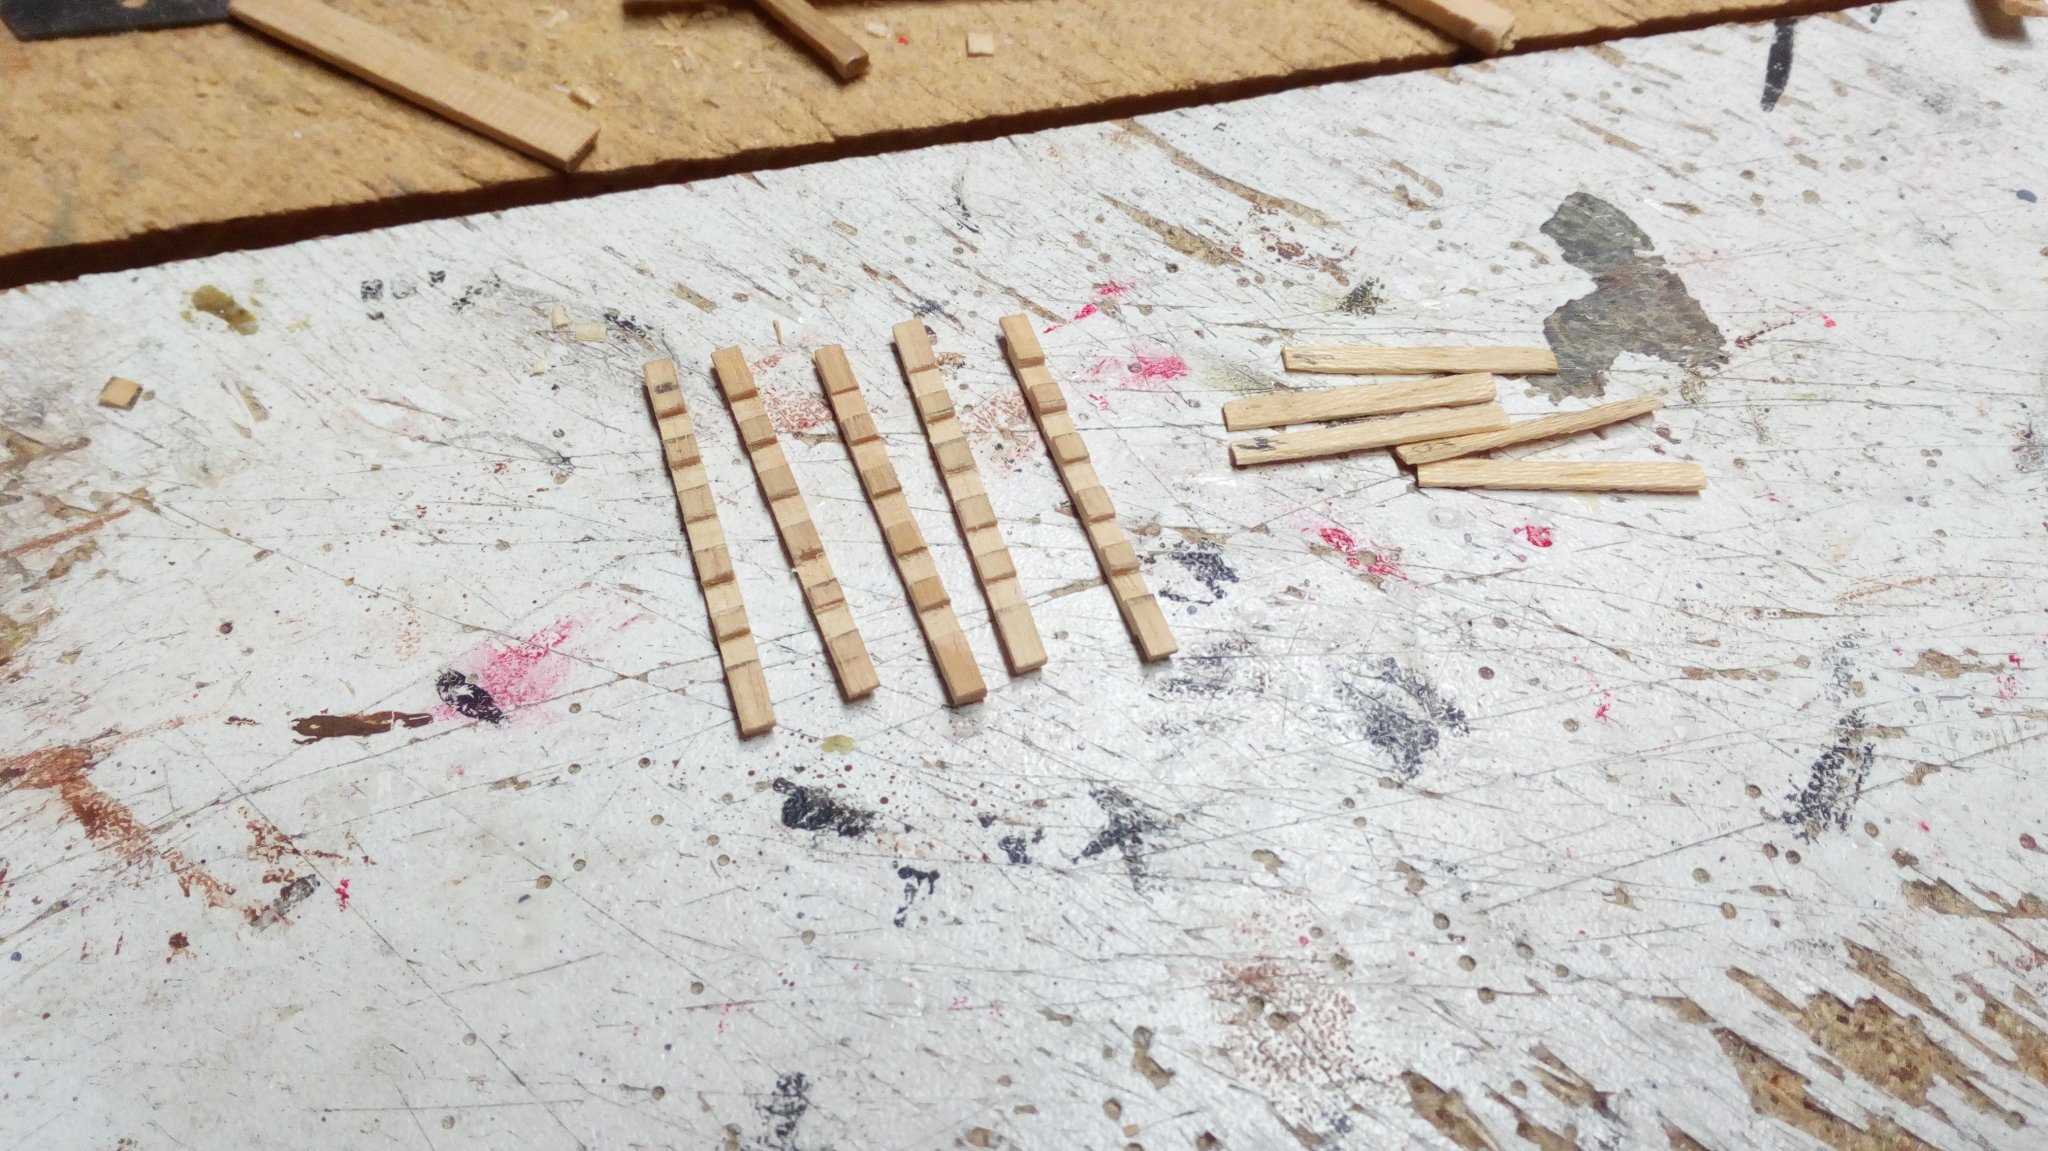
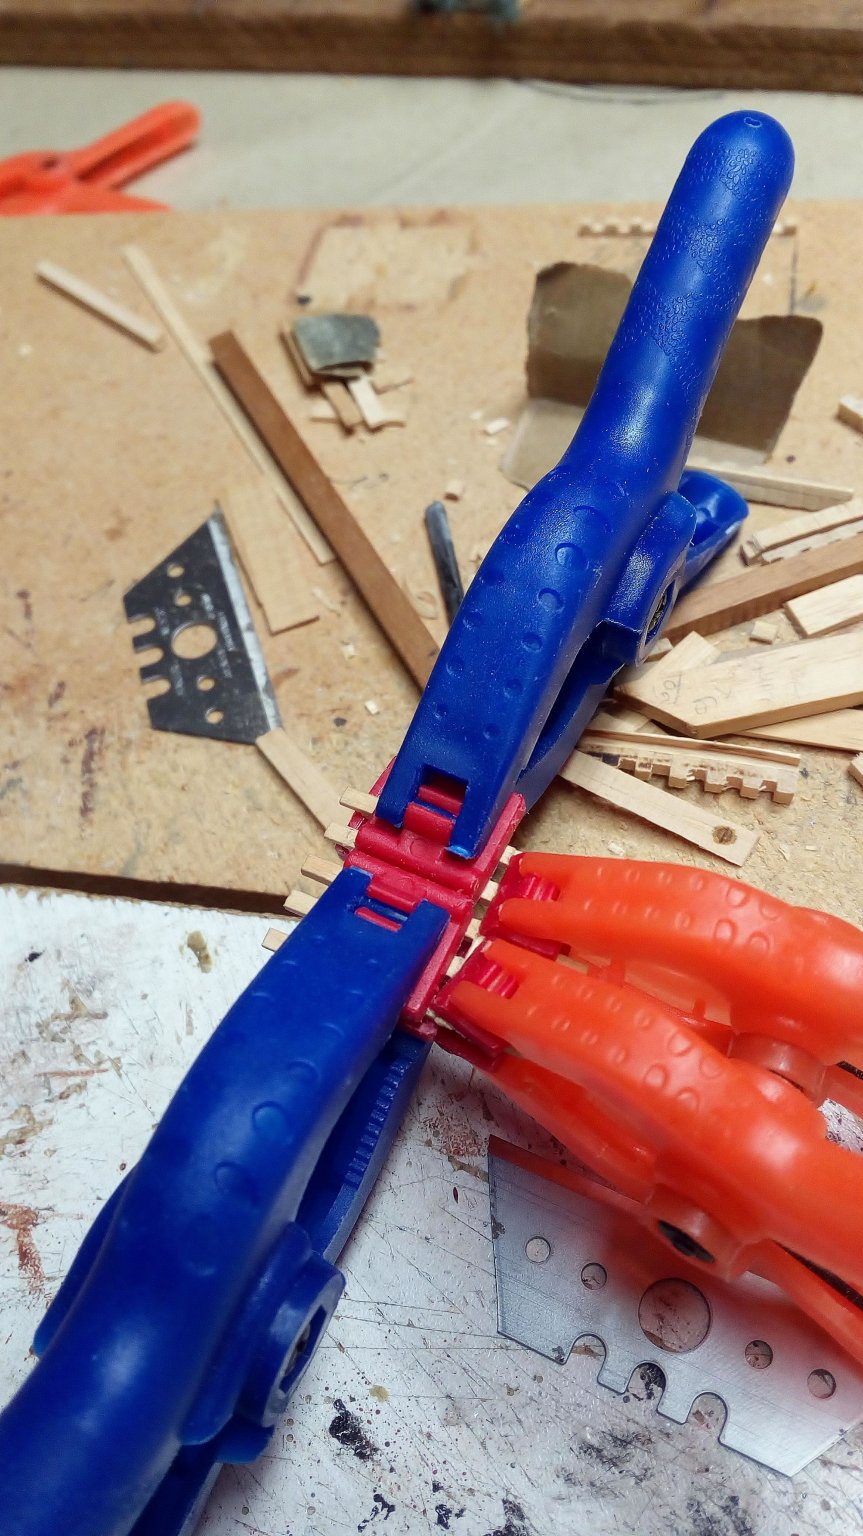
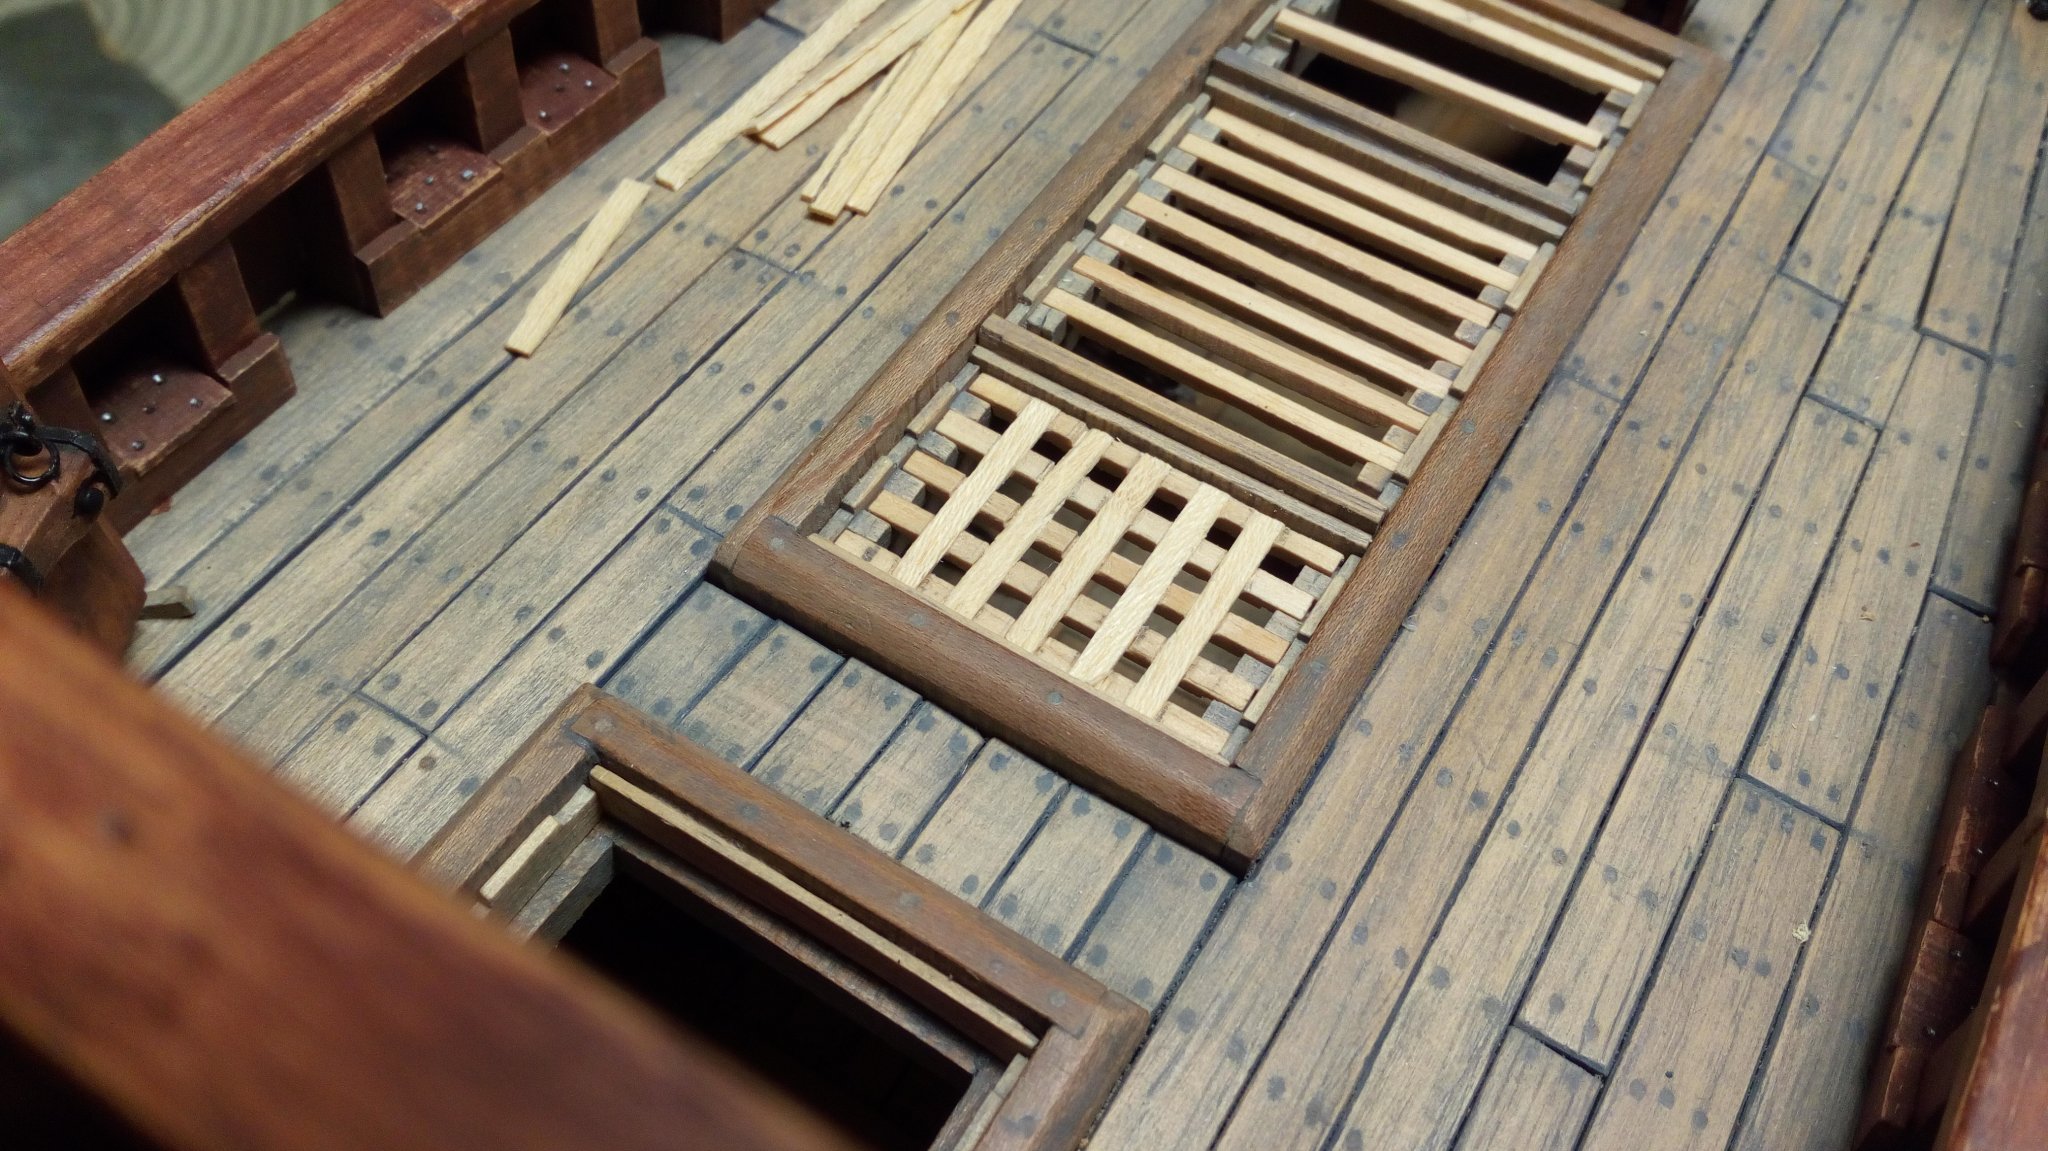
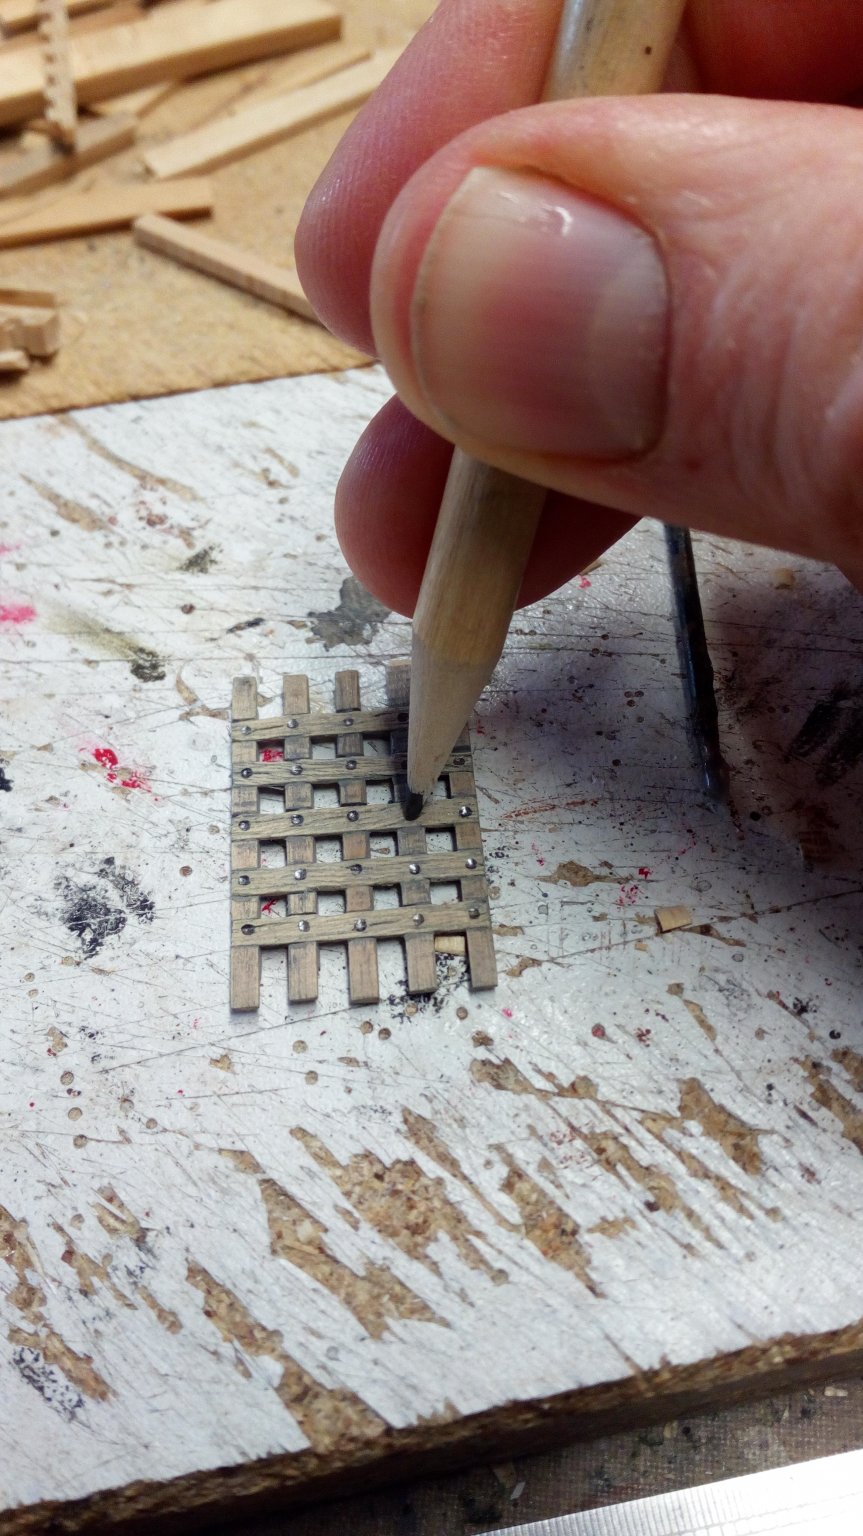
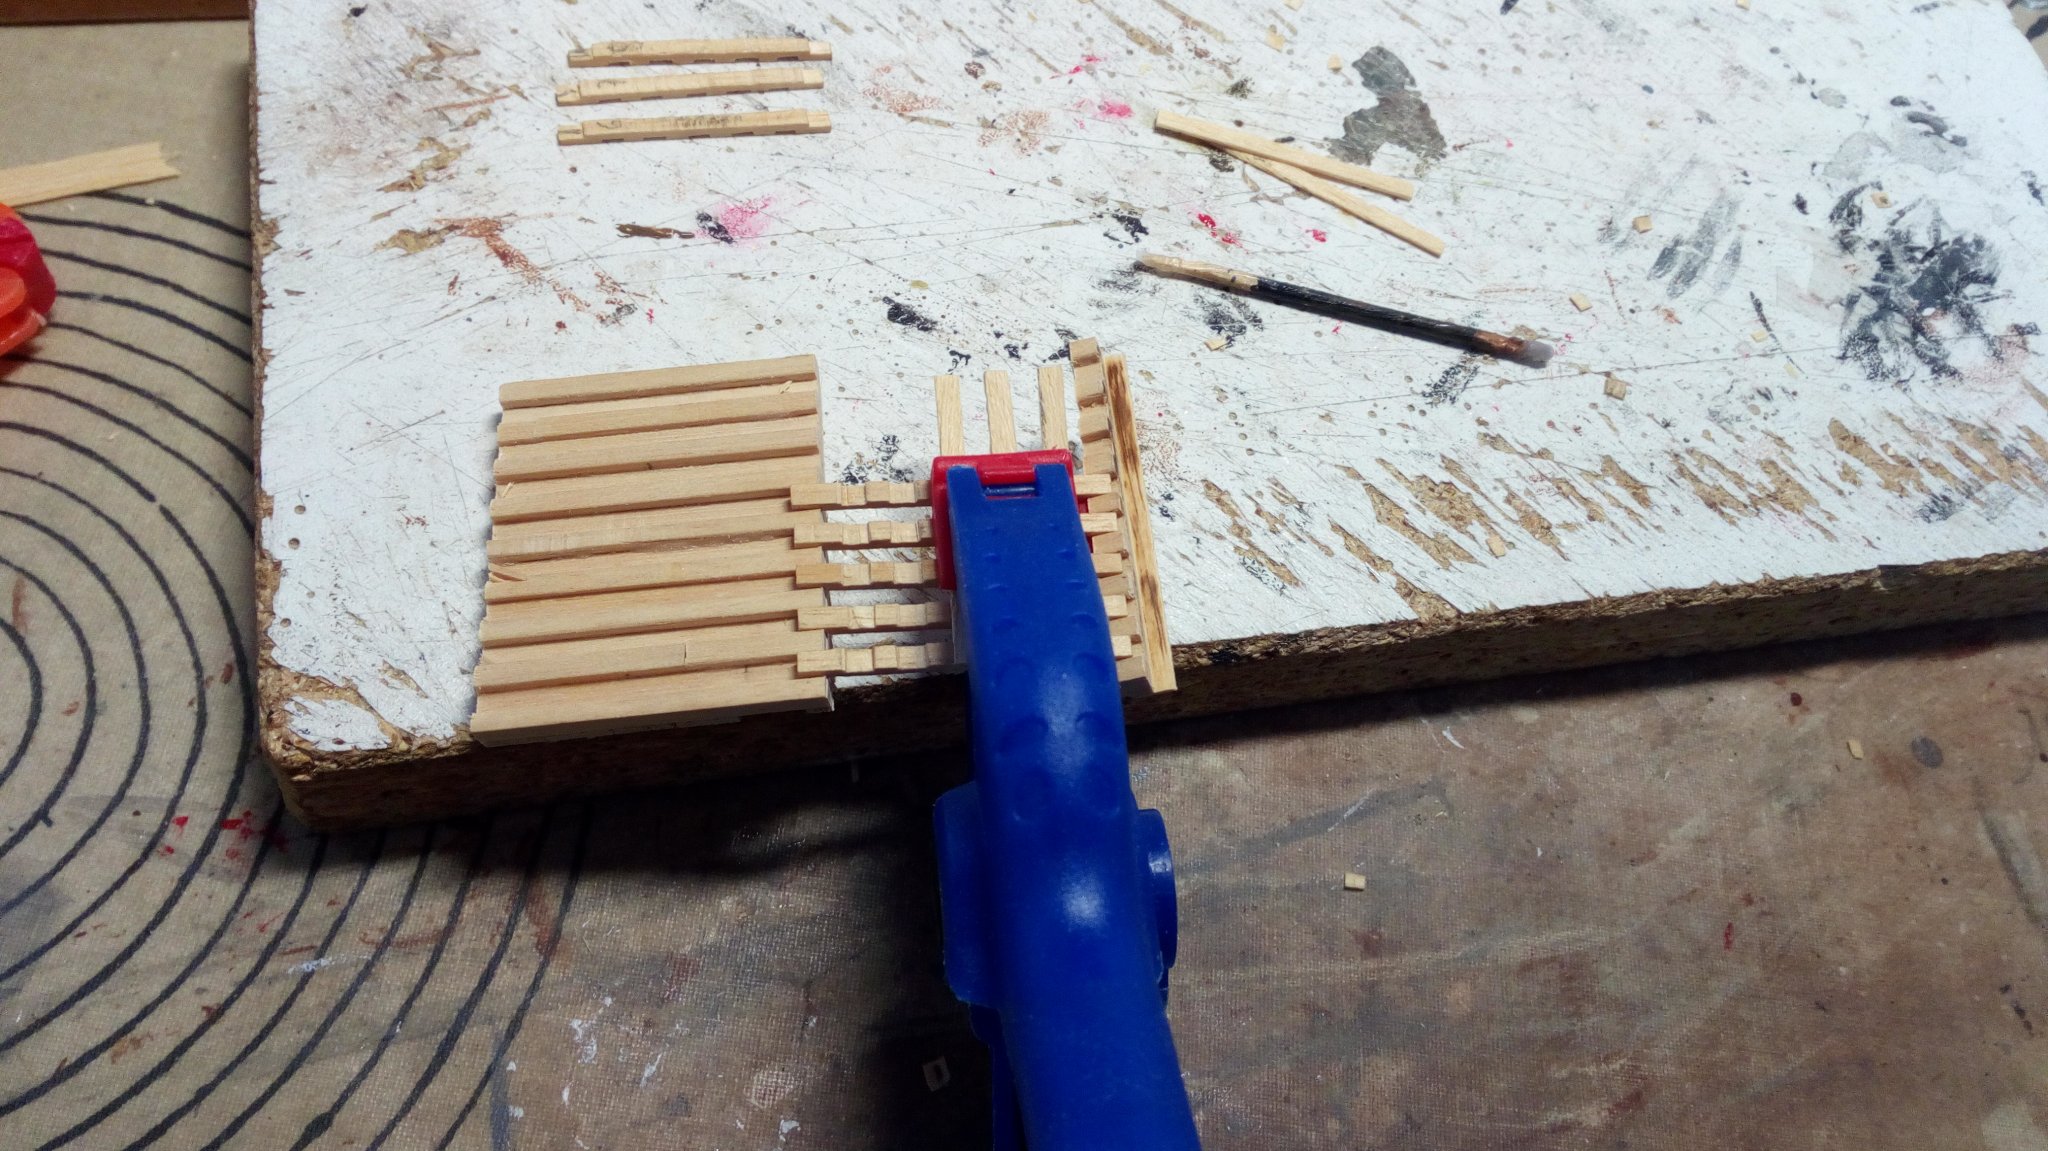
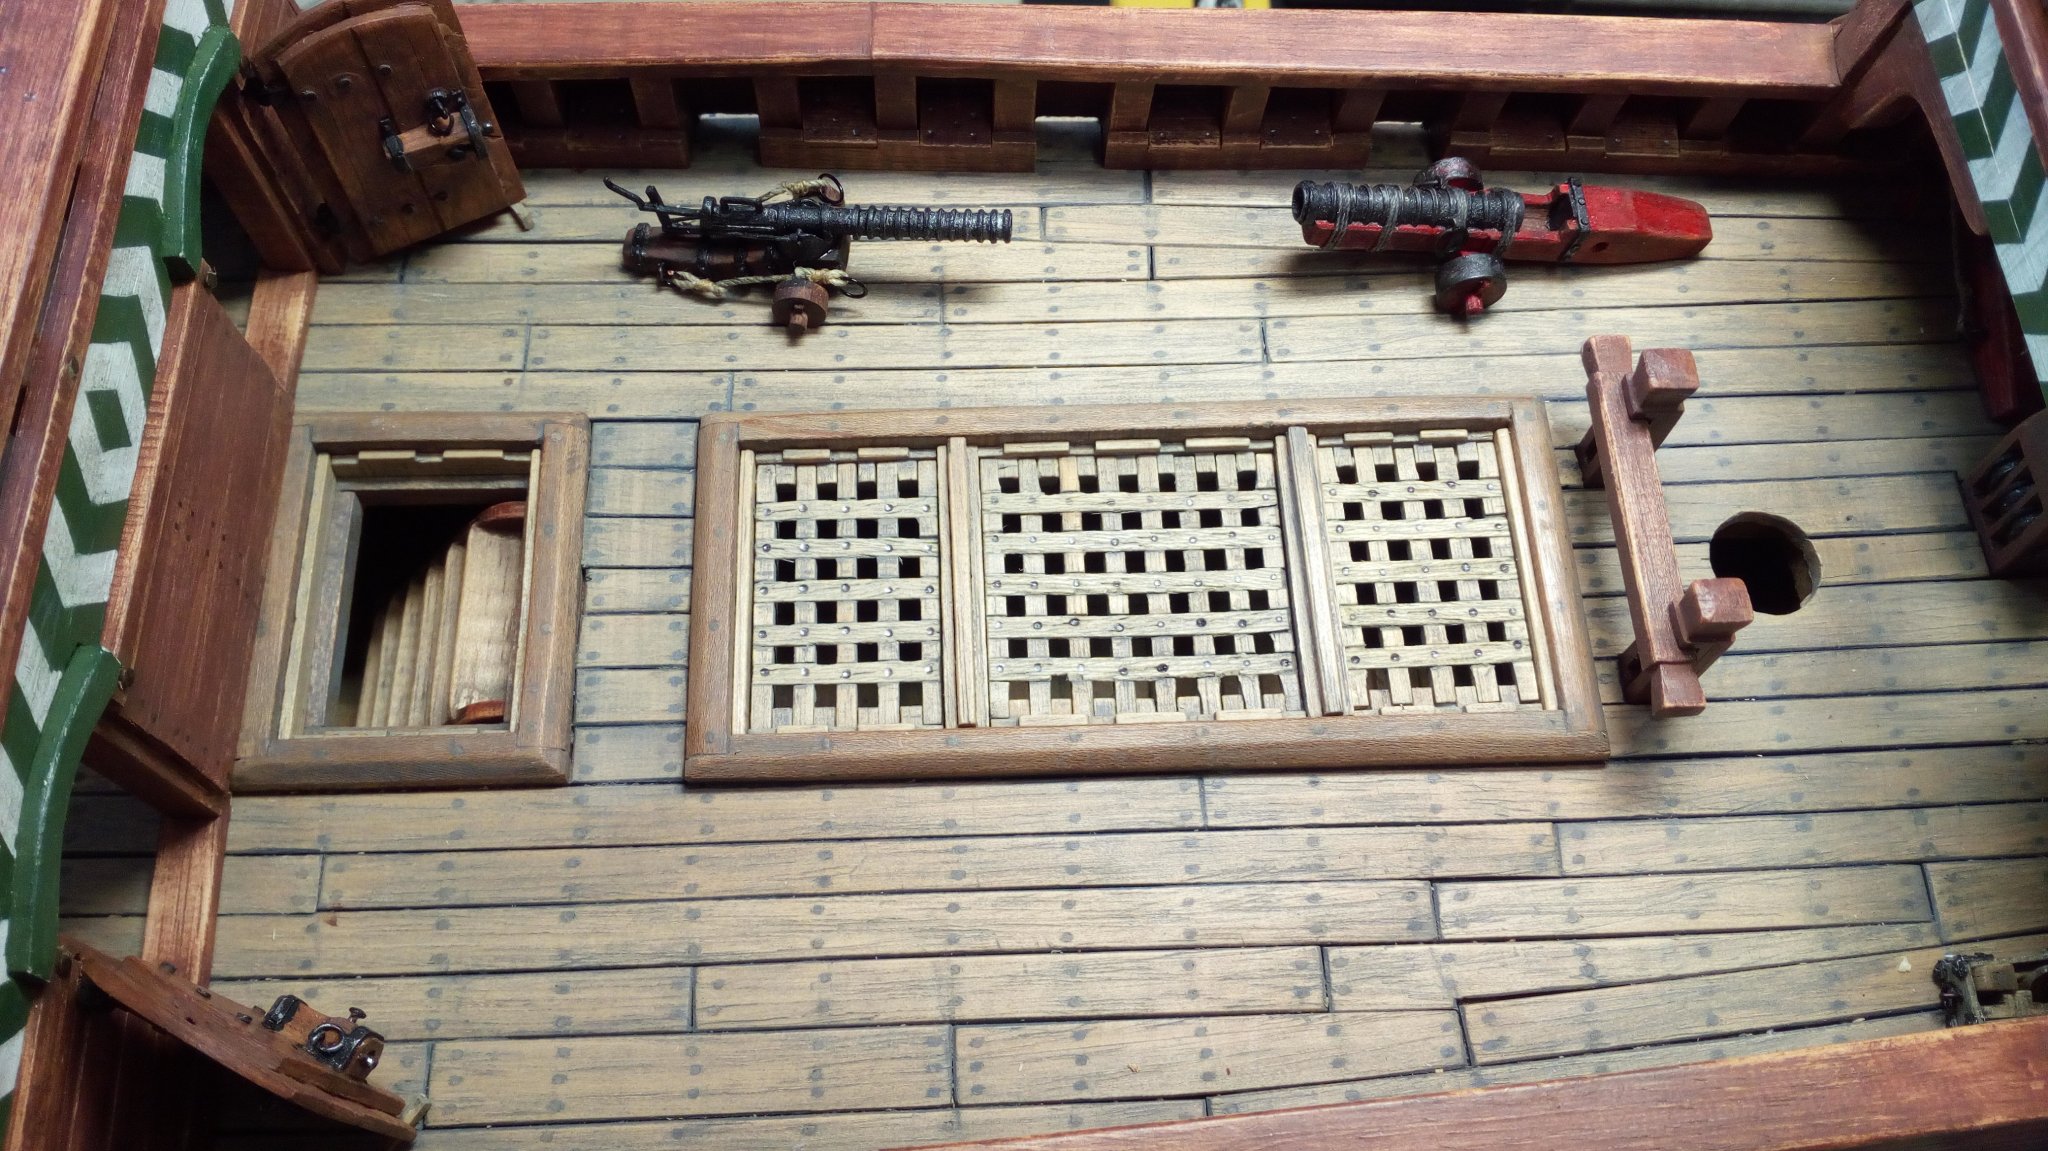
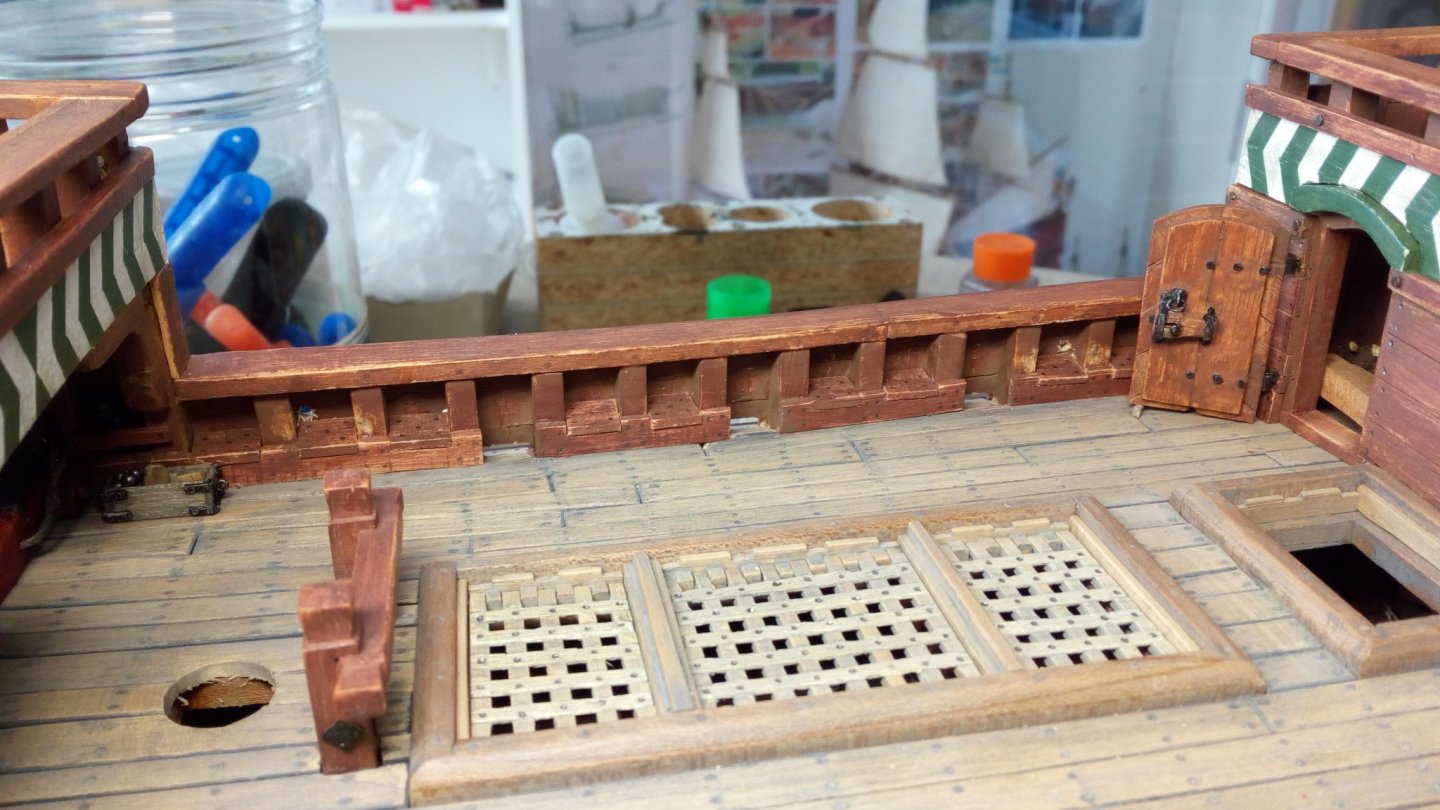
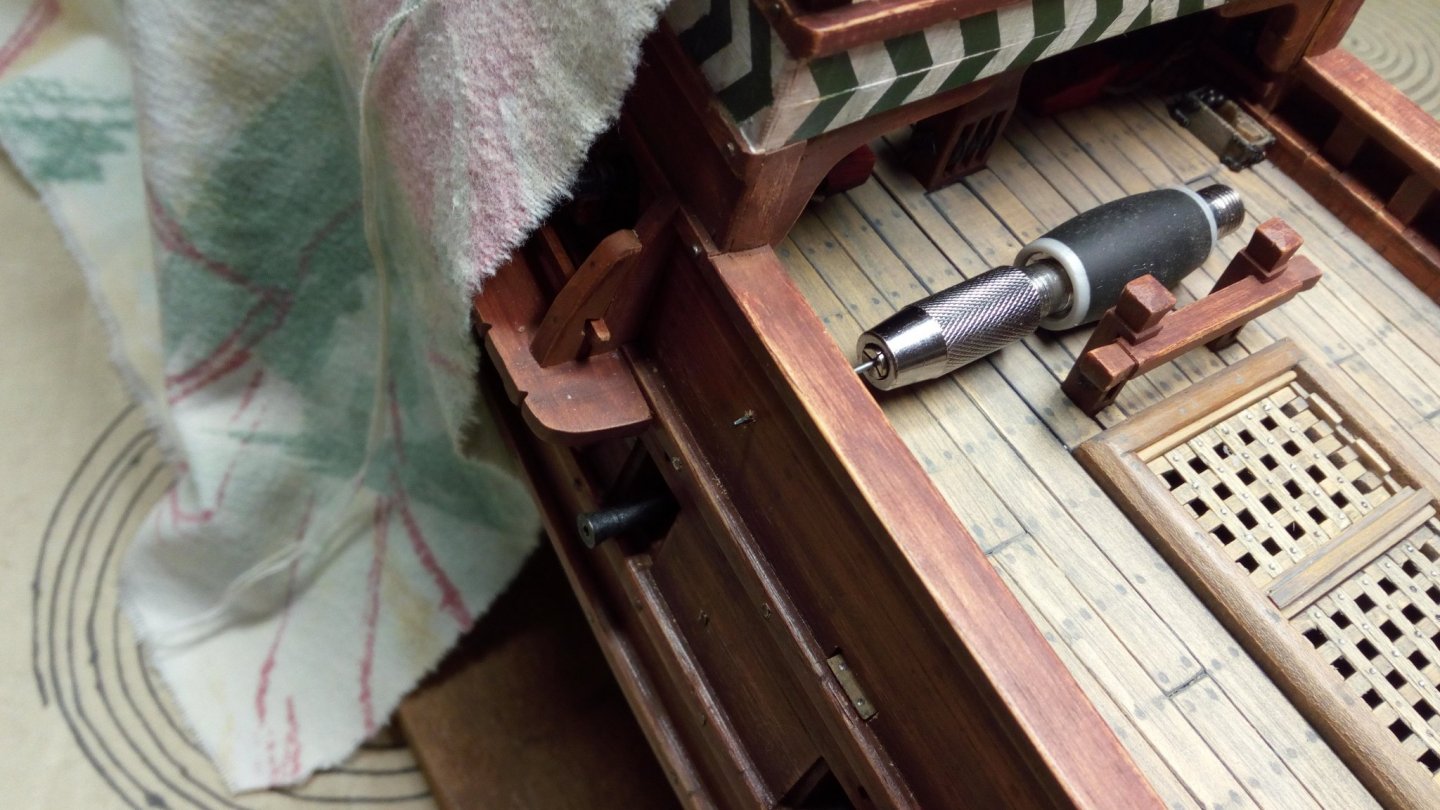
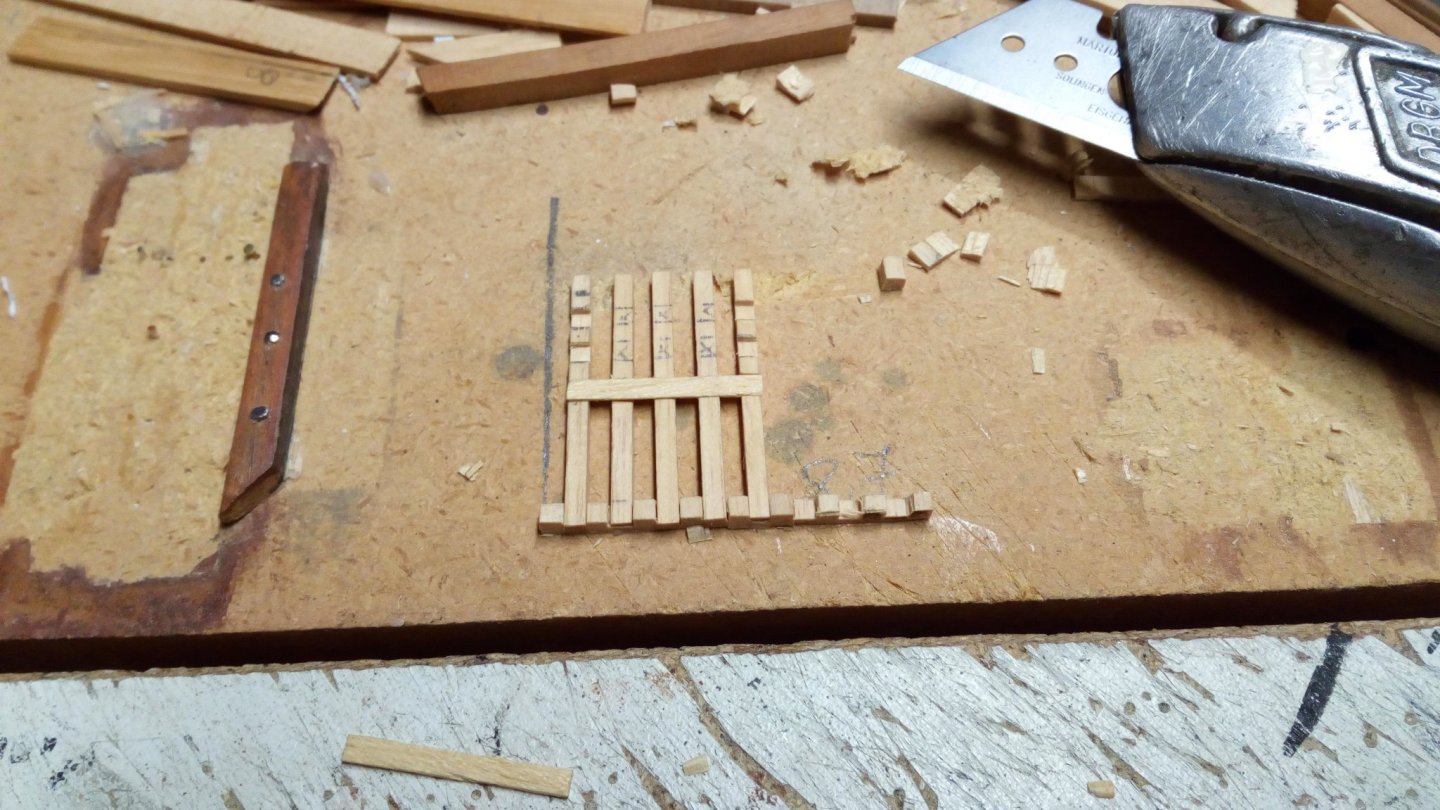
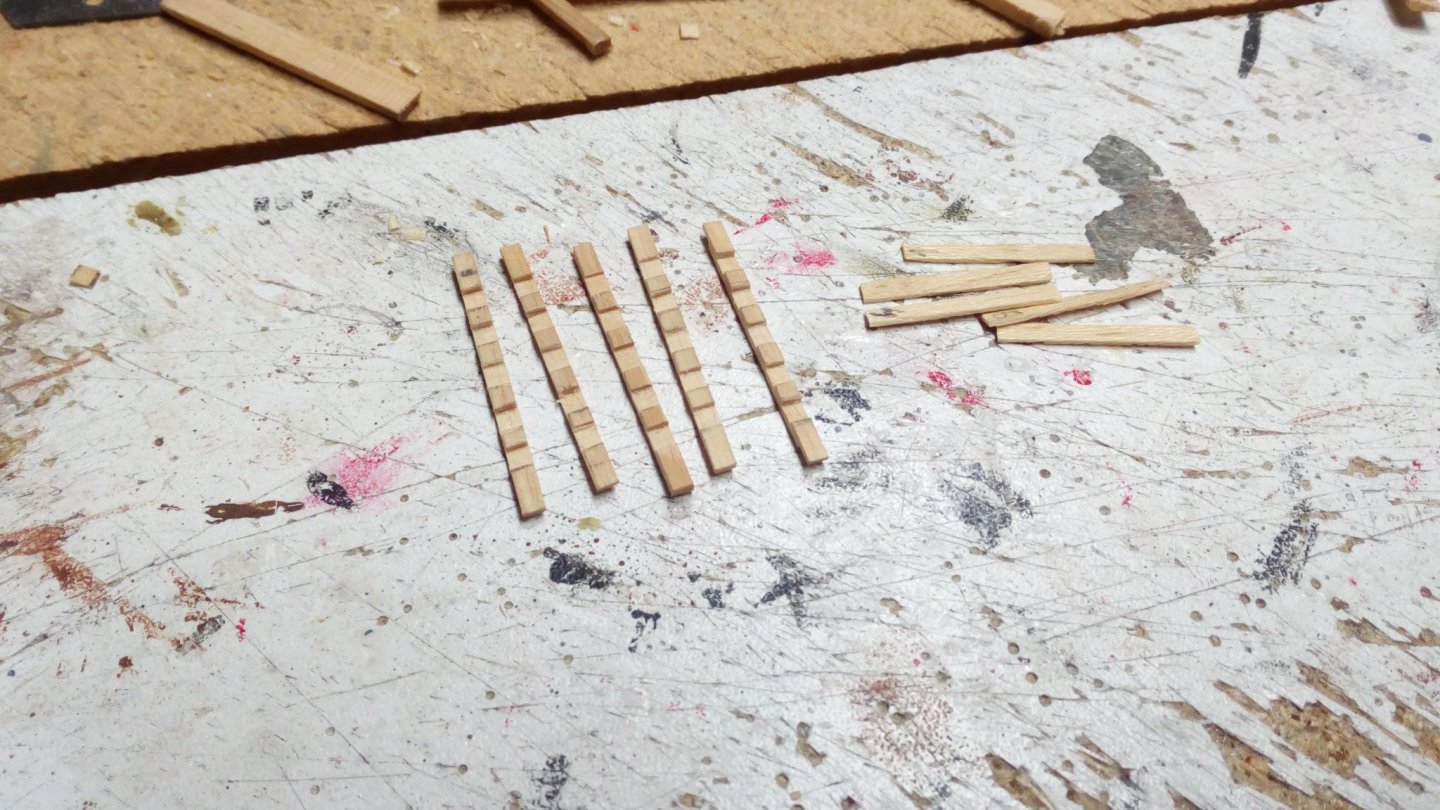
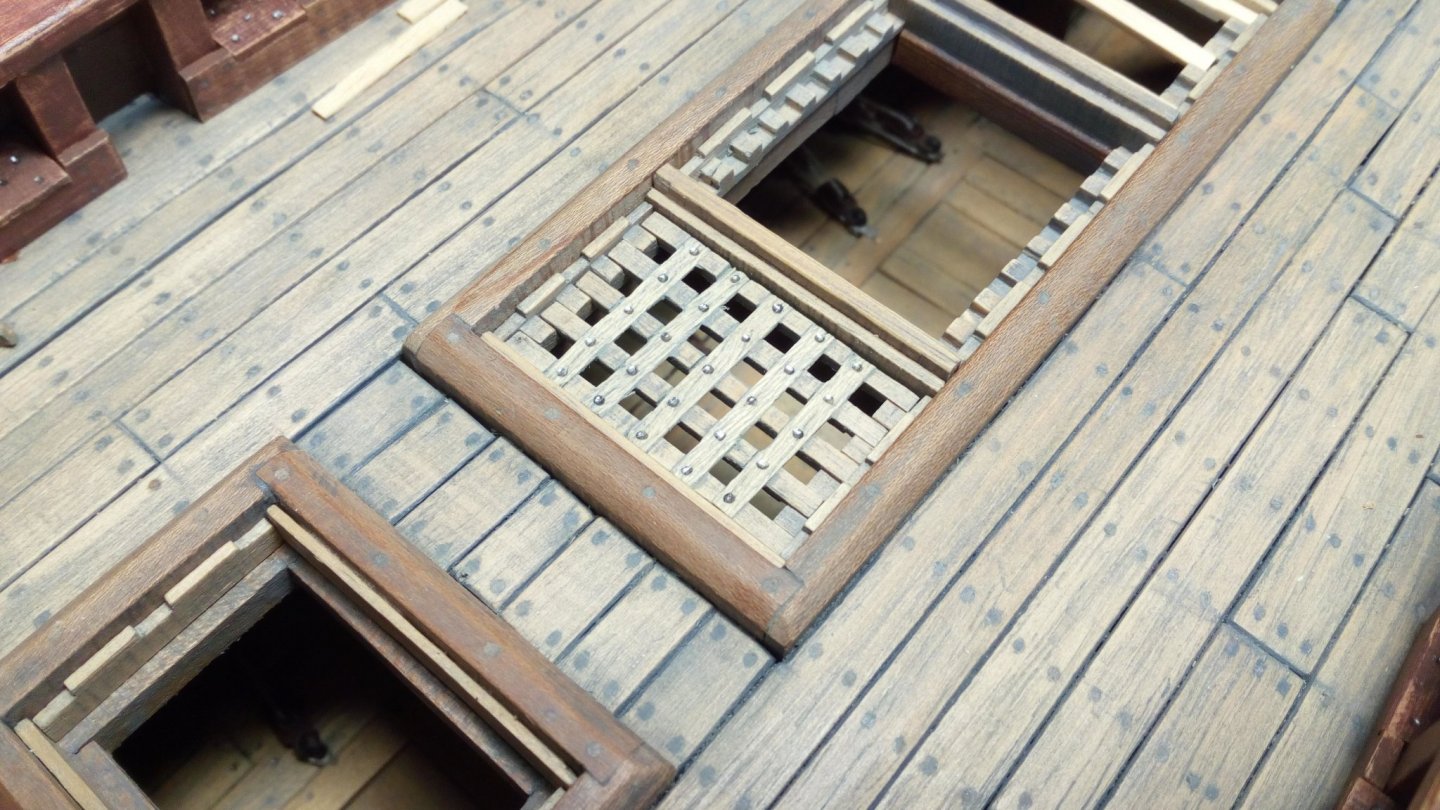
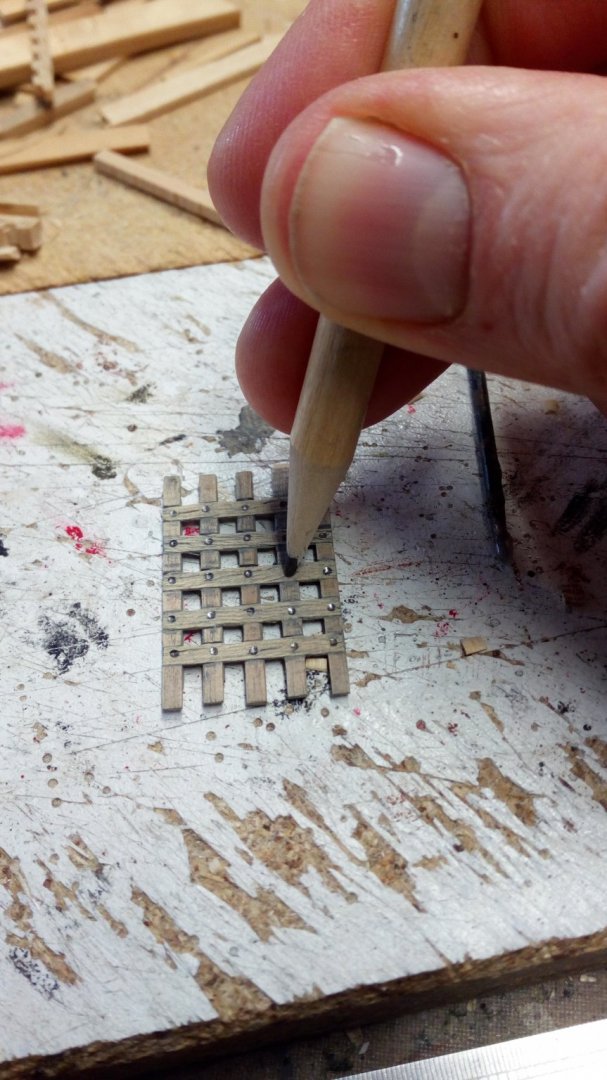
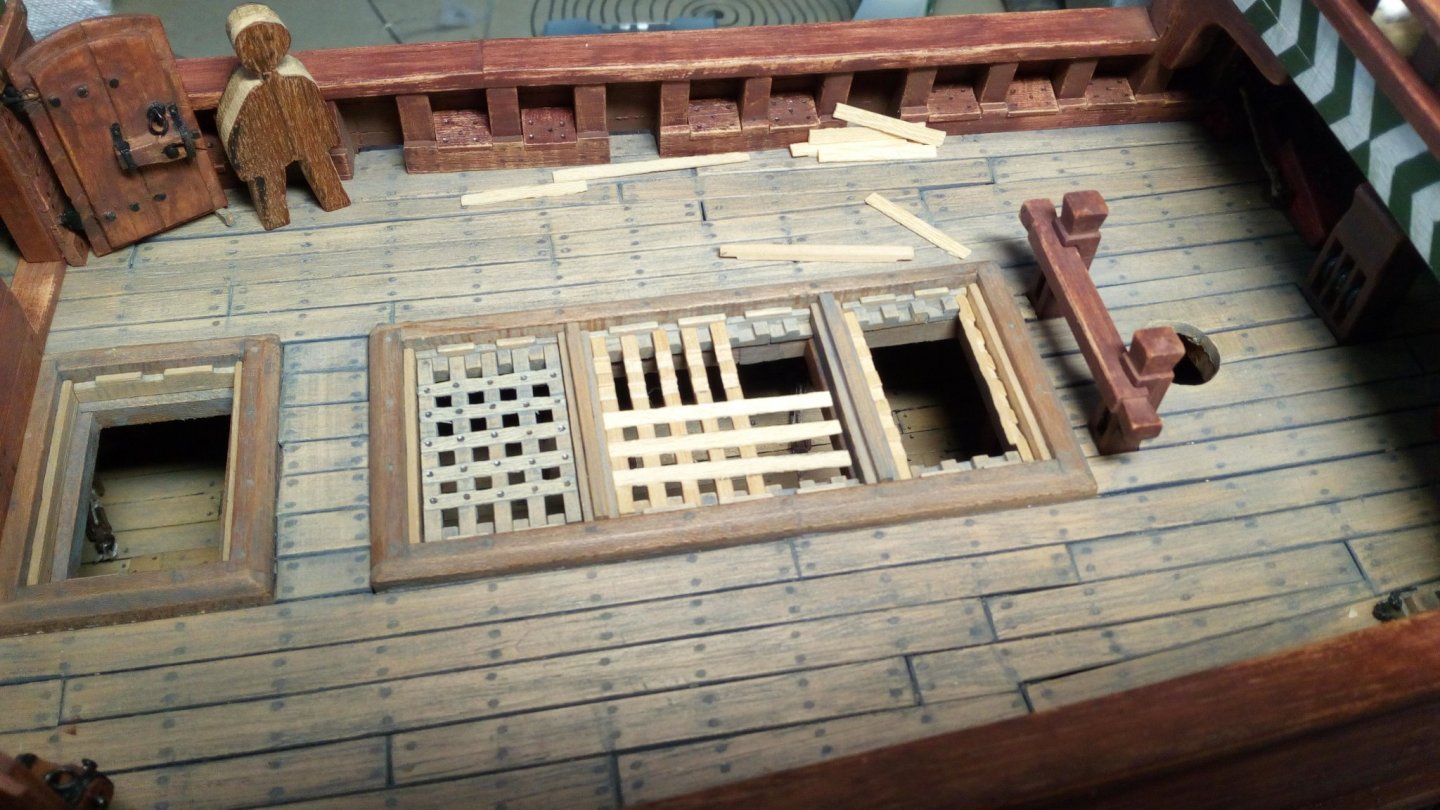
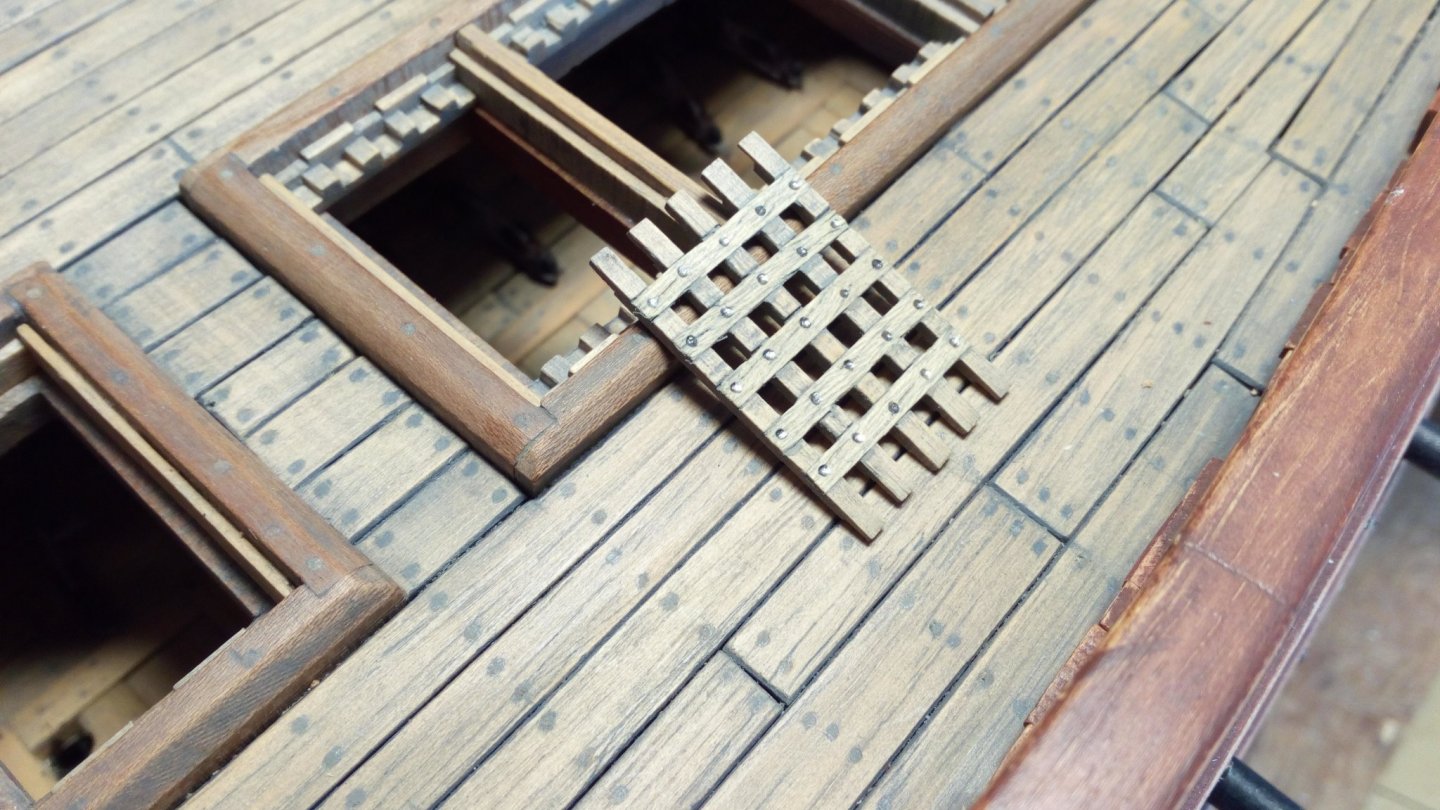
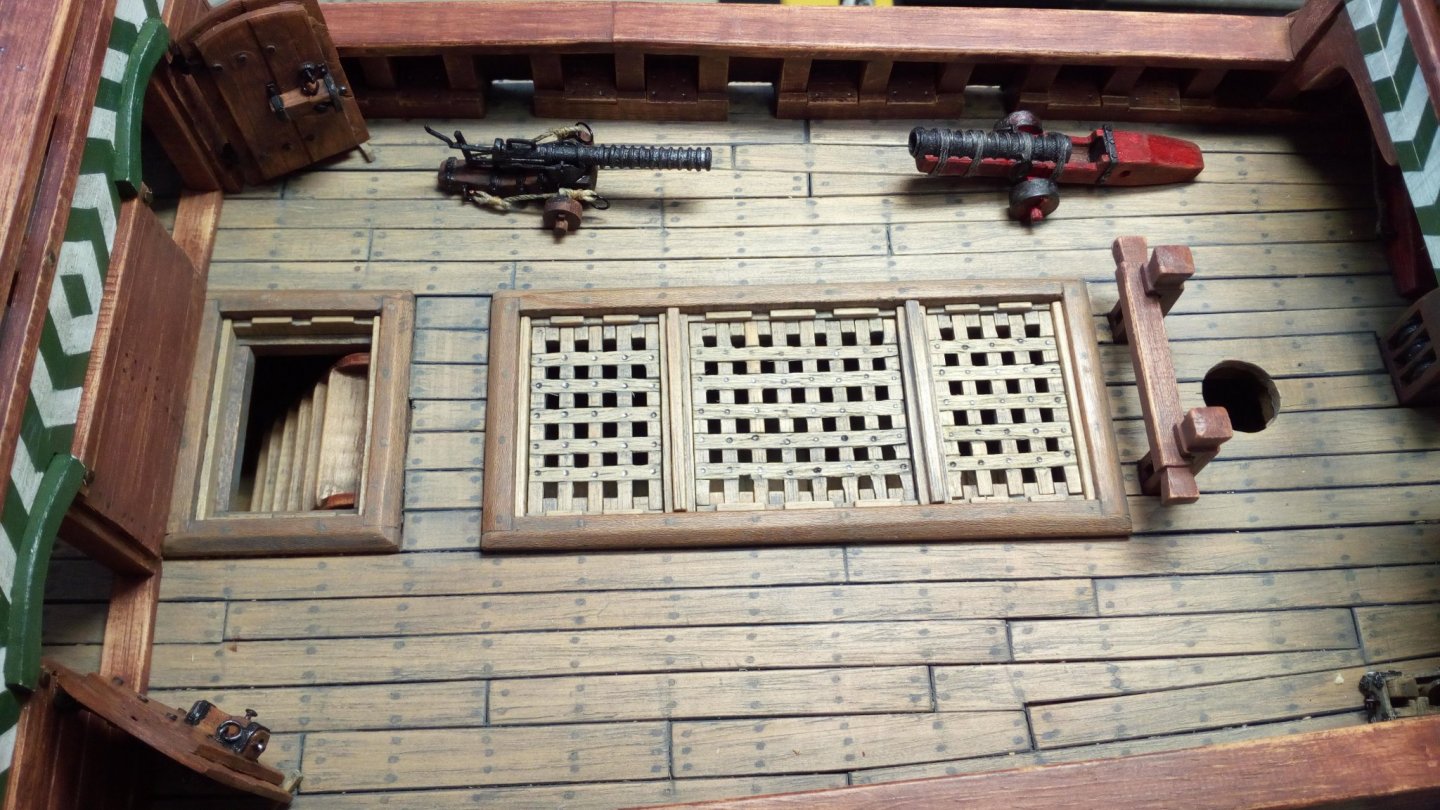
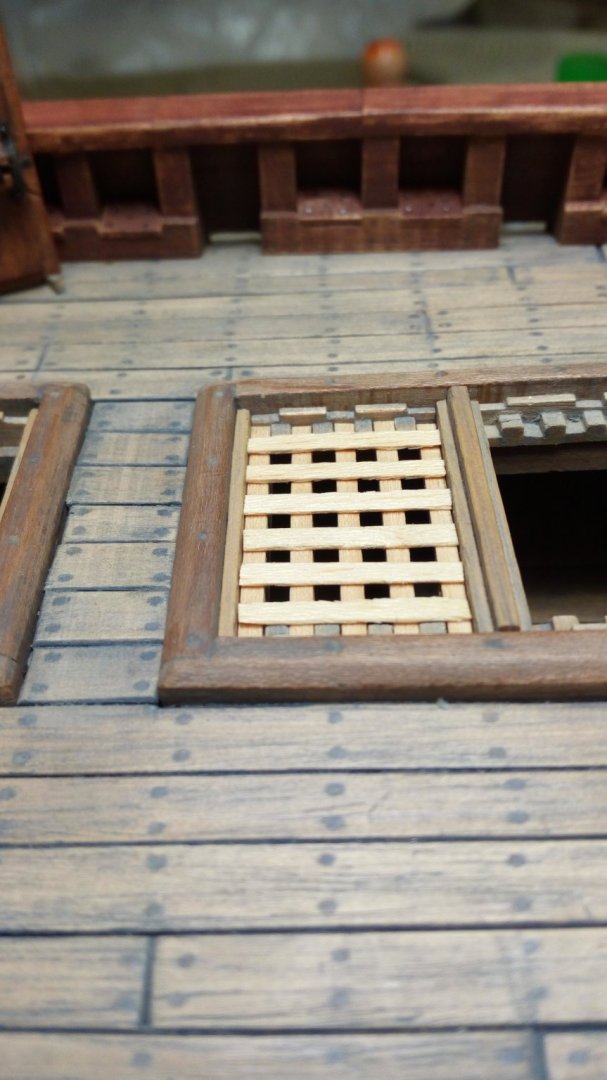
Grating finnished Something was wrong with my first idea. The planks were on top of the beams and the layout was wrong Therefore option 2. More work, but better. First i make grooves in the "beams" Gluing together. test fitting. "nails" painted and weathered. The large piece is made in parts. And is placed dry fitted to allow the adhesive to cure further. That way I have more certainty that everything will fit. Grating ready and the stairs to the lower deck dry fitted. Thanks for following, the nice comments and likes.


- 756 replies
-
- 13
-
-
- galleon
- golden hind
- (and 2 more)
-
Welcome back
-
Retirement?? Started working at the age of 18. I am now 56 years old . I can probably retire at the age 61. But then I only get part of my pension money I can actually only retire at the age of 67 to get a full pension. Fingers crossed for a quick and healthy return of your daughter and her friend.


.jpg.1cbe0be5f3d30e16945681c88ef311f4.jpg)